pajalle.com

Ne tekee jotka osaa

Audi e-tron

Tuleva projektikin tuli jo hankittua, joten dokumentoidaan nyt ensin syksyn ja talven perheautoprojekti alta pois.

Heikin perheessä kun oli autoilun sähköistäminen makuun päästy, alkoi hiljalleen tuntua siltä, että halutaan vaihtaa myös perheen käyttöauto Passat GTE kokonaan sähköiseksi. Vetokoukku ja jonkinlainen vetokykykin haluttiin säilyttää, jolloin vaihtoehtoja ei ollut kovin montaa. Sopivasti SVT:lle tuli myyntiin vm 2019 Audi e-tron, joka muutaman päivän jahkailun jälkeen päätettiin ostaa.

Aihio oli aika rajun näköinen ja se varmaan pelotti muita ostajia

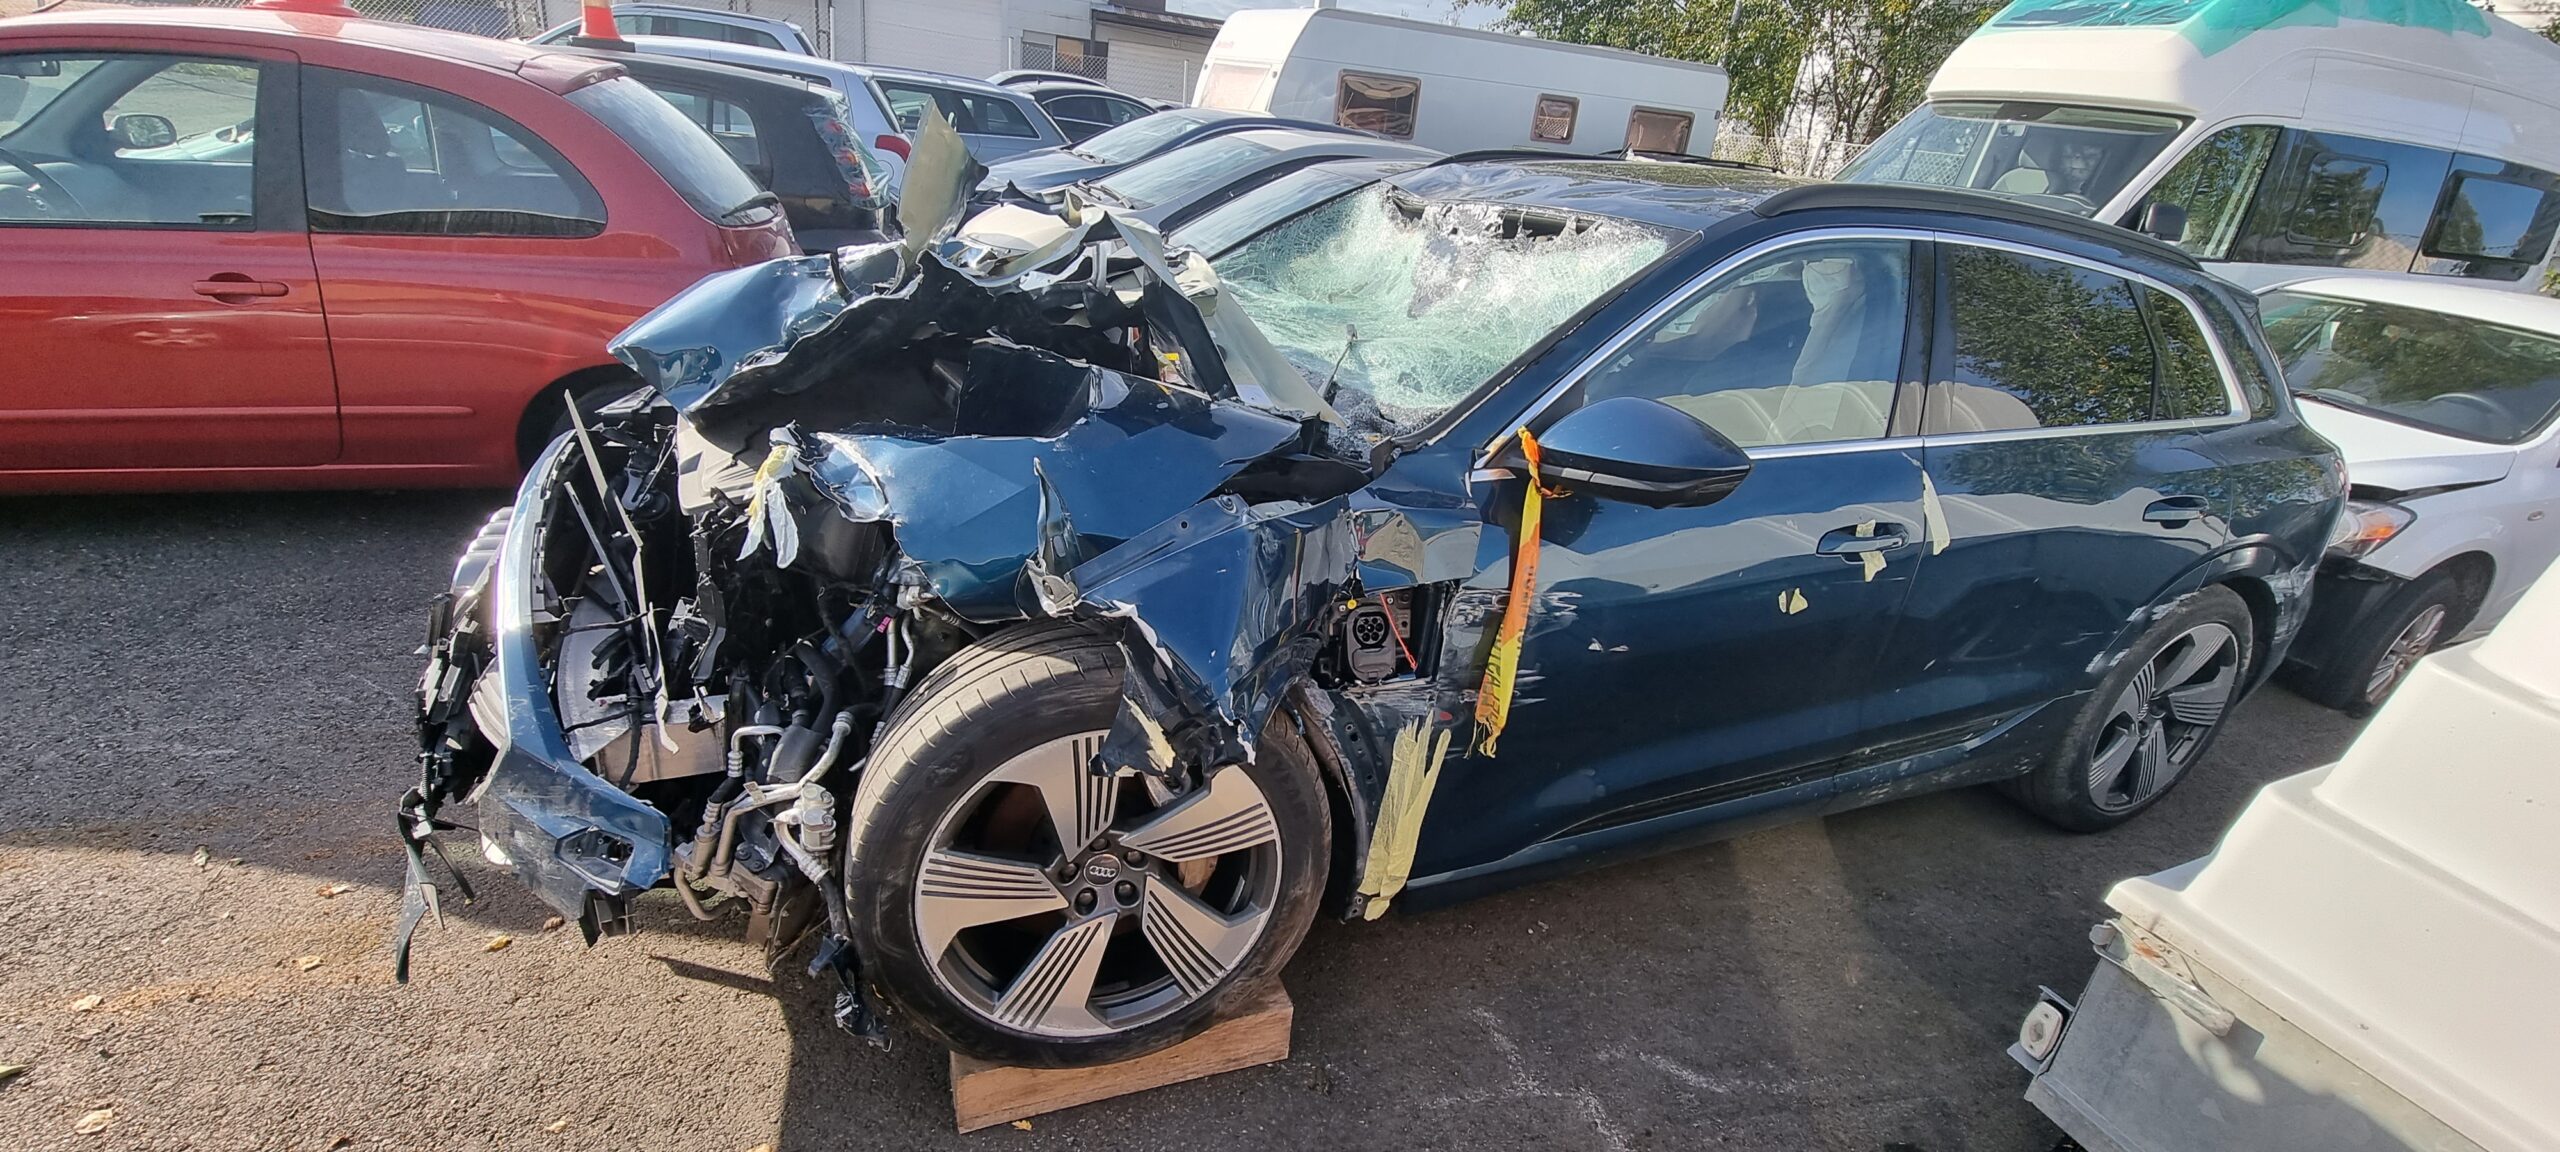
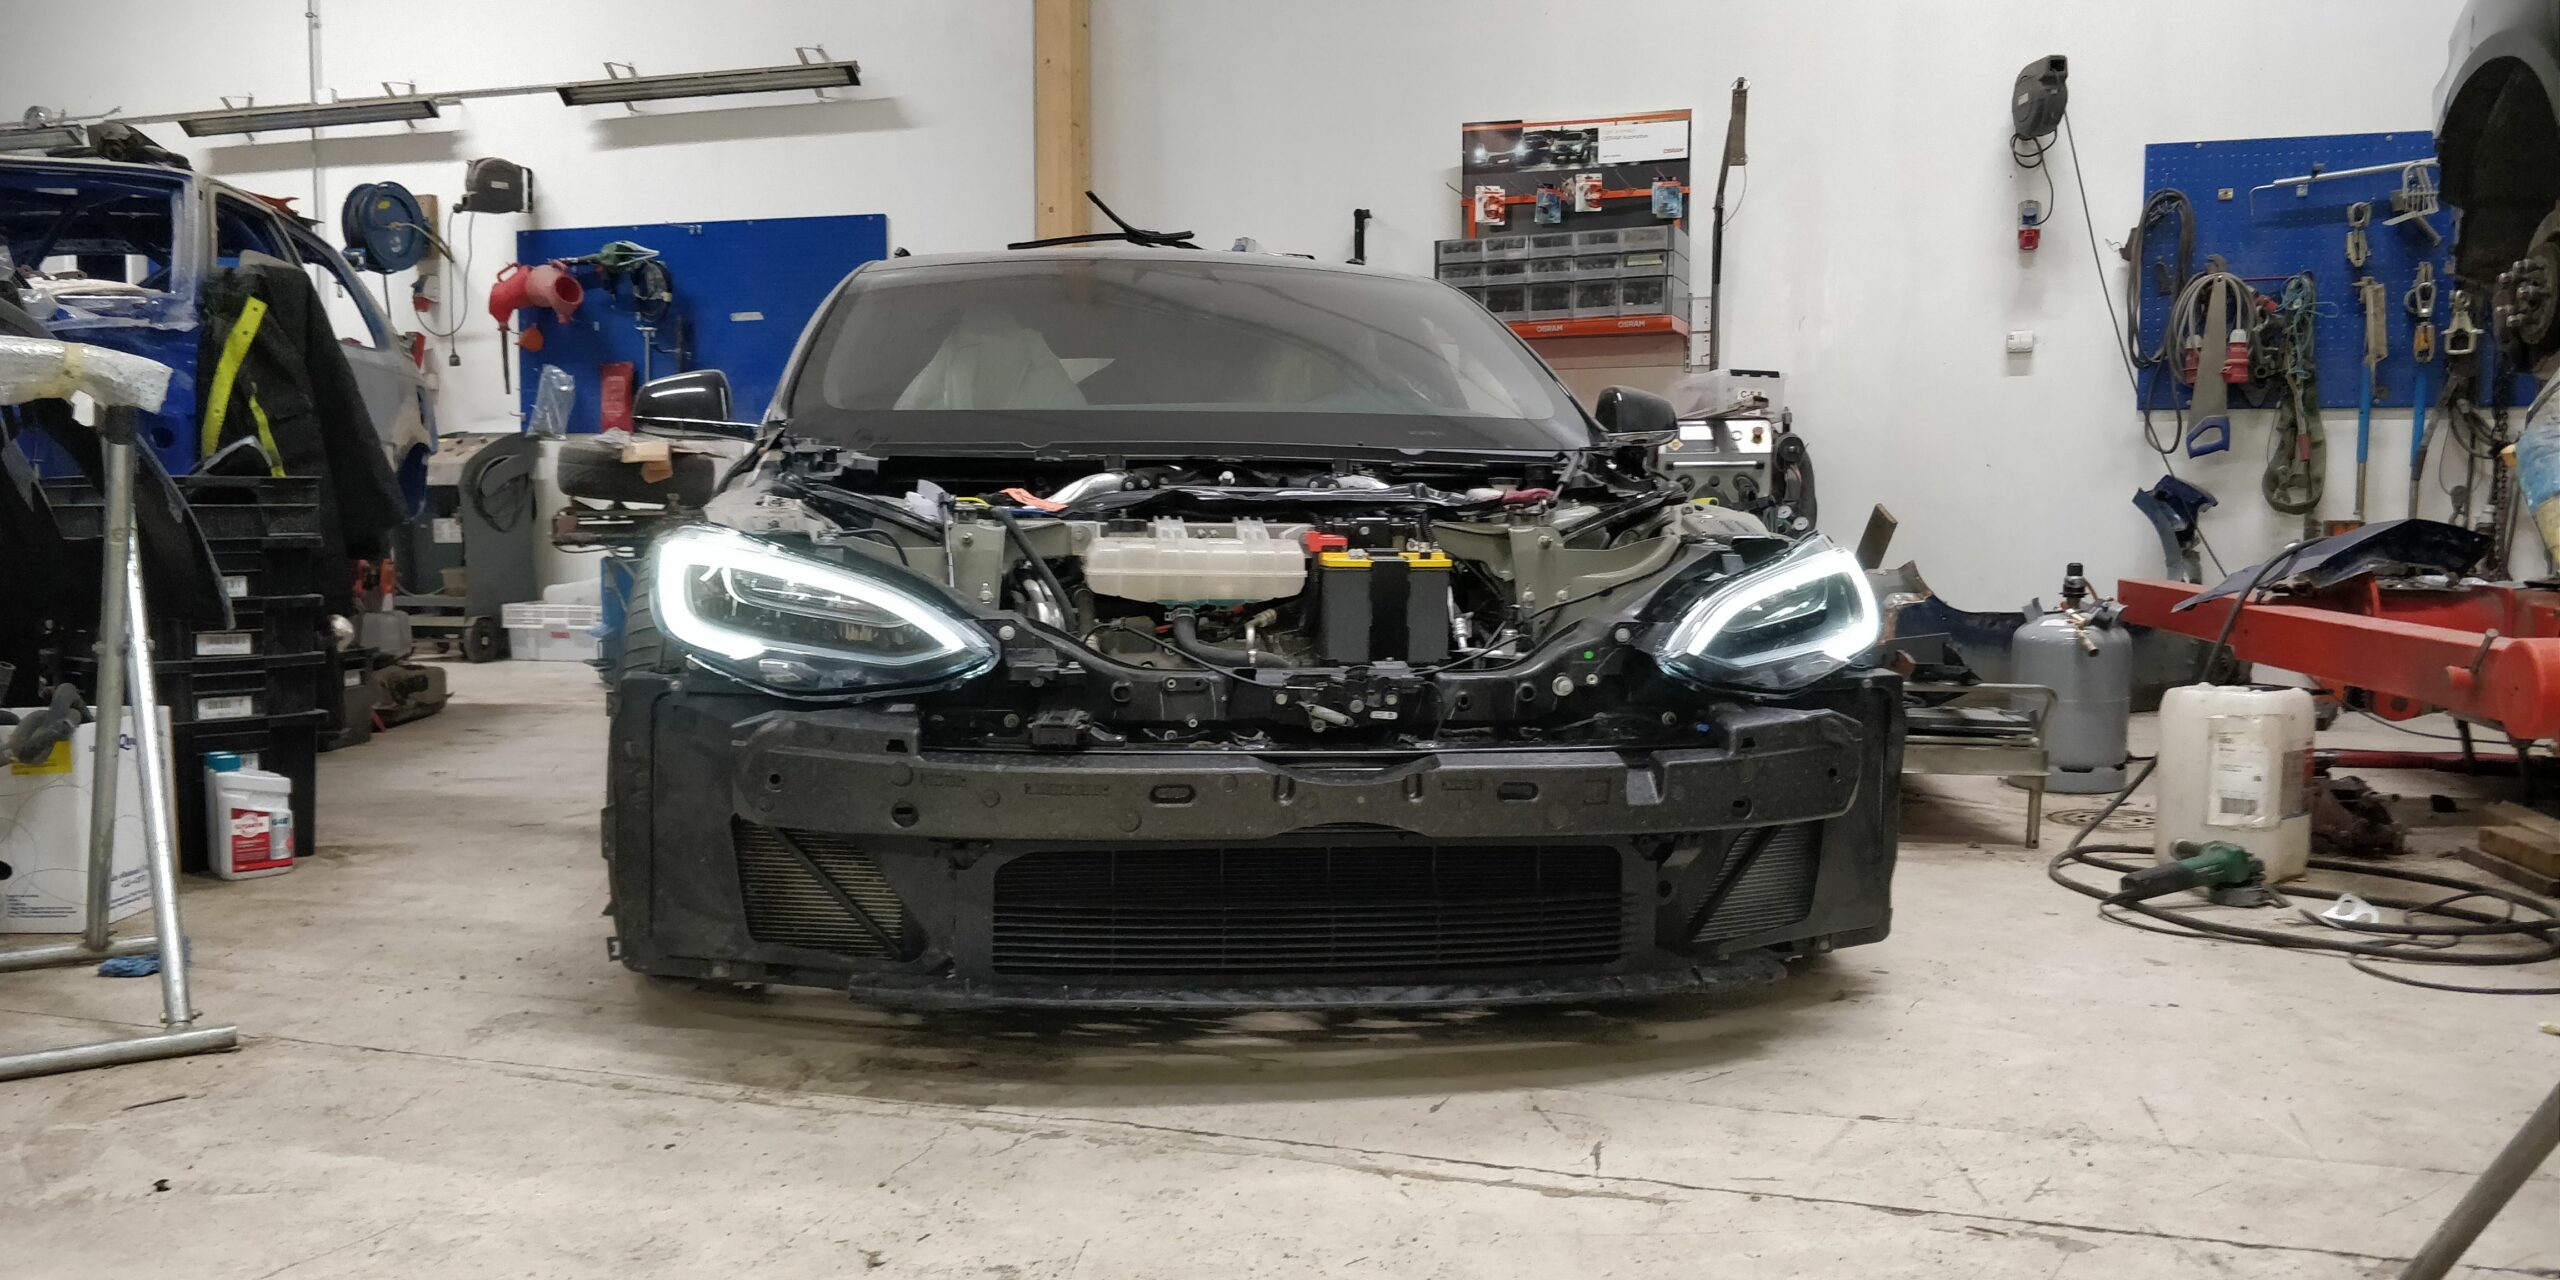
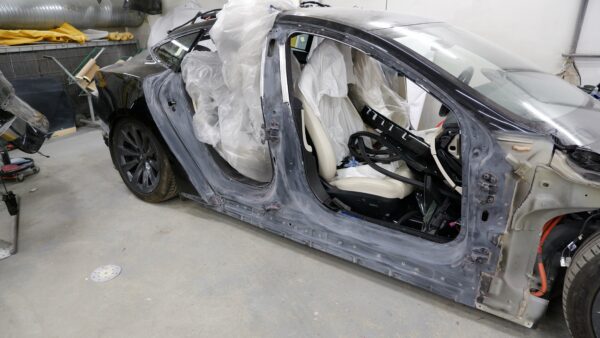
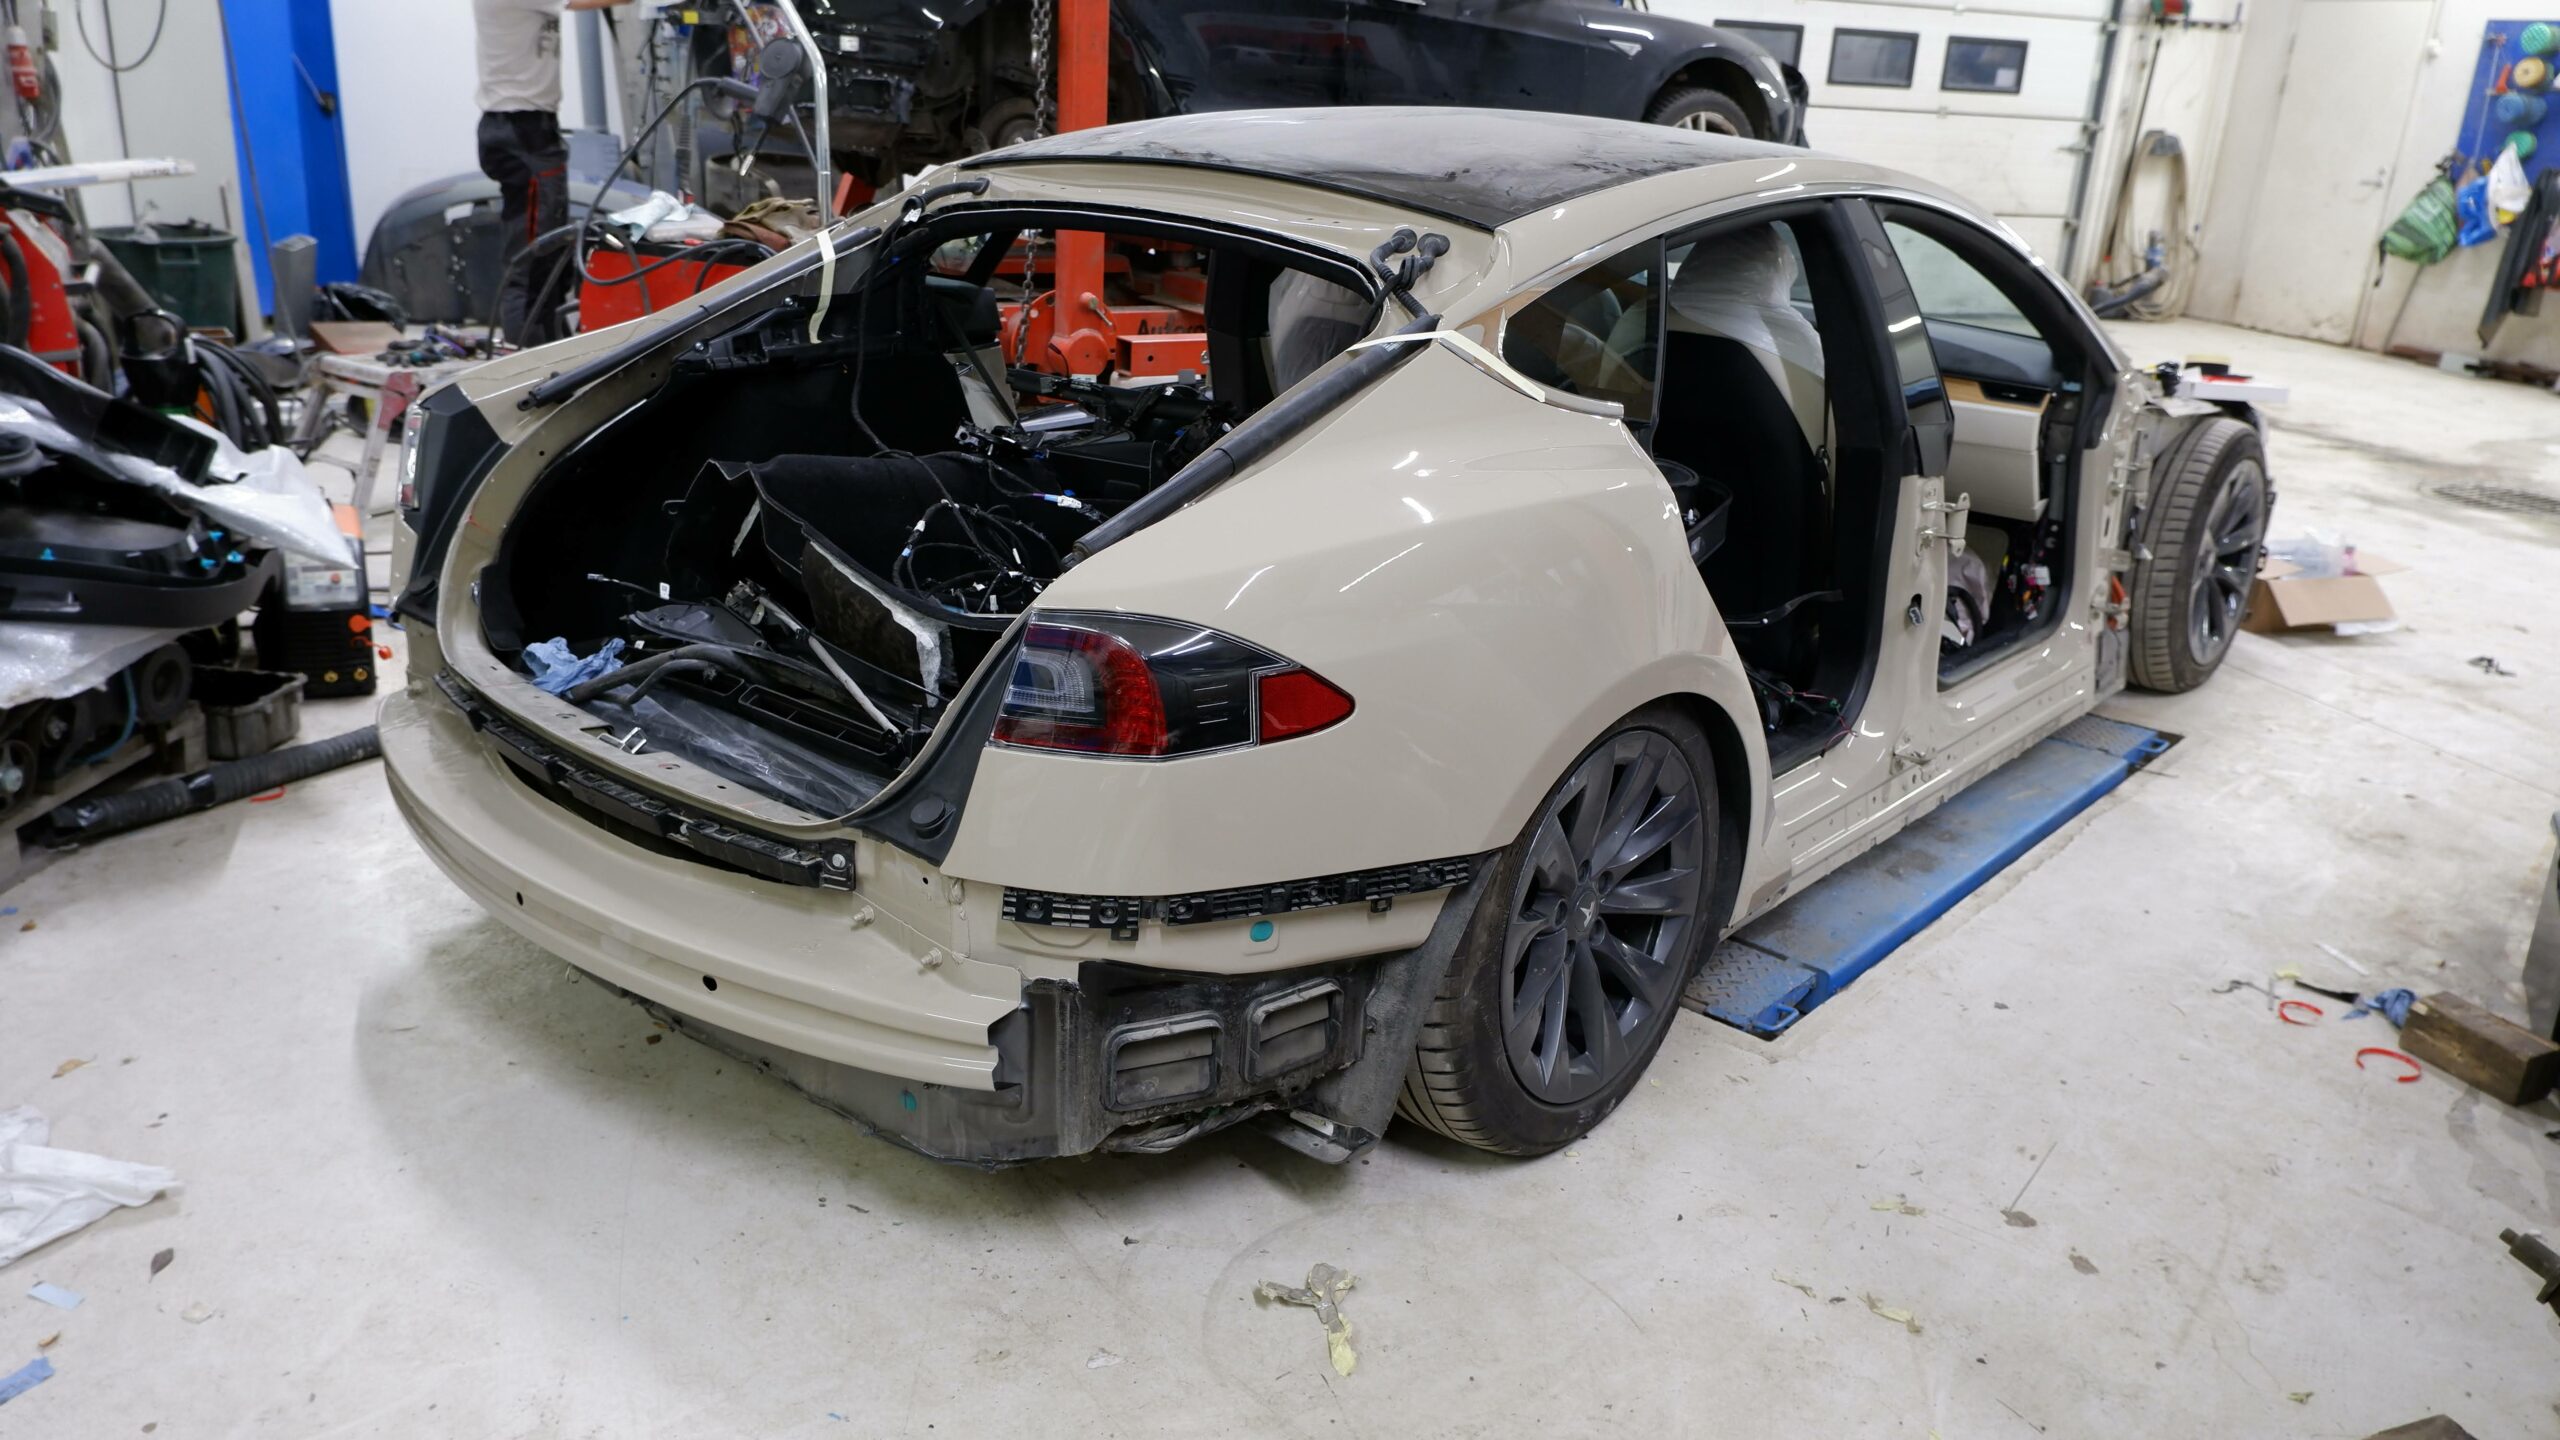
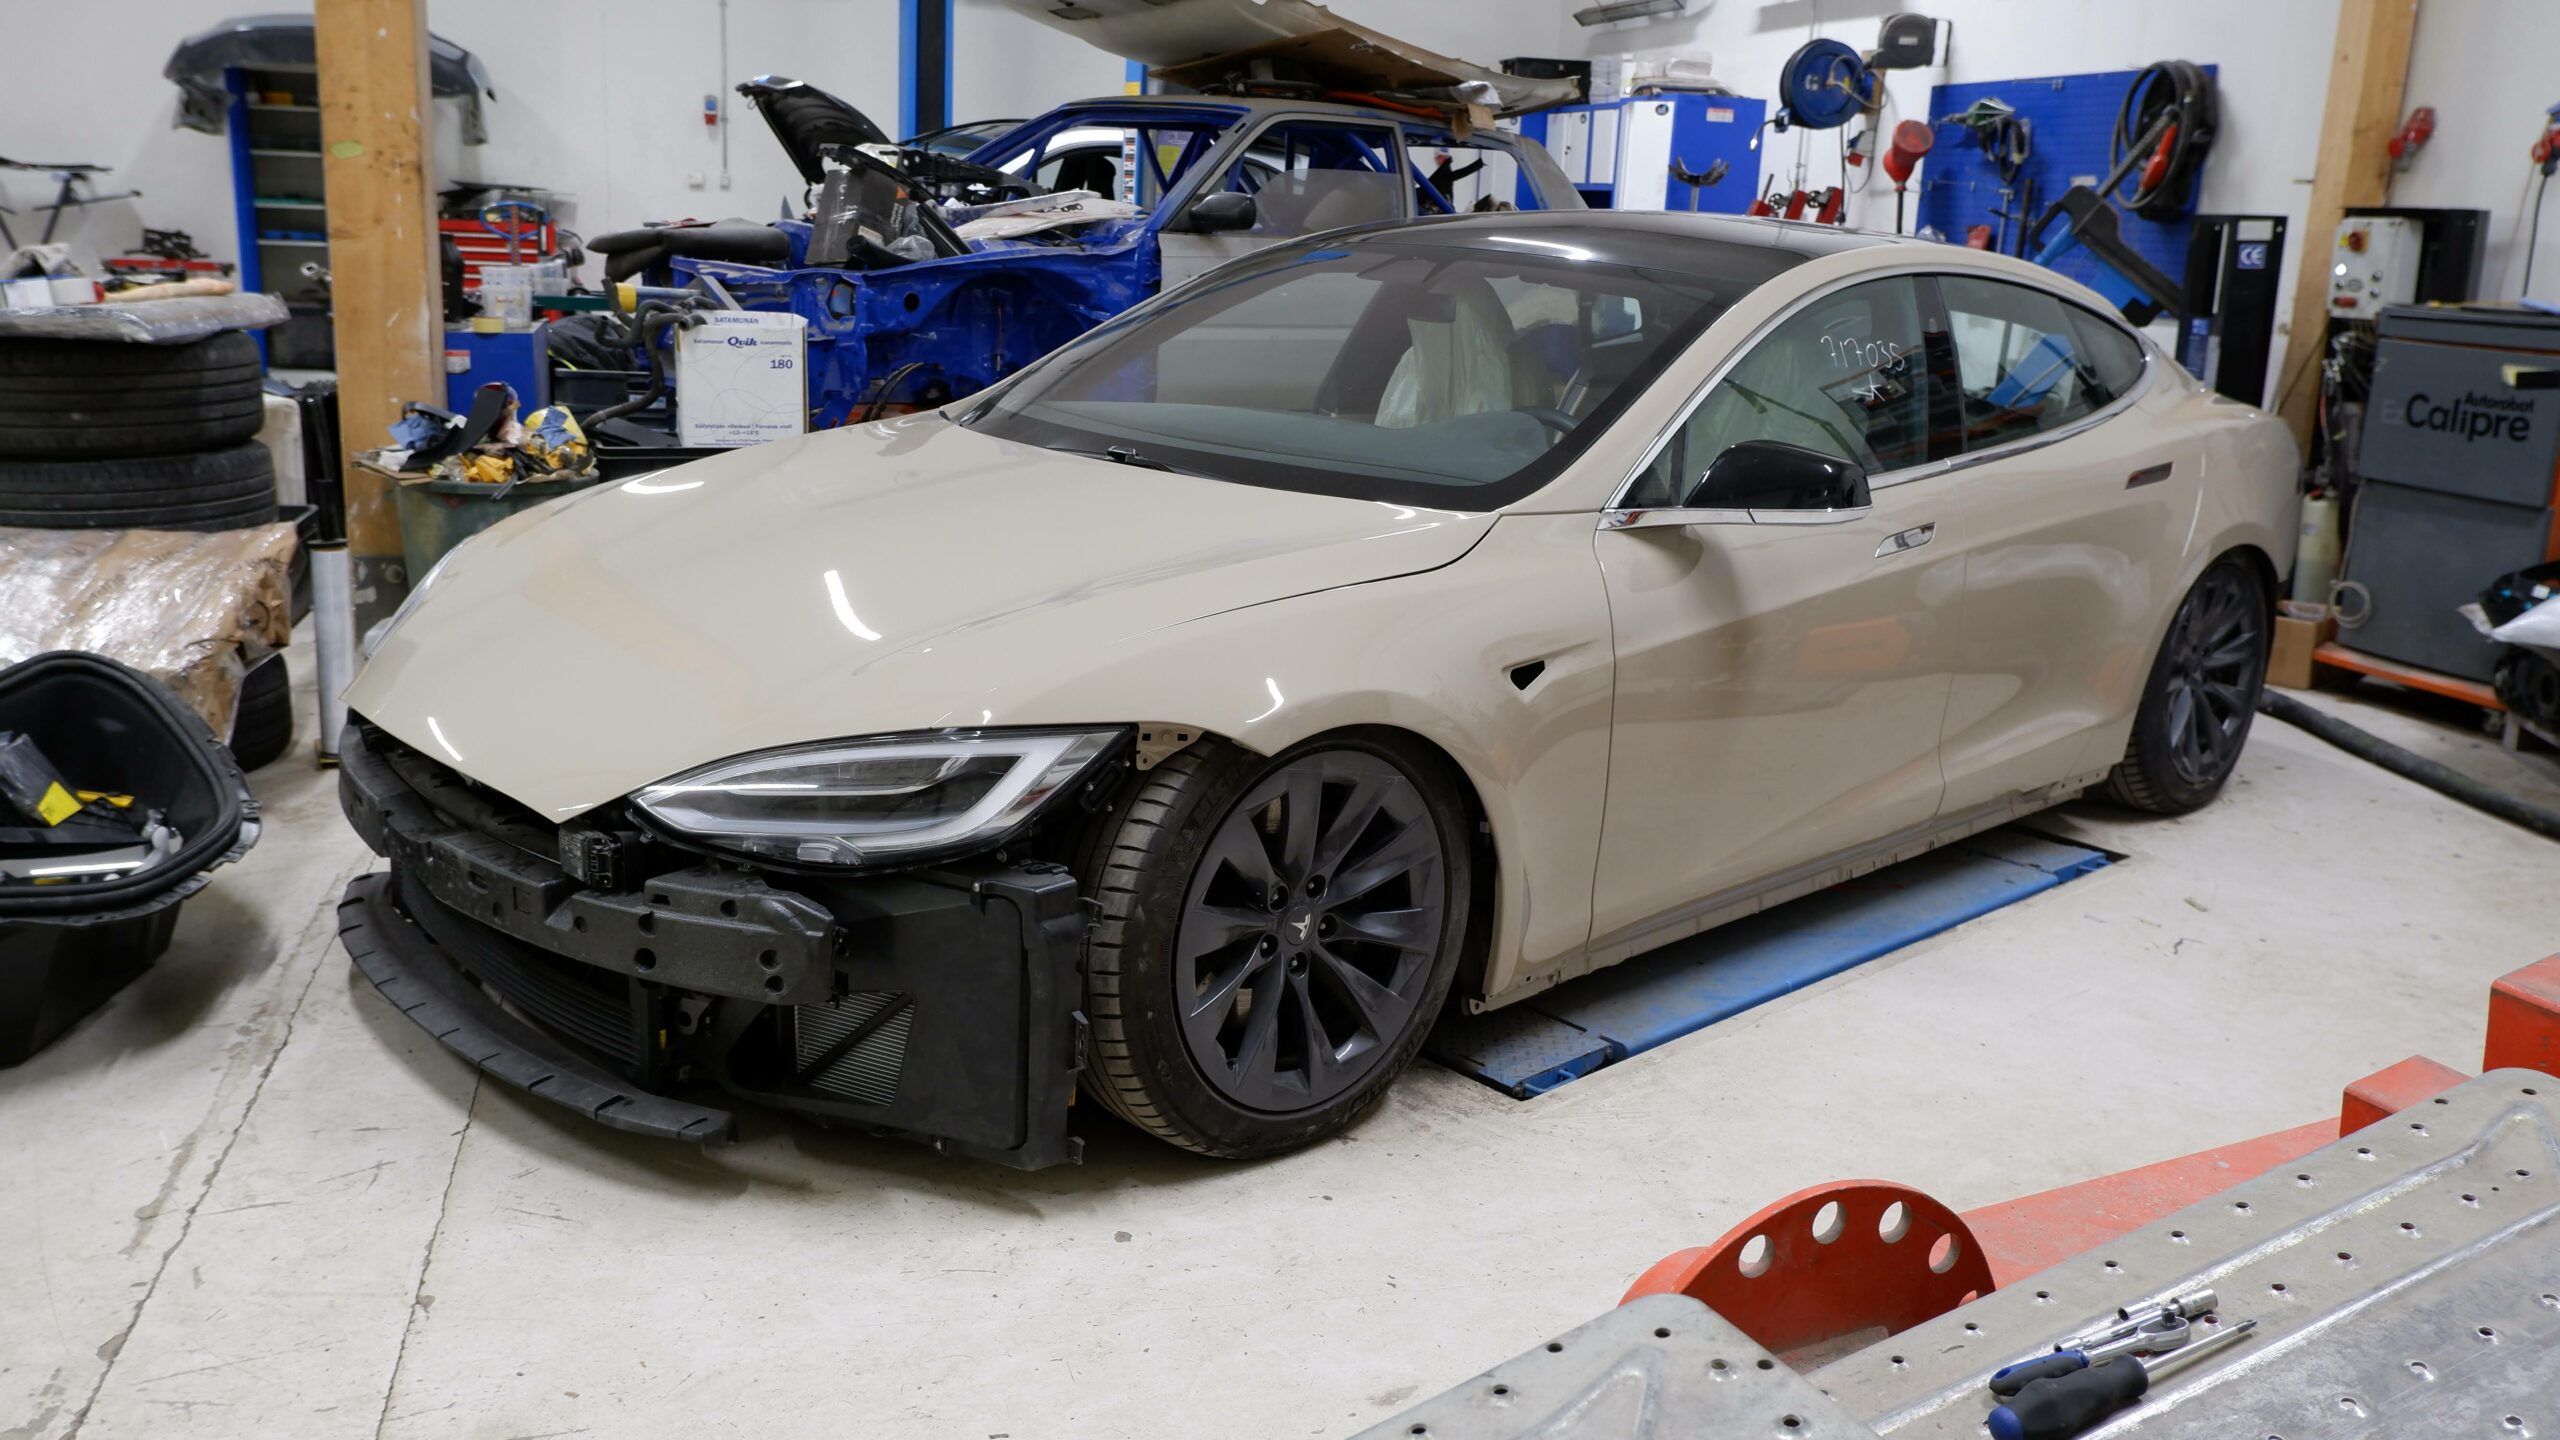
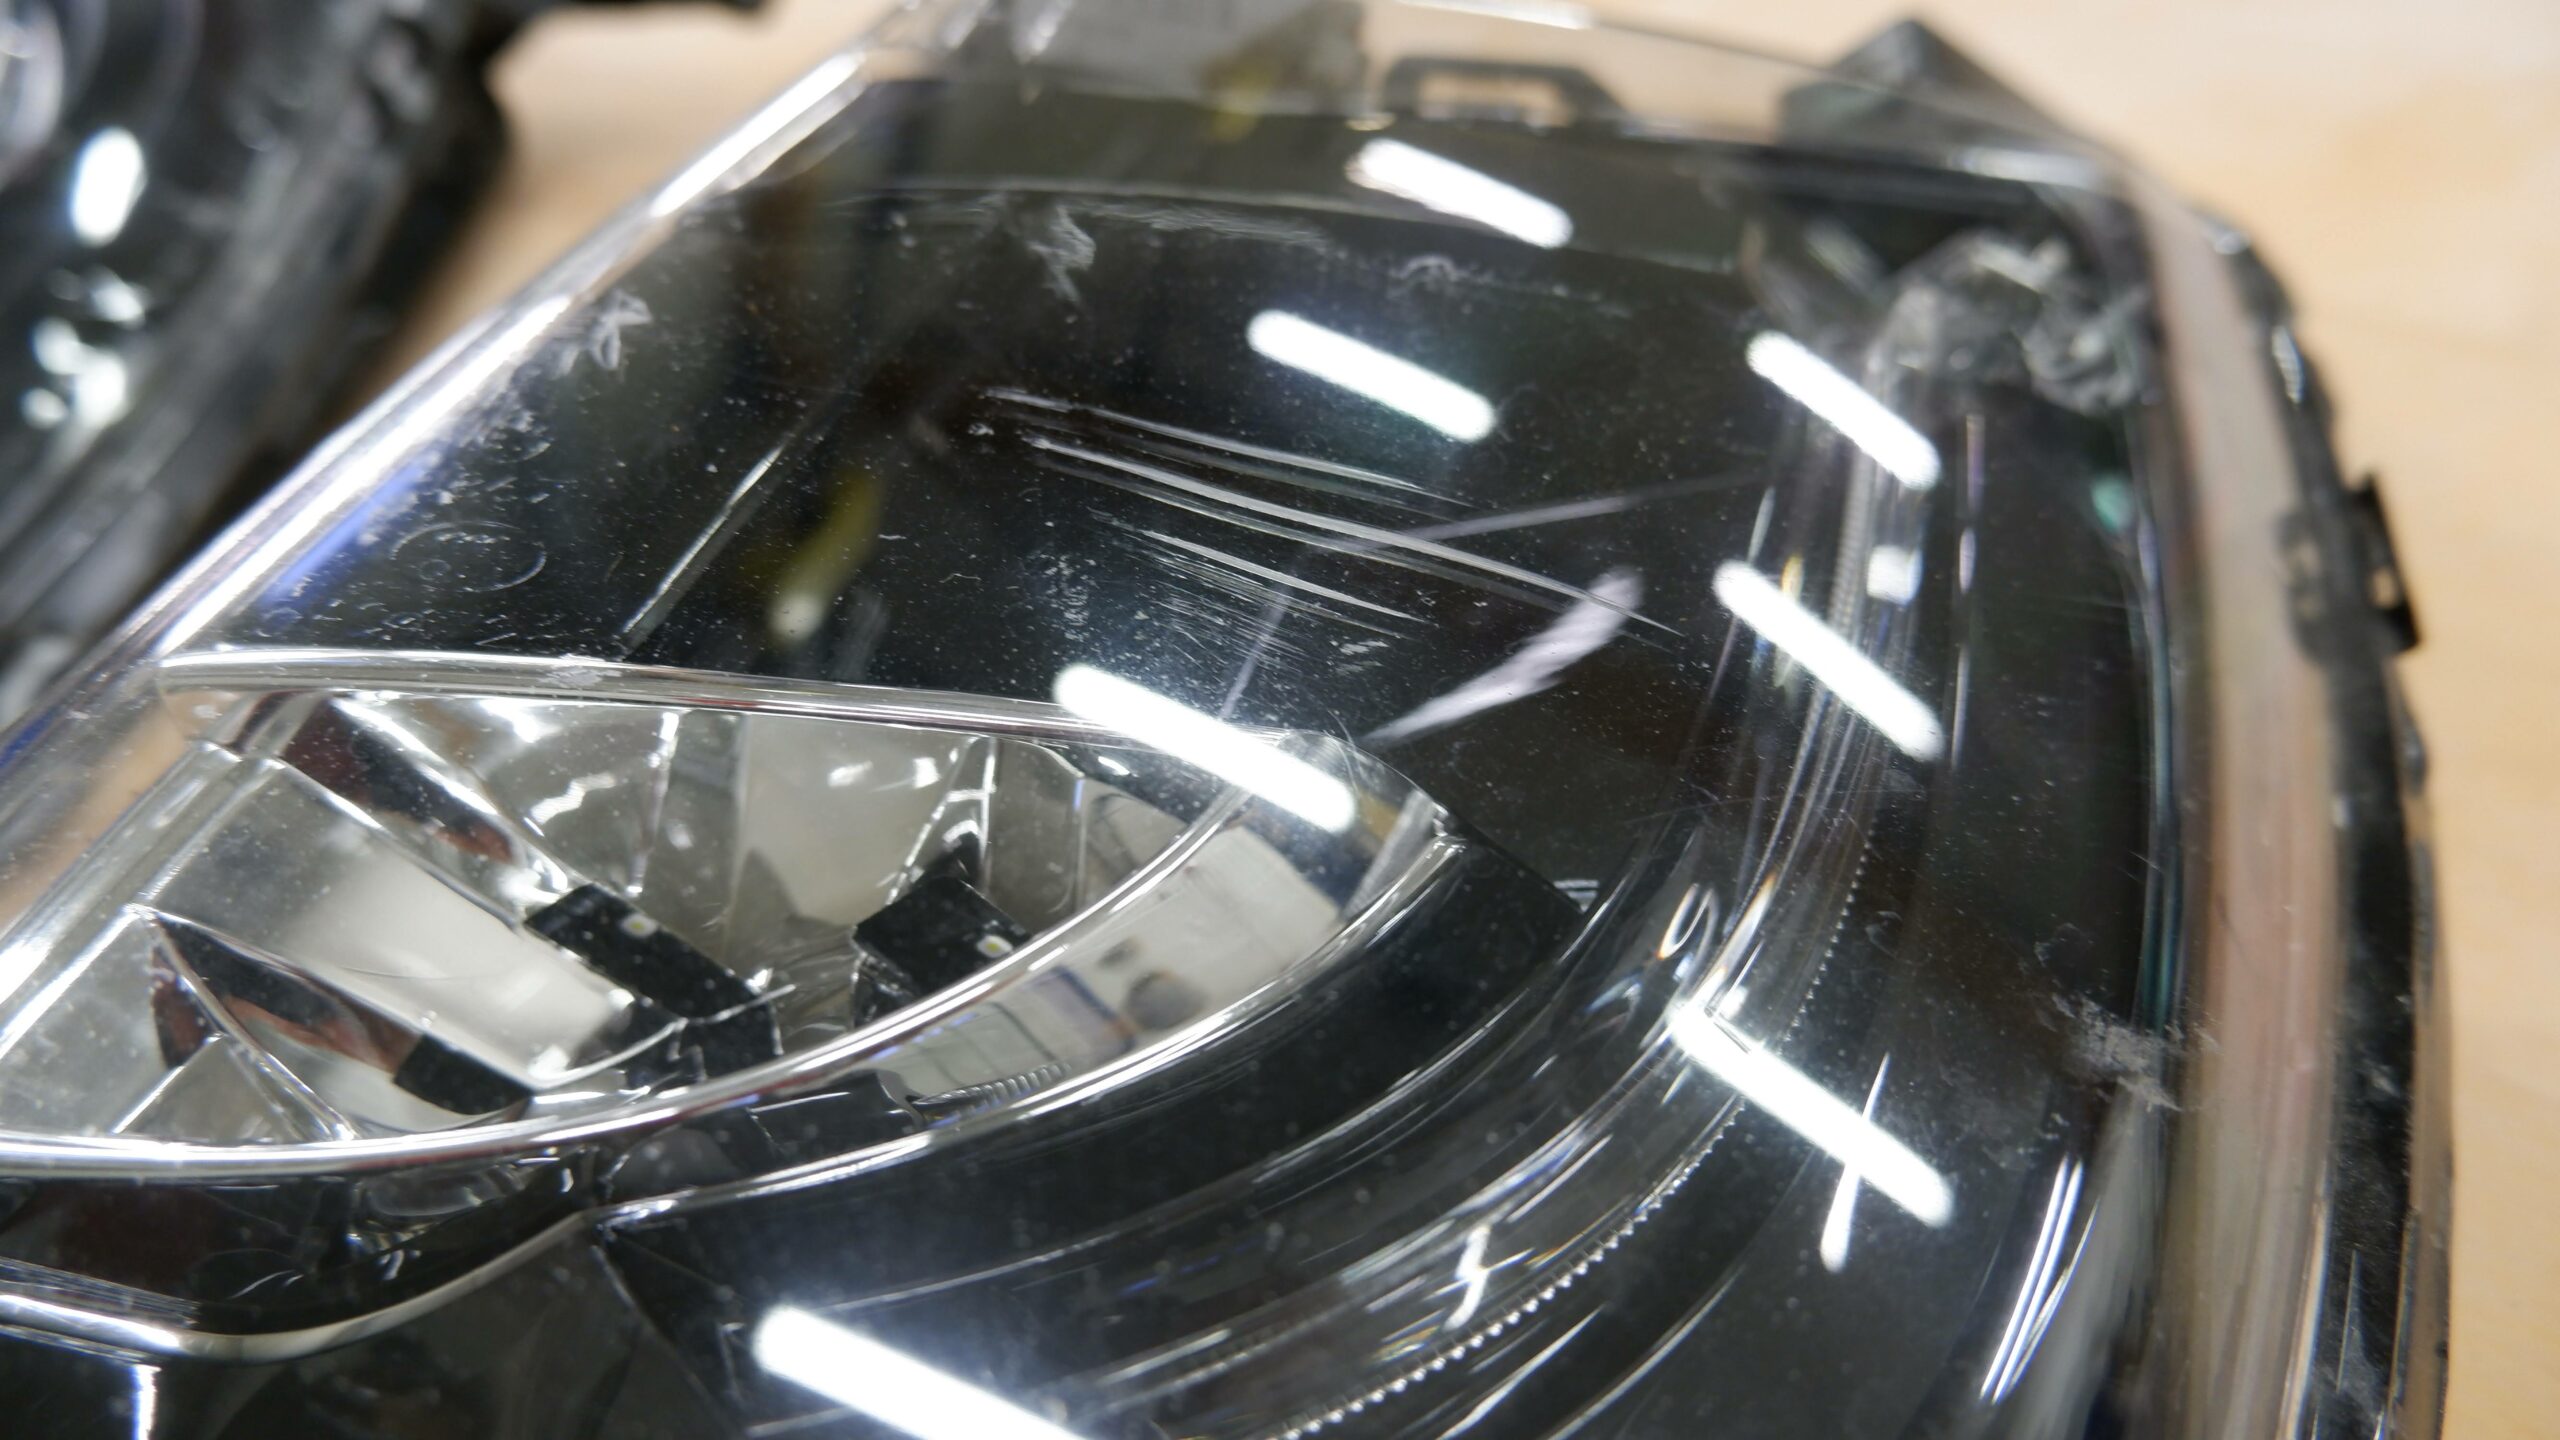
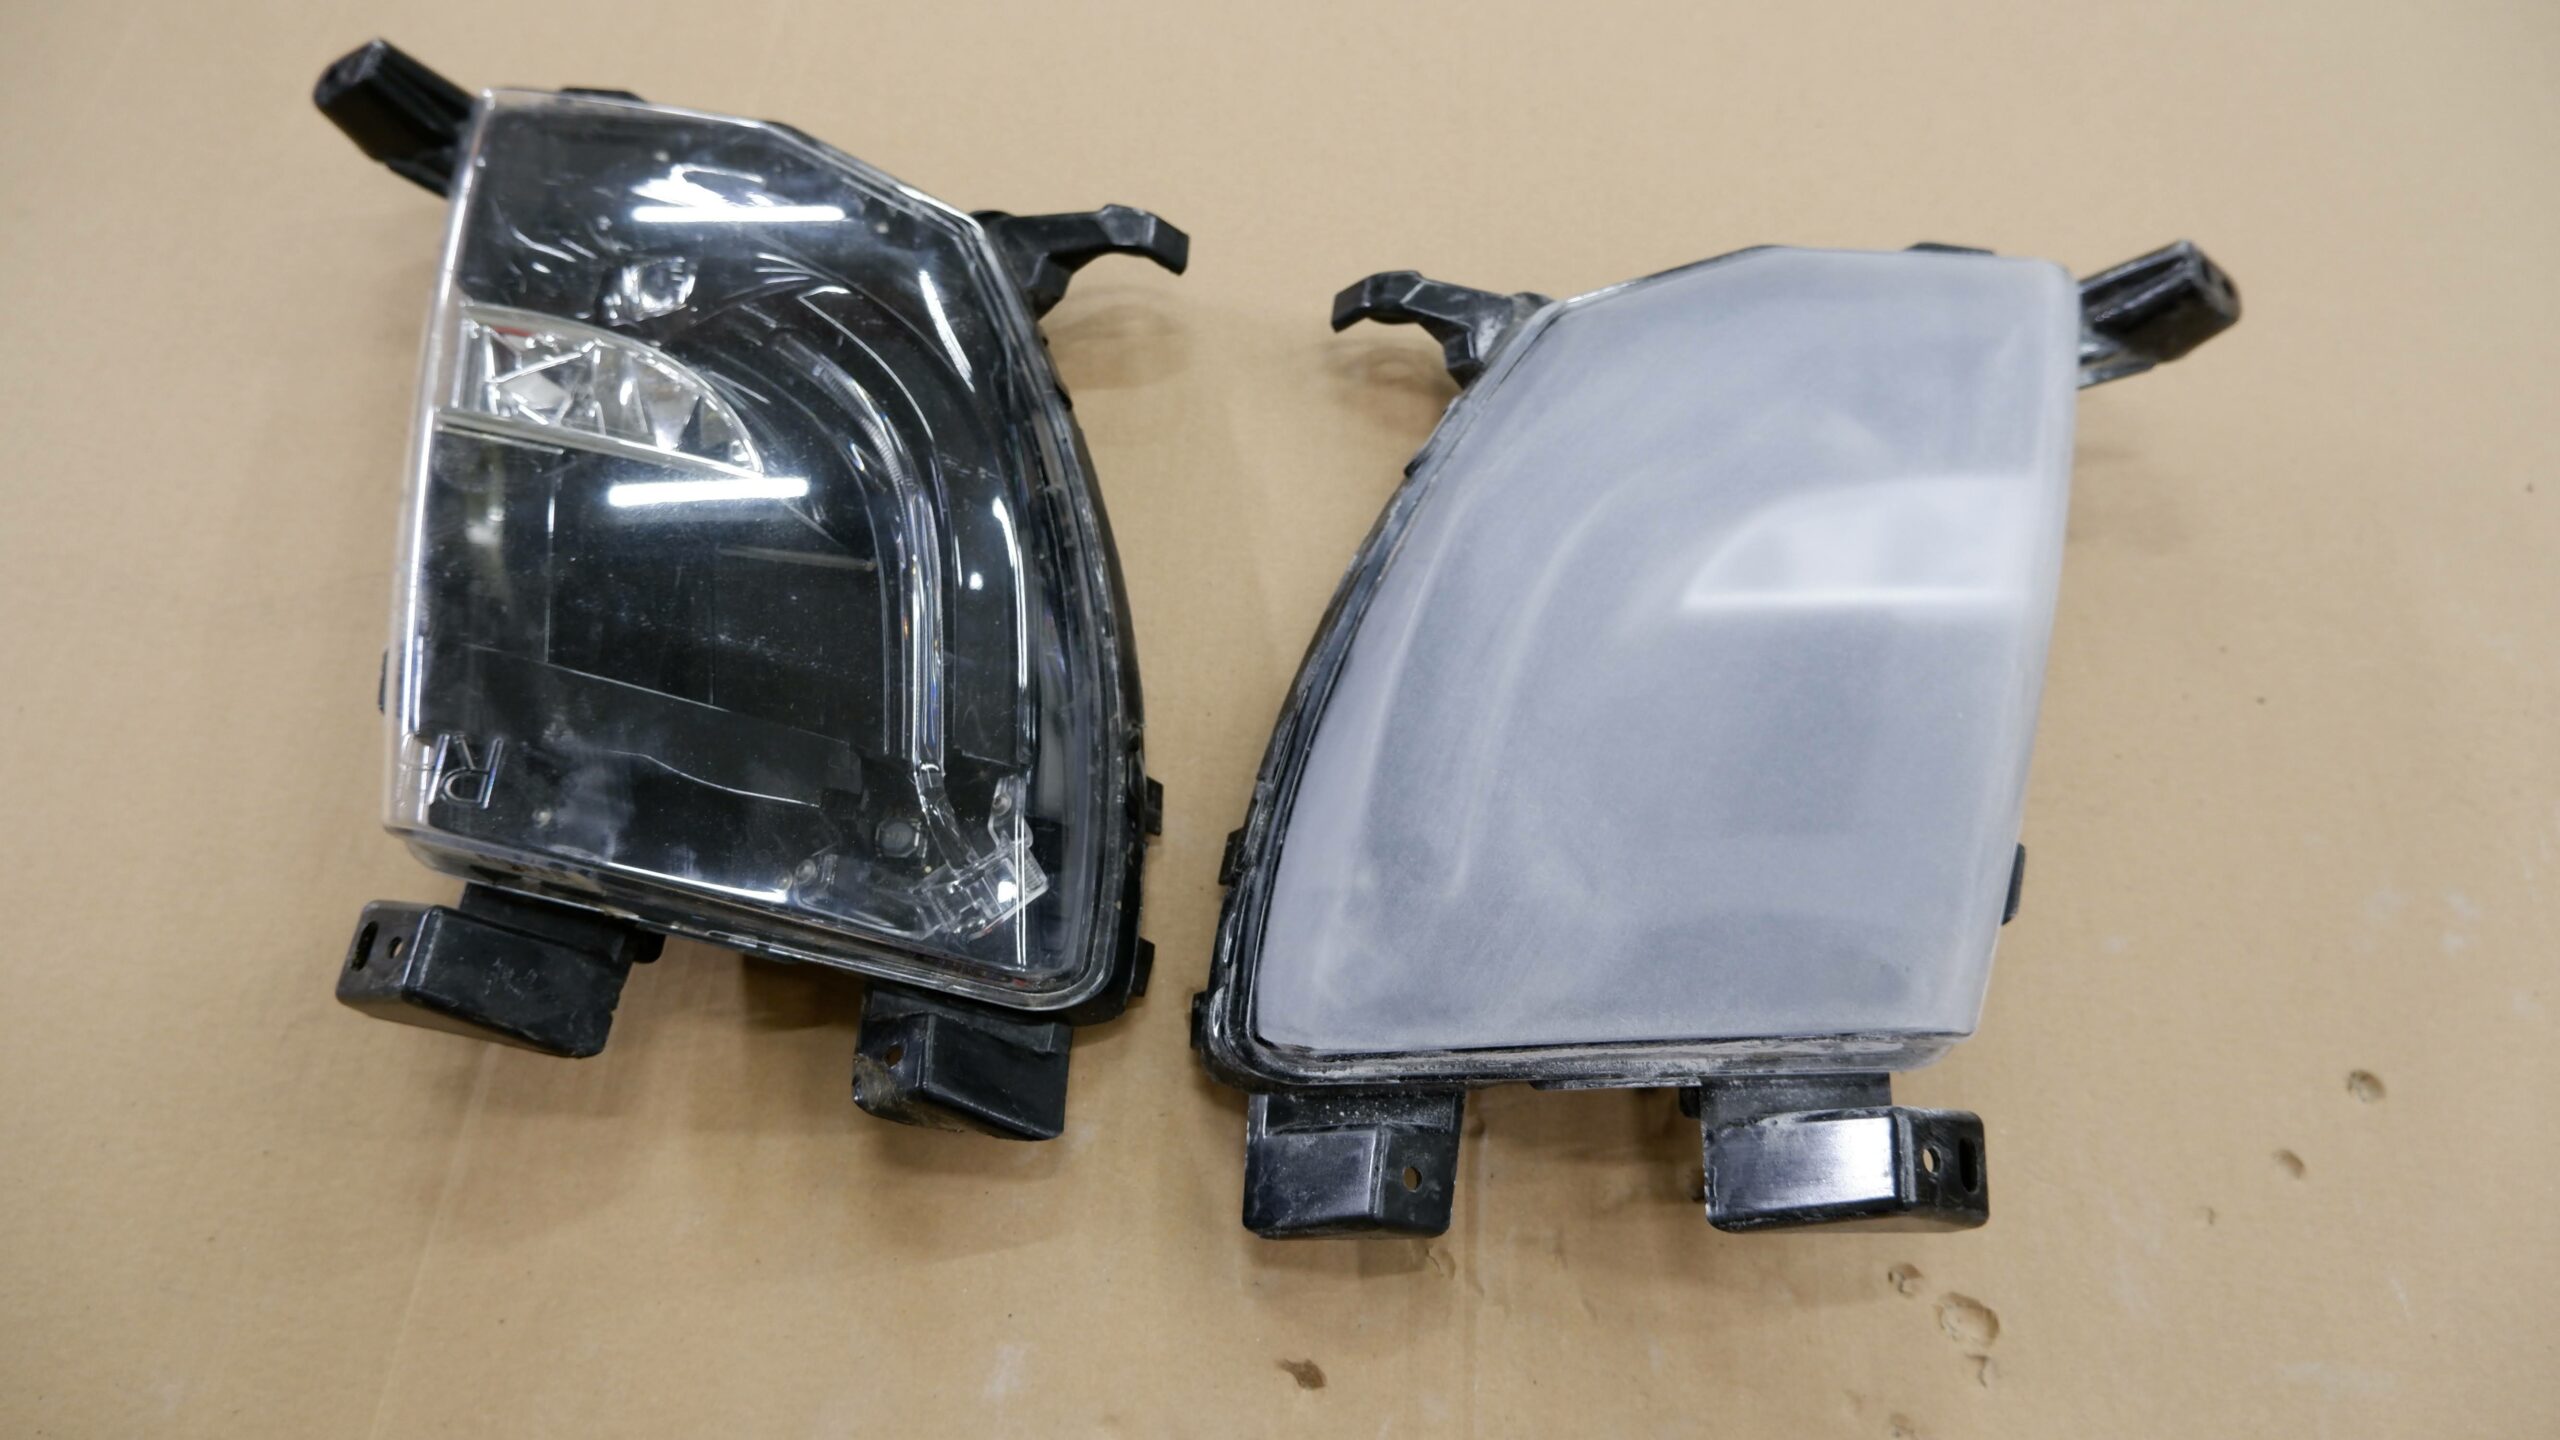
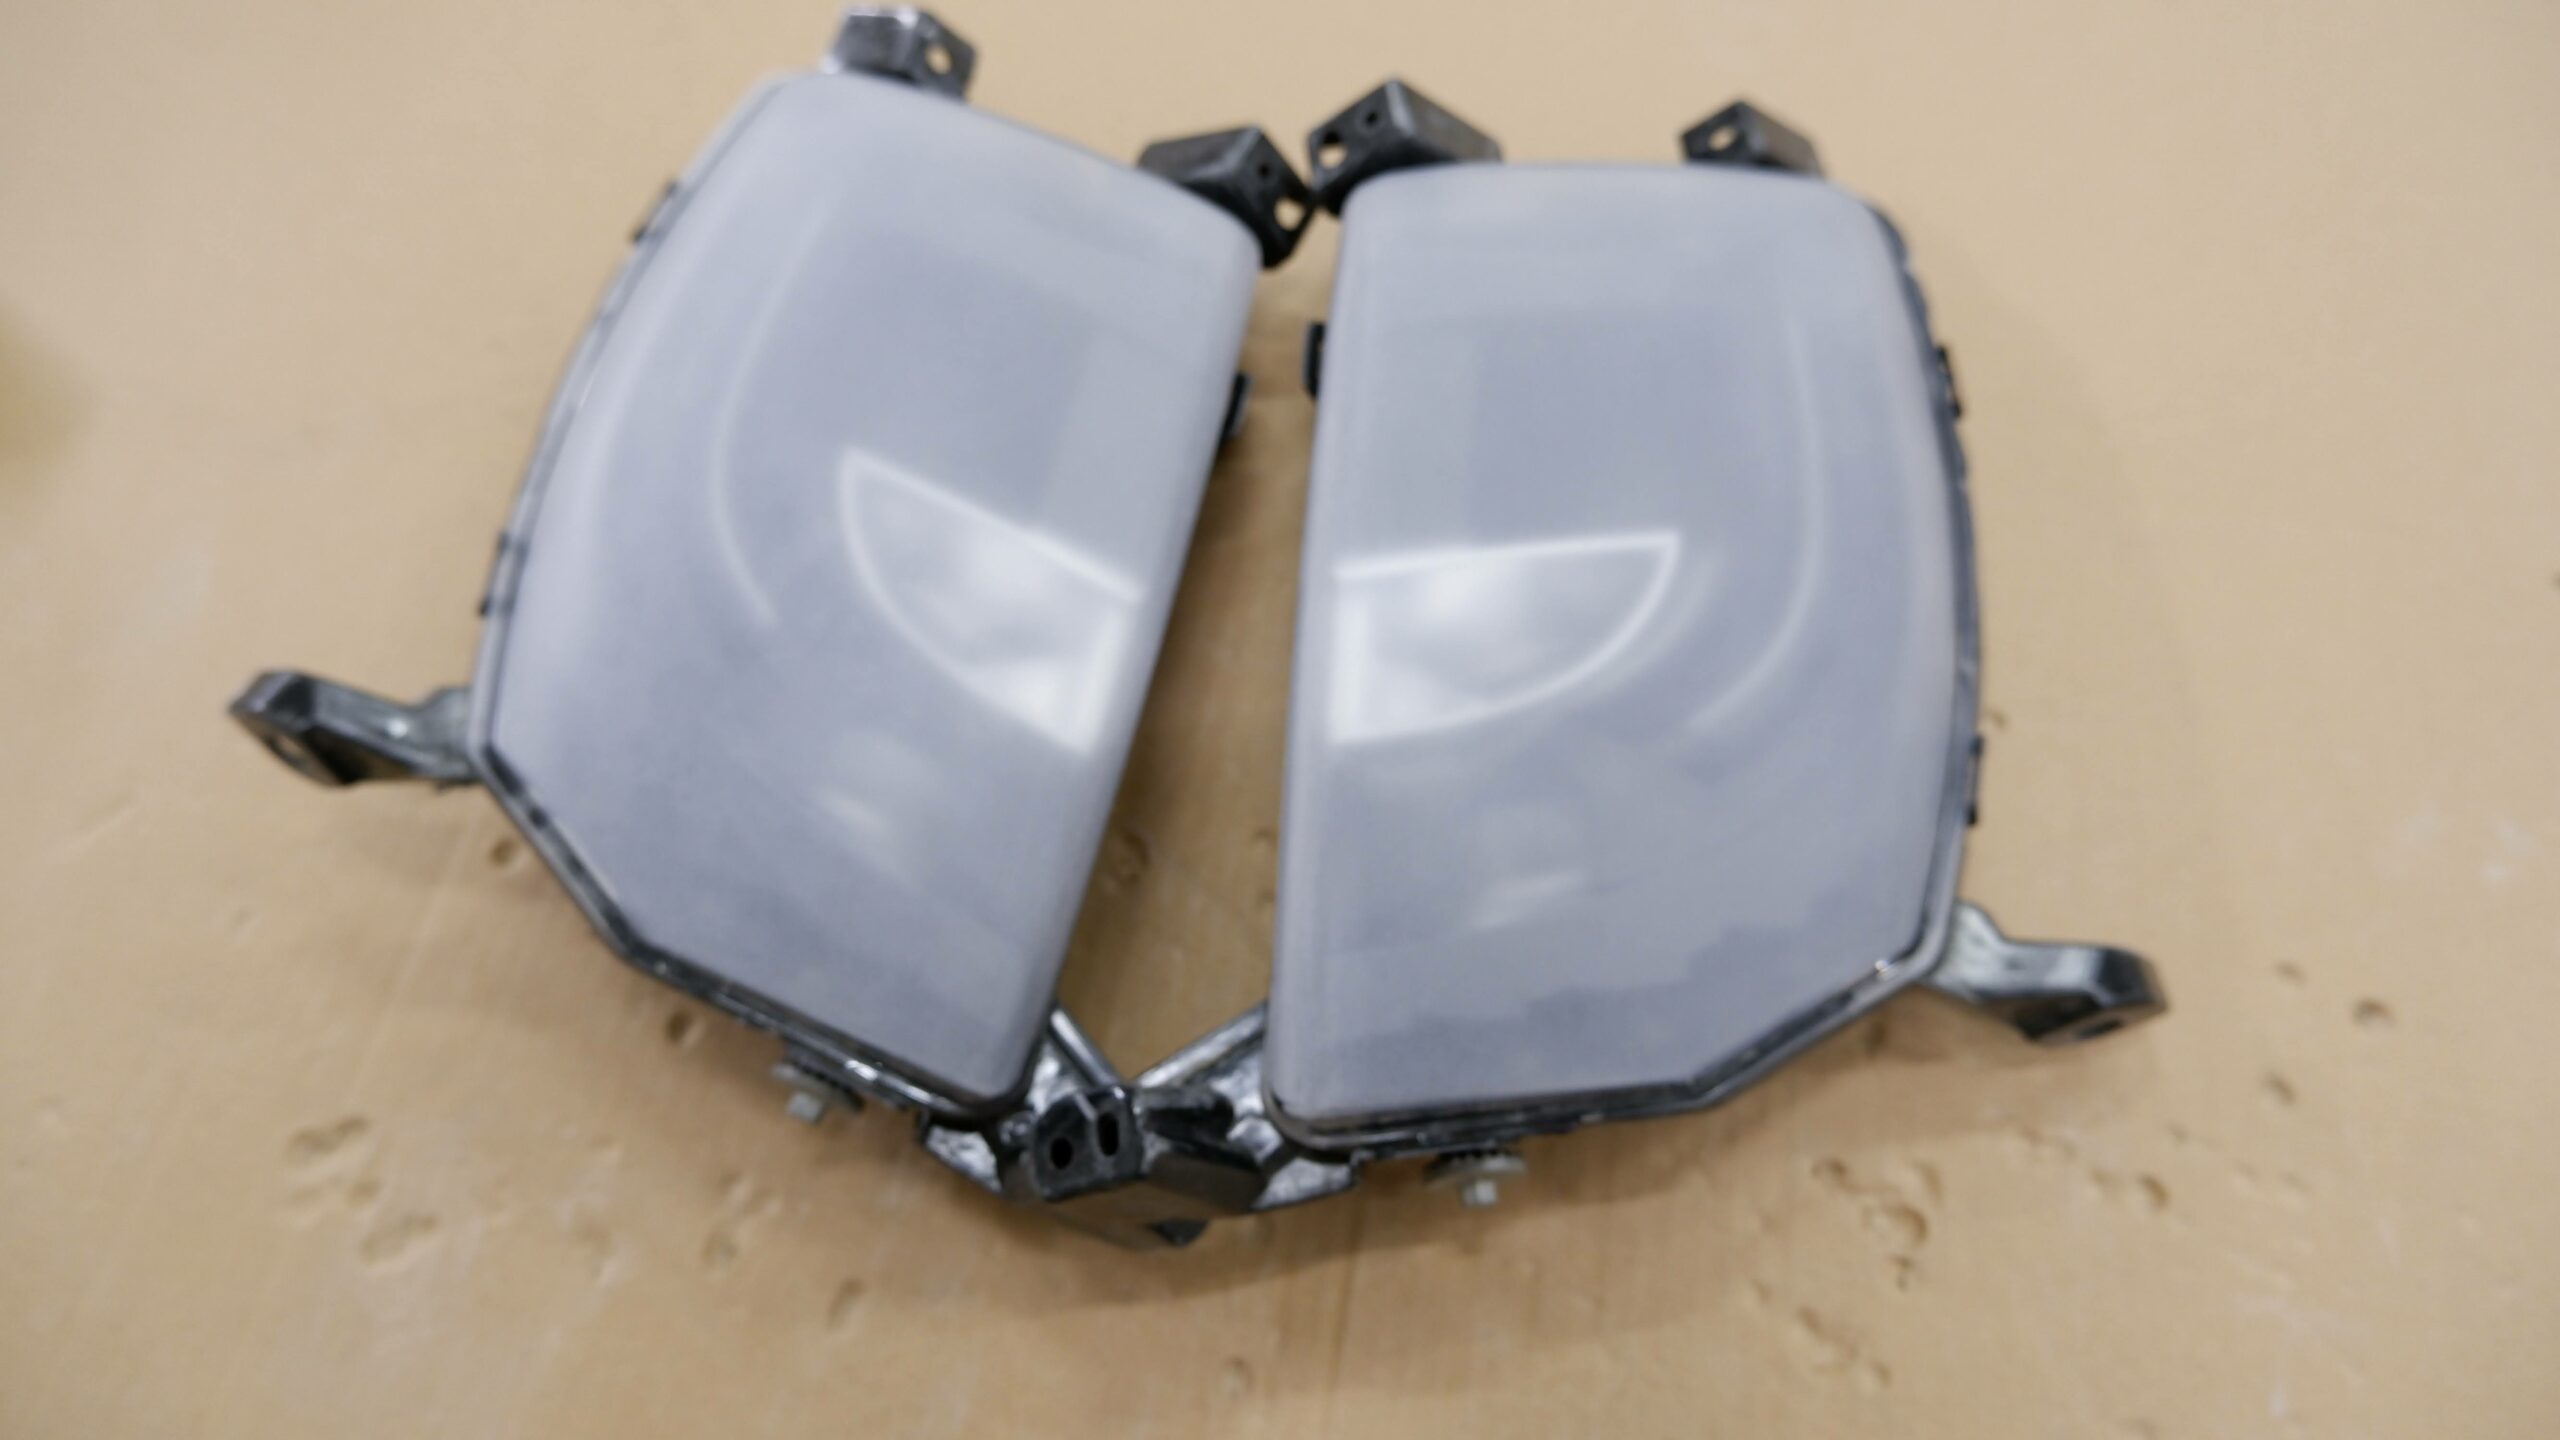
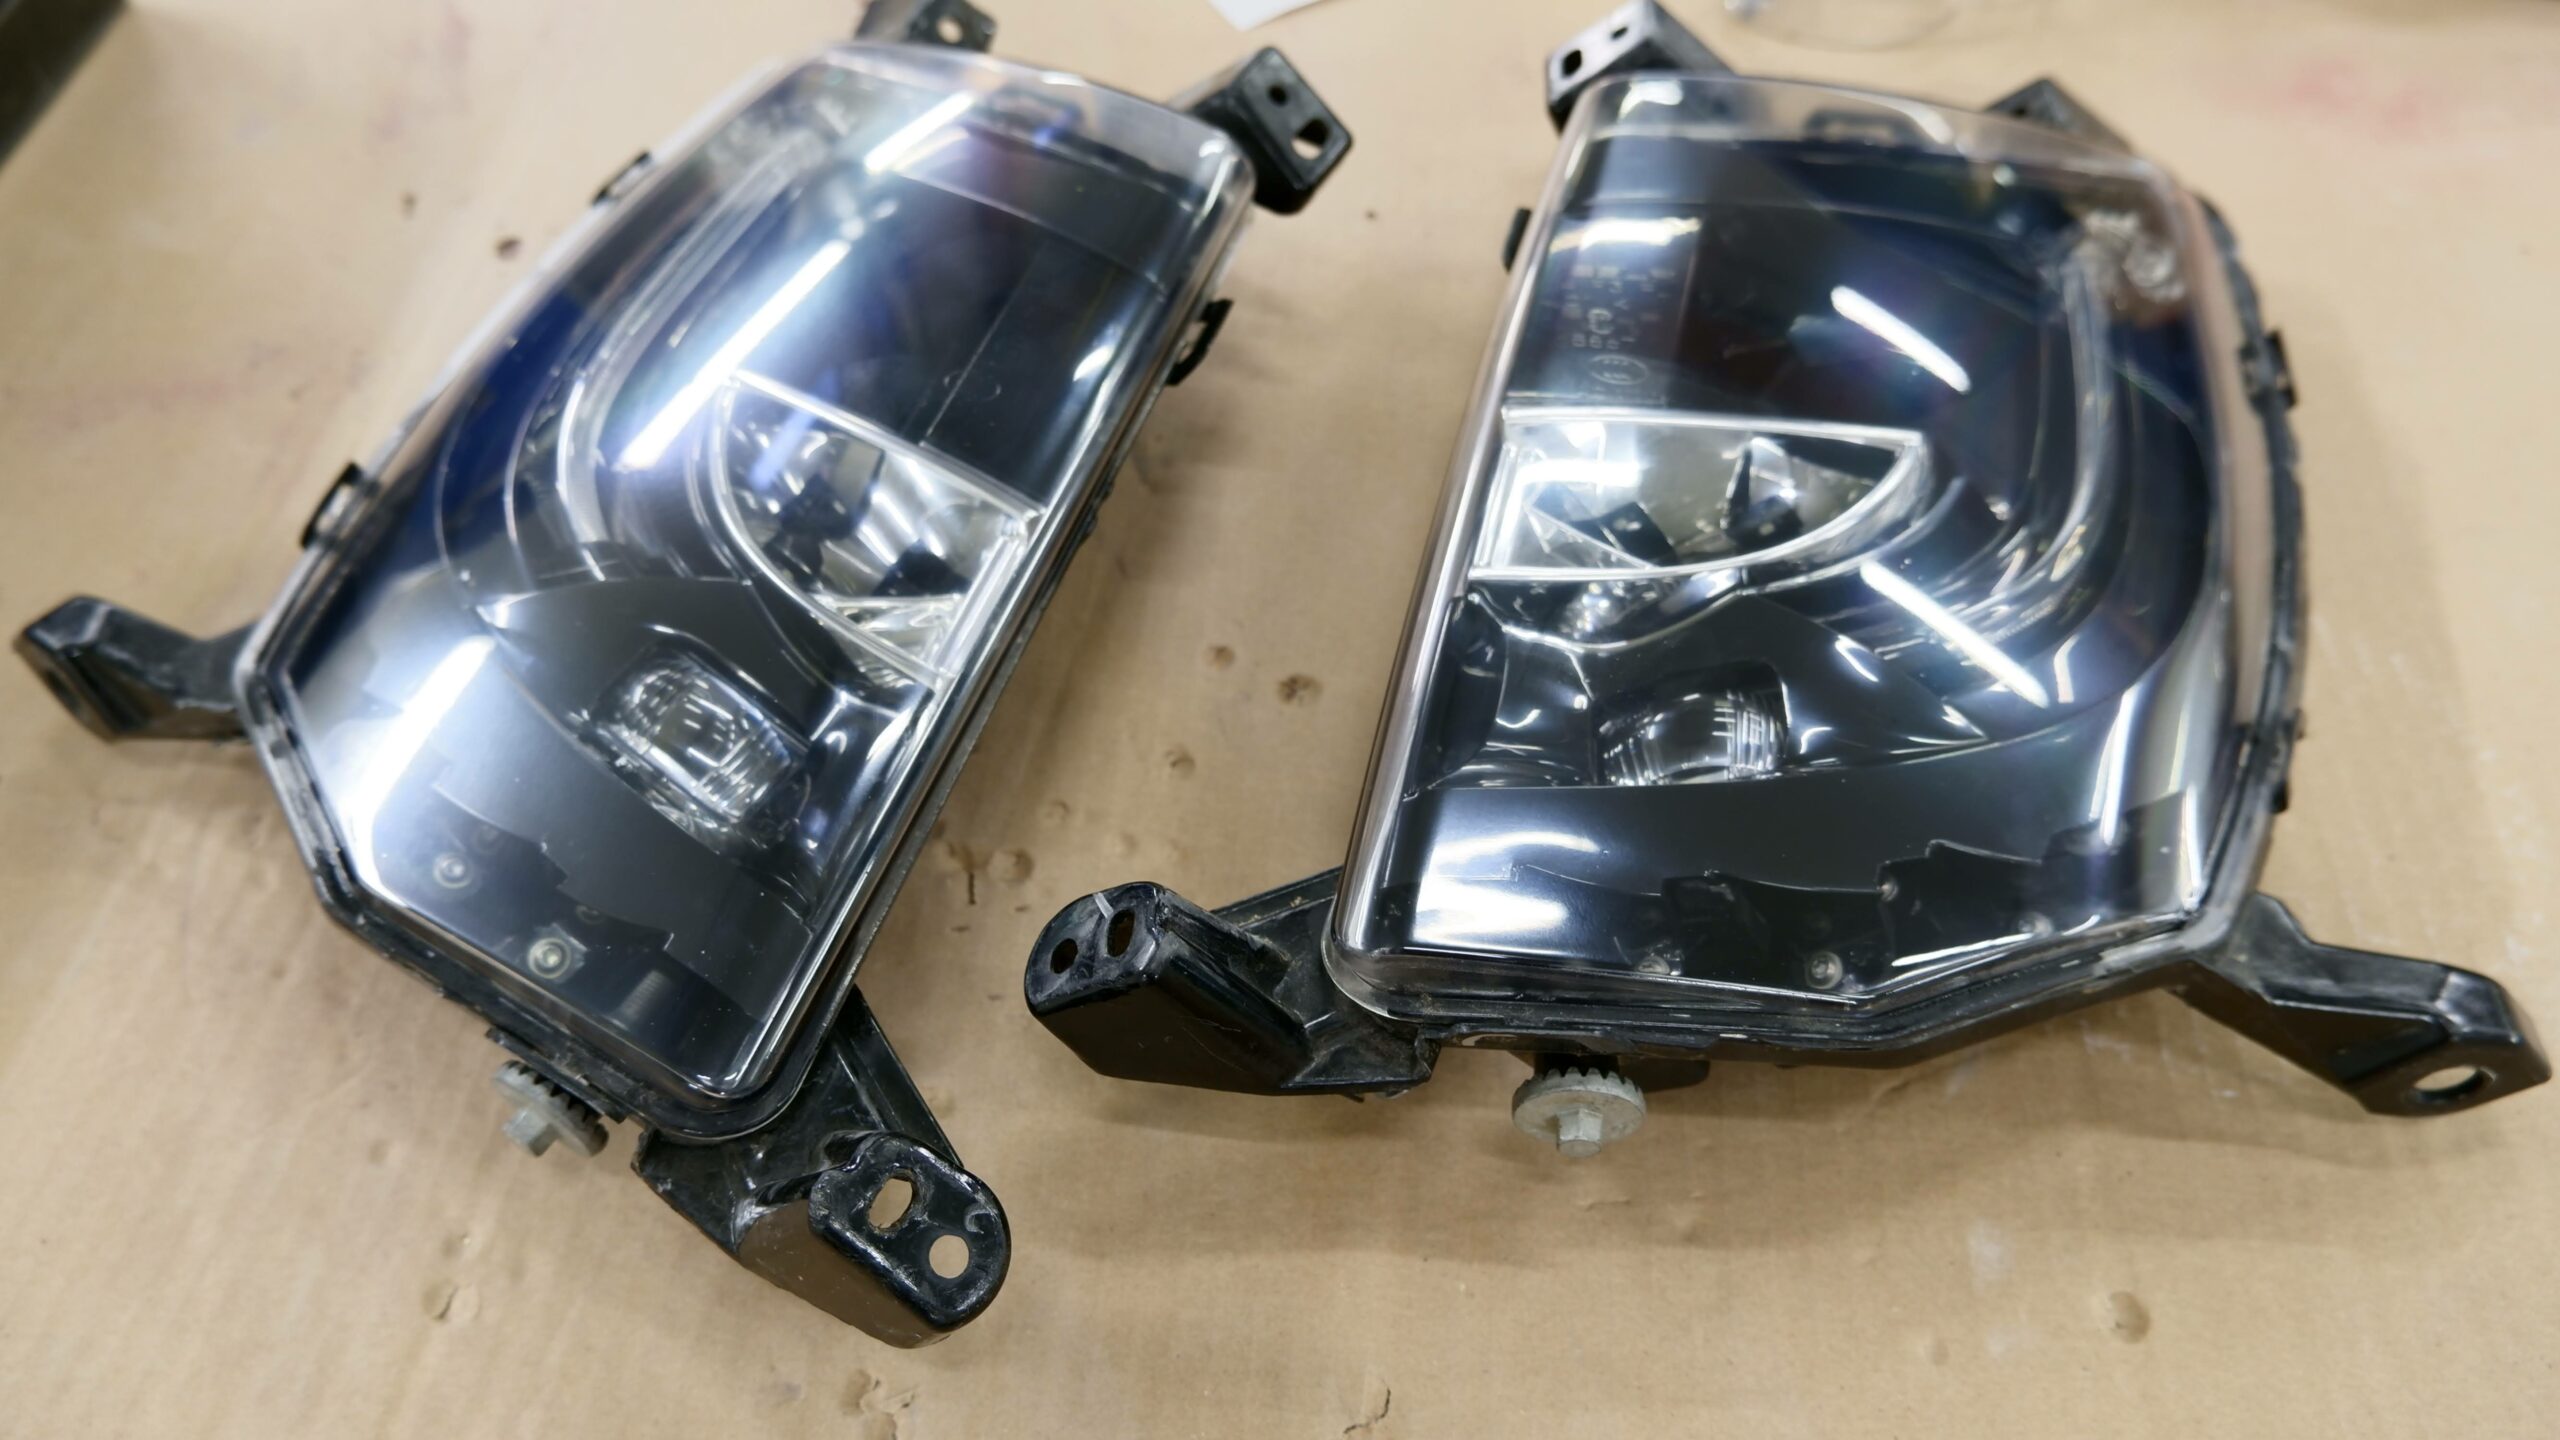
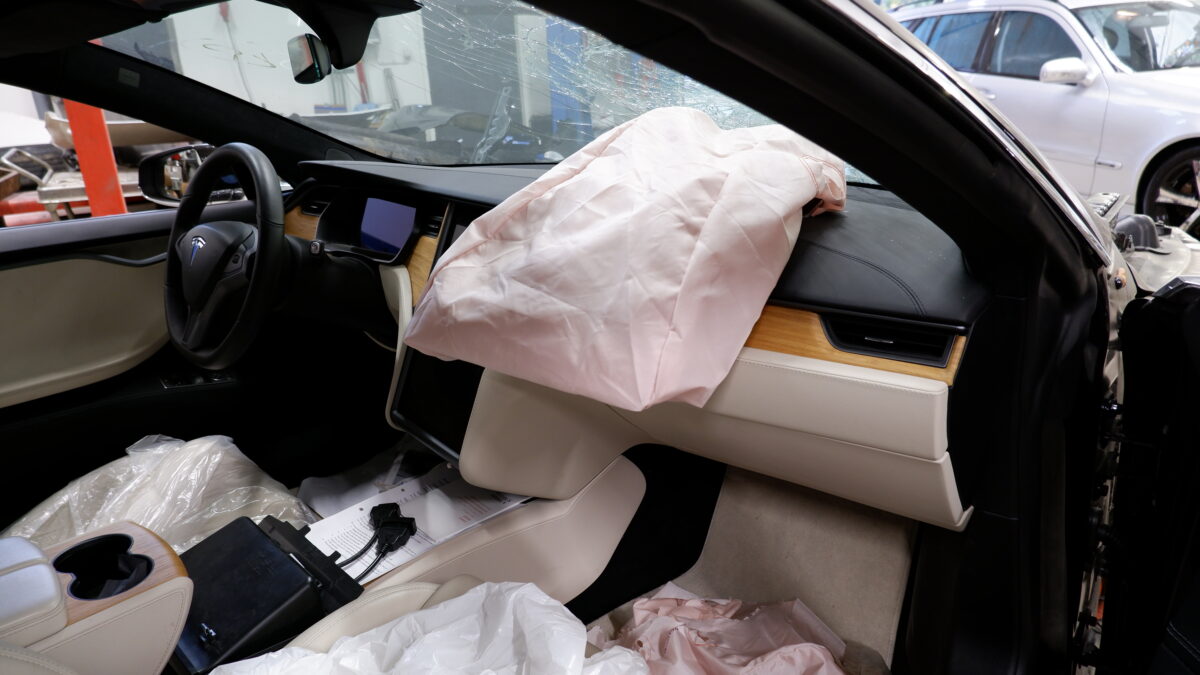
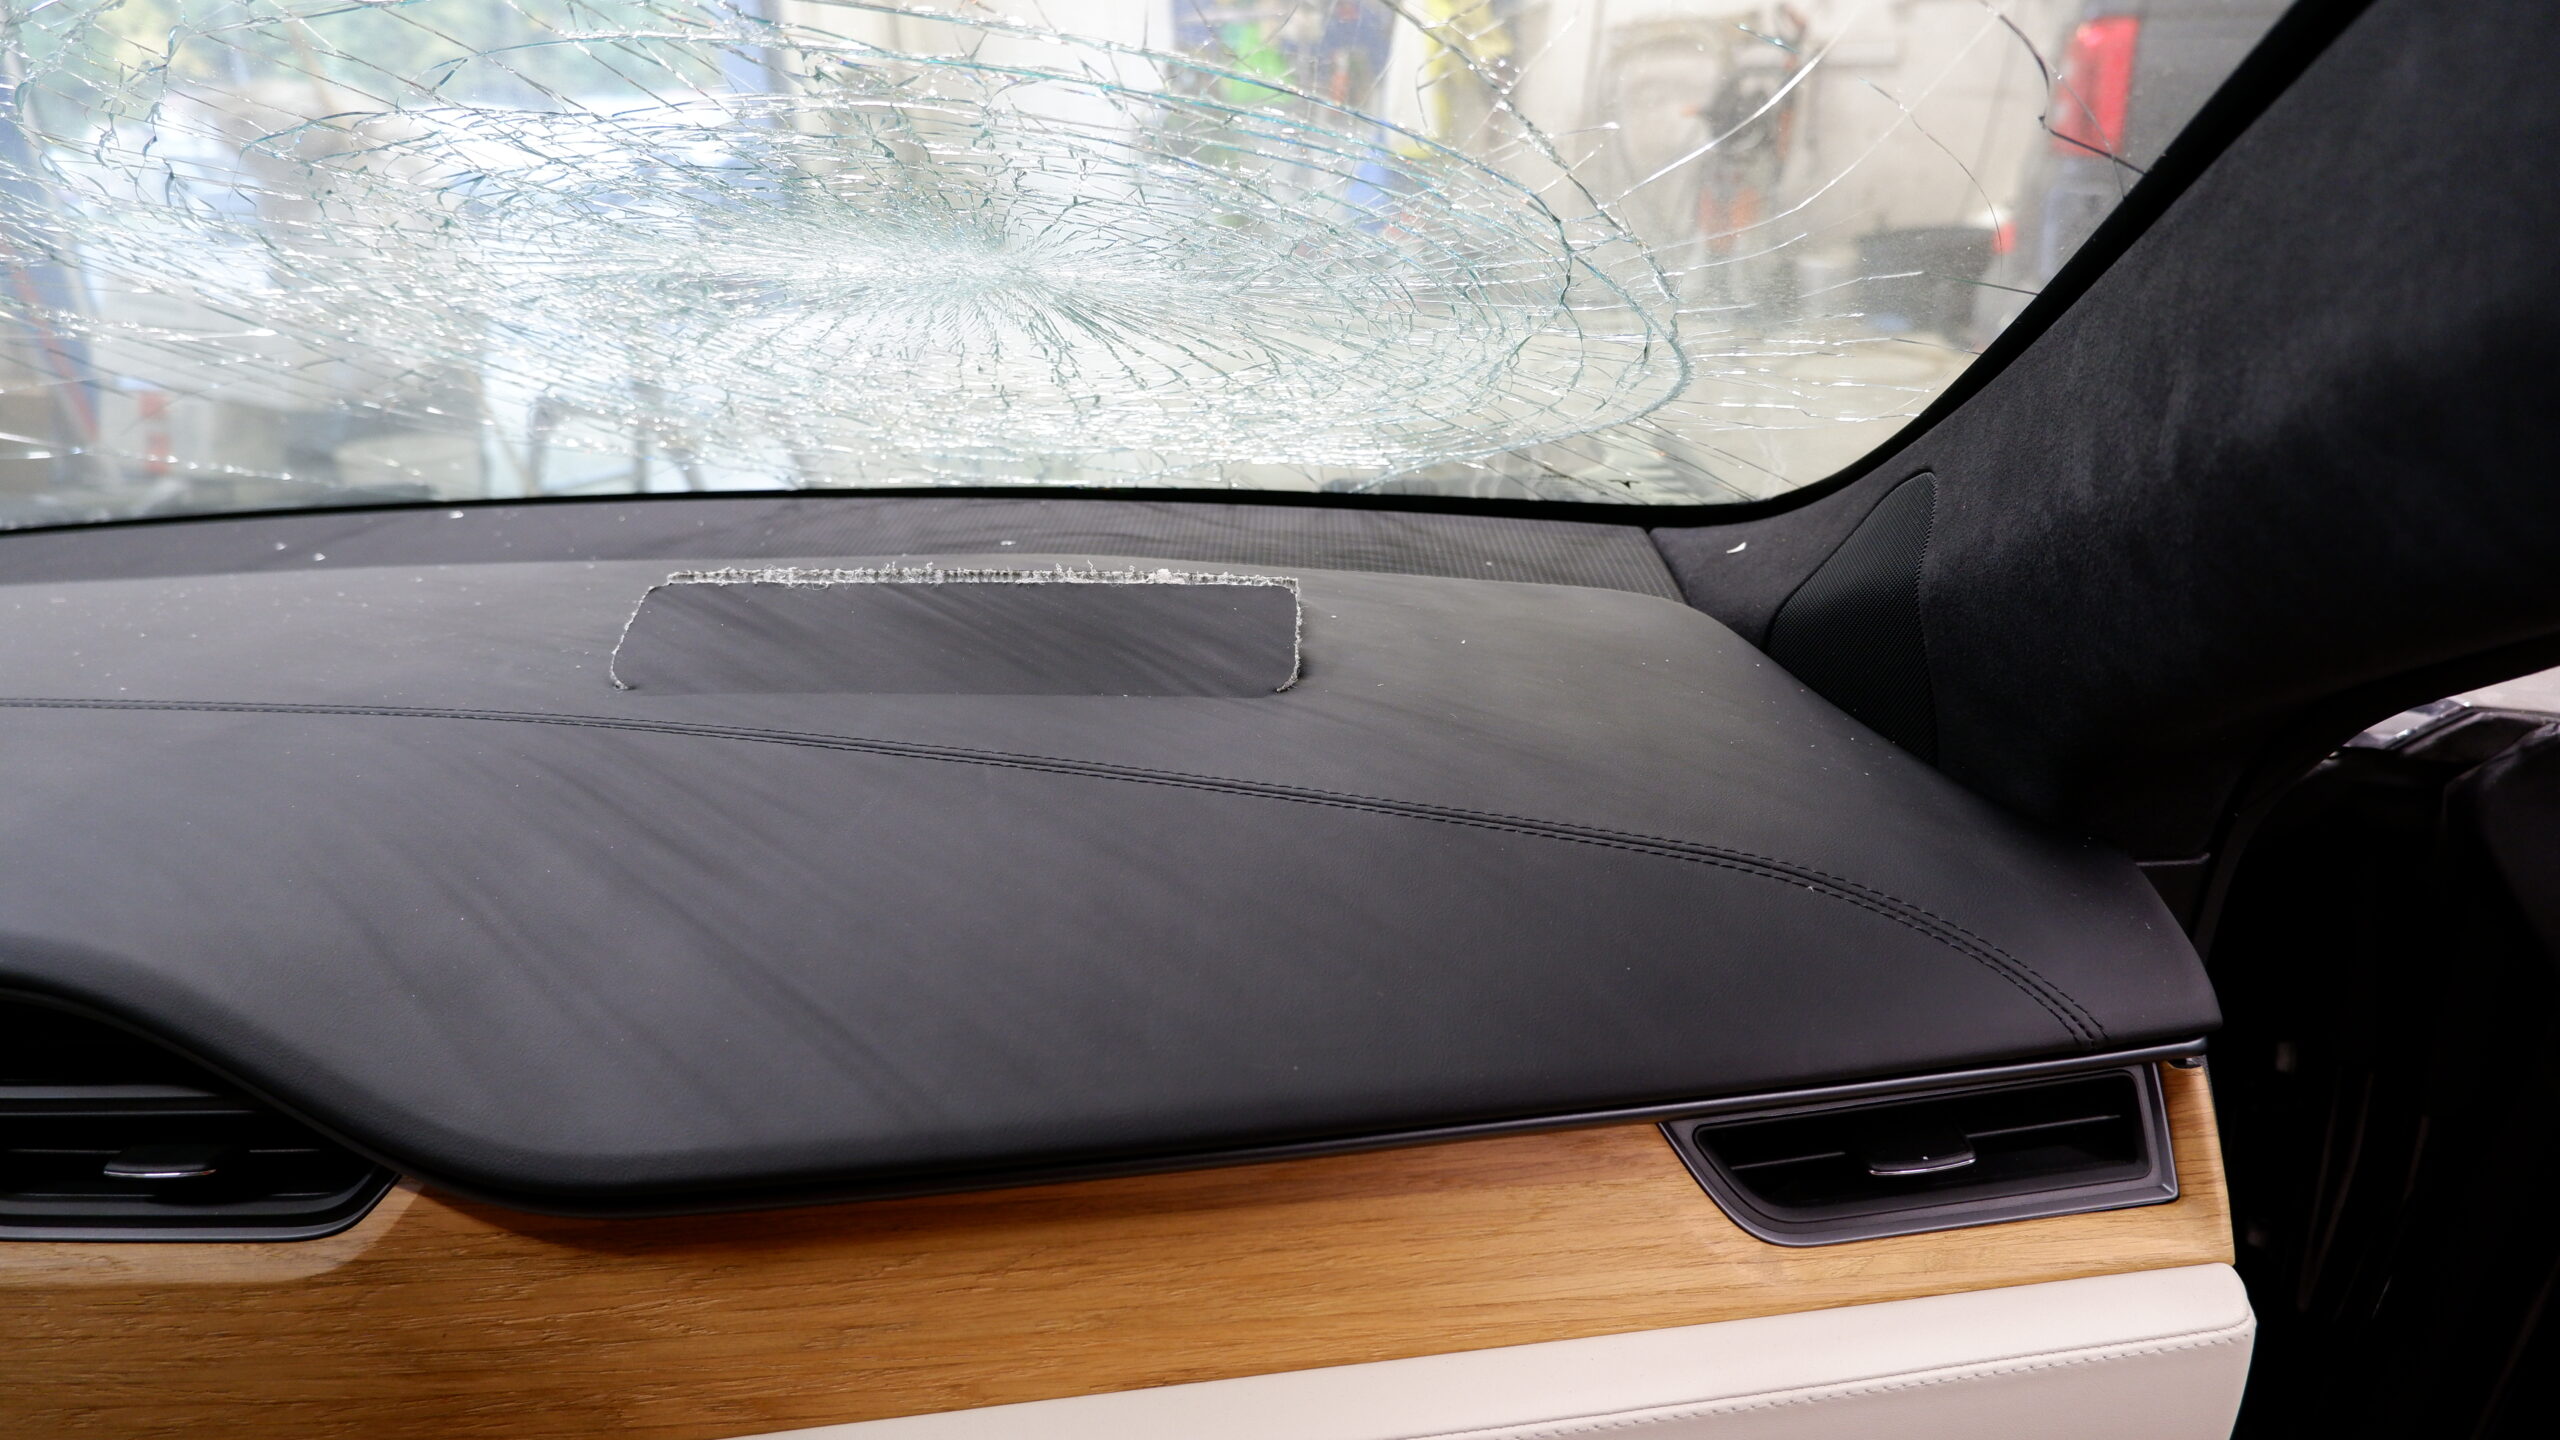
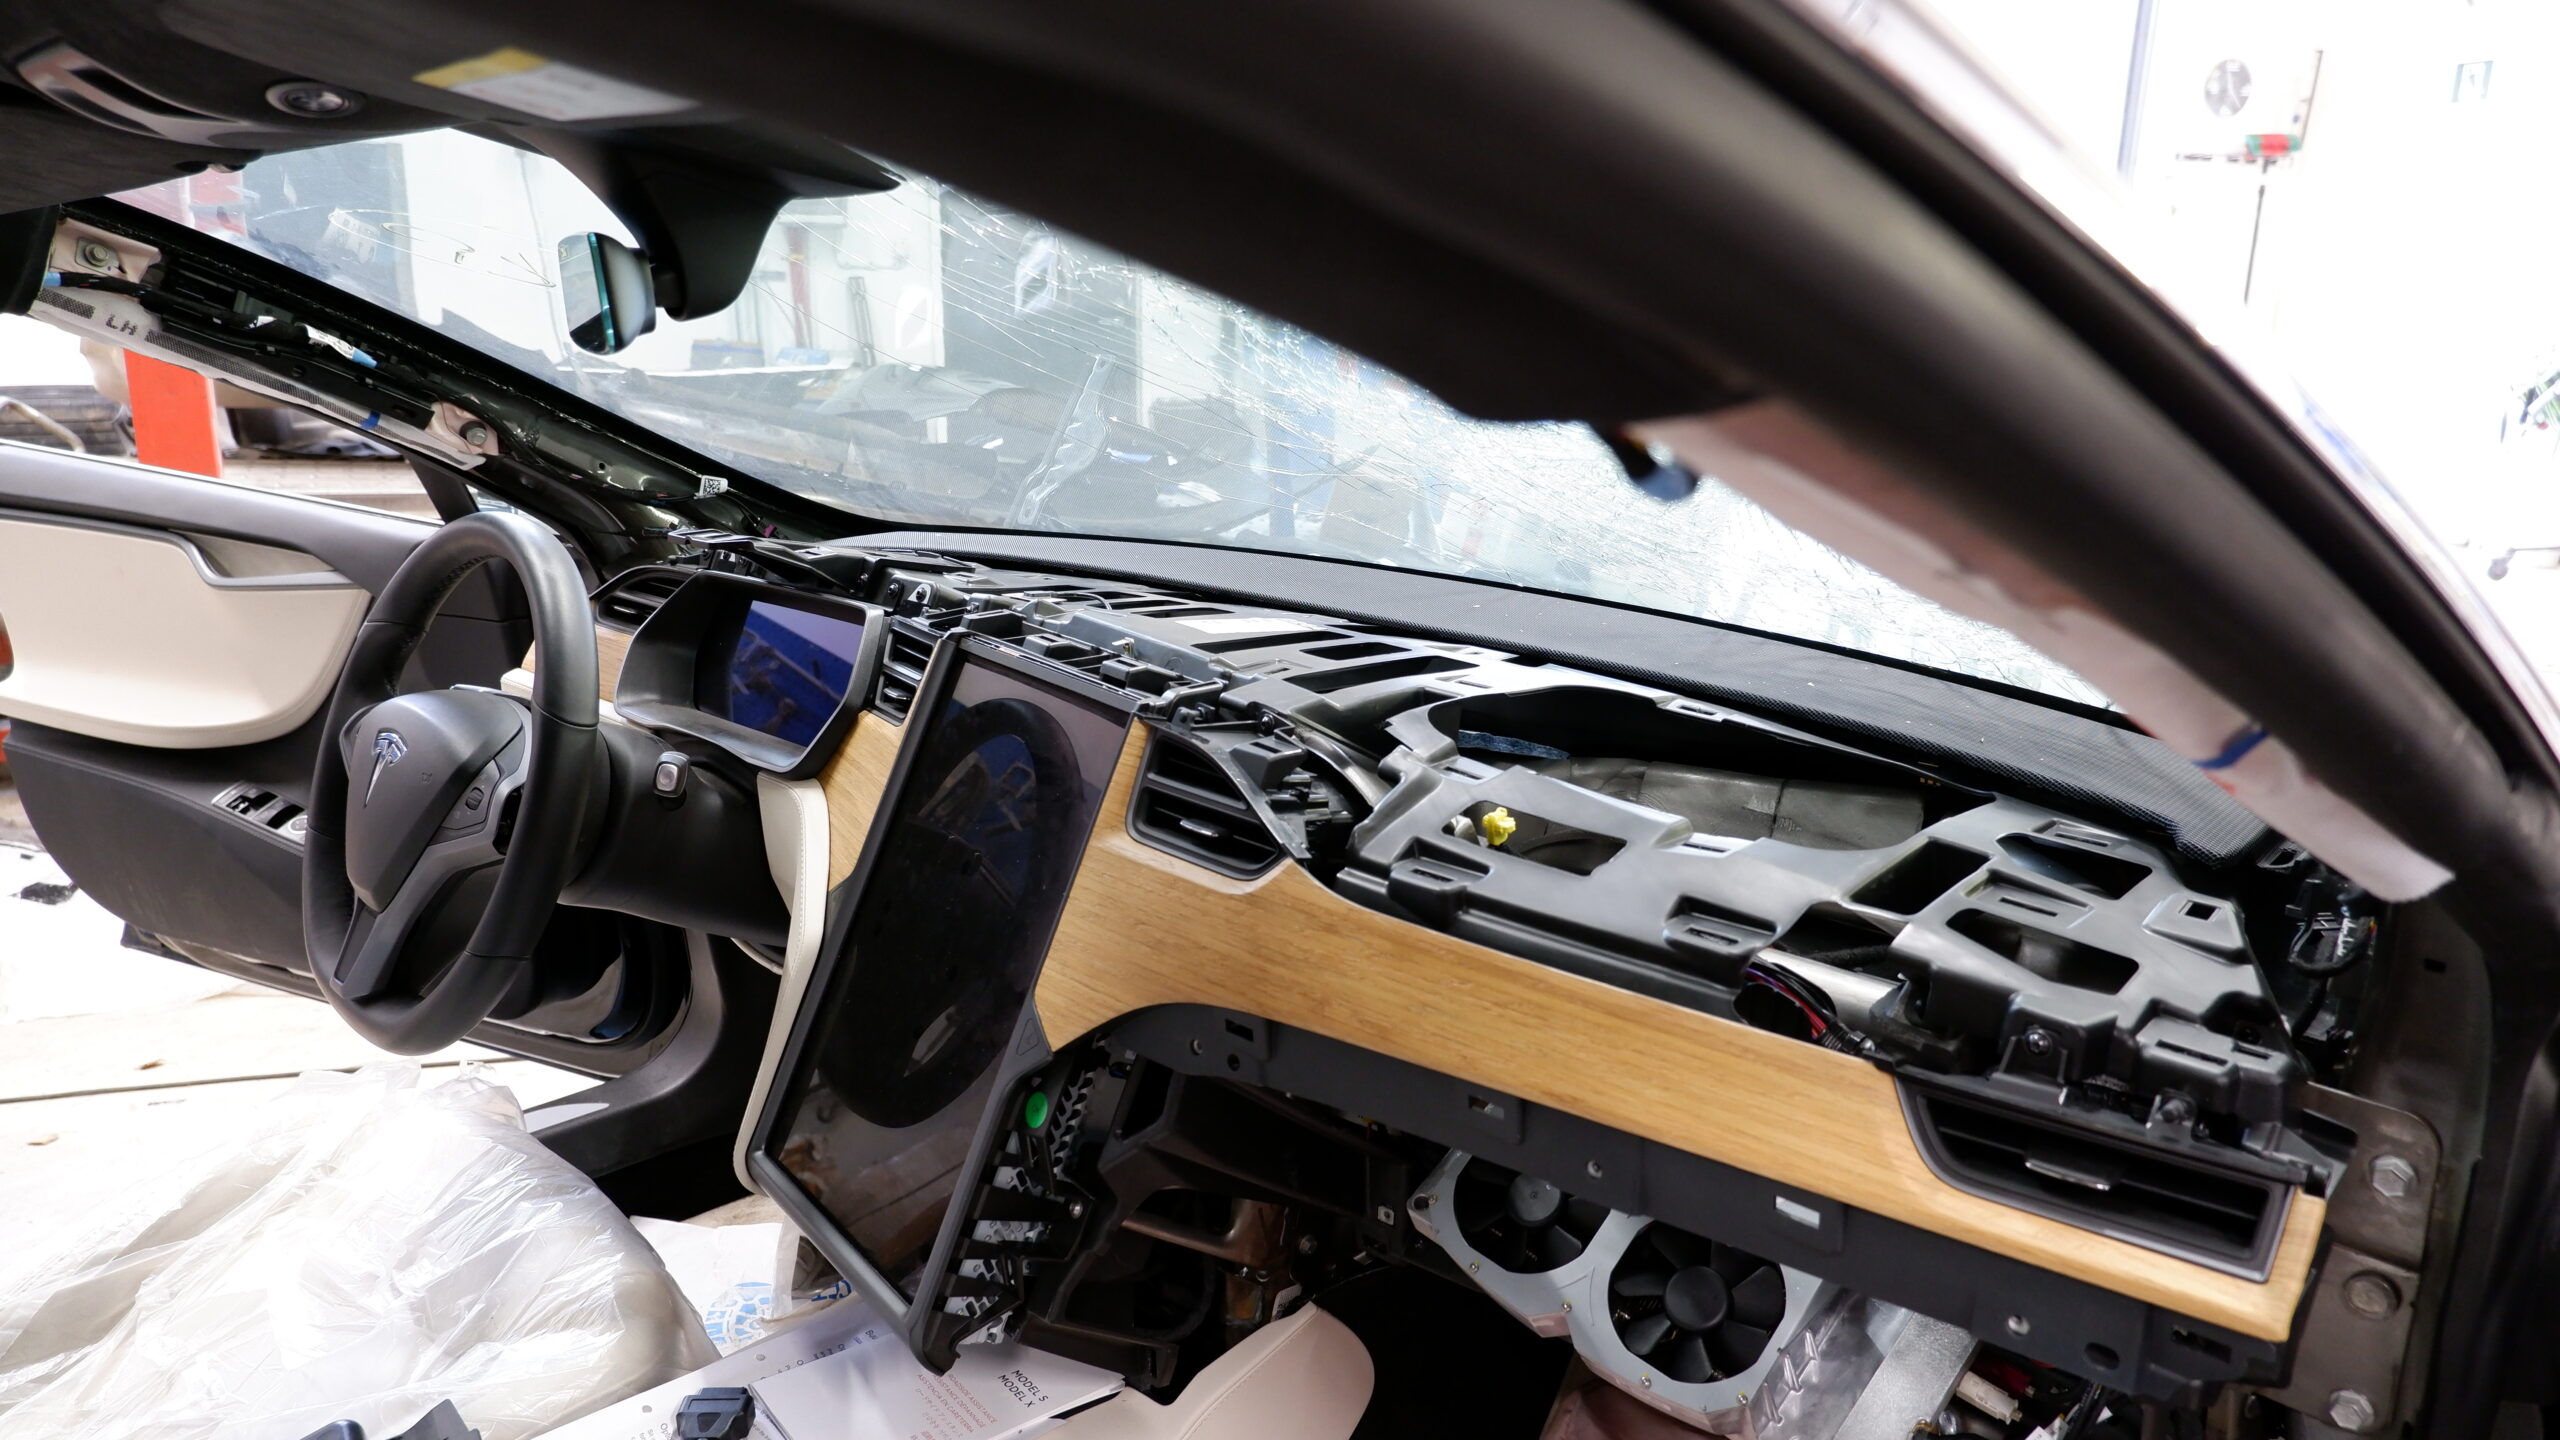
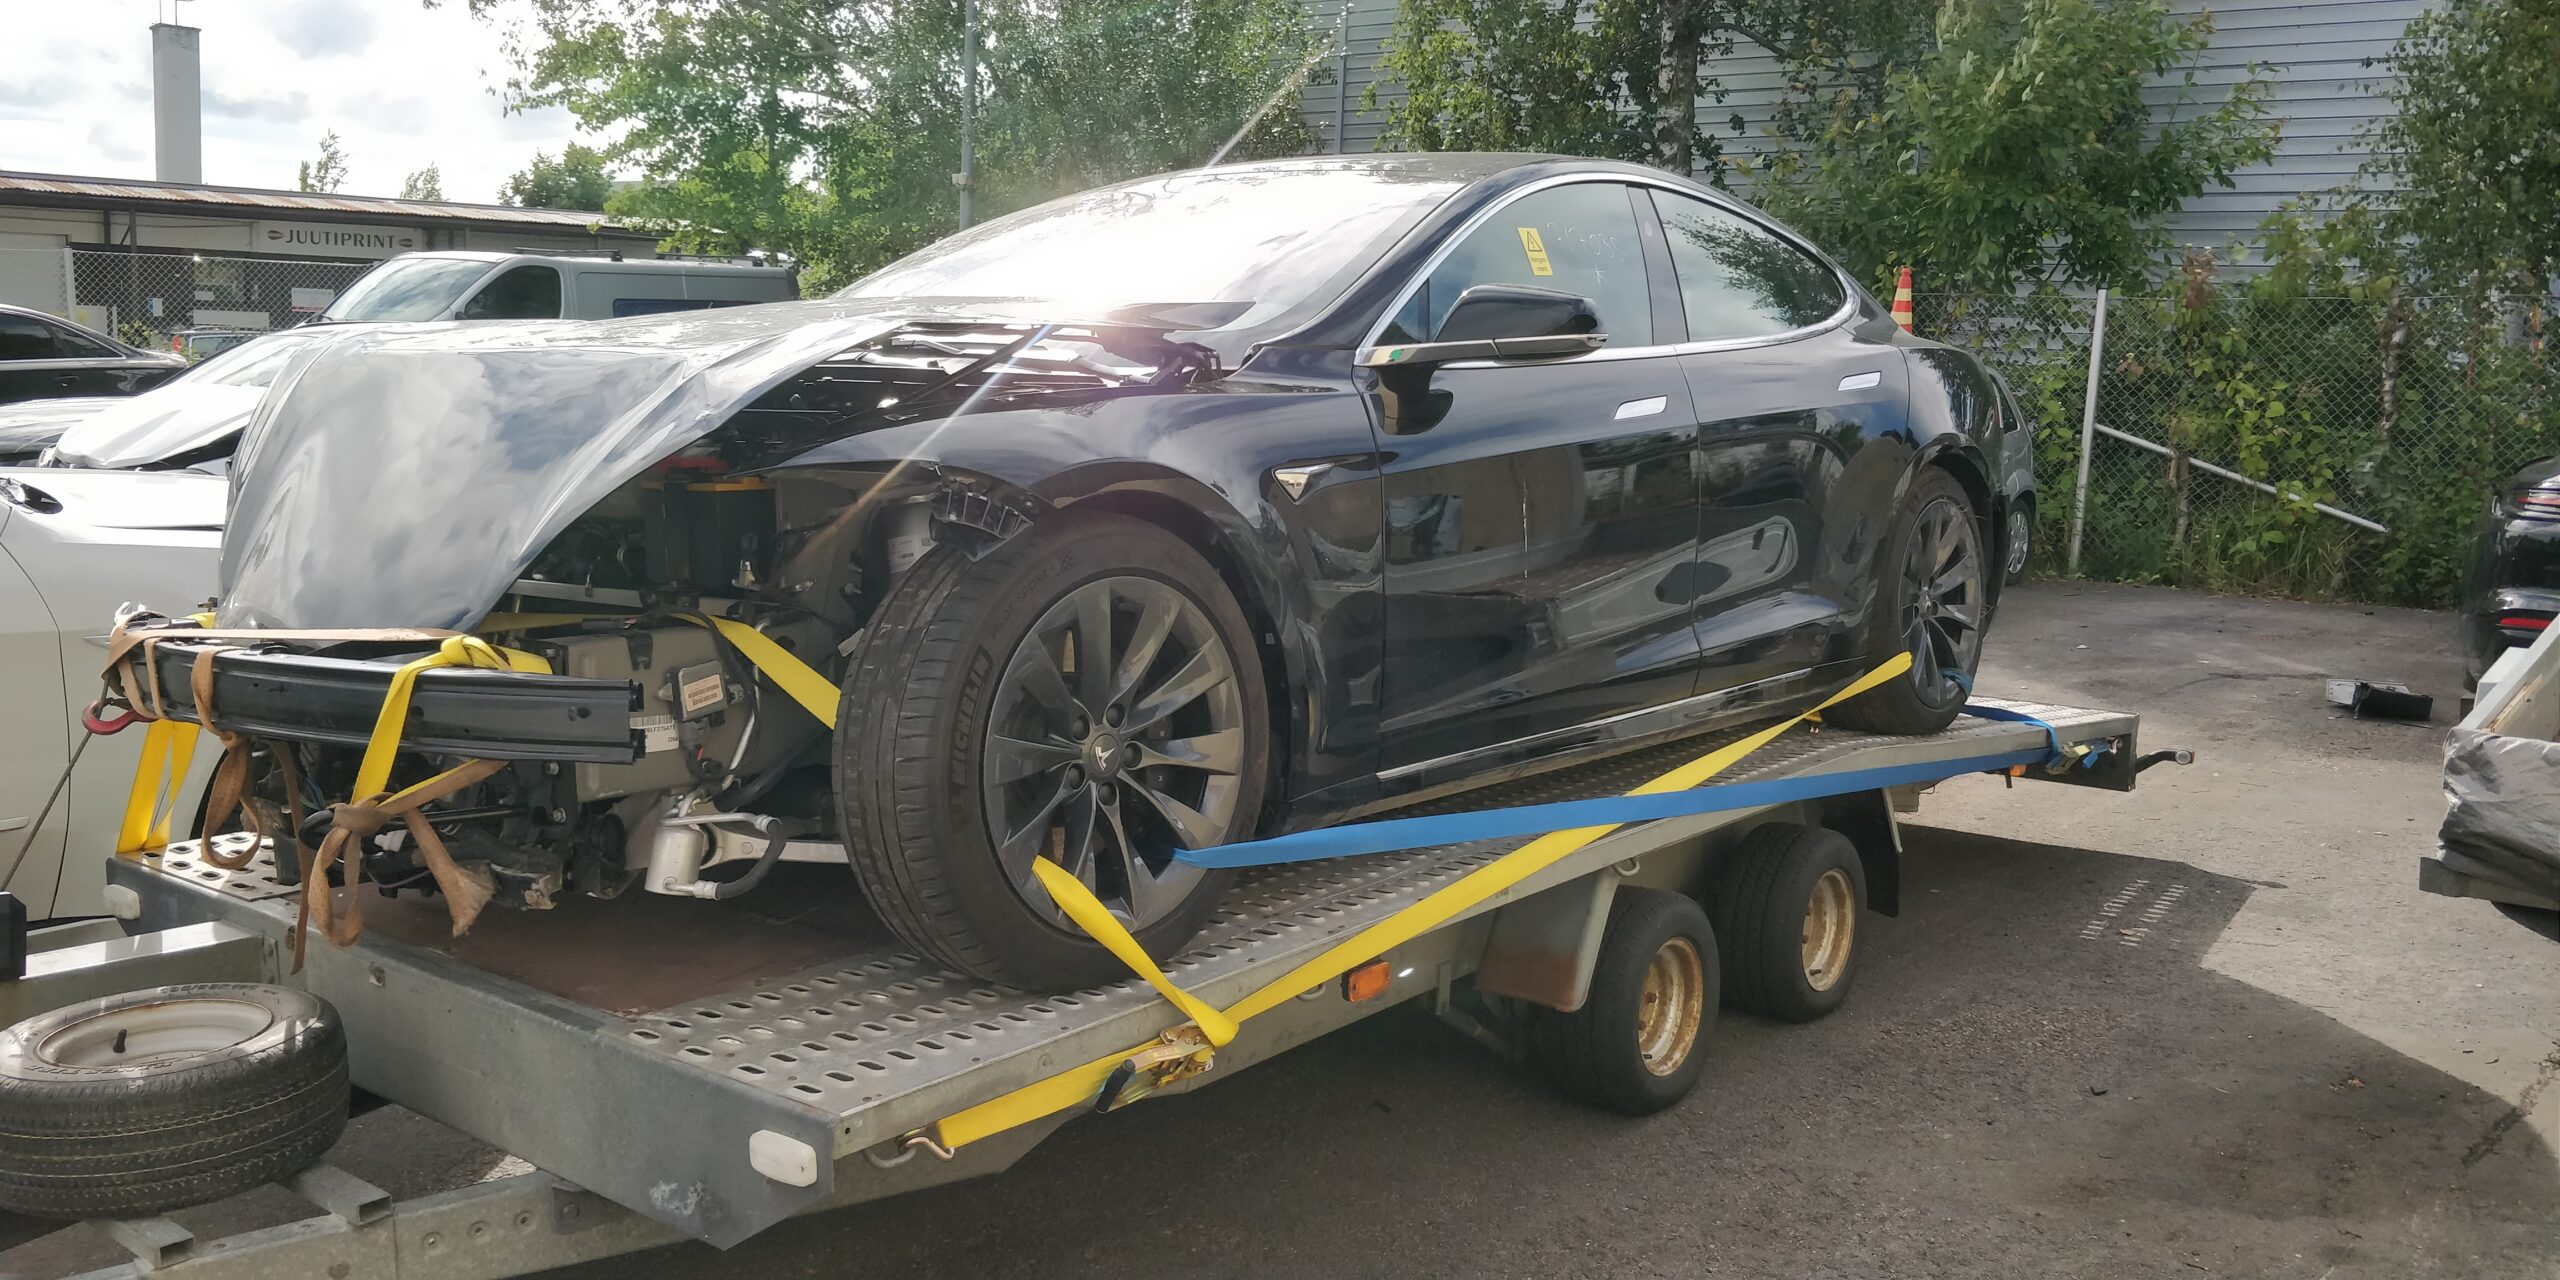
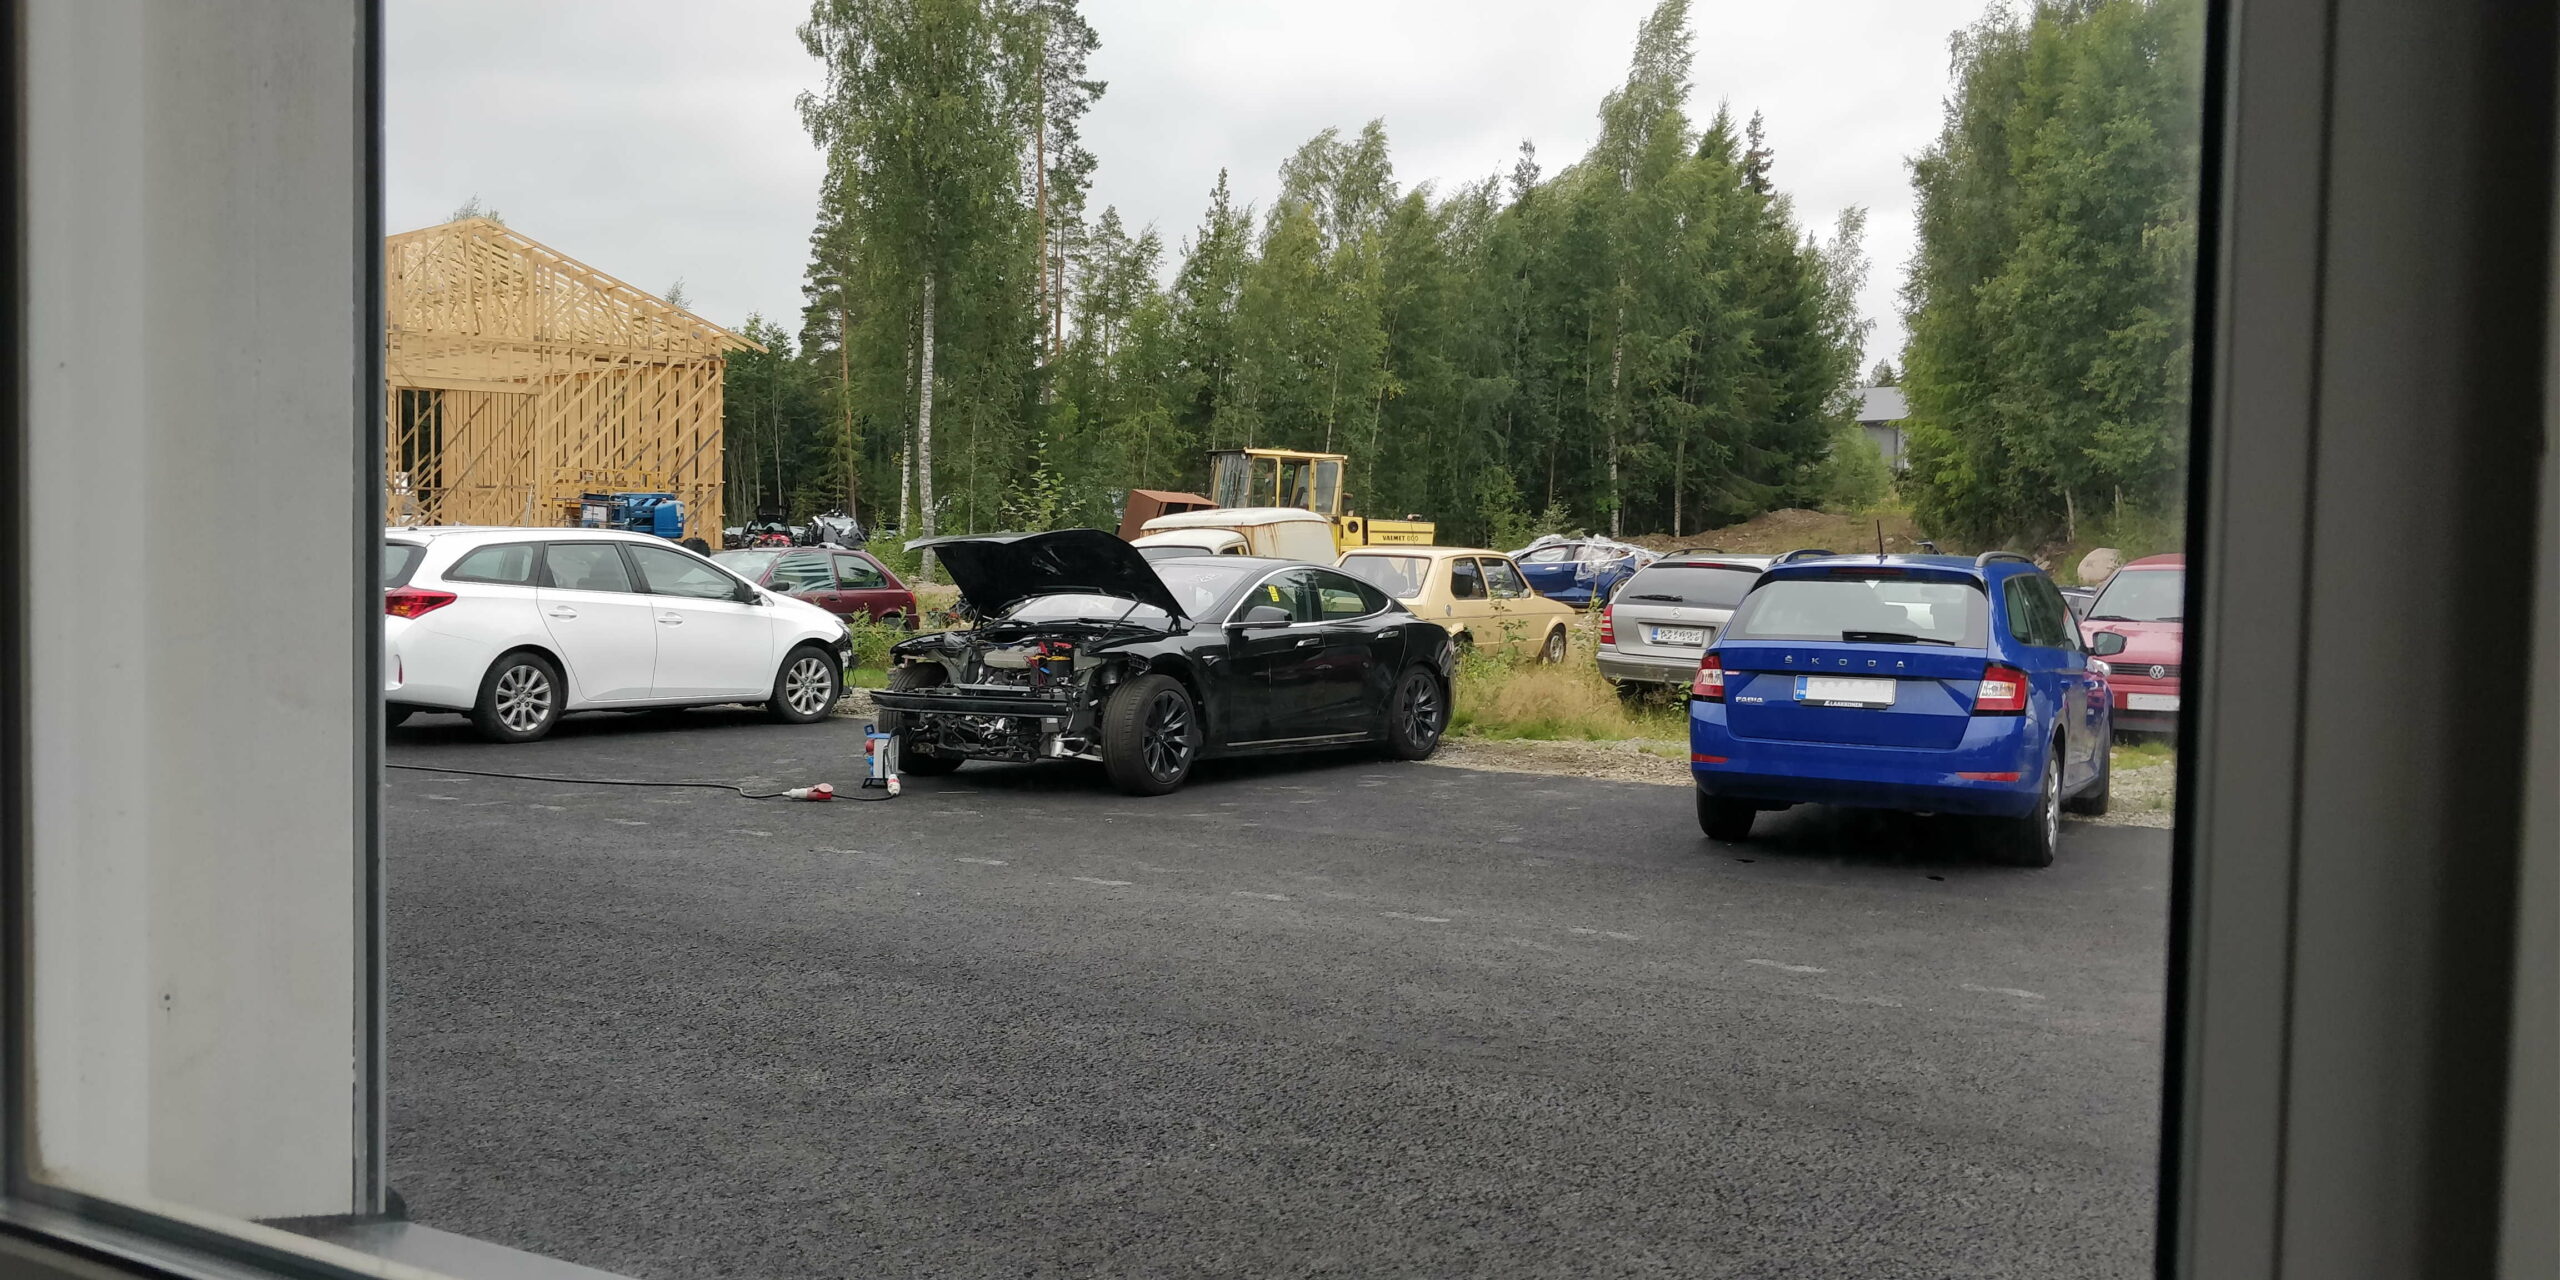
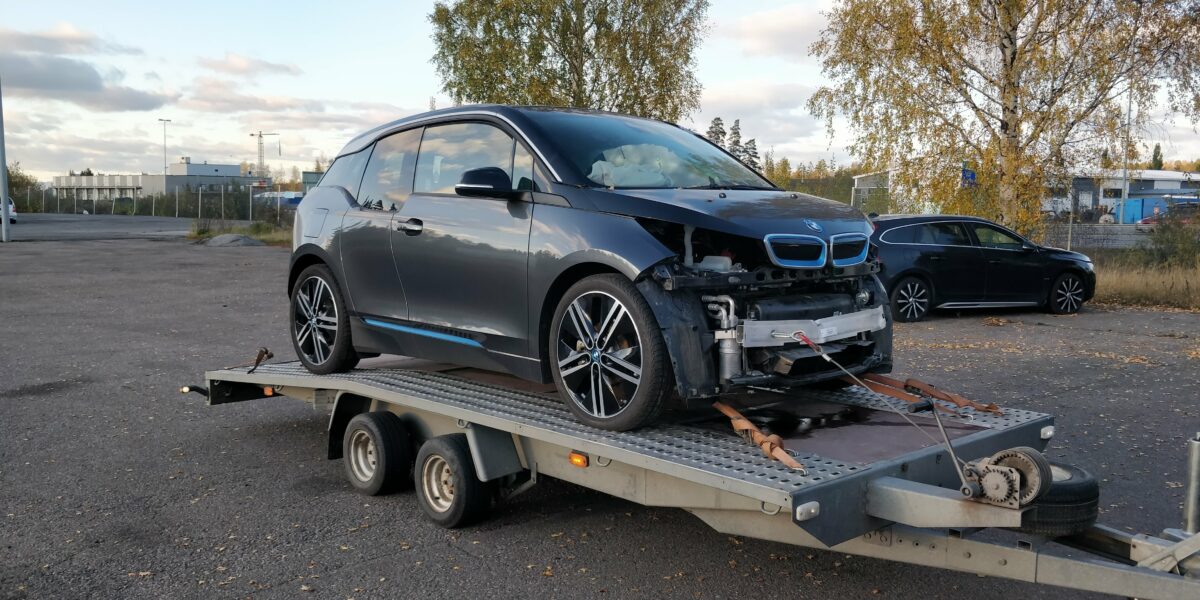
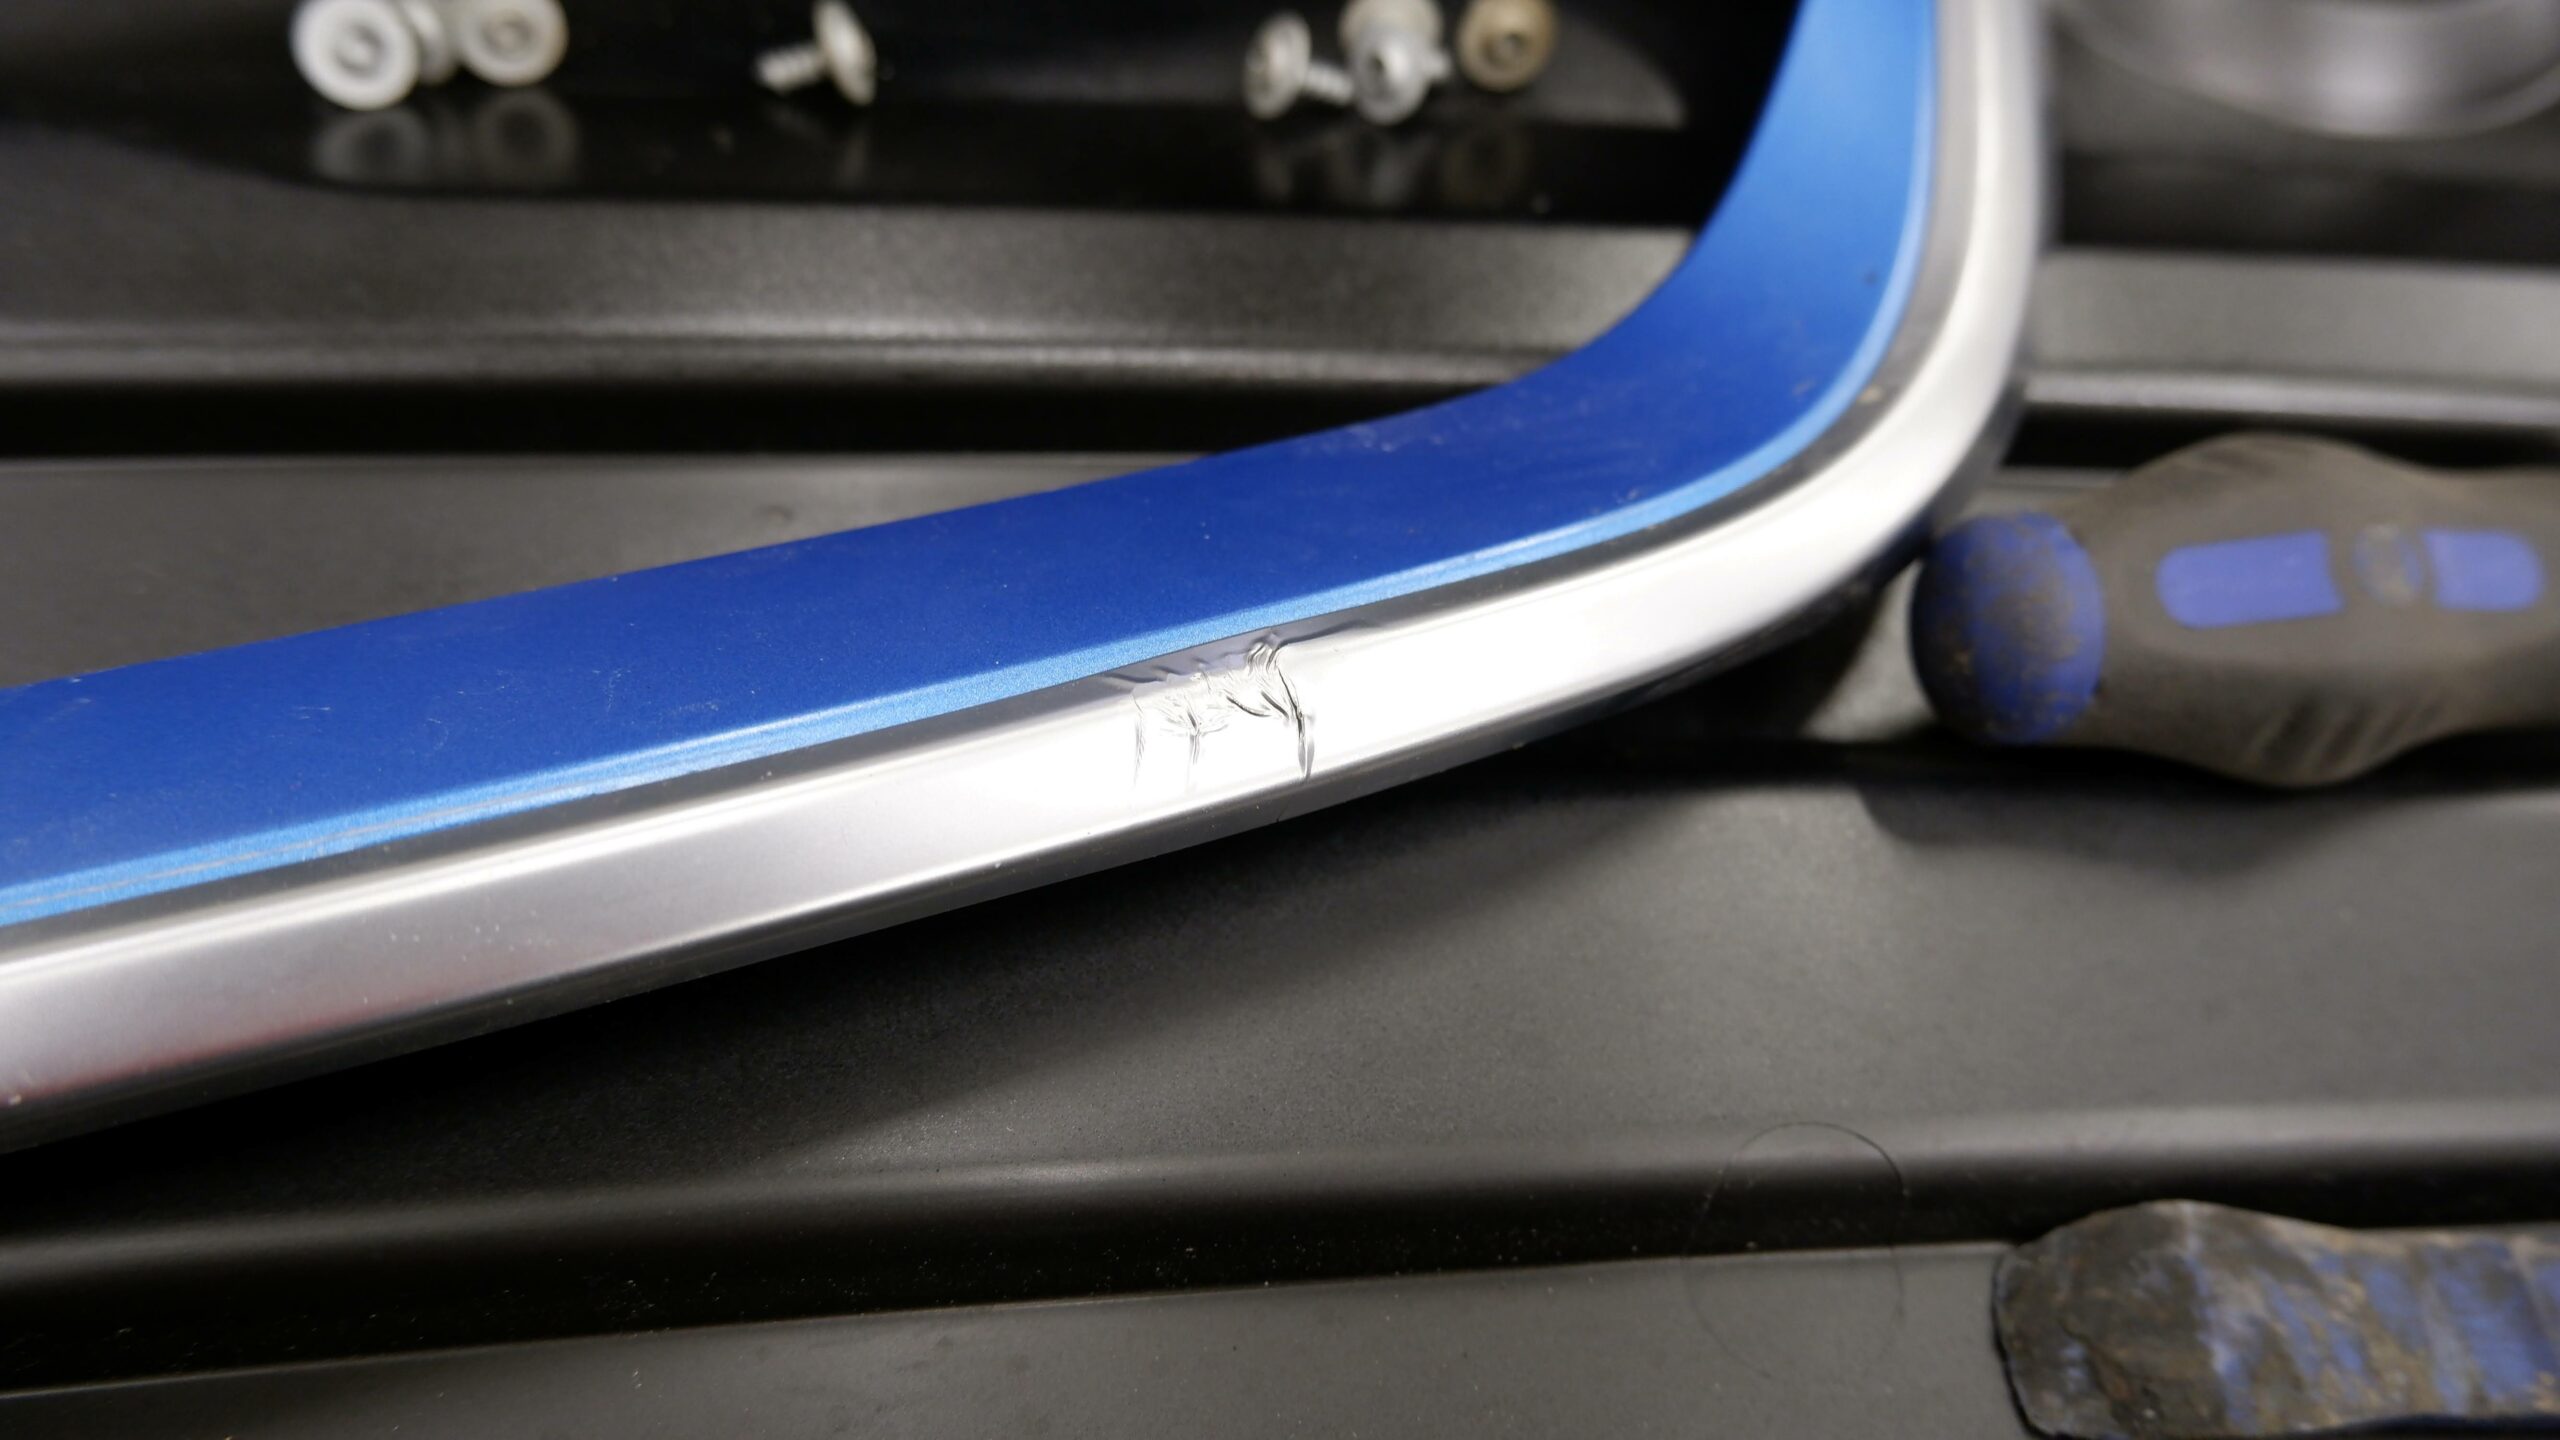
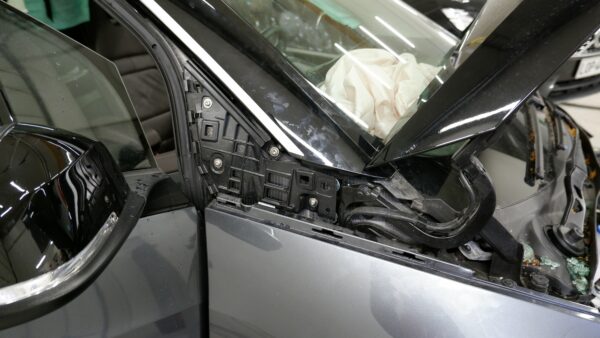
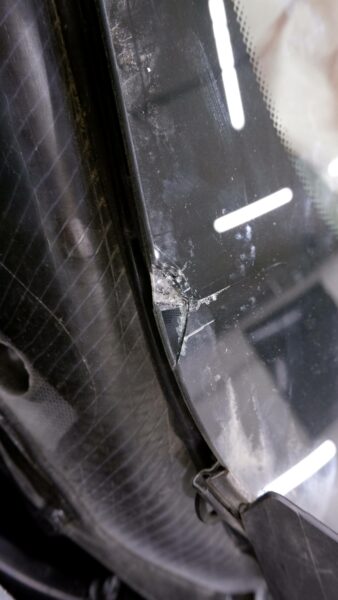
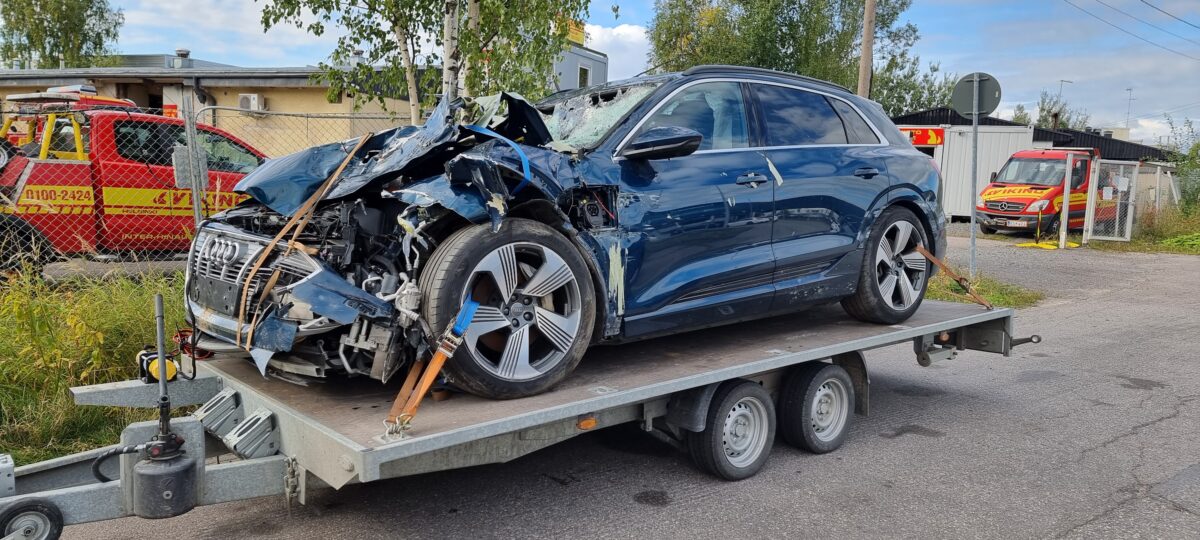
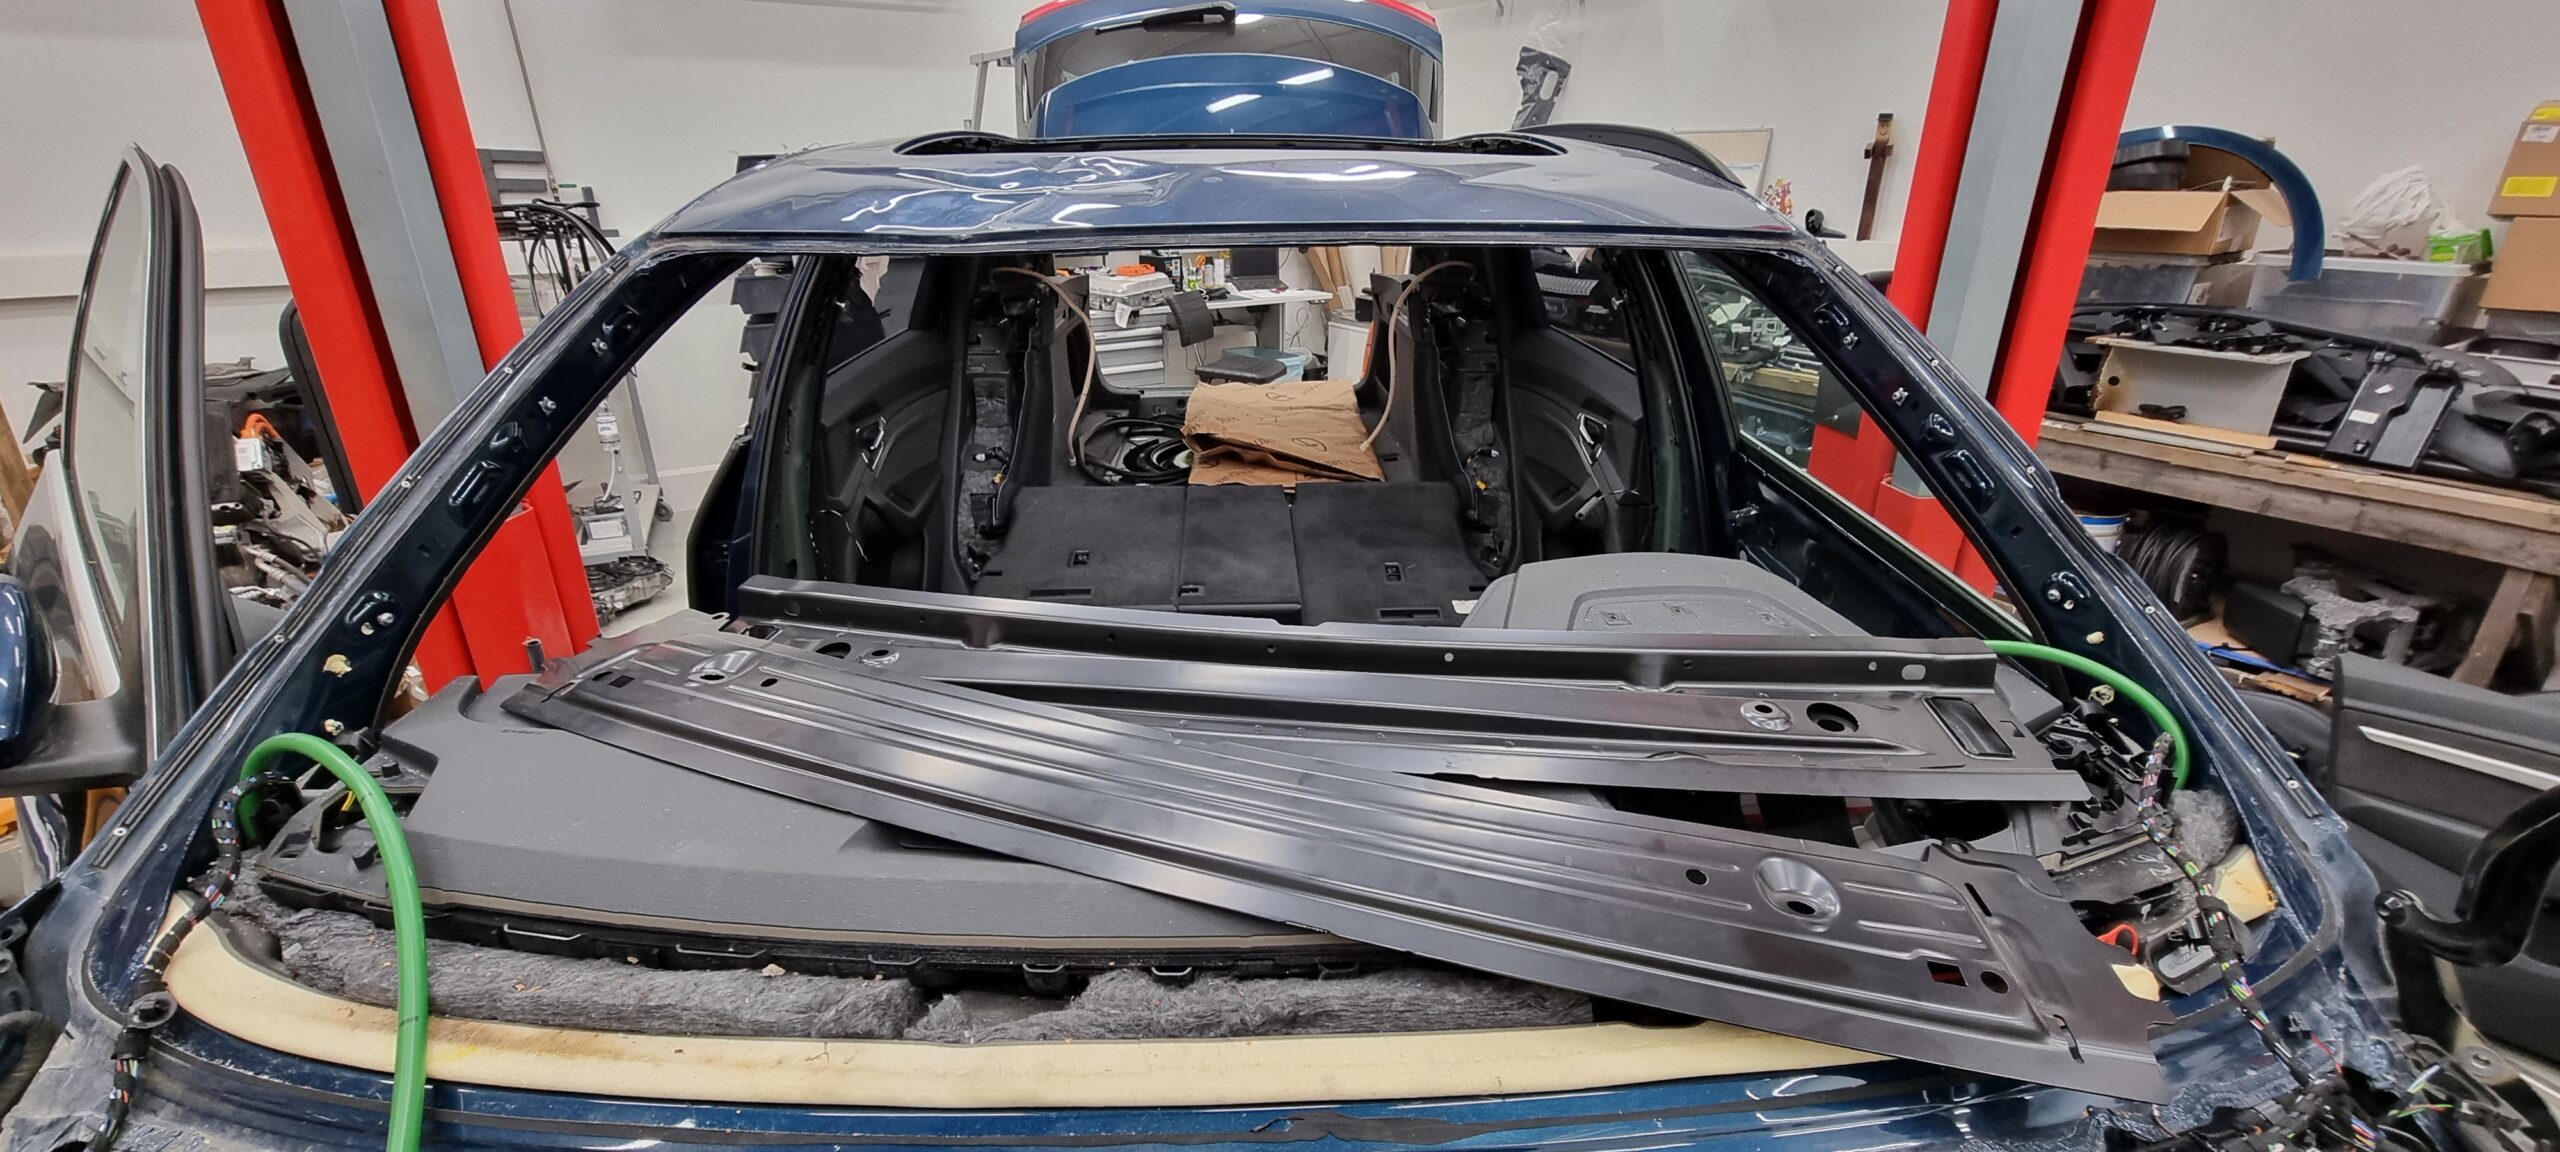
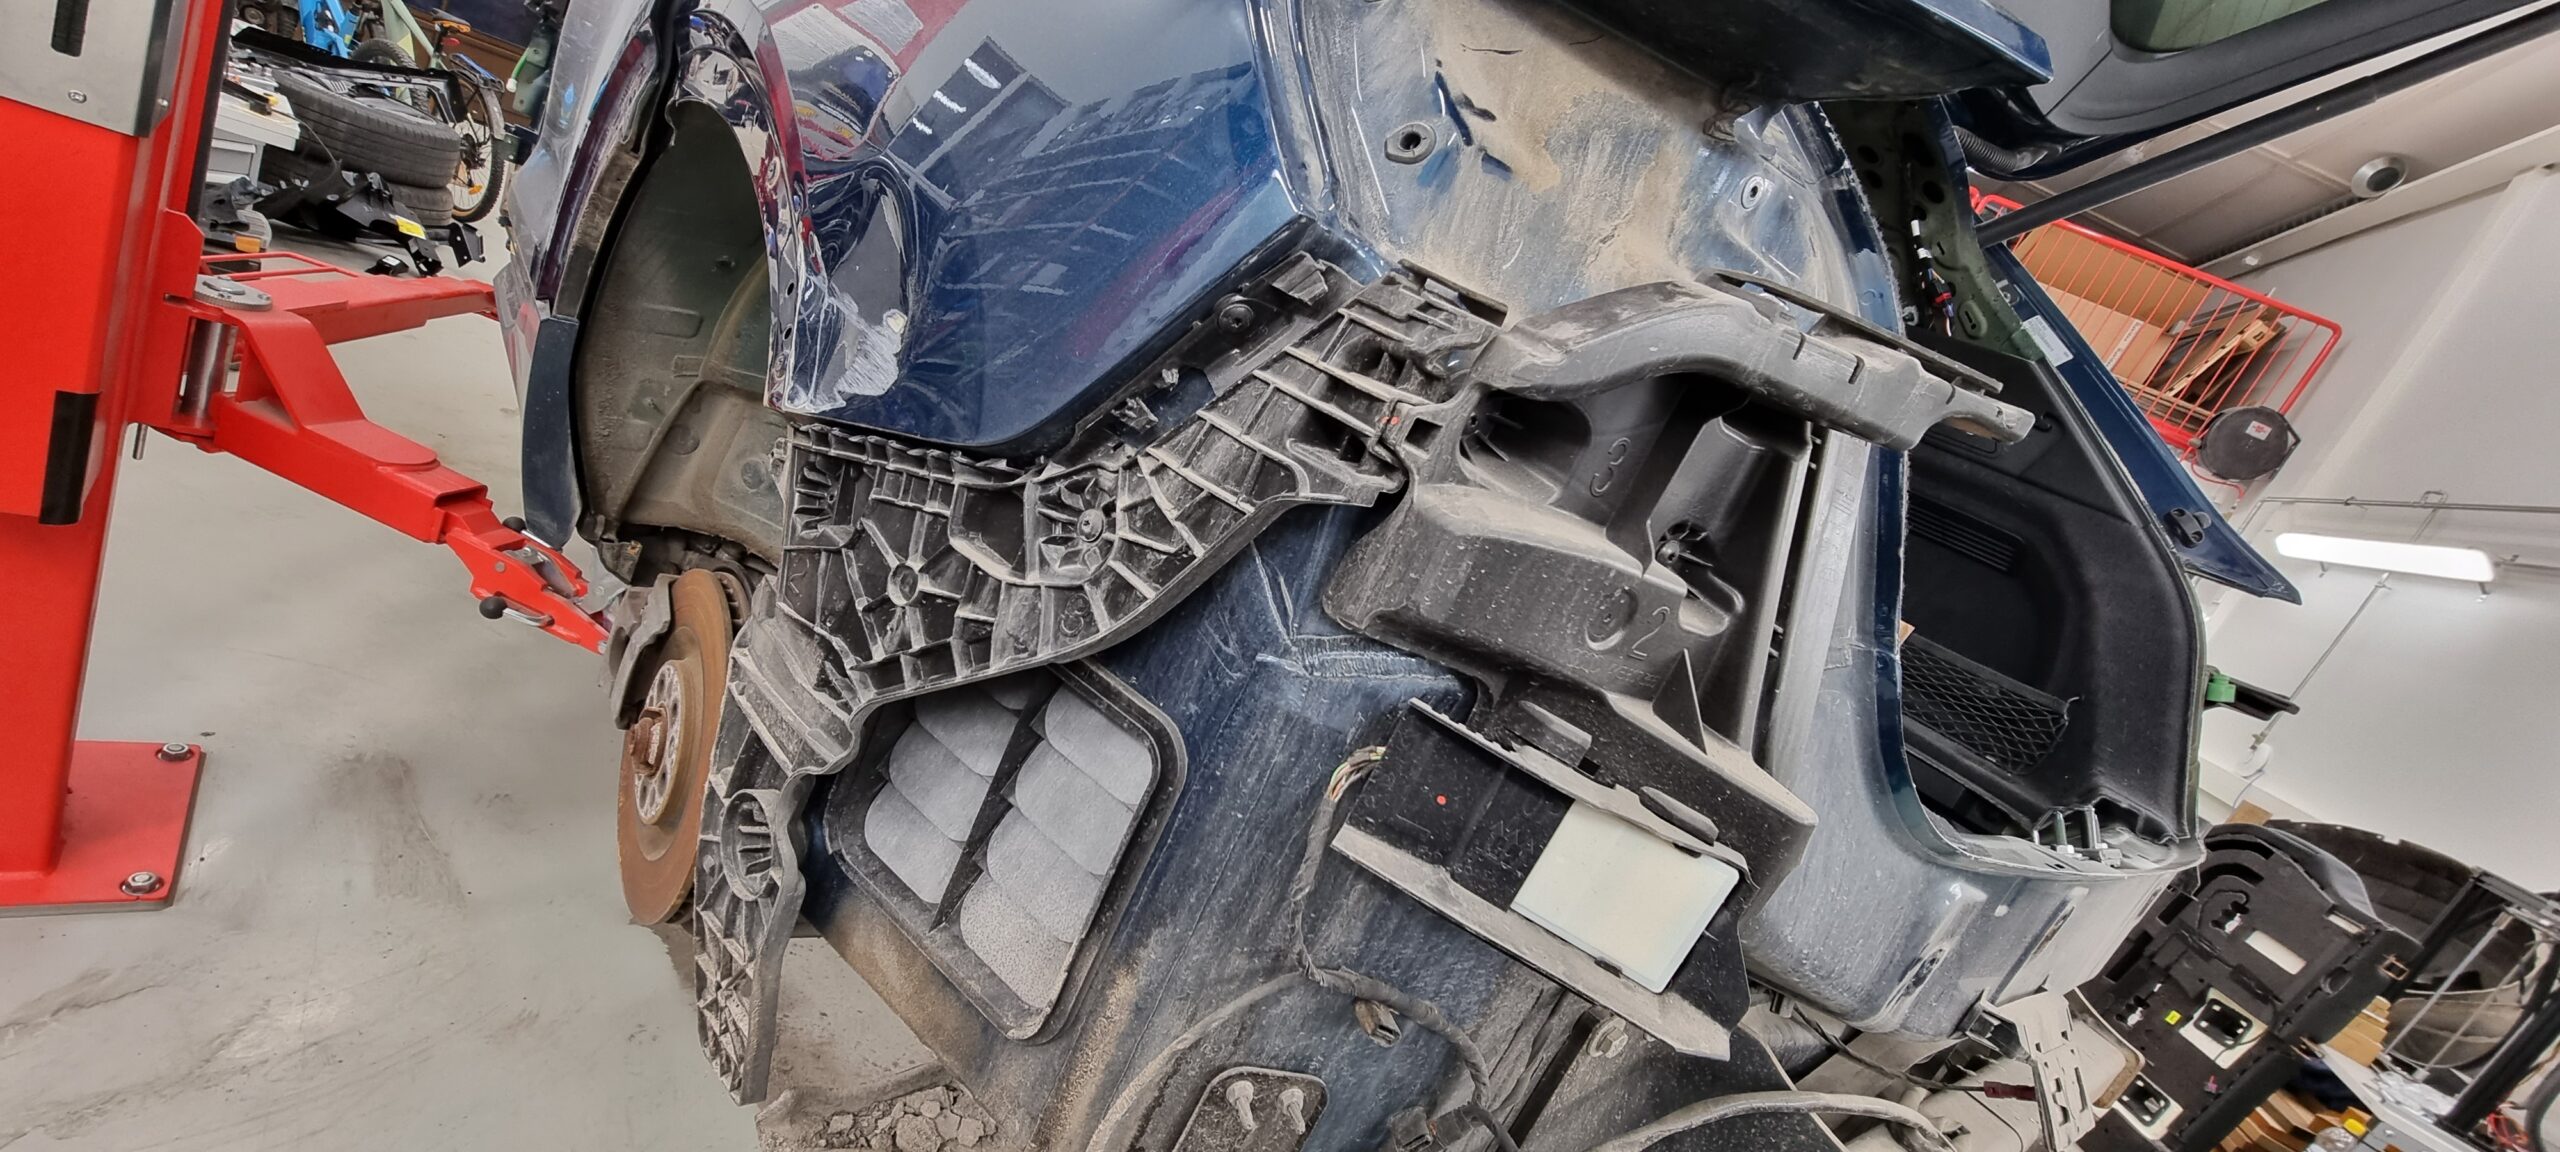
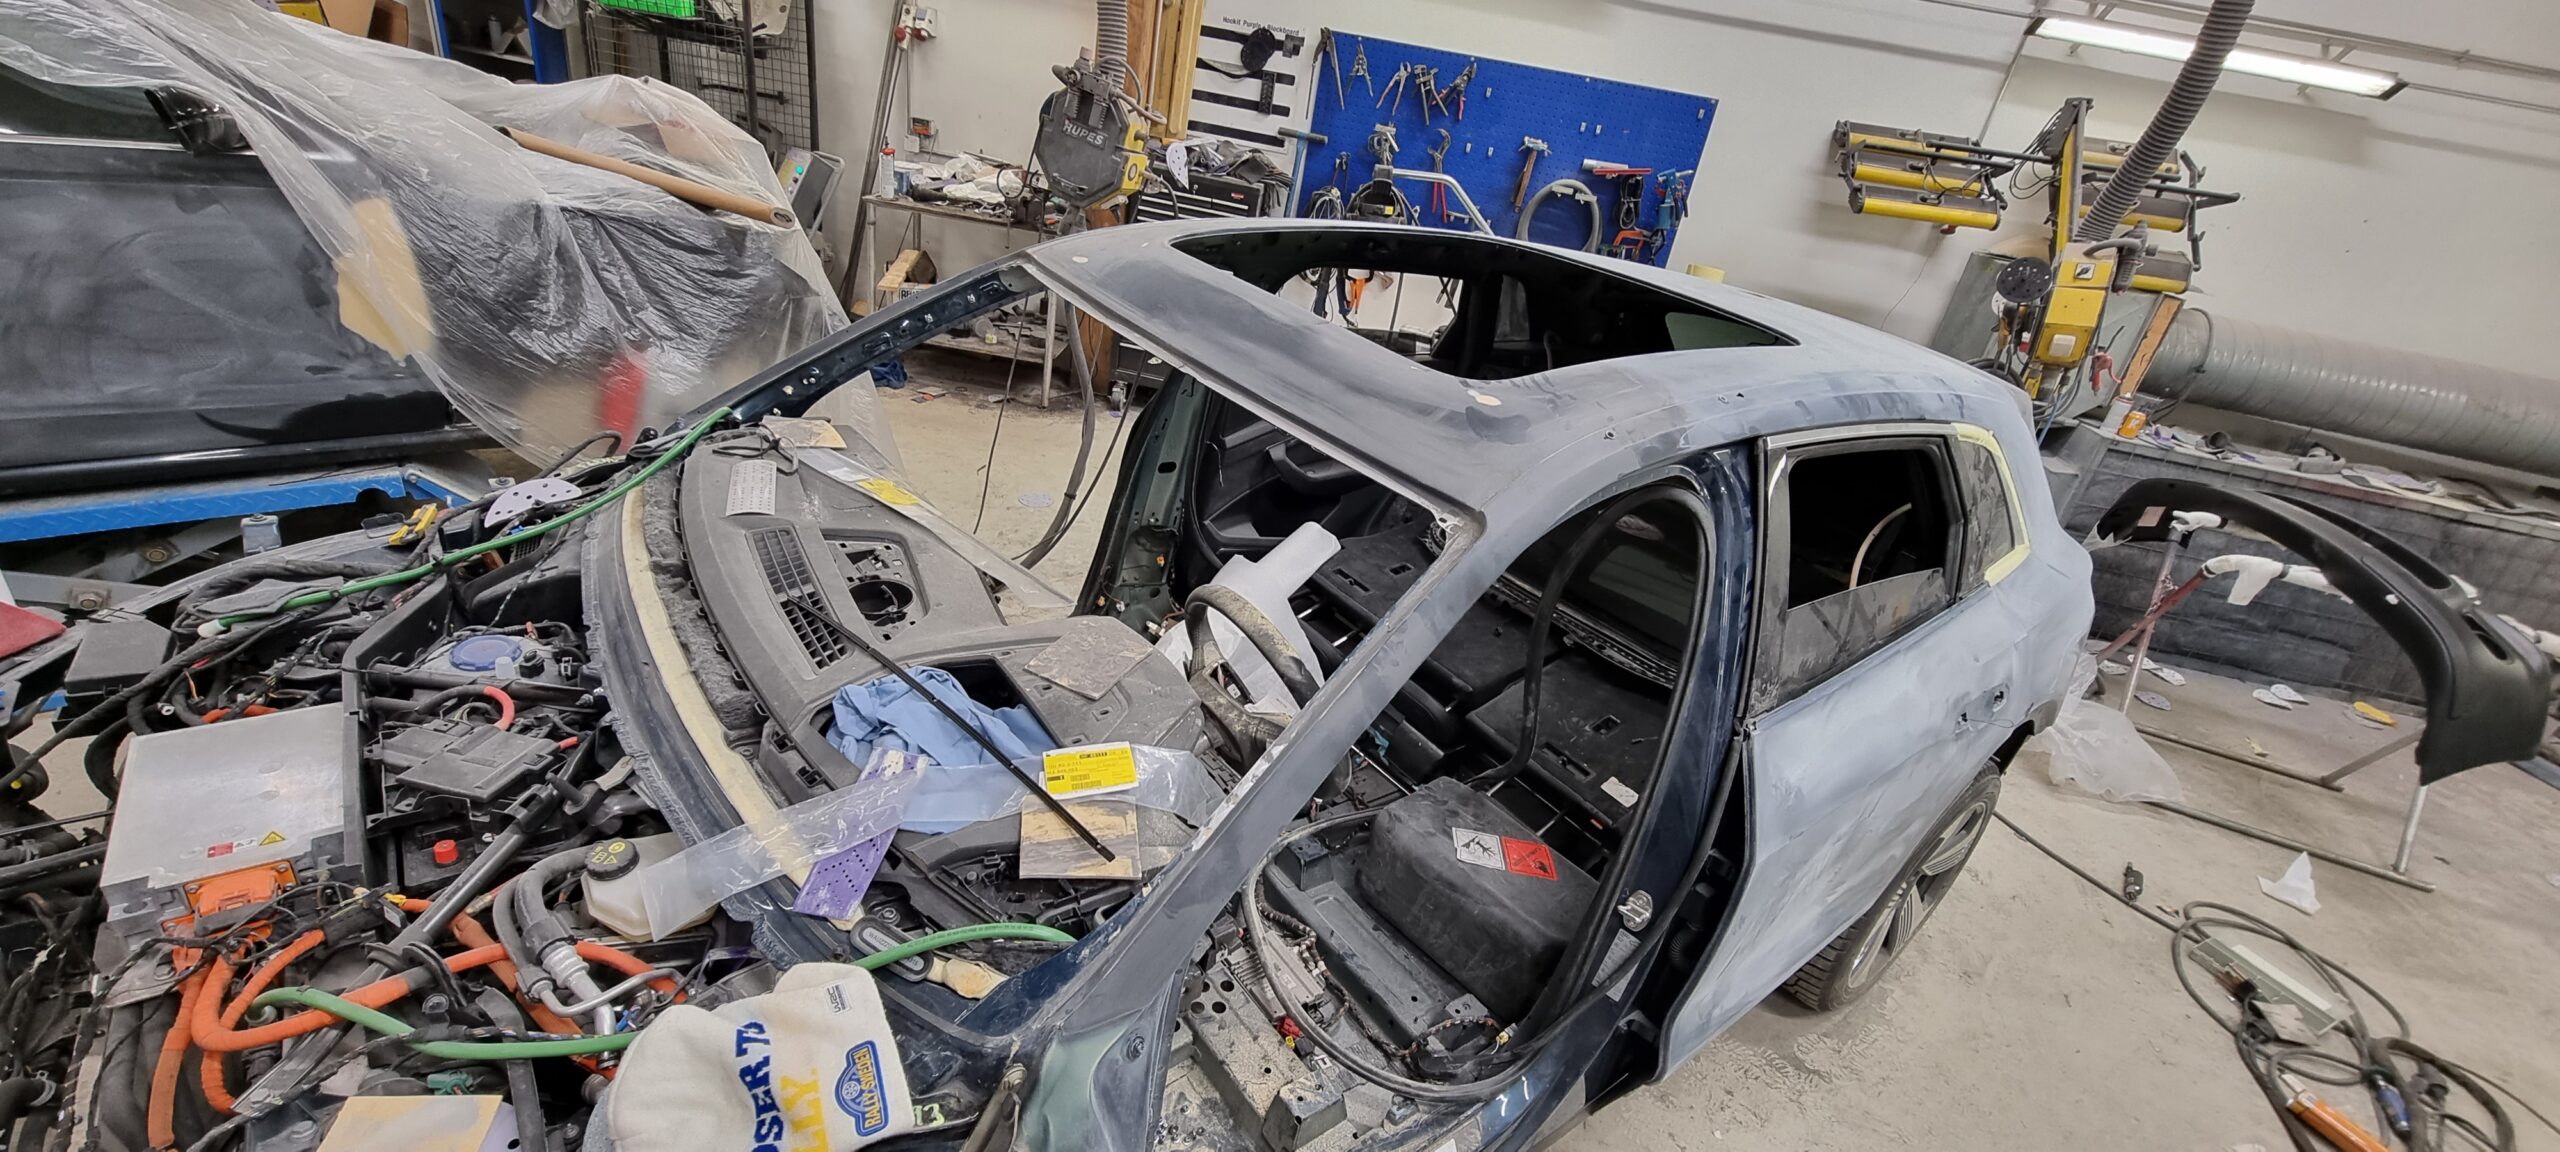
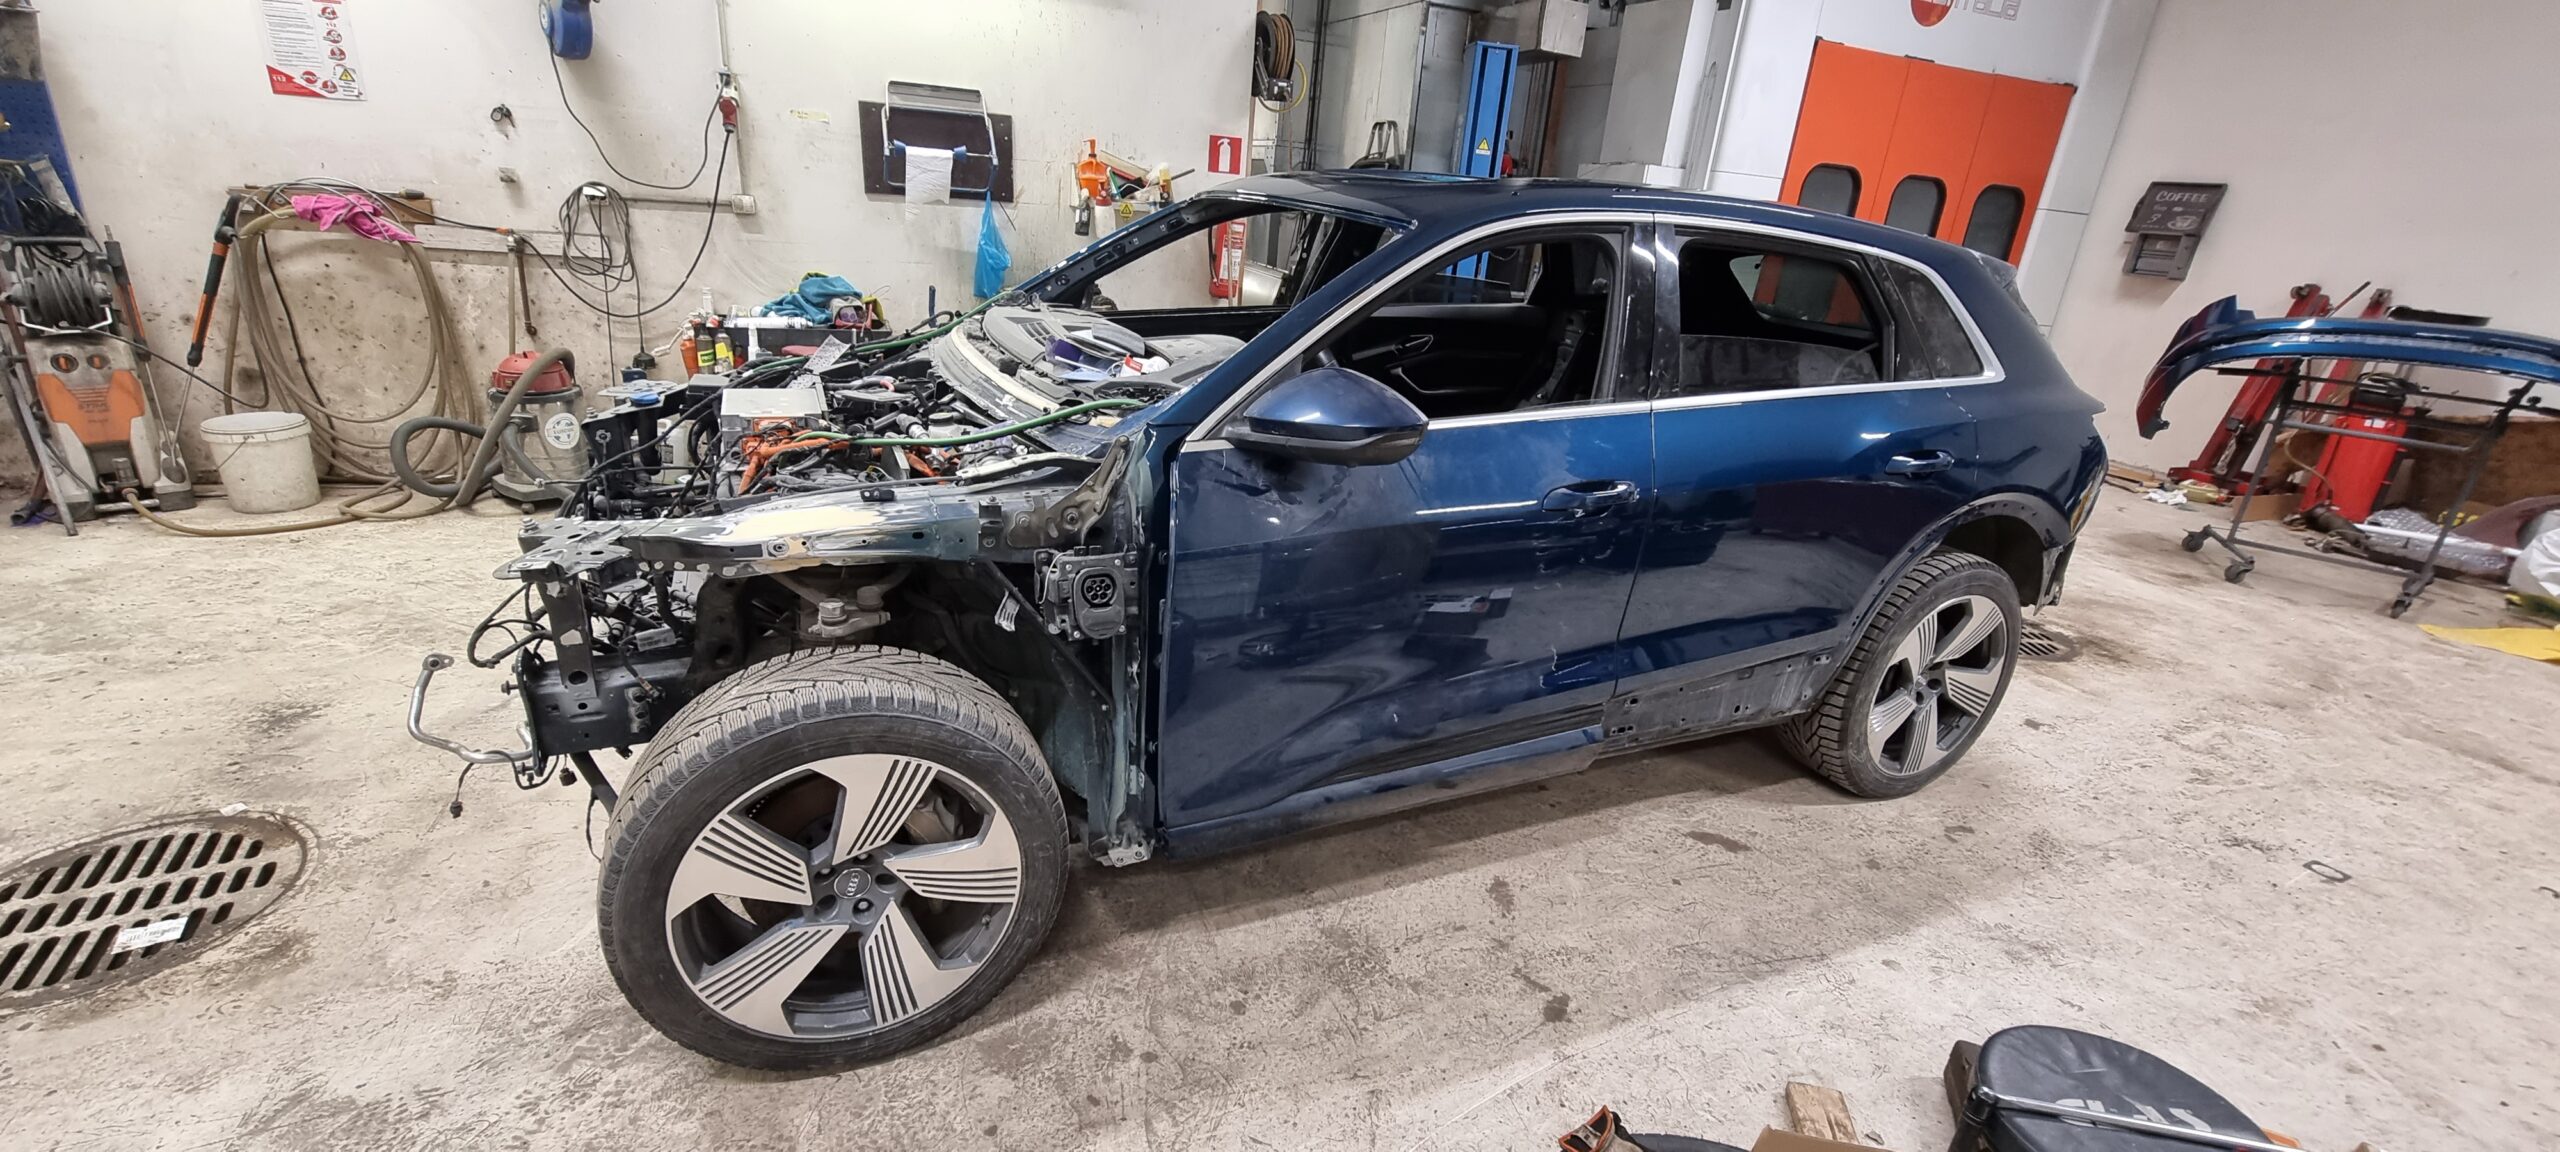
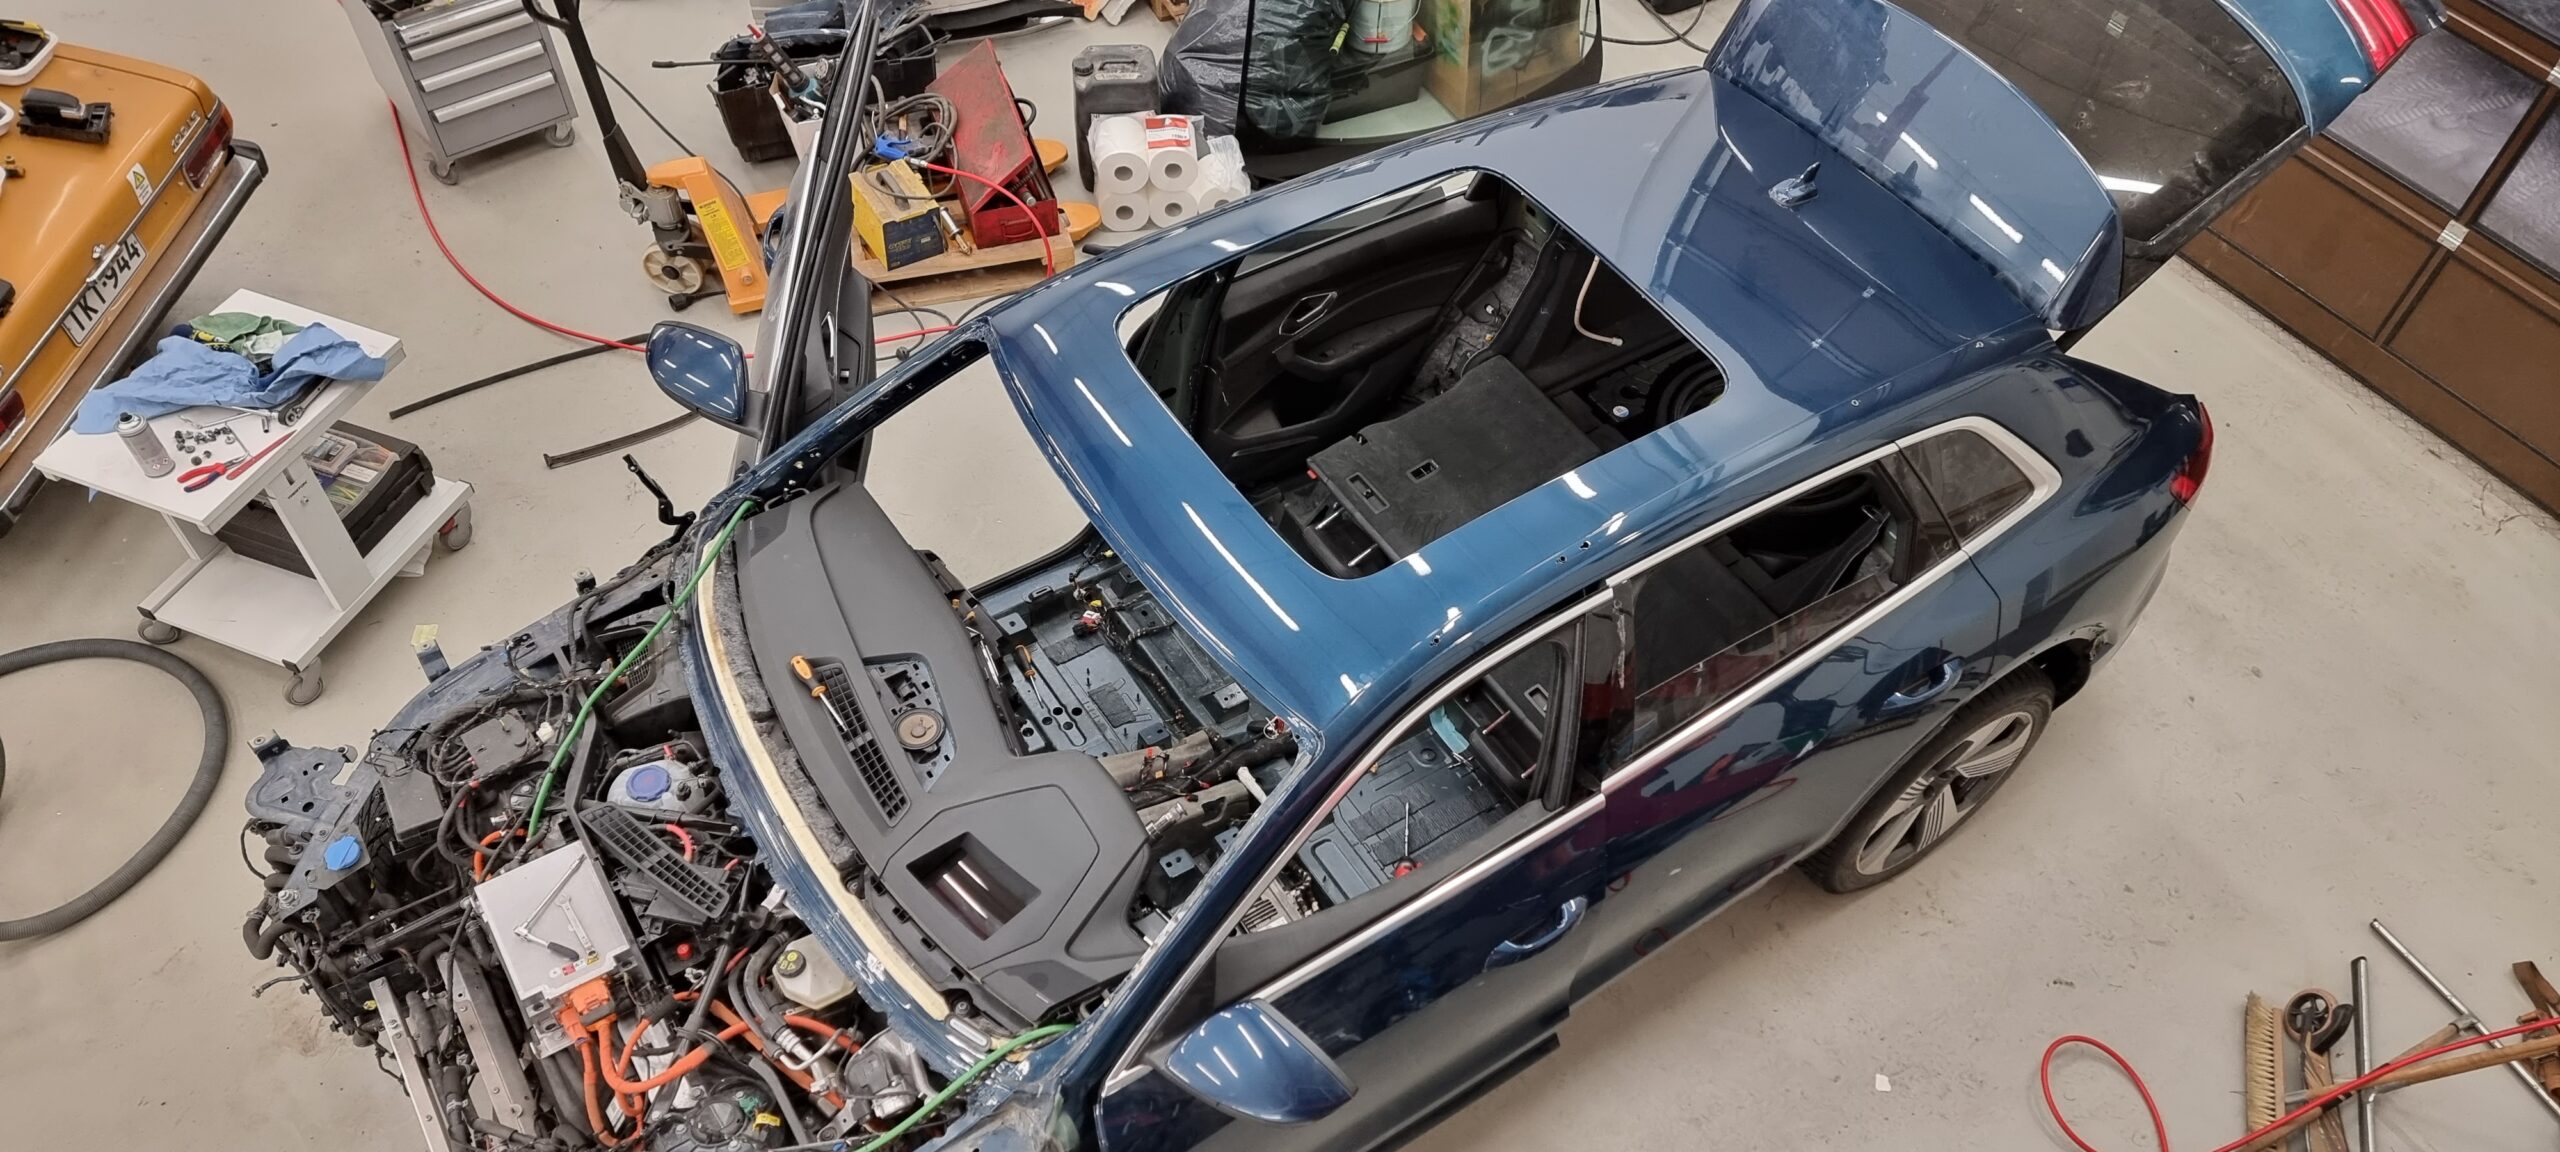
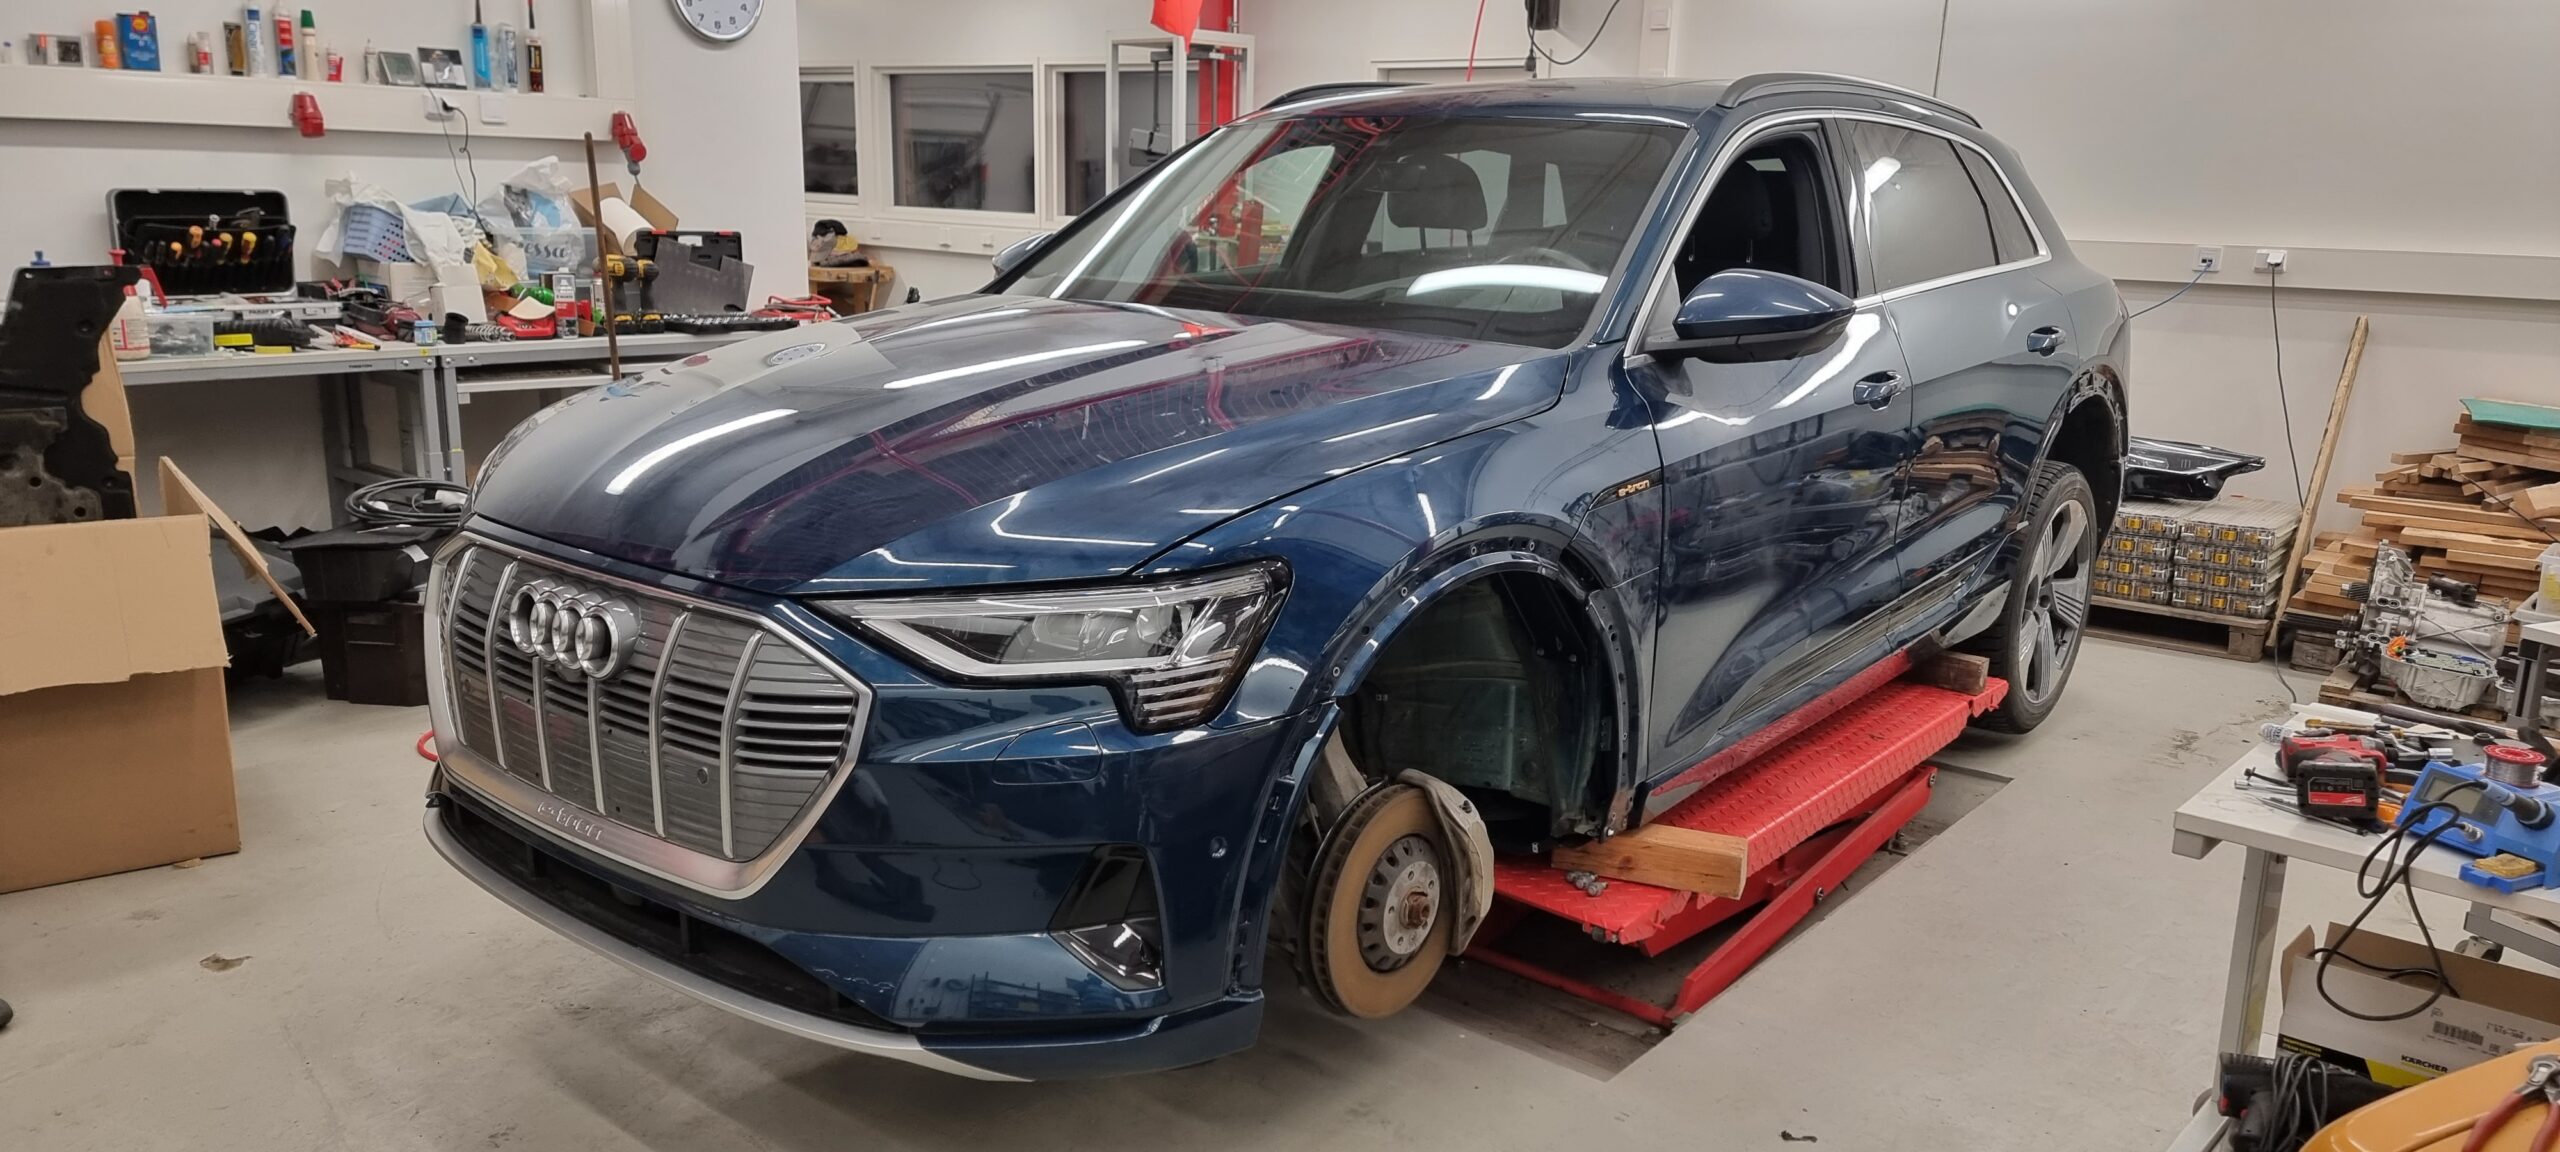
Jo kuvista kävi selväksi, että auto oli ollut hirvikolarissa. Myöhemmin aiemman omistajan kanssa jutellessa selvisi, että hirvi oli eksynyt moottoritielle, eikä ollut aitojen välistä sitten osannut pois ja lopulta seurauksena oli tämä. Eläin lasille lähes täydestä motarivauhdista ja sen jälkeen vielä auton vasen kylki motarin kaiteeseen. Turvalaitteet olivat tehneet tehtävänsä, eikä henkilövahinkoja tullut. Keulasta aikalailla kaikki rikki. Näyttää hurjalta, kun alumiiniset pintaosat repeilevät palasiksi.

Saimme apua auton kyytiin nostamisessa.

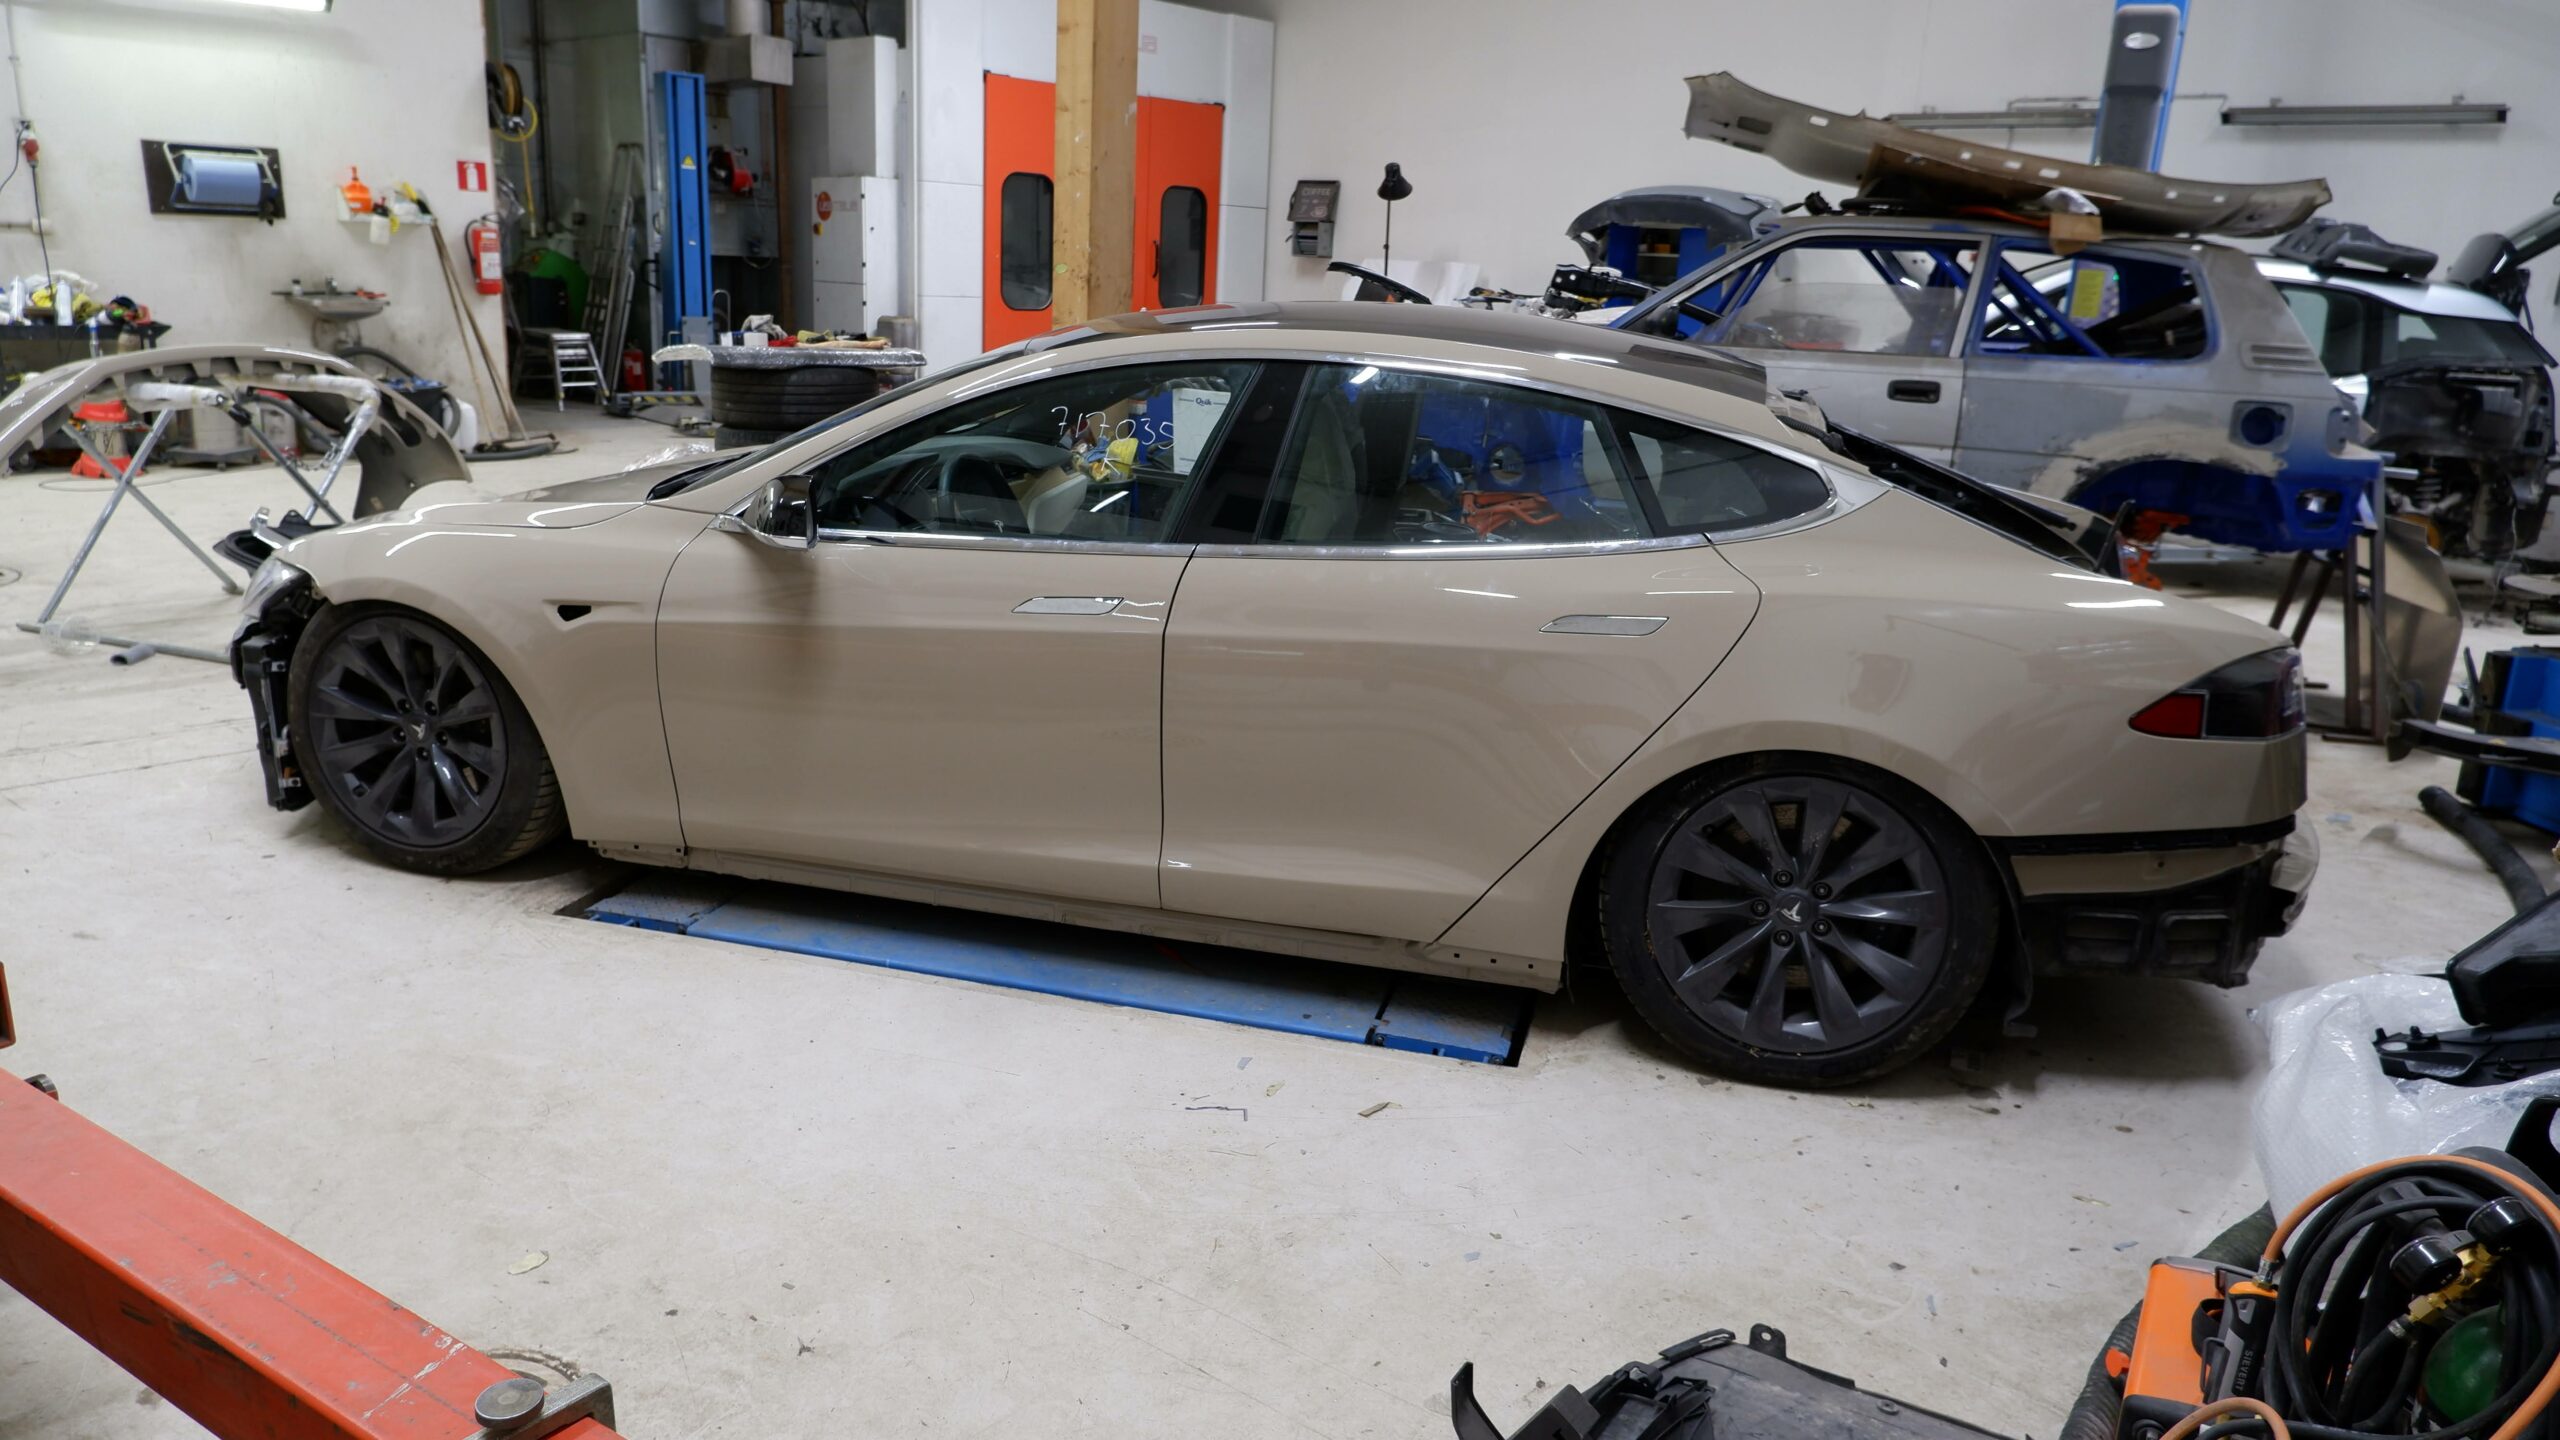
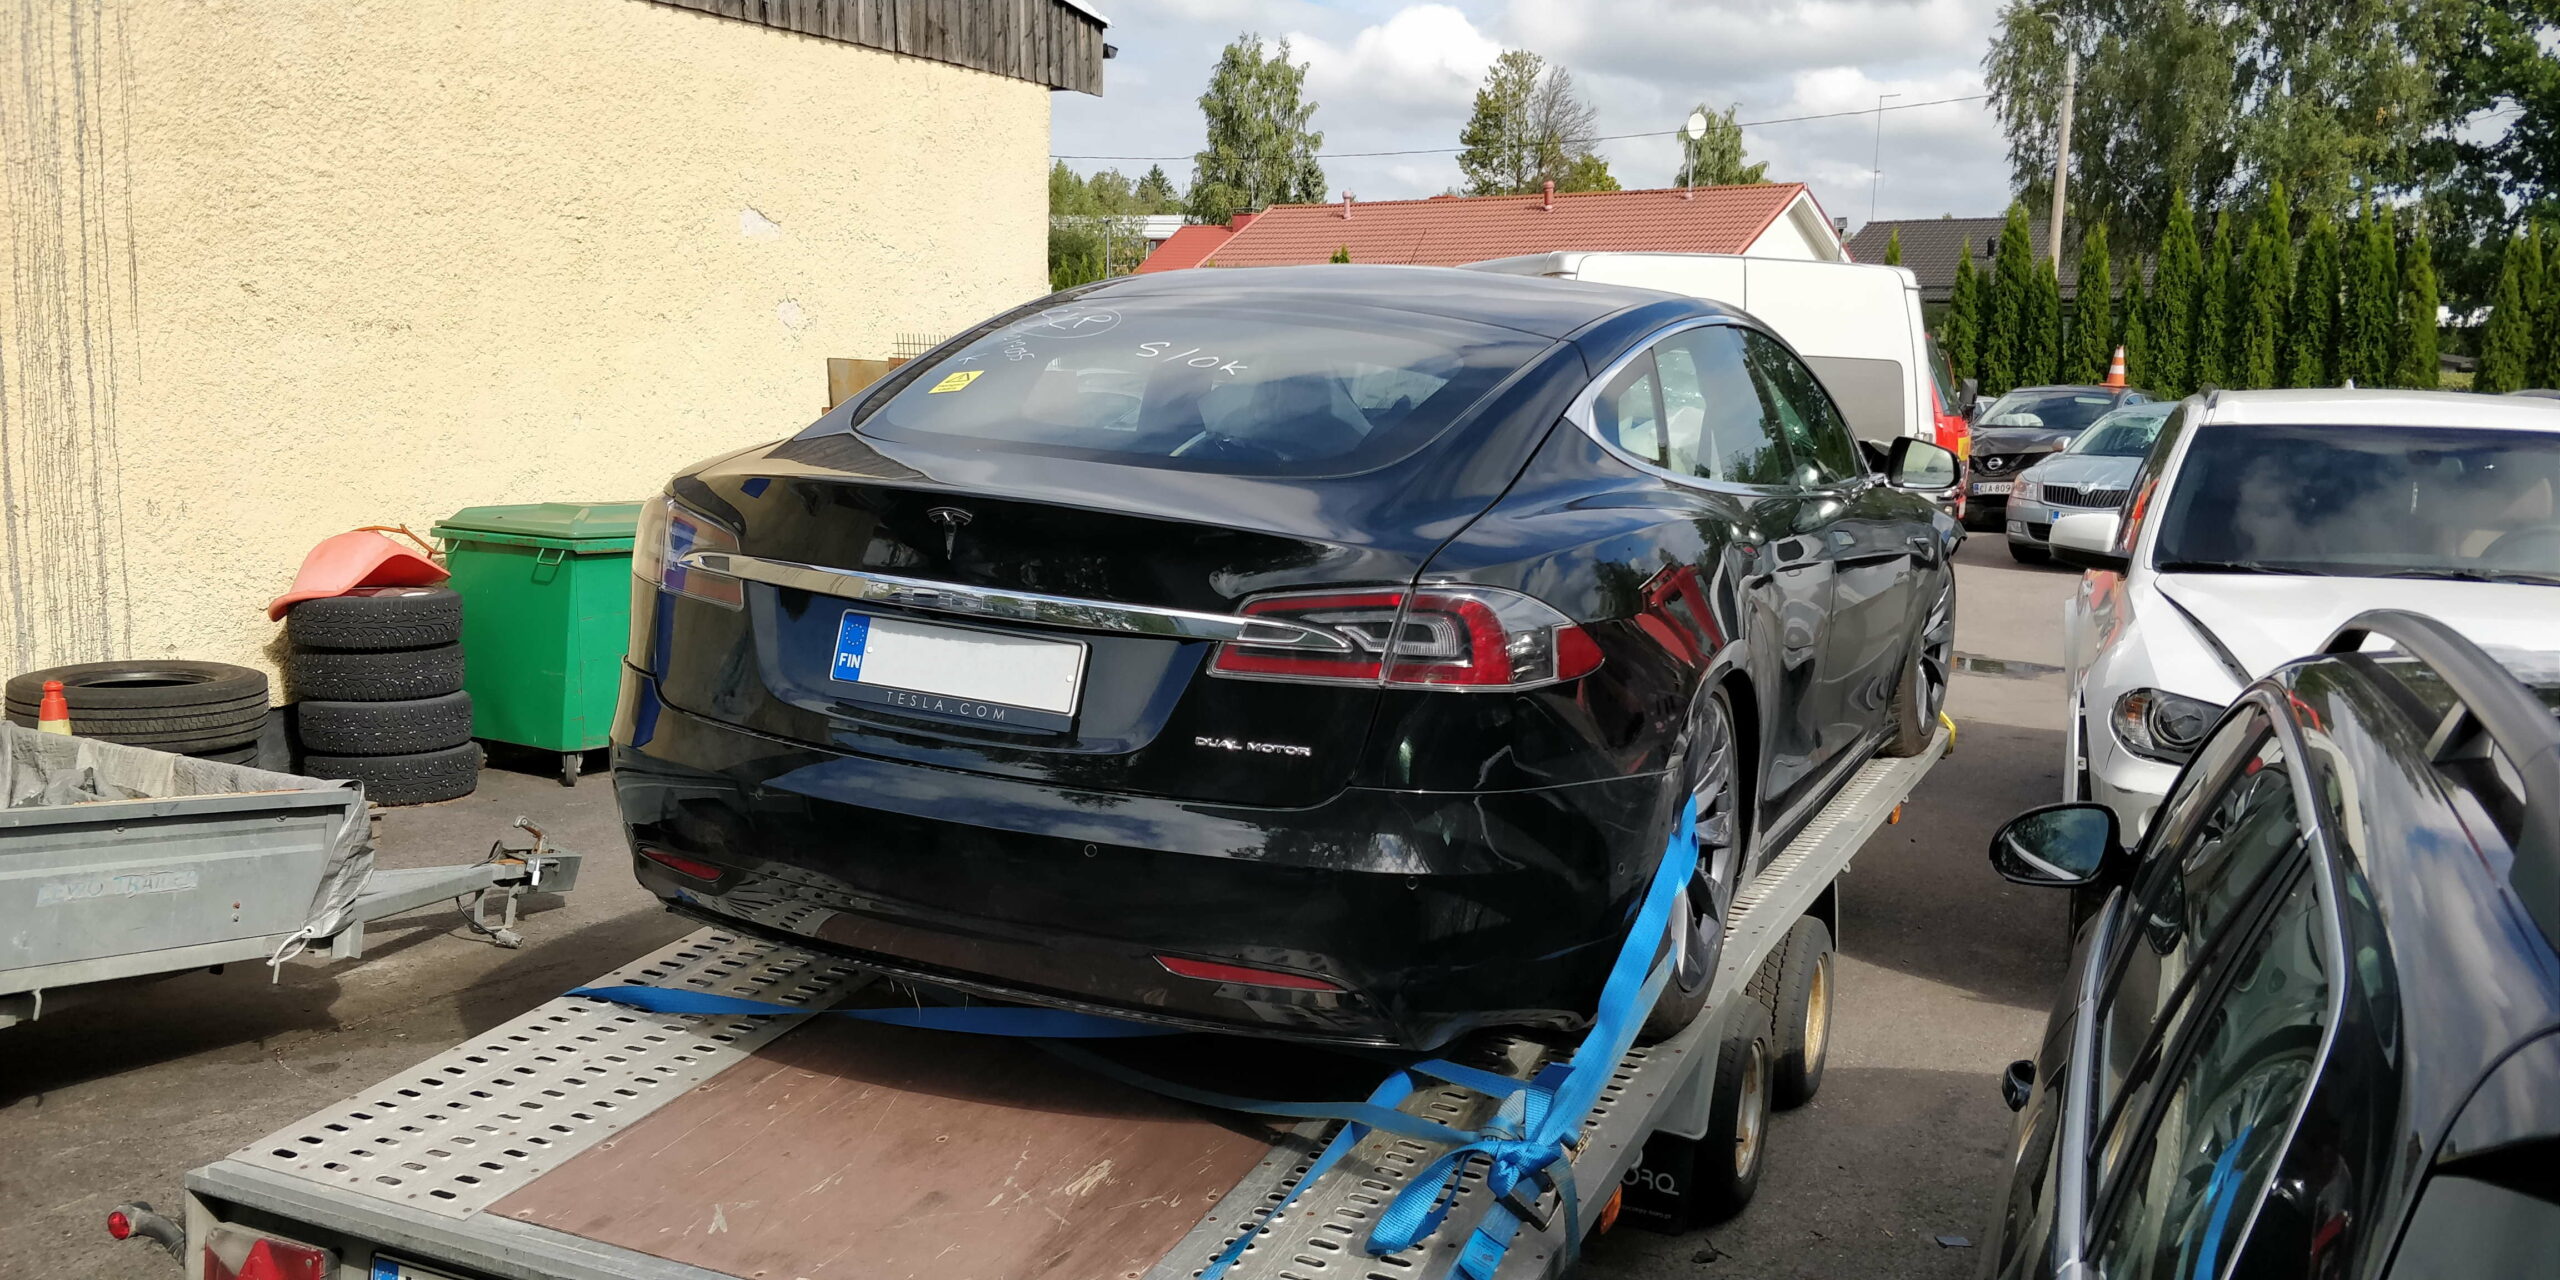
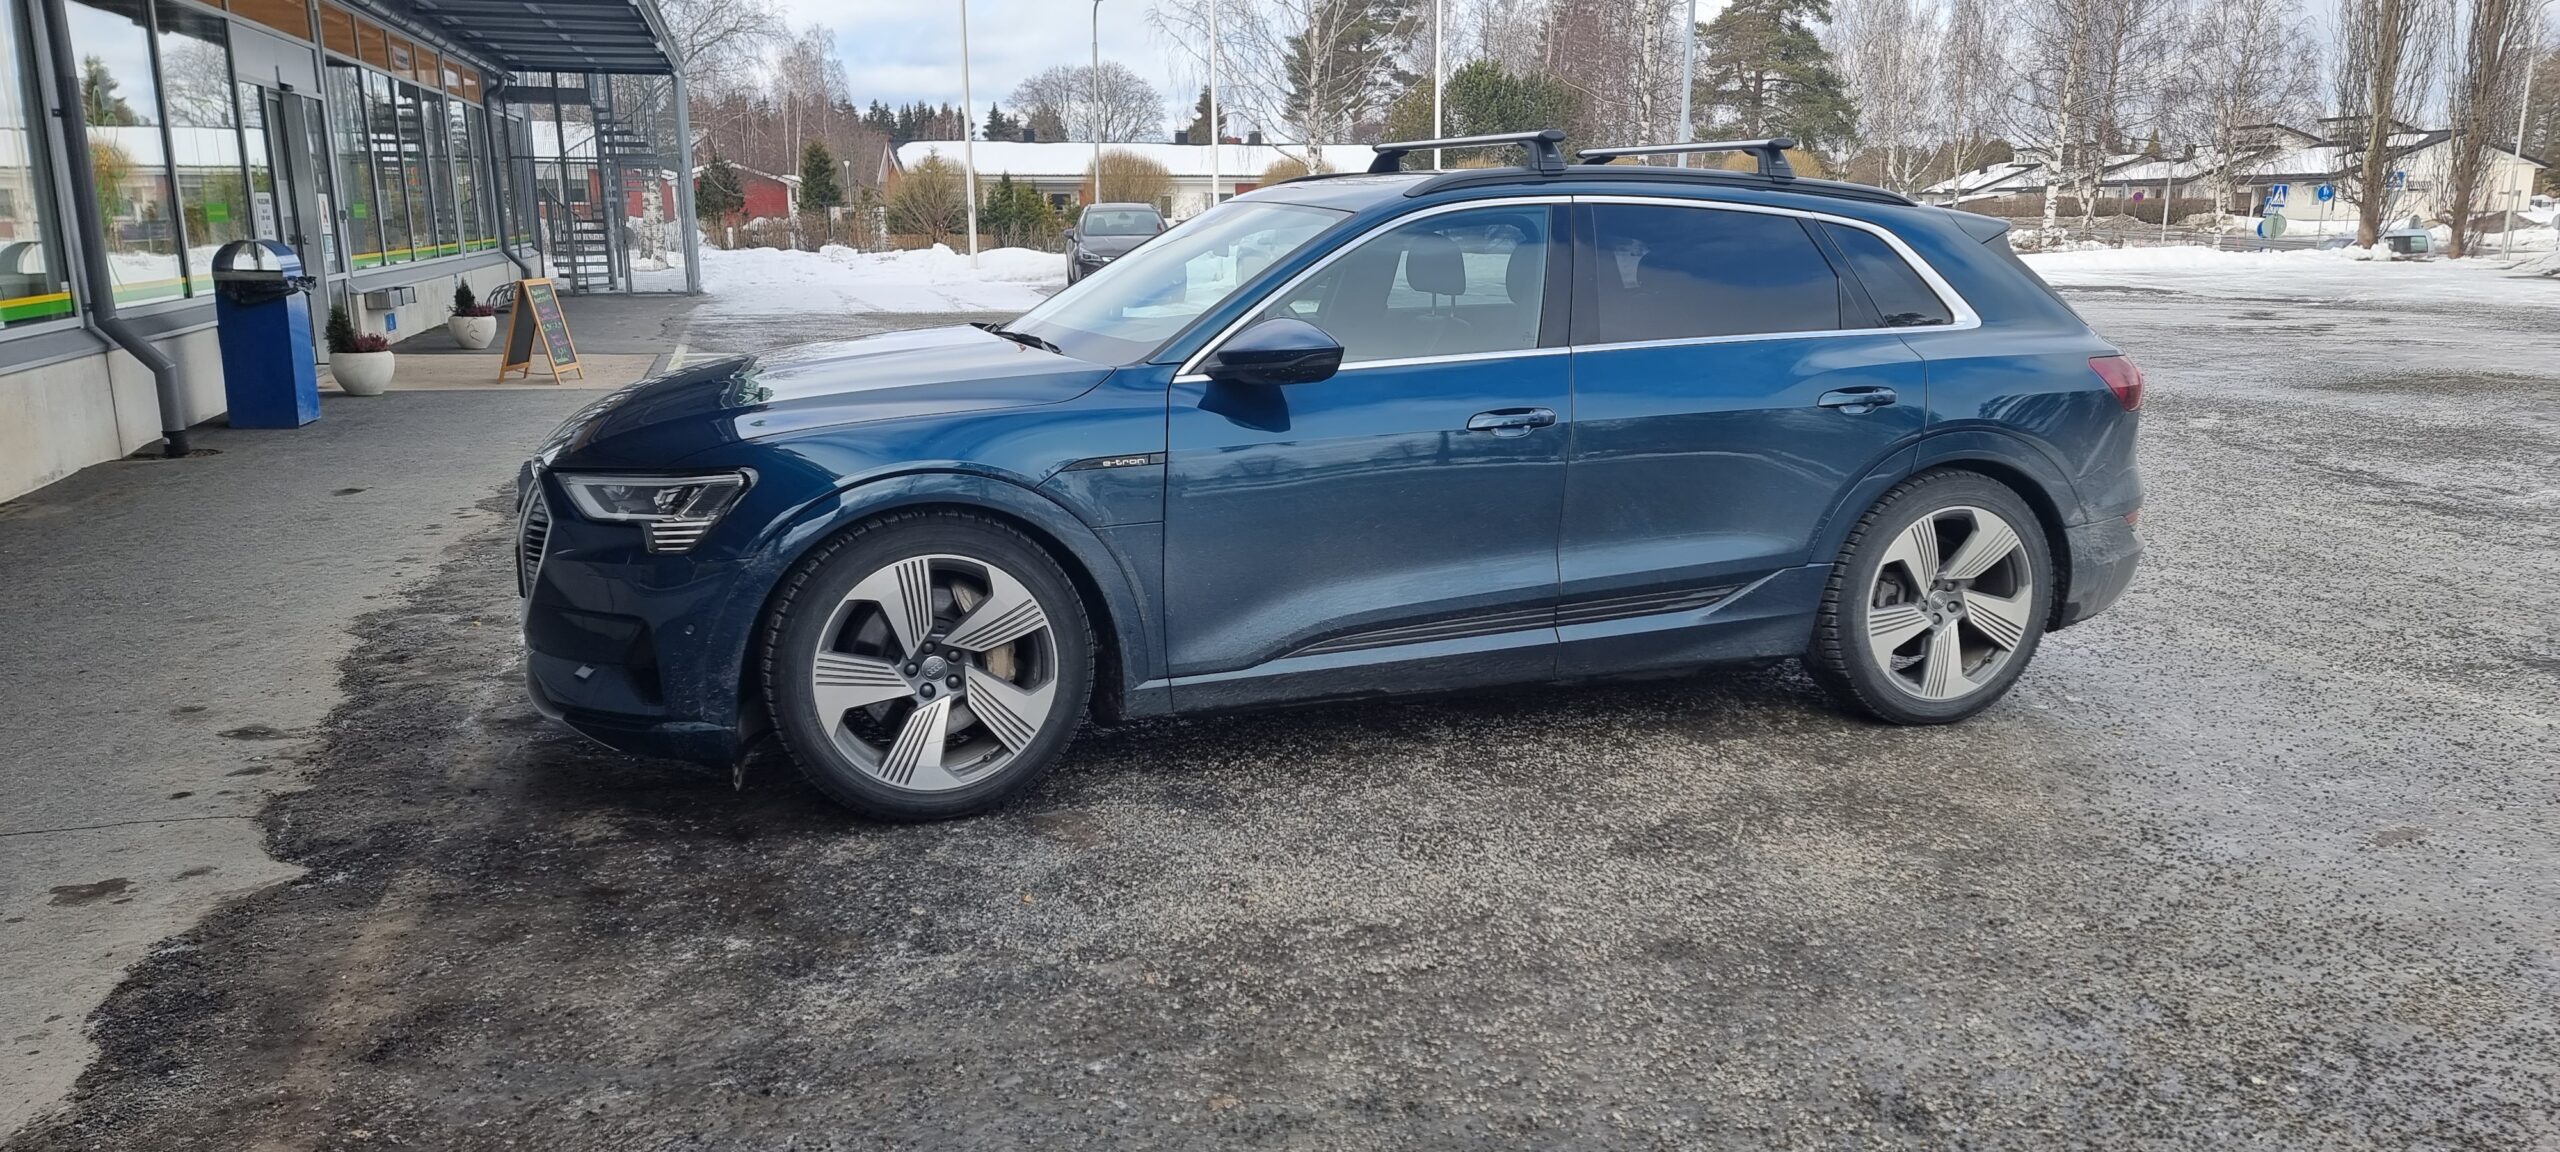
Oikea kylki autosta on täysin ehjä. Auto on siis 2019-mallia ja ajettu n. 45 000 km. Tuotu Suomeen käytettynä Saksasta. Autossa on hyvät varusteet, erilaisia ajoavustimia löytyy vaikka millä mitalla, Matrix-valot ja ylipäätään auto on isommalla akulla ja tehoilla varustettu 55-malli.

Auto kärryllä Vantaalla. Keulan osia sidottiin hieman kiinni, etteivät putoile matkalle.
Vioista ikävin näkyy tässä.

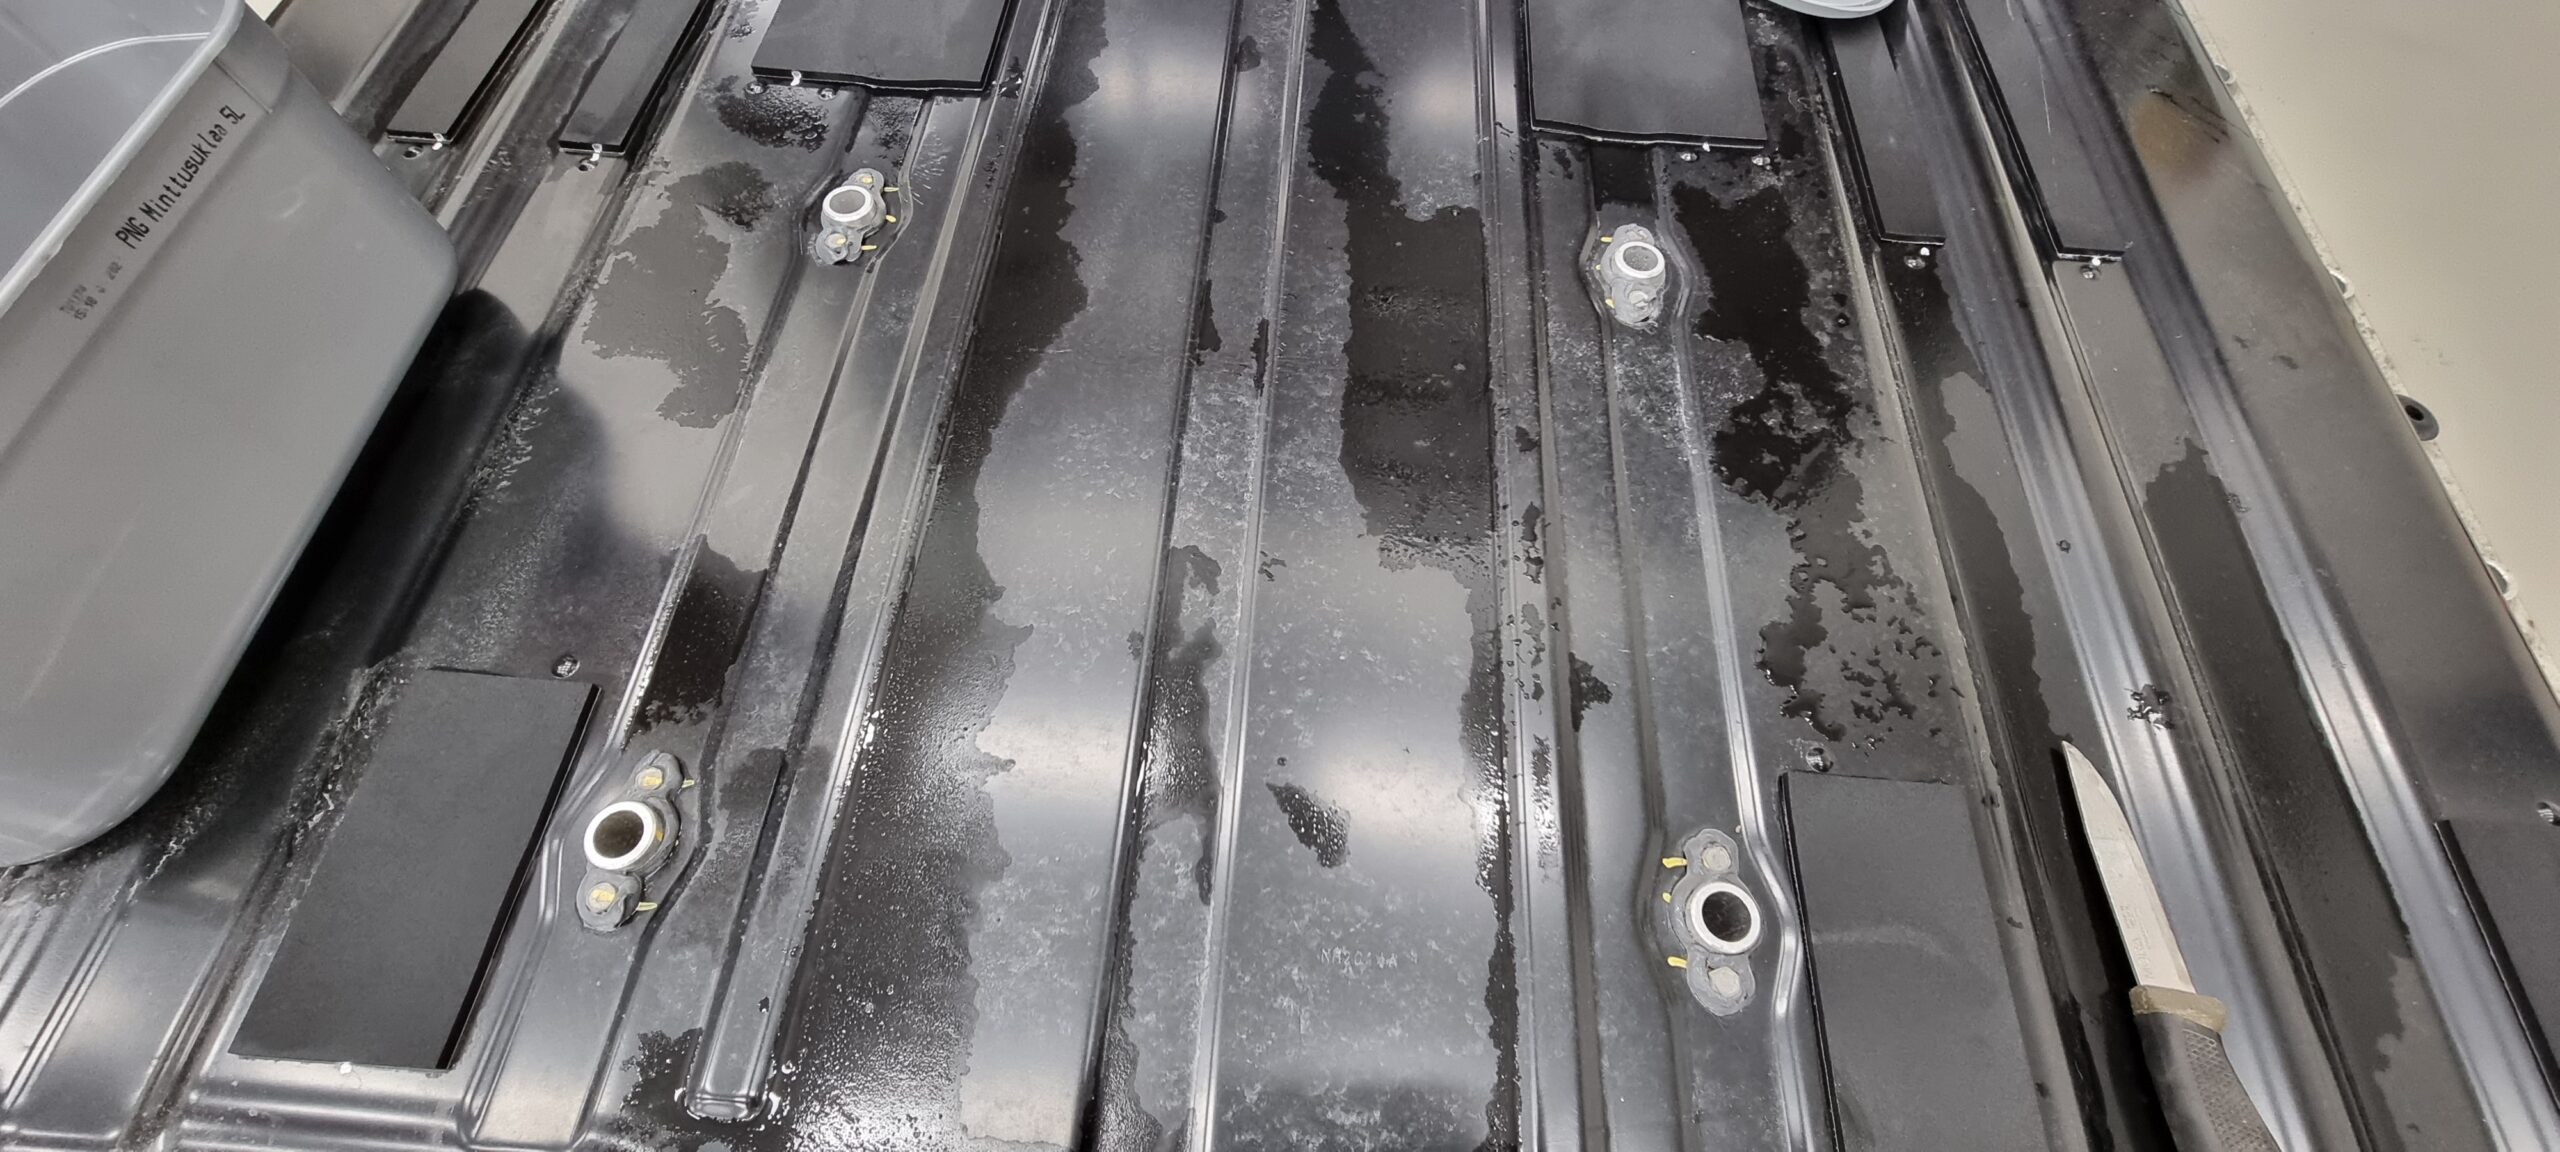
Hirvi lasille tullessaan oli painanut katon etureunaaki sisään. Toinen ikävä asia oli se, että auto oli seissyt käytännössä koko elokuun taivasalla ja sisään oli satanut vettä aikalailla. Voisi toivoa, että vaikka nämä tavallaan romuja ovat, niin toisten romut ovat toisten aarteita – voisi tällaisen lasin edes teipata sen verran, ettei kaikki vesi sada sisään. Onneksi sisään päässyt vesi ei ollut rikkonut mitään.

Kotona traileri peruutettiin suoraan nosturipaikalle, mistä auto saatiin ilmaan. Tähän mennessä ei siis ollut tarvinnut työnnellä senttiäkään. Taustalla premium-Audi 47 vuoden takaa.

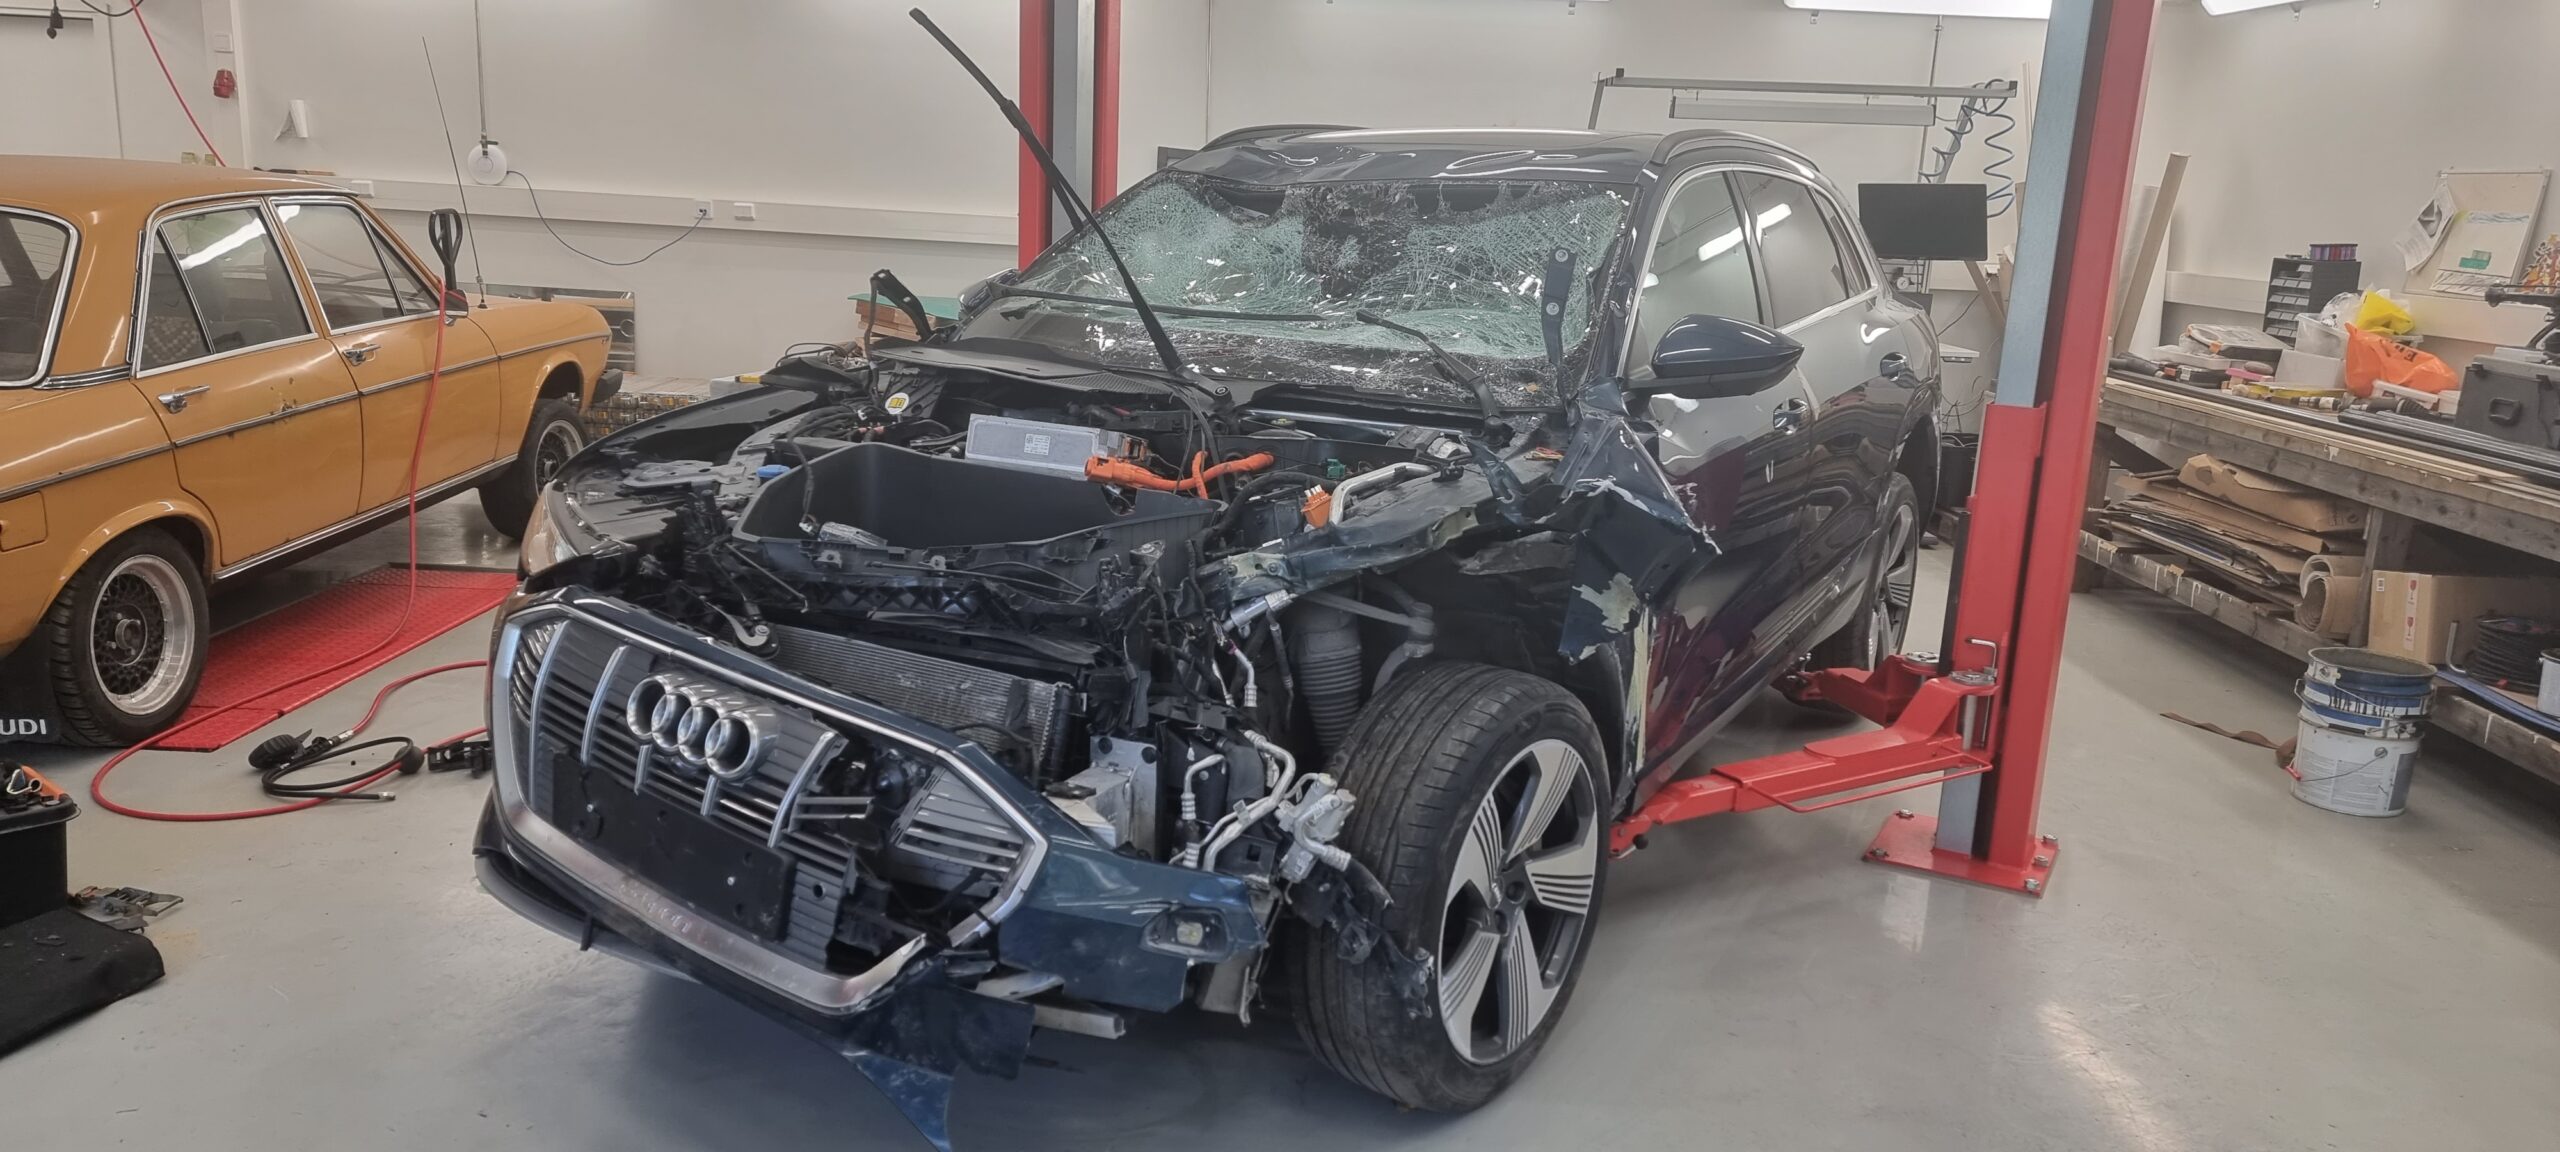
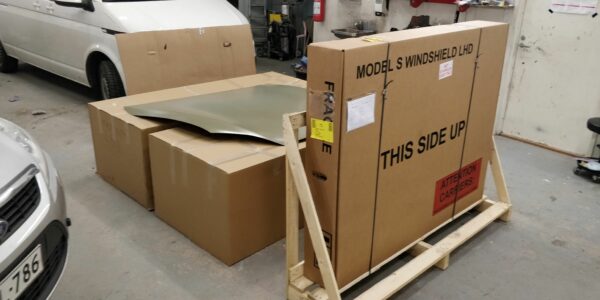
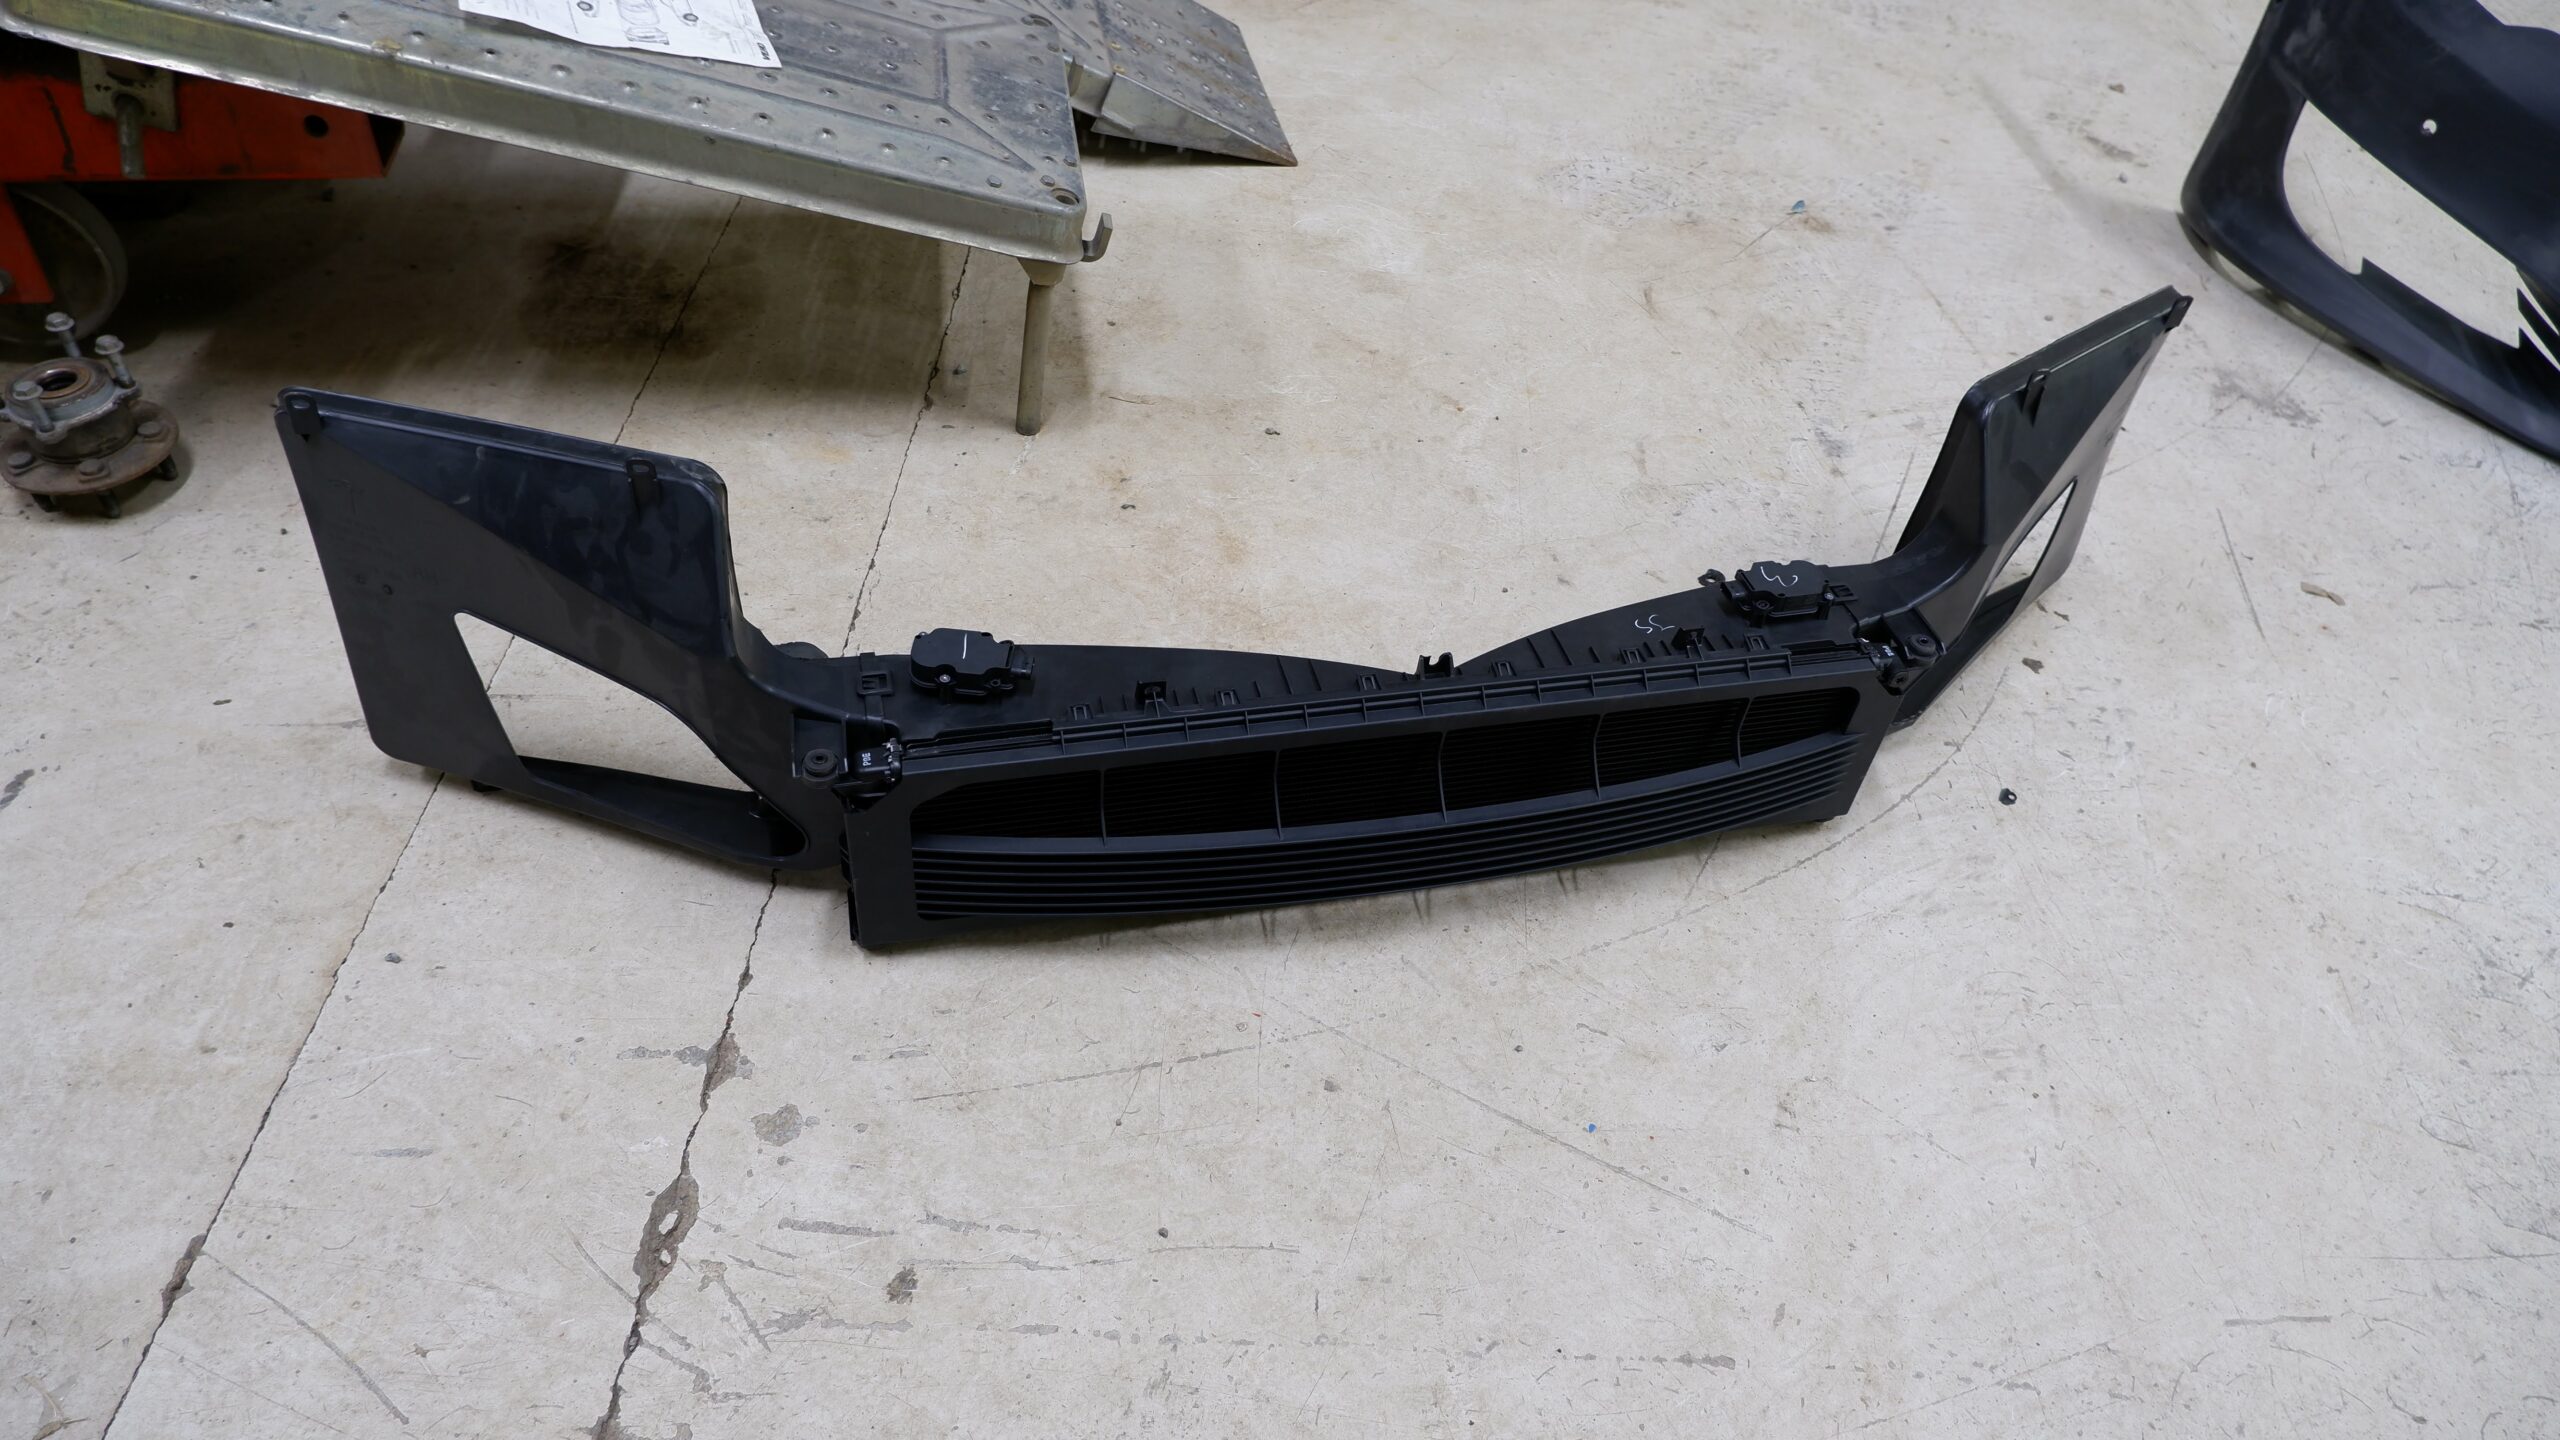
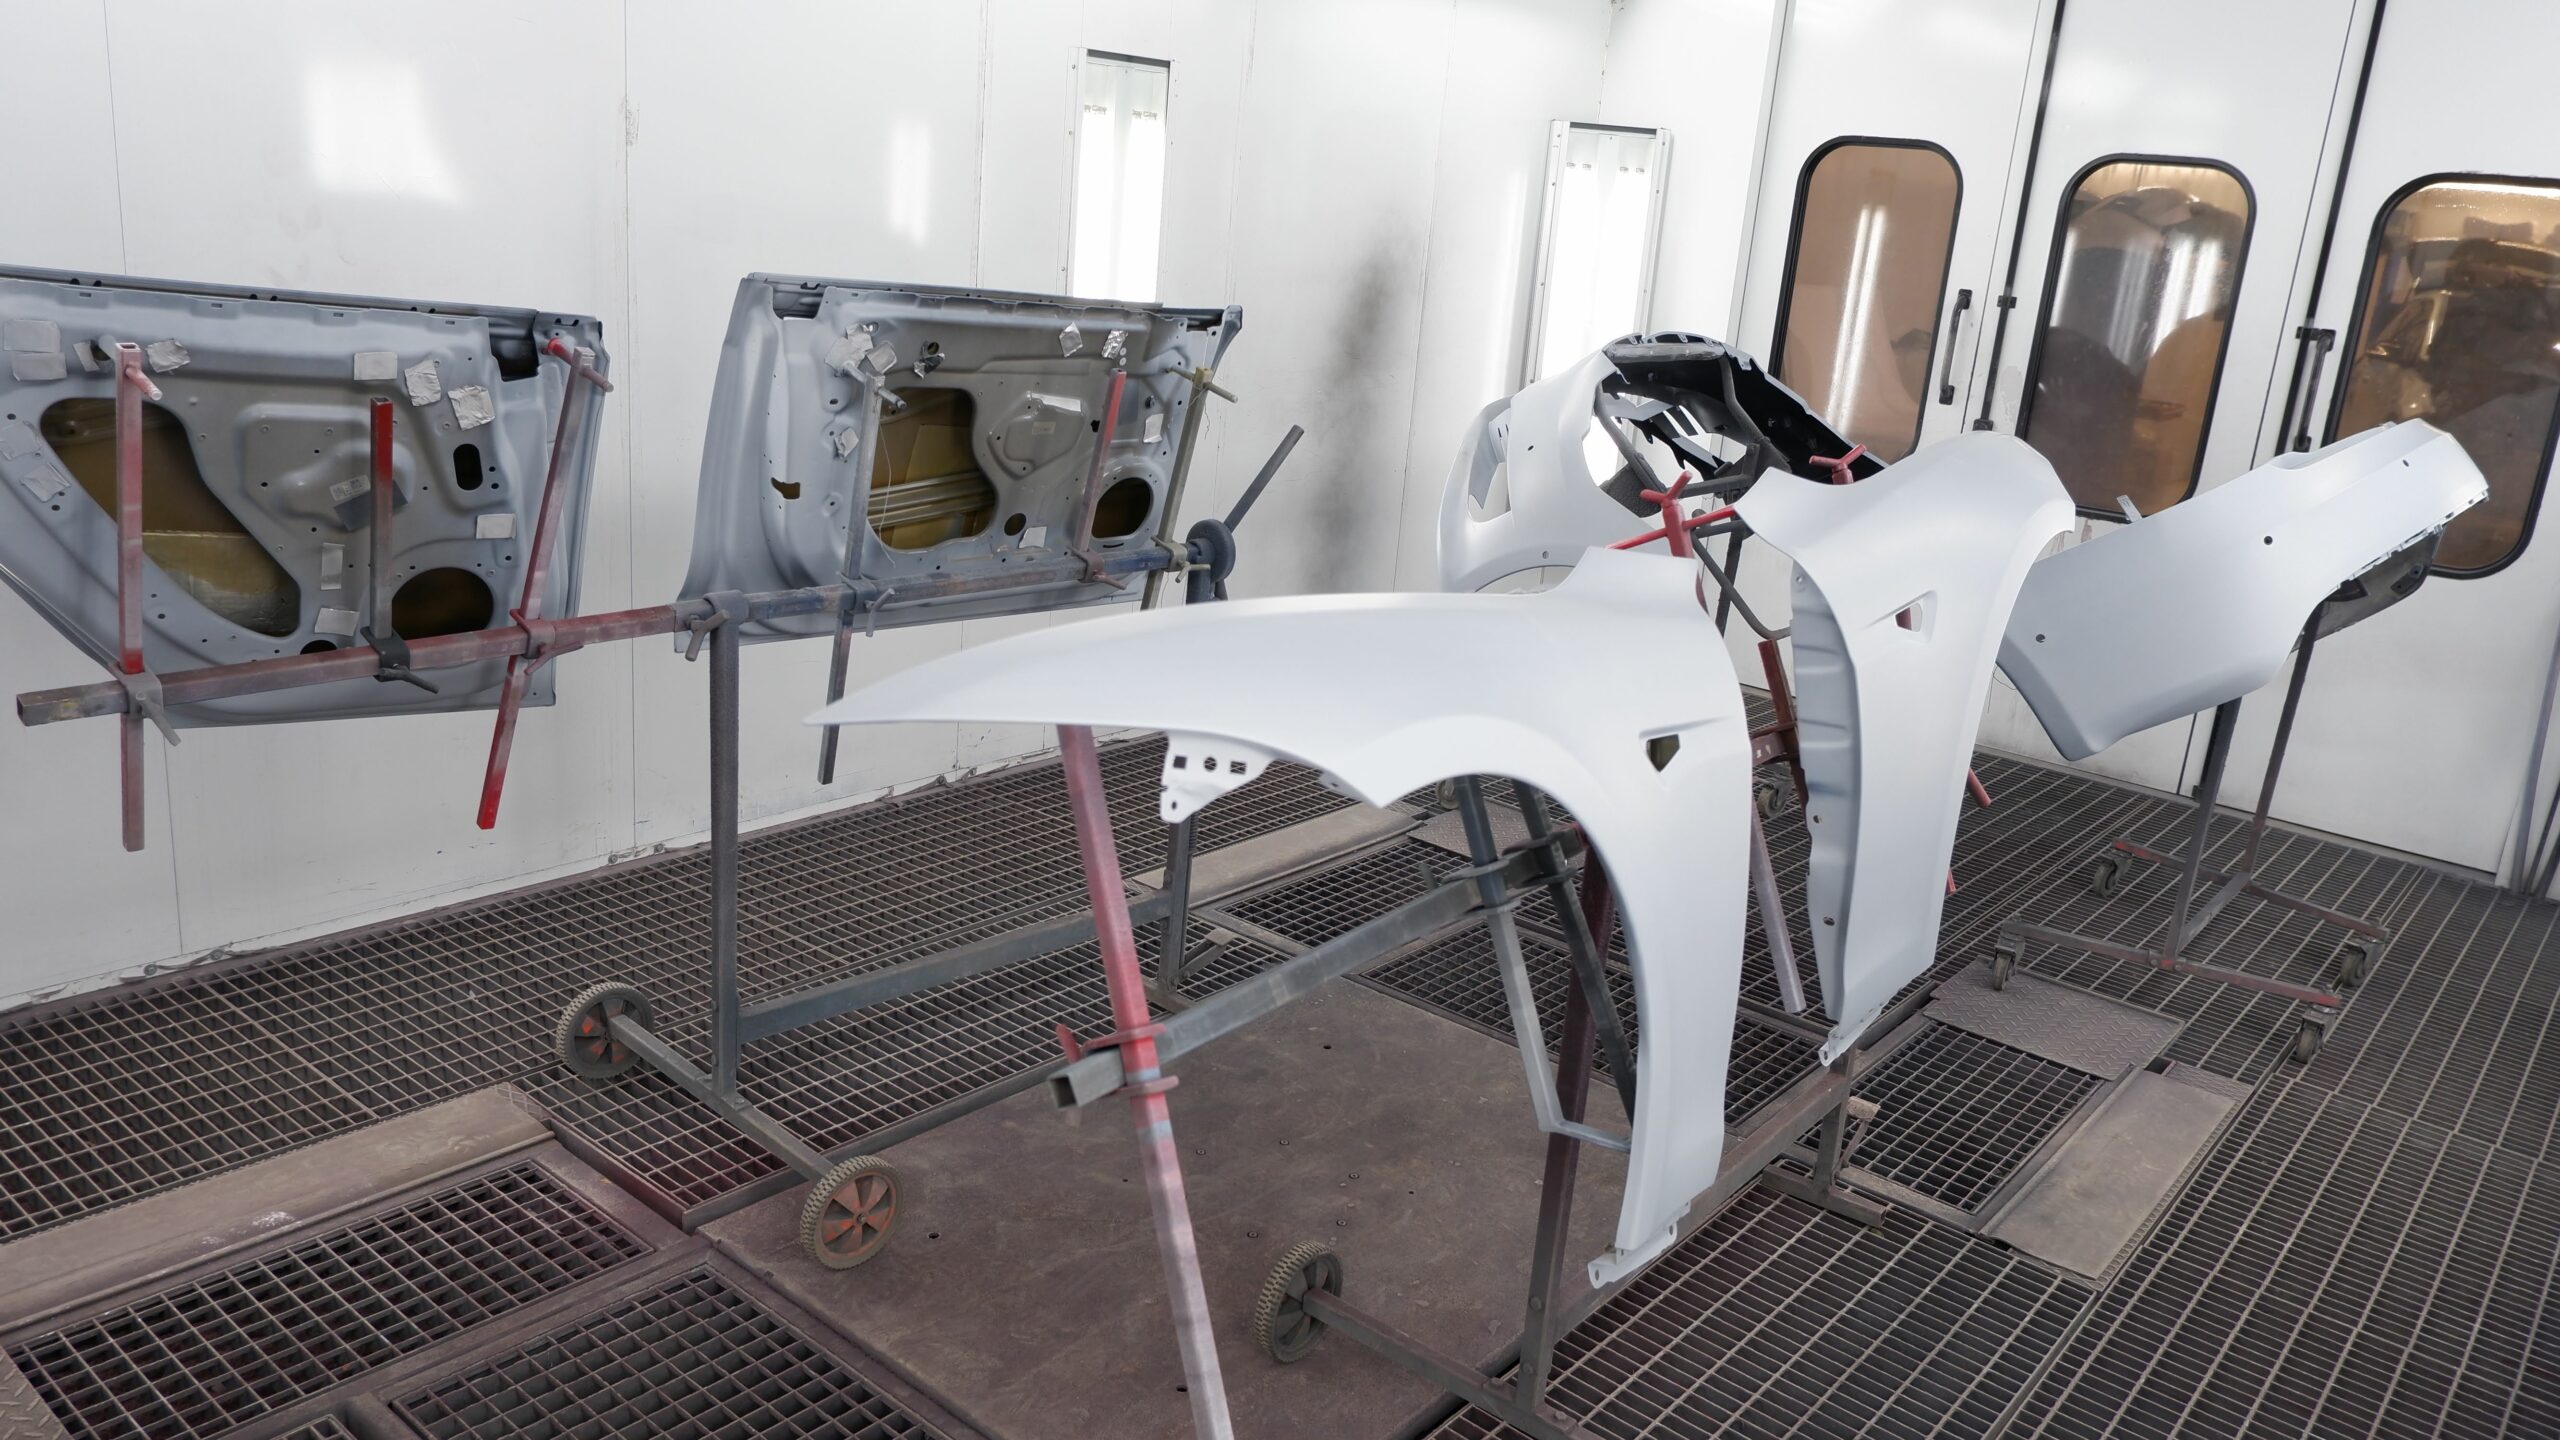
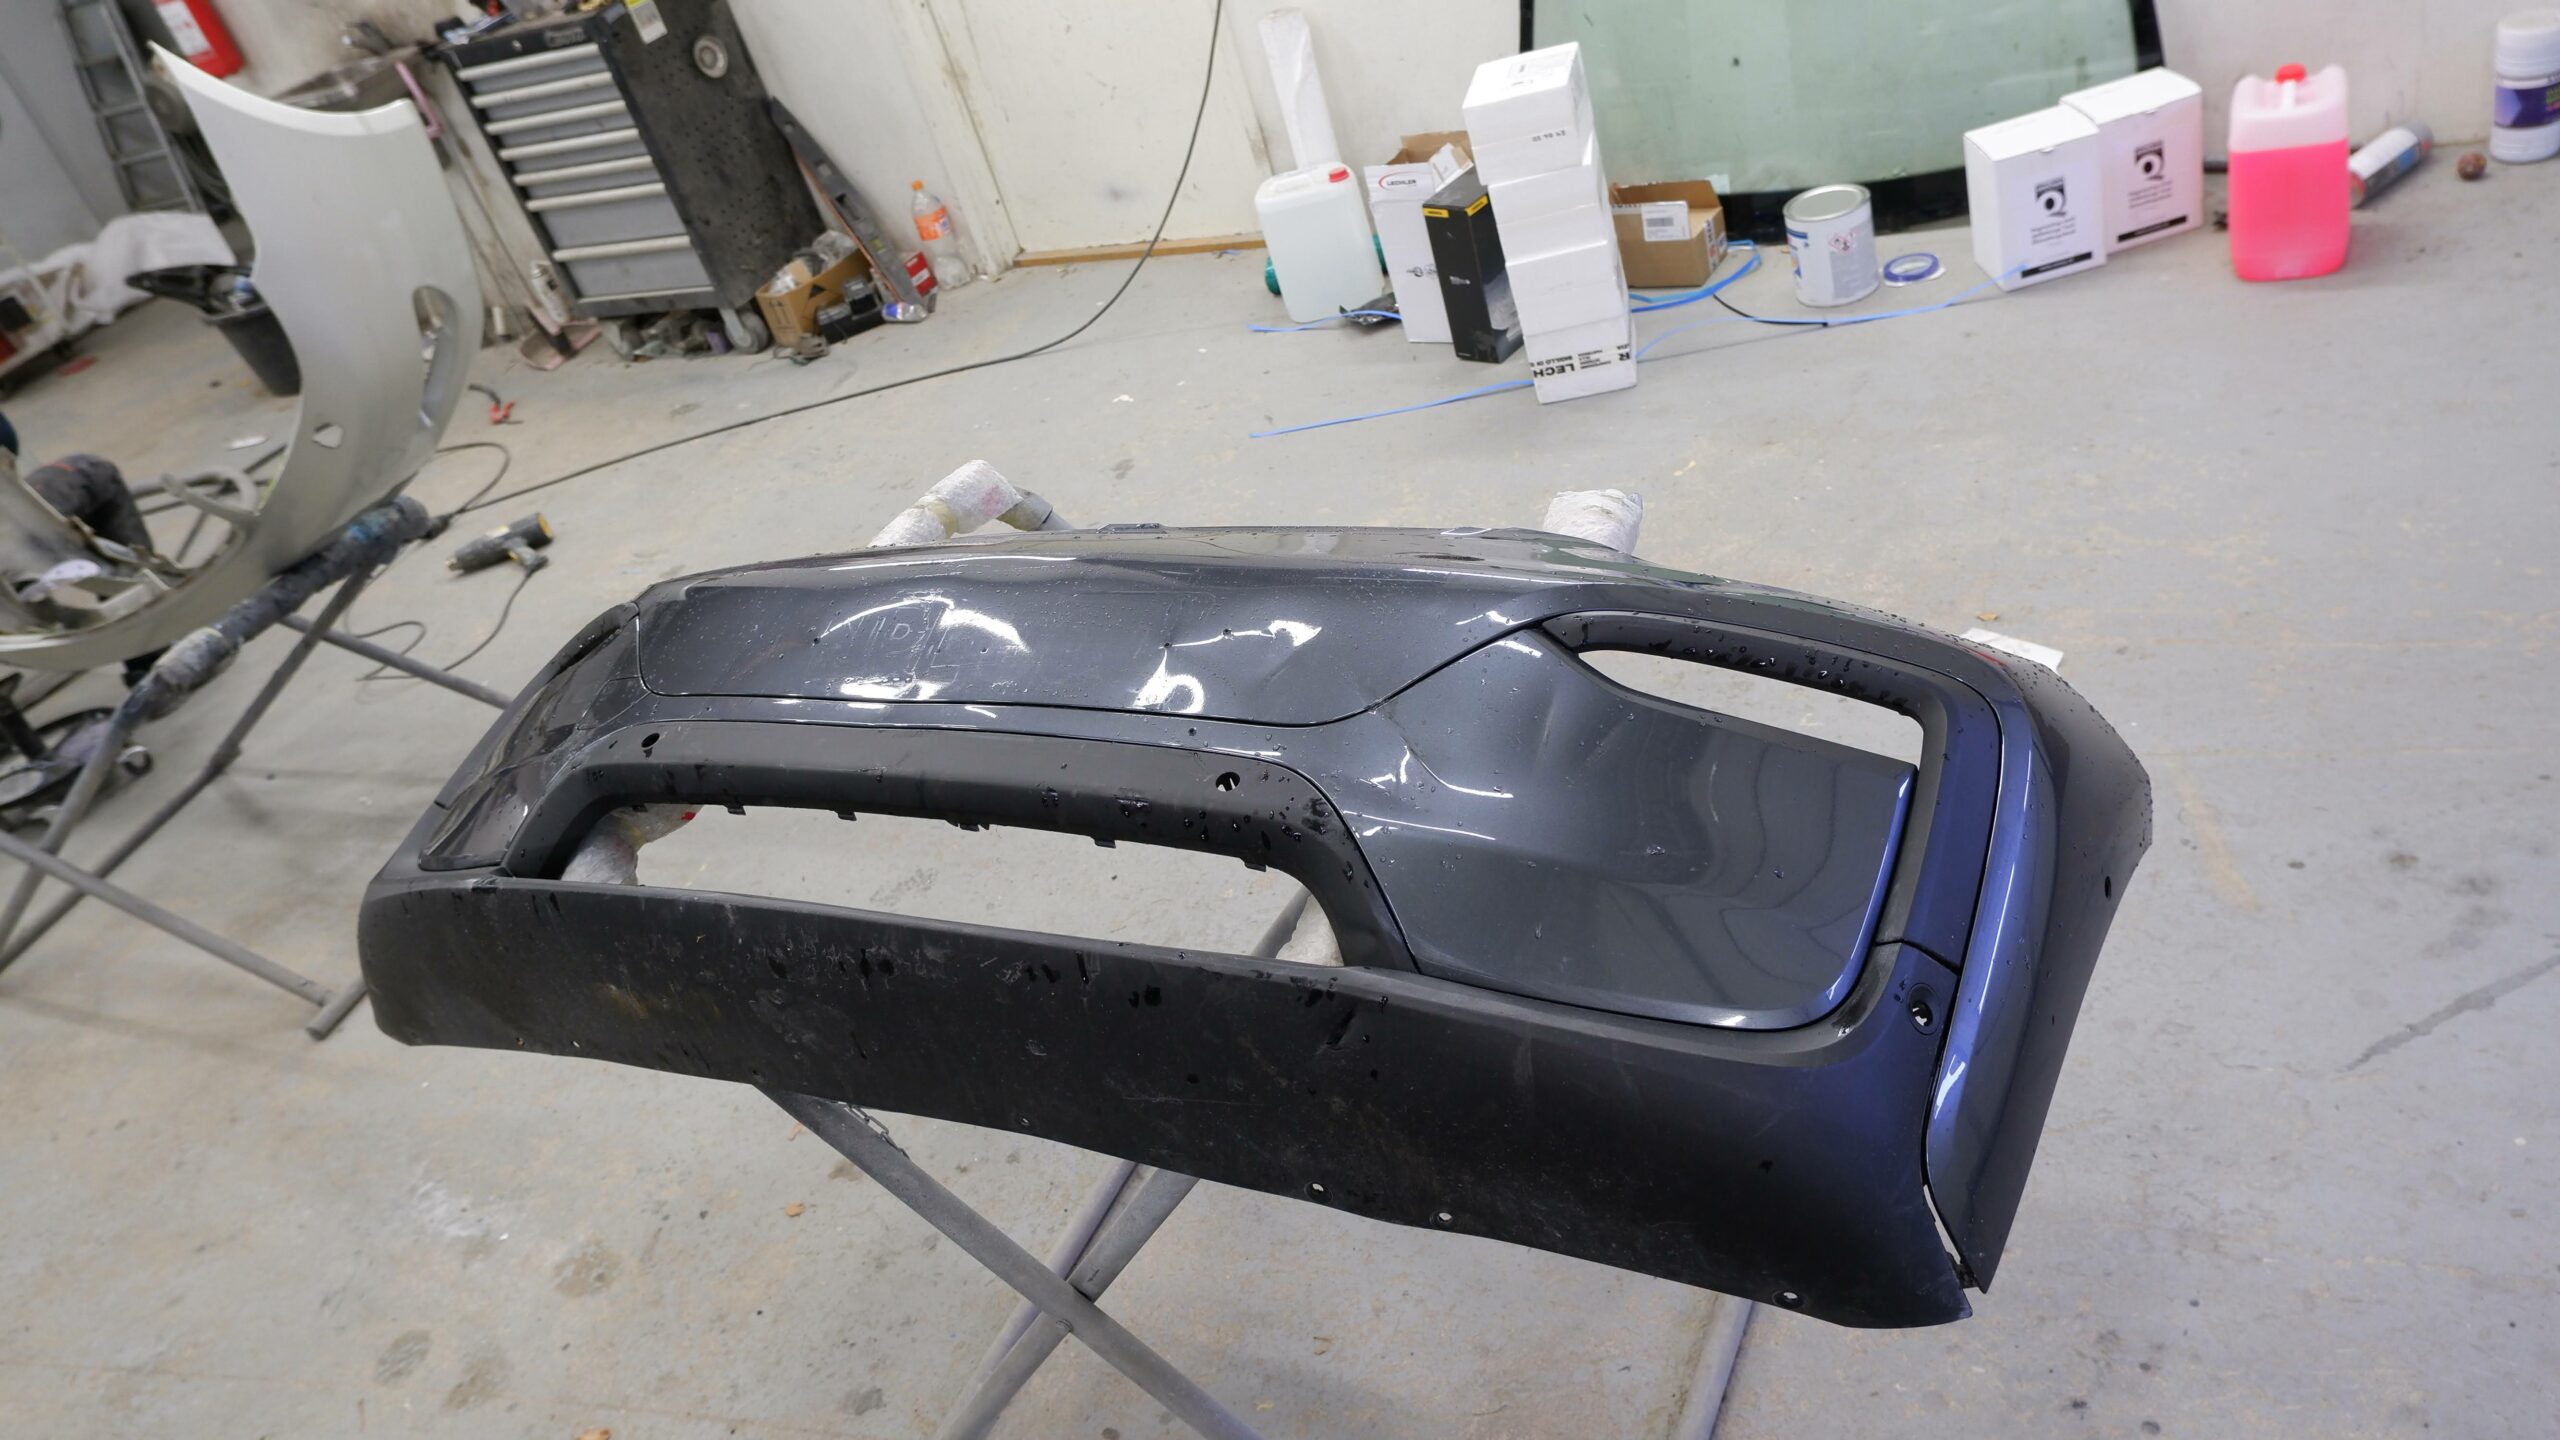
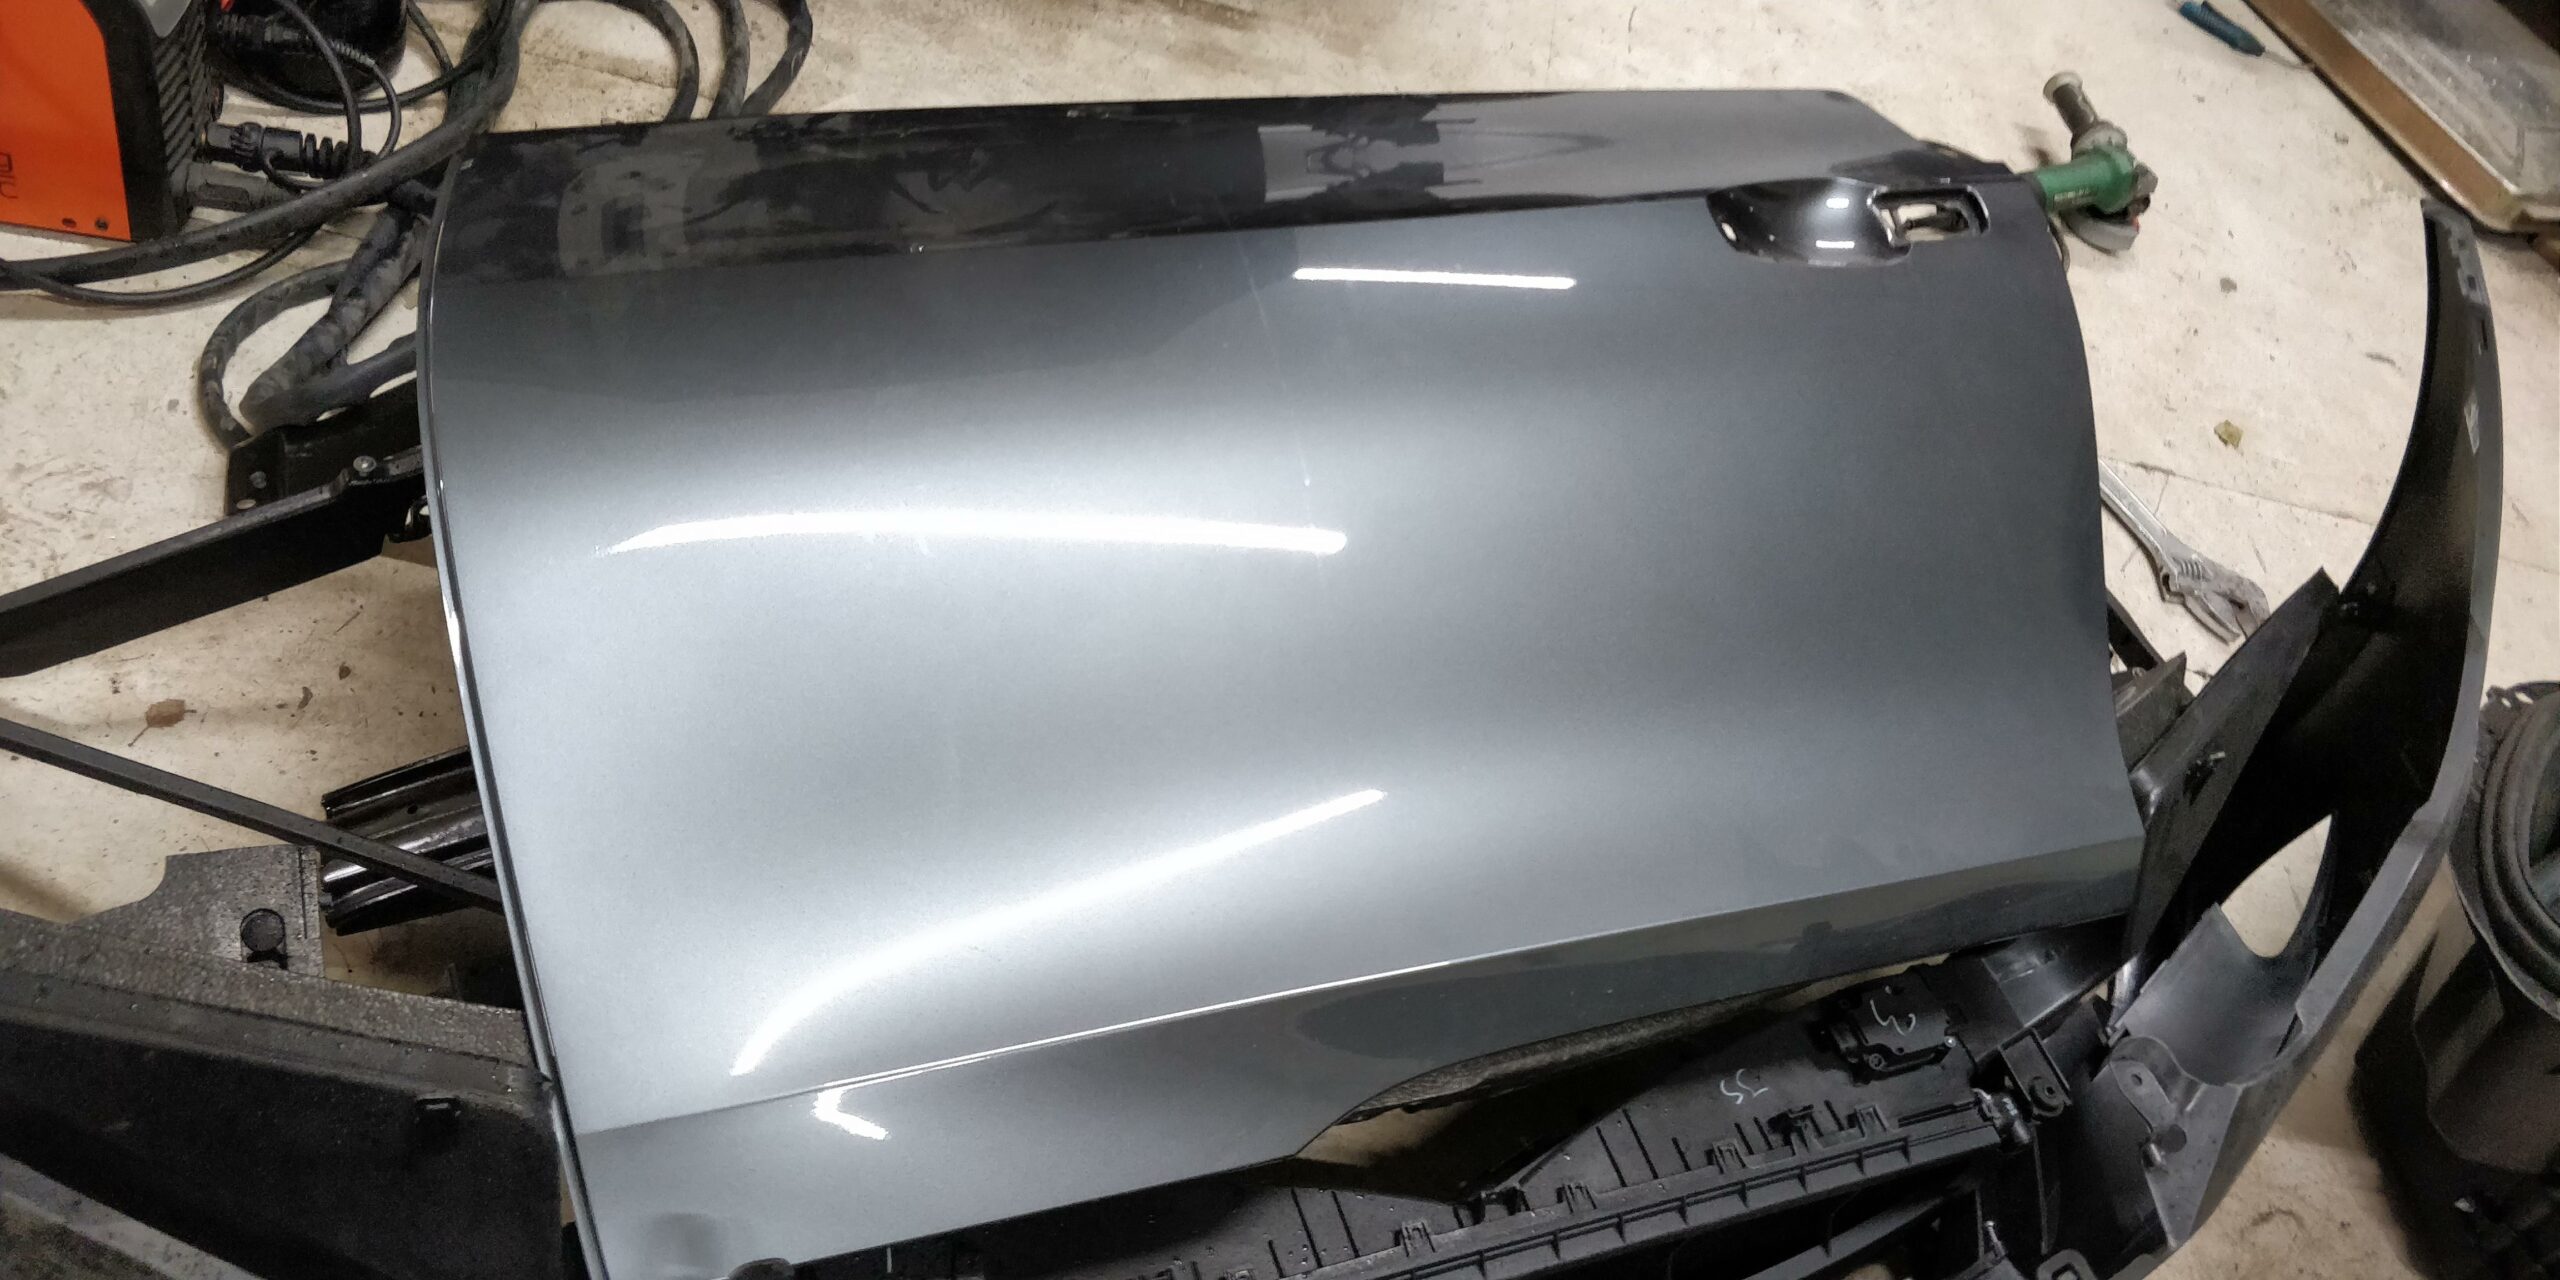
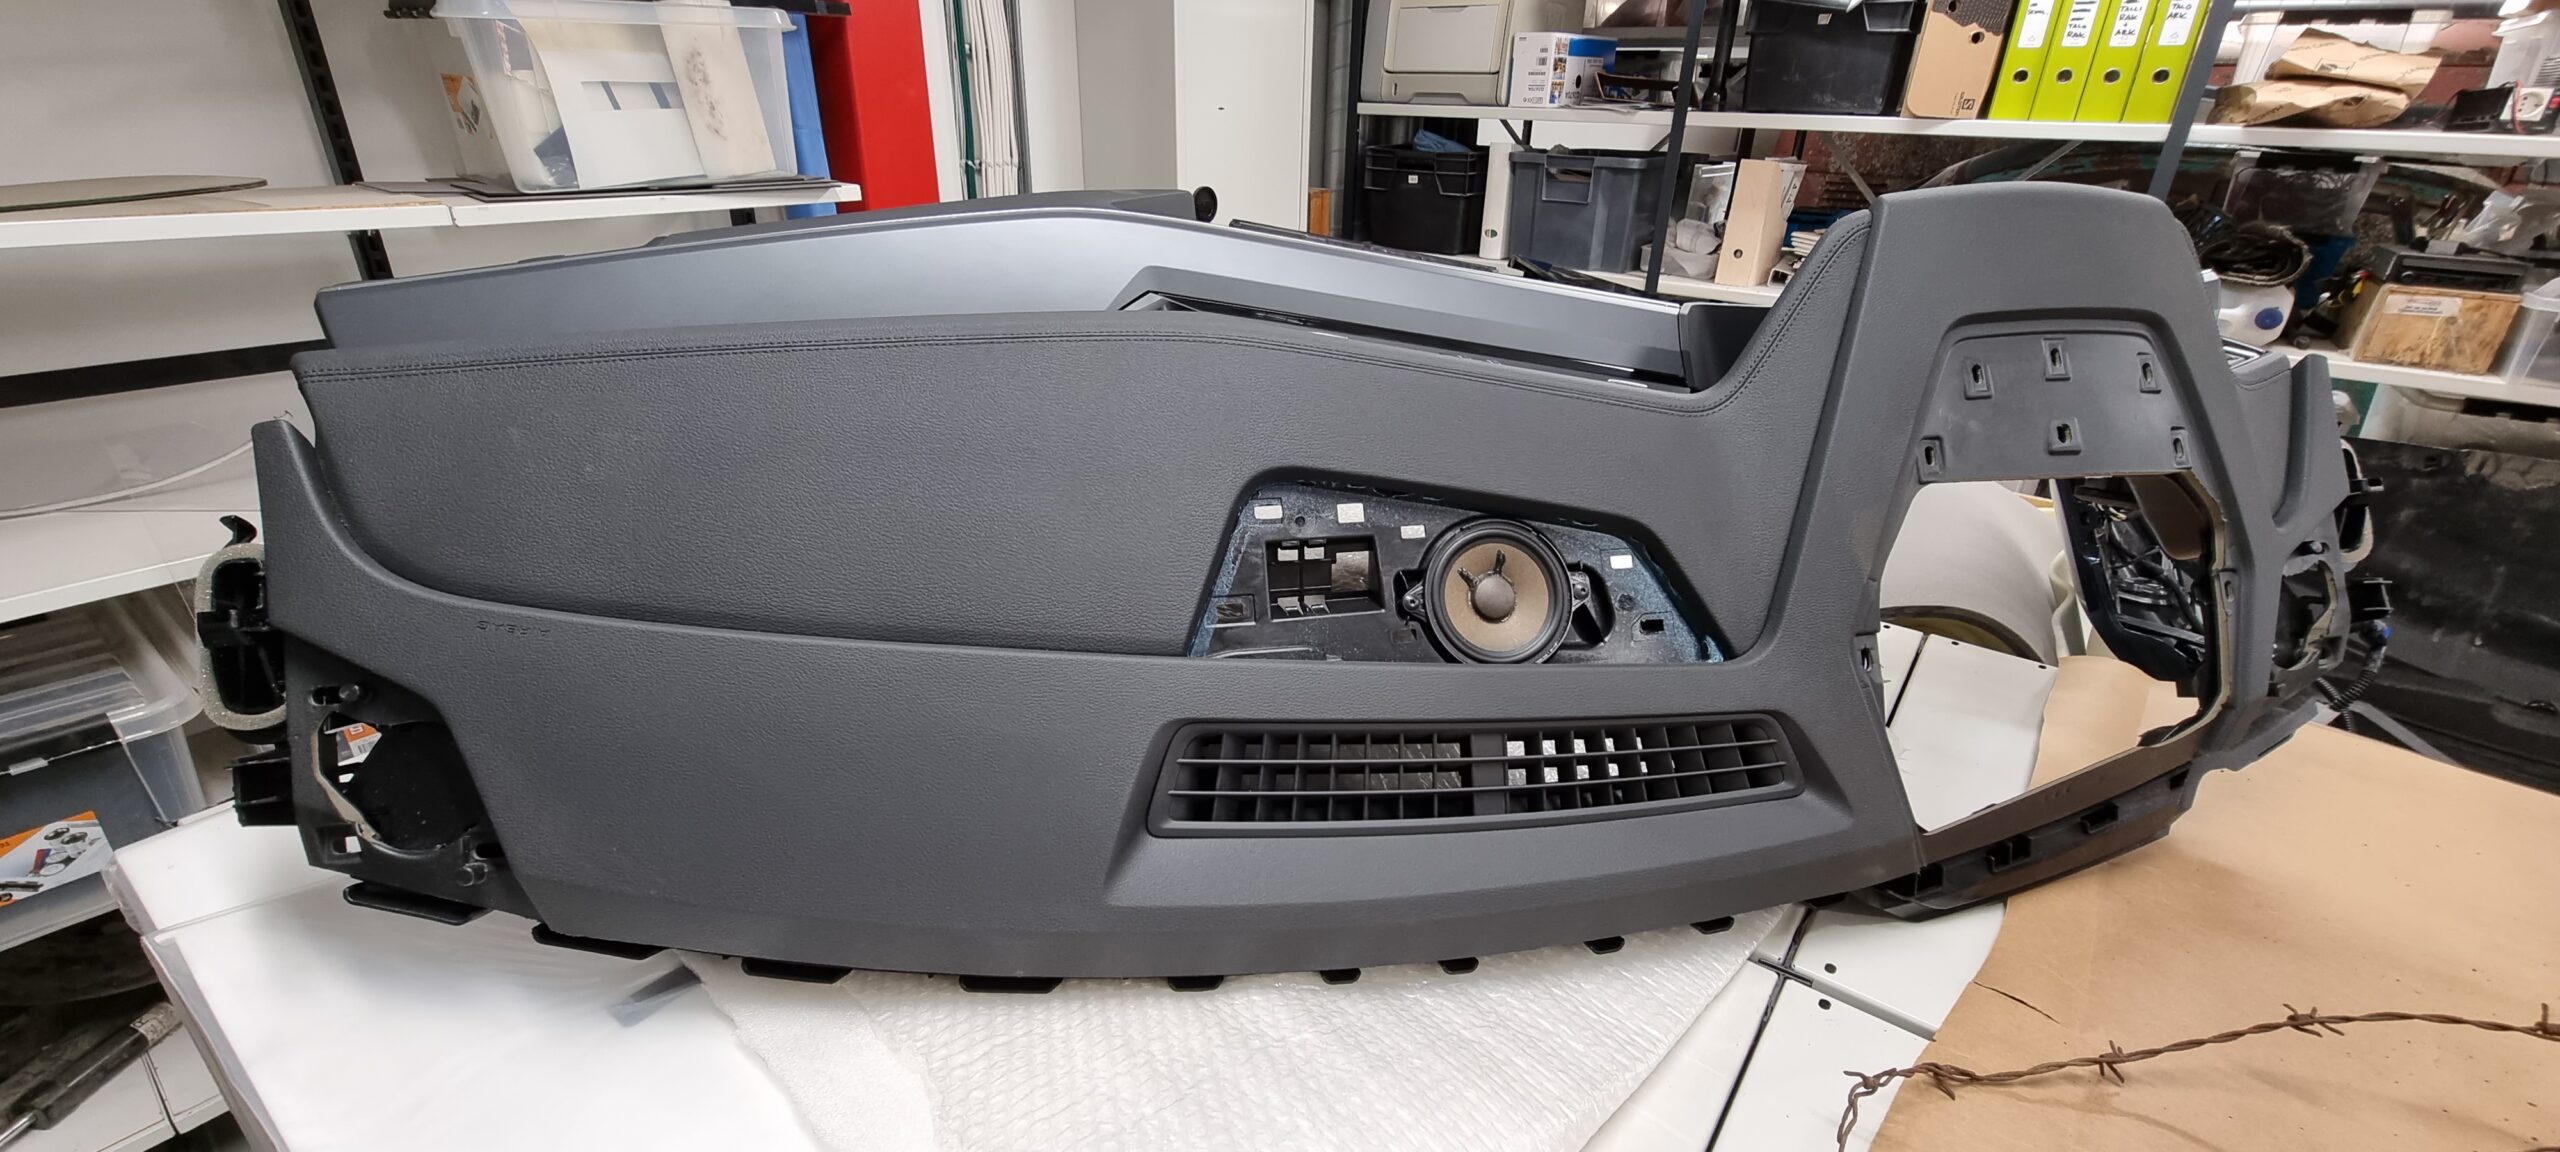
Osaltaan ostopäätökseen vaikutti se, että eBayssä sattui samaan aikaan olemaan myynnissä täydellinen keulapaketti puretusta autosta ja vielä saman värinen. Jahka e-tronin vaurioita oli tutkittu sen verran, että päätettiin pitää auto, laitettiin keulapaketti Saksasta välittömästi tilaukseen.

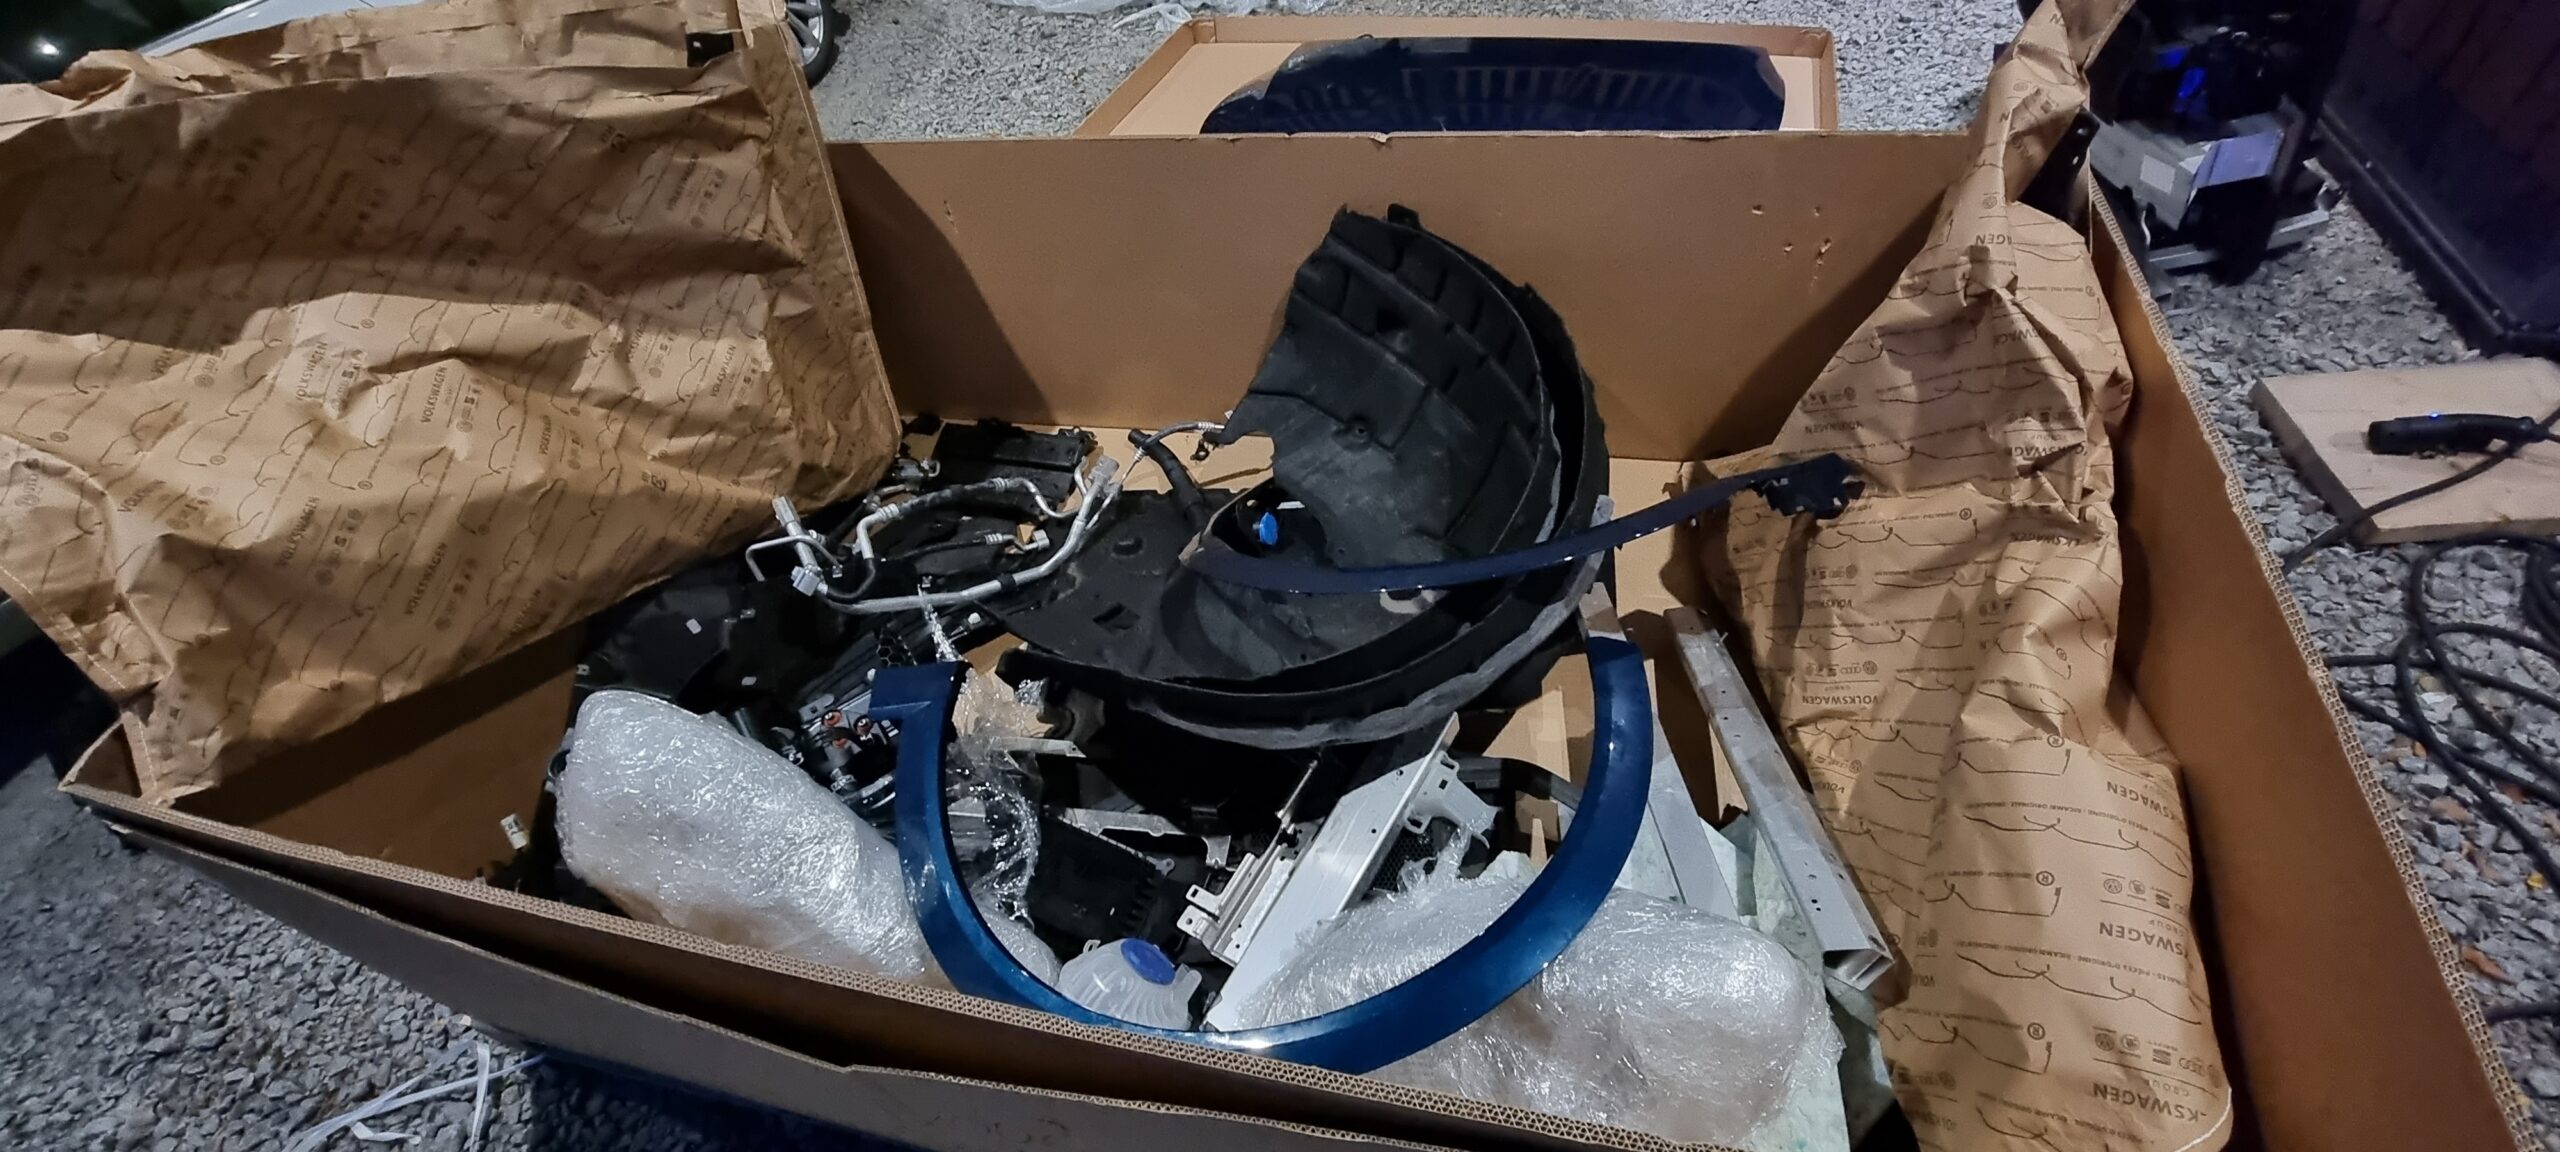
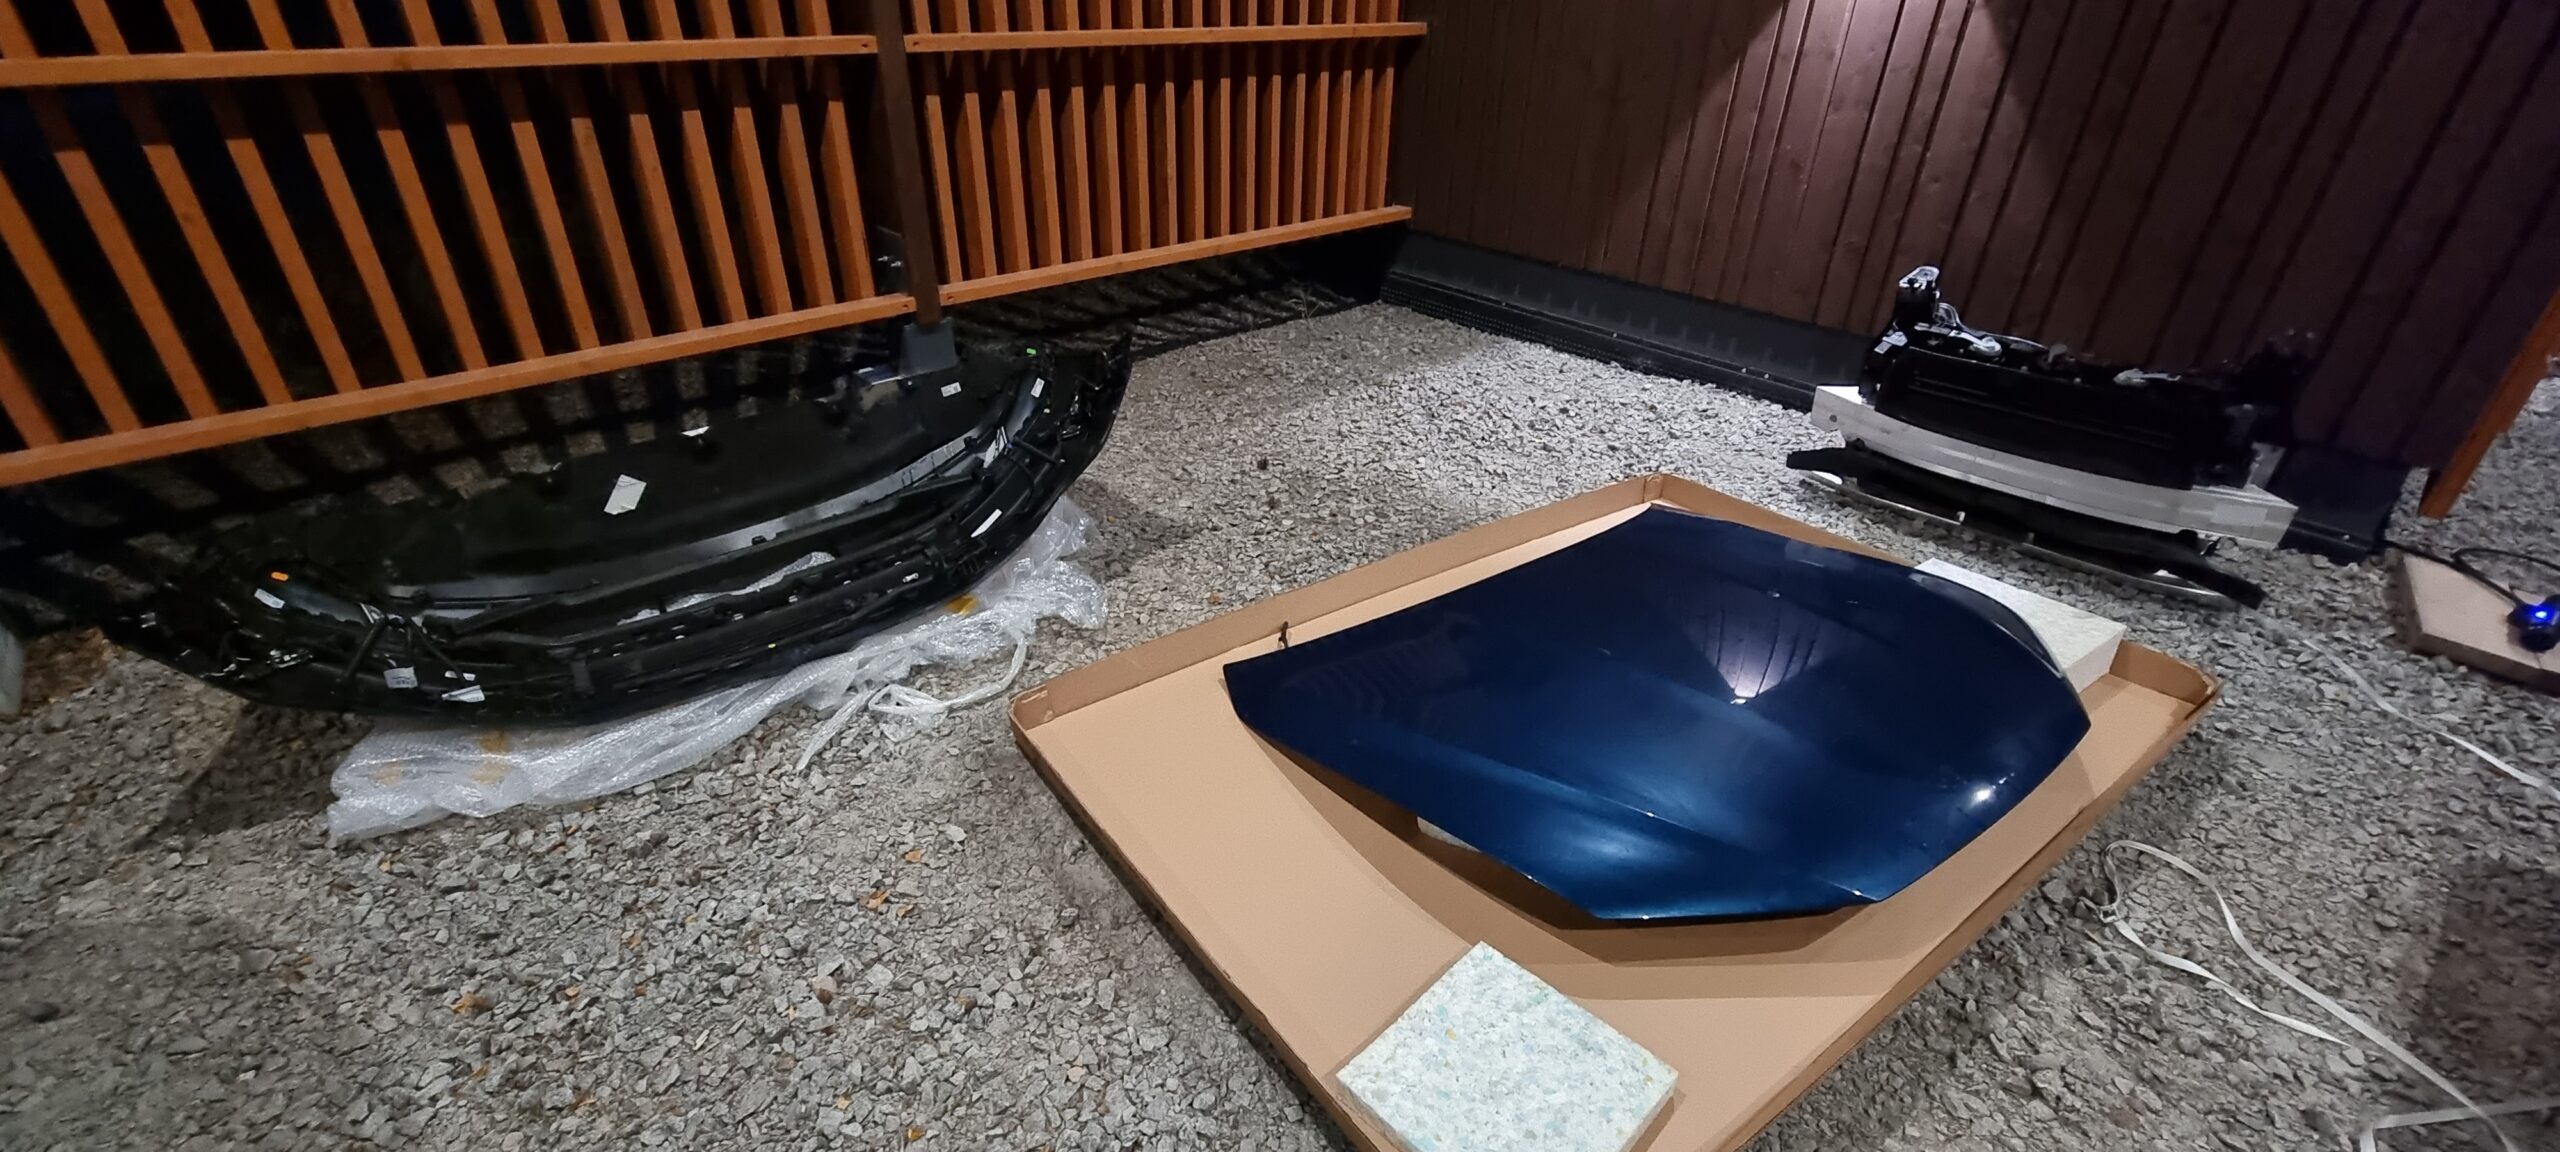
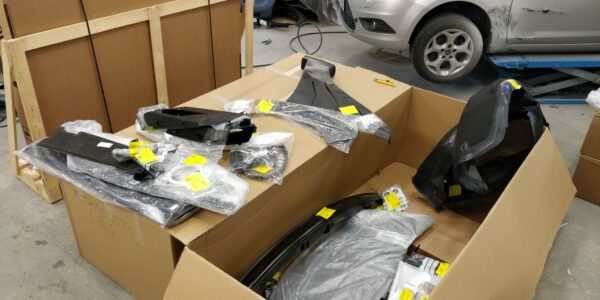
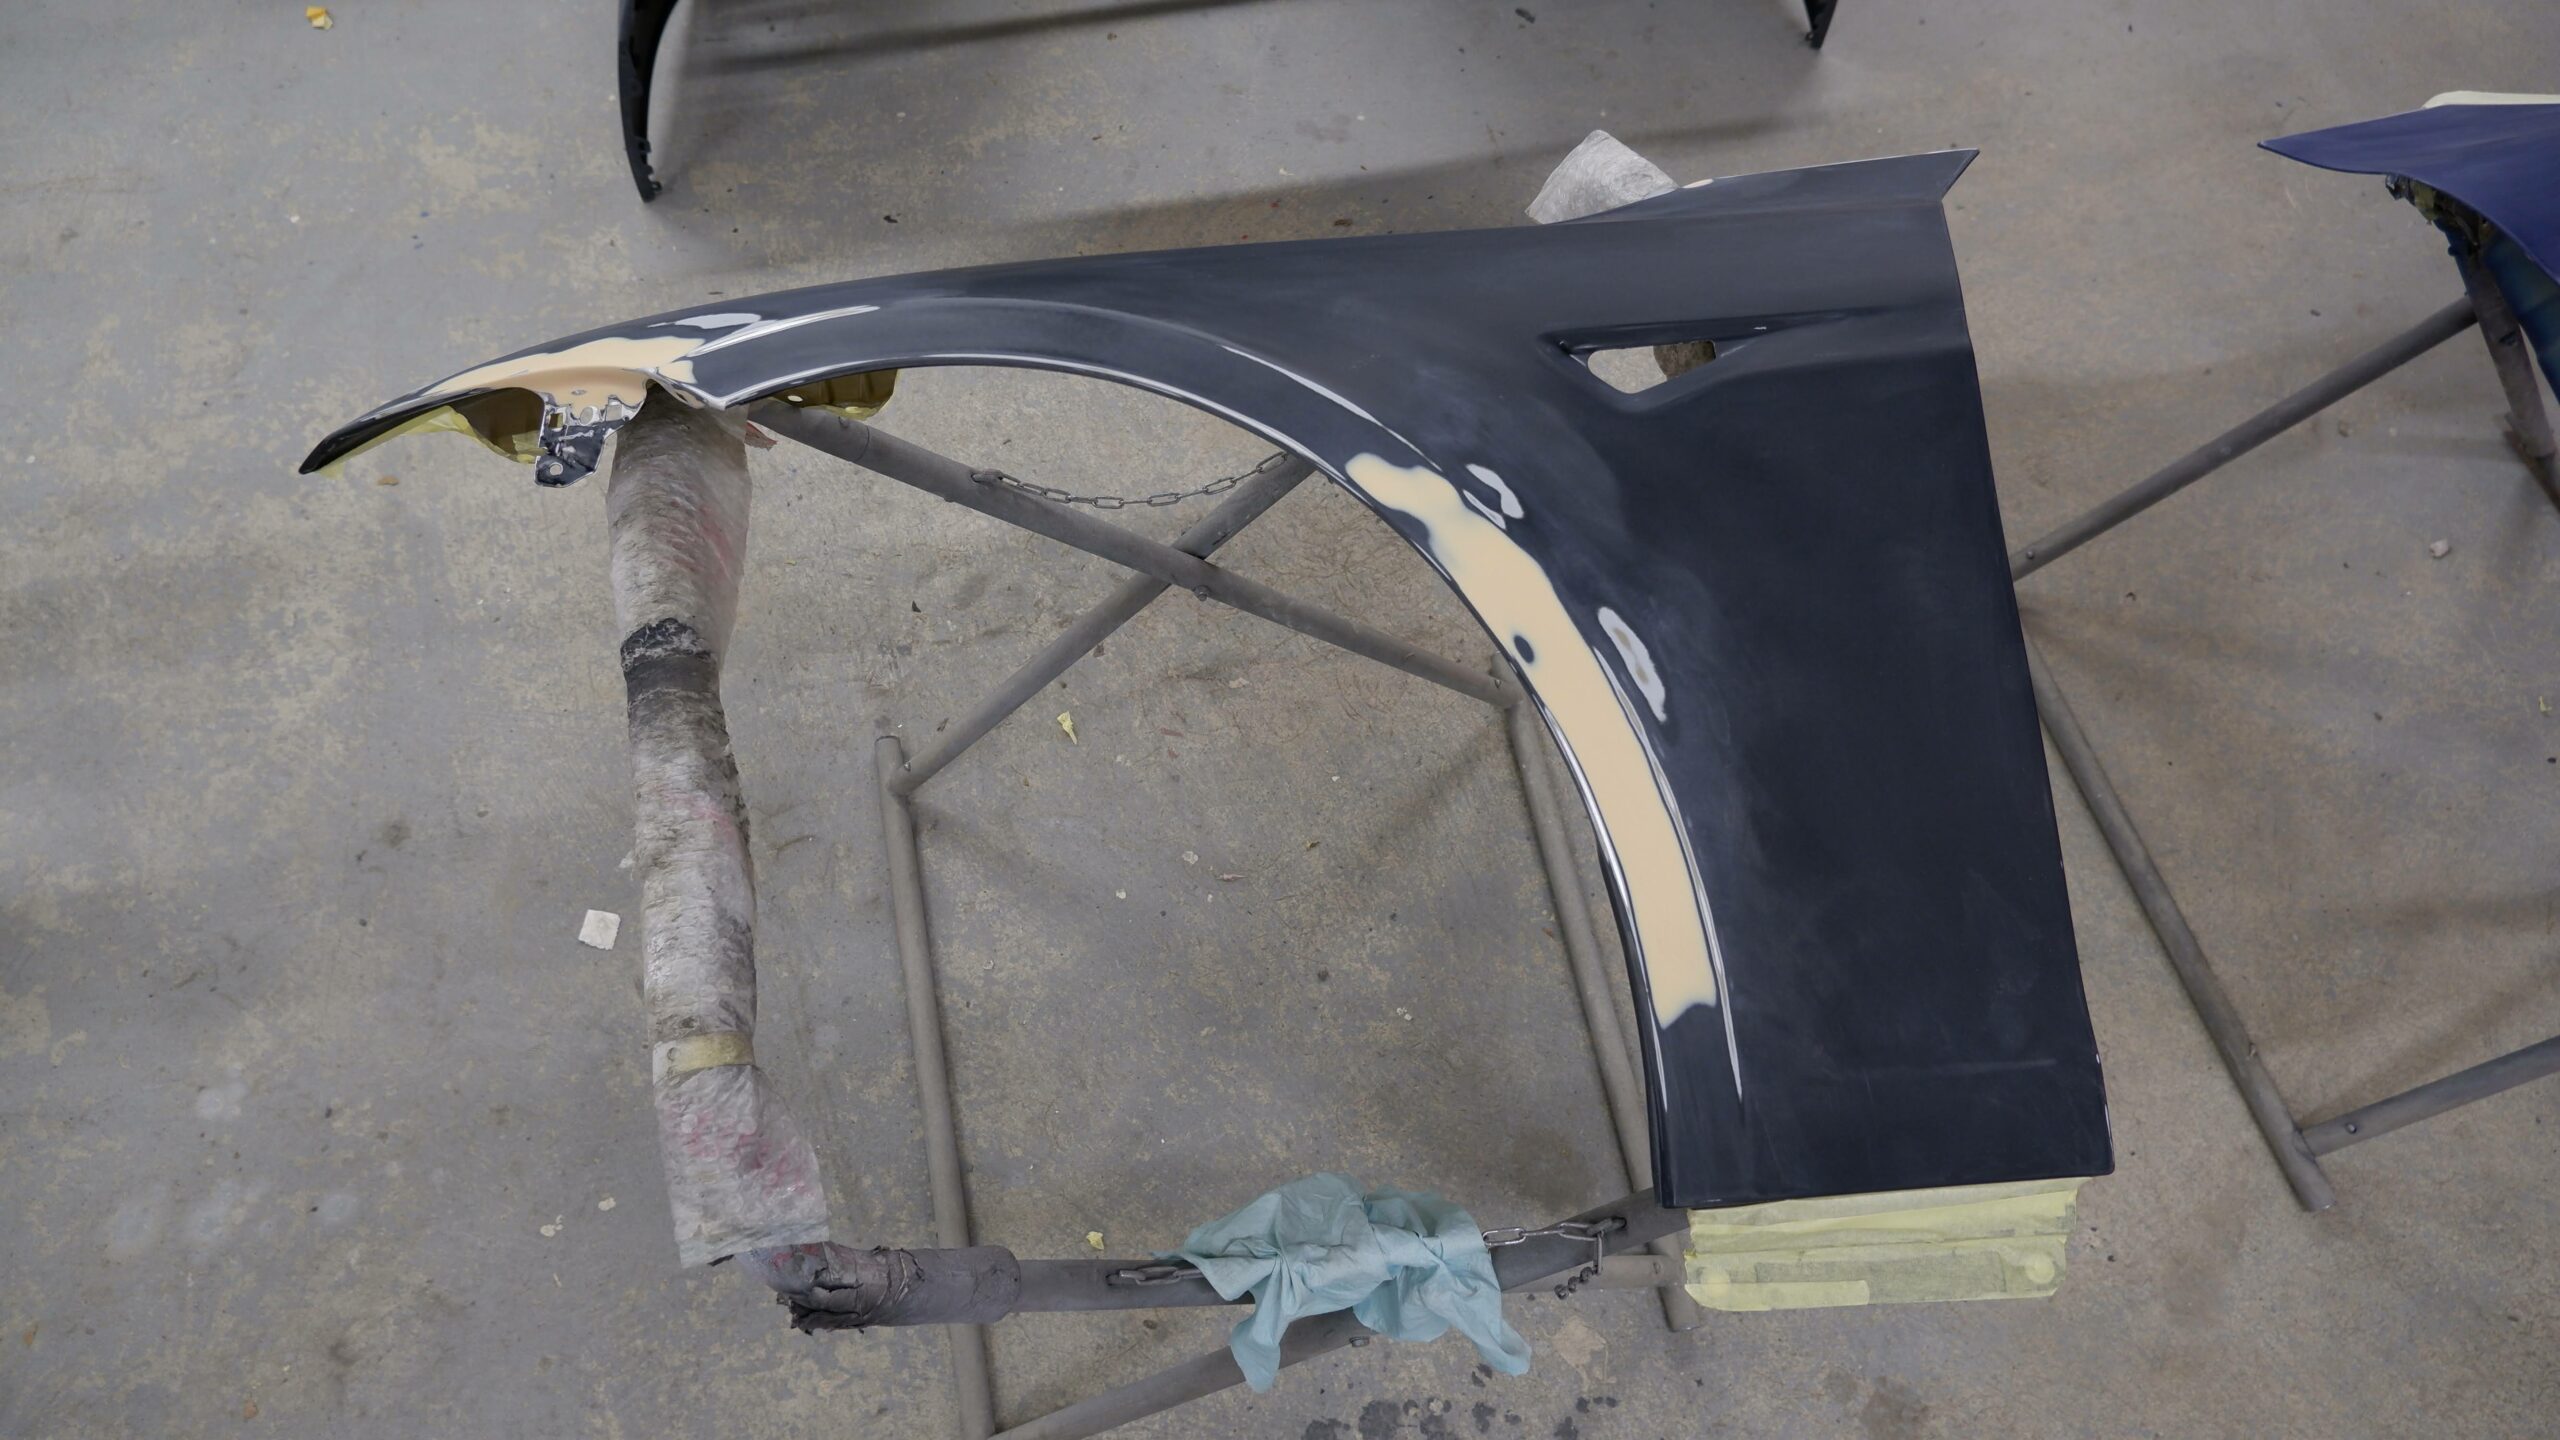
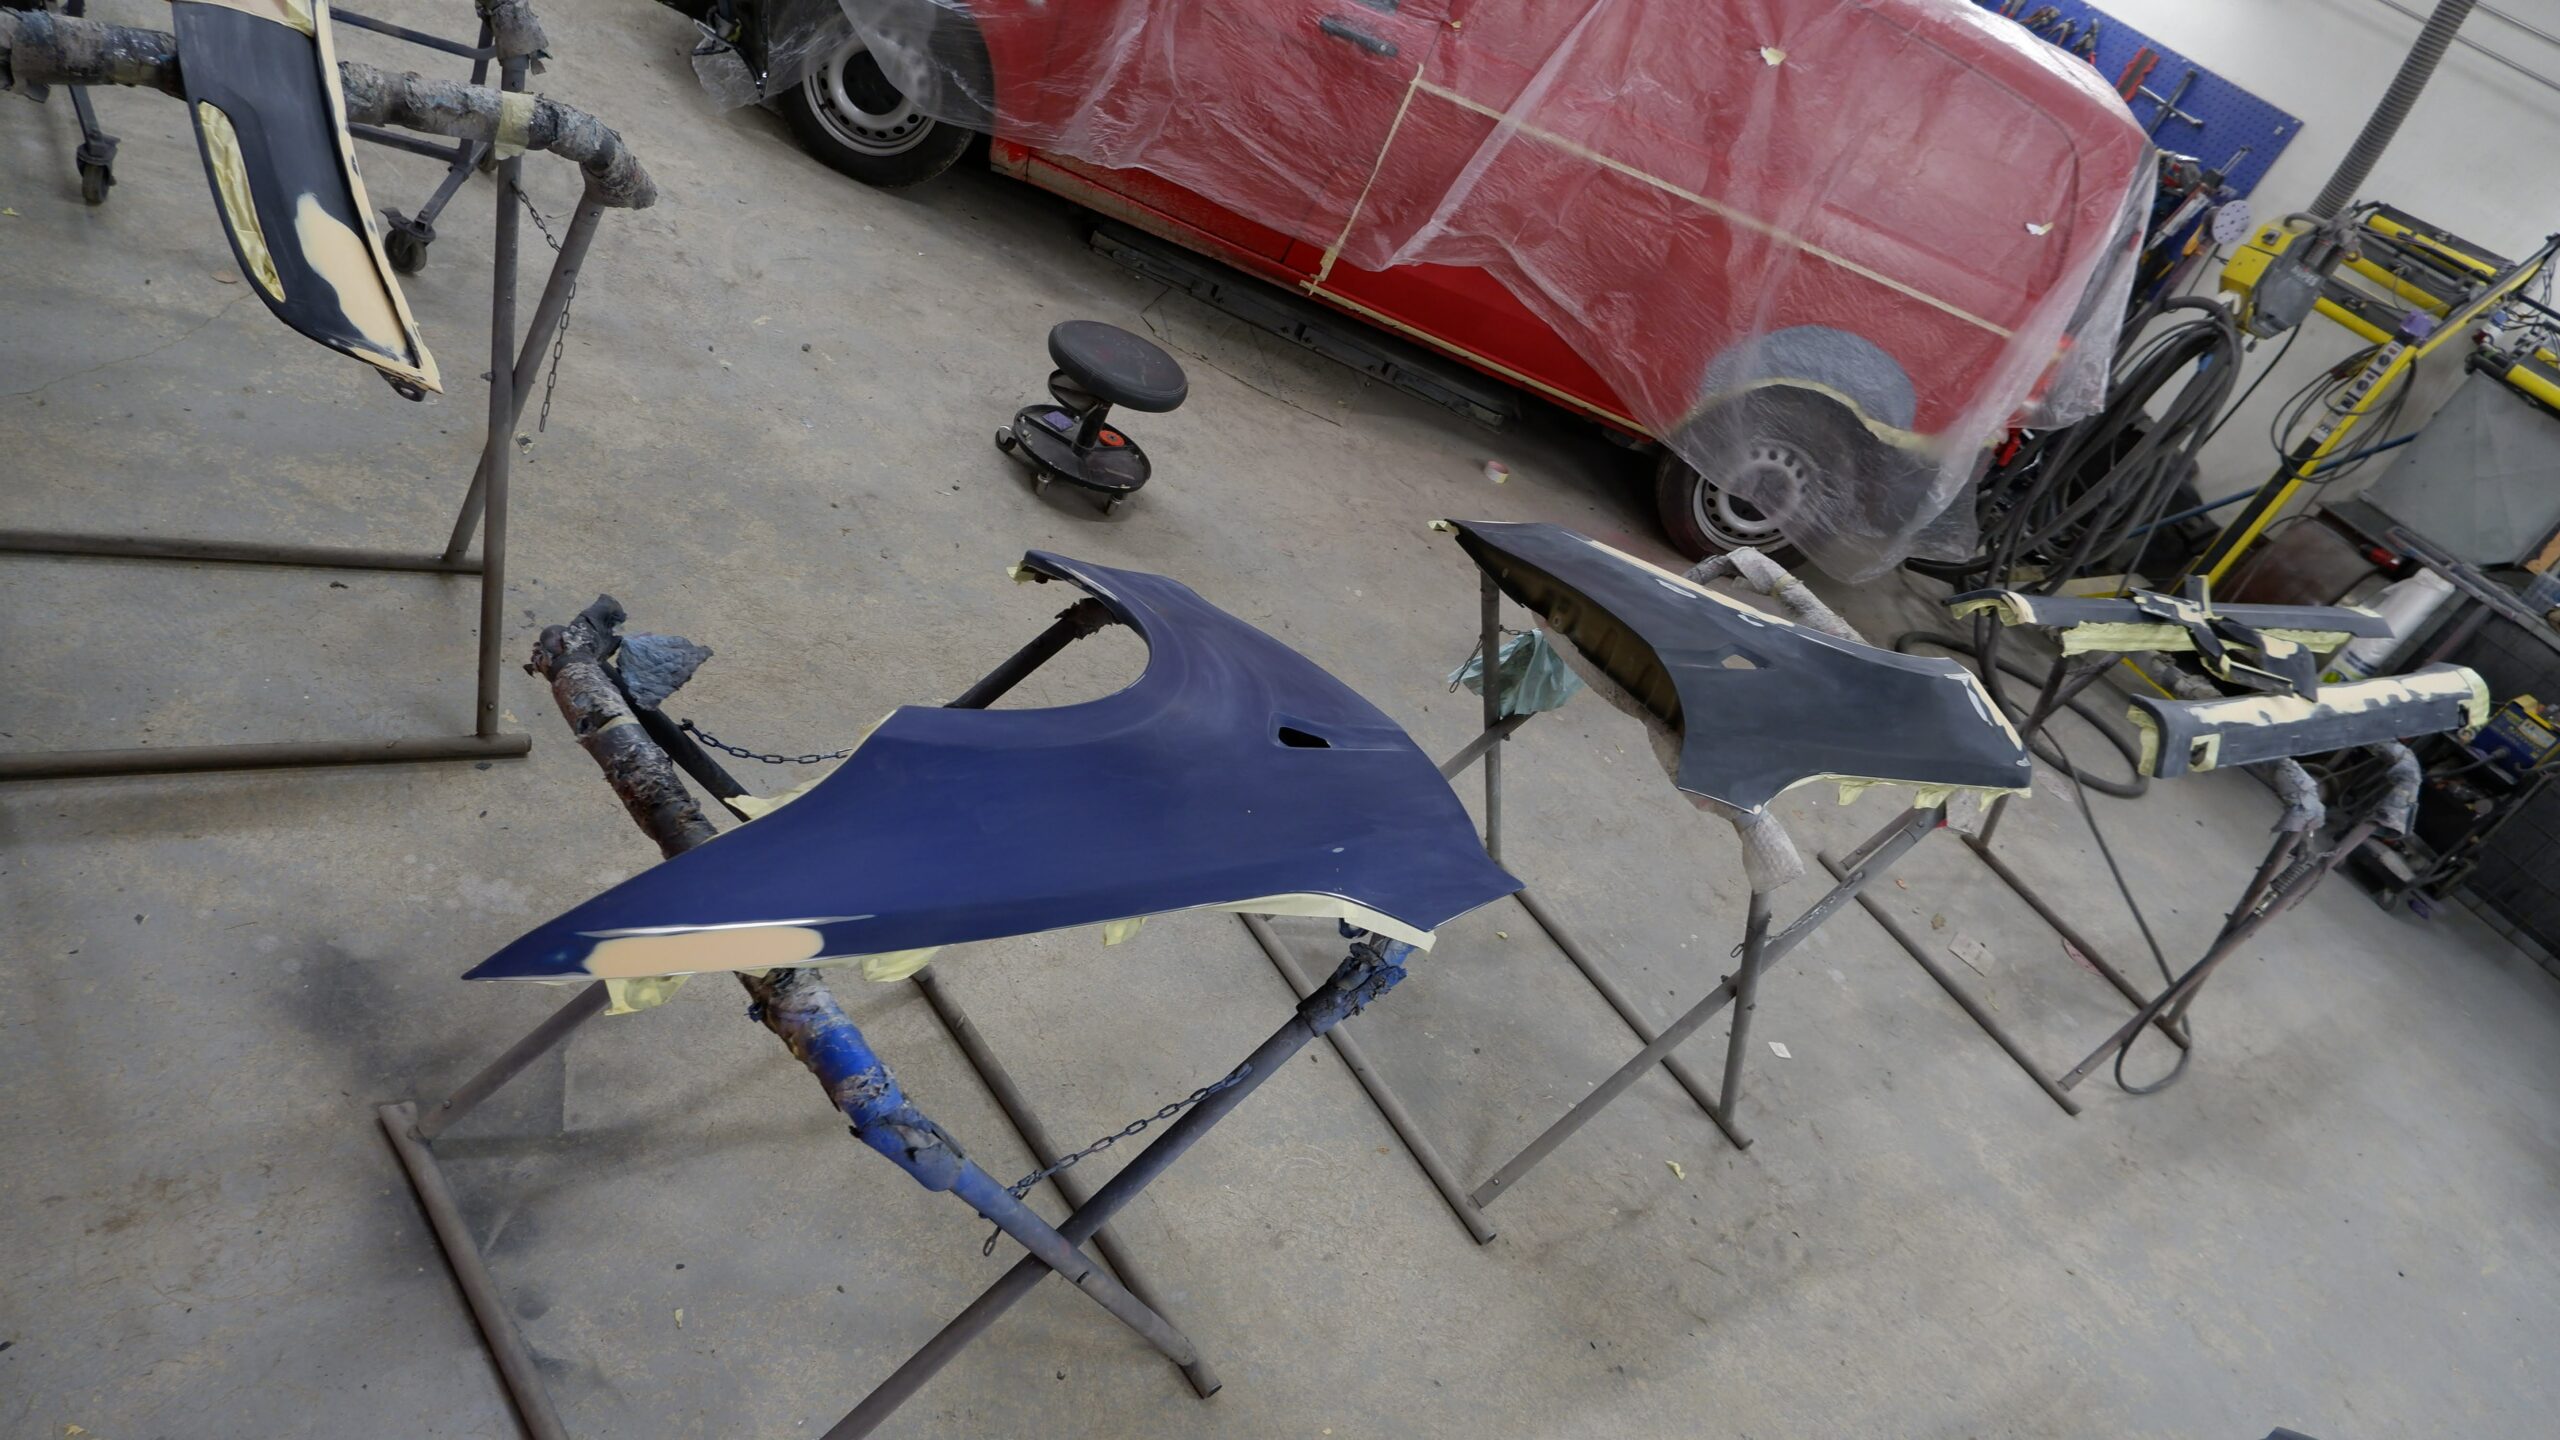
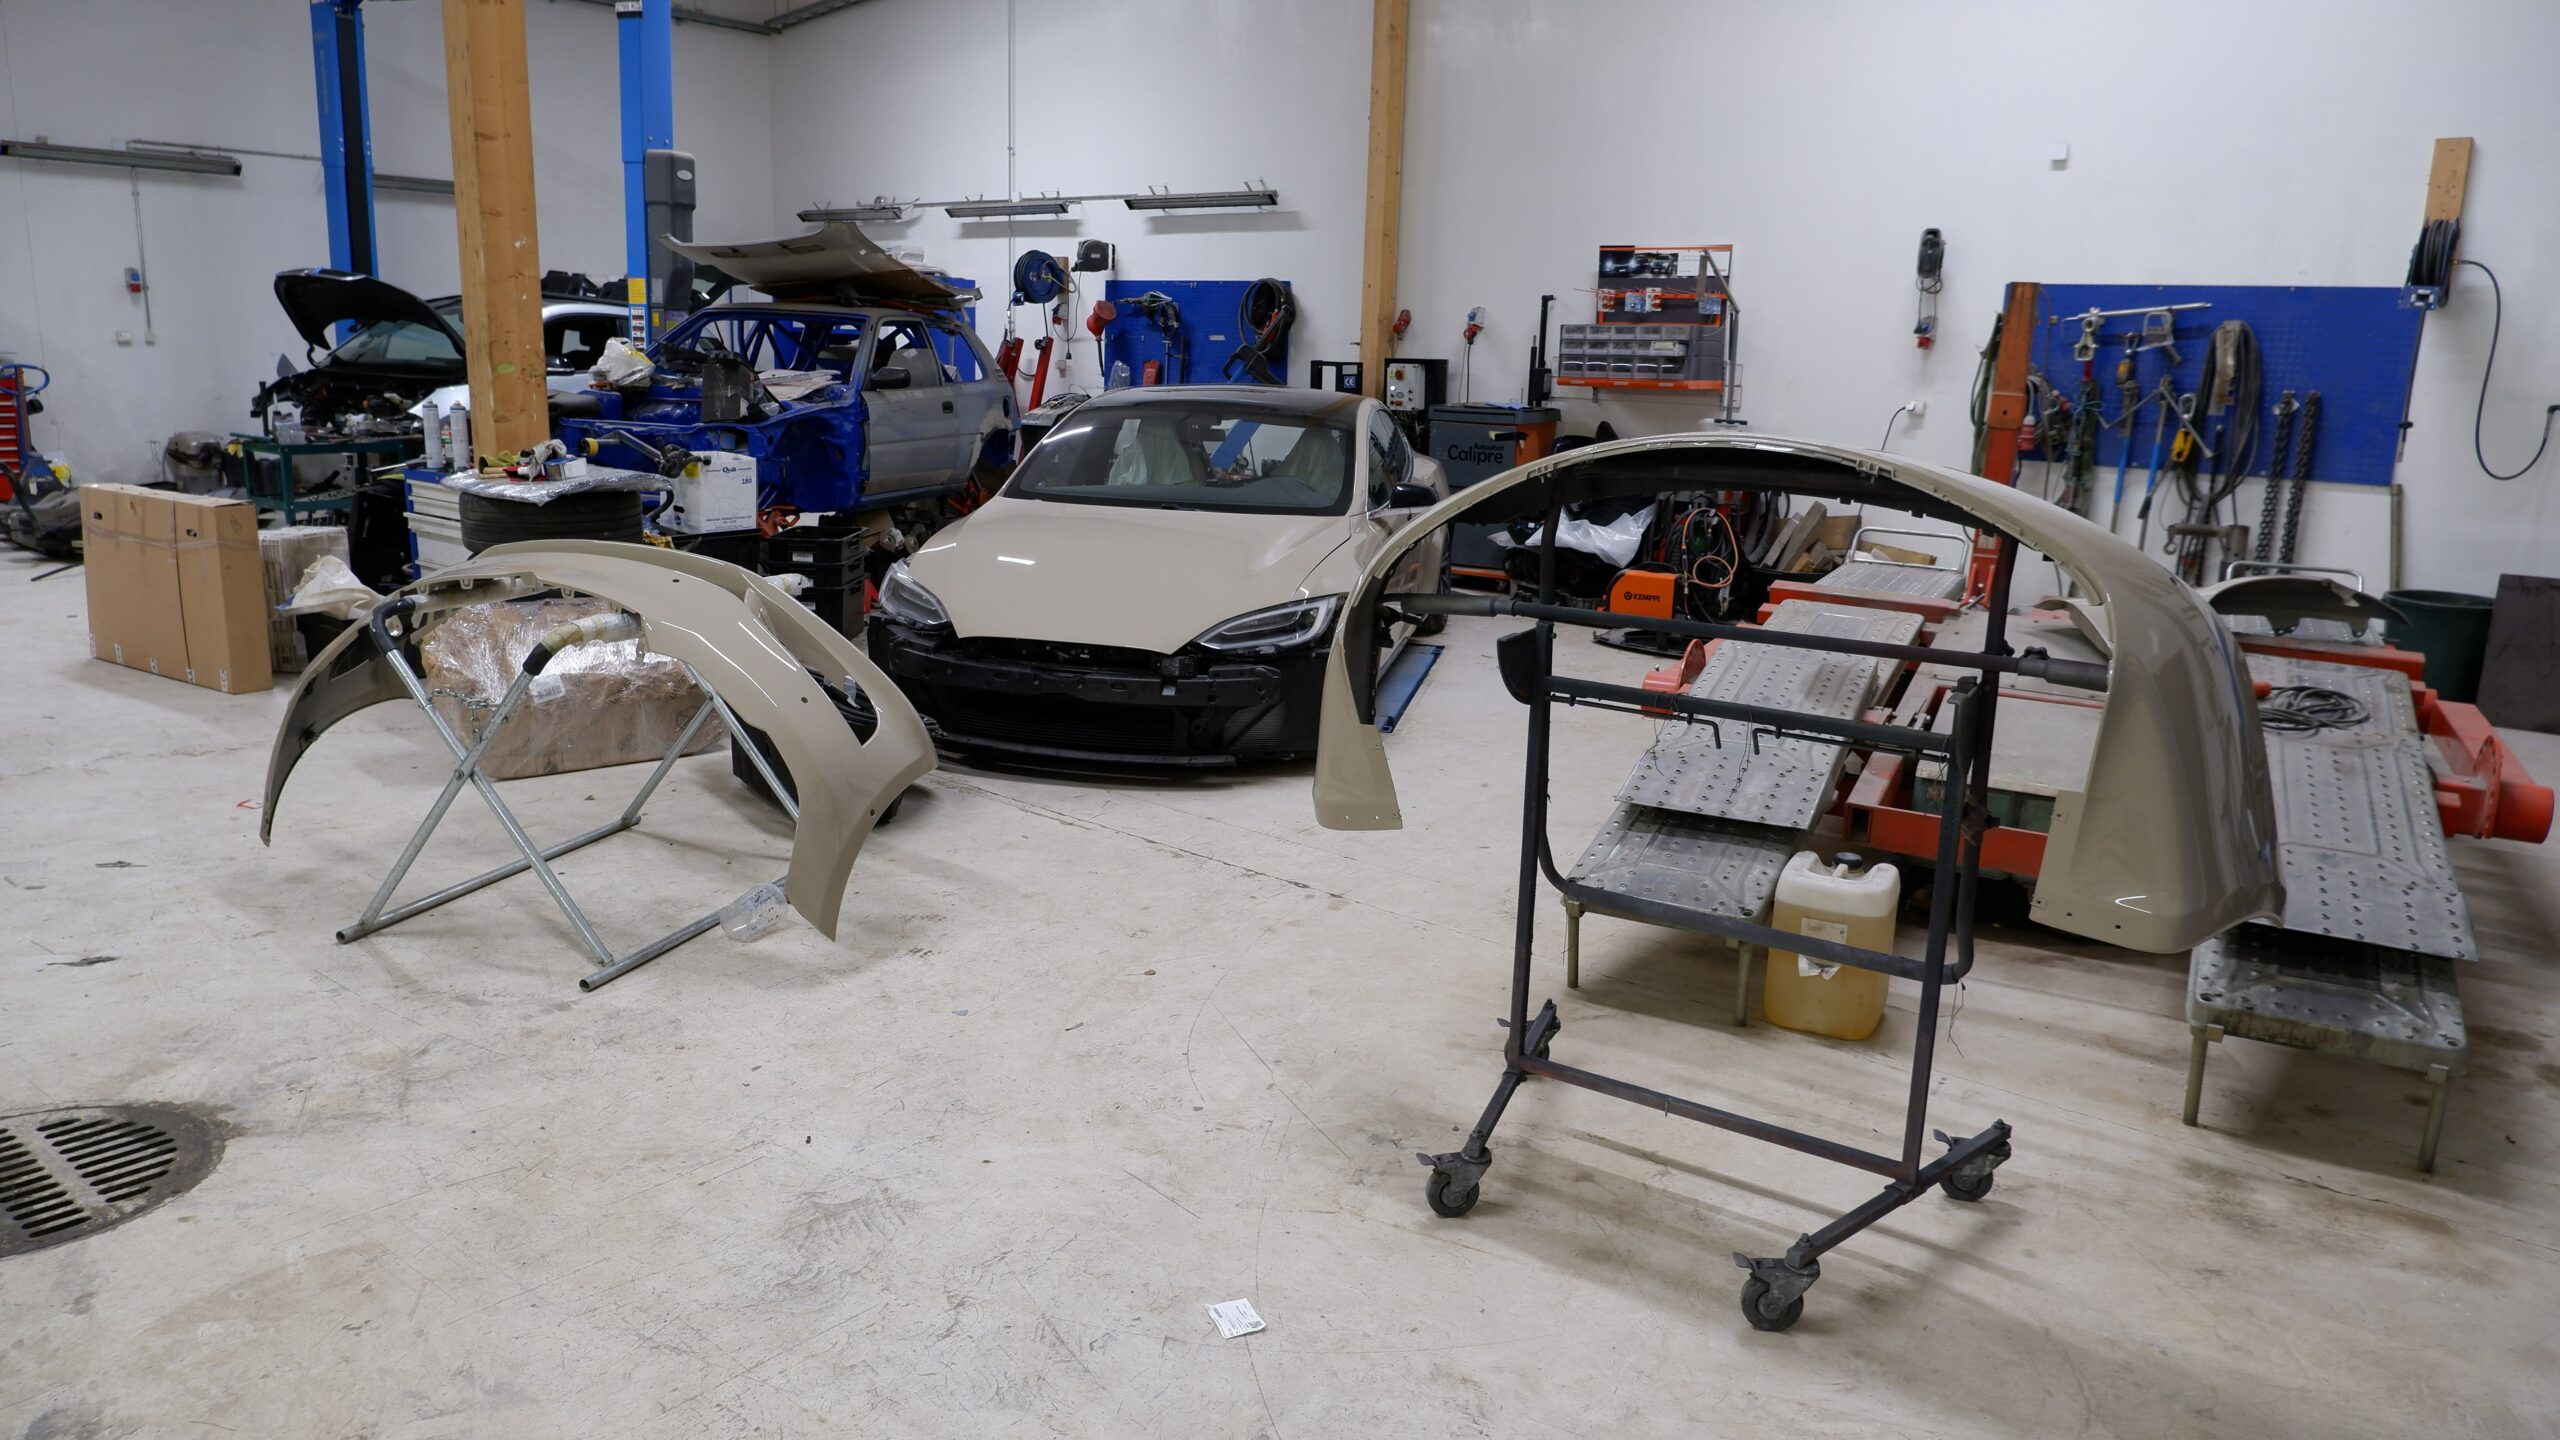
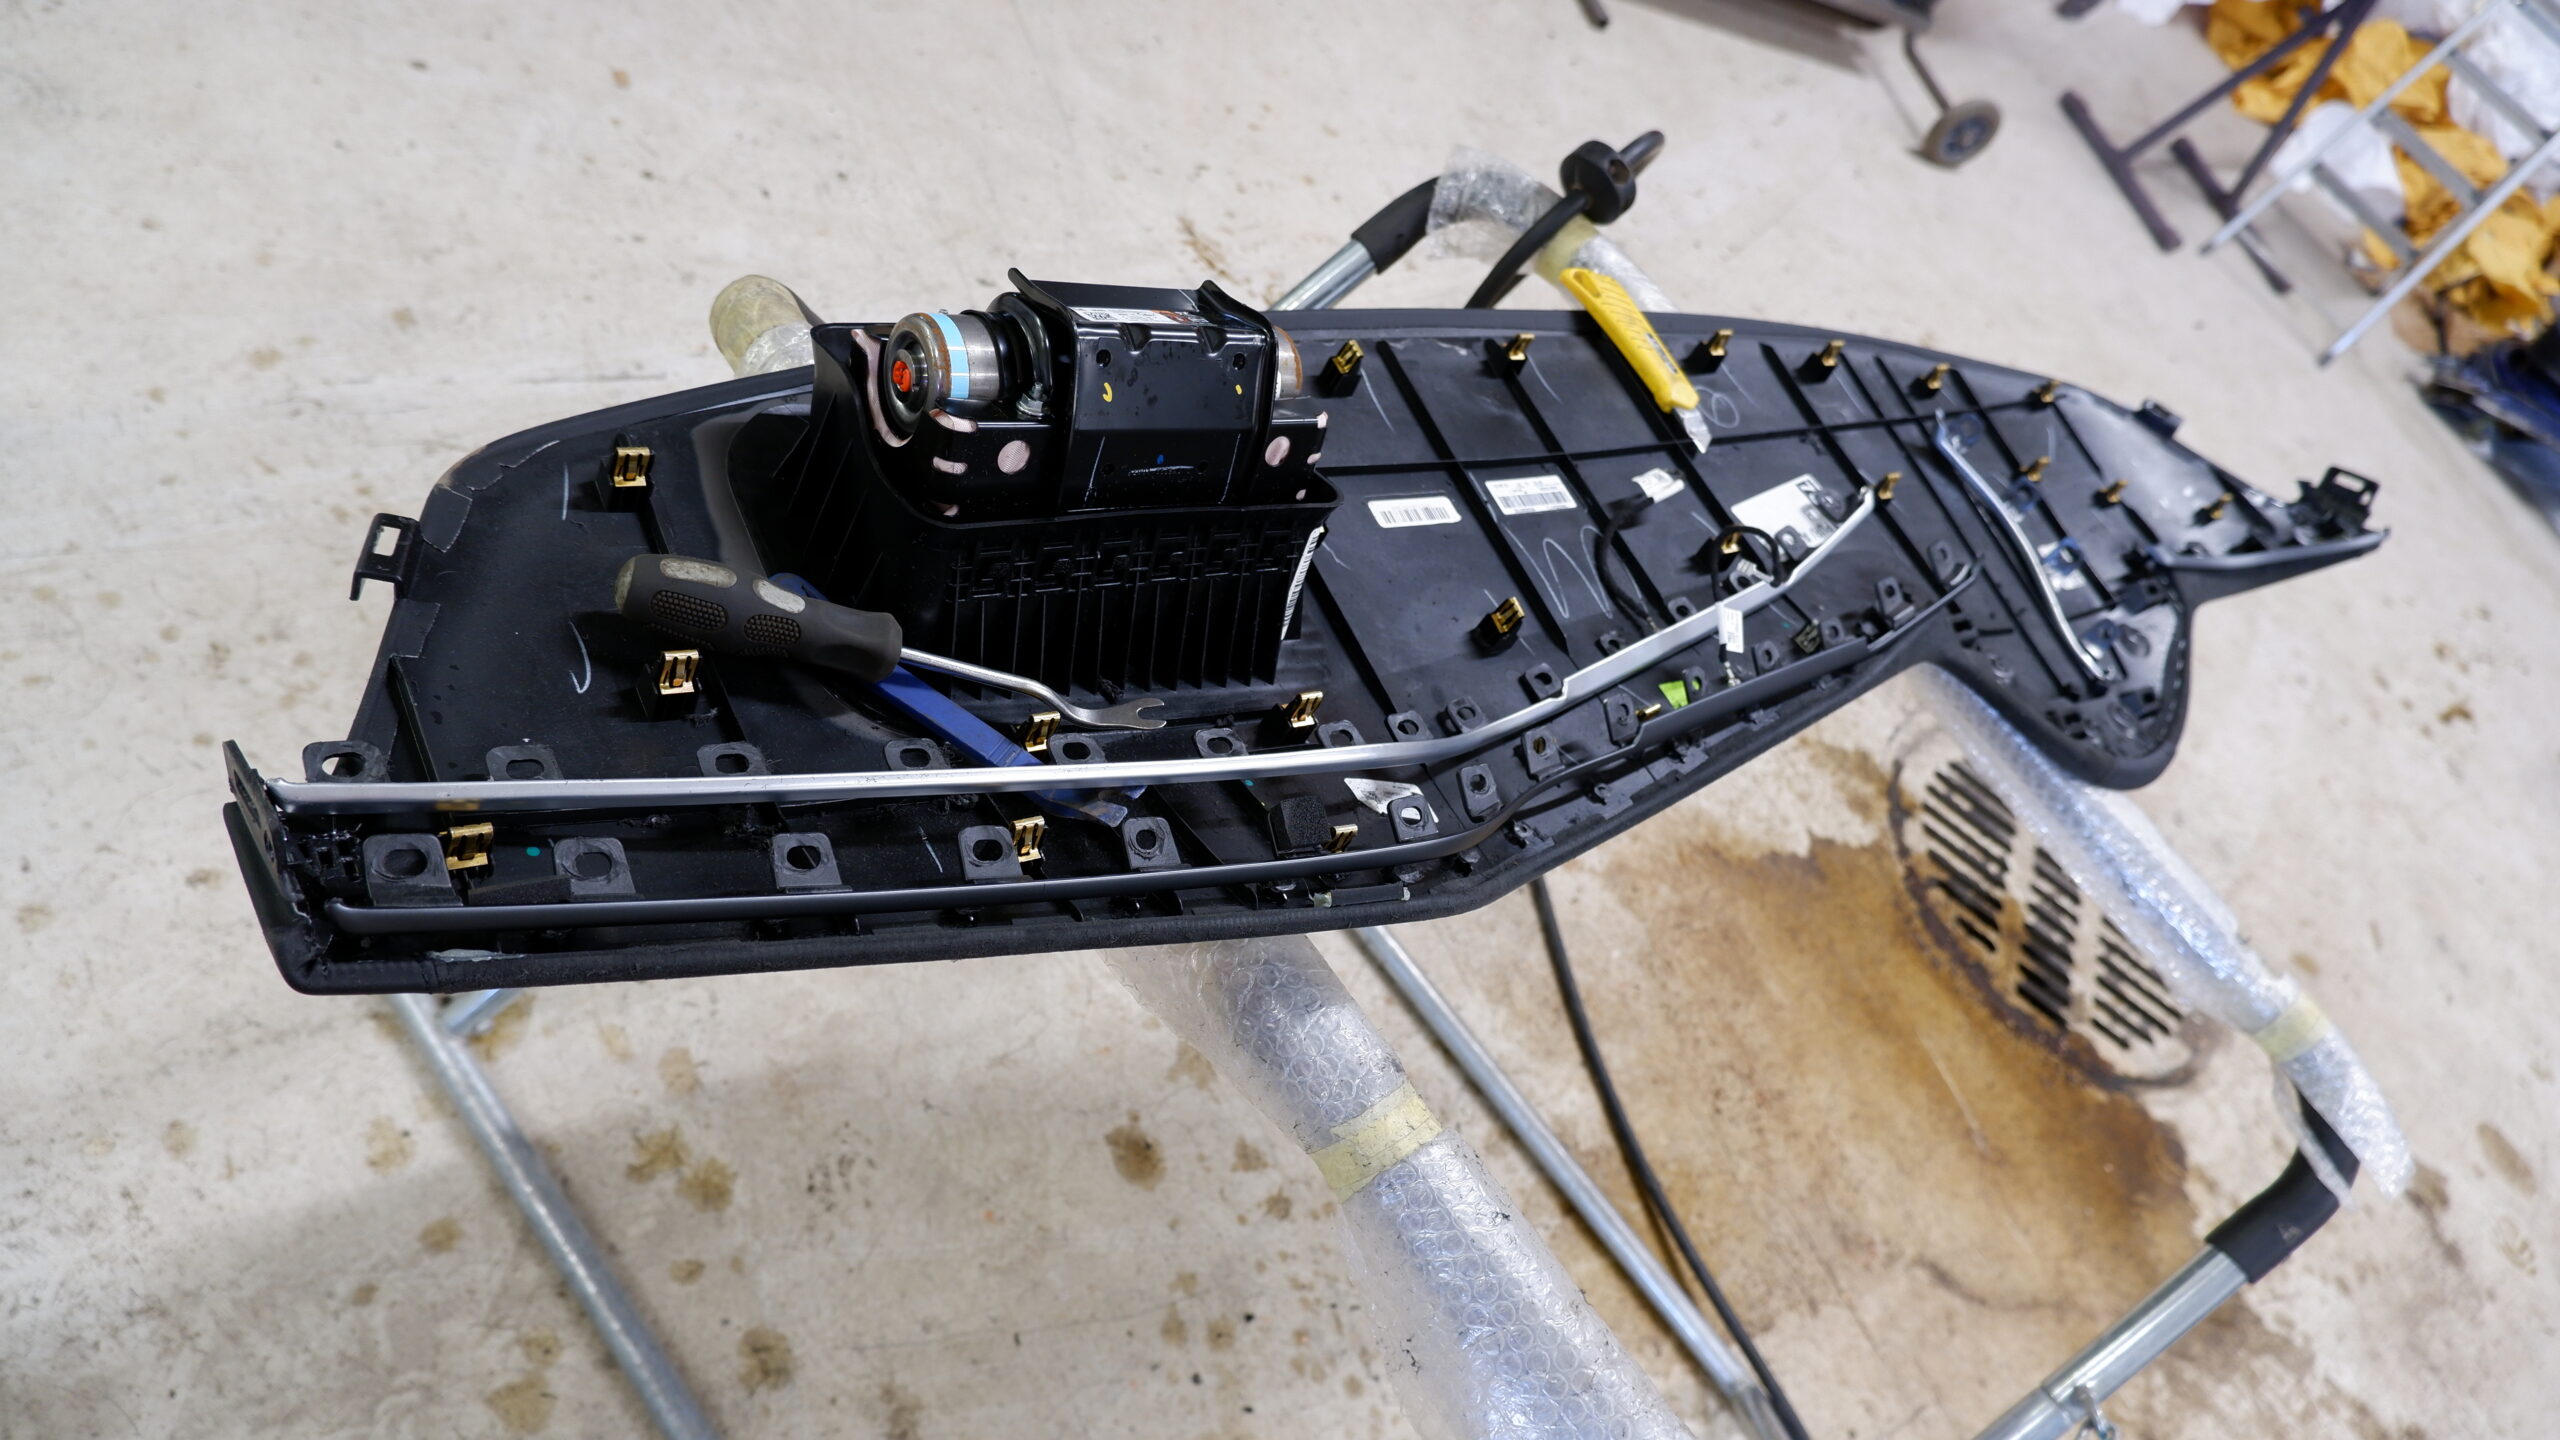
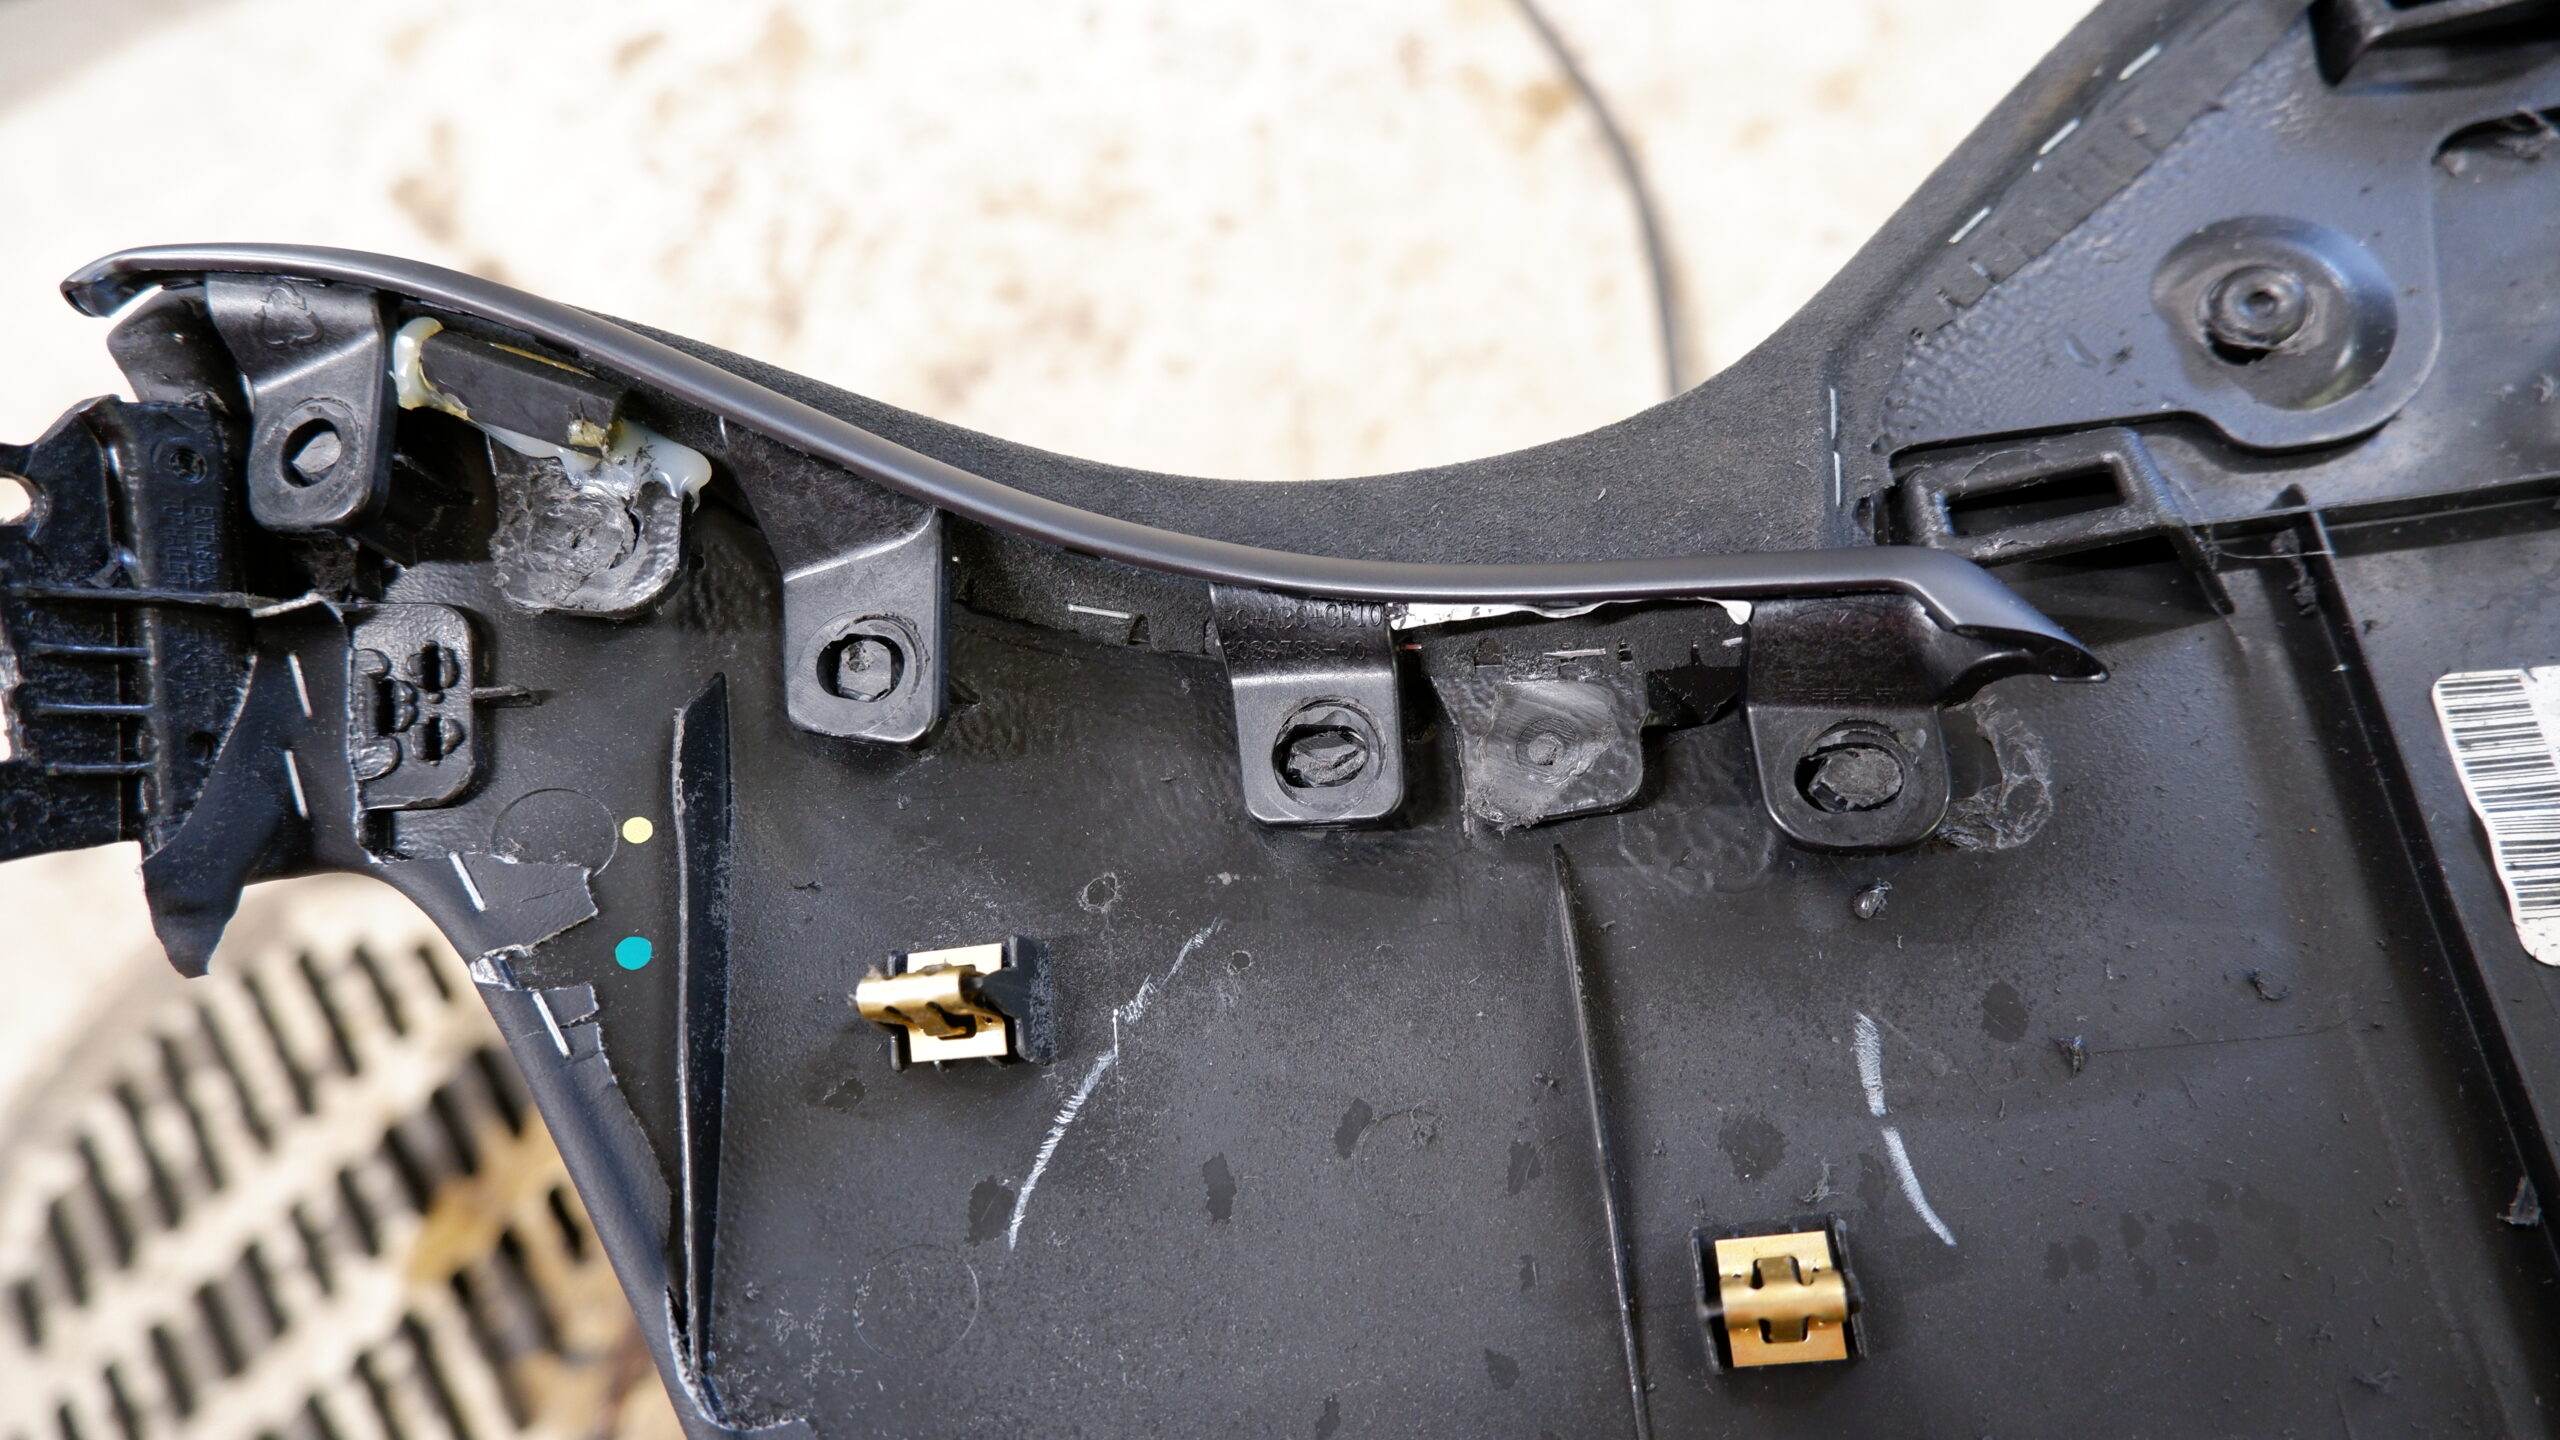
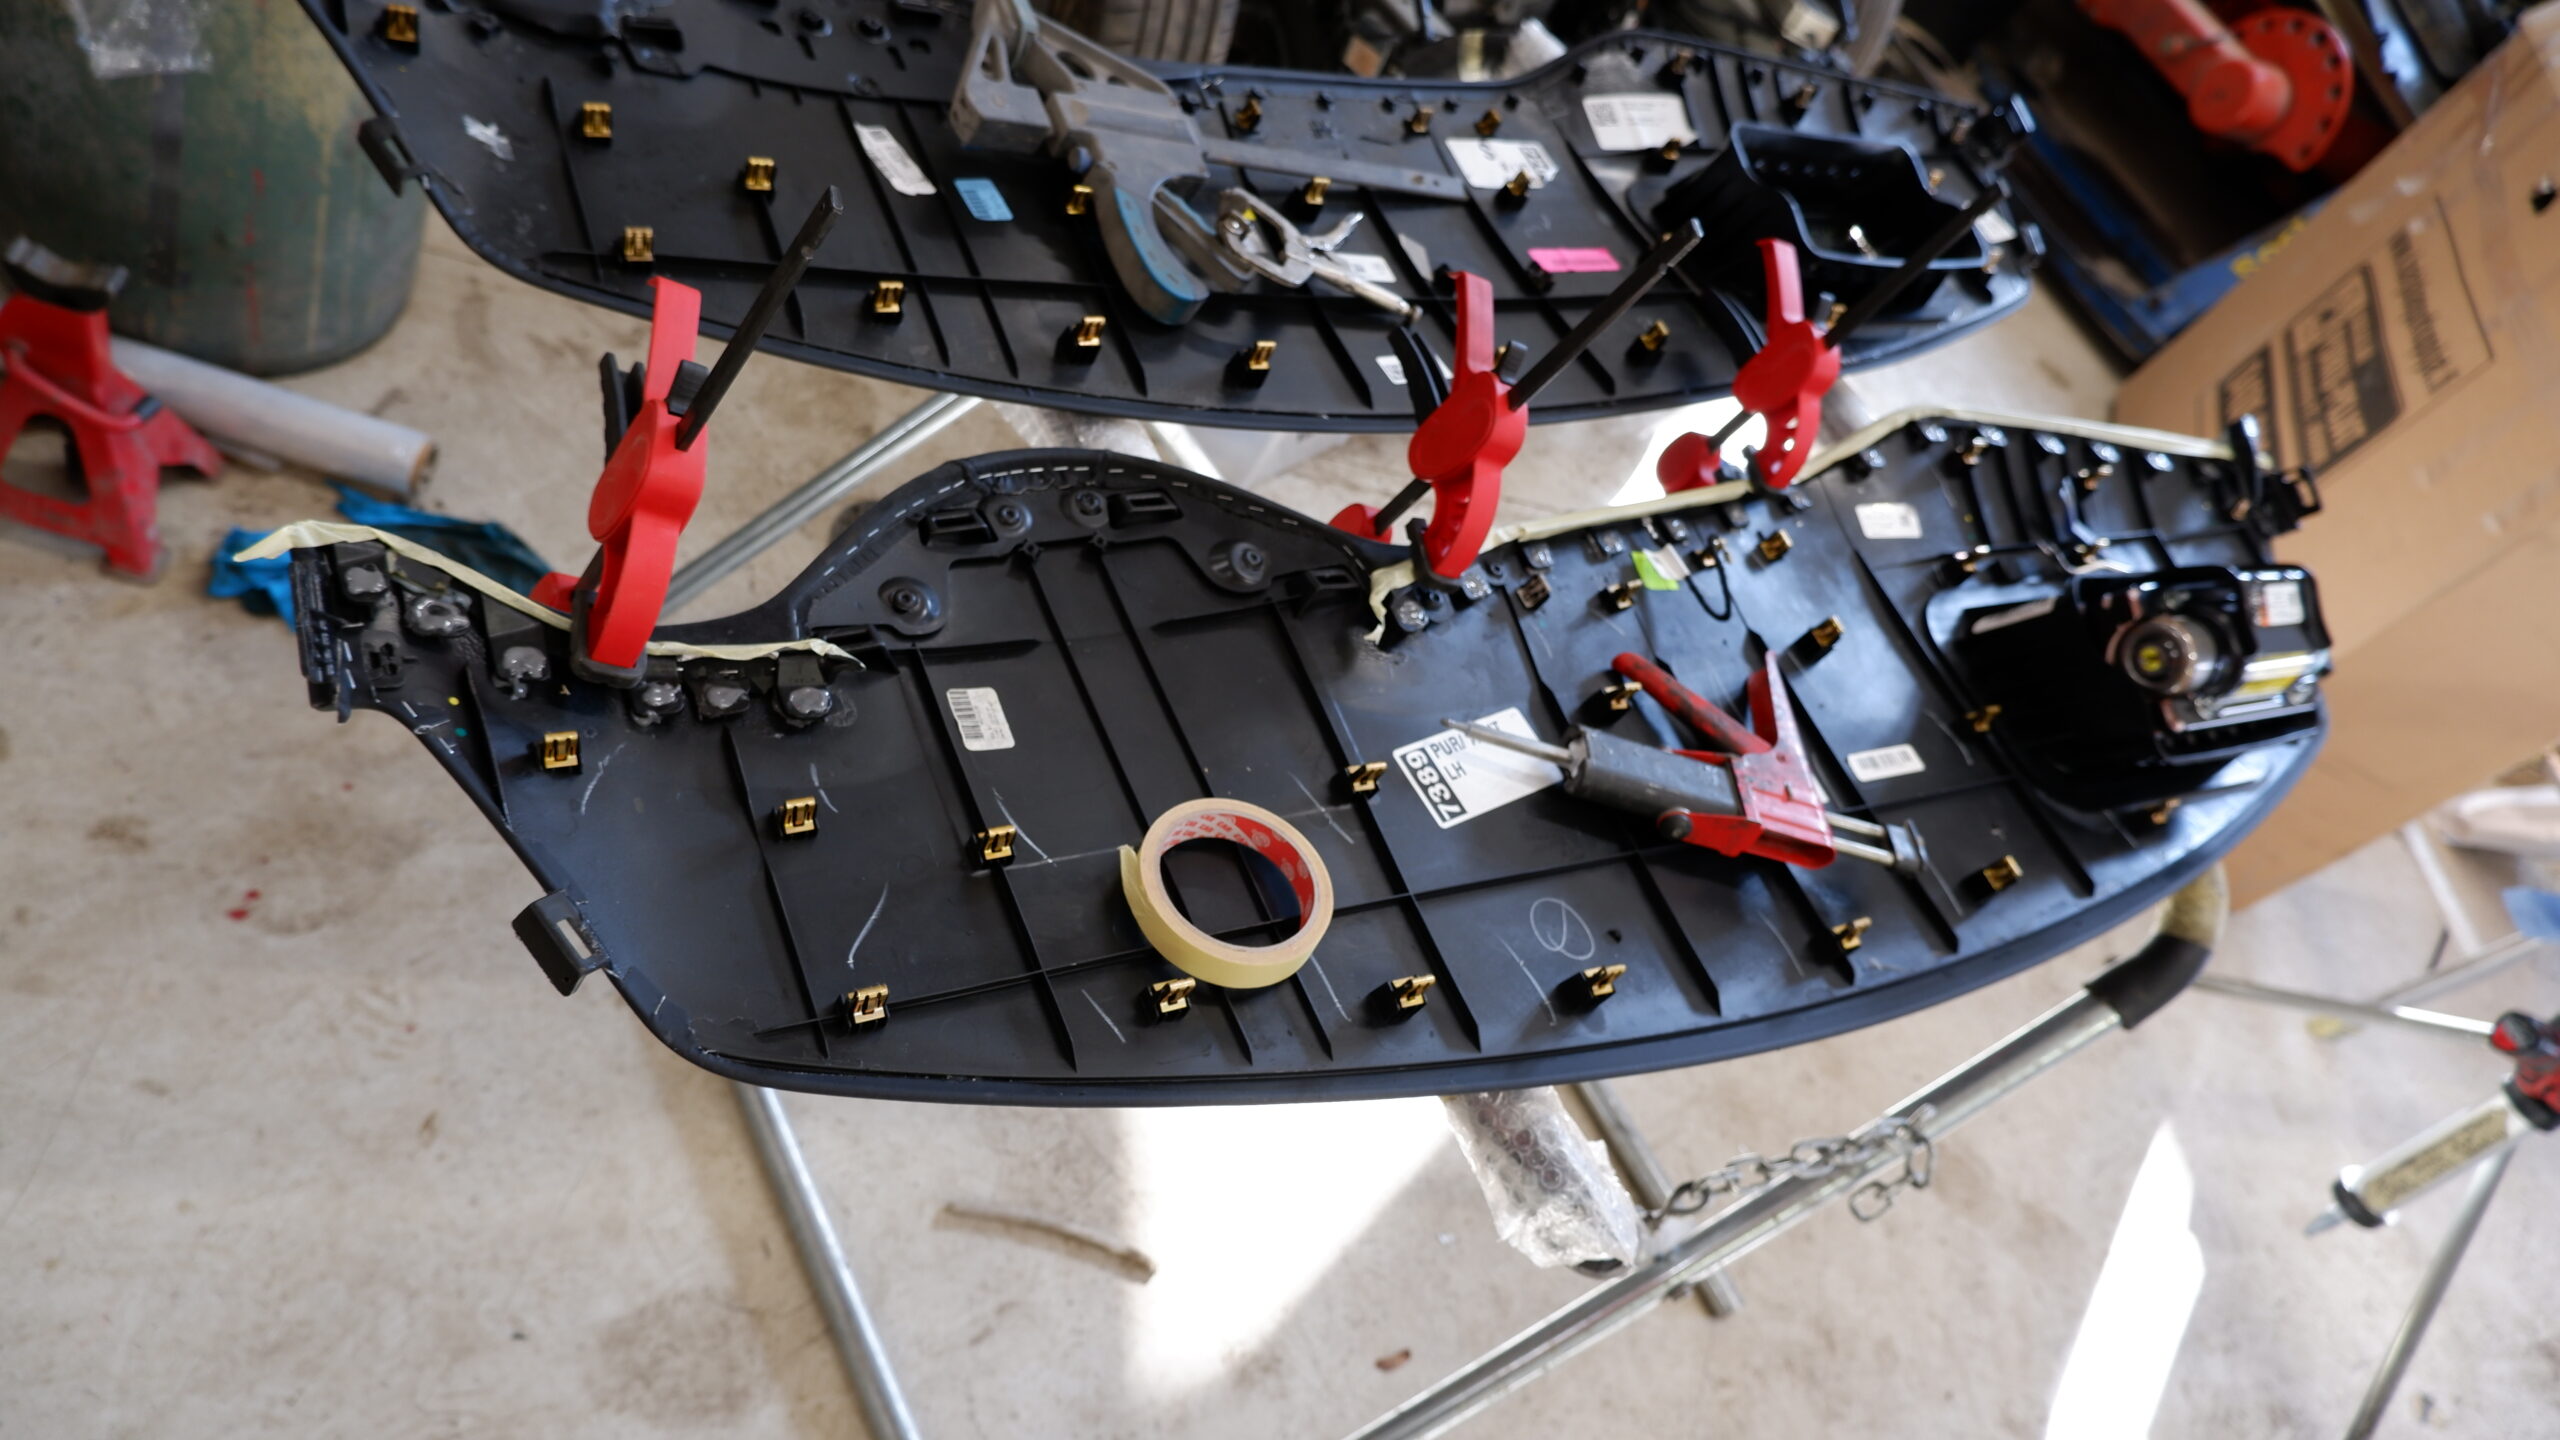
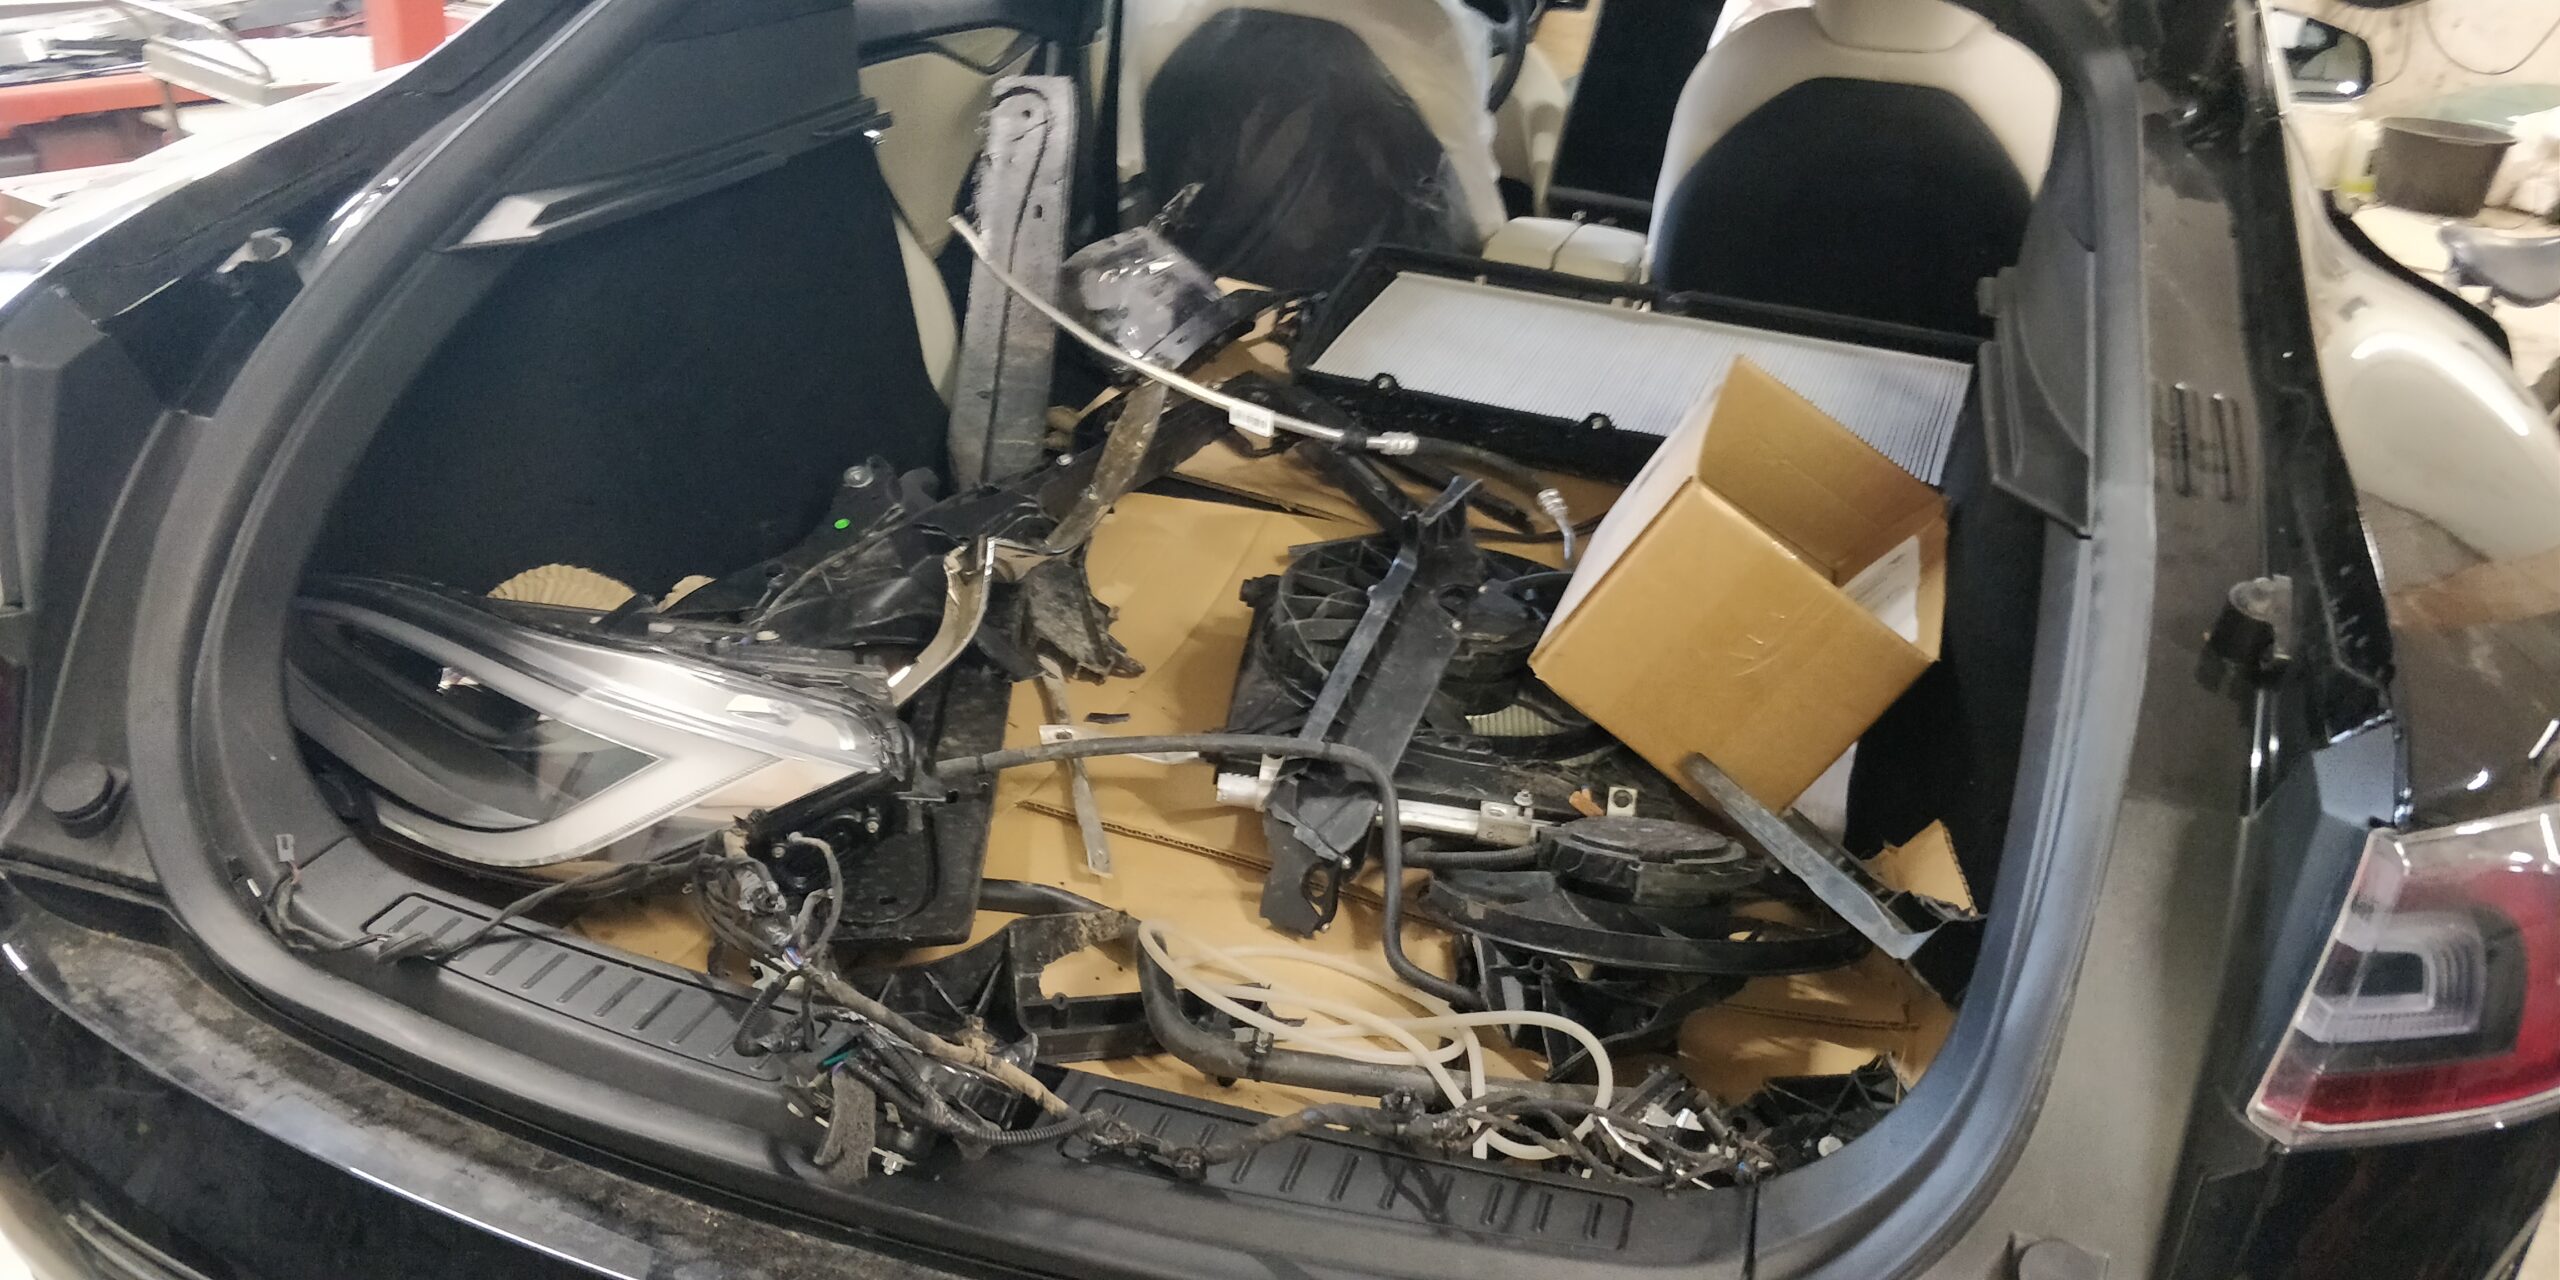
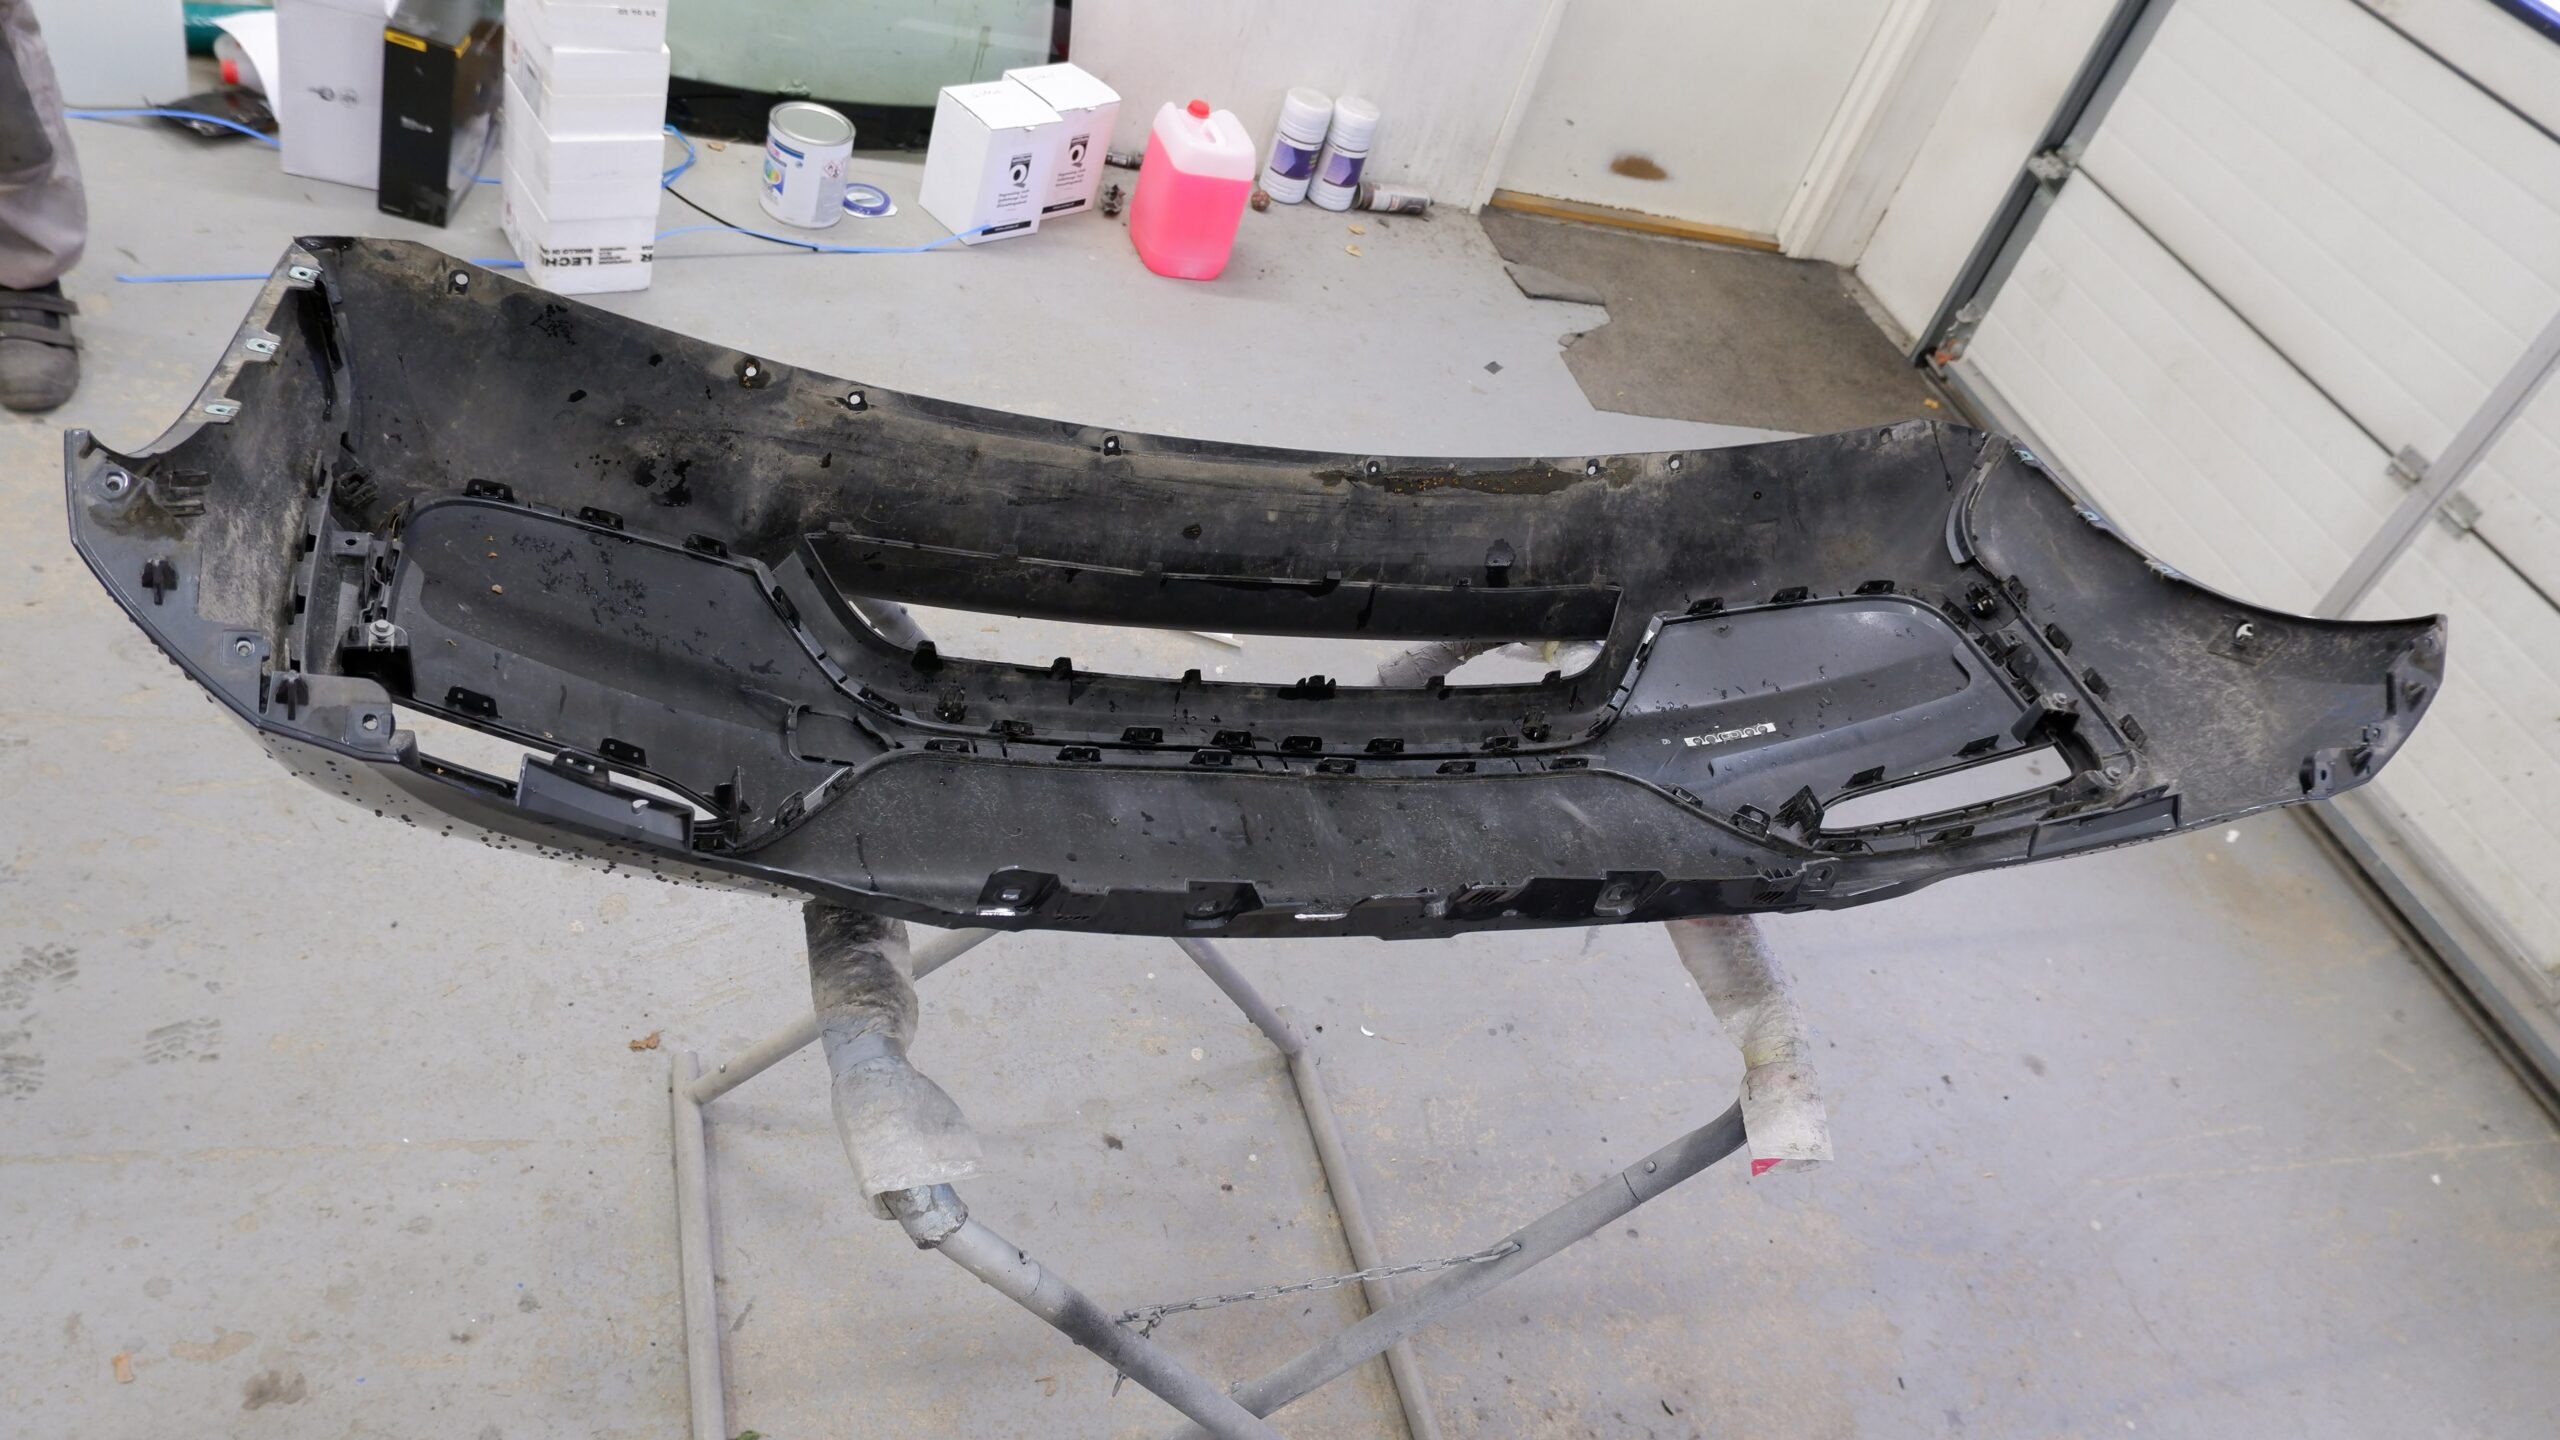
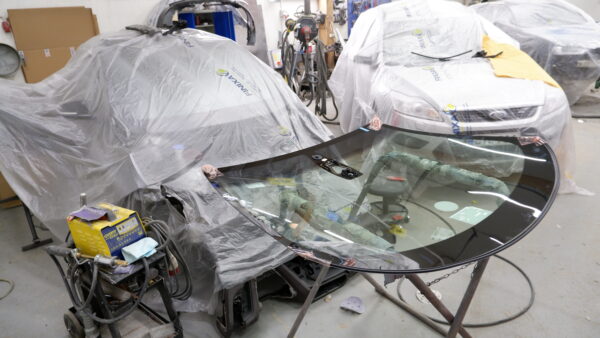
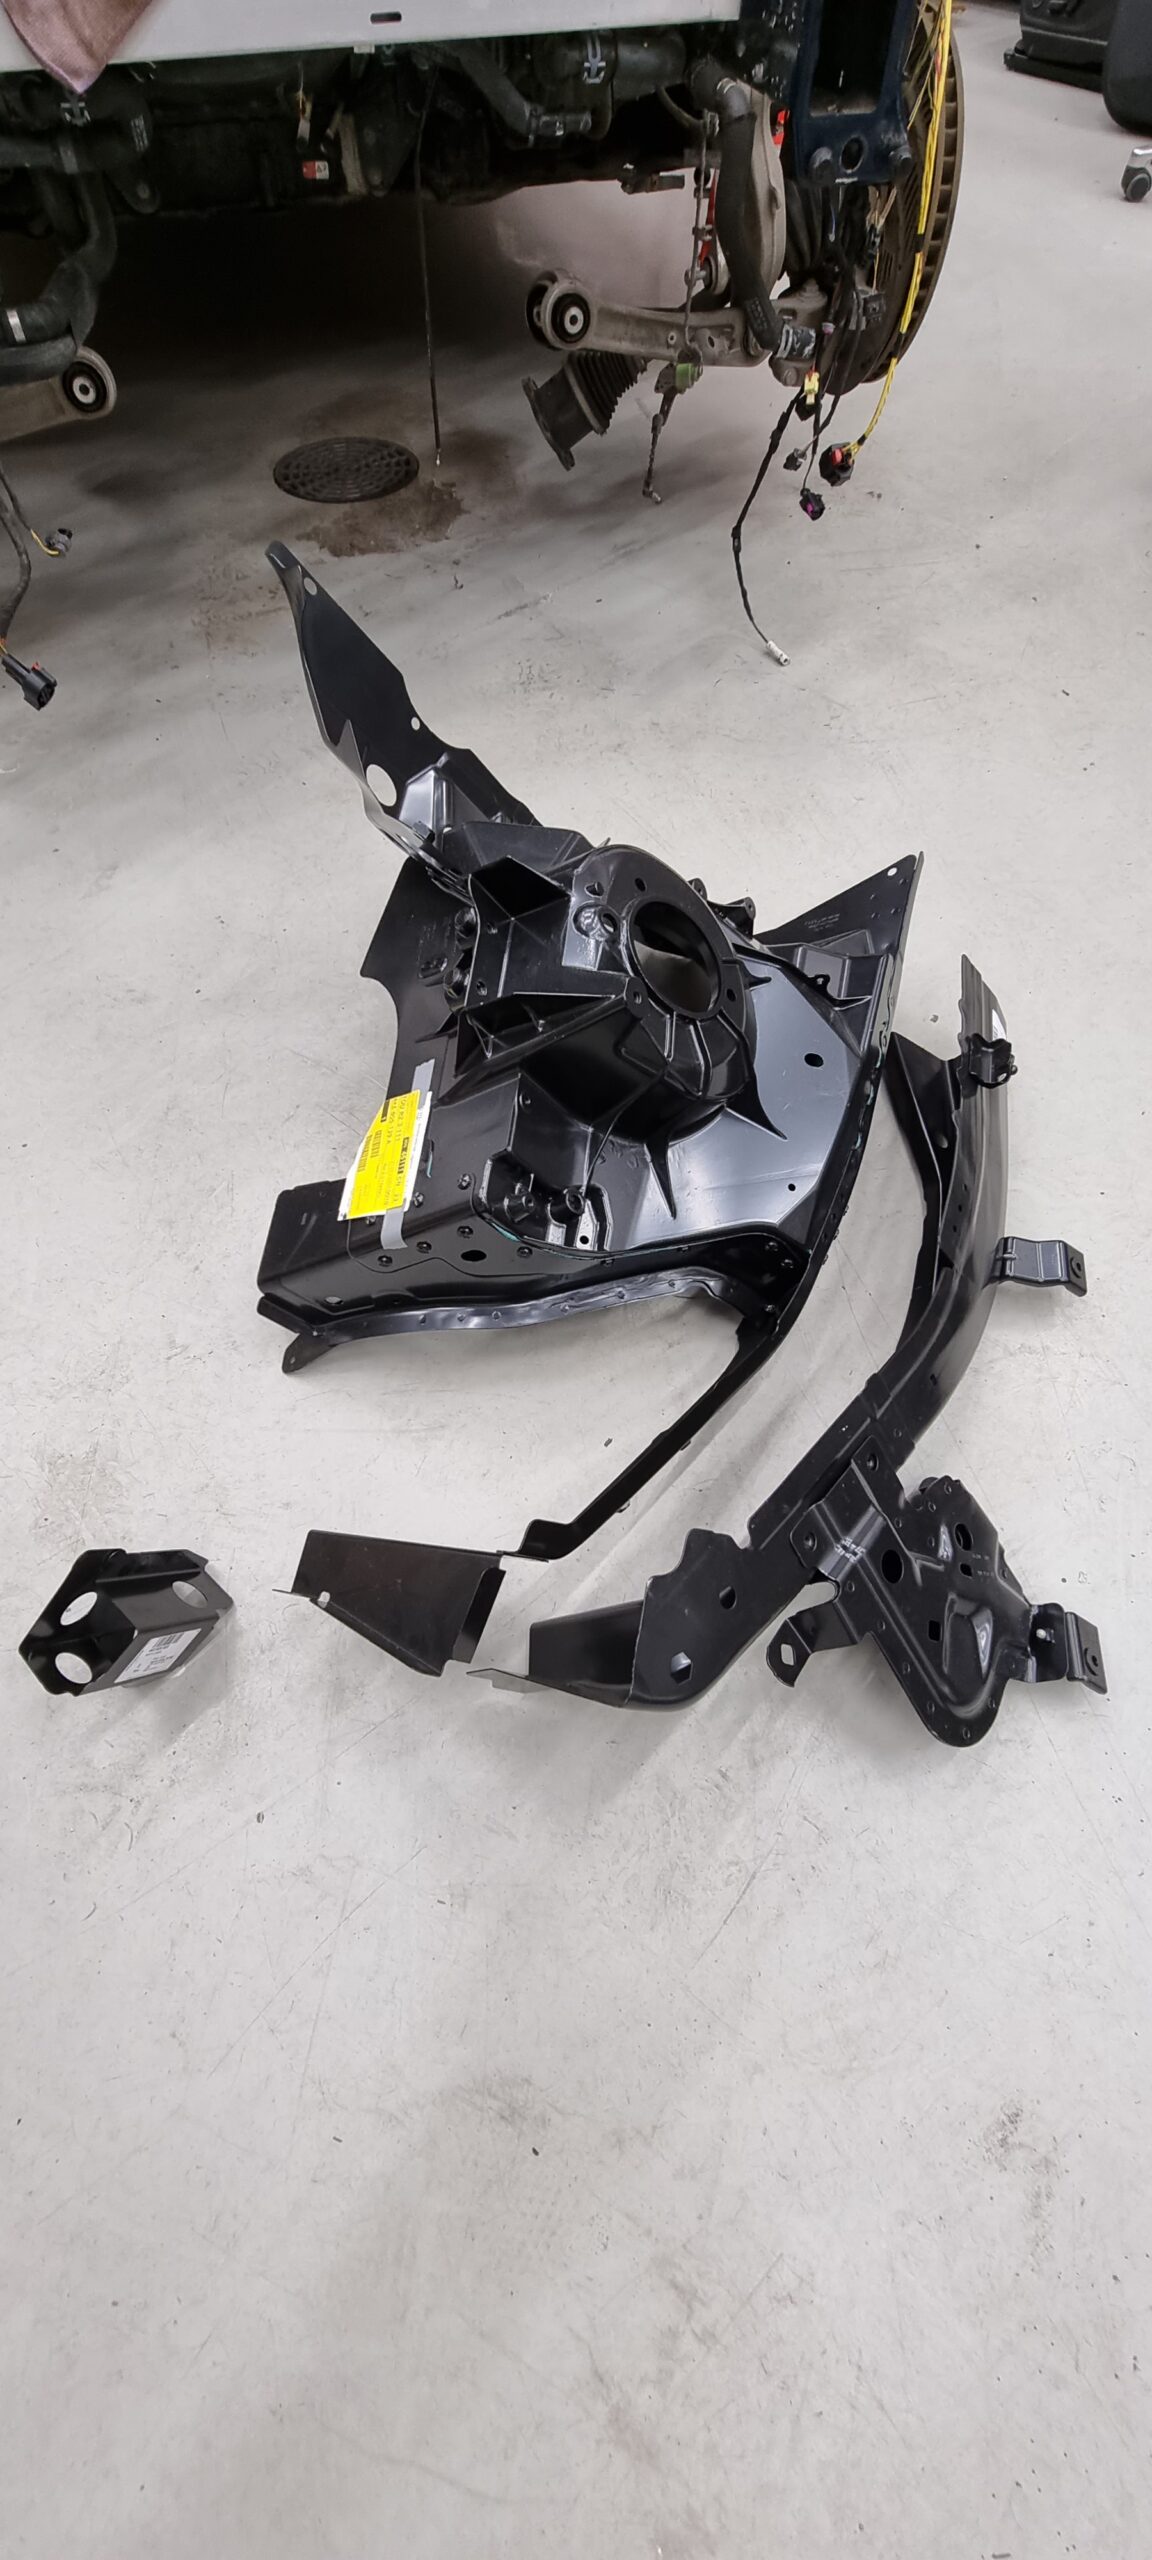
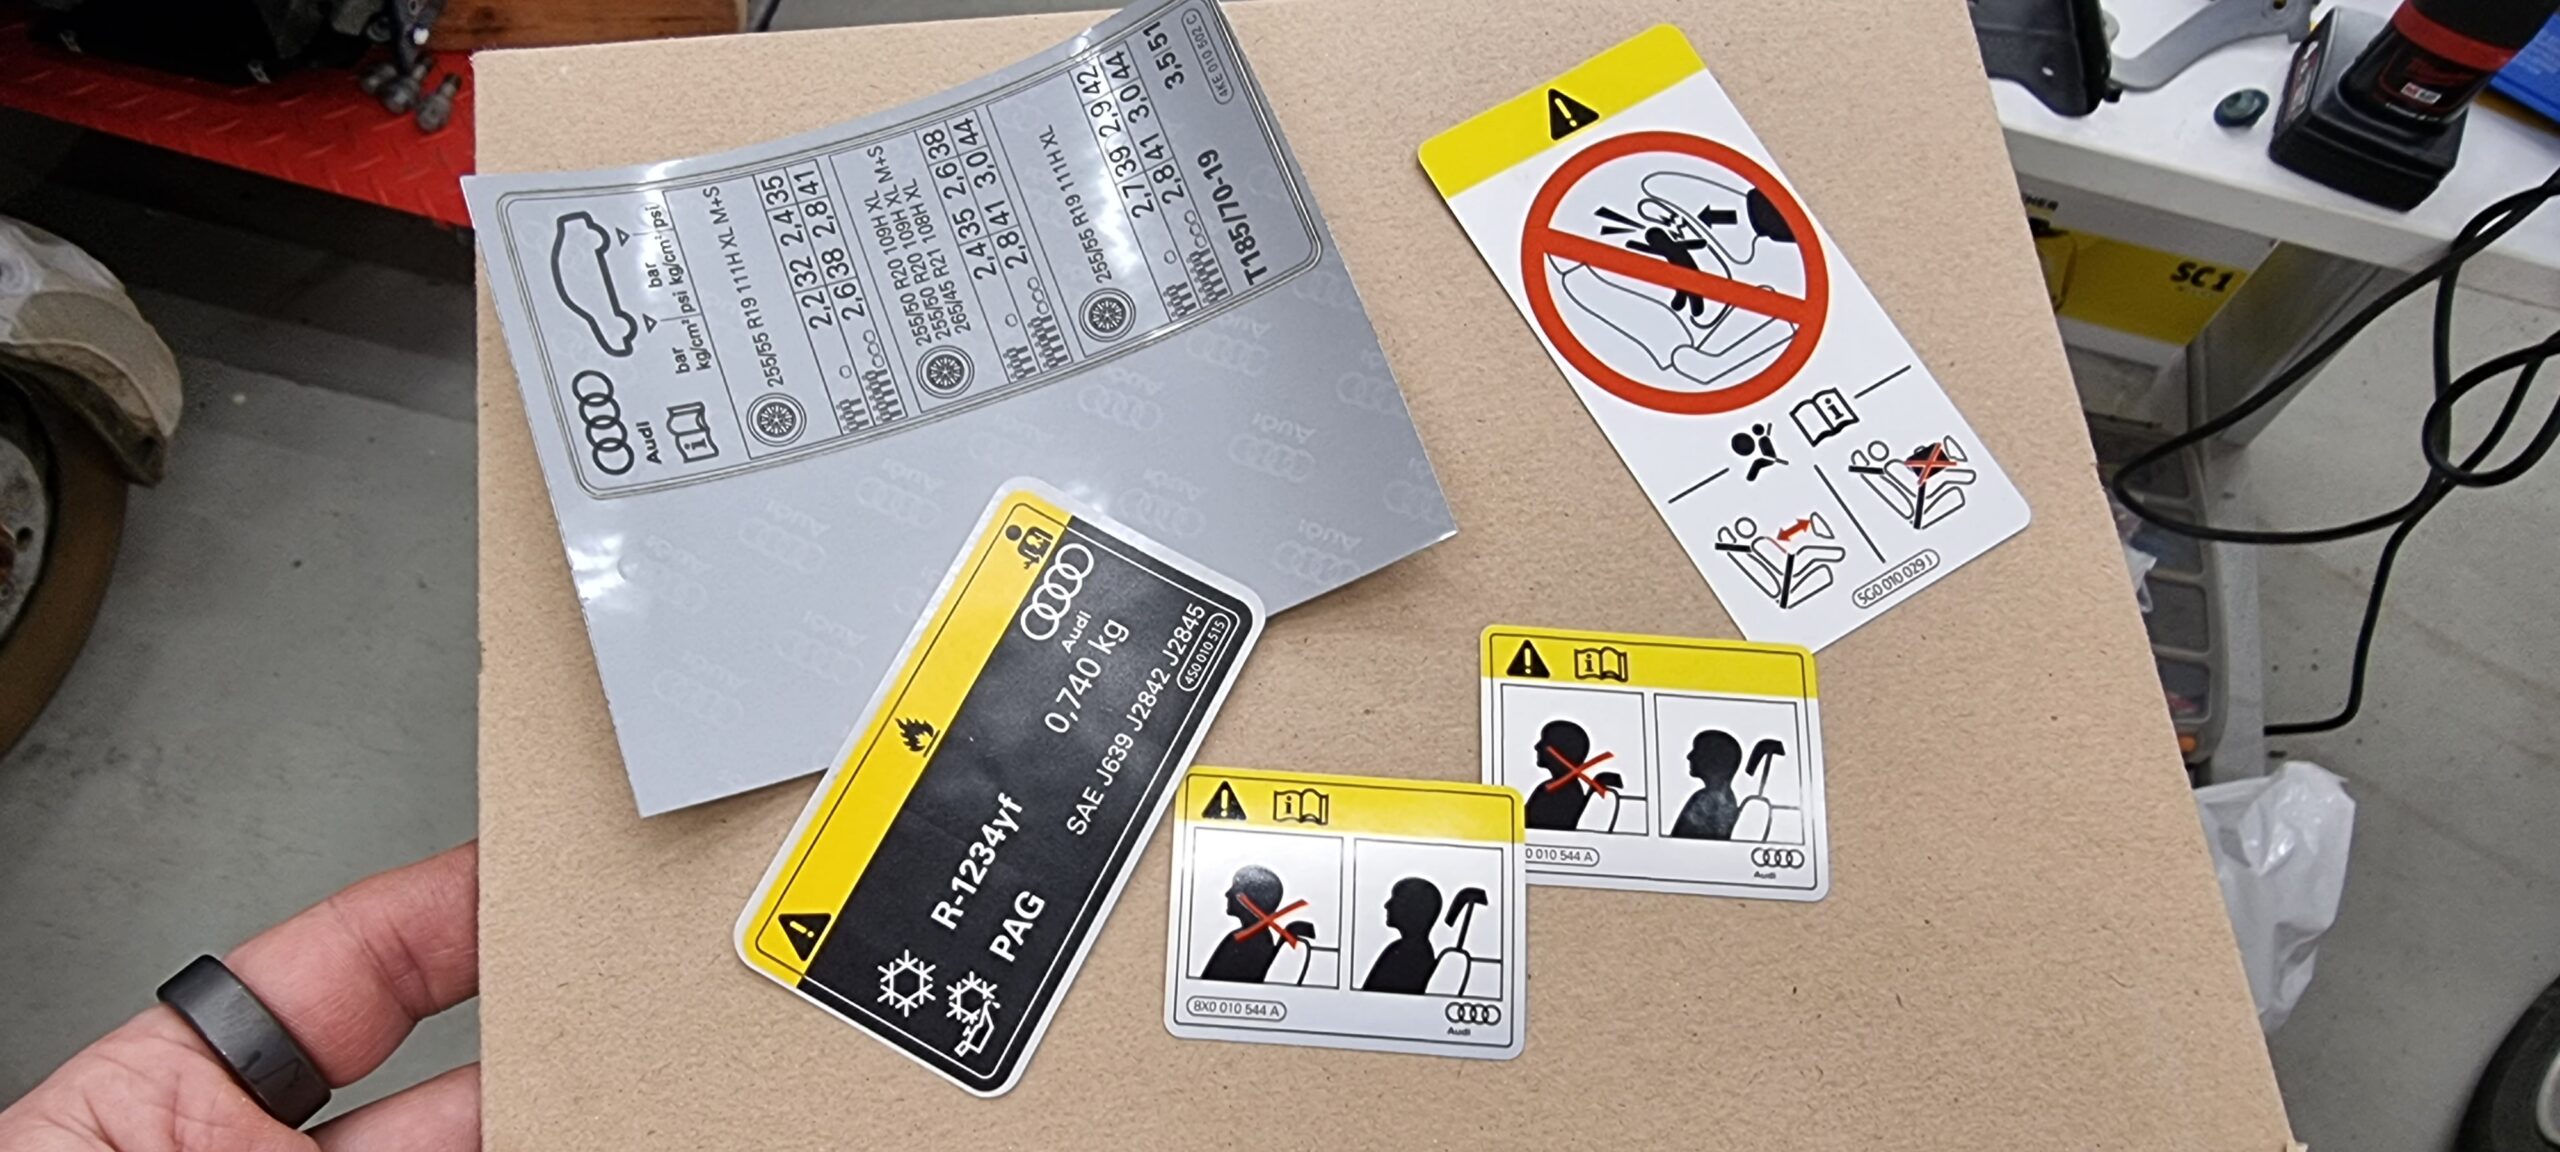
Paketissa tuli lähes kaikki, mitä keulan korjaamiseen tarvitaan. Myöhemmin tuli tilattua vielä muutama pikku juttu lisää samasta paikasta, mutta tämä paketti helpotti projektin läpiviemistä huomattavasti. Hyvin paljon työläämpää olisi ollut alkaa metsästää osia yksi kerrallaan. Keulapaketti maksoi 7500 euroa. Paketti oli purettu vain muutama kymmenen kilometriä ajetusta tehtaan testiautosta. Myöhemmin paljastui, että kyseinen auto oli varustettu Kiinan markkinoiden mukaisesti, eli siinä oli mm. vääränlainen rekisterikilven tausta.

AC-laturi on ”konehuoneessa” ylimmäisenä ja sen liittimiä oli murtunut. Vaikka itse laturin elektroniikka olisi ehjää, niin pitää vaihtaa, koska laturi ei ole purettavissa.
Sisällä on pusseja ja vöitä lauennut. Onneksi penkkien tyynyt olivat jääneet ehjäksi – kaikki muu olikin sitten uusittava.

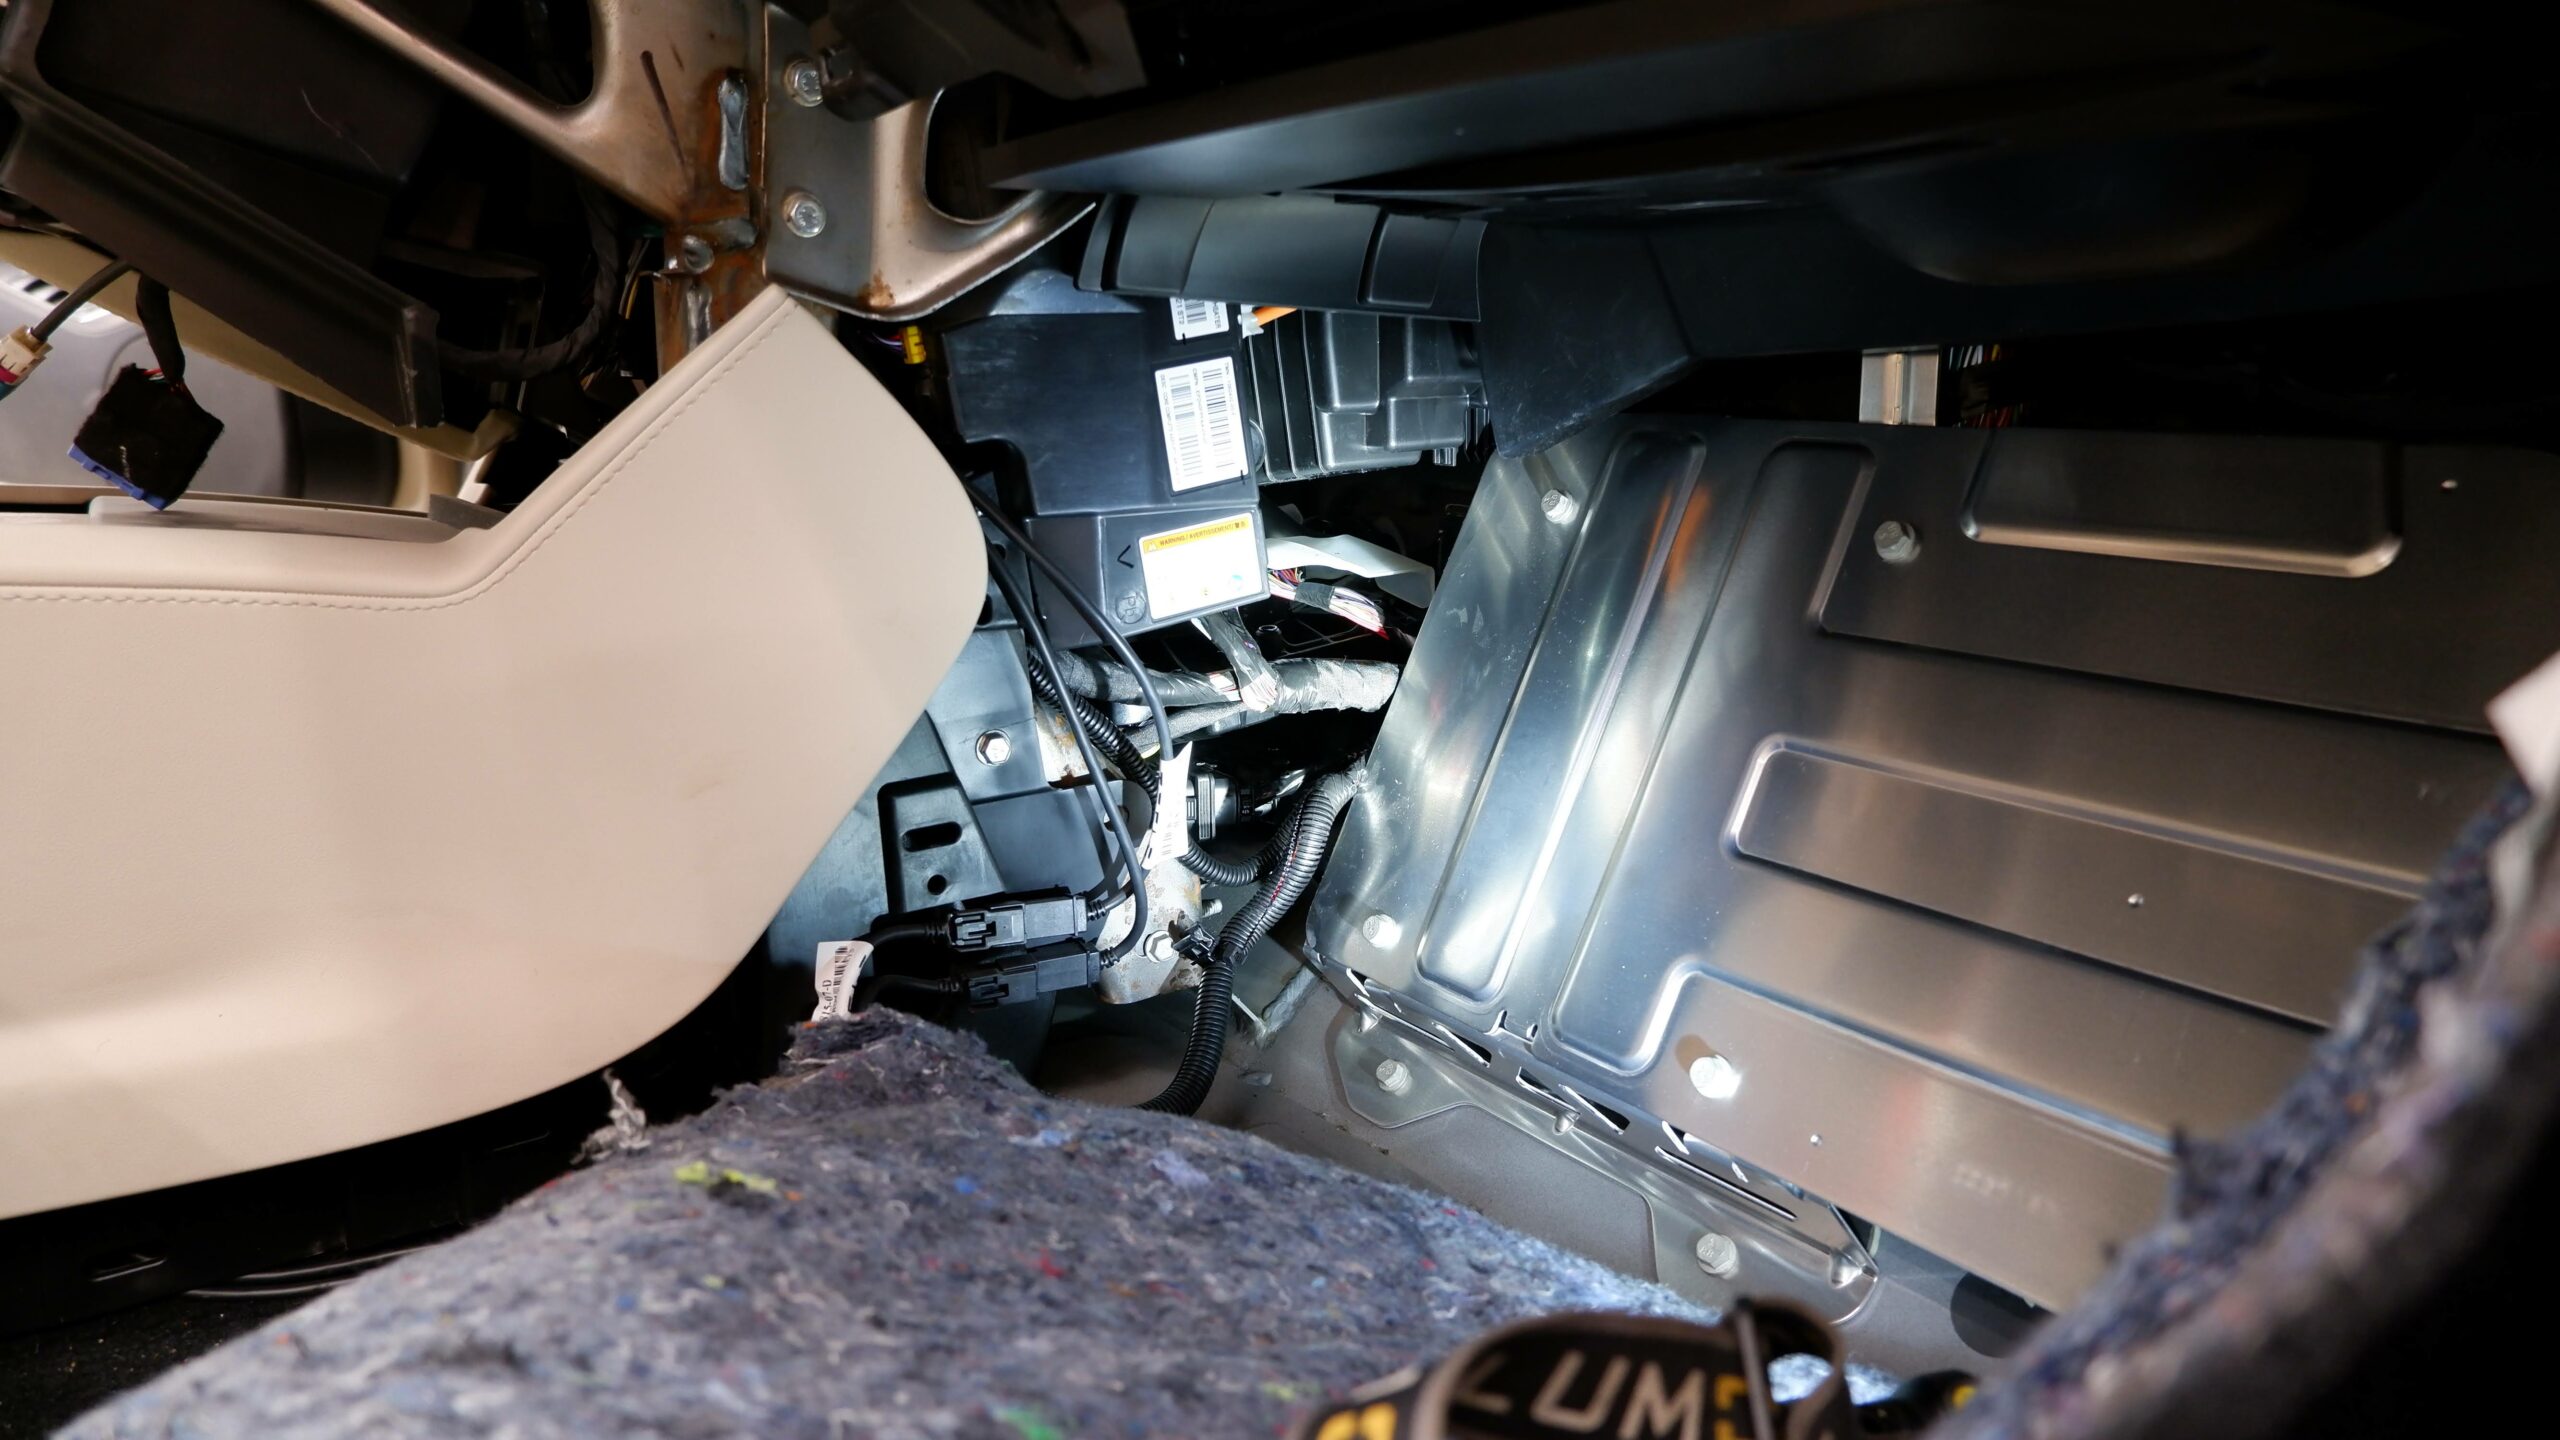
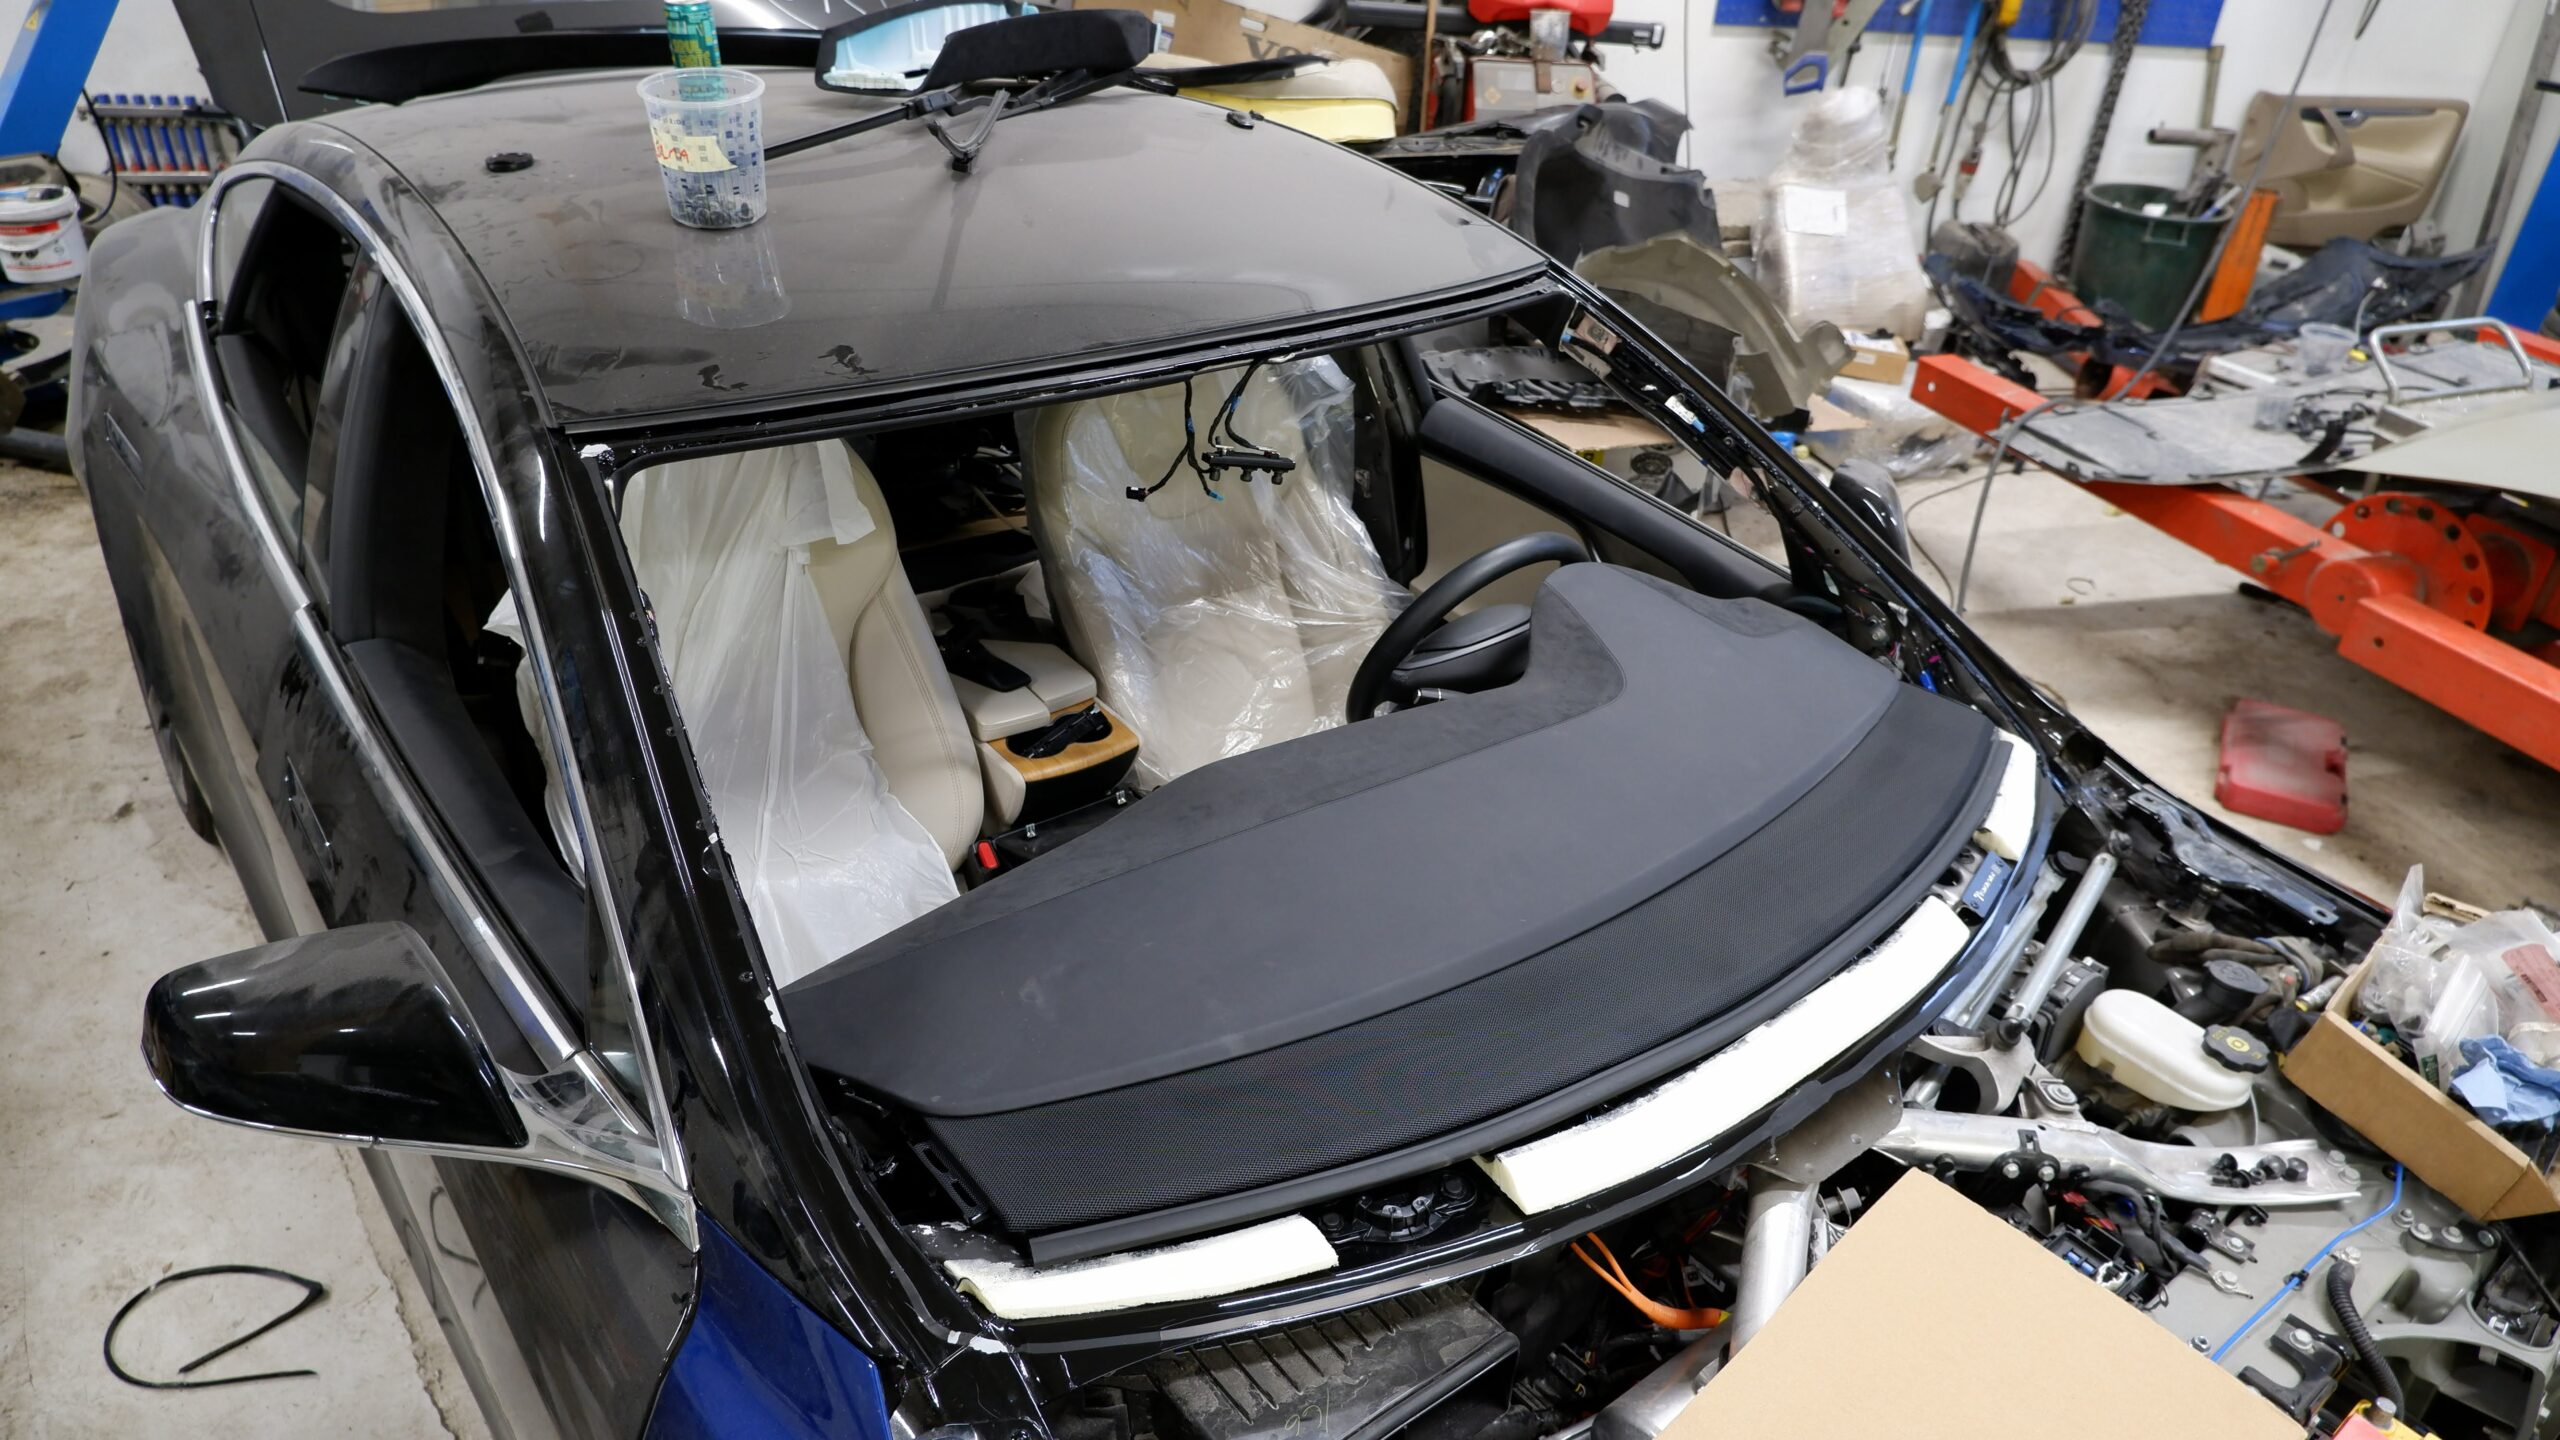
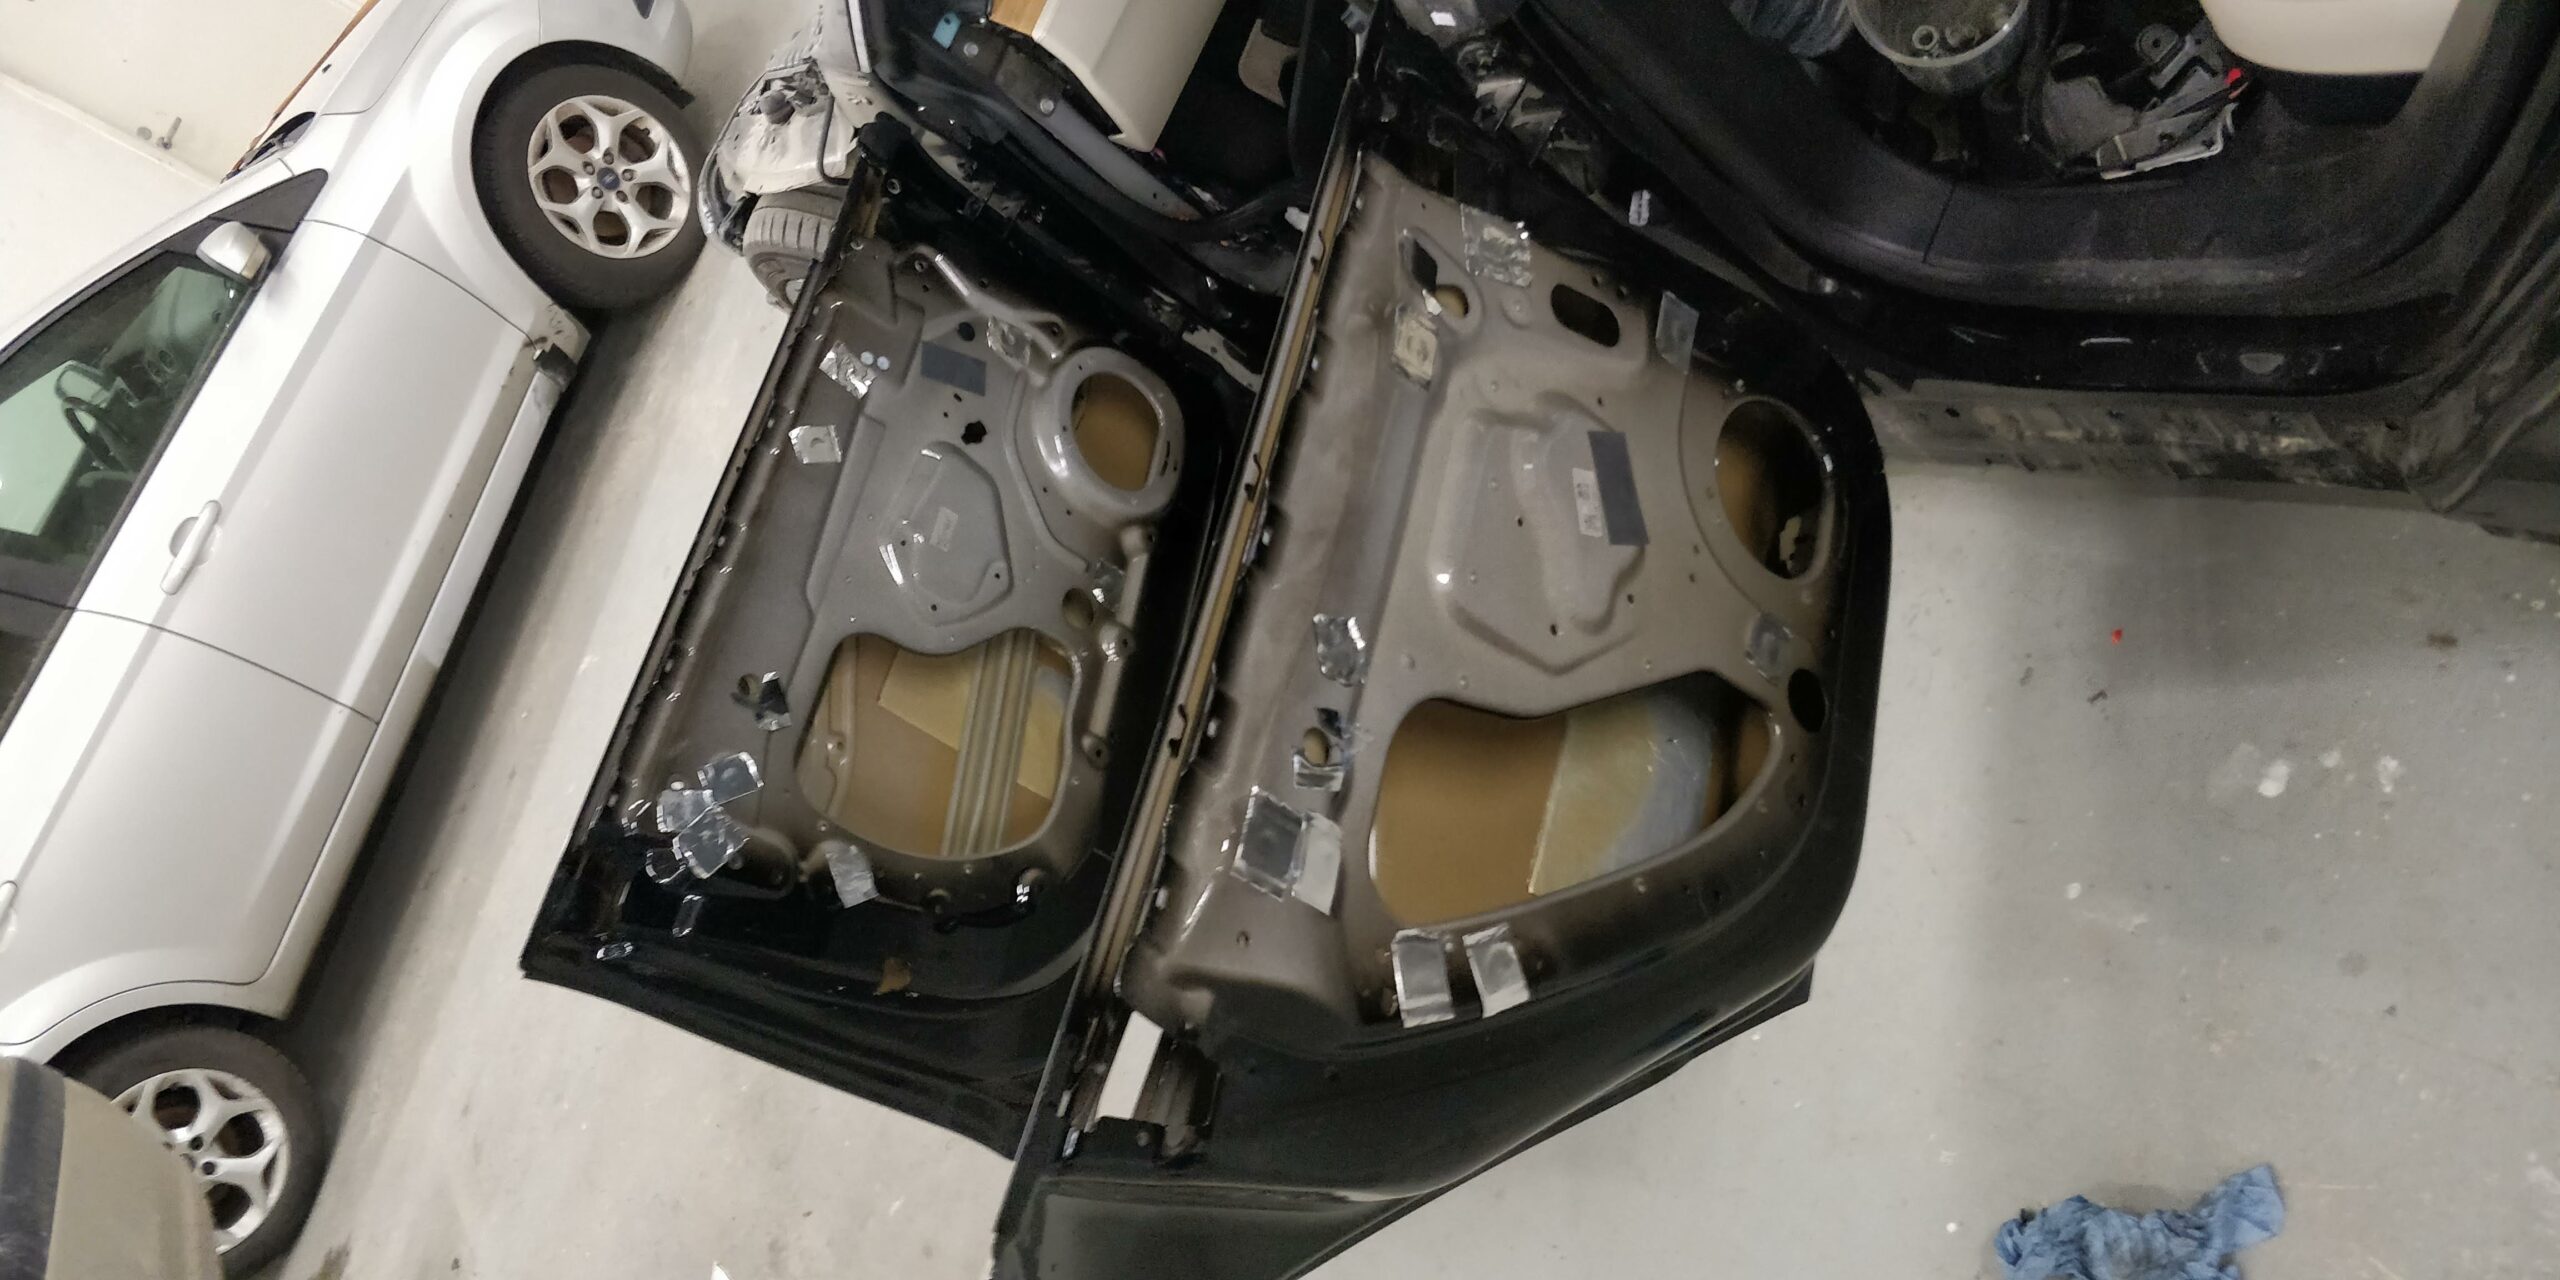
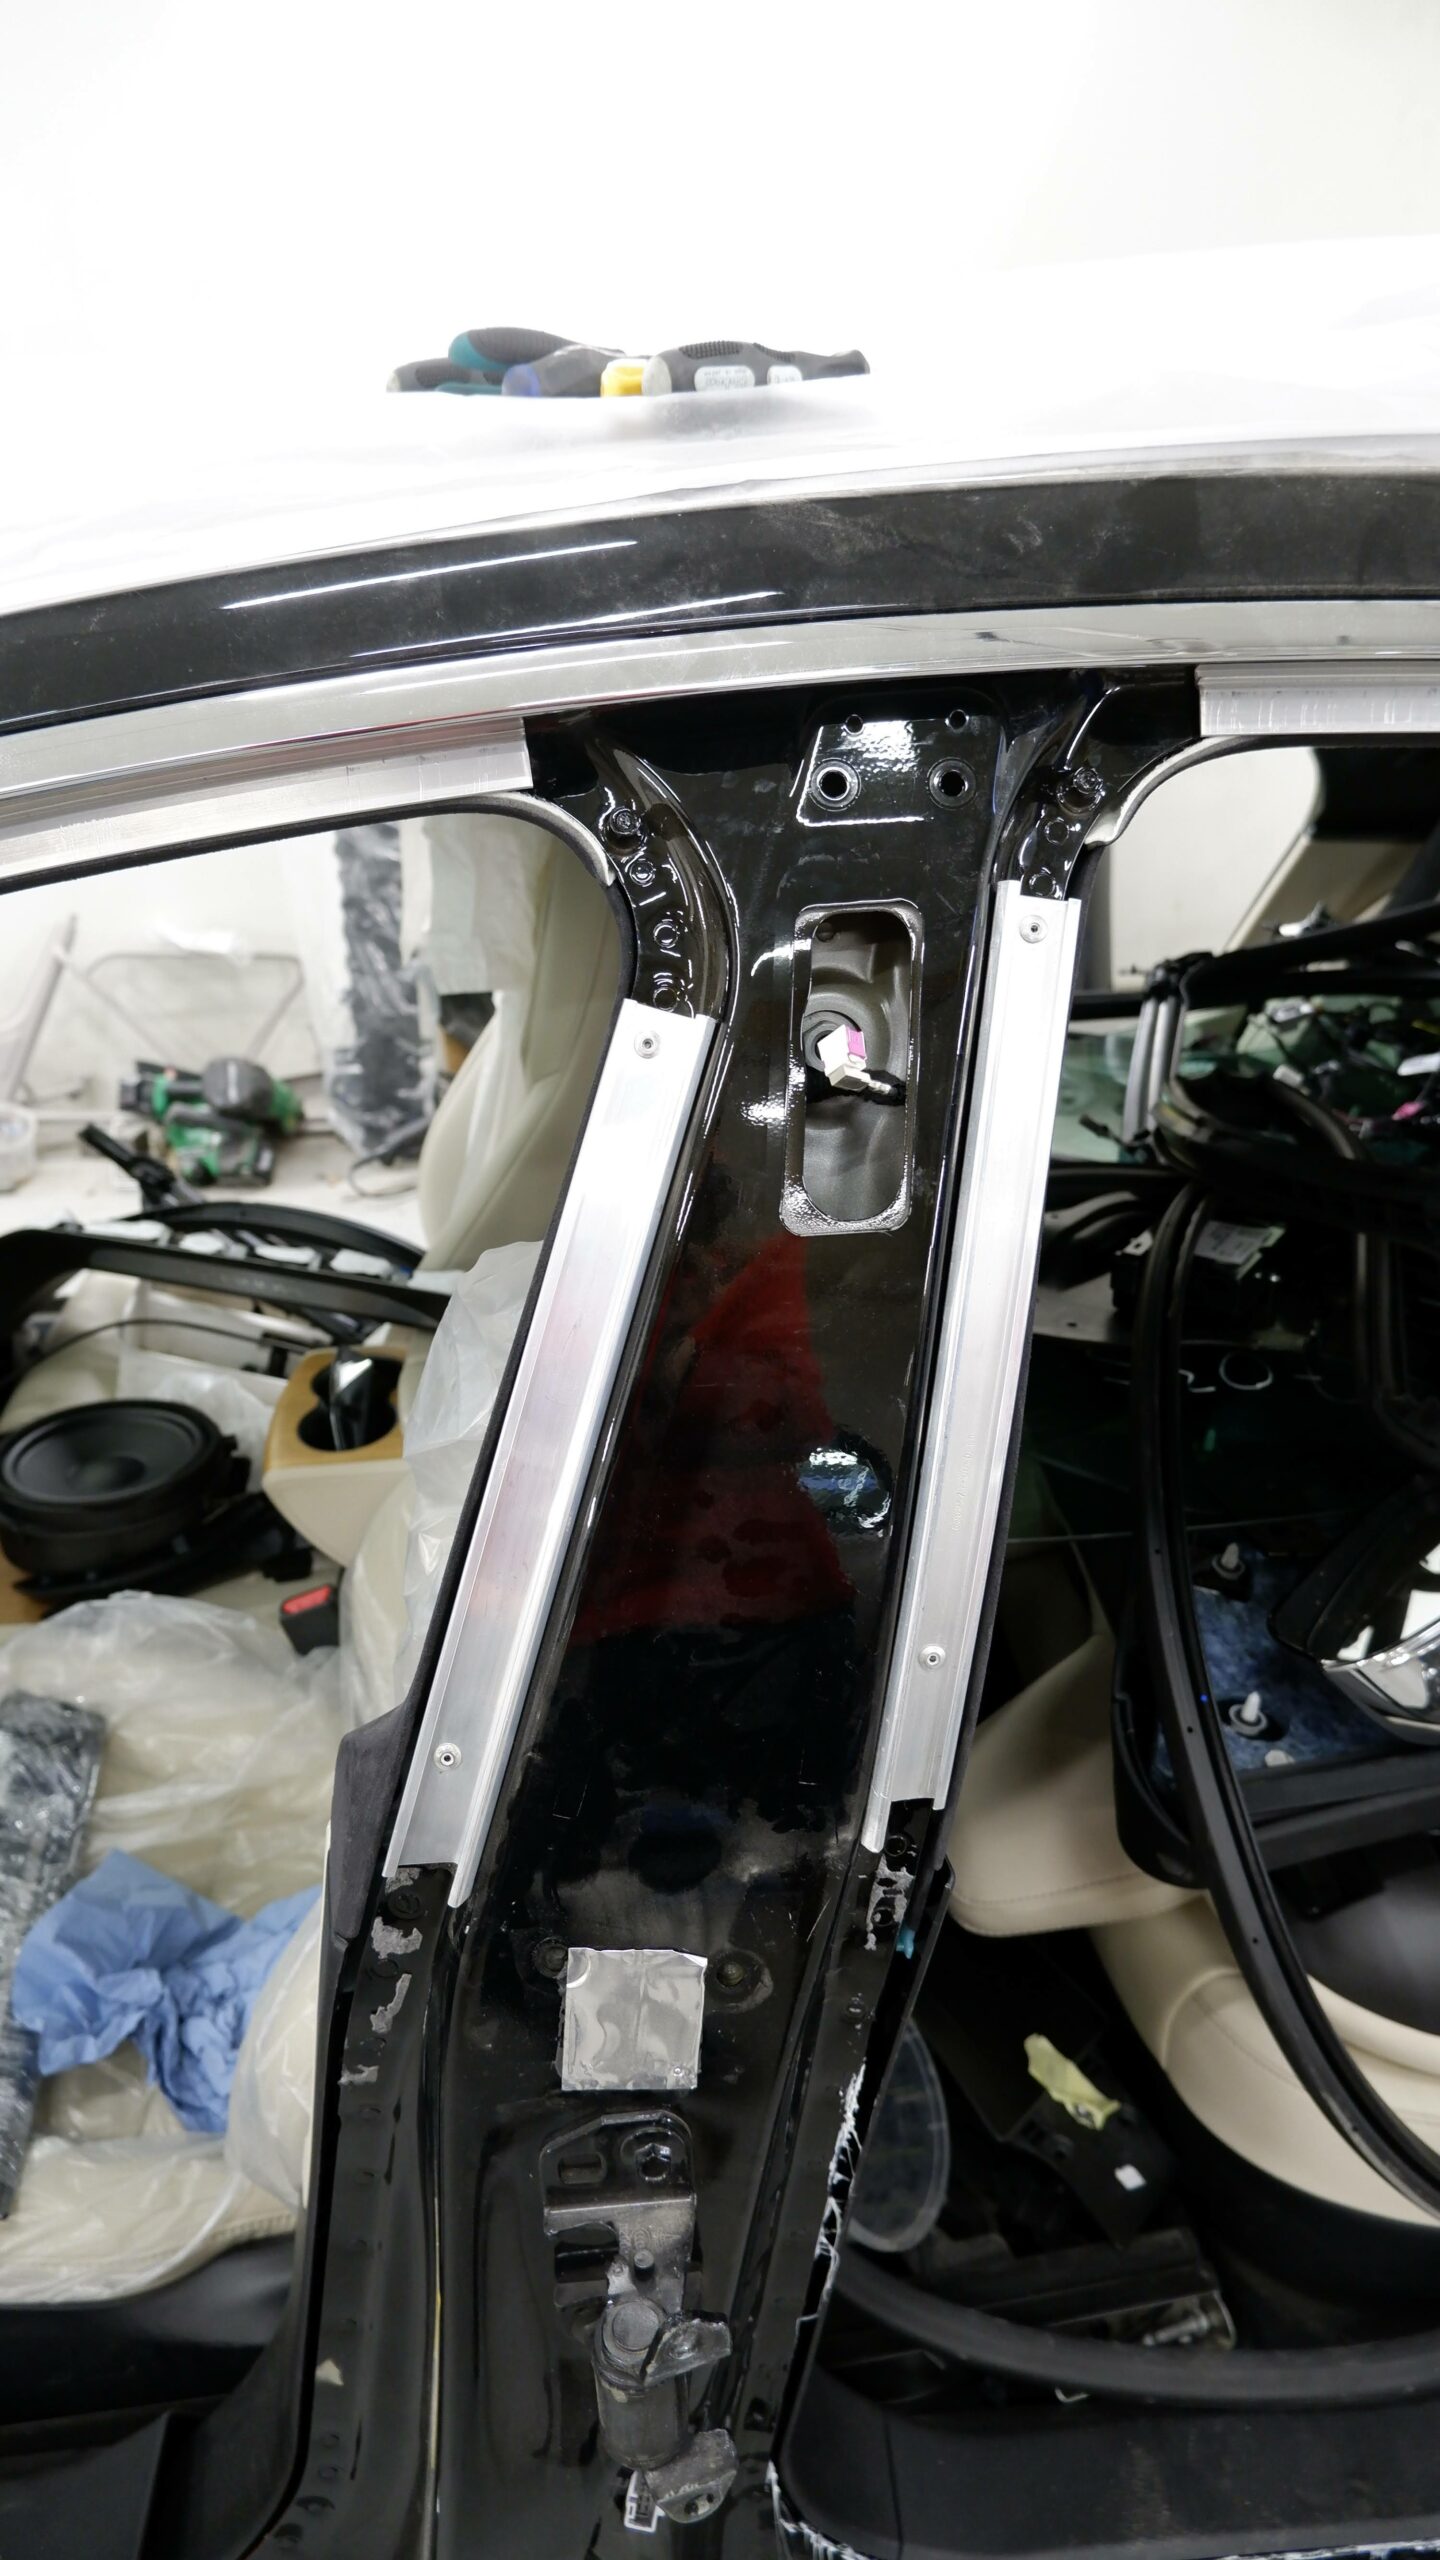
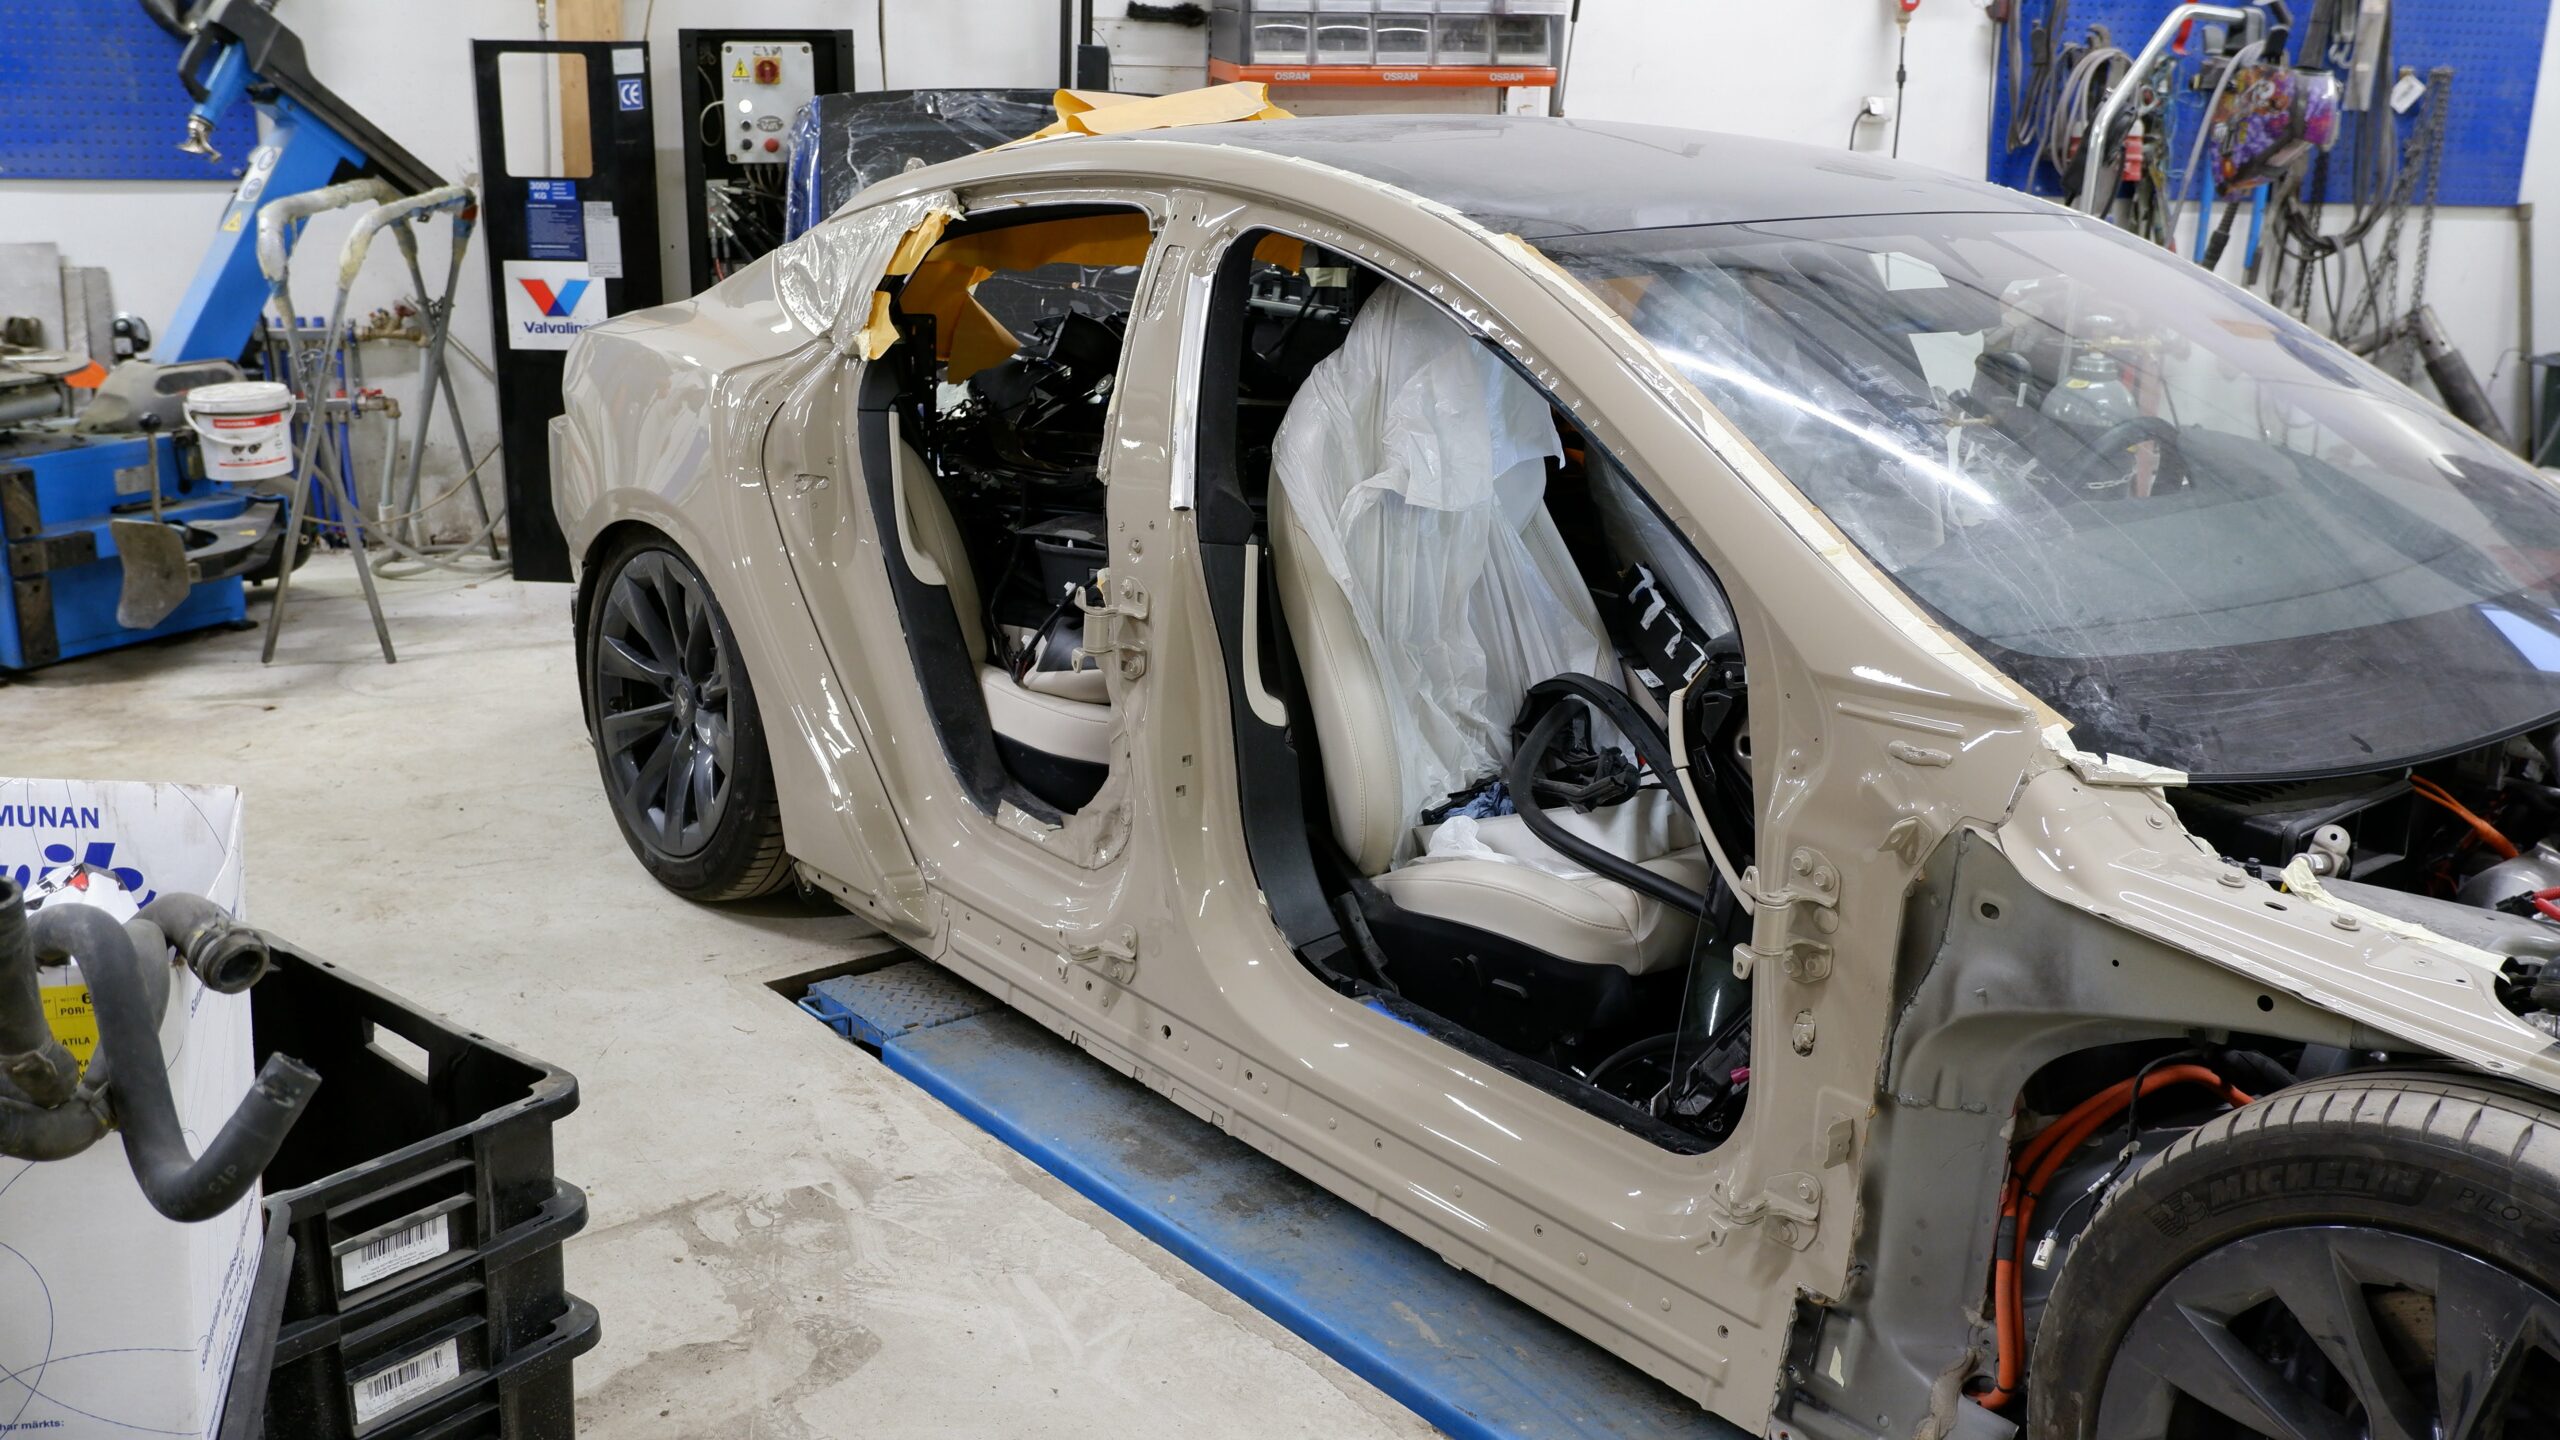
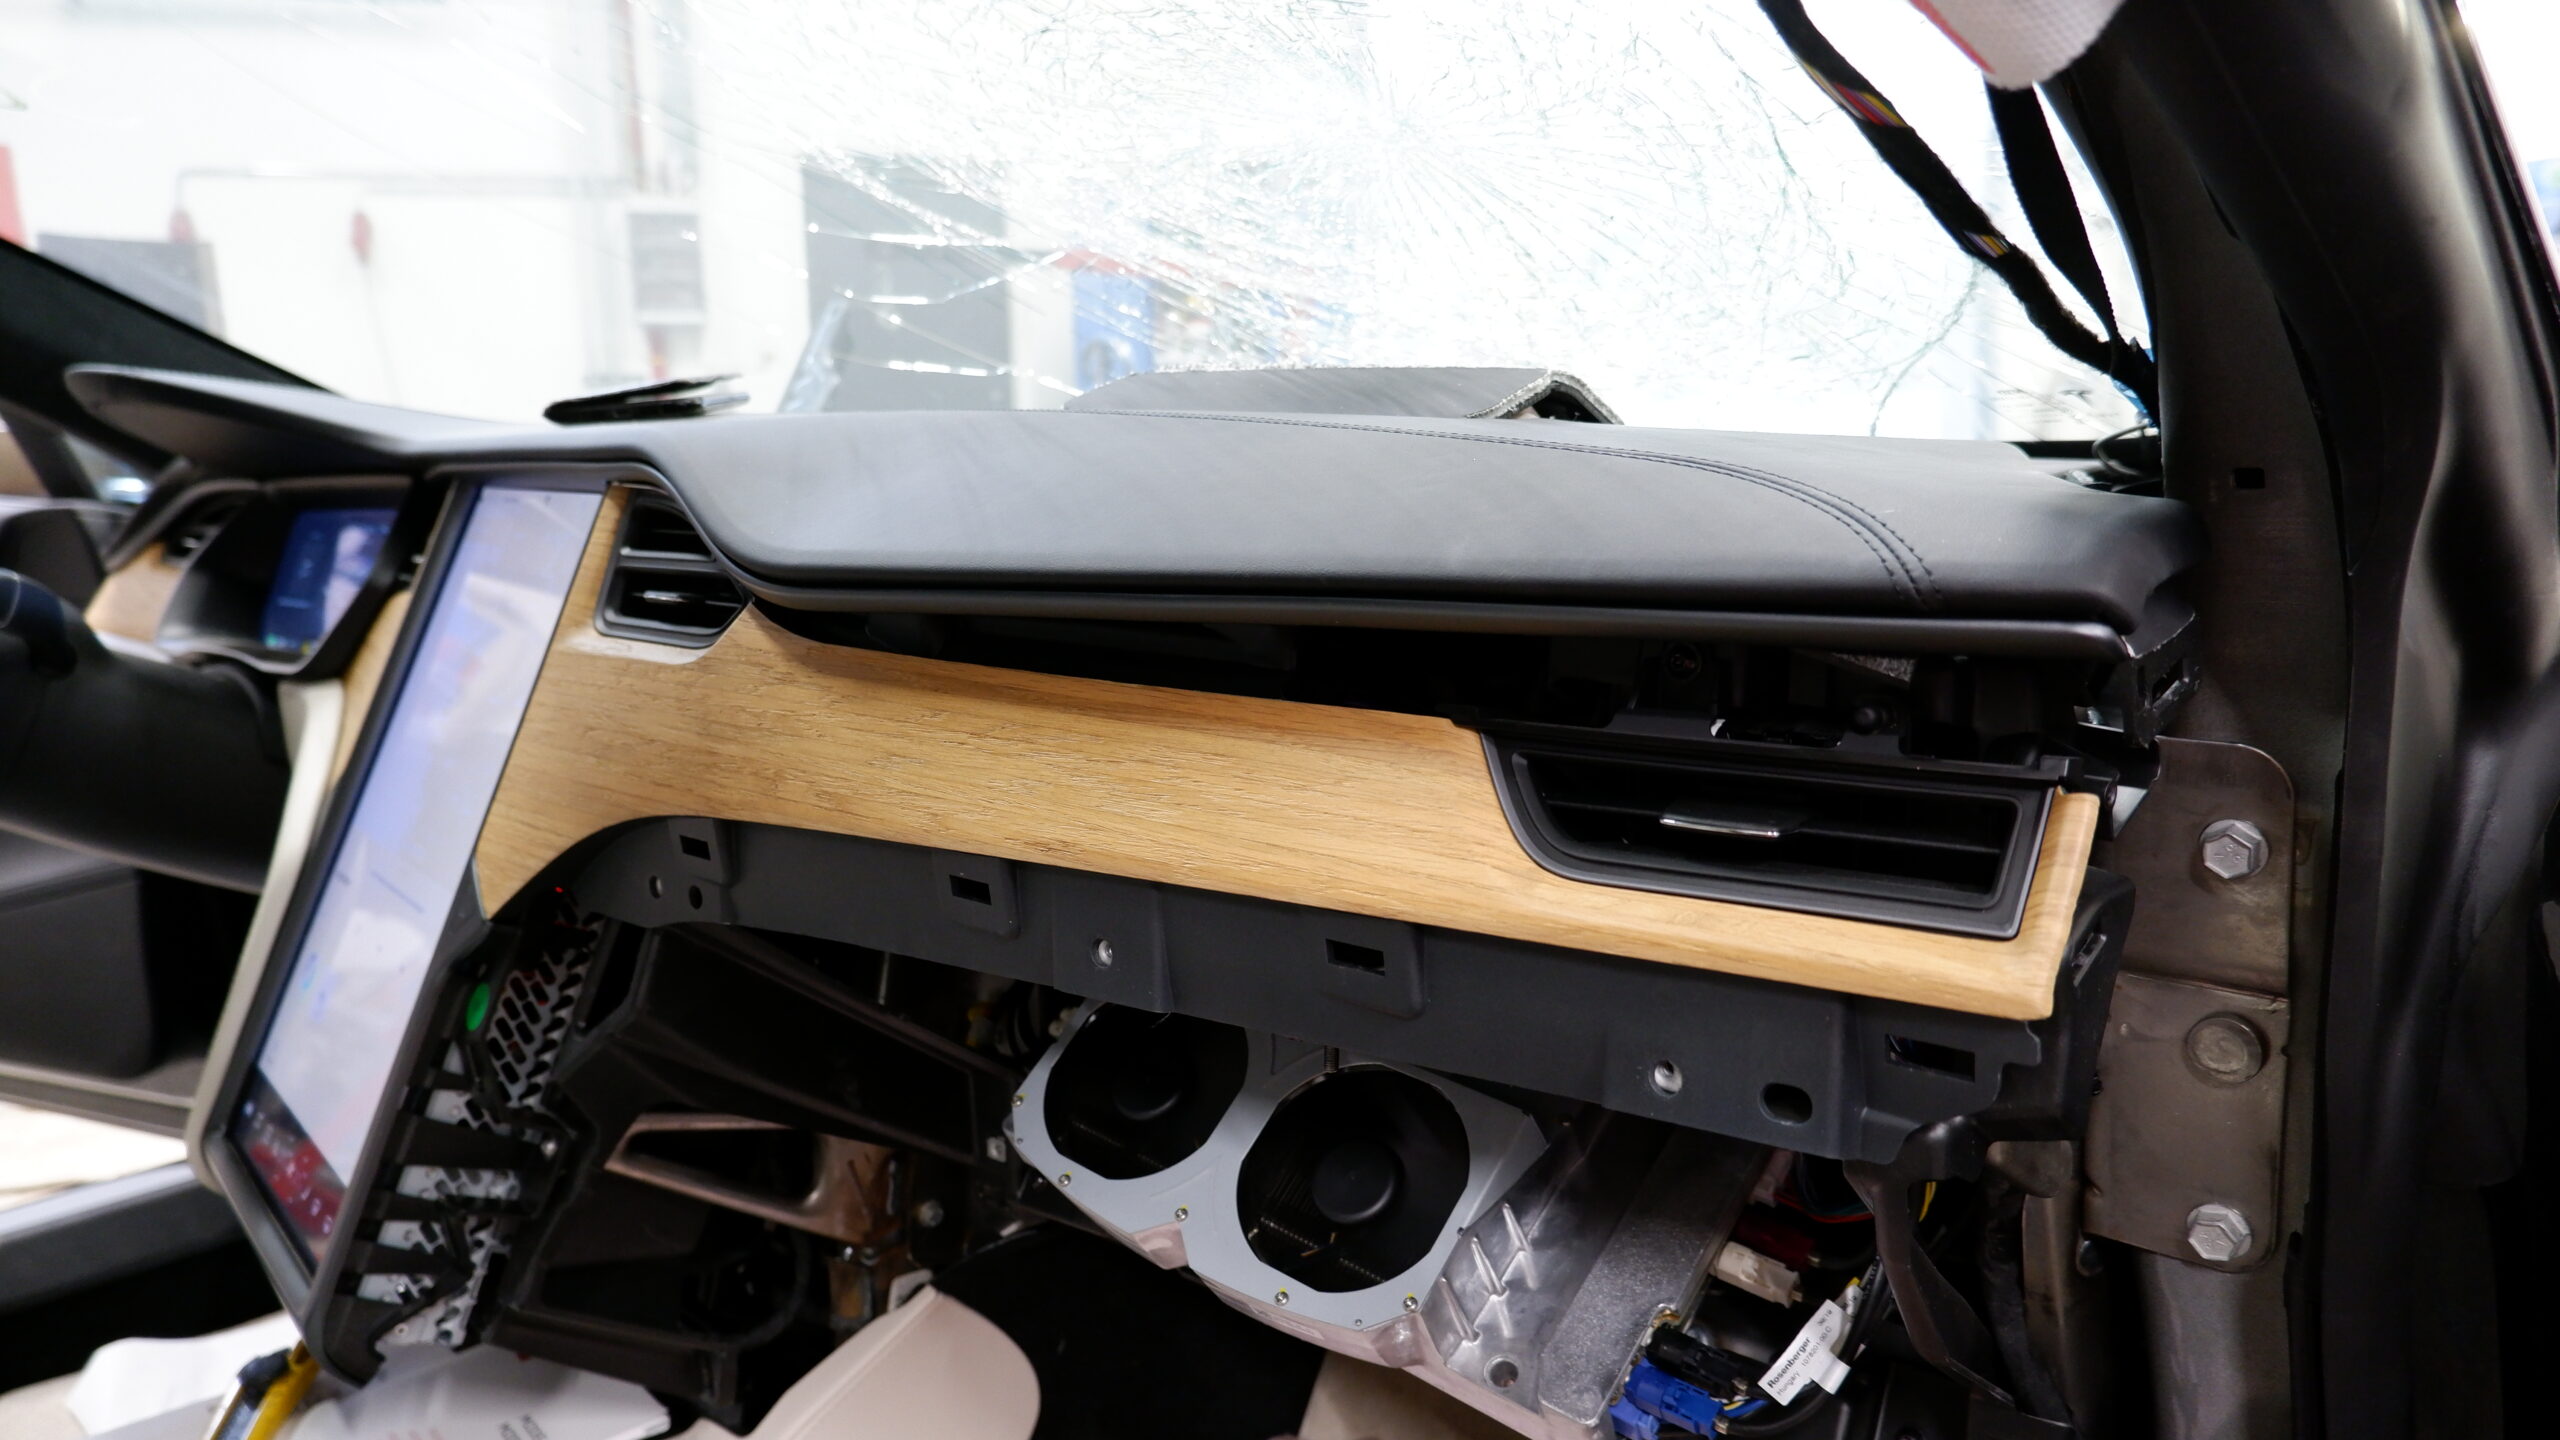
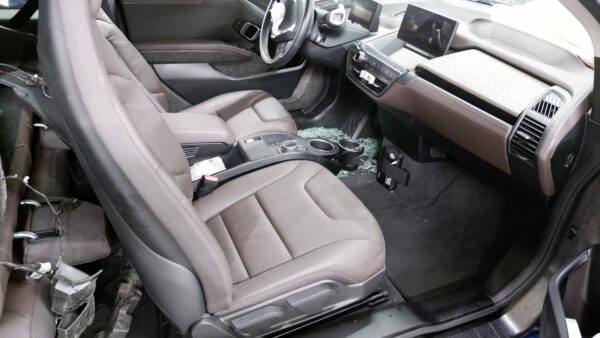
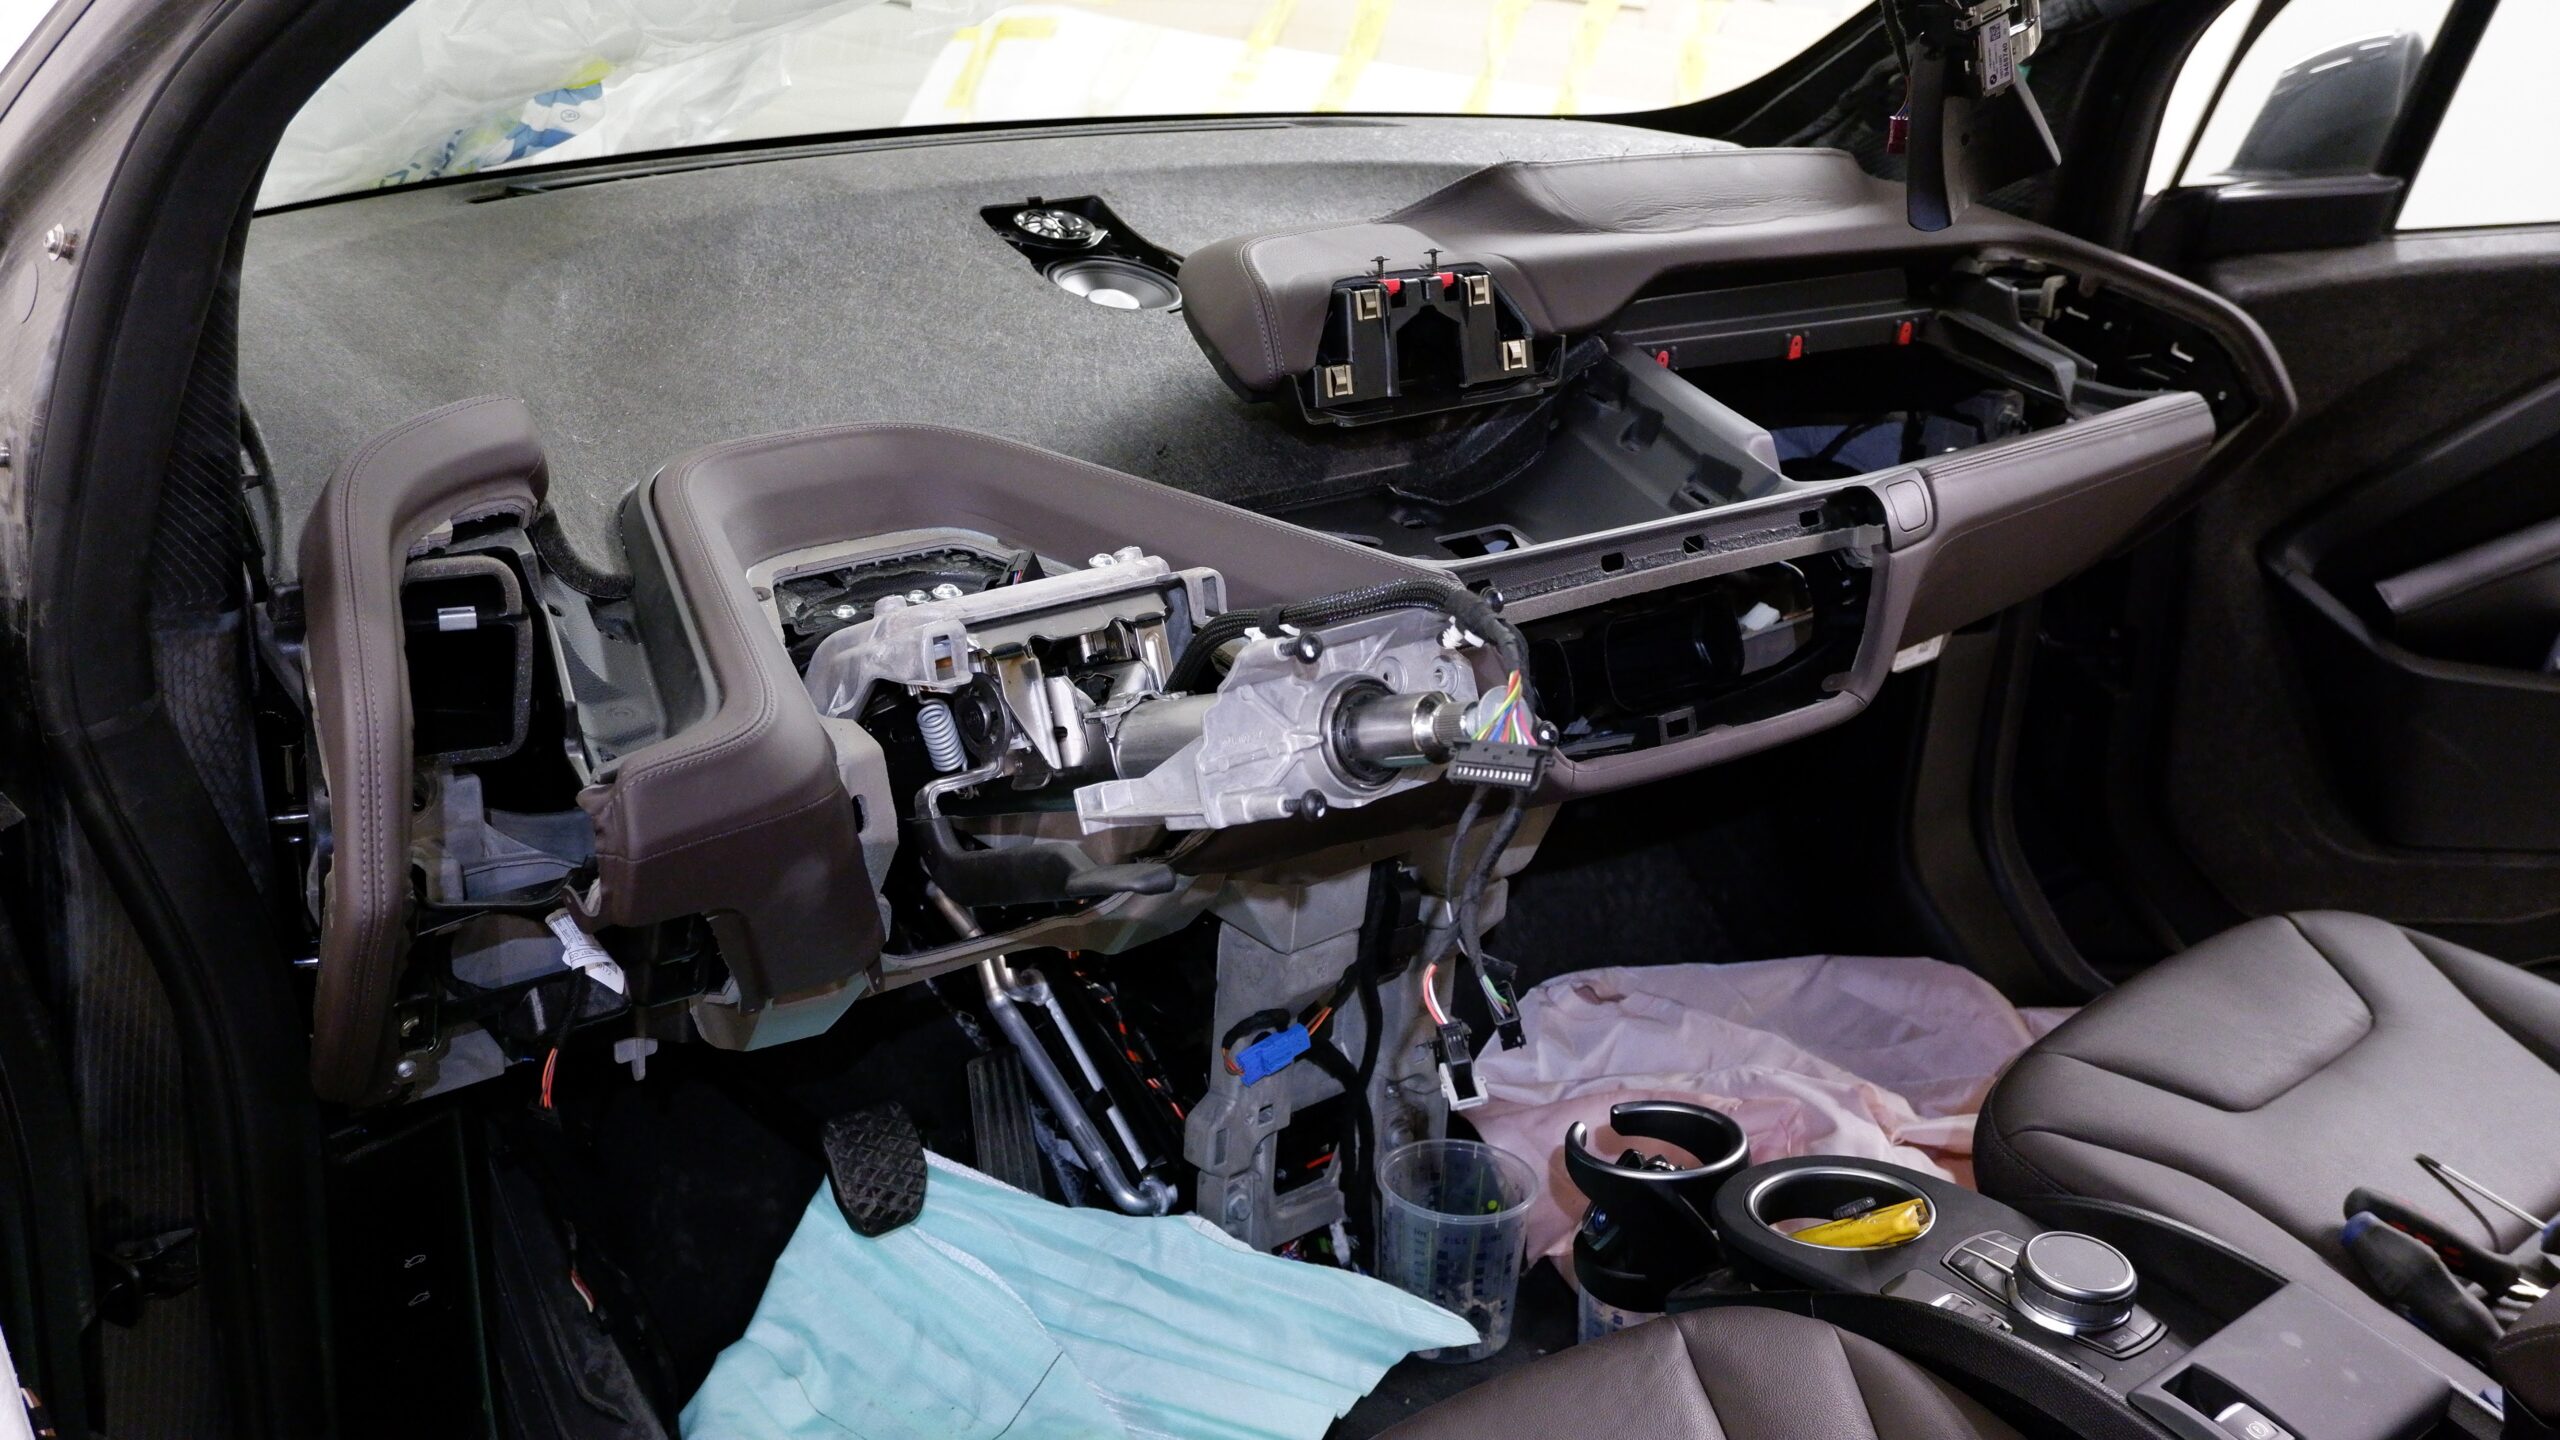
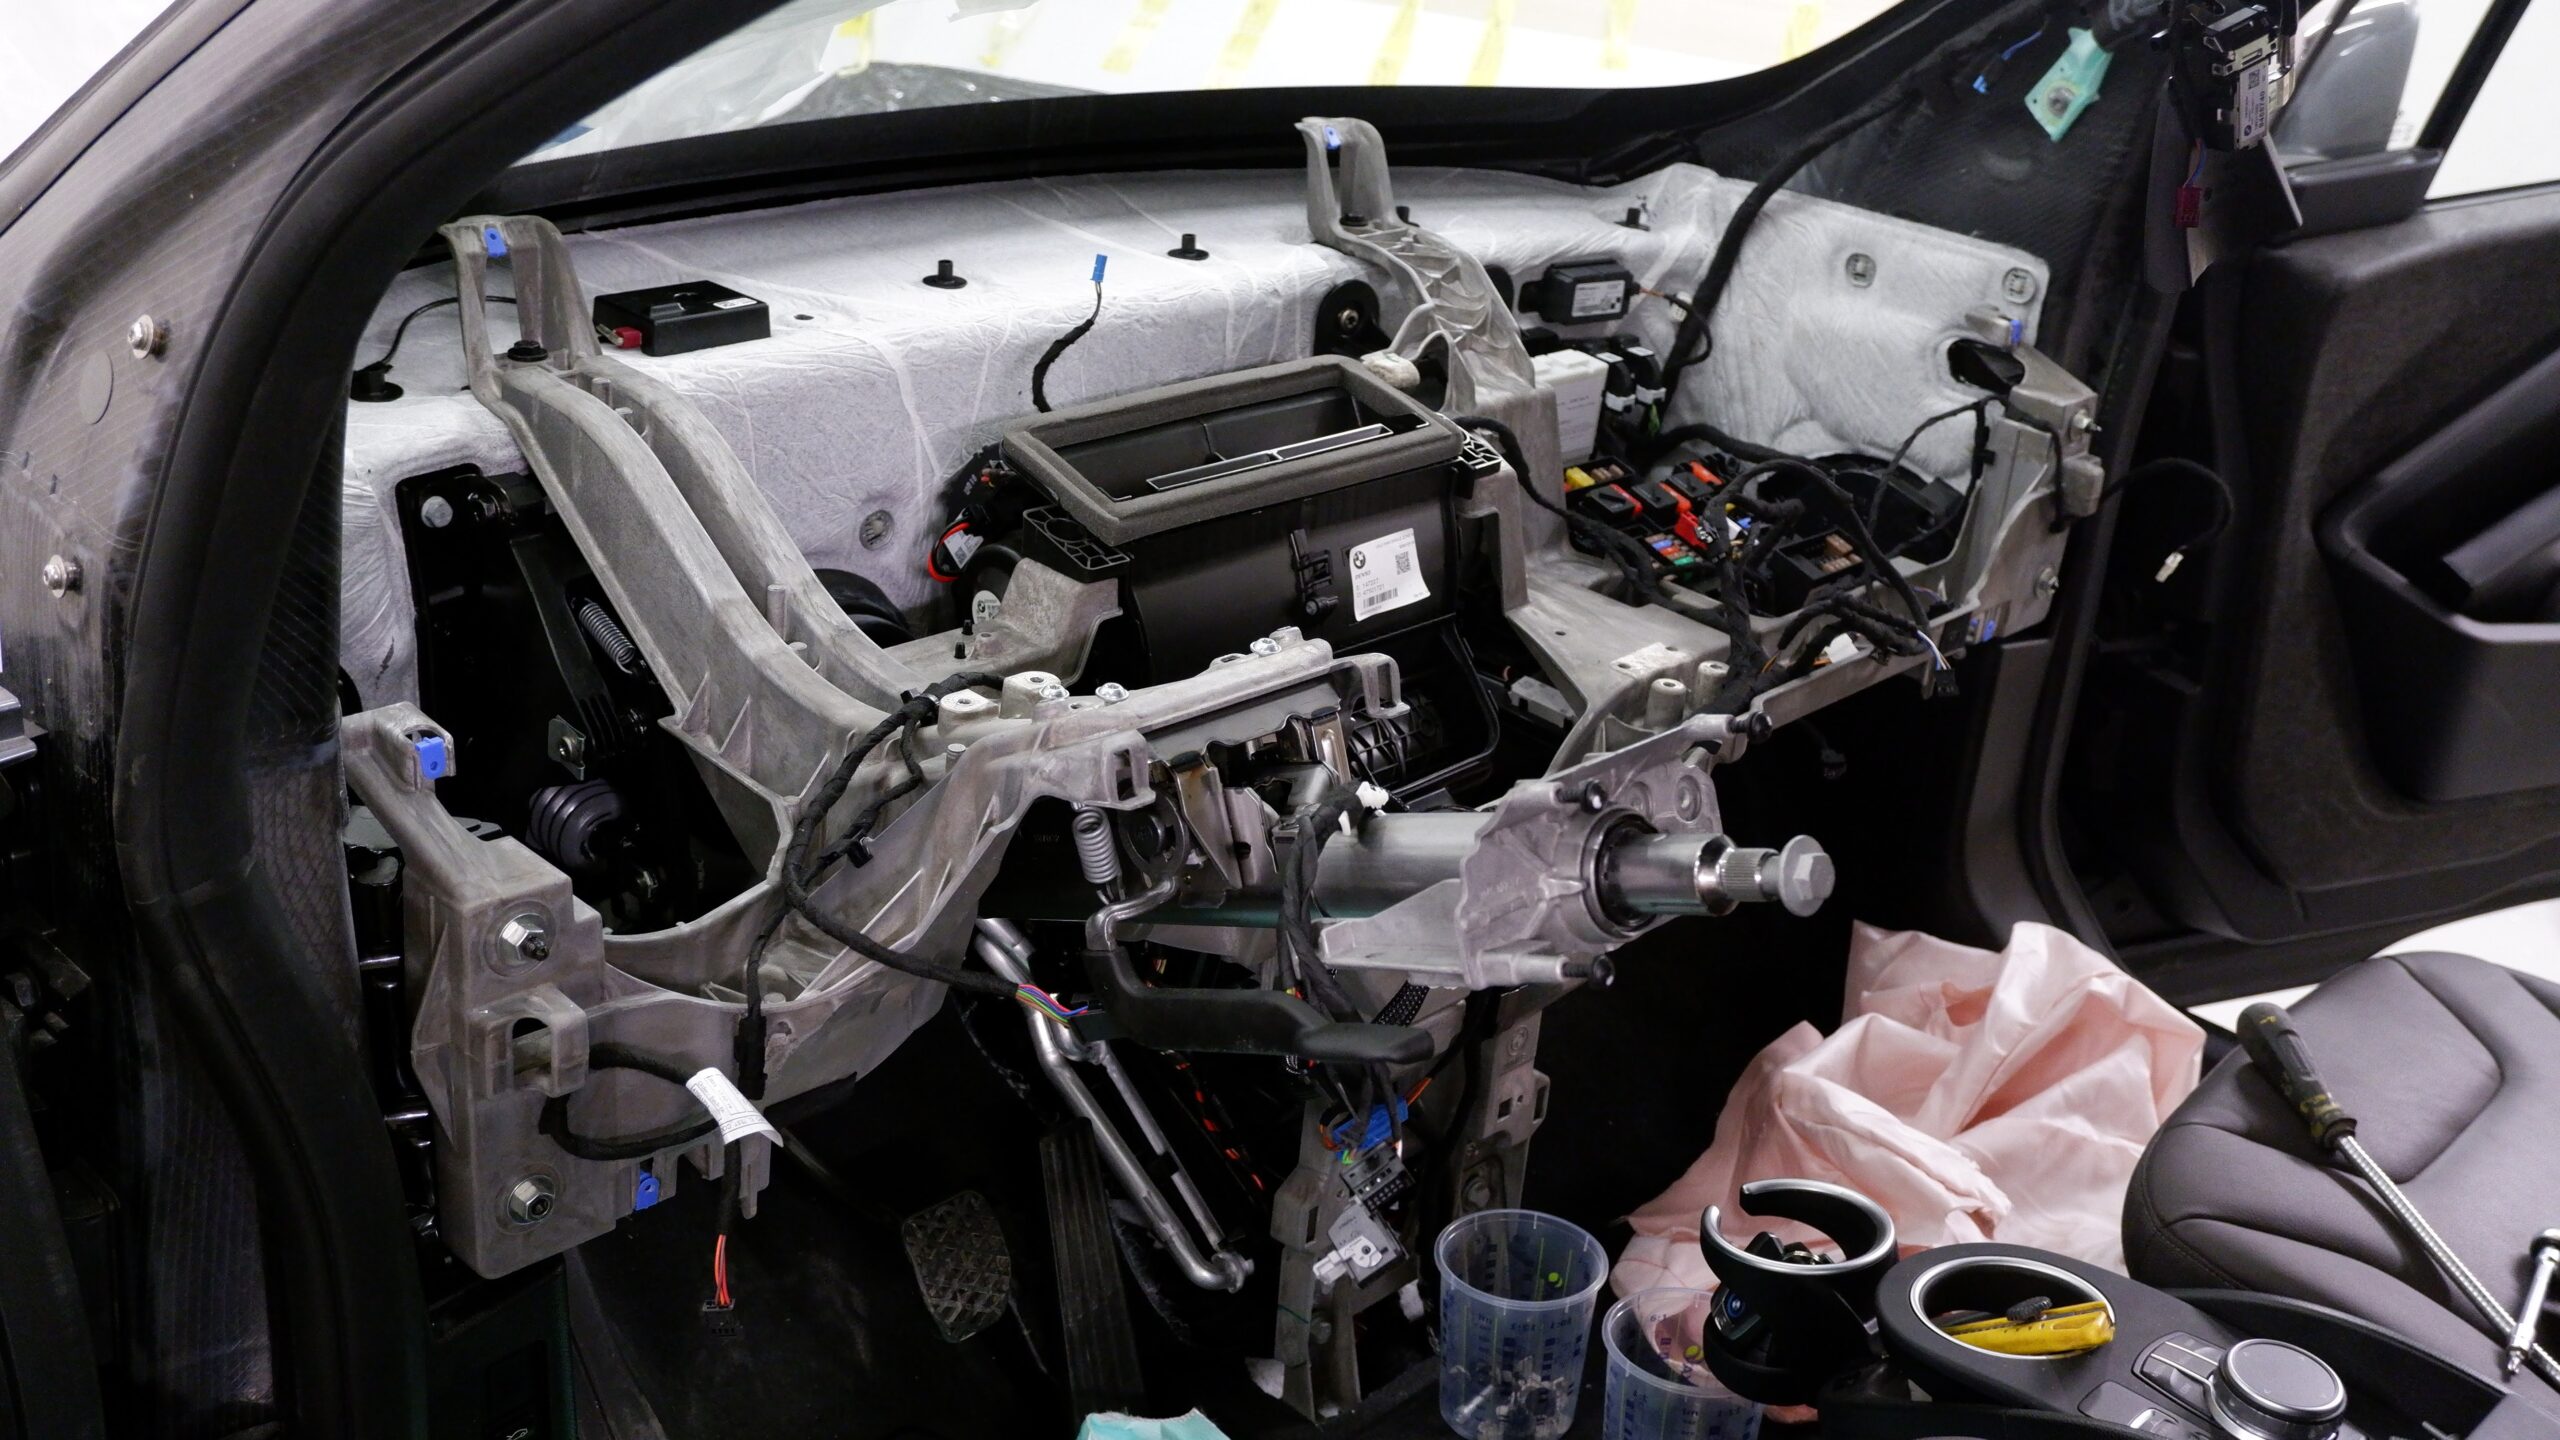
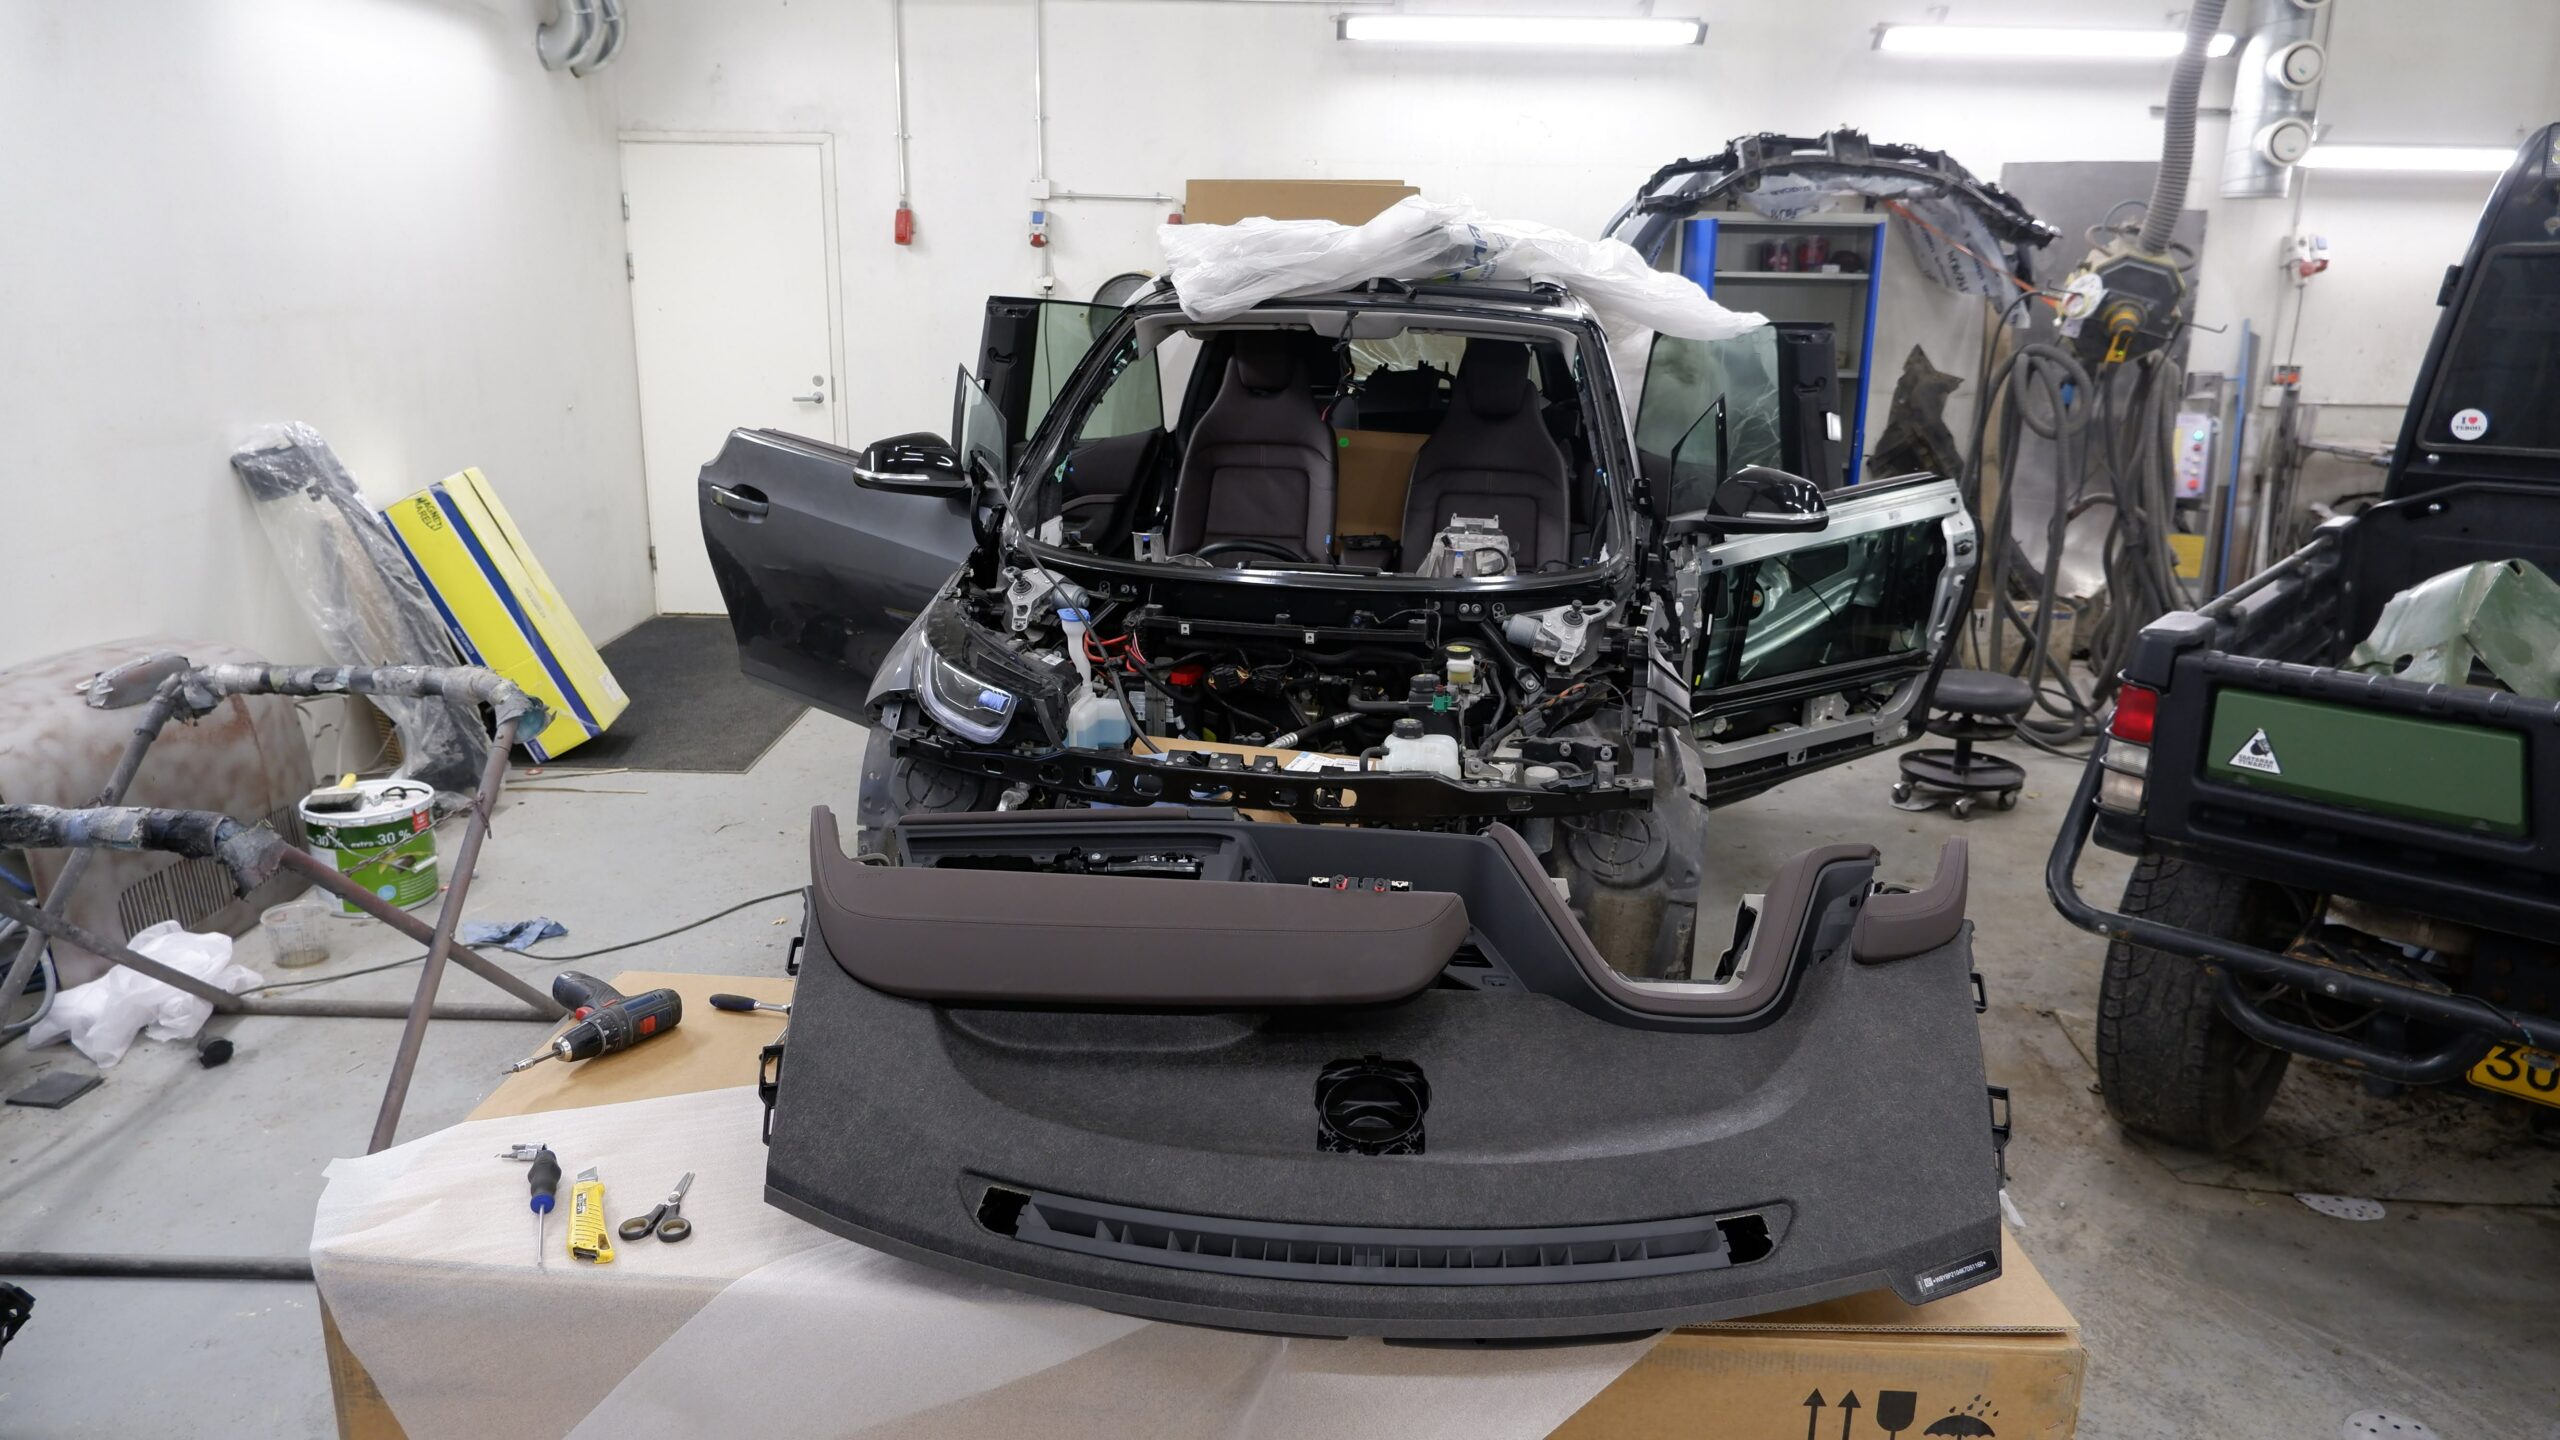
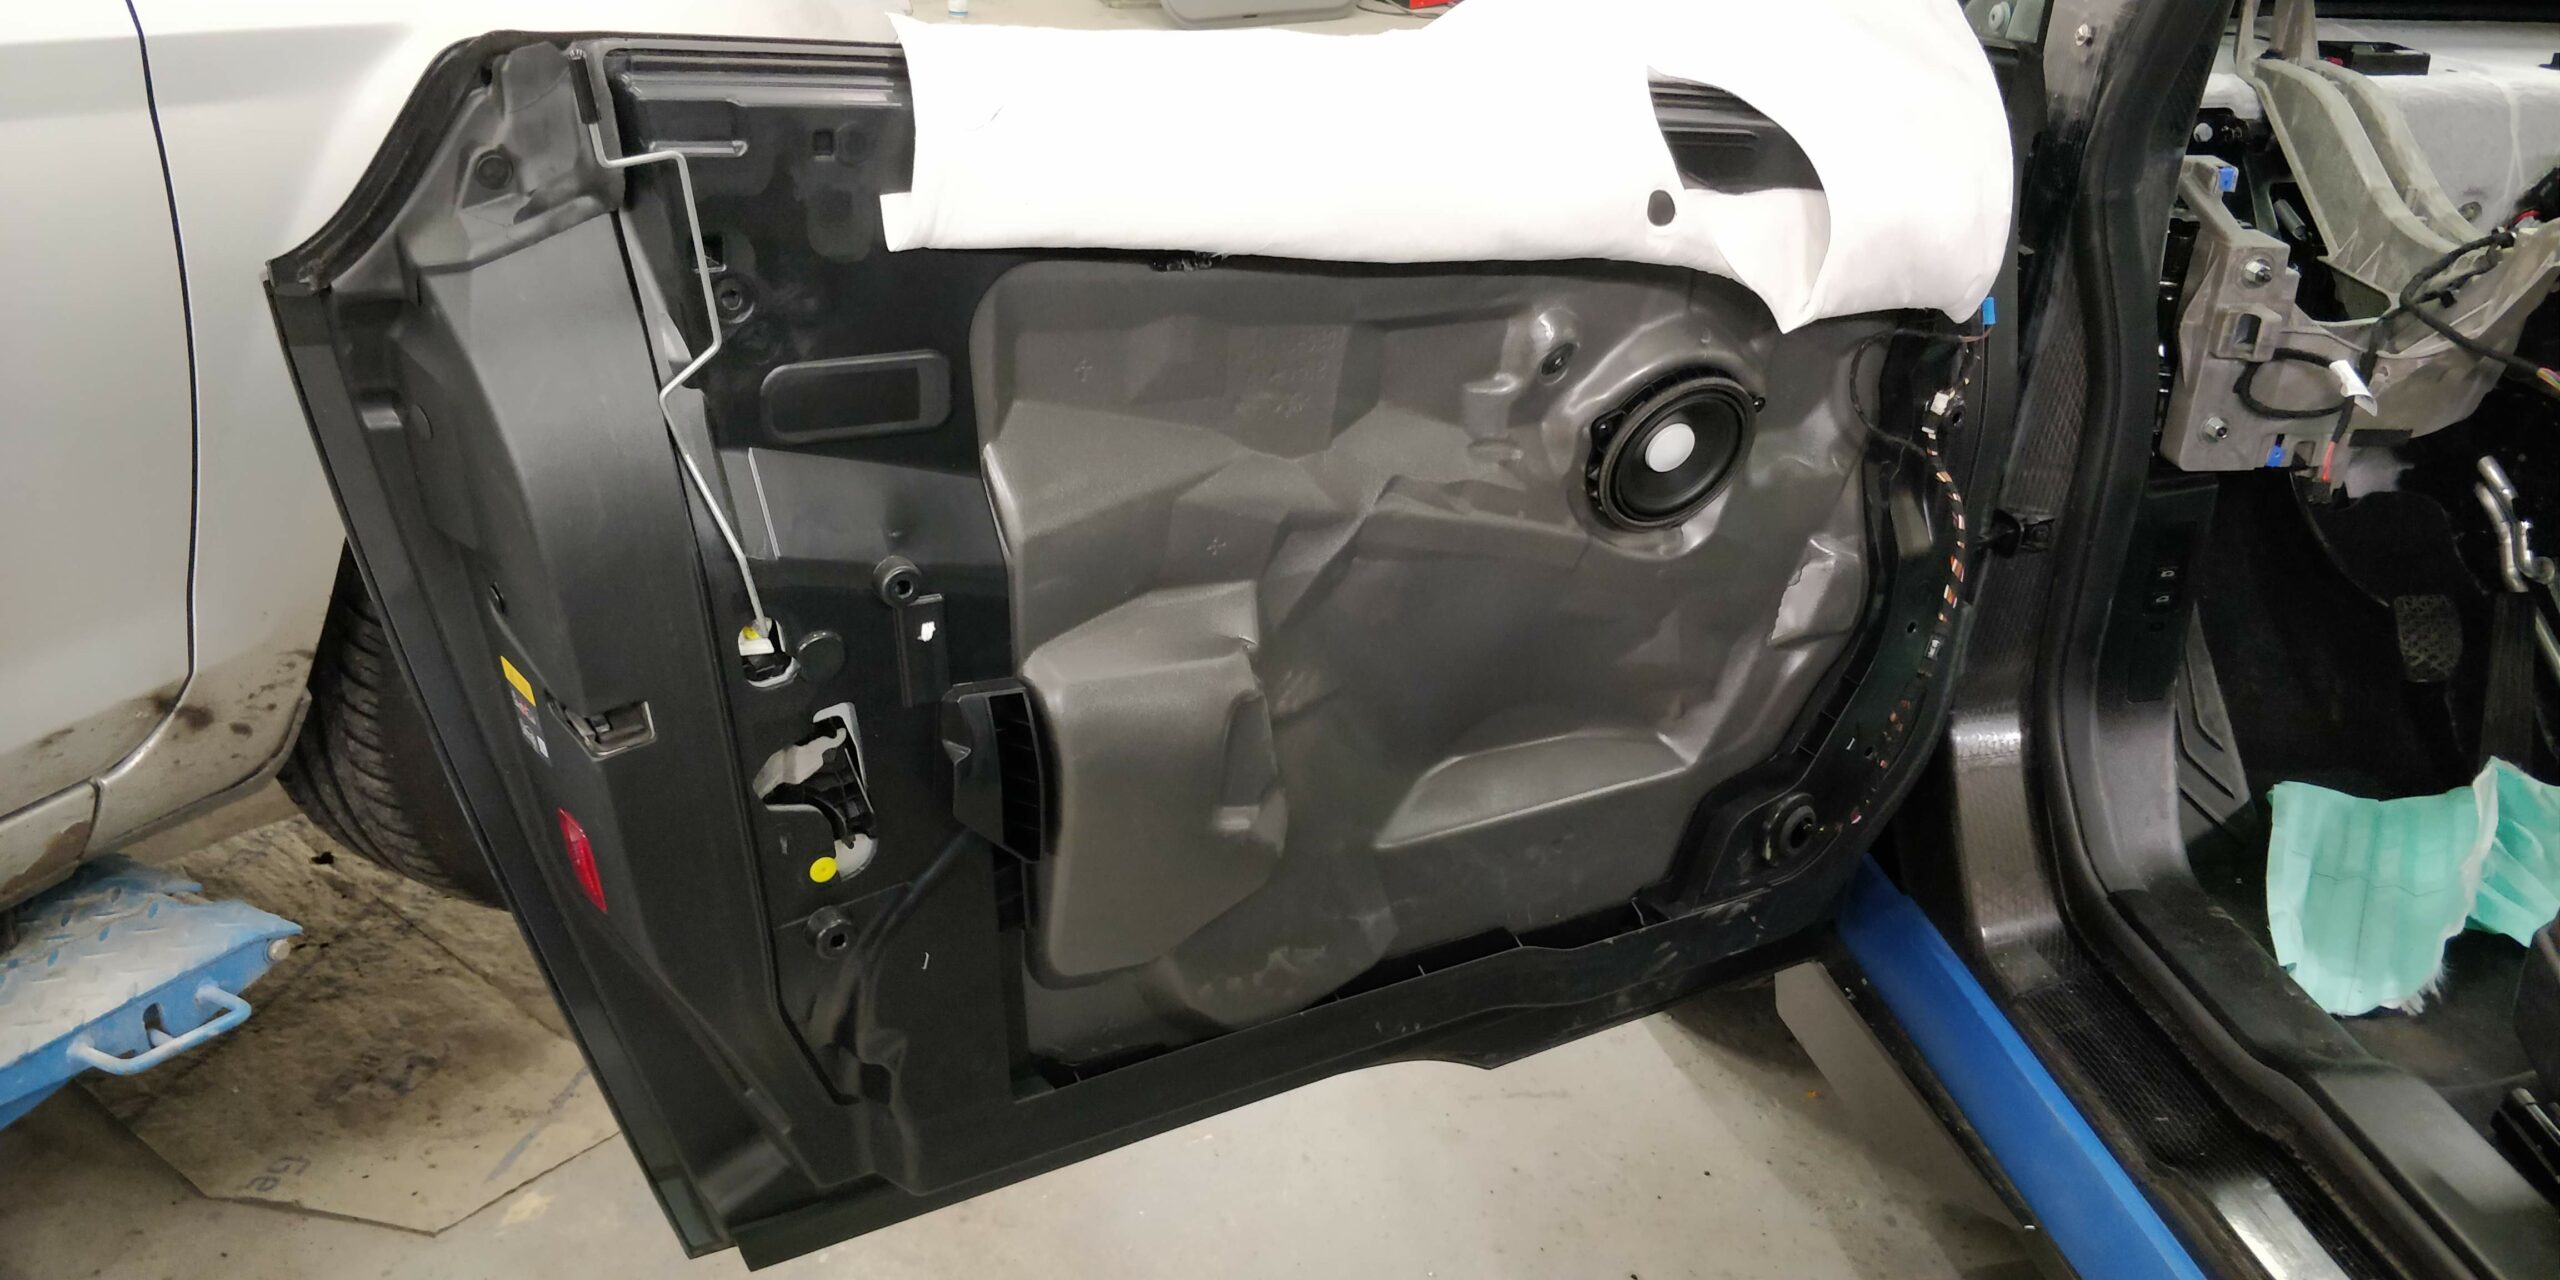
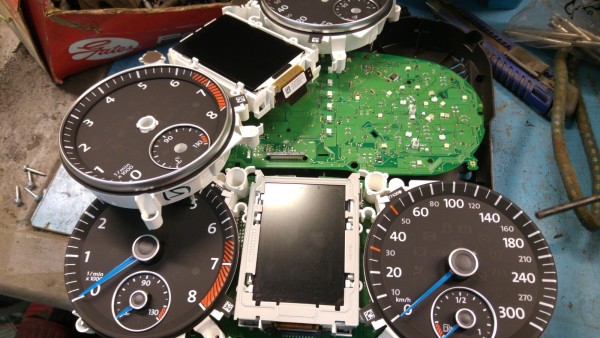
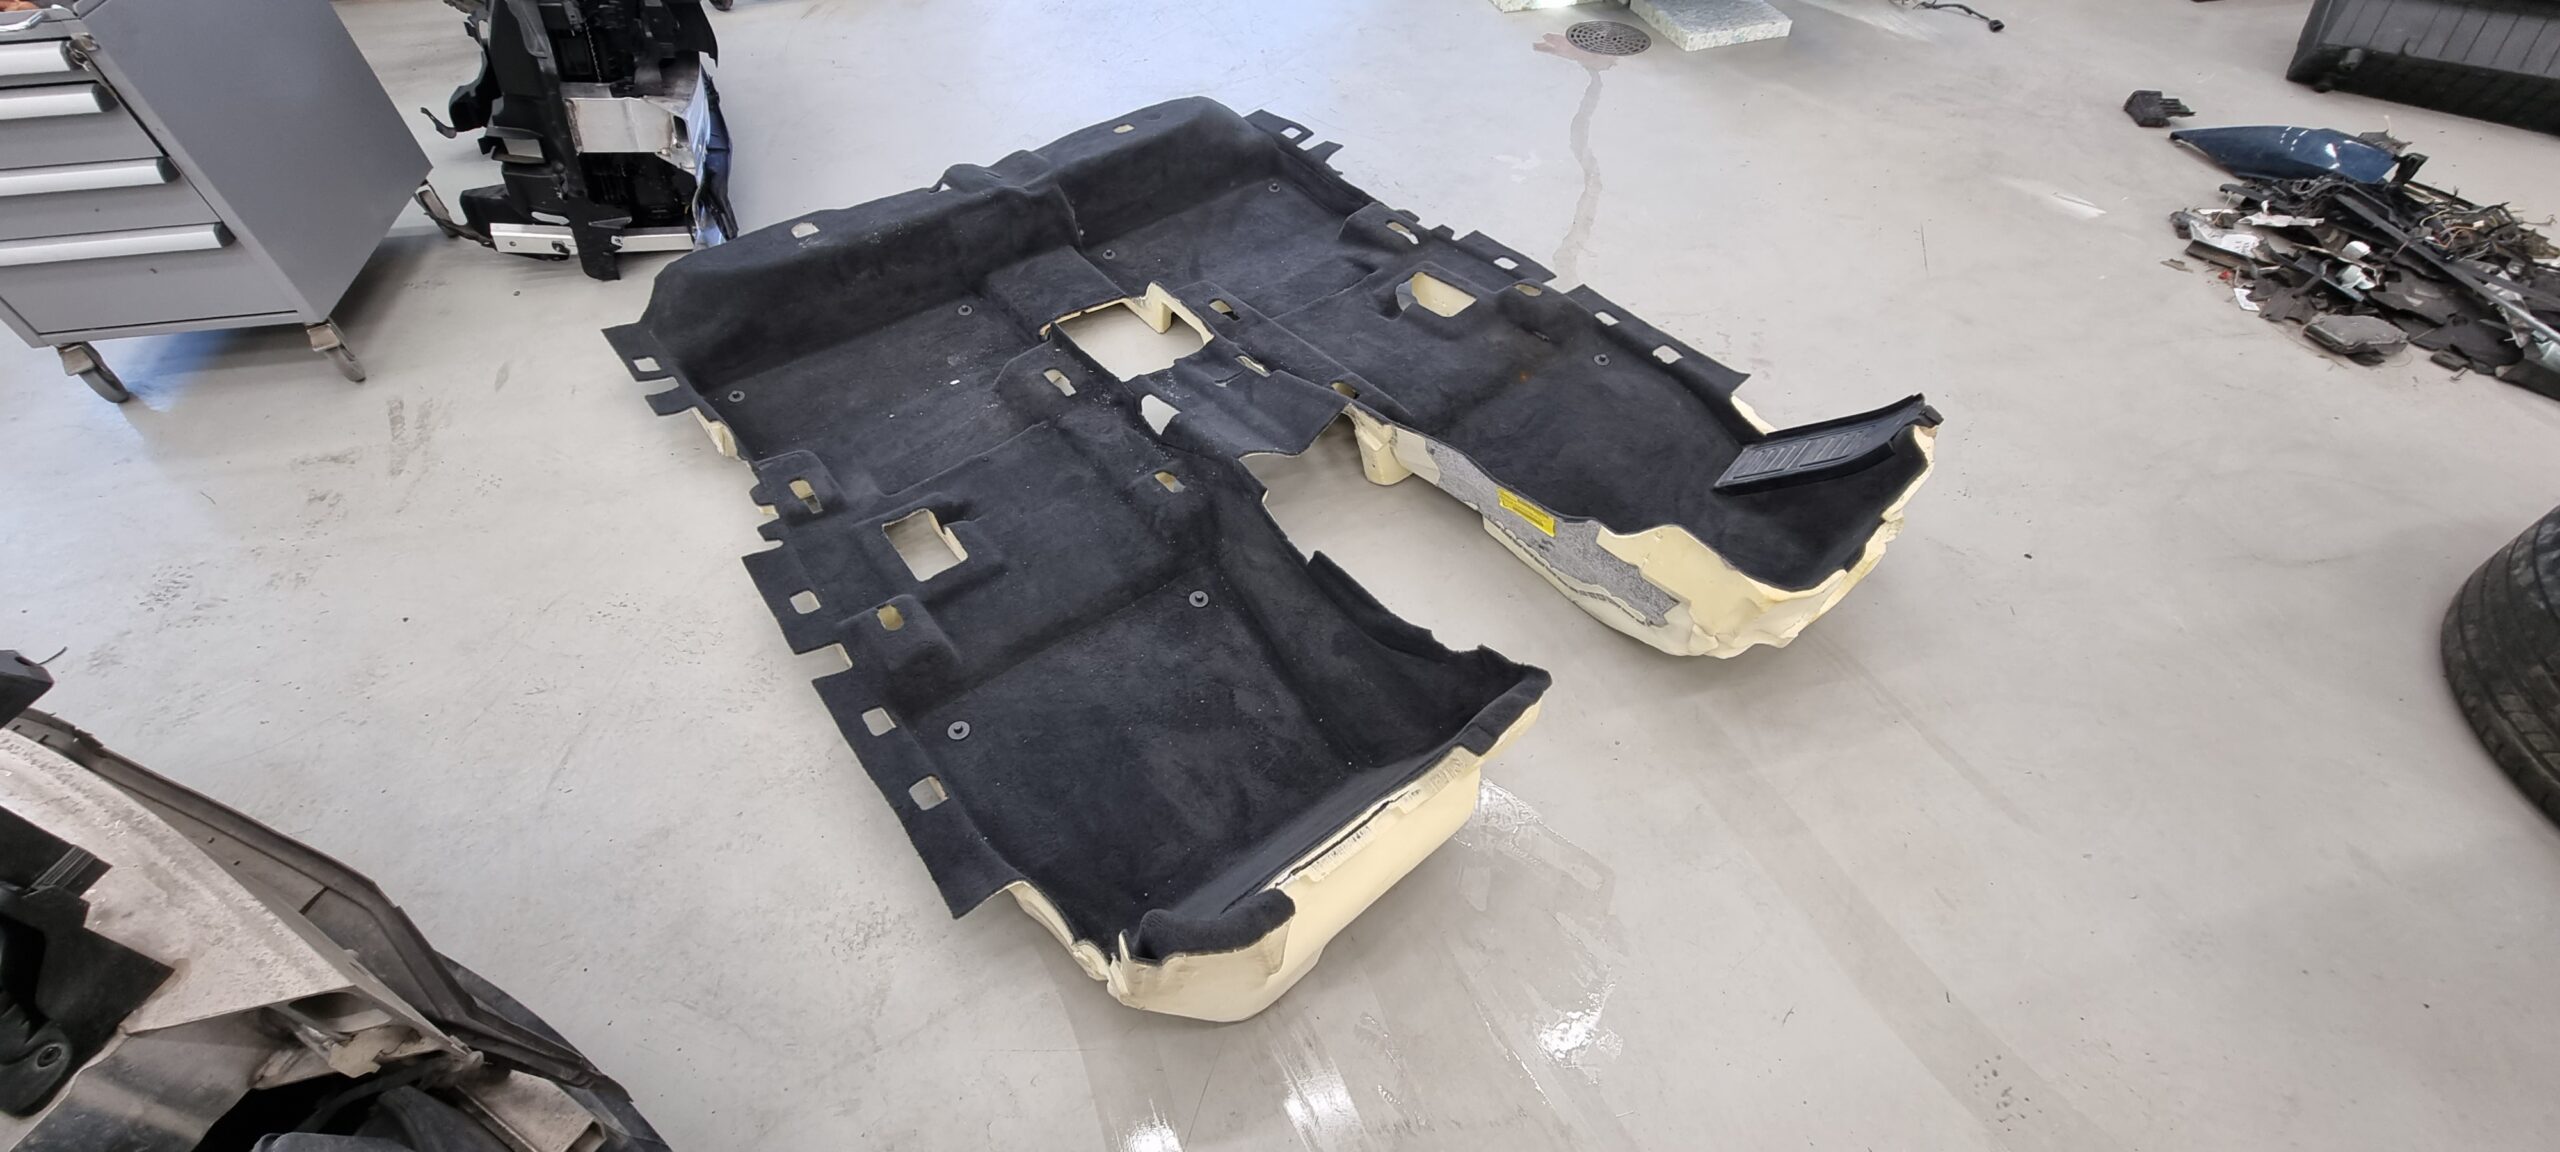
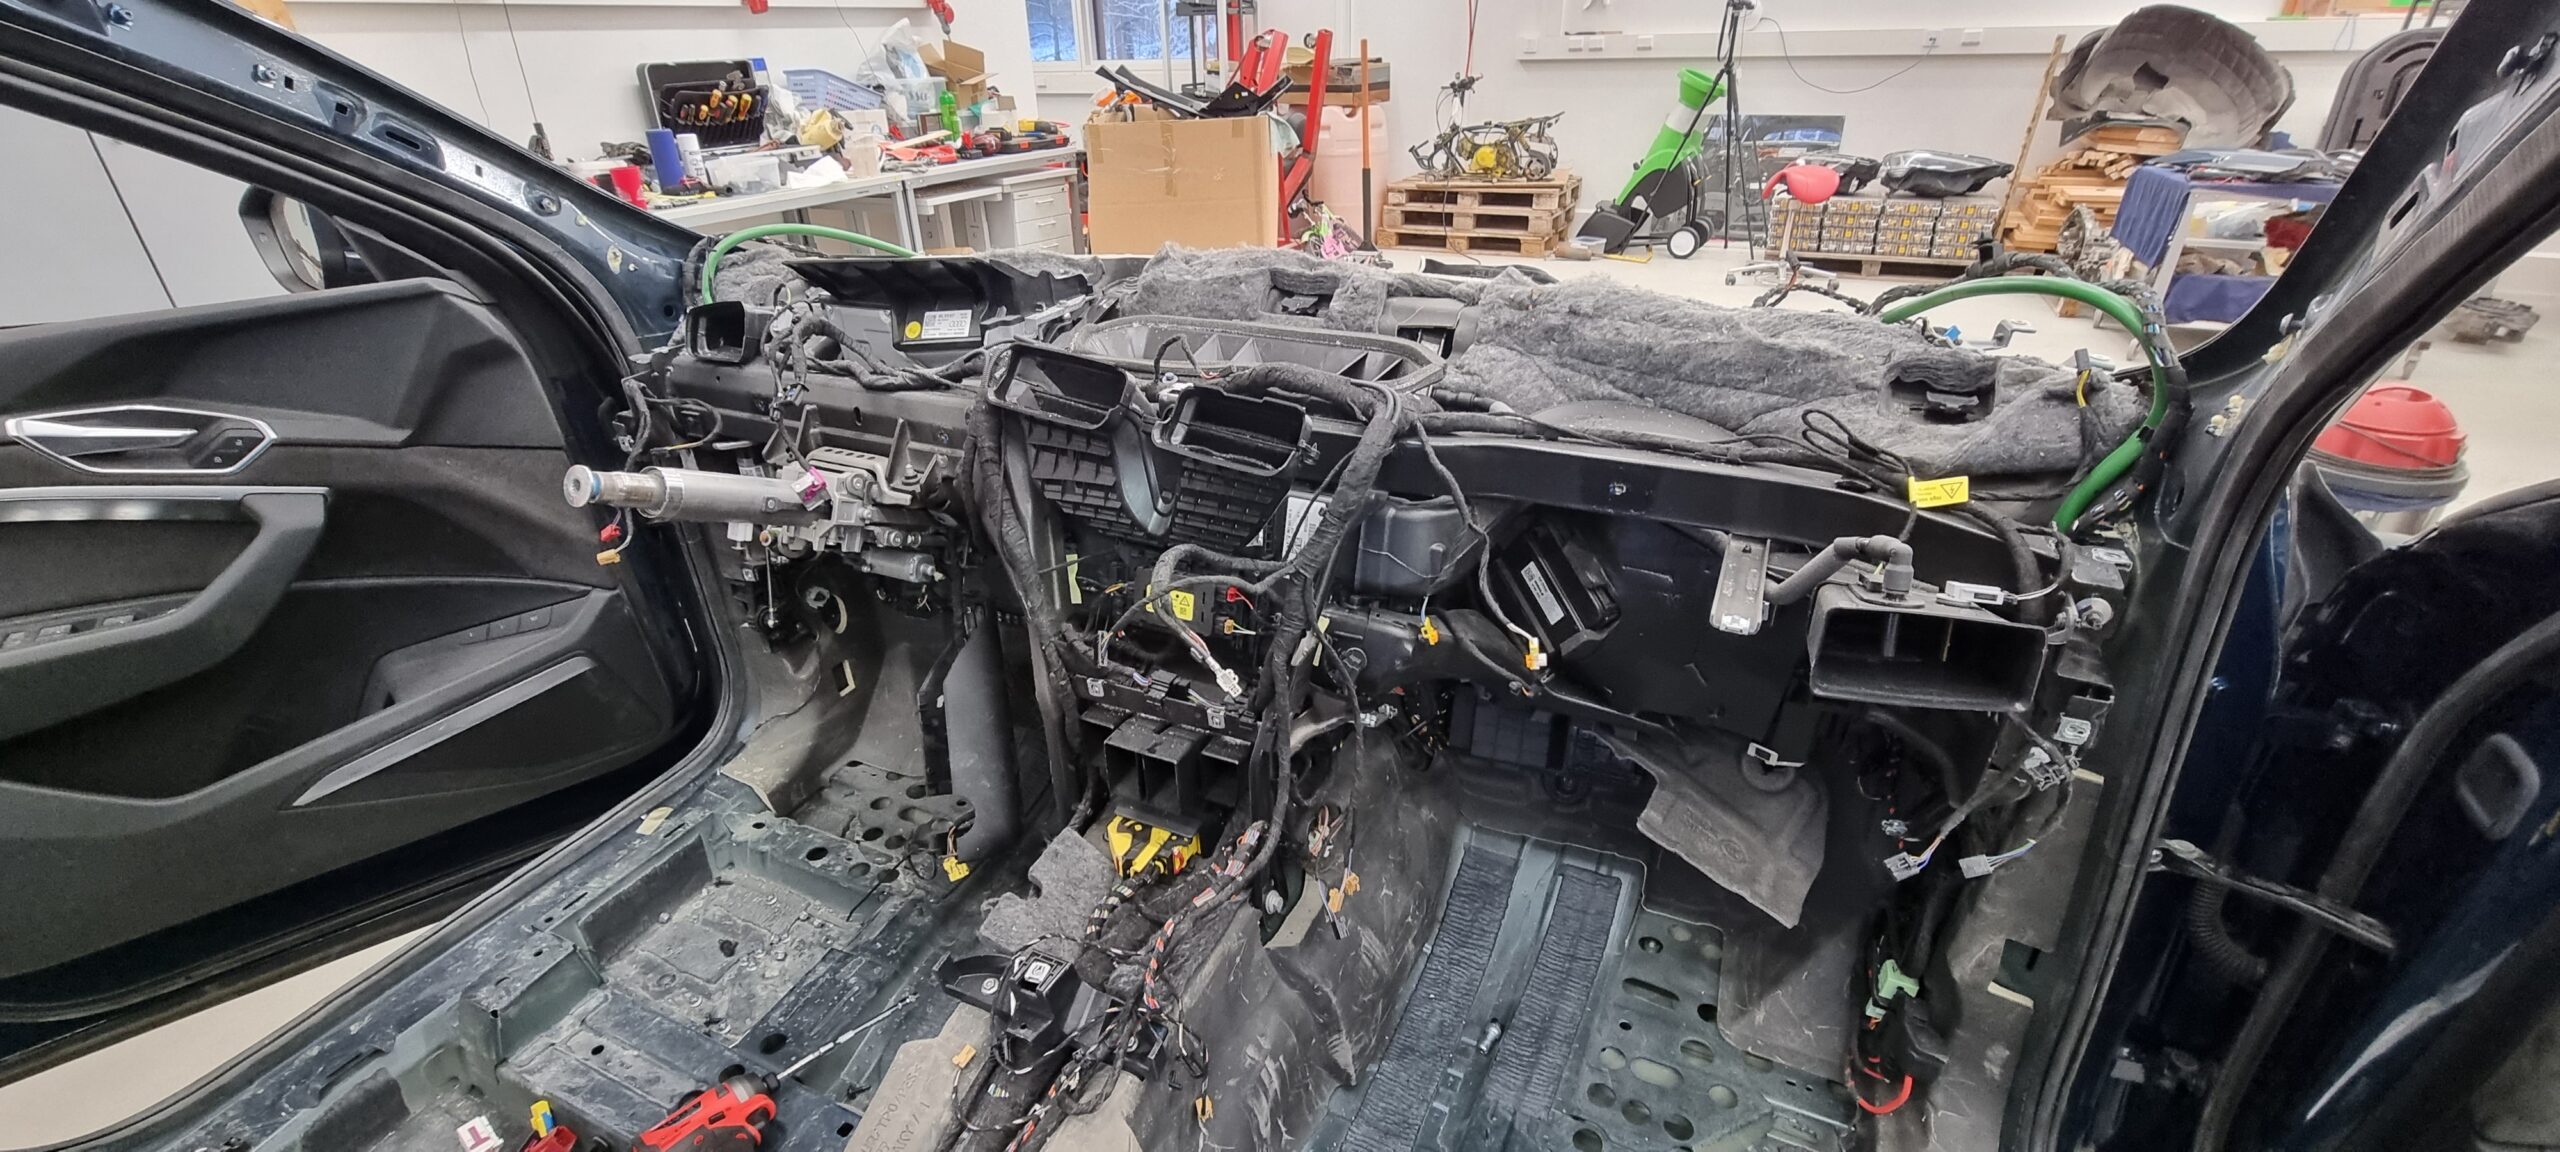
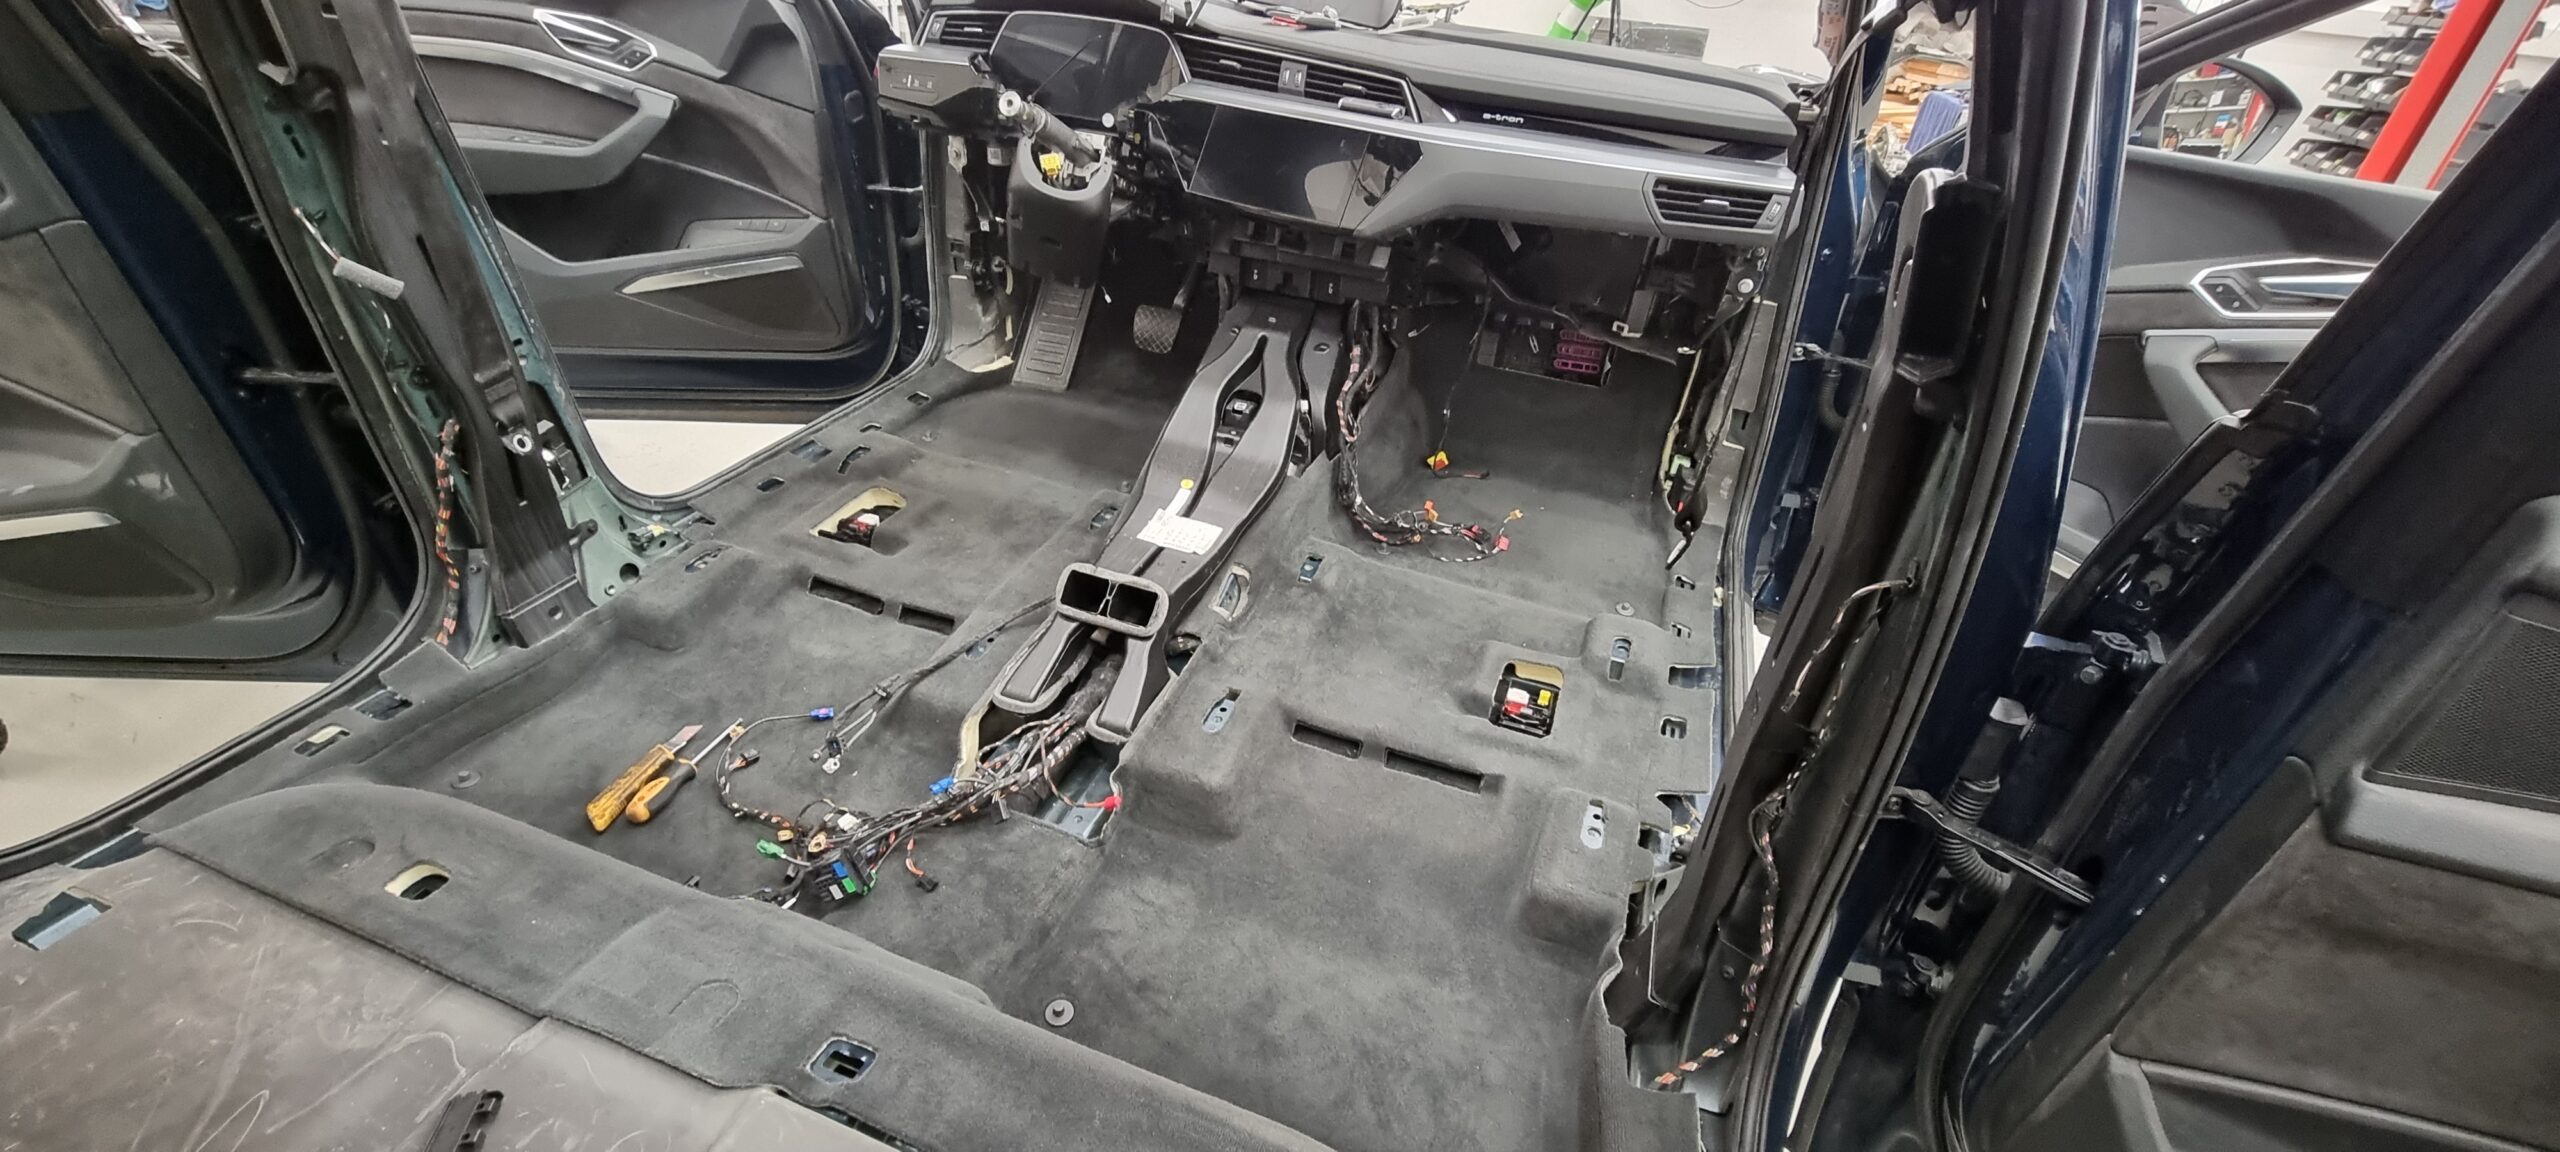
Ihan aluksi päätettiin purkaa sisusta, jotta saadaan lattiamatto kuivumaan. Matto oli litimärkä elokuun sateiden jäljiltä. Oli myös jo tiedossa, että katon oikominen tulee aiheuttamaan sen verran paljon sotkua, että sisusta on muutenkin parasta purkaa pois, ettei vahingoitu. Myös bägien ja vöiden uusimisen takia sisustaa joutuisi hyvin paljon purkamaan myöhemmin.

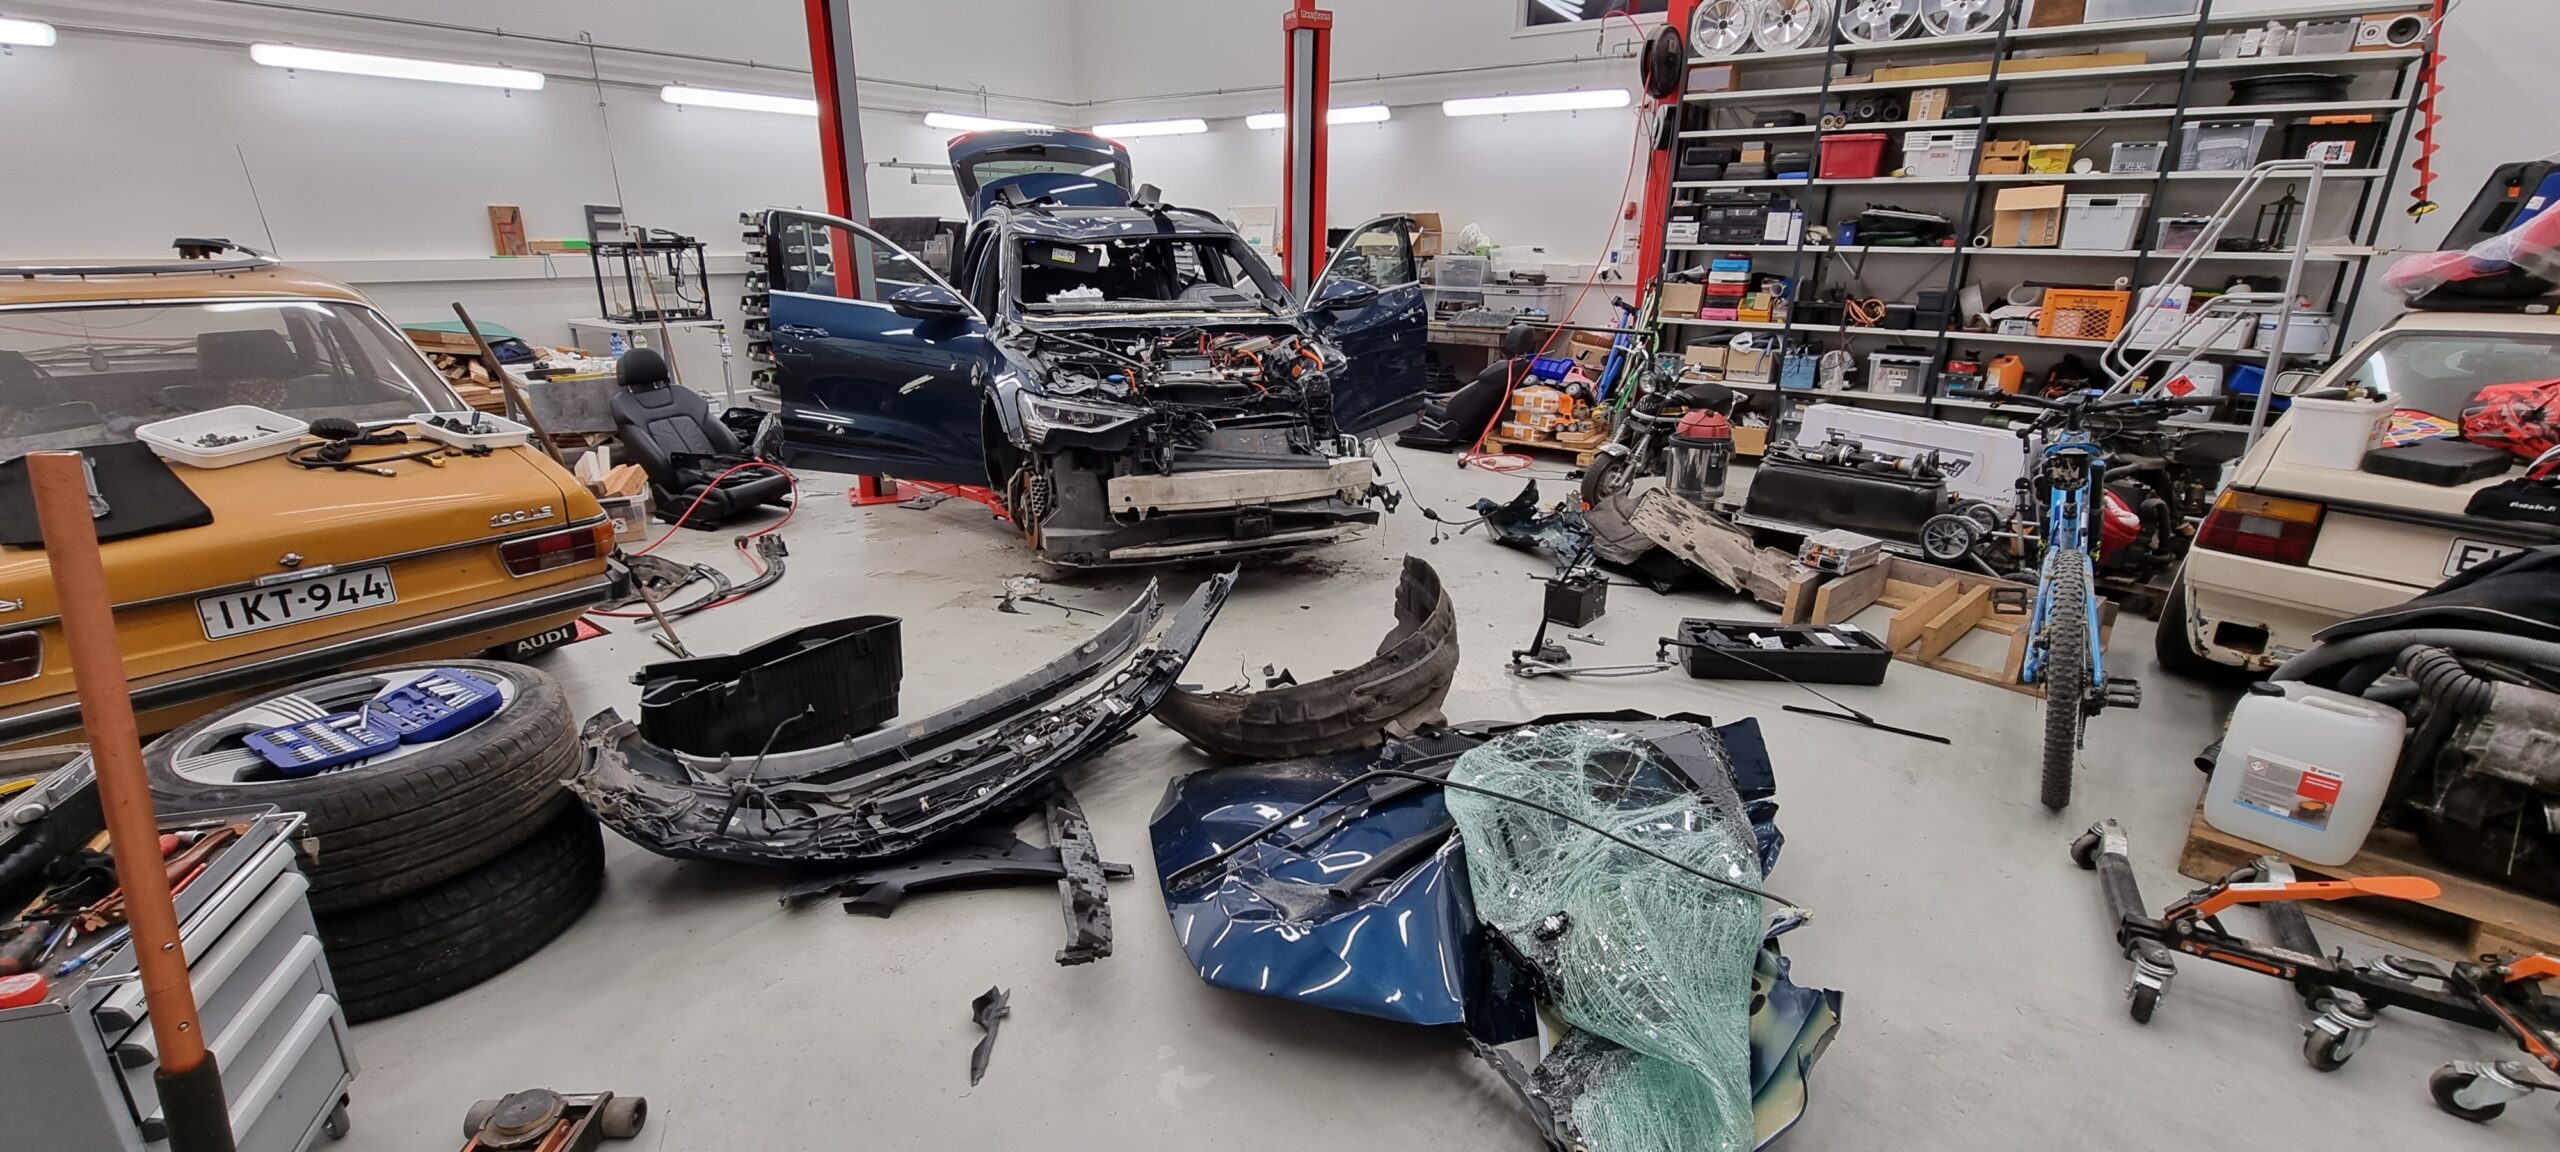
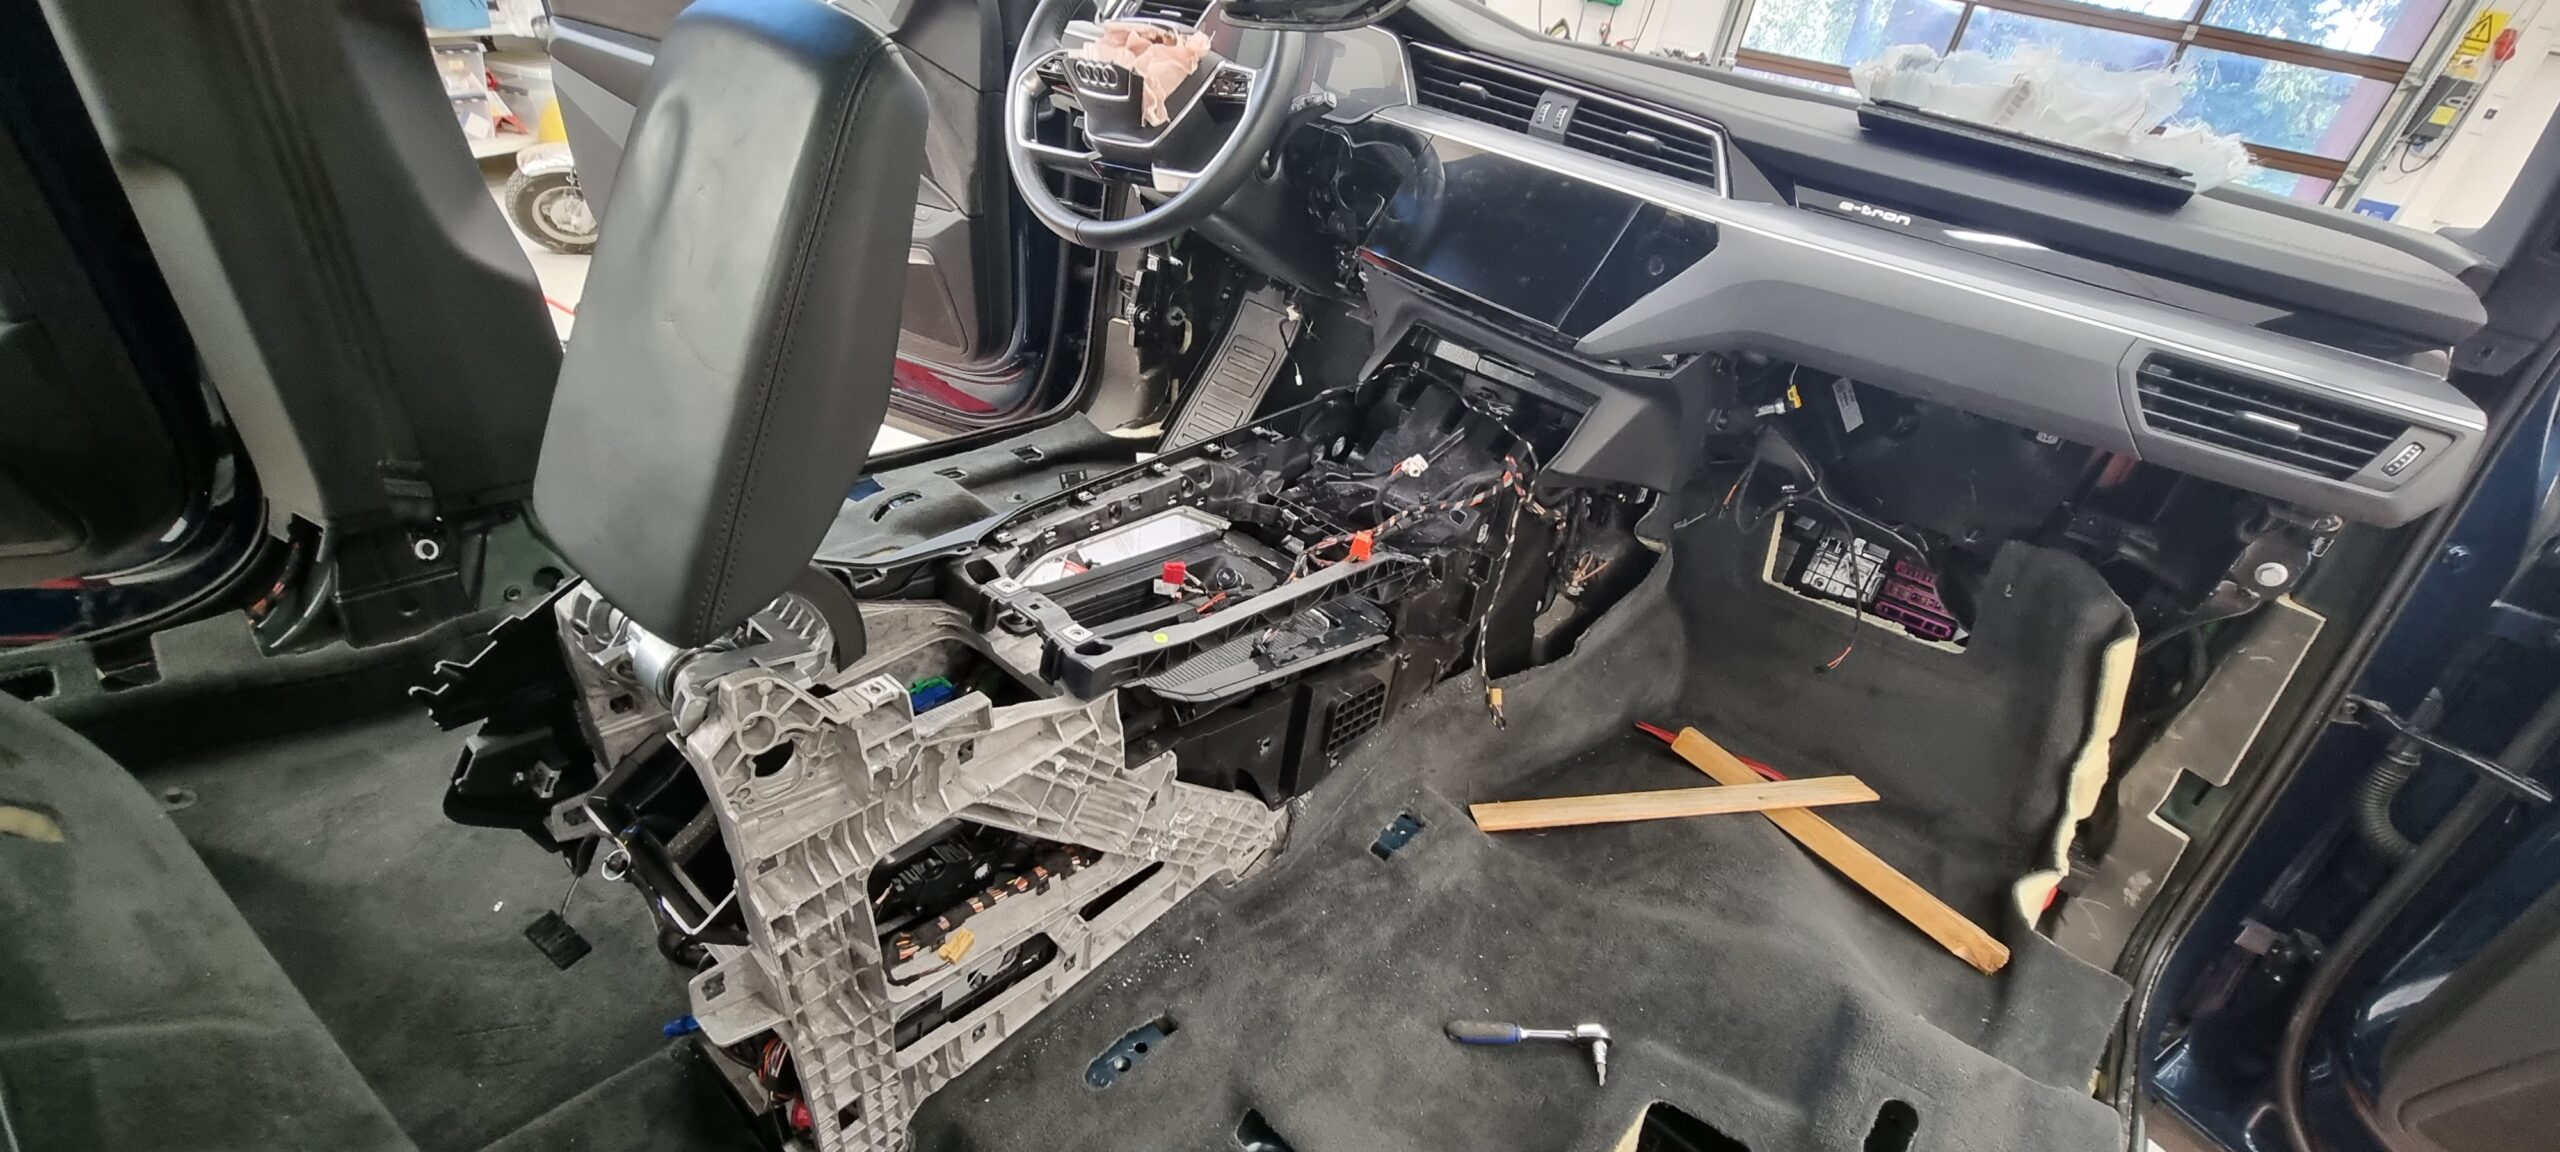
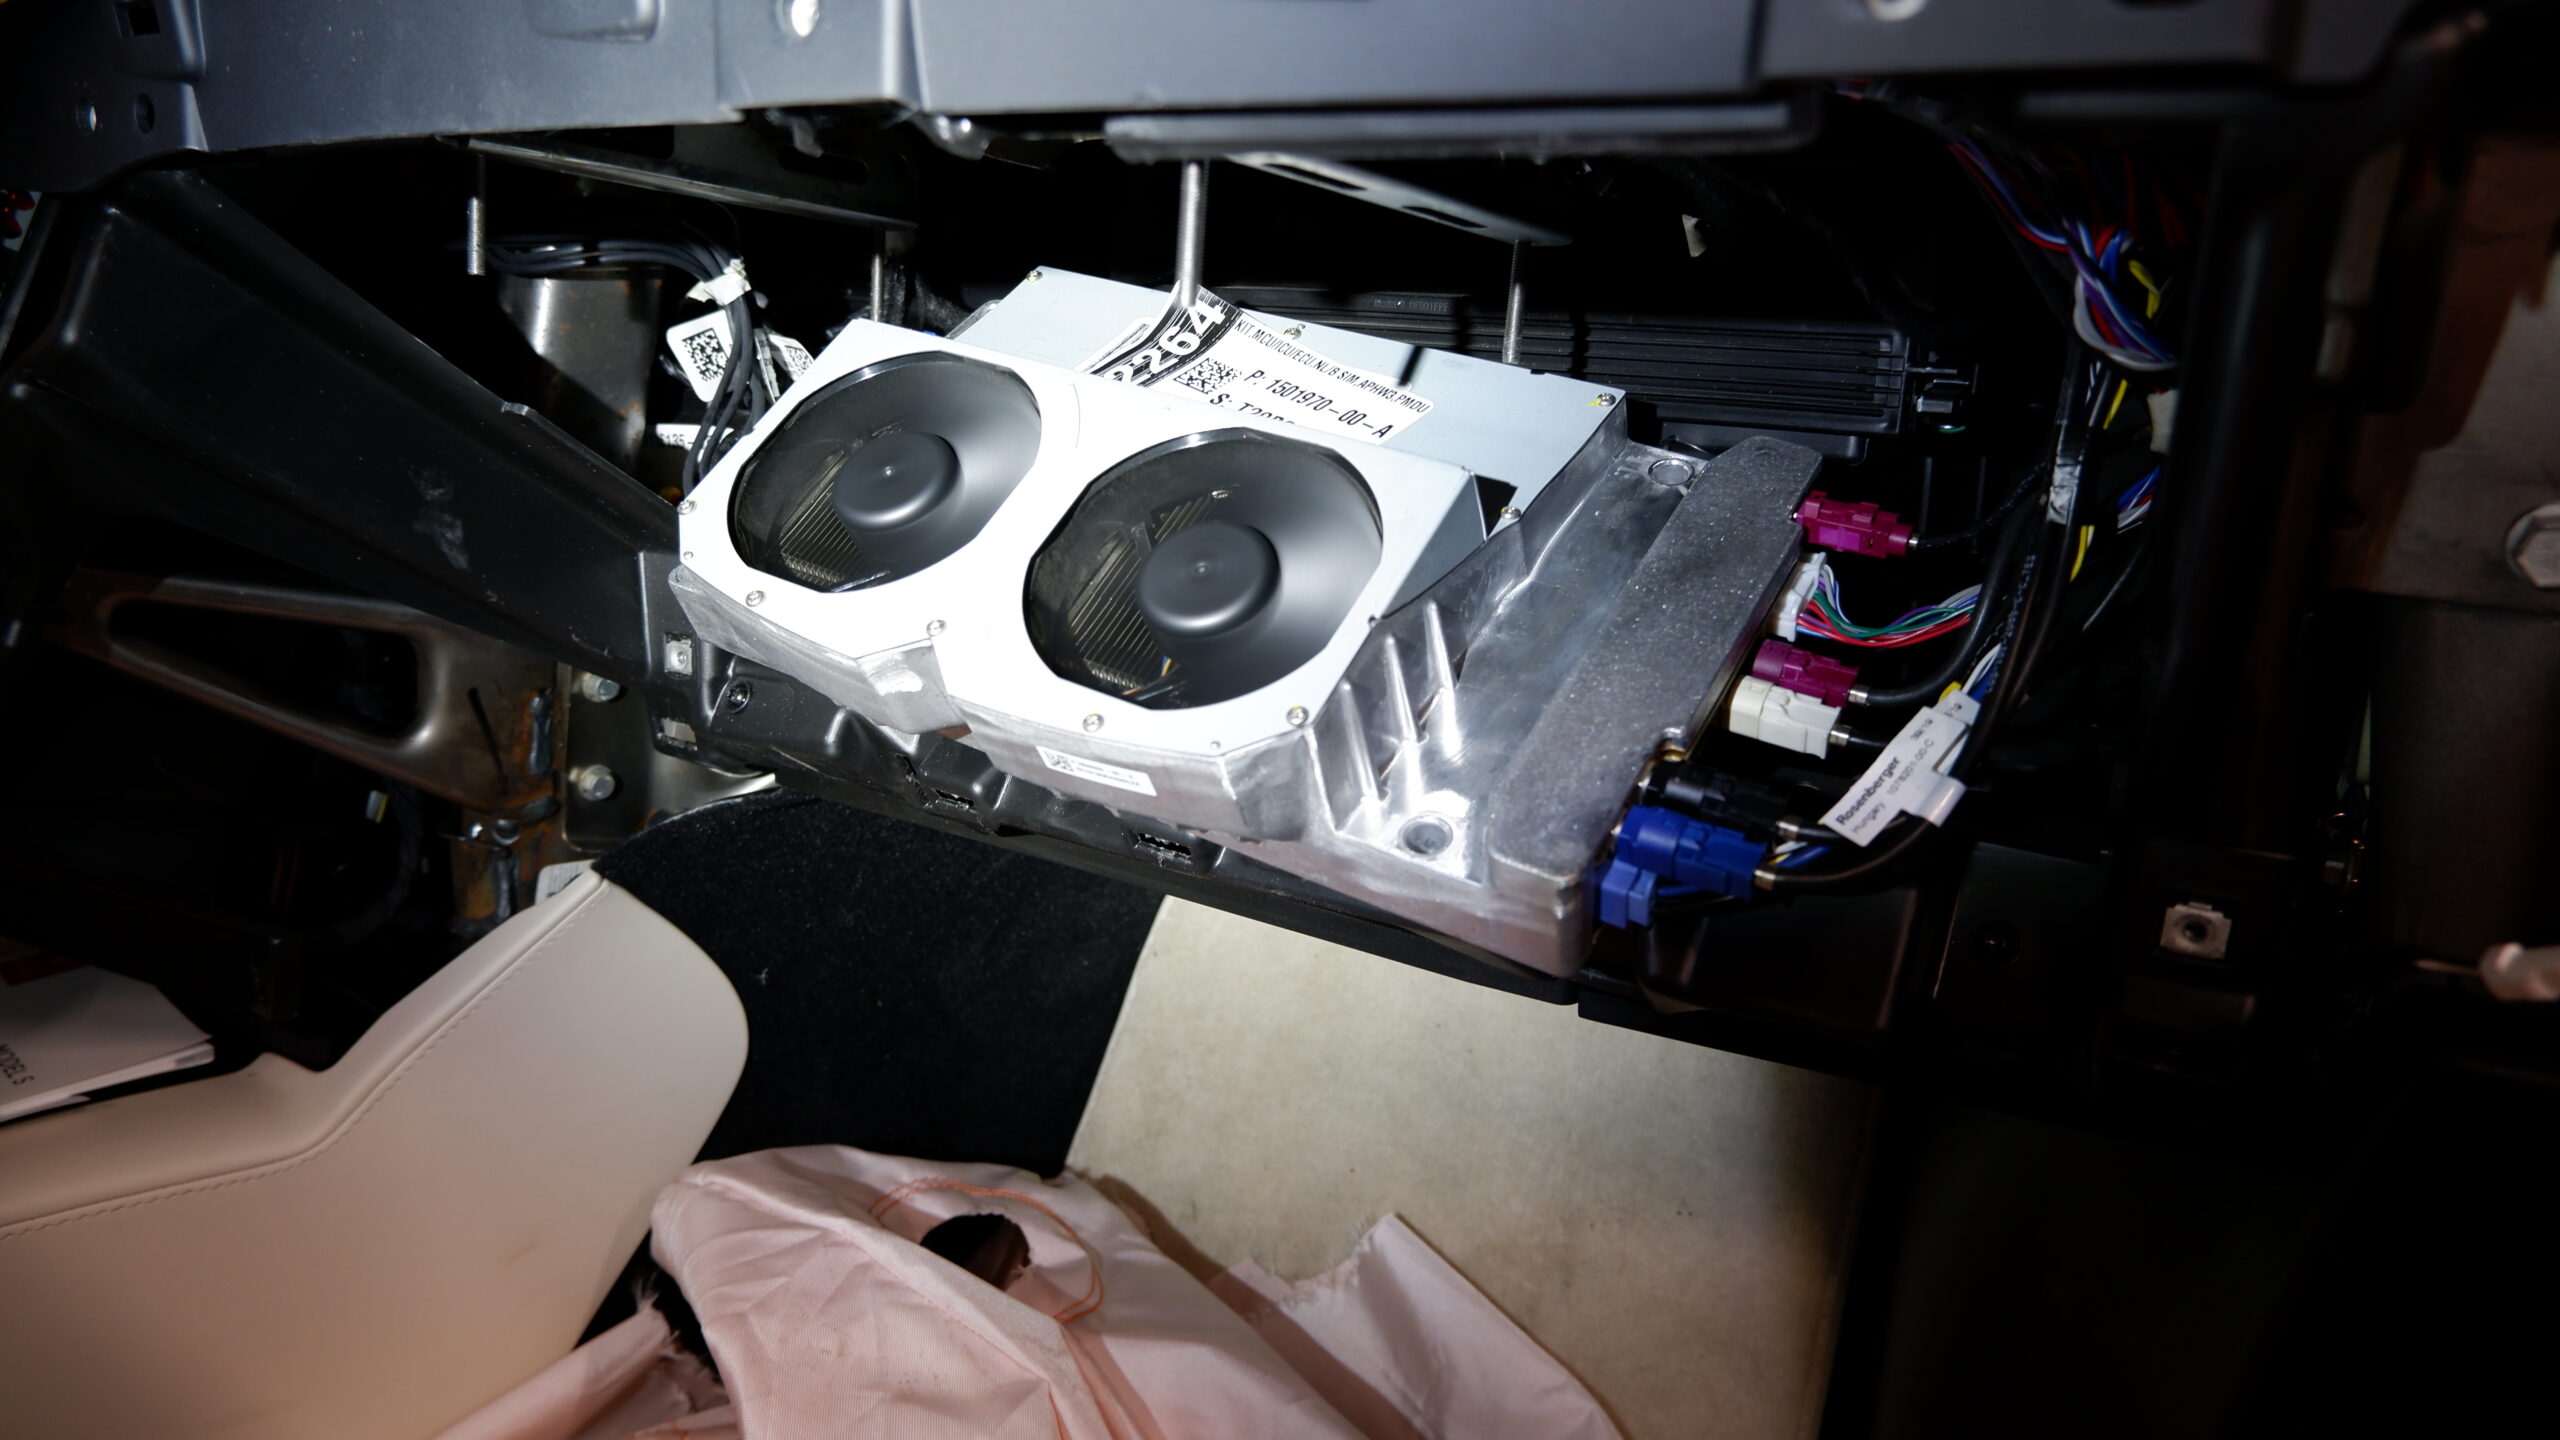
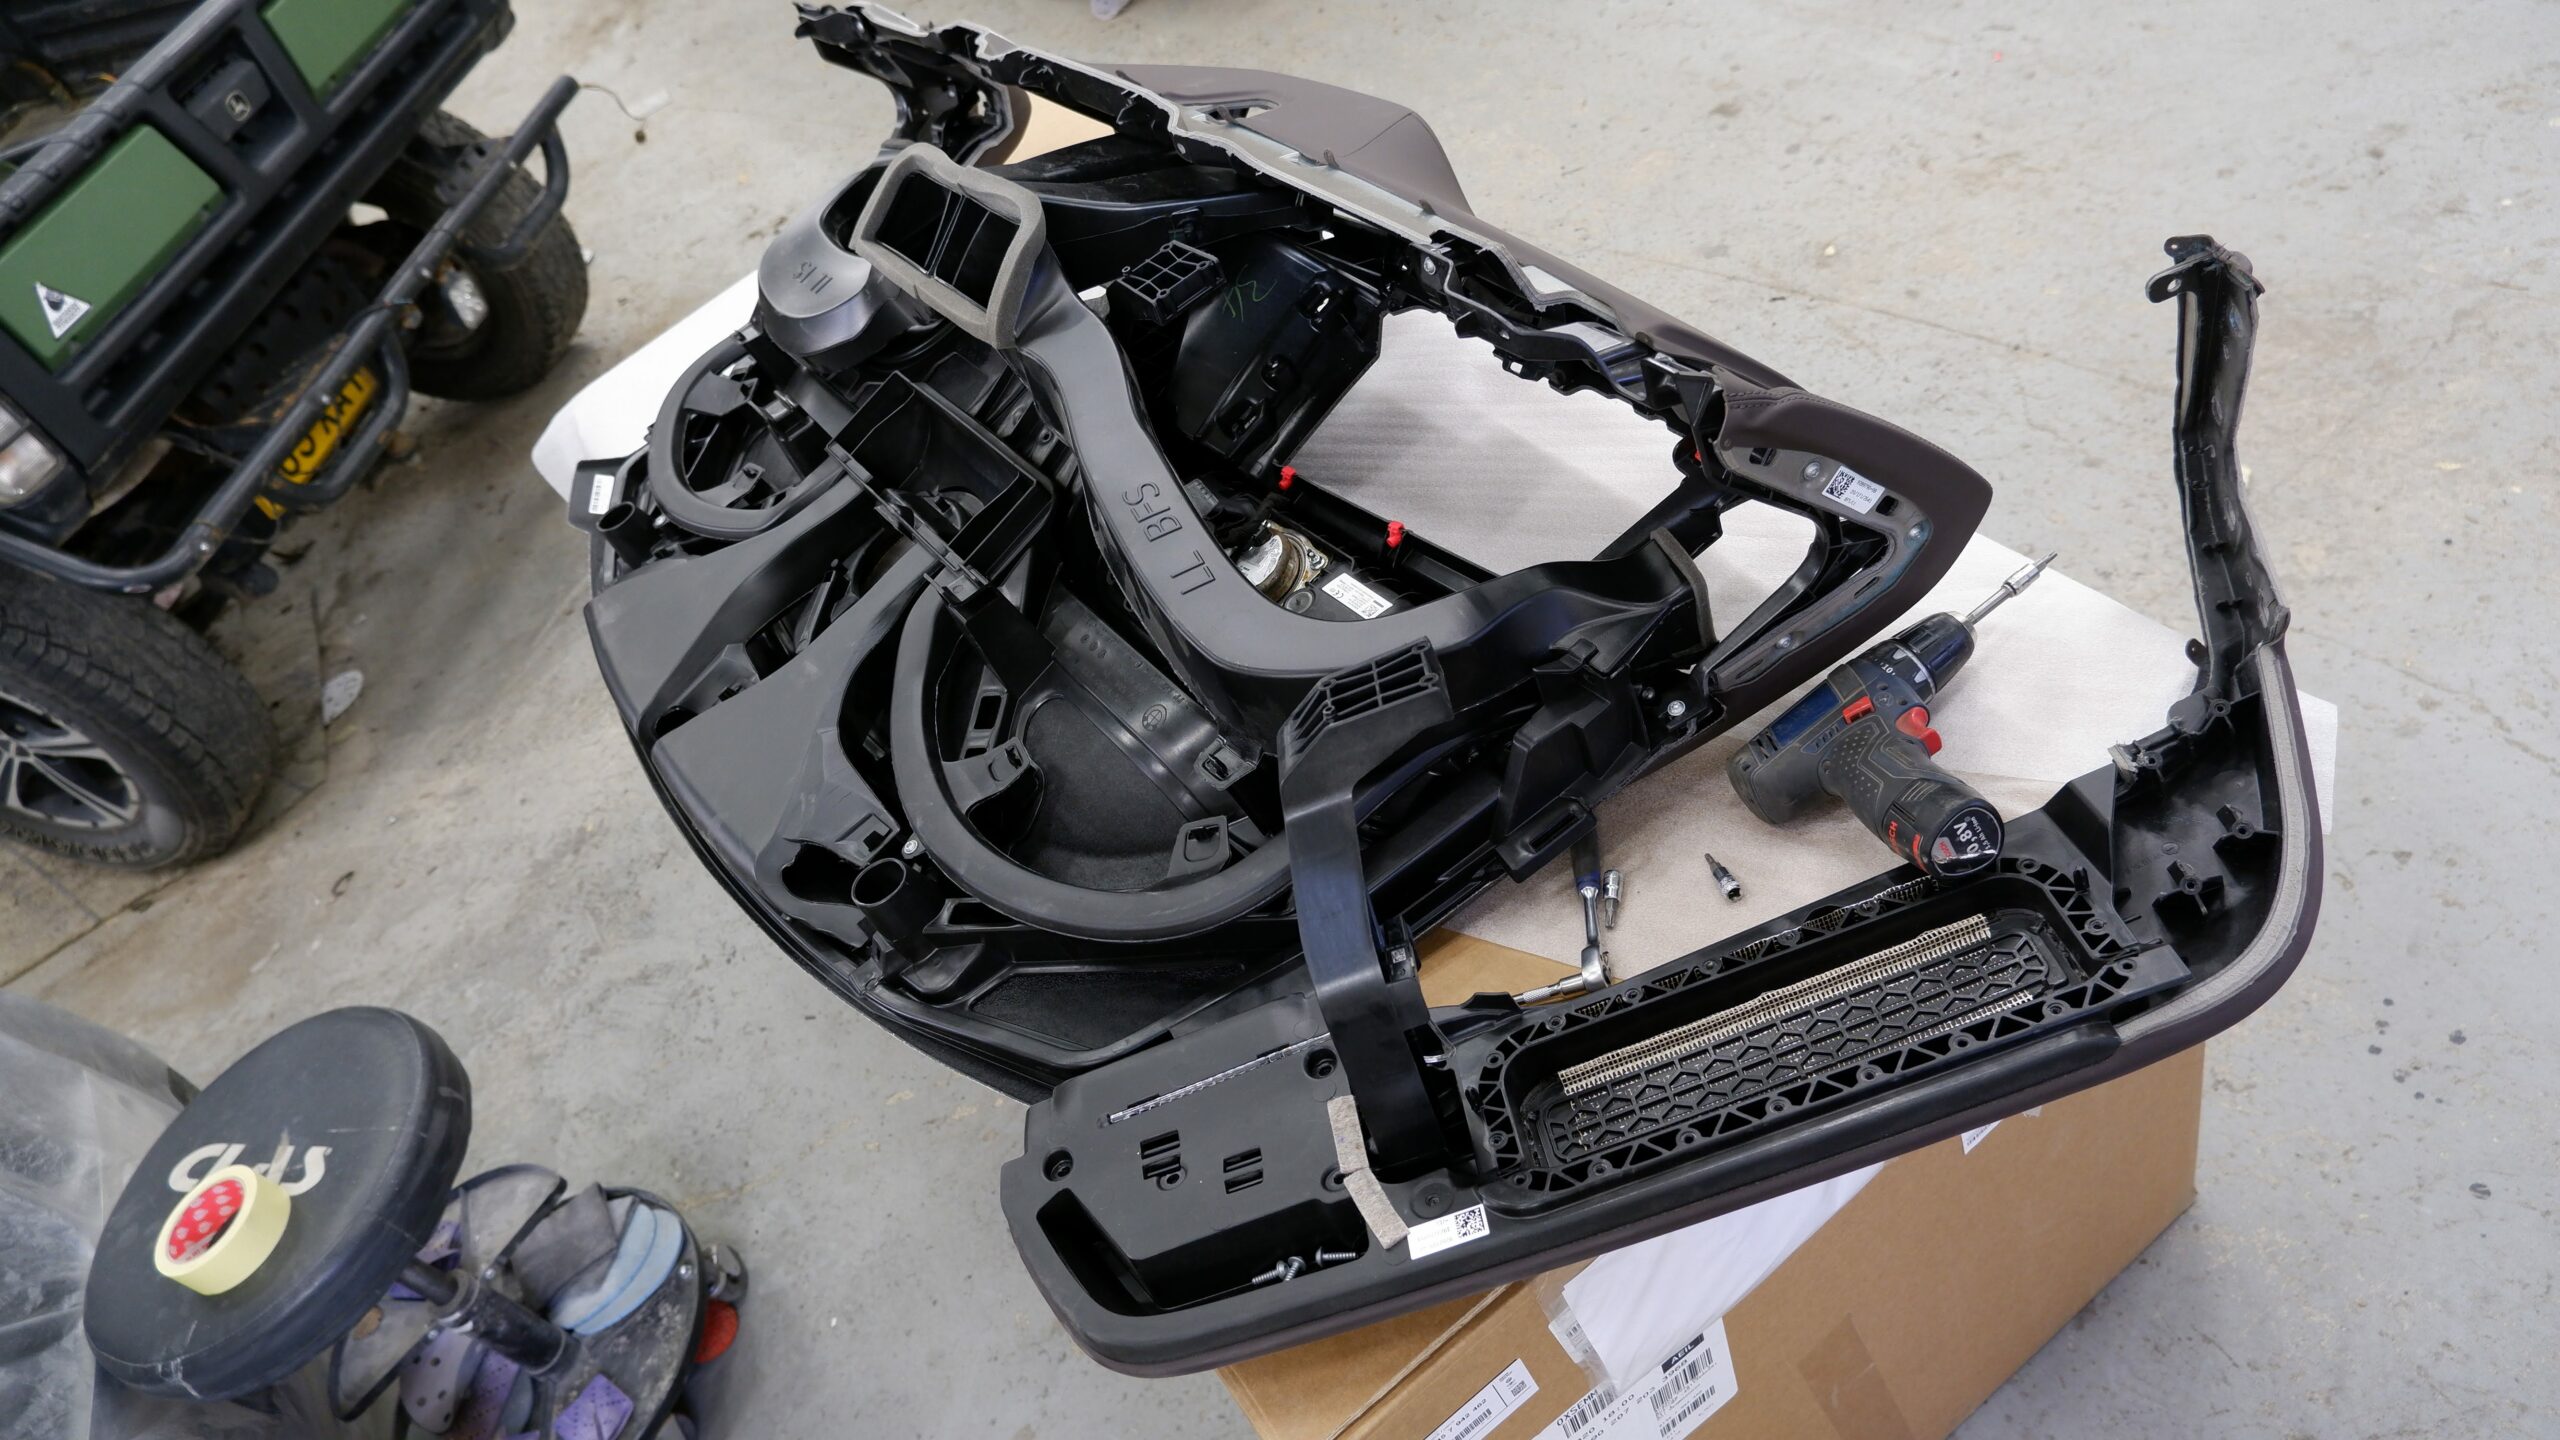
Talli alkoi hiljalleen täyttyä purkuosista. Keskikonsoli oli oikein saksalaisen insinöörityön taidonnäyte. Luultavasti ainakin puoli päivää purin pelkkää keskikonsolia, kun ensikertalaisena piti aika varovasti edetä, ettei riko mitään. ErWinistä ostetut ohjeet tulivat tällä kertaa todella tarpeeseen. Jos joku ei tiedä, niin erWin on Audin oma palvelu, mistä alle kympillä saa ostettua tunniksi käyttäoikeutta latailla erilaisia ohjeita, sähkökaavioita jne. Tunnissa ehtii ladata käytännössä kaiken, mitä tällaisessa projektissa tarvitsee. Esimerkiksi kaikki sisustan purku- ja kasausohjeet saa yhtenä isona PDF-tiedostona.

Tuulilasin irti leikkaamisen jälkeen myös kattoverhoilu saatiin pudotettua alas ja pois autosta.
Ihme kyllä kattoluukku oli säilynyt ehjänä. Ainoastaan muutama kattoluukun kehikon kiinnike oli murtunut ja ne saatiin korjattua liimaamalla muoviliimalla.

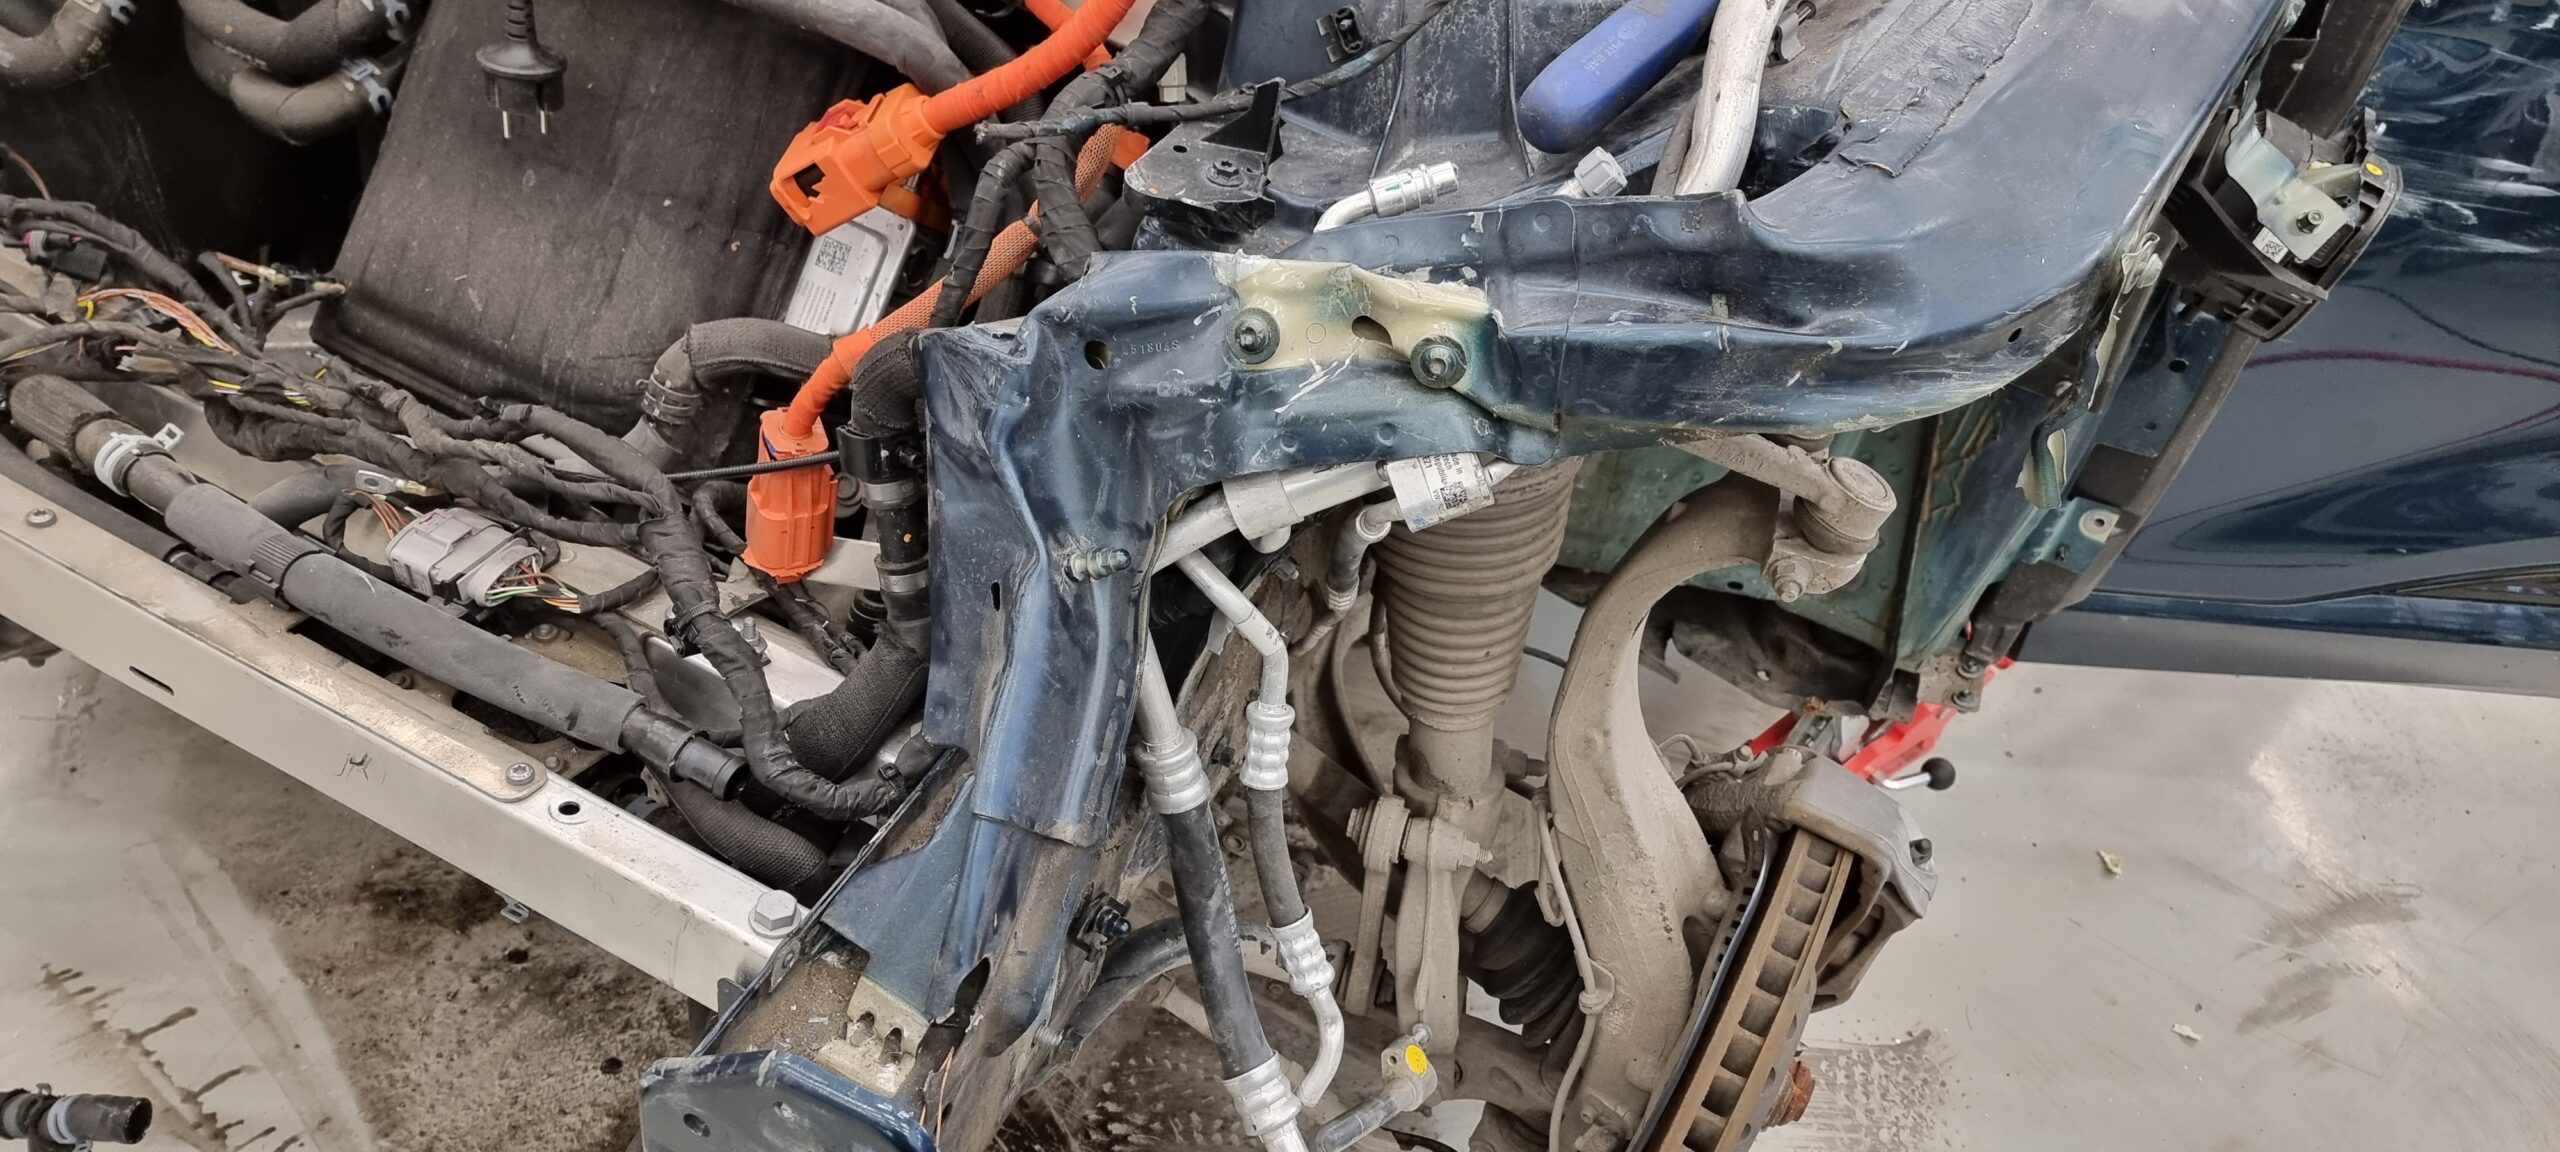
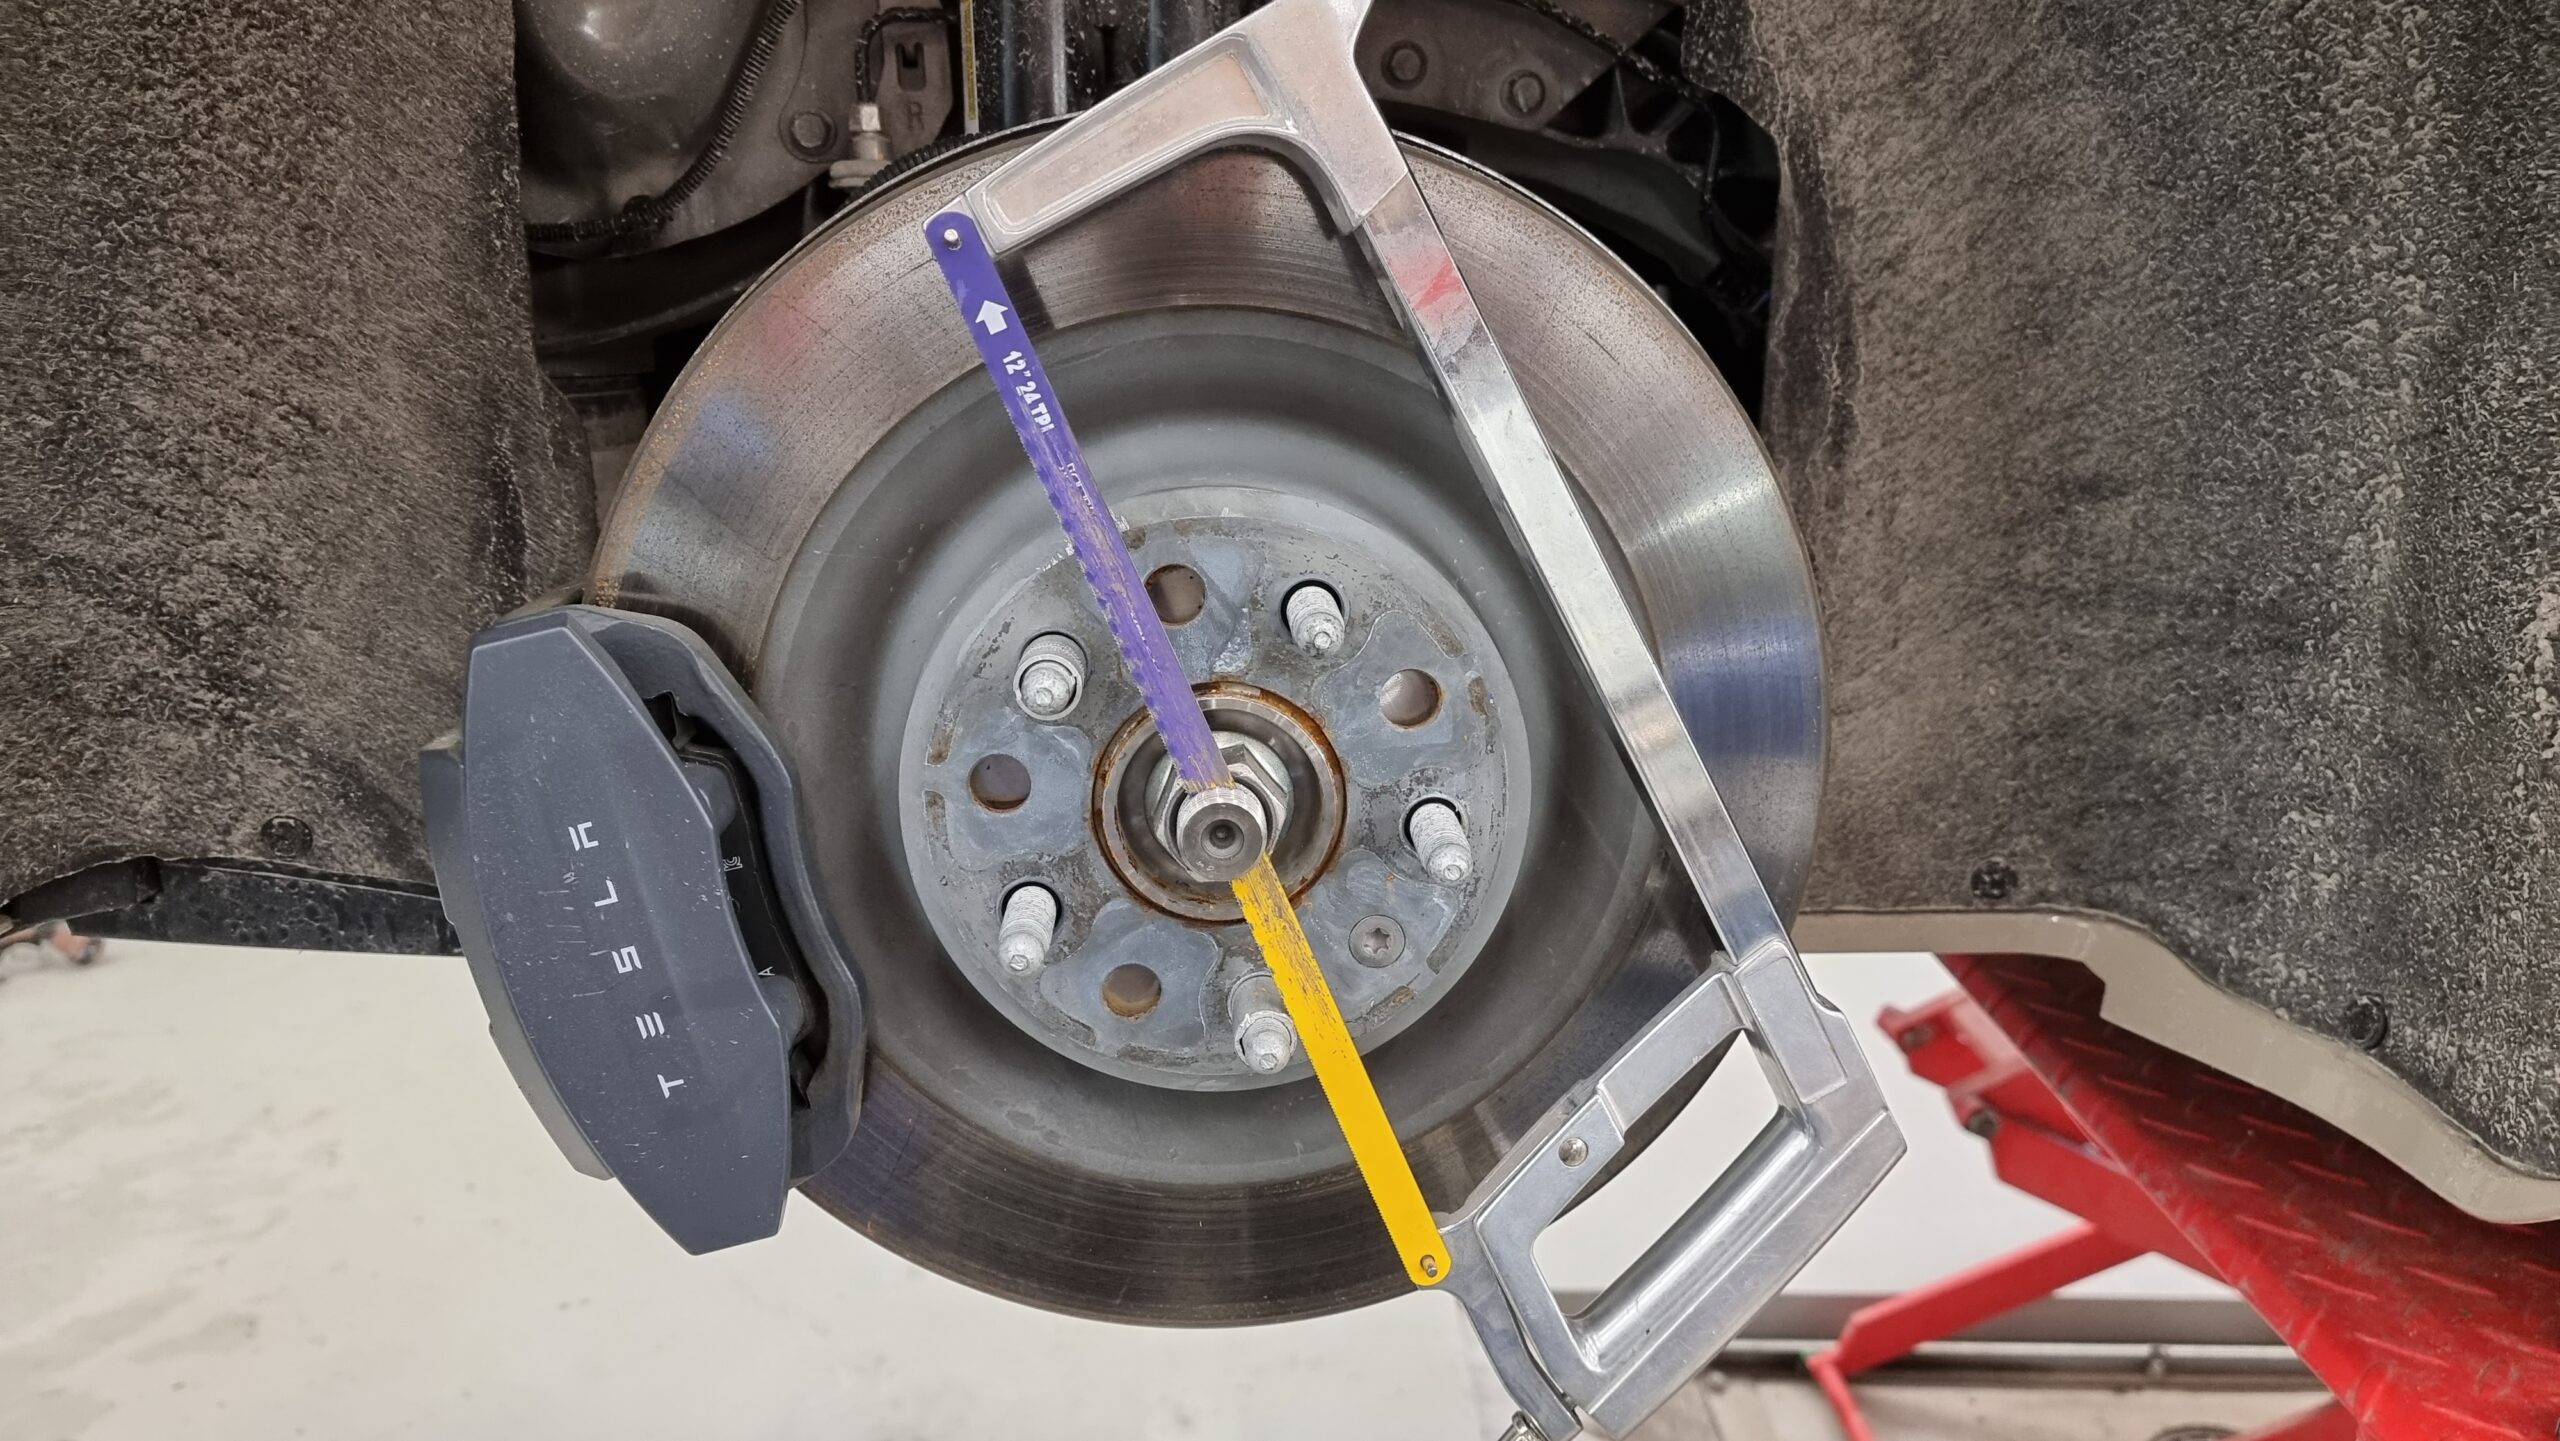
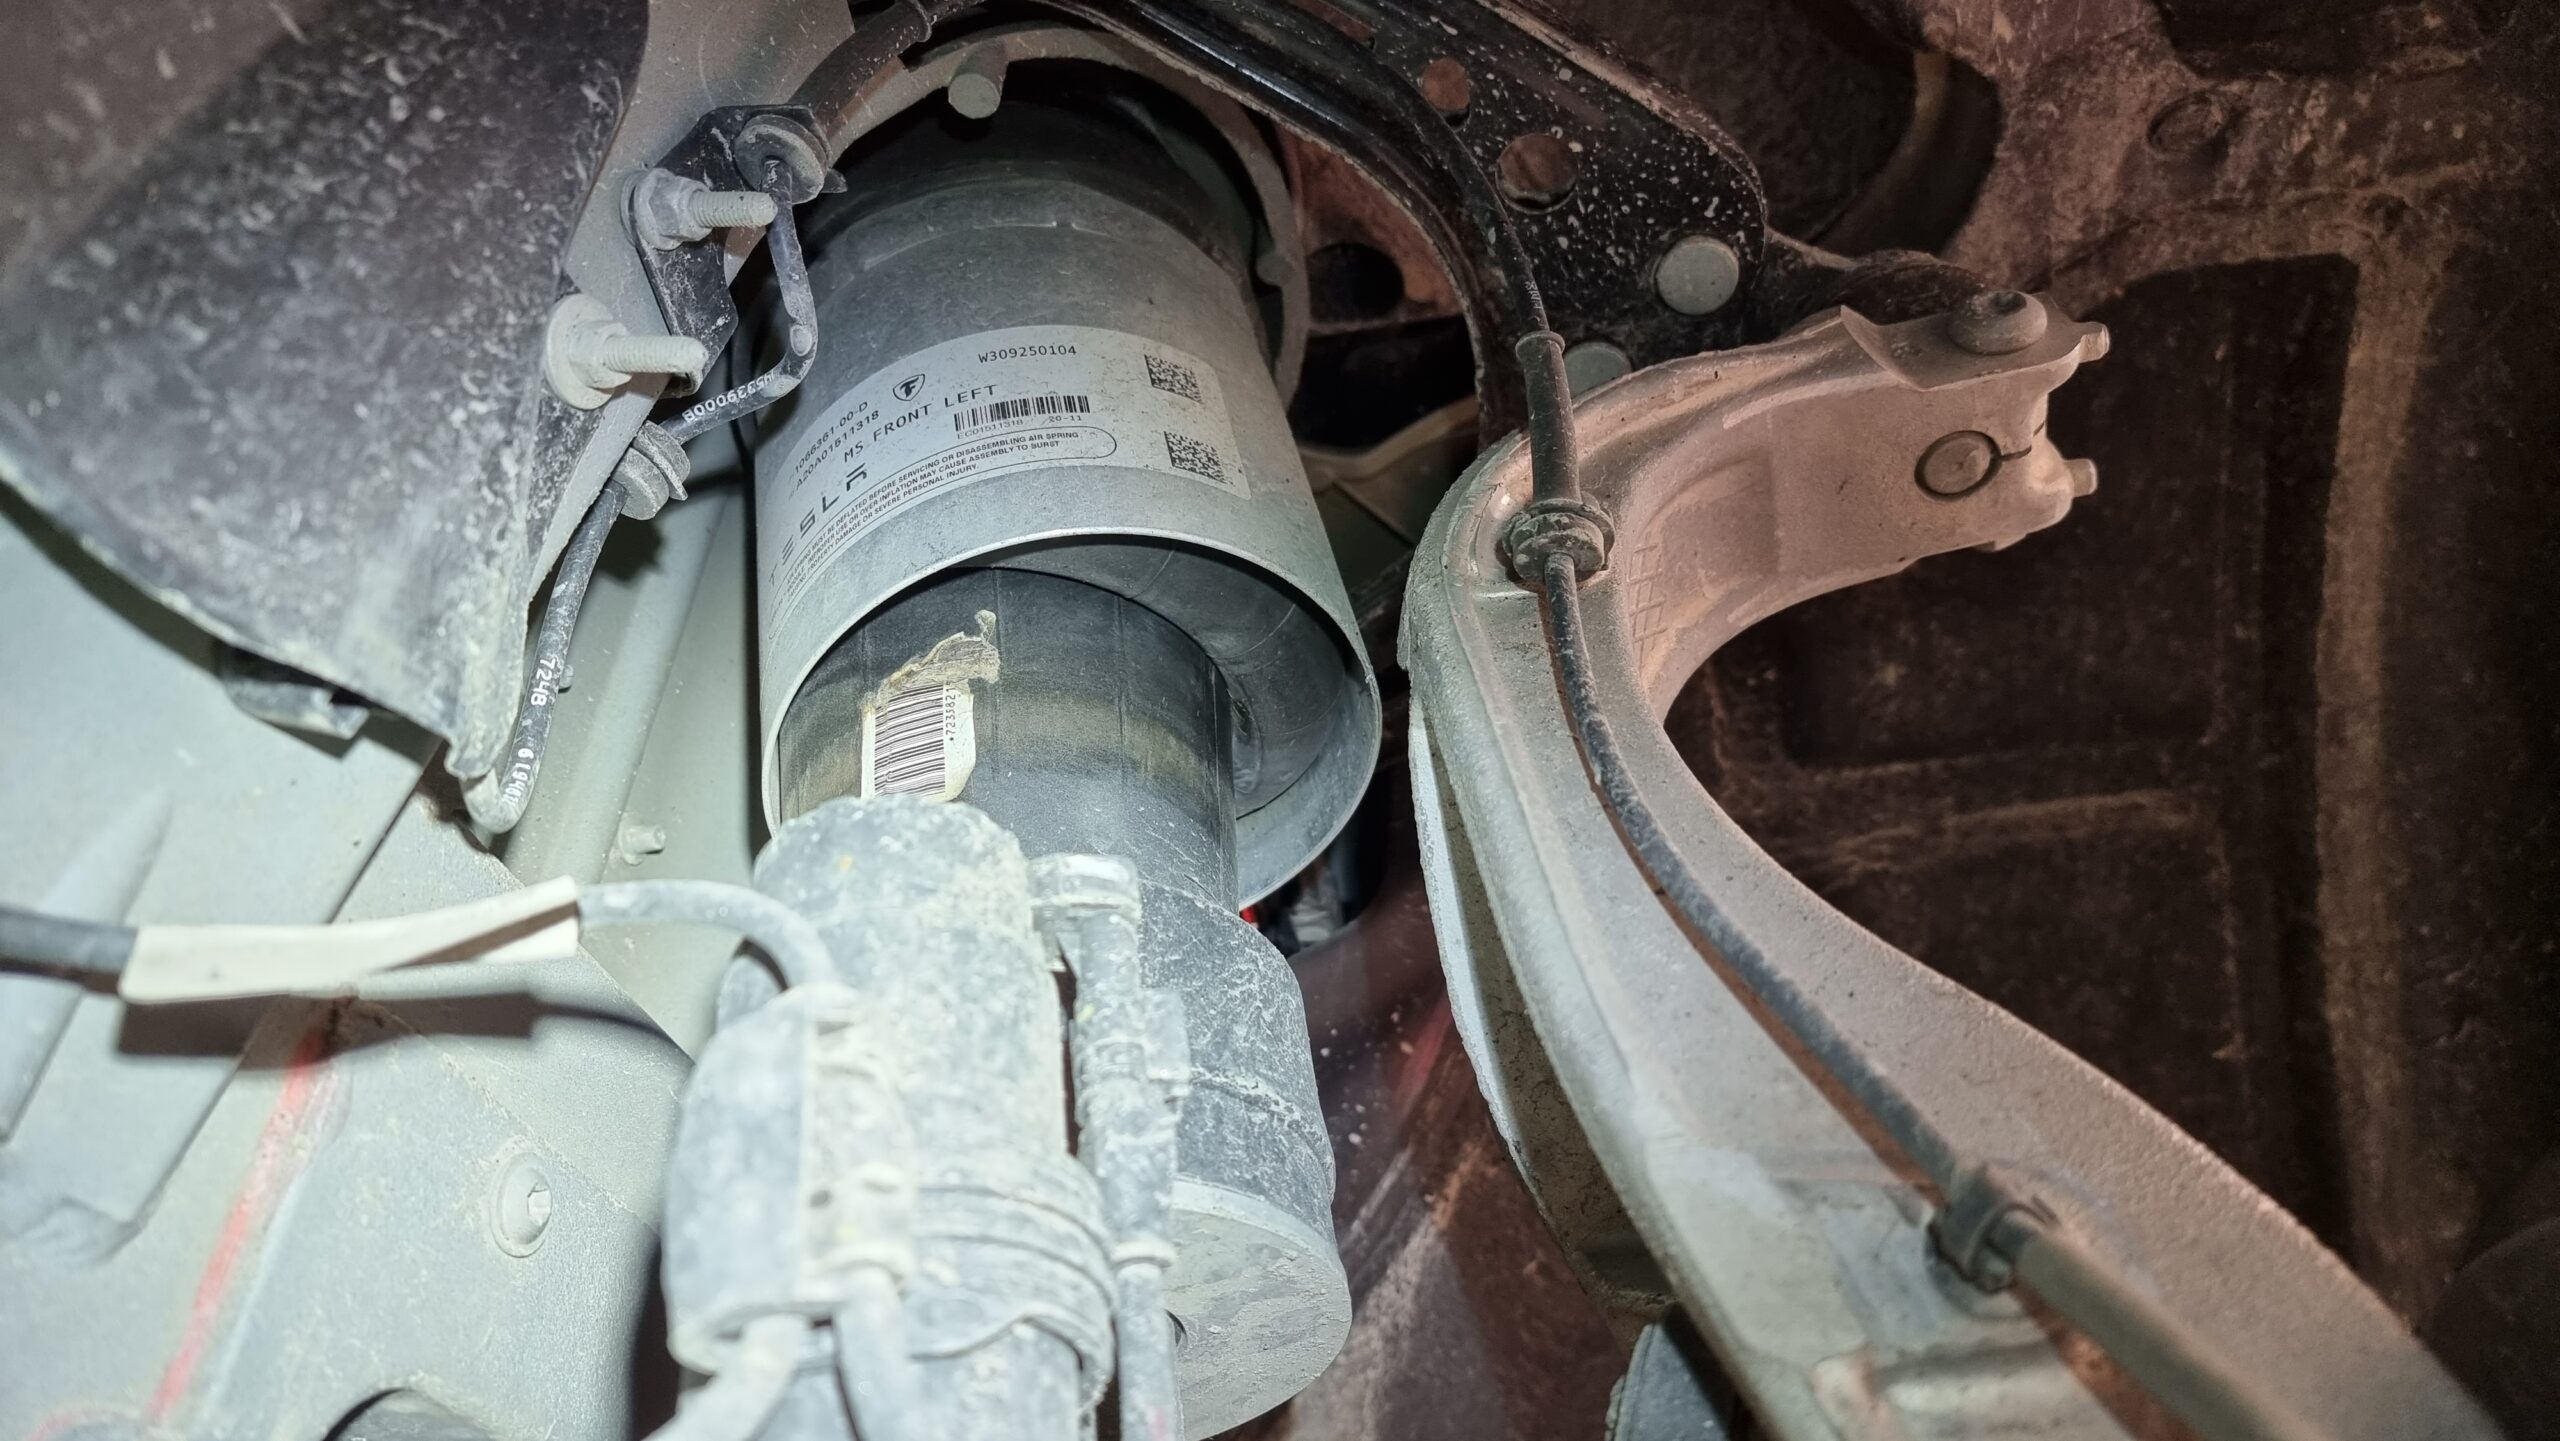
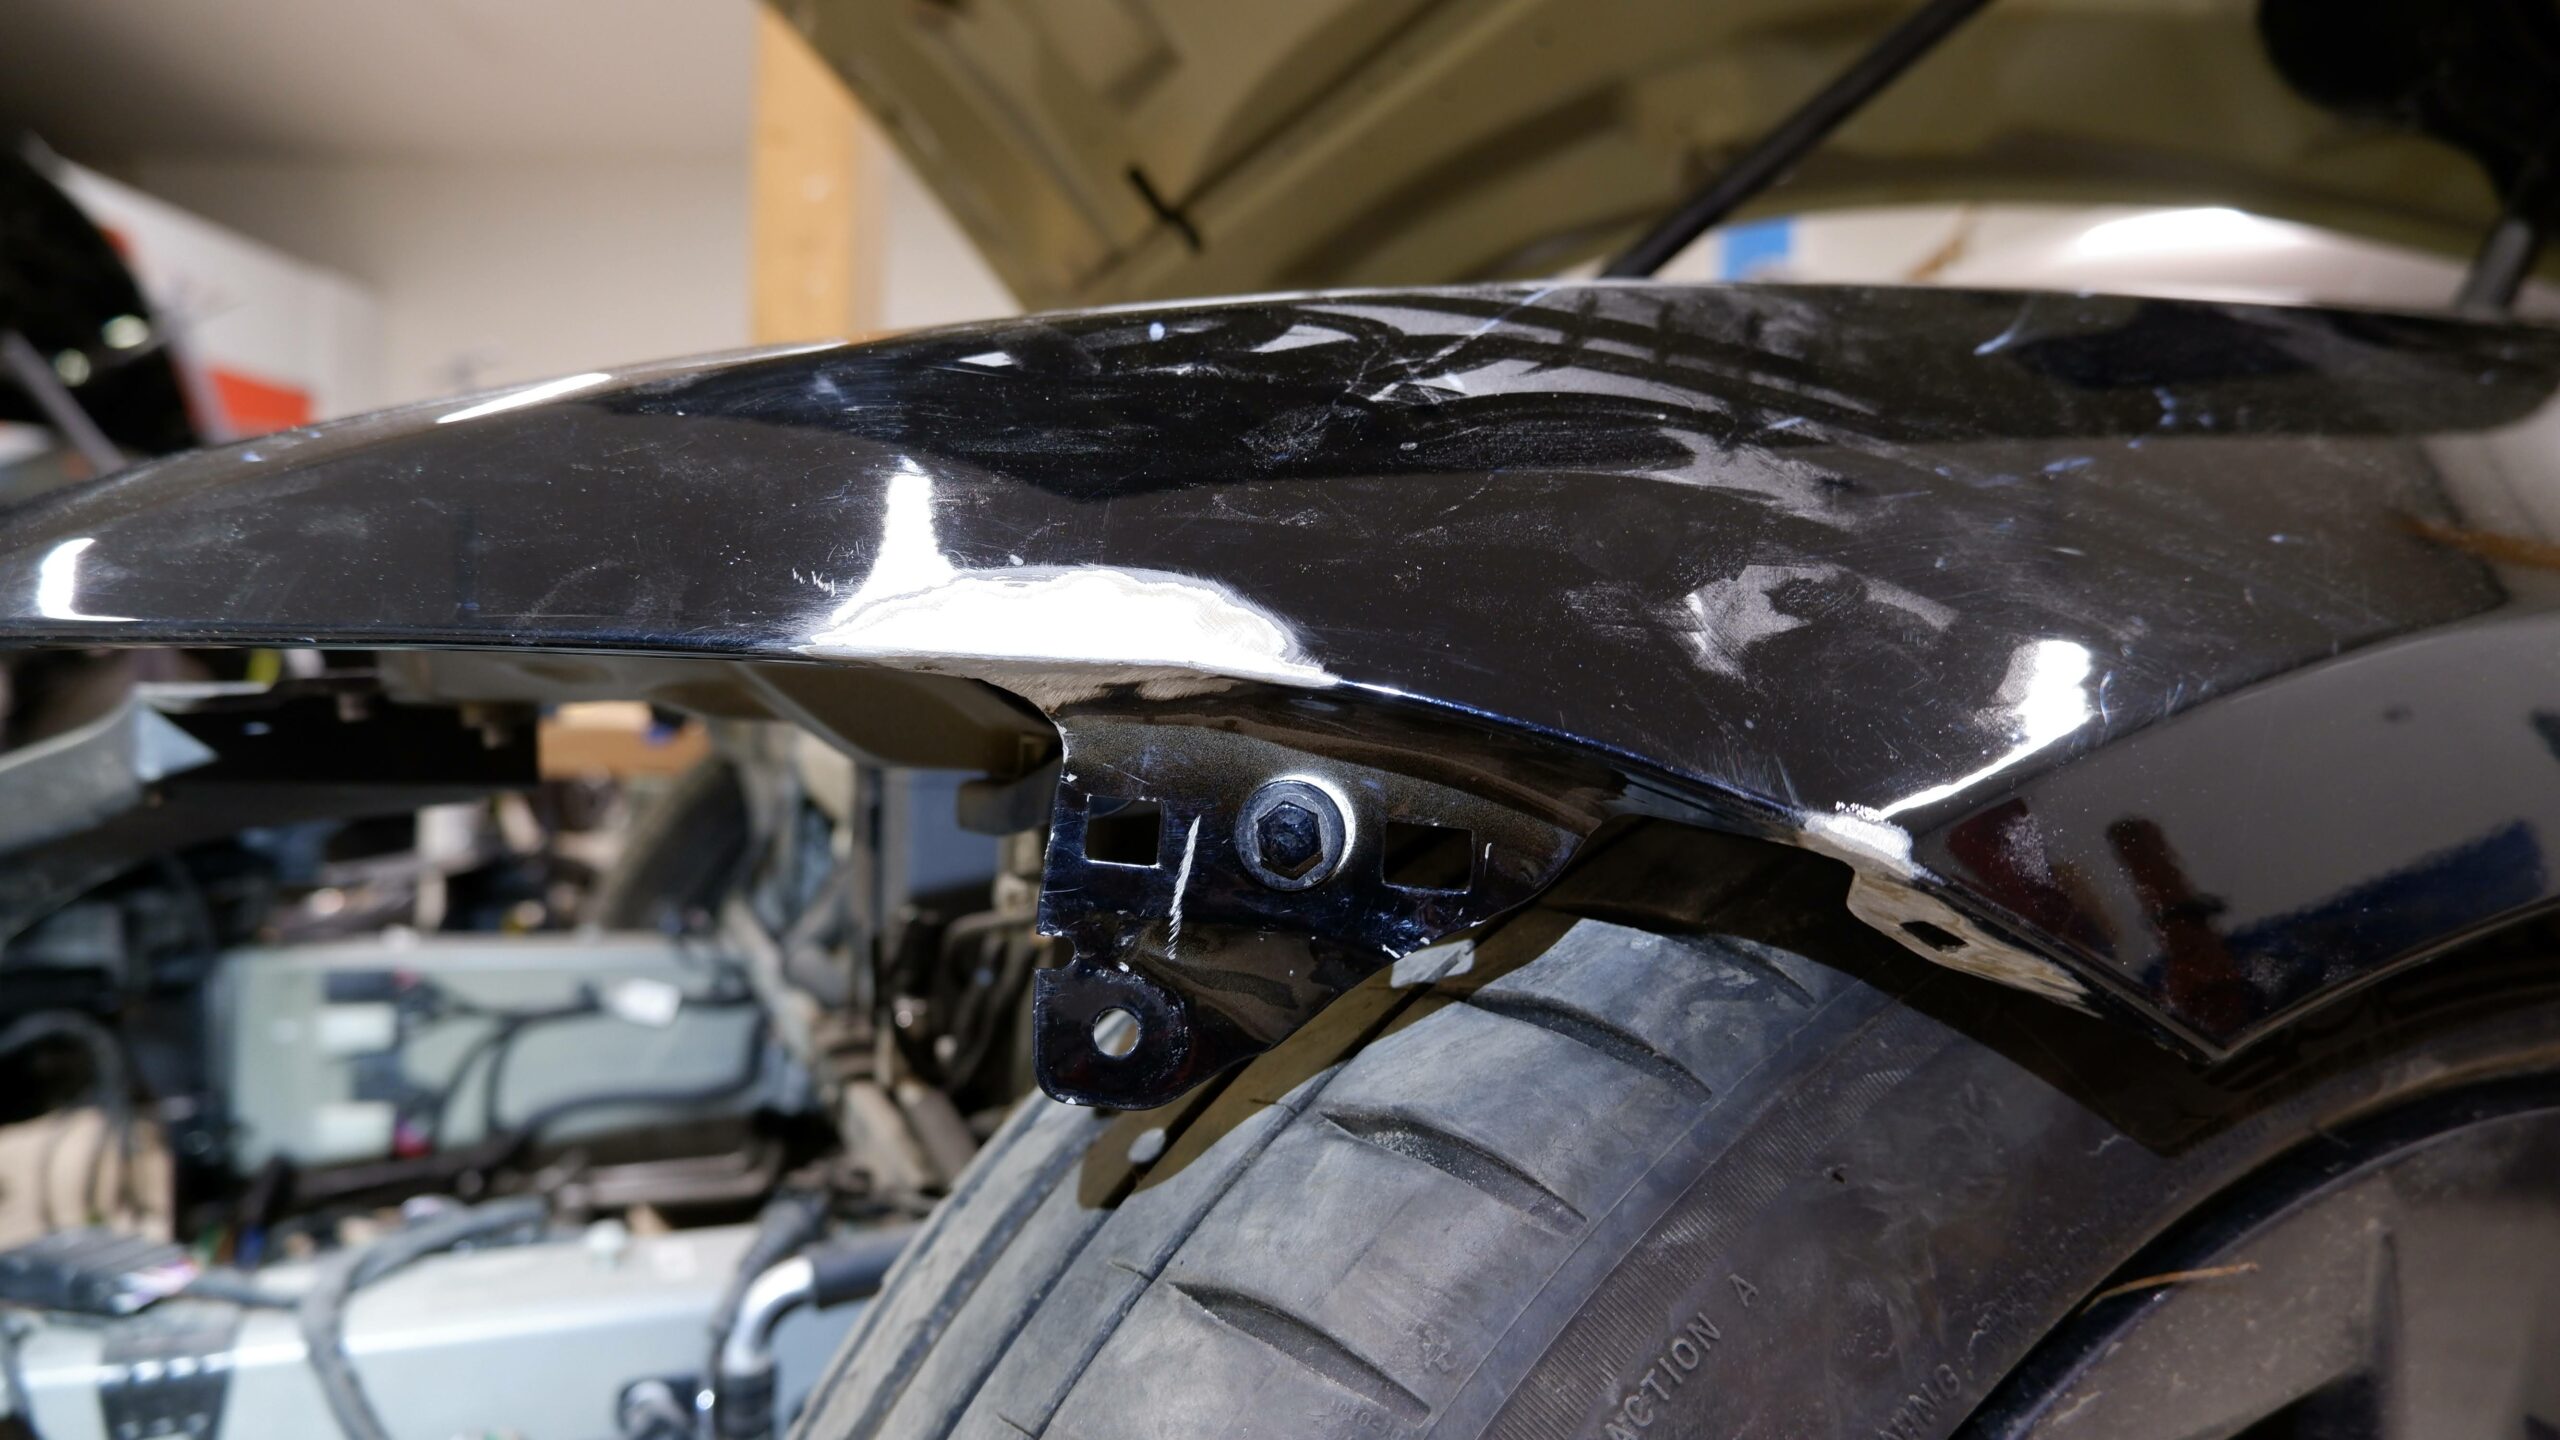
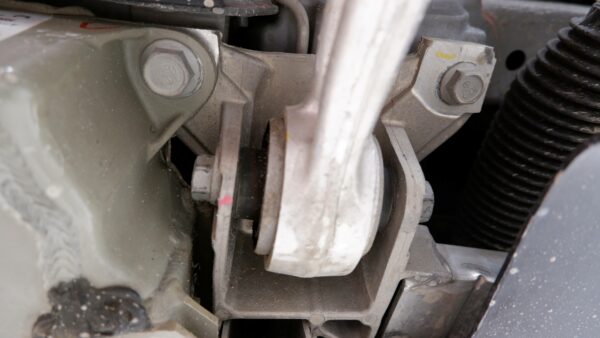
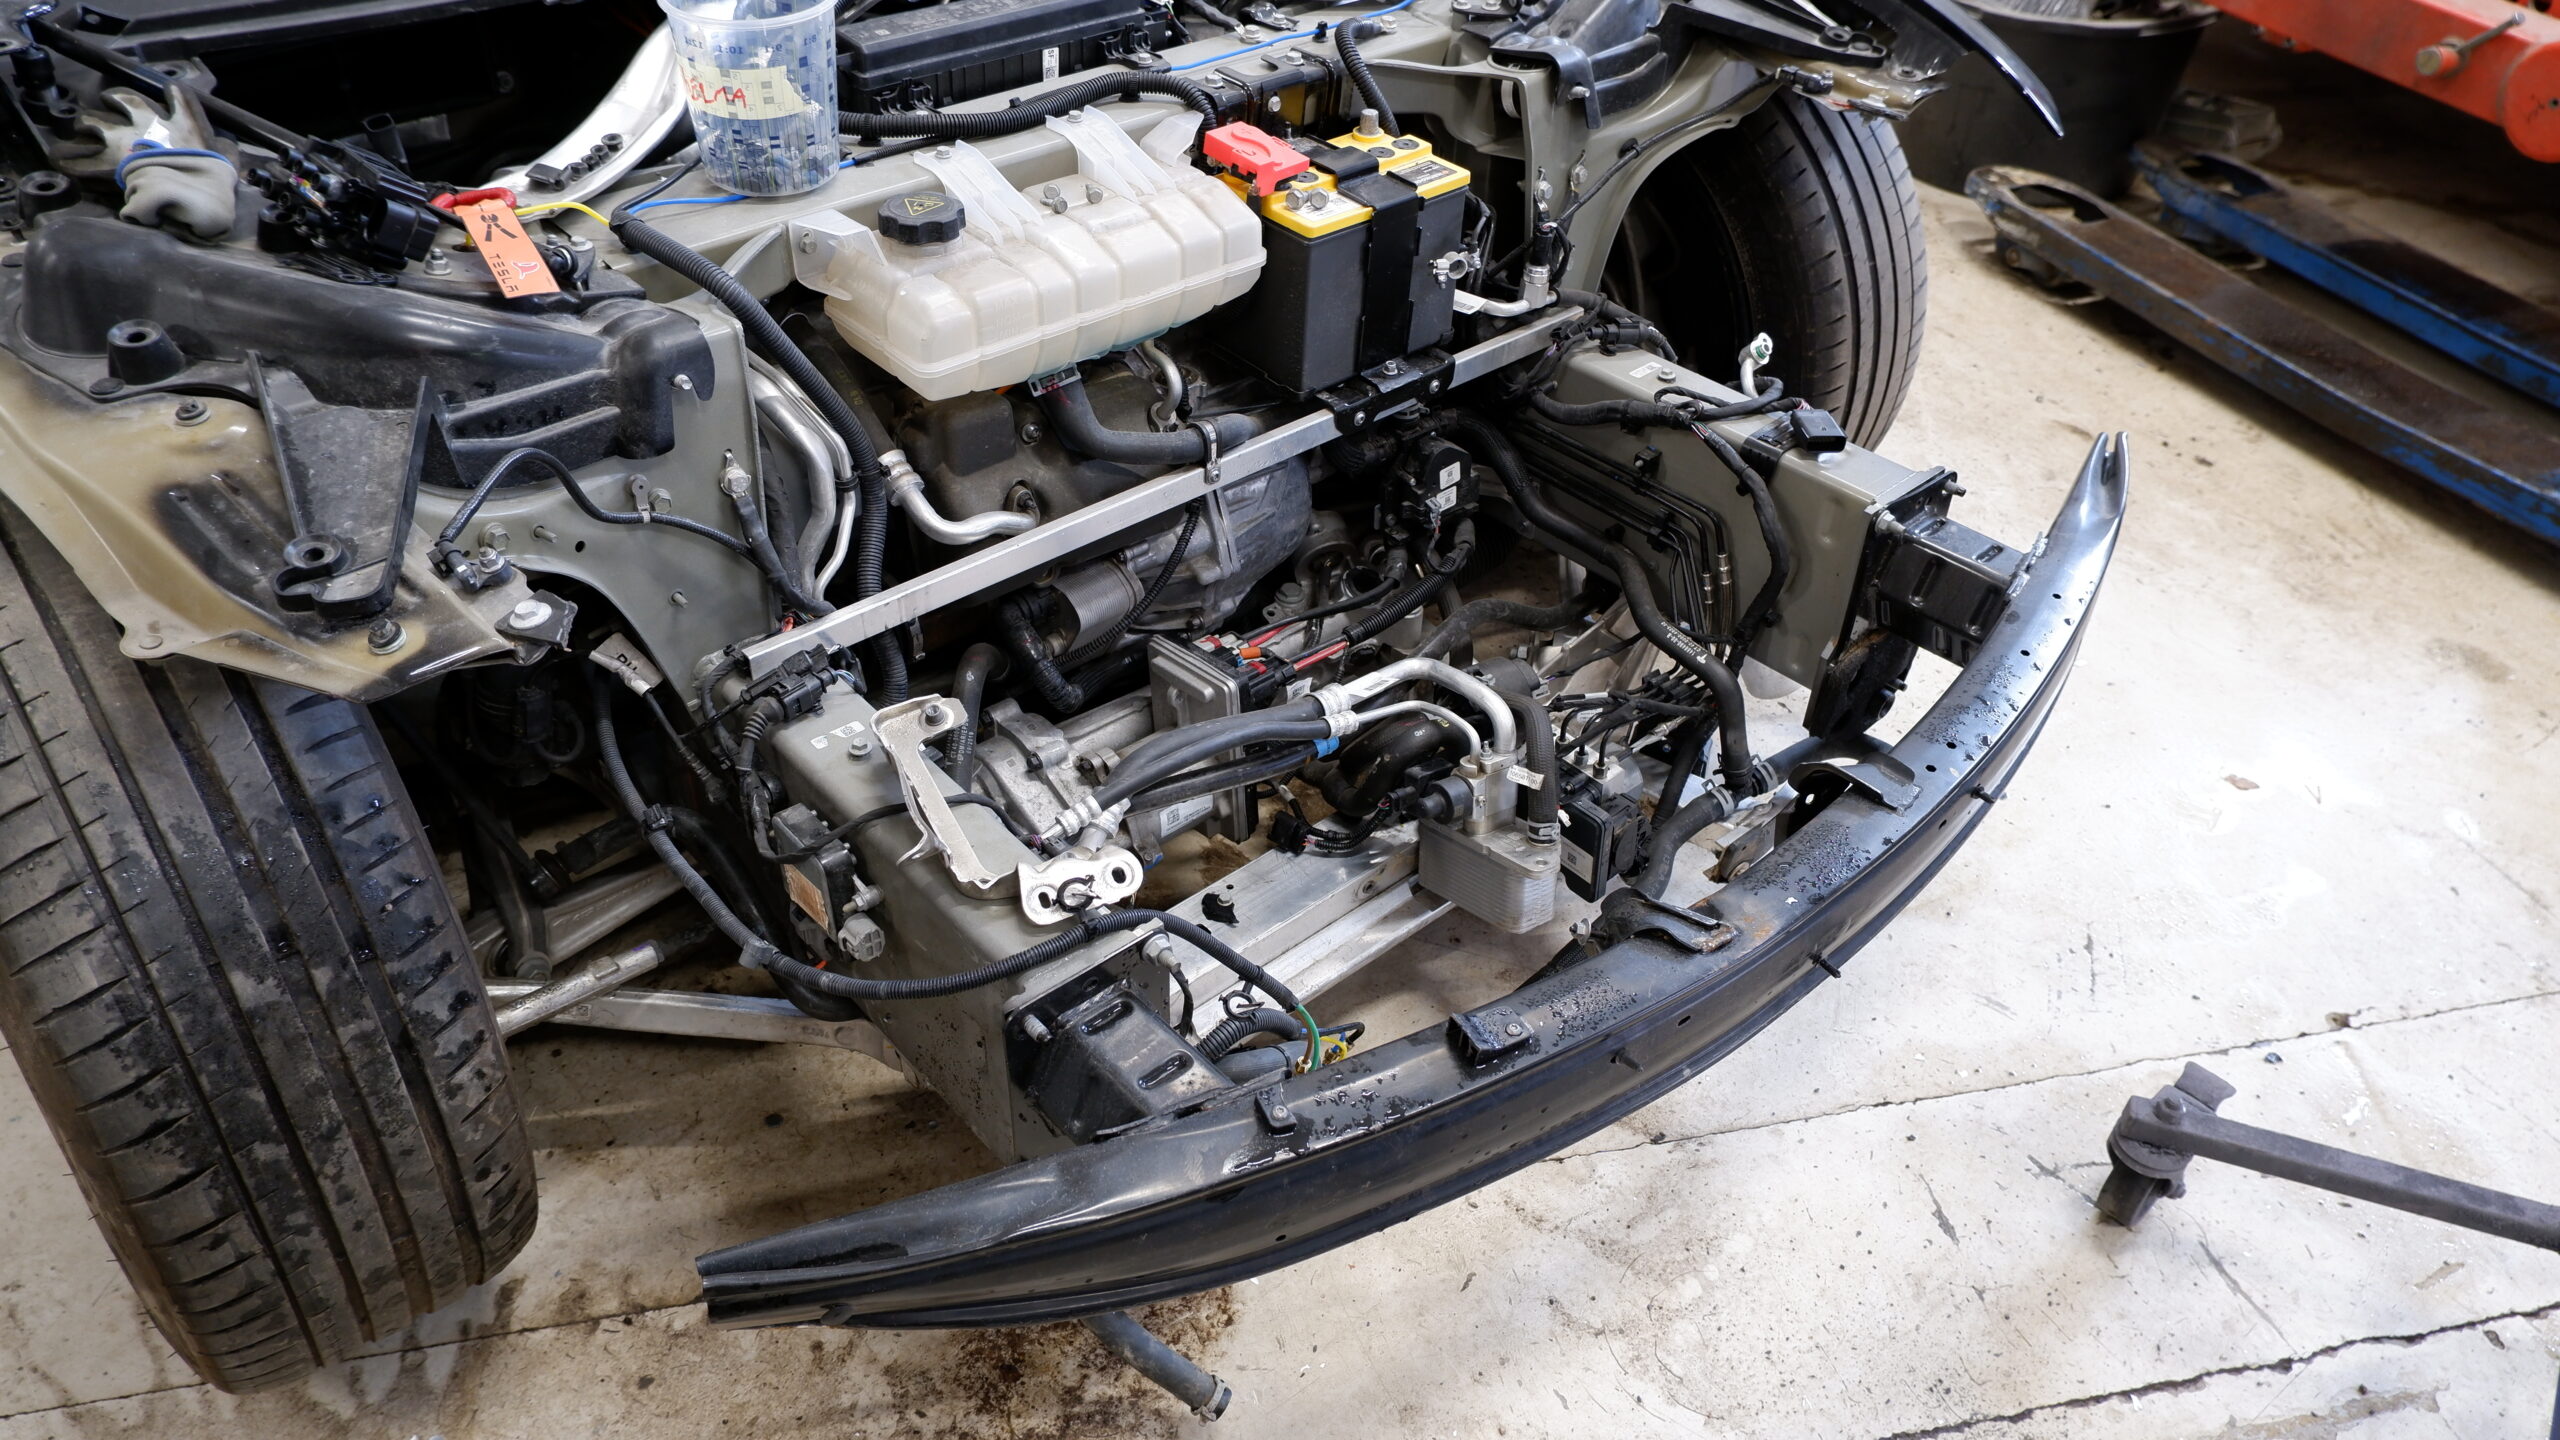
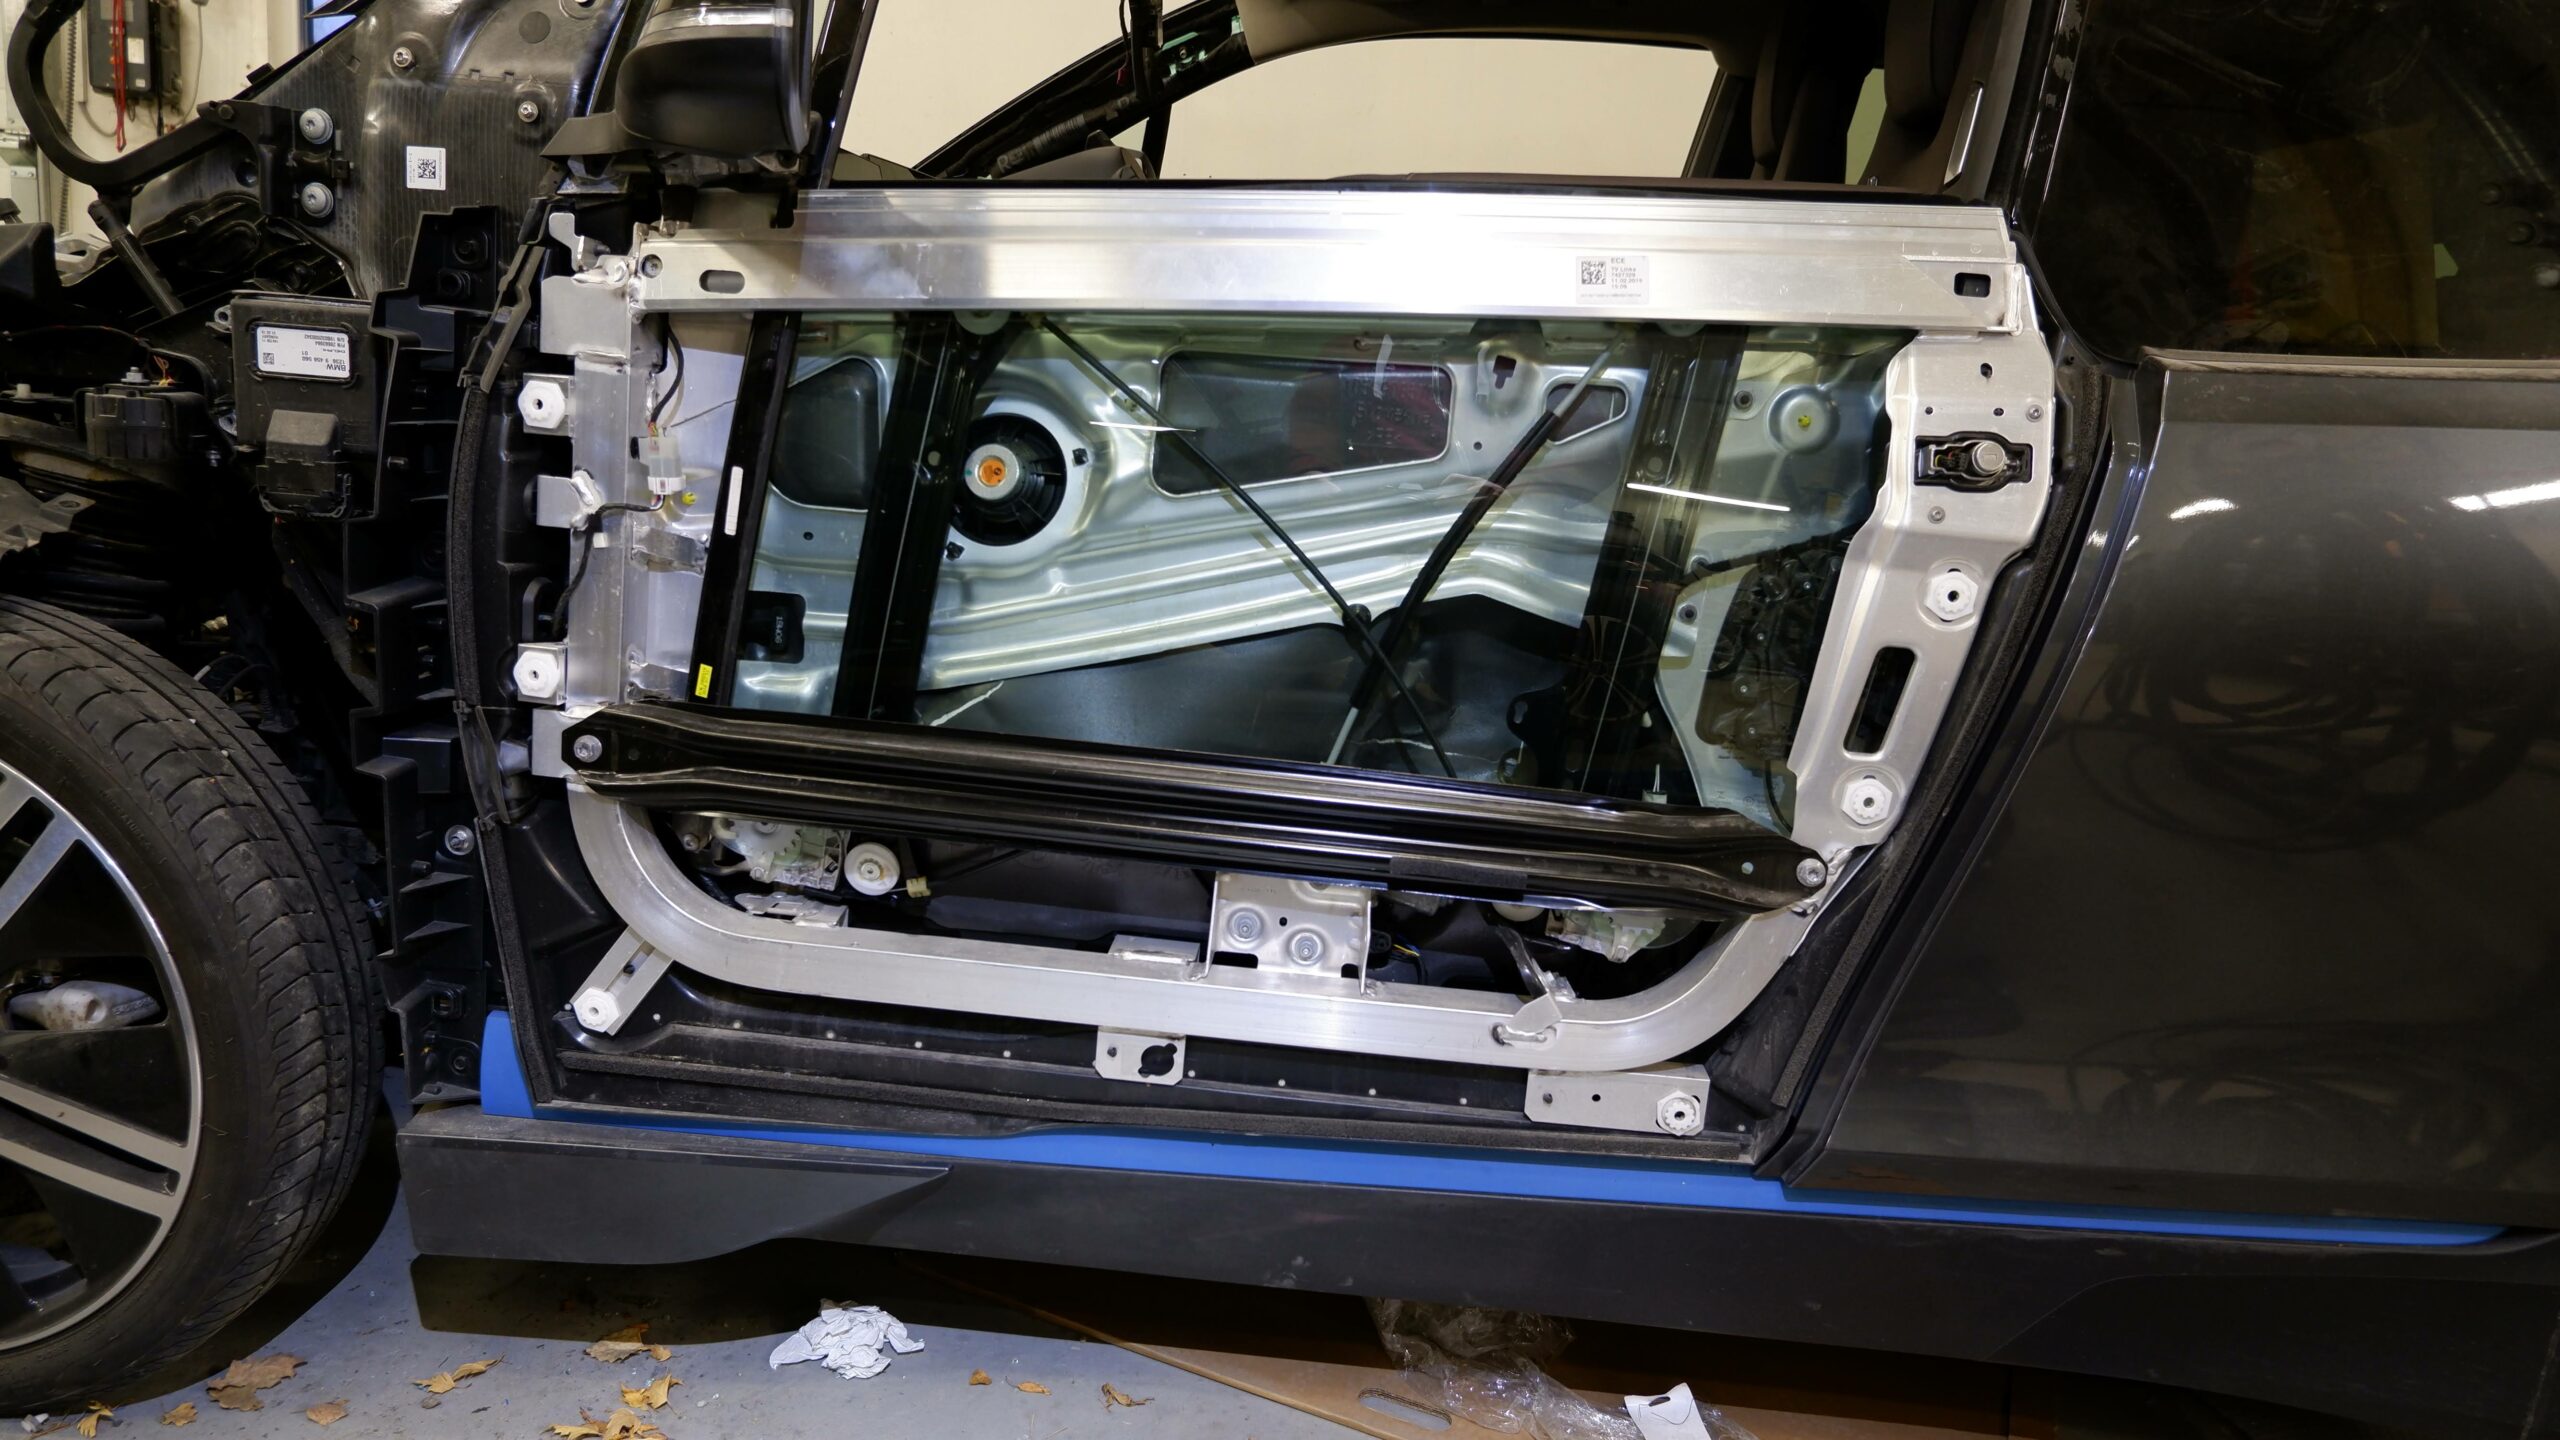
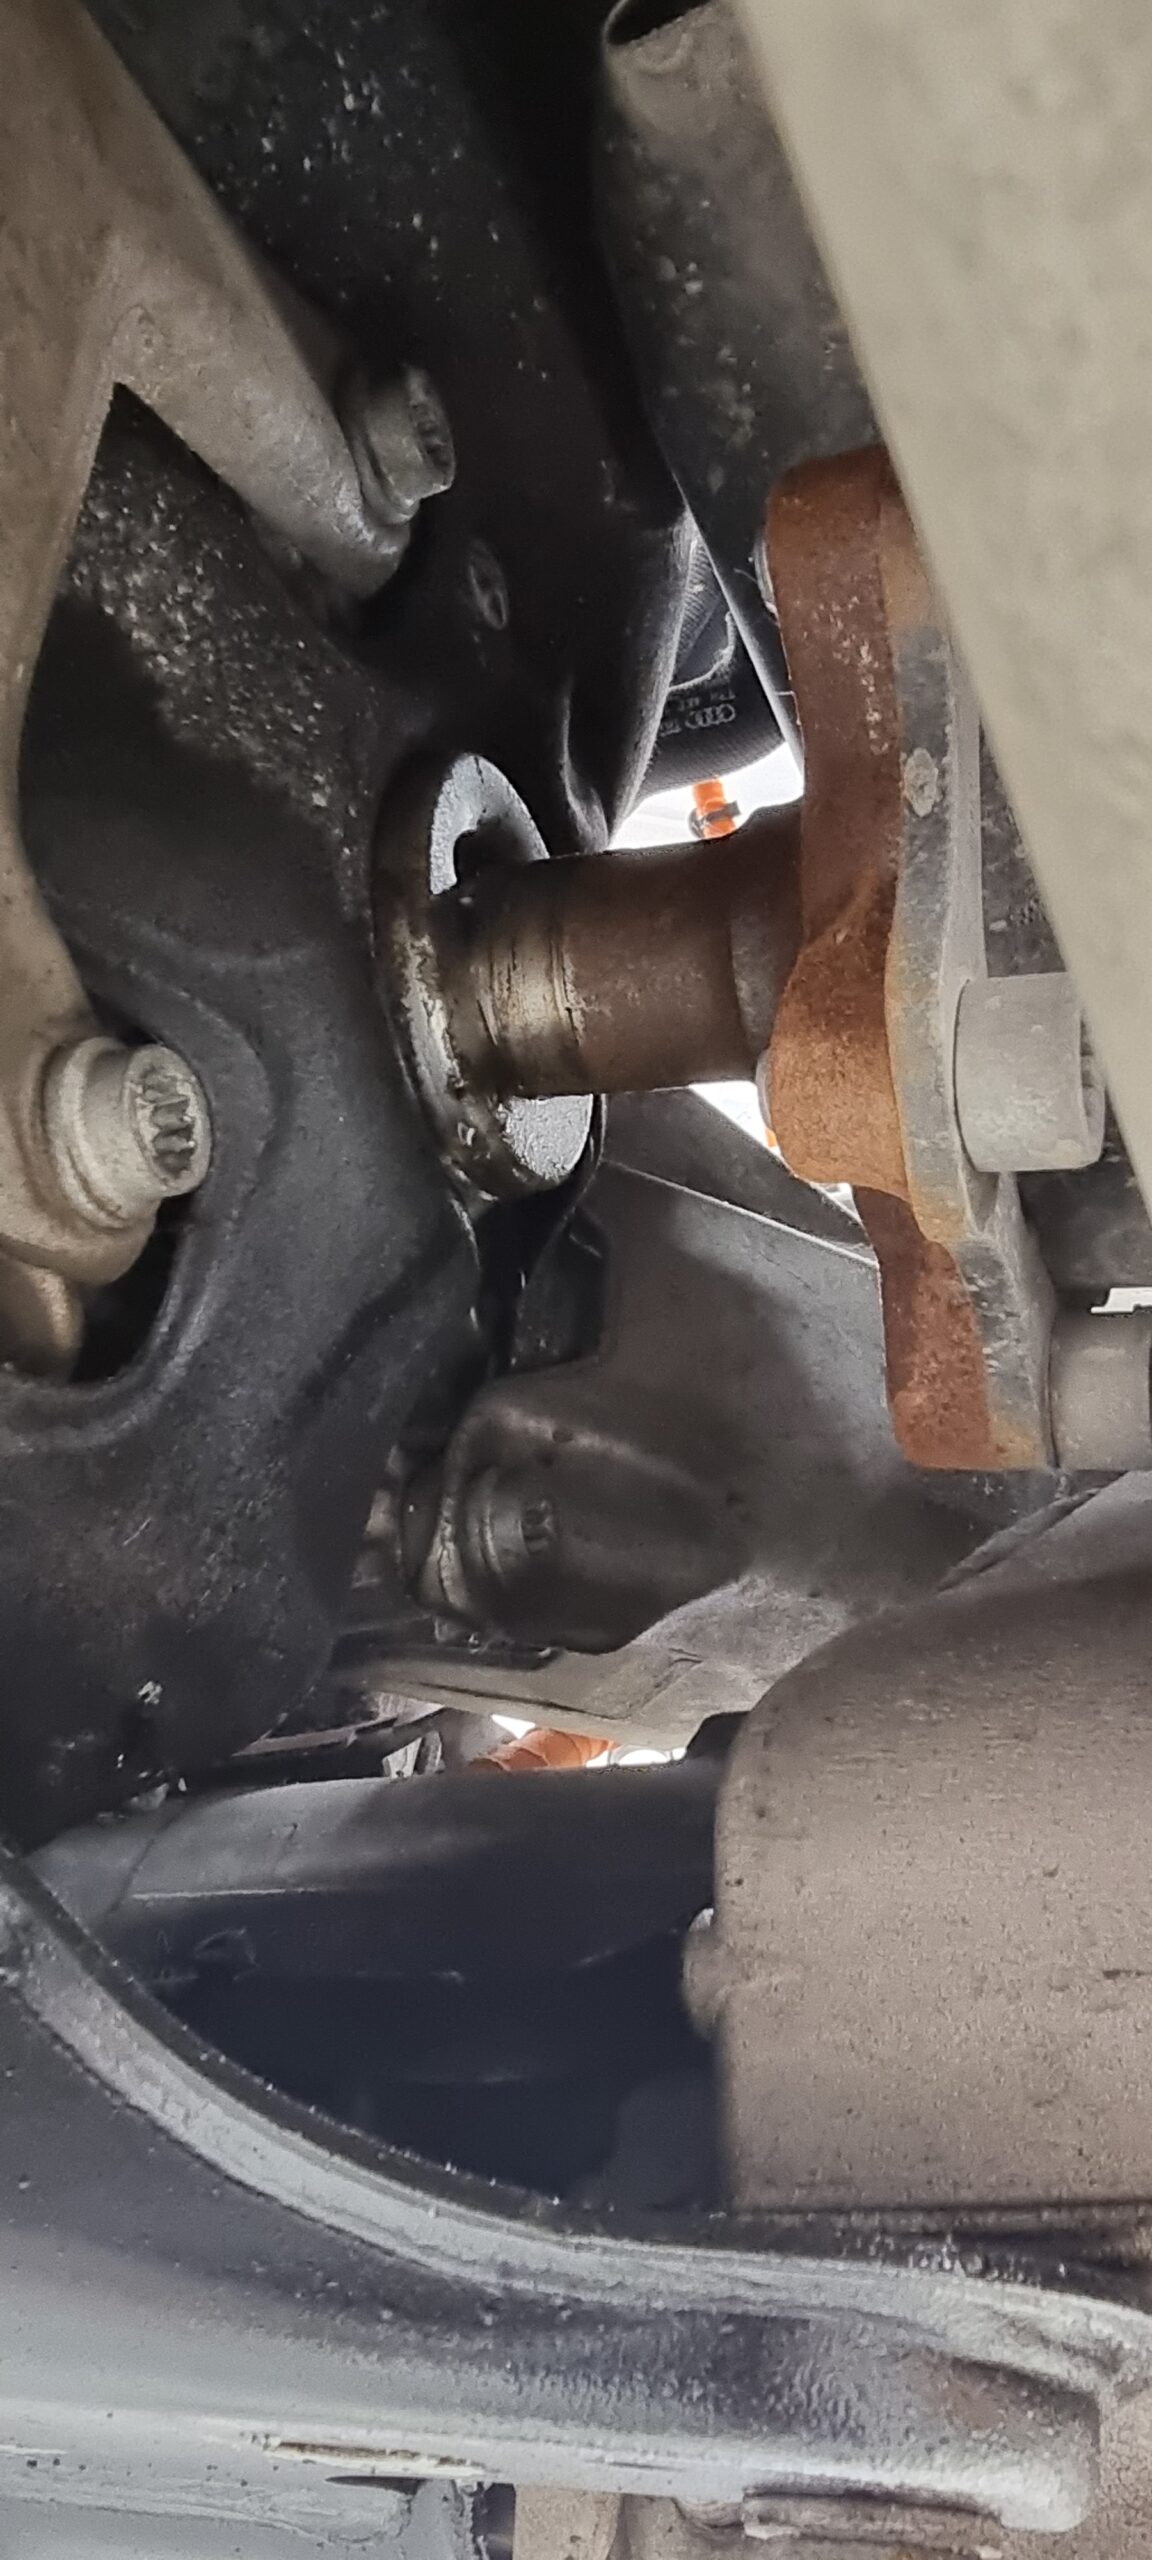
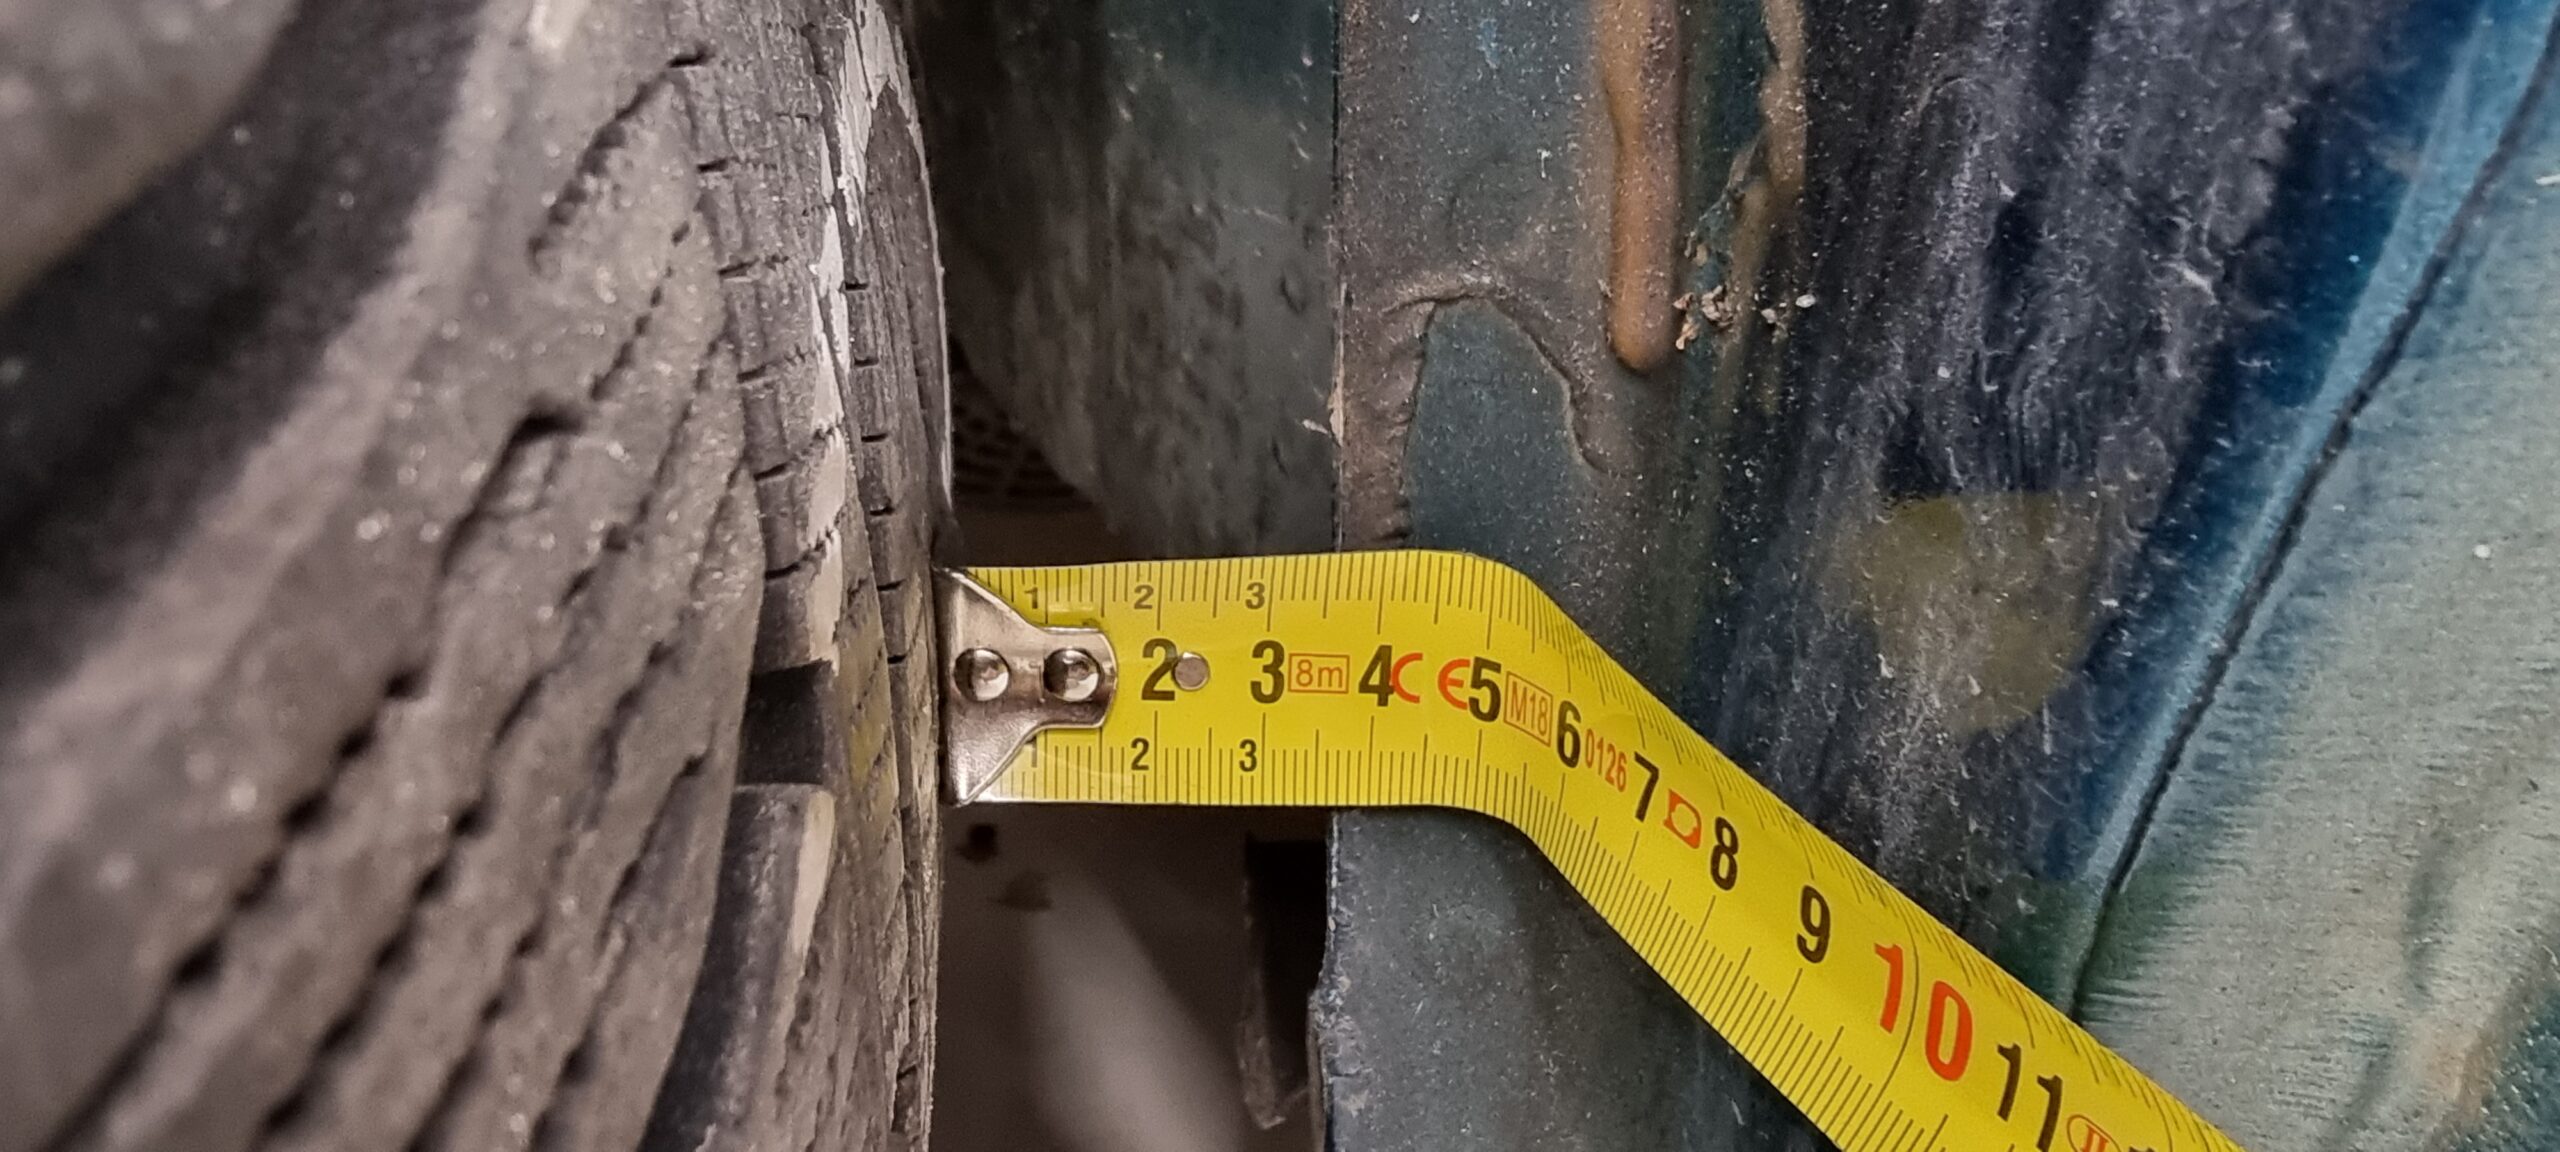
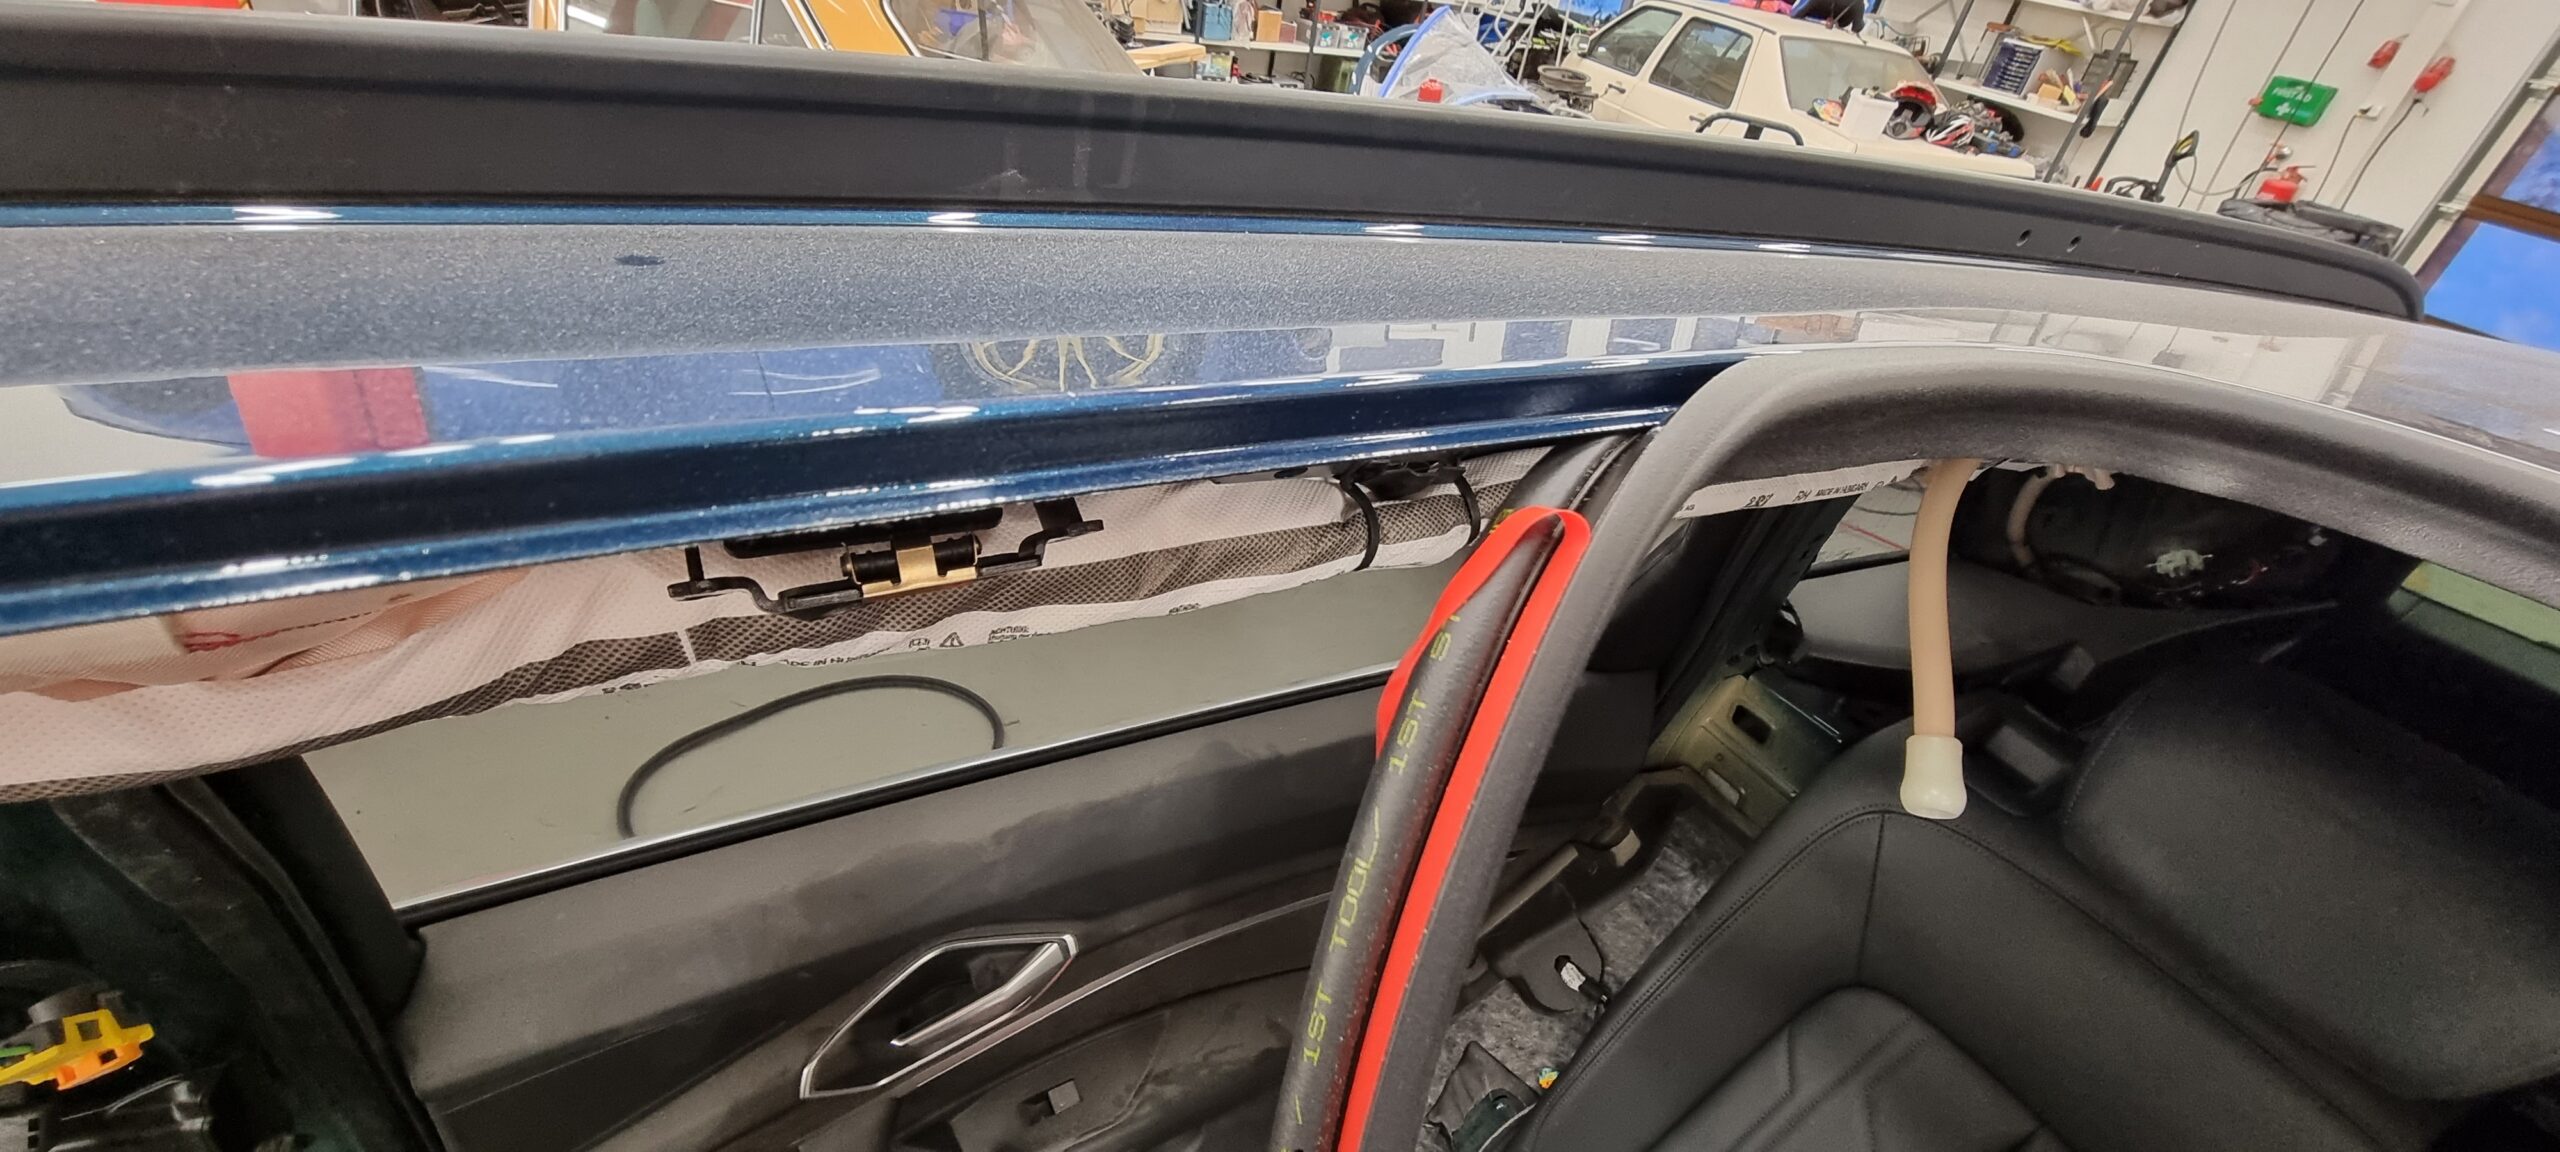
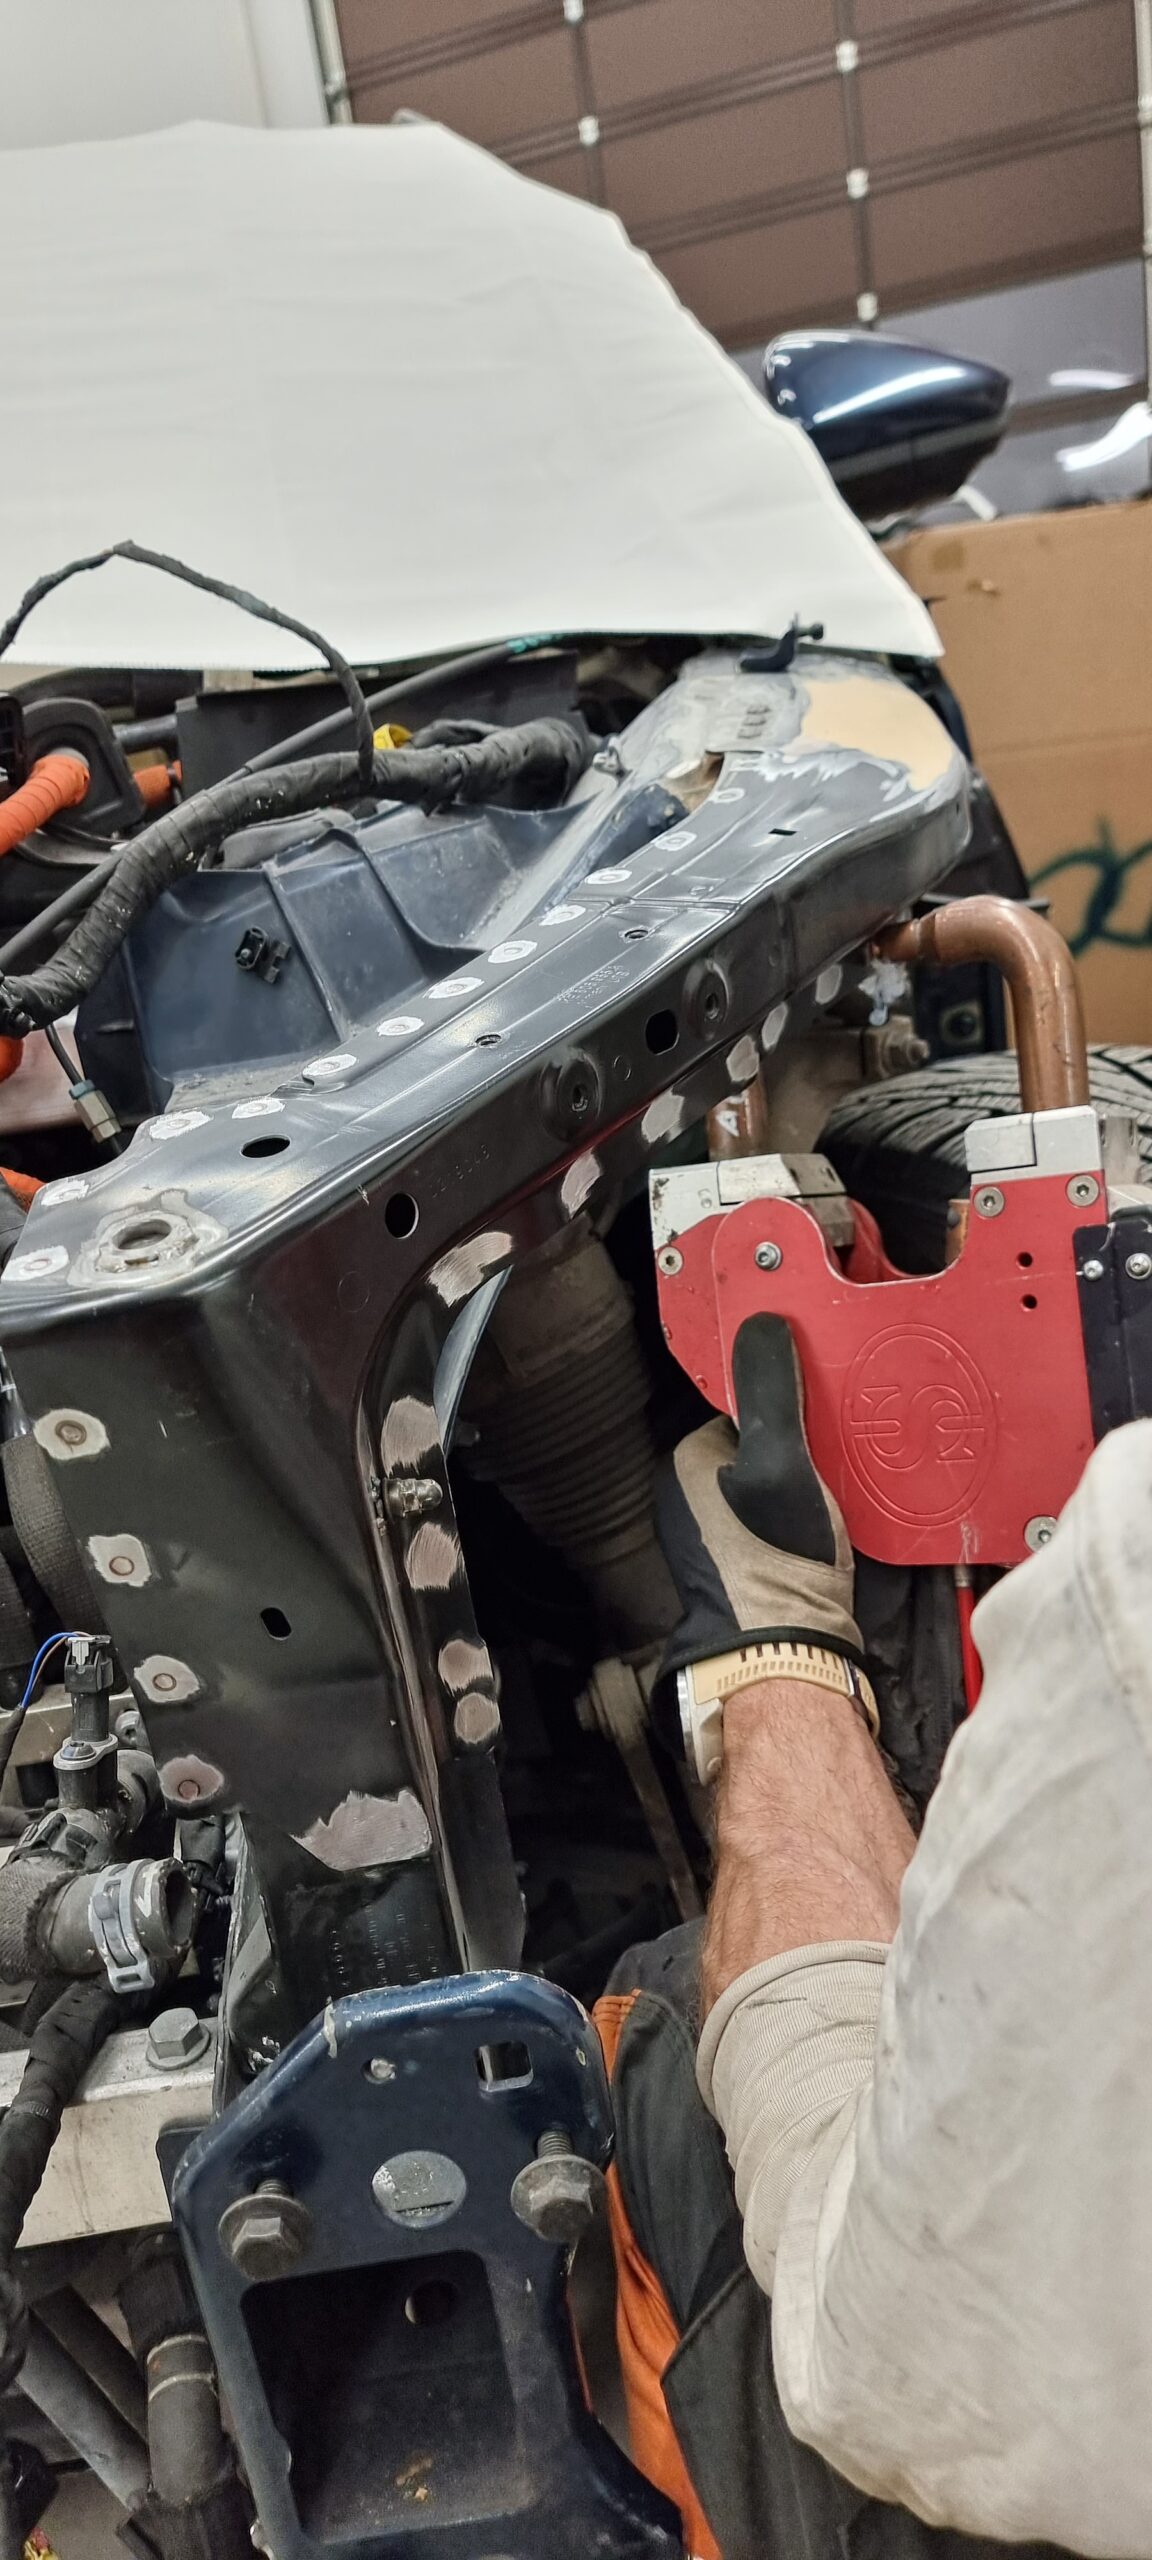
Vasemmasas etunurkassa yläaisa oli reilusti vääntynyt ja vääntyessään rikkonut joitakin sähköjohtoja. Heti alkuun mitattiin, että iskarin yläpää on paikallaan, eli isoja muodonmuutoksia ei ole onneksi tullut.

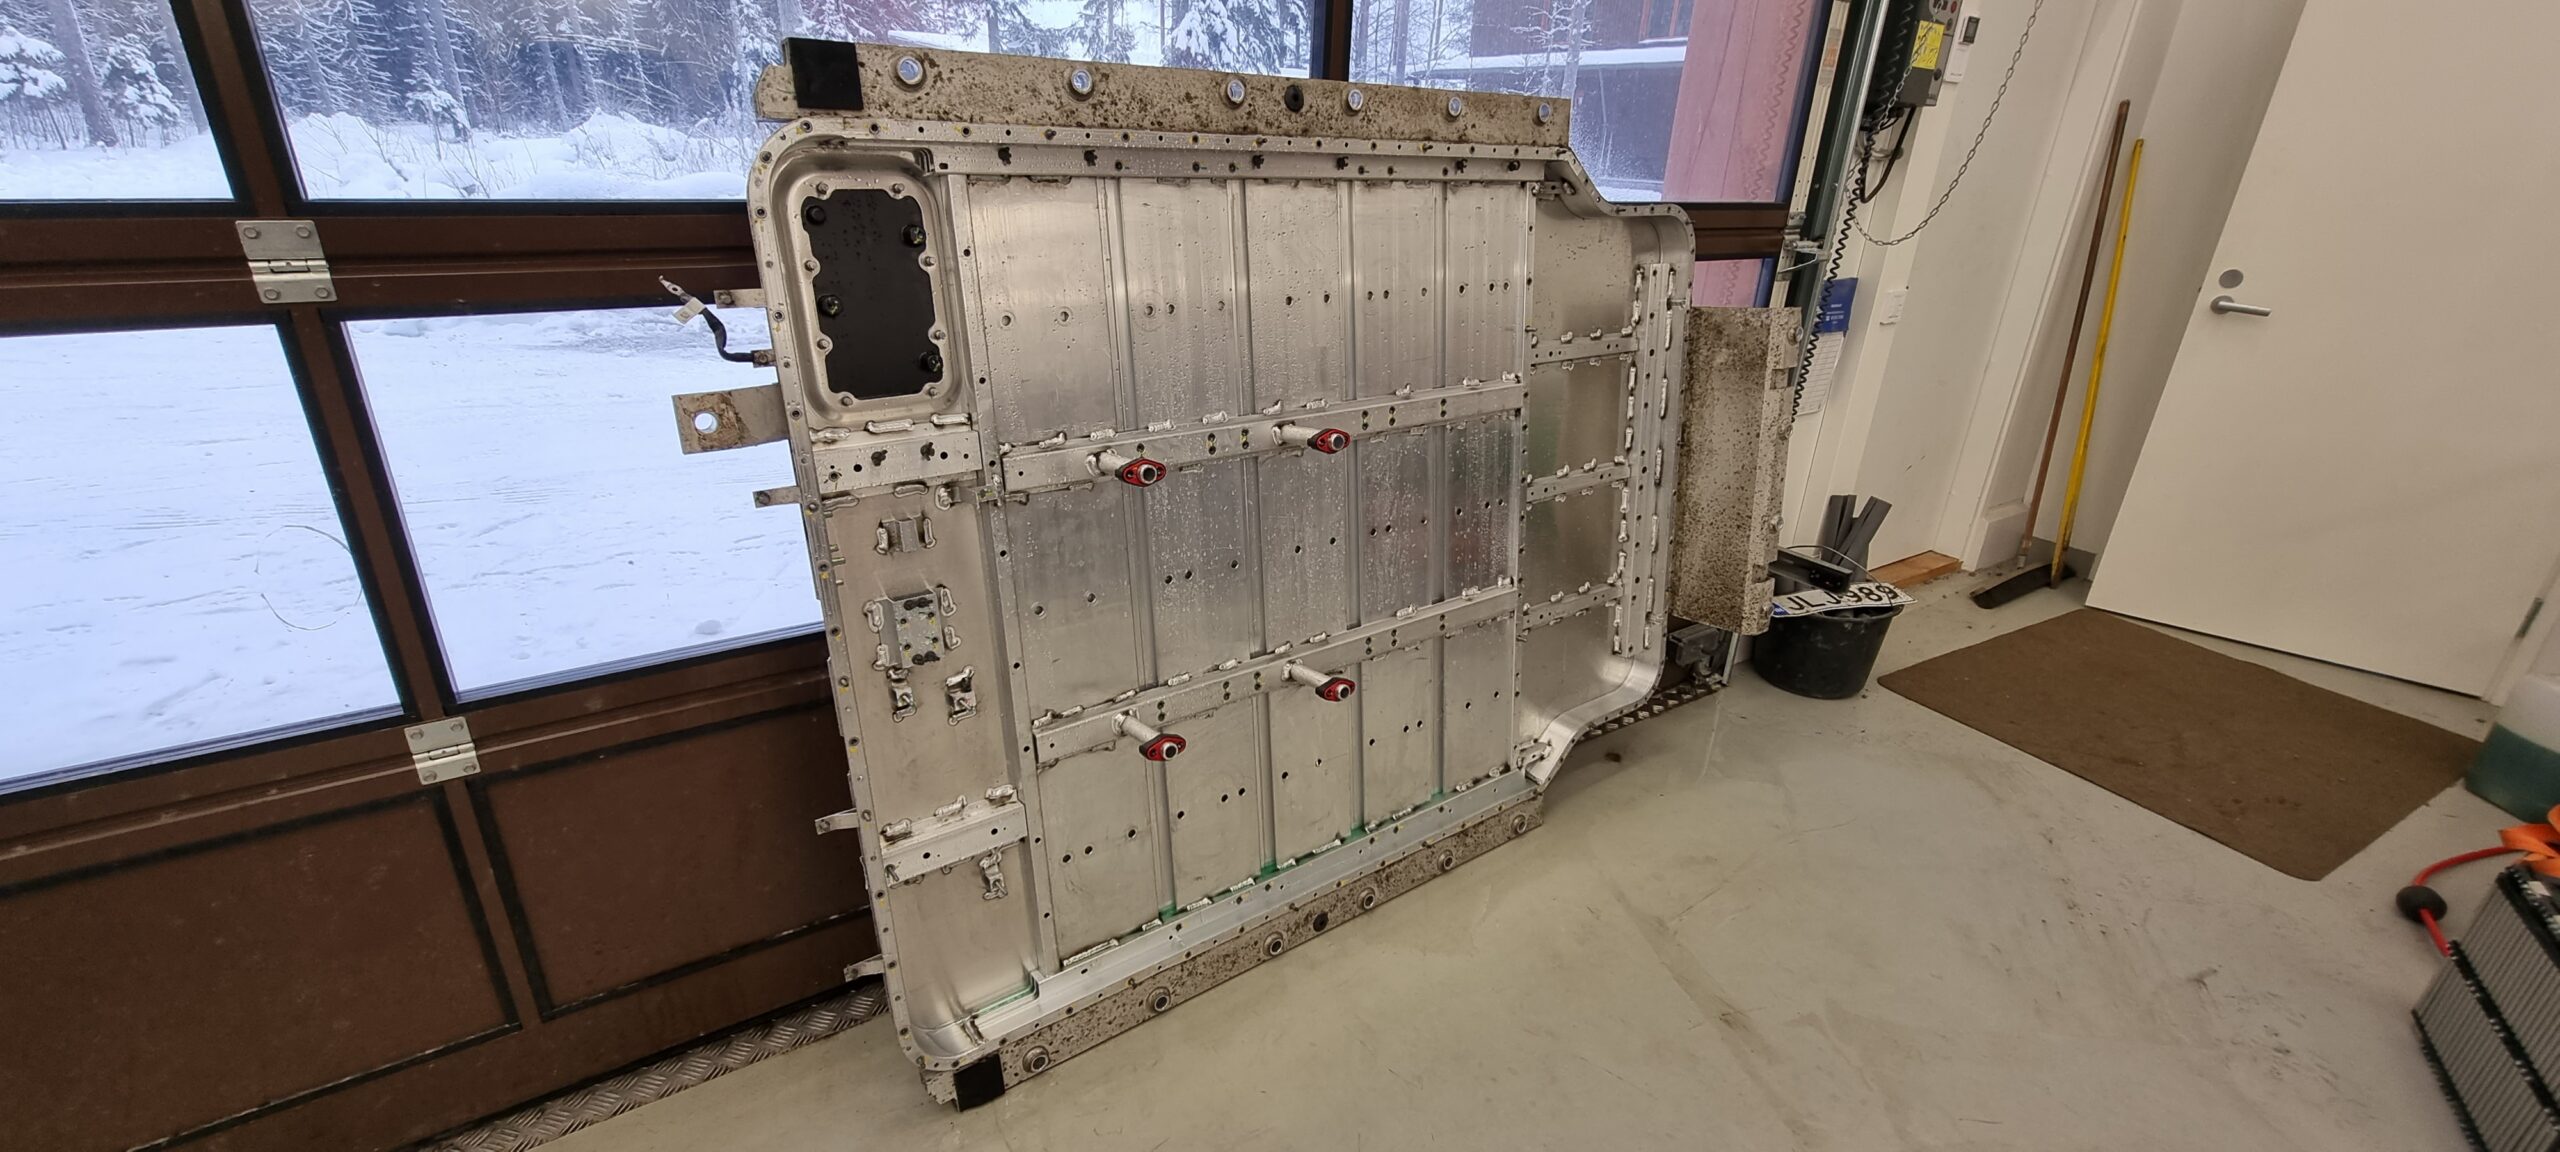
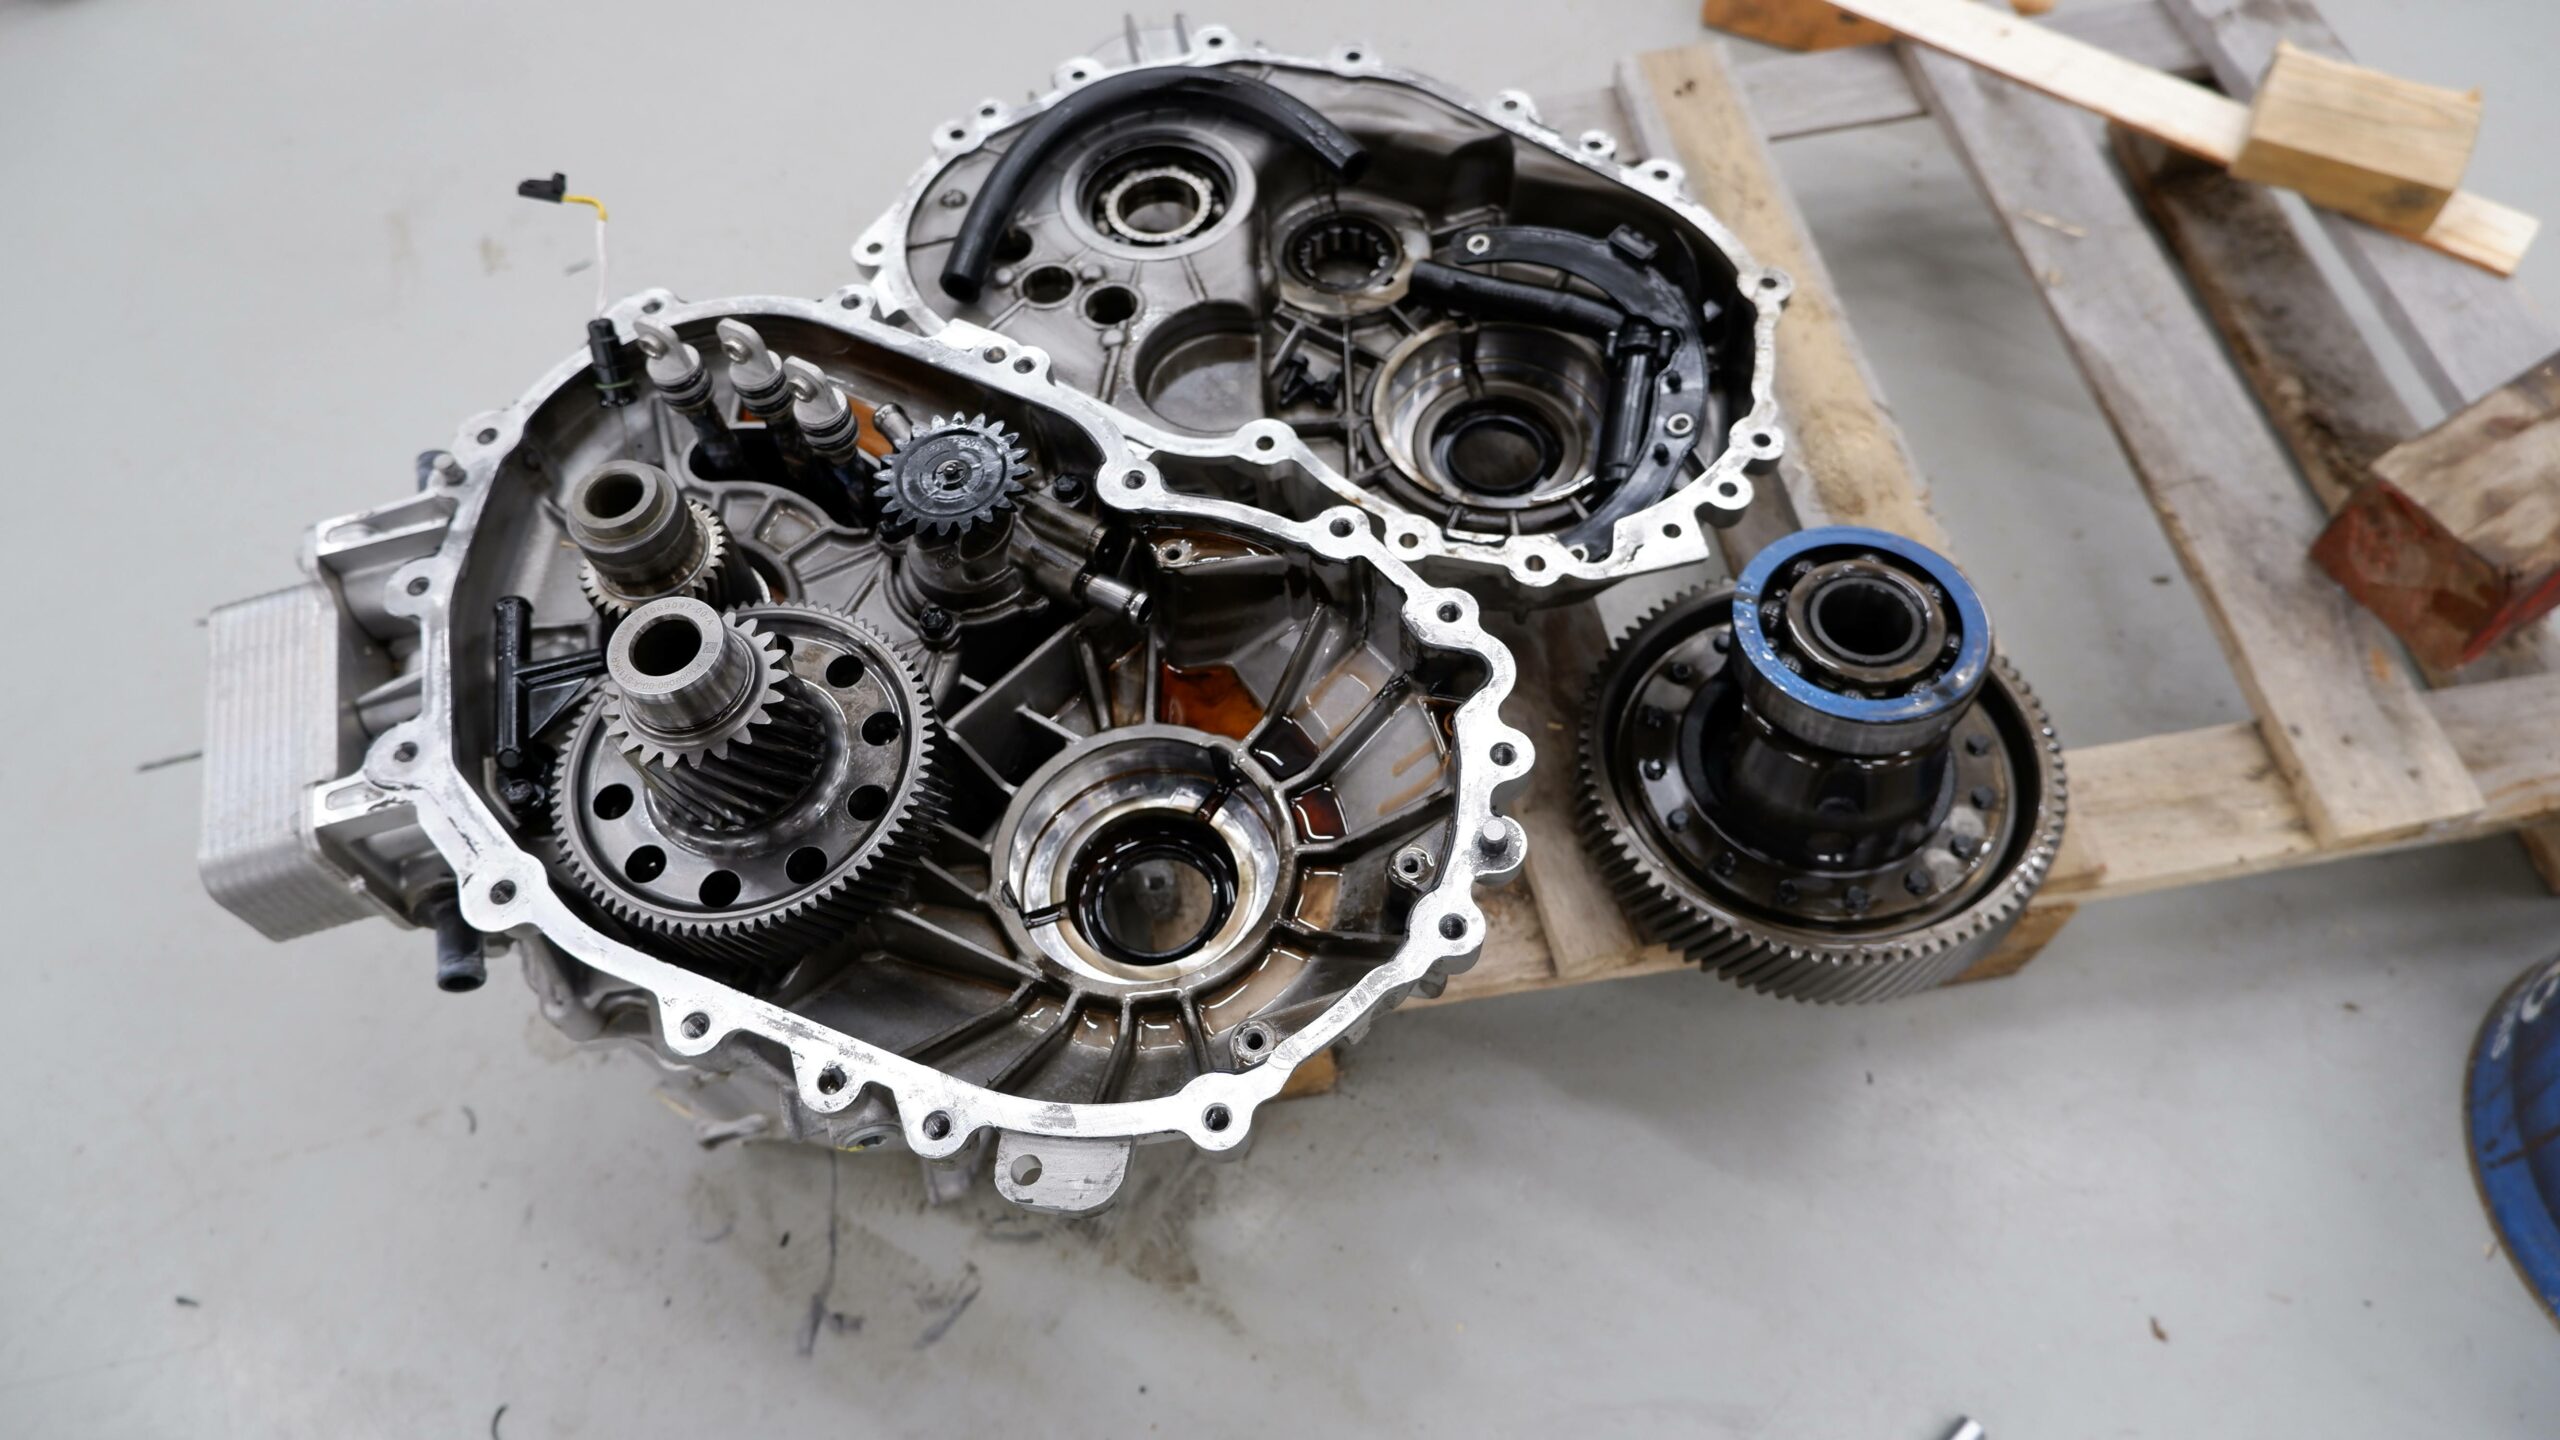
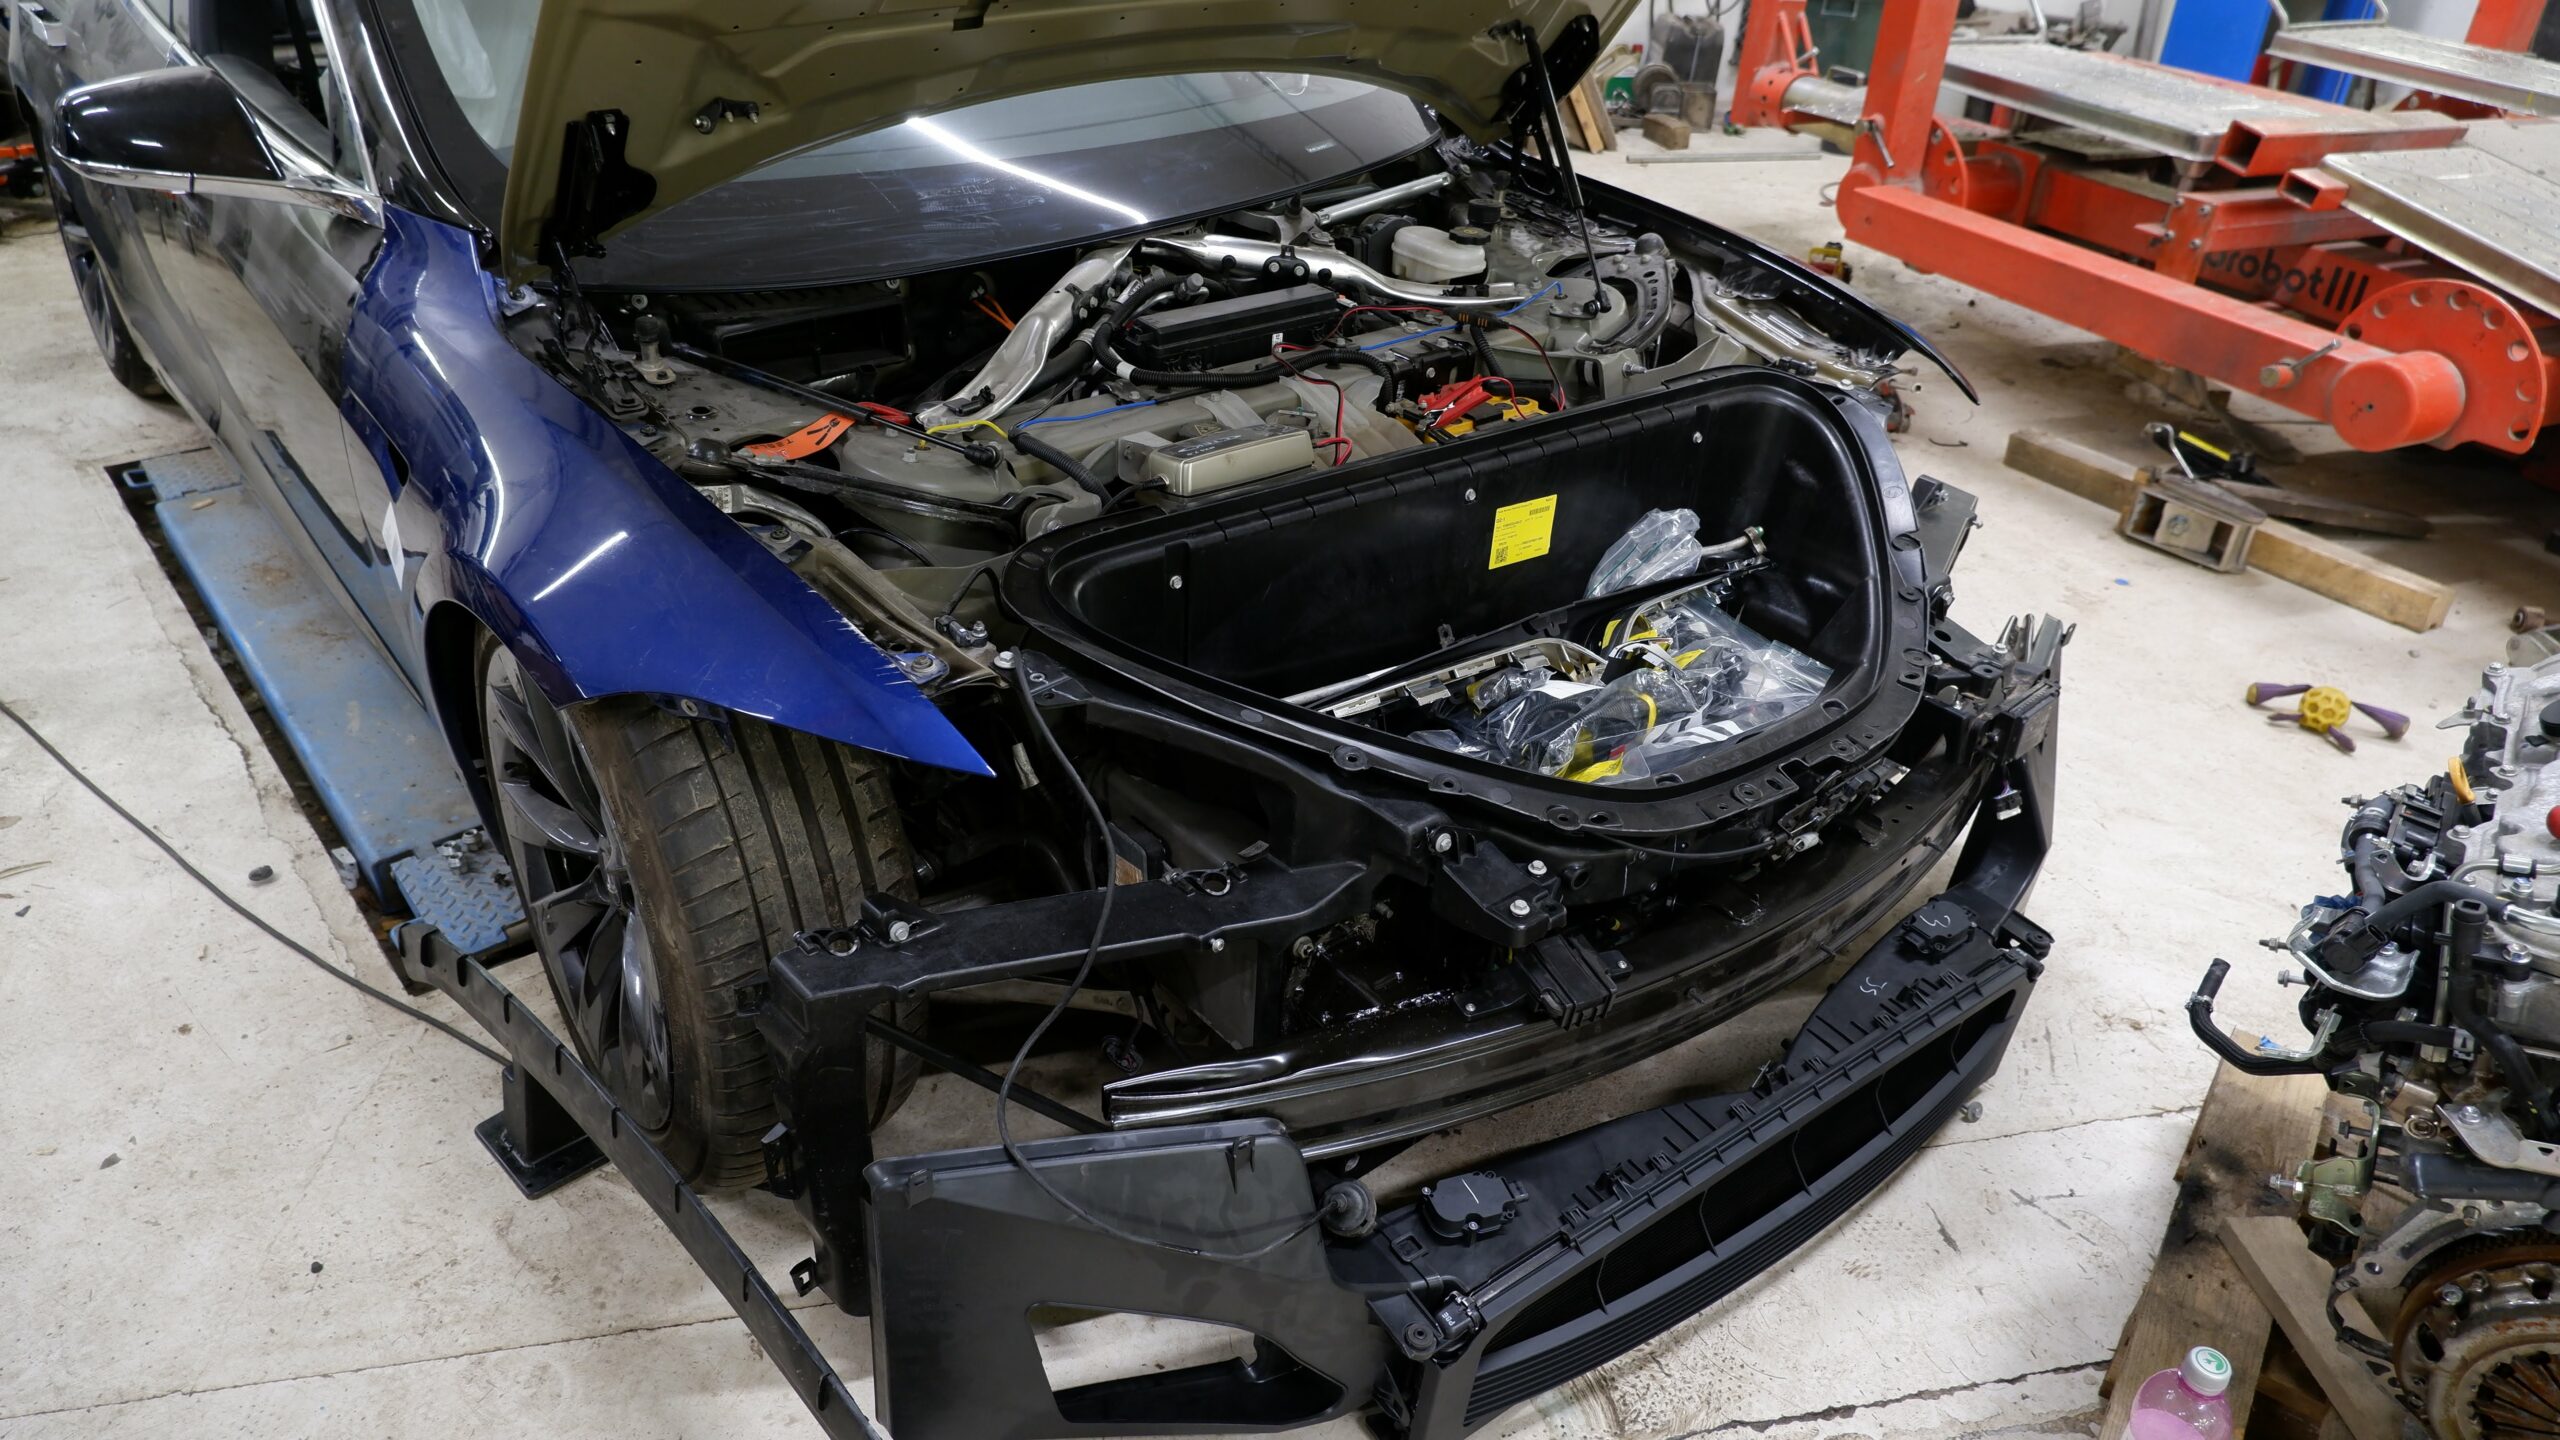
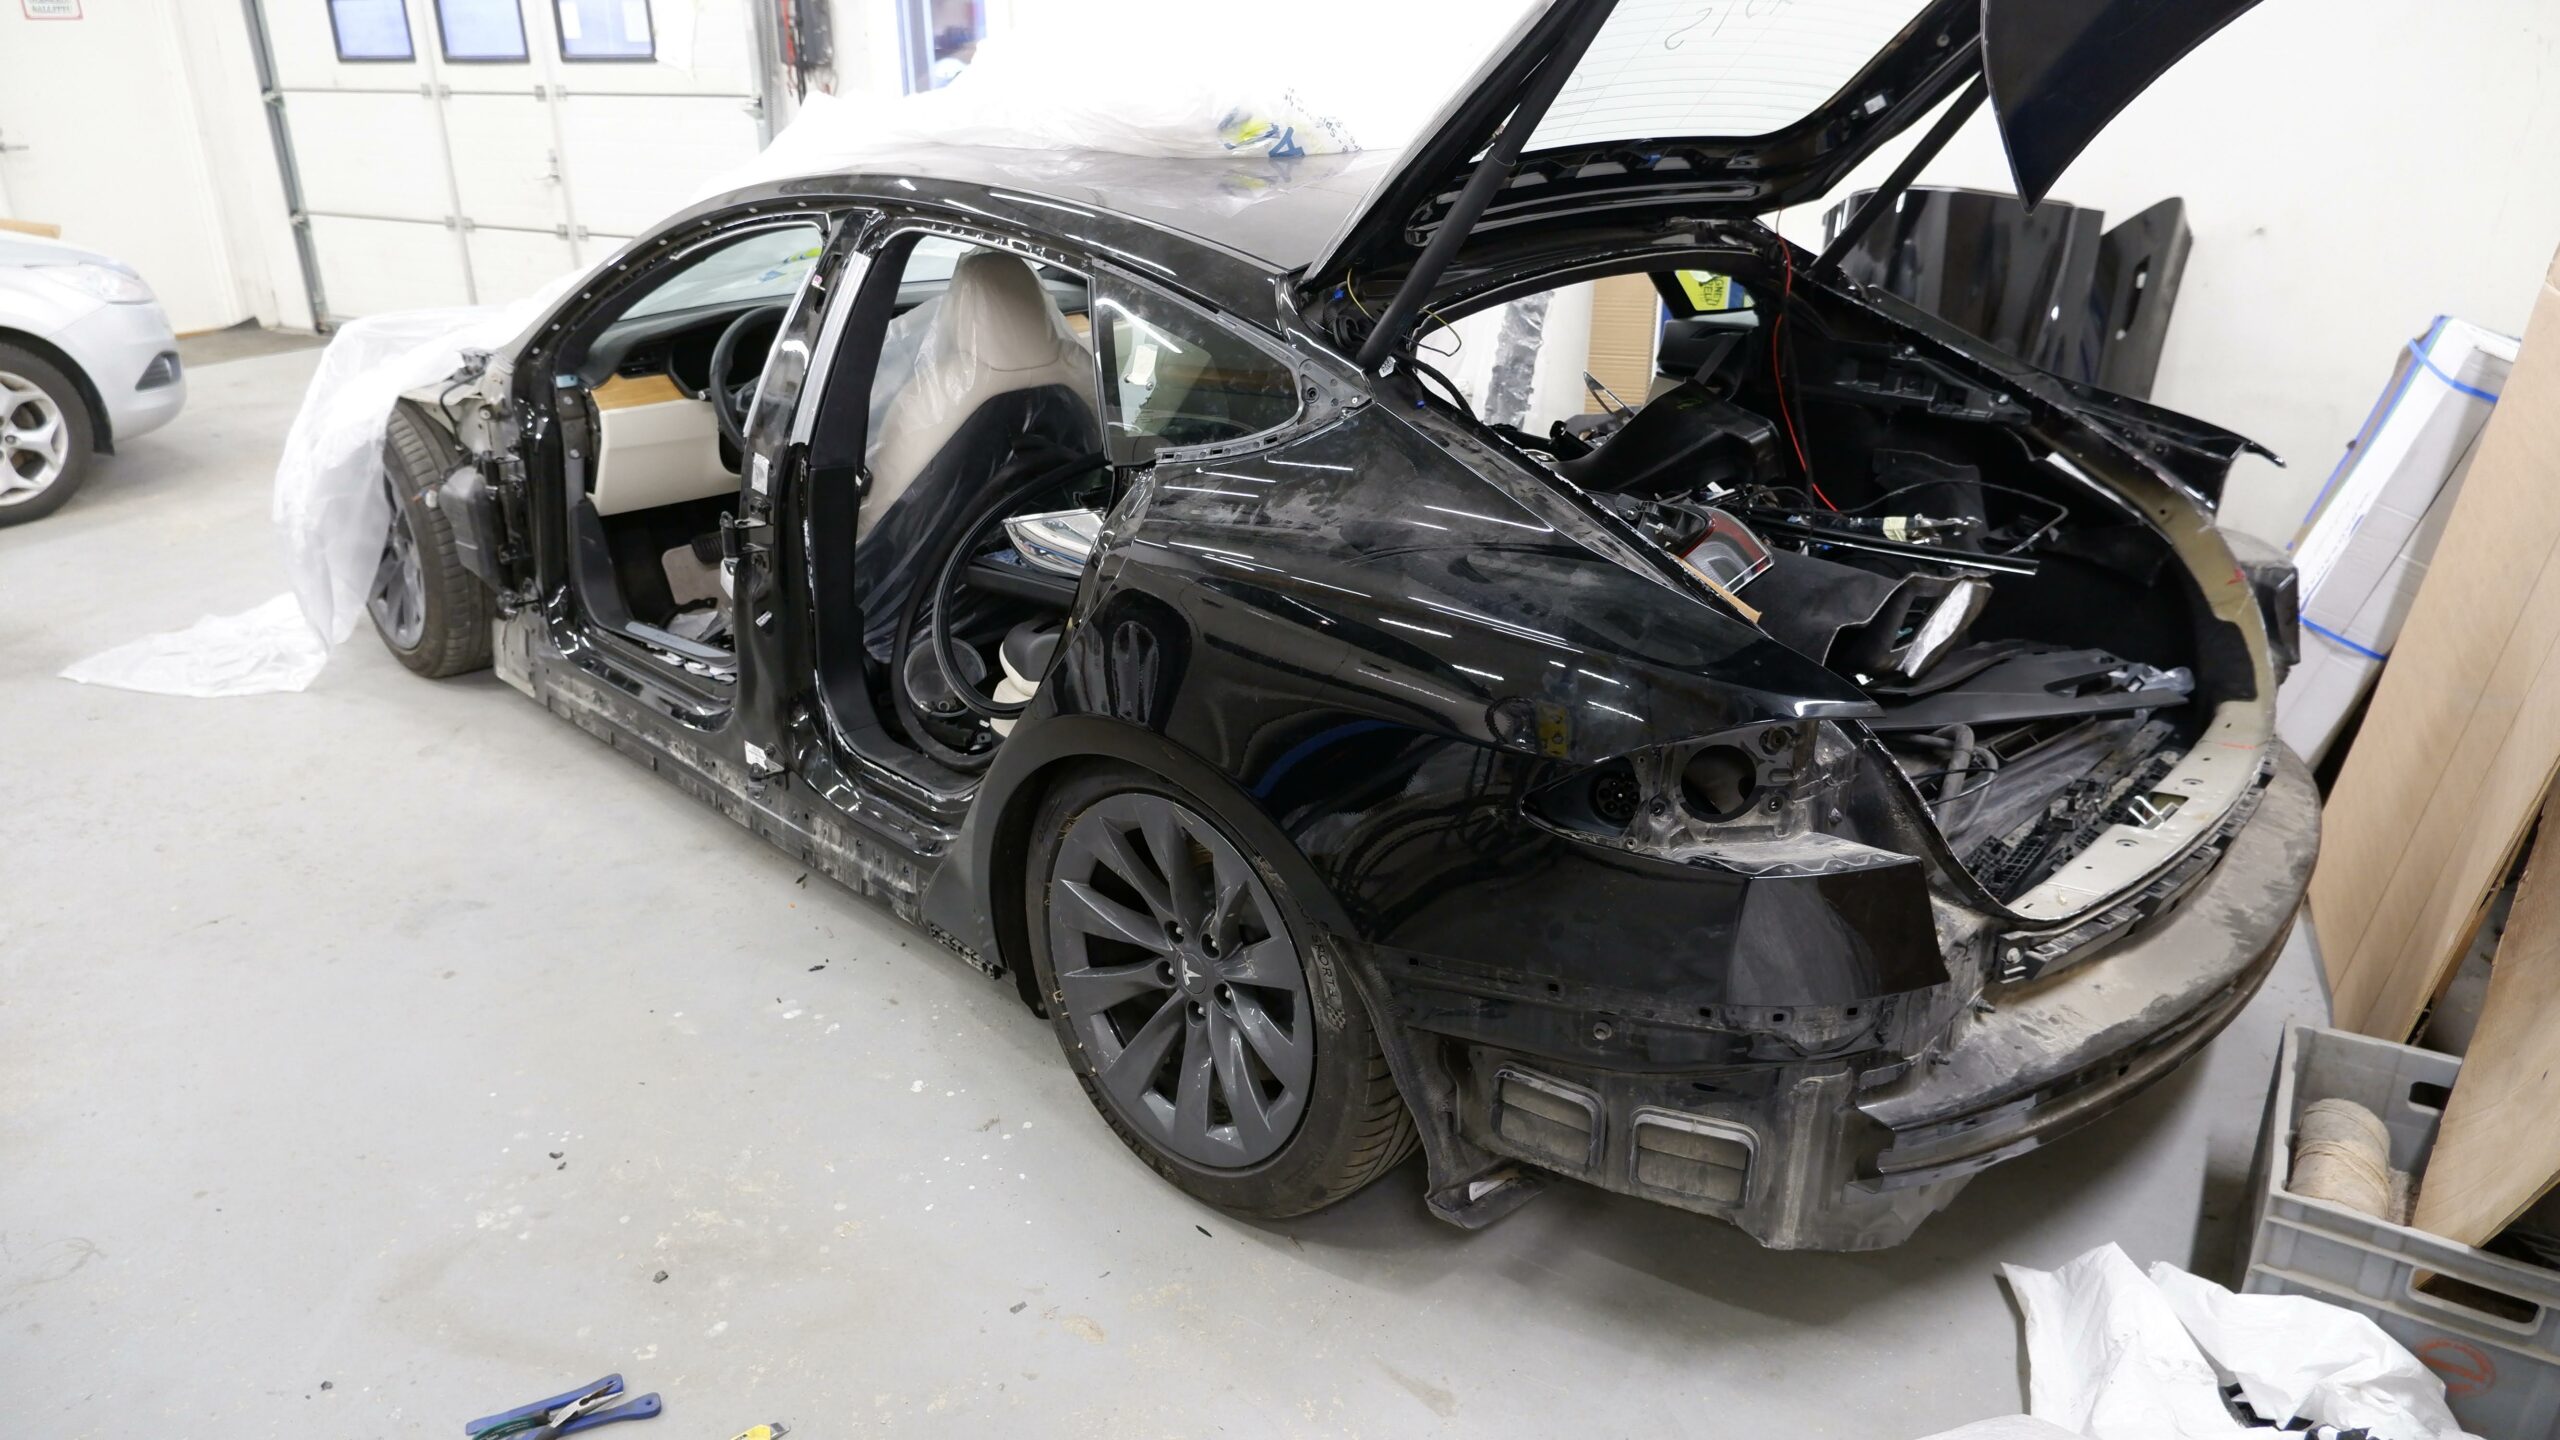
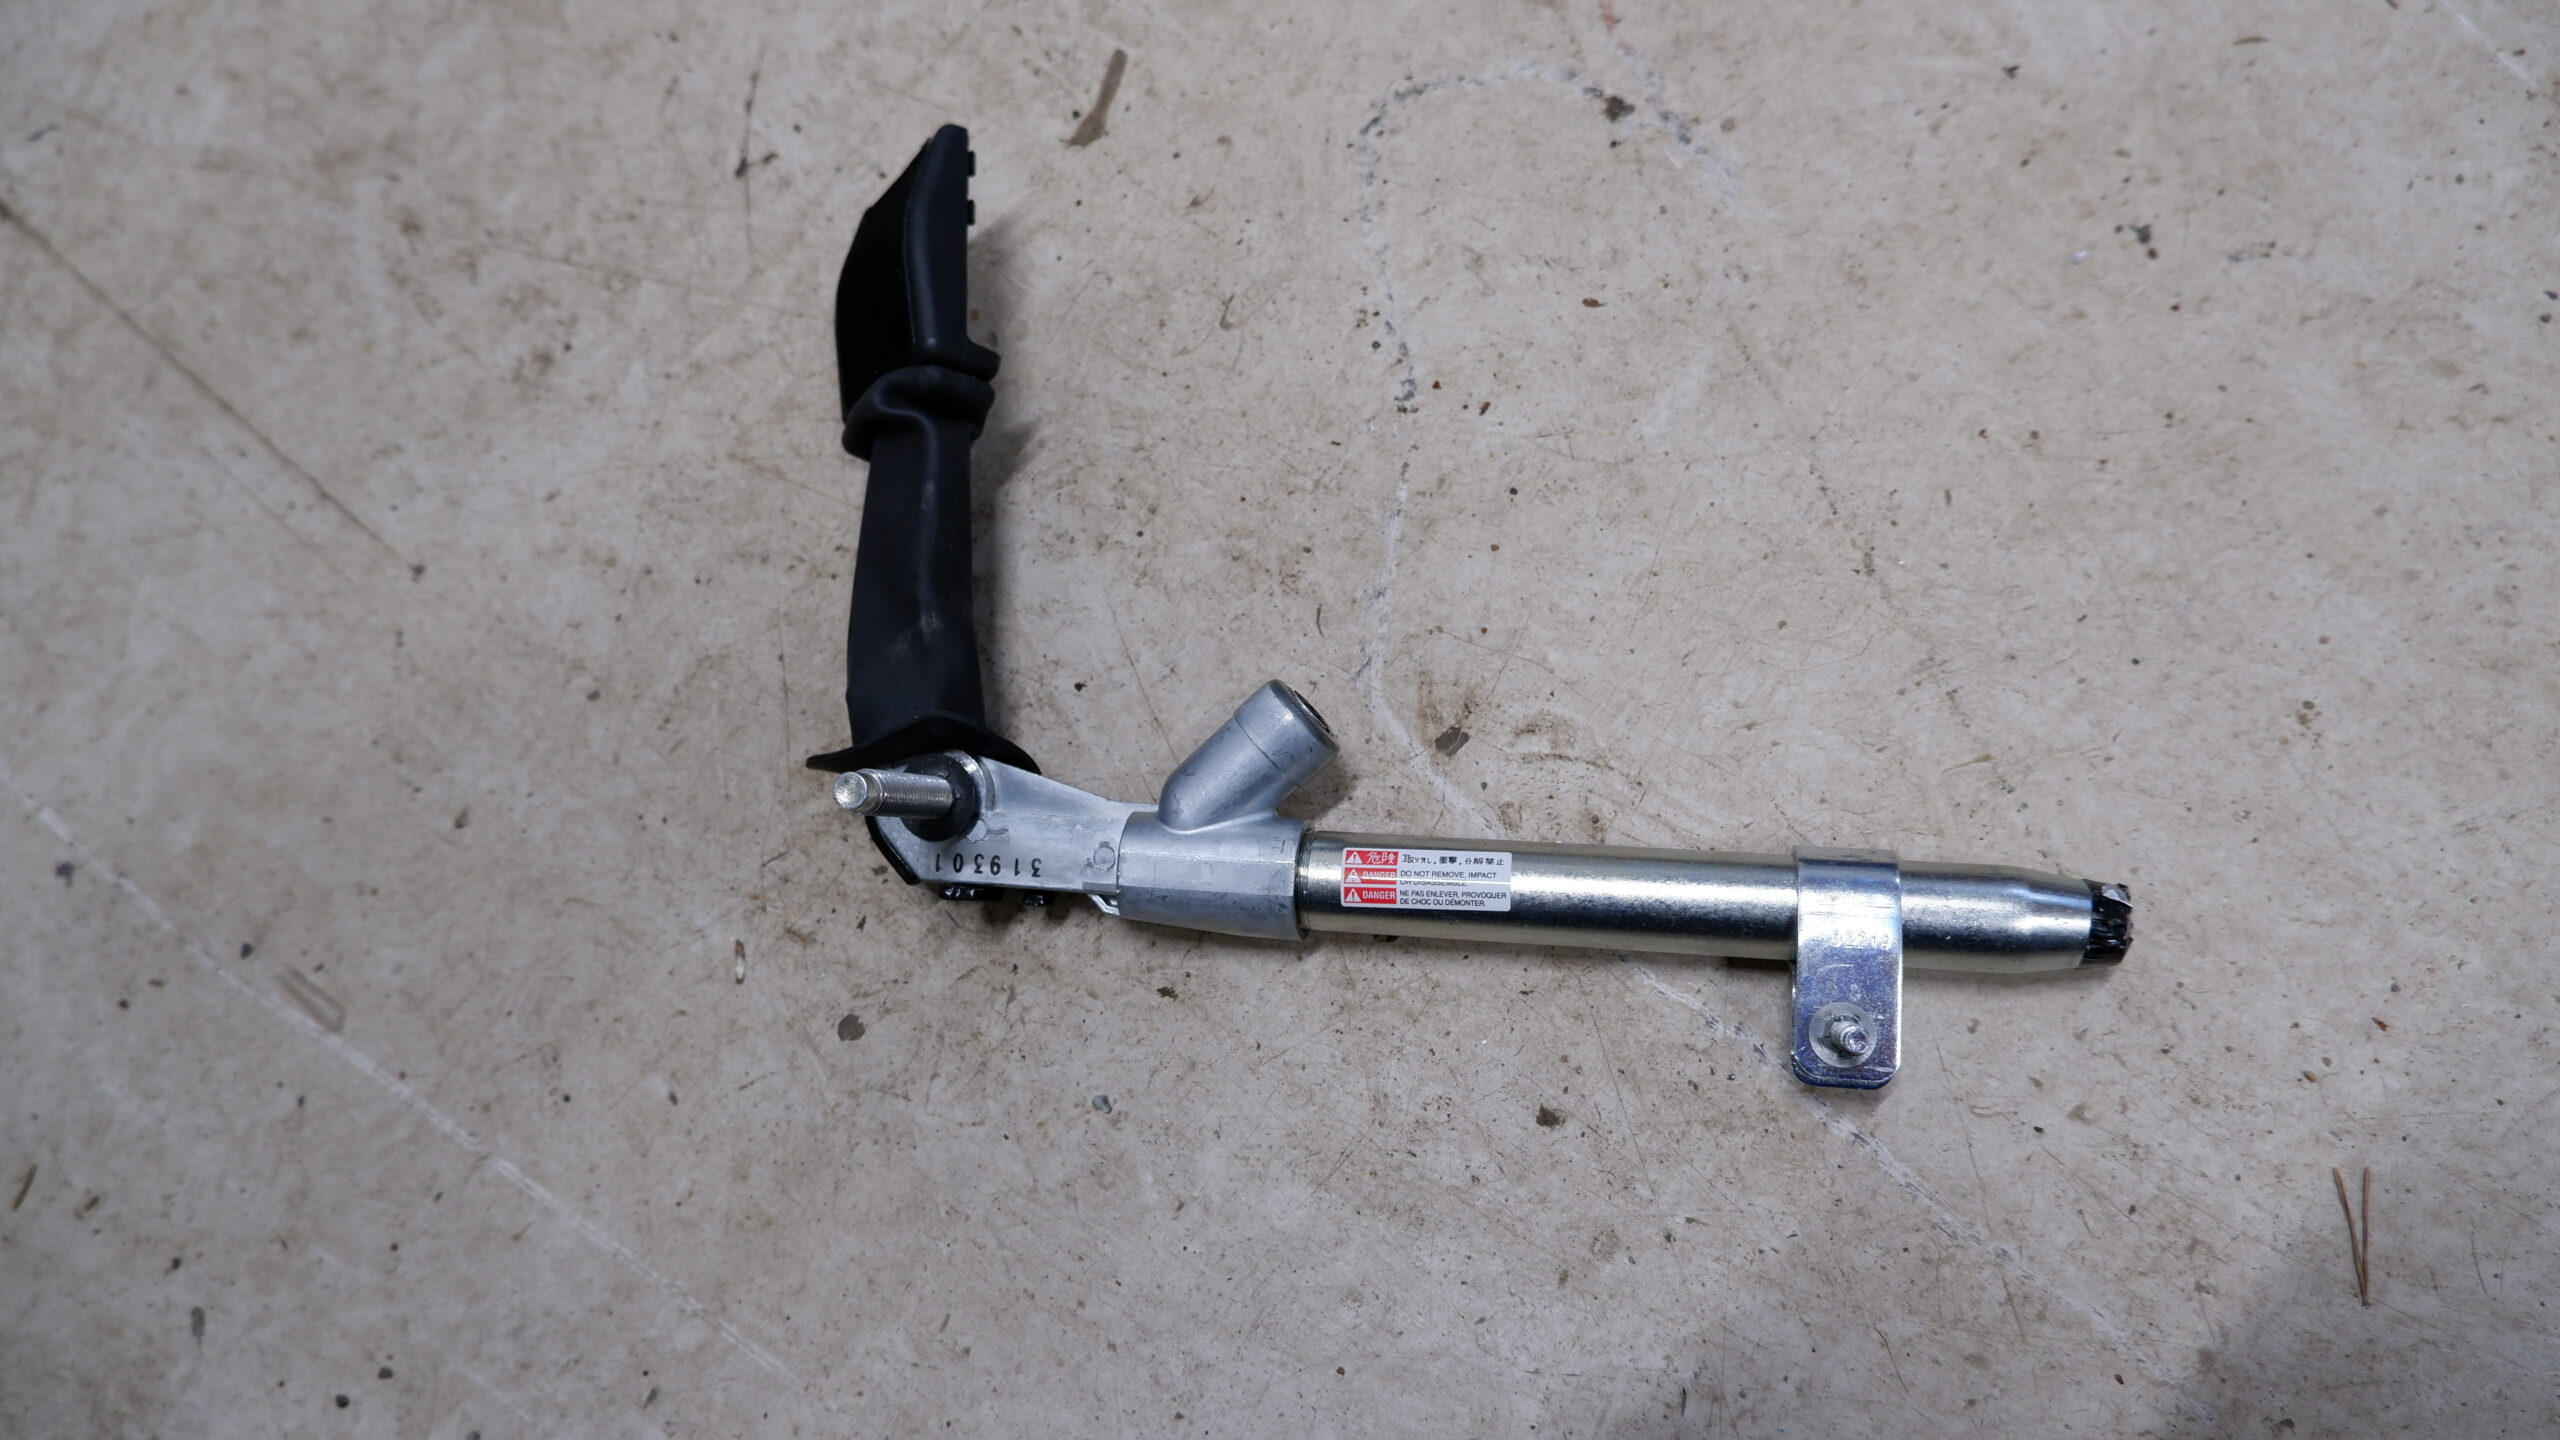
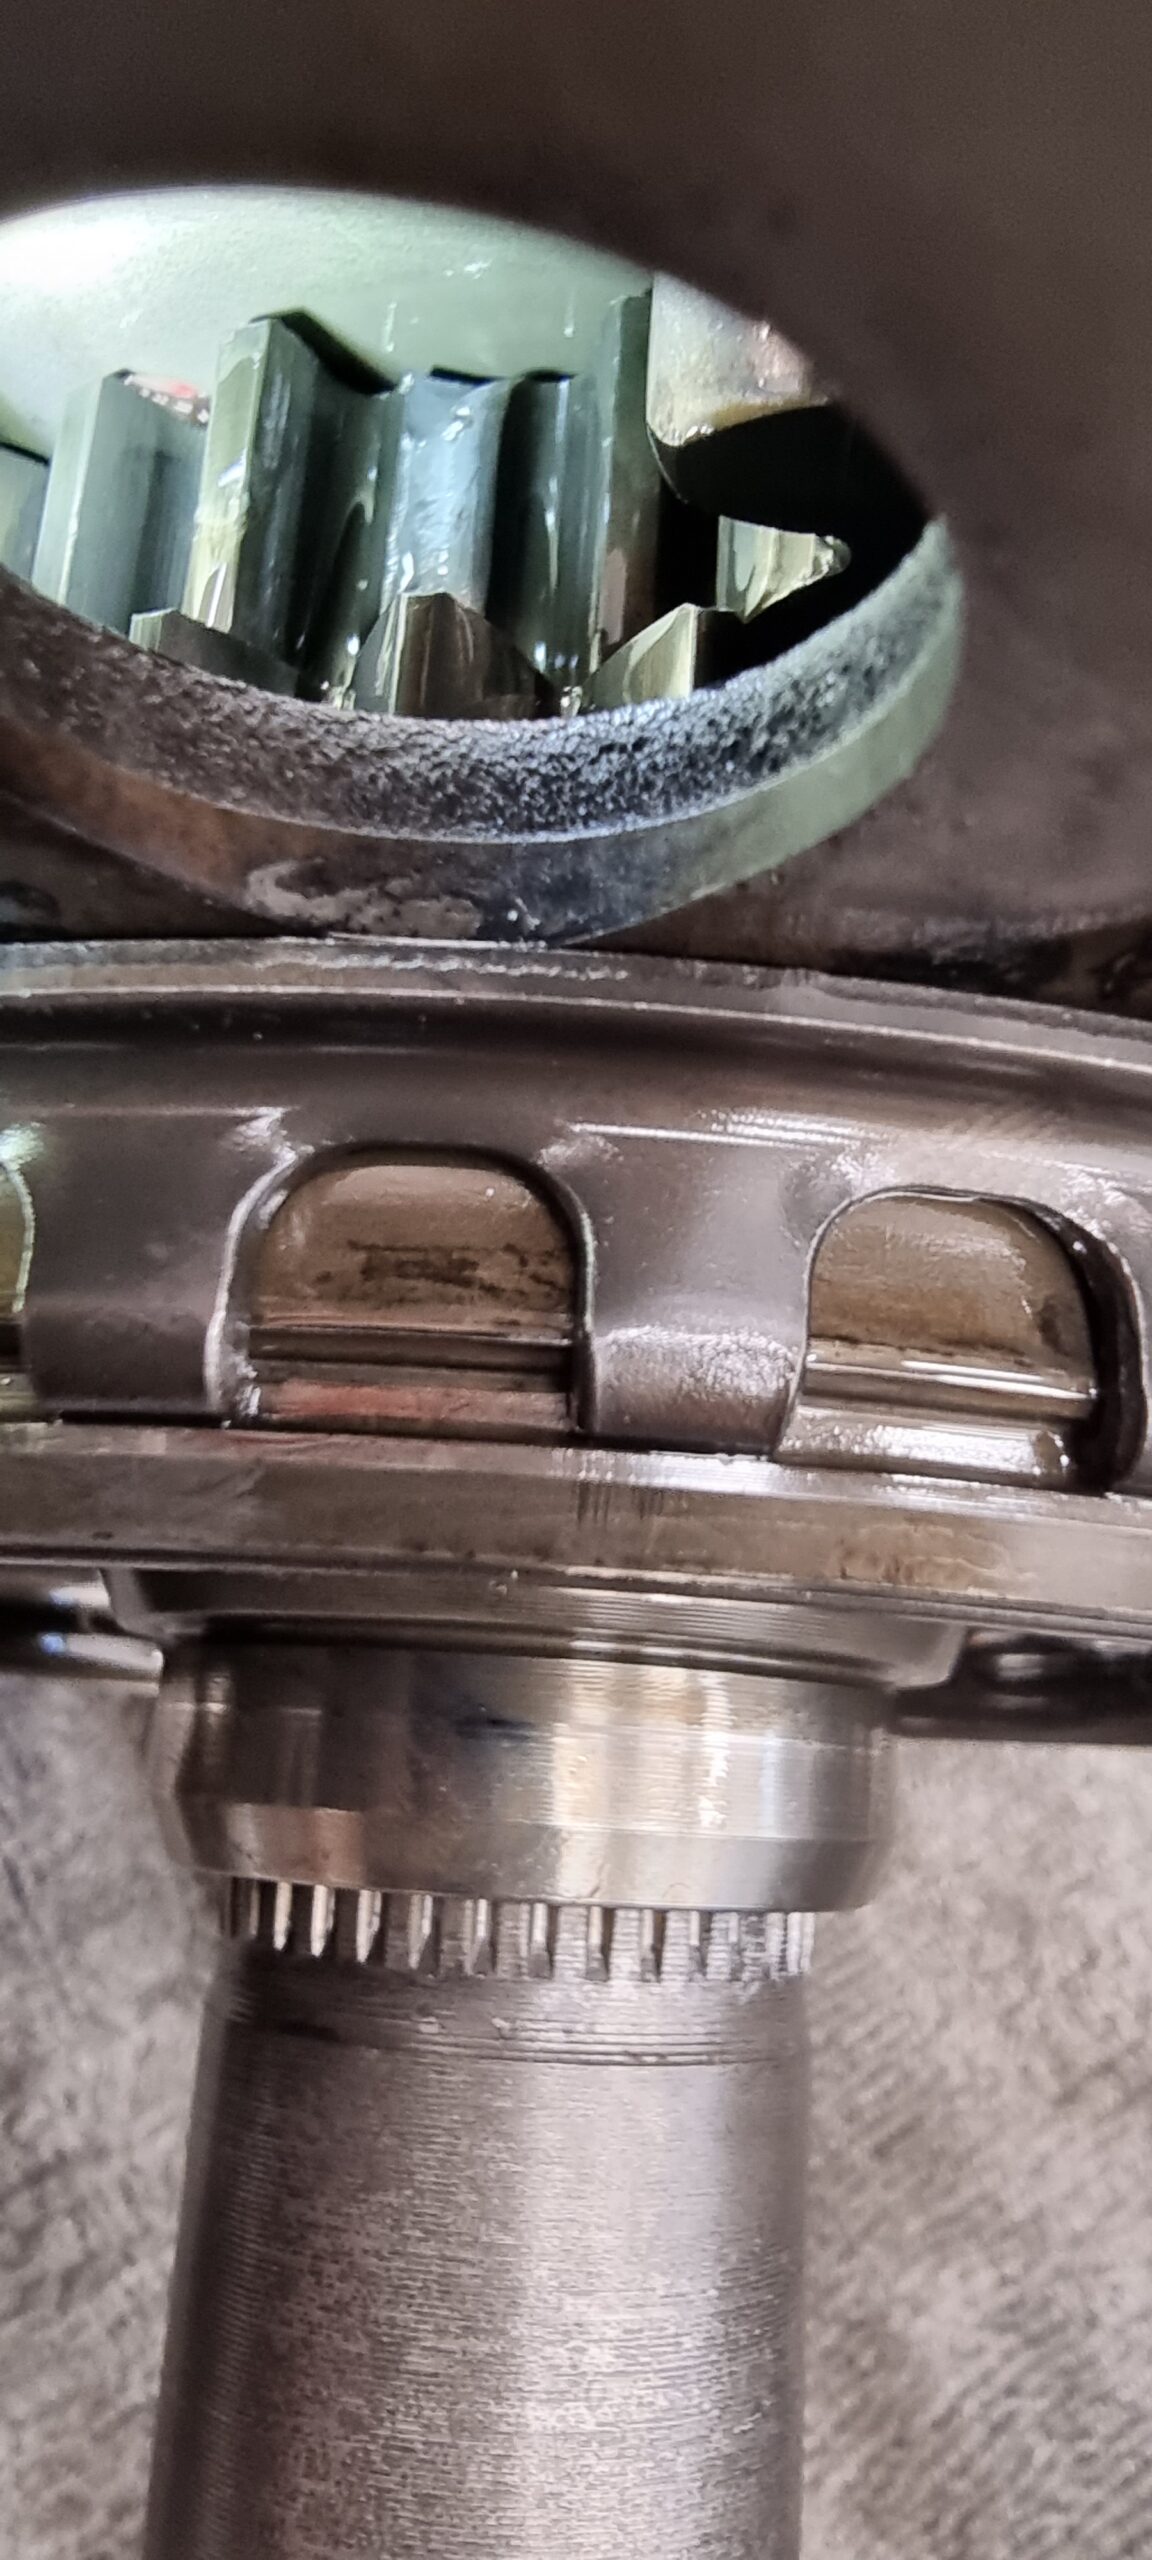
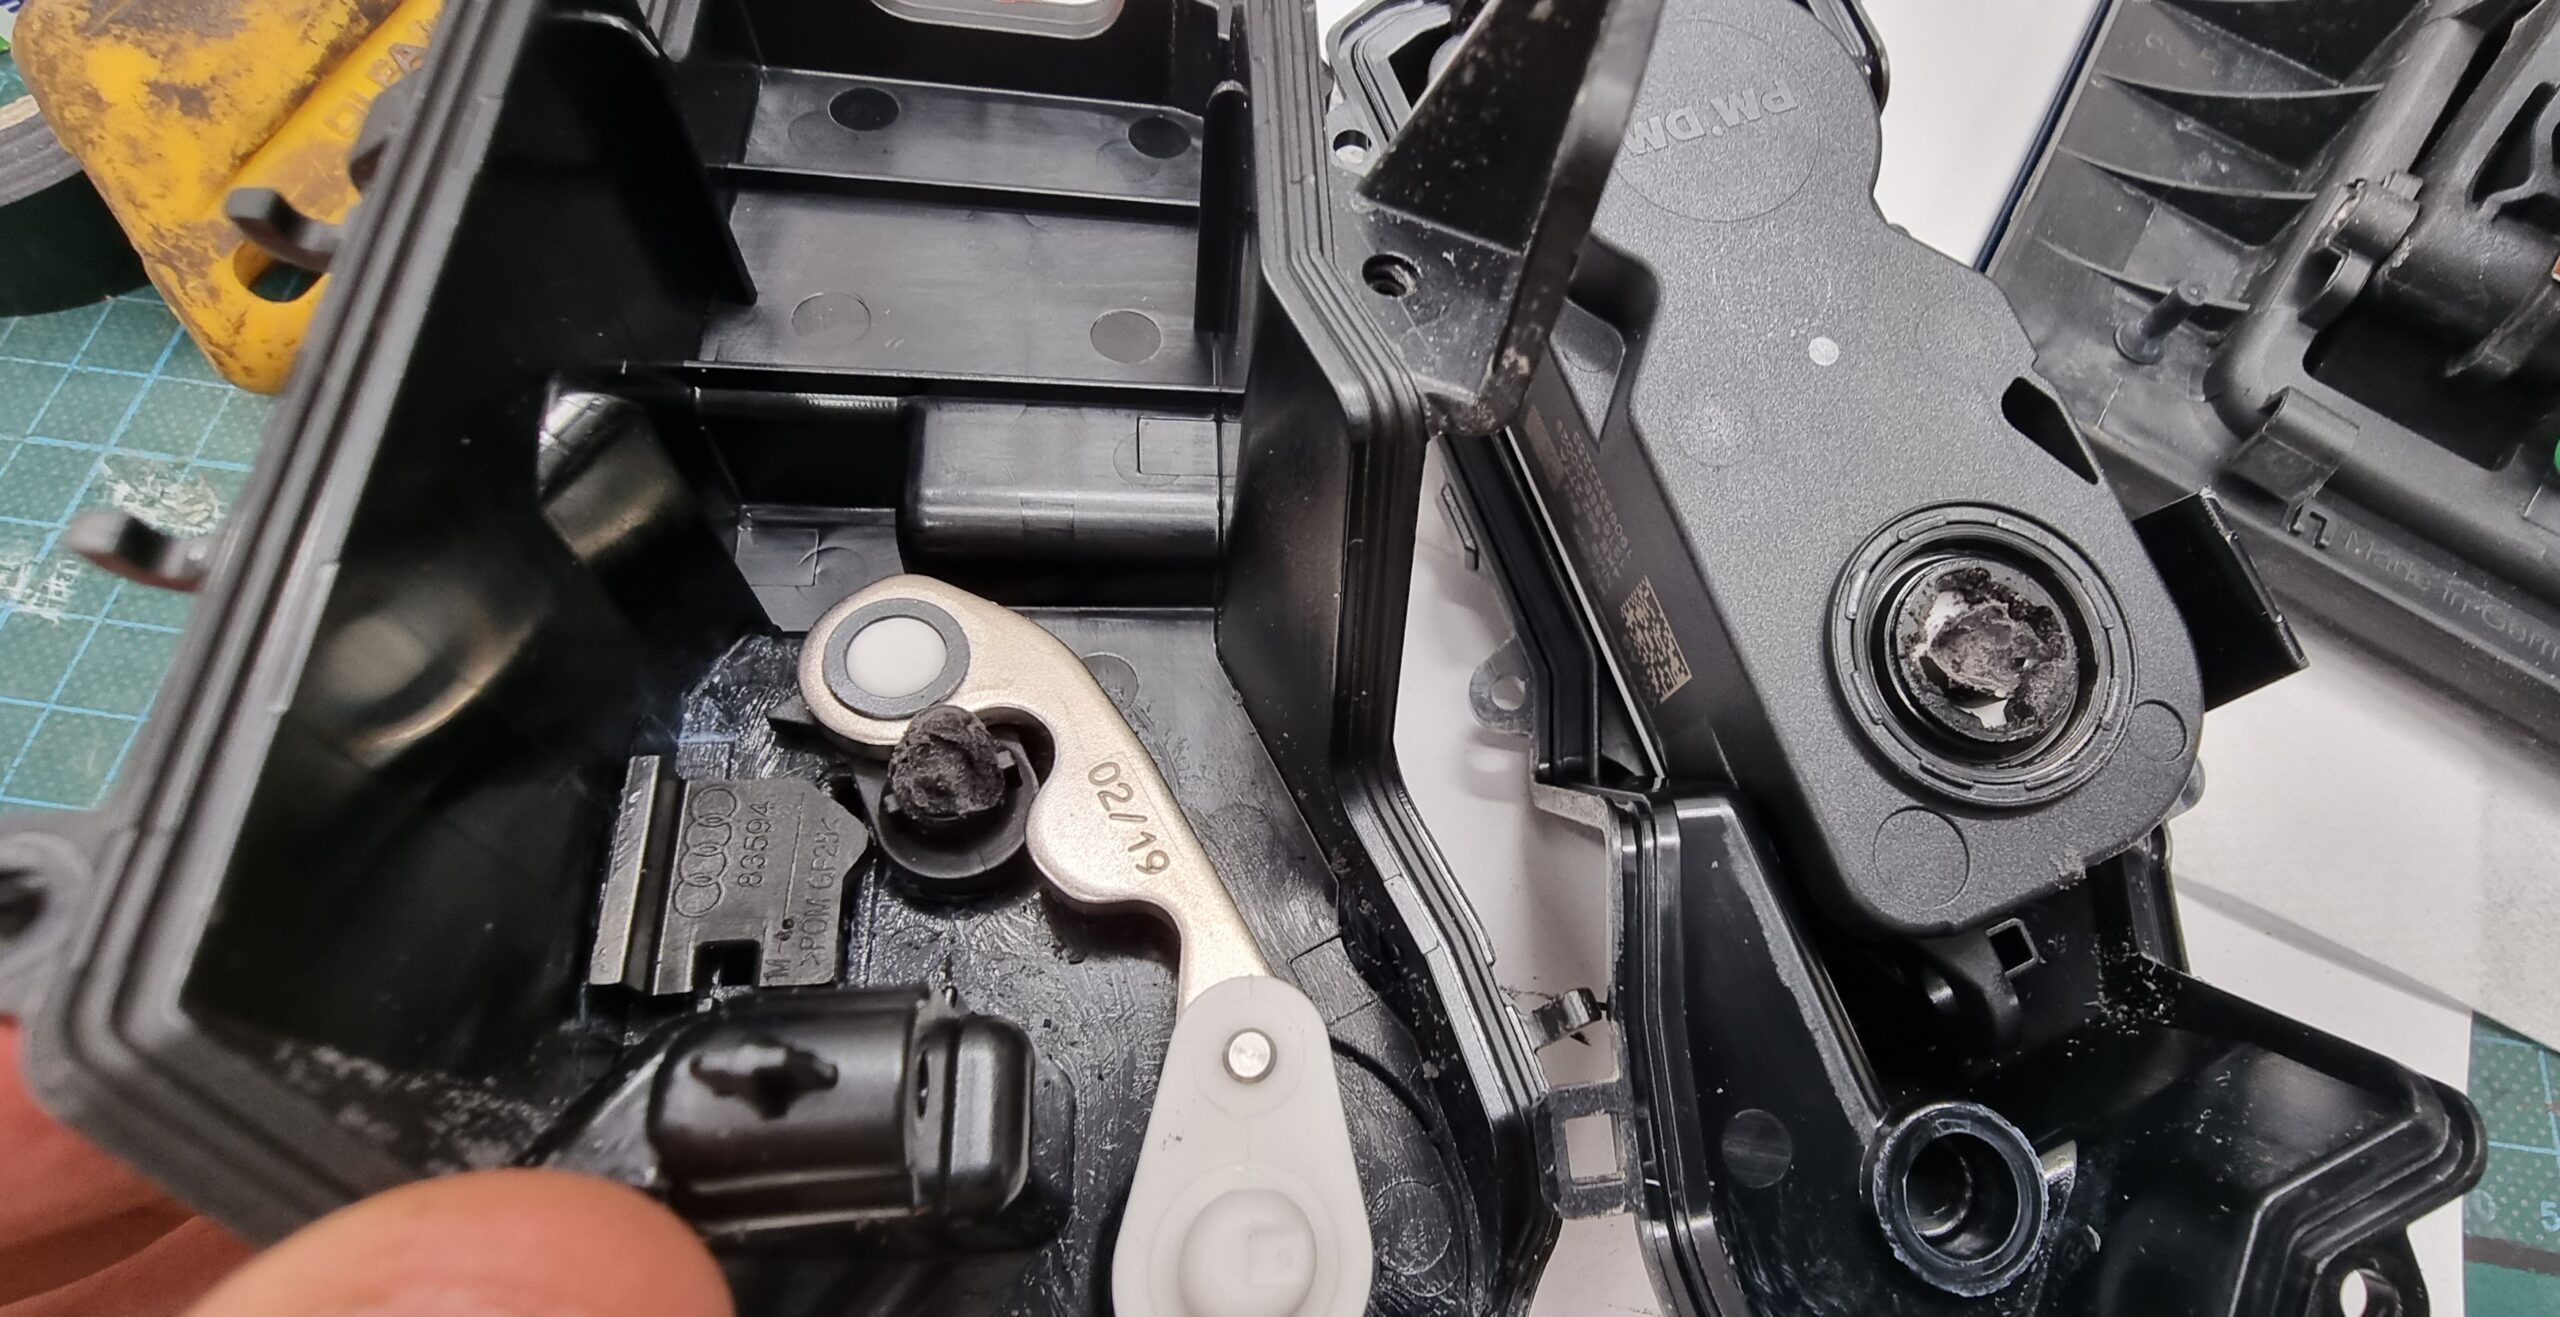
Ainoa isompi negatiivinen yllätys paljastui vasta päiviä purkamisen aloittamisen jälkeen. Ihmettelin, kun rengas ei nosturilla pyöri kunnolla ja aloin selvitellä asiaa. Selvisi, että auton oikealla puolella vetarin laippa heilui epämääräisesti. Vetarin irrottamisen jälkeen laippa jäi ns. käteen. Ei auttanut muu kuin tiputtaa tekniikka etupäästä pois.

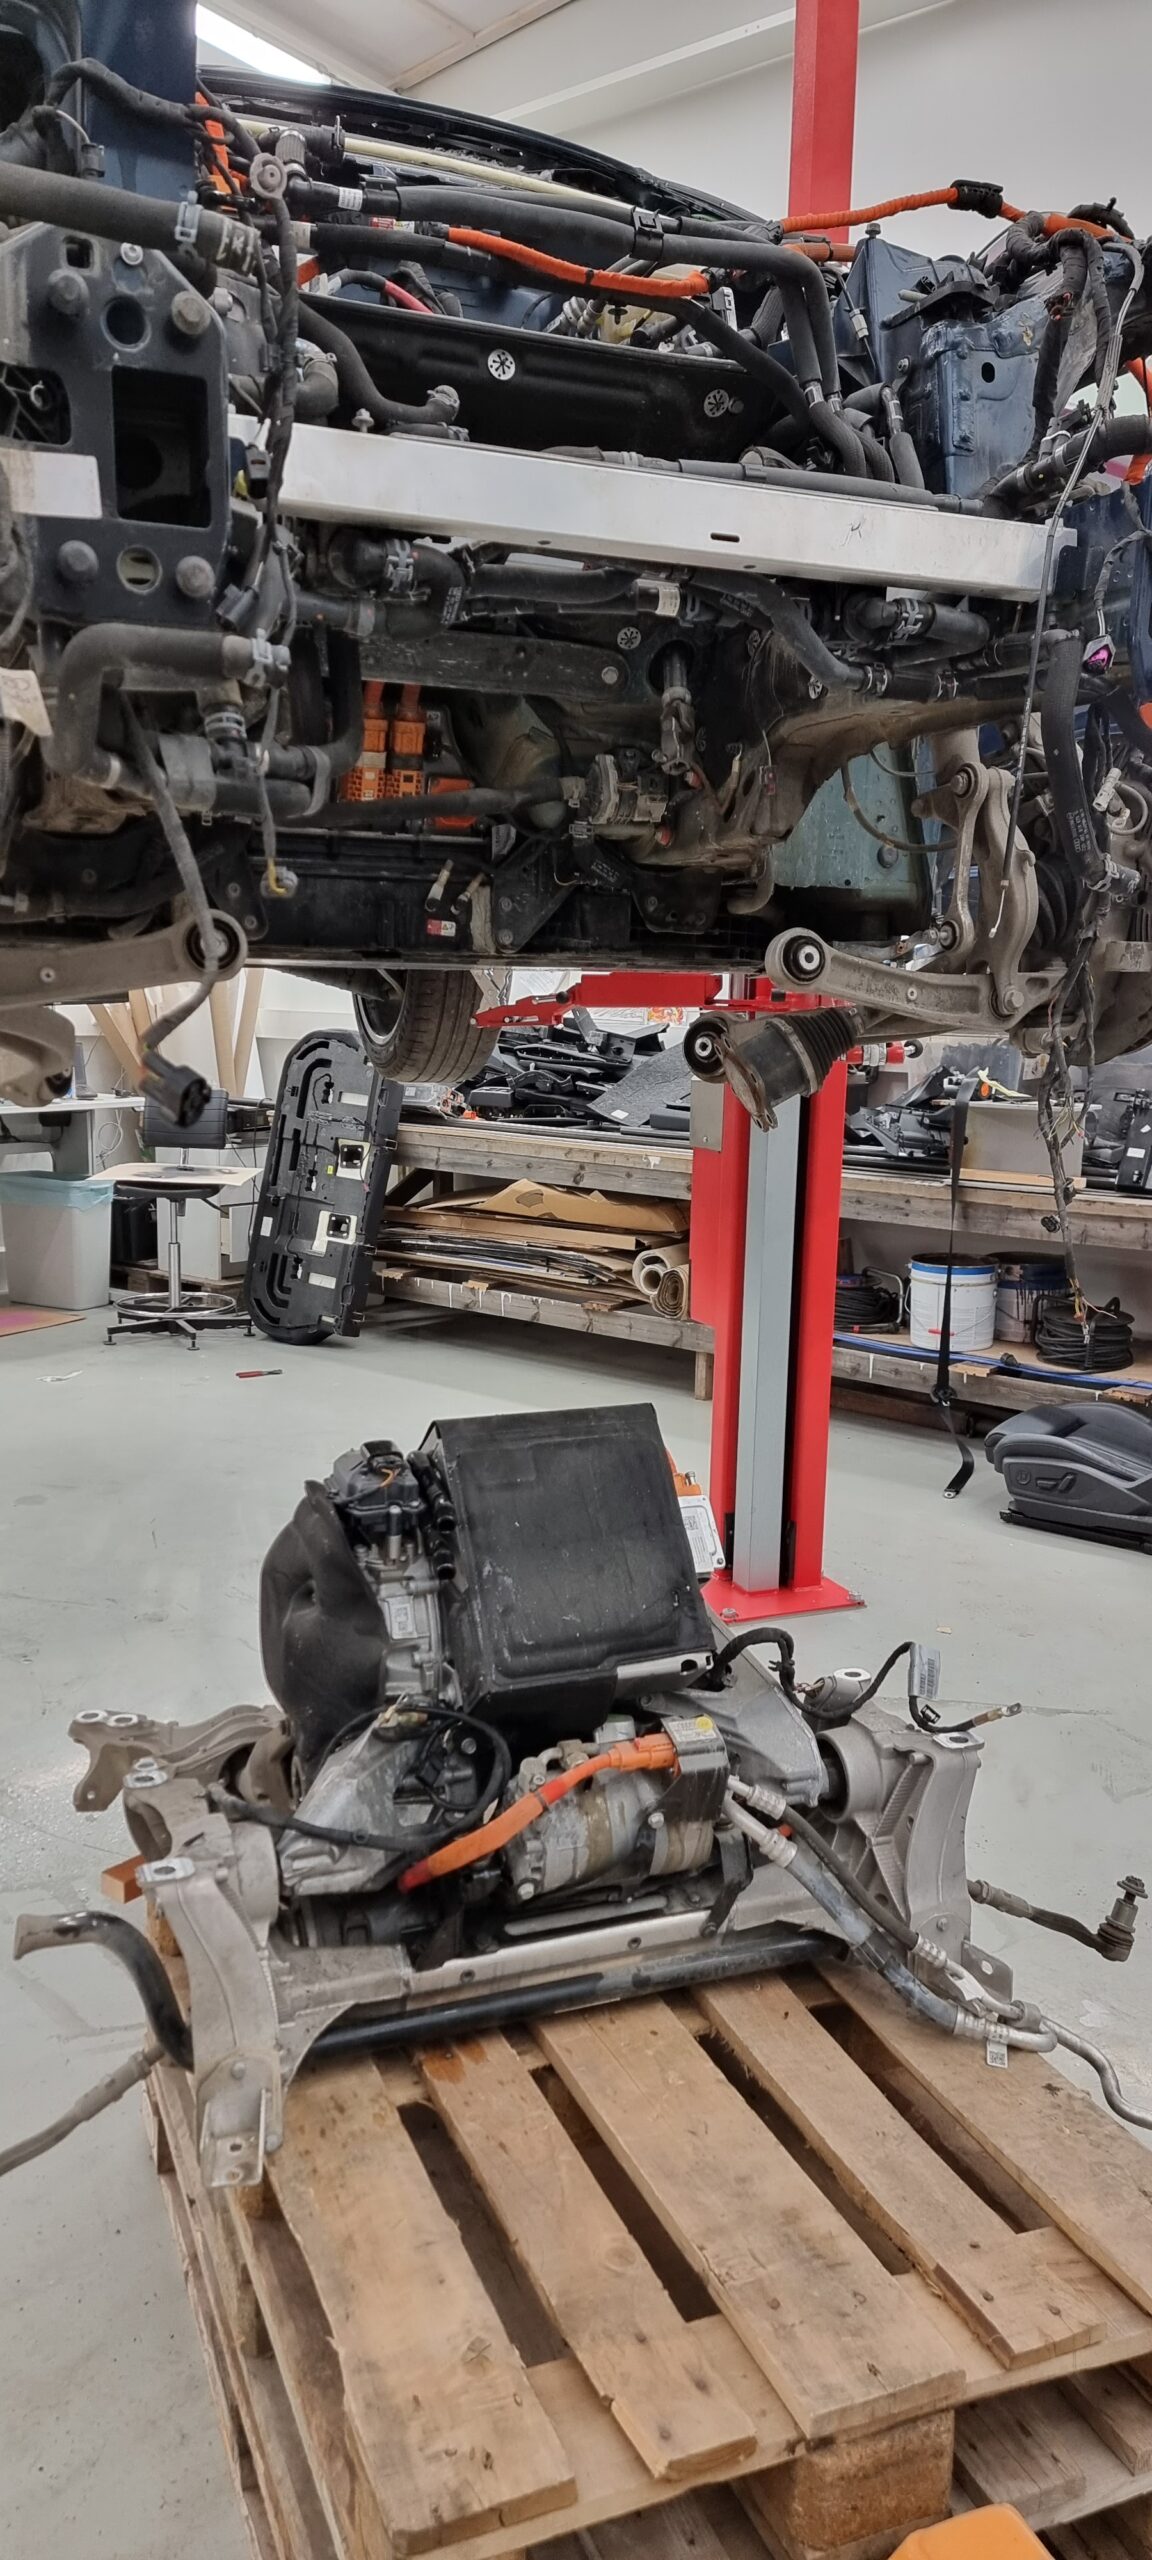
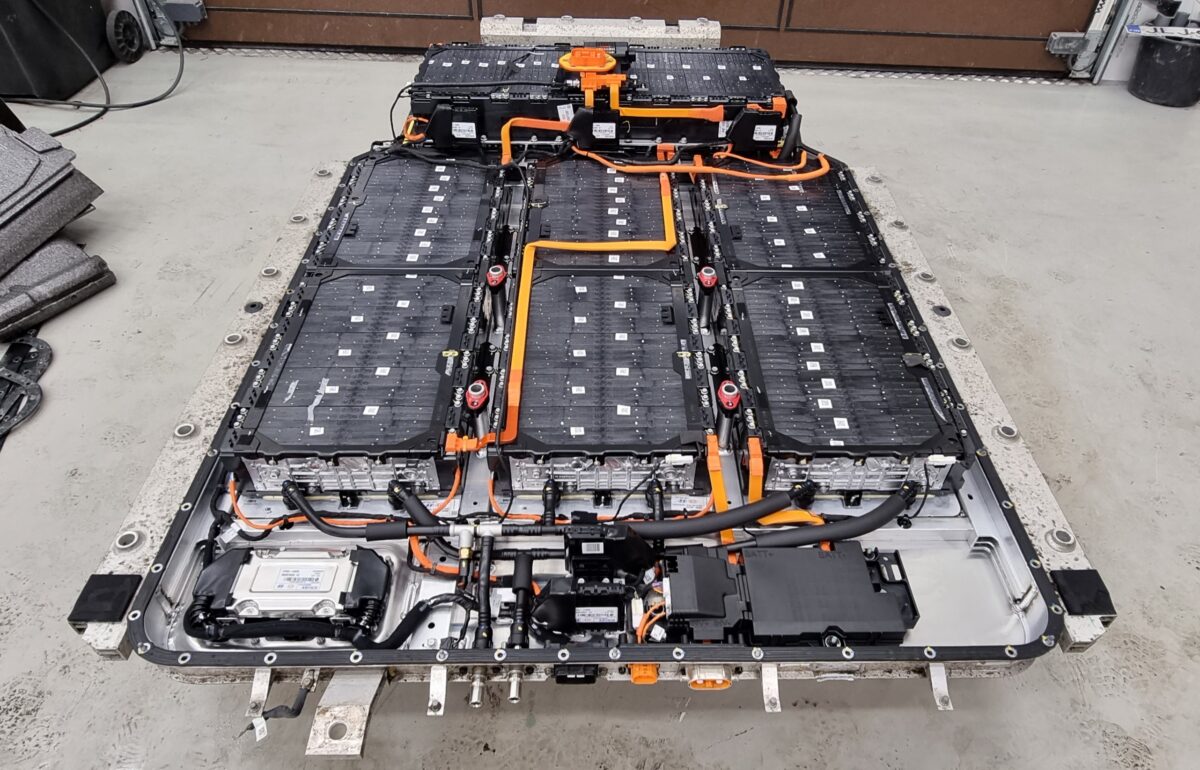
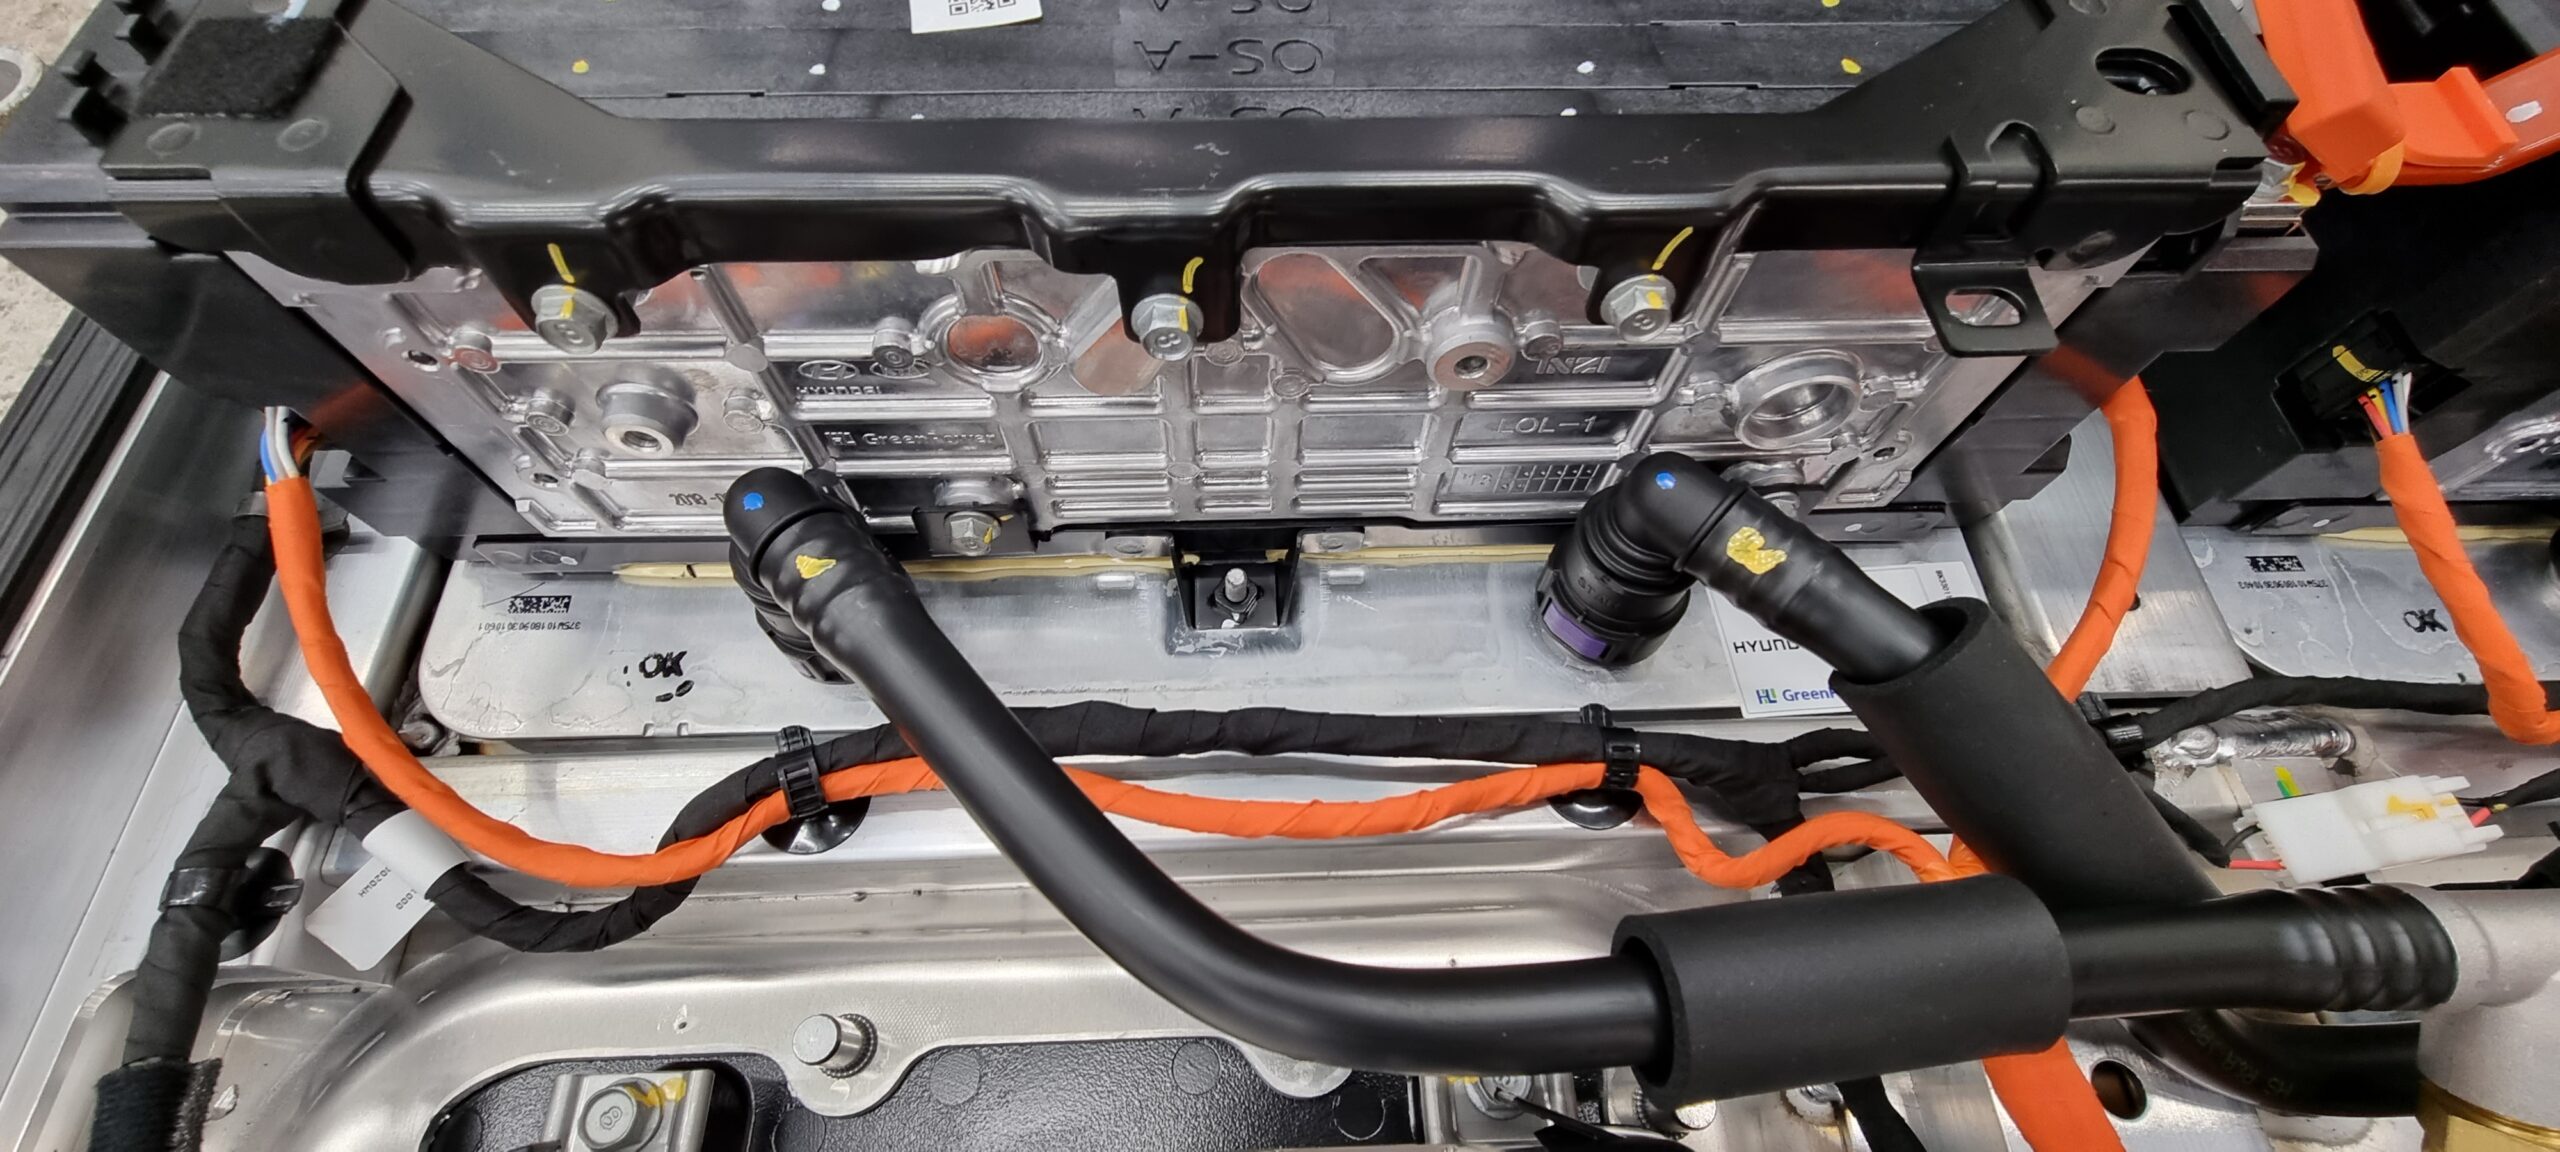
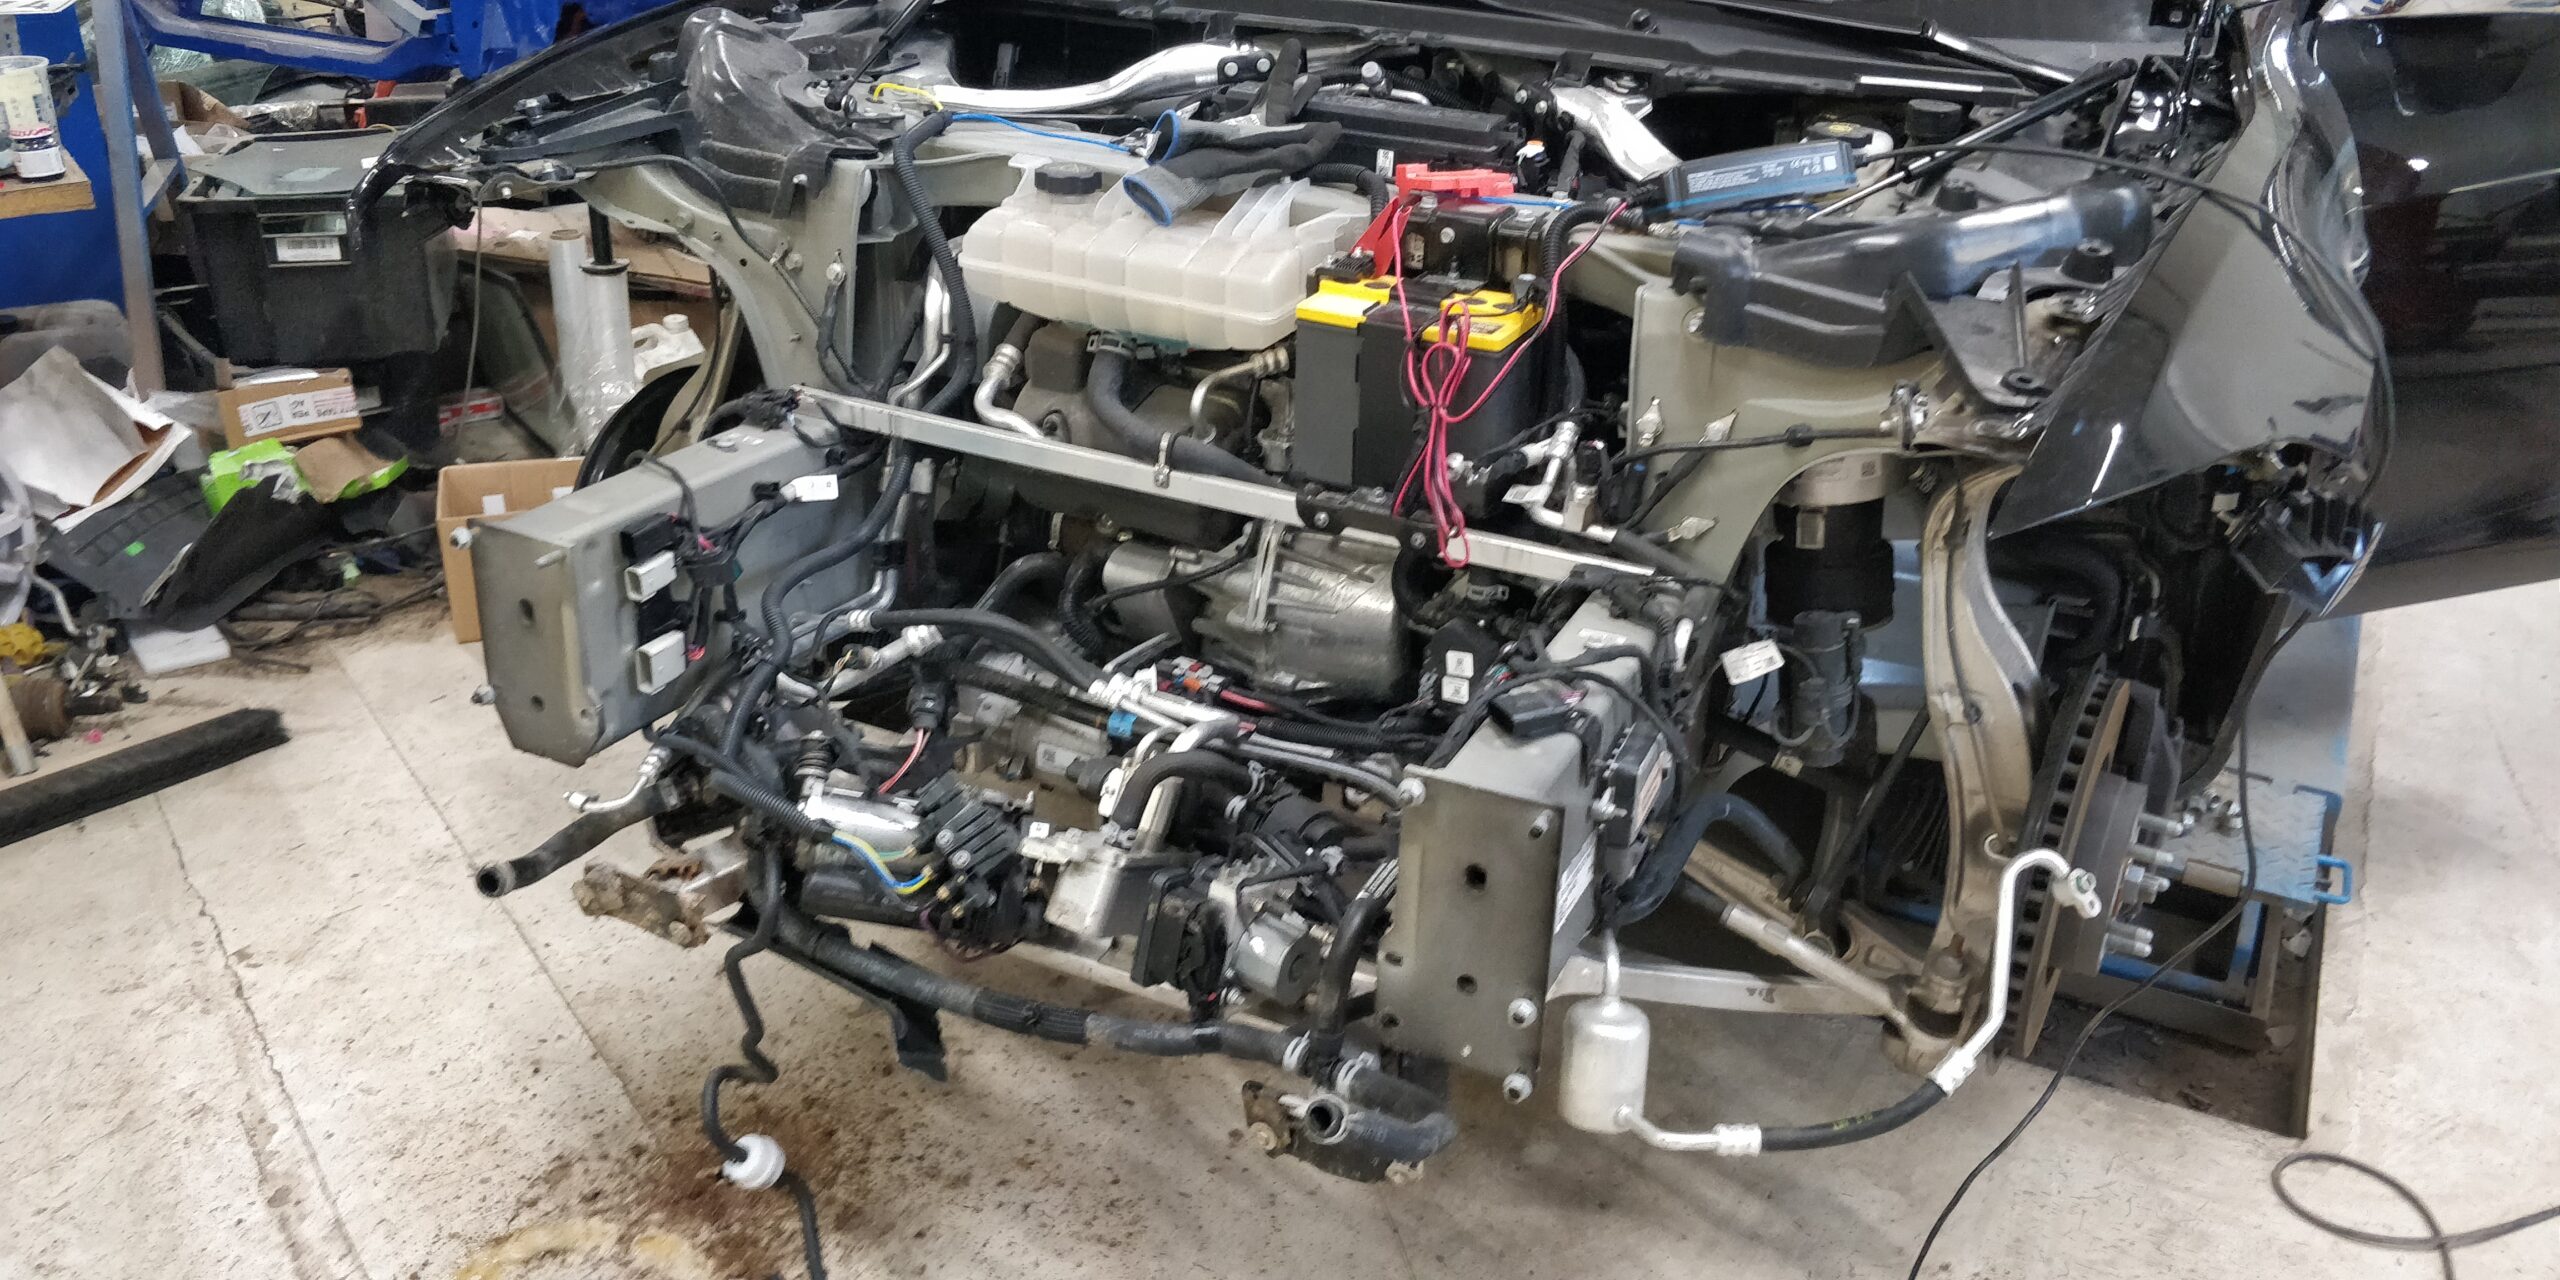
Sinänsä sähköauton tekniikan tiputtaa äkkiä pois. Ei tarvitse miettiä polttoainelinjoja tai pakoputkea. Muutamia liittimiä, vesiletkuja ja apurungon pultit irti ja paketti on melkein sillä irti.

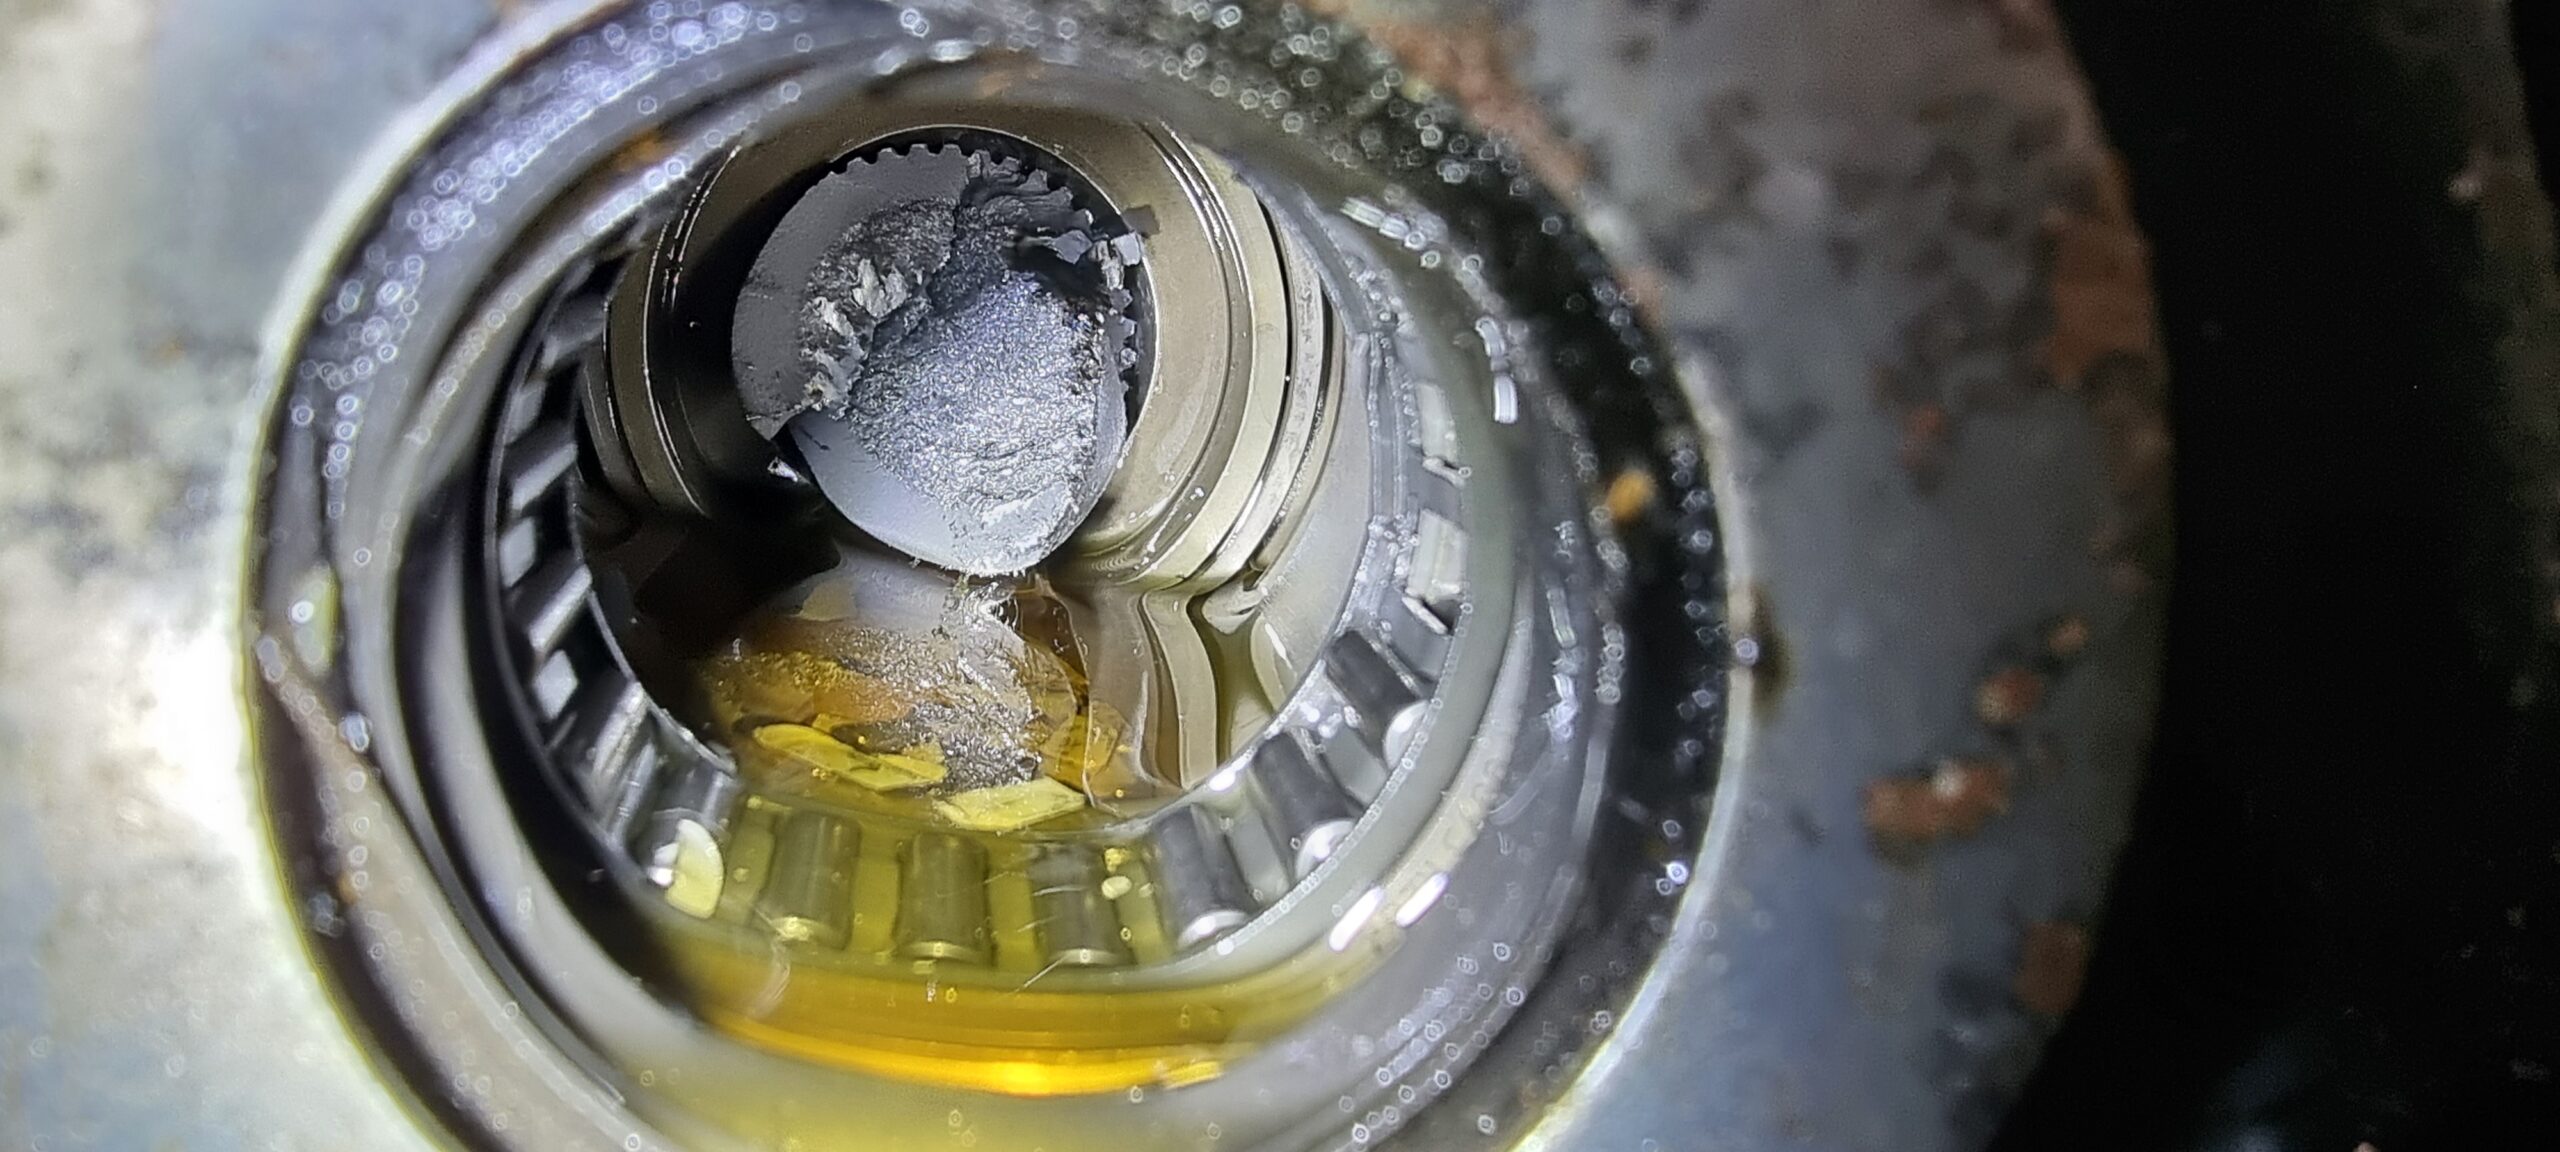
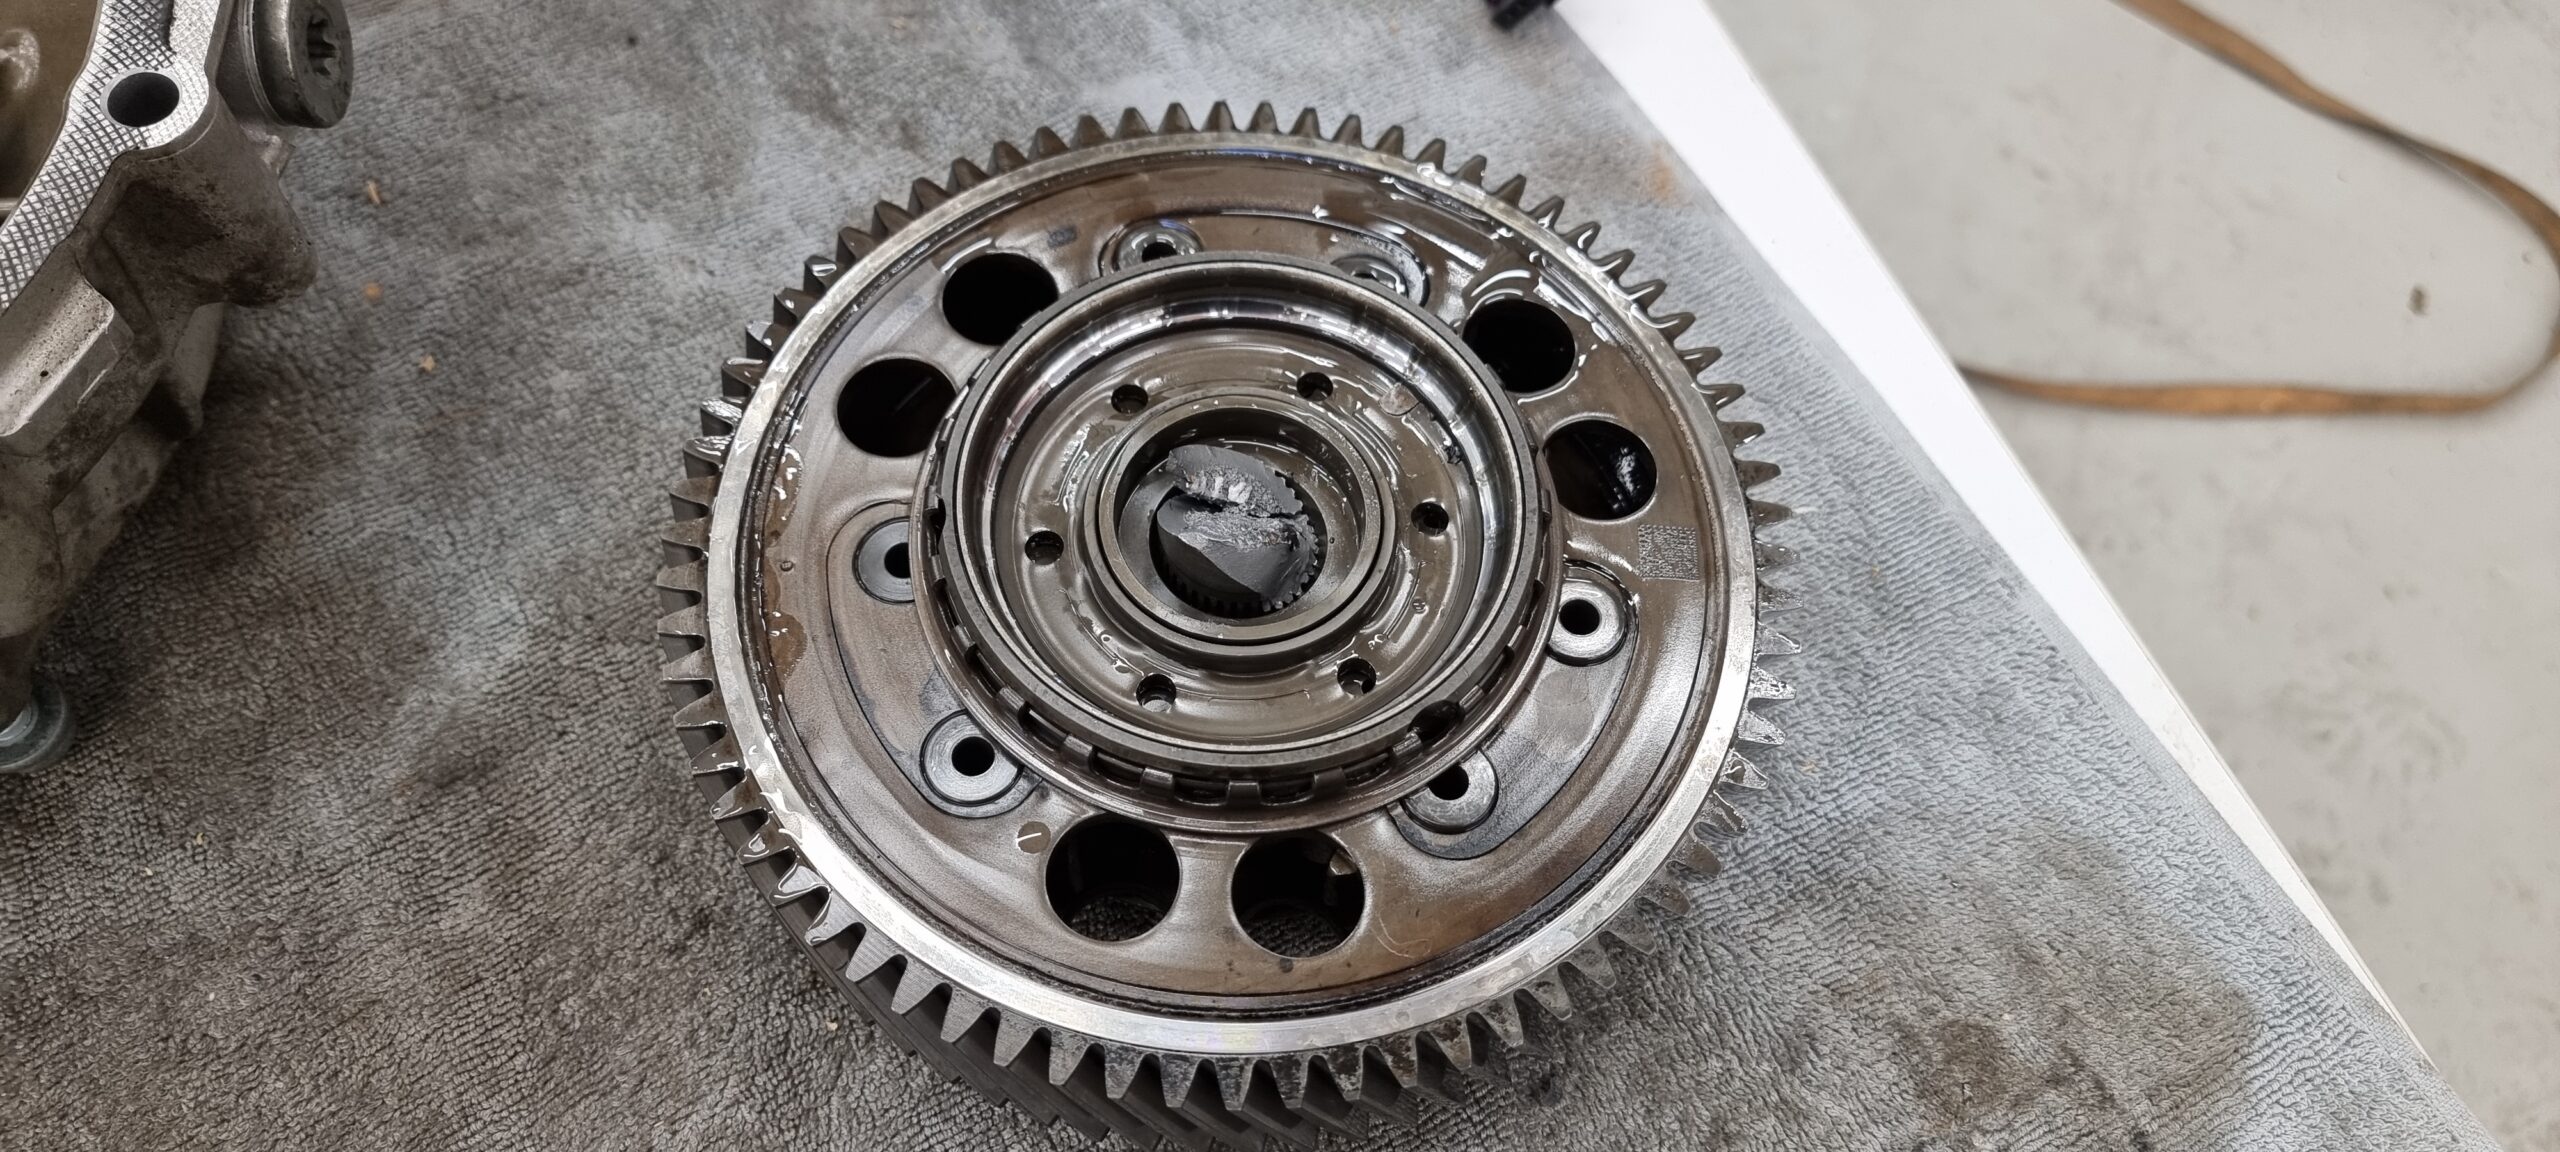
Kun etuvoimansiirto oli purettu, paljastui katkenneen vetarin laipan lisäksi, että tasauspyörästöstä oli hampaita poikki. Siksi ei kuljettajan puoleinen pyörä pyörinyt, vaikka parkkilukko oli vapautettu. Erikoista oli se, miksi näi oli käynyt. Todennäköisesti motarin kaiteeseen osuessa kuljettajan pyörä oli äkillisesti lyönyt lukkoon, momentti oli siirtynyt voimansiirtoon ja heikoimmat kohdat löytyivät sitten toisen puolen laipasta ja tasauspyörästön hampaista.

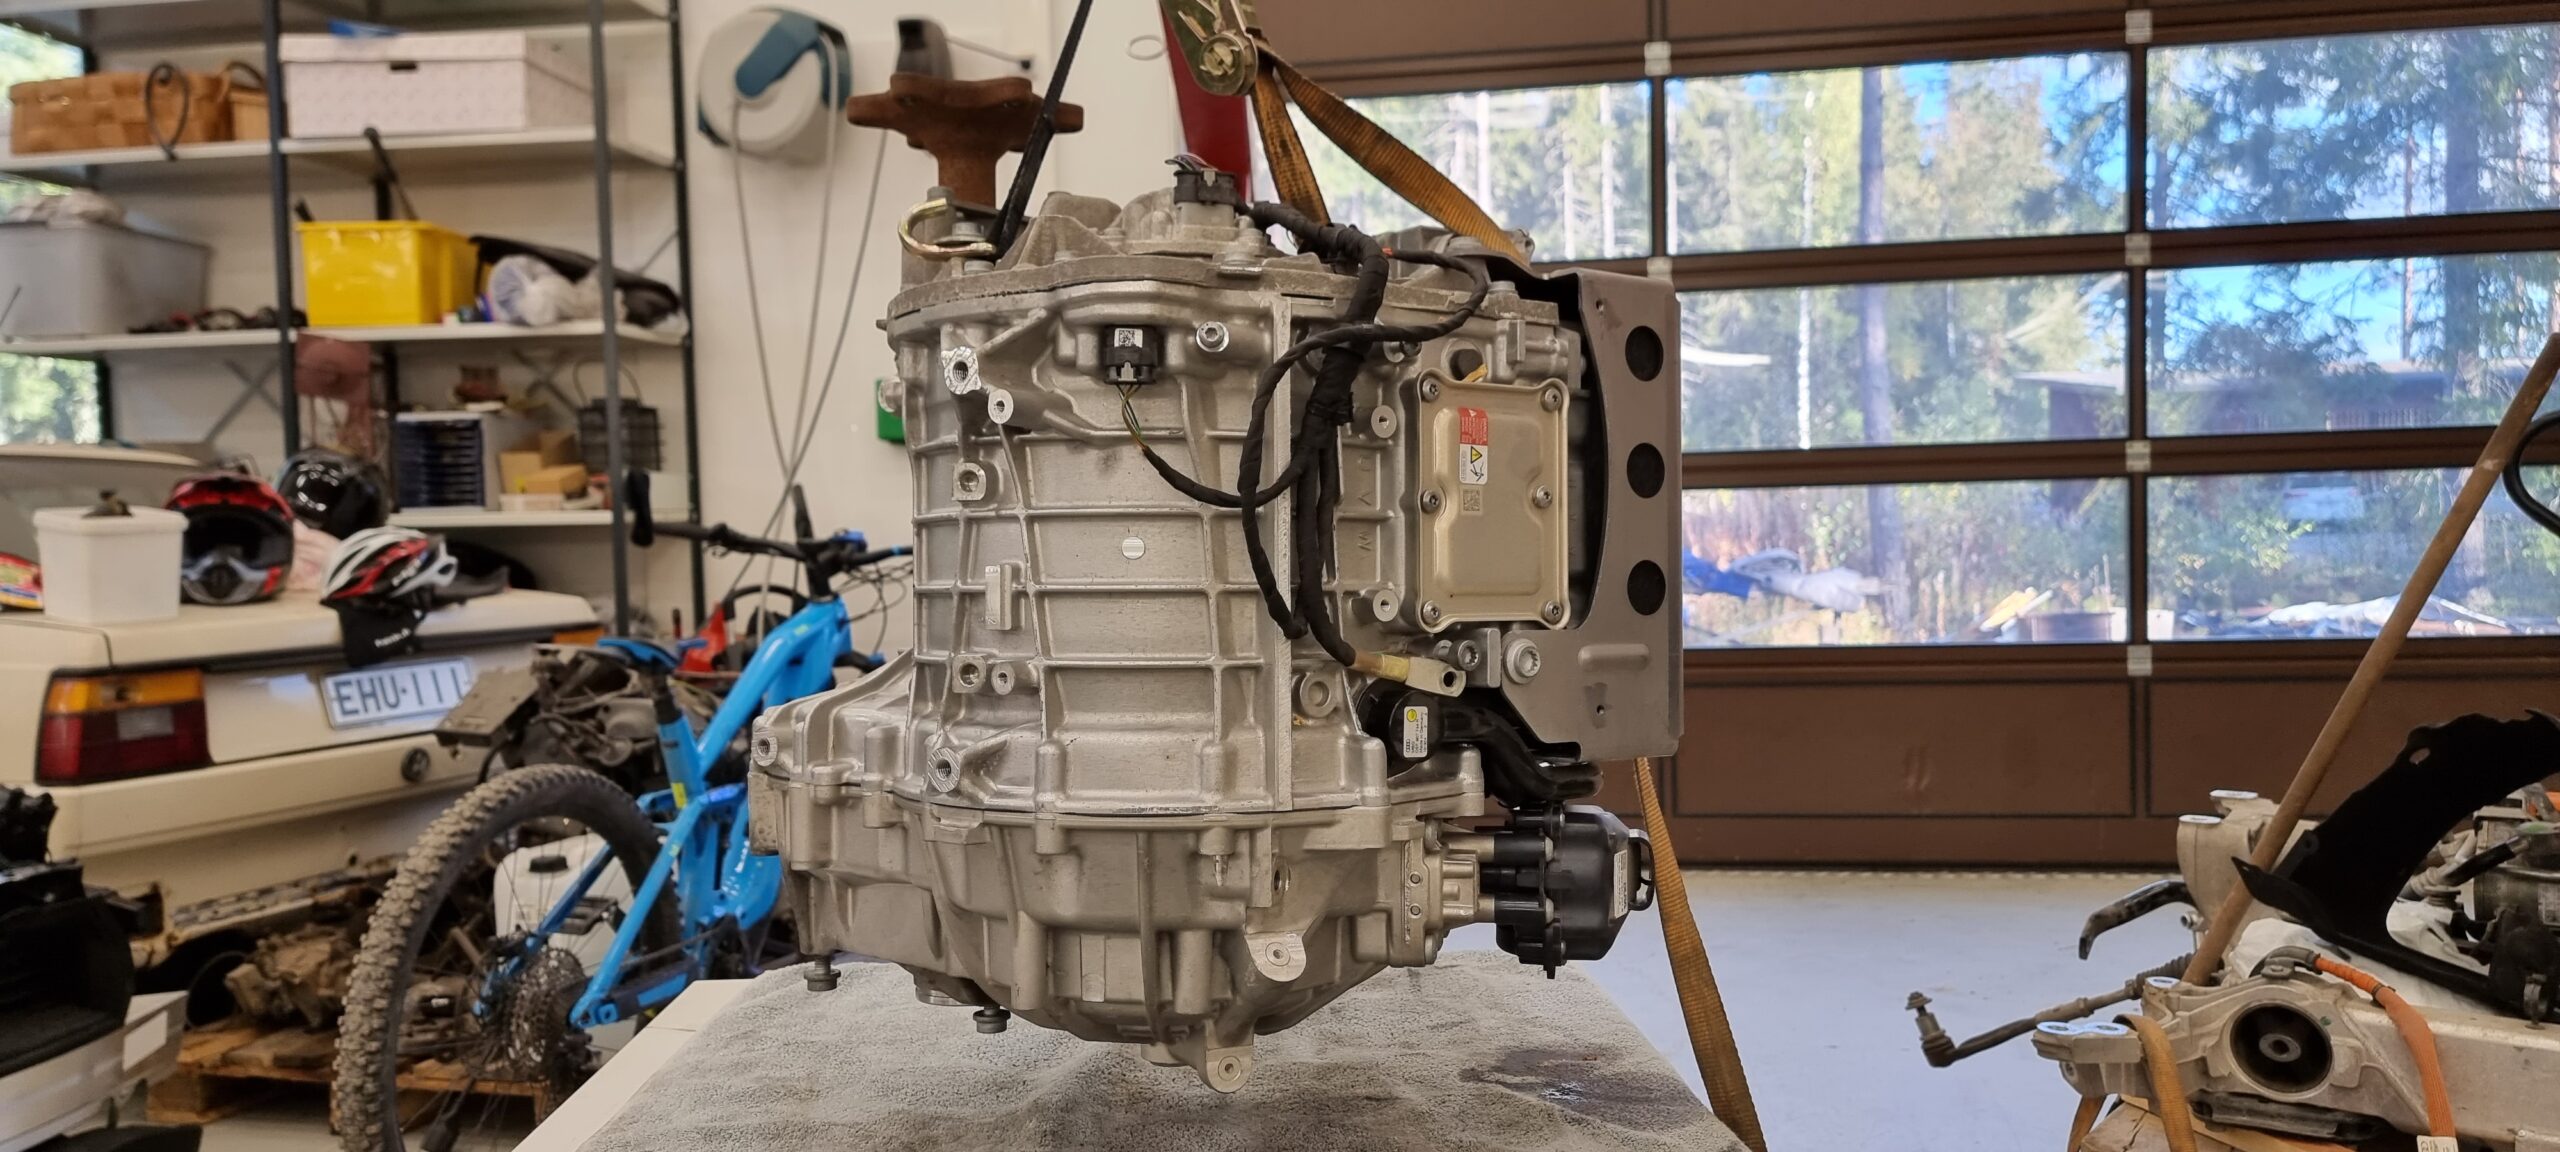
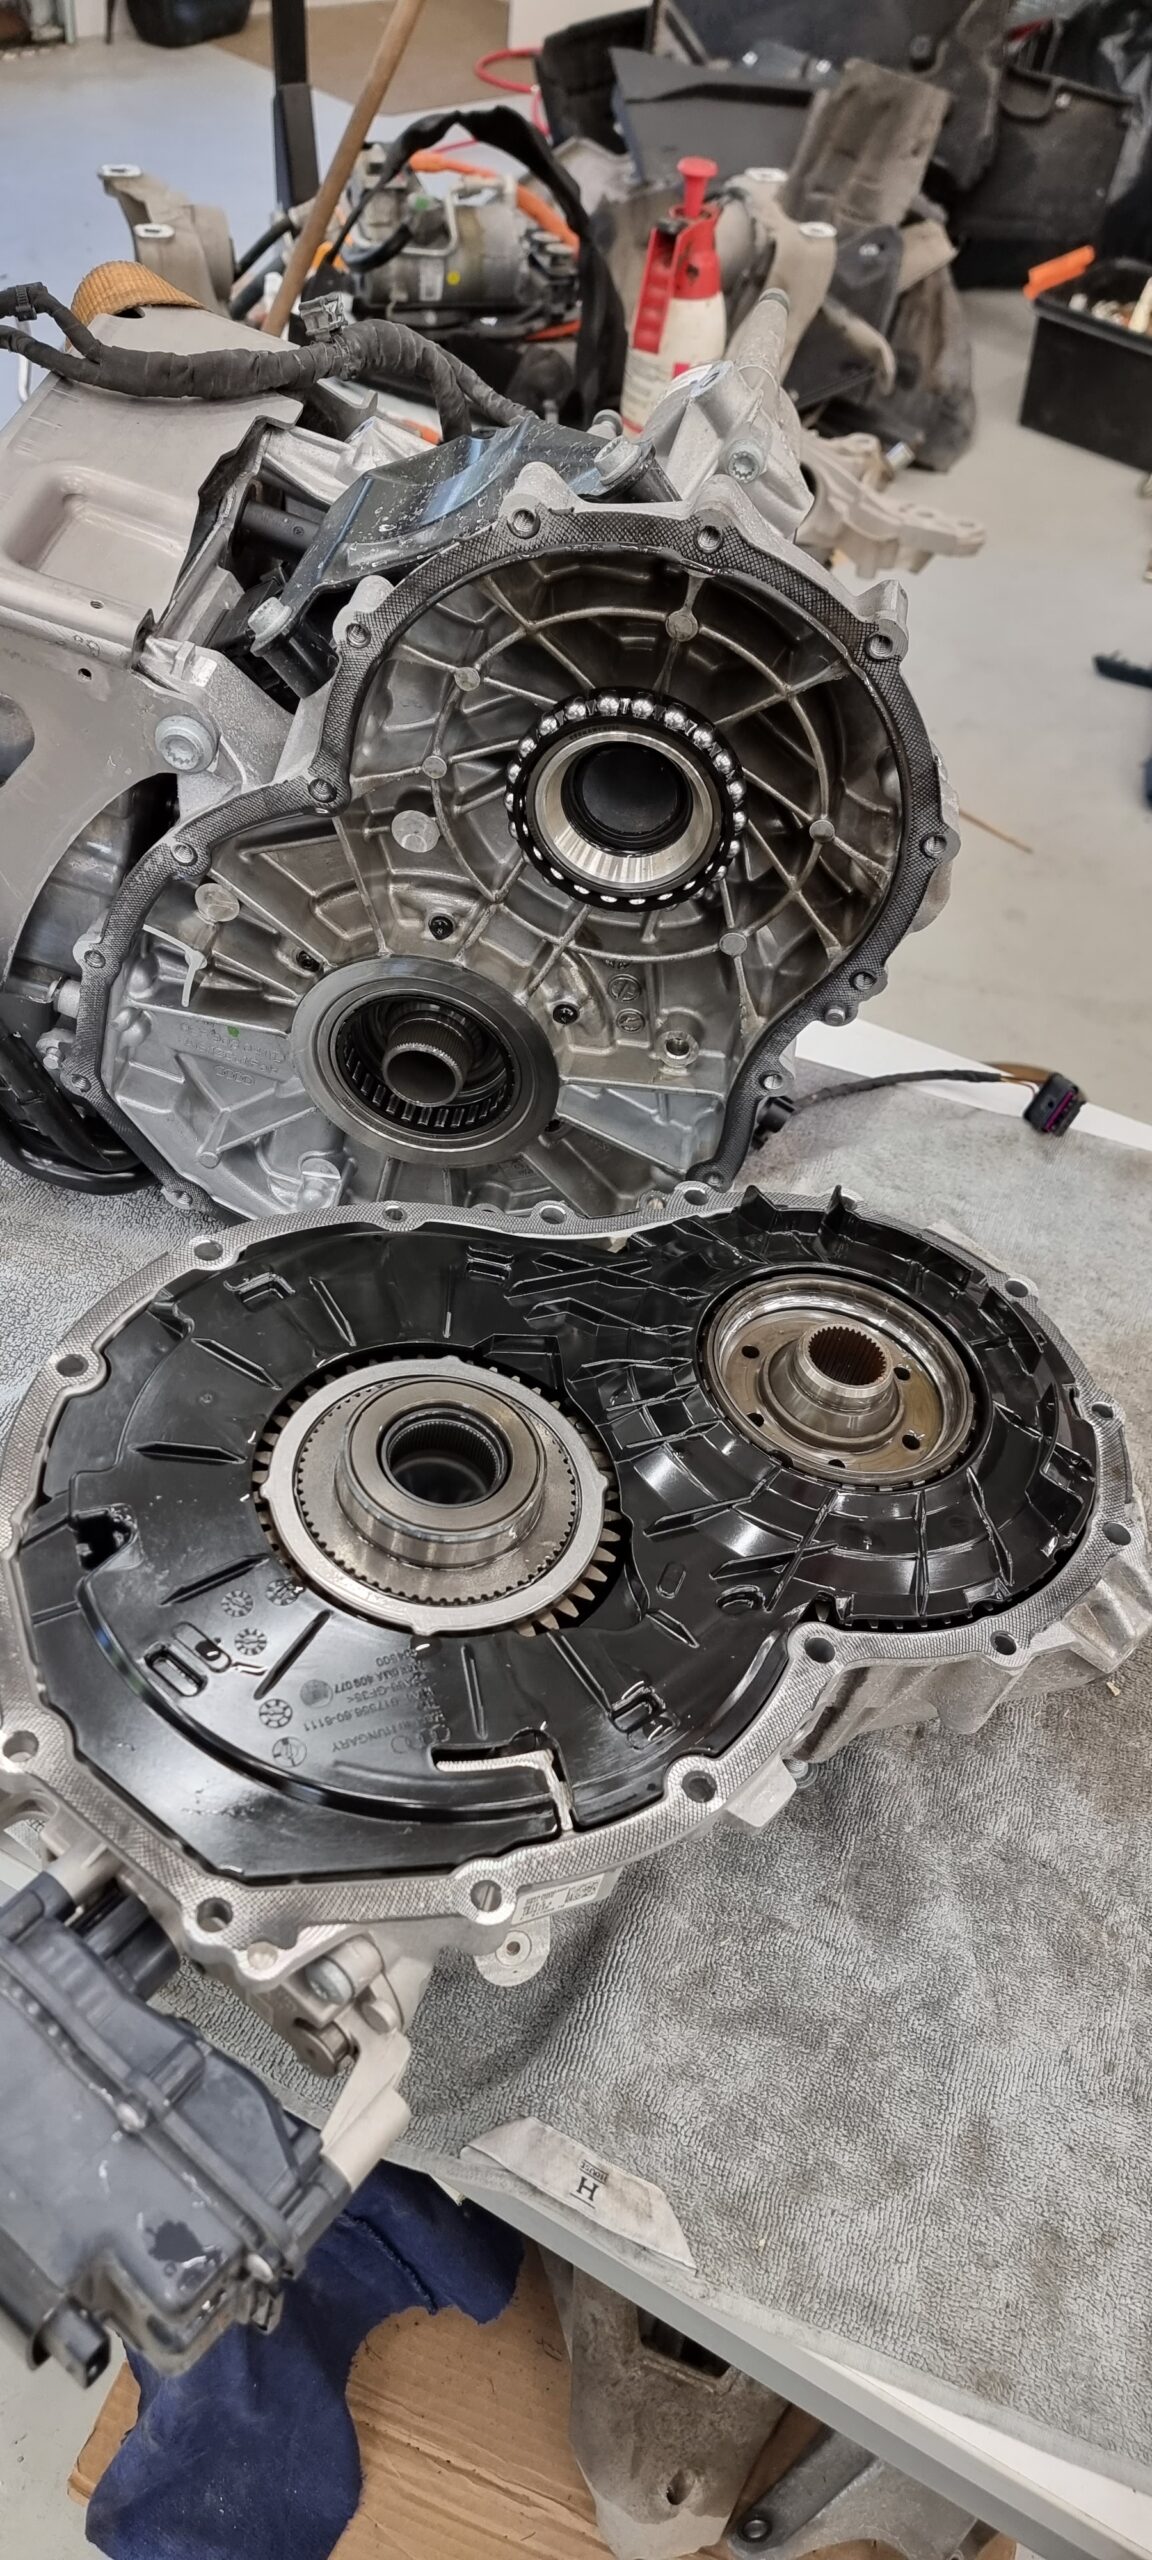
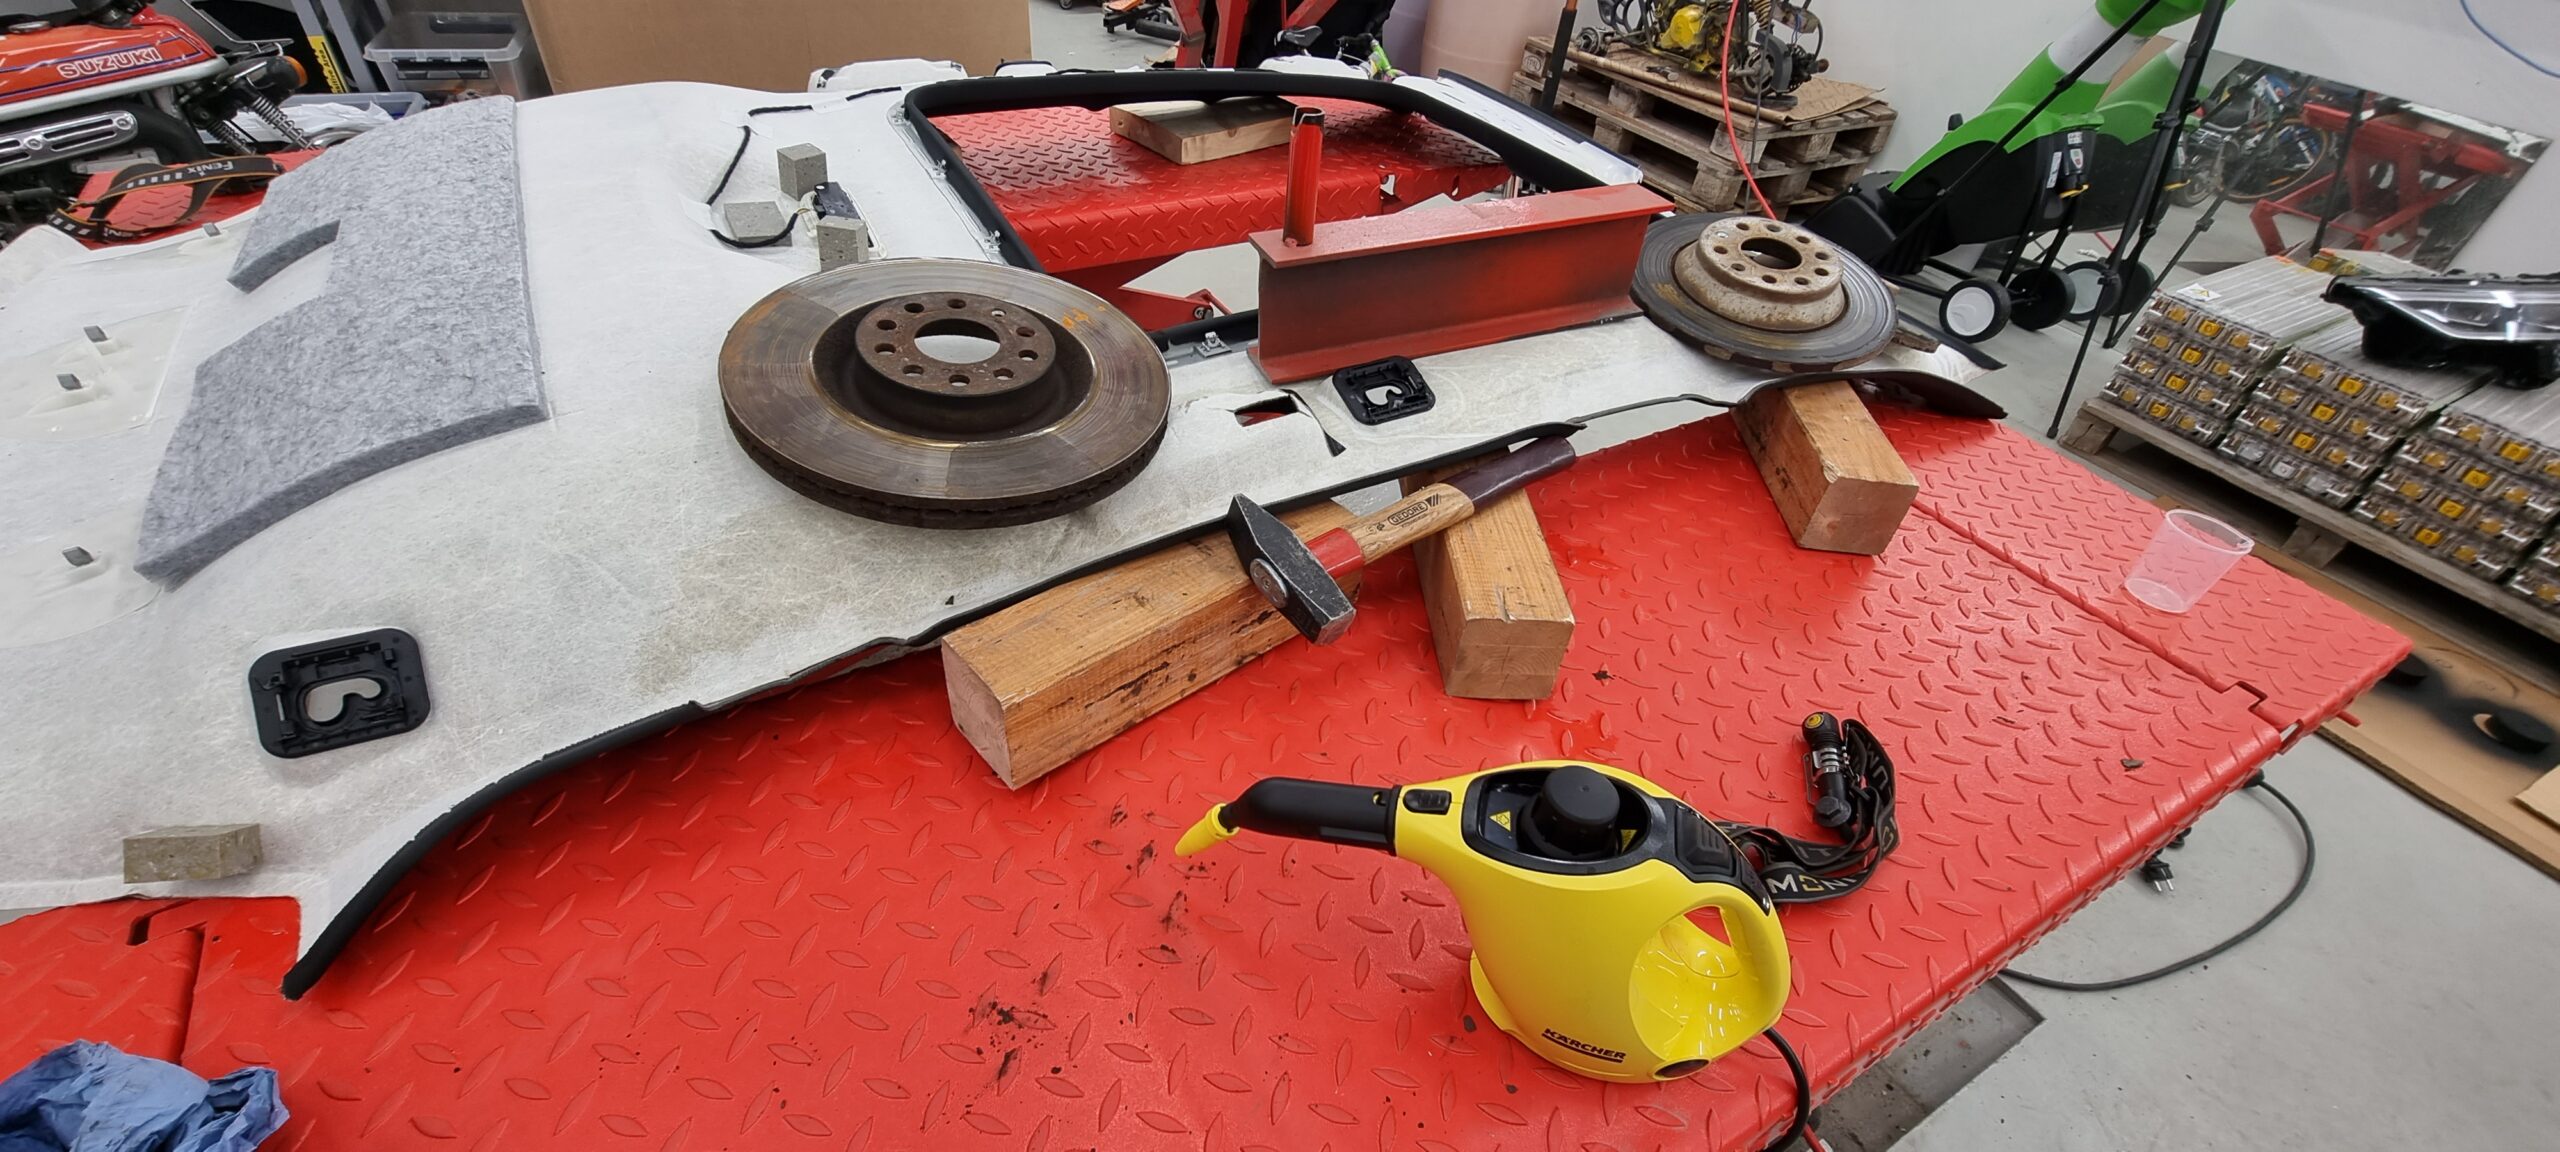
Pelkkää perää ei tietenkään saanut varaosana mistään. Onneksi koko loota maksoi uutenakin vain n. 1400 euroa, joten tästä ei isoa lovea projektin budjettiin lopulta tullut – ylimääräistä vaivaa toki.

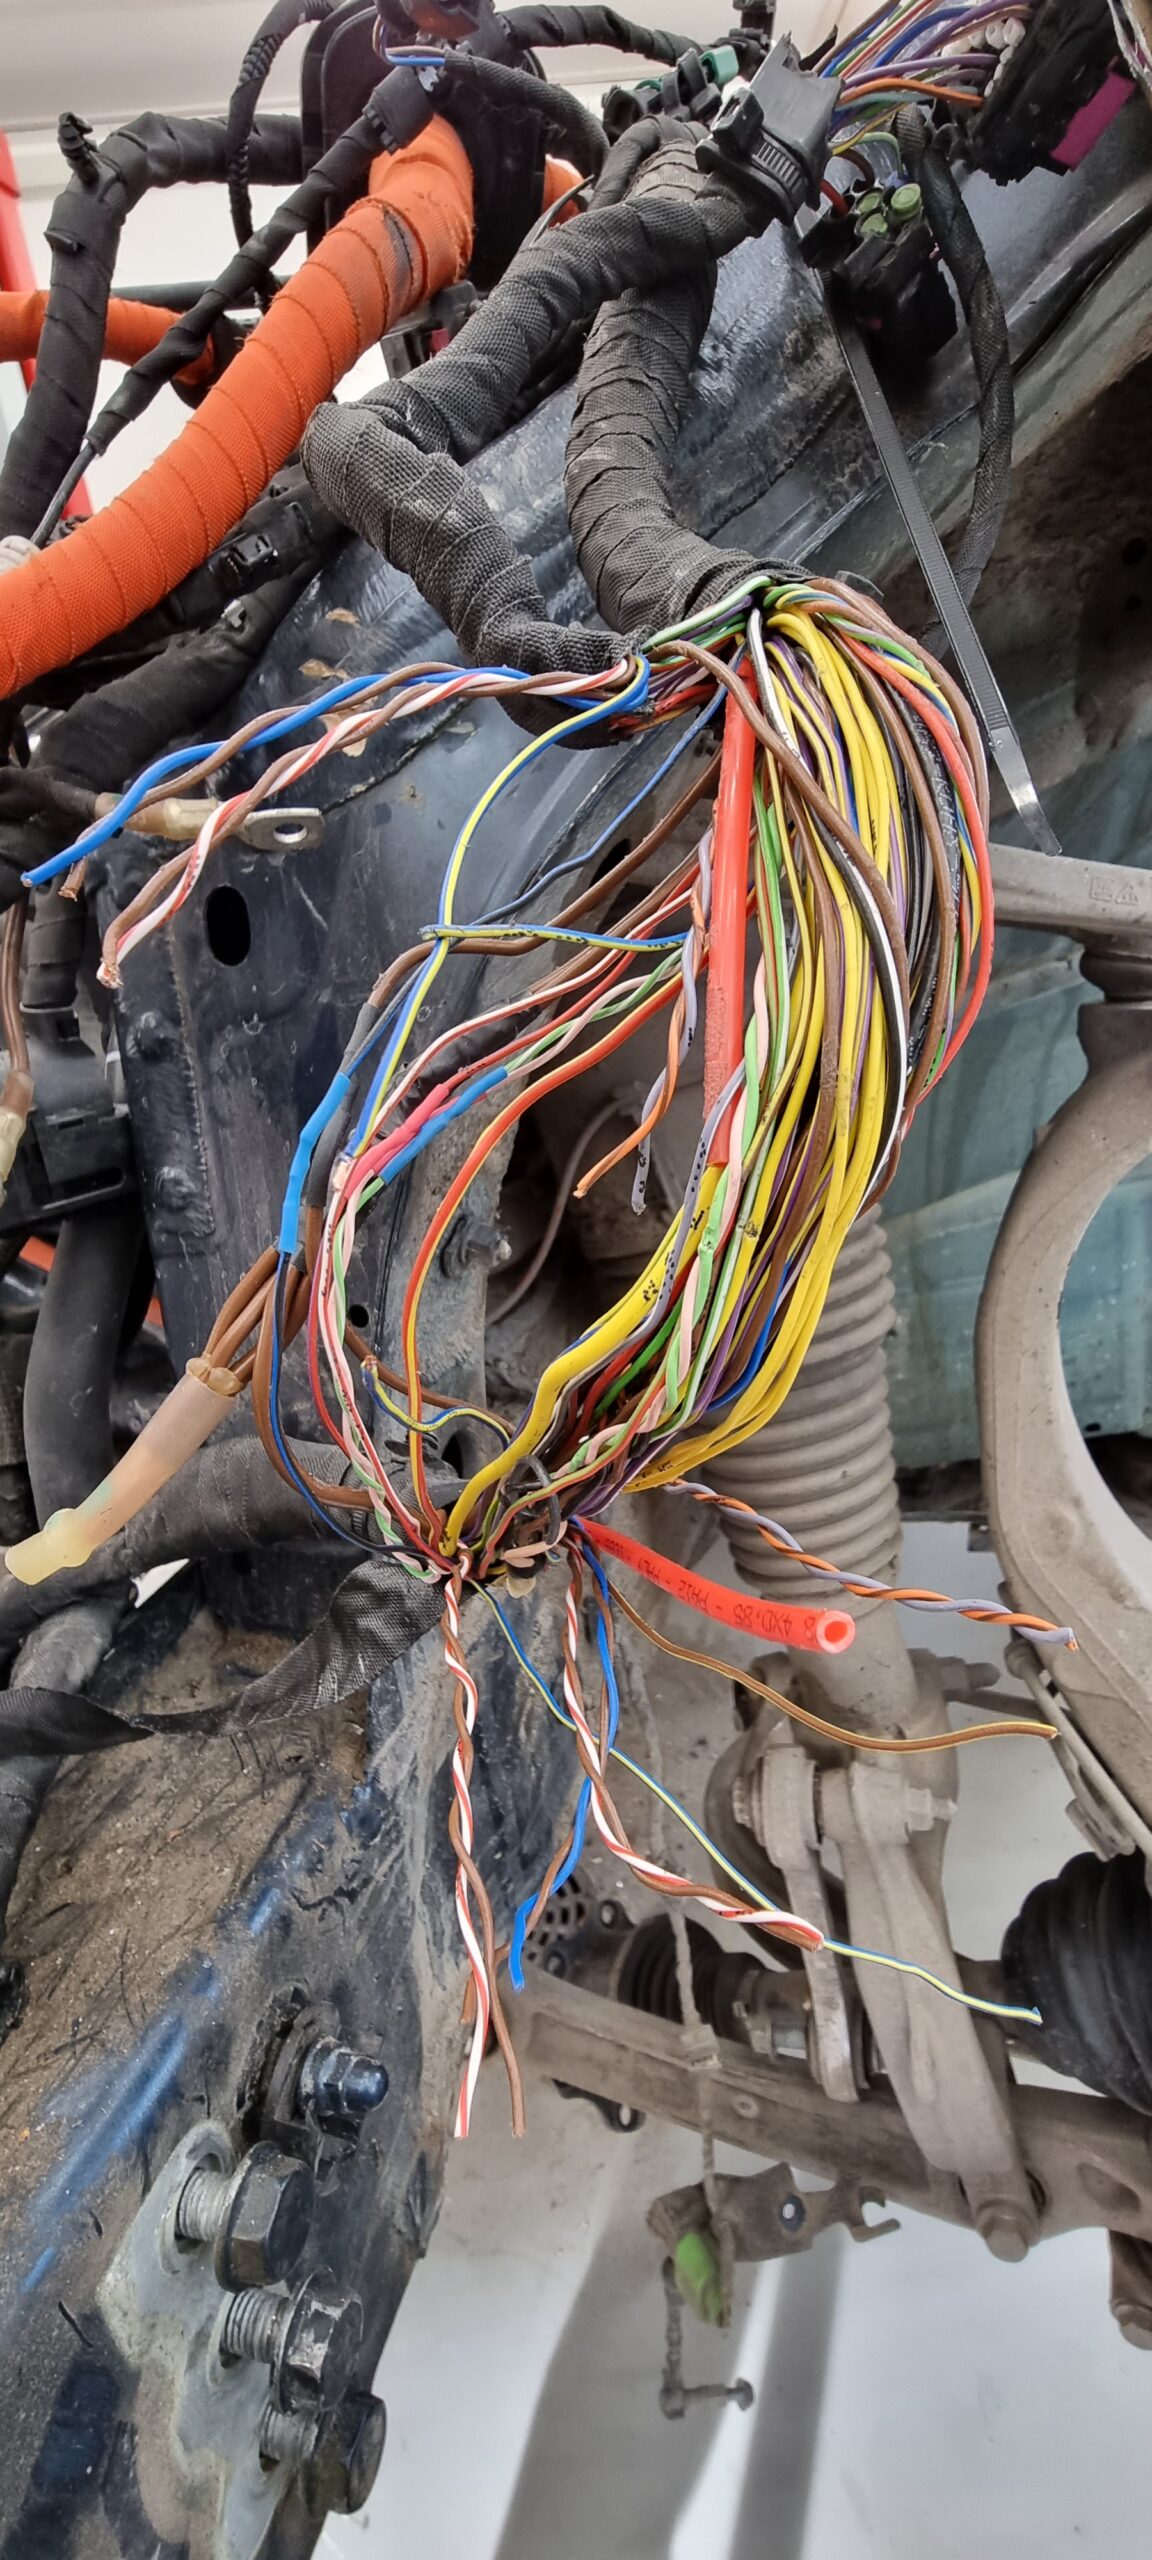
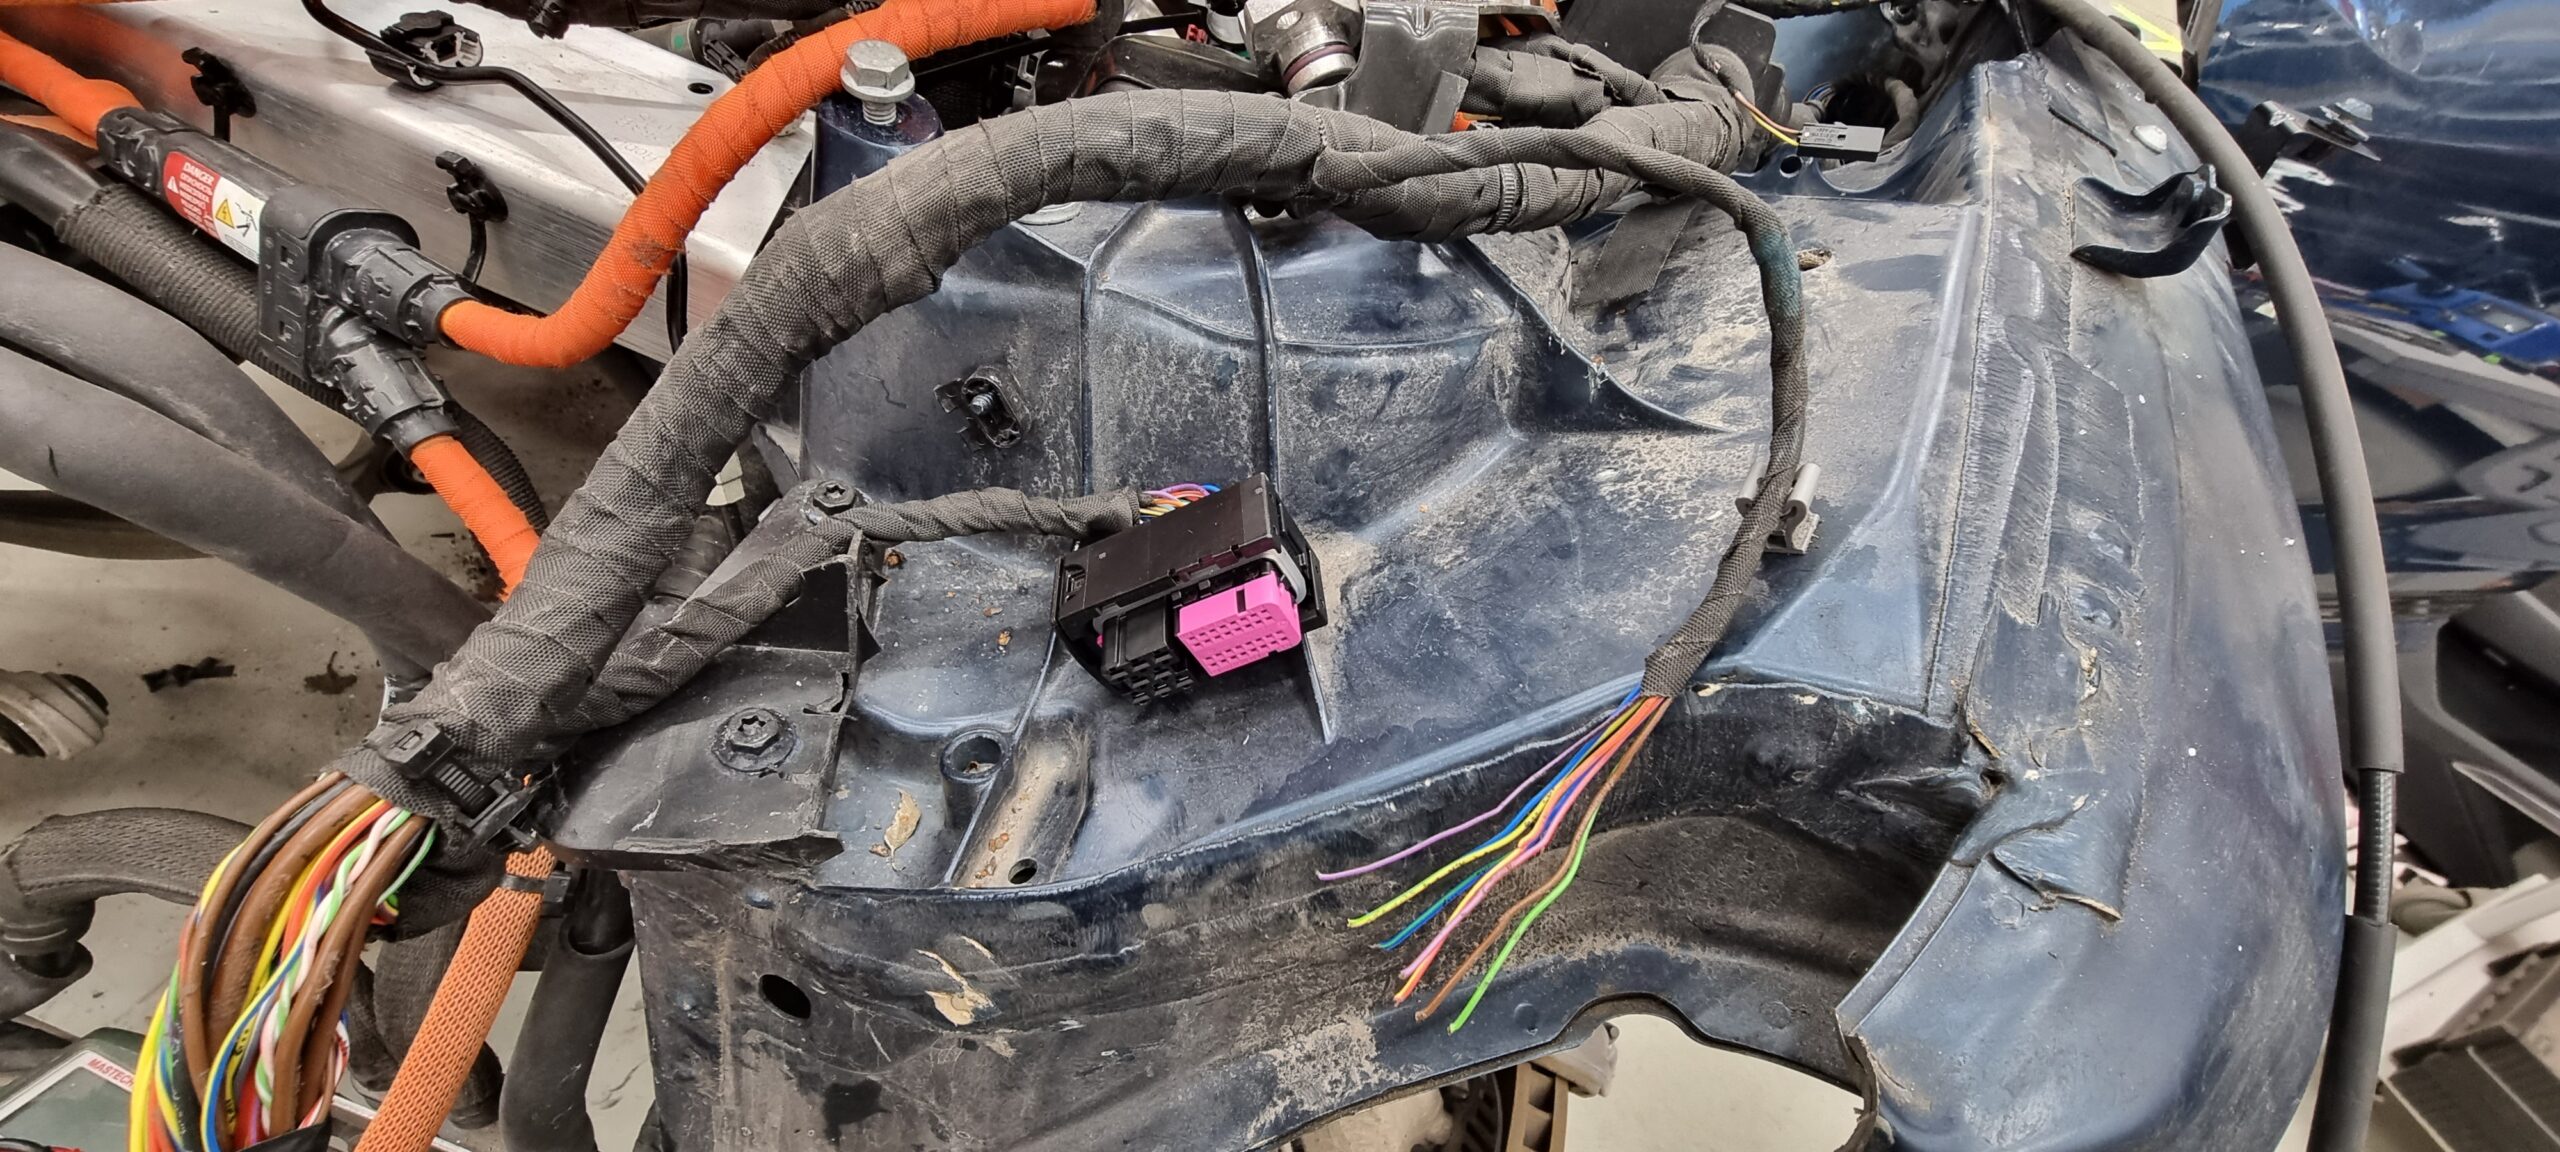
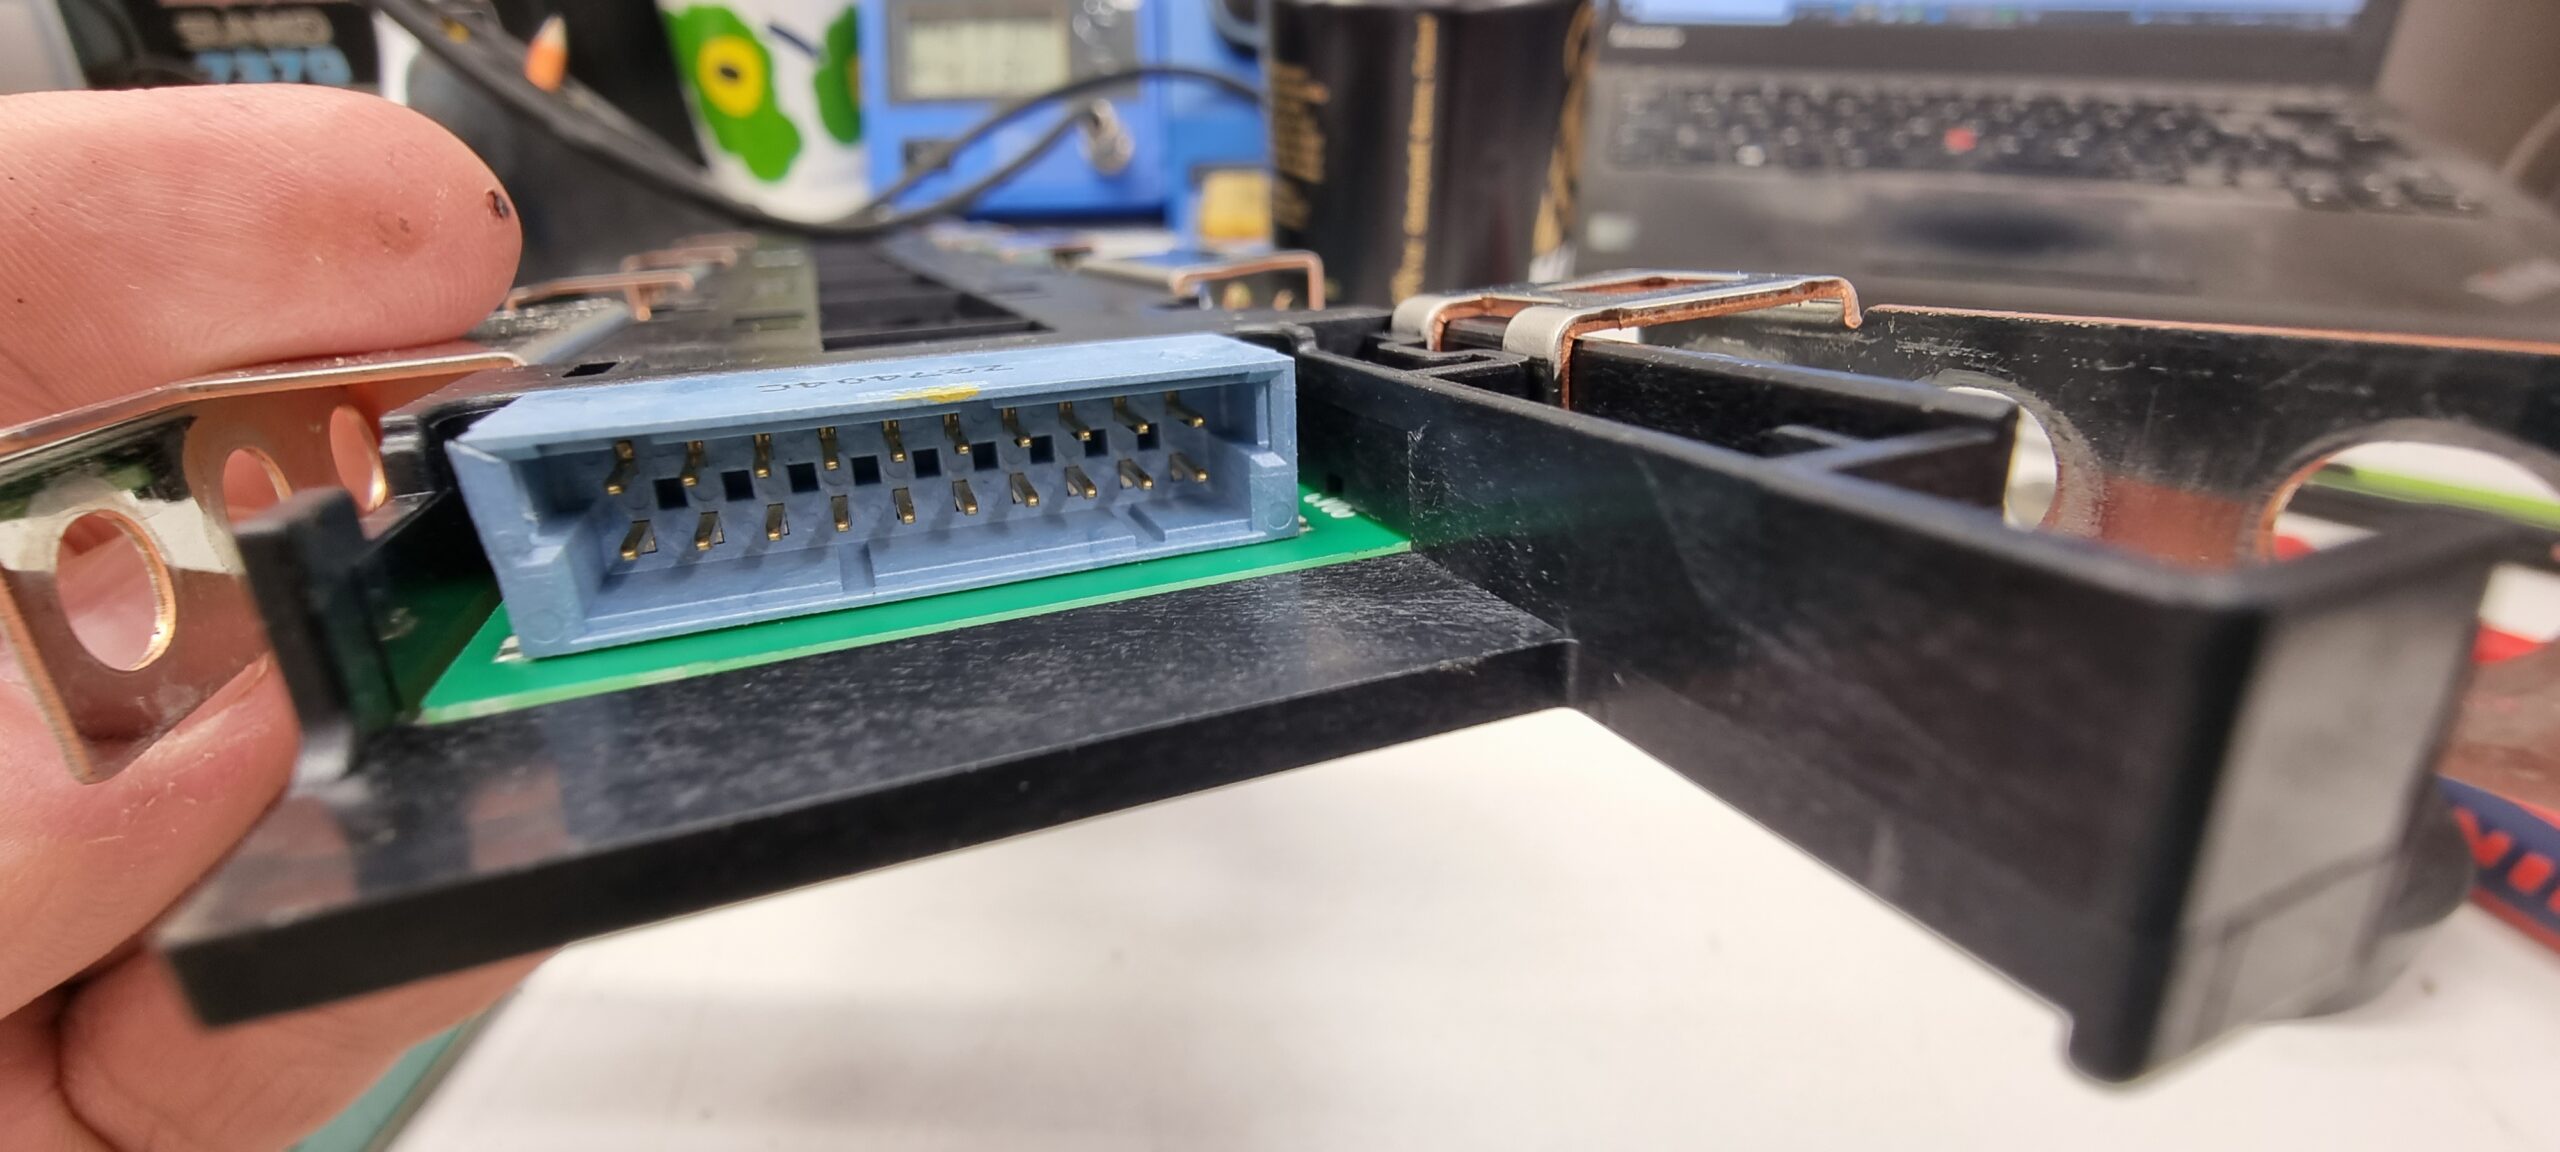
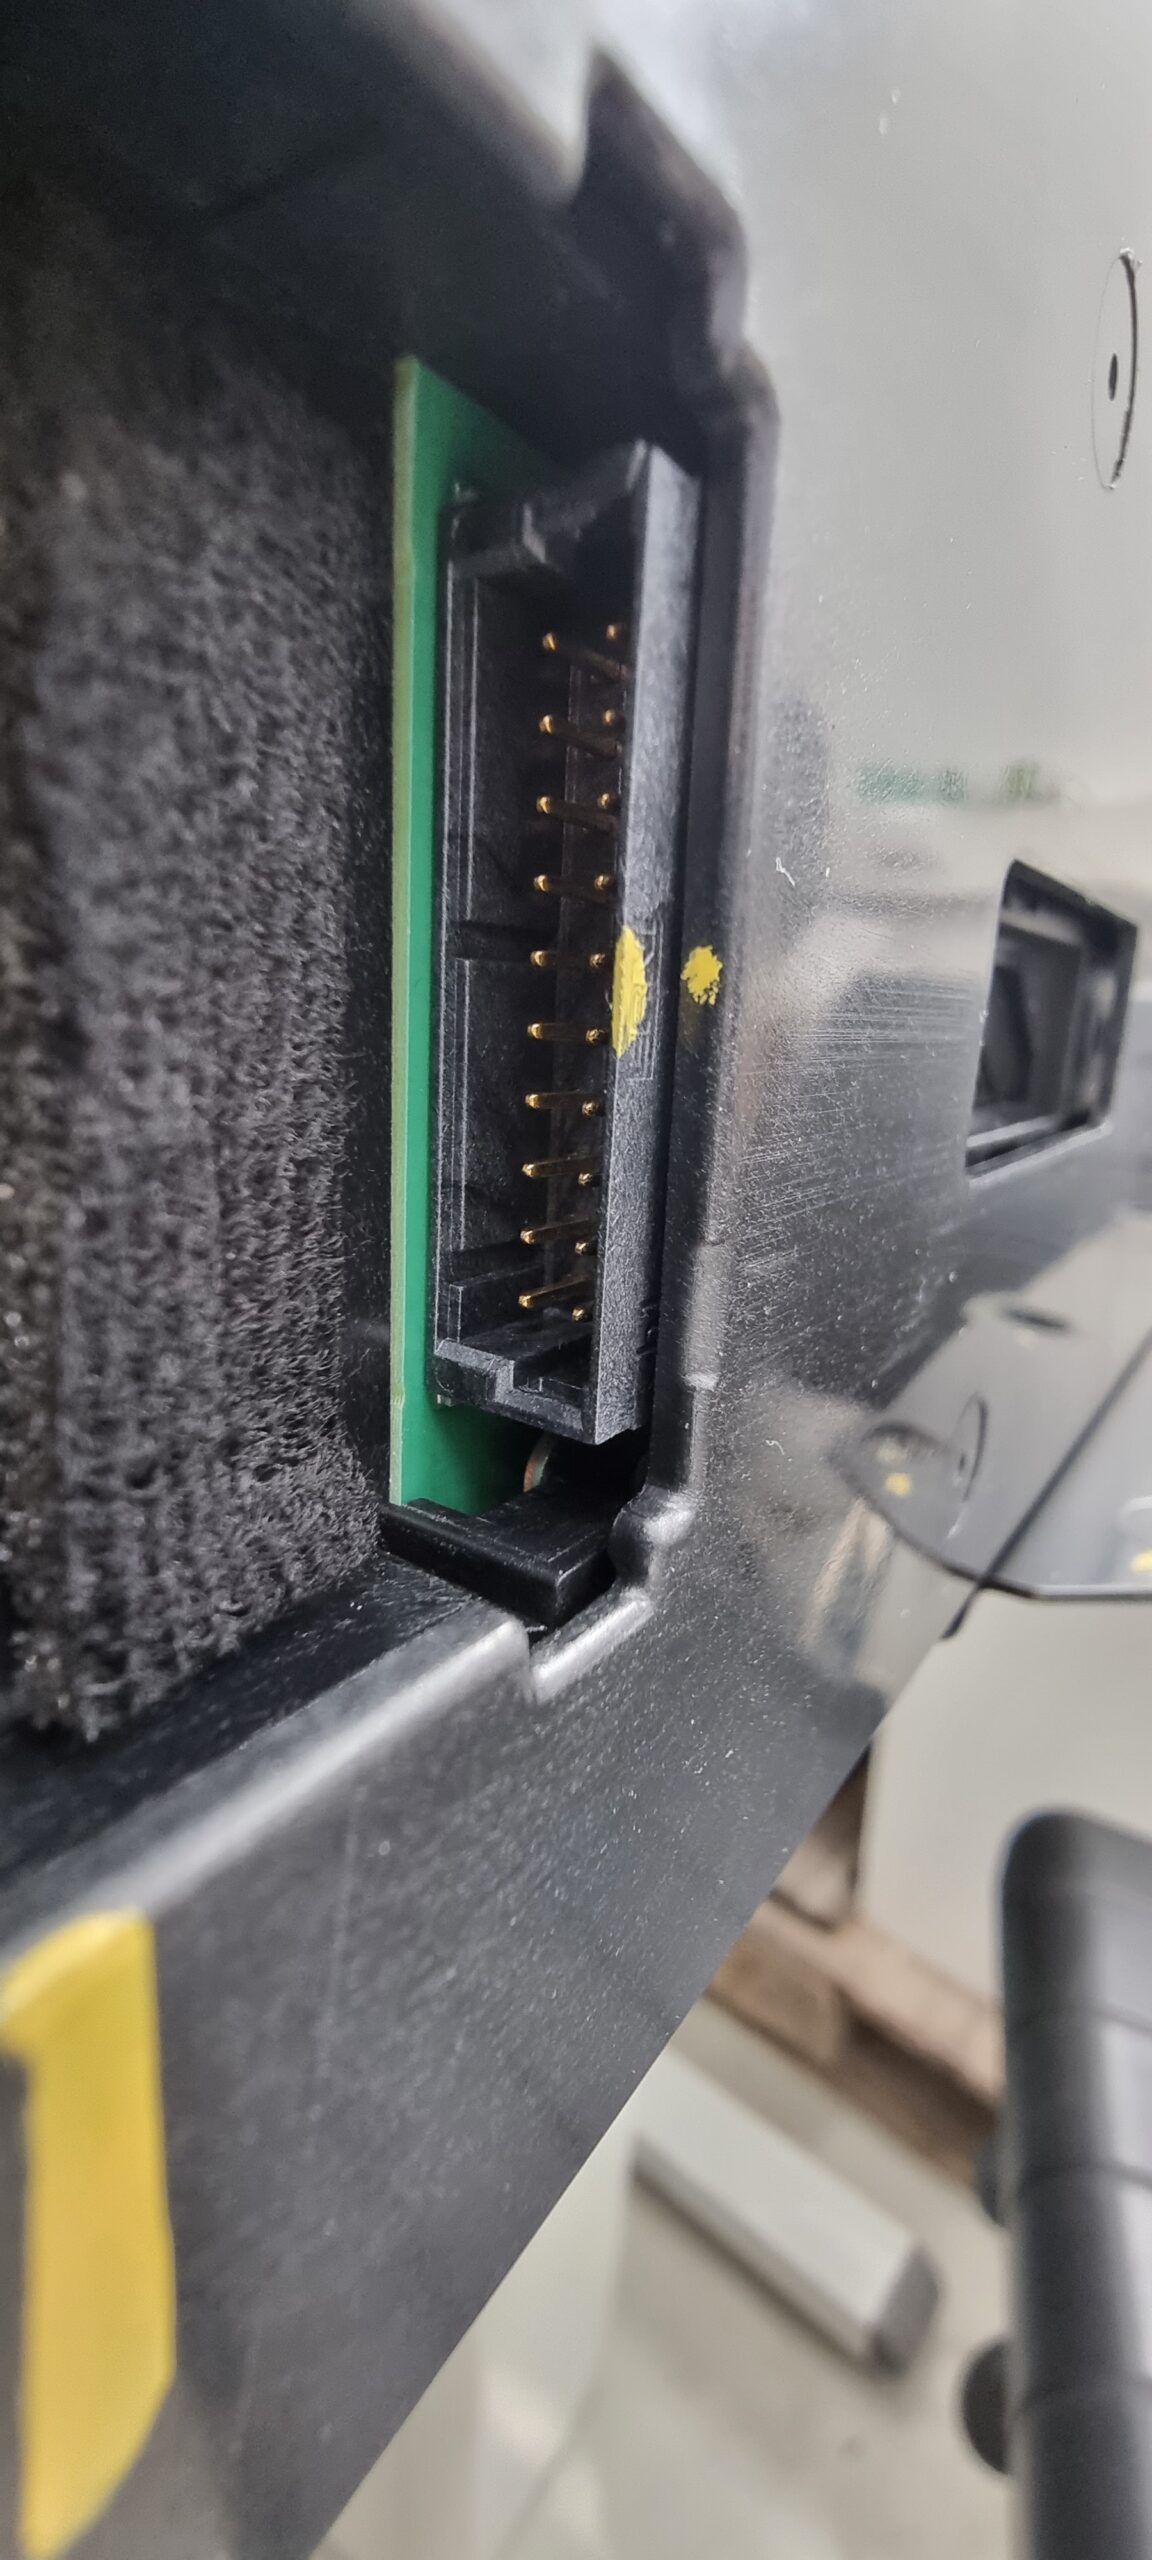
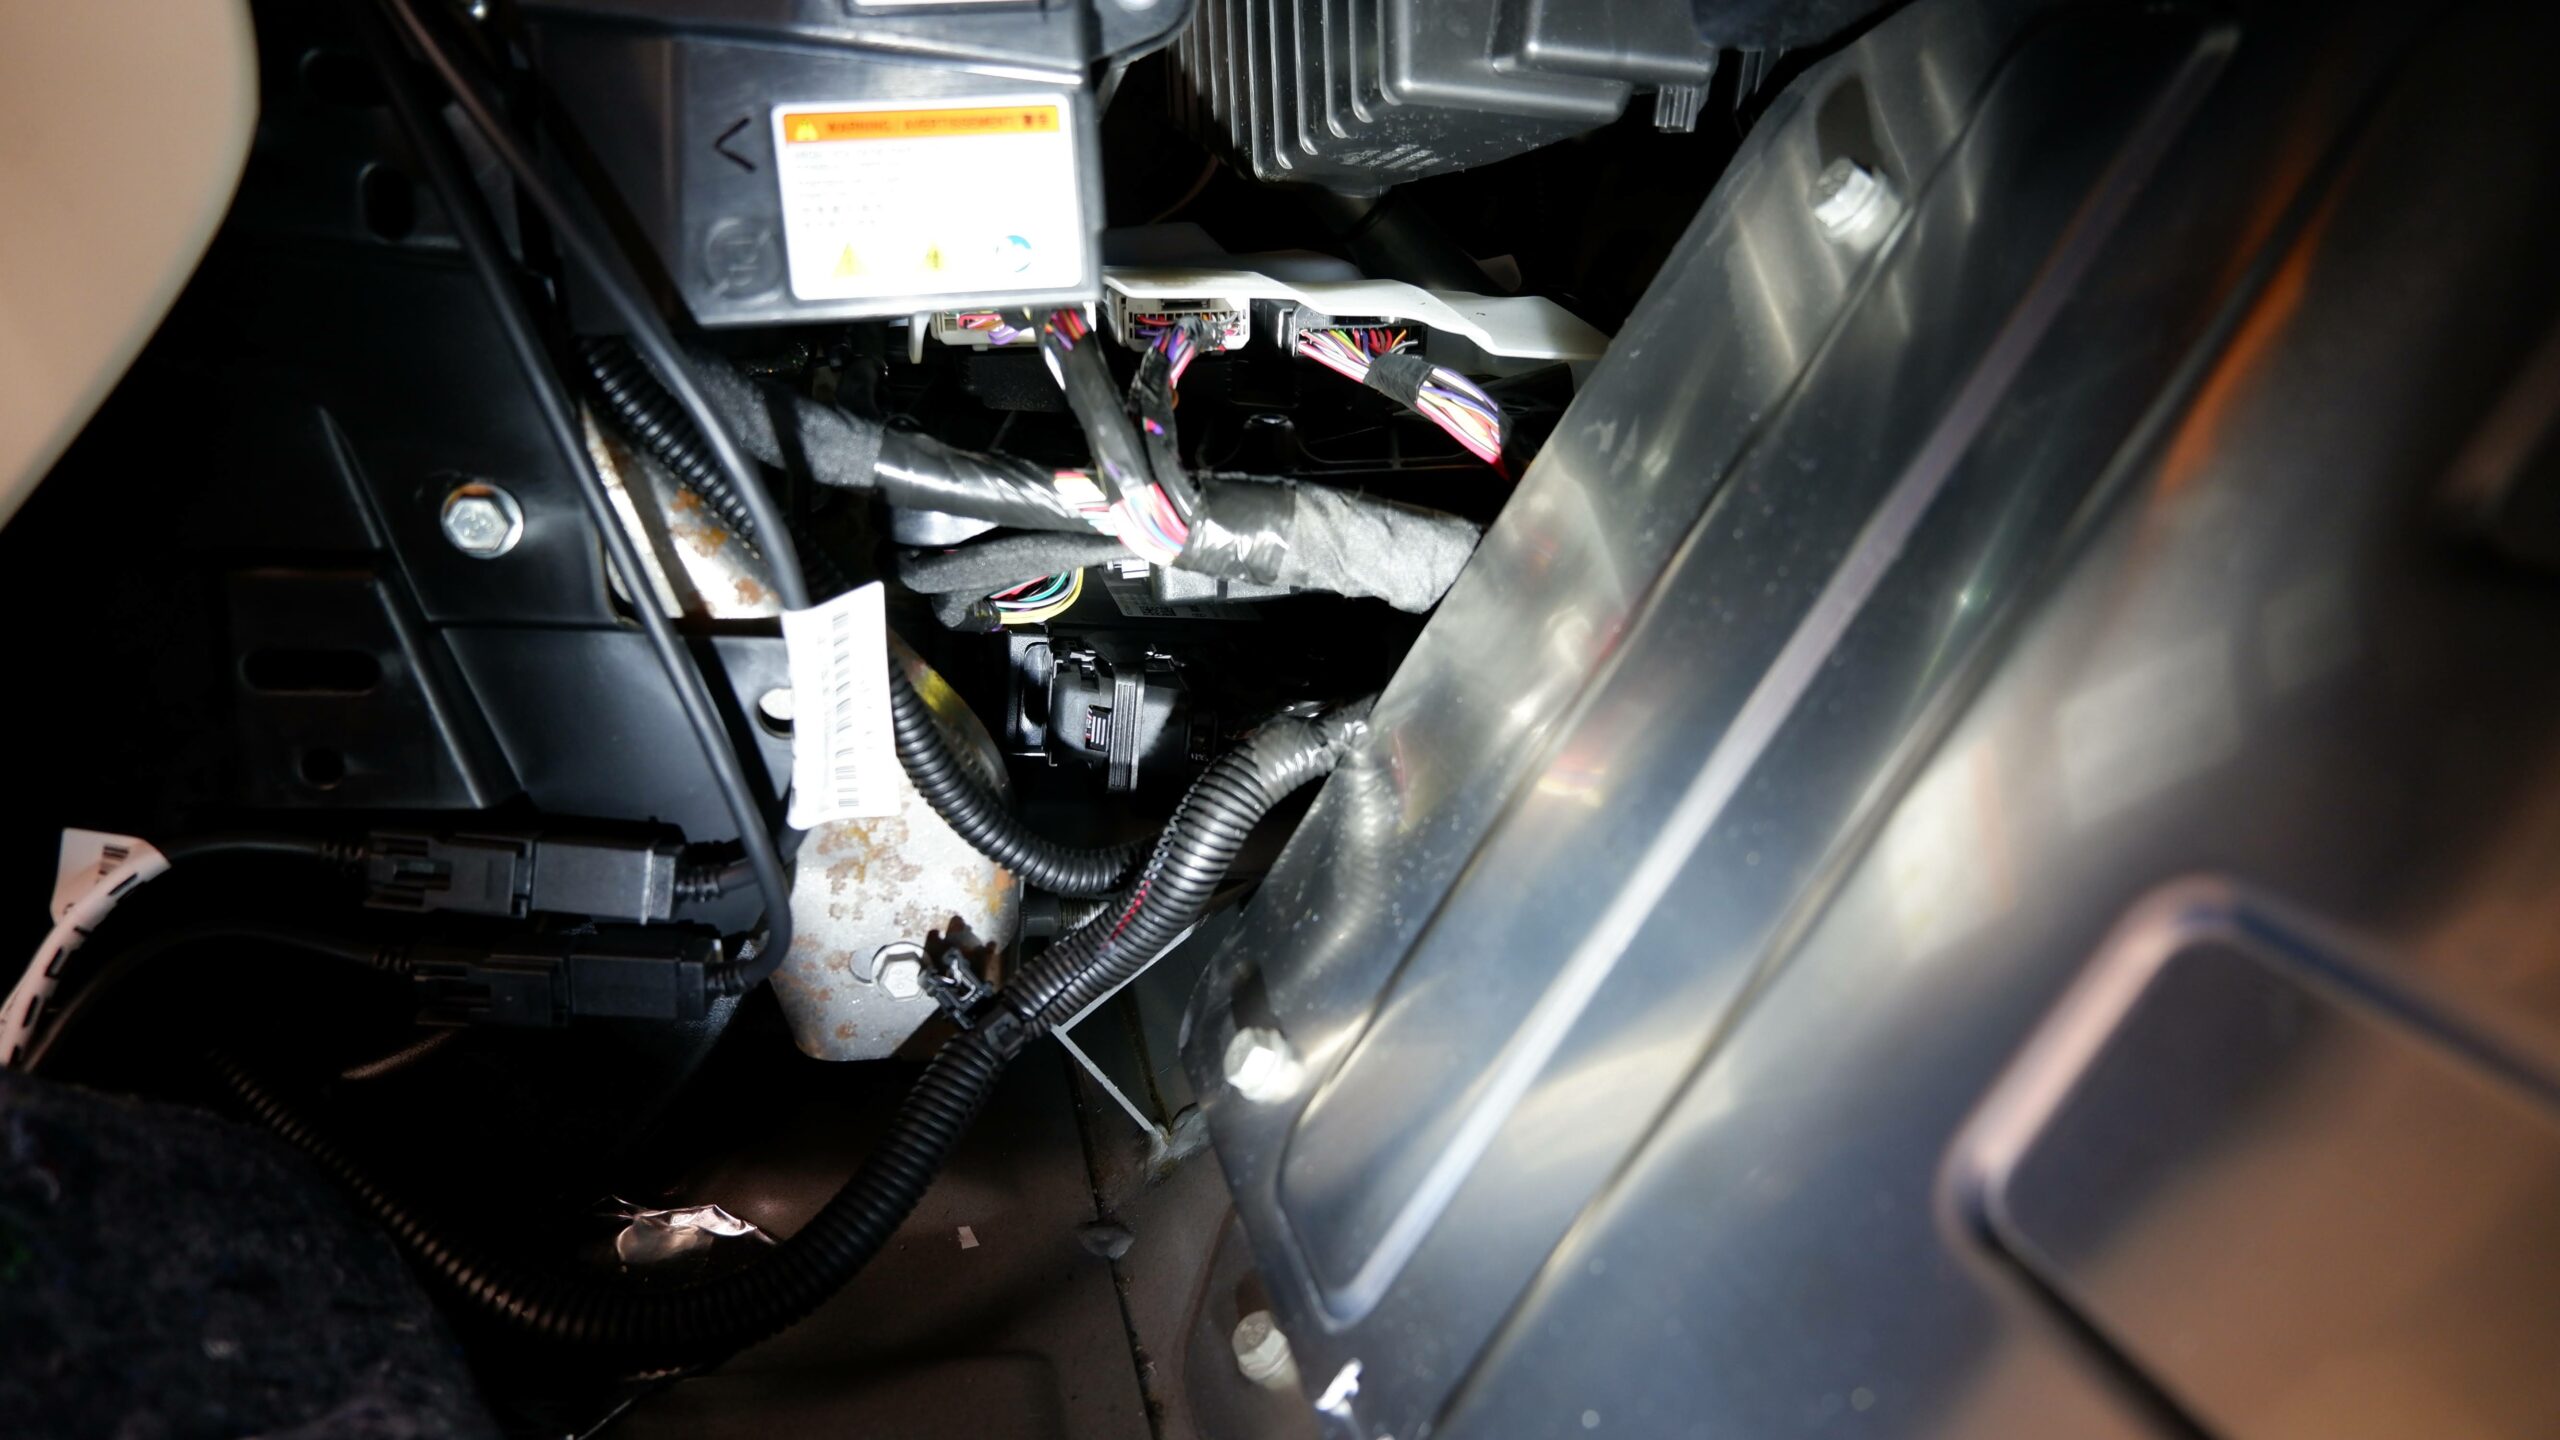
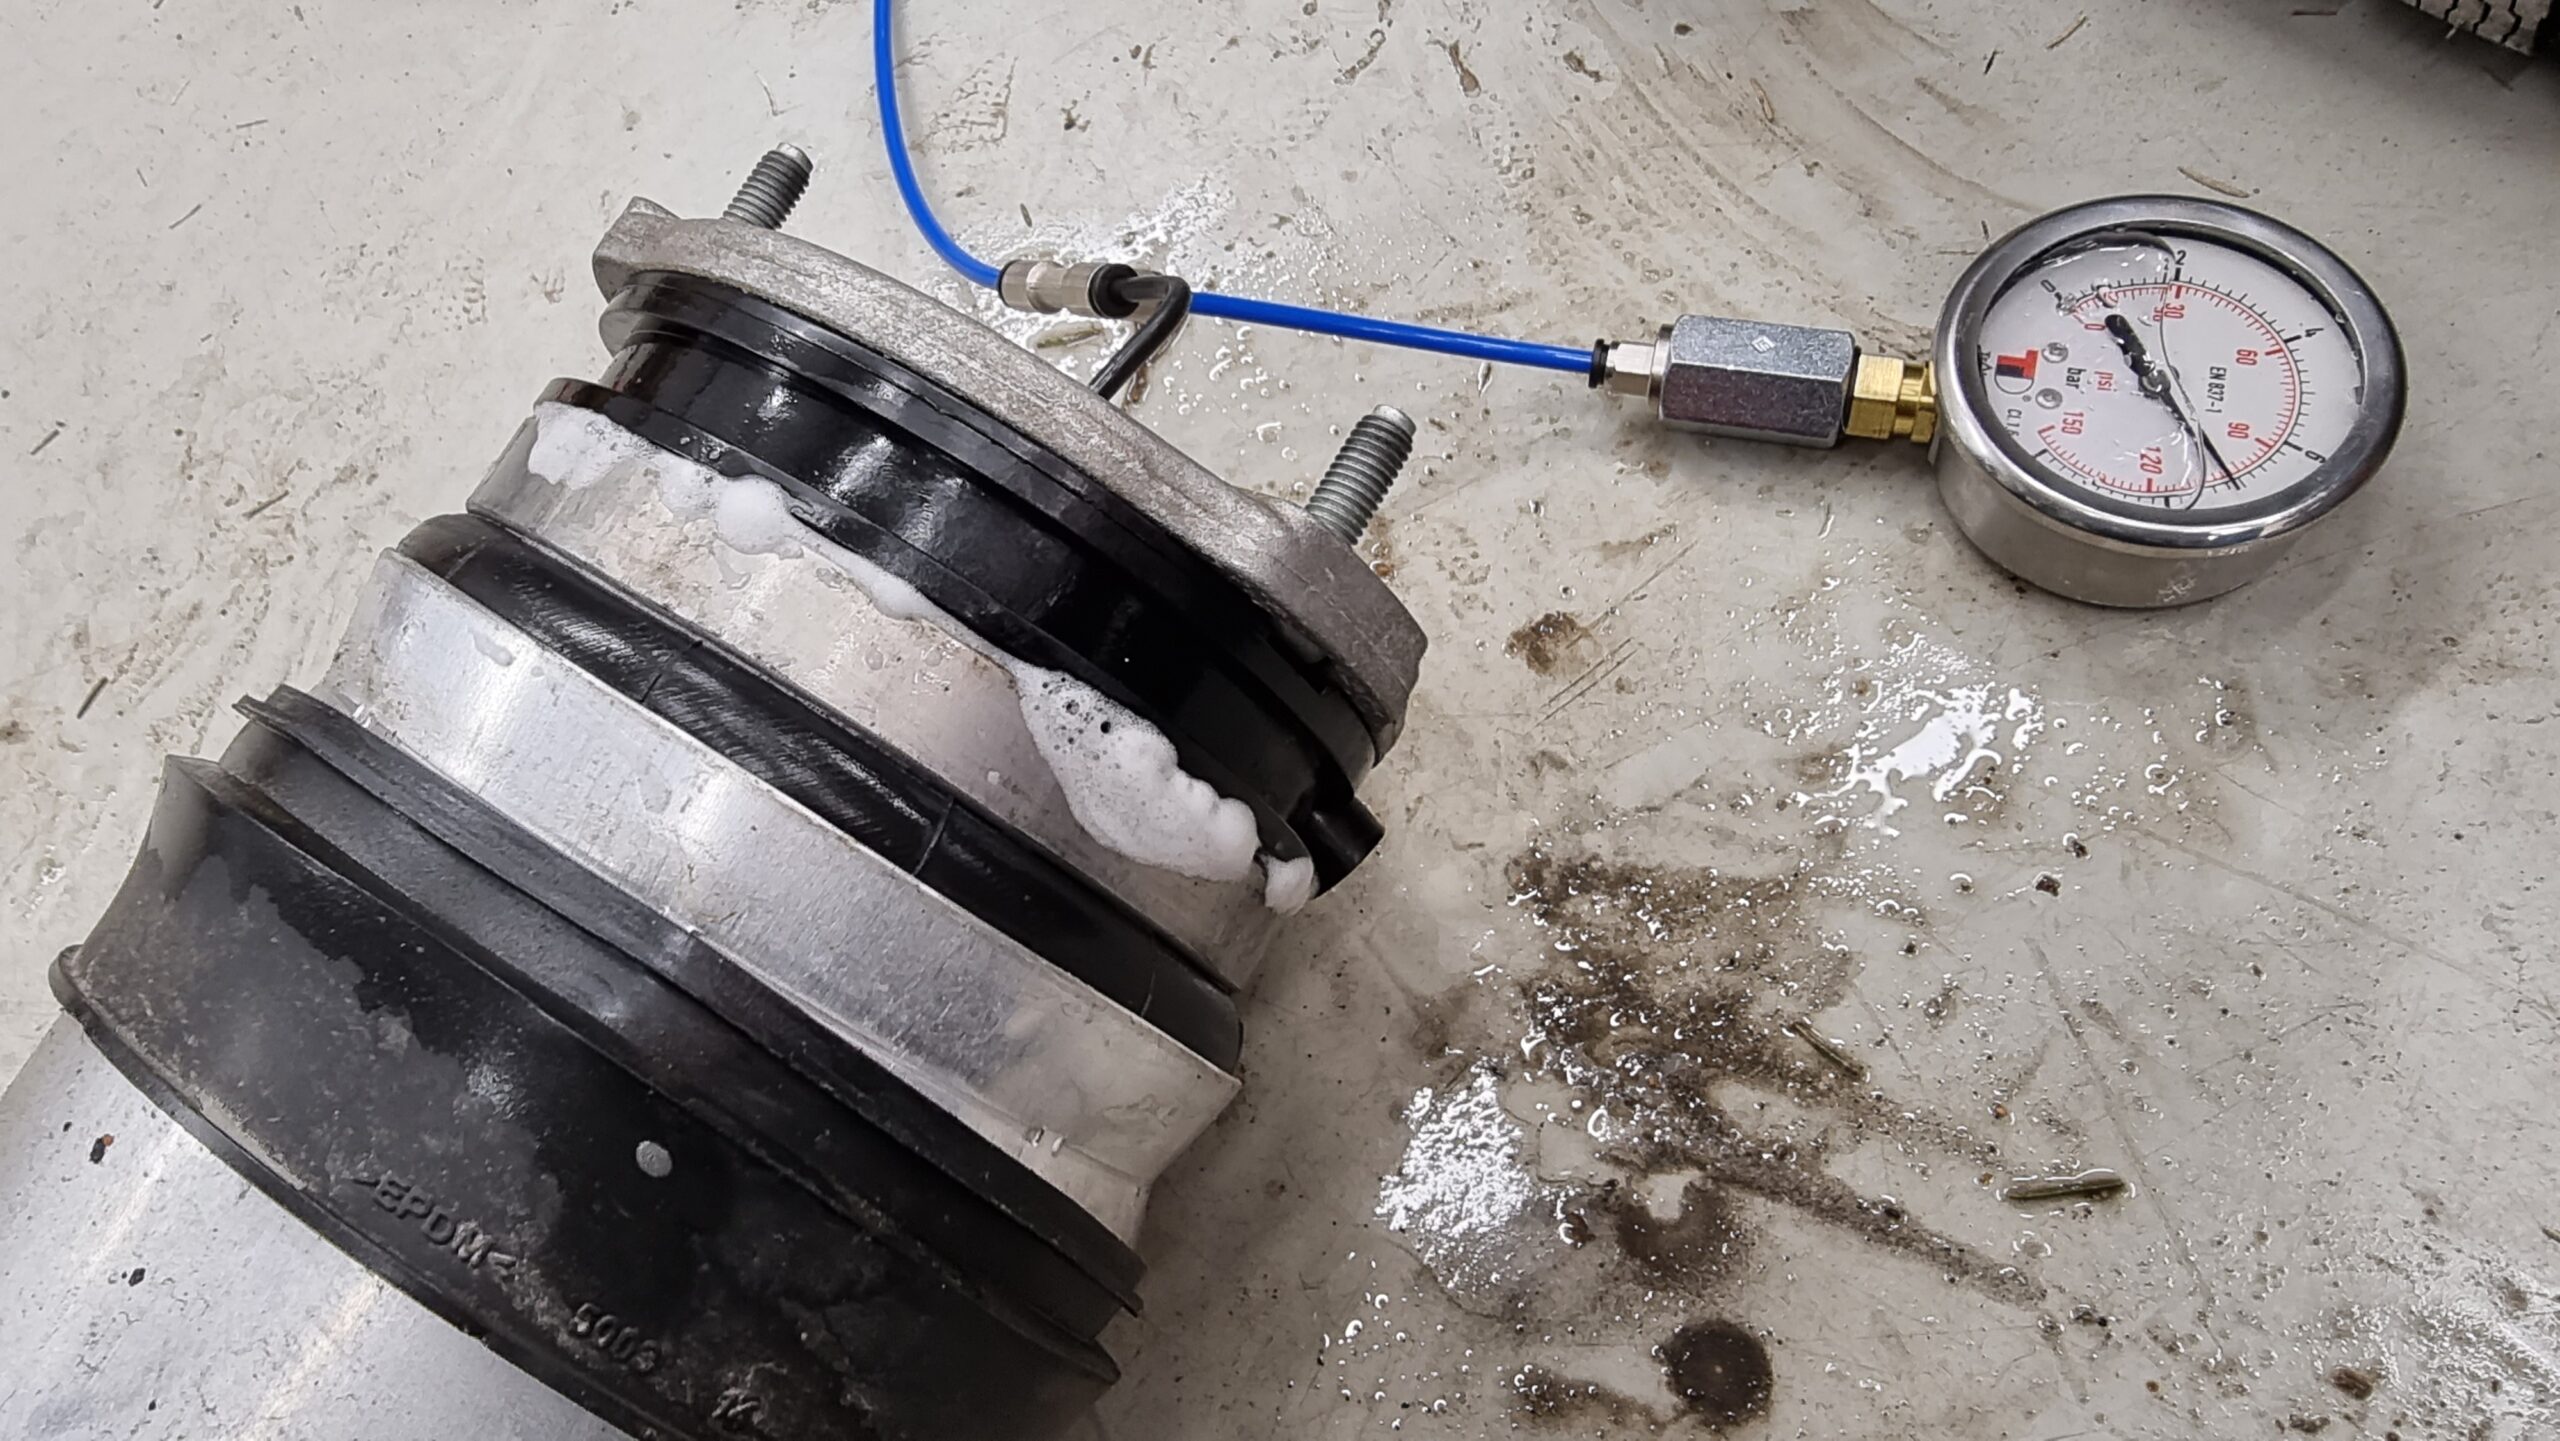
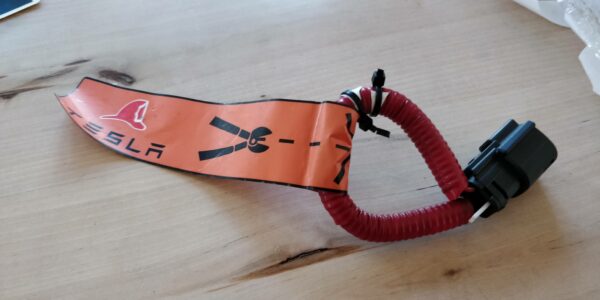
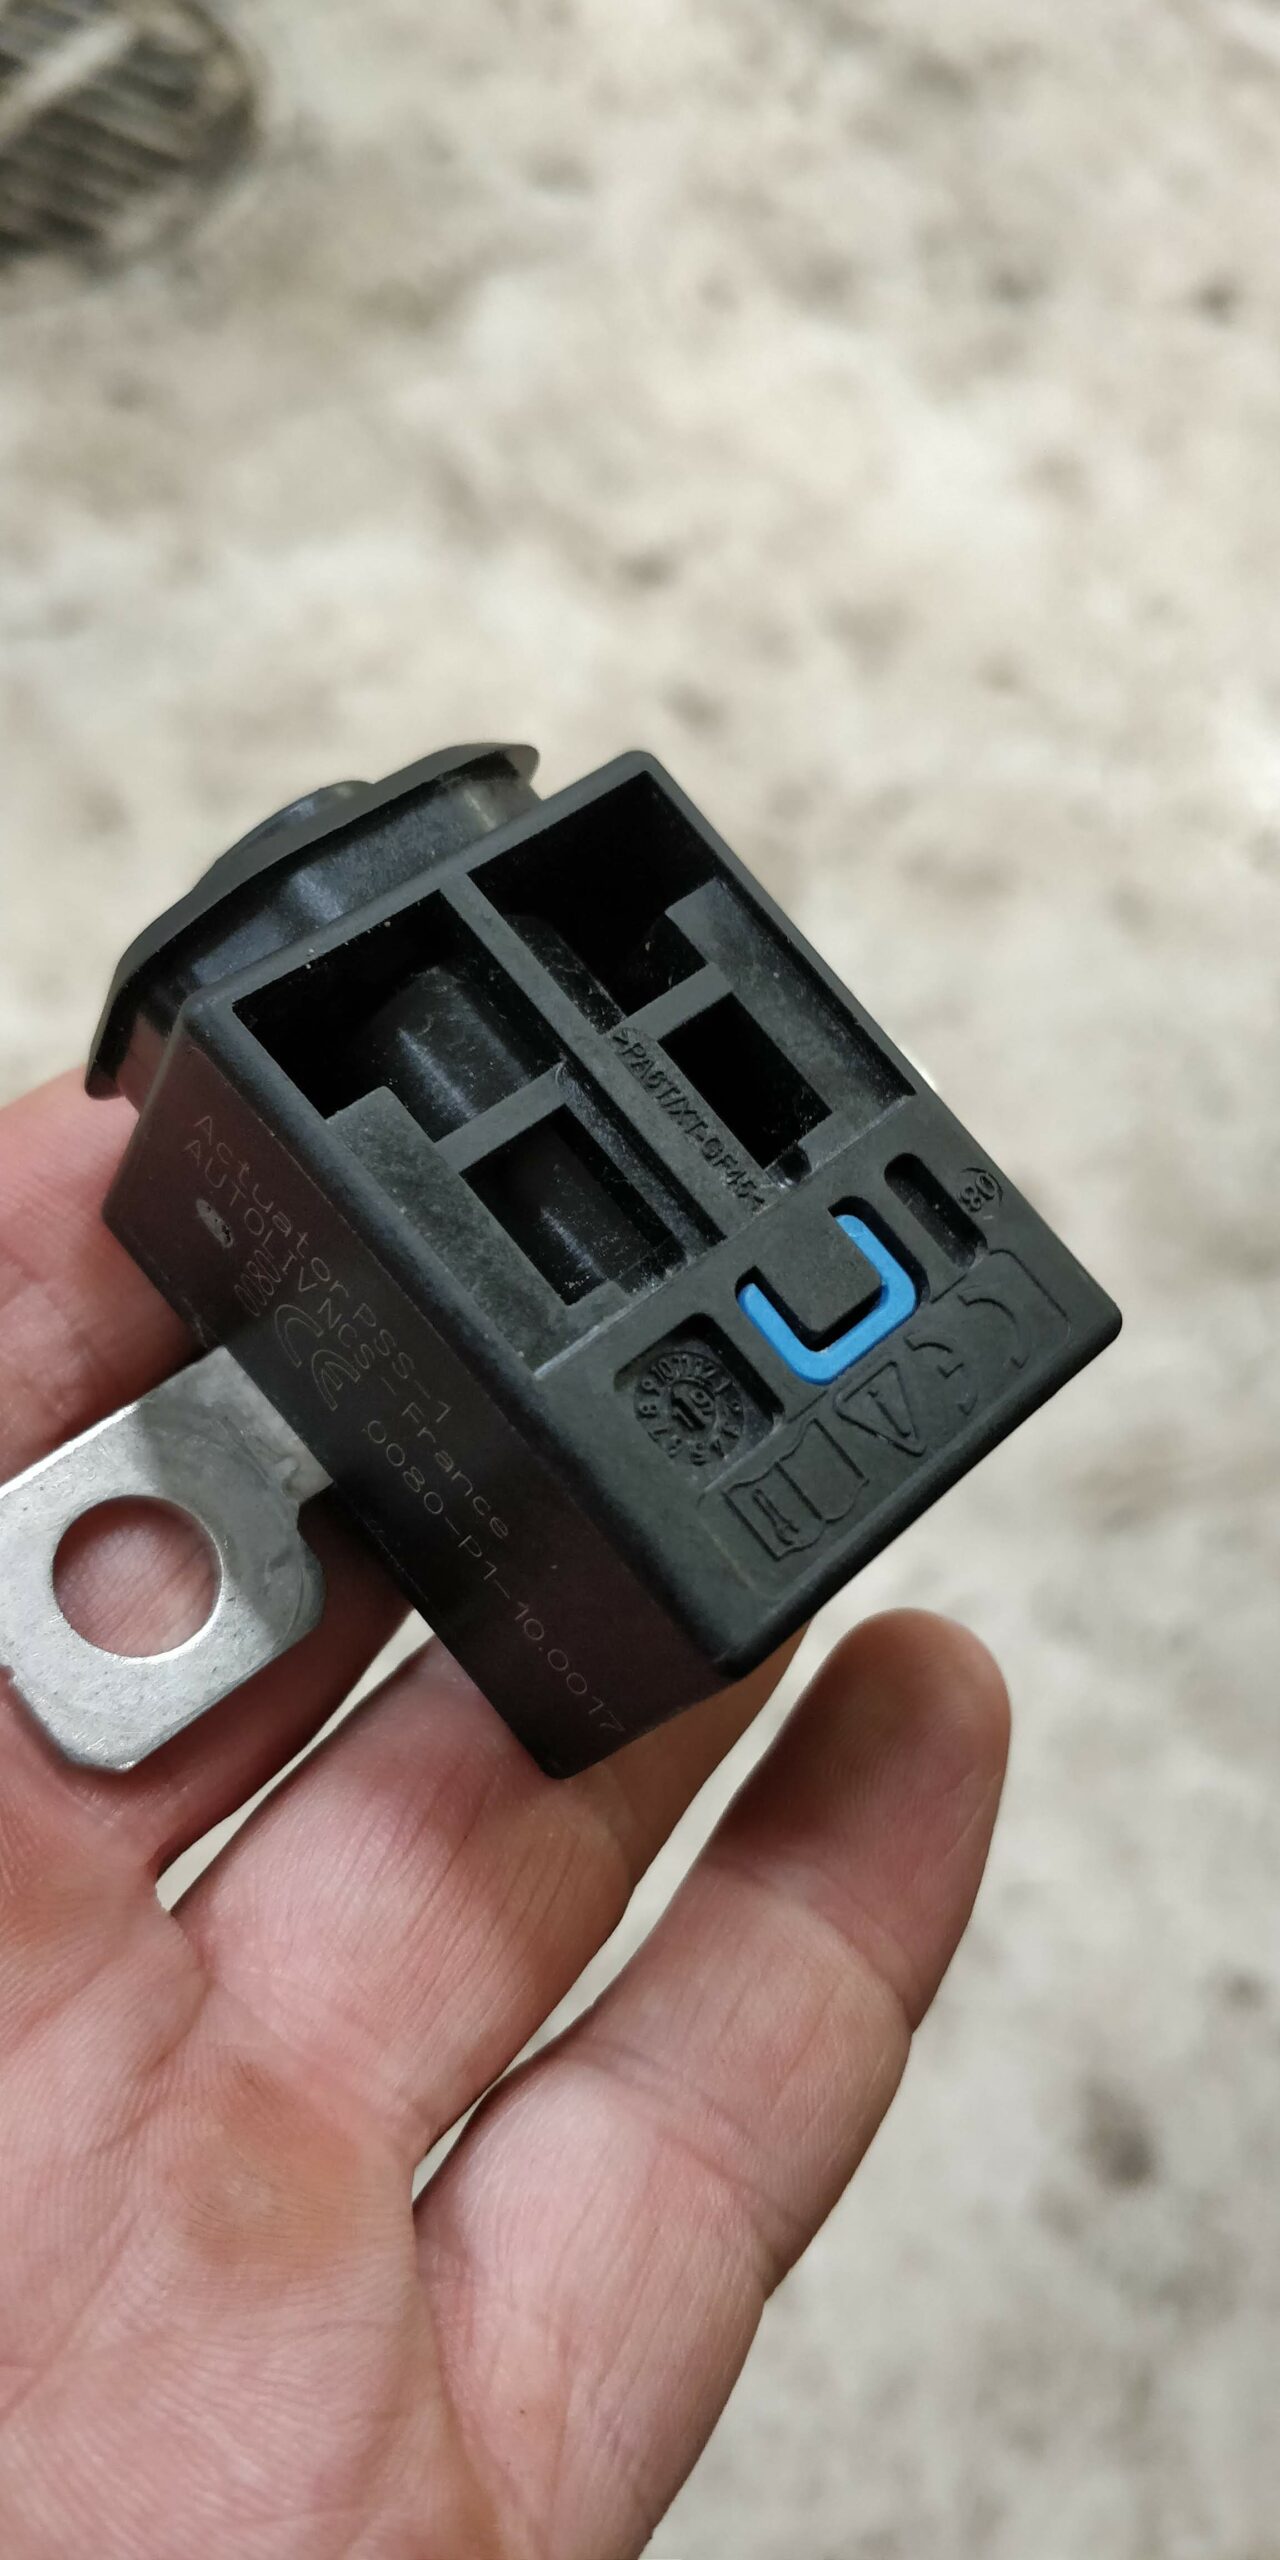
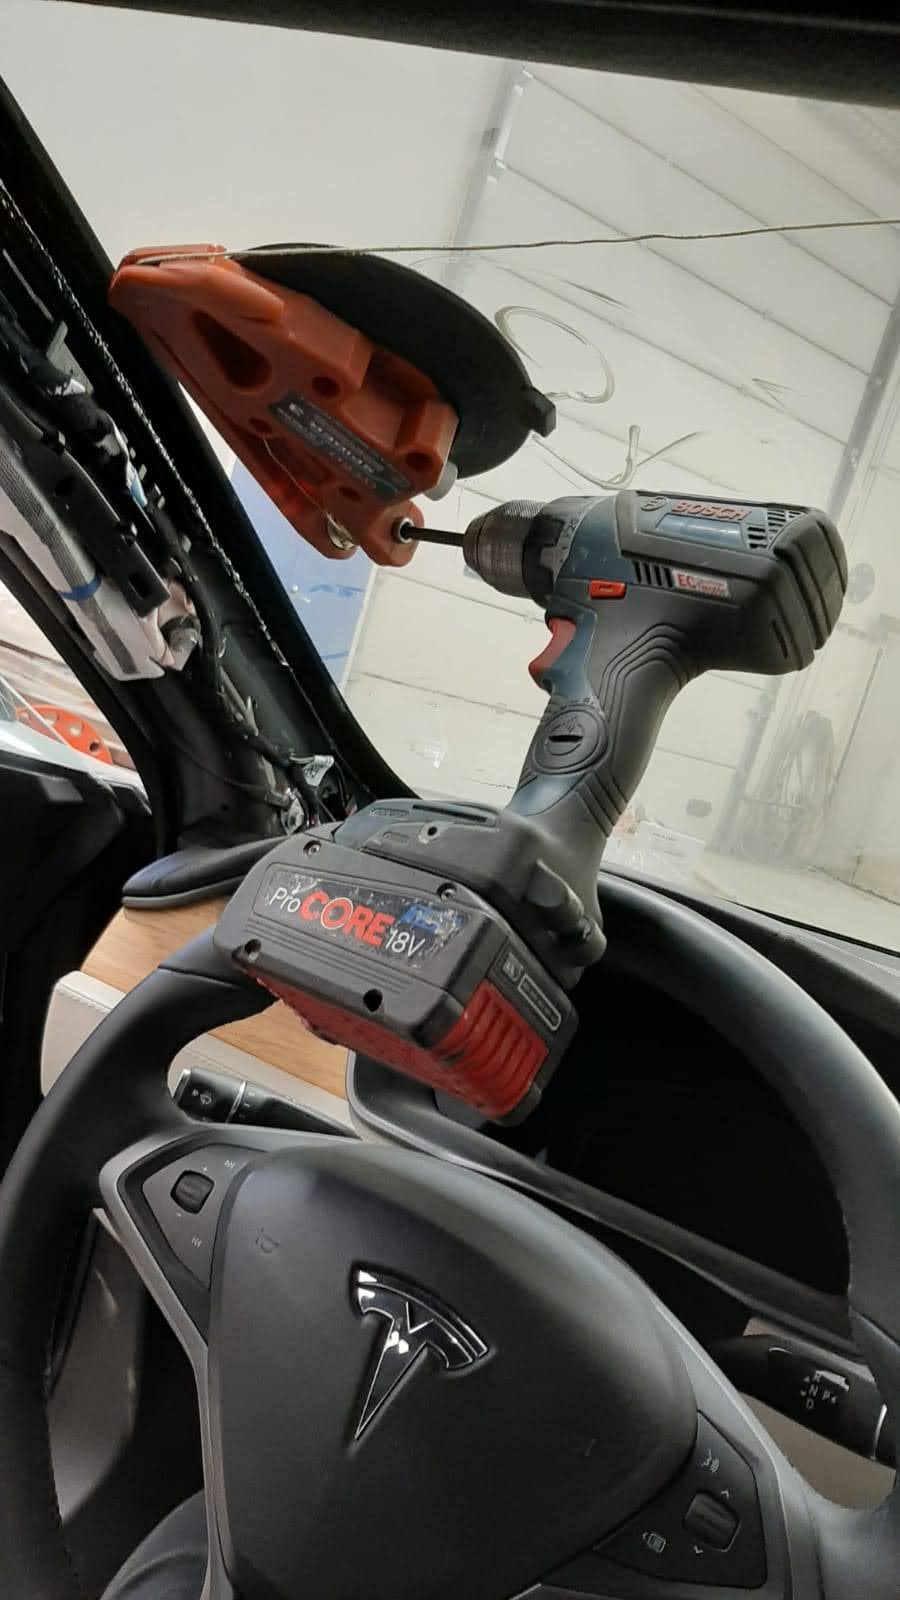
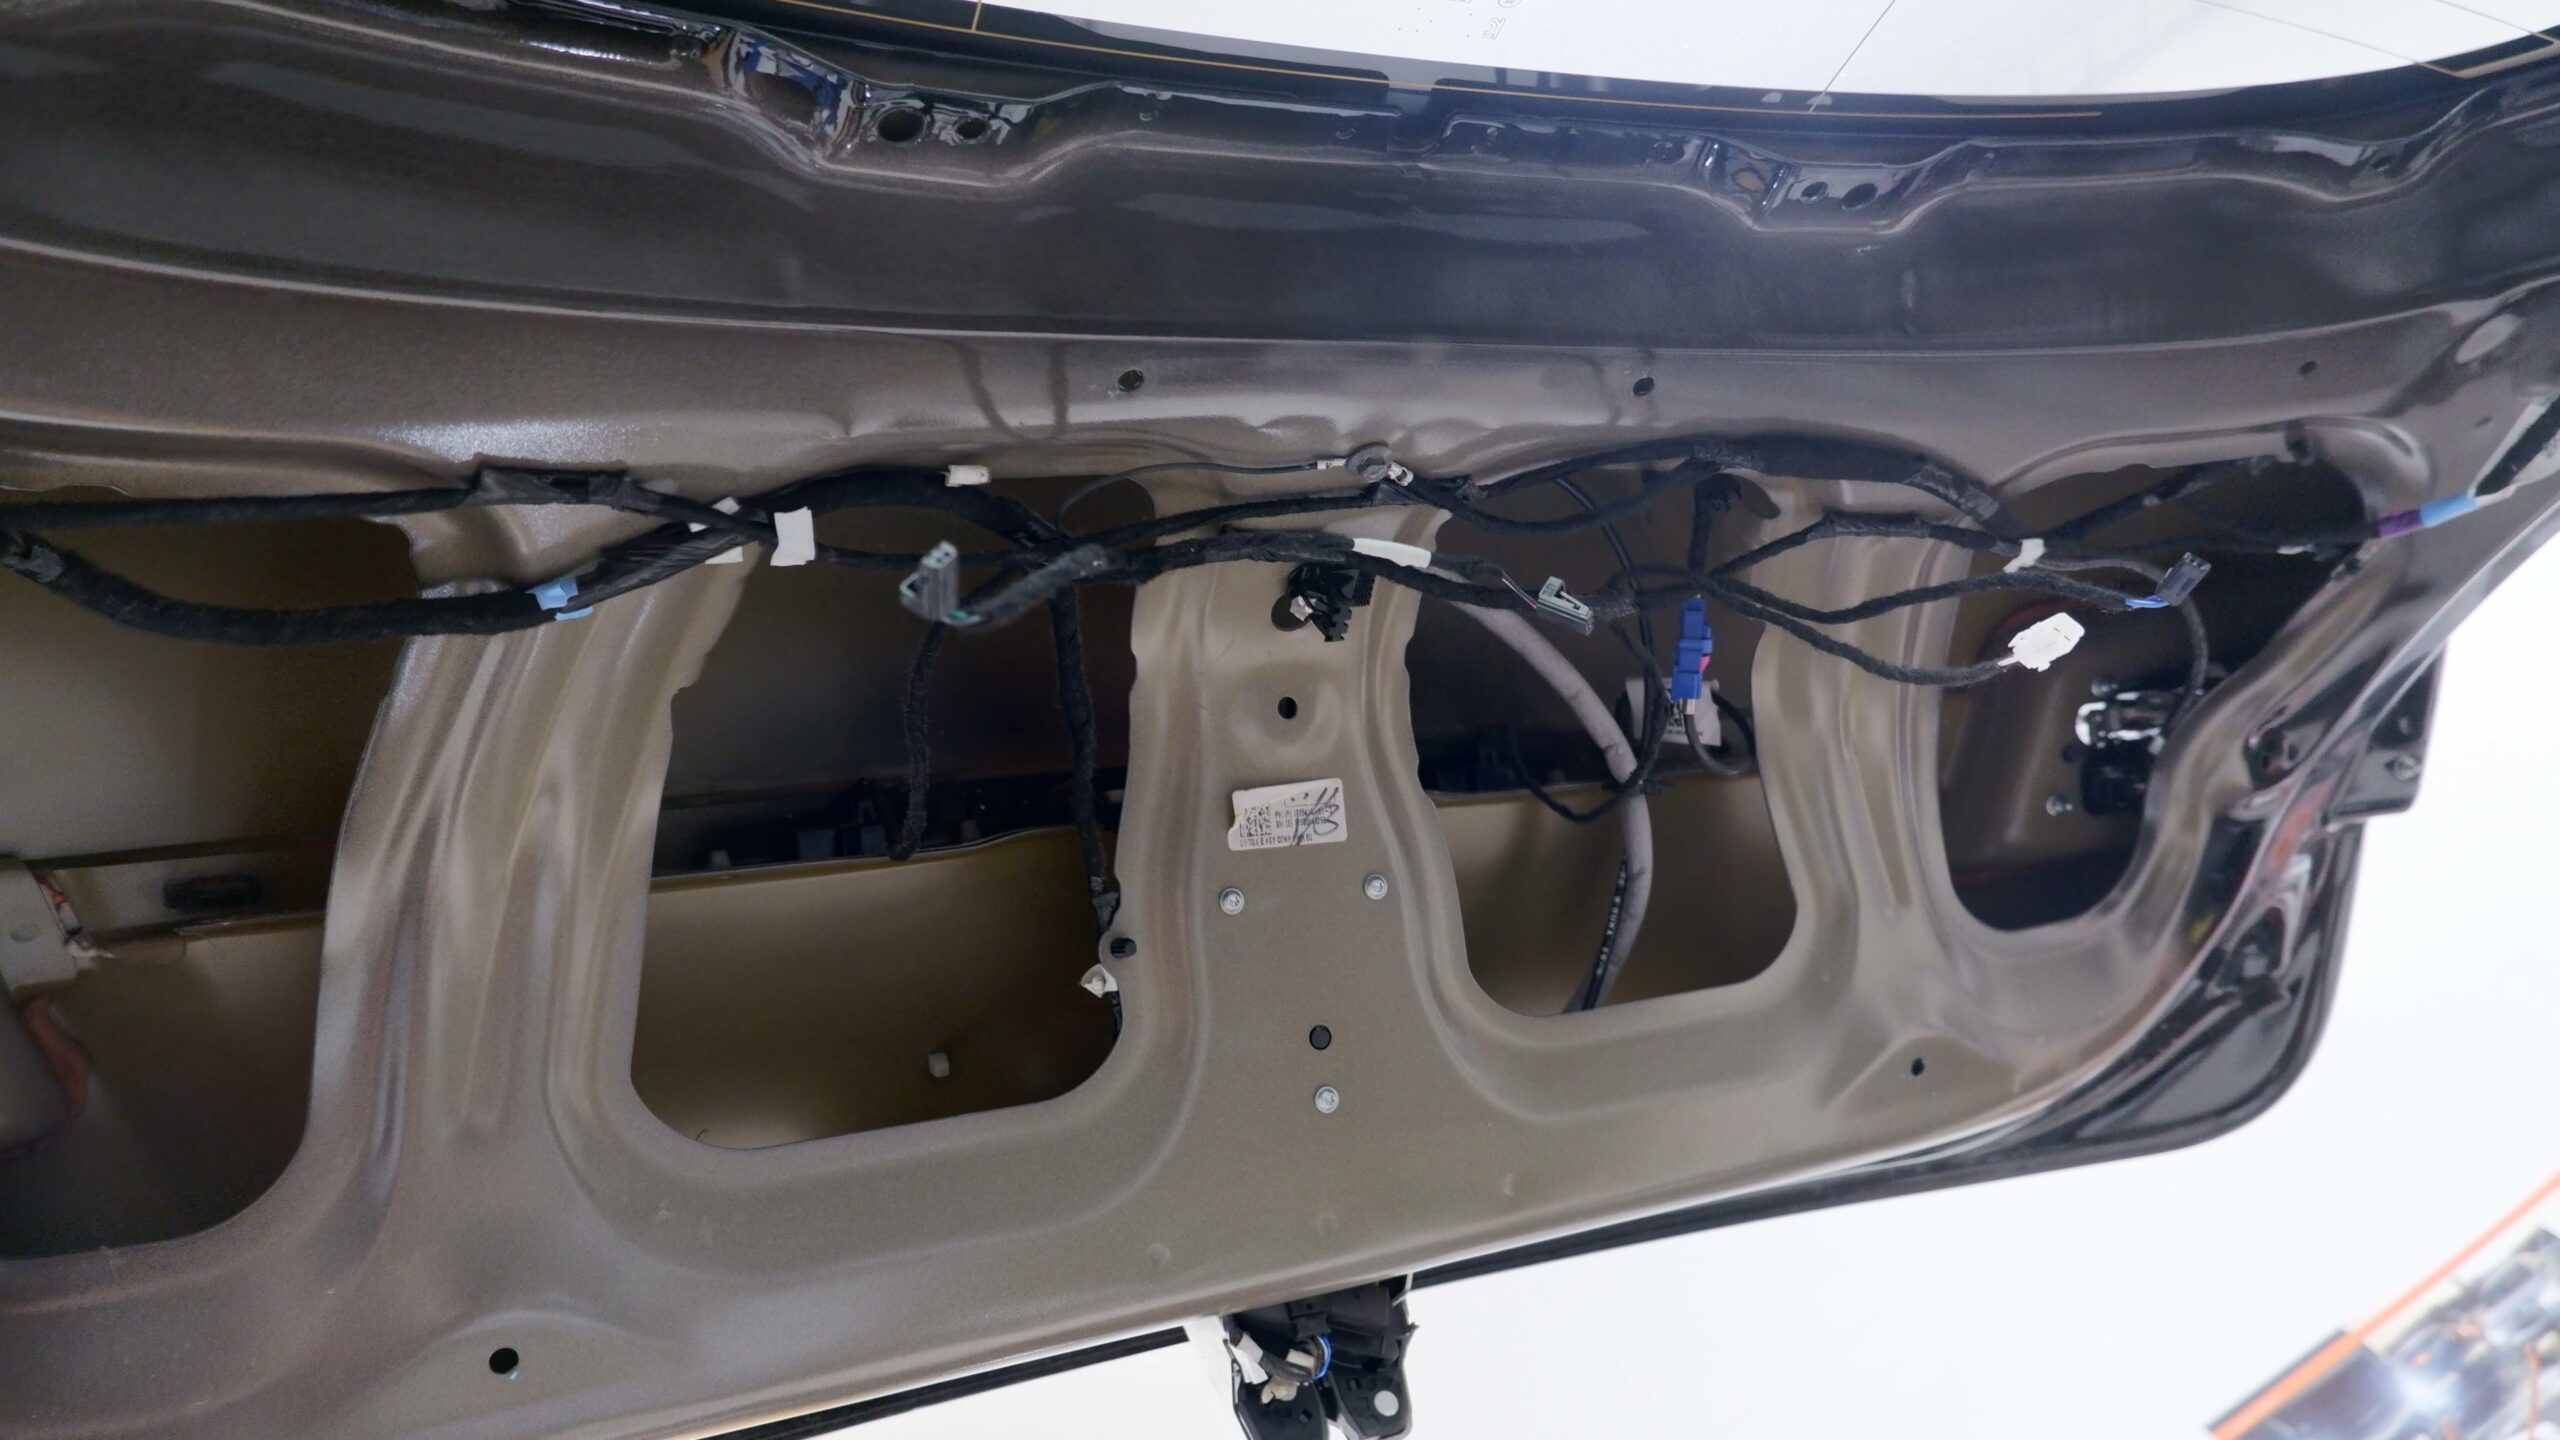
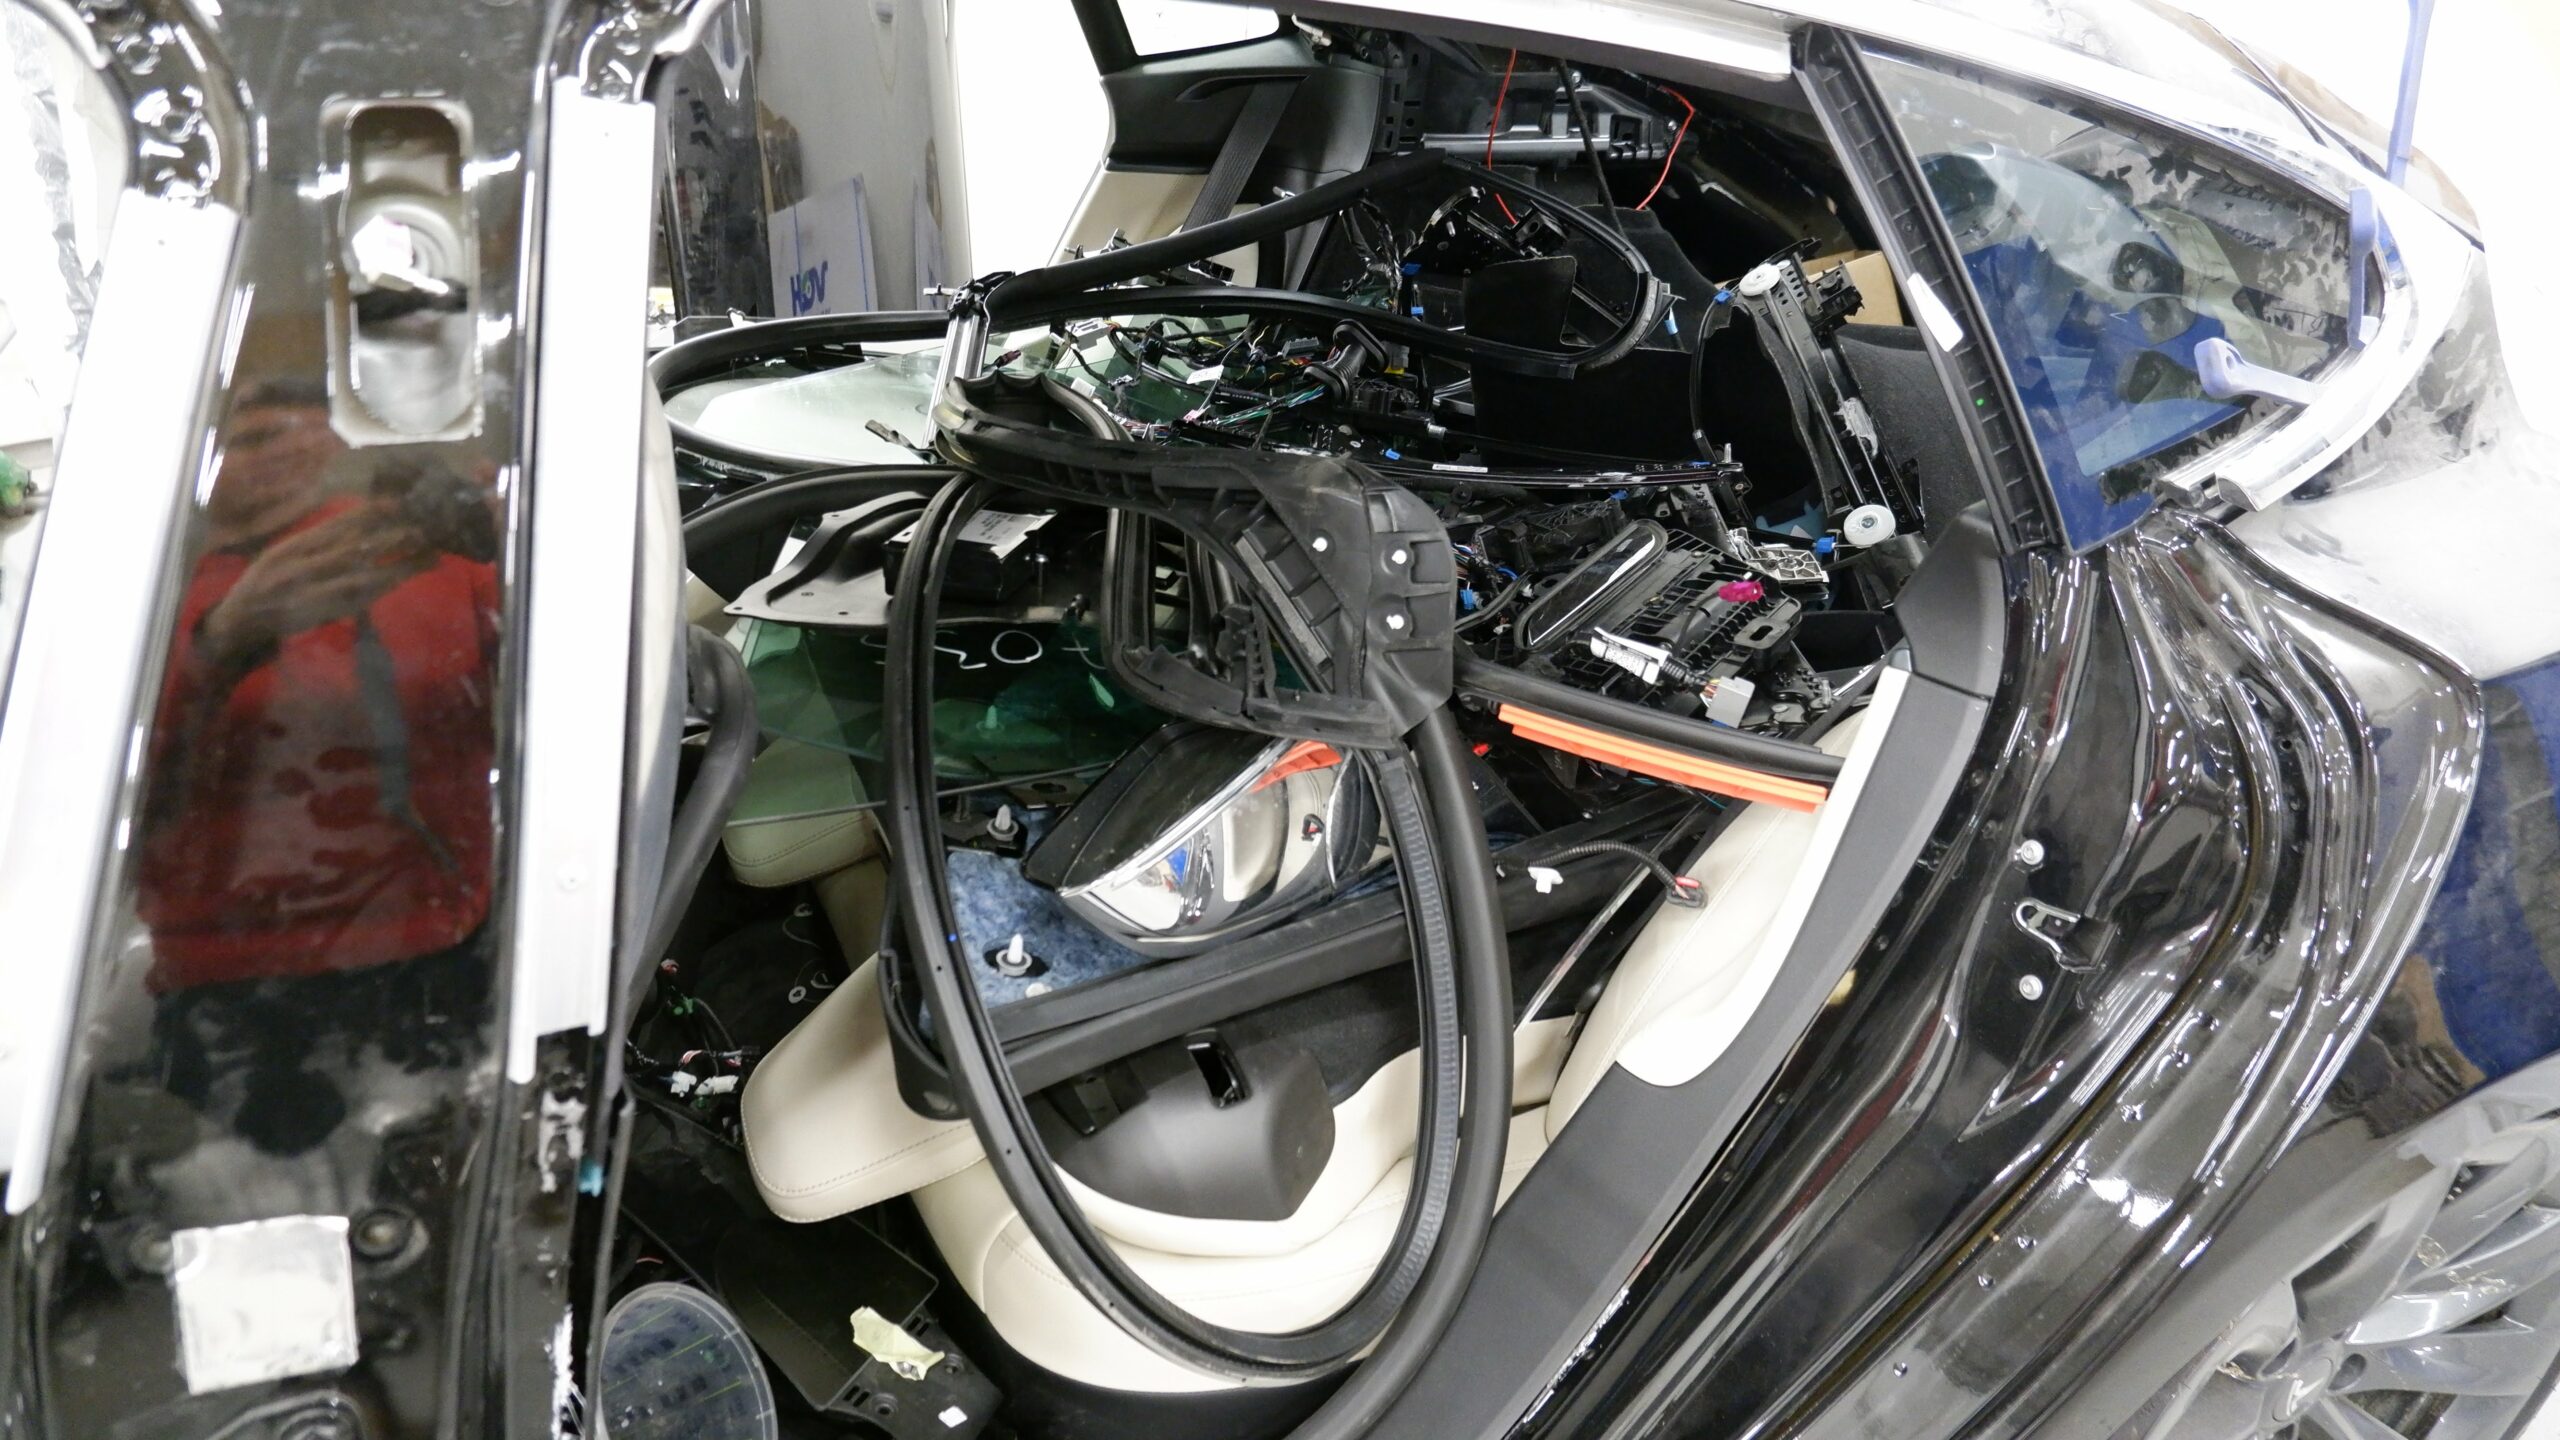
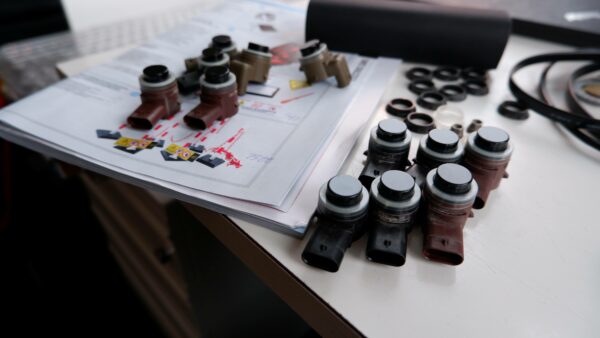
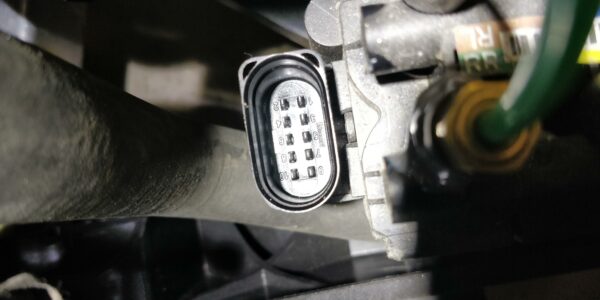
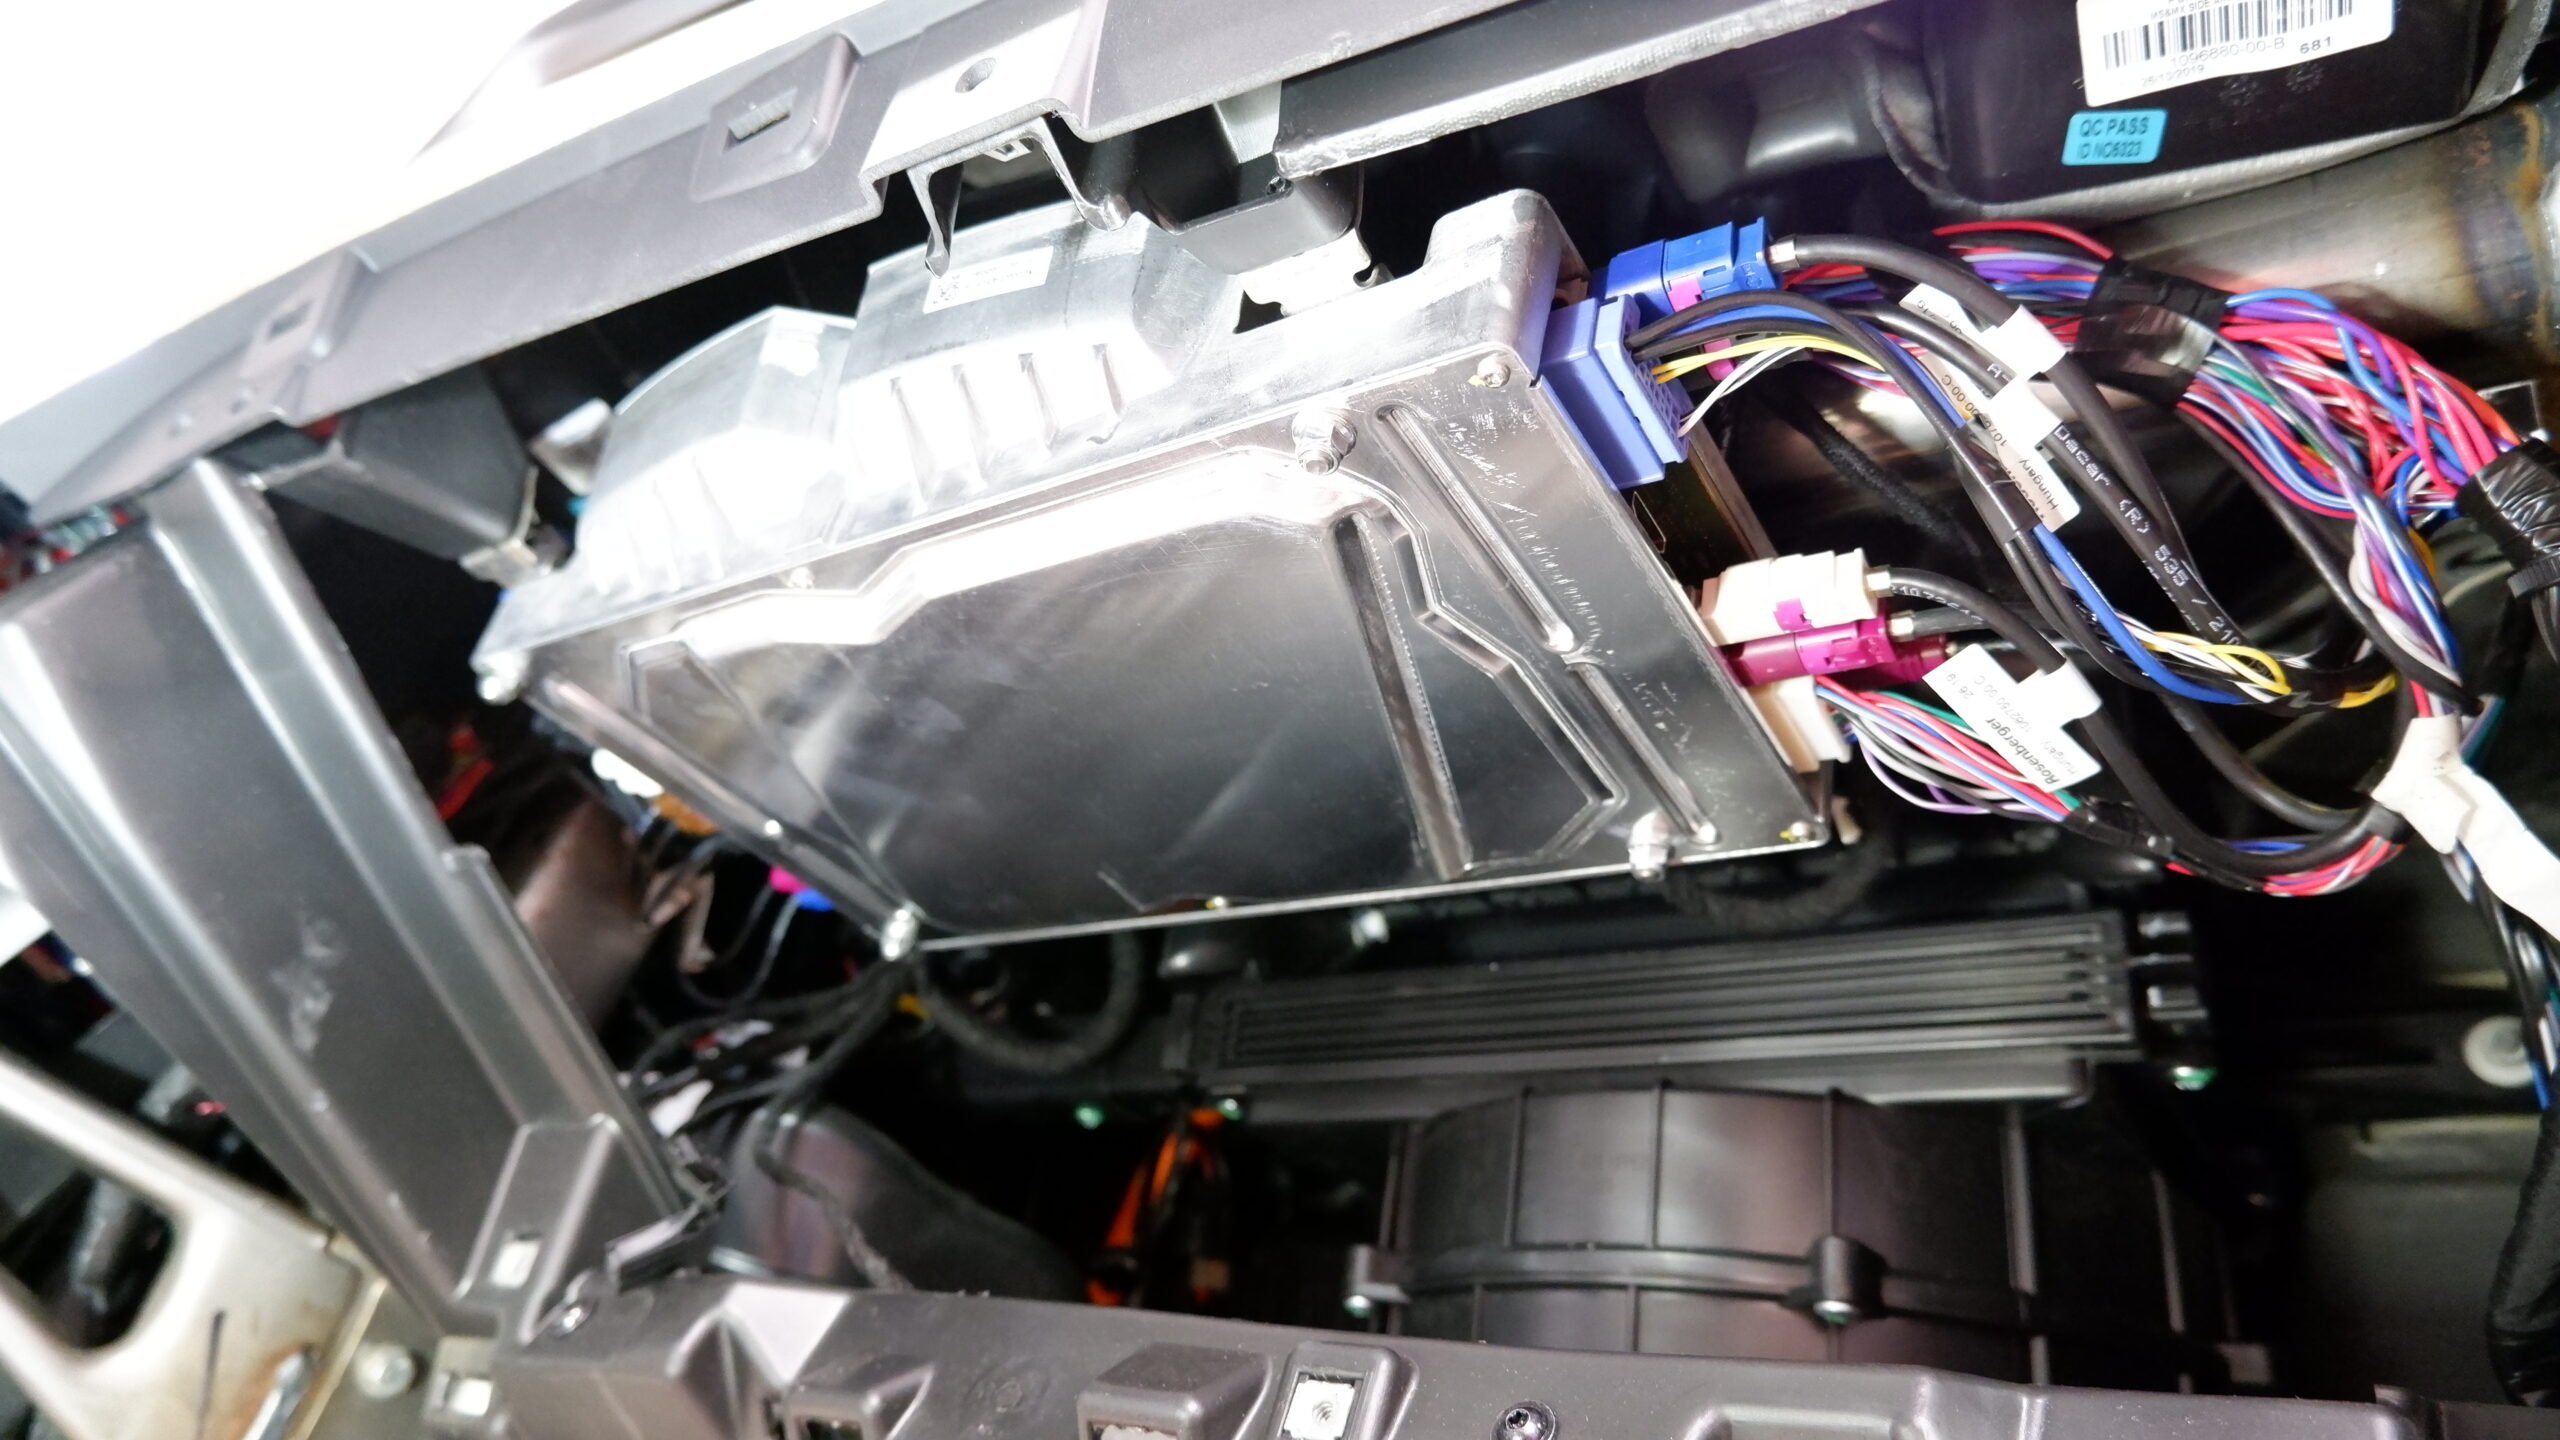
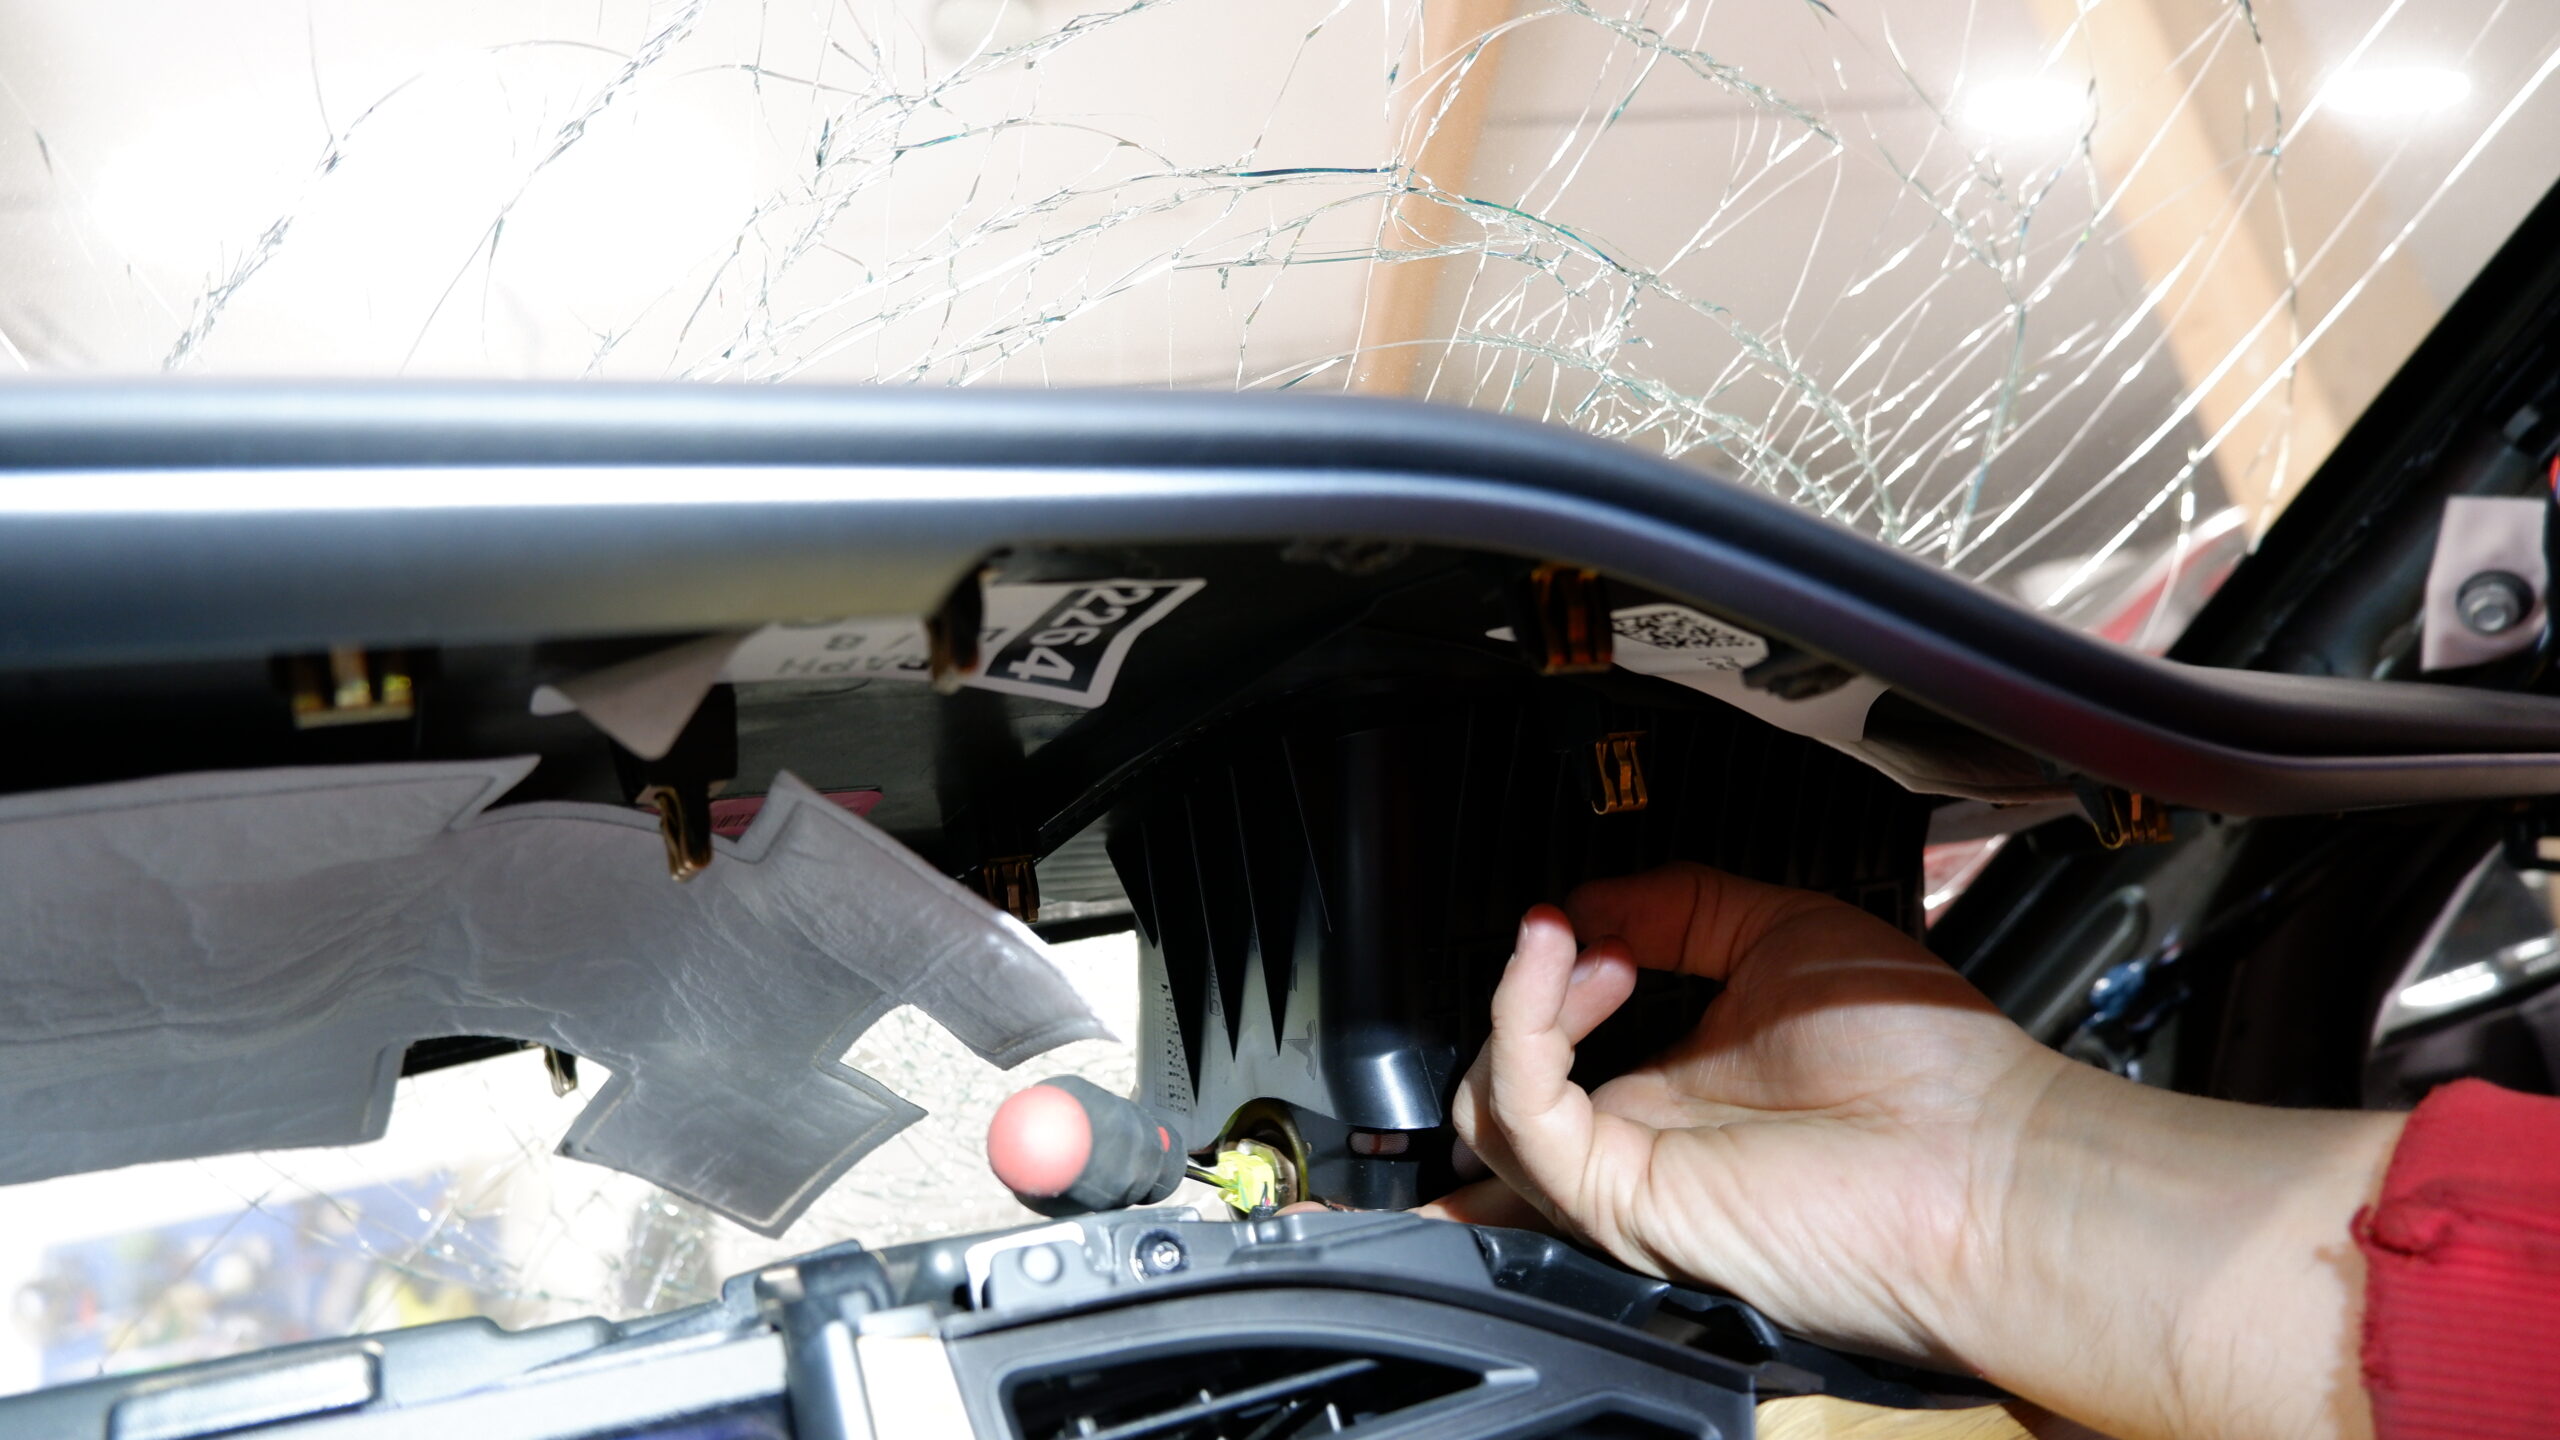
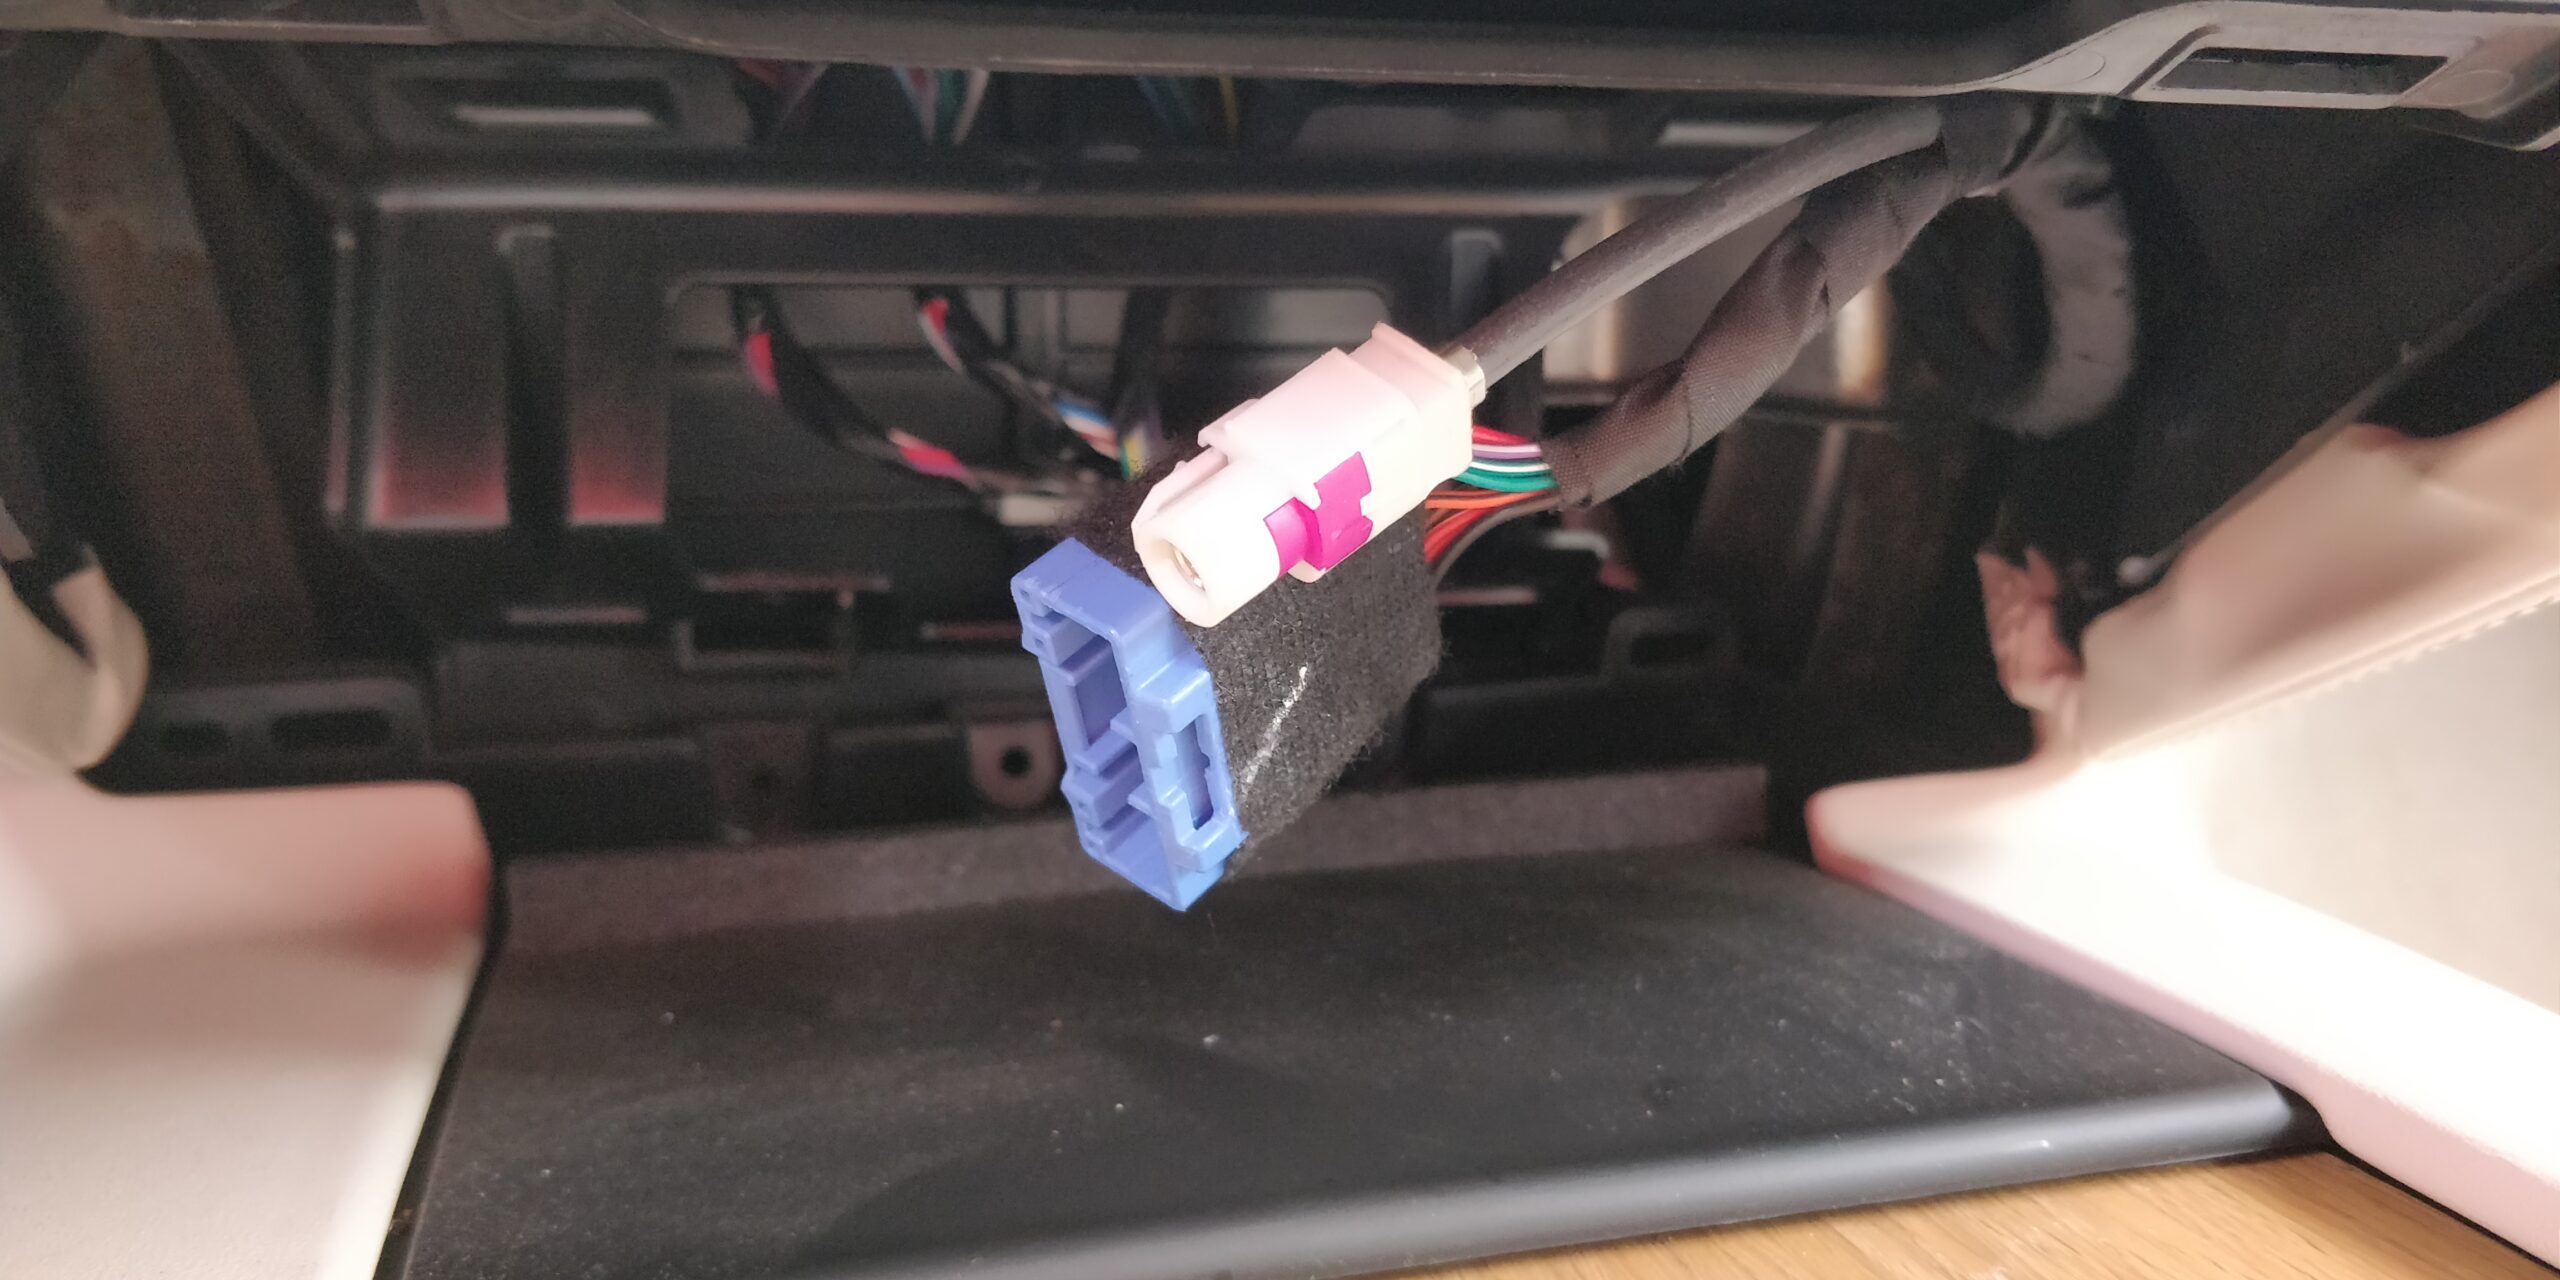
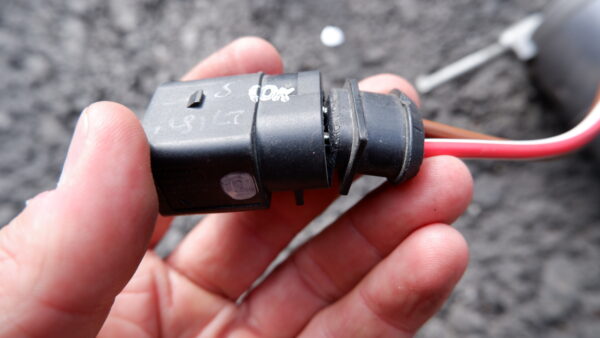
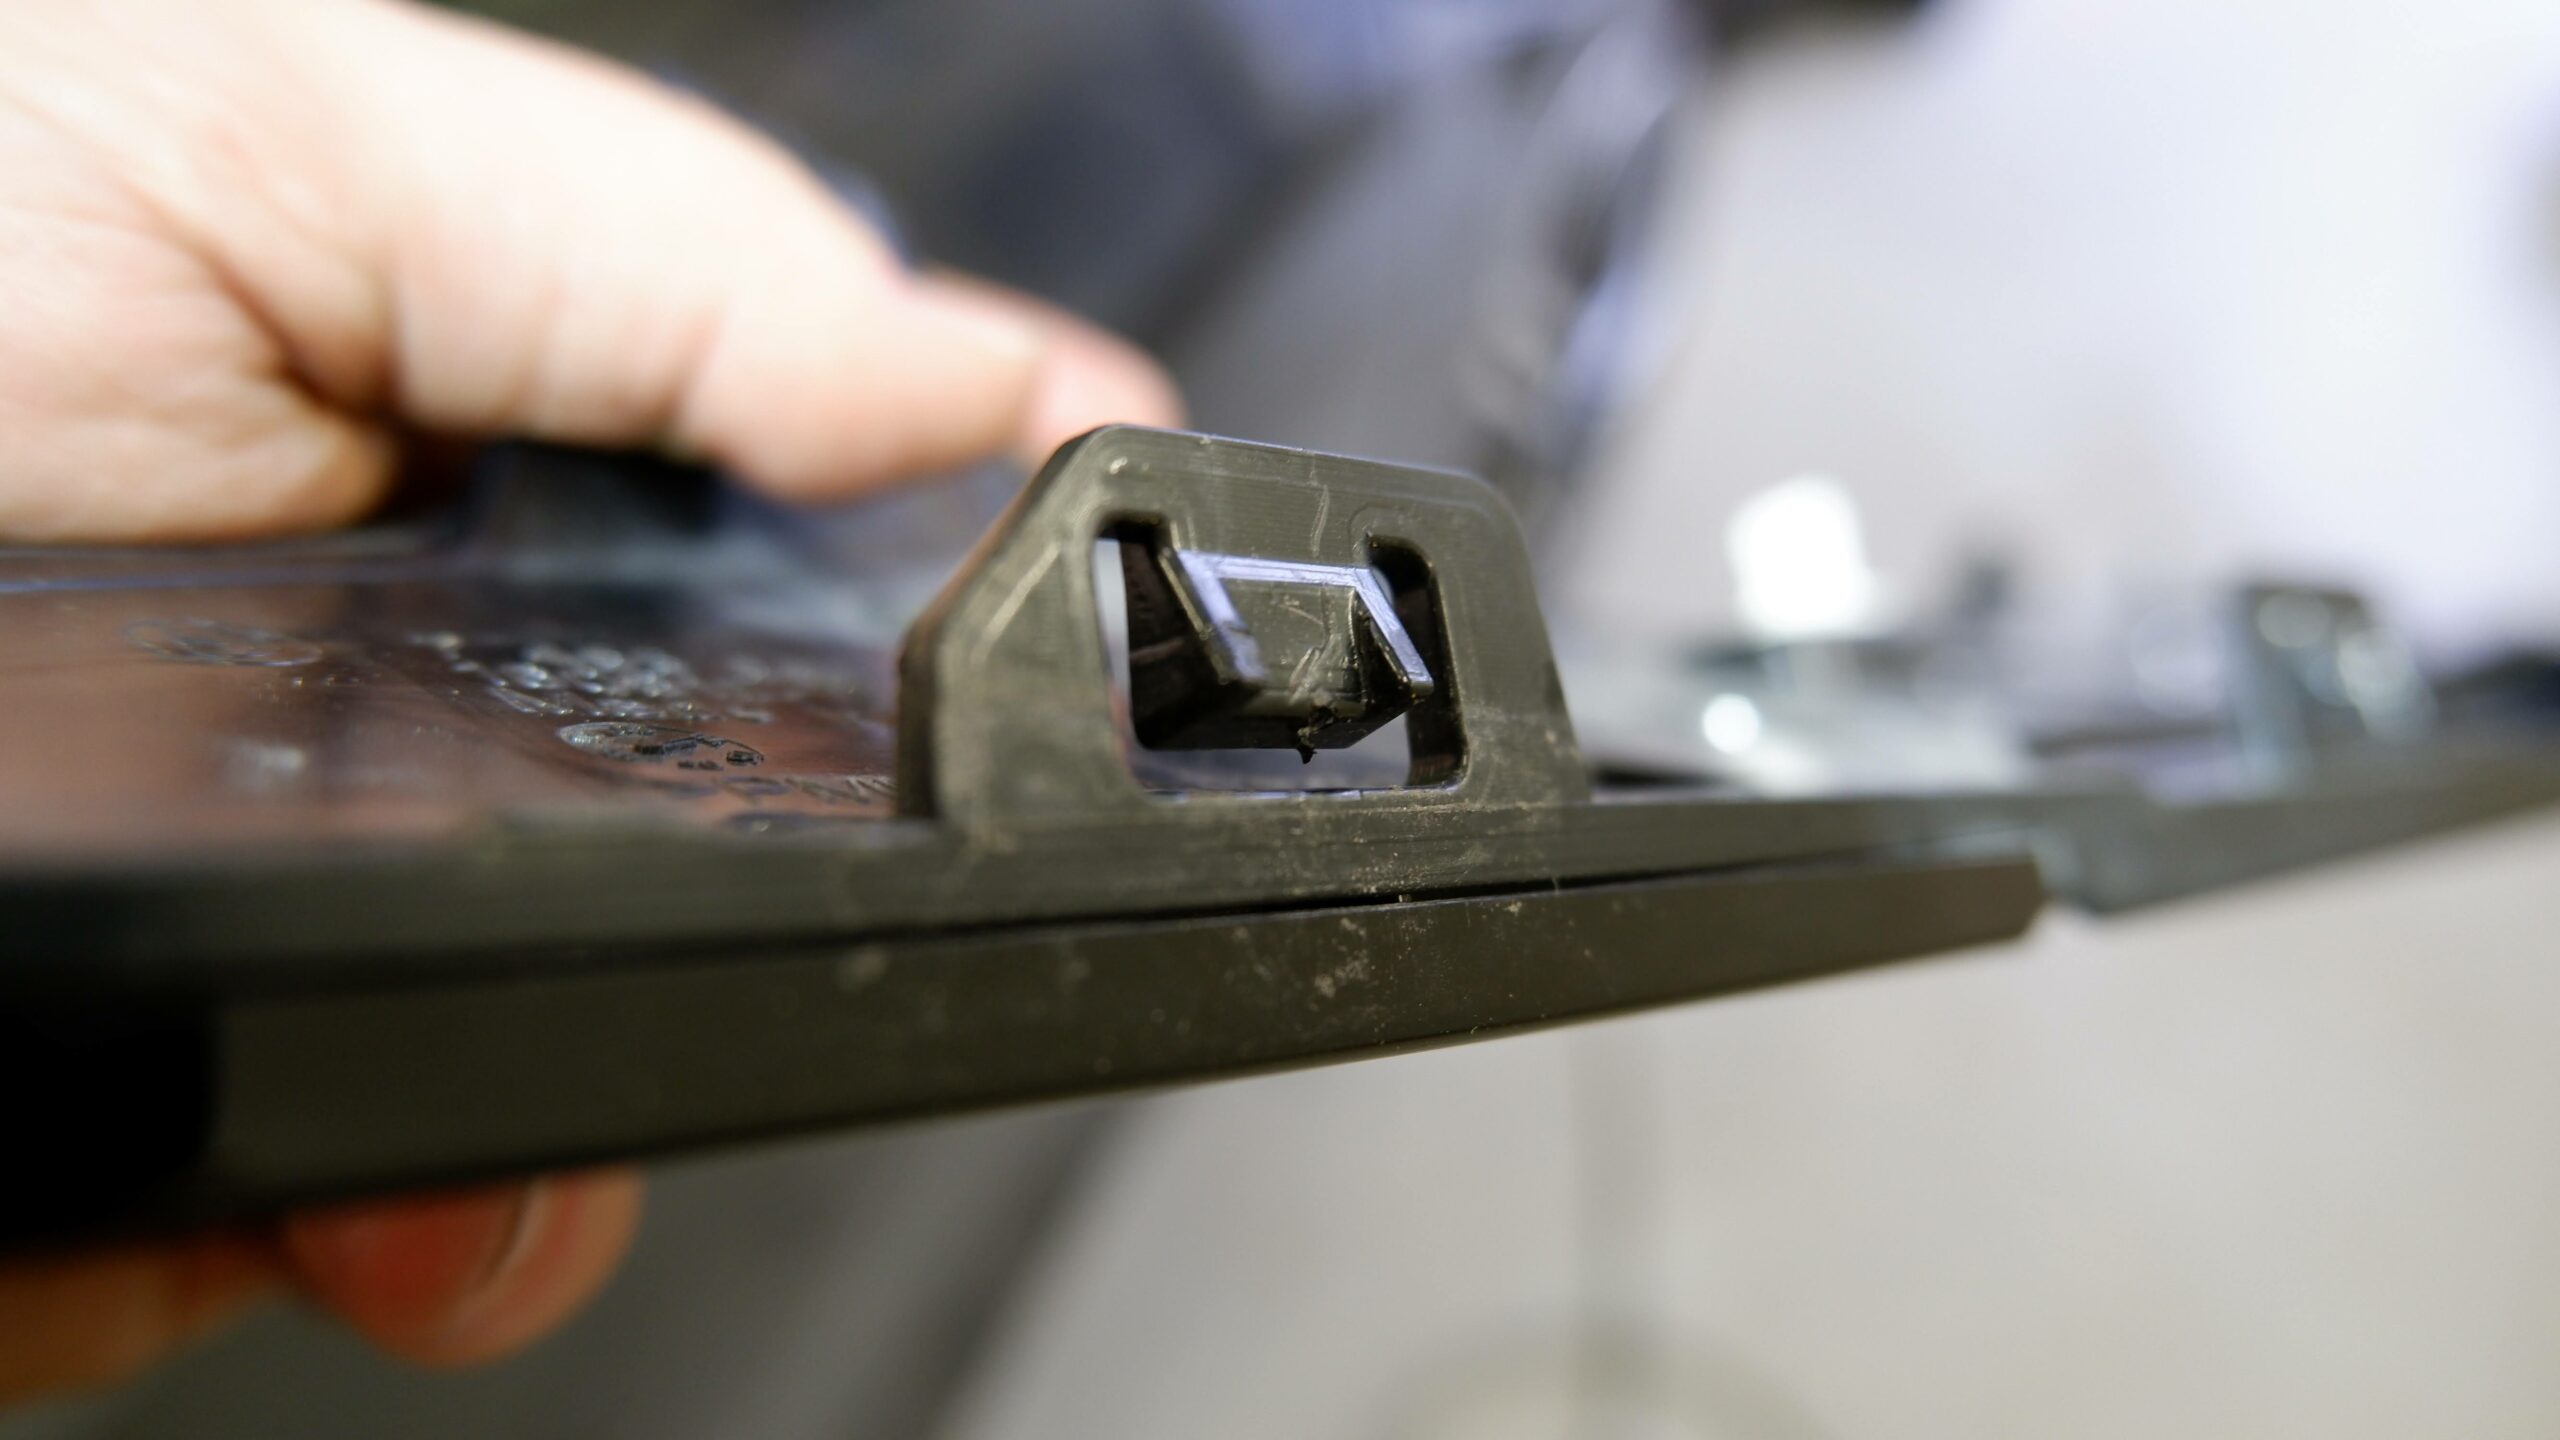
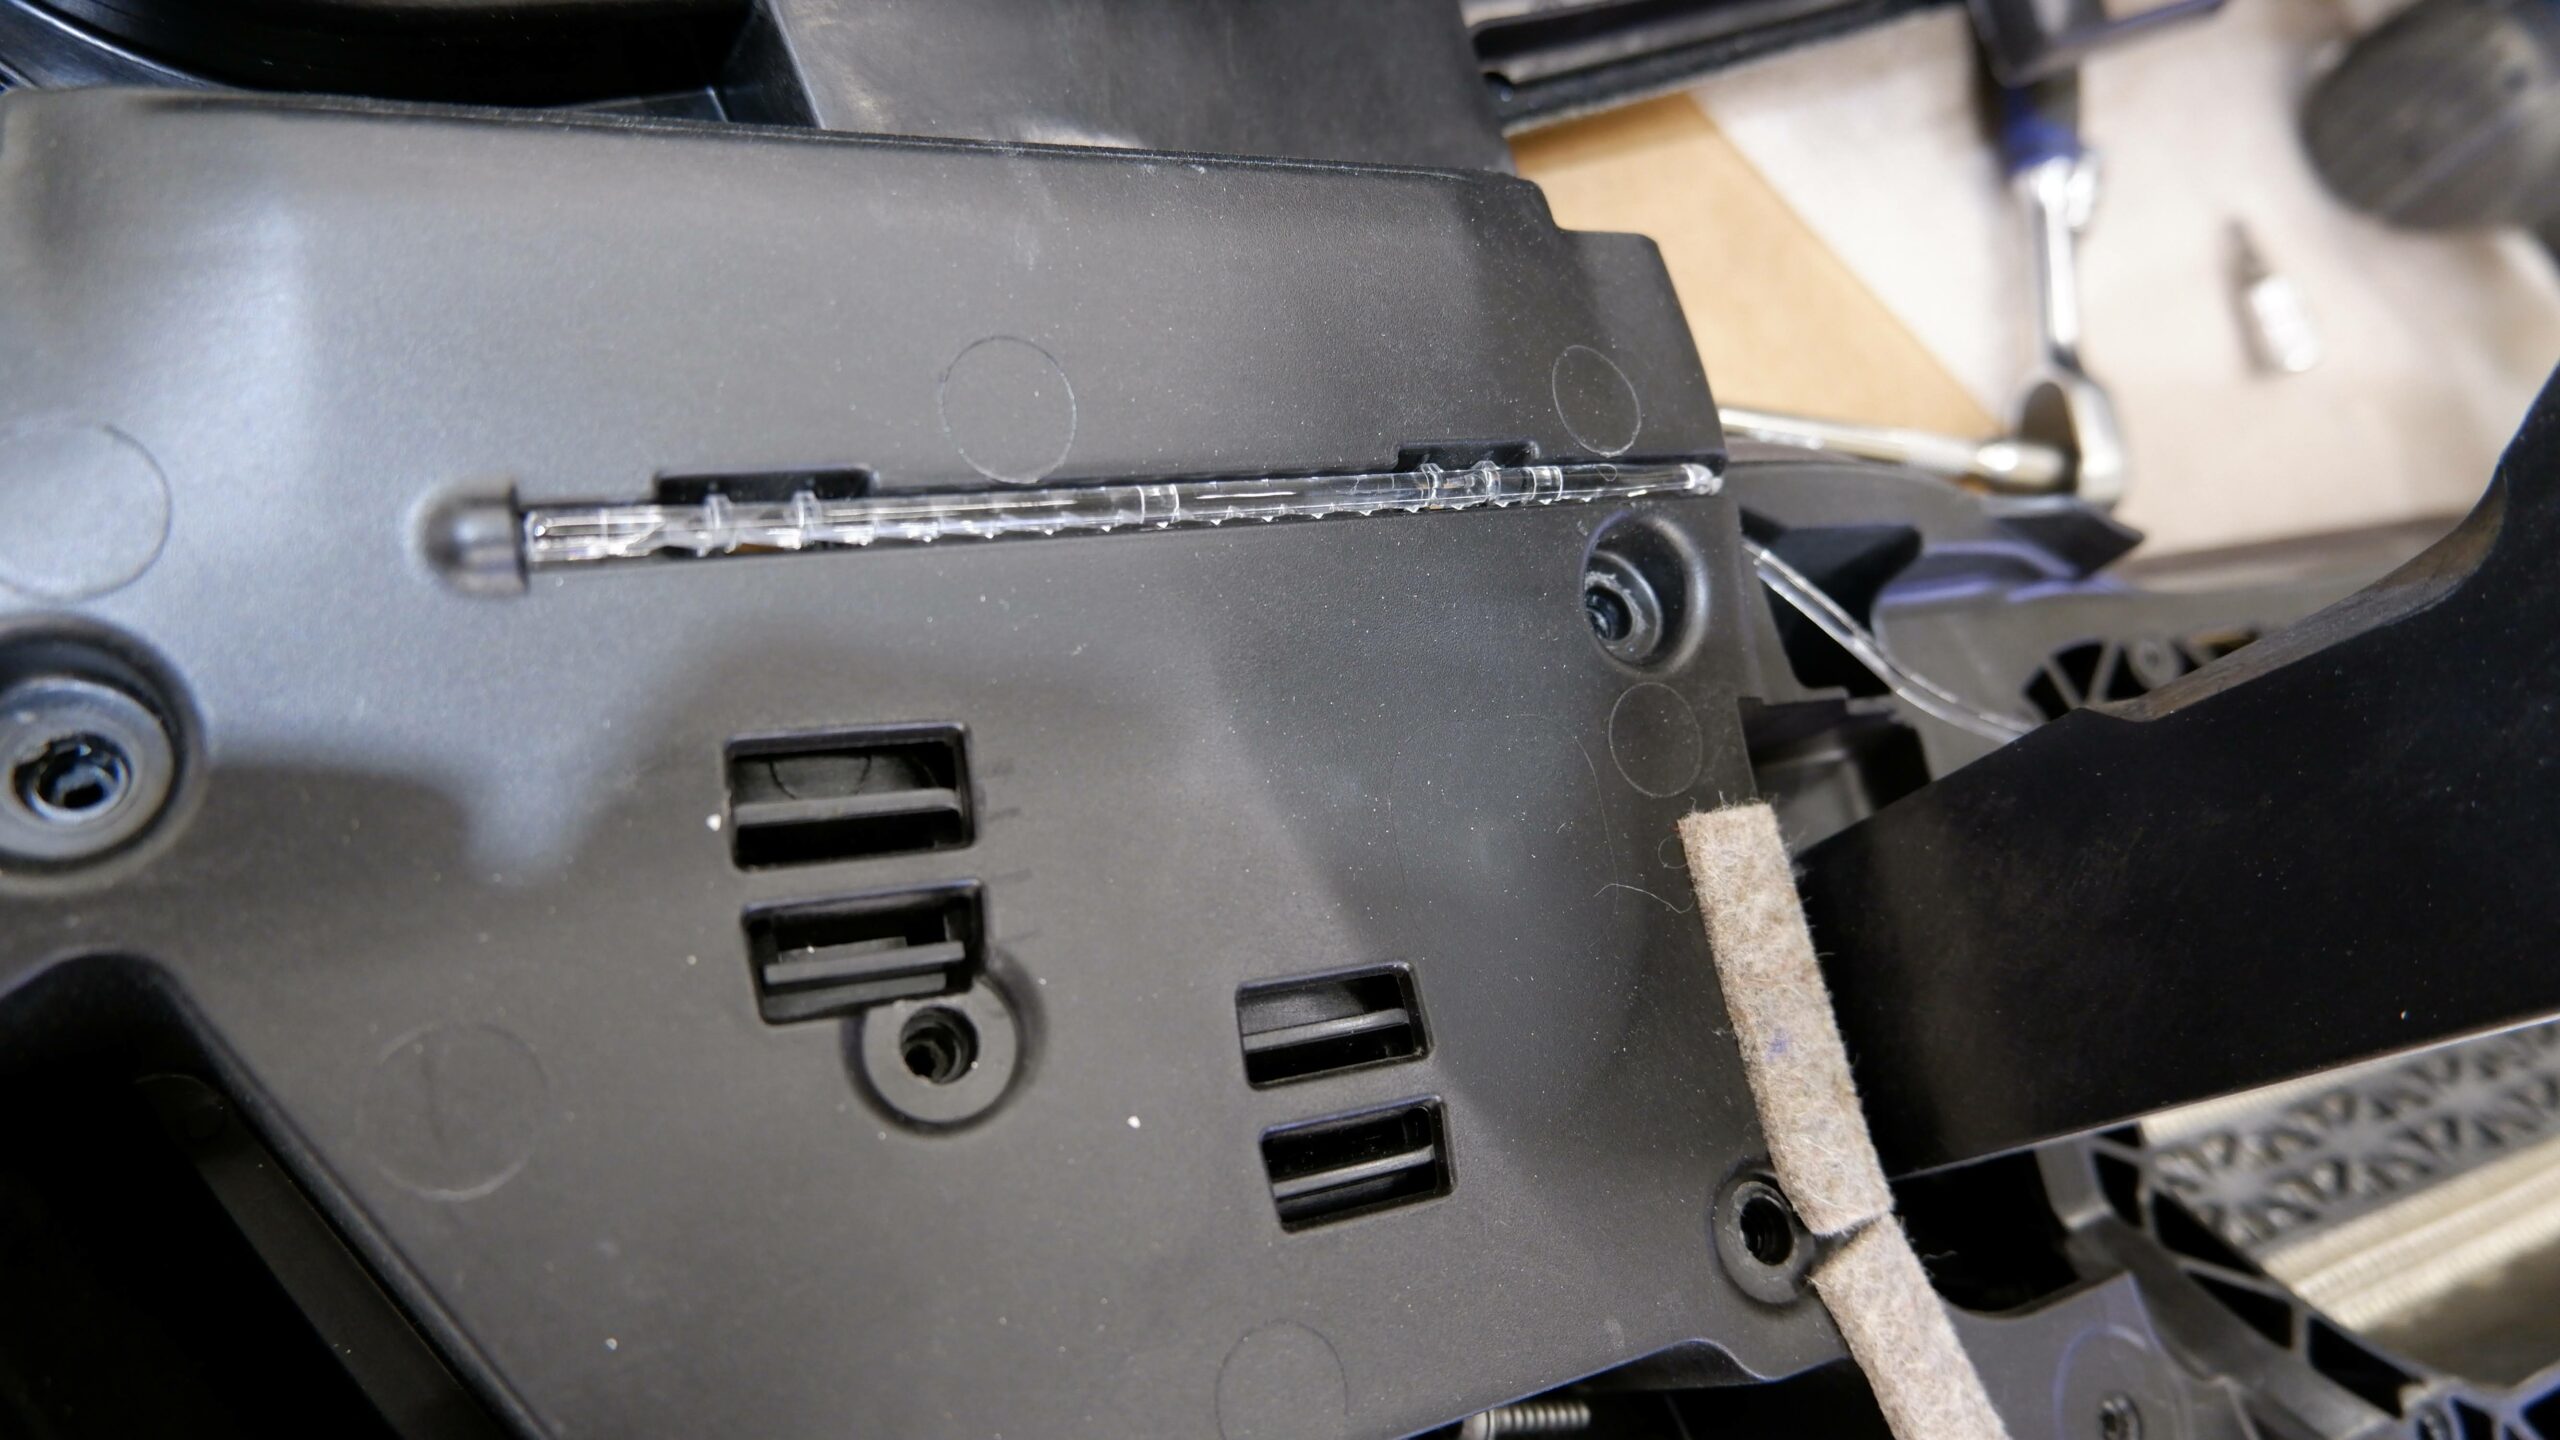
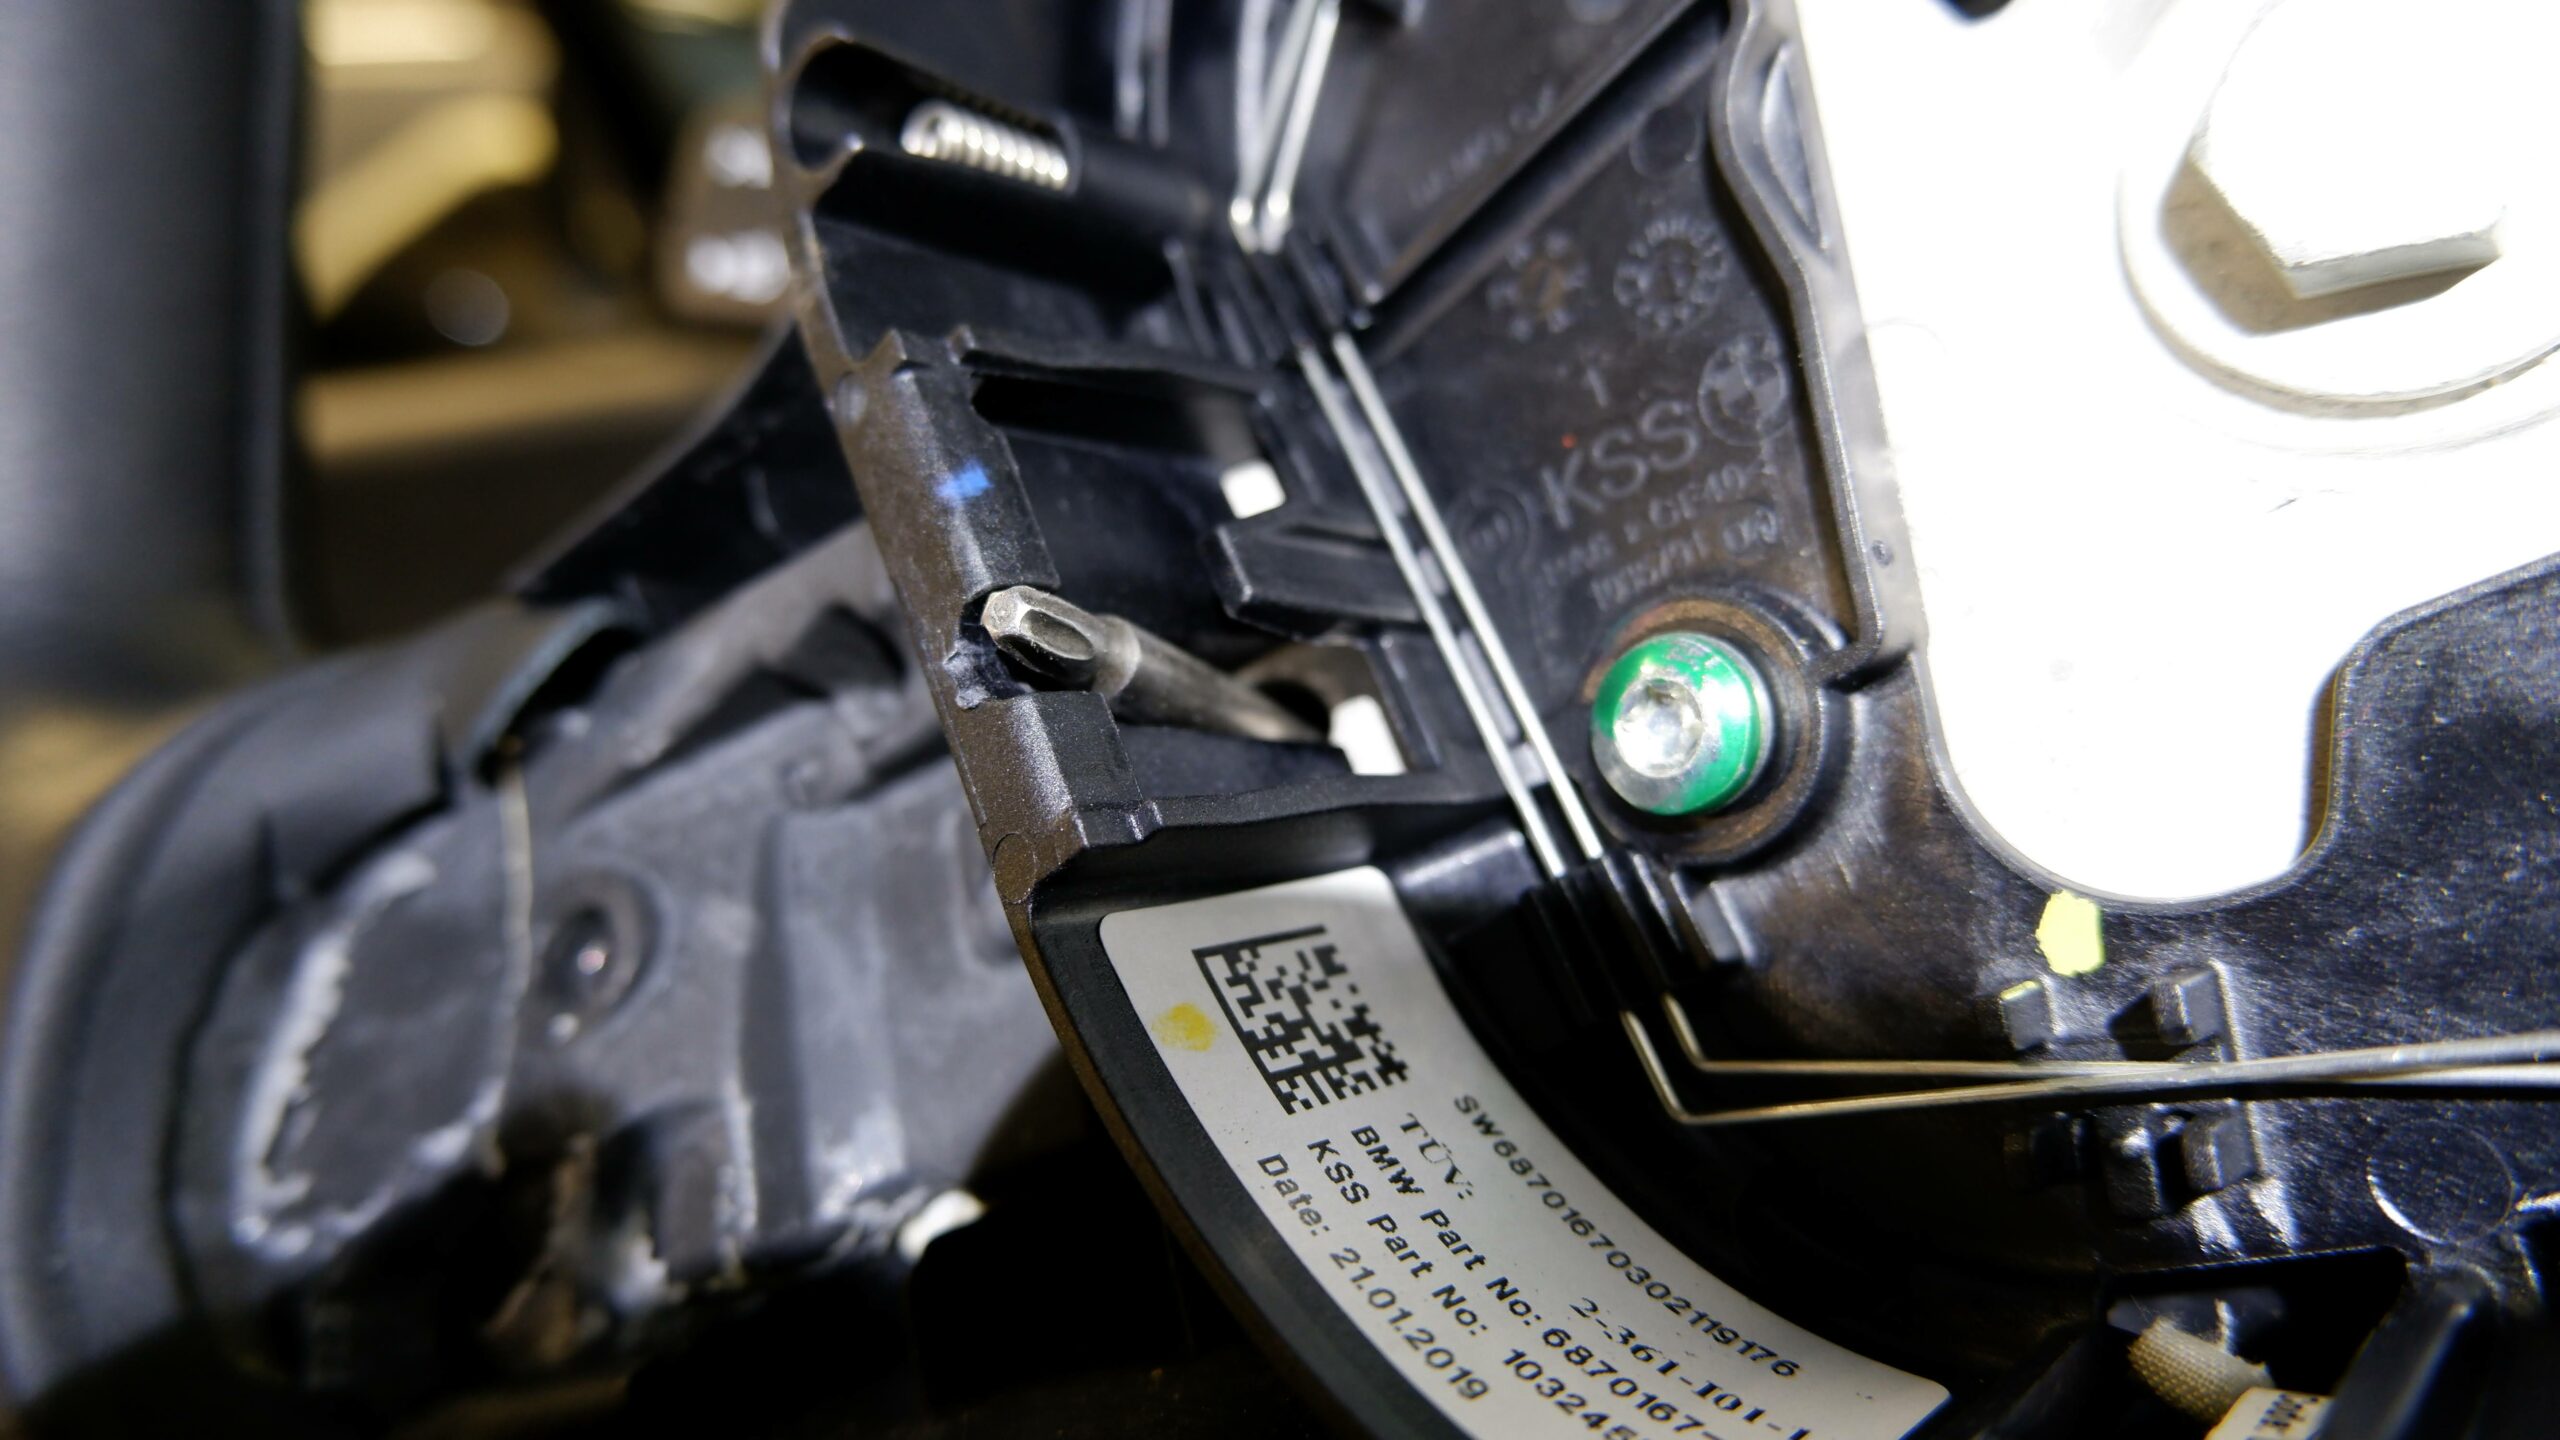
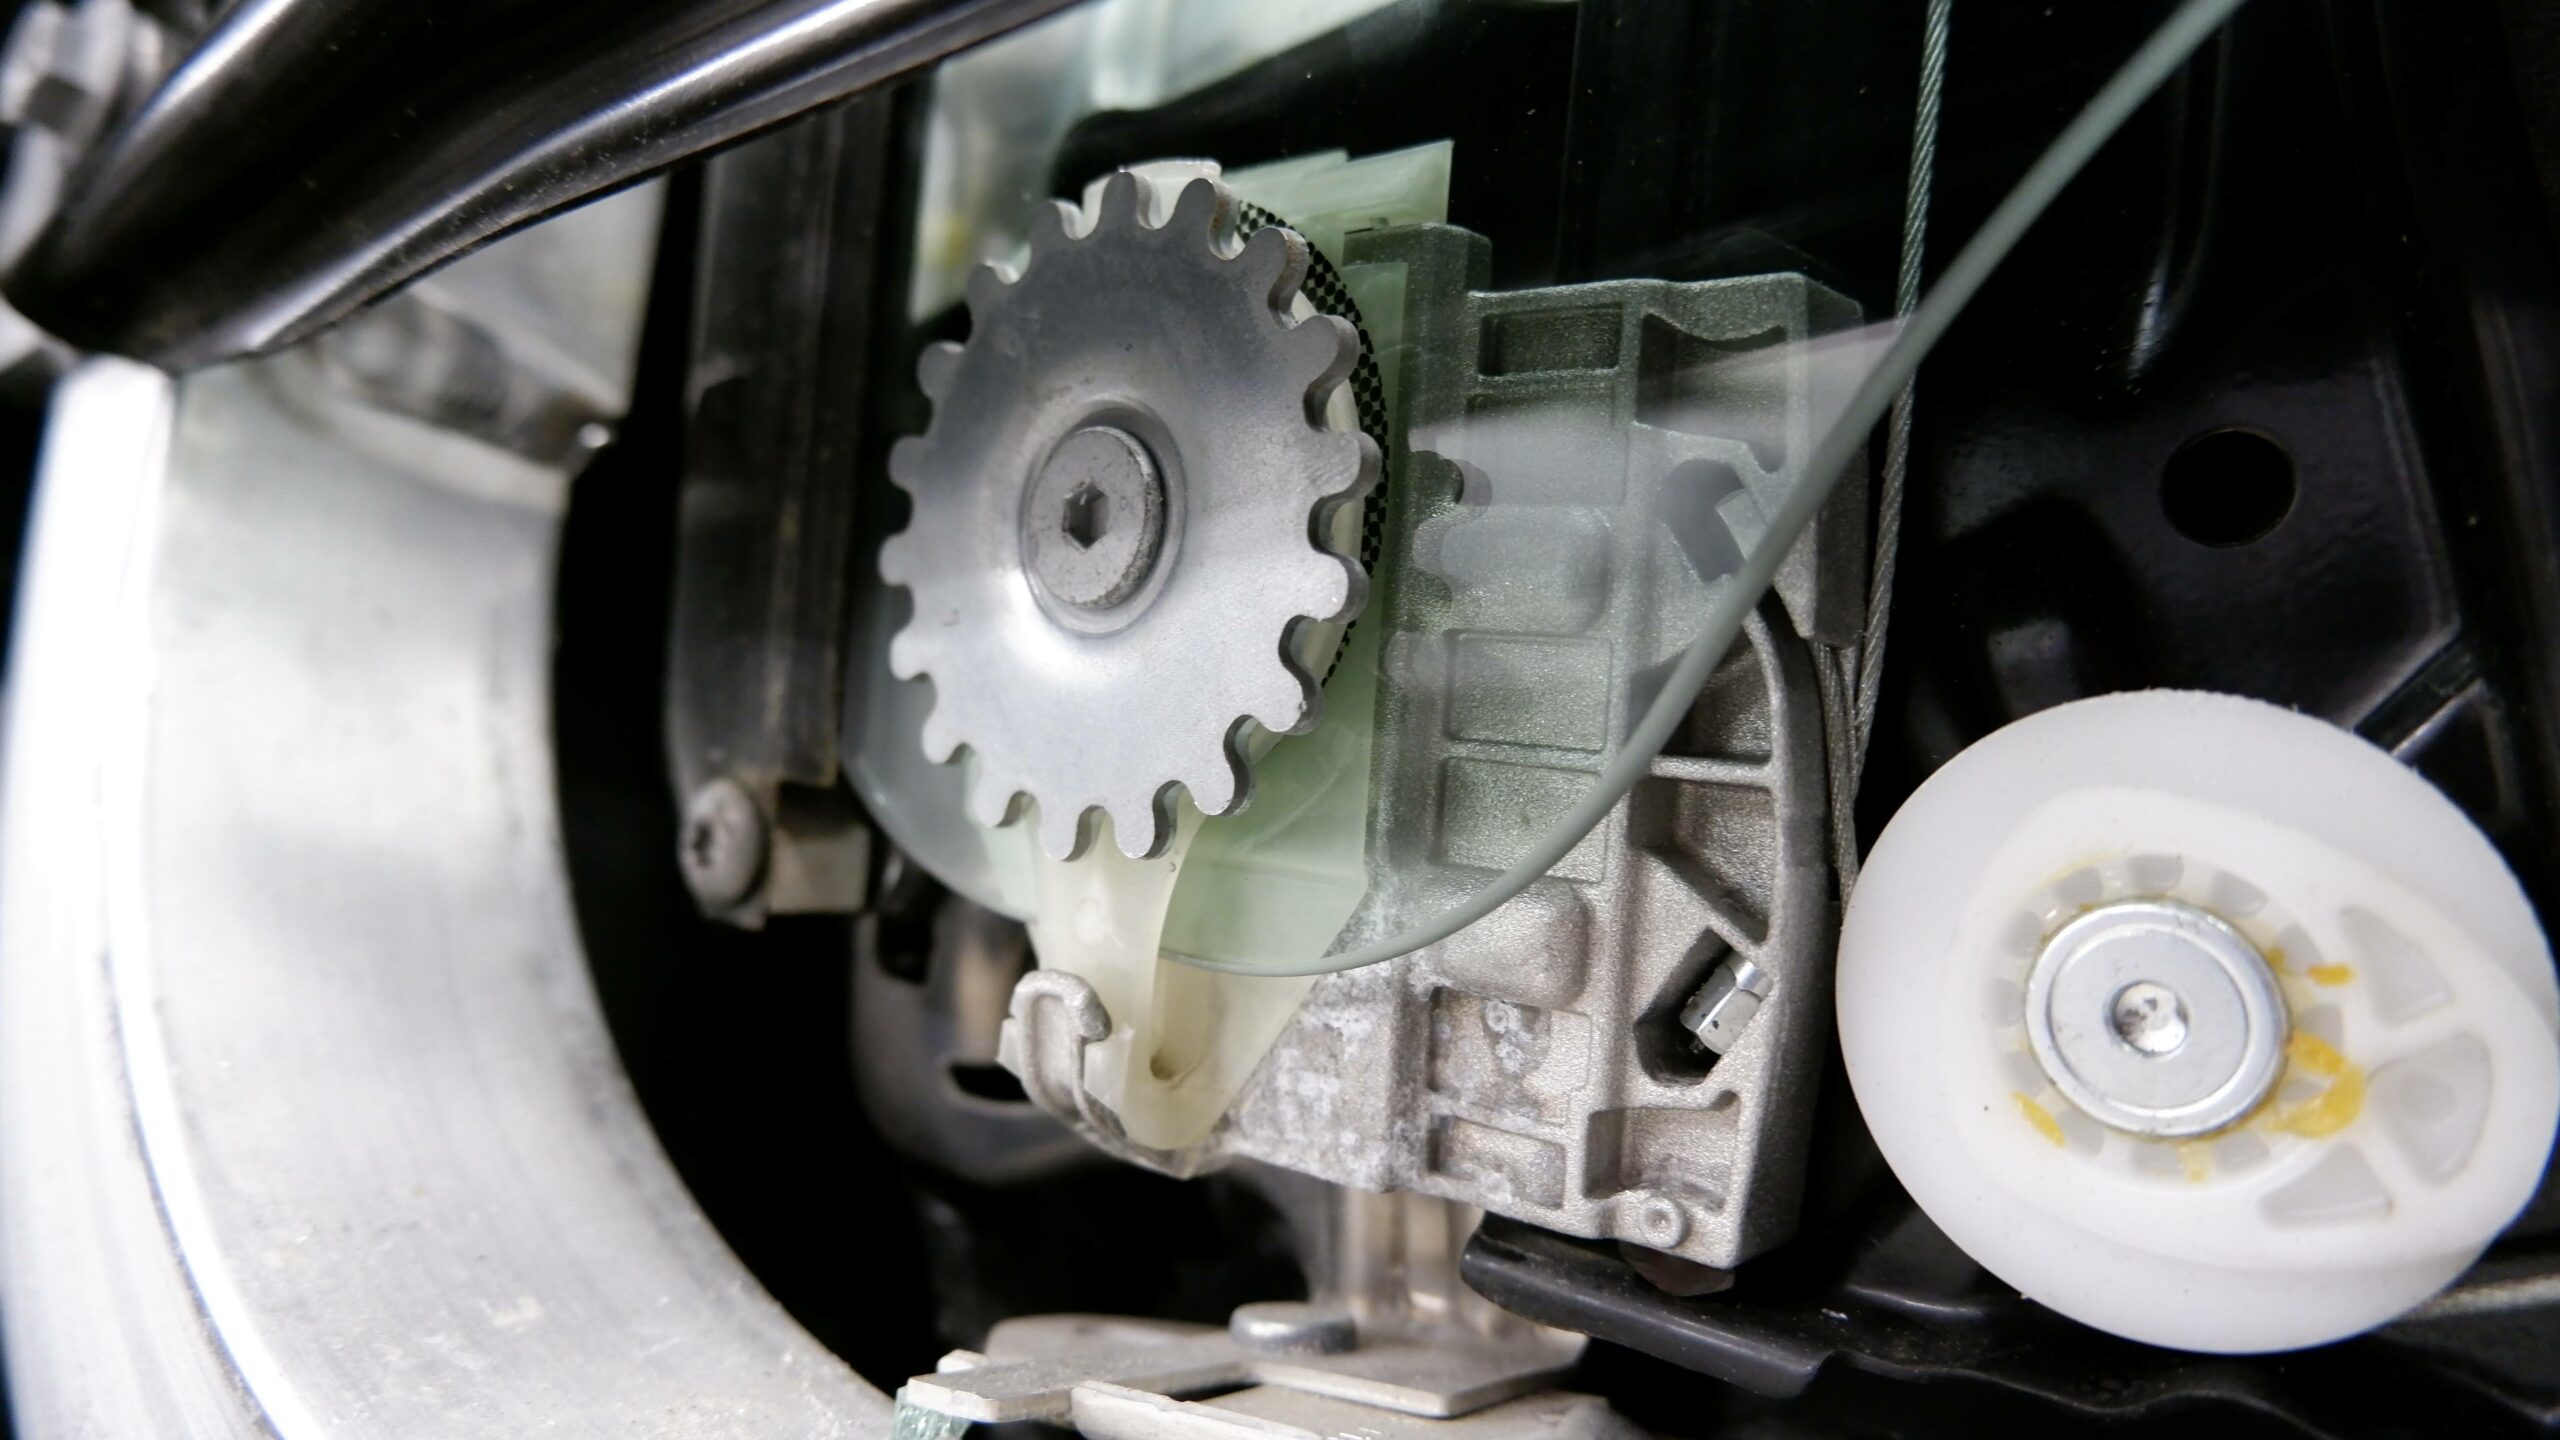
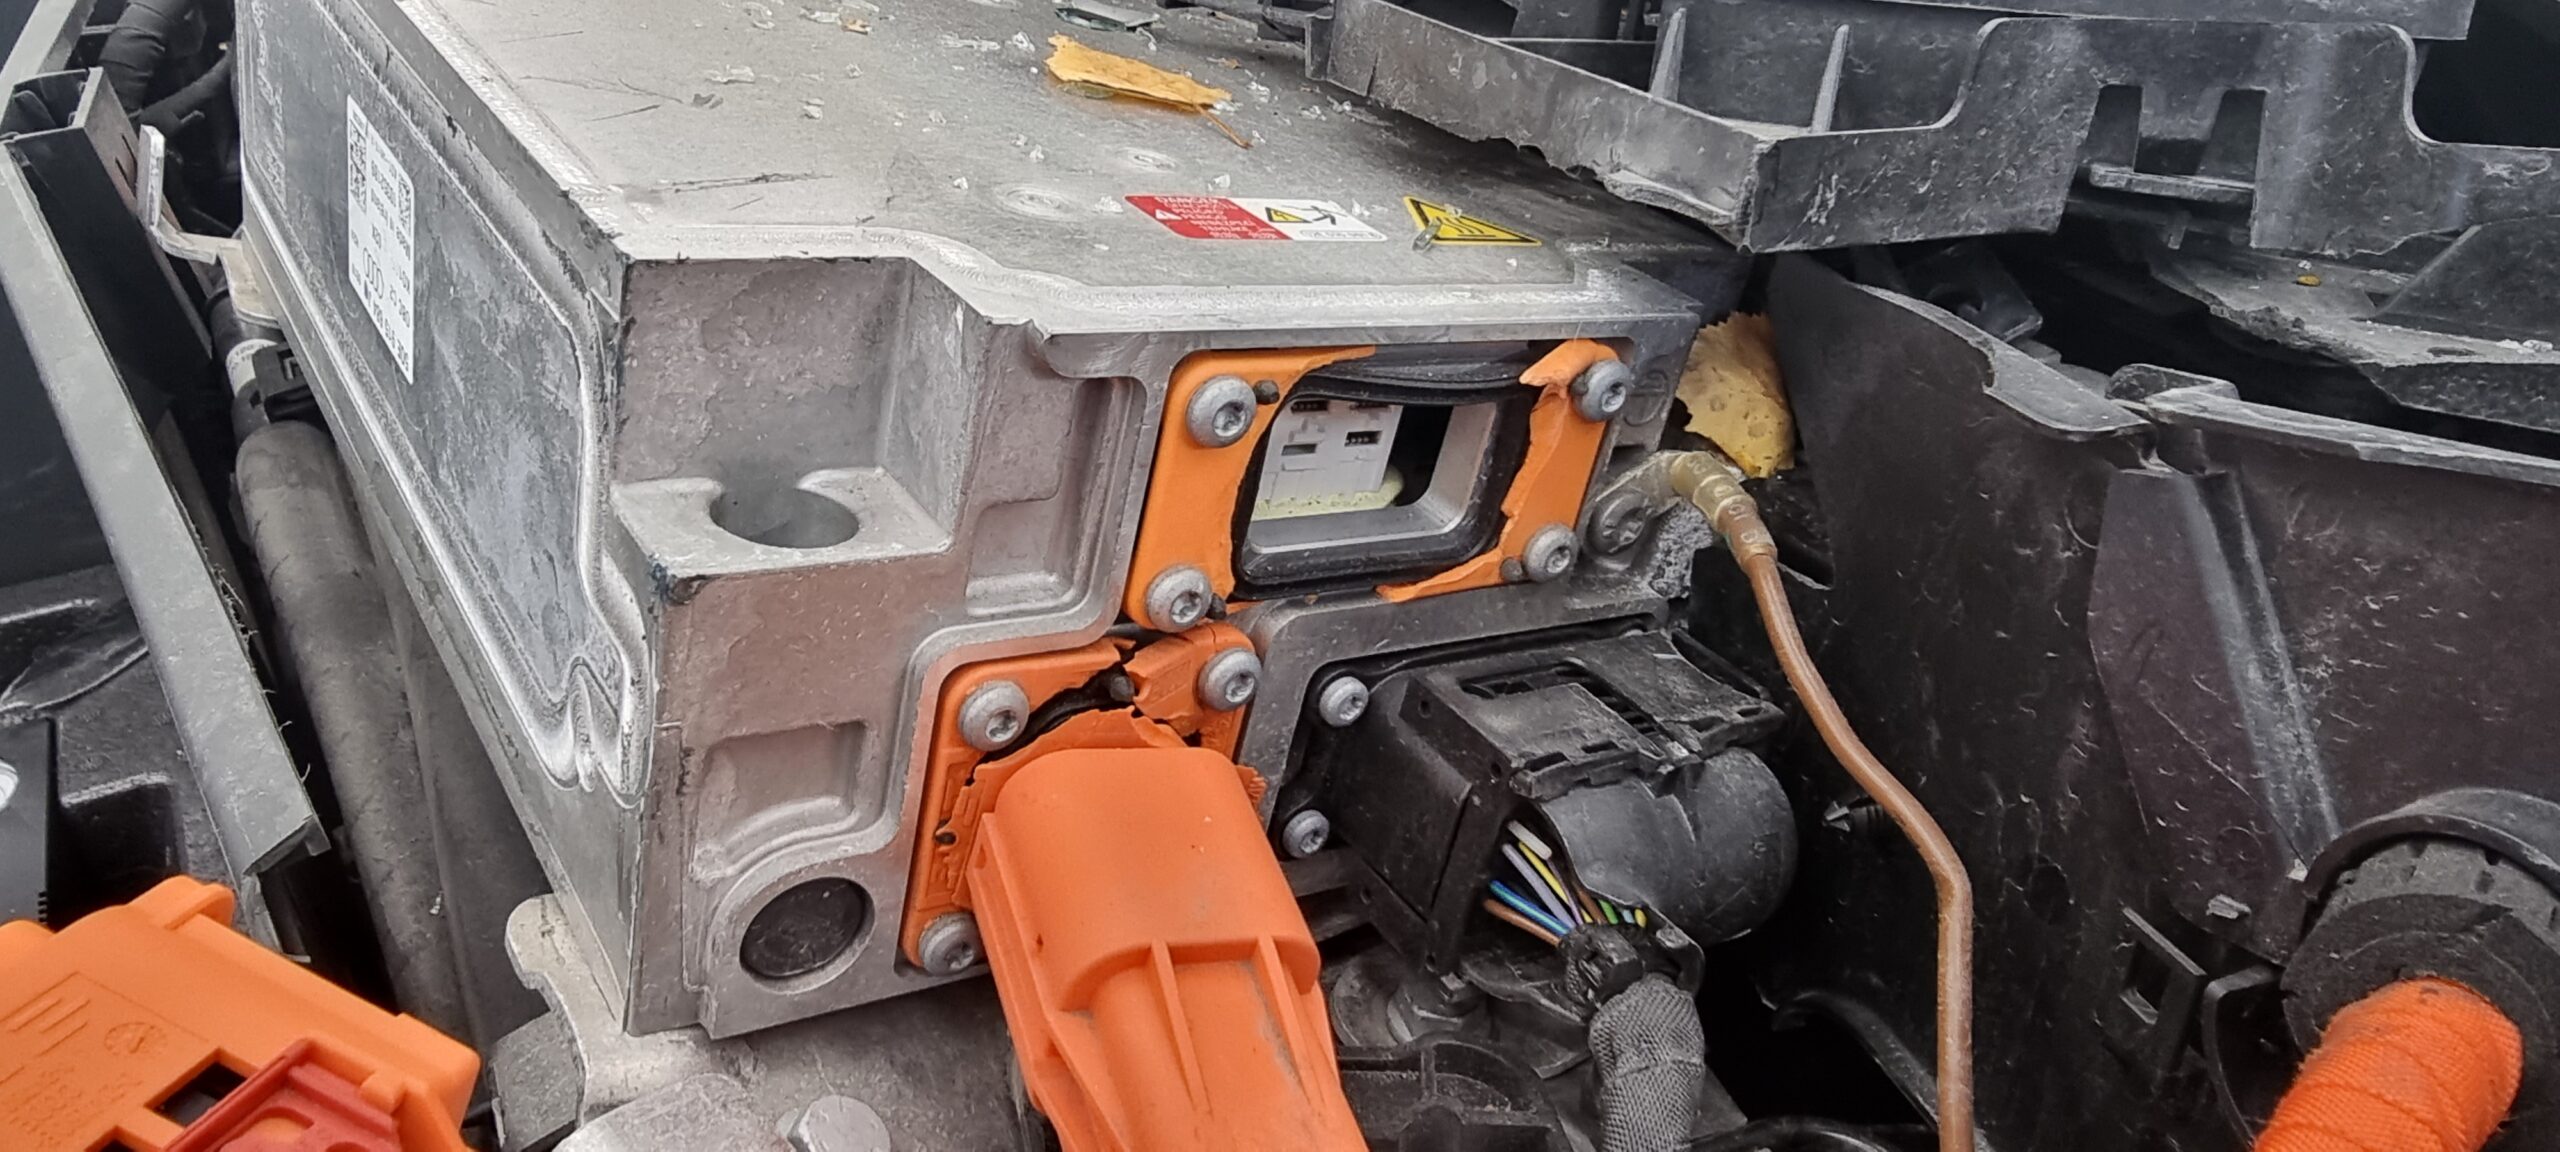
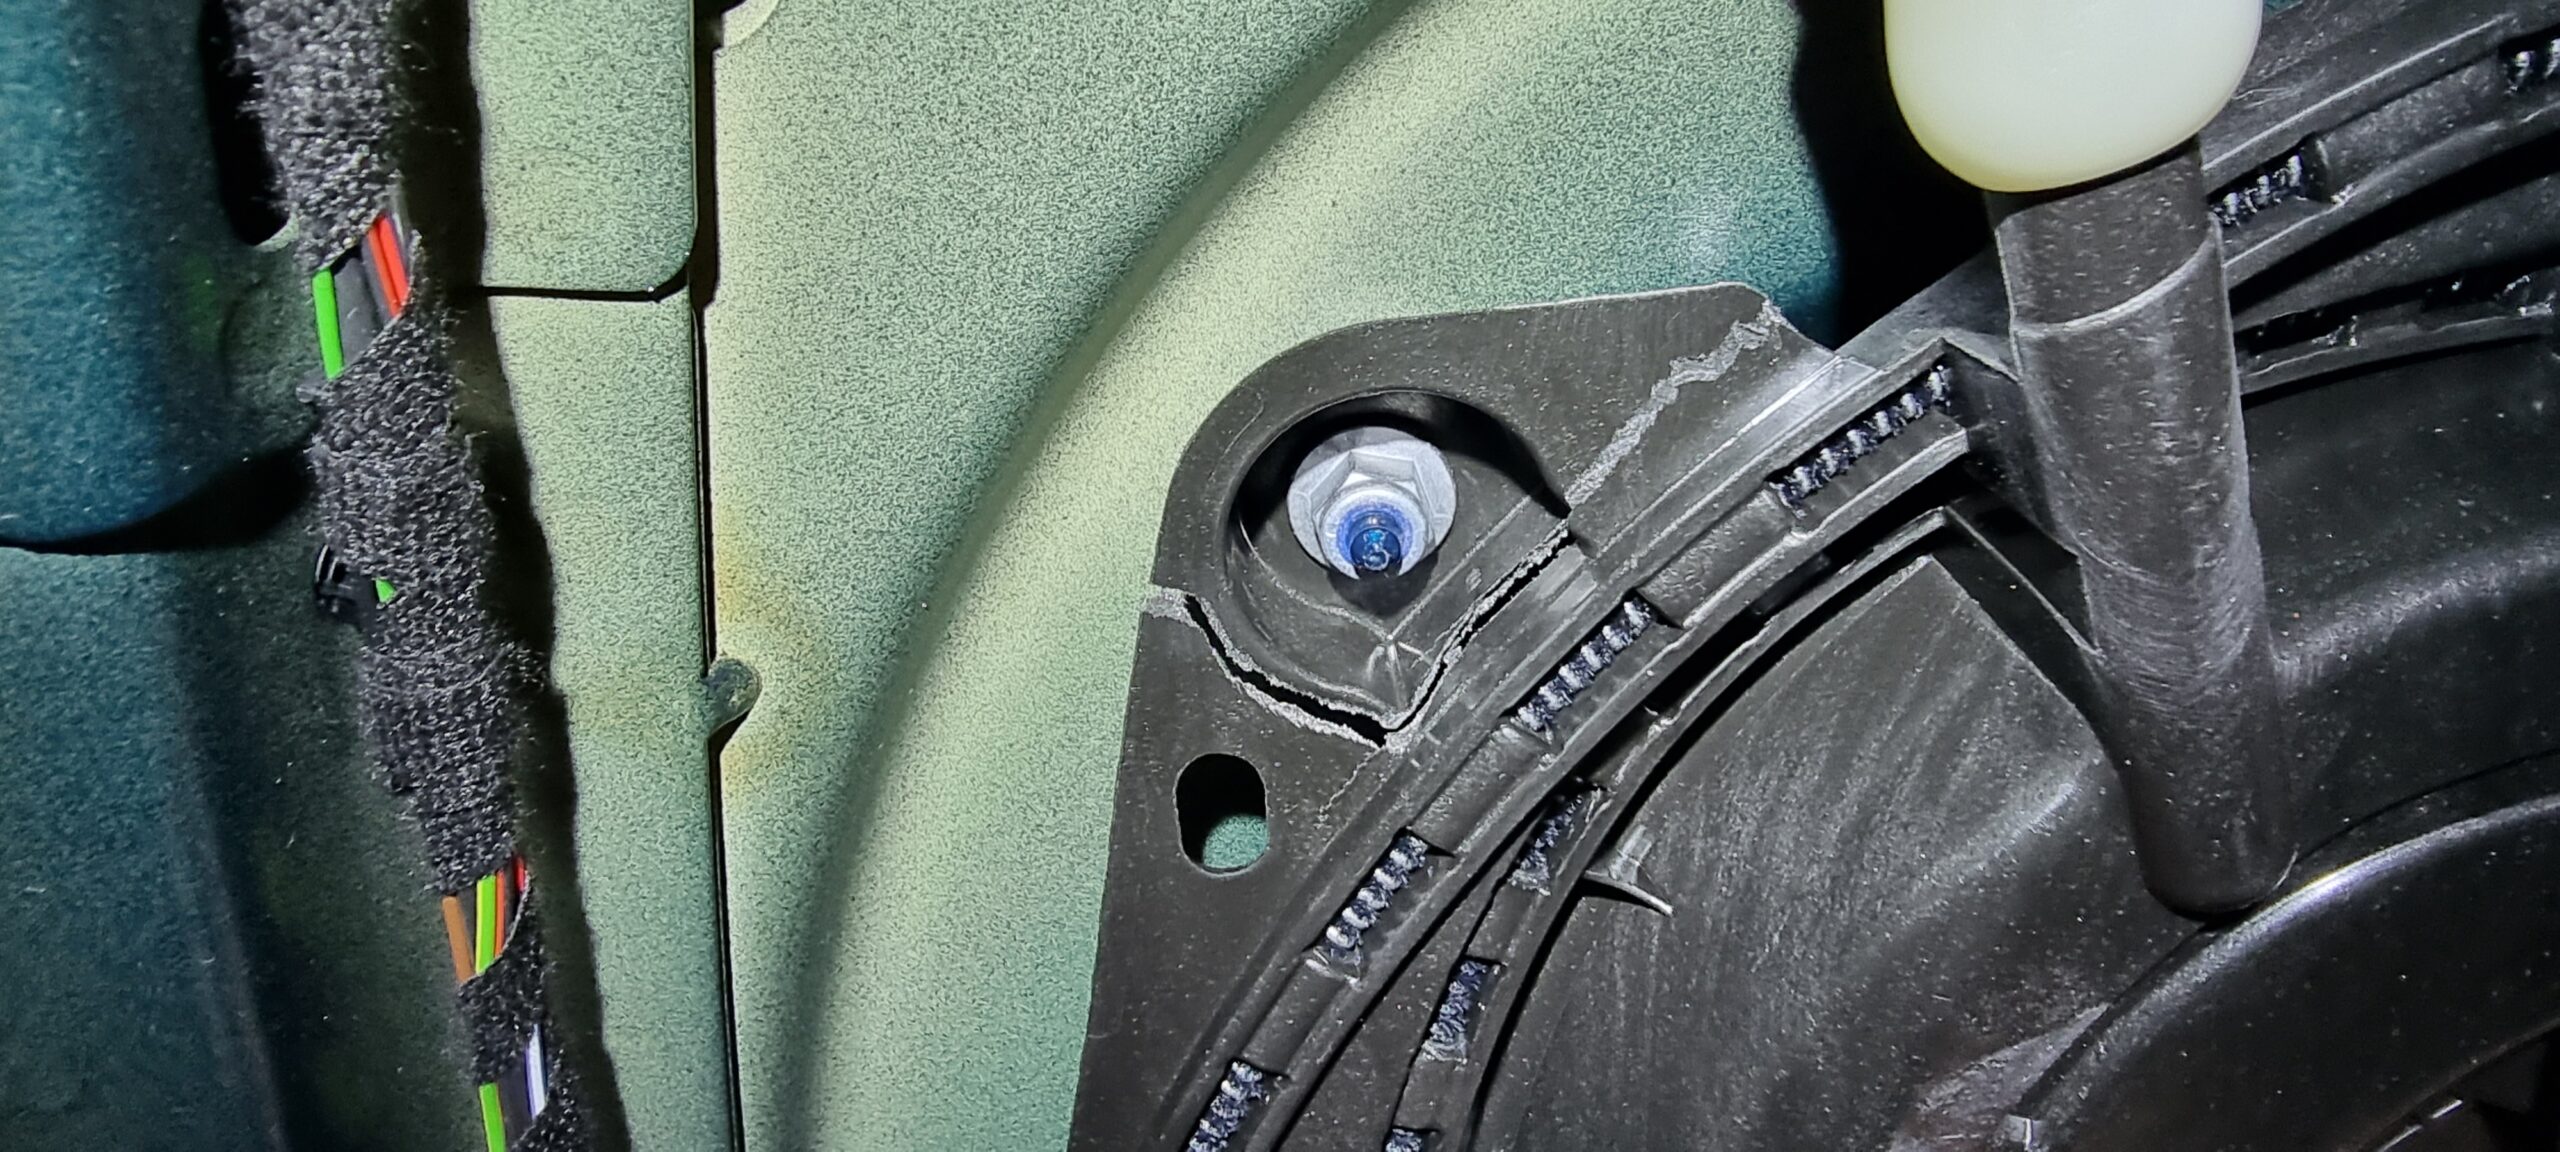
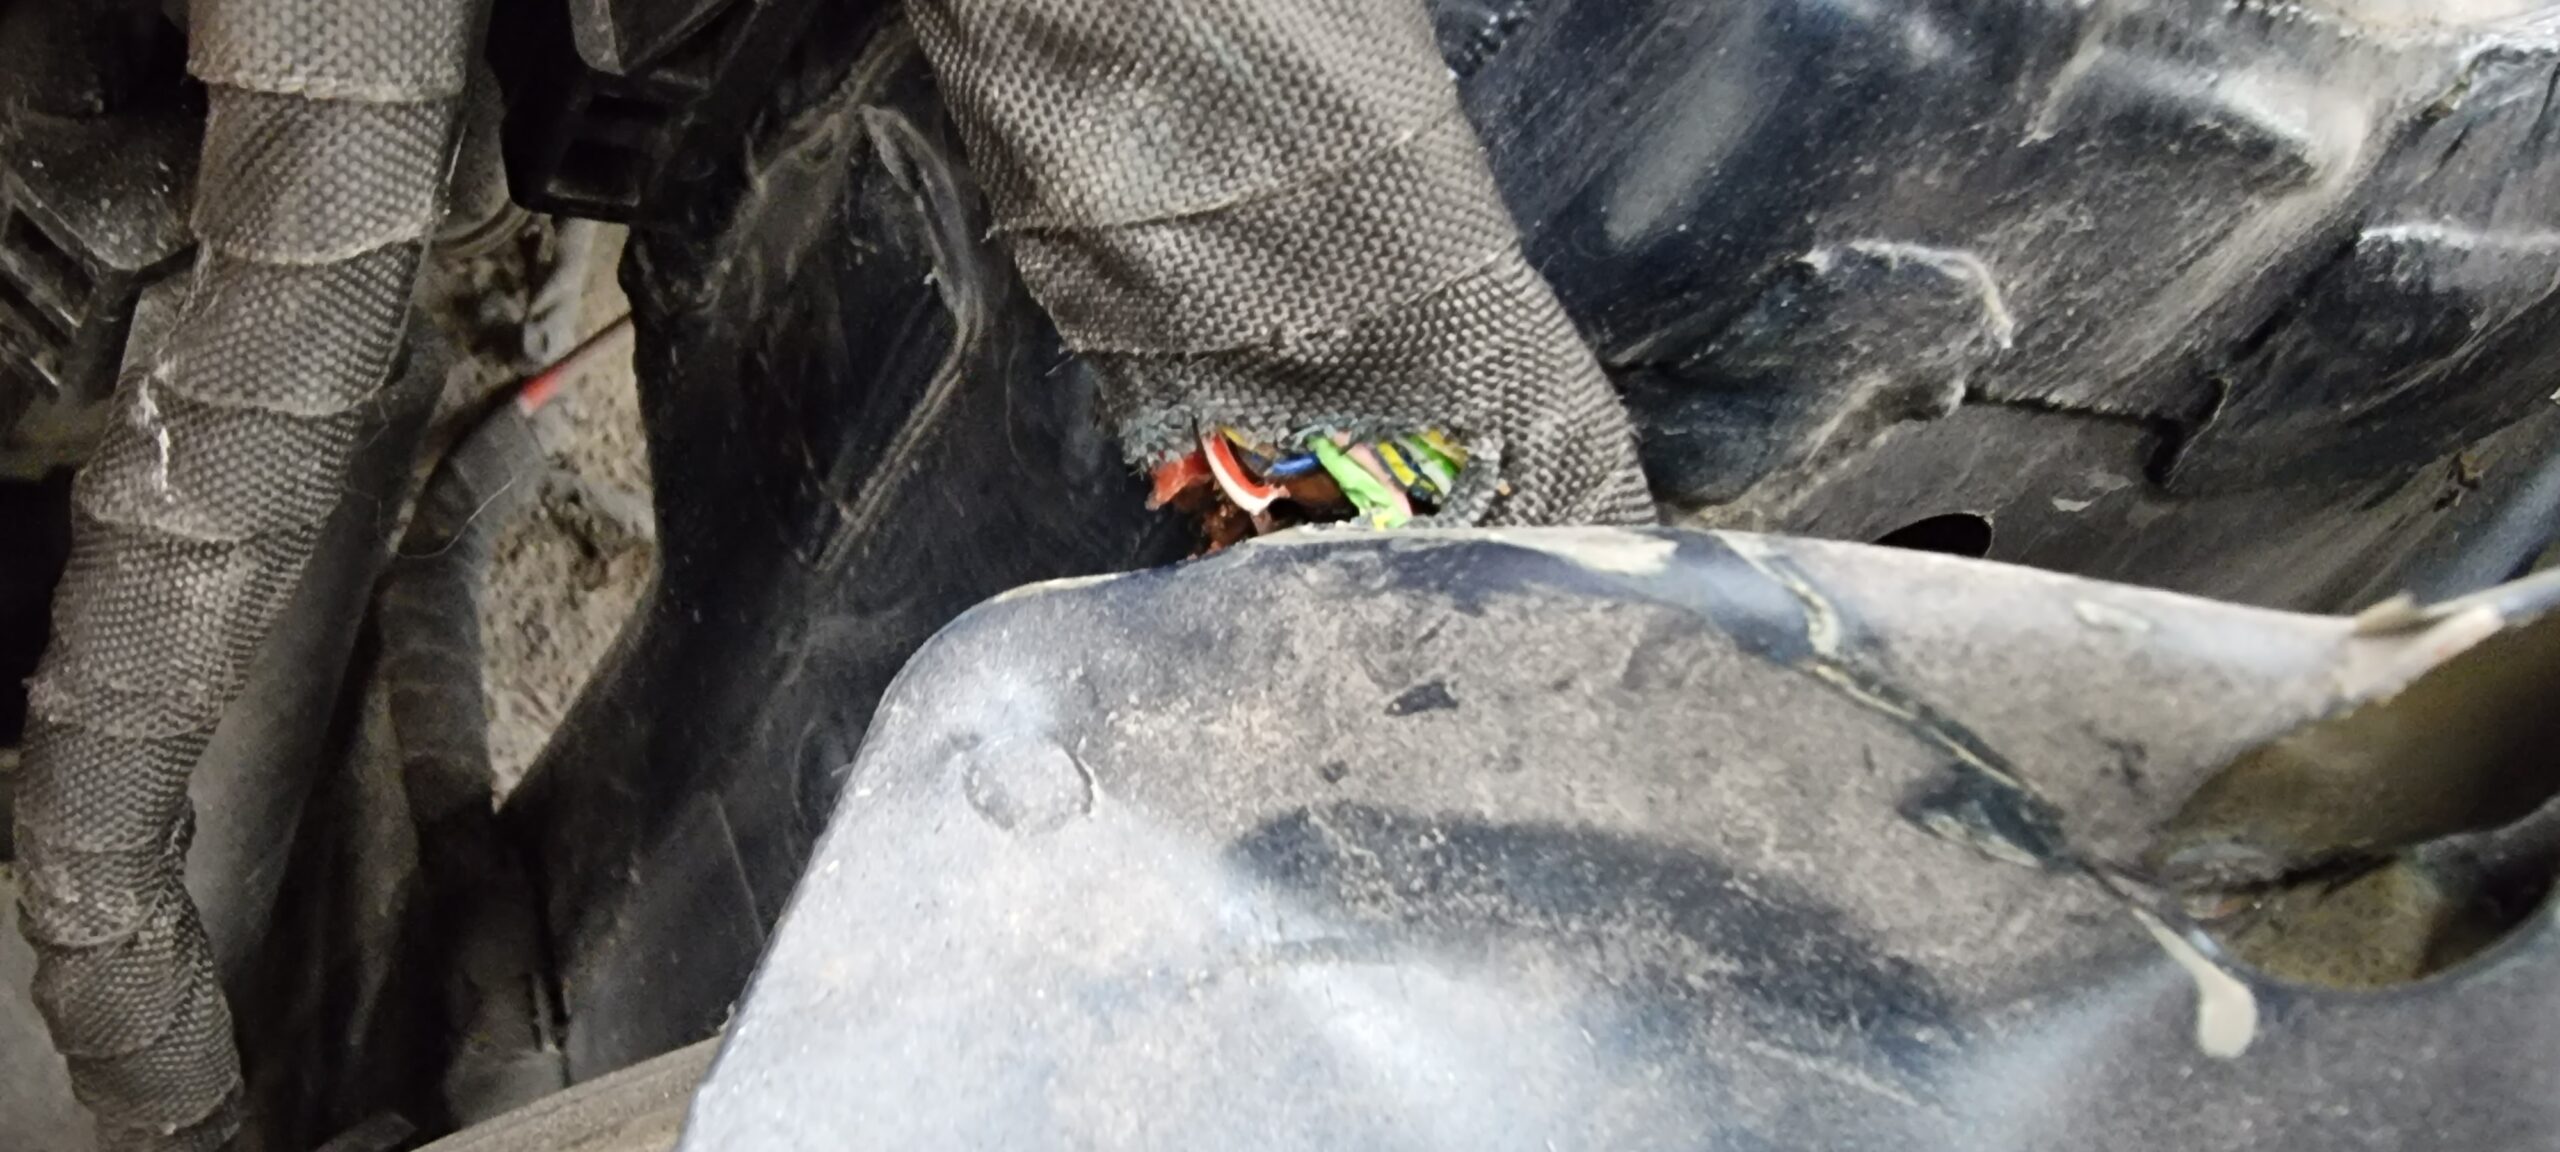
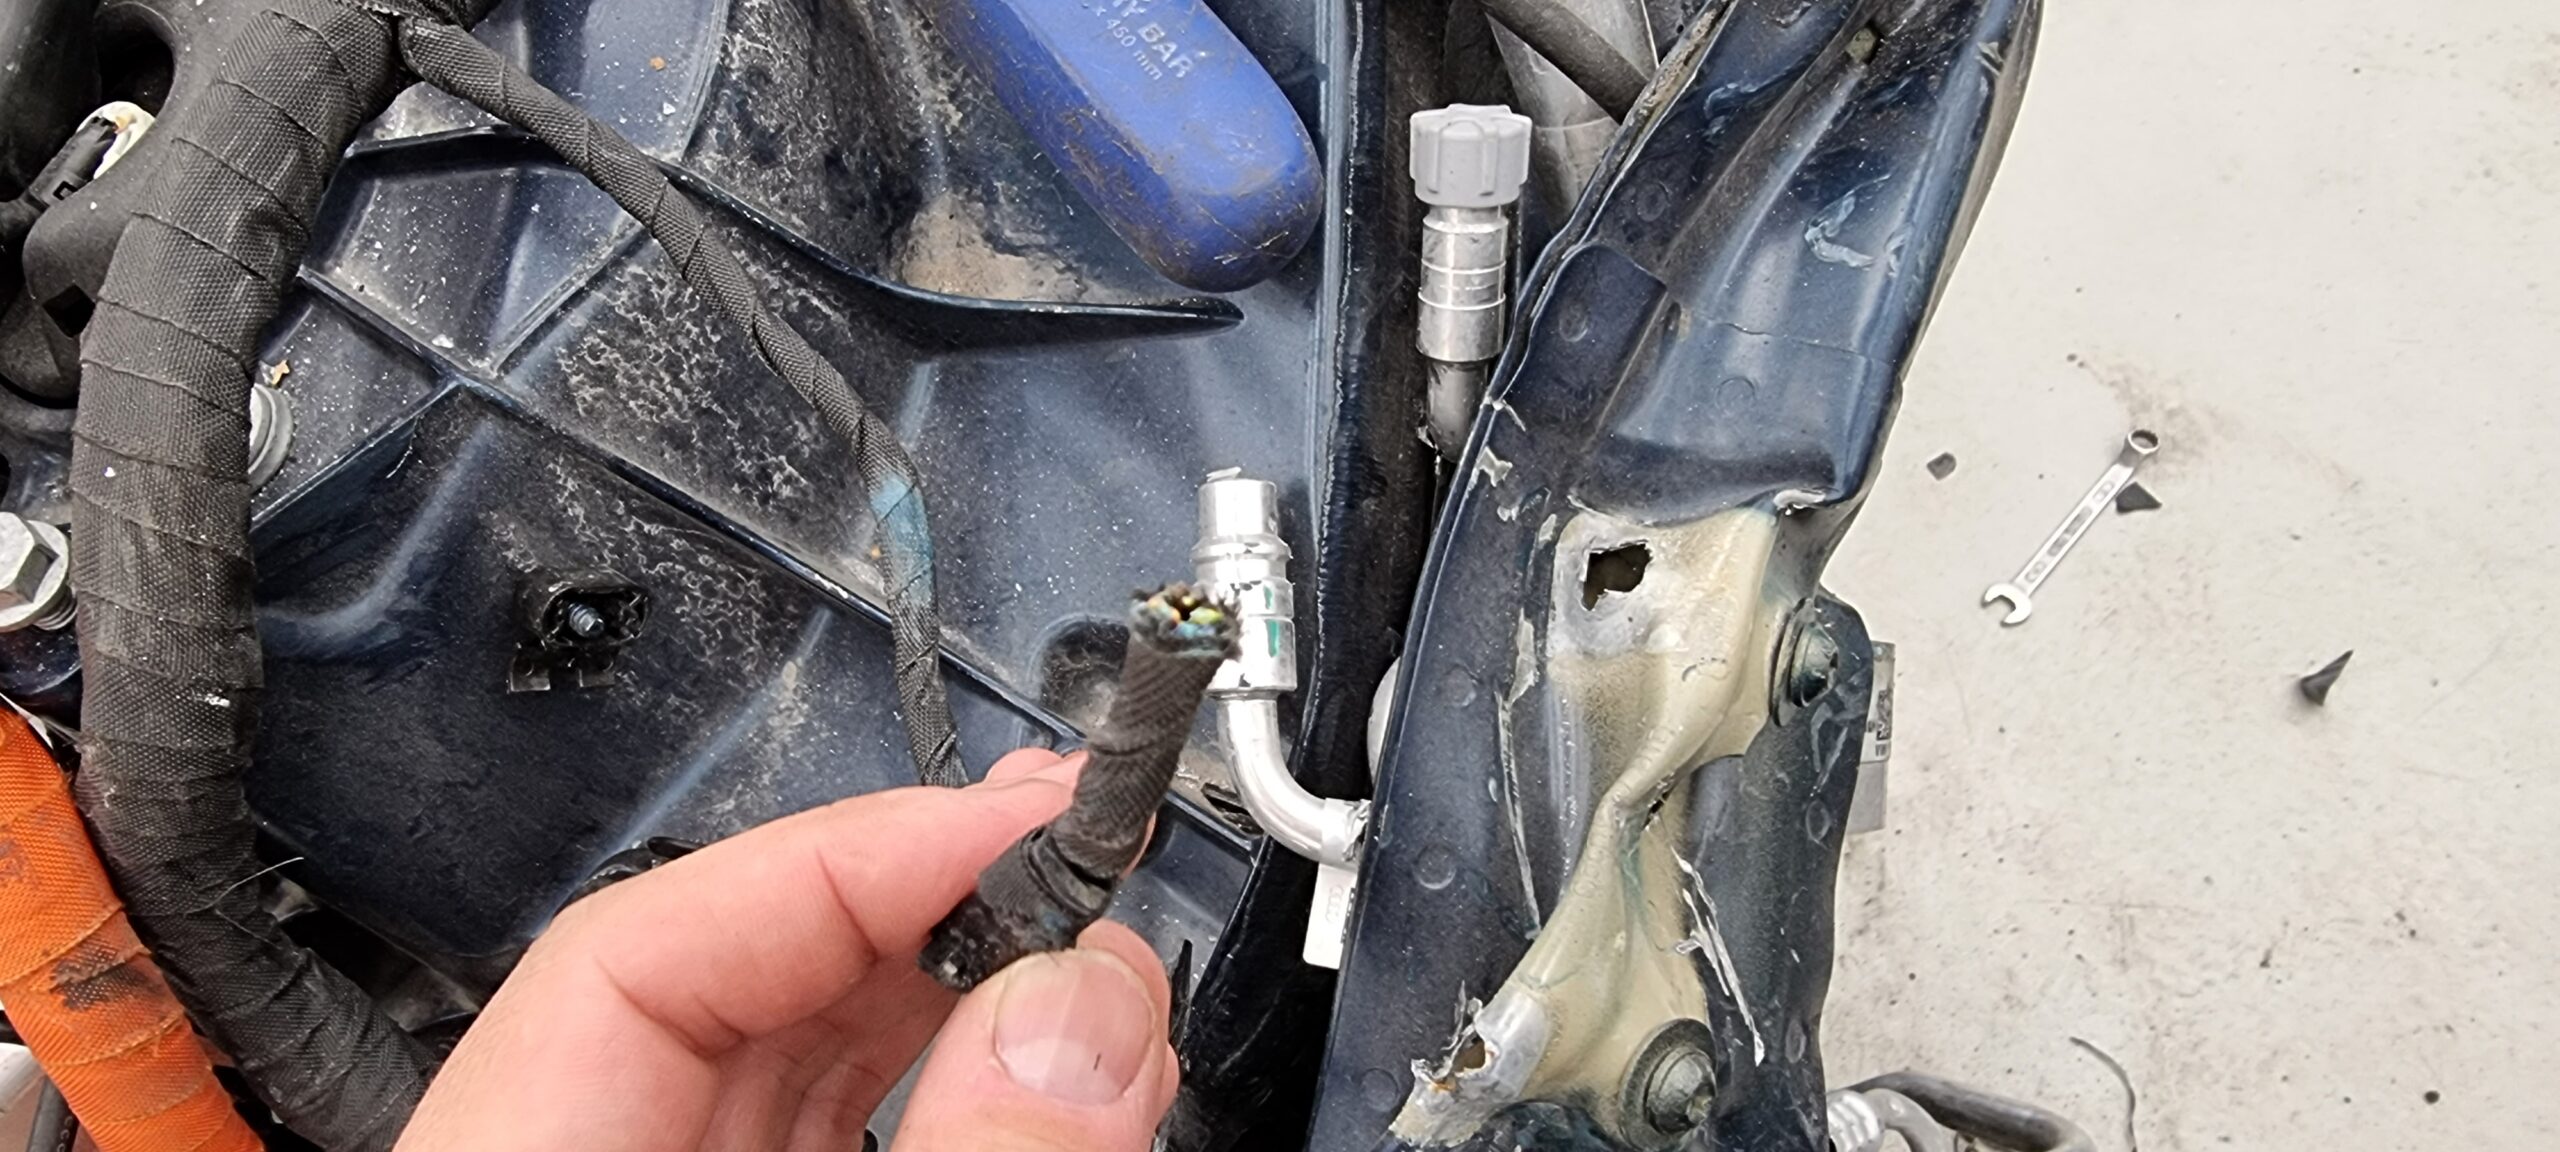
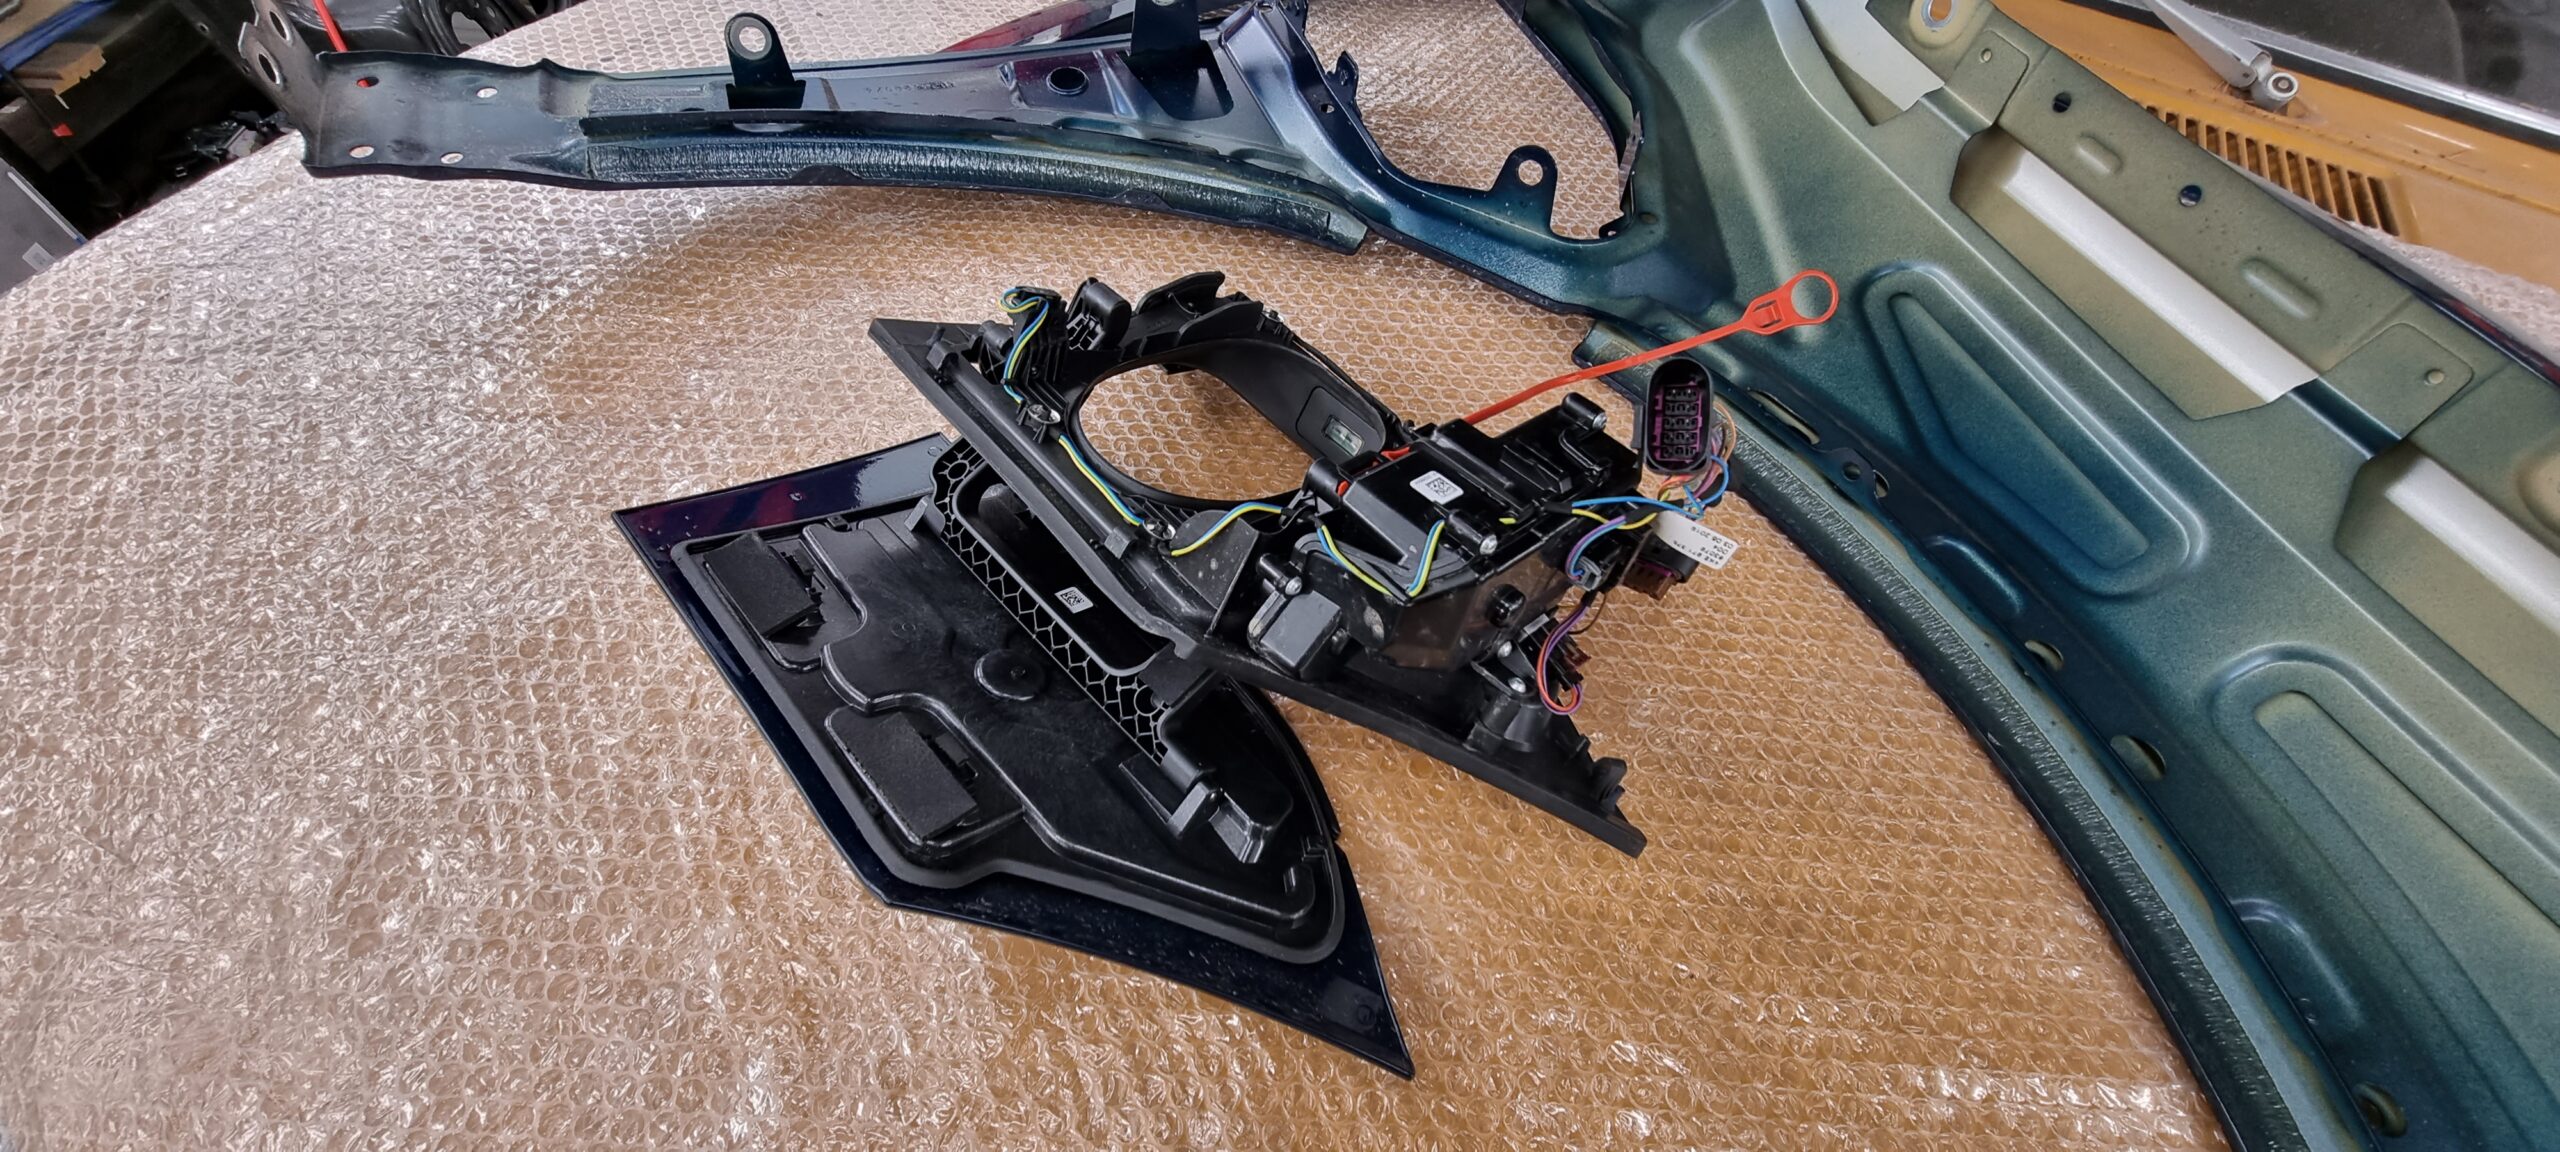
Johtosarjan korjailujumppaa sai harrastaa useita tunteja. Muutaman liittimen joutui uusimaan – mm. kuvassa näkyvä lämmönhallinnan ohjainlaitteen liitin sisälsi ”muutaman” pinnin ja olivat työläitä irrottaa ja siirtää uuteen liittimeen. Koko johtosarjan vaihtaminen uuteen olisi ollut aivan järjetön homma, tällöin auto olisi pitänyt purkaa aivan kokonaan. Korjaamalla tuli oikein hyvä ja toimiva paketti. Ilmajousituksen paineputkeen piti tehdä ylimääräinen jatko.

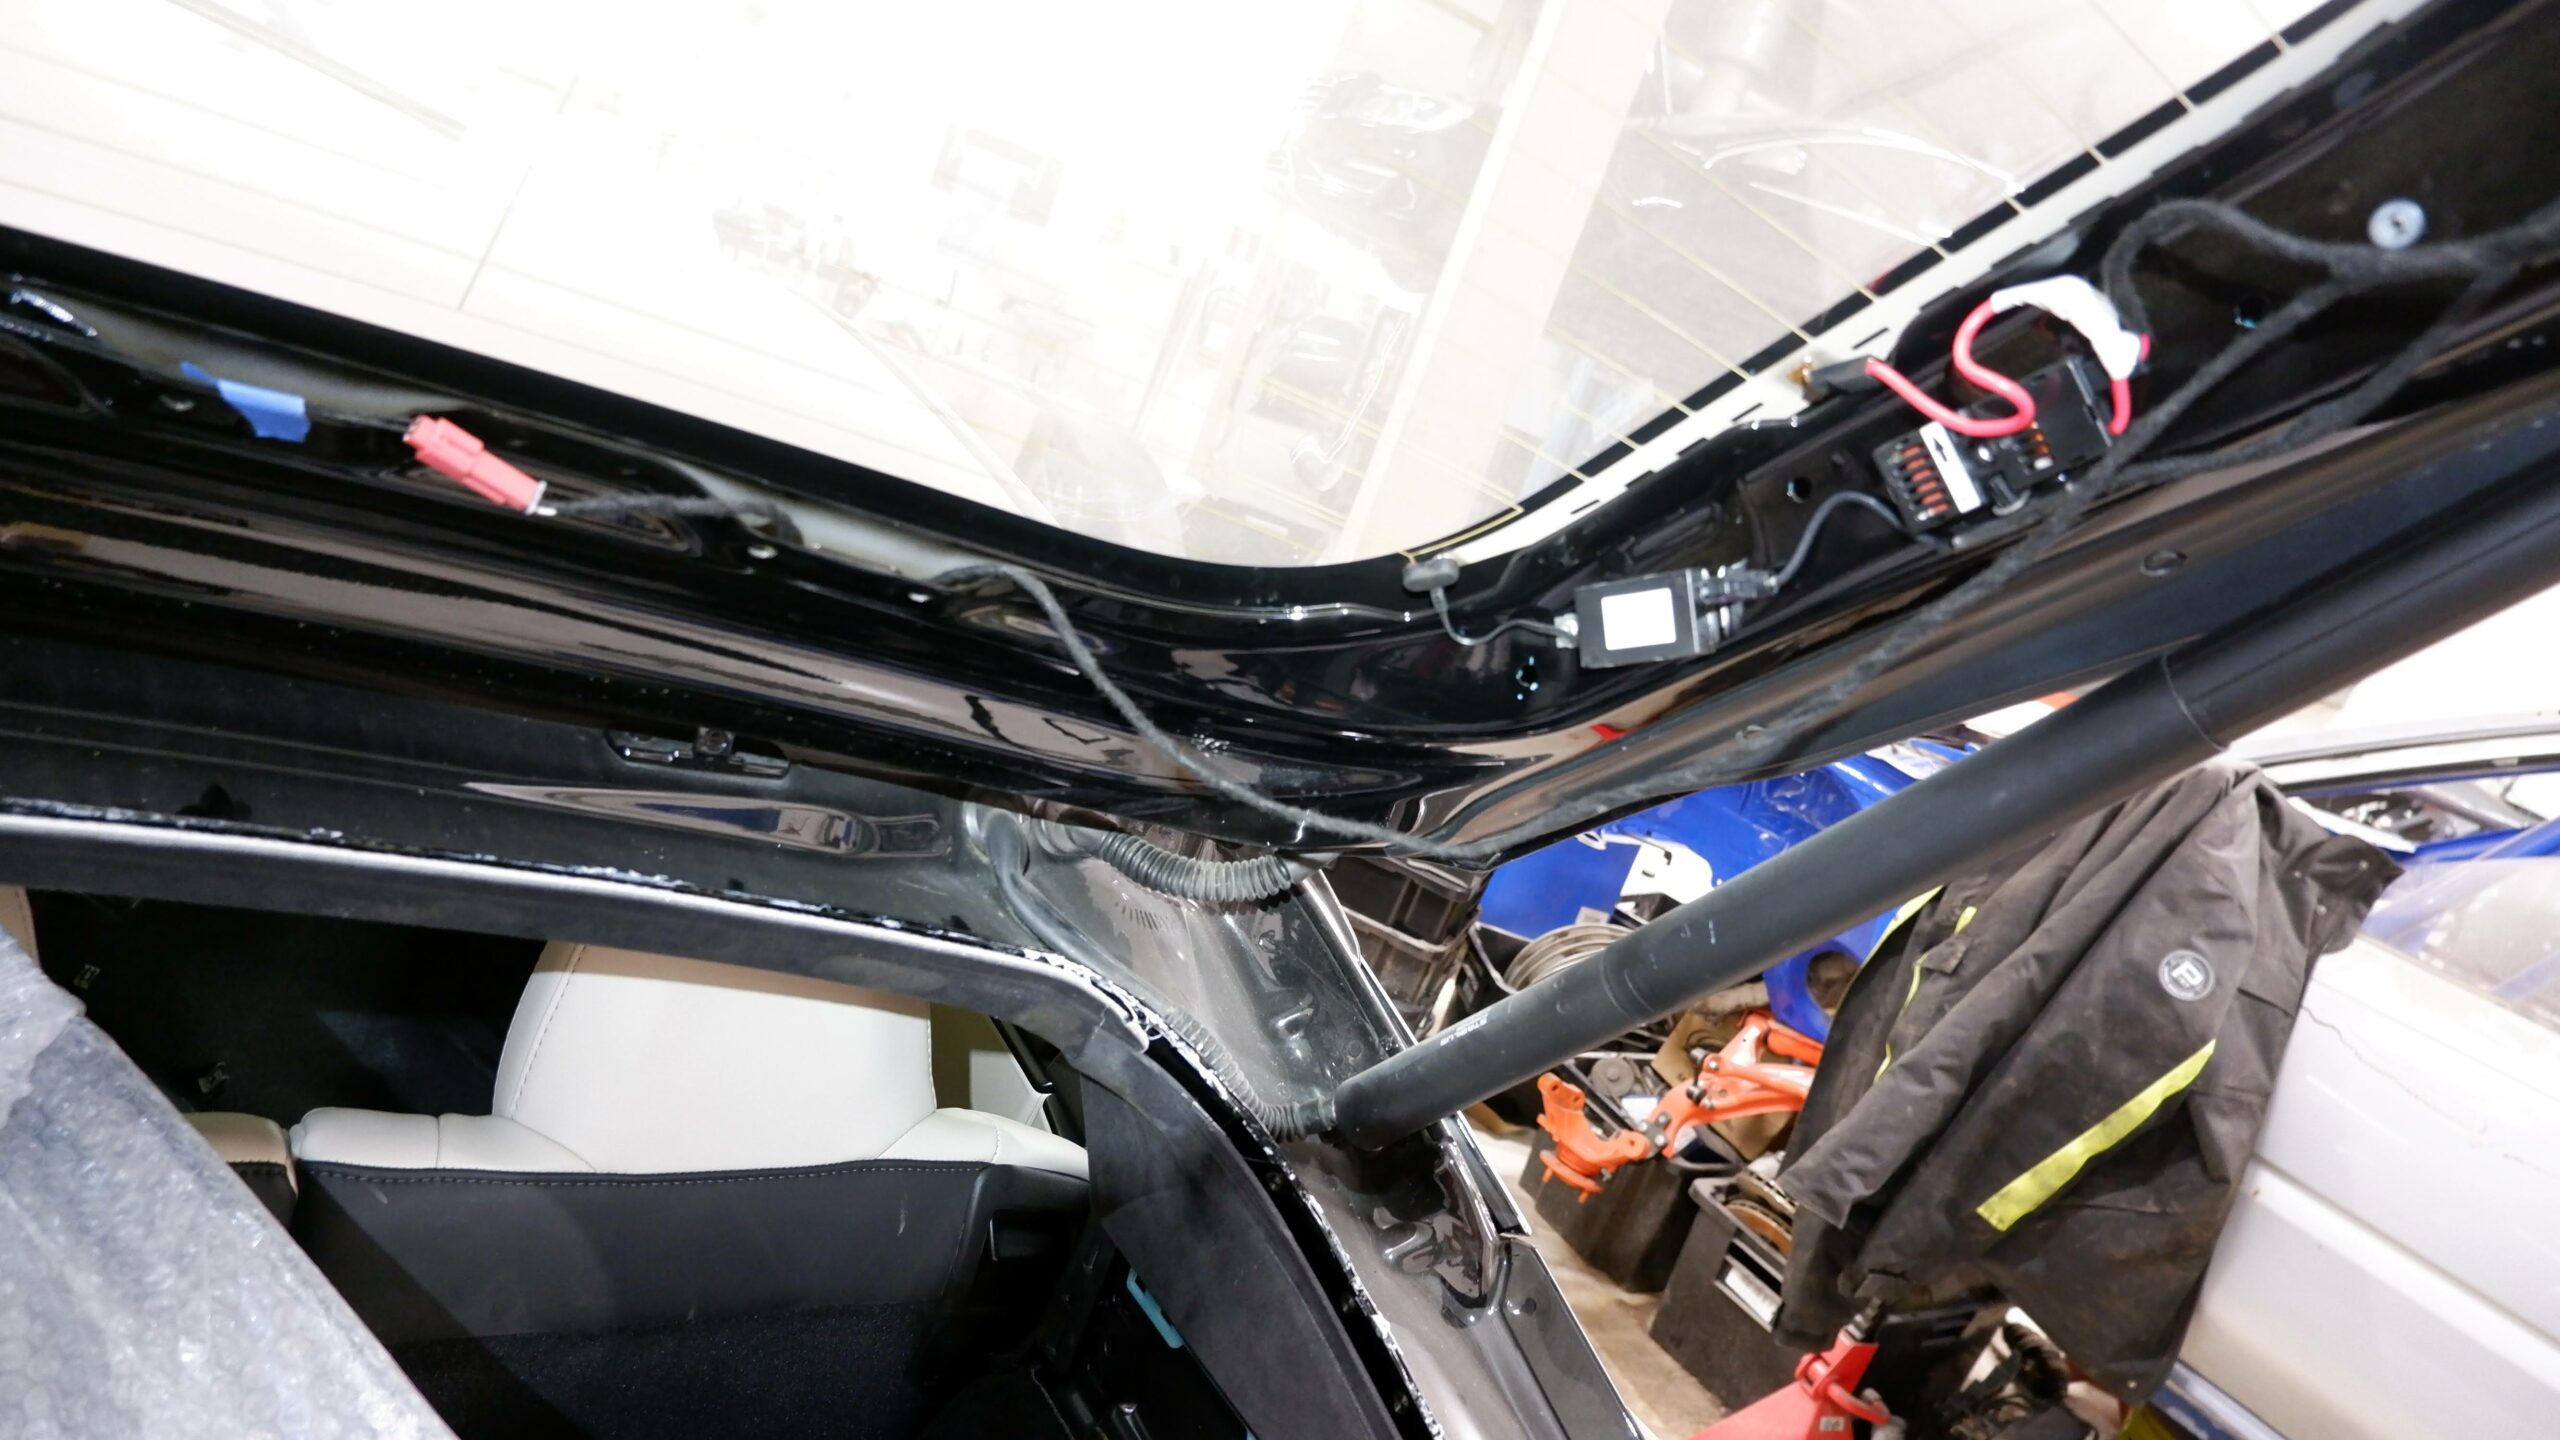
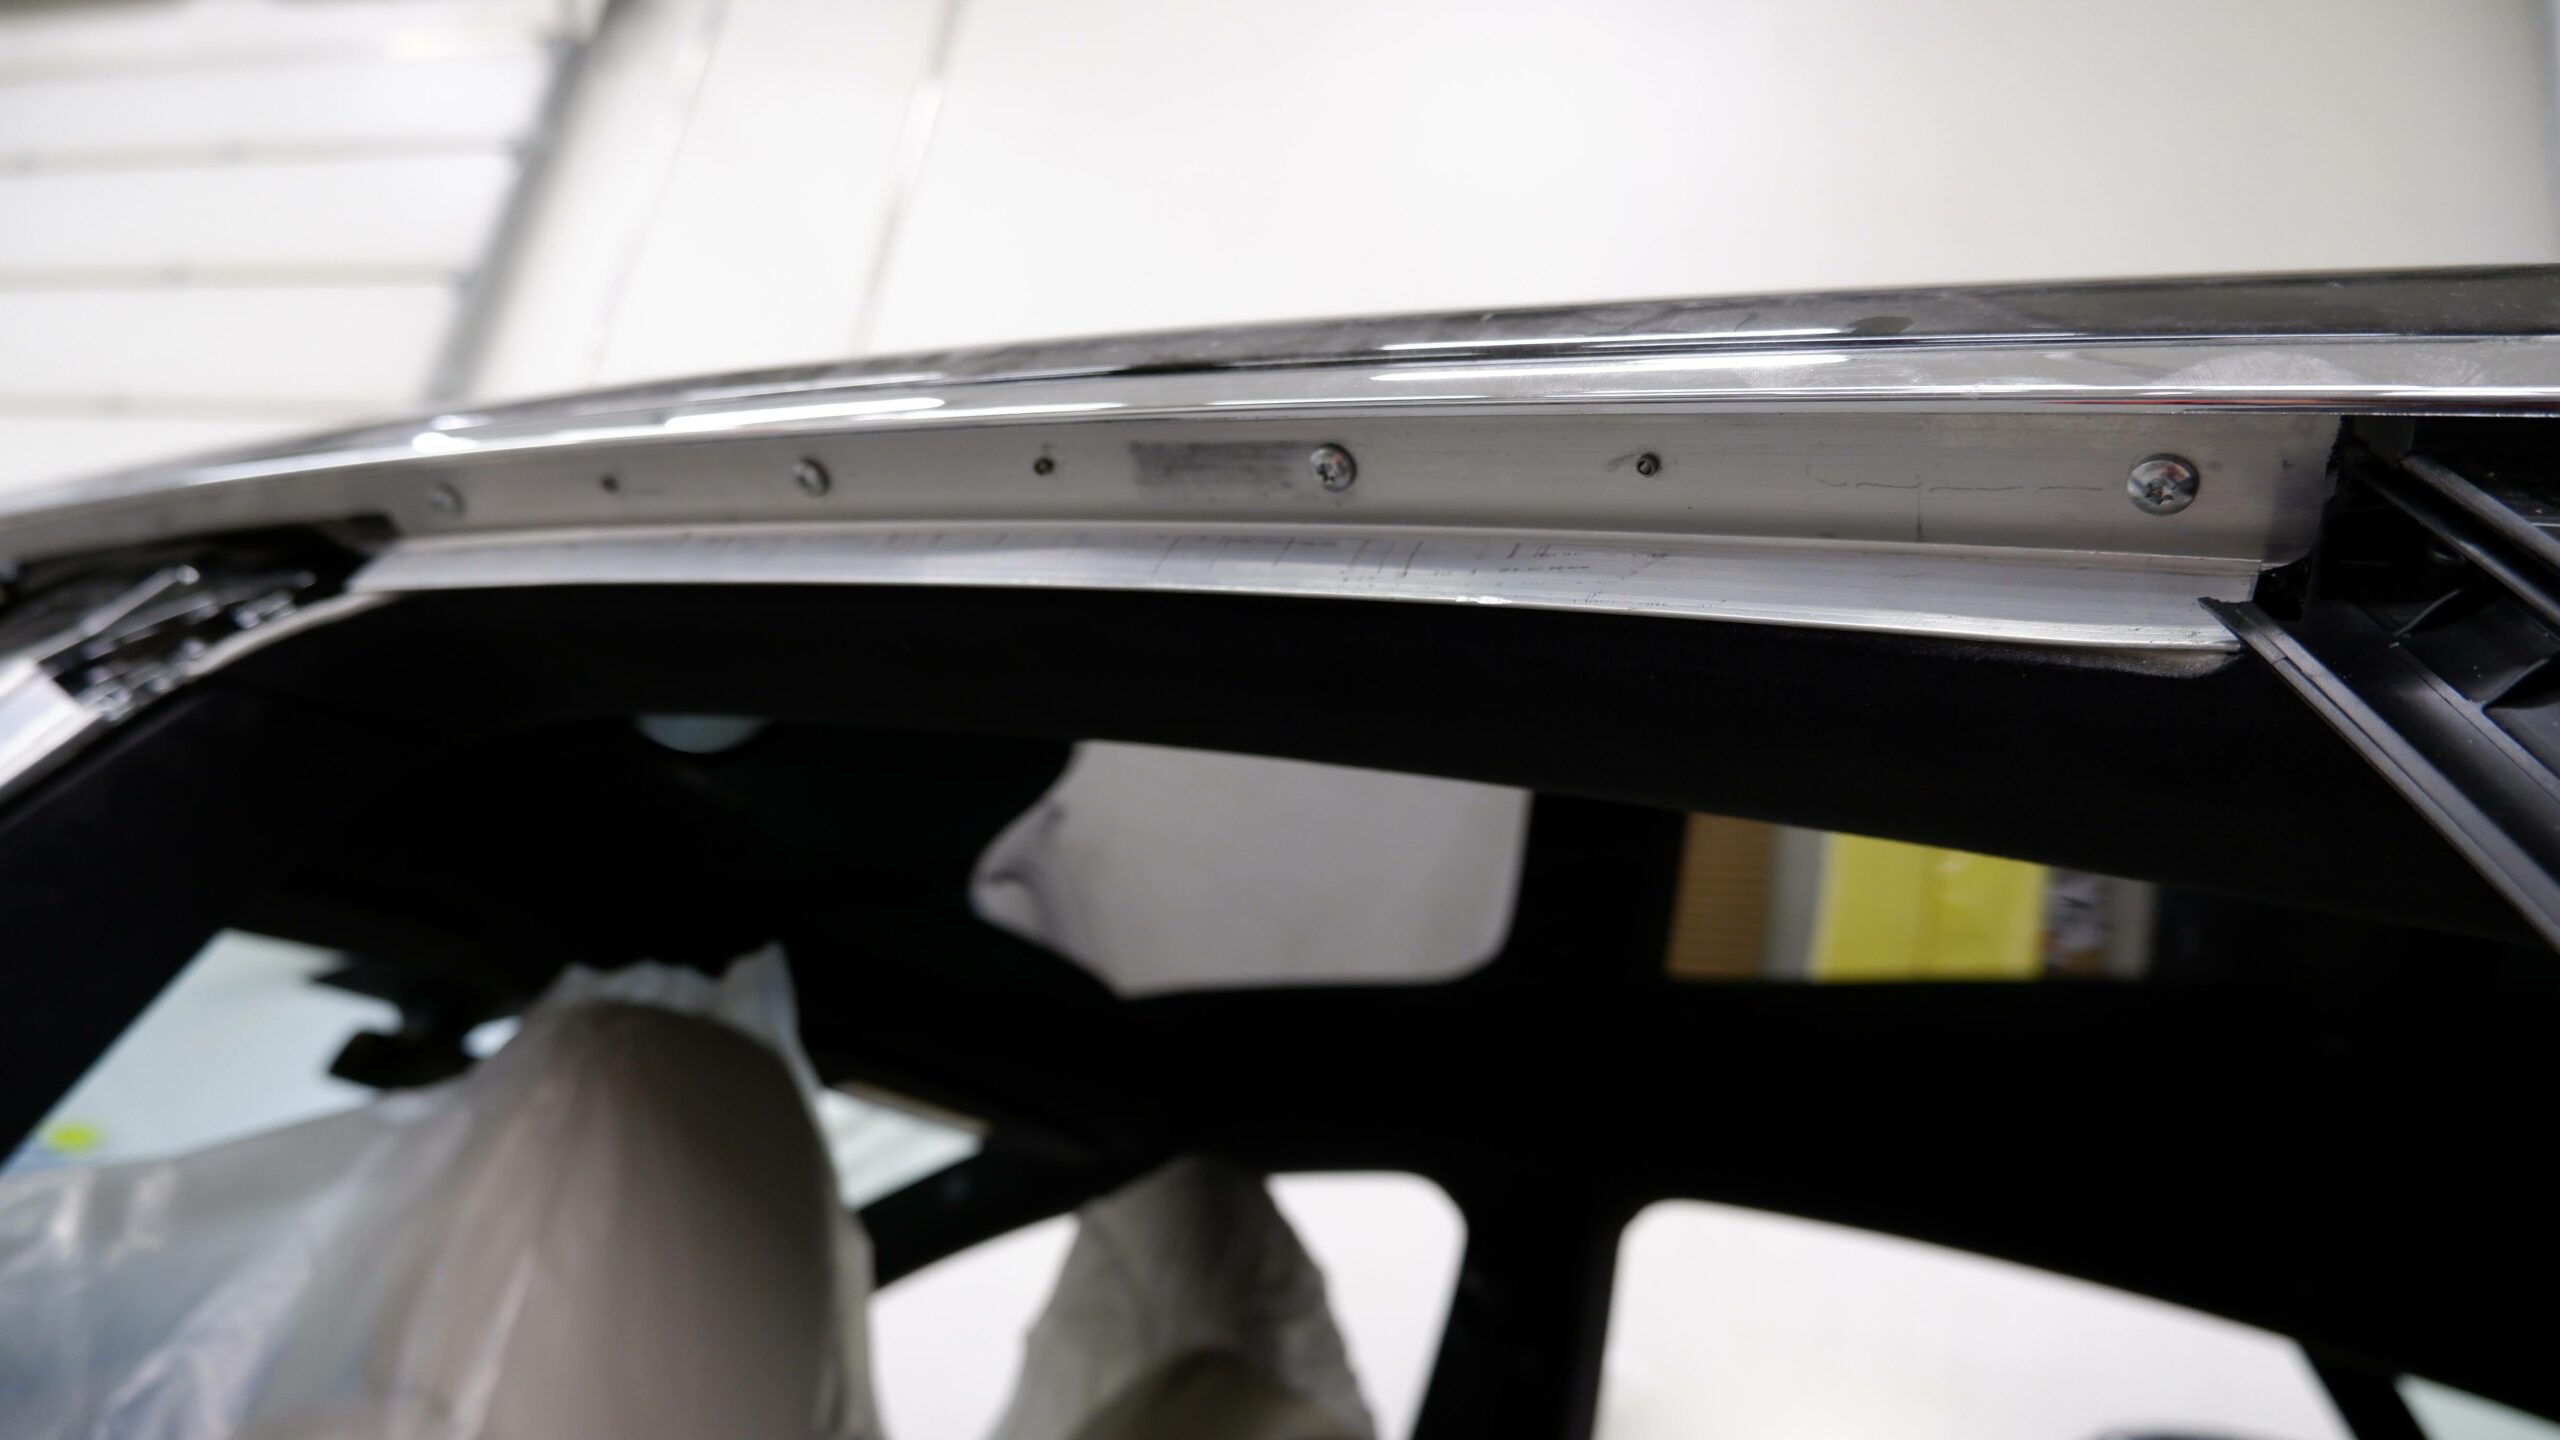
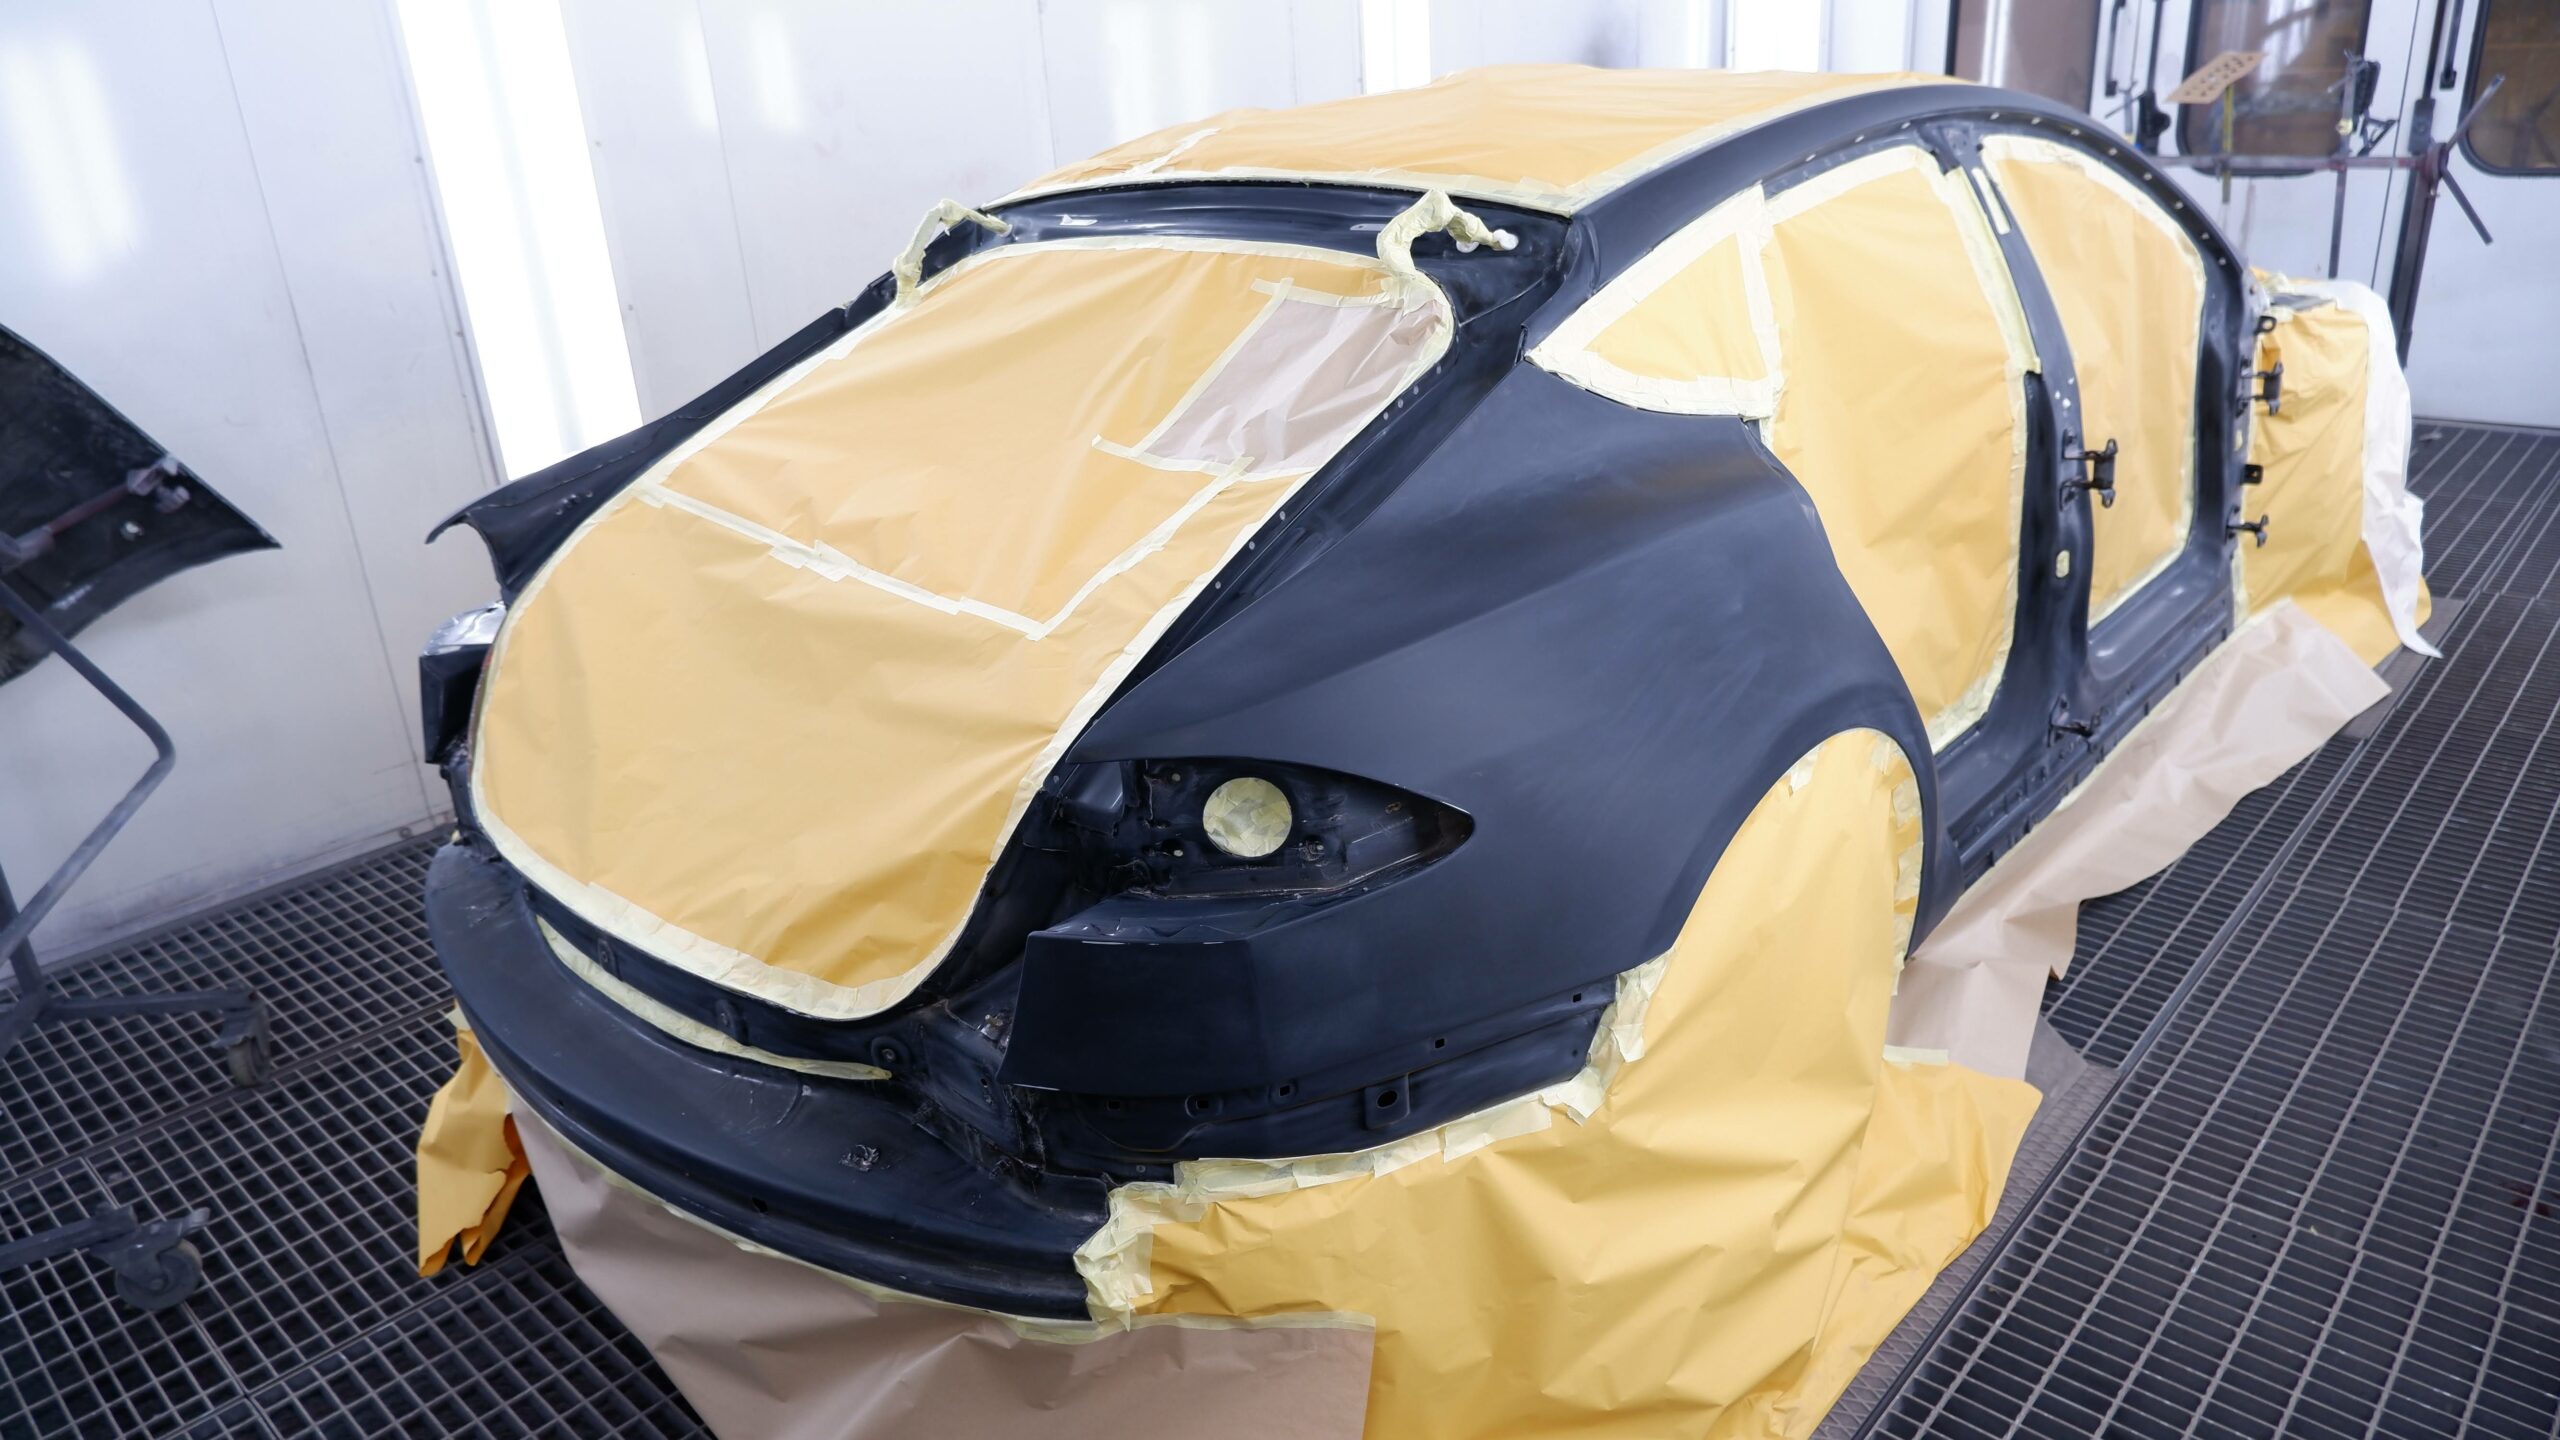
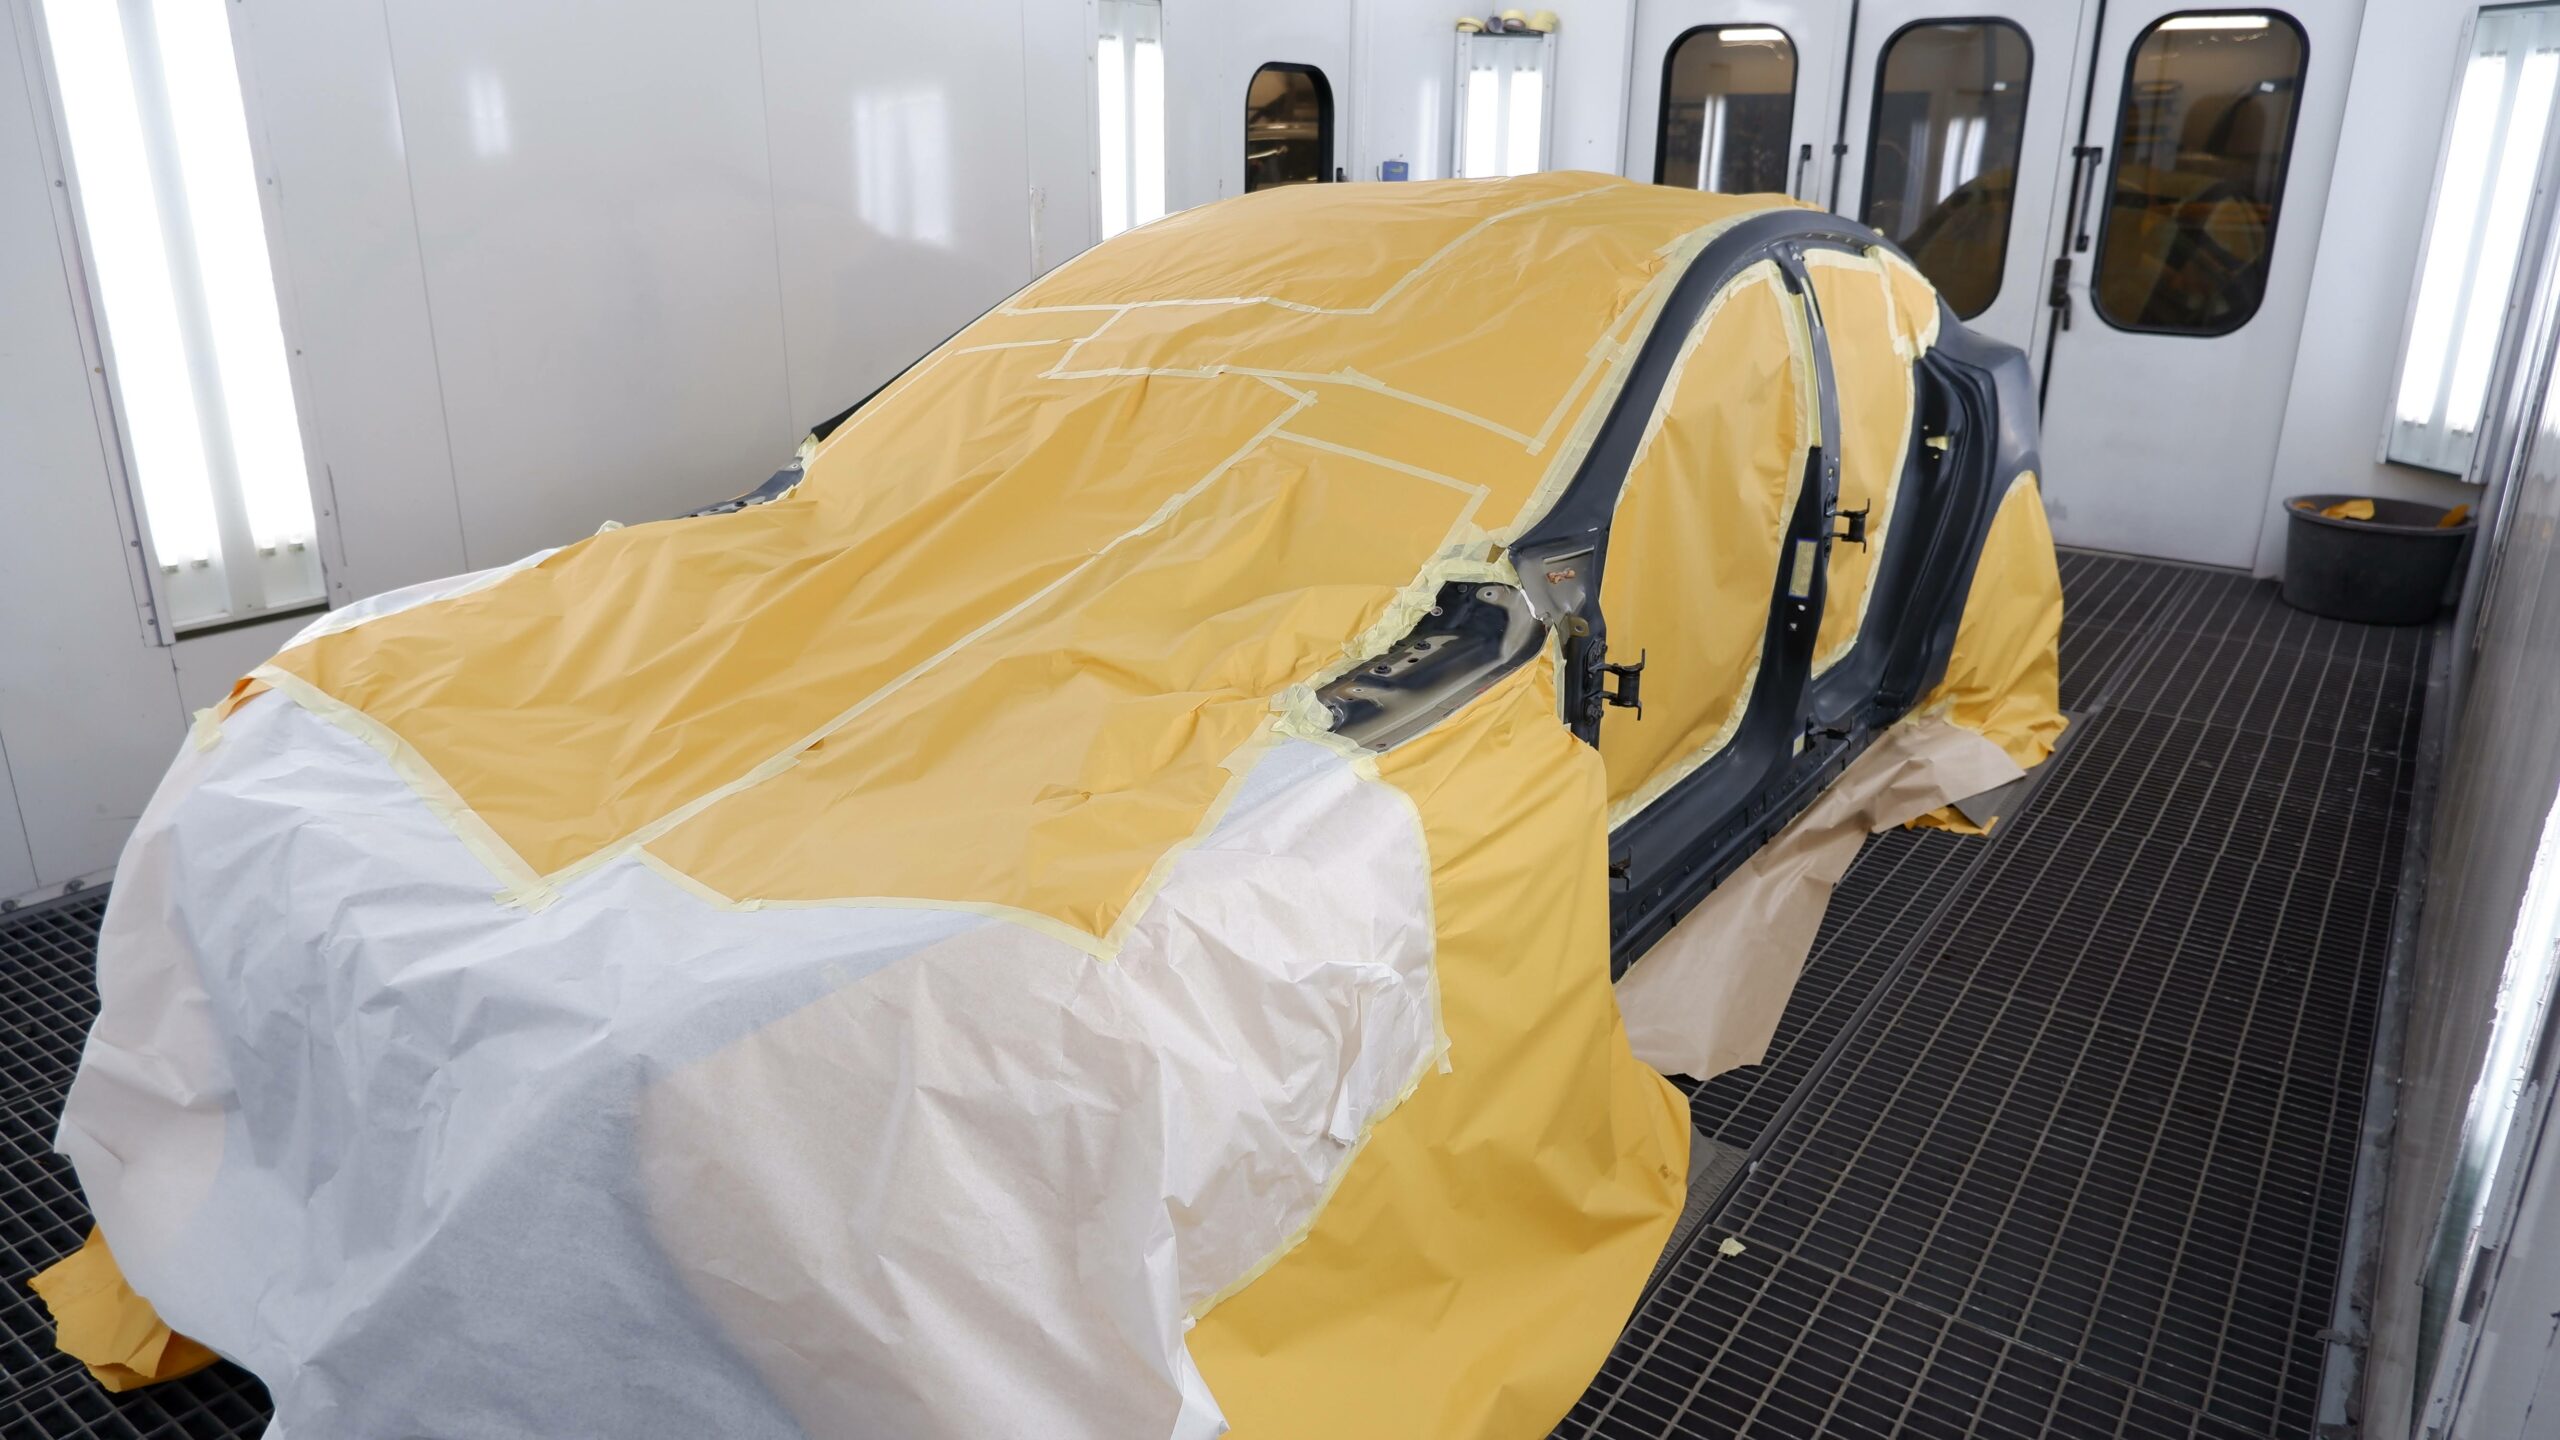
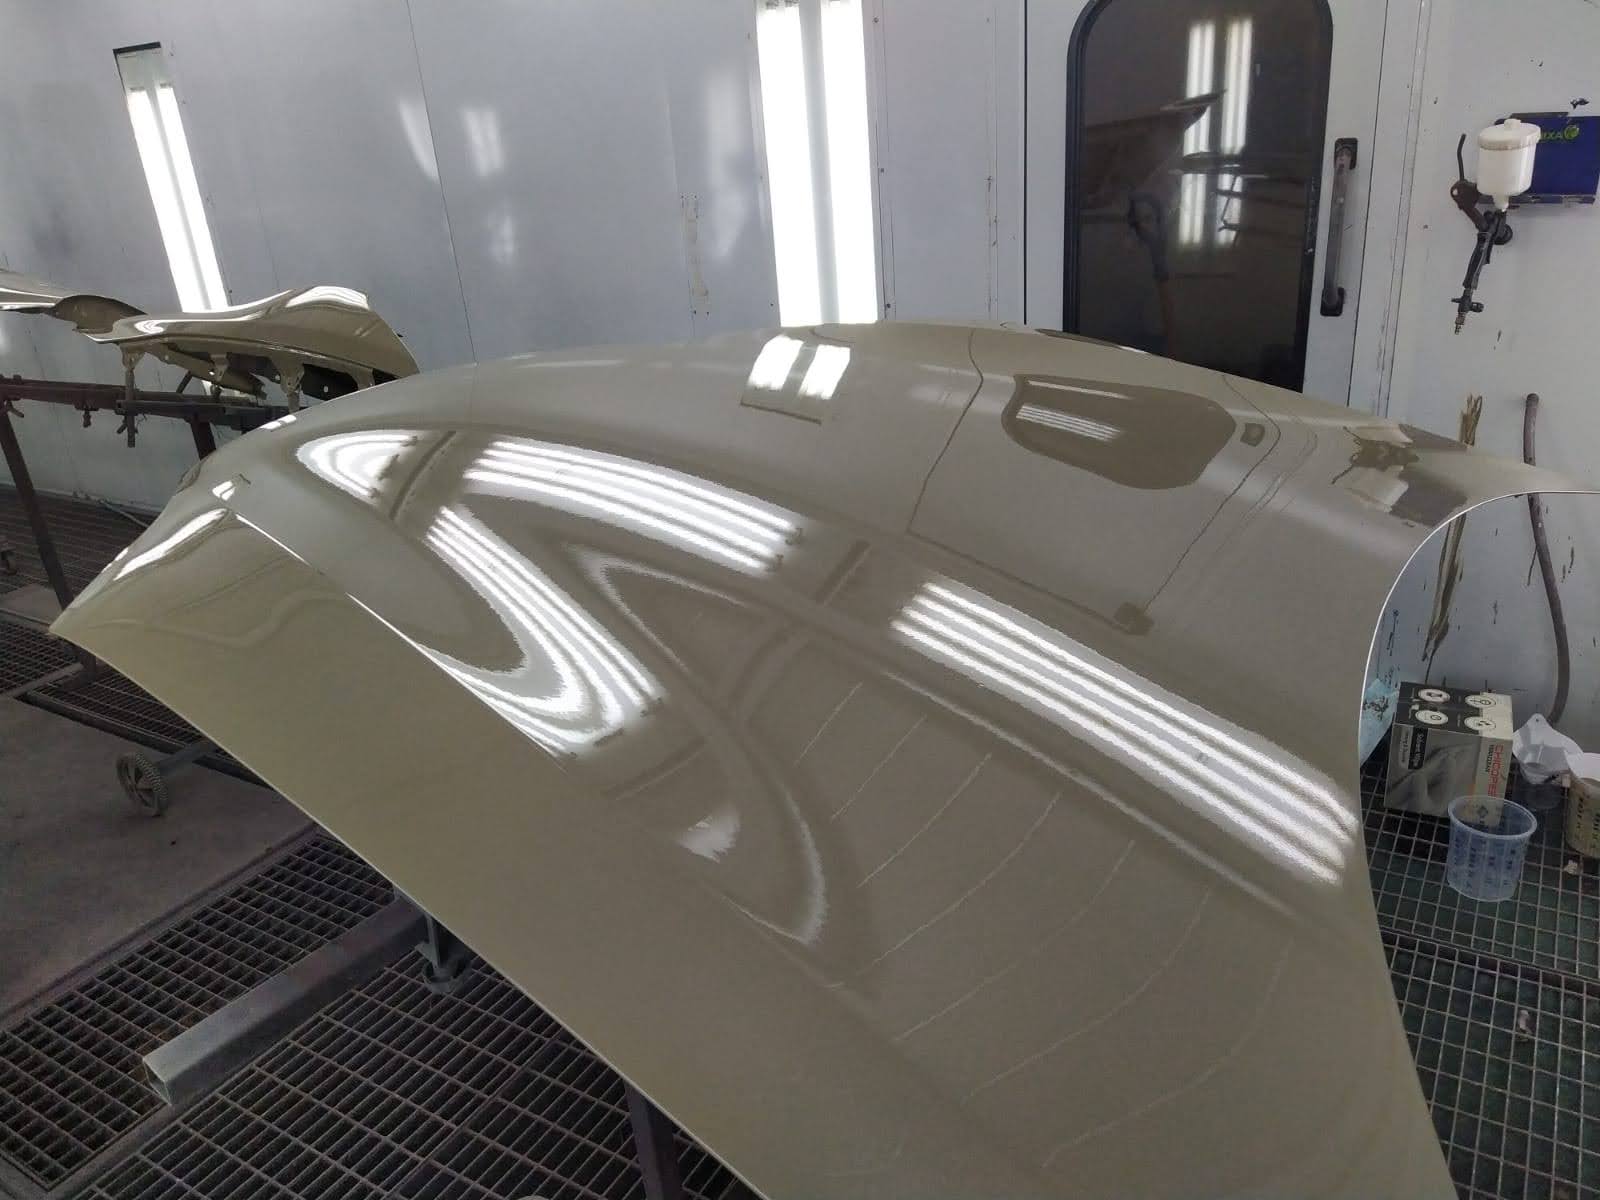
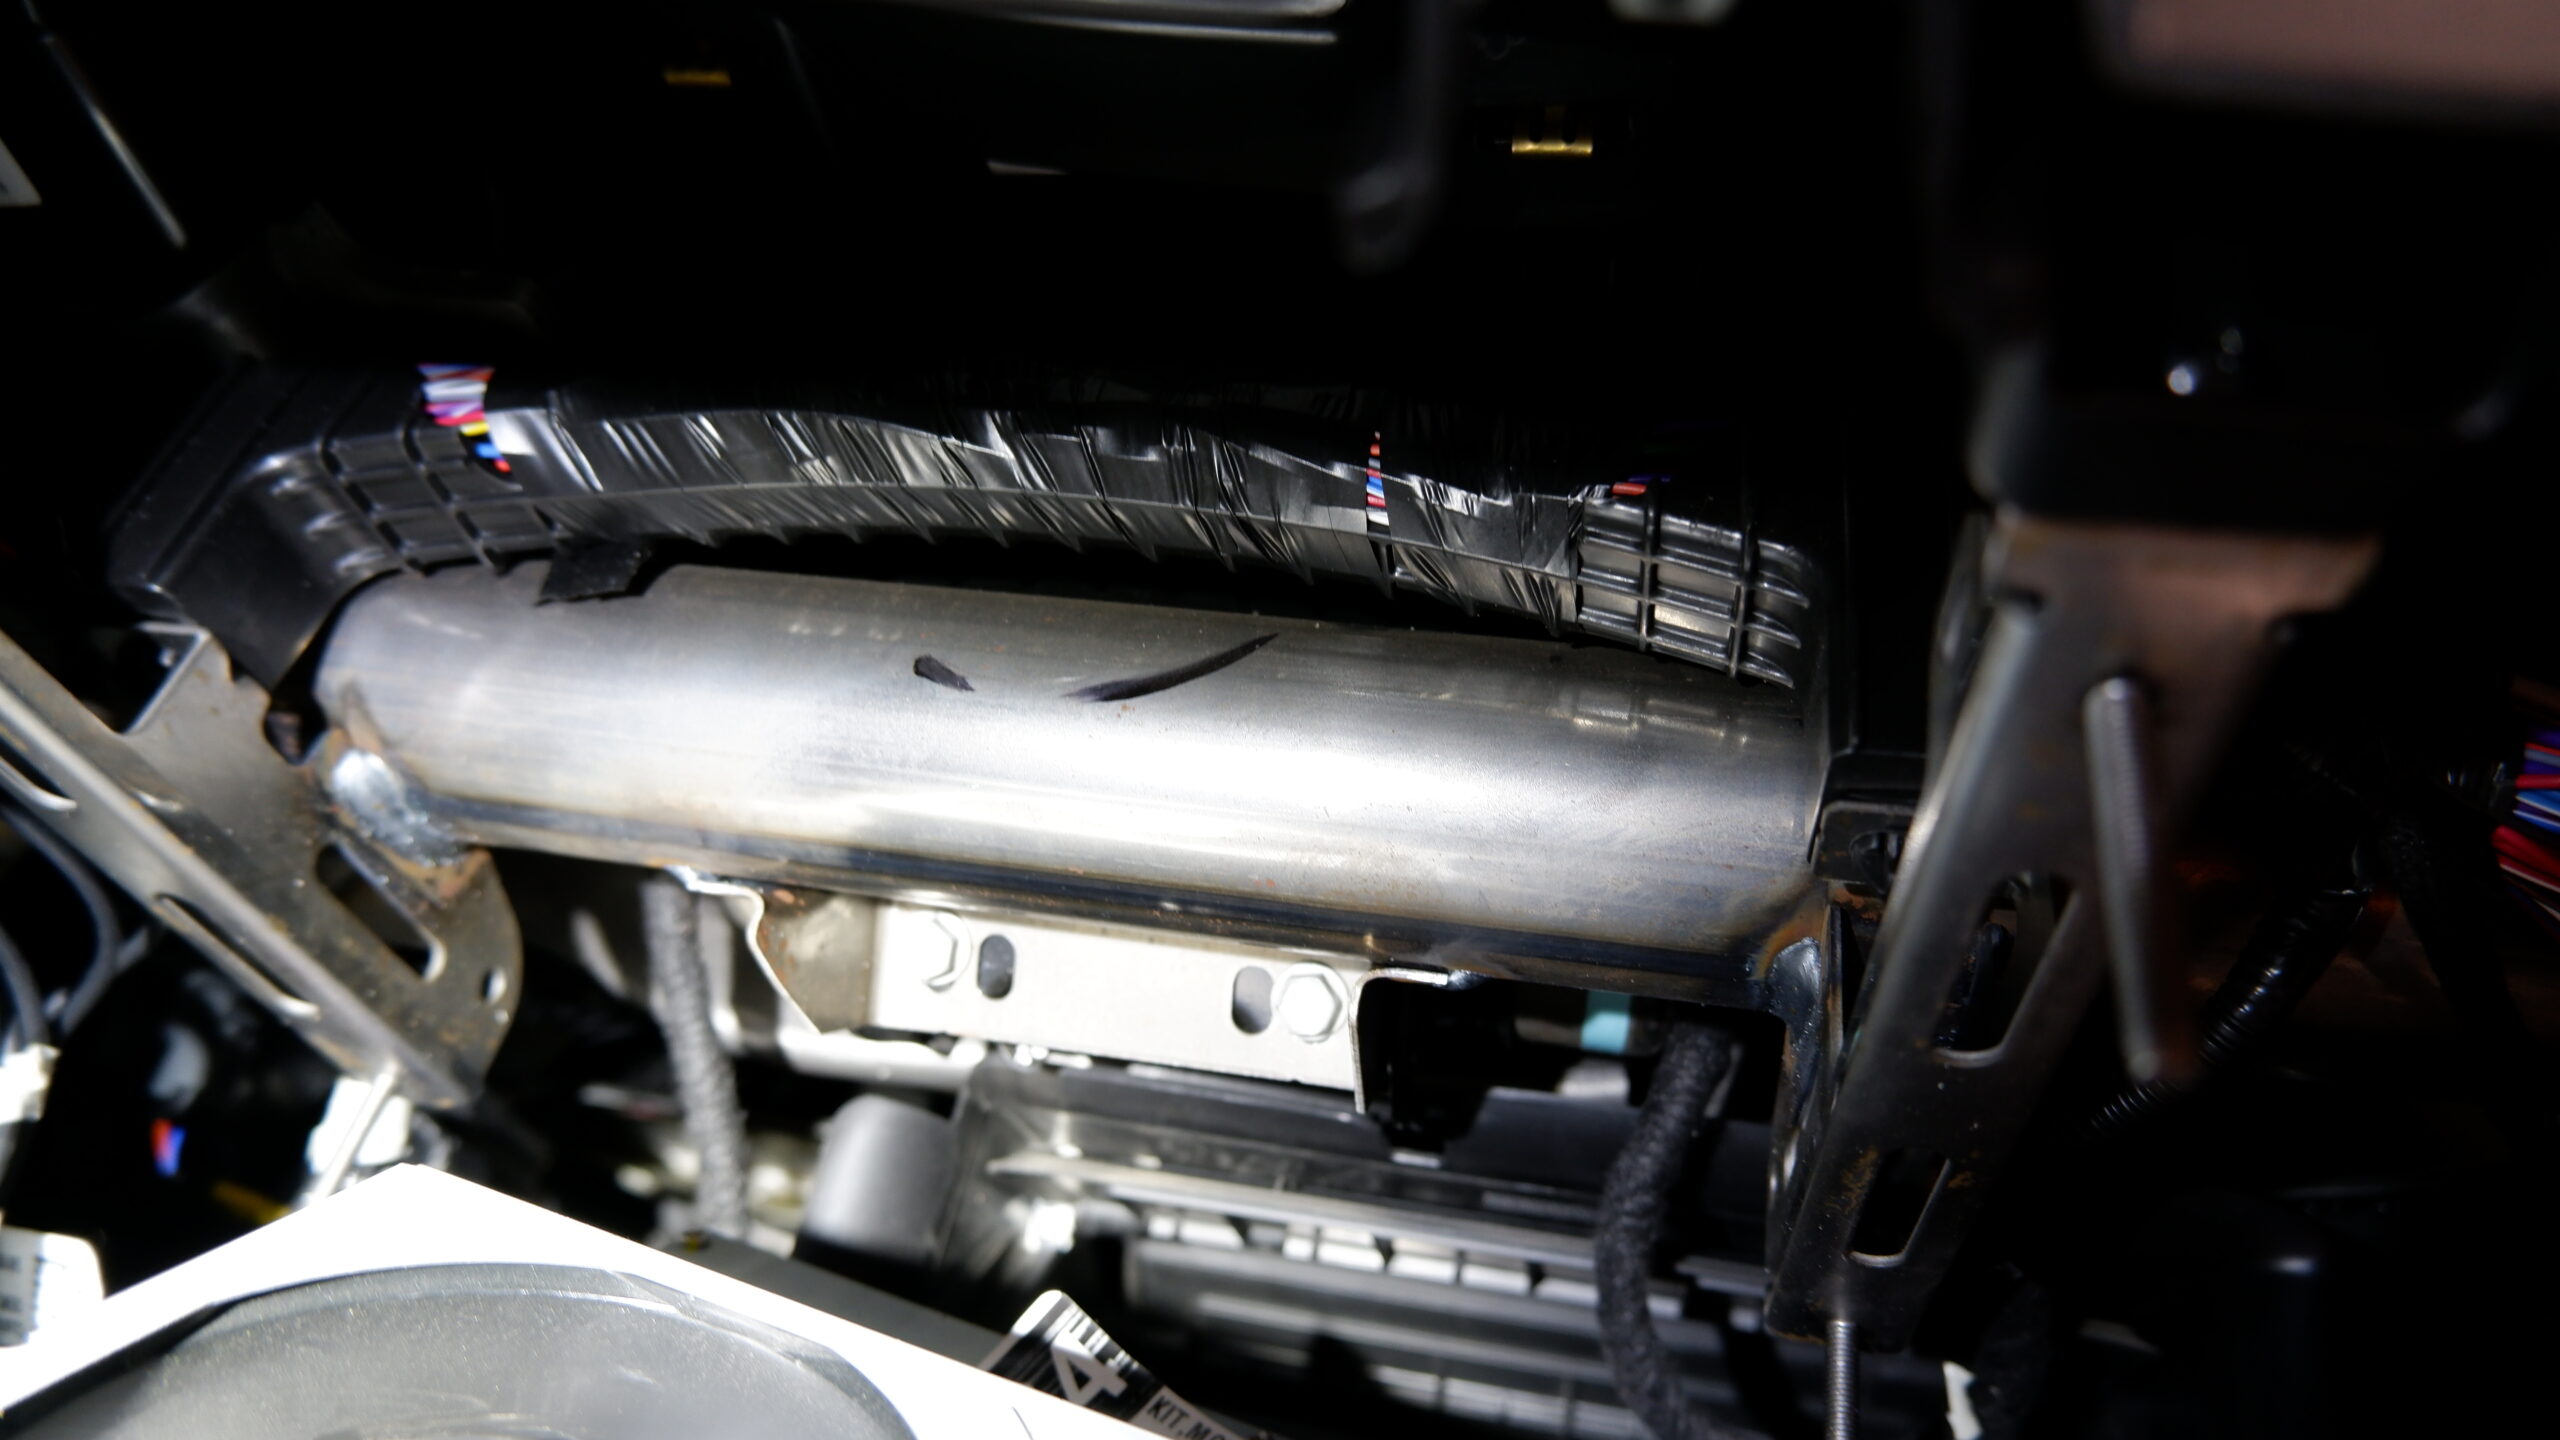
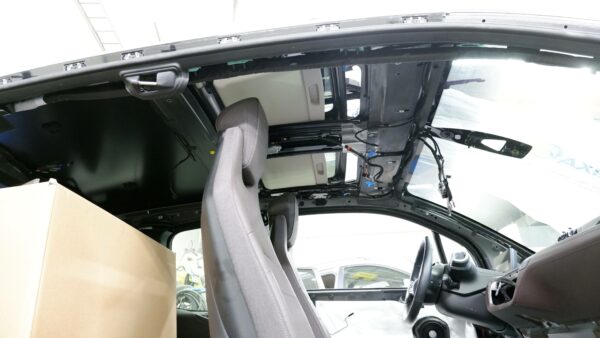
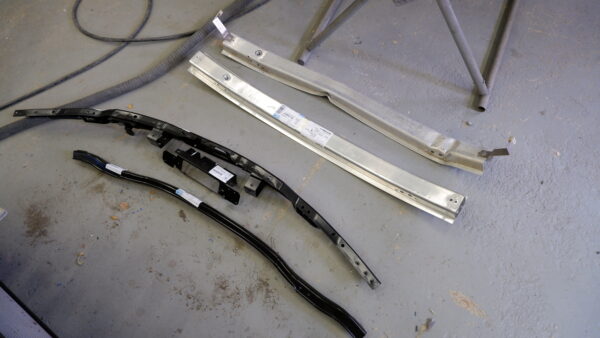
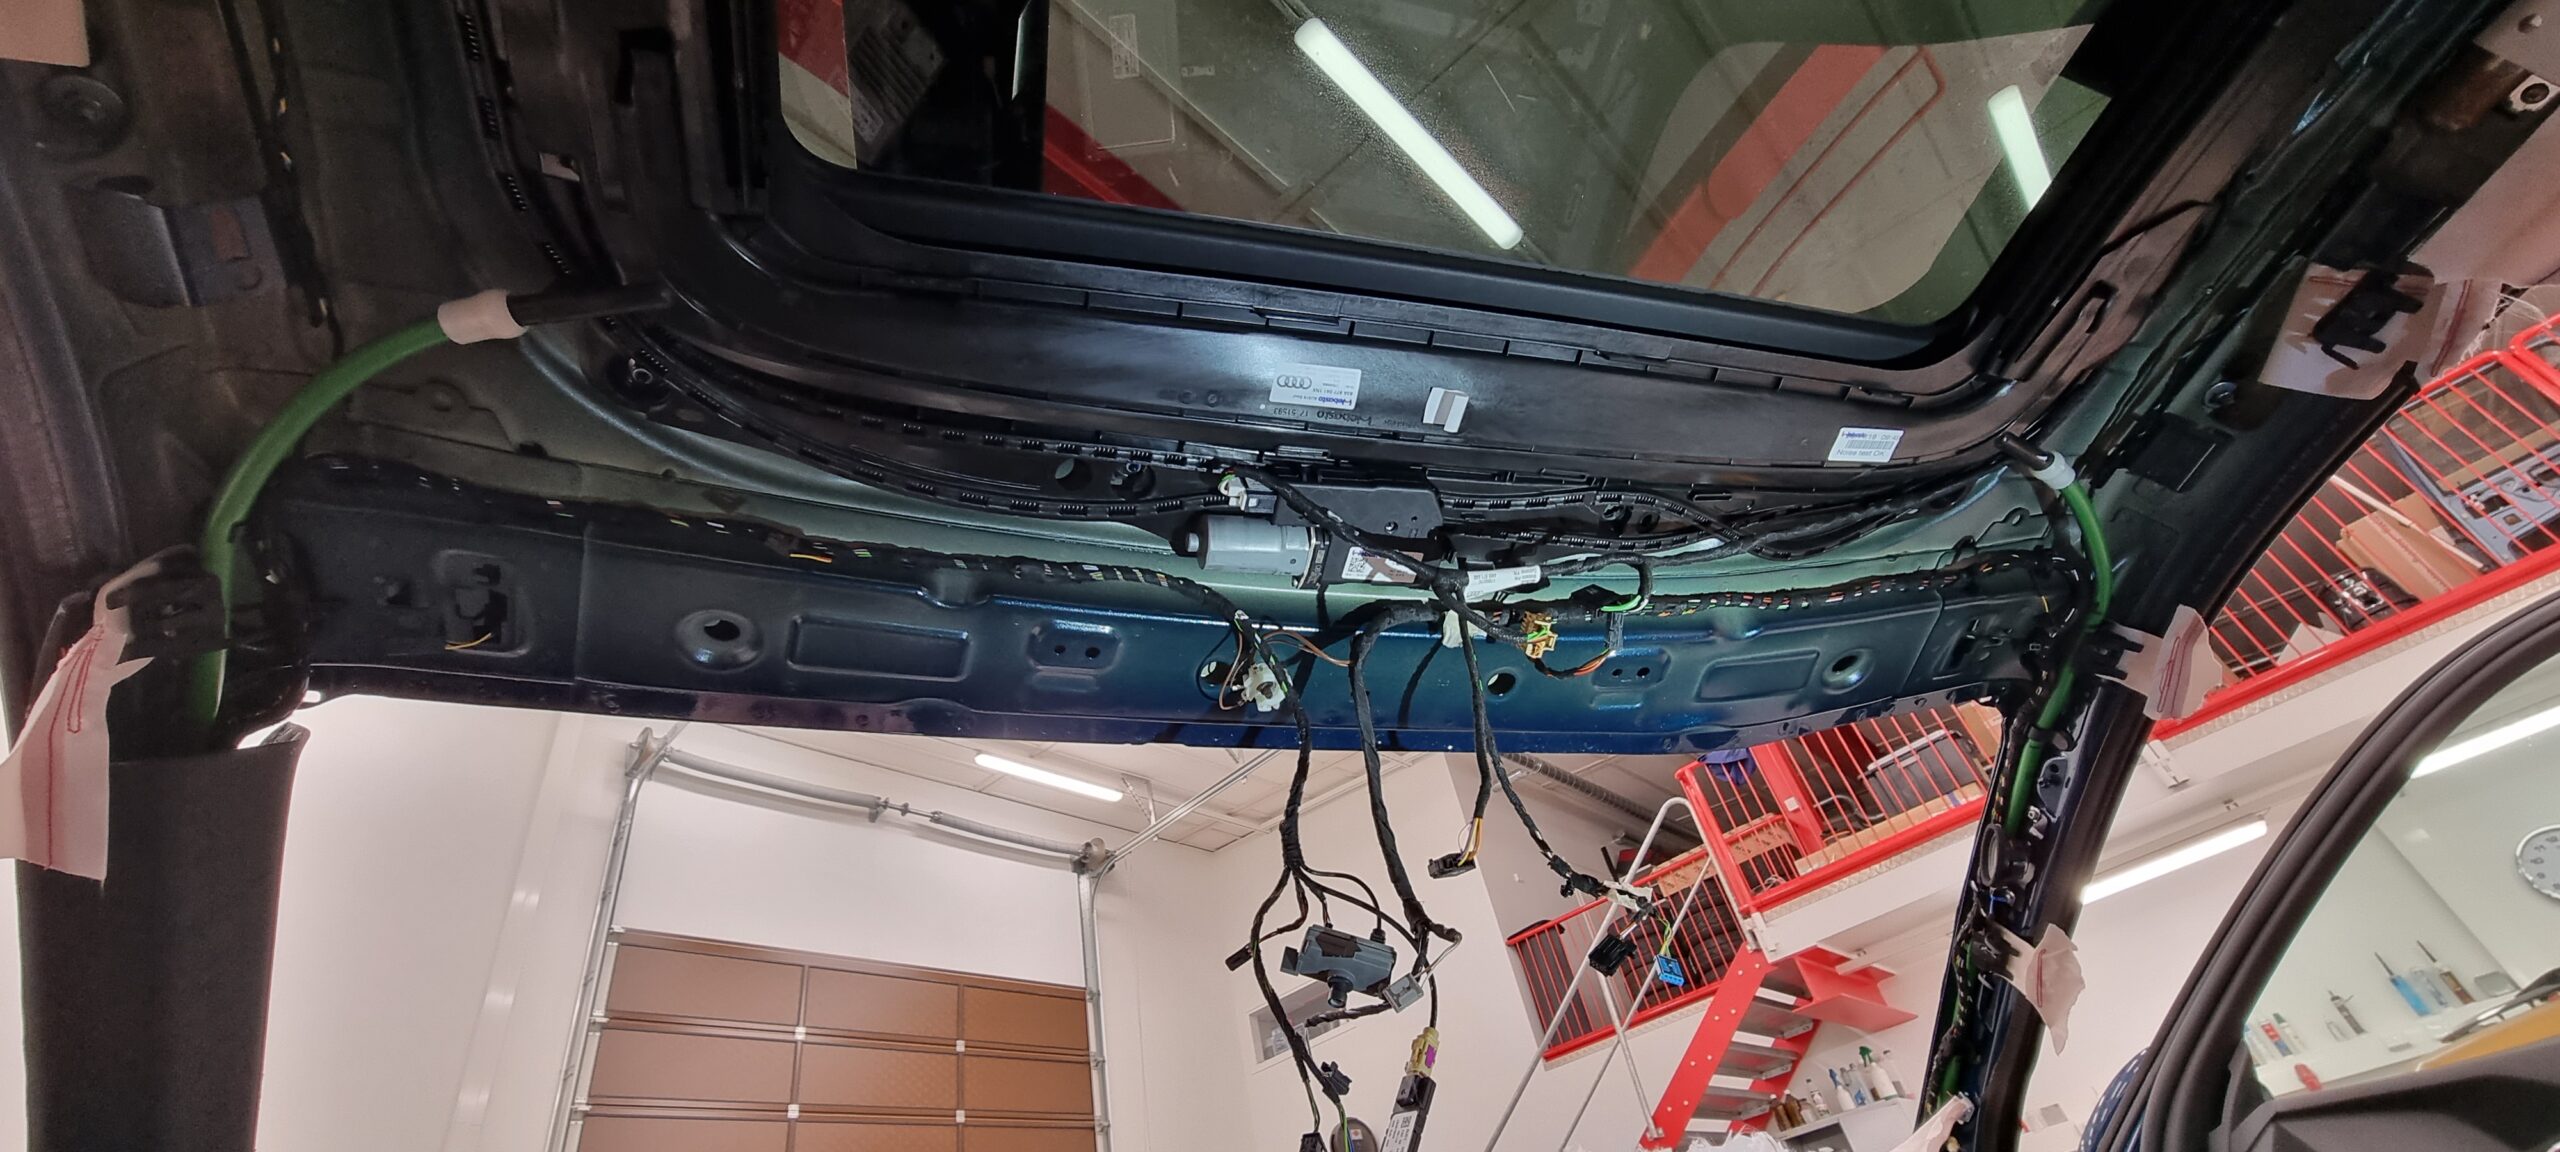
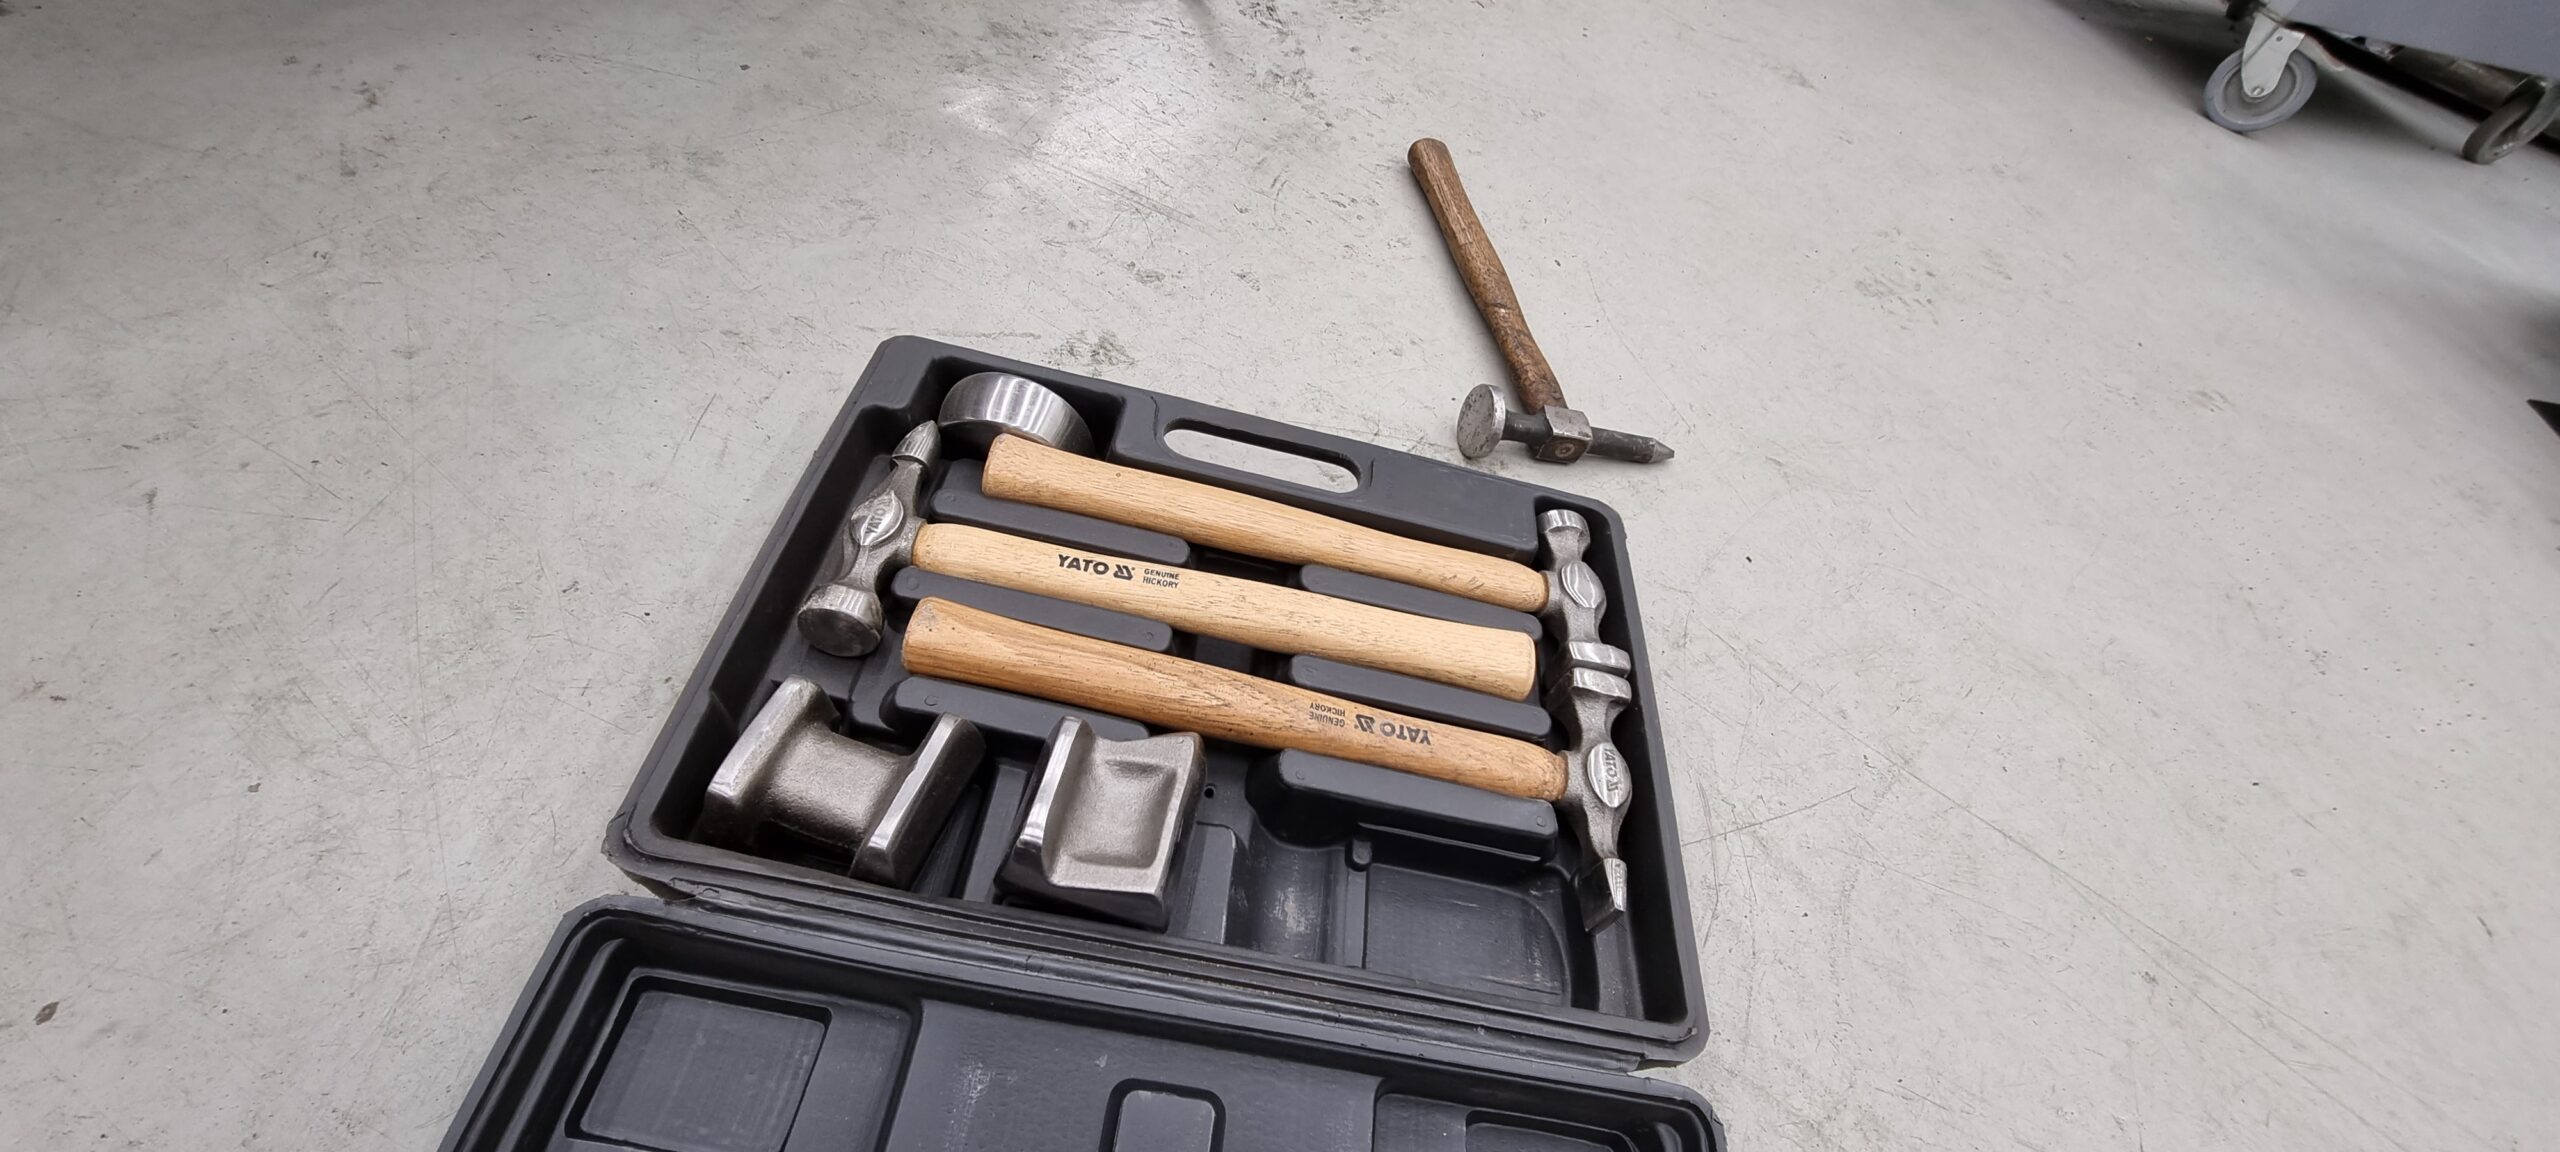
Sitten katon kimppuun. Kattoluukku oli tiputettu pois. Ensin katon etureuna tunkattiin suurin piirtein paikalleen. Mietittiin mitä tehdään. Yksi vaihtoehto olisi ollut irrottaa kattopelti kokonaisuudessaan. Päätettiin hylätä tämä vaihtoehto ja lähestyä ongelmaa alta päin. Porasimme katon etureunan vahvikkeet irti, jotta kattopeltiä pääsi oikomaan kunnolla vasaroiden ja vastinten kanssa.

Tuulilasi istuu paikalleen nätisti

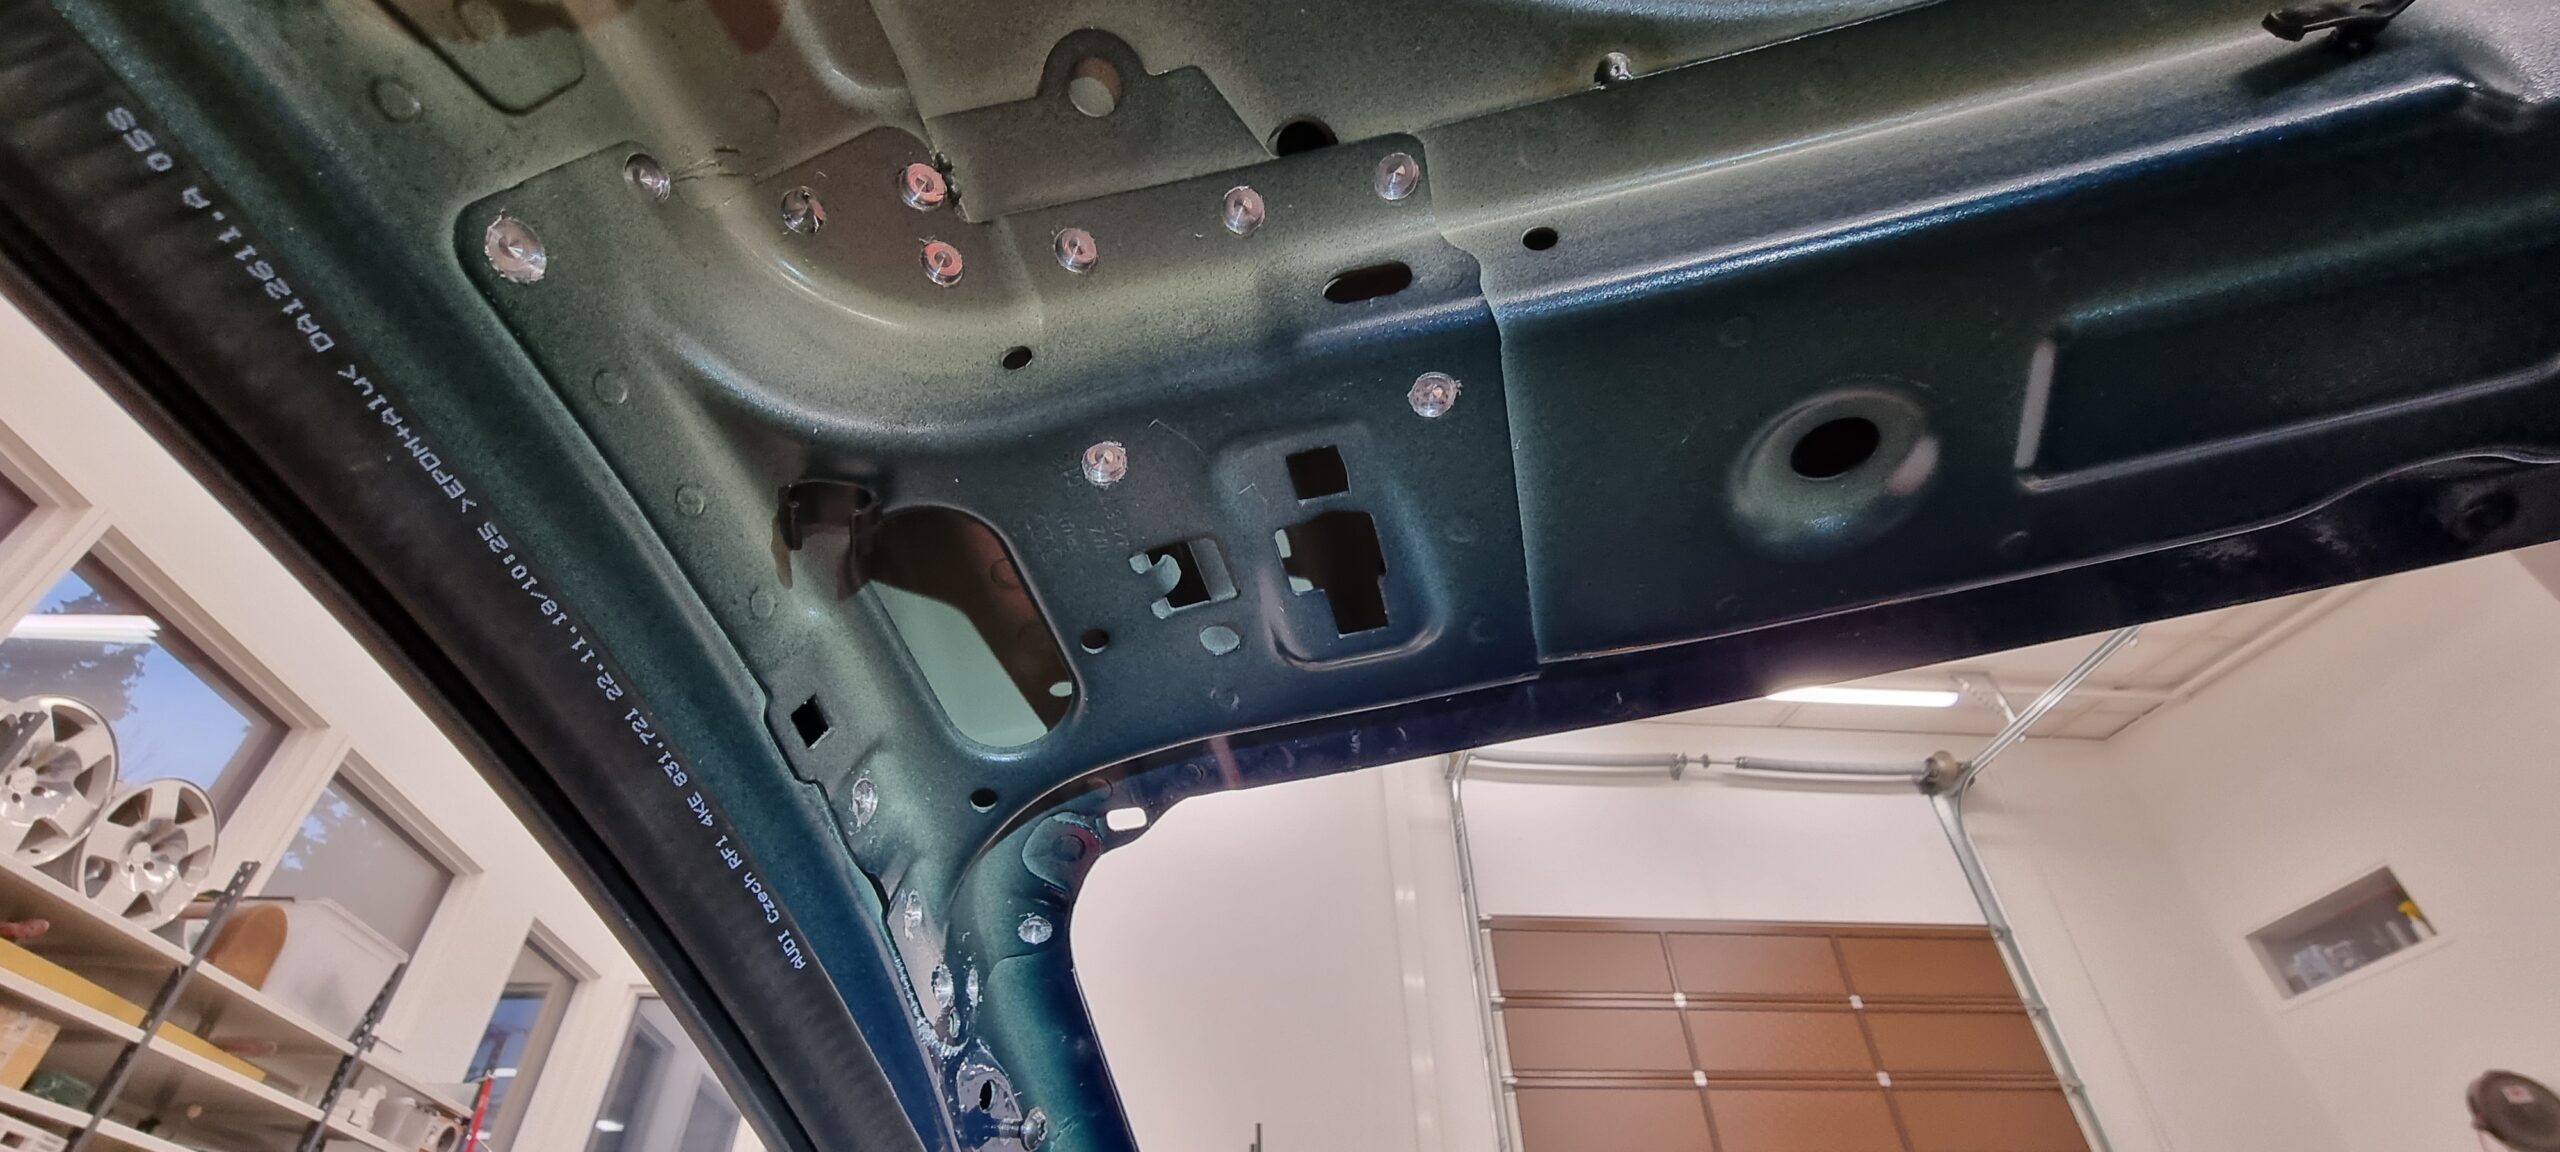
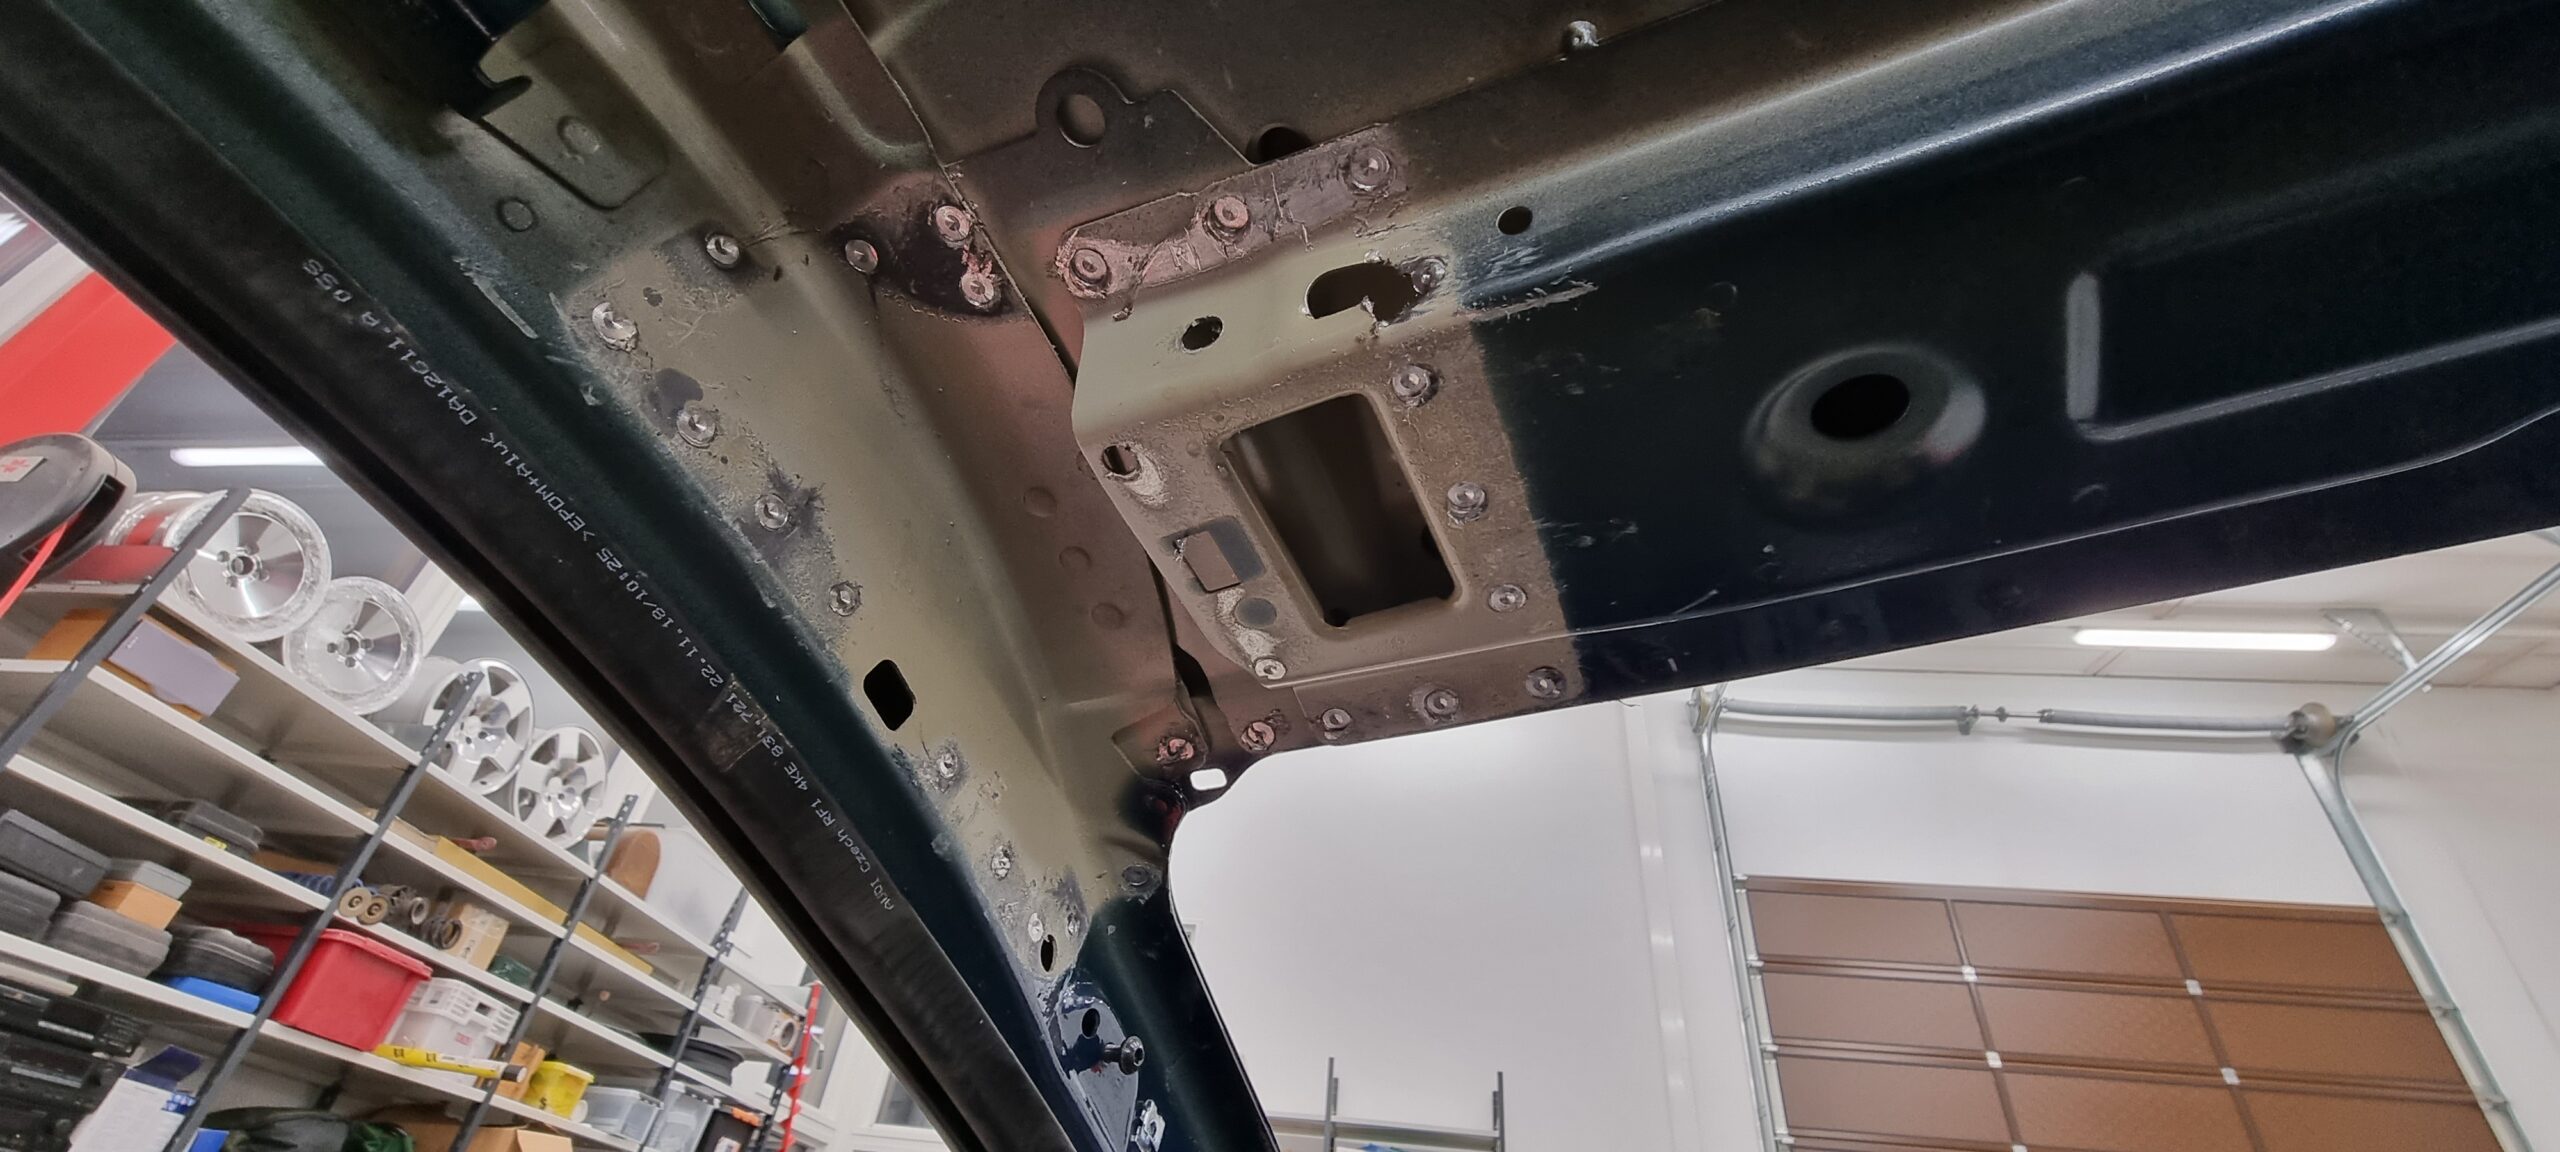
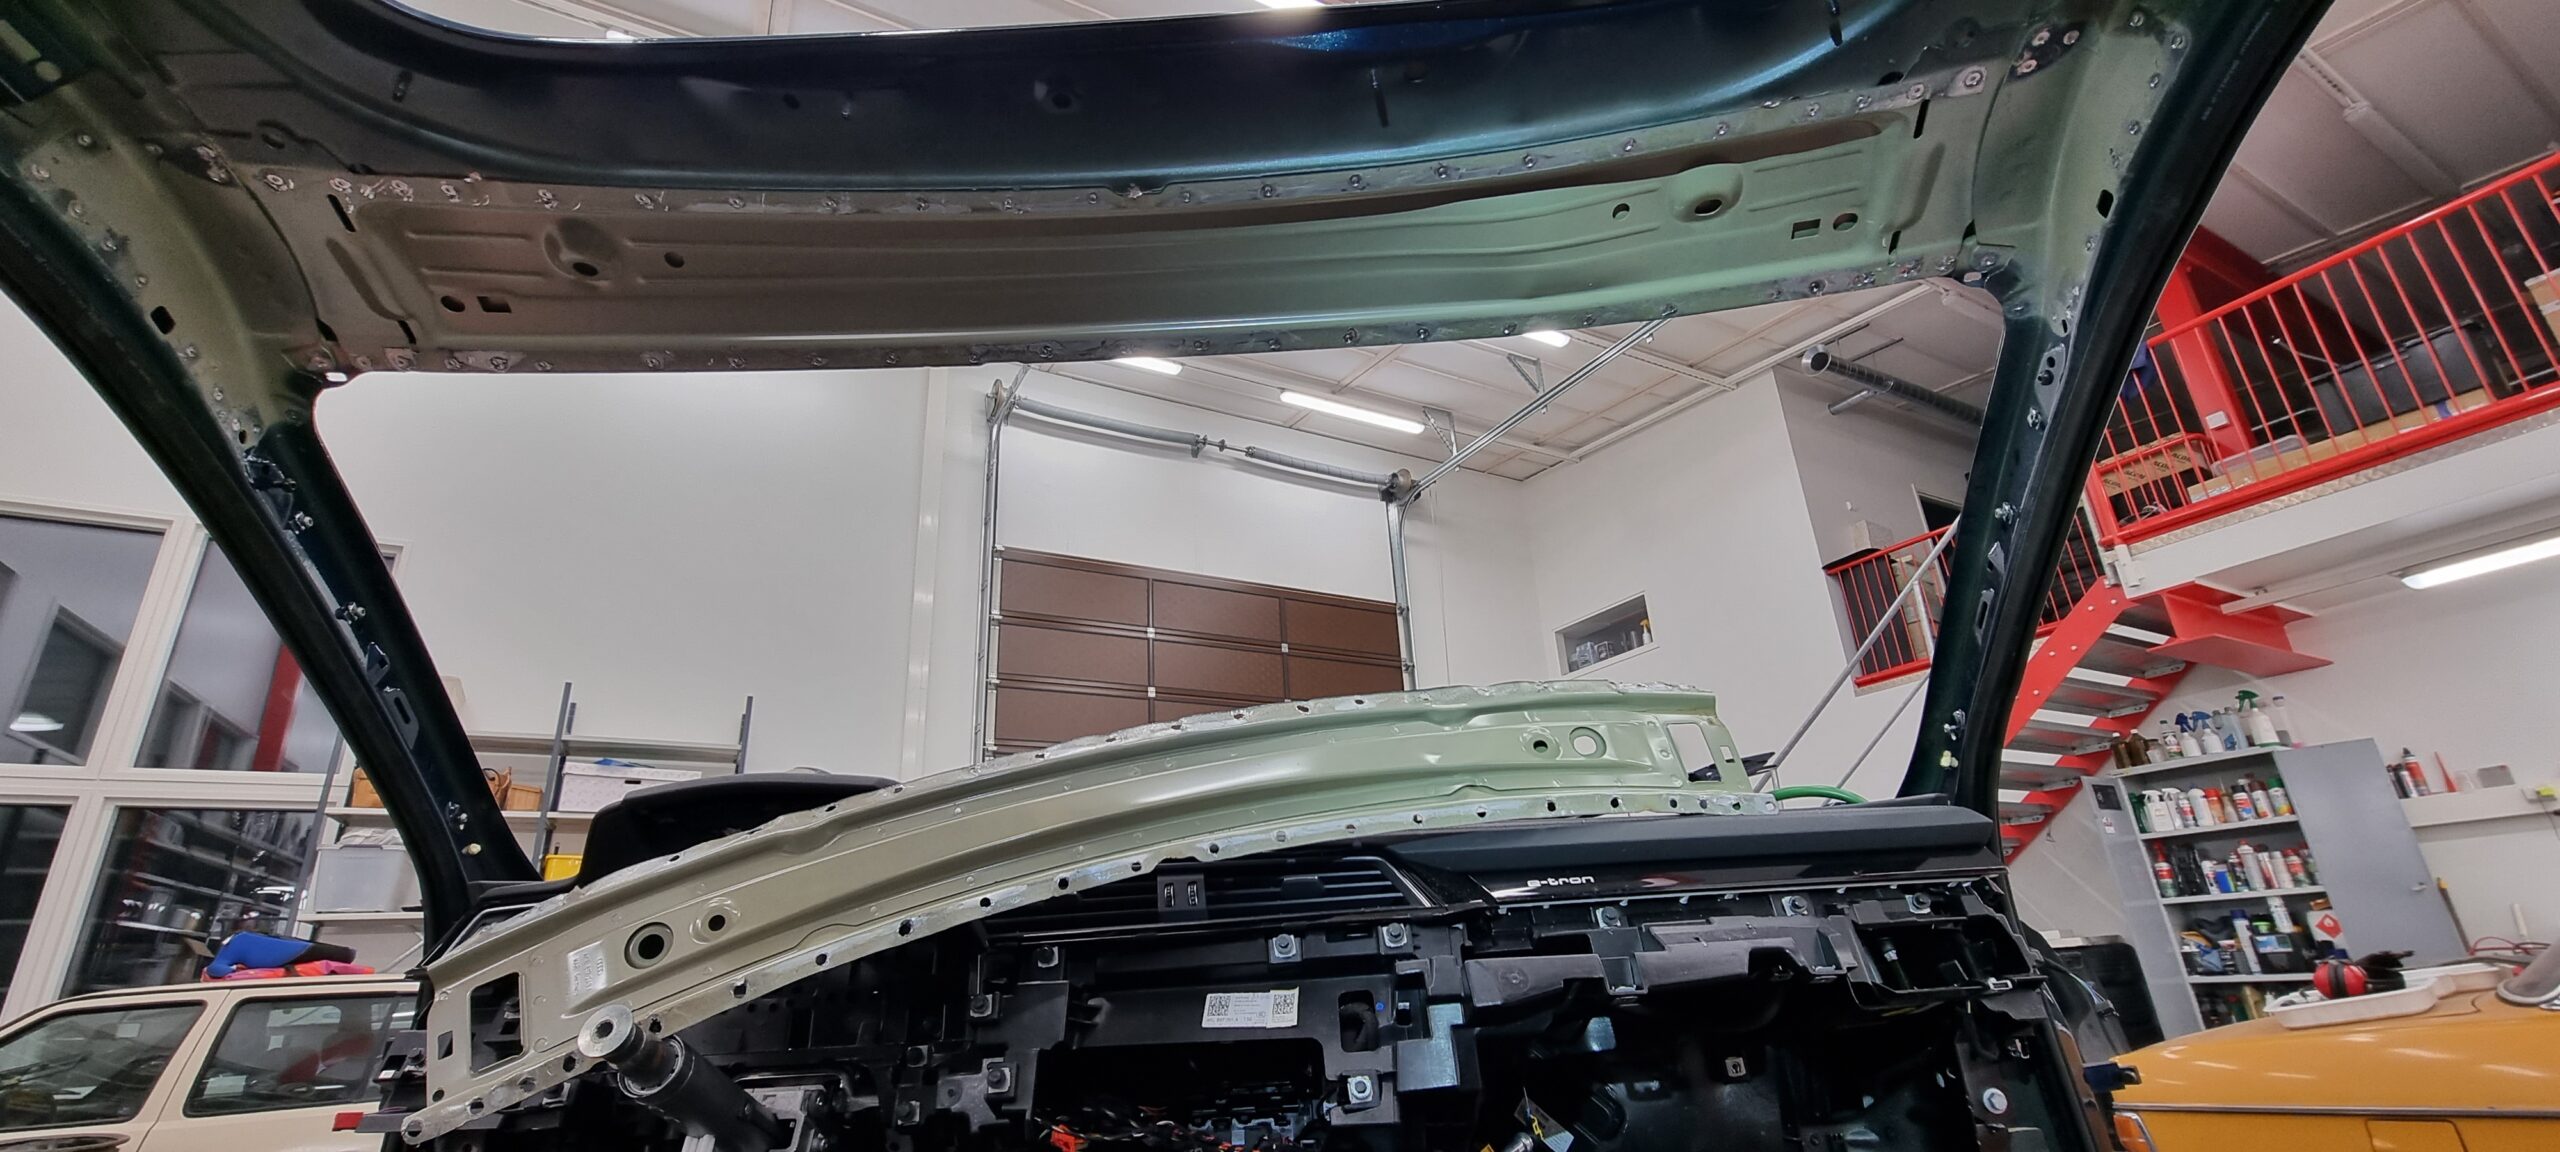
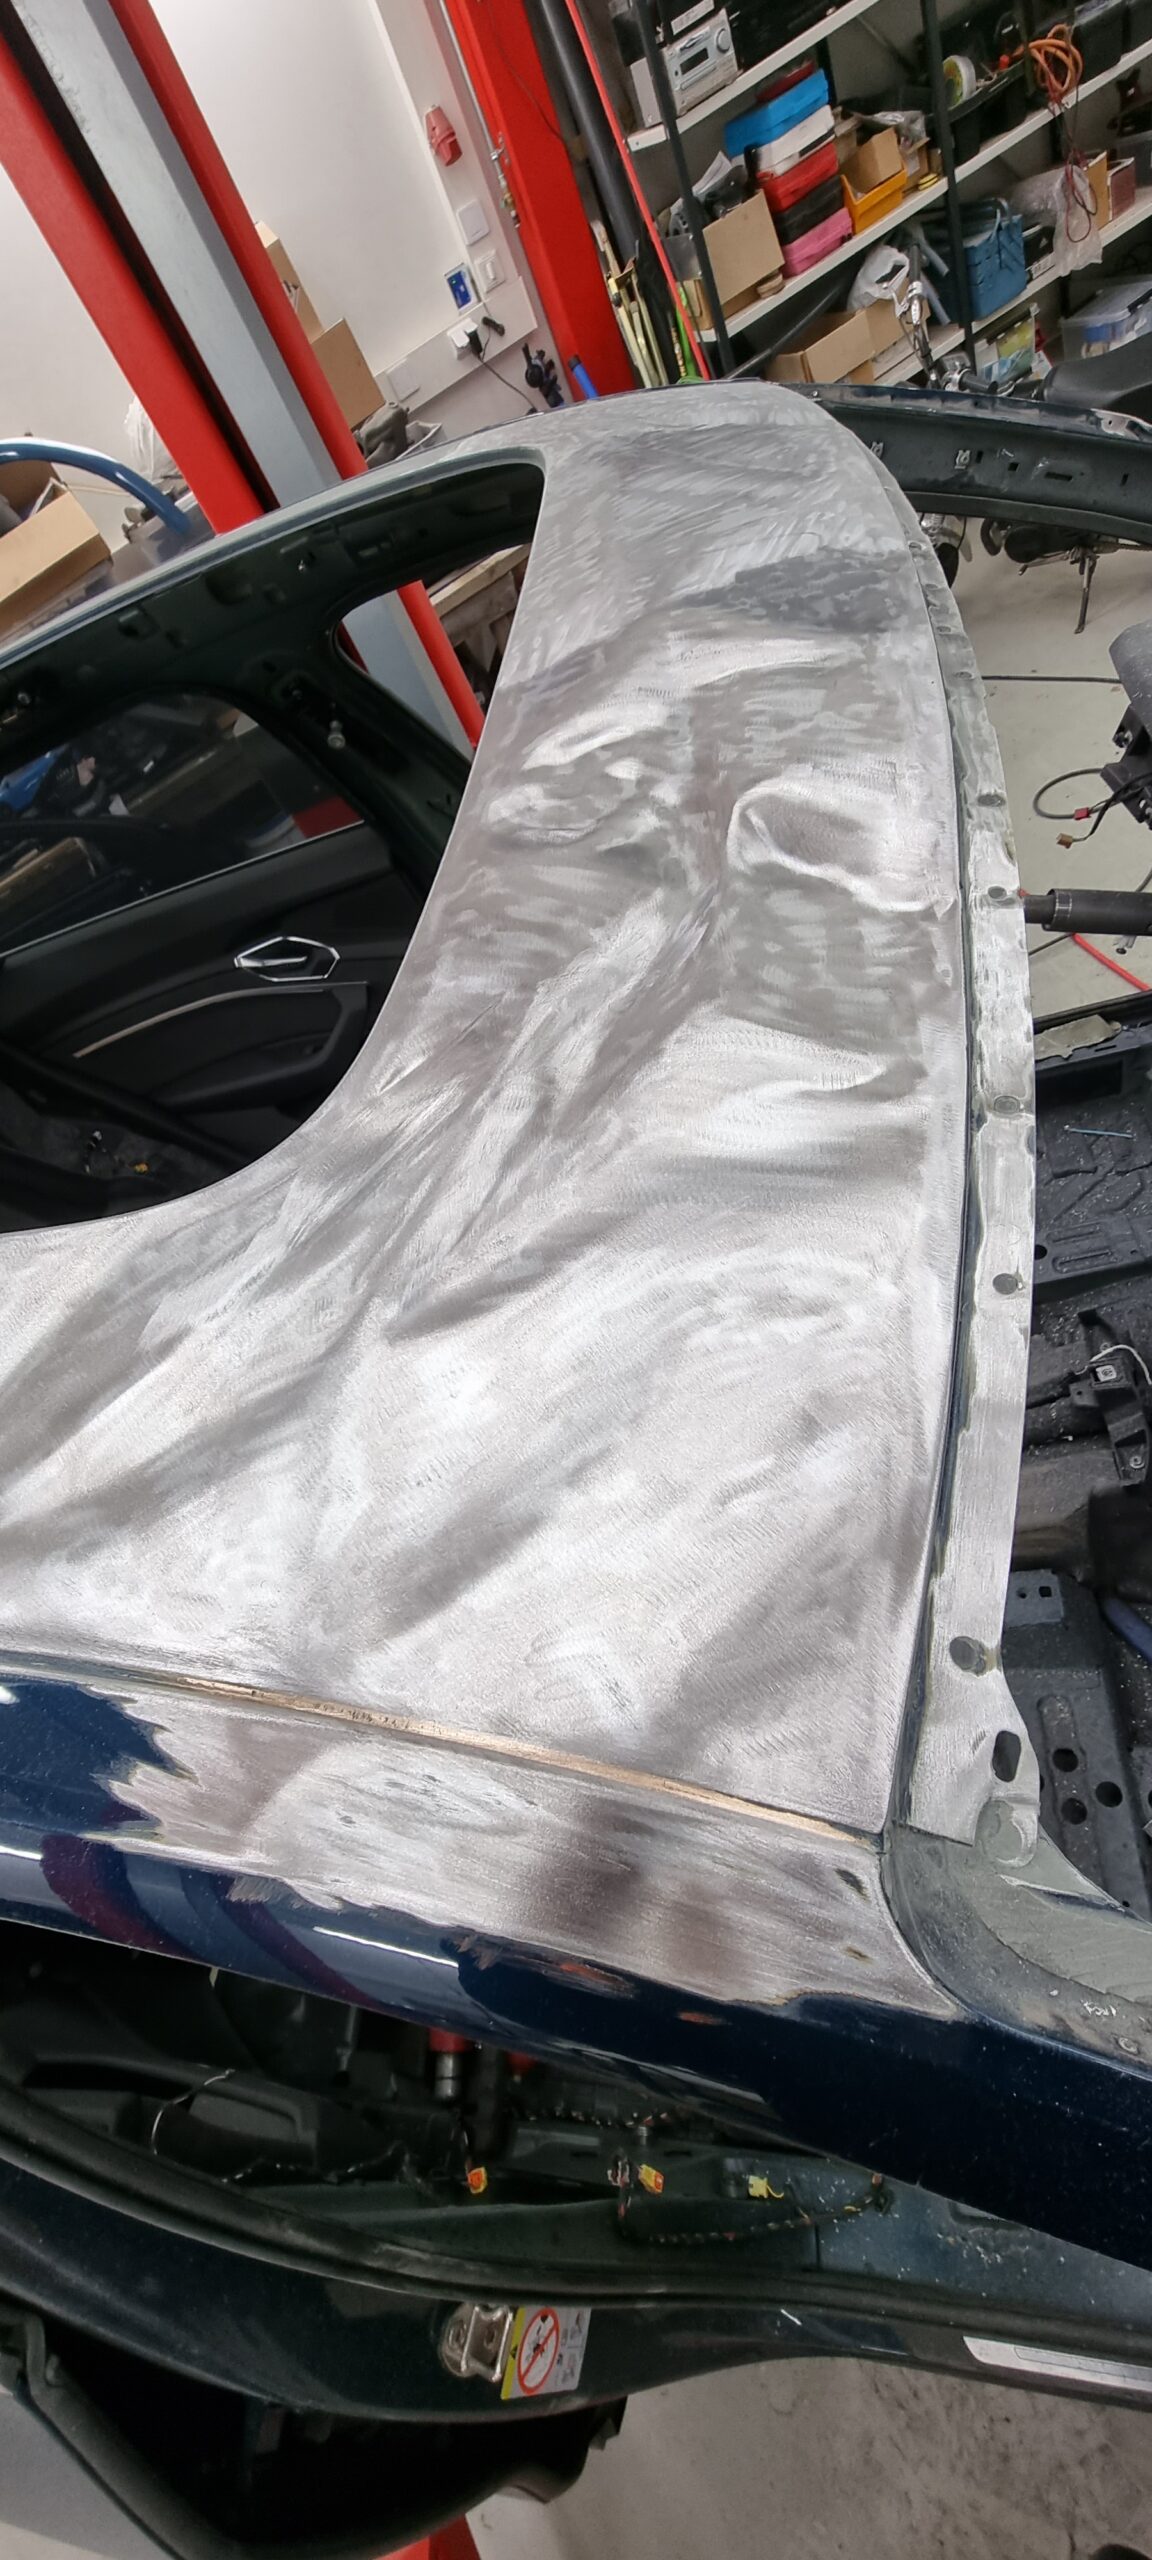
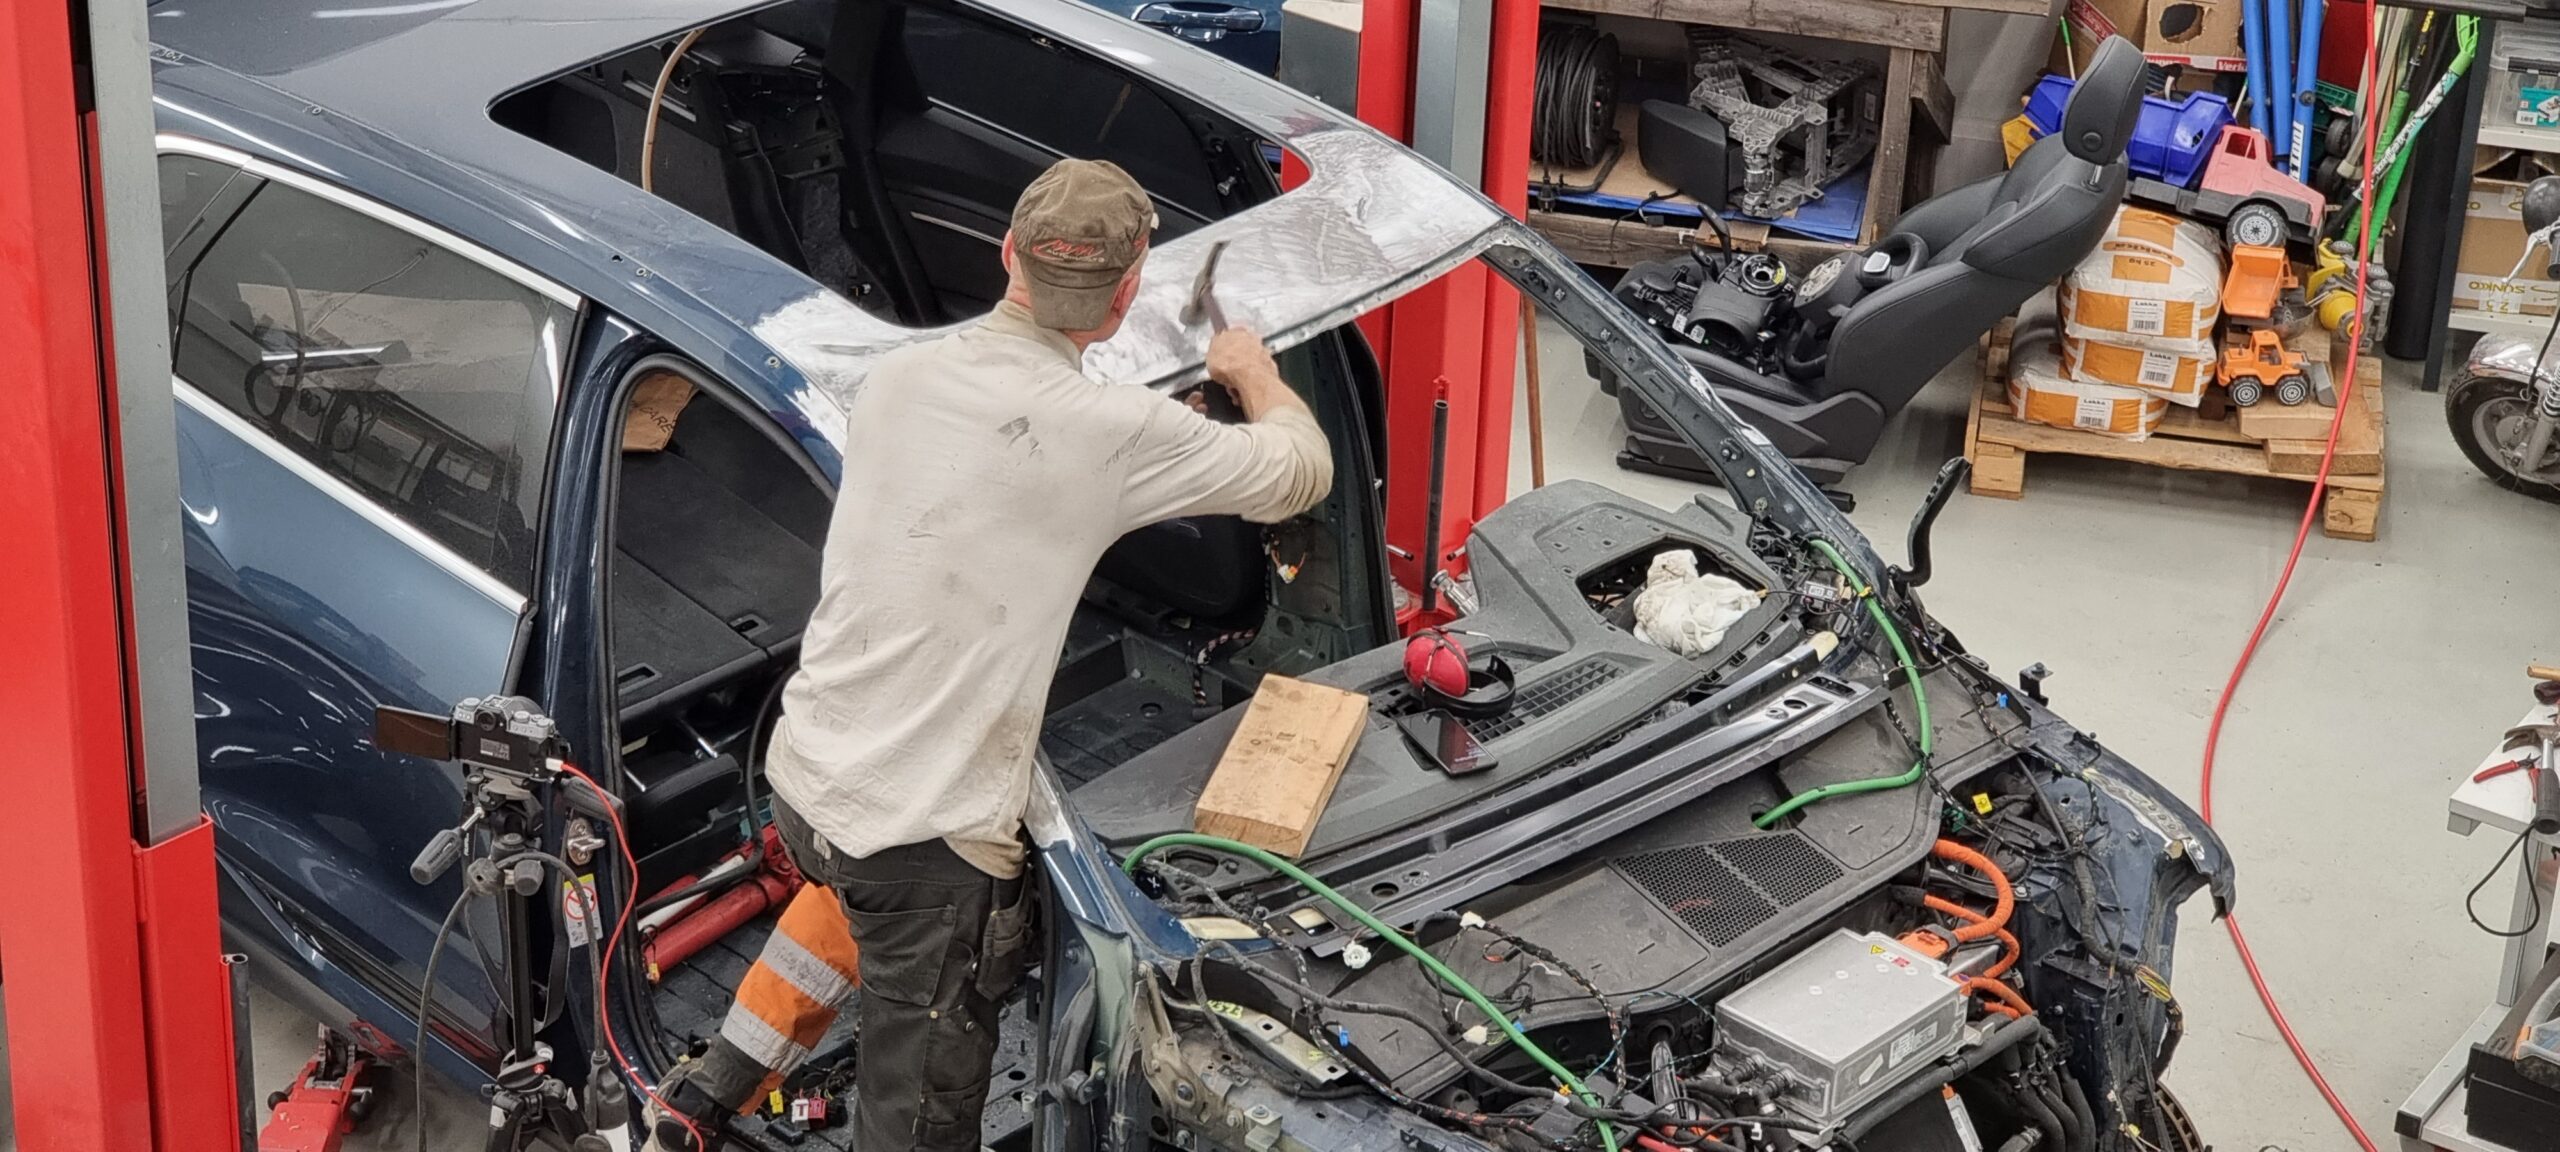
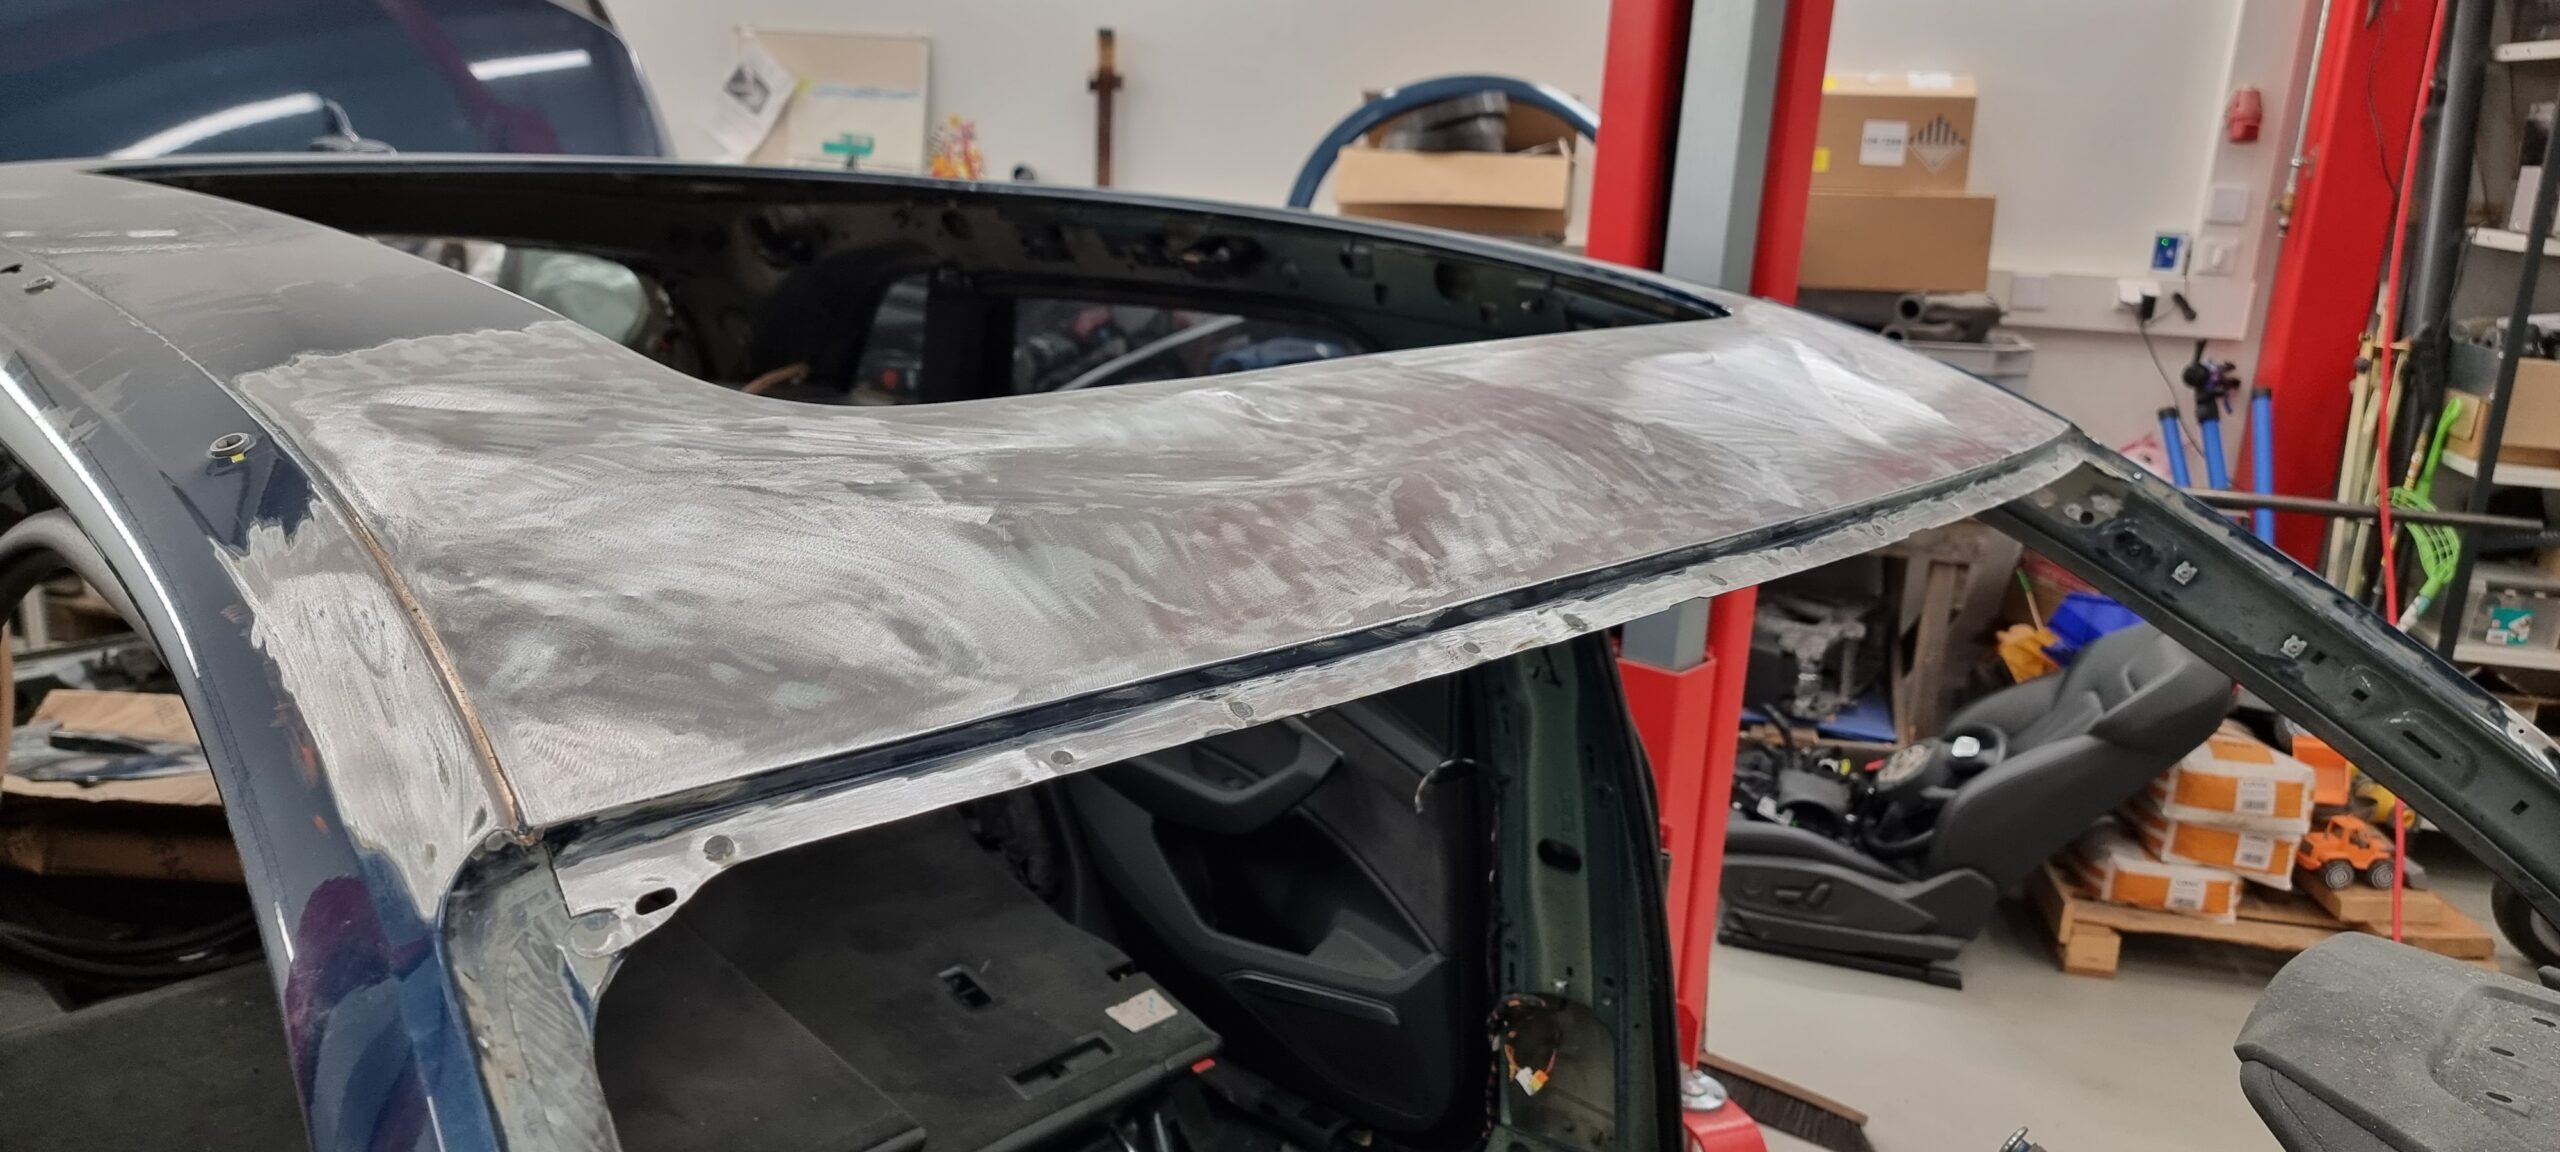
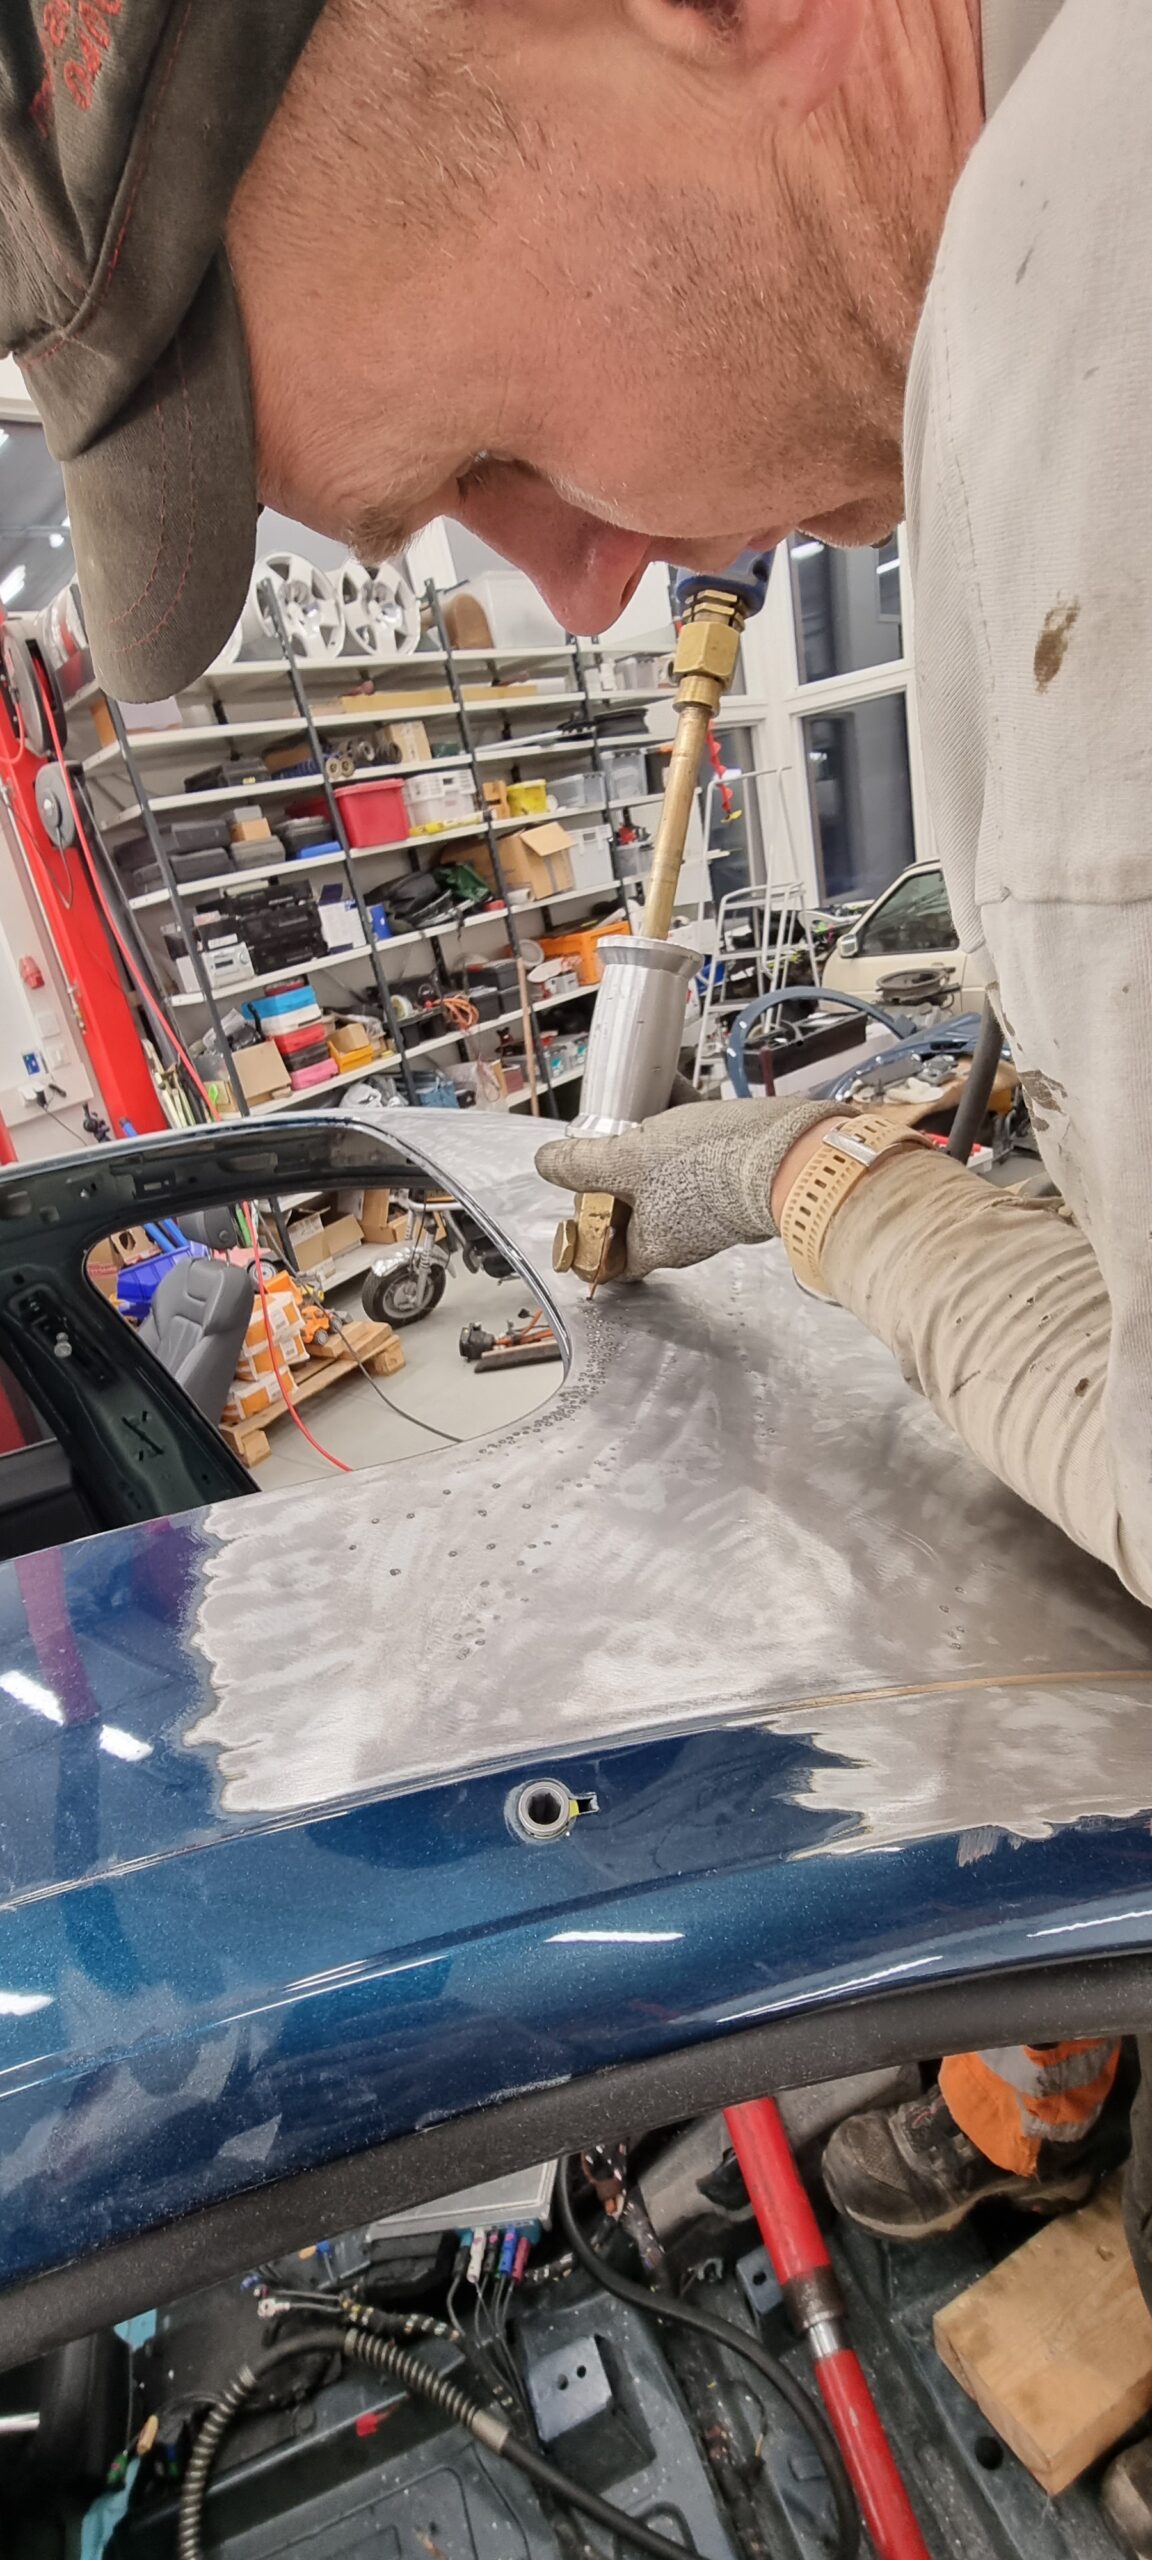
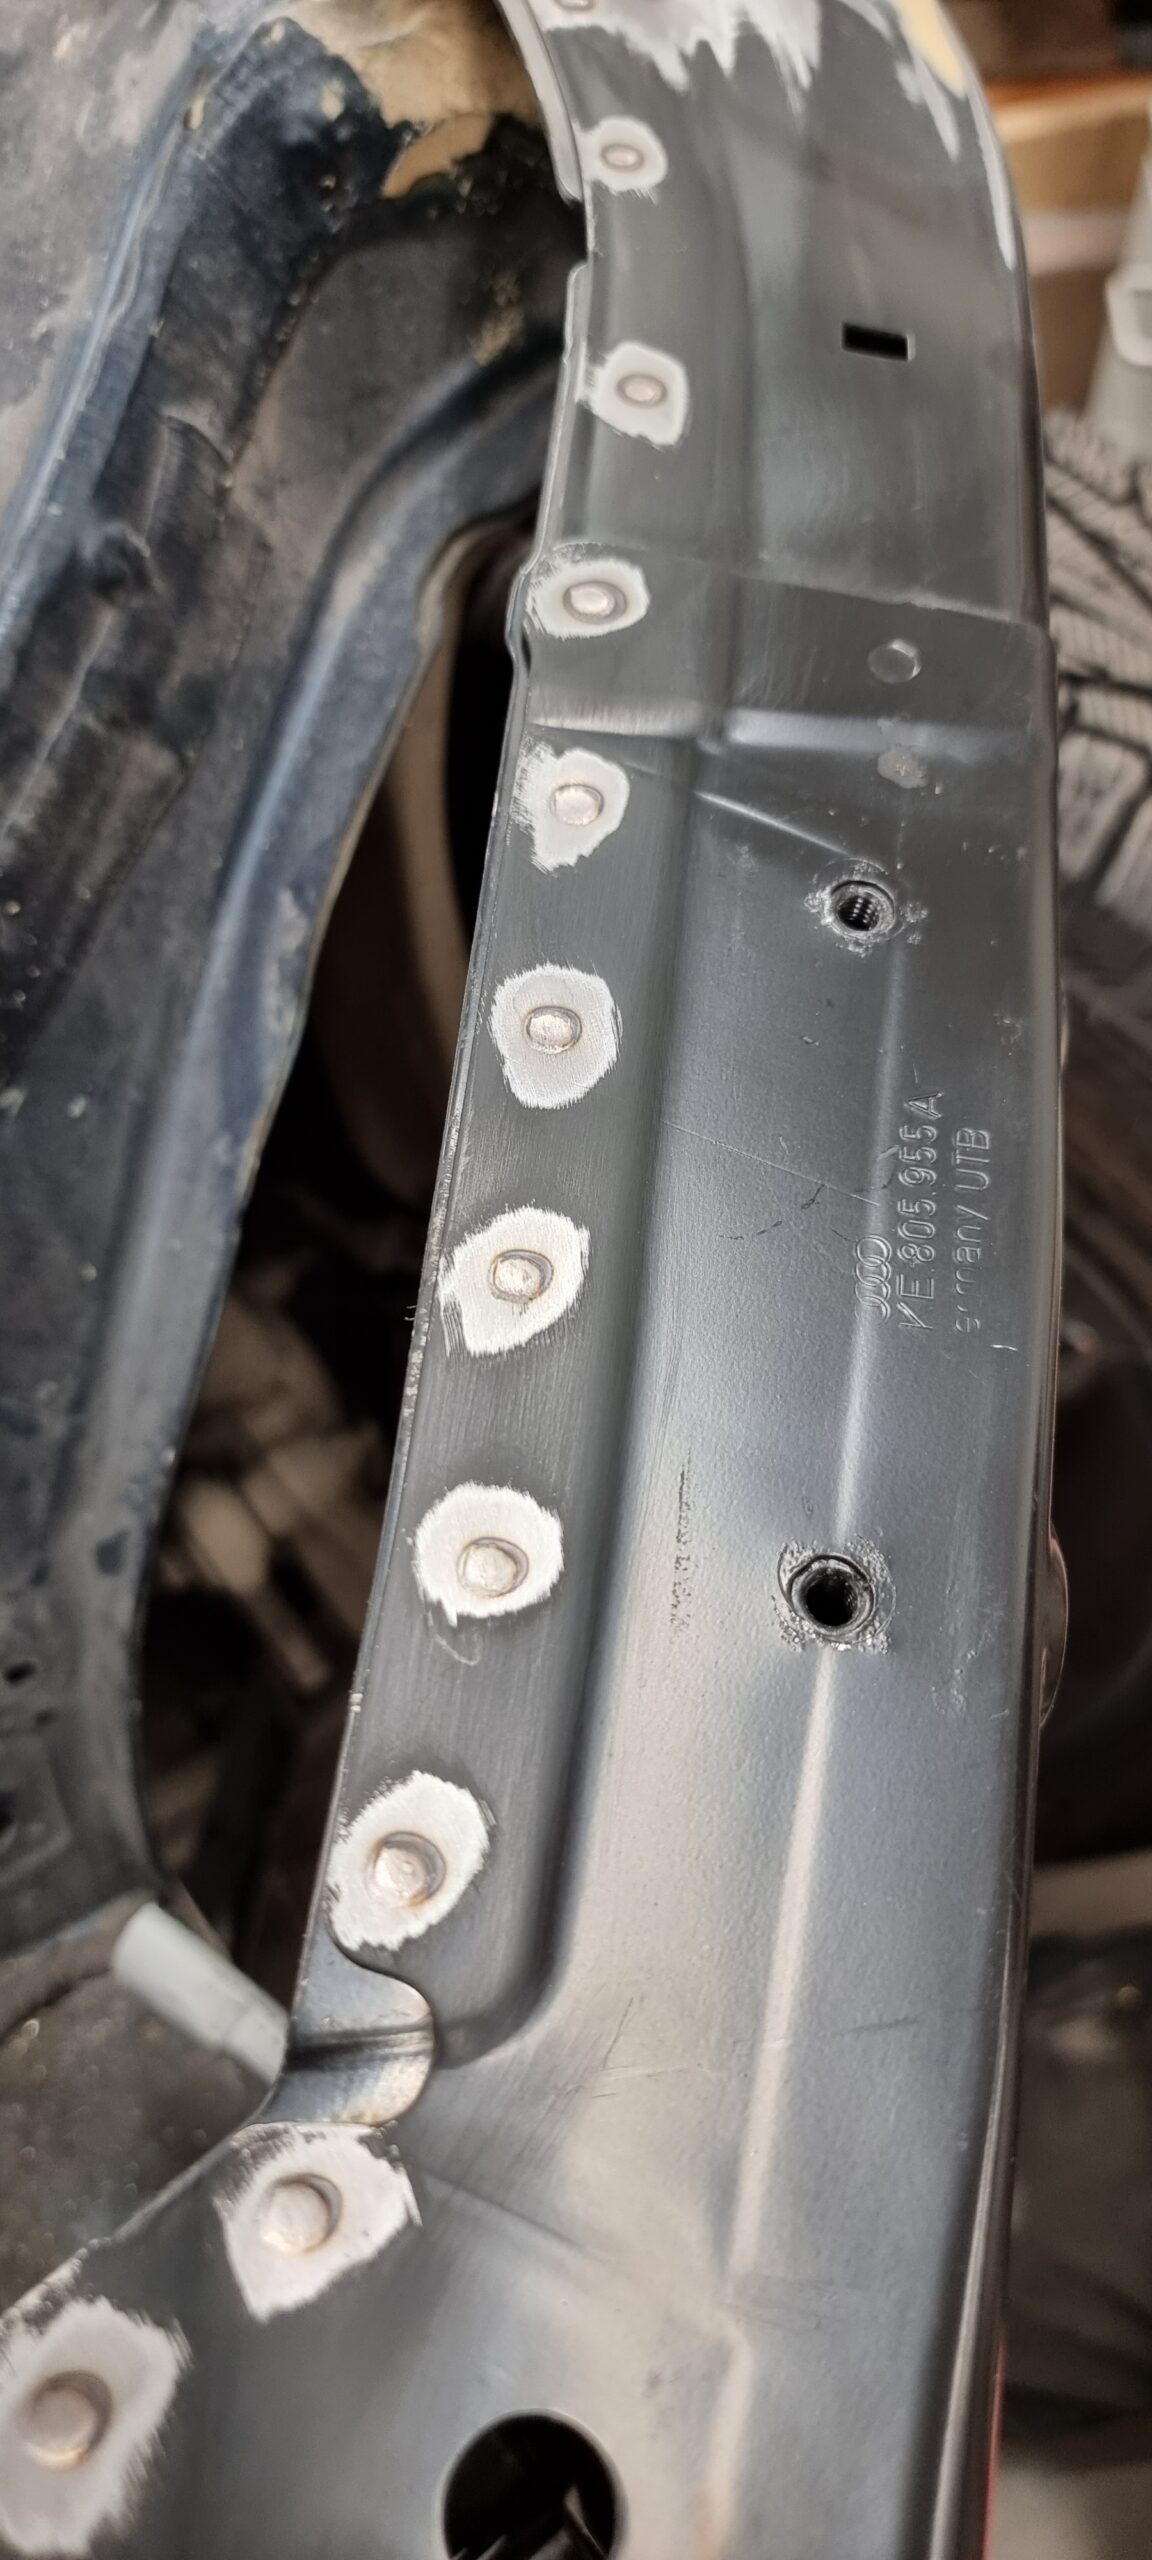
Etureunaan tuli uudet vahvikkeet, jotka pistehitsattiin toisiinsa kiinni ja vahvikepalkki liimattiin ja hitsattiin takaisin paikalleen. Tästä tuli oikein hyvä.

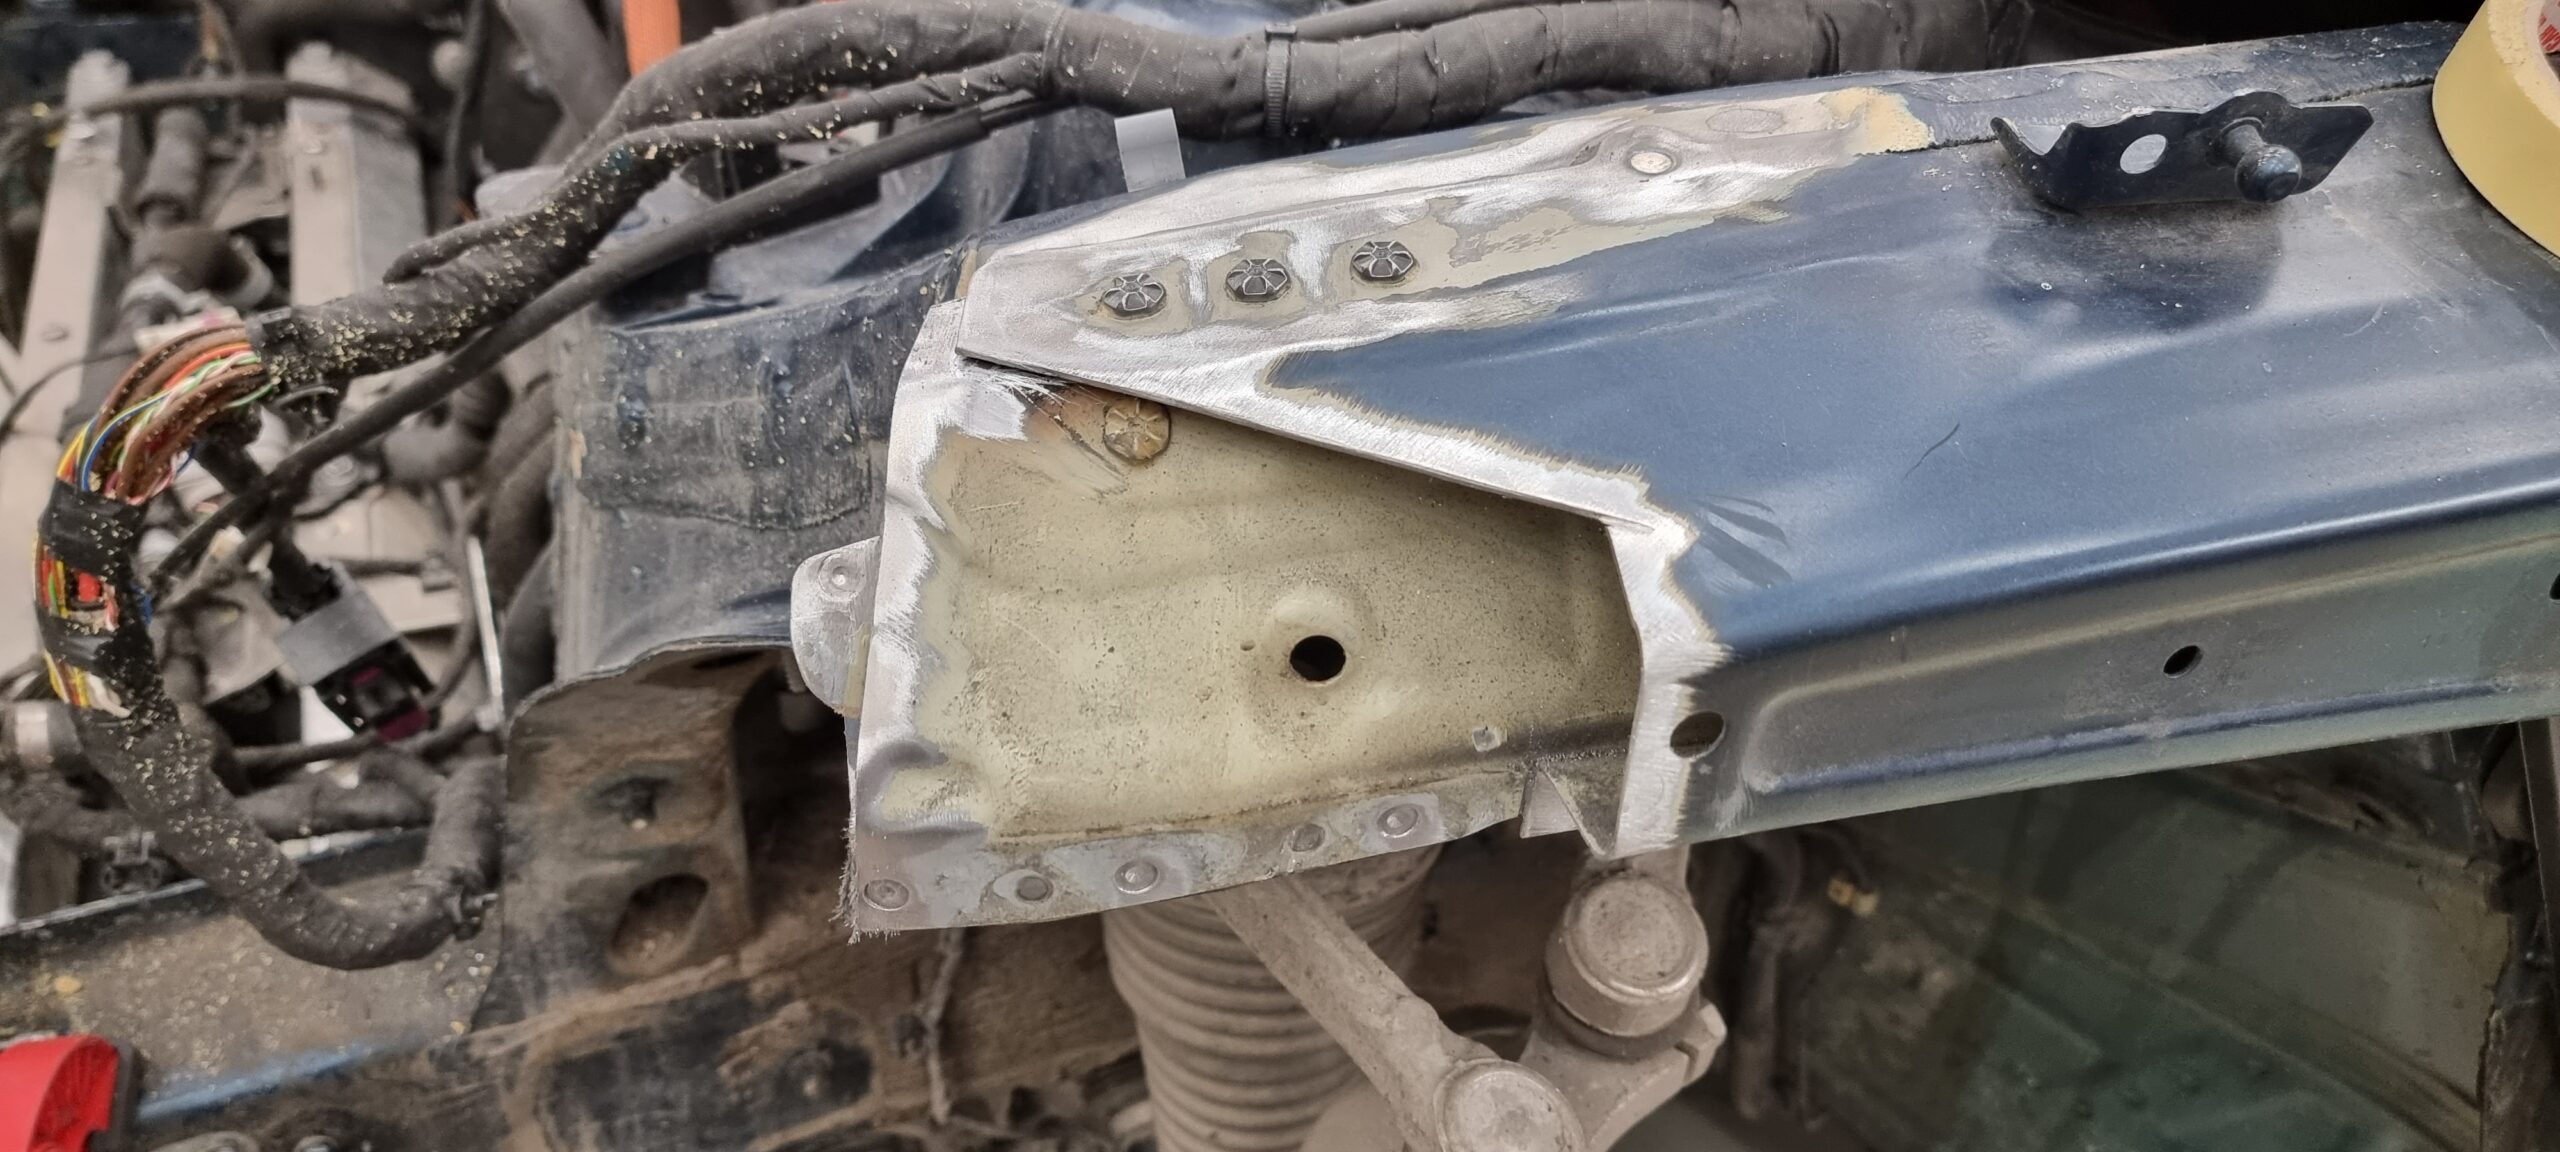
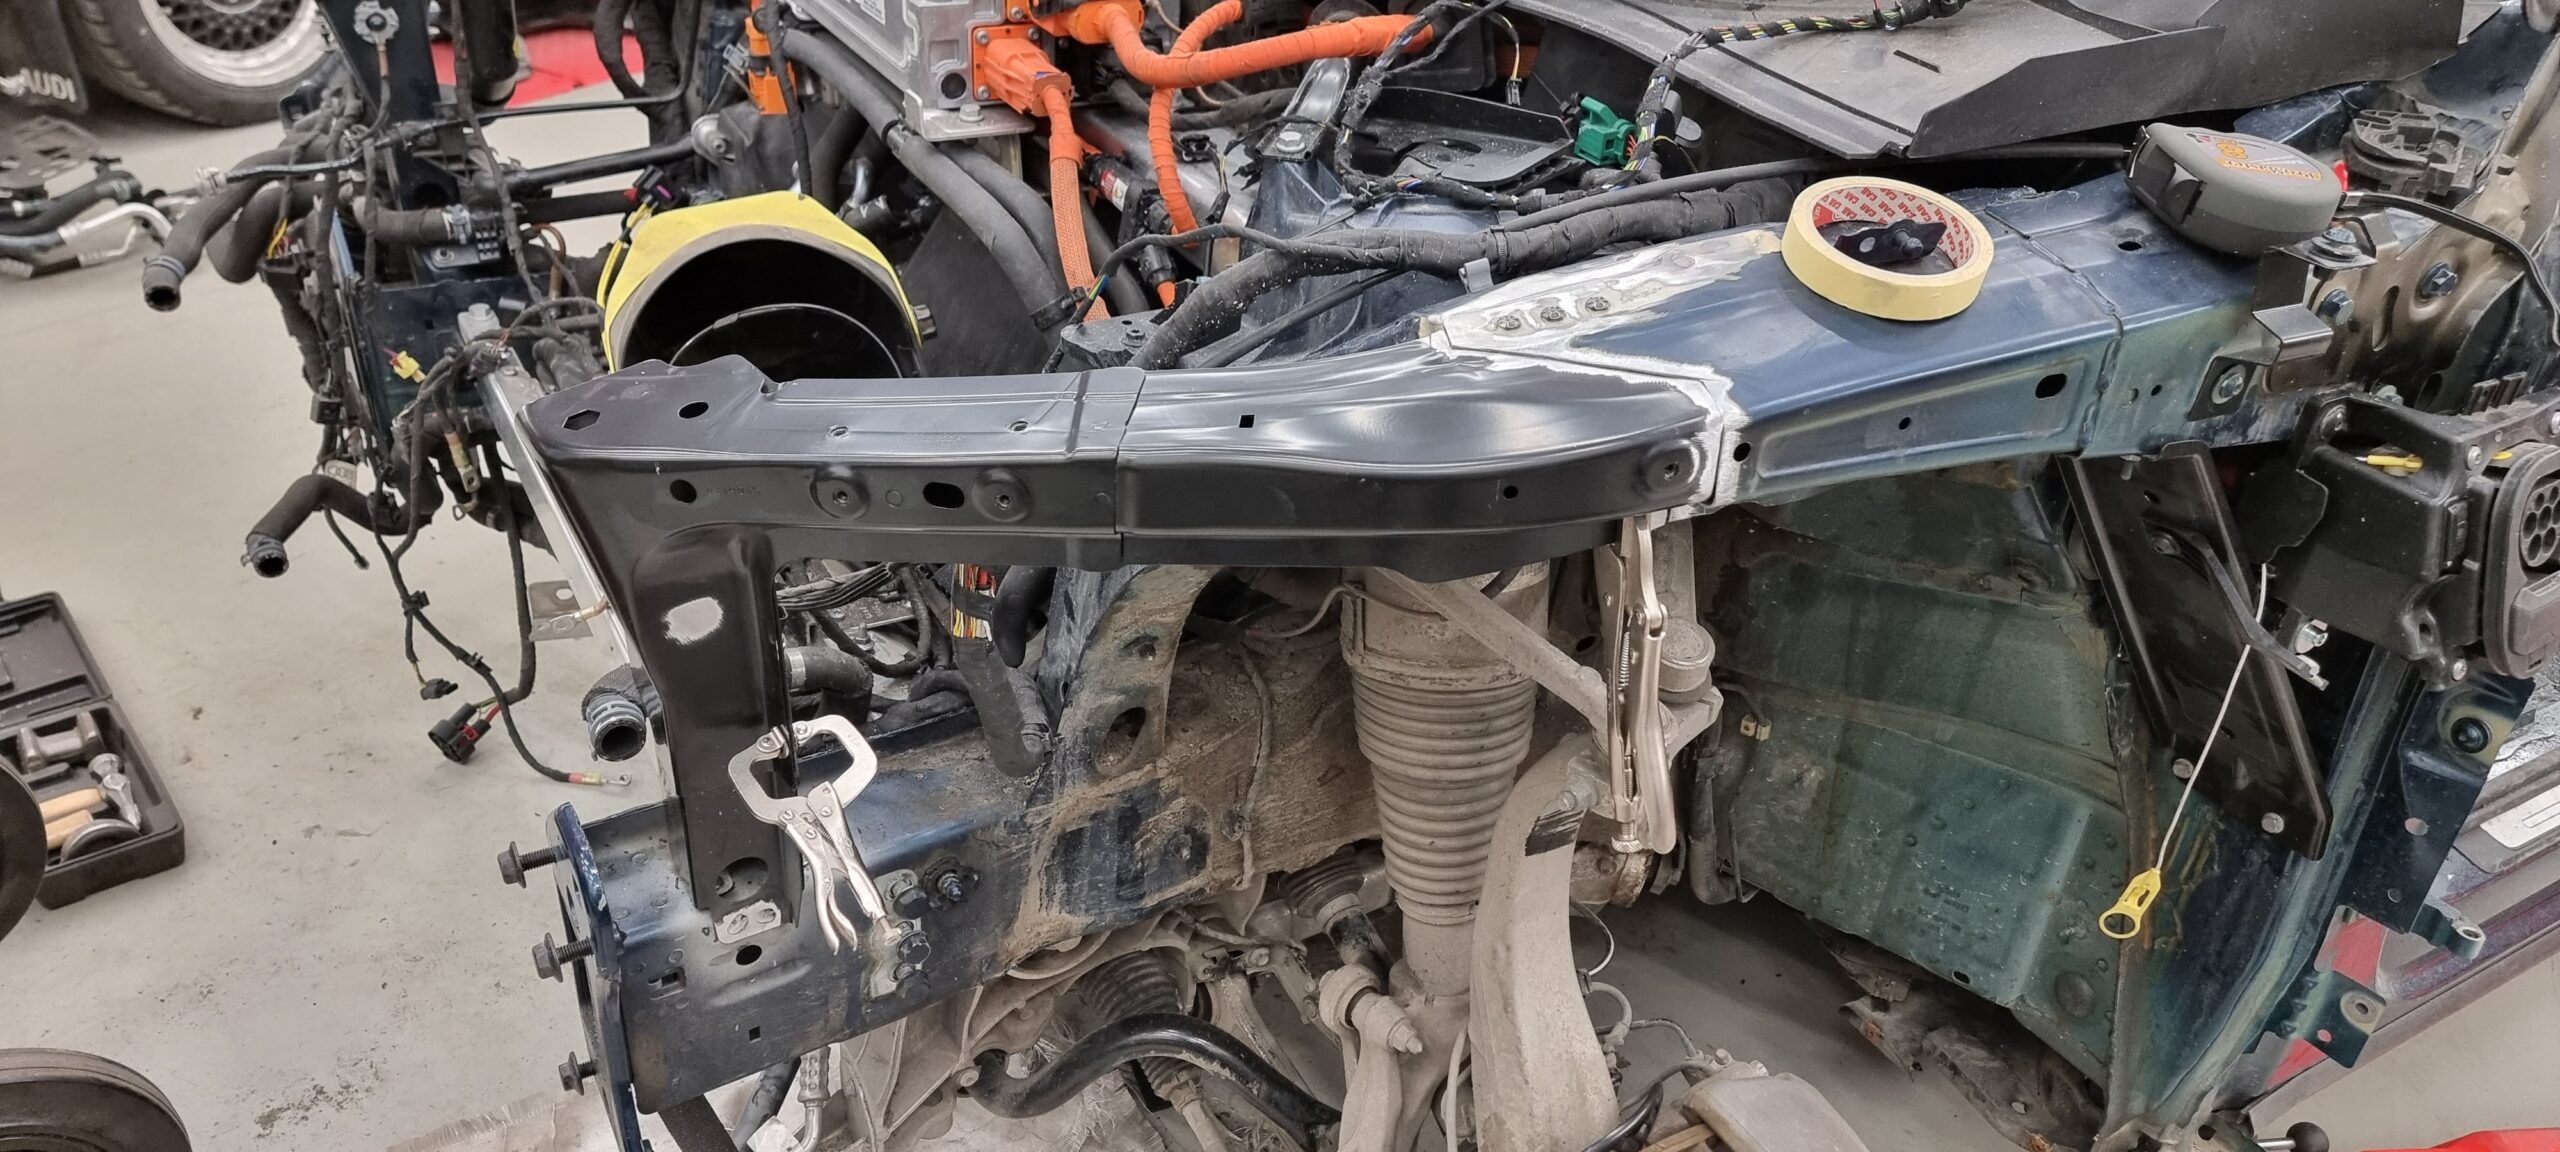
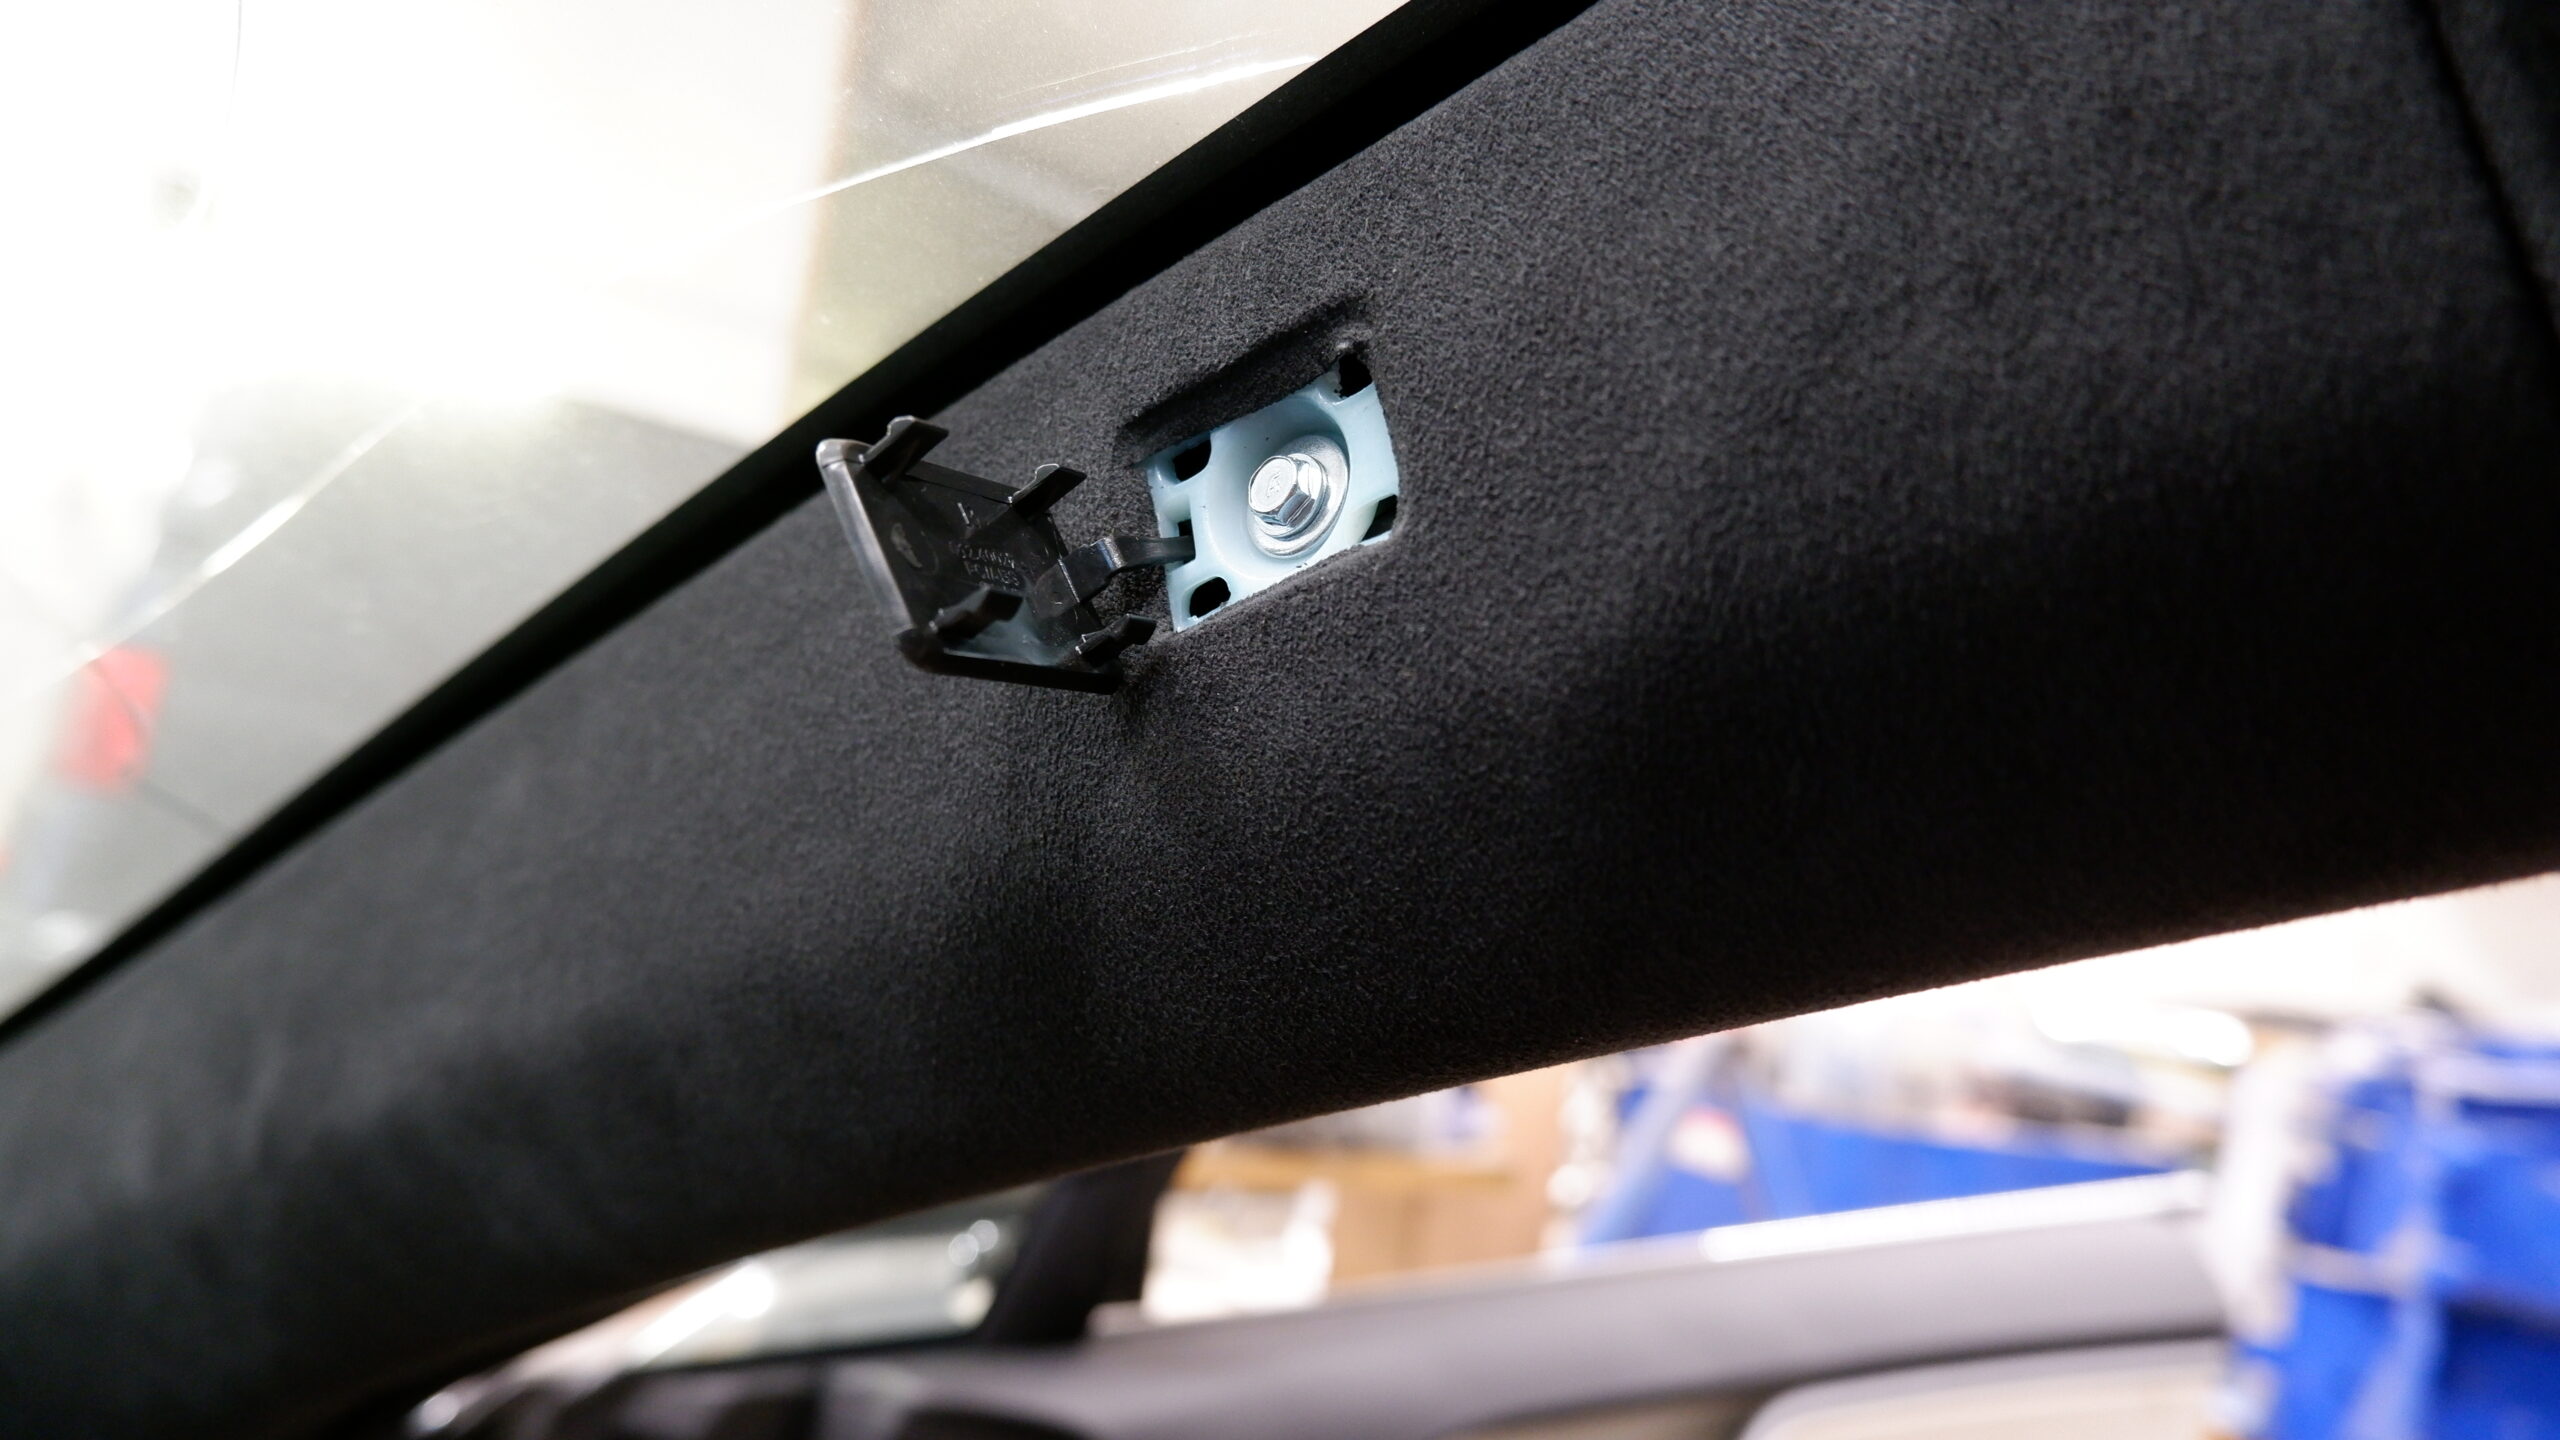
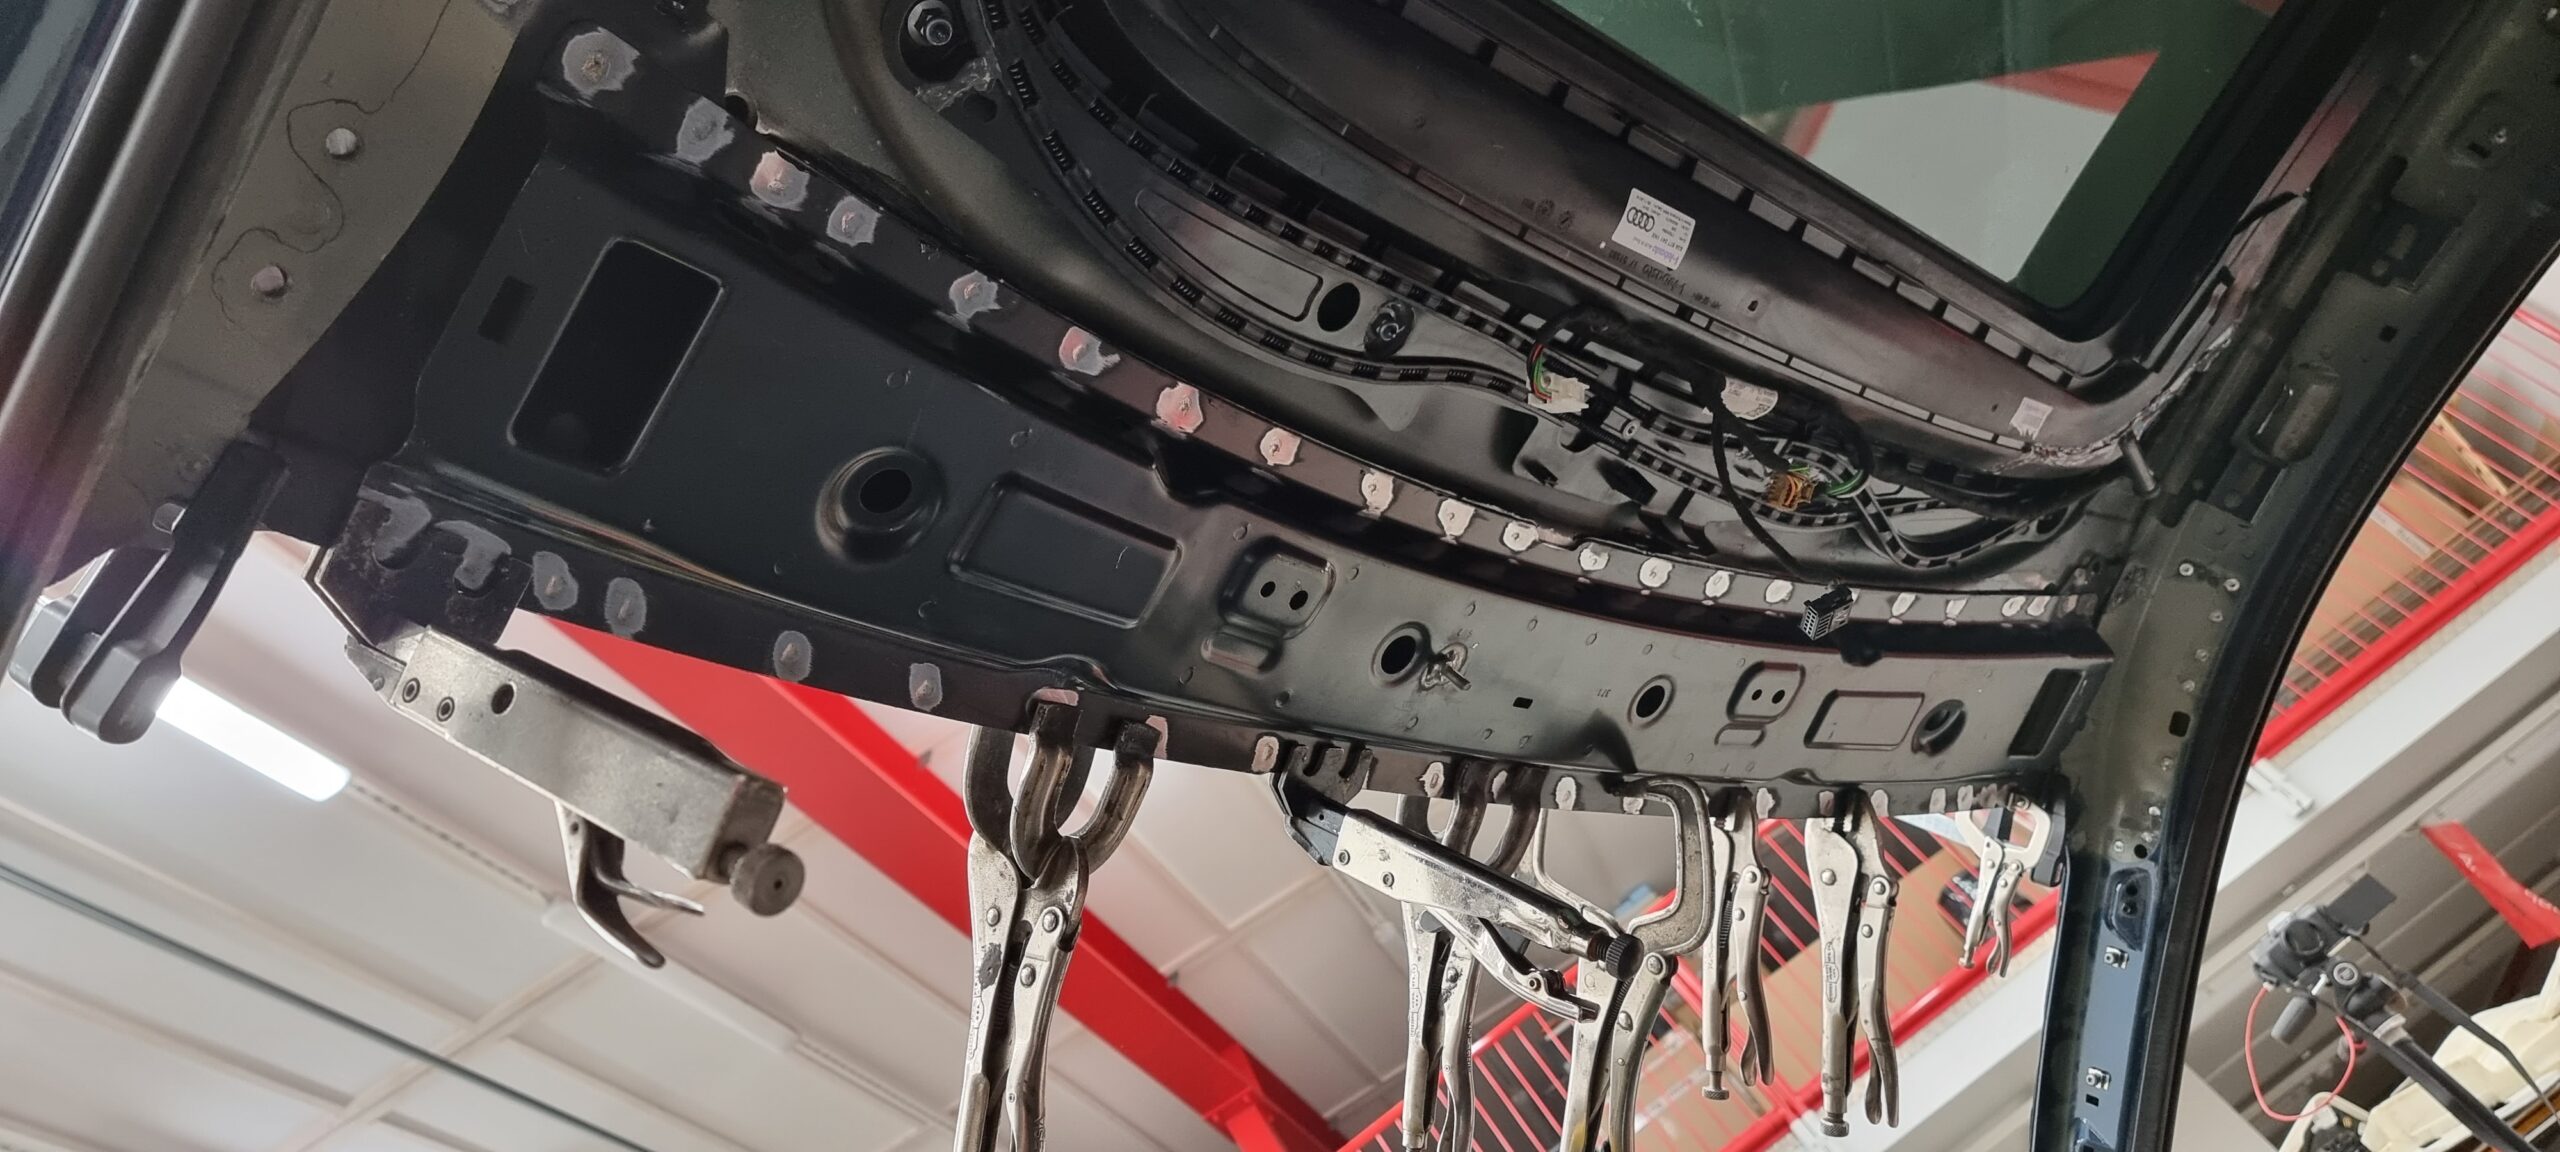
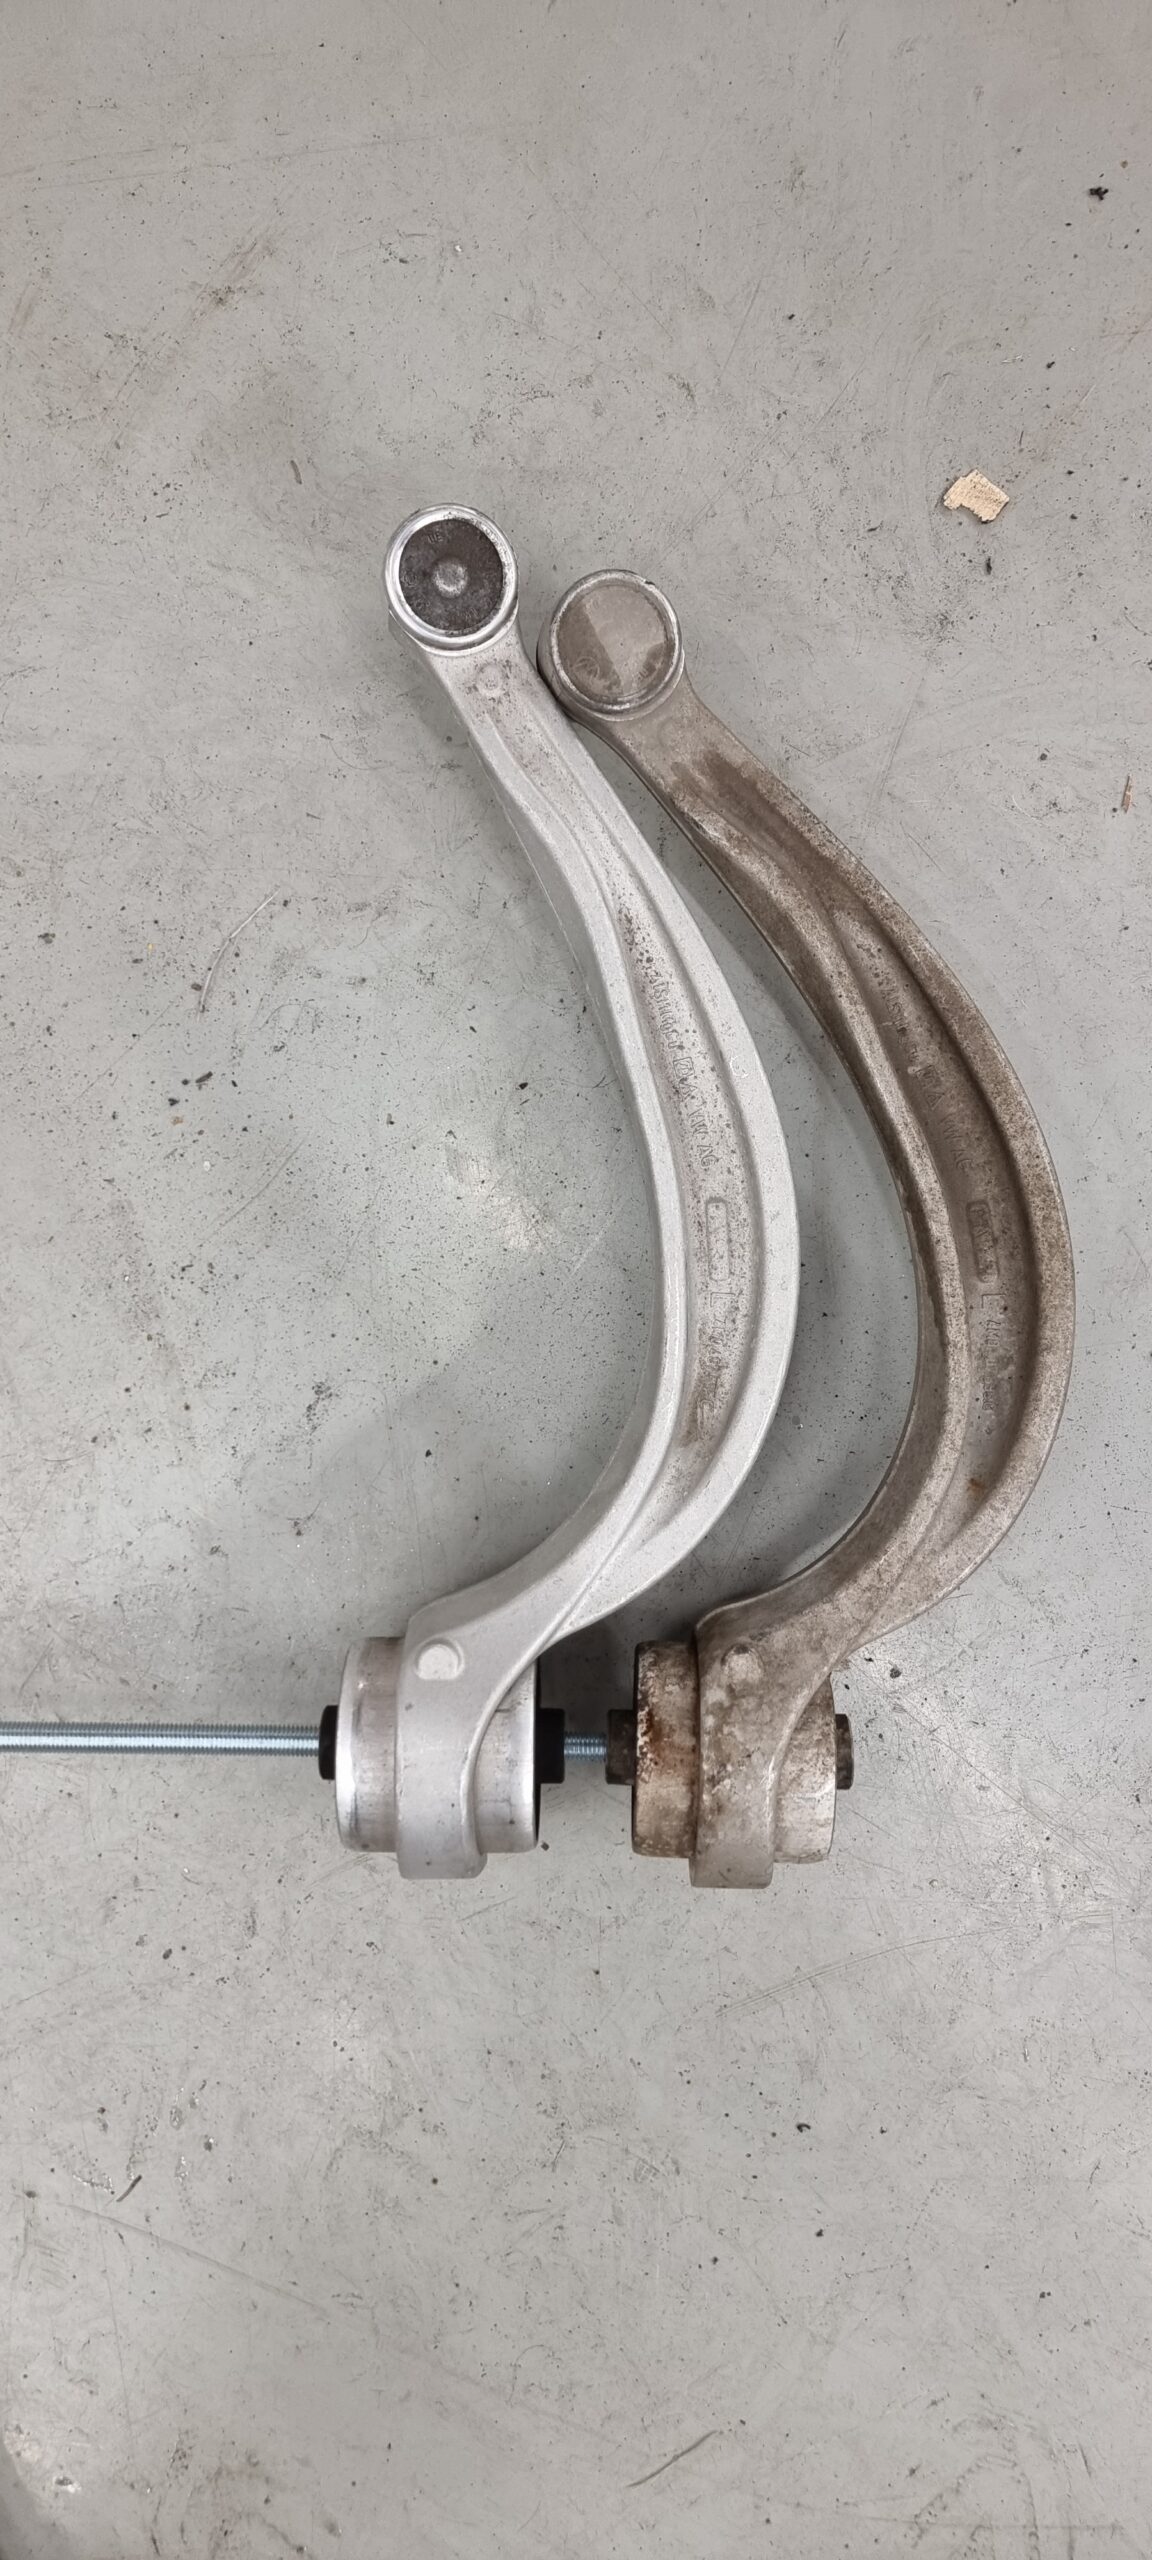
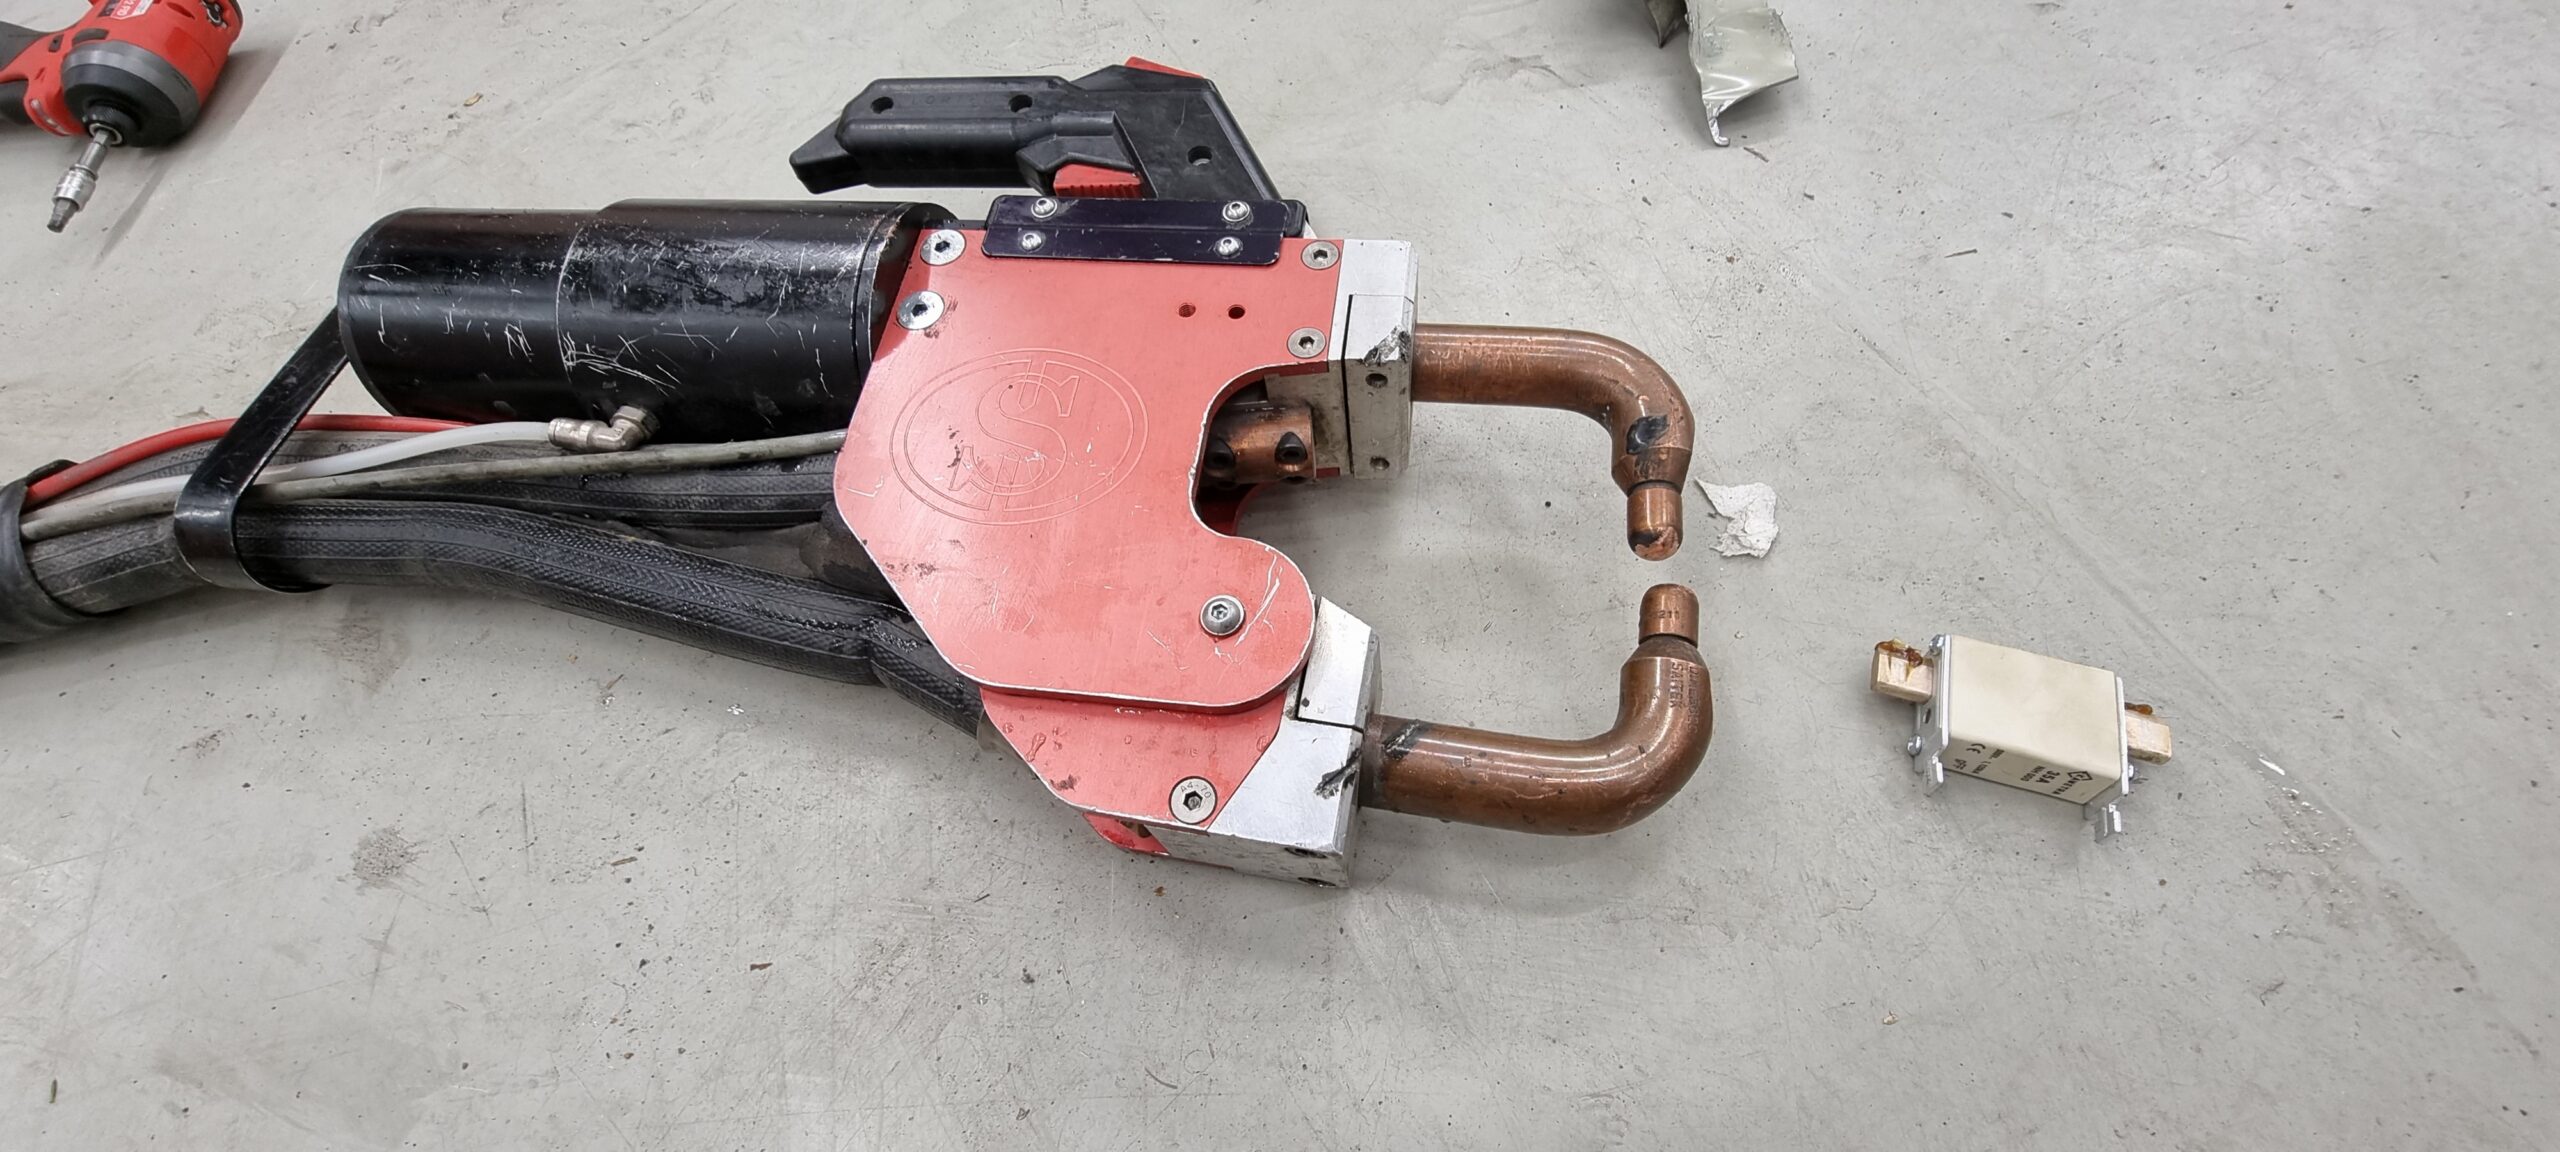
Myös etunurkkaan tuli kaikki yläaisaan liittyvät osat uusia osia. Koska iskaritorni oli täysin paikallaan, vaihdettiin vain itse yläaisan osat. Sen viimeistely jäi myöhäisempään ajankohtaan, kun pistehitsauskone lähti huoltoon.

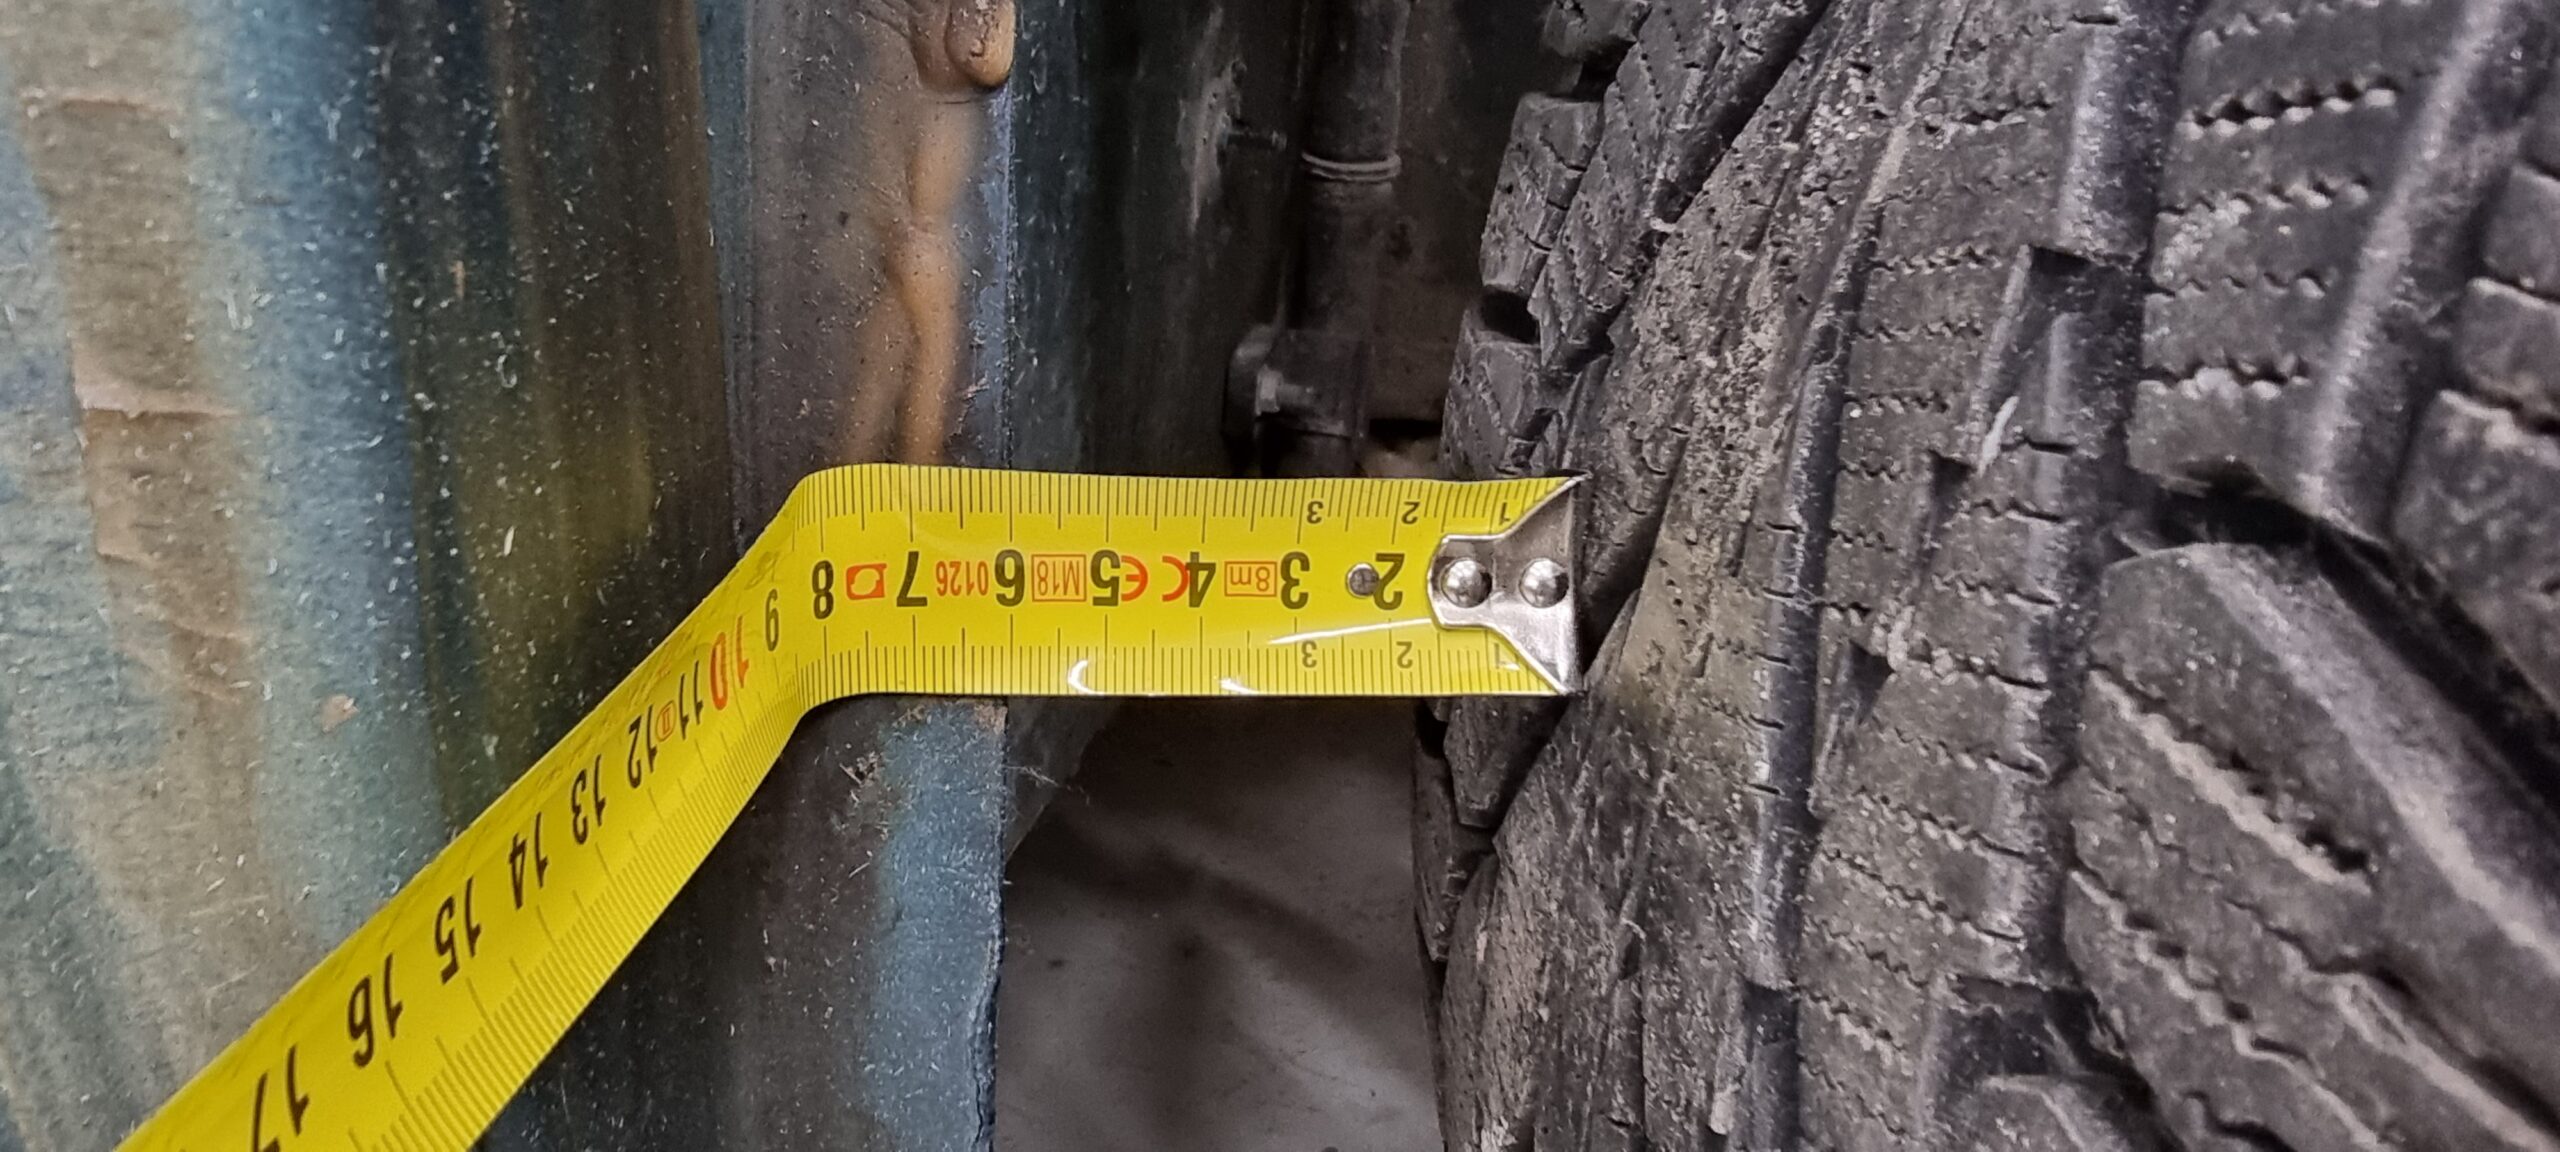
Autoa katsellessa alkoi pistää silmään, että kuljettajan puolen pyörä on taaempana kuin toinen pyörä. Tämä ei voinut tarkoittaa muuta kuin vääntynyttä tukivartta, joka löytyi jälleen eBaystä ja vaihtui ripeästi.

Myös takapuskuri piti purkaa pois, koska takanurkka oli ottanut pienen osuman motarin kaiteeseen.
Maalit pois ennen oikomista

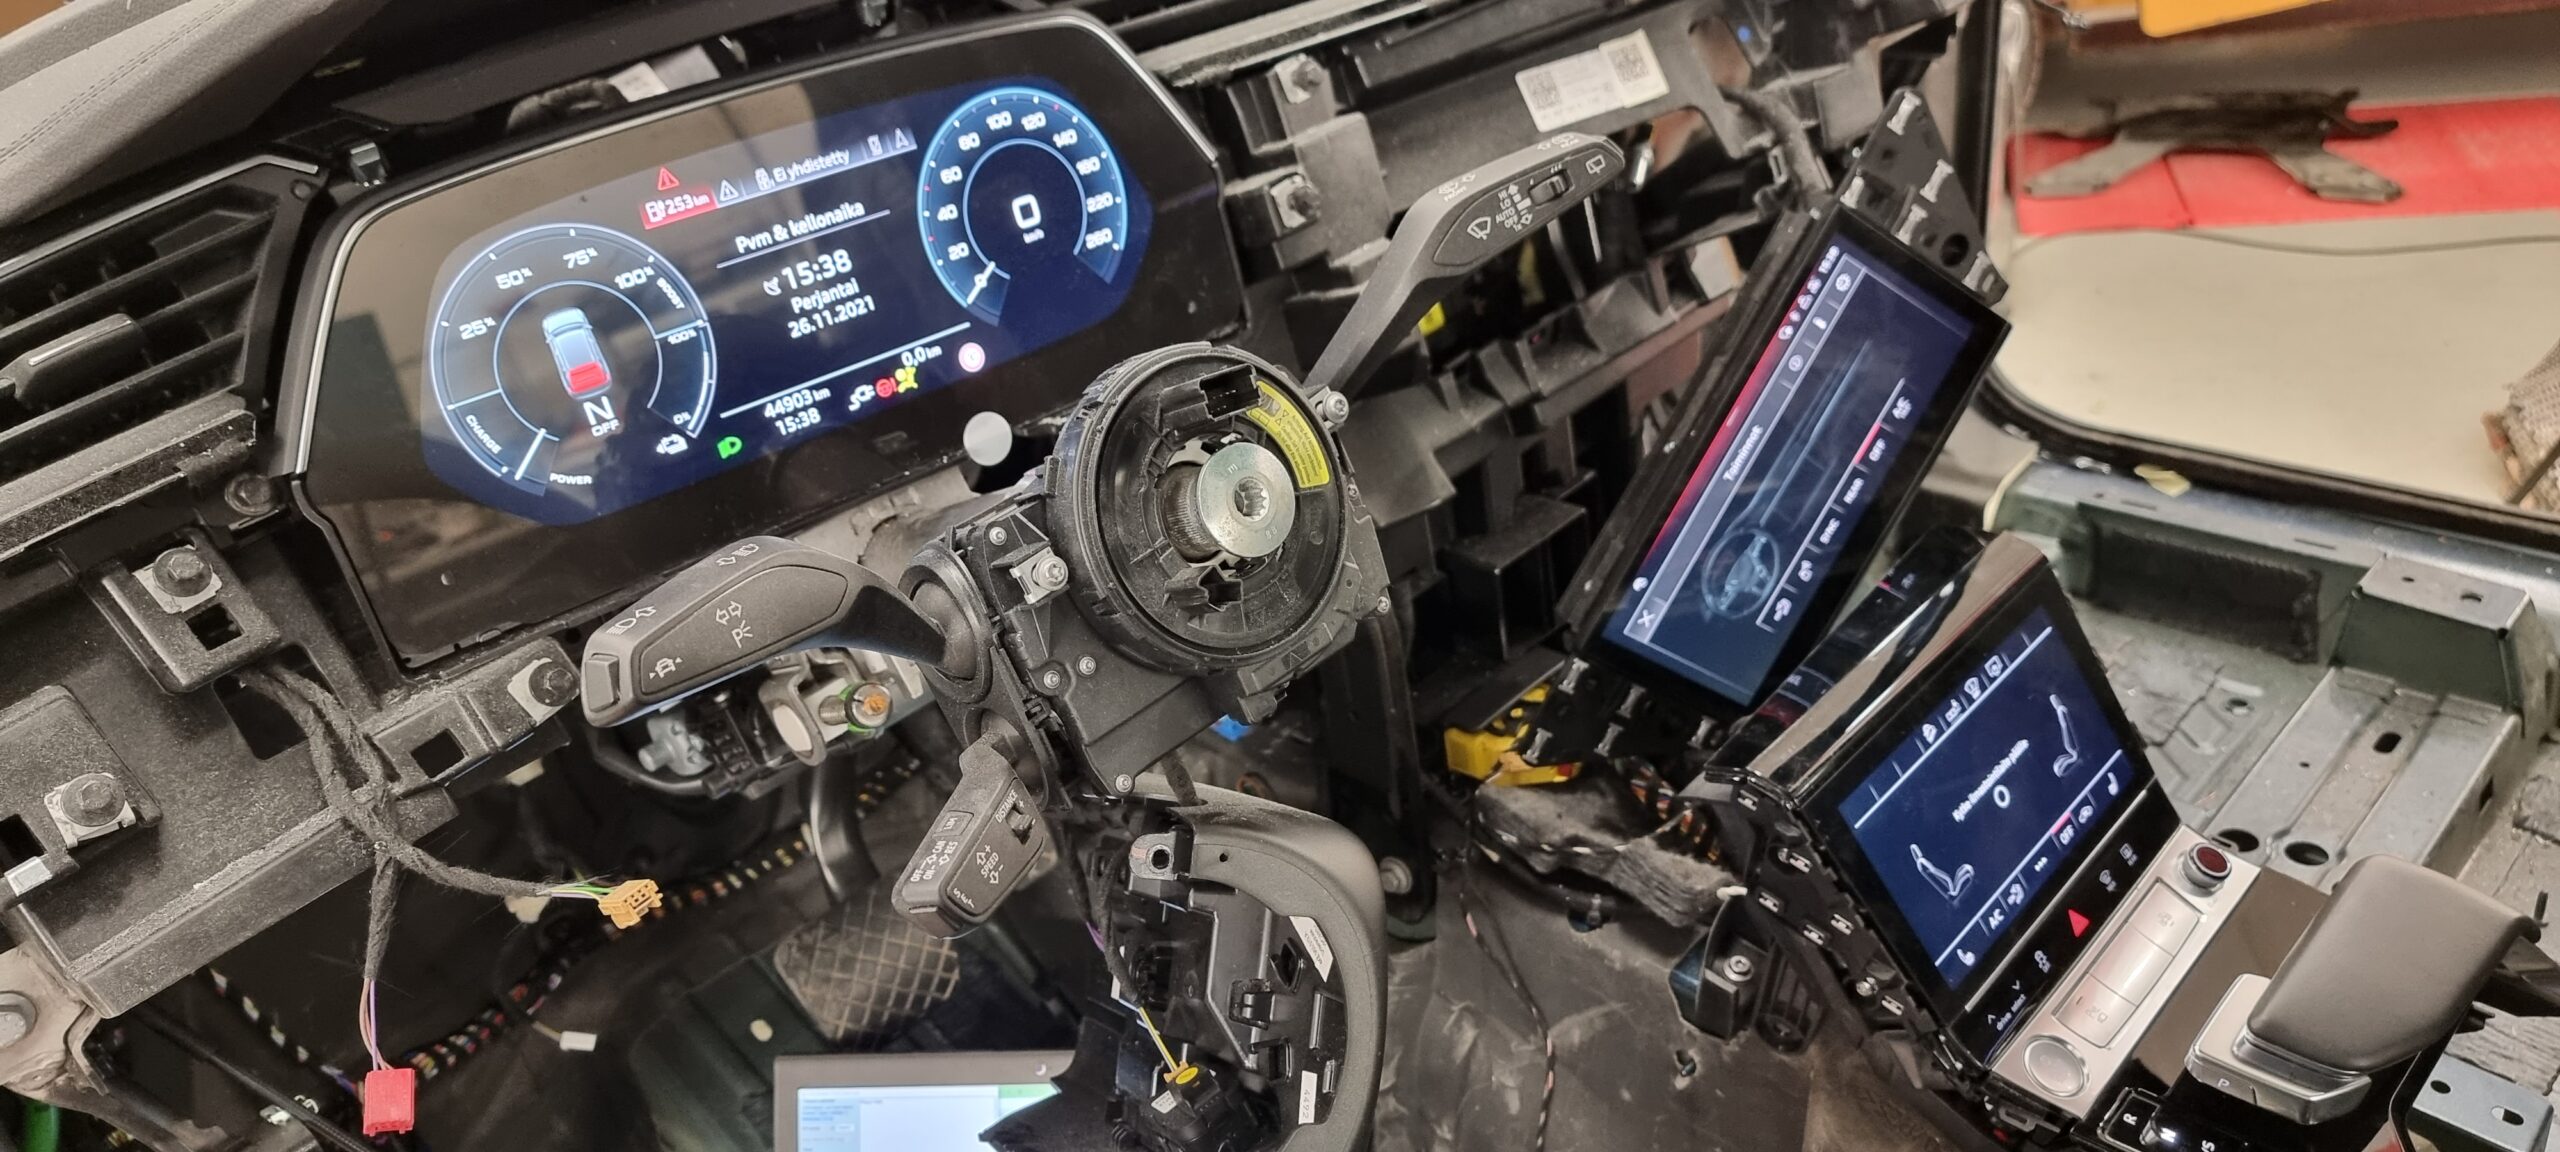
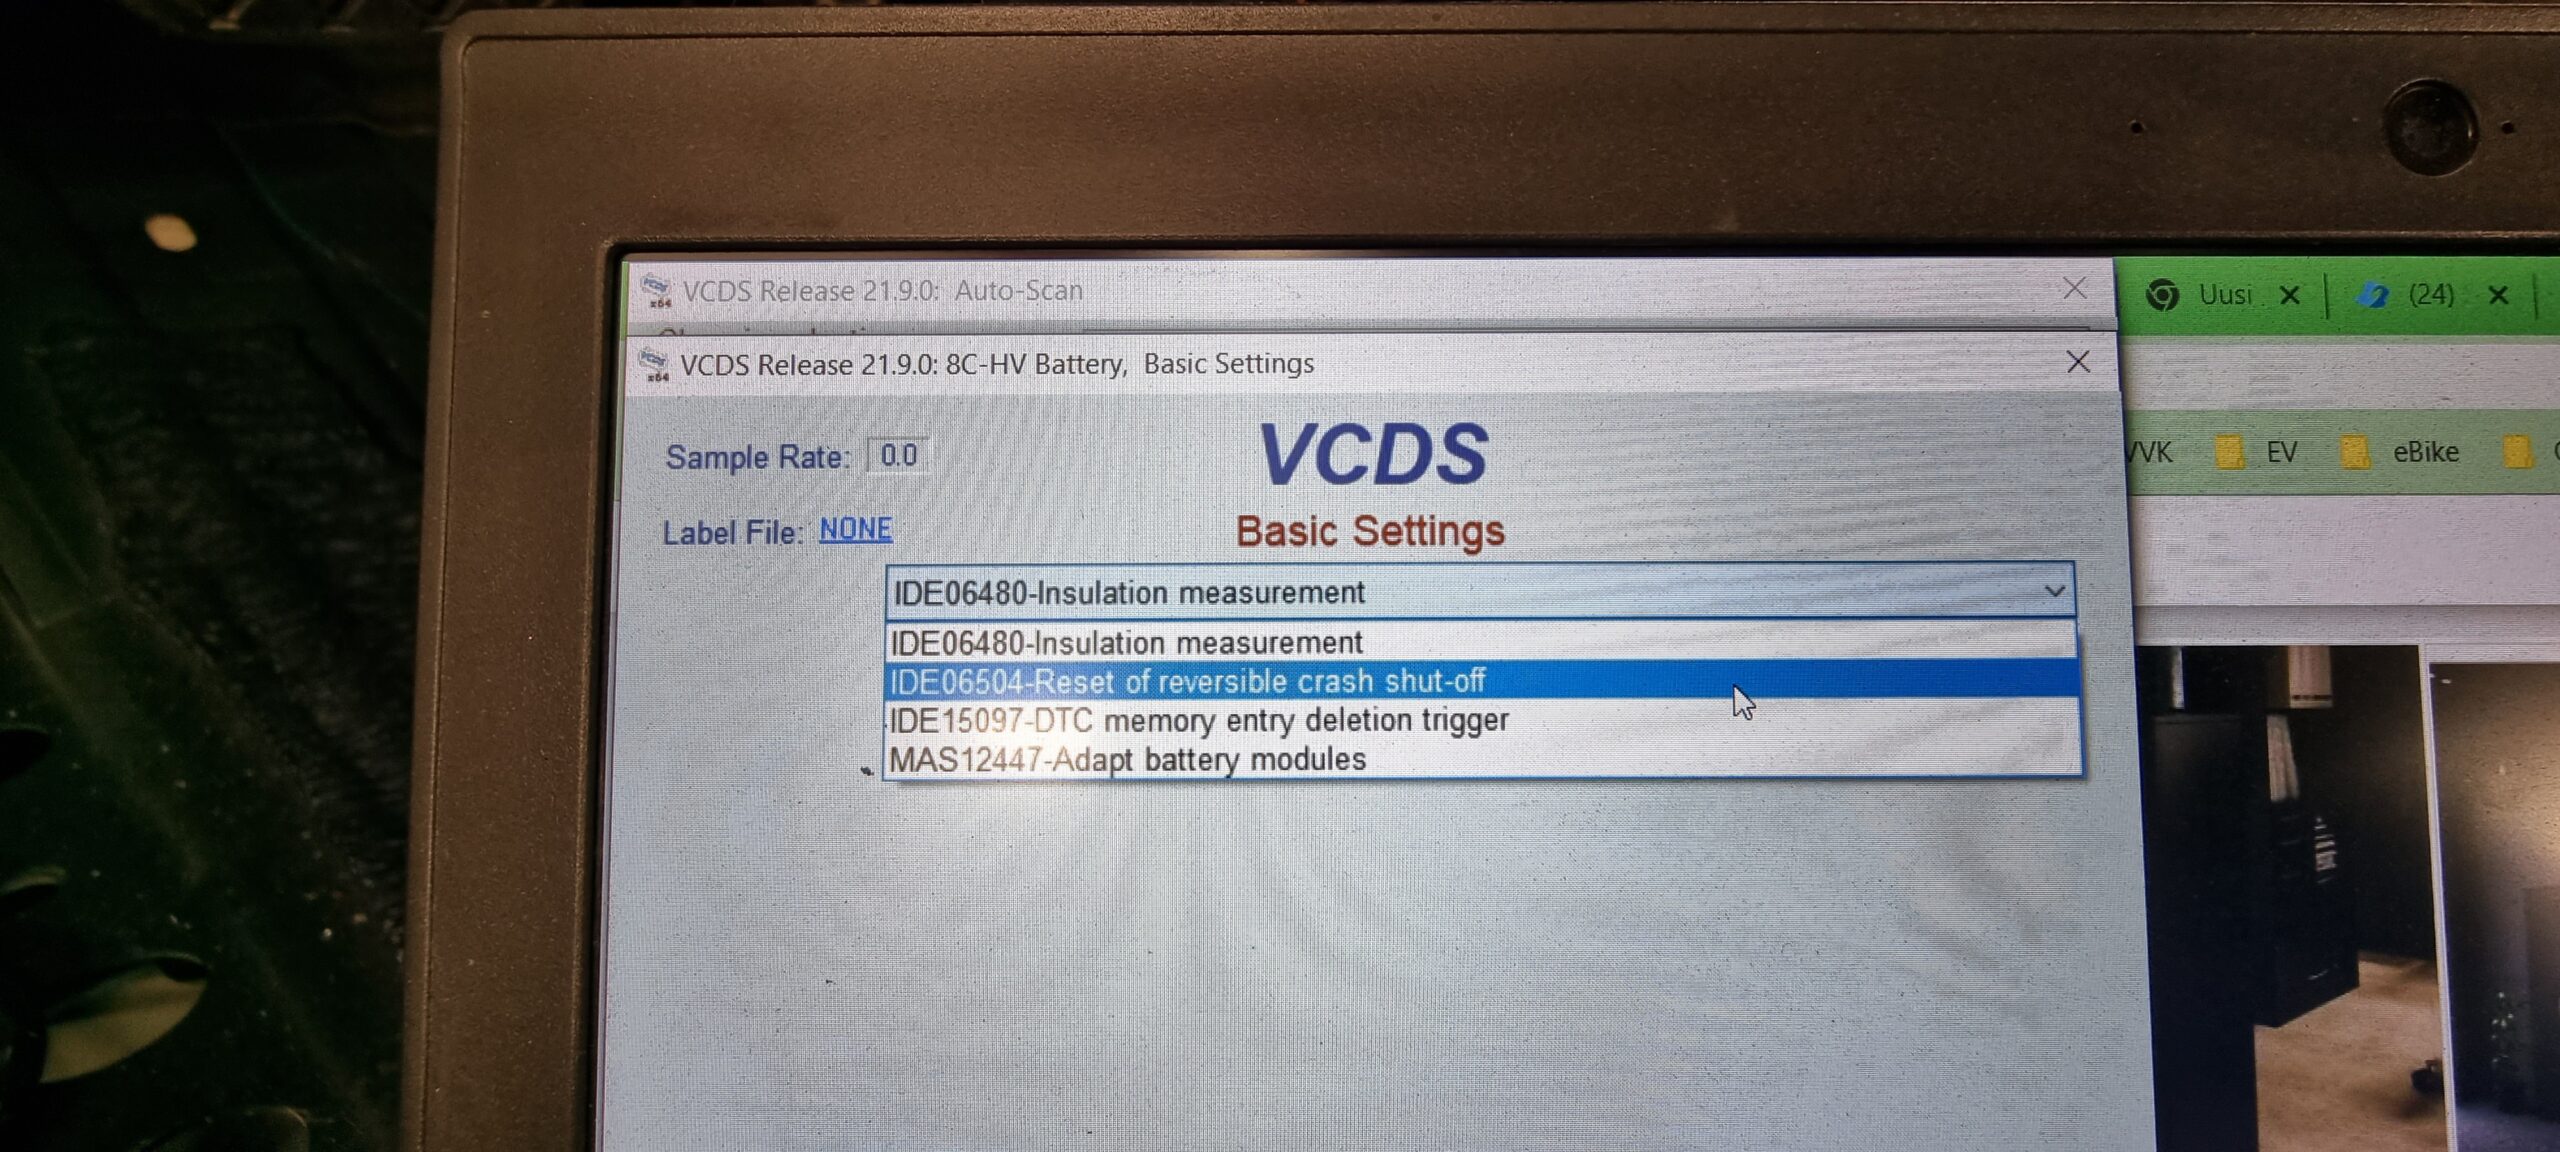
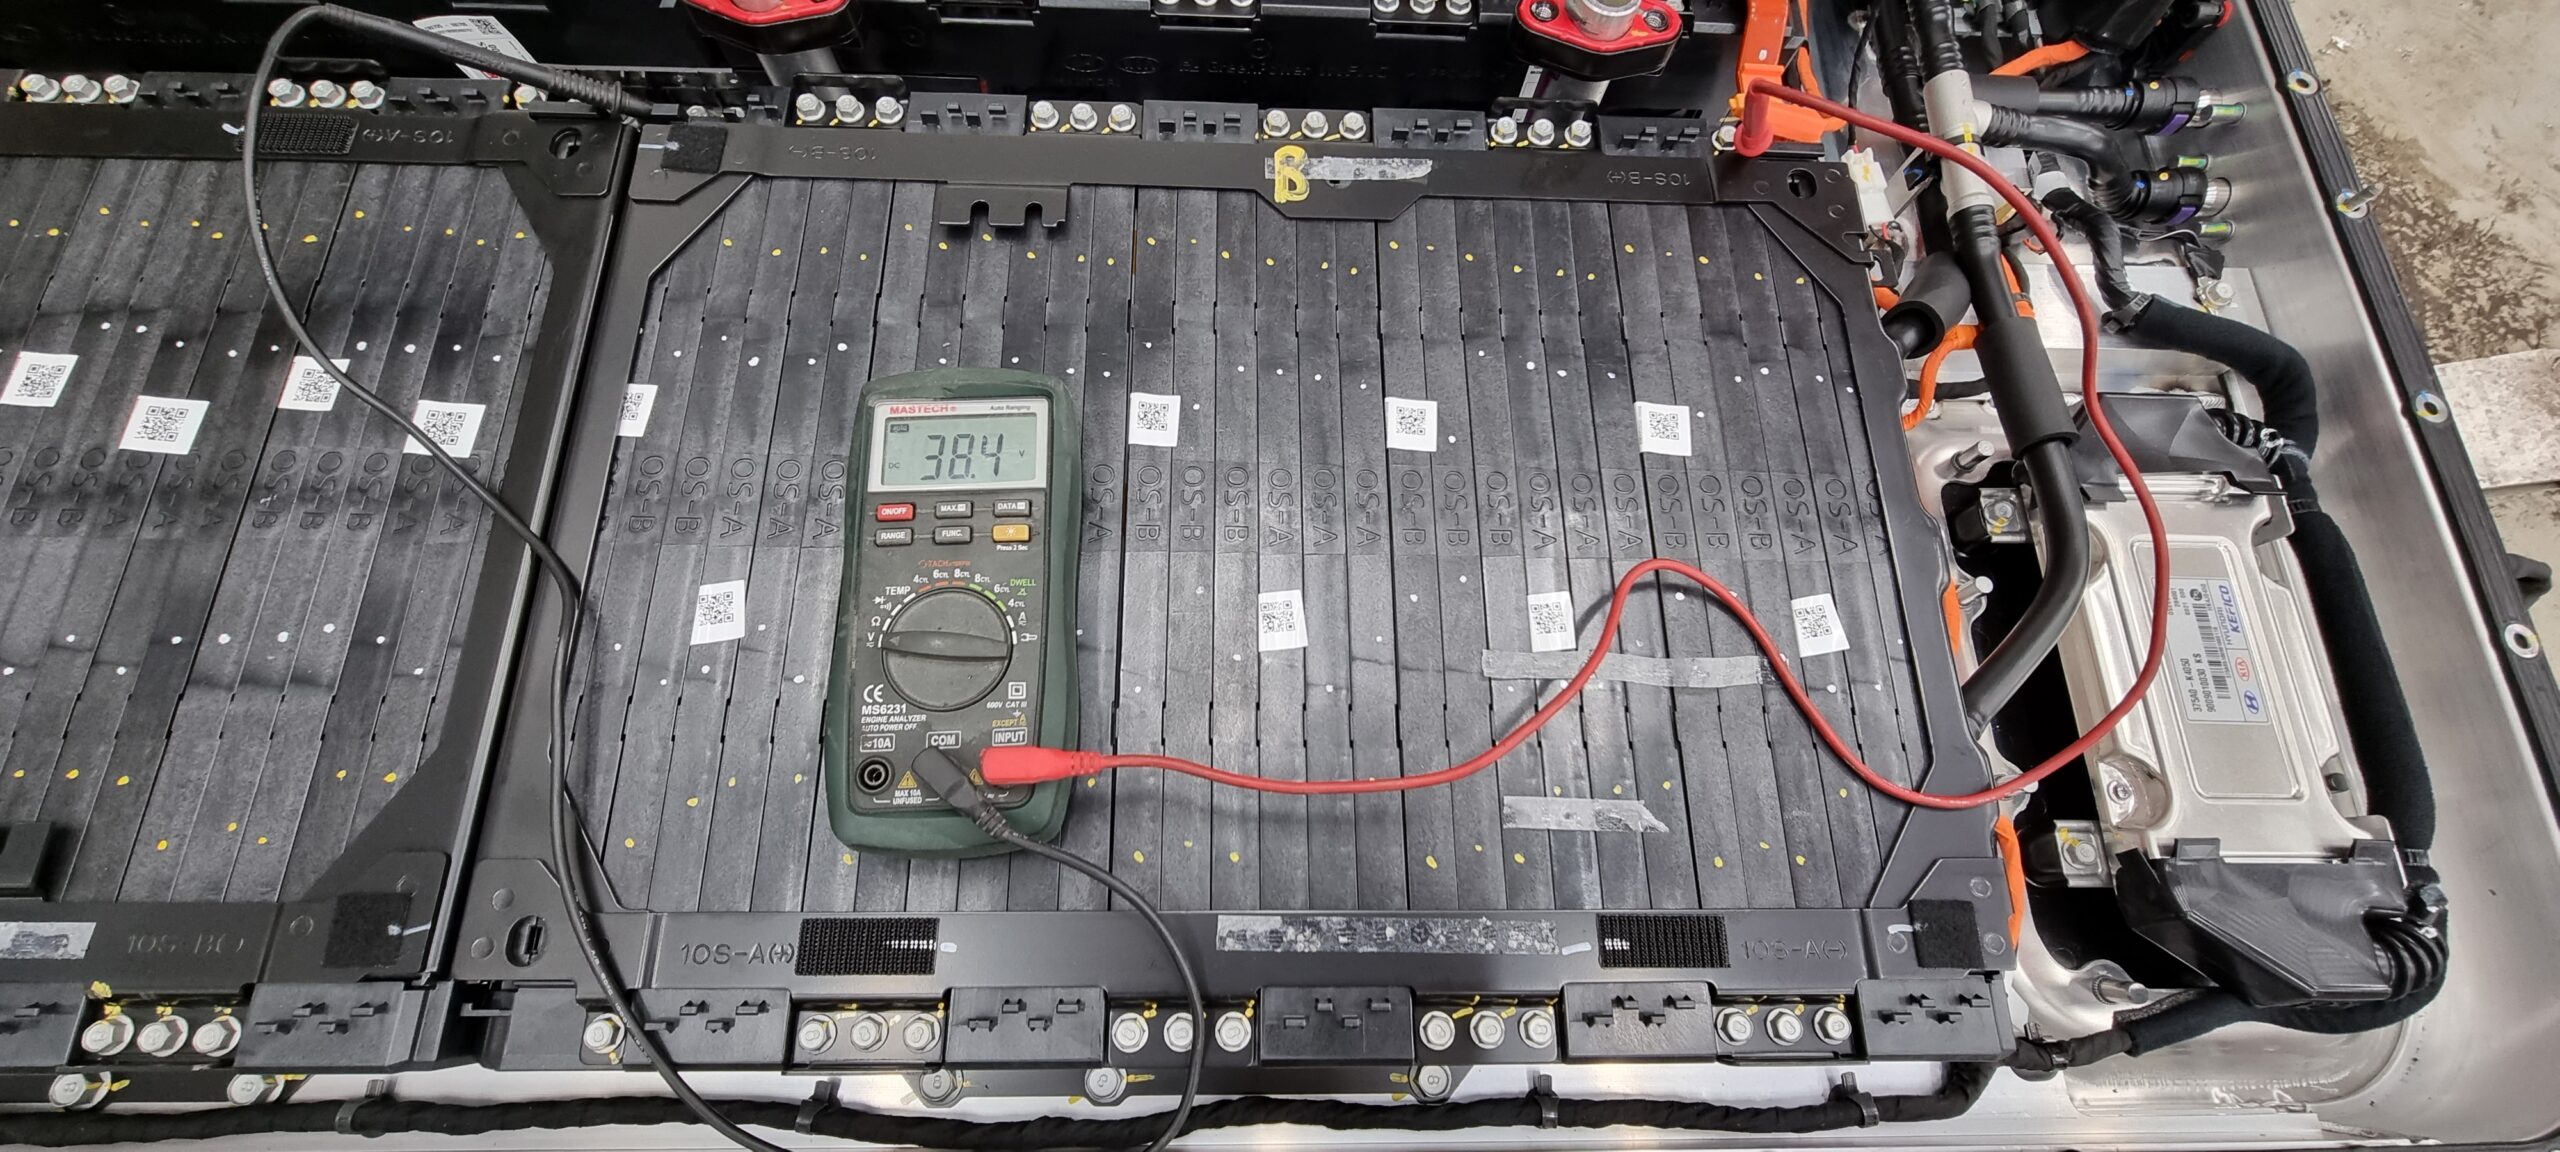
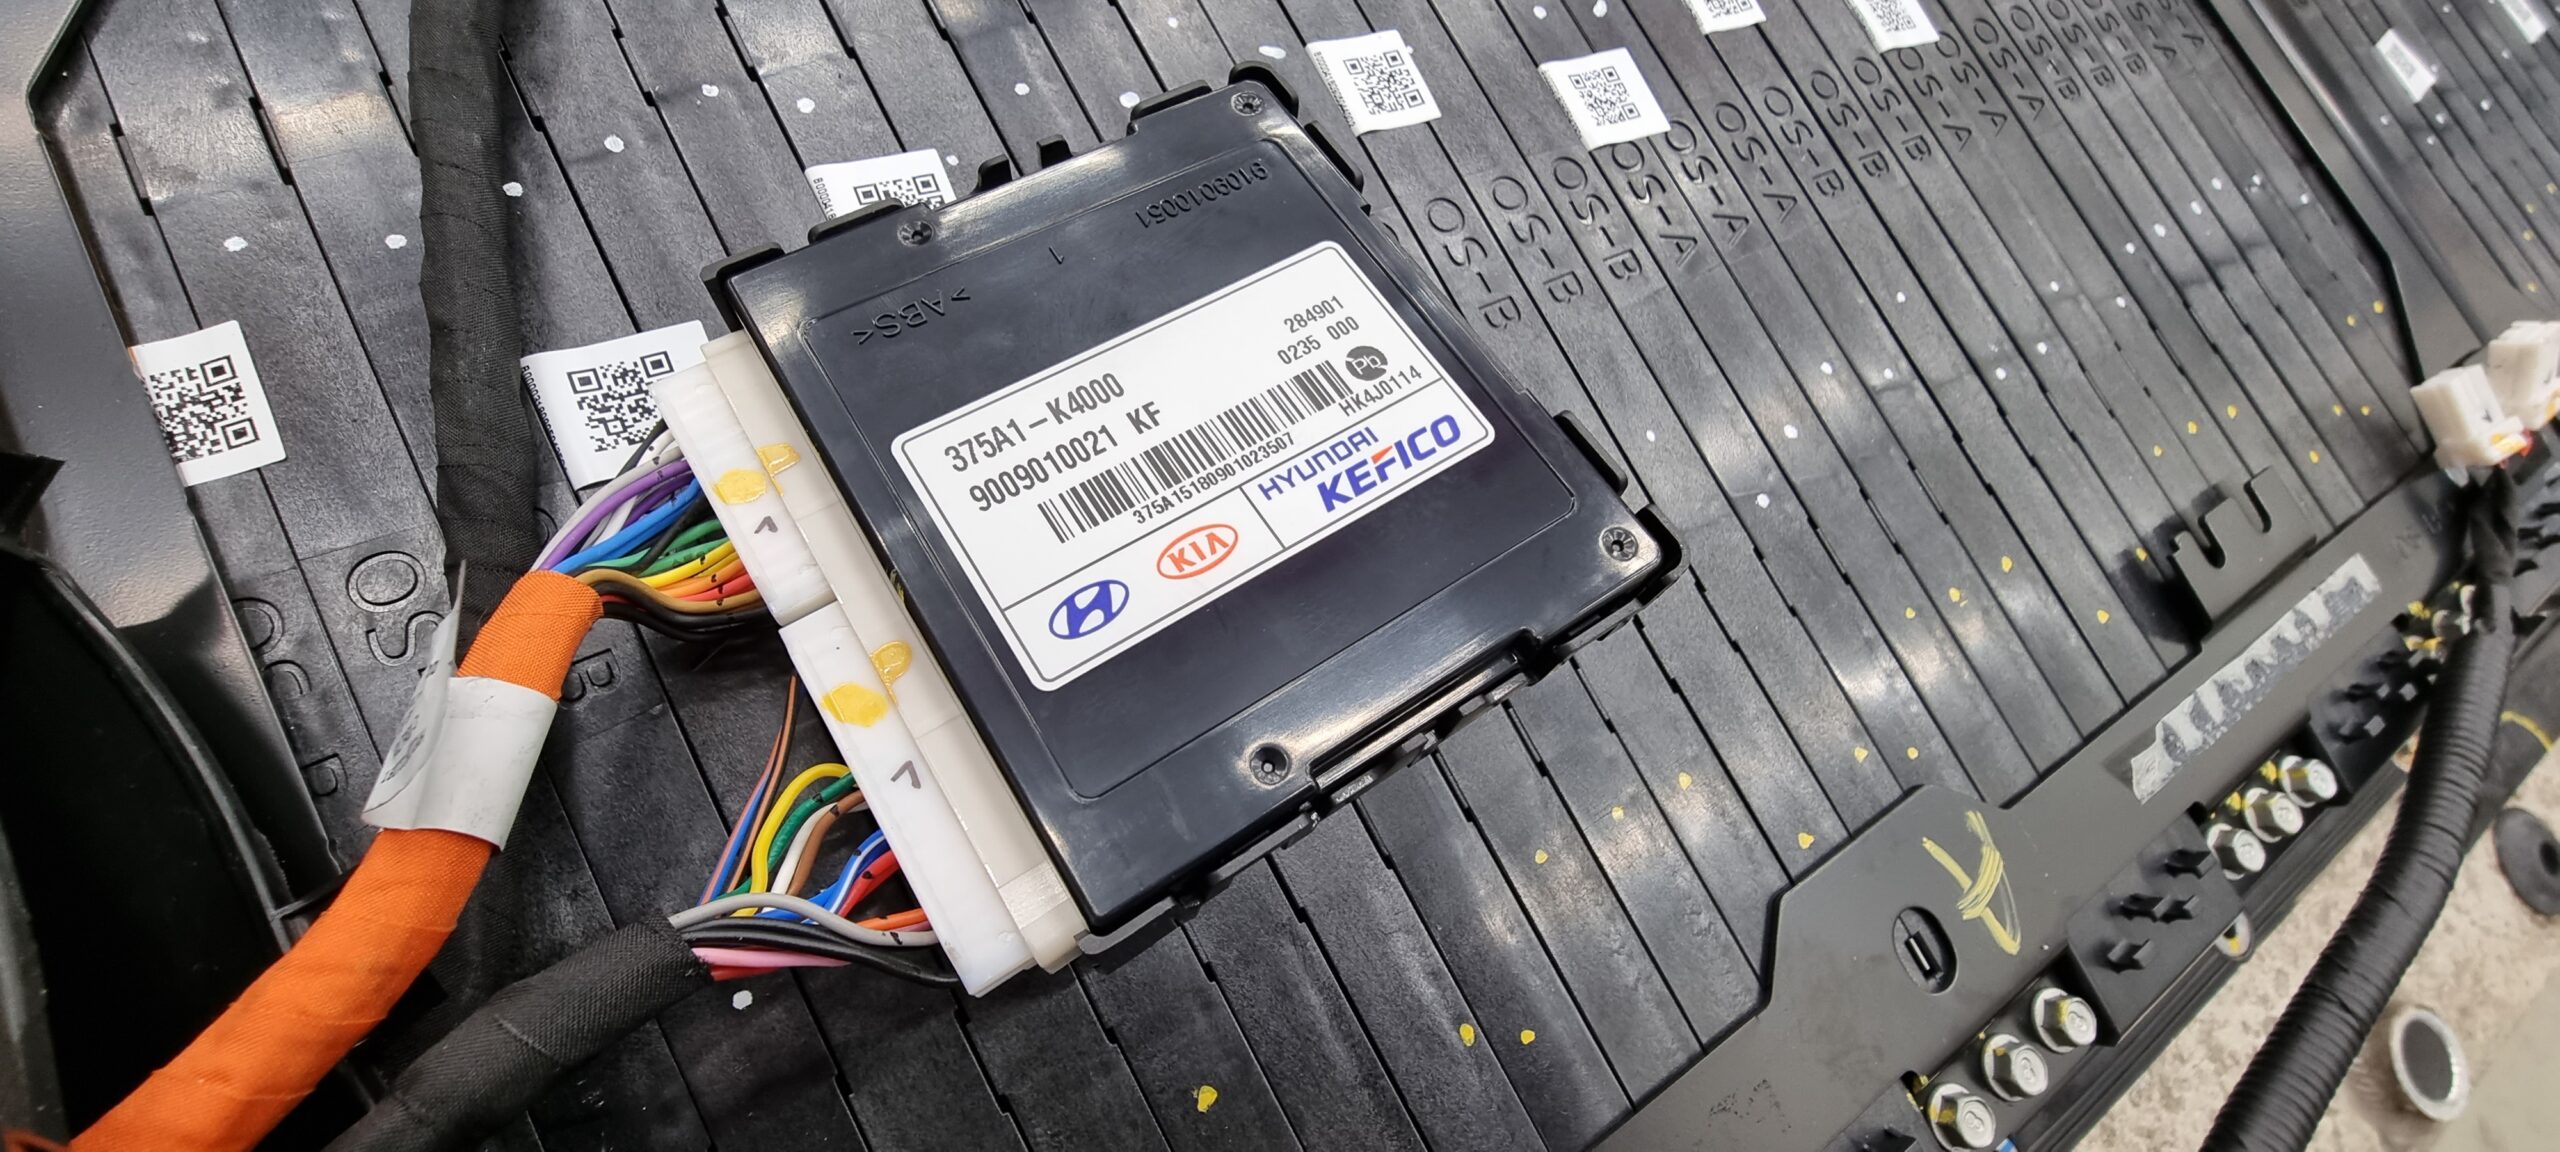
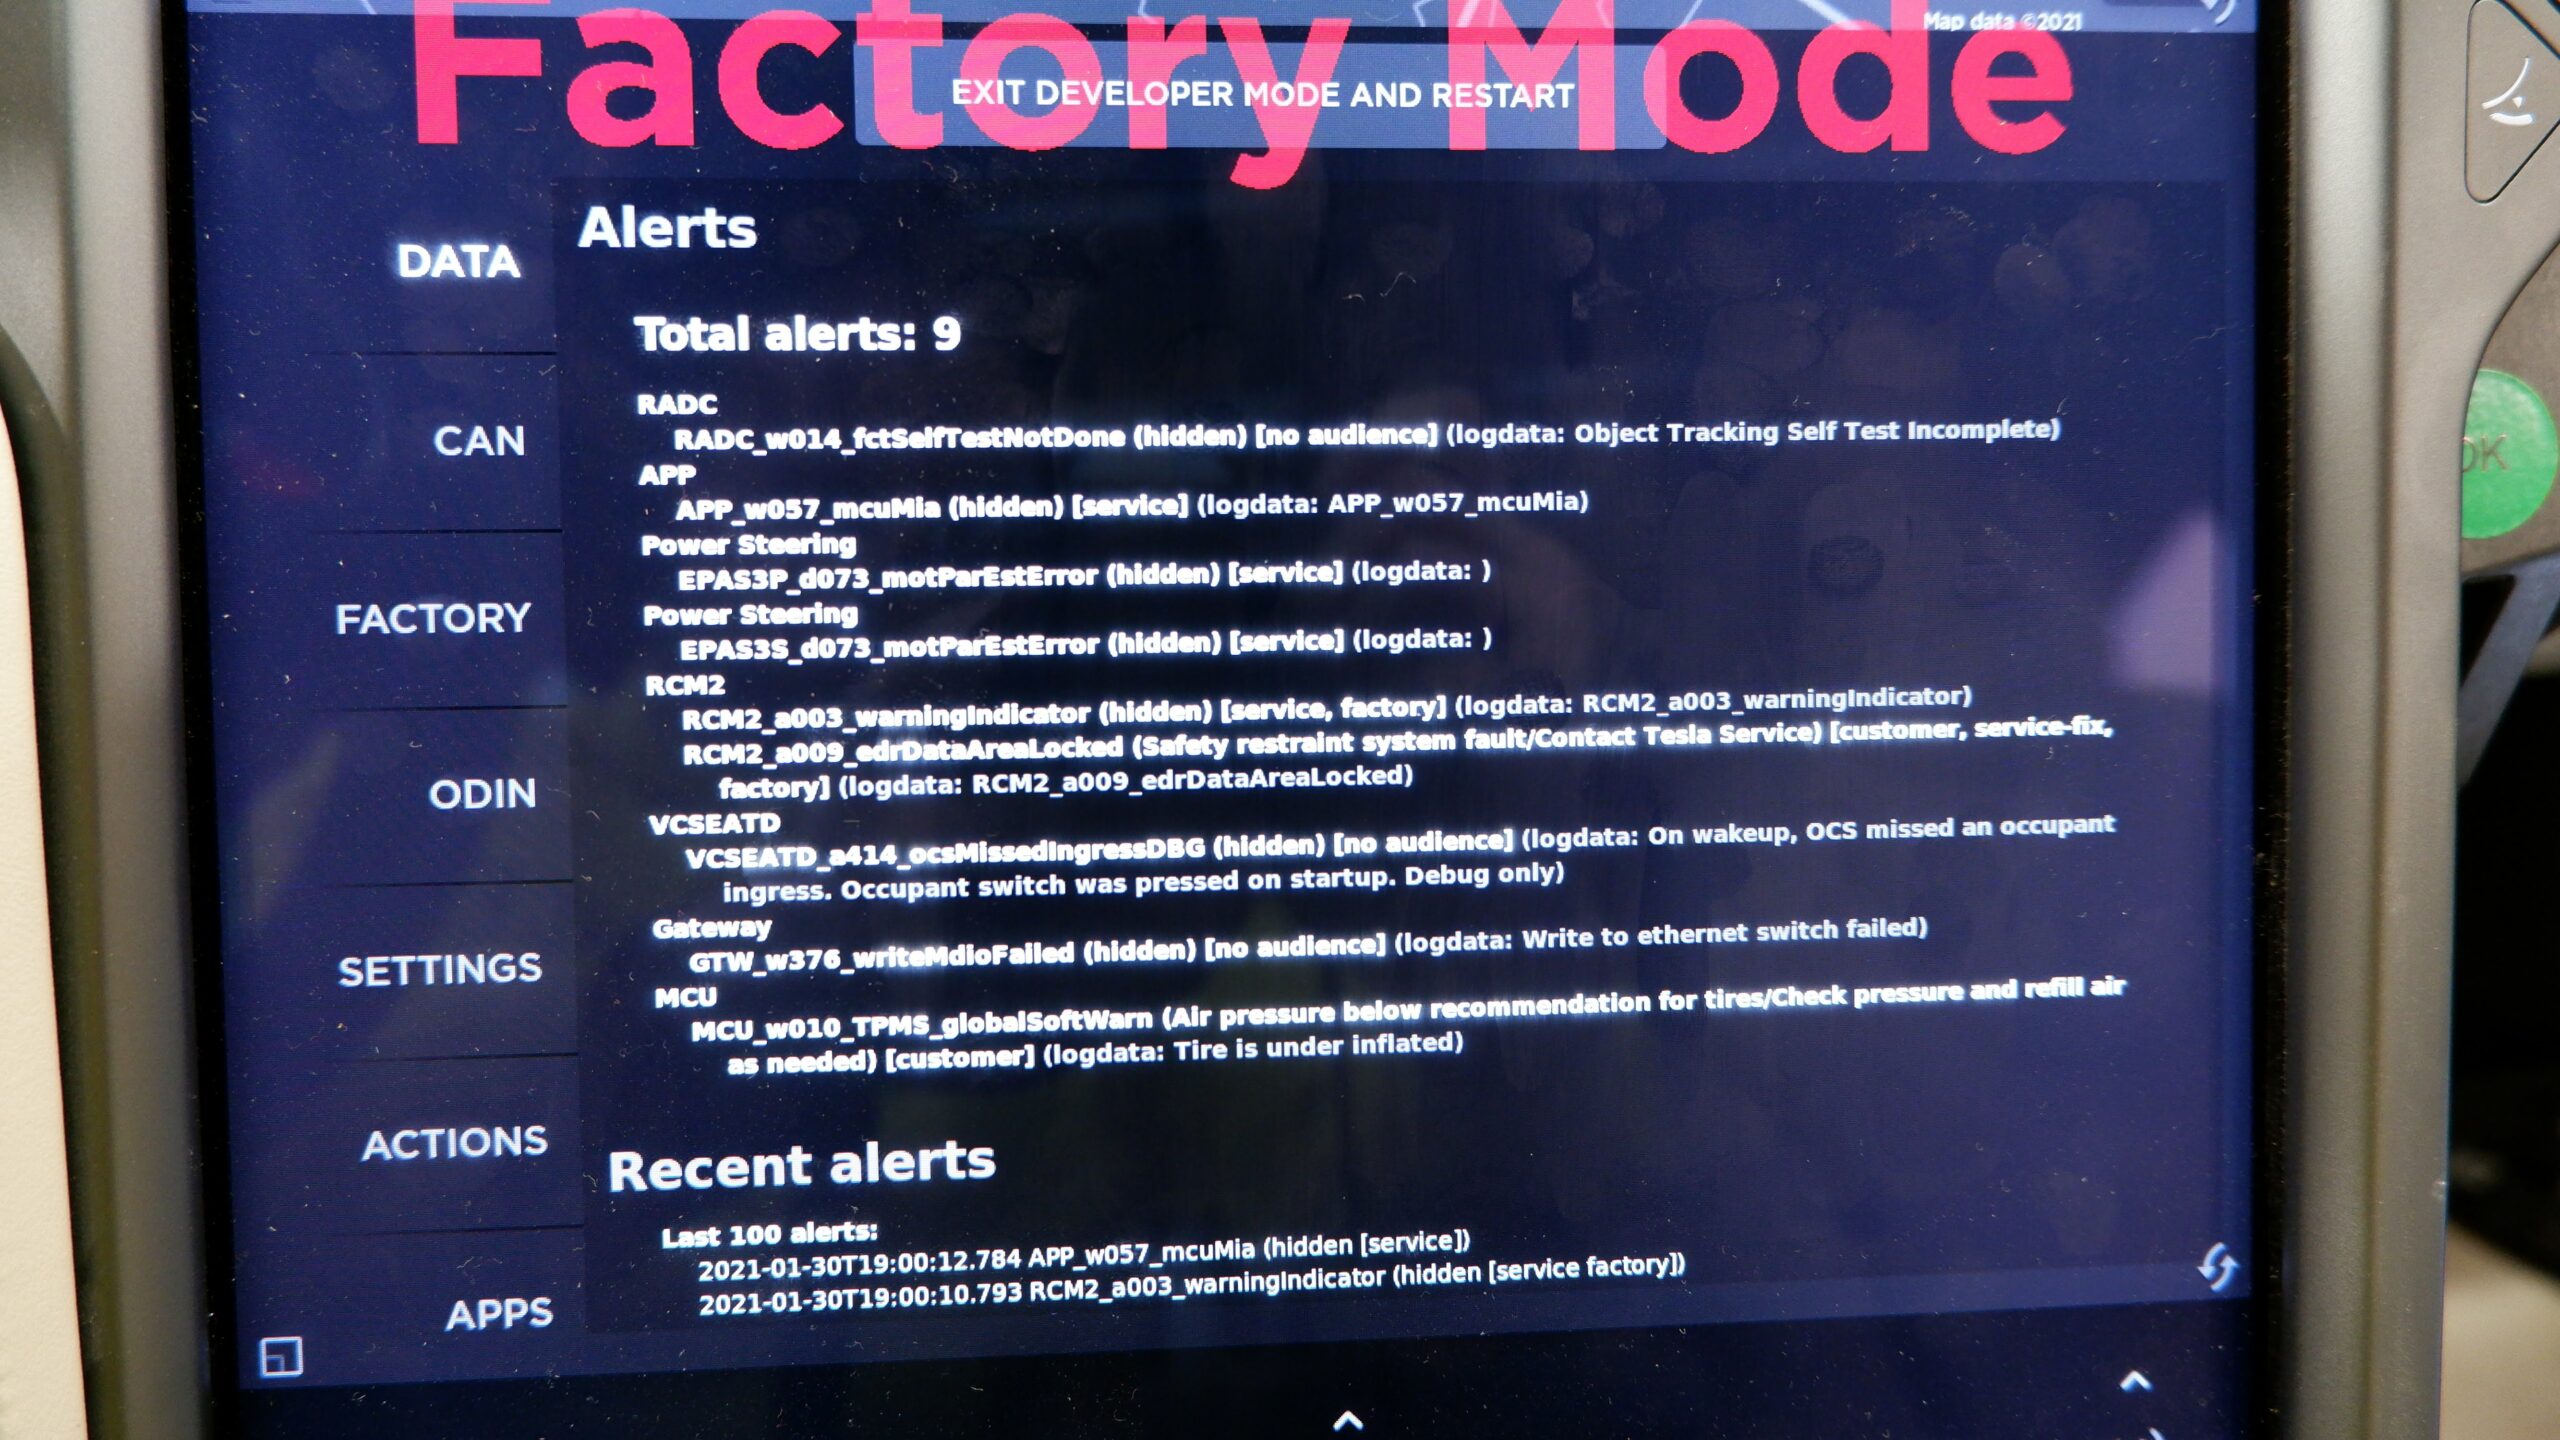
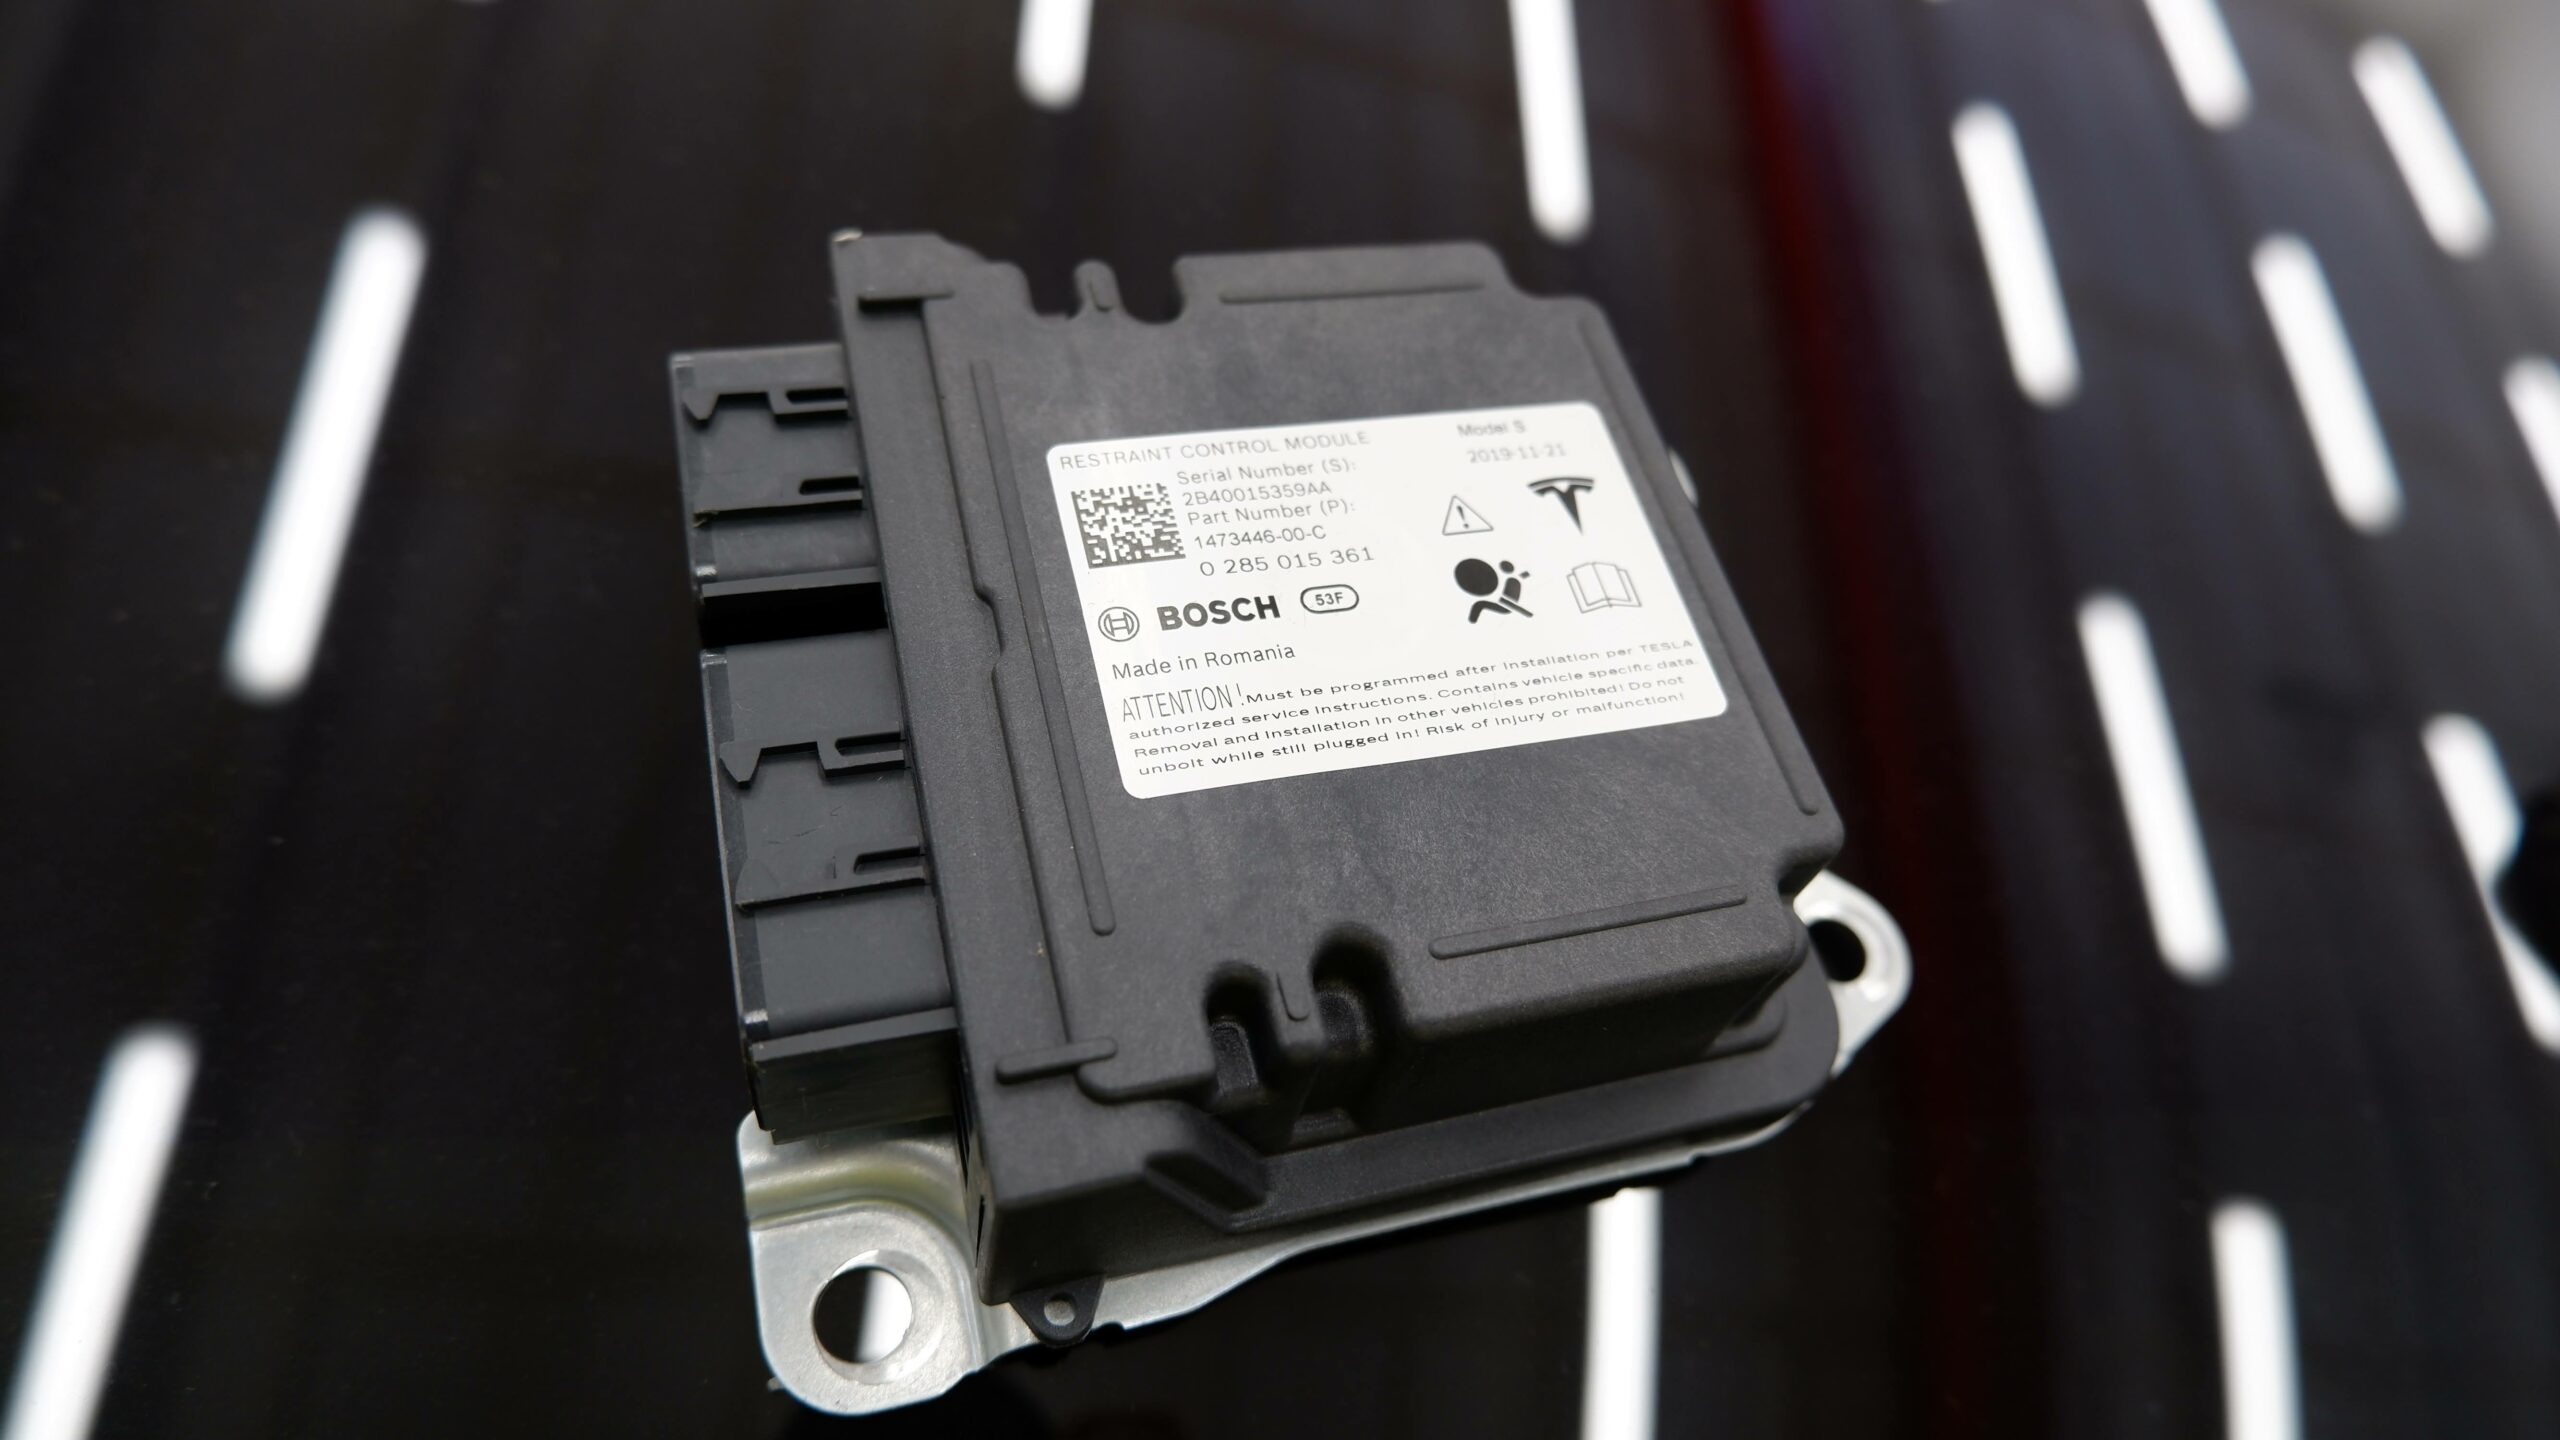
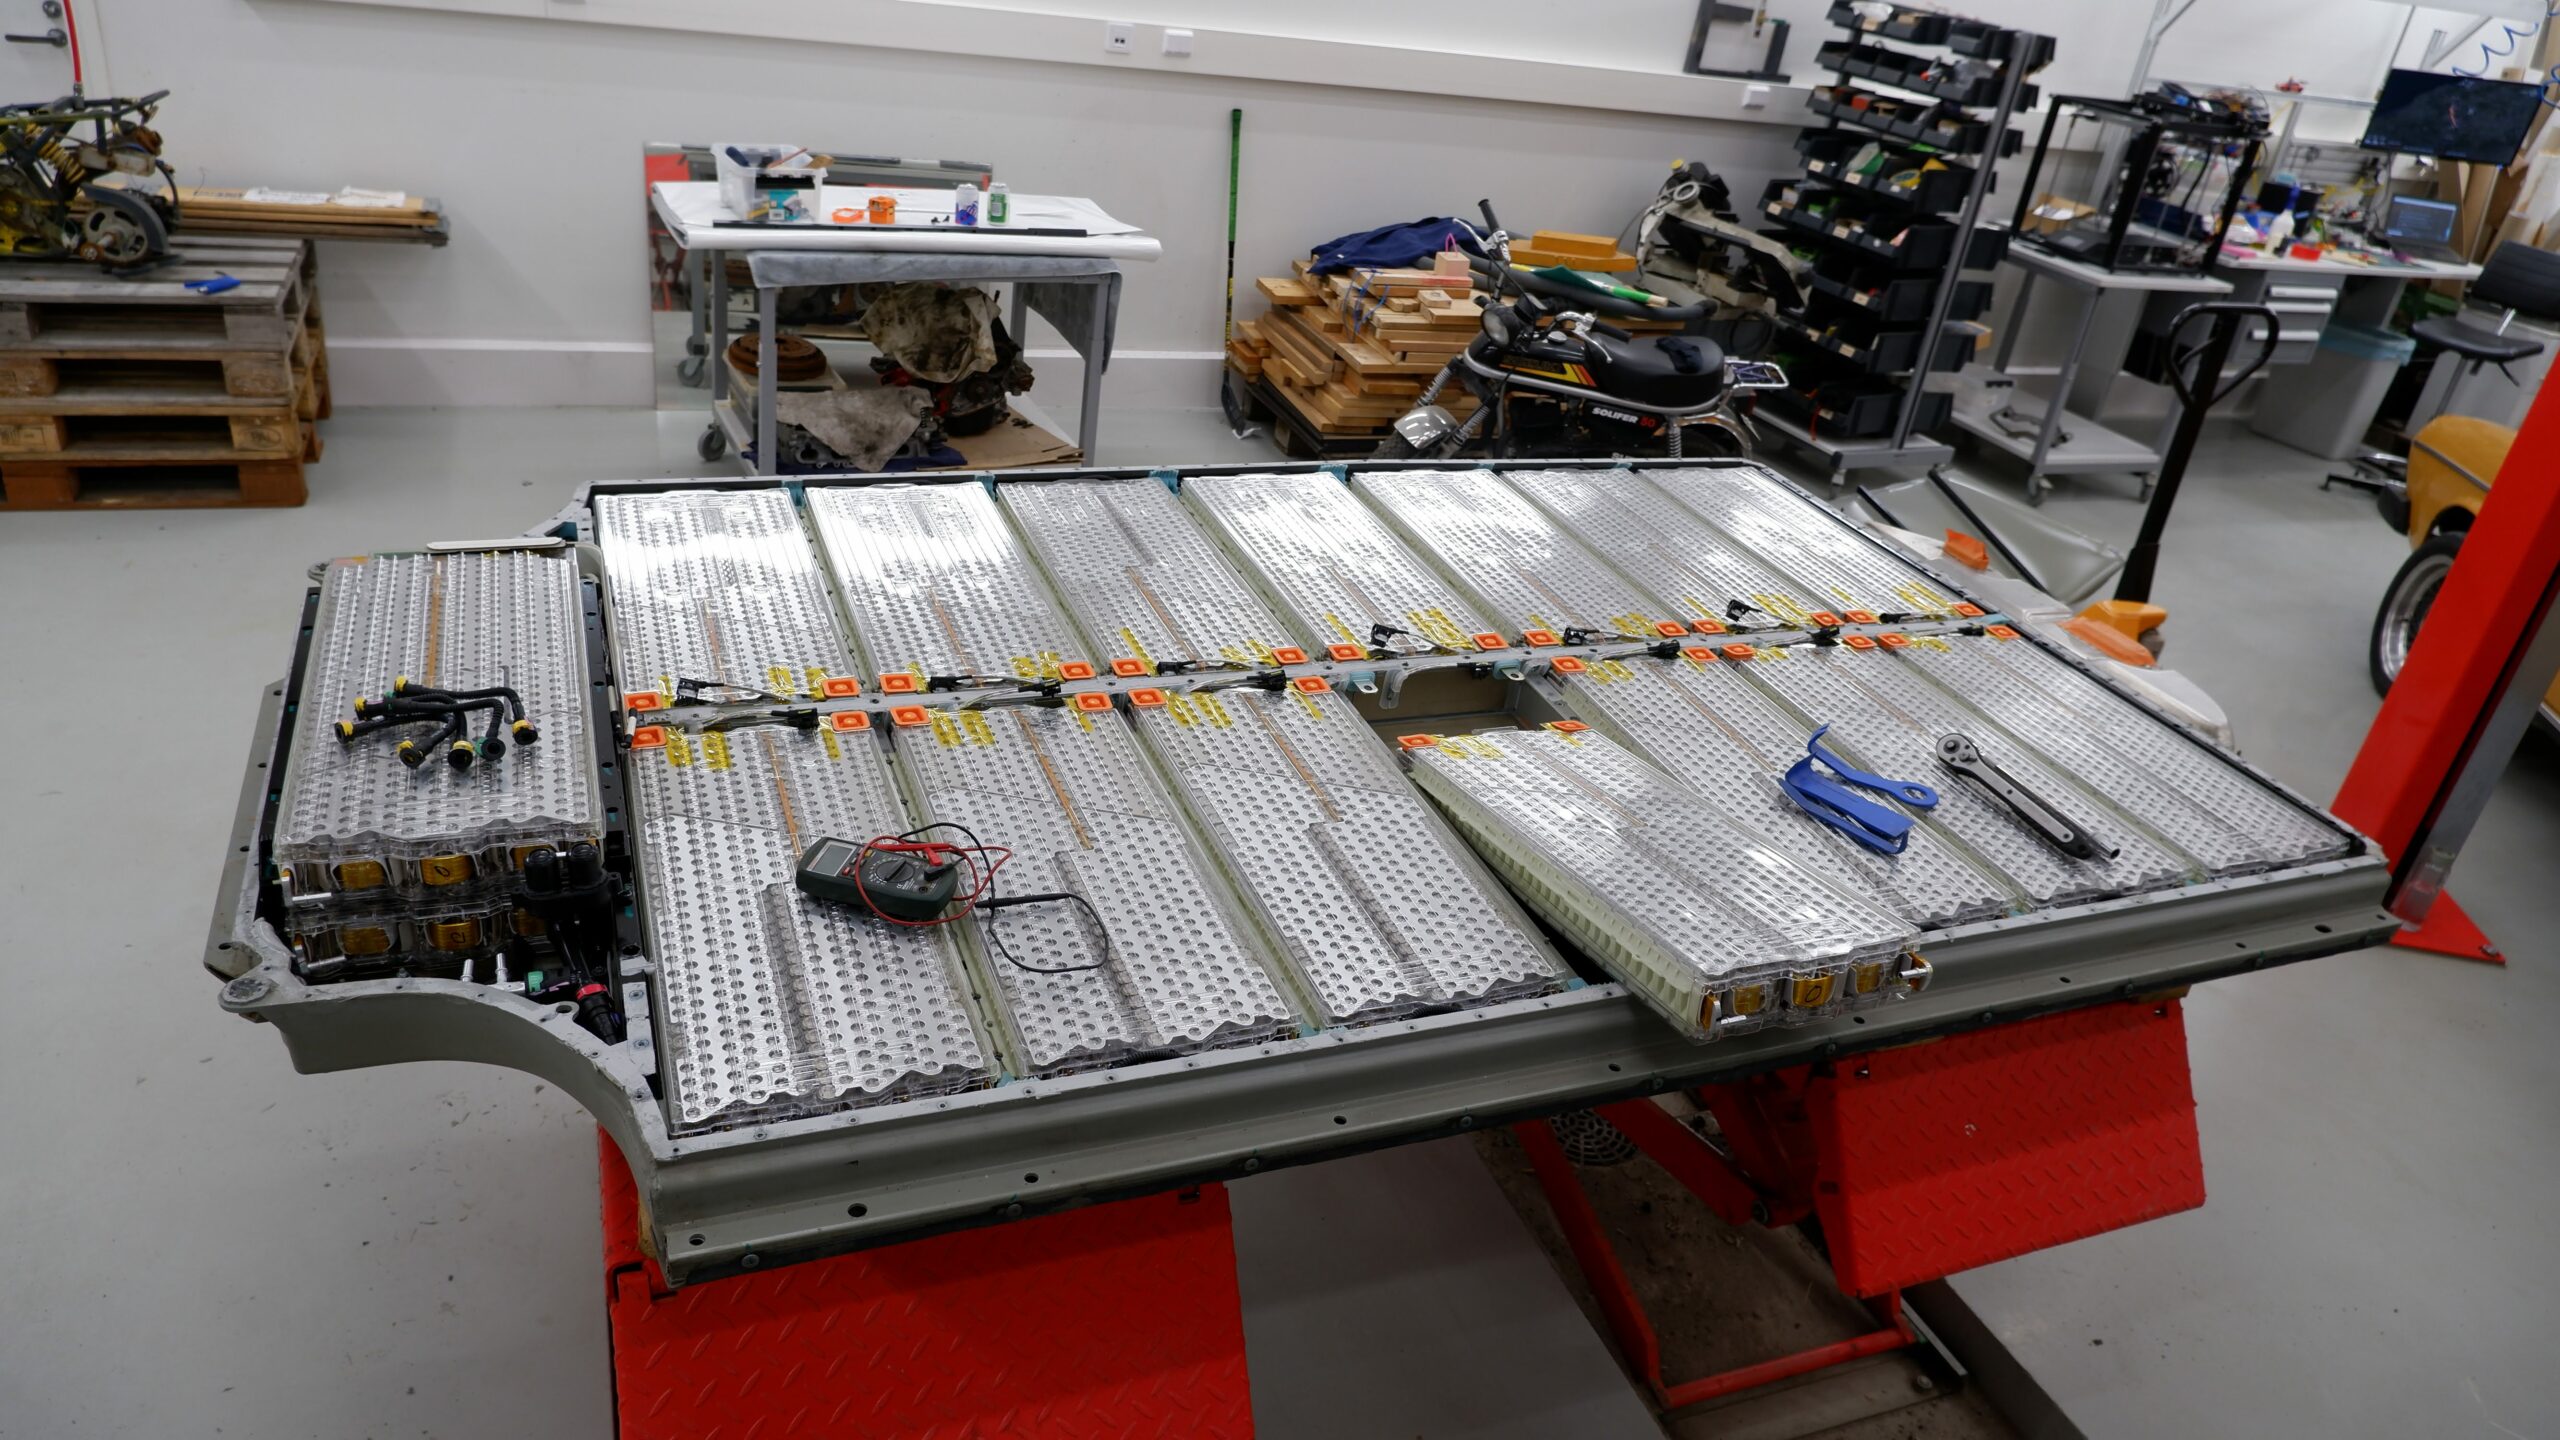
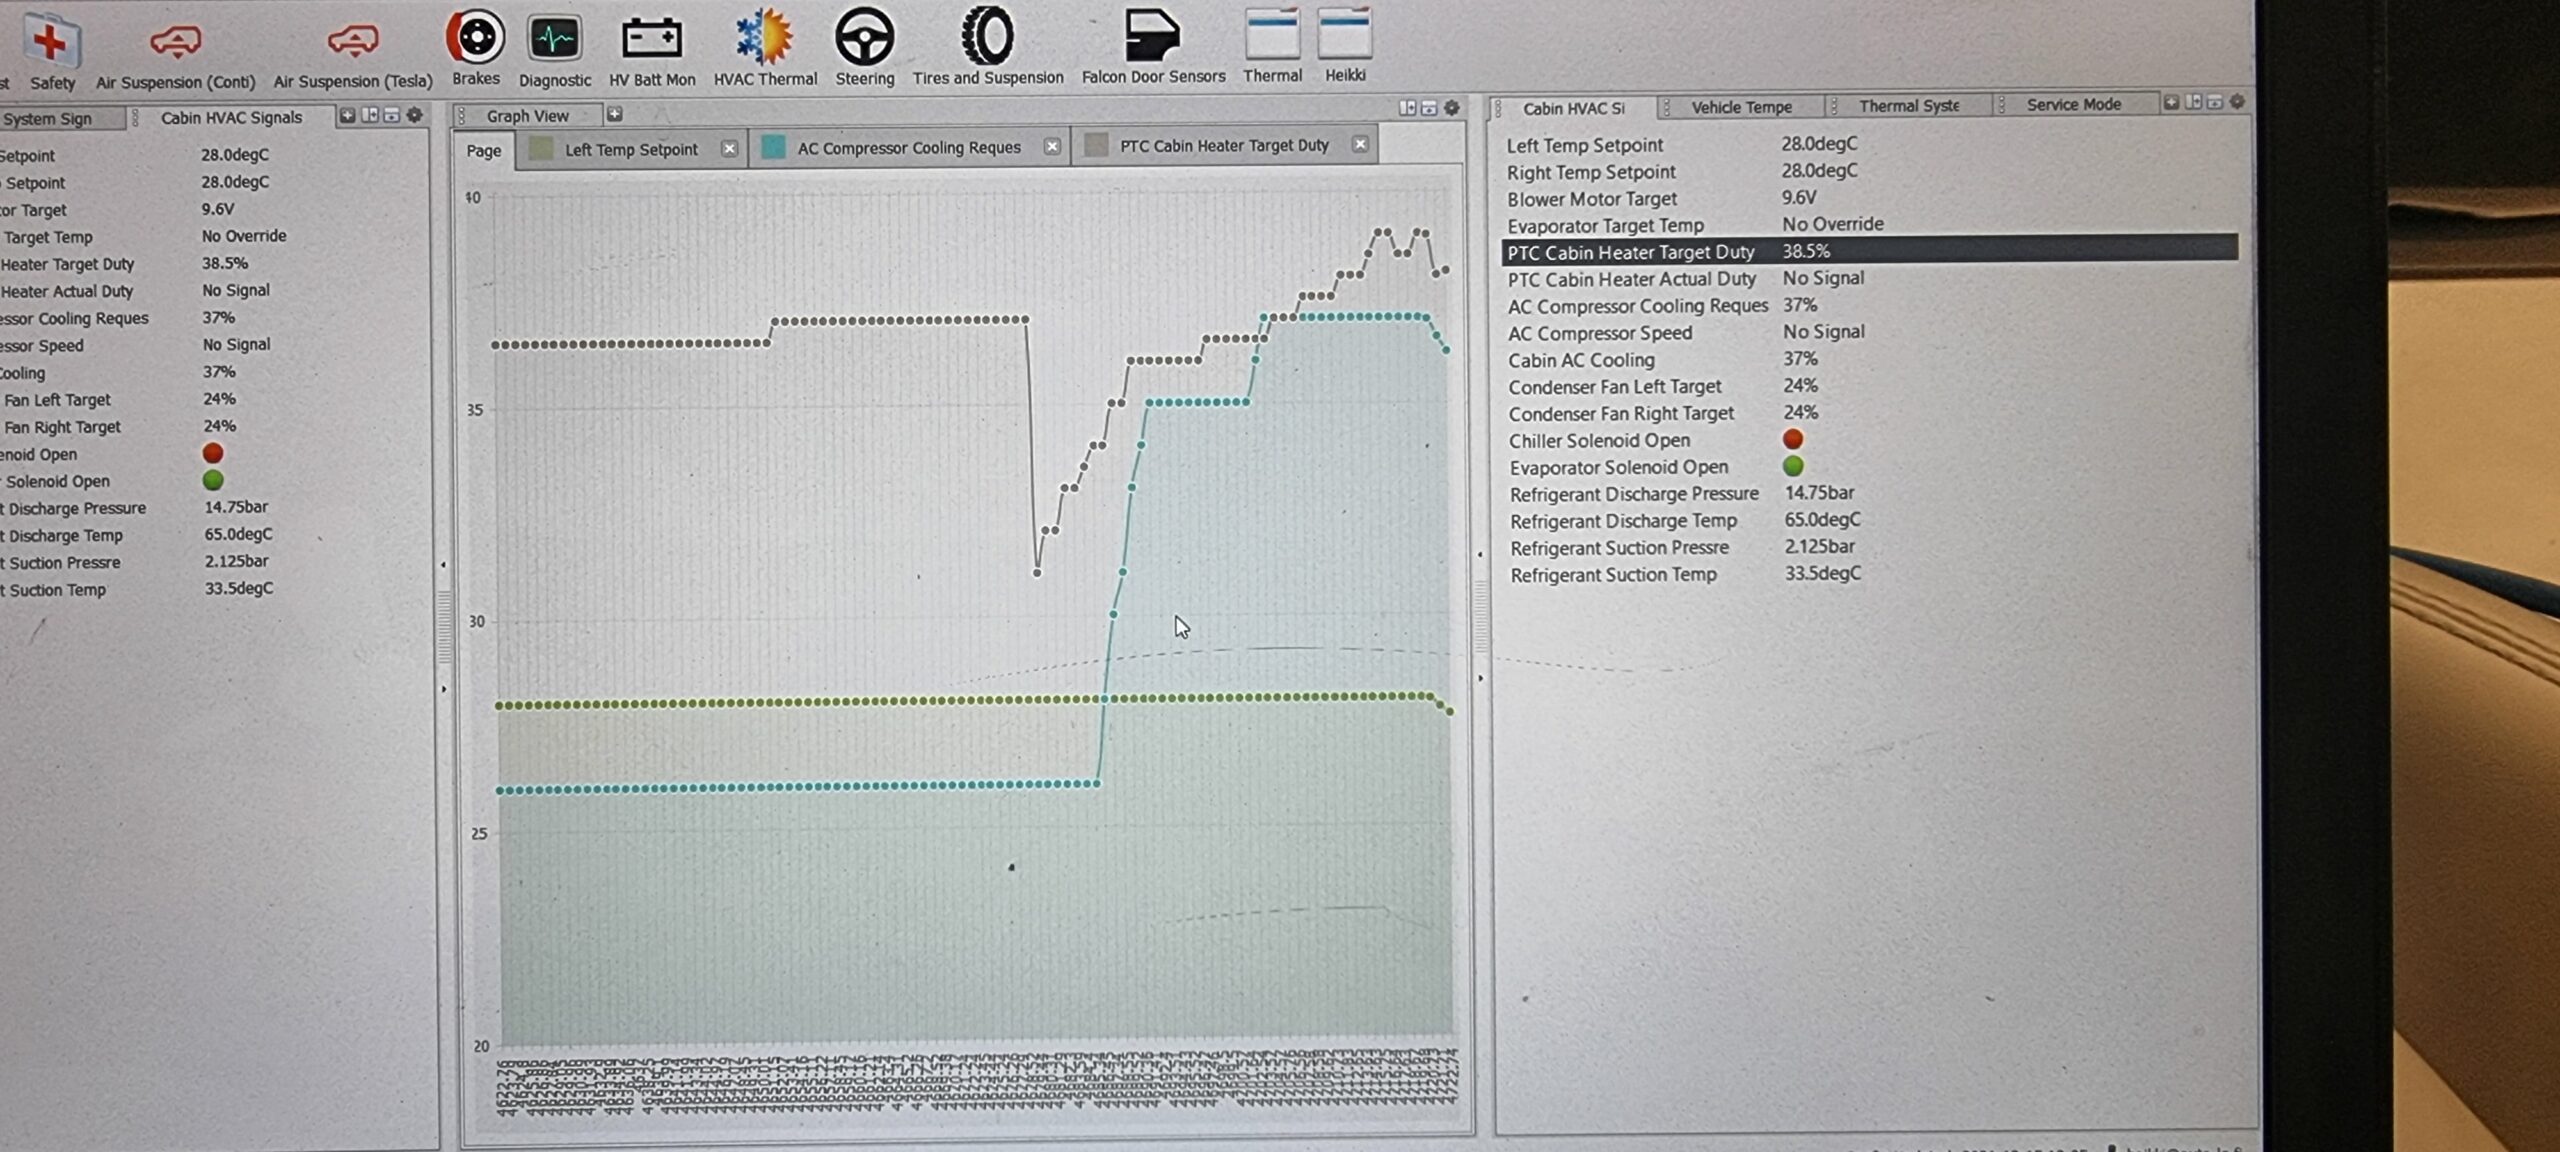
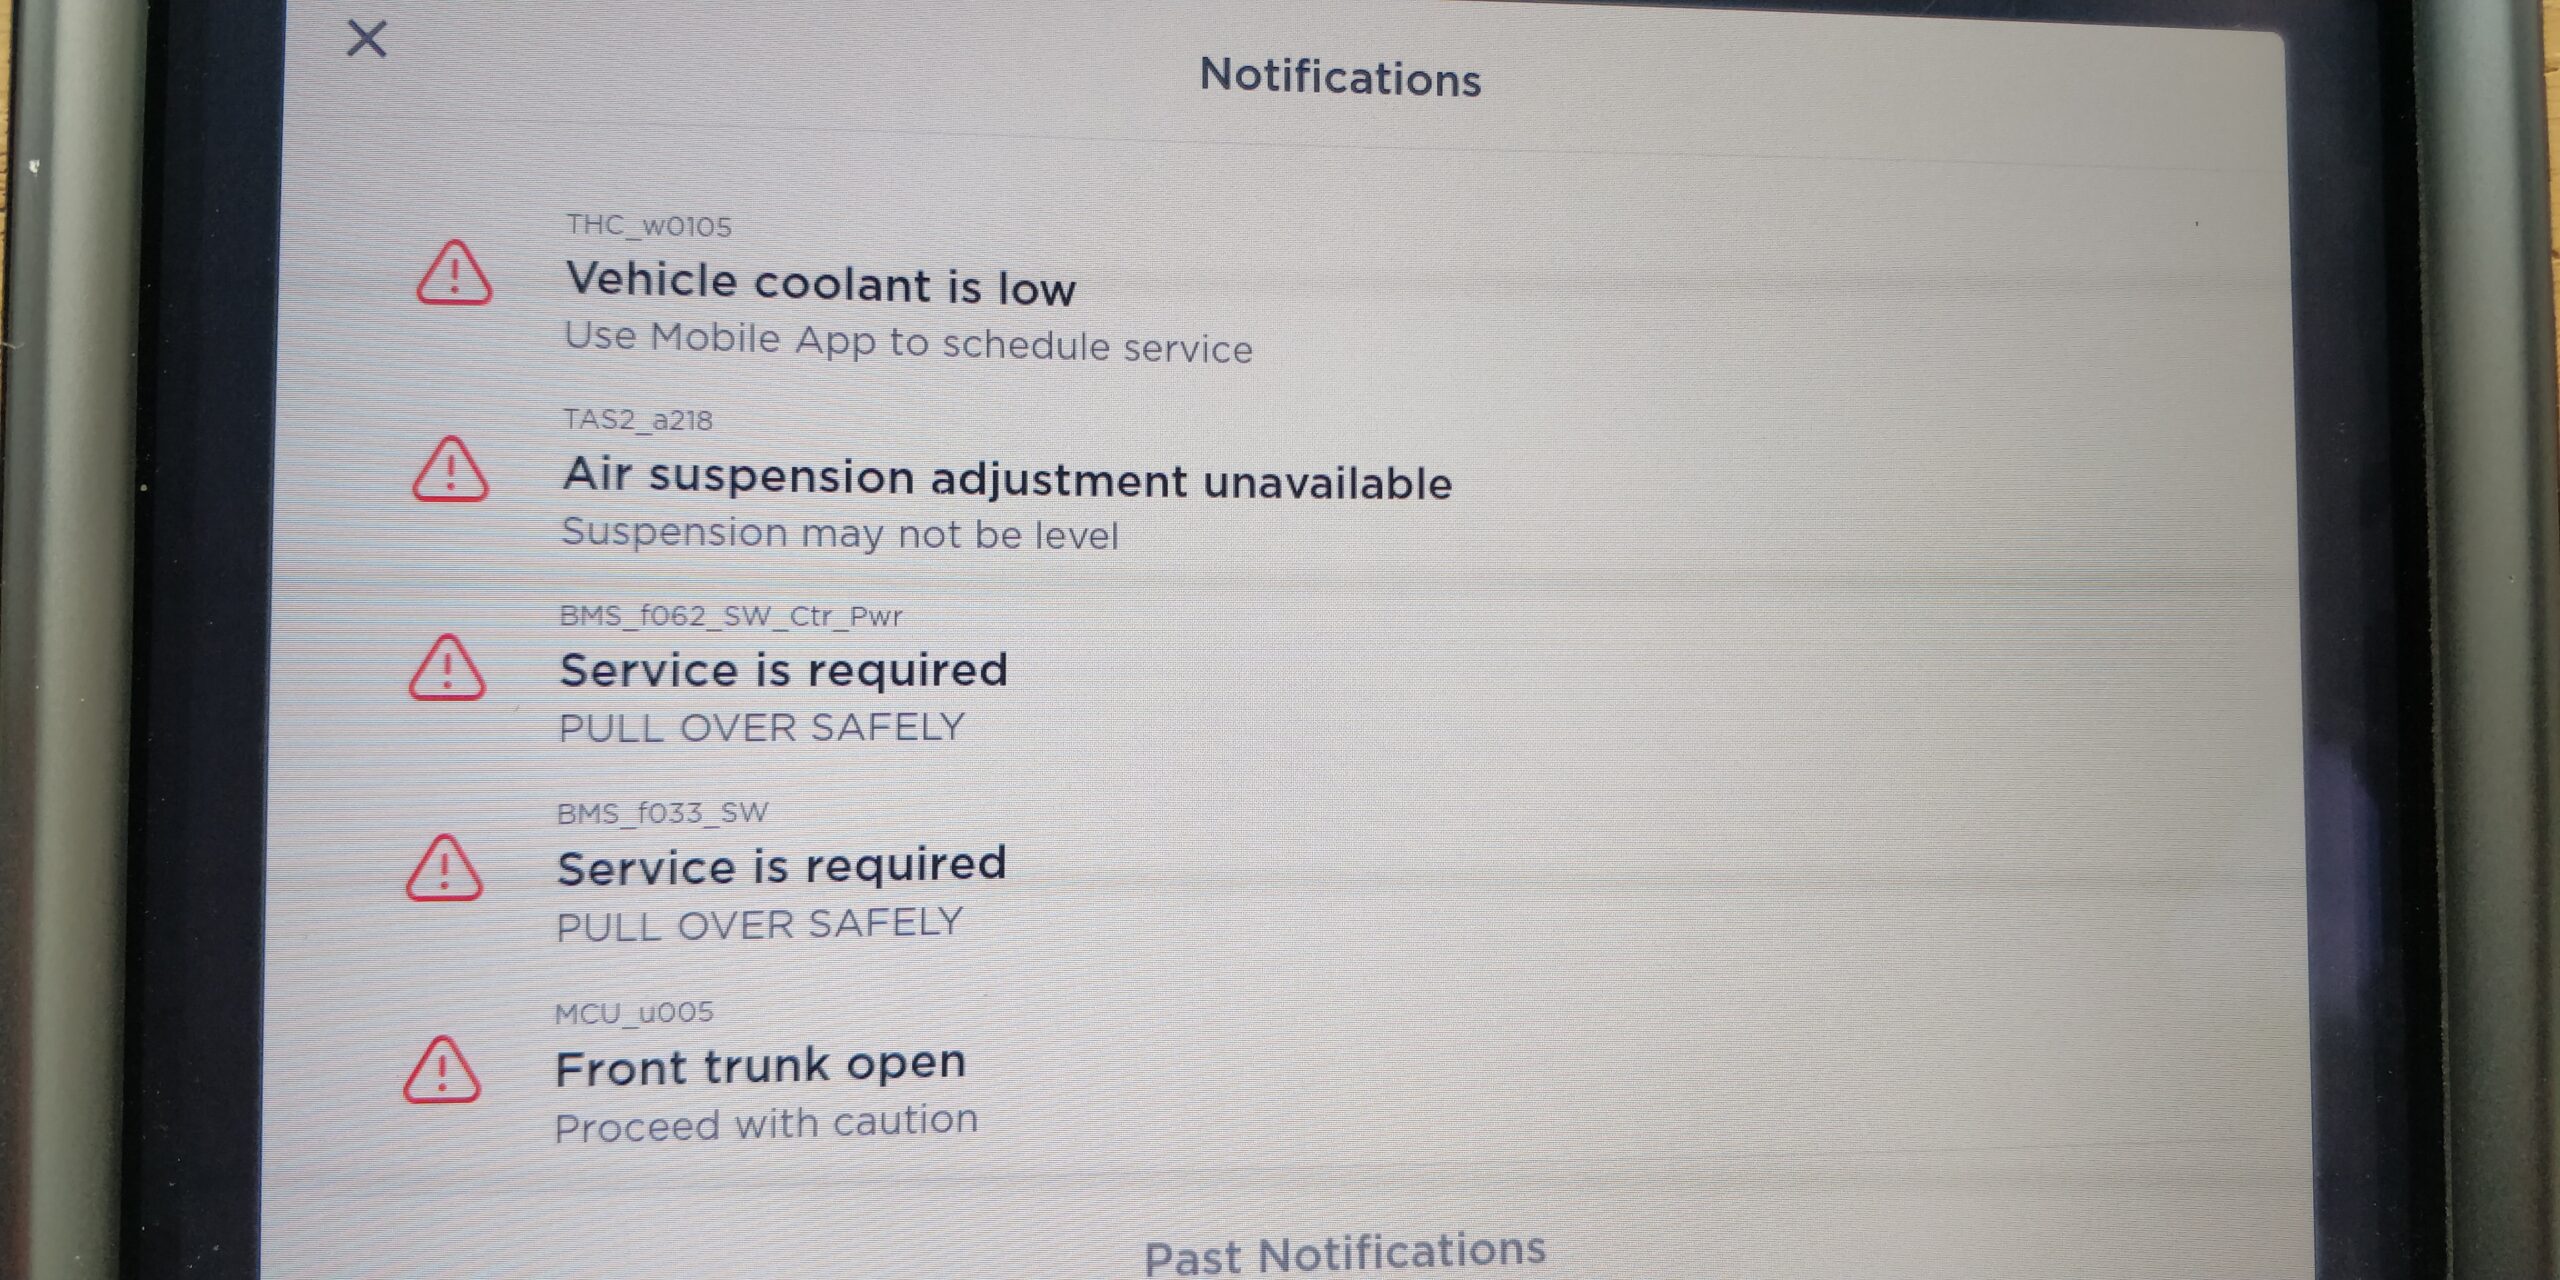
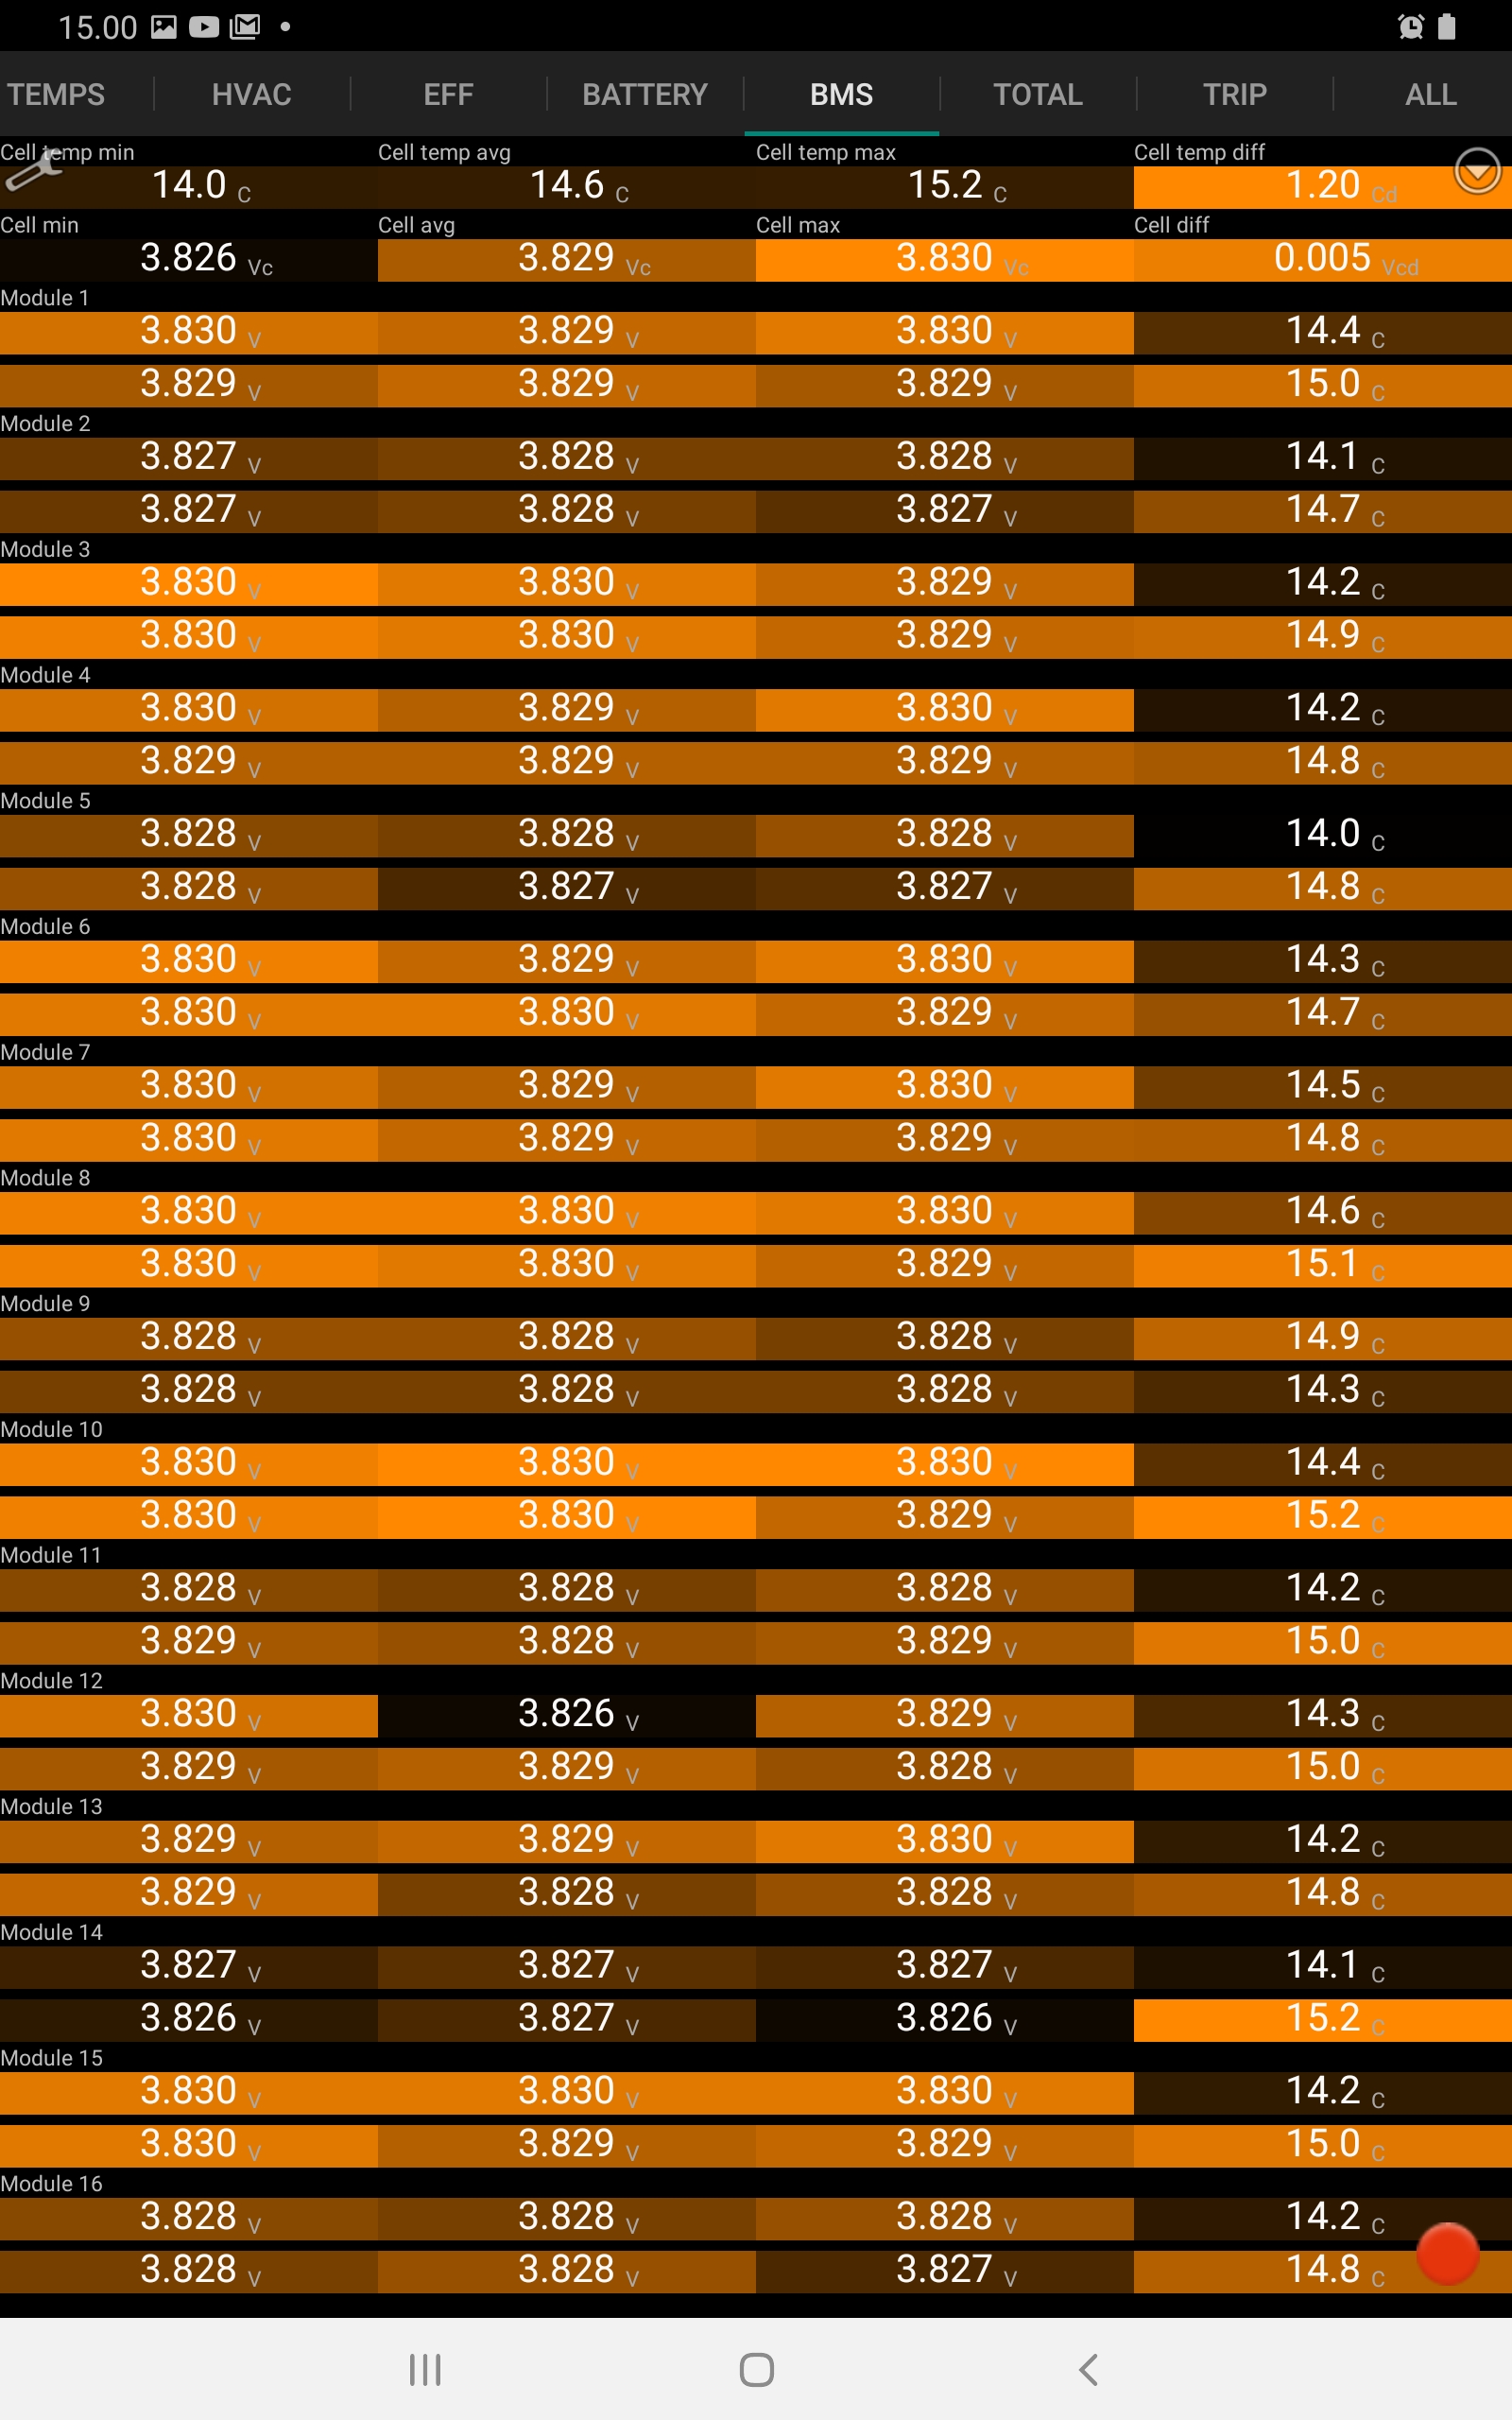
Välillä ihmeteltiin vikakoodejakin. Piti kasata sen verran moduuleita paikalleen, että sai auton eloon ja tavoitteena oli saada auto liikkumaan omin voimin. VCDS:llä pystyi HV-akulta poistamaan kolariin liittyvät vikakoodit, mutta auto ei sillä kuitenkaan suostunut käynnistymään.

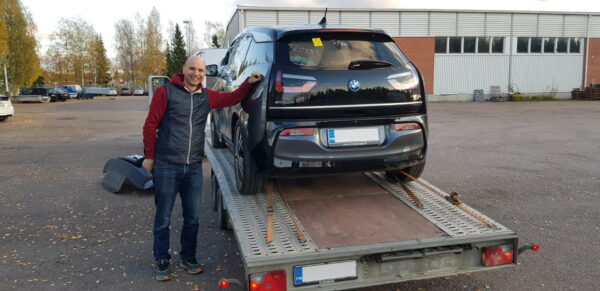
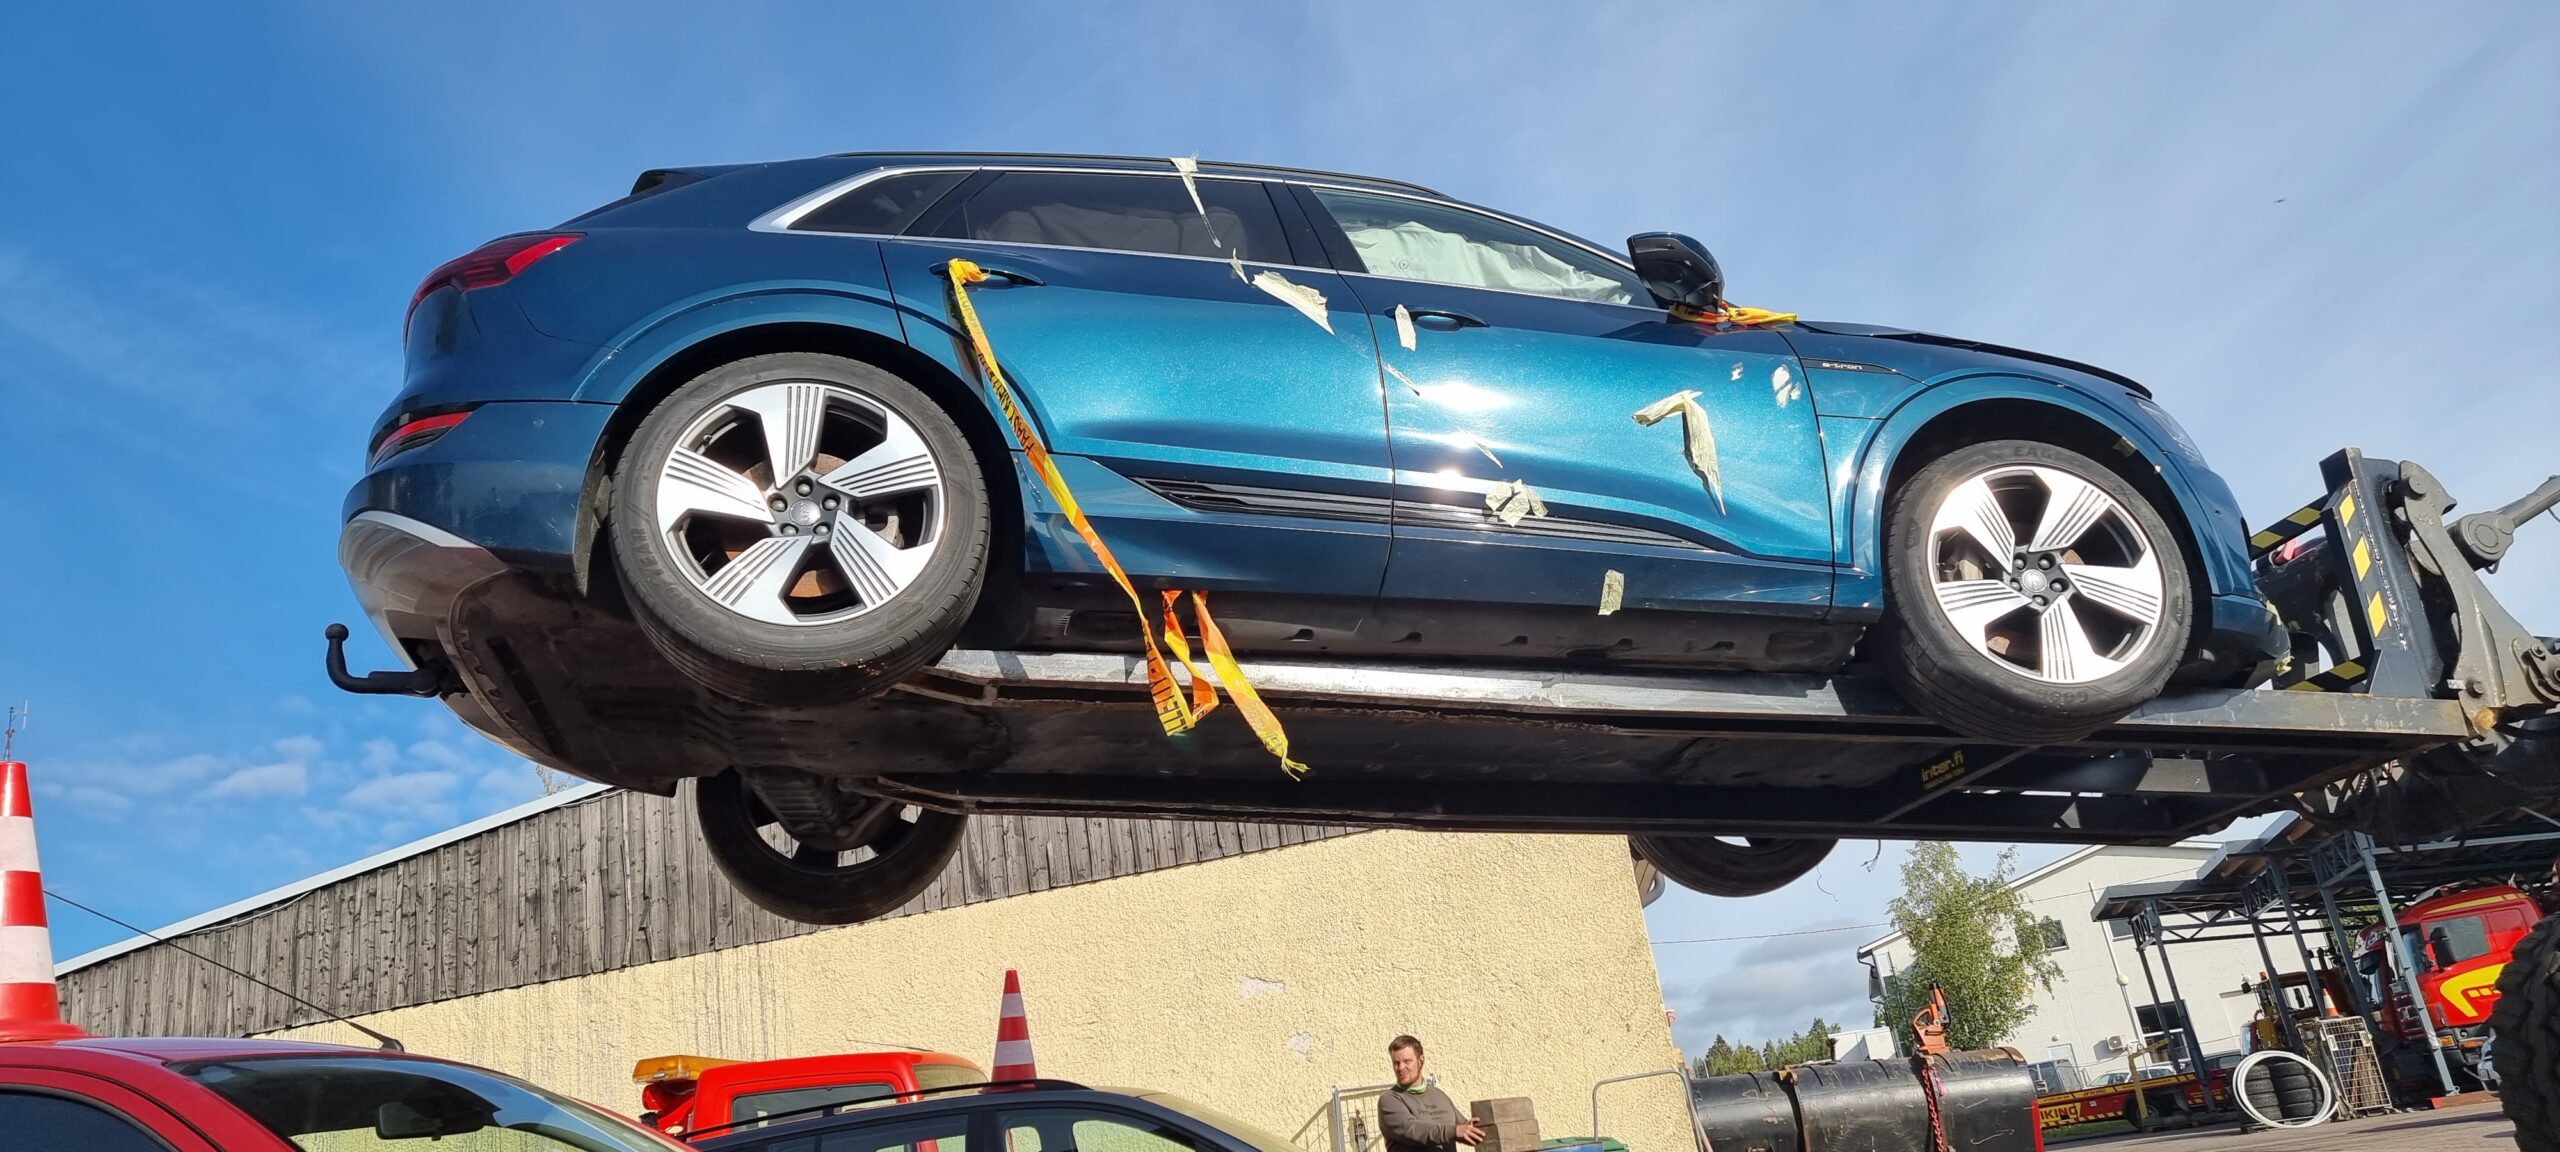
Niinpä joulukuun alussa lähdettiin sitten kohti Kolarikorjaus P. Gullans maalaamoa jälleen suoraan nosturilta trailerikyydillä.

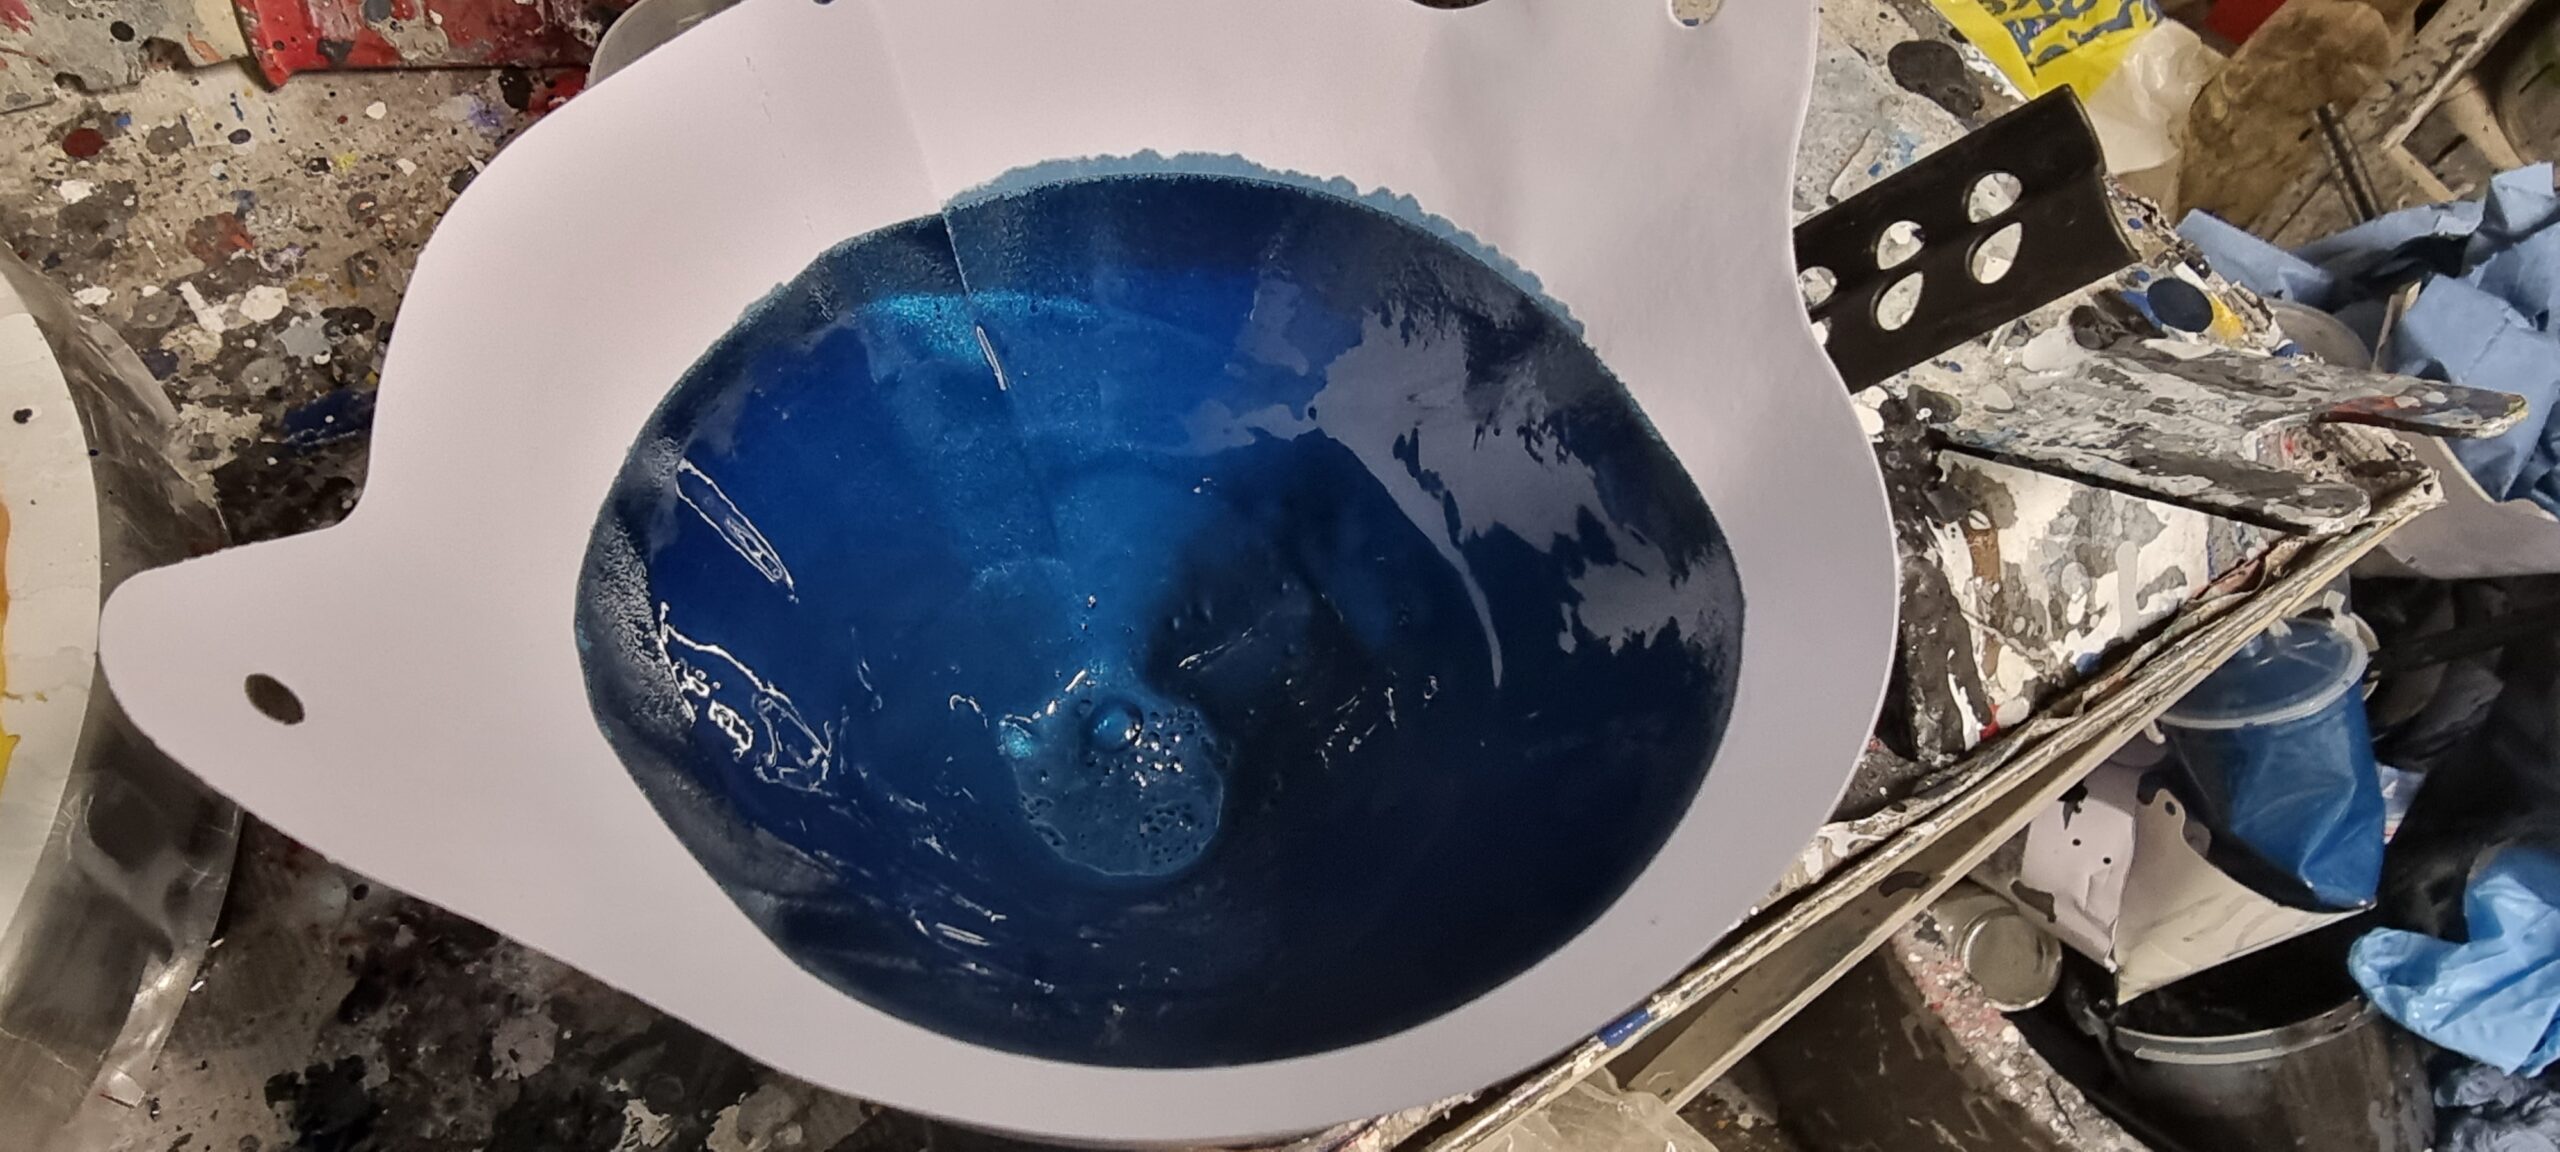
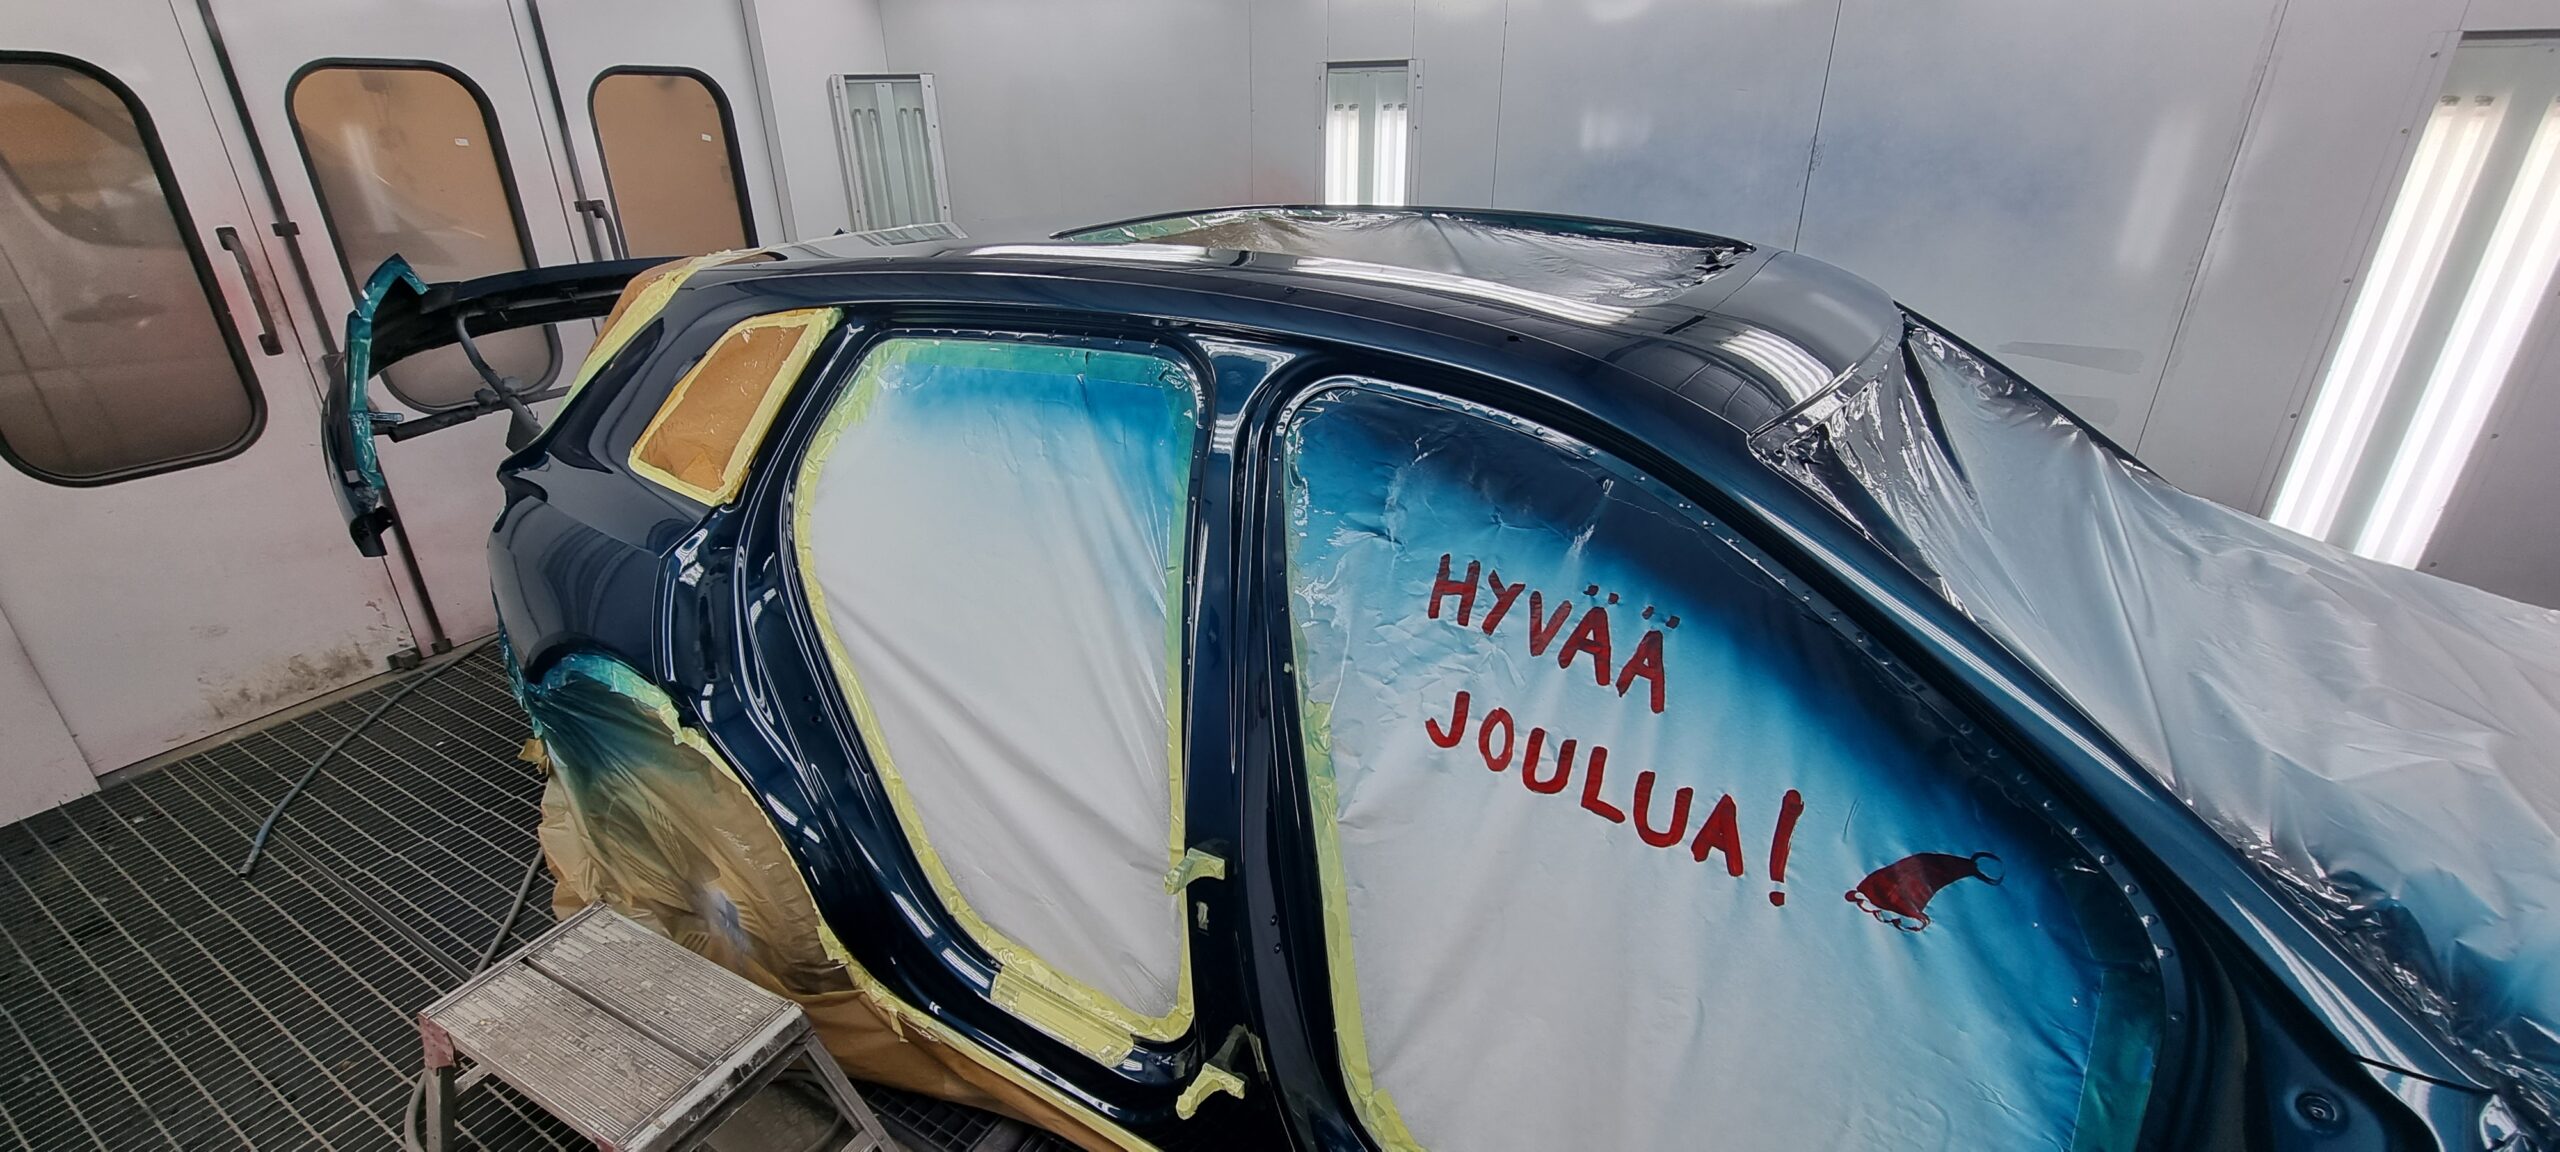
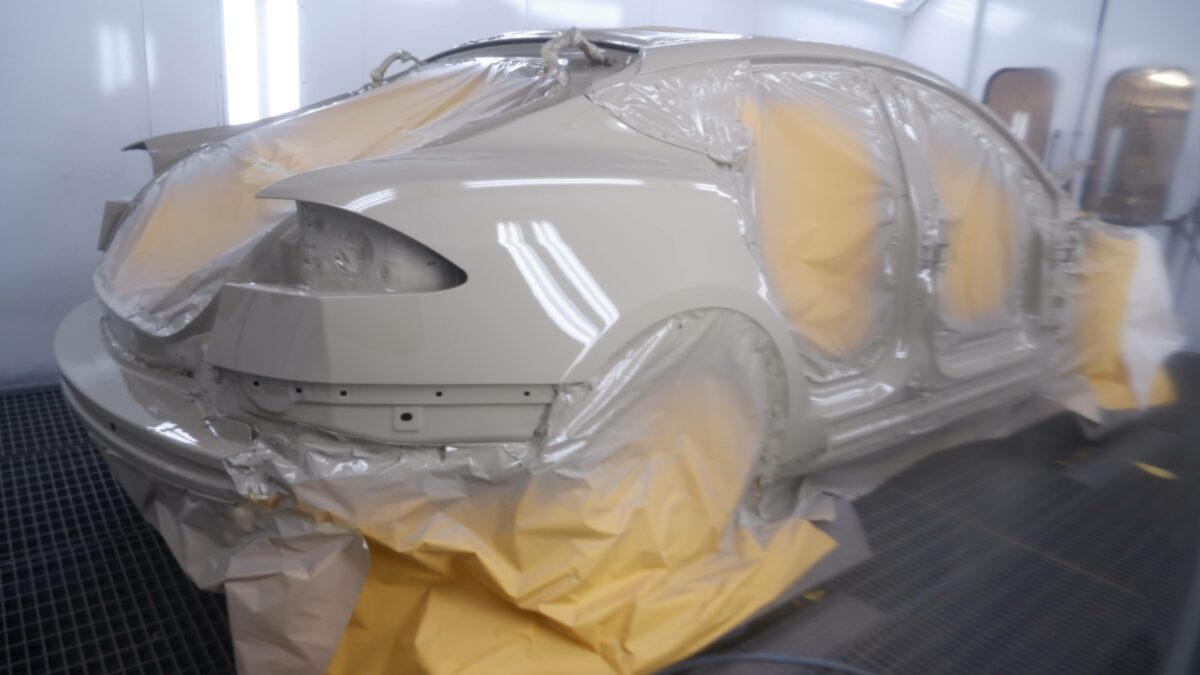
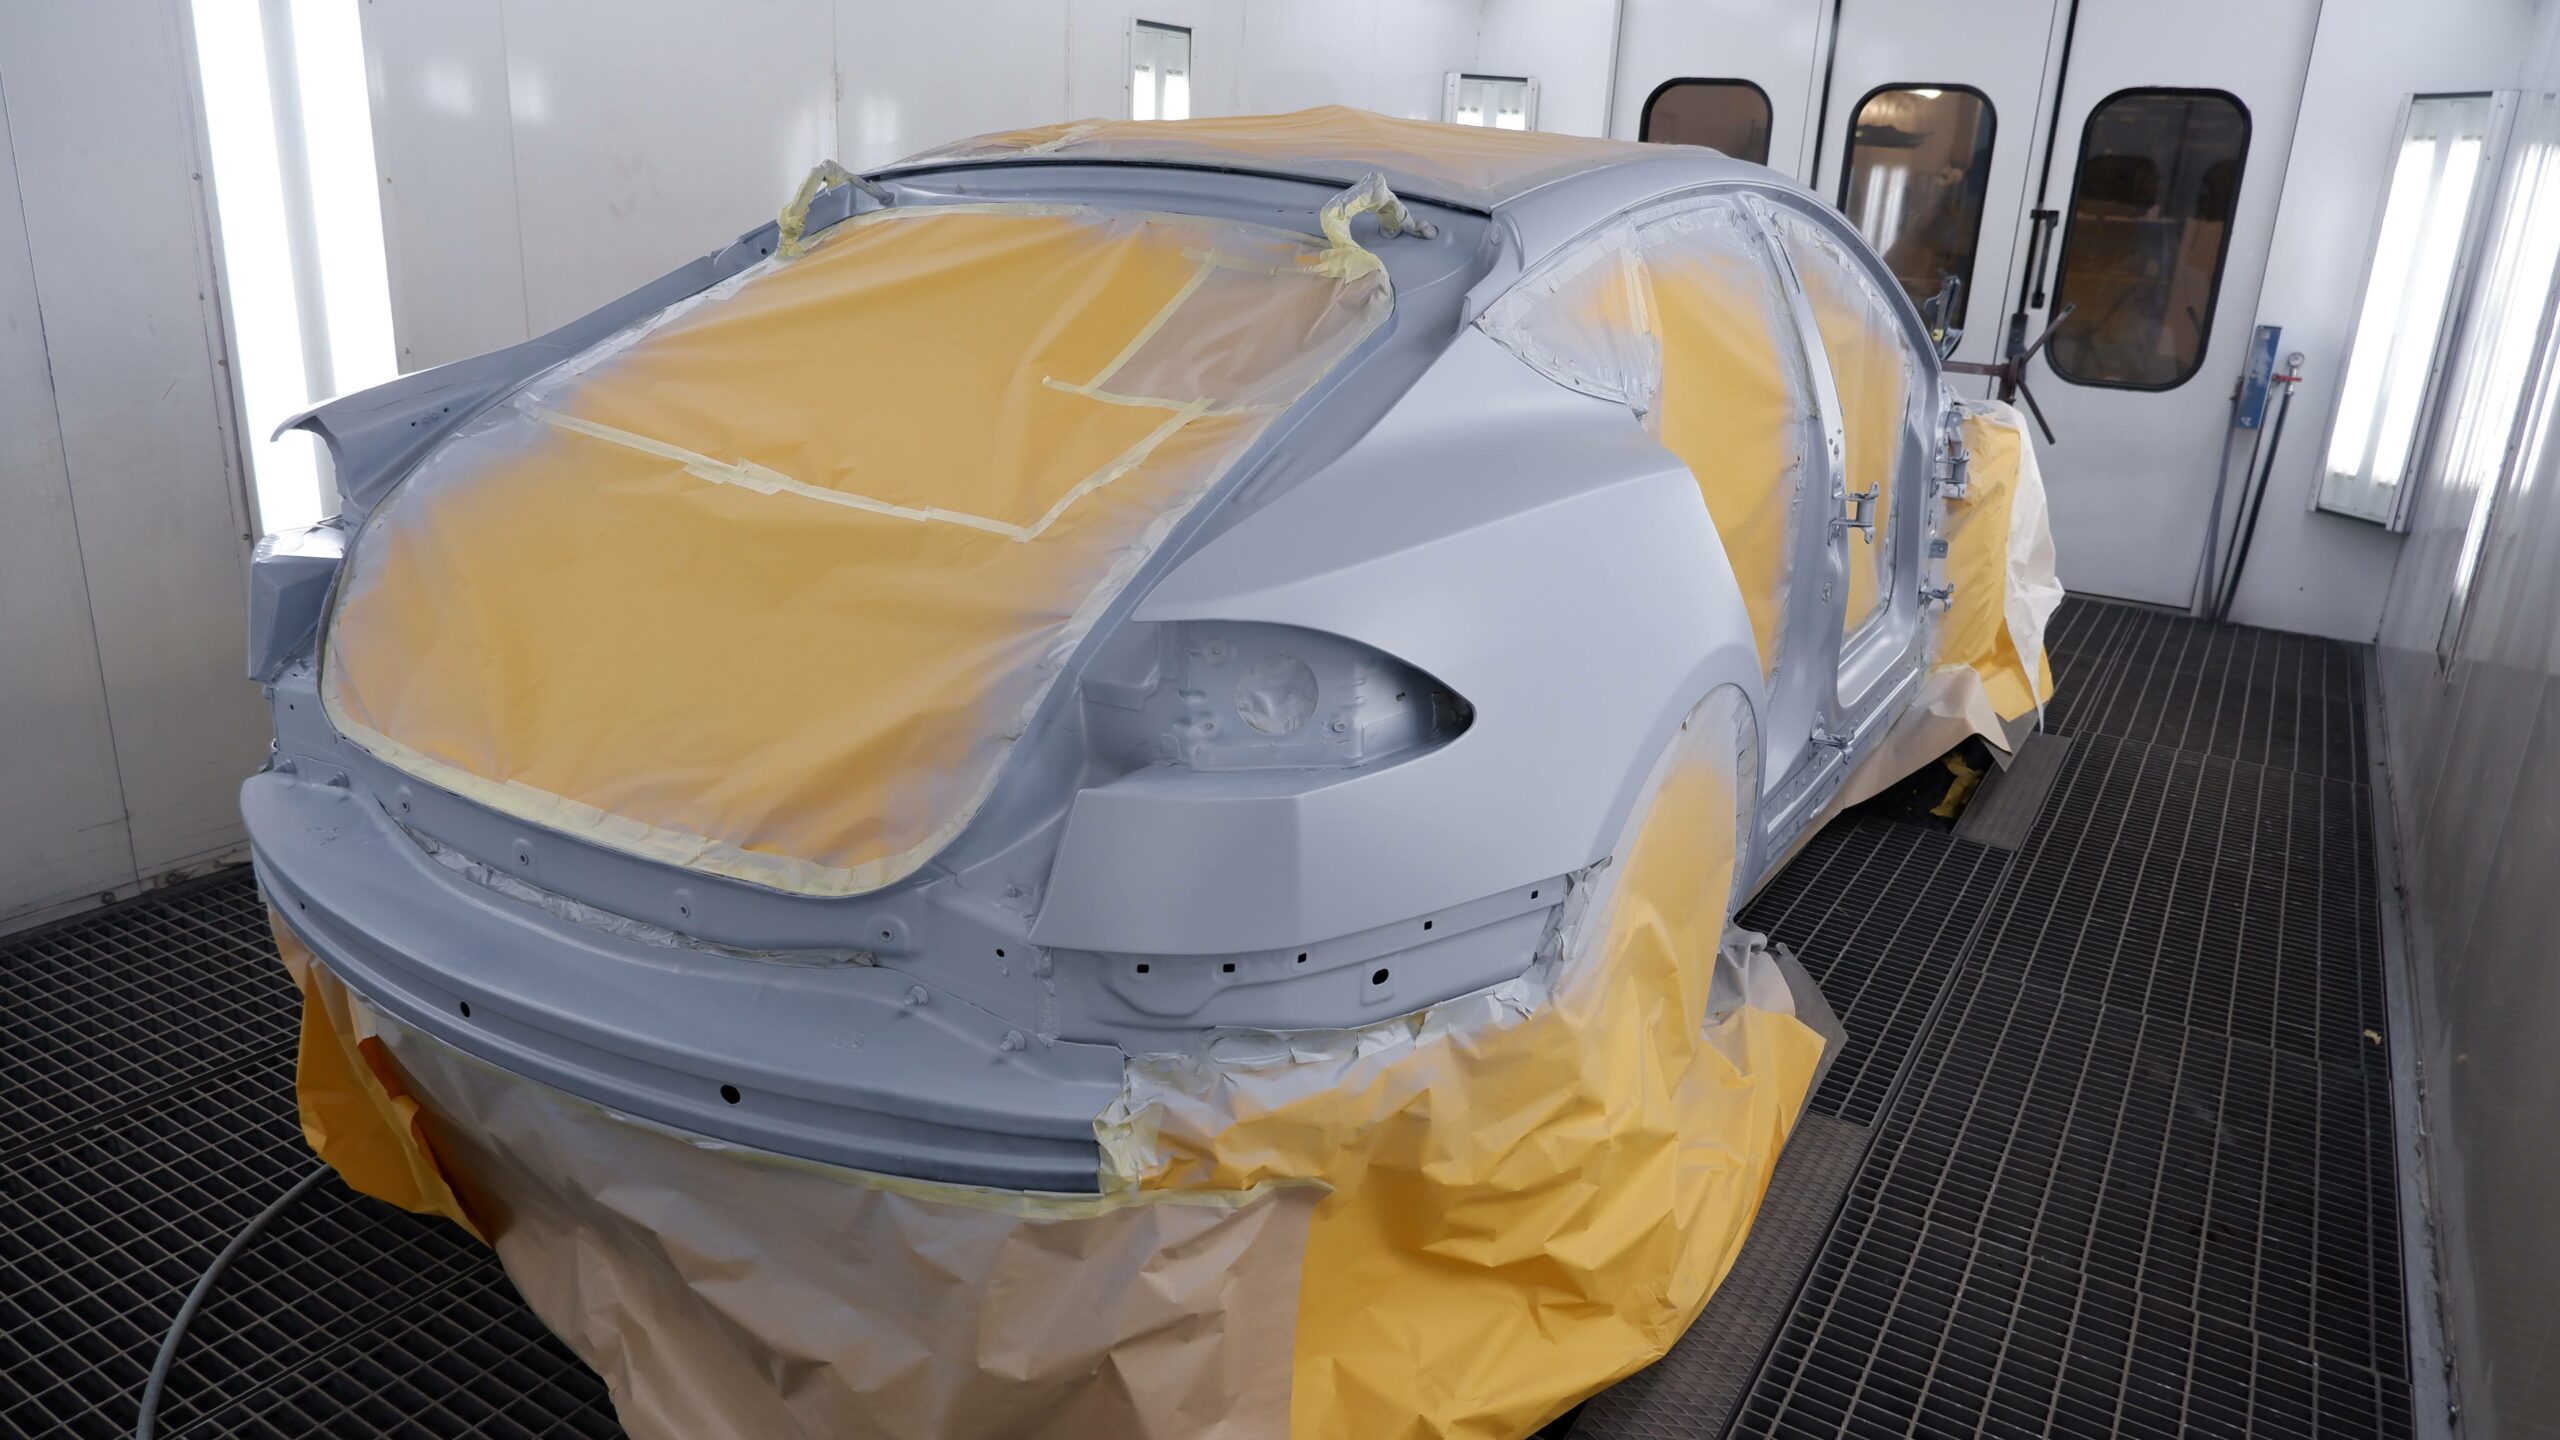
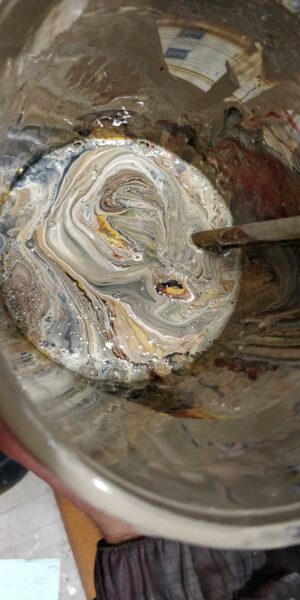
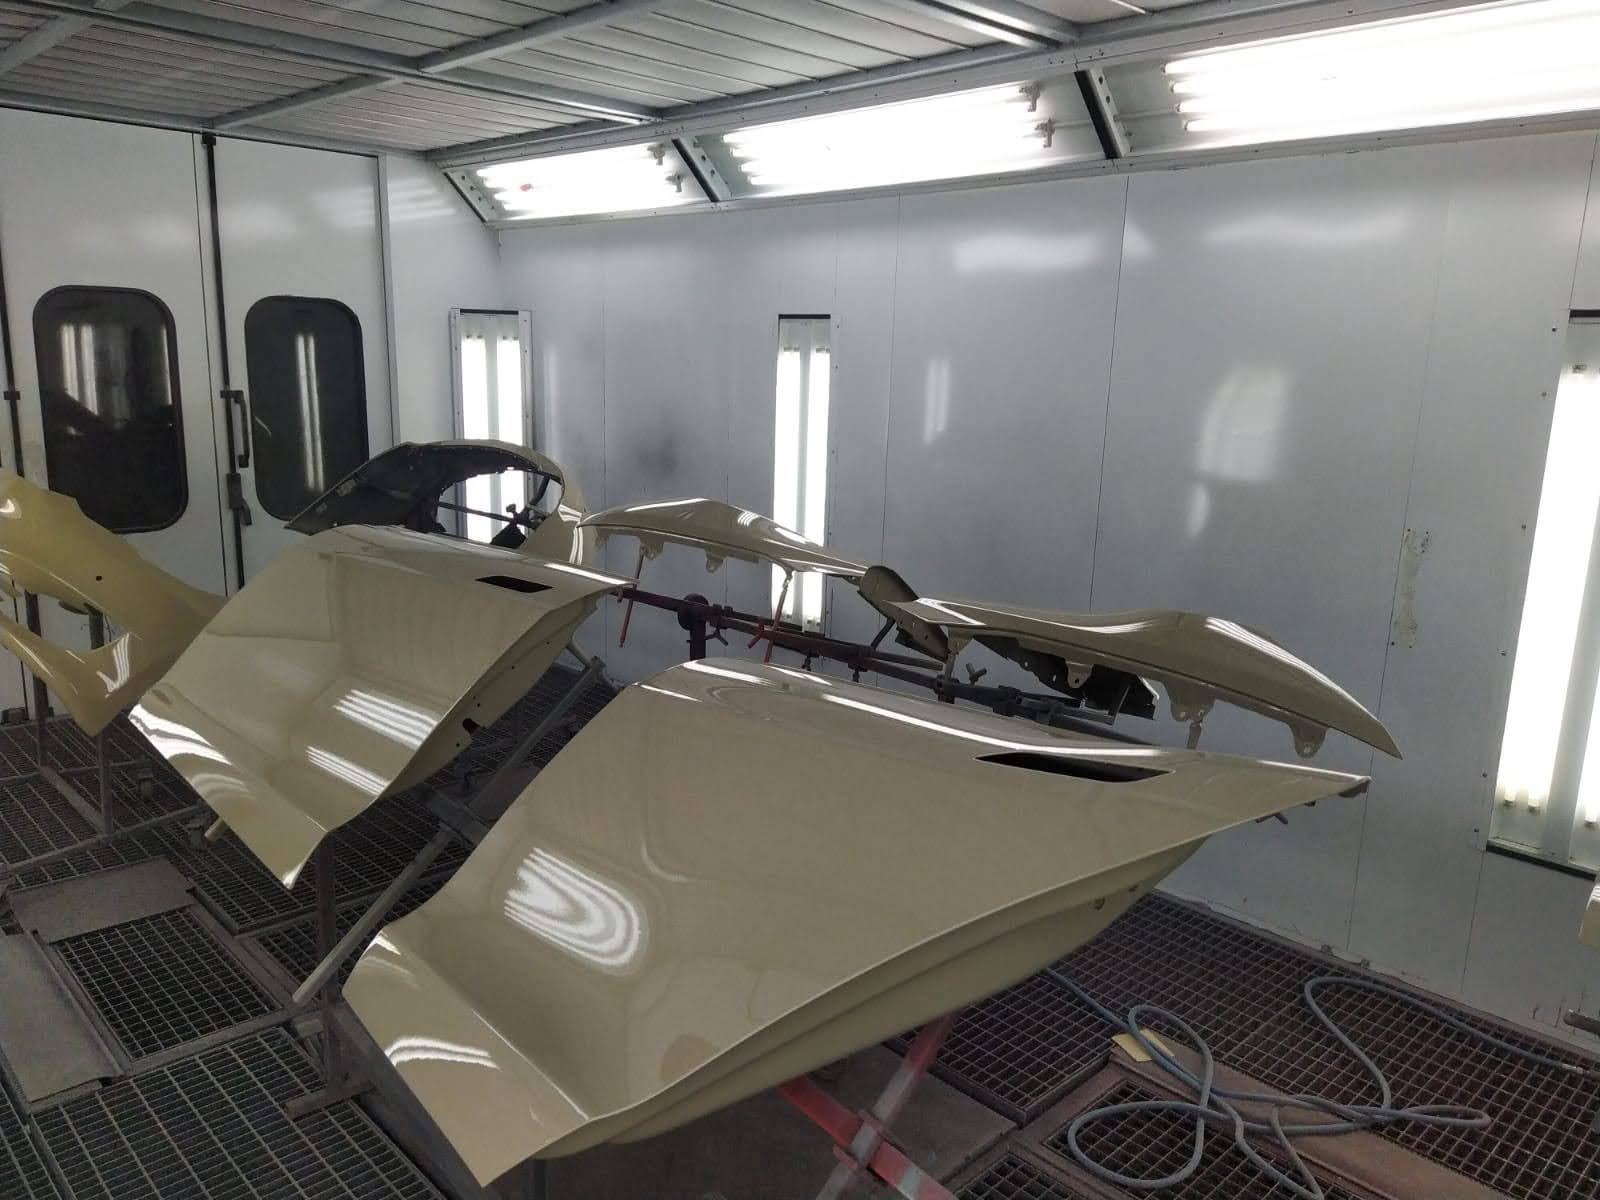
Maalaamolla tehtiin loput viimeistelyt. Katto kitattiin, A-pilareita kunnostettiin ja takakulma oiottiin ja kitattiin maalausvalmiiksi. Väri on Galaxyblau, joka oli sen verran haastava väri, että ensimmäisen maalitoimittajan sävyt eivät täsmänneet ja jouduttiin hankkimaan väriä toiselta toimittajalta. Maalin sekaan tulee hienoa lasimurskaa, joka saa siihen aikaan hienon kimaltelun sopivassa valossa.

Maalari lupasi auton jouluksi maalata ja aatonaattona se tosiaan värin sai pintaansa. Hyvä tuli!

Tapahtui myös joulun ihme. Maalausuunin jälkeen pientä kasailua ja kun auto piti siirtää takaisin trailerille, auto suostuikin liikkumaan omin voimin! Lopulta ymmärsimme, että syy miksi se ei aiemmin näin tehnyt oli se, että ovet eivät olleet paikallaan. Nämä konsernin sähkövatkaimet kun edellyttävät, että ovet ovat kiinni, jotta niillä pystyy ajamaan!

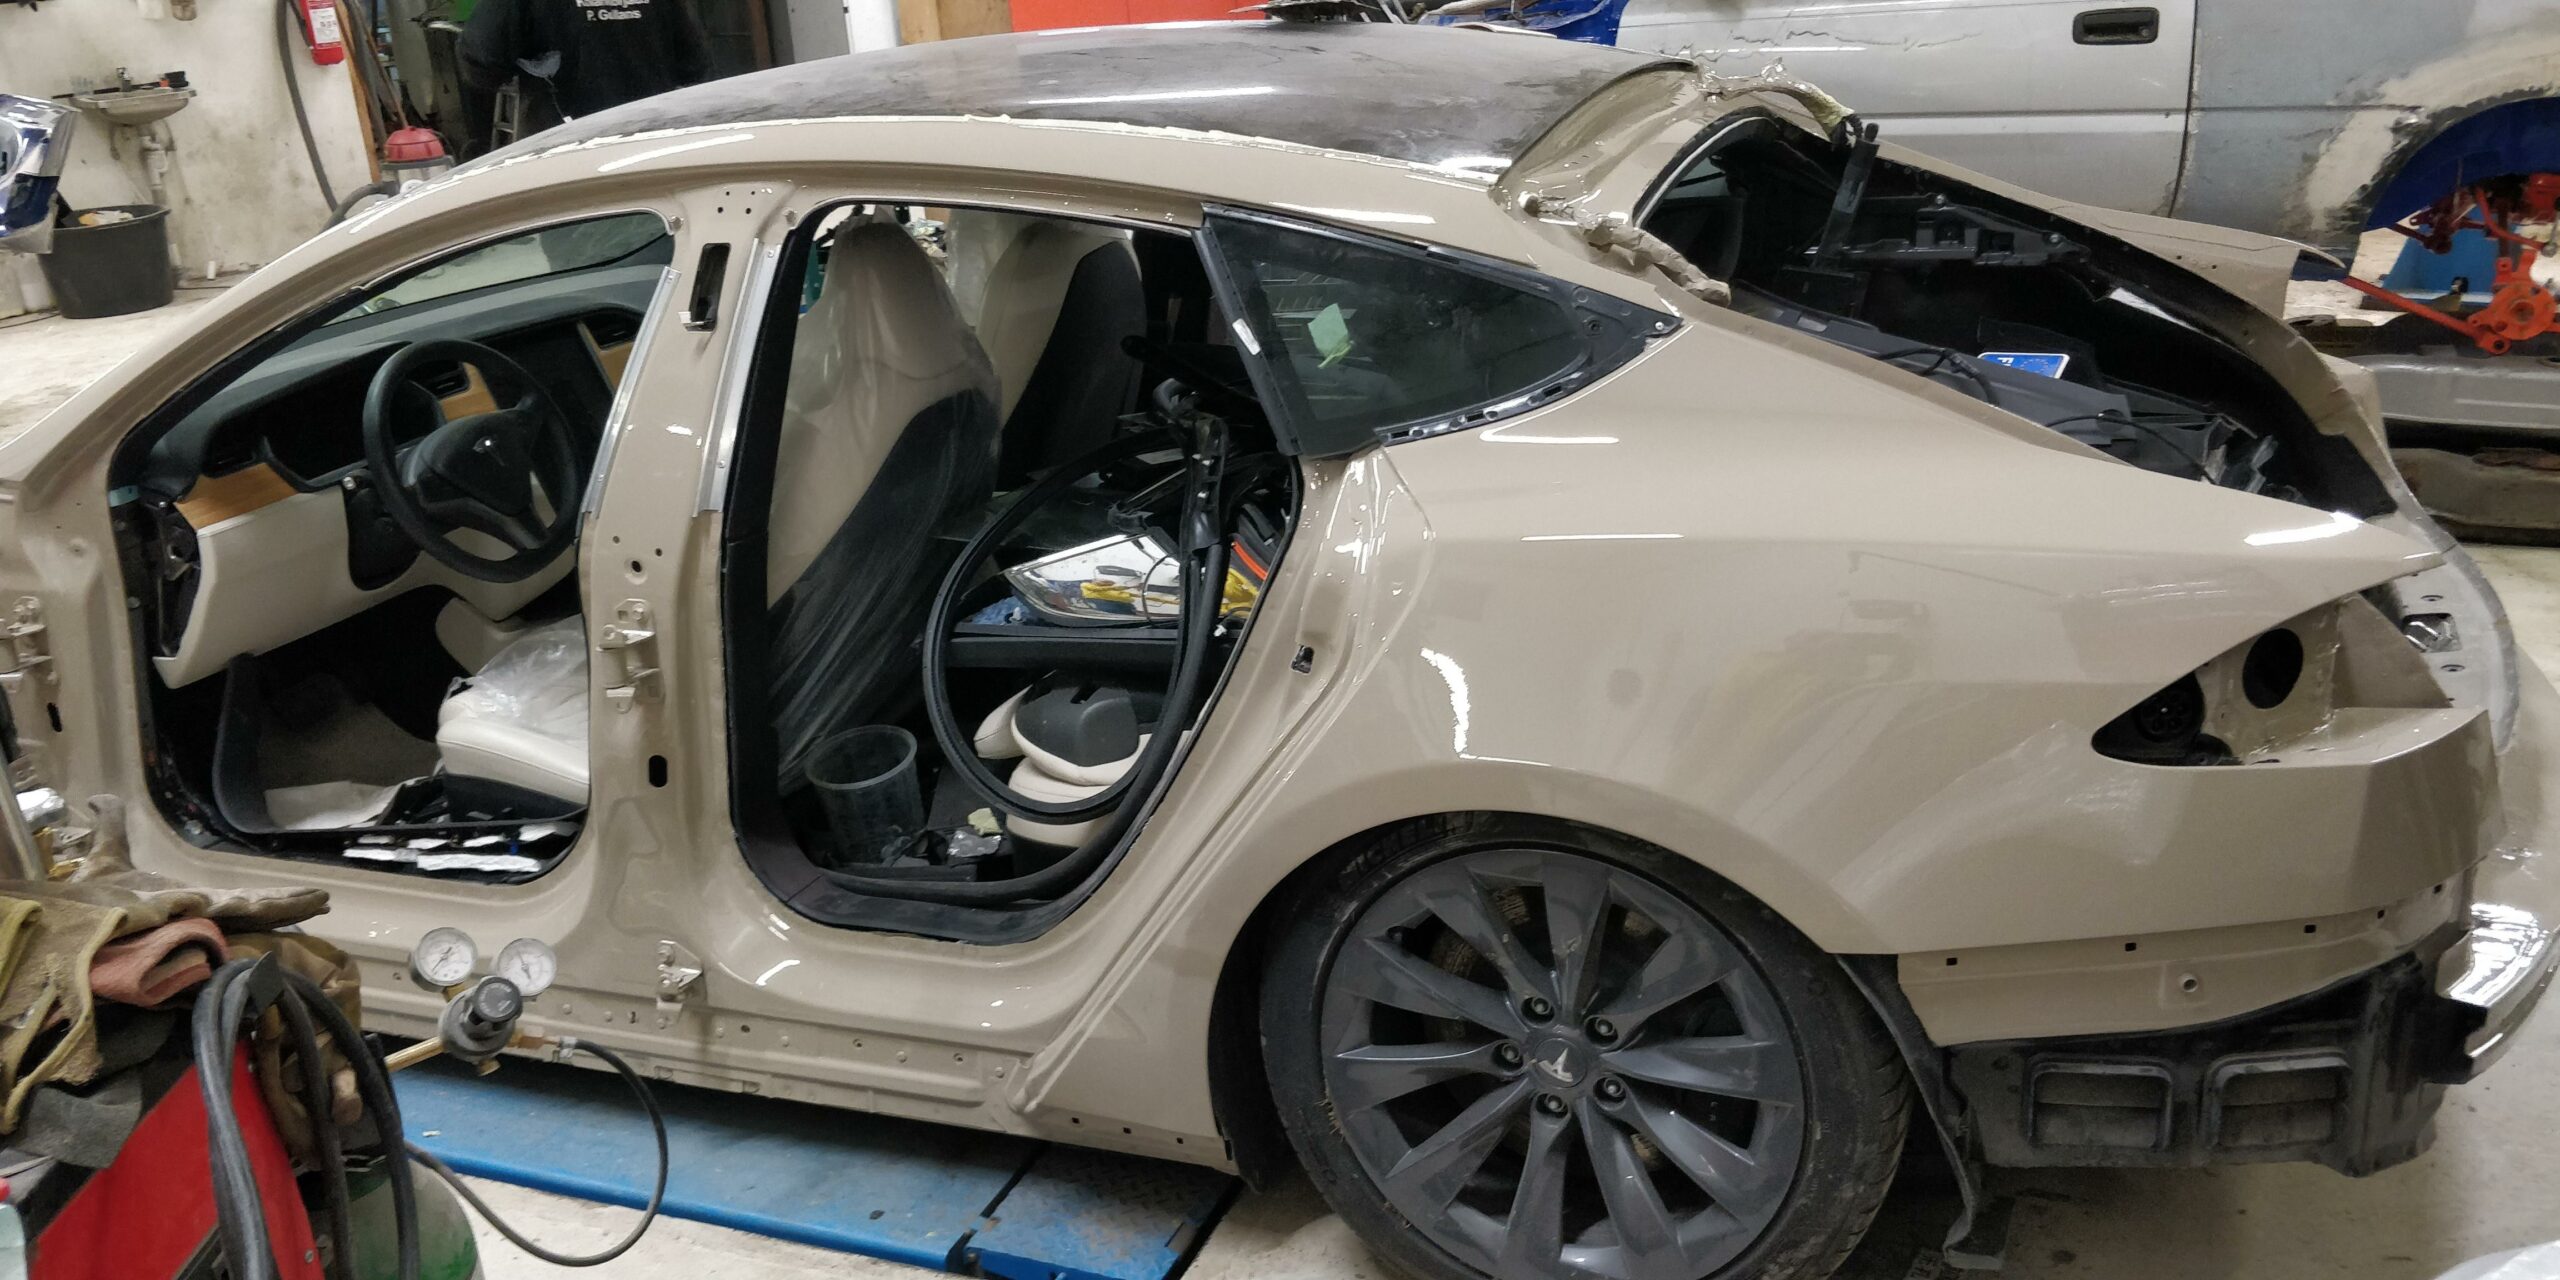
Myös kuljettajan ovi vaihtui samasta purkuautosta peräisin olevaan kuin keulakin. Hieman jännitti miten värisävyt täsmäävät. Takaovi ja -kylki maalattiin, etuovi on saksalaisesta purkuautosta, oikean puolen ovet alkuperäiset. Kaikki sävyt täsmäävät silti hyvin, vaikka joka paikkaan ei häivytyksiä tehtykään.

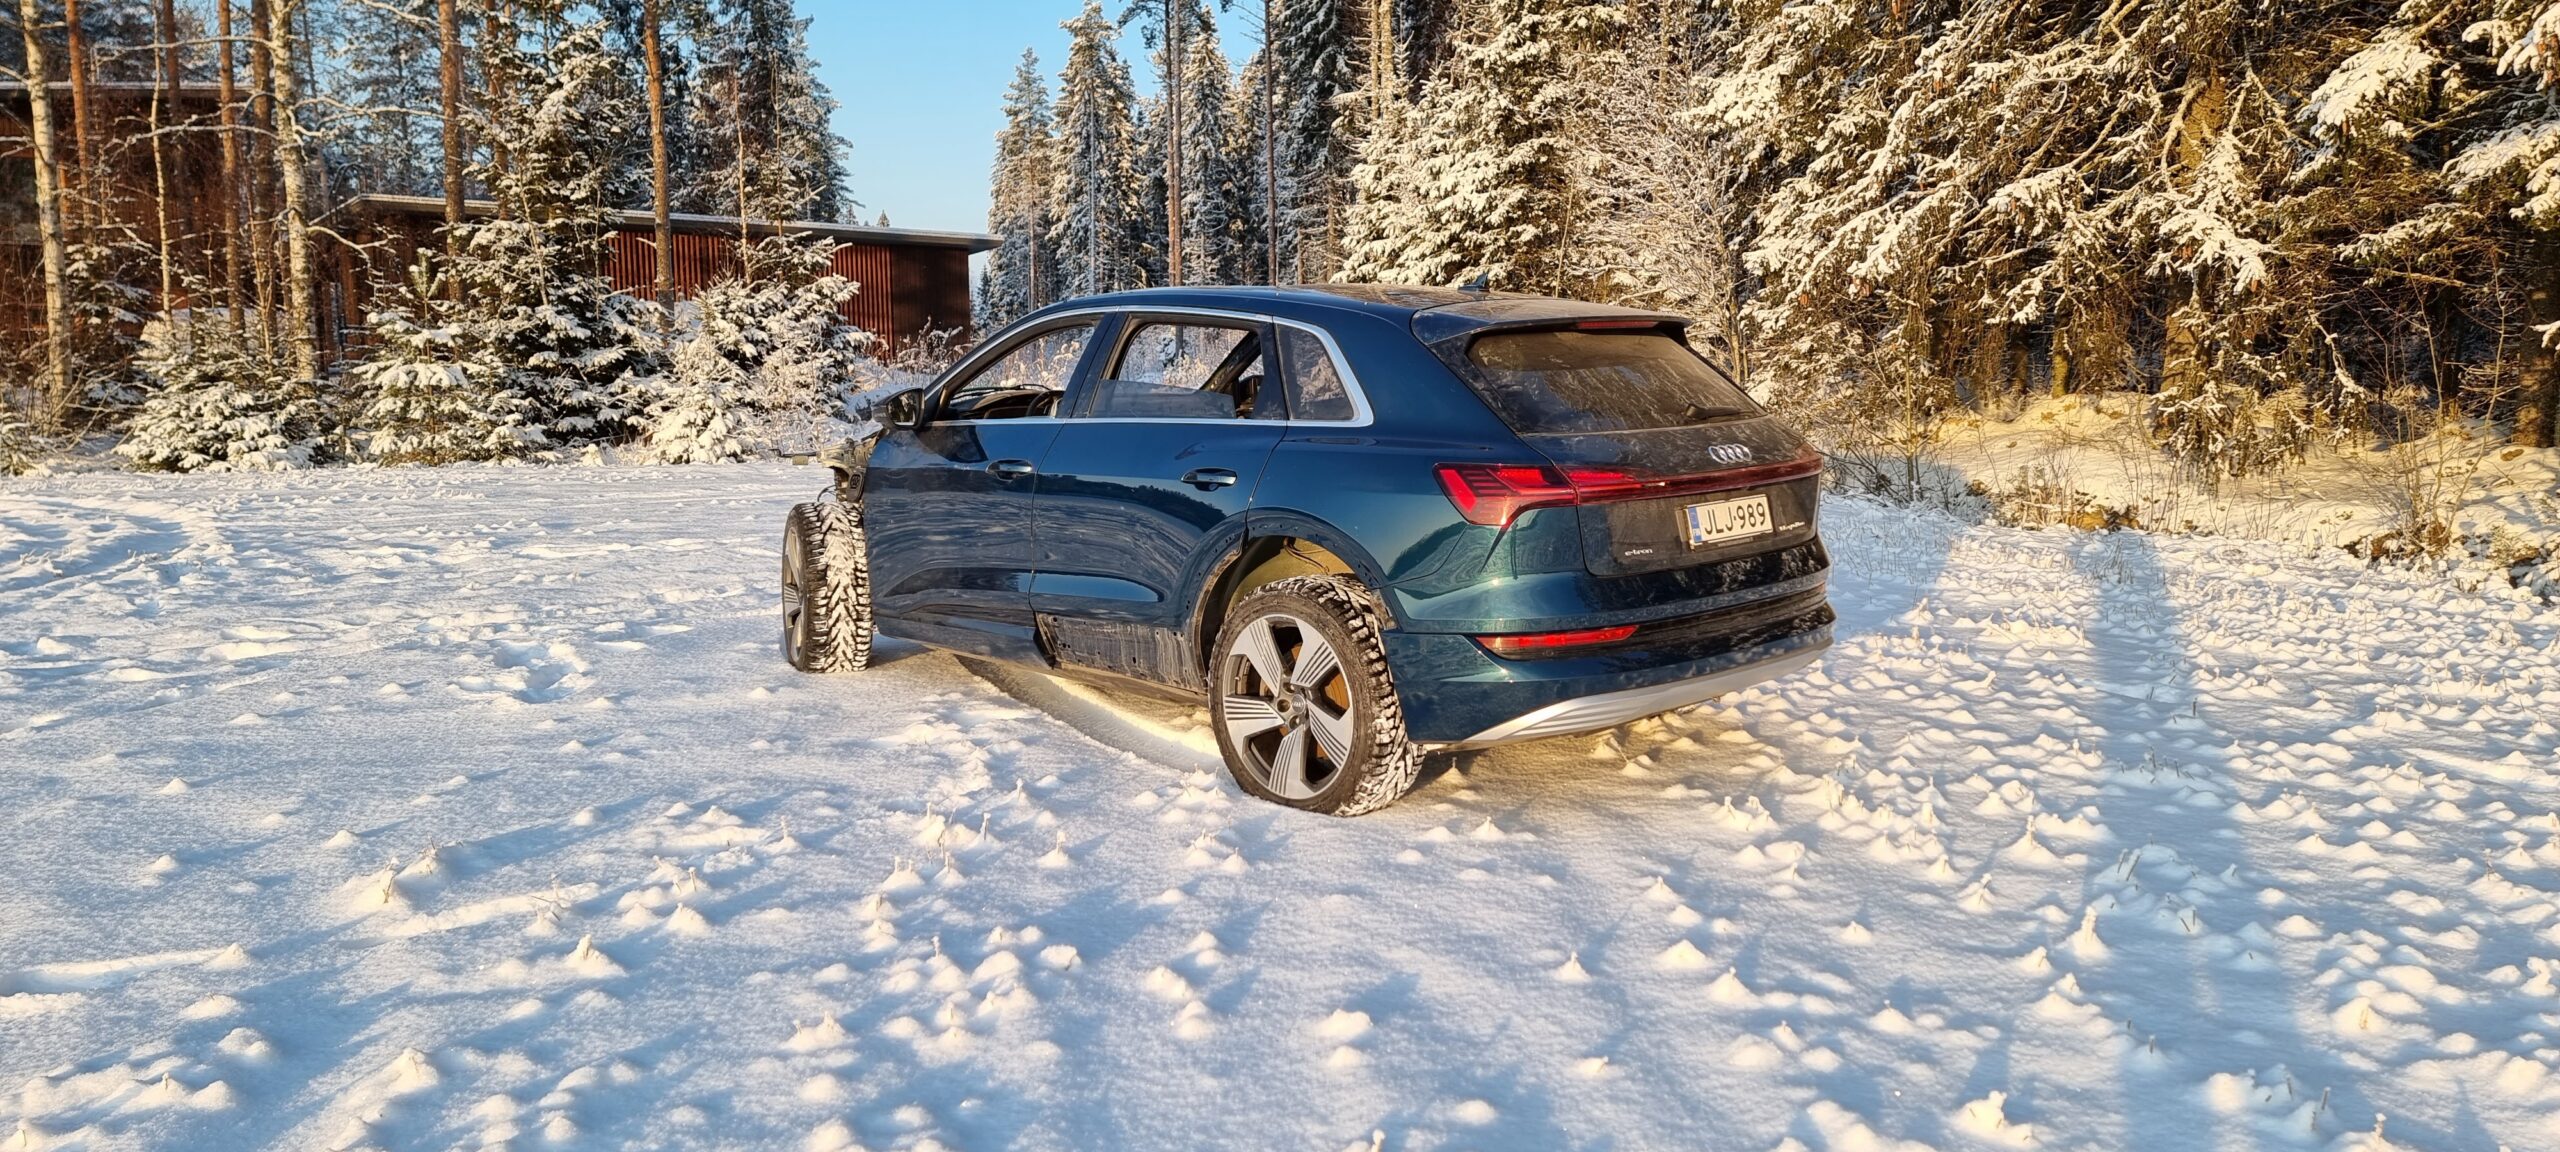
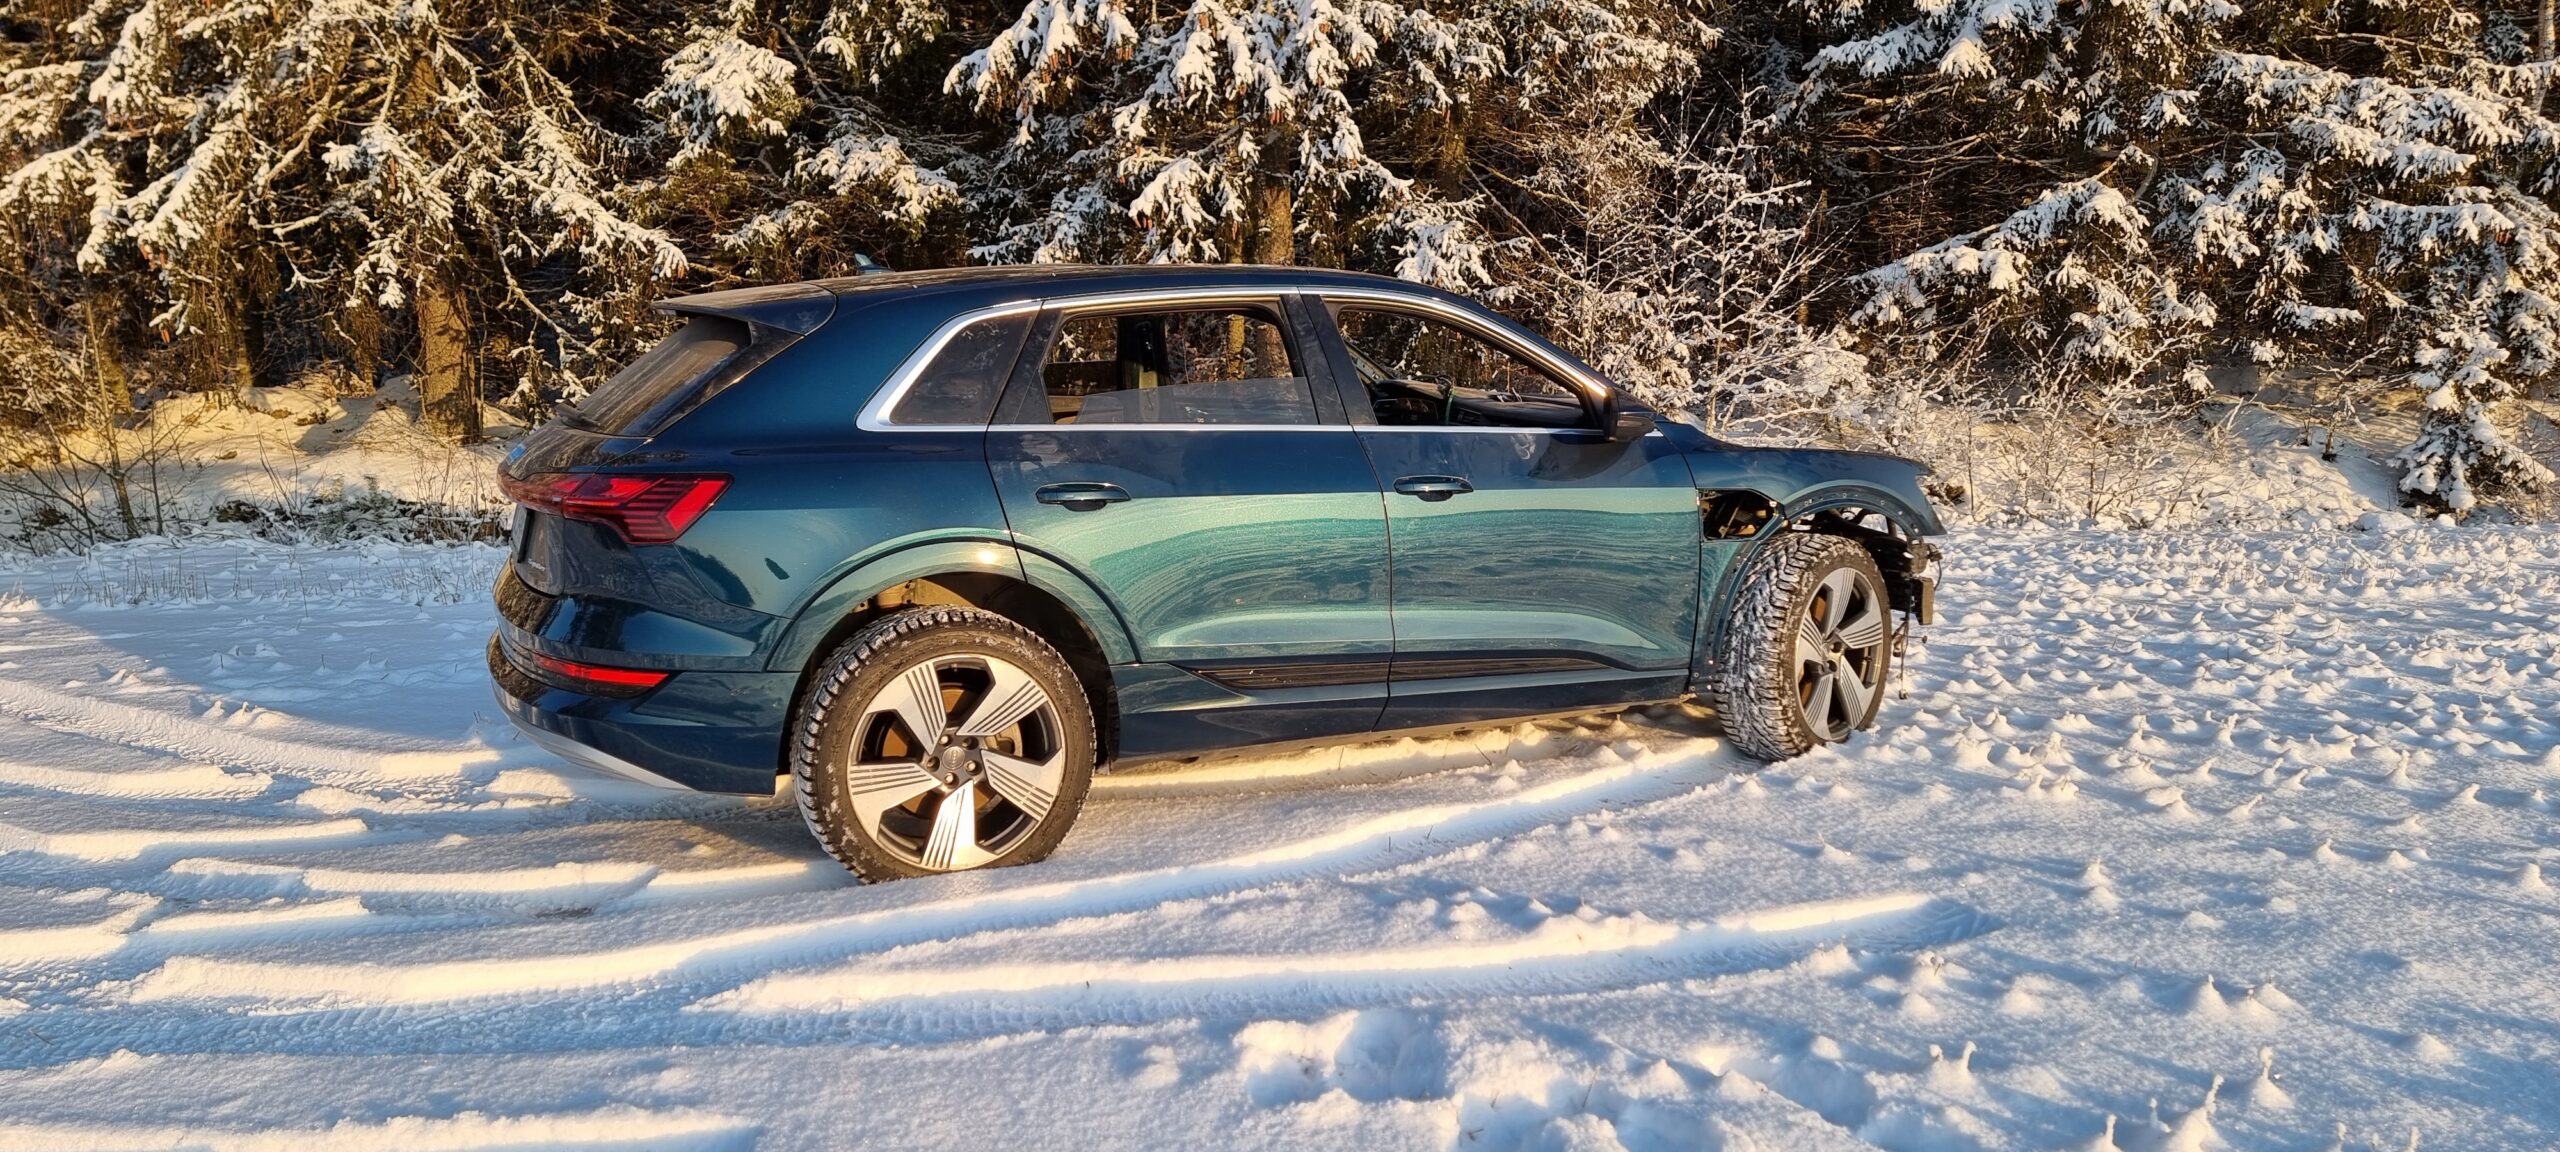
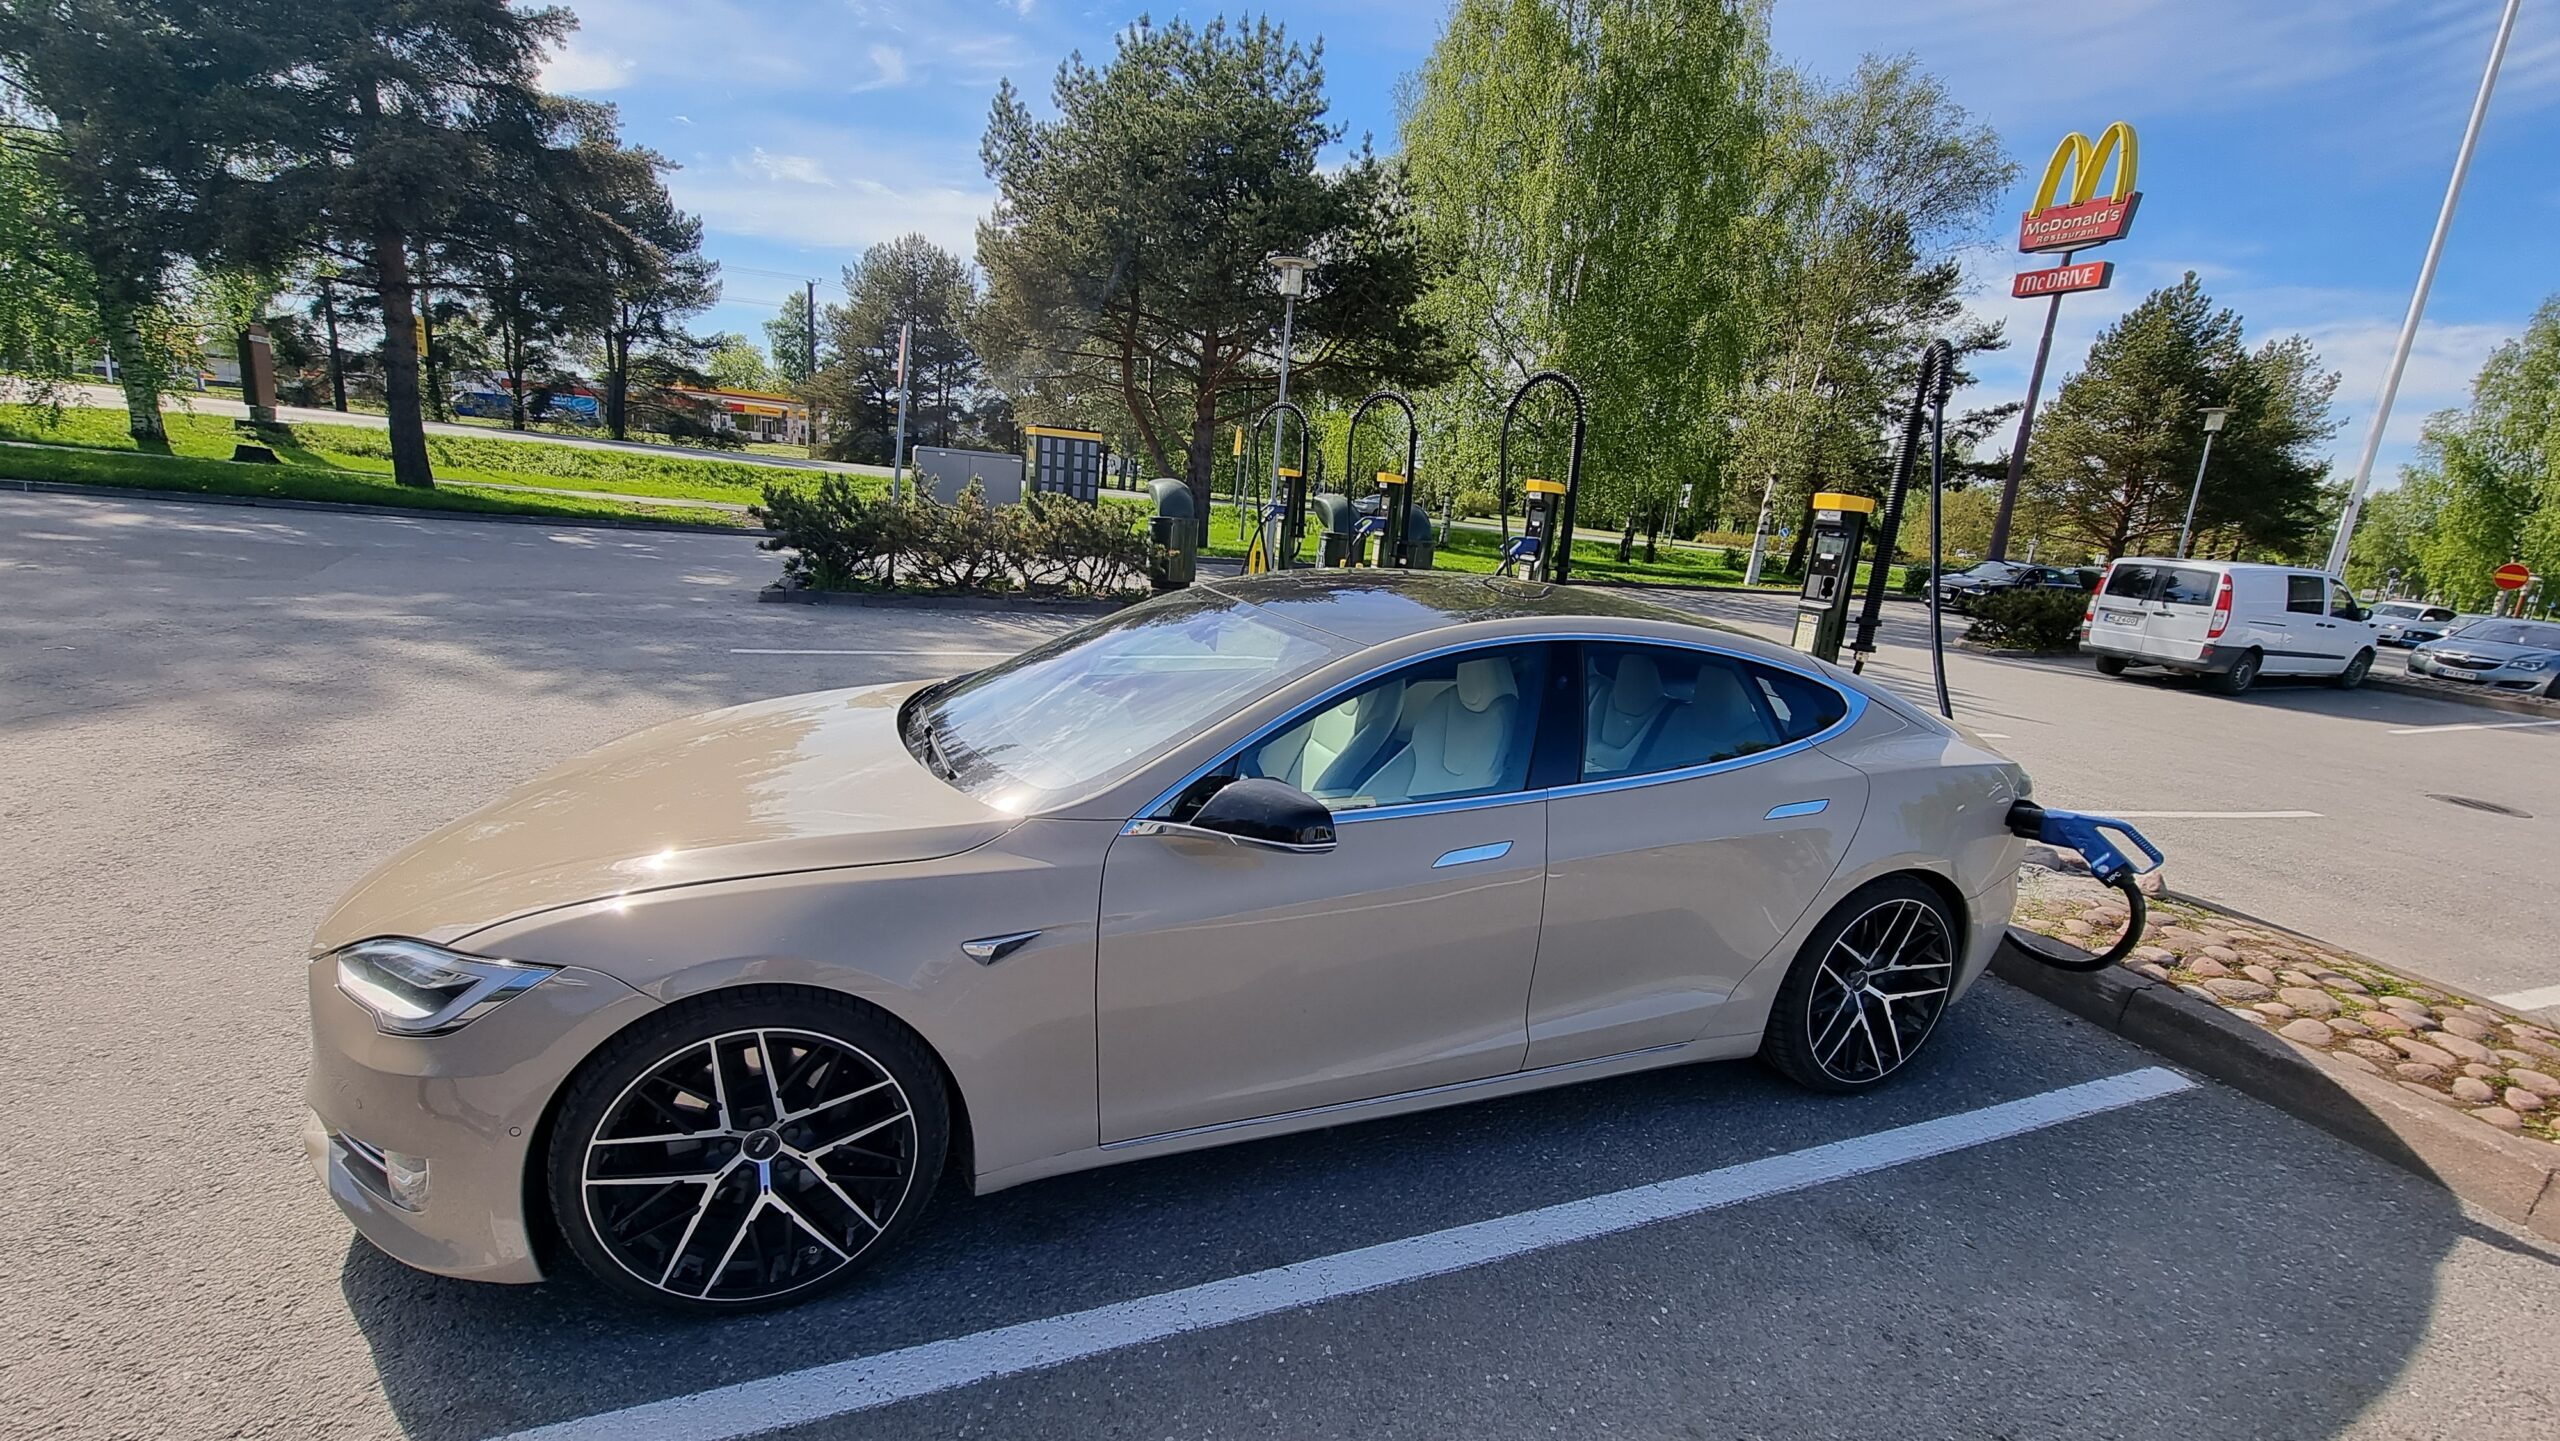
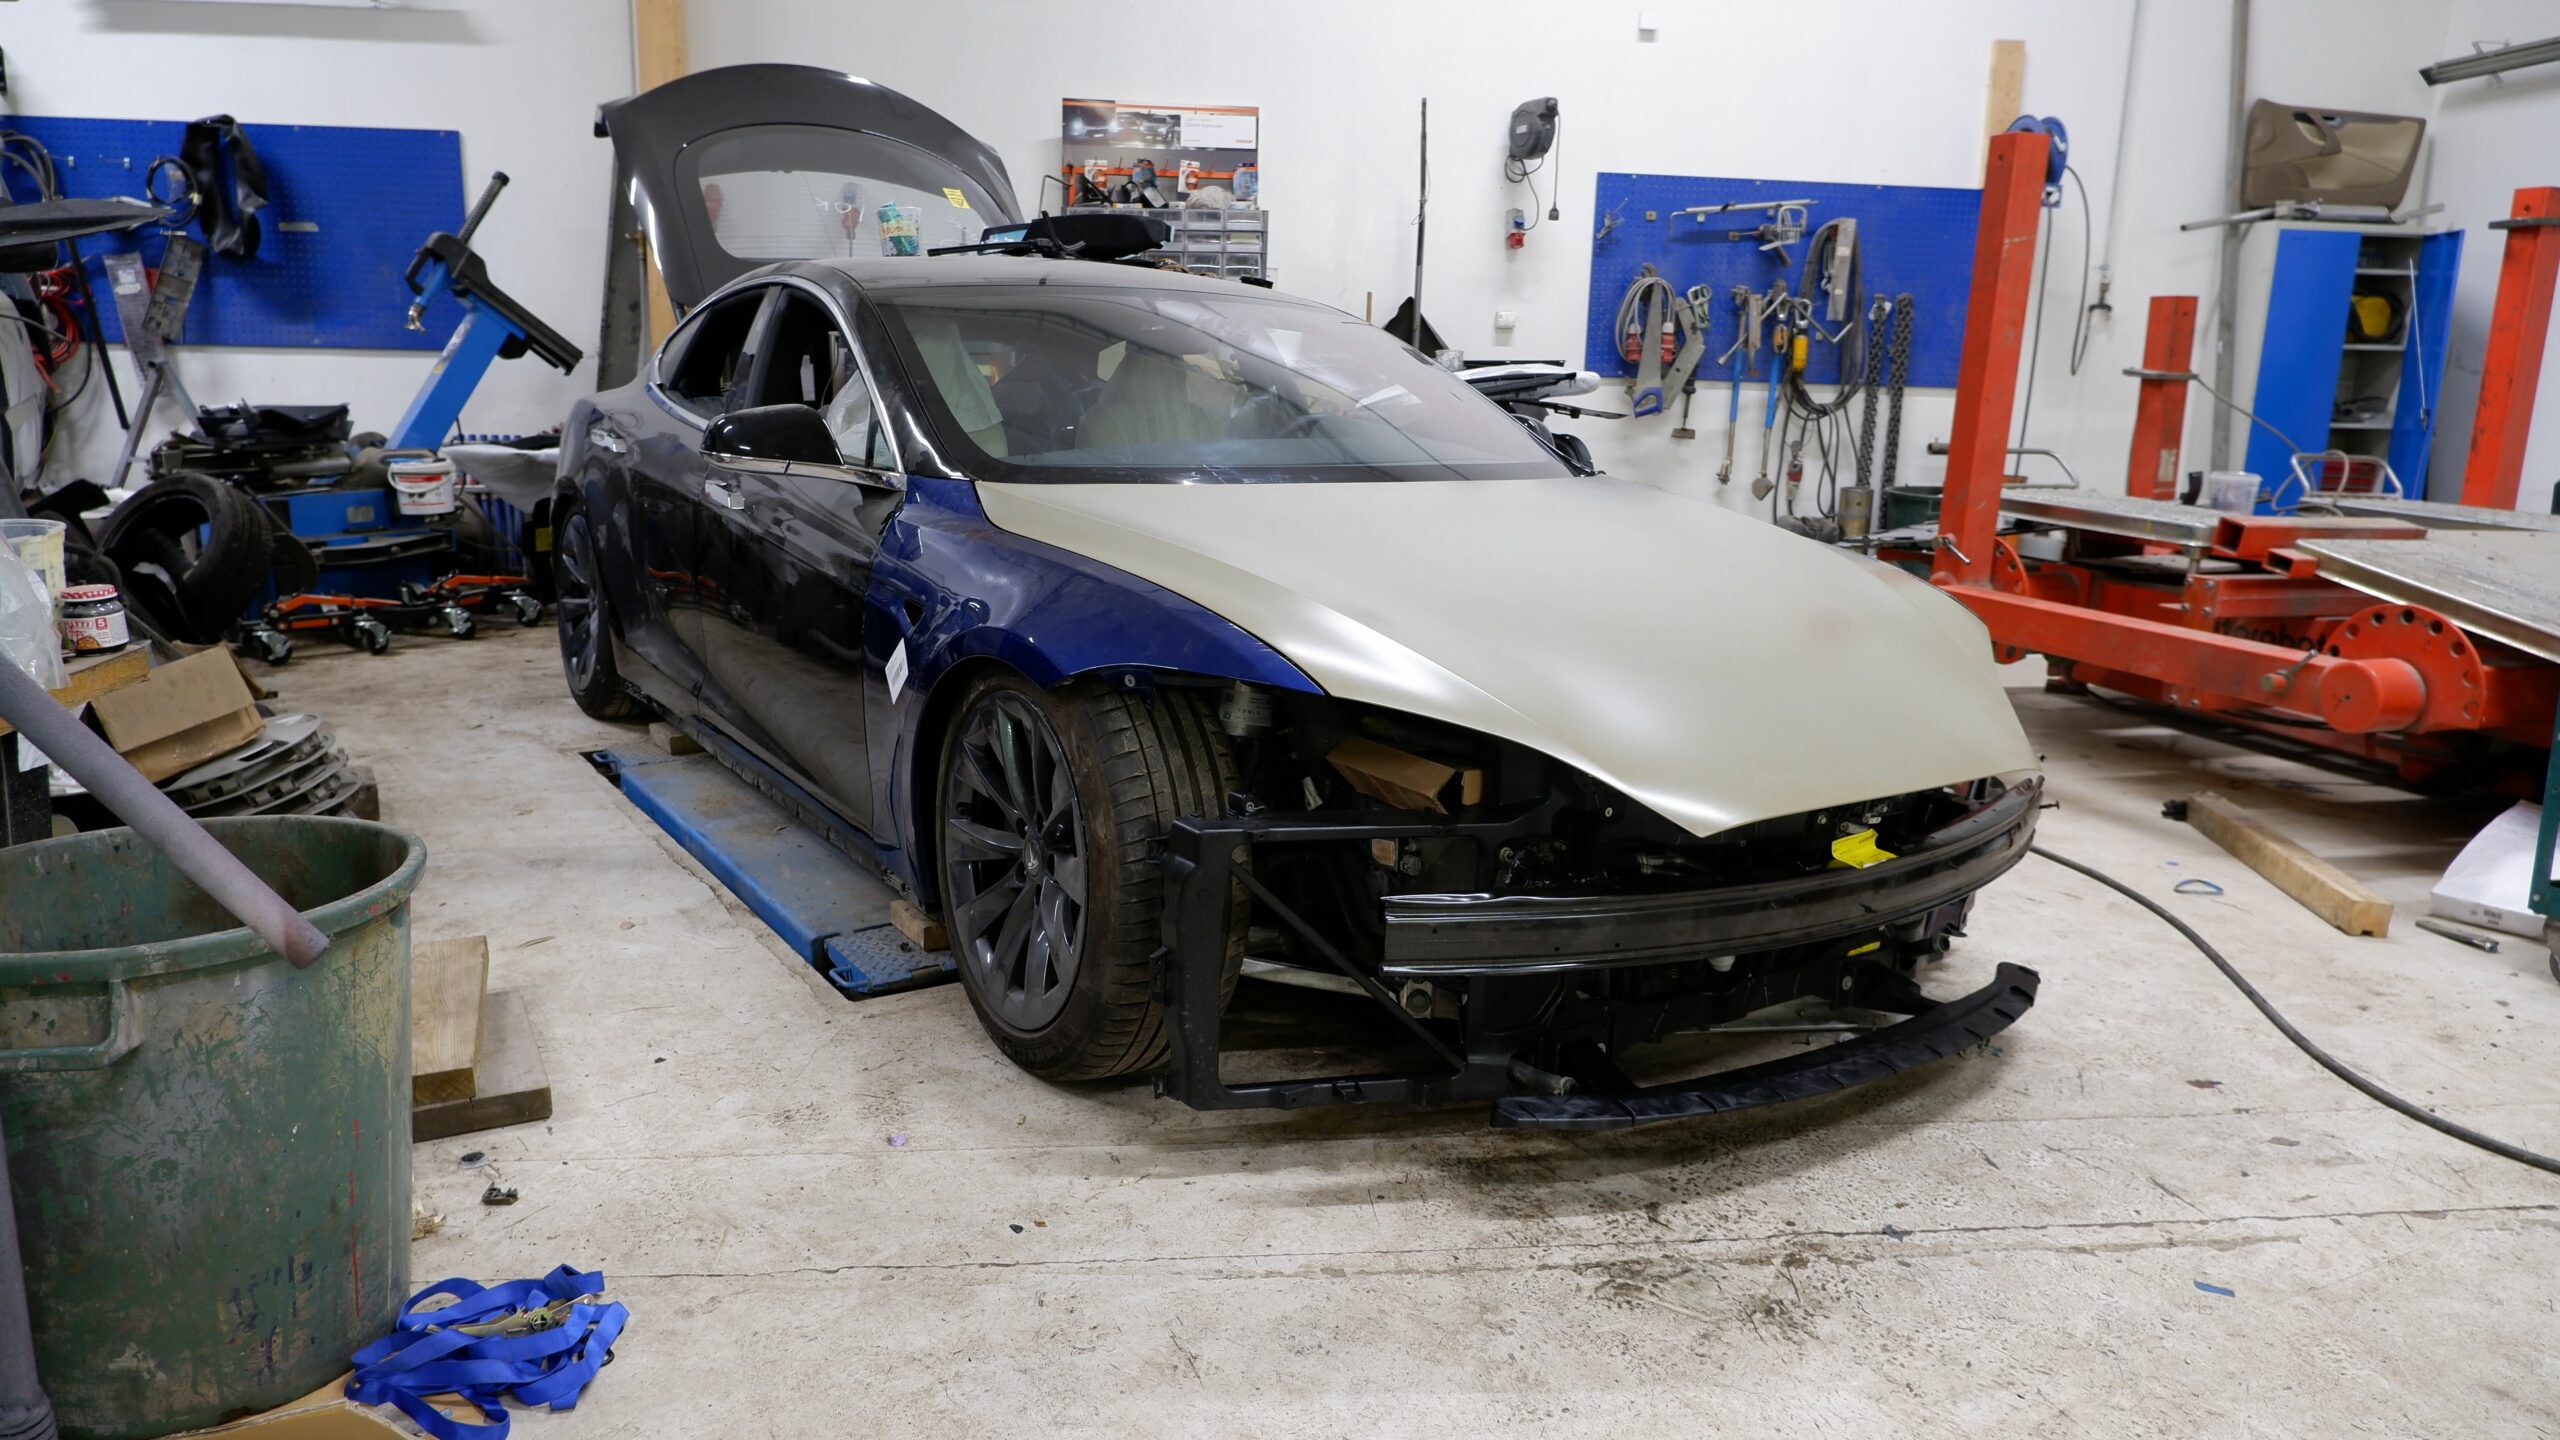
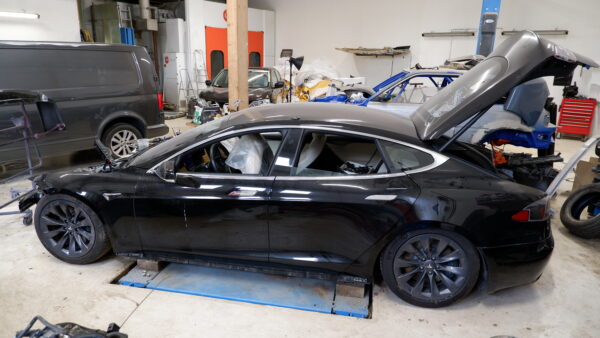
Joulun jälkeen auto sitten kuskattiin takaisin kotiin ja otettiin muutama kuvakin iltapäivän auringossa – nyt auto oli helppo siirrellä kuvauksen kannalta parempaan paikkaankin, kun sillä pystyi ajamaan.

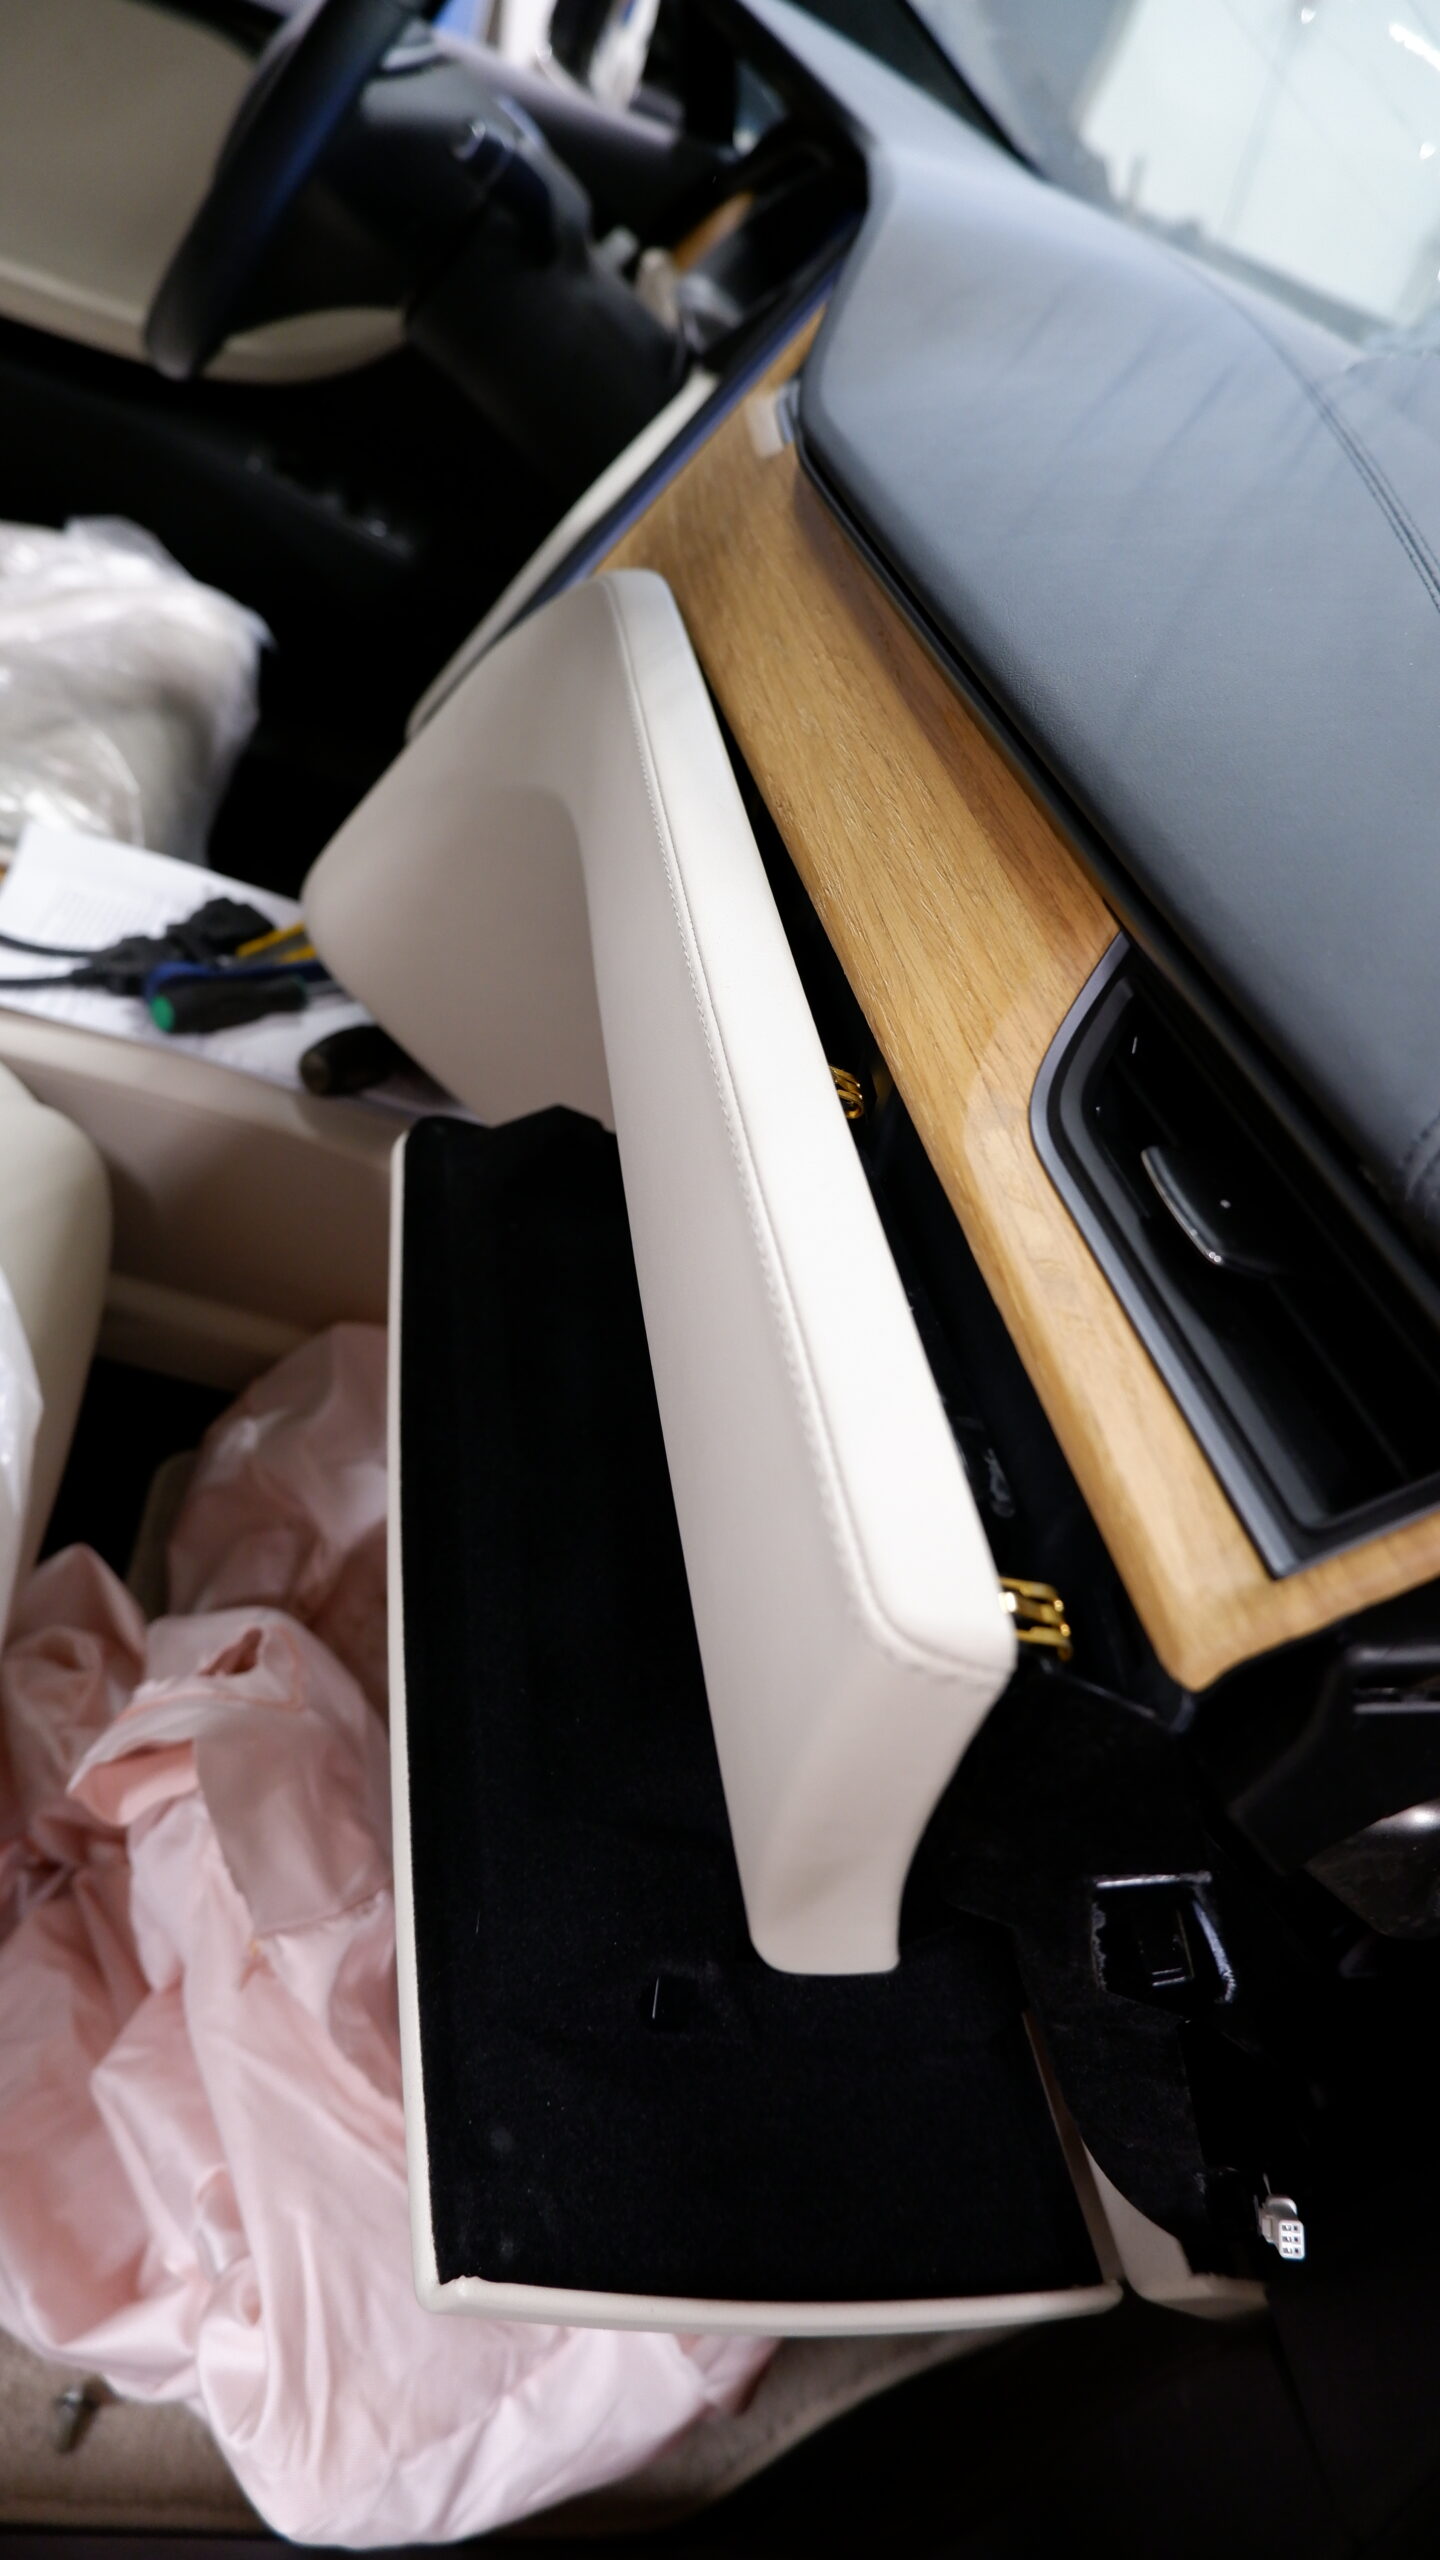
Sisustan kasailussa sai helposti kulumaan kokonaisen päivän, jos riittikään.

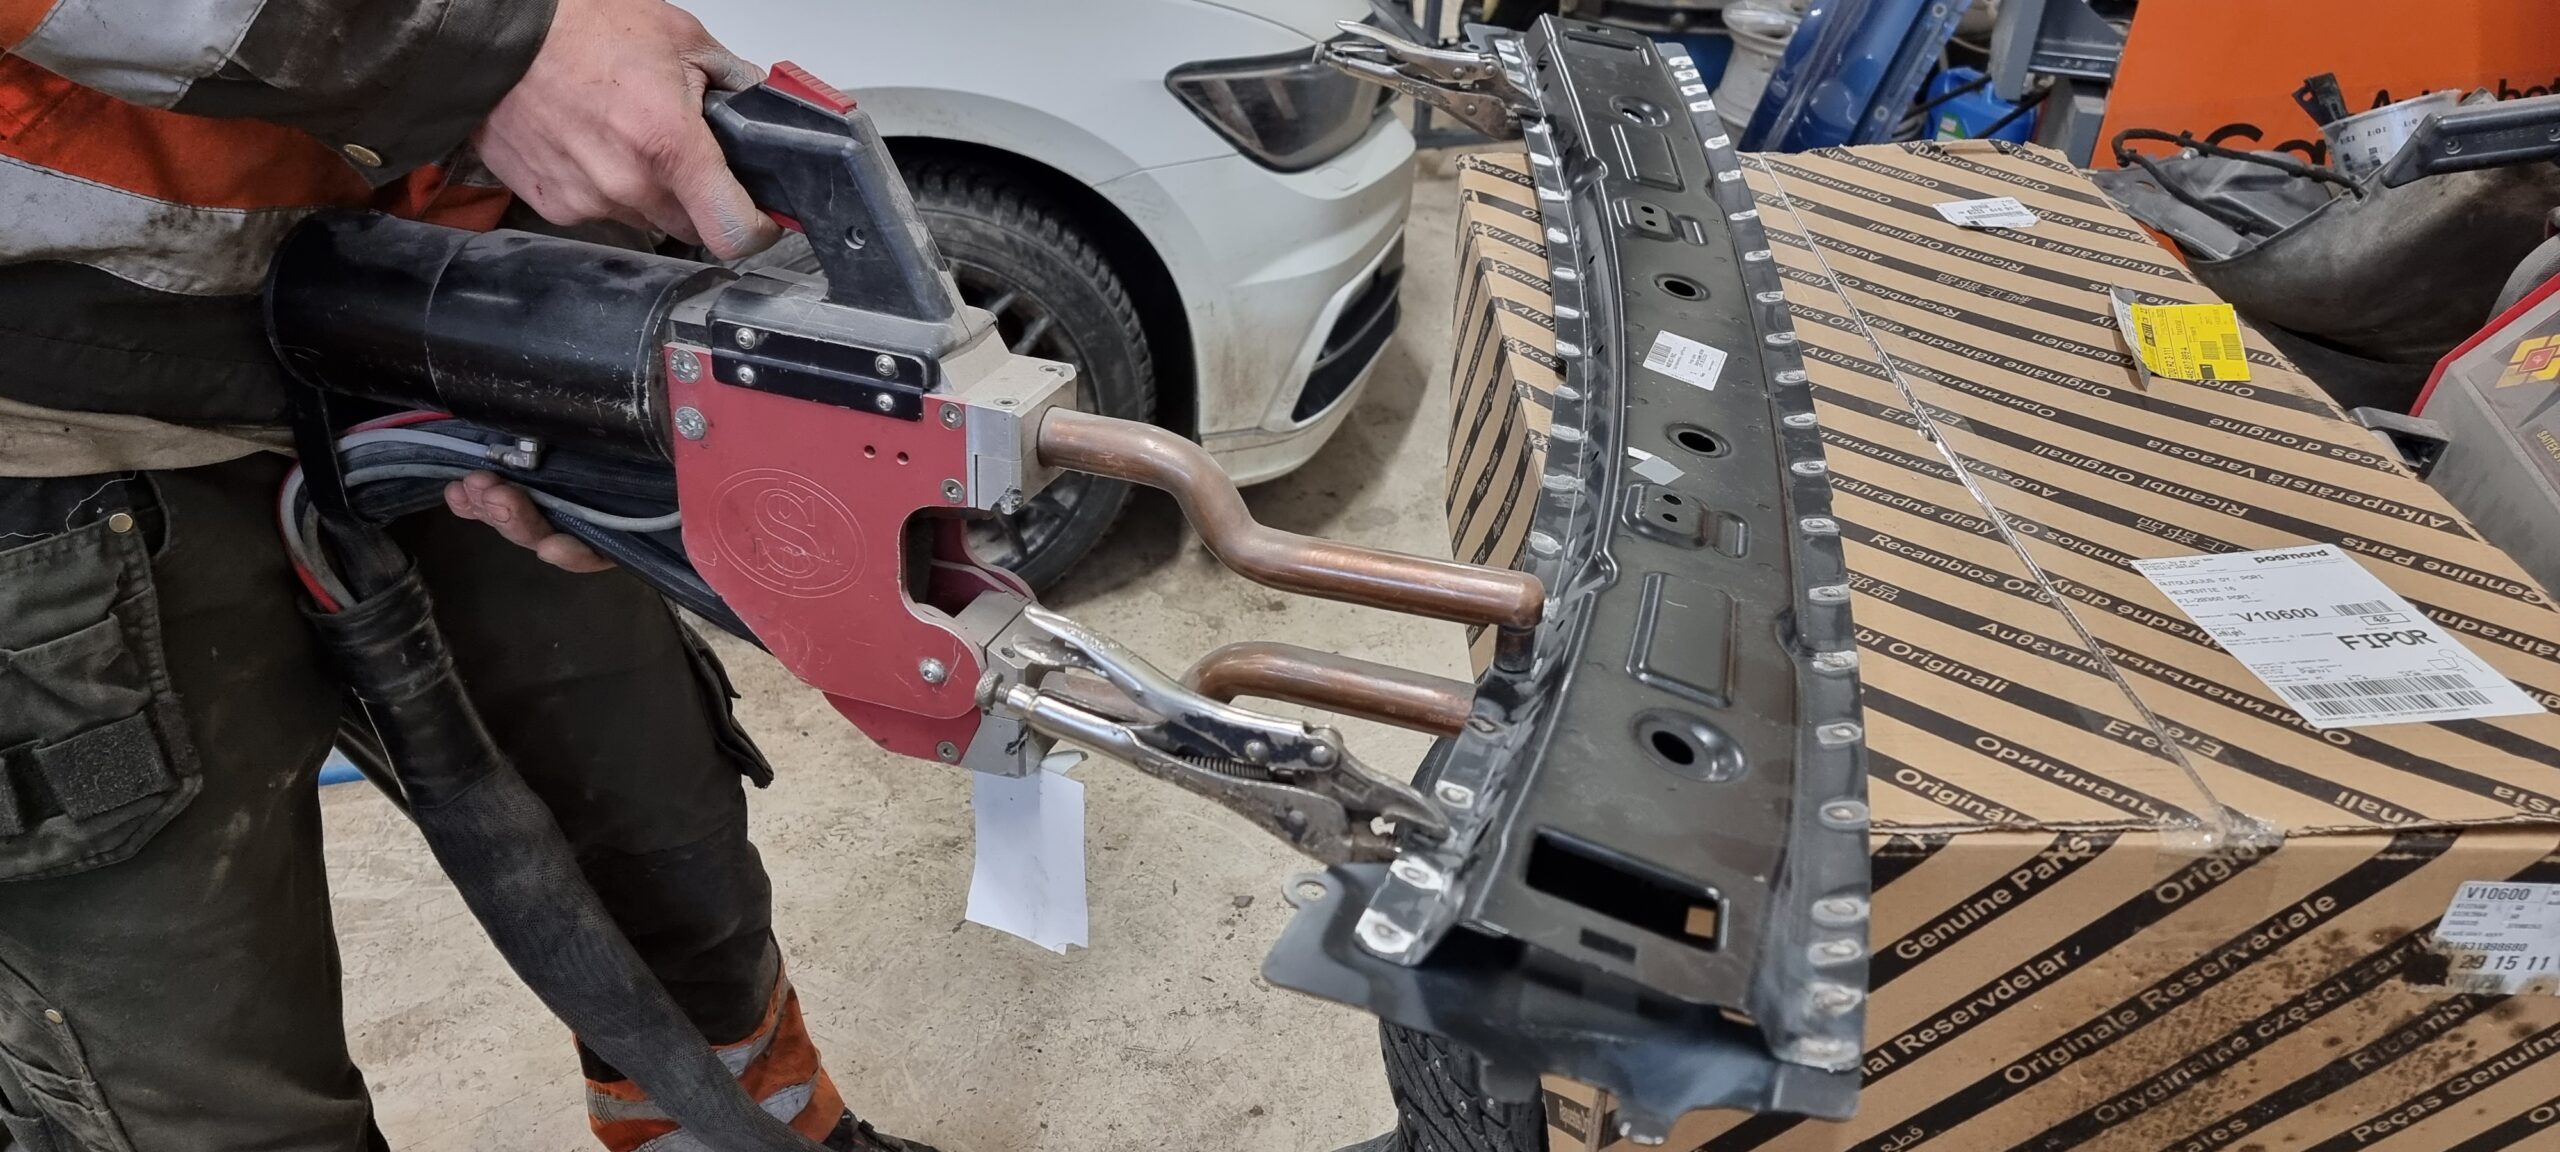
Pistehitsauslaite saatiin korjauksesta vasta tässä vaiheessa. 35A sulakkeet olivat lujilla, mutta etunurkka saatiin hitsattua kuntoon.

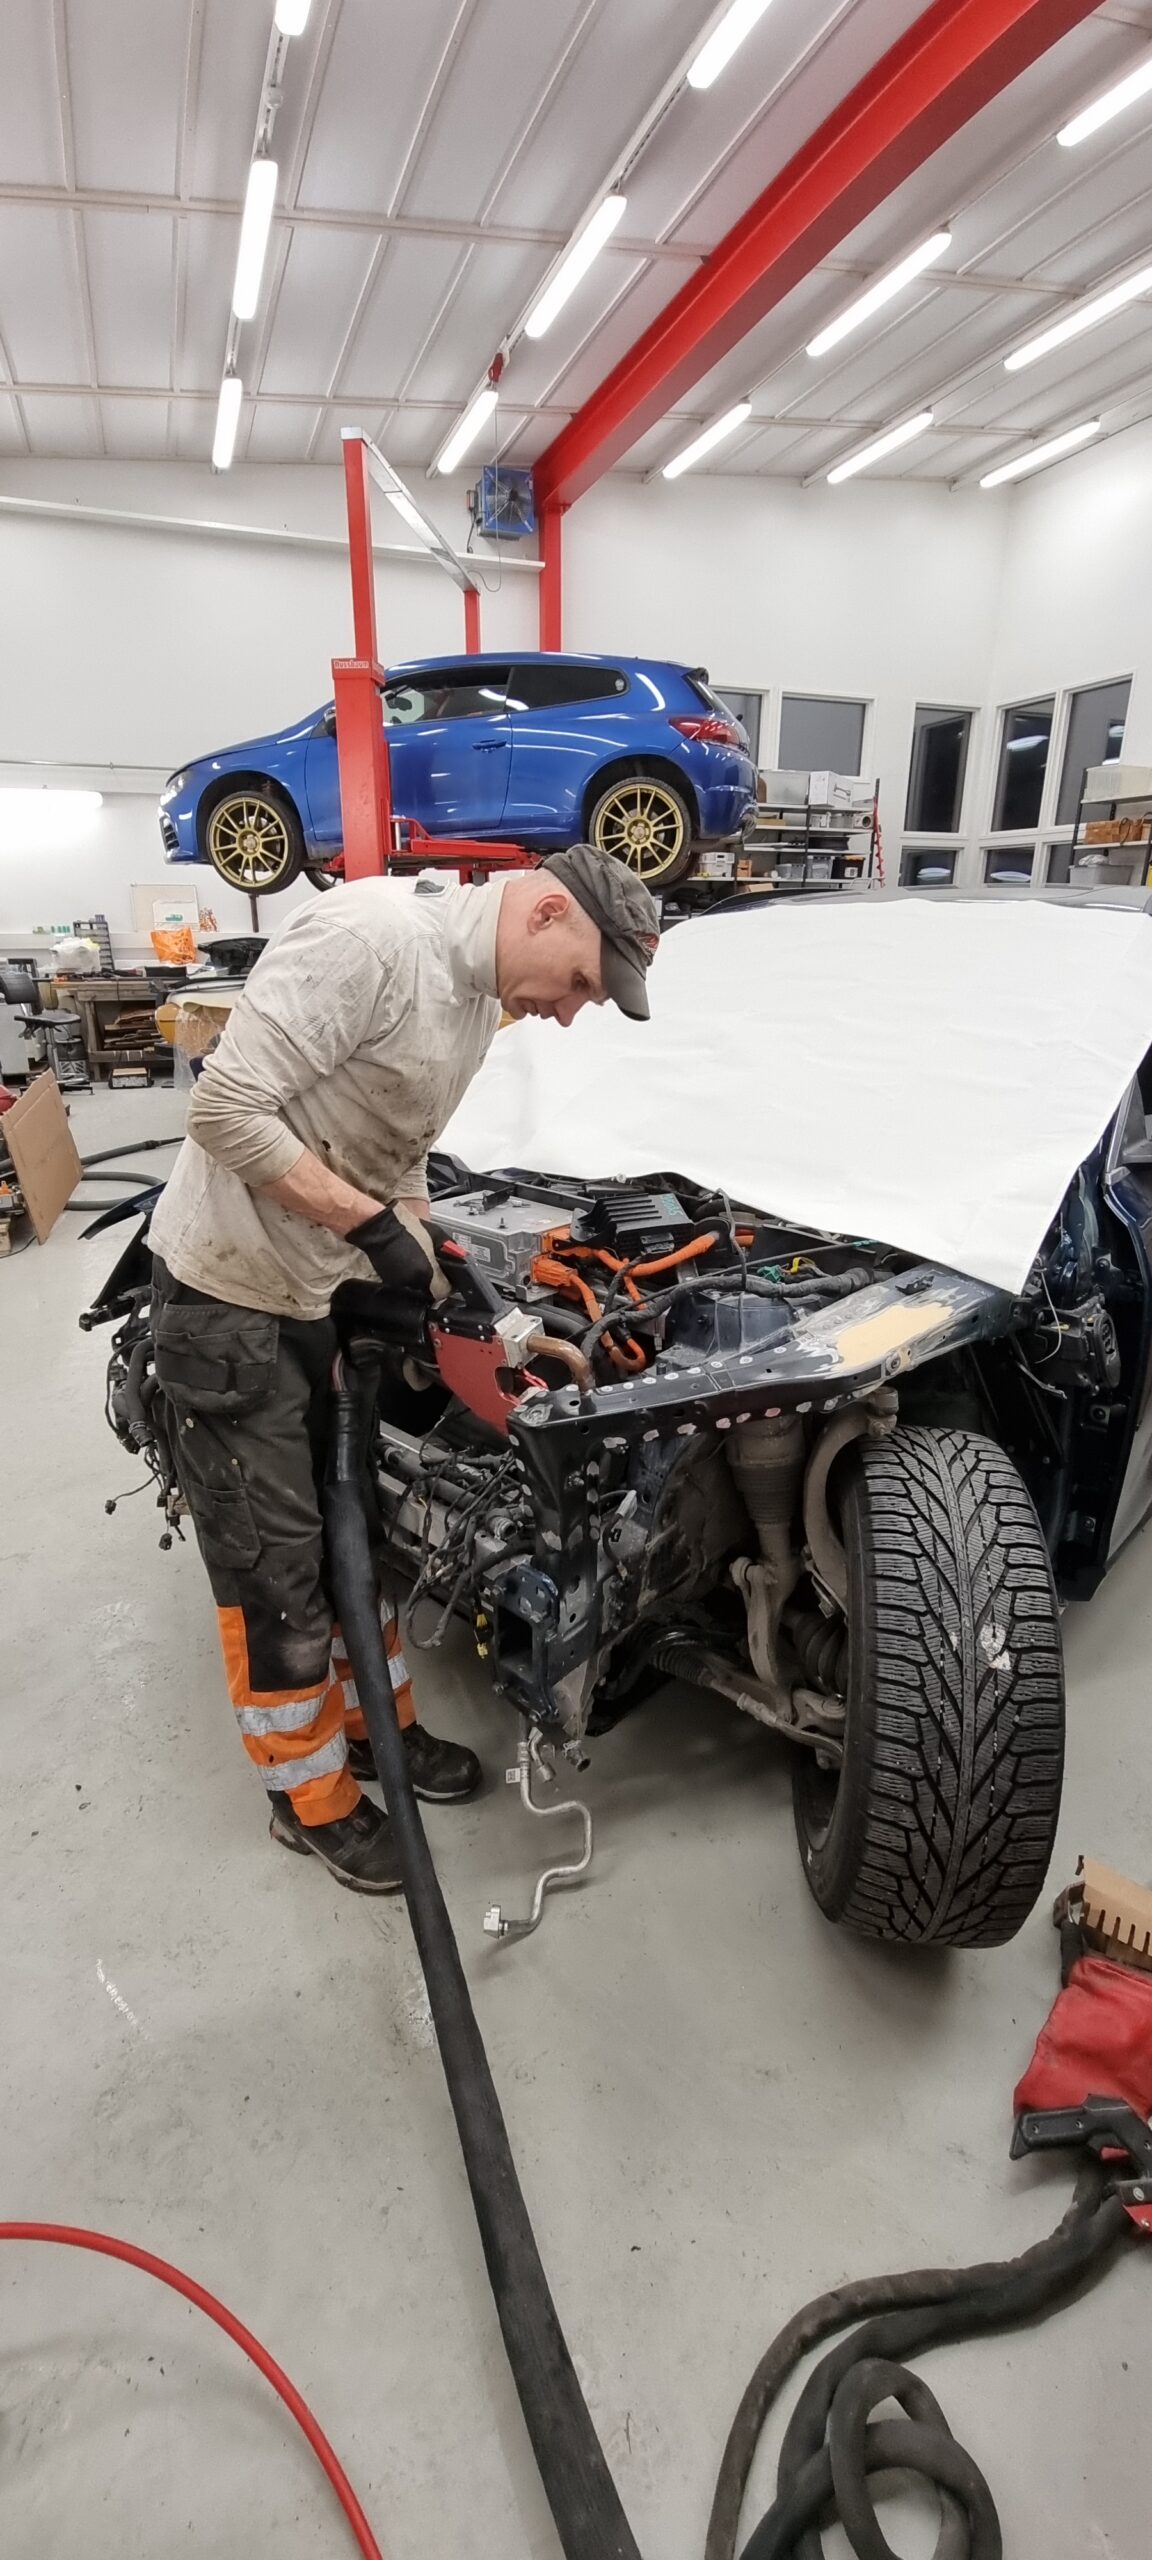
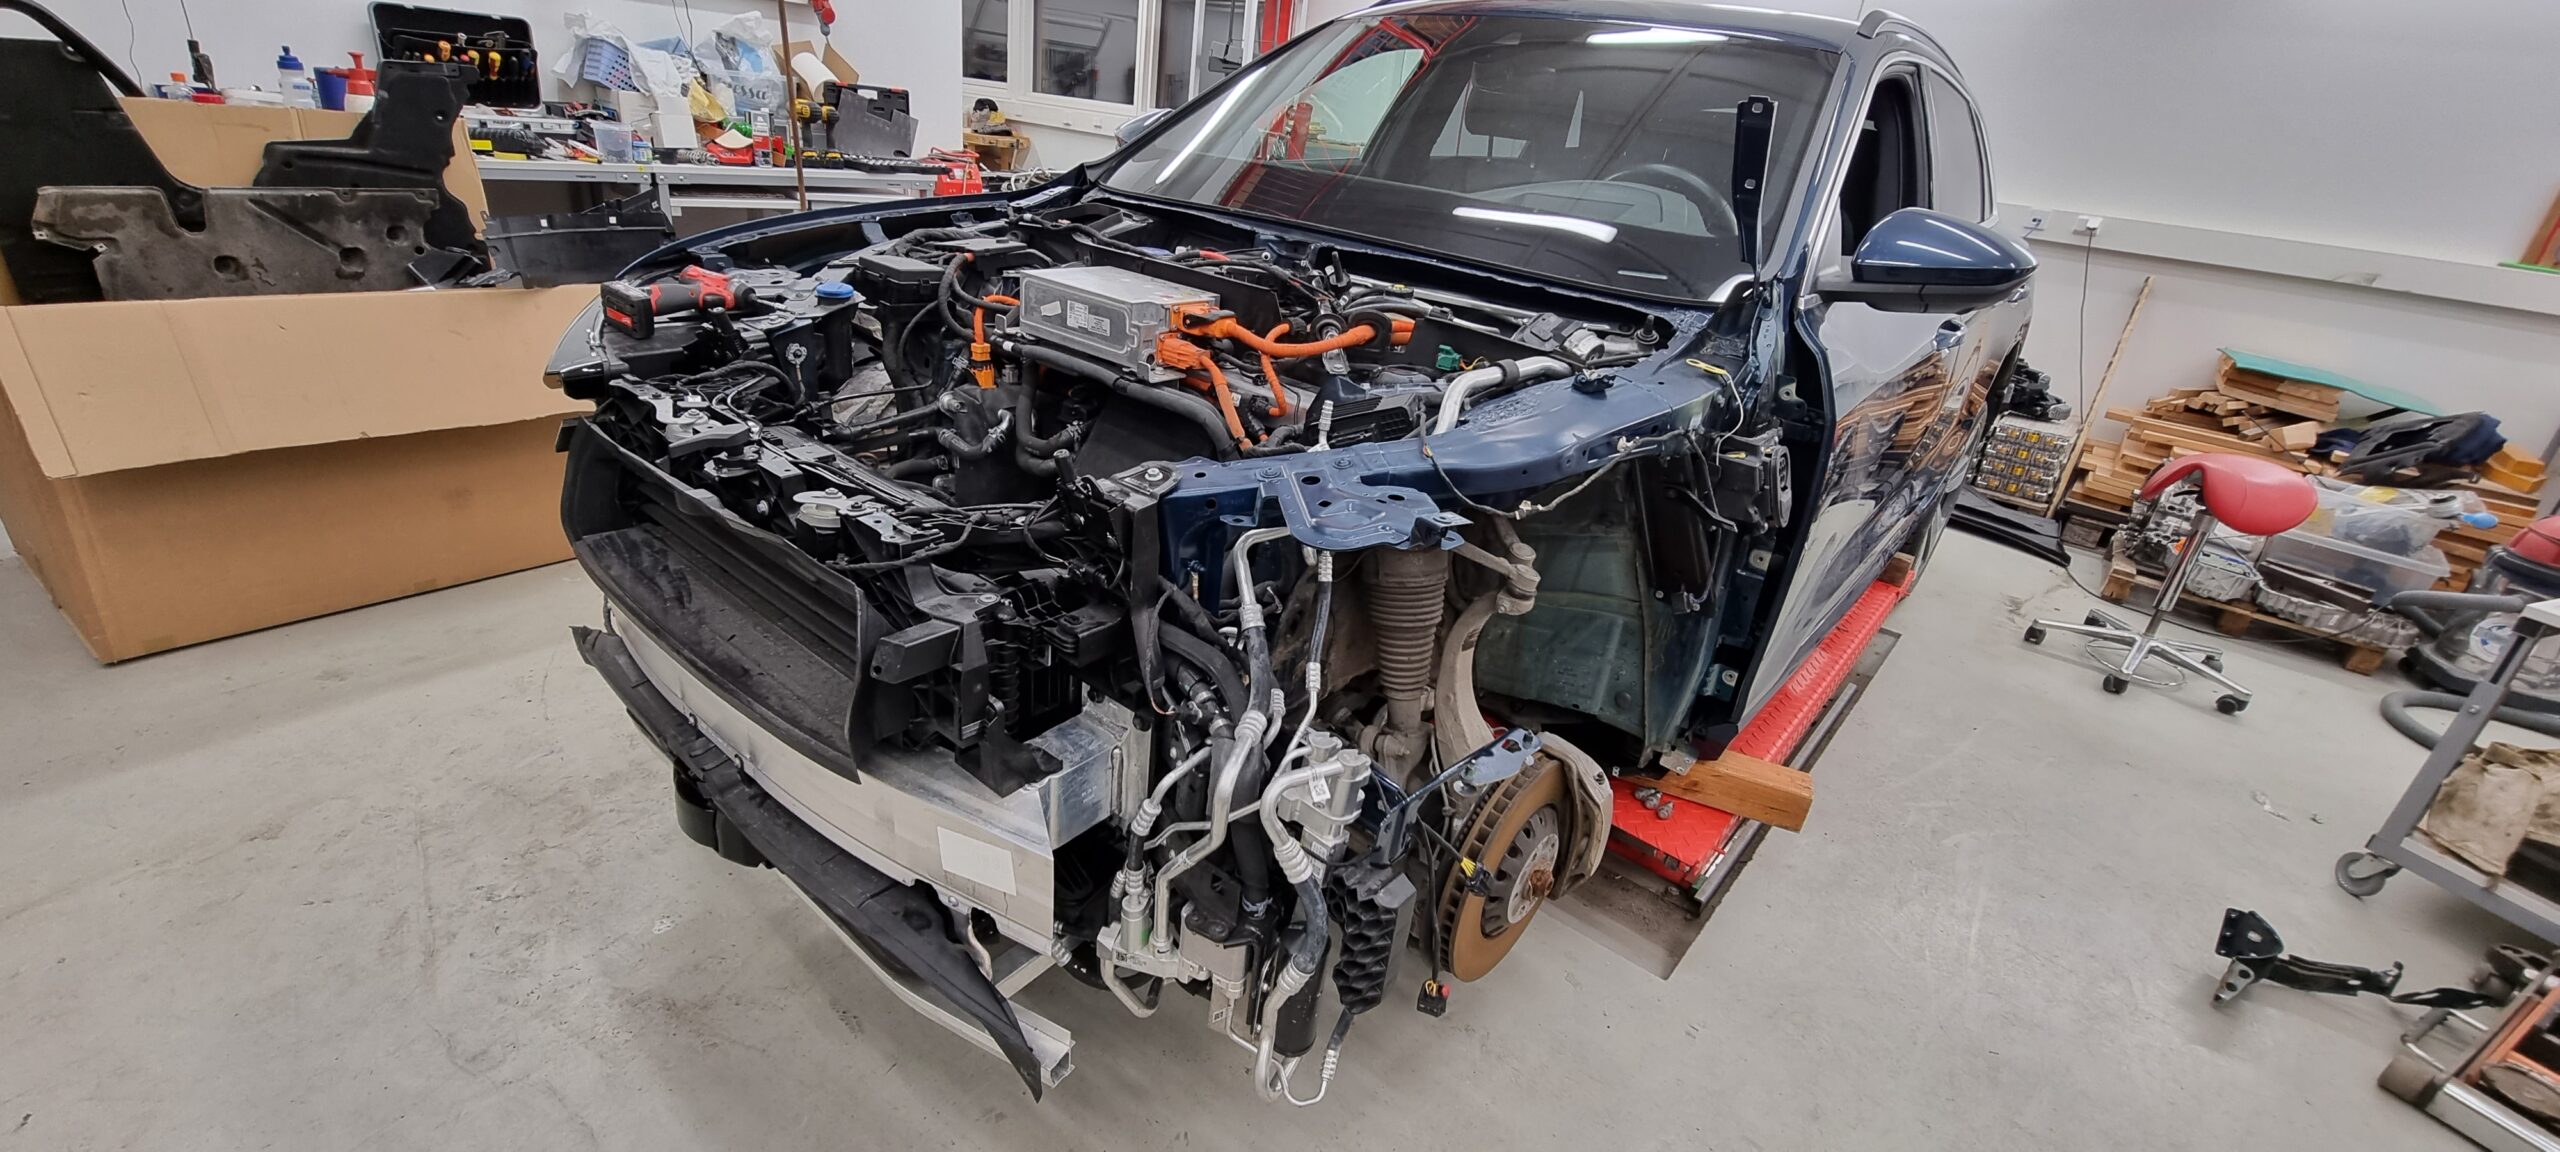
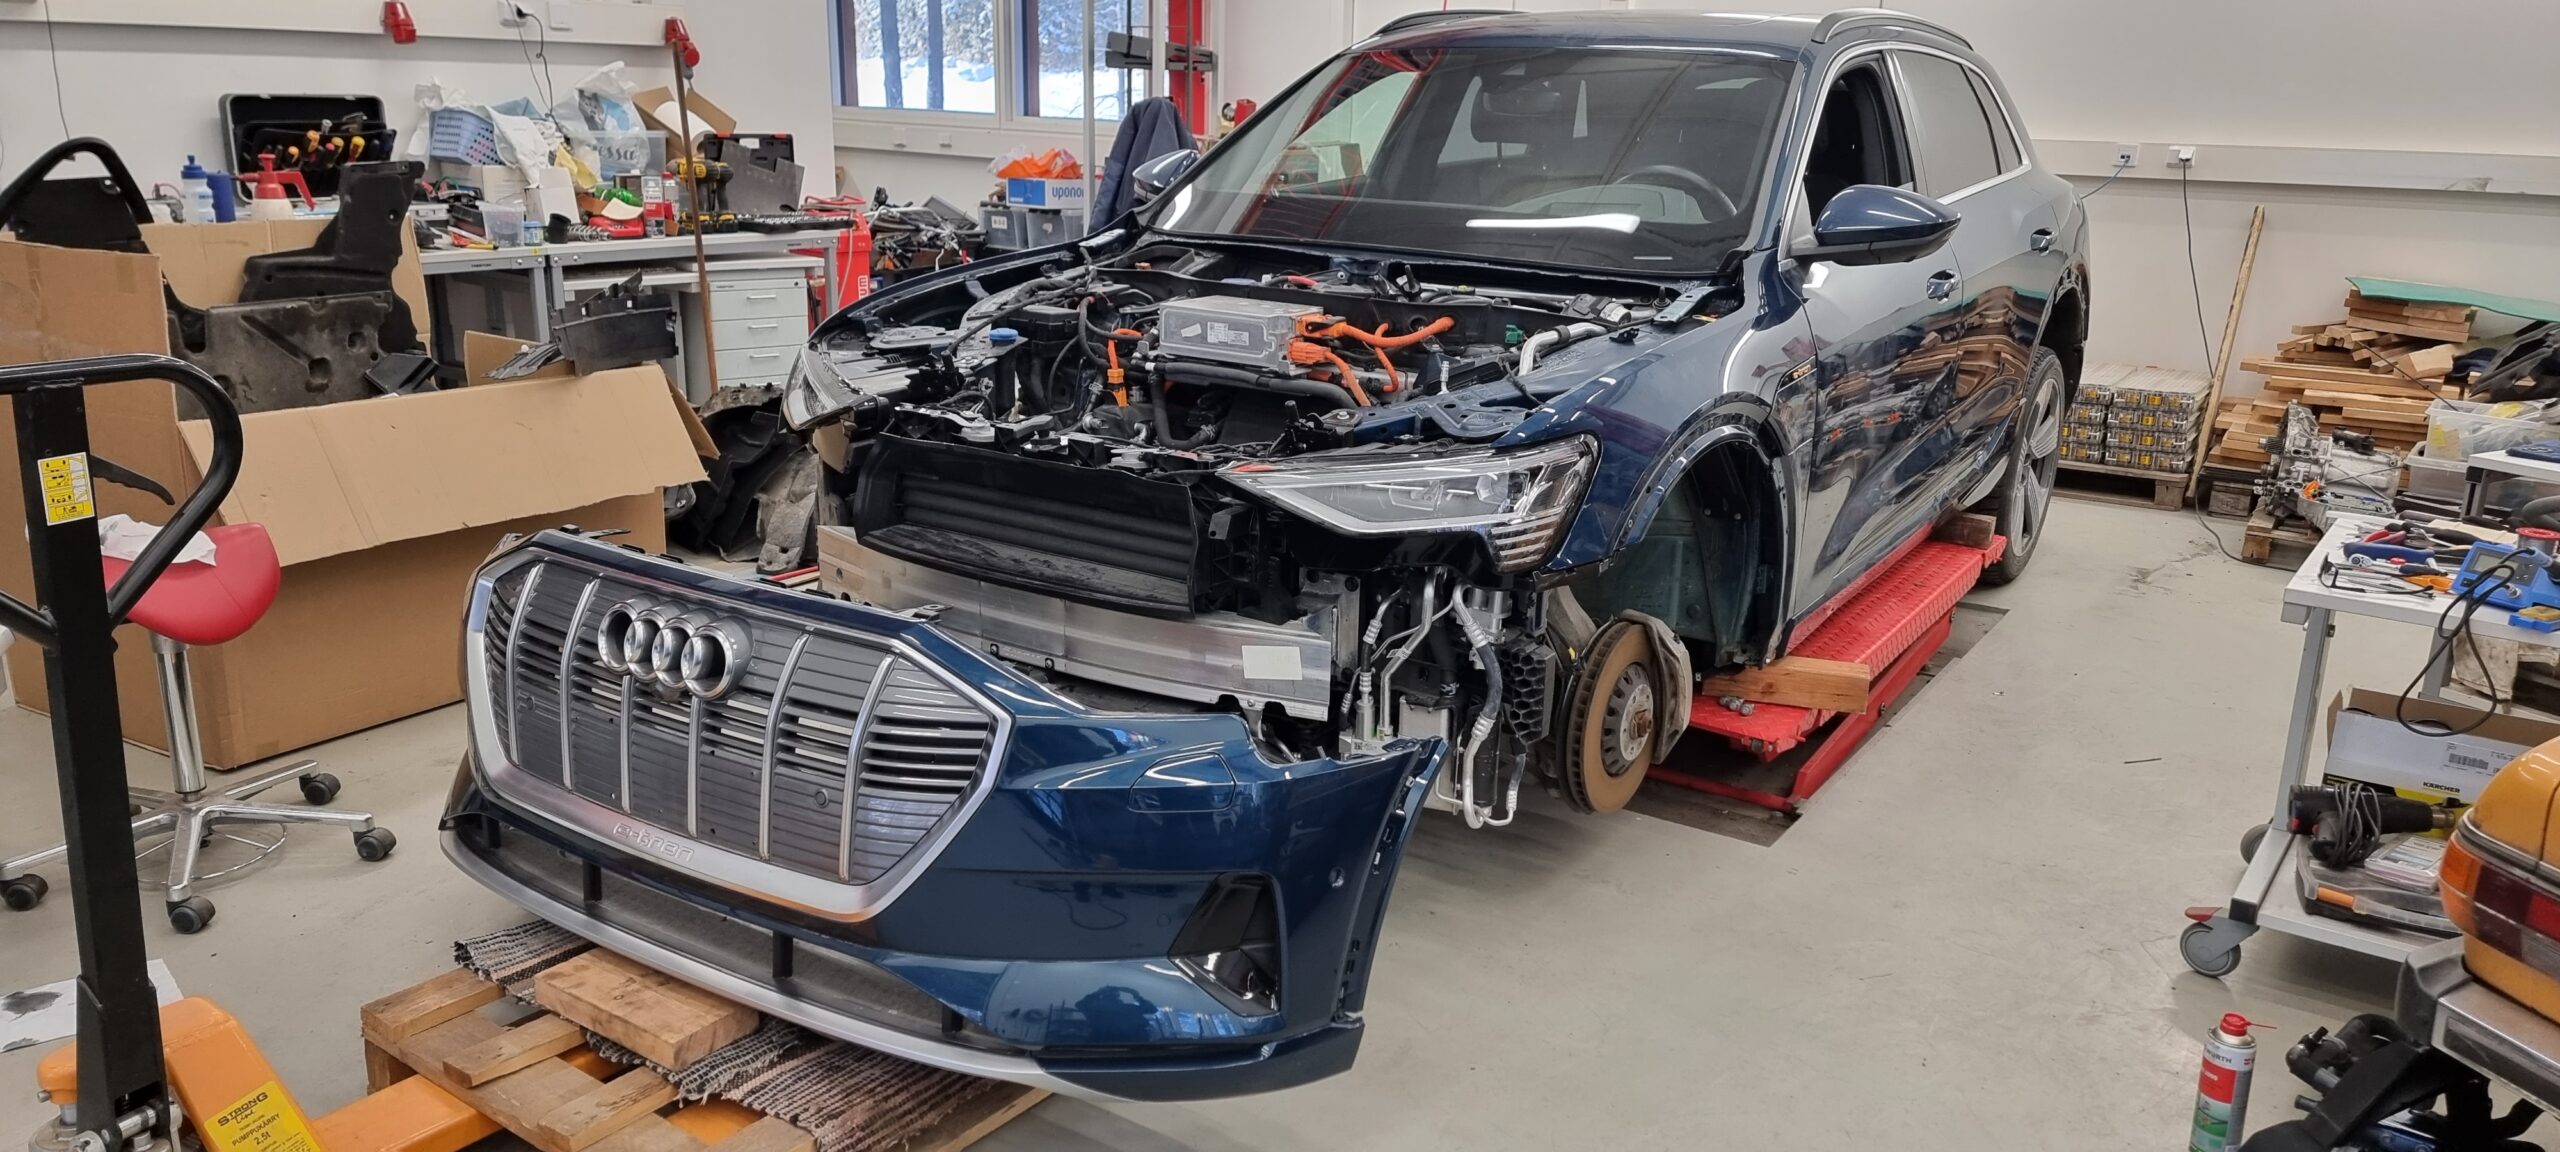
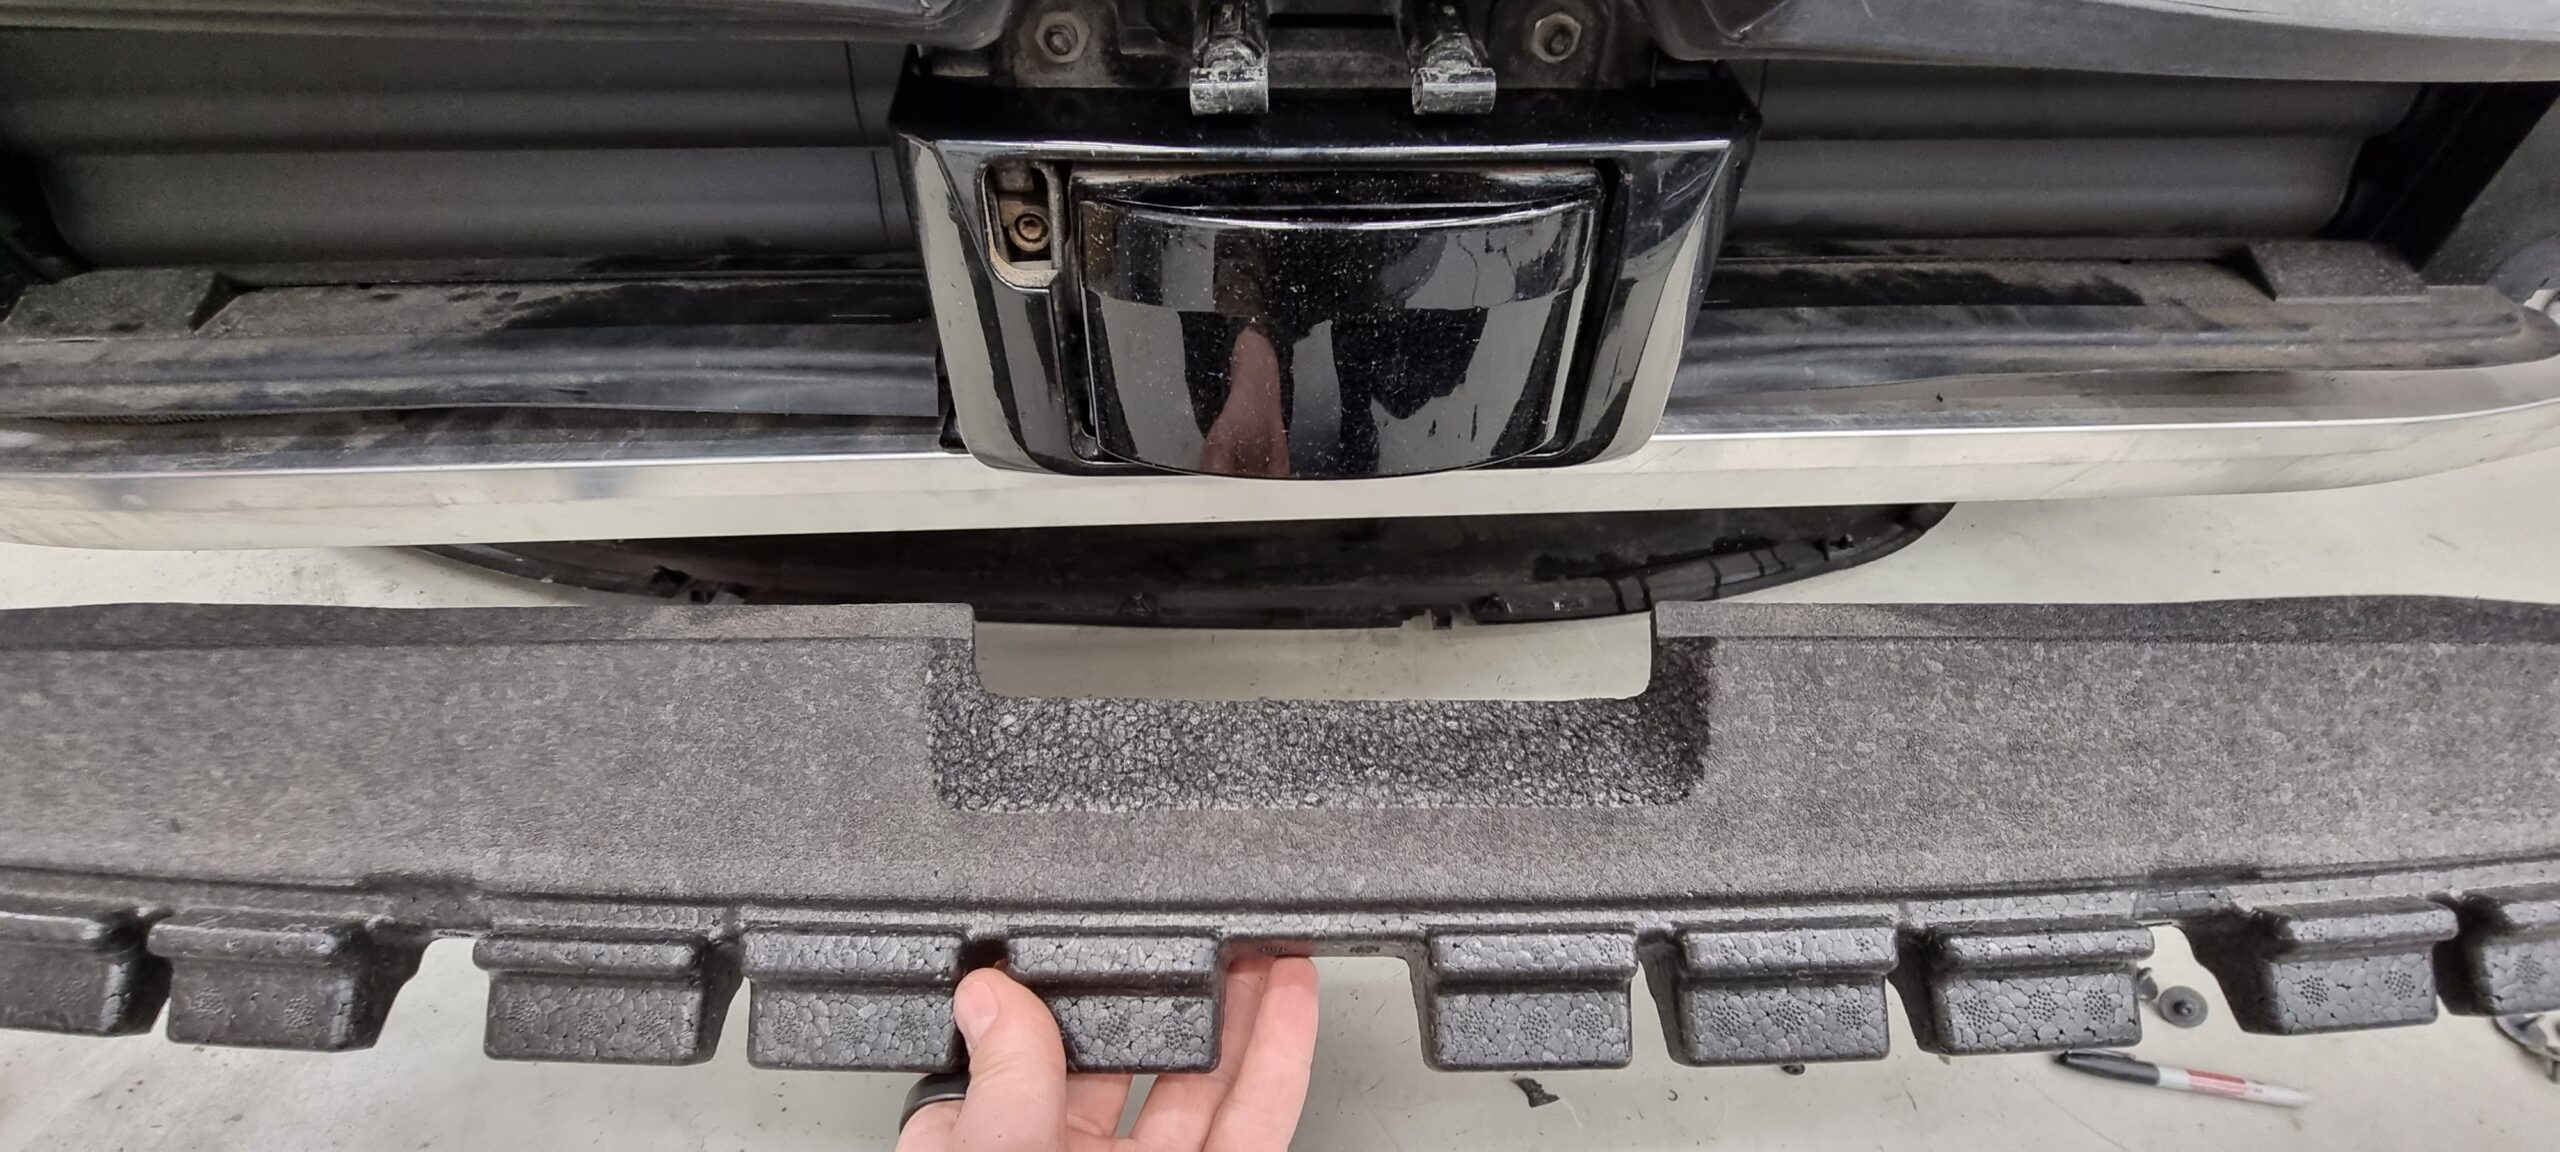
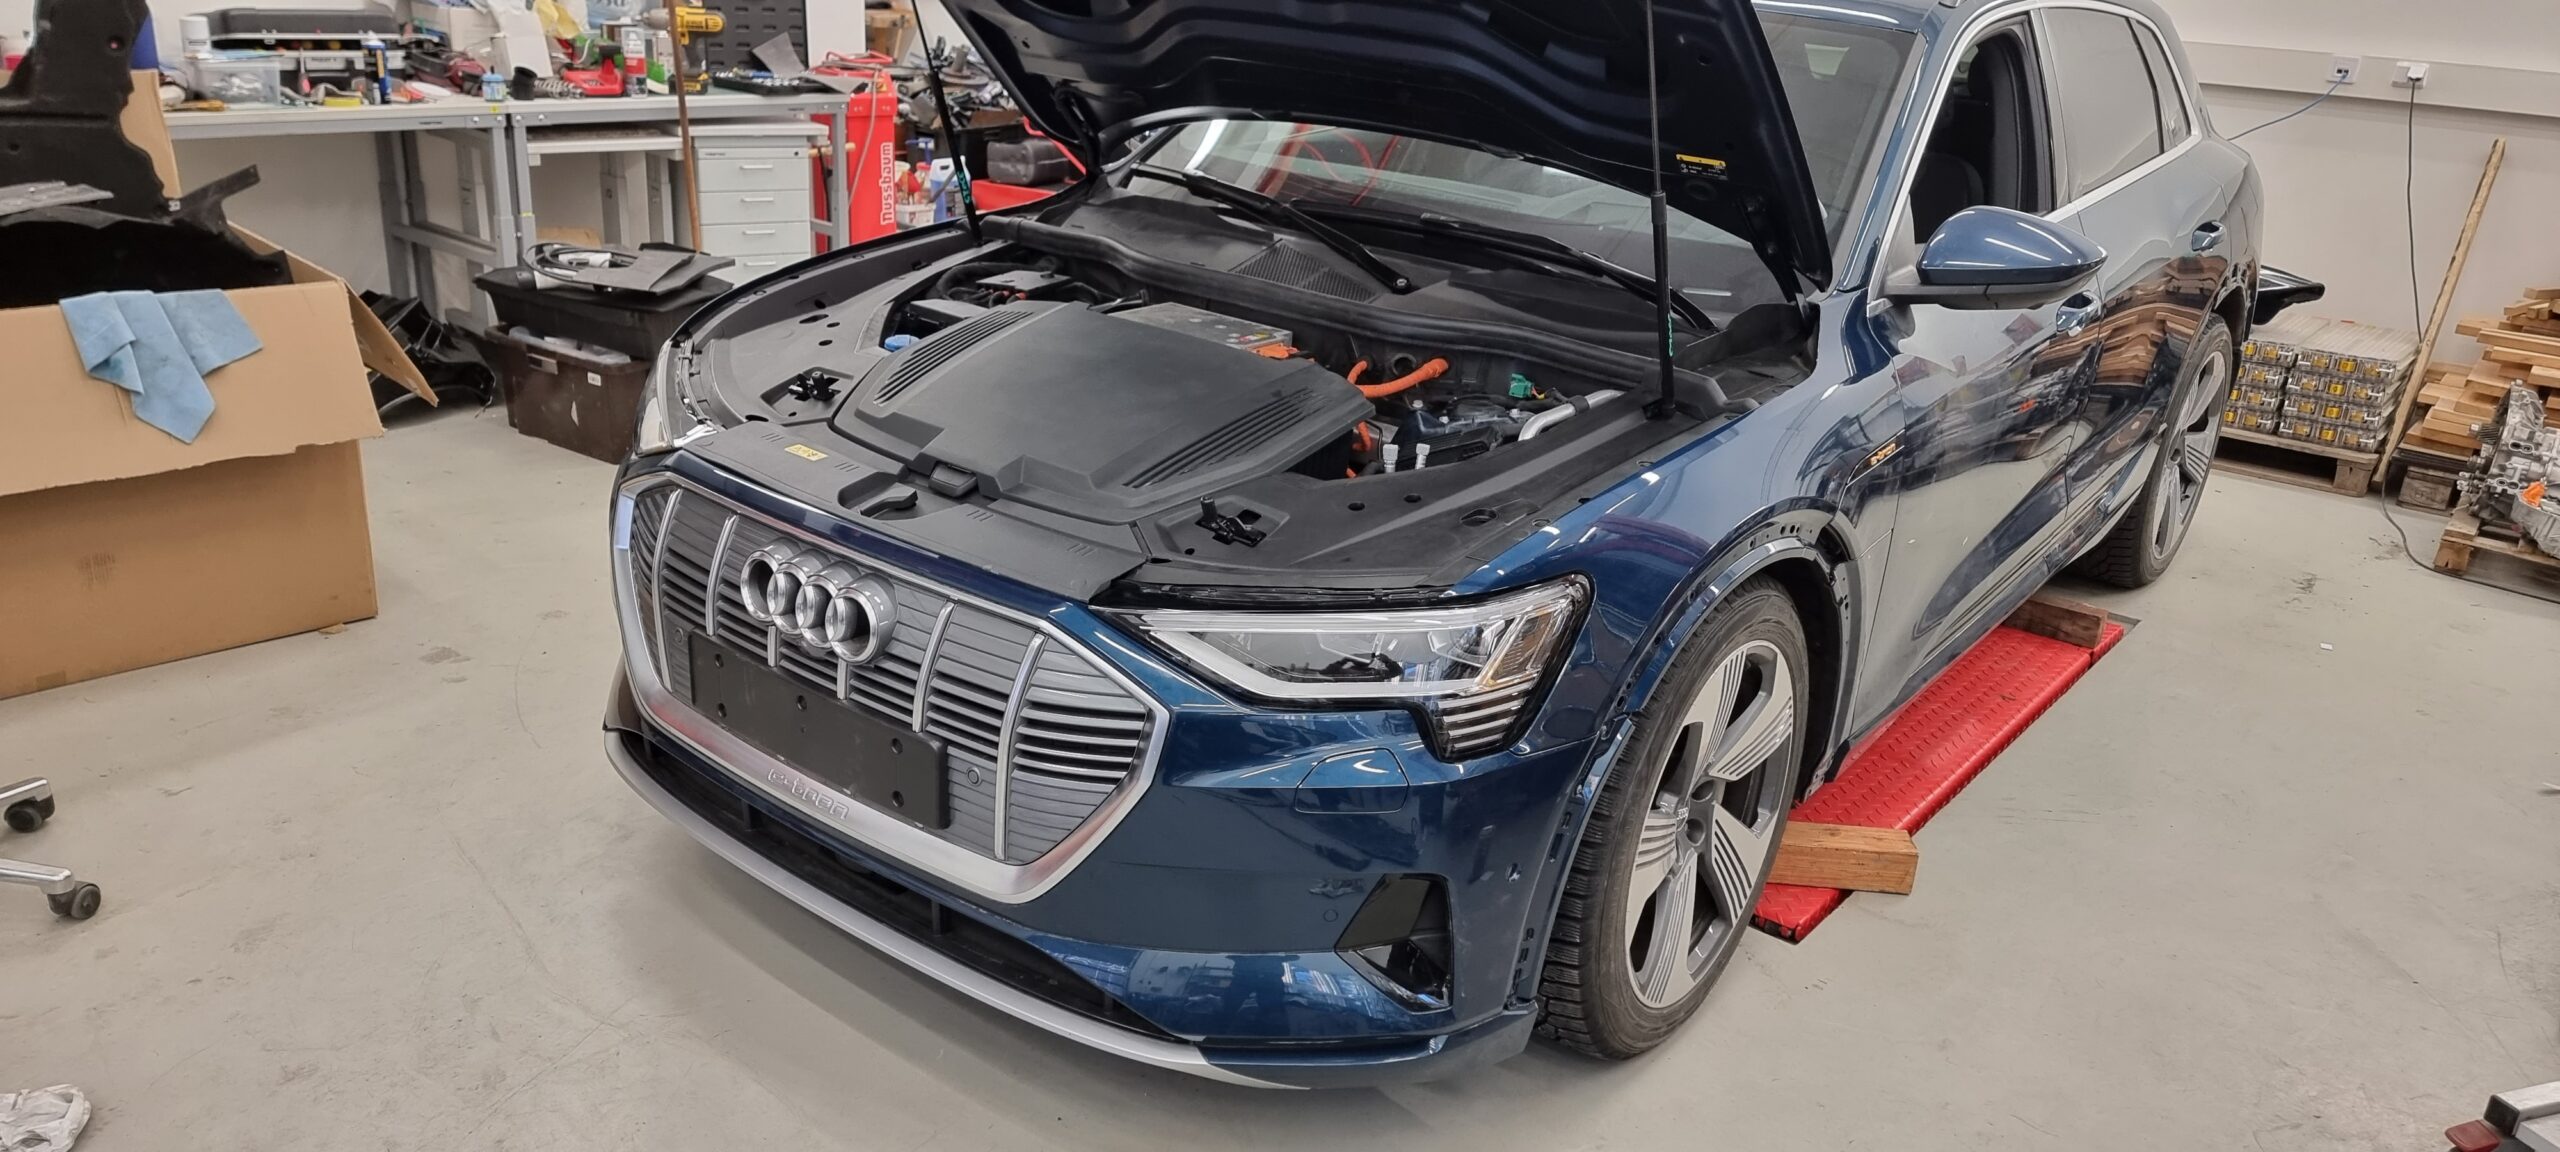
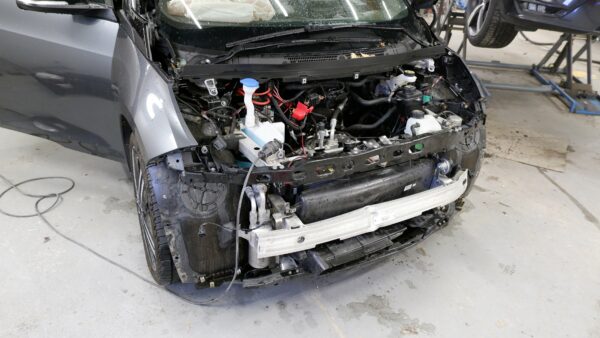
Lopulta siis päästiin keulakin kasaamaan, eikä siinä lopulta mennyt kauaa. Etupuskurissa olevaa alareunan pehmustetta jouduttiin hieman muokkaamaan – Kiina-keulassa ei ollut ollut lidar-tutkaa.

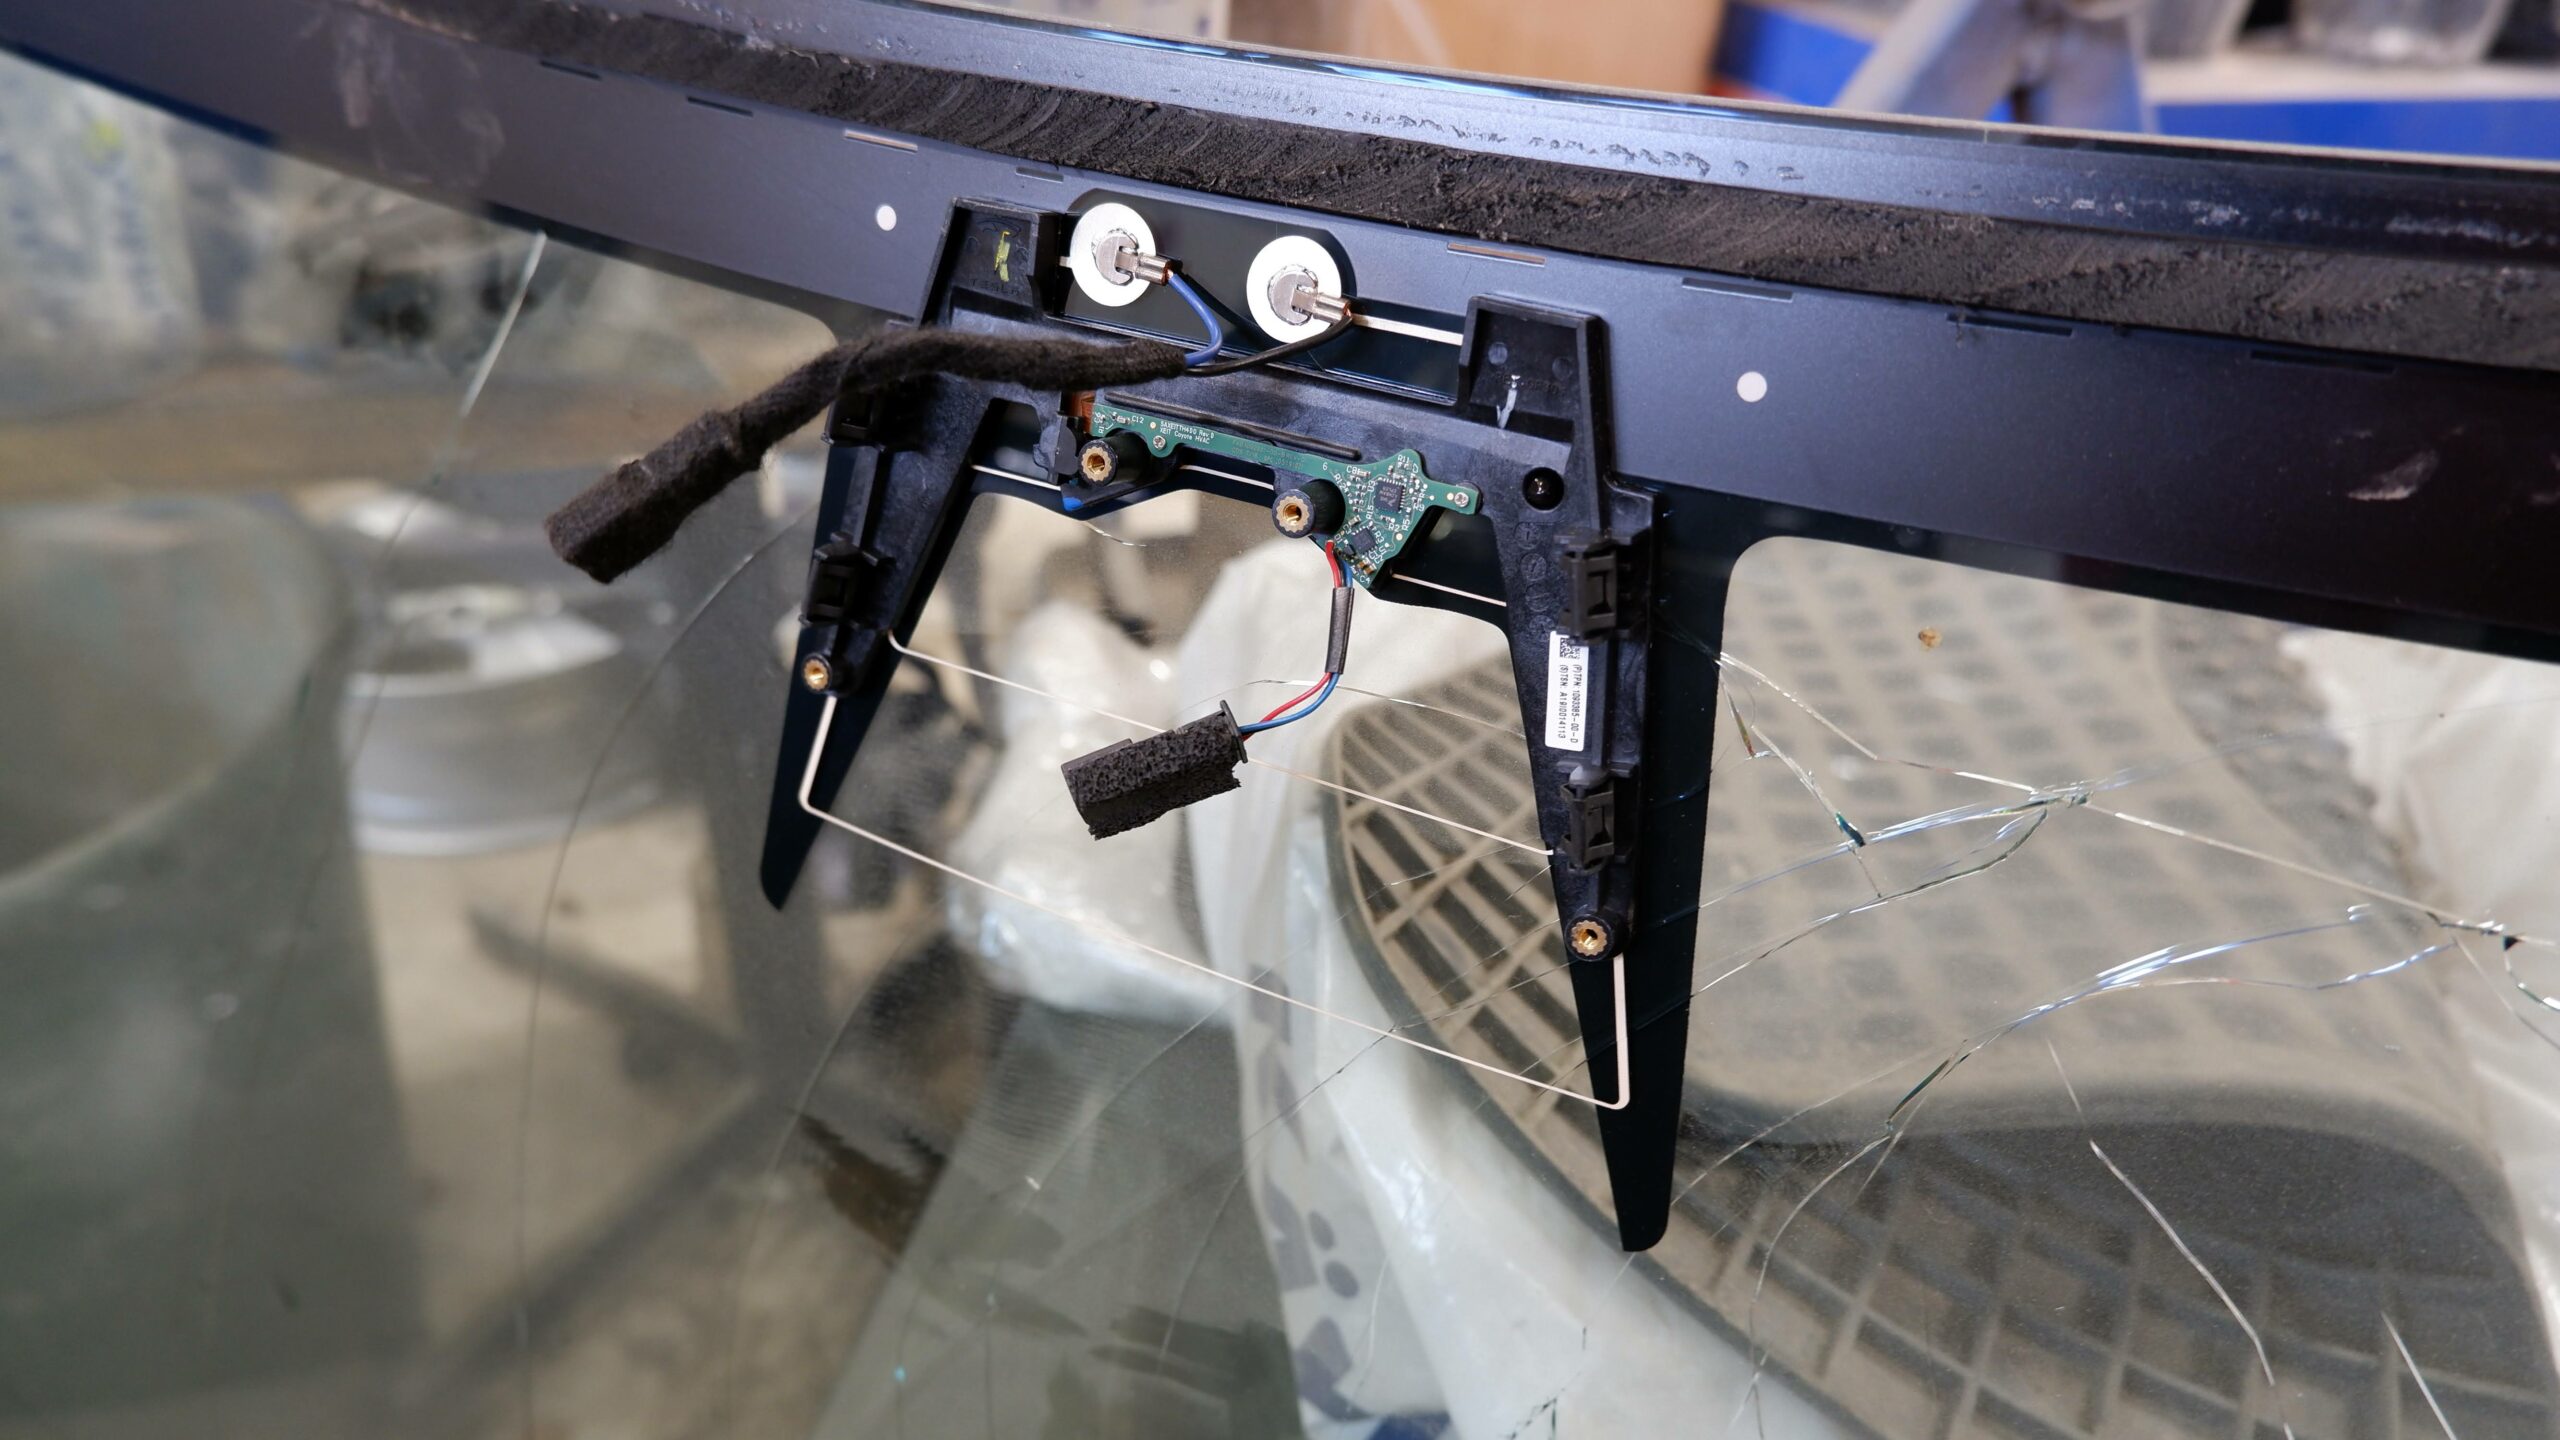
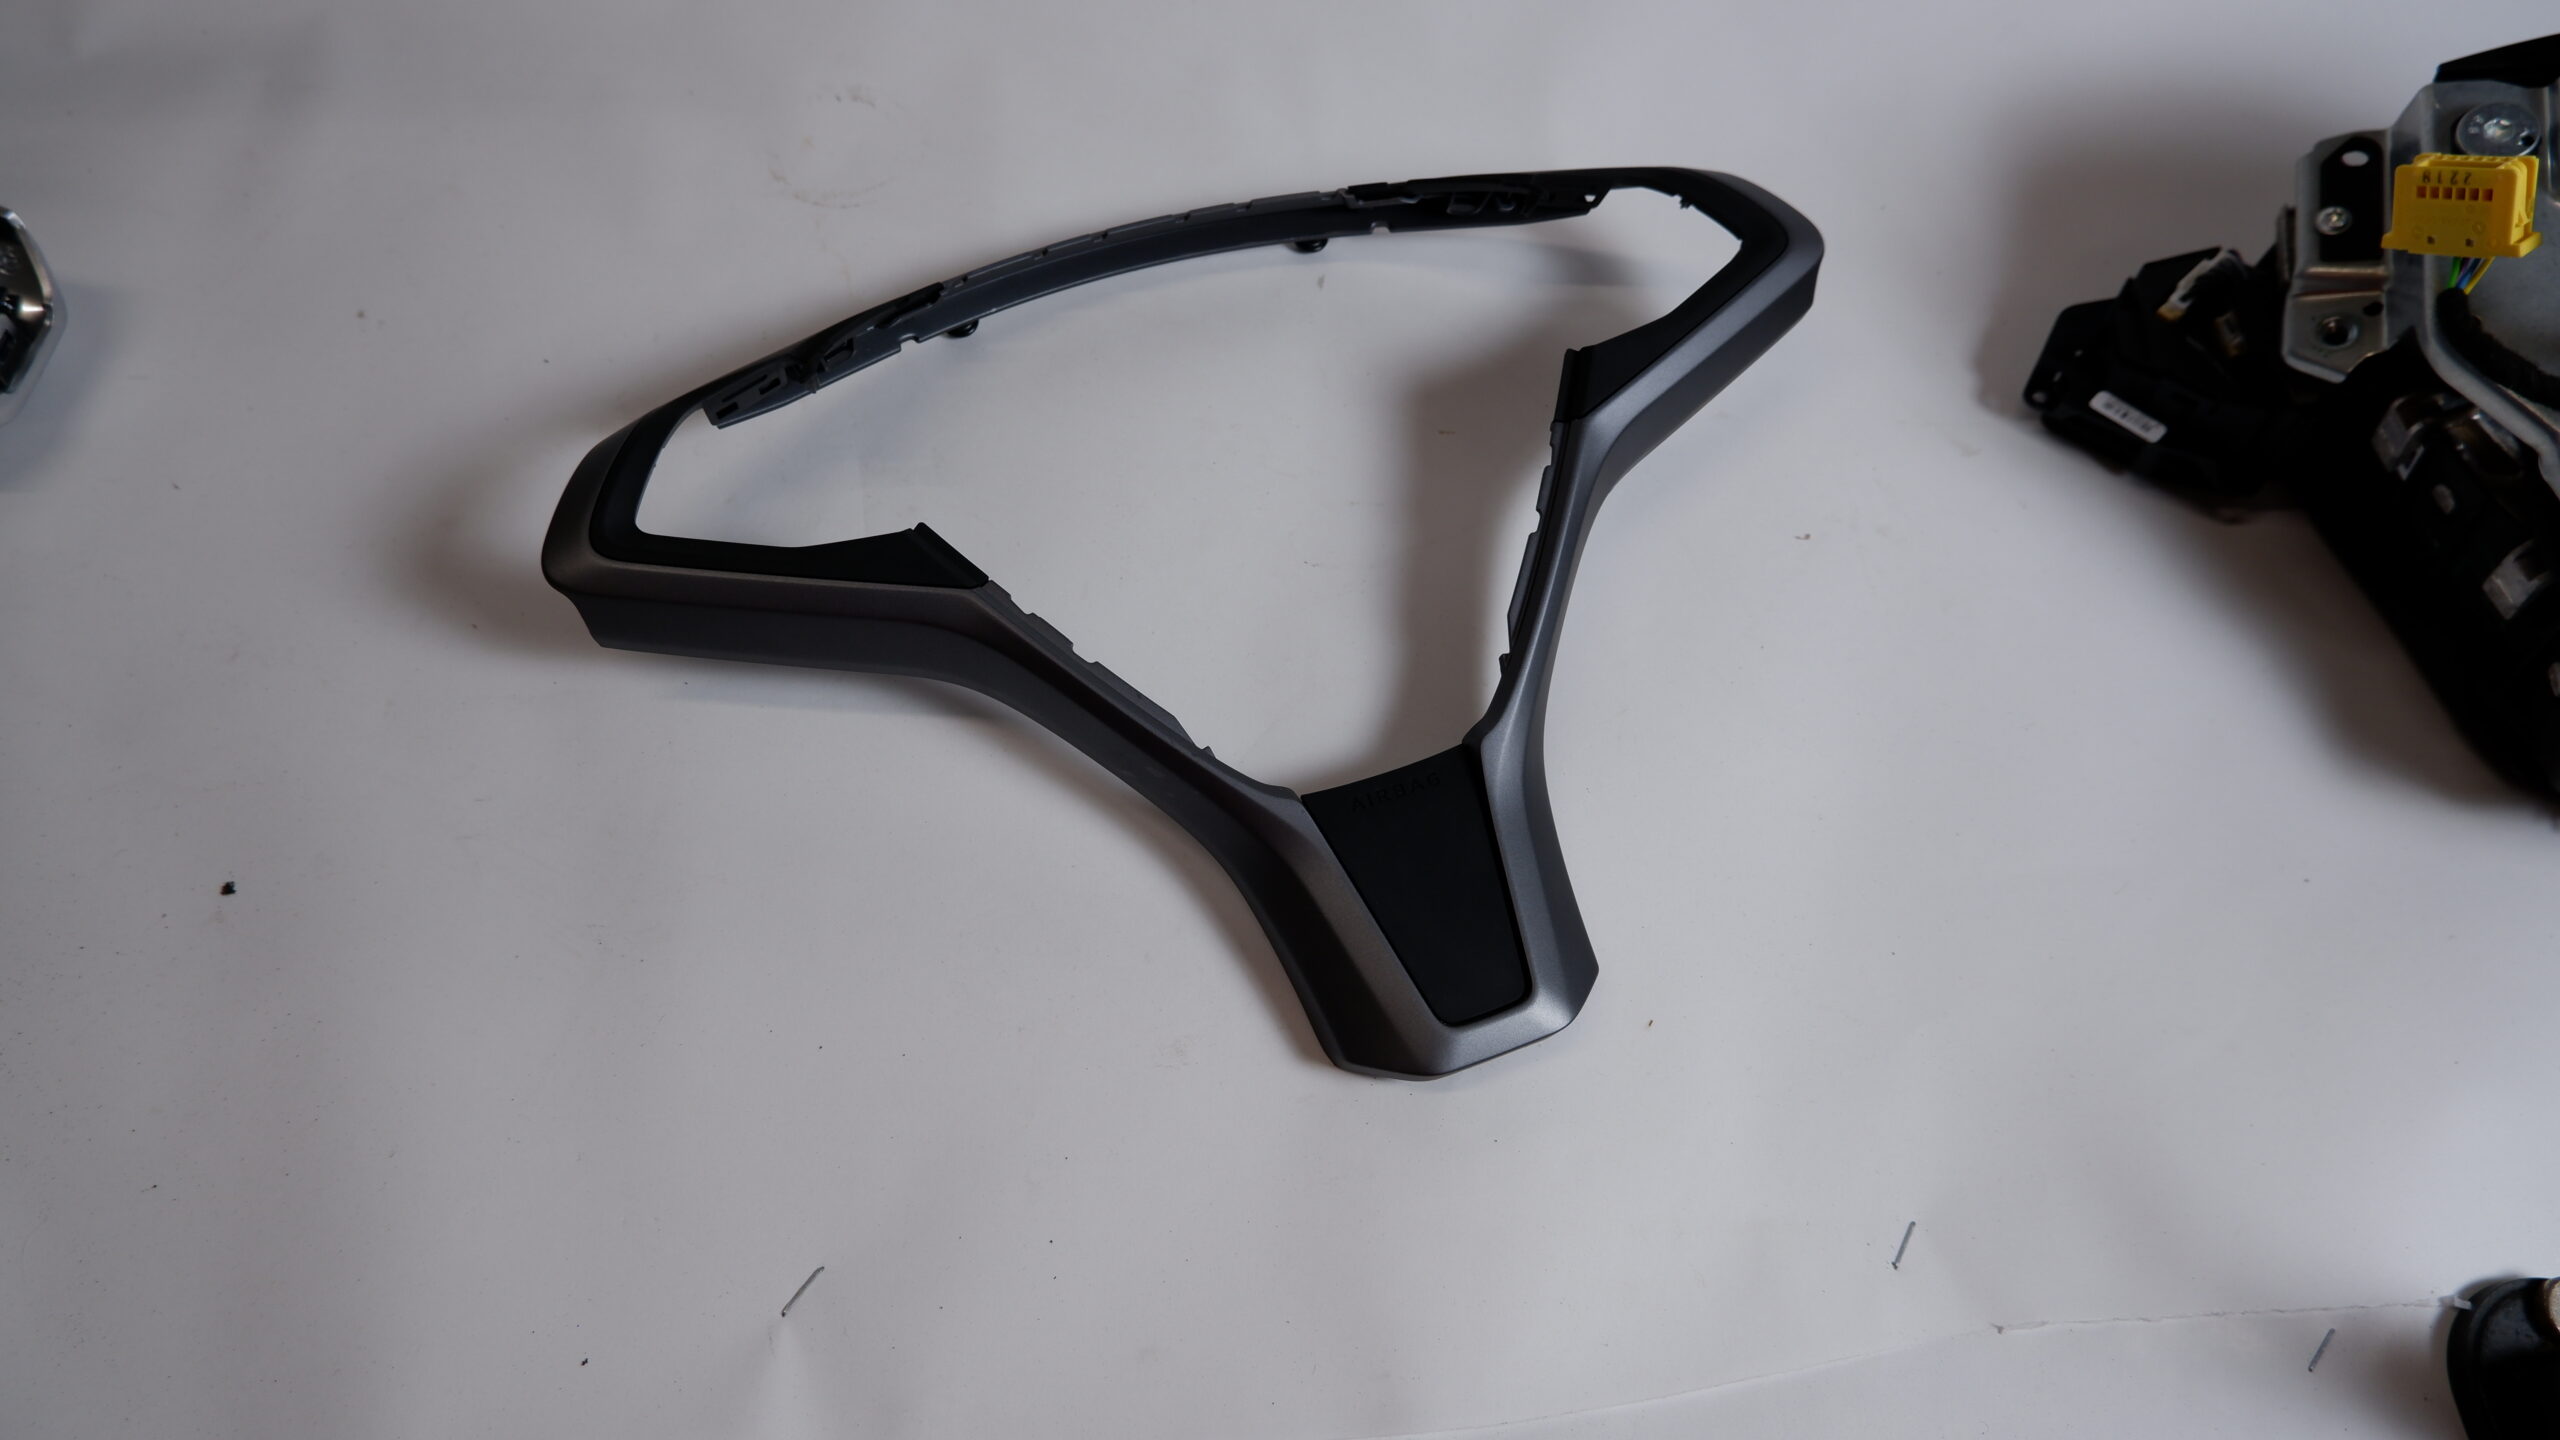
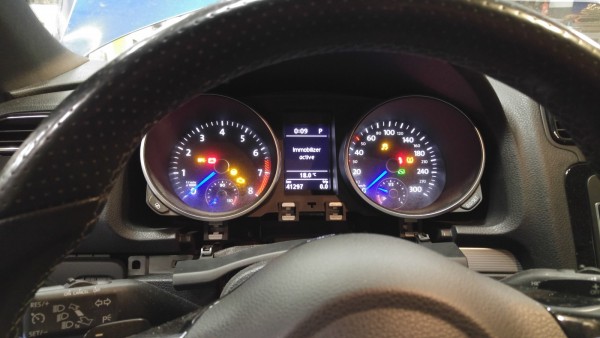
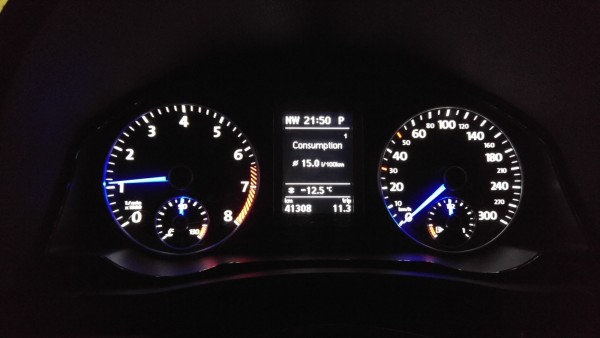
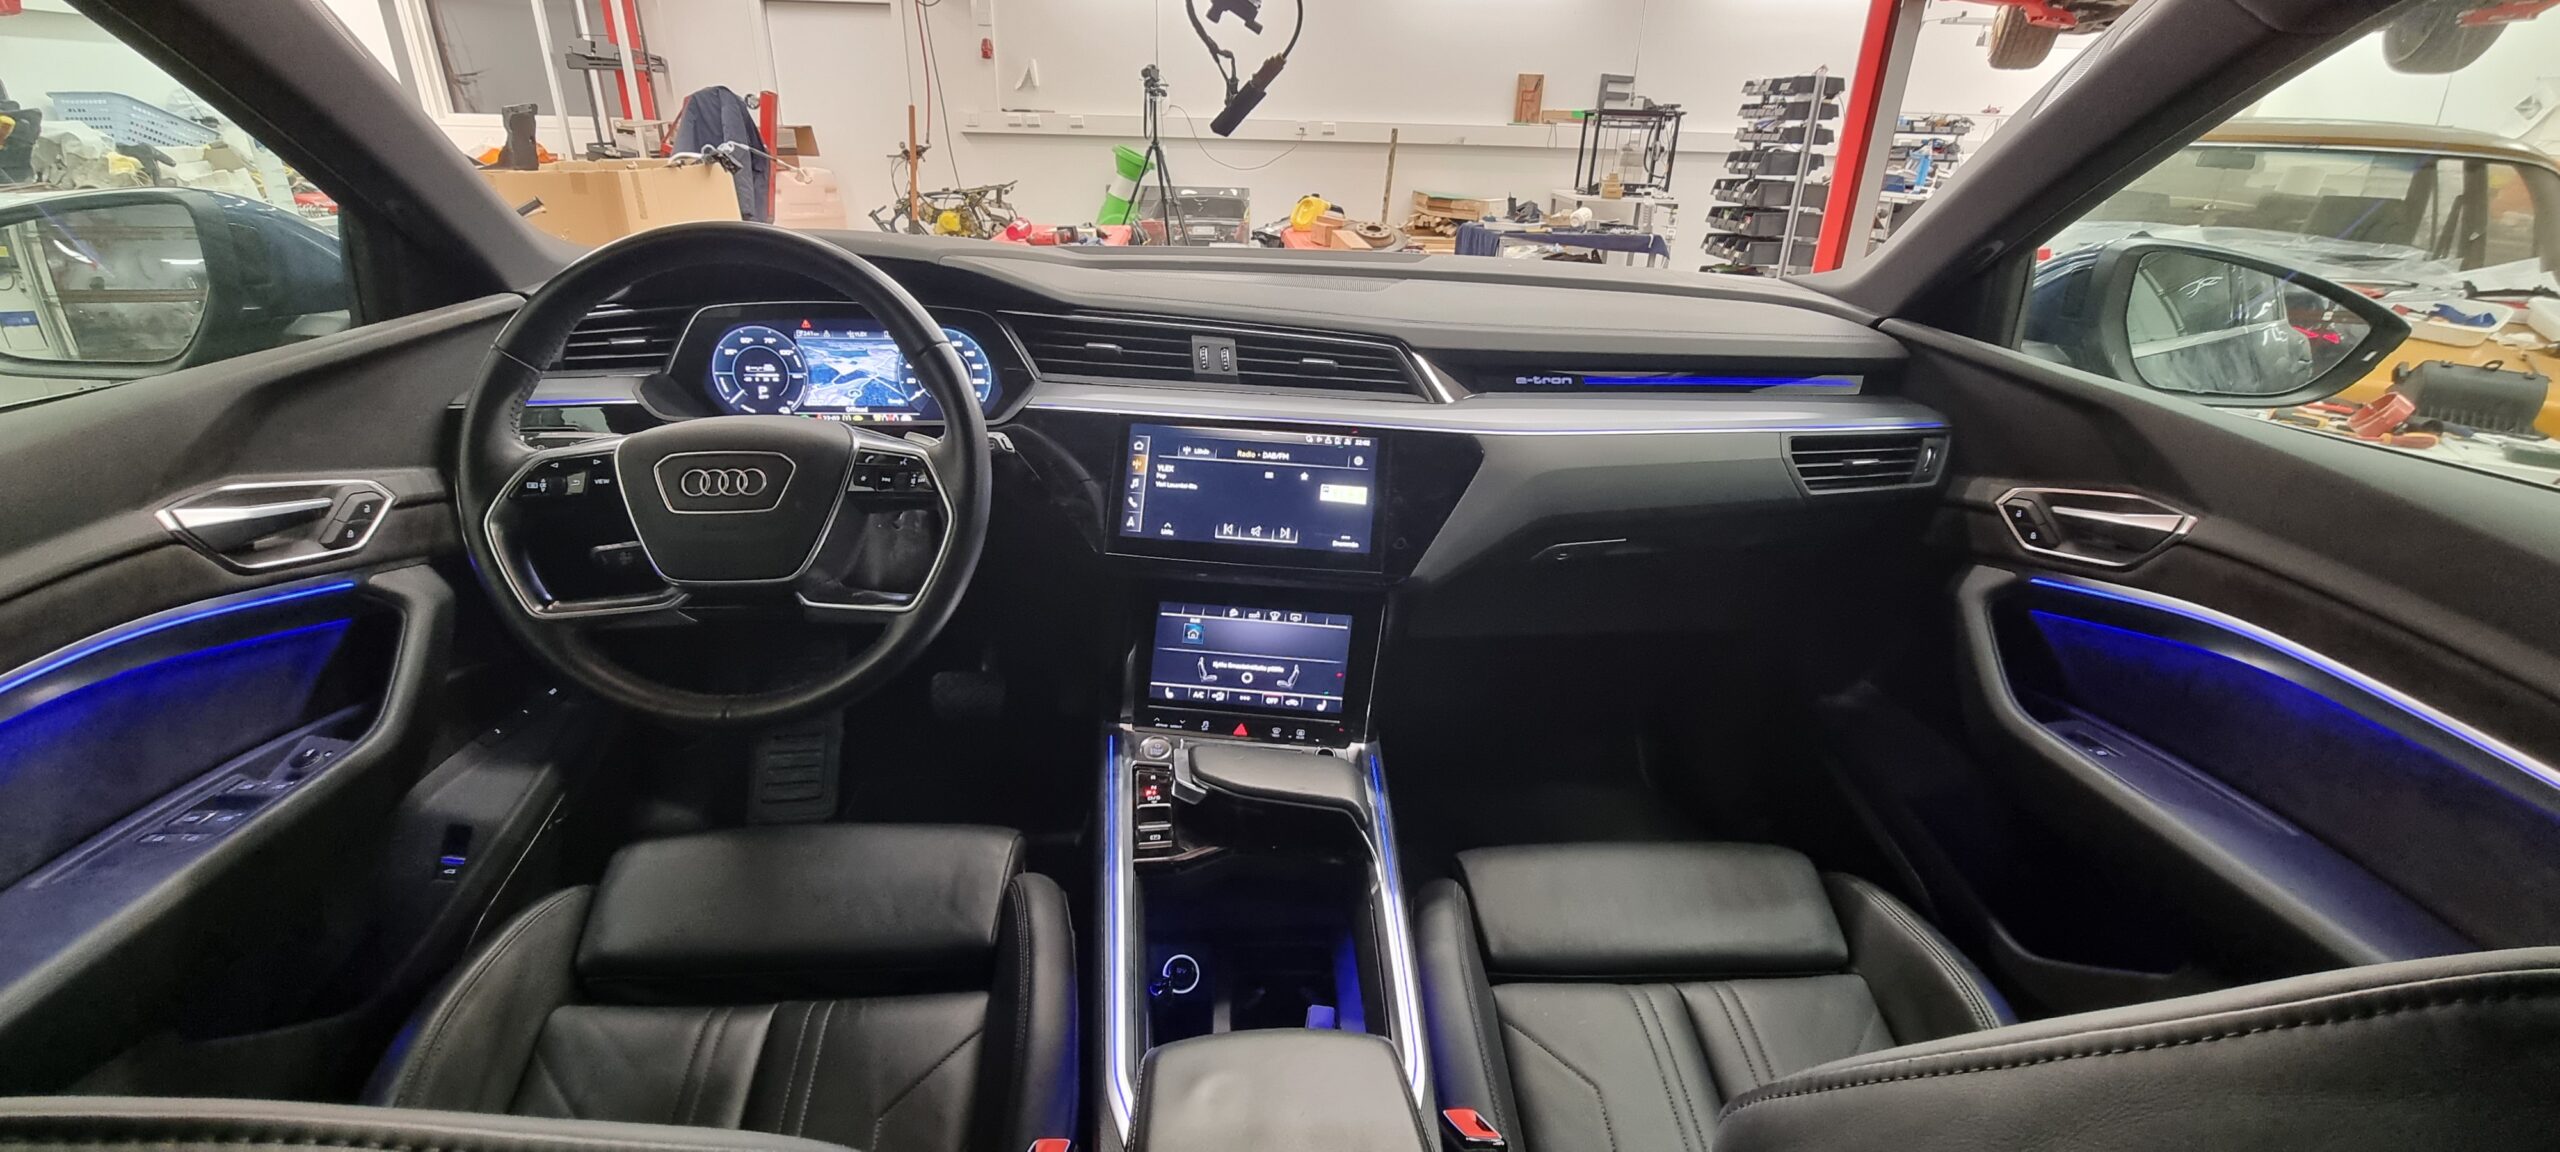
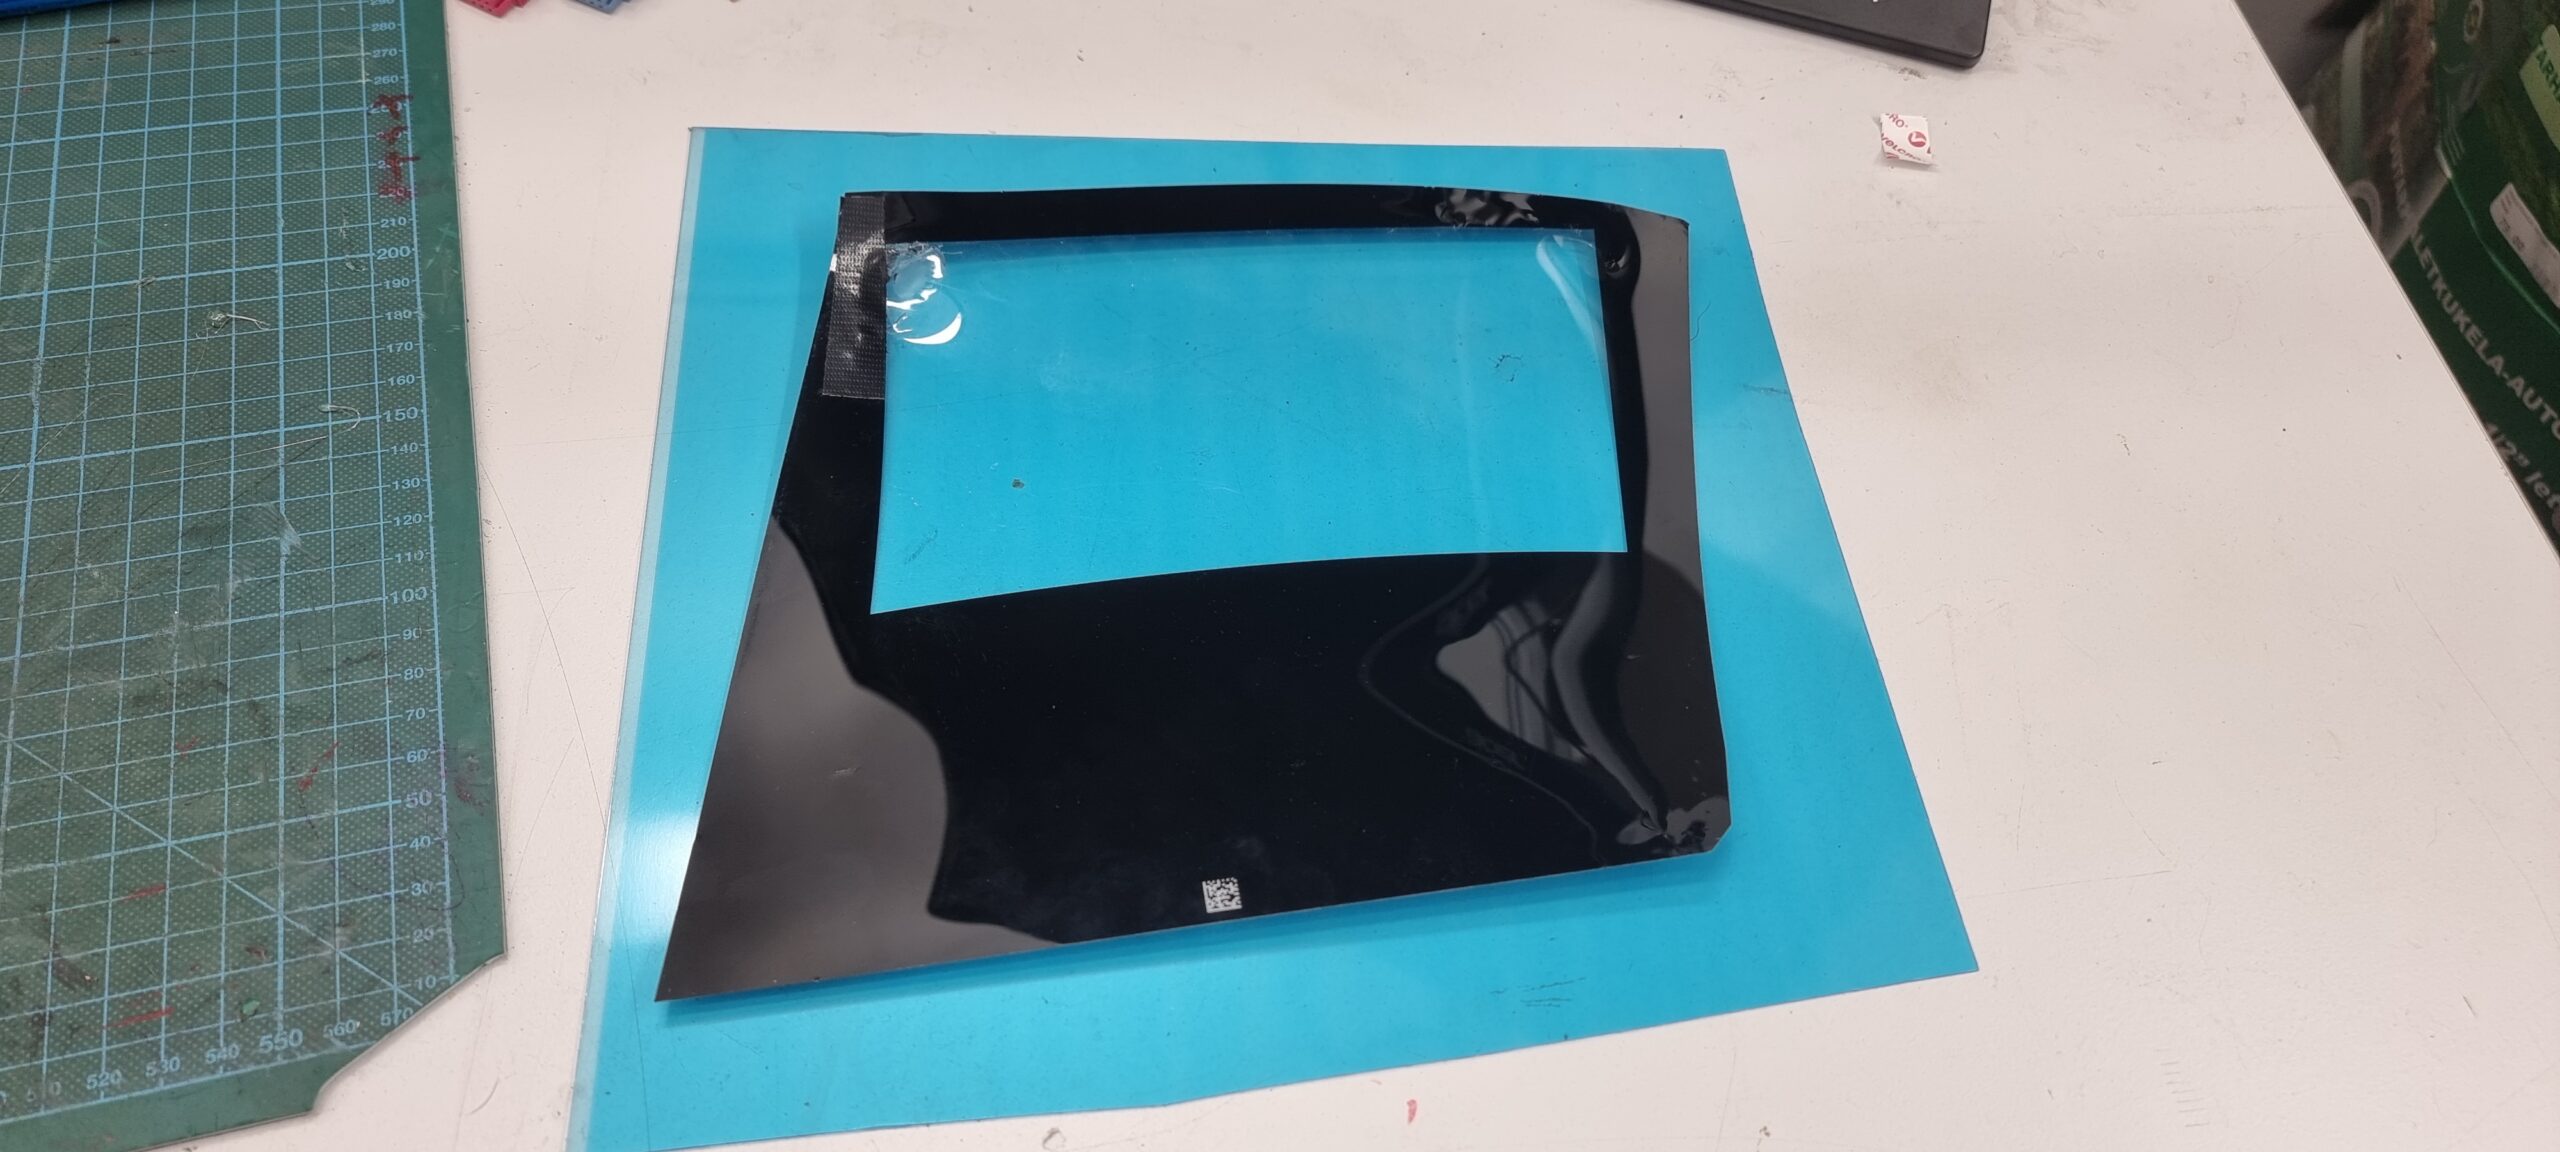
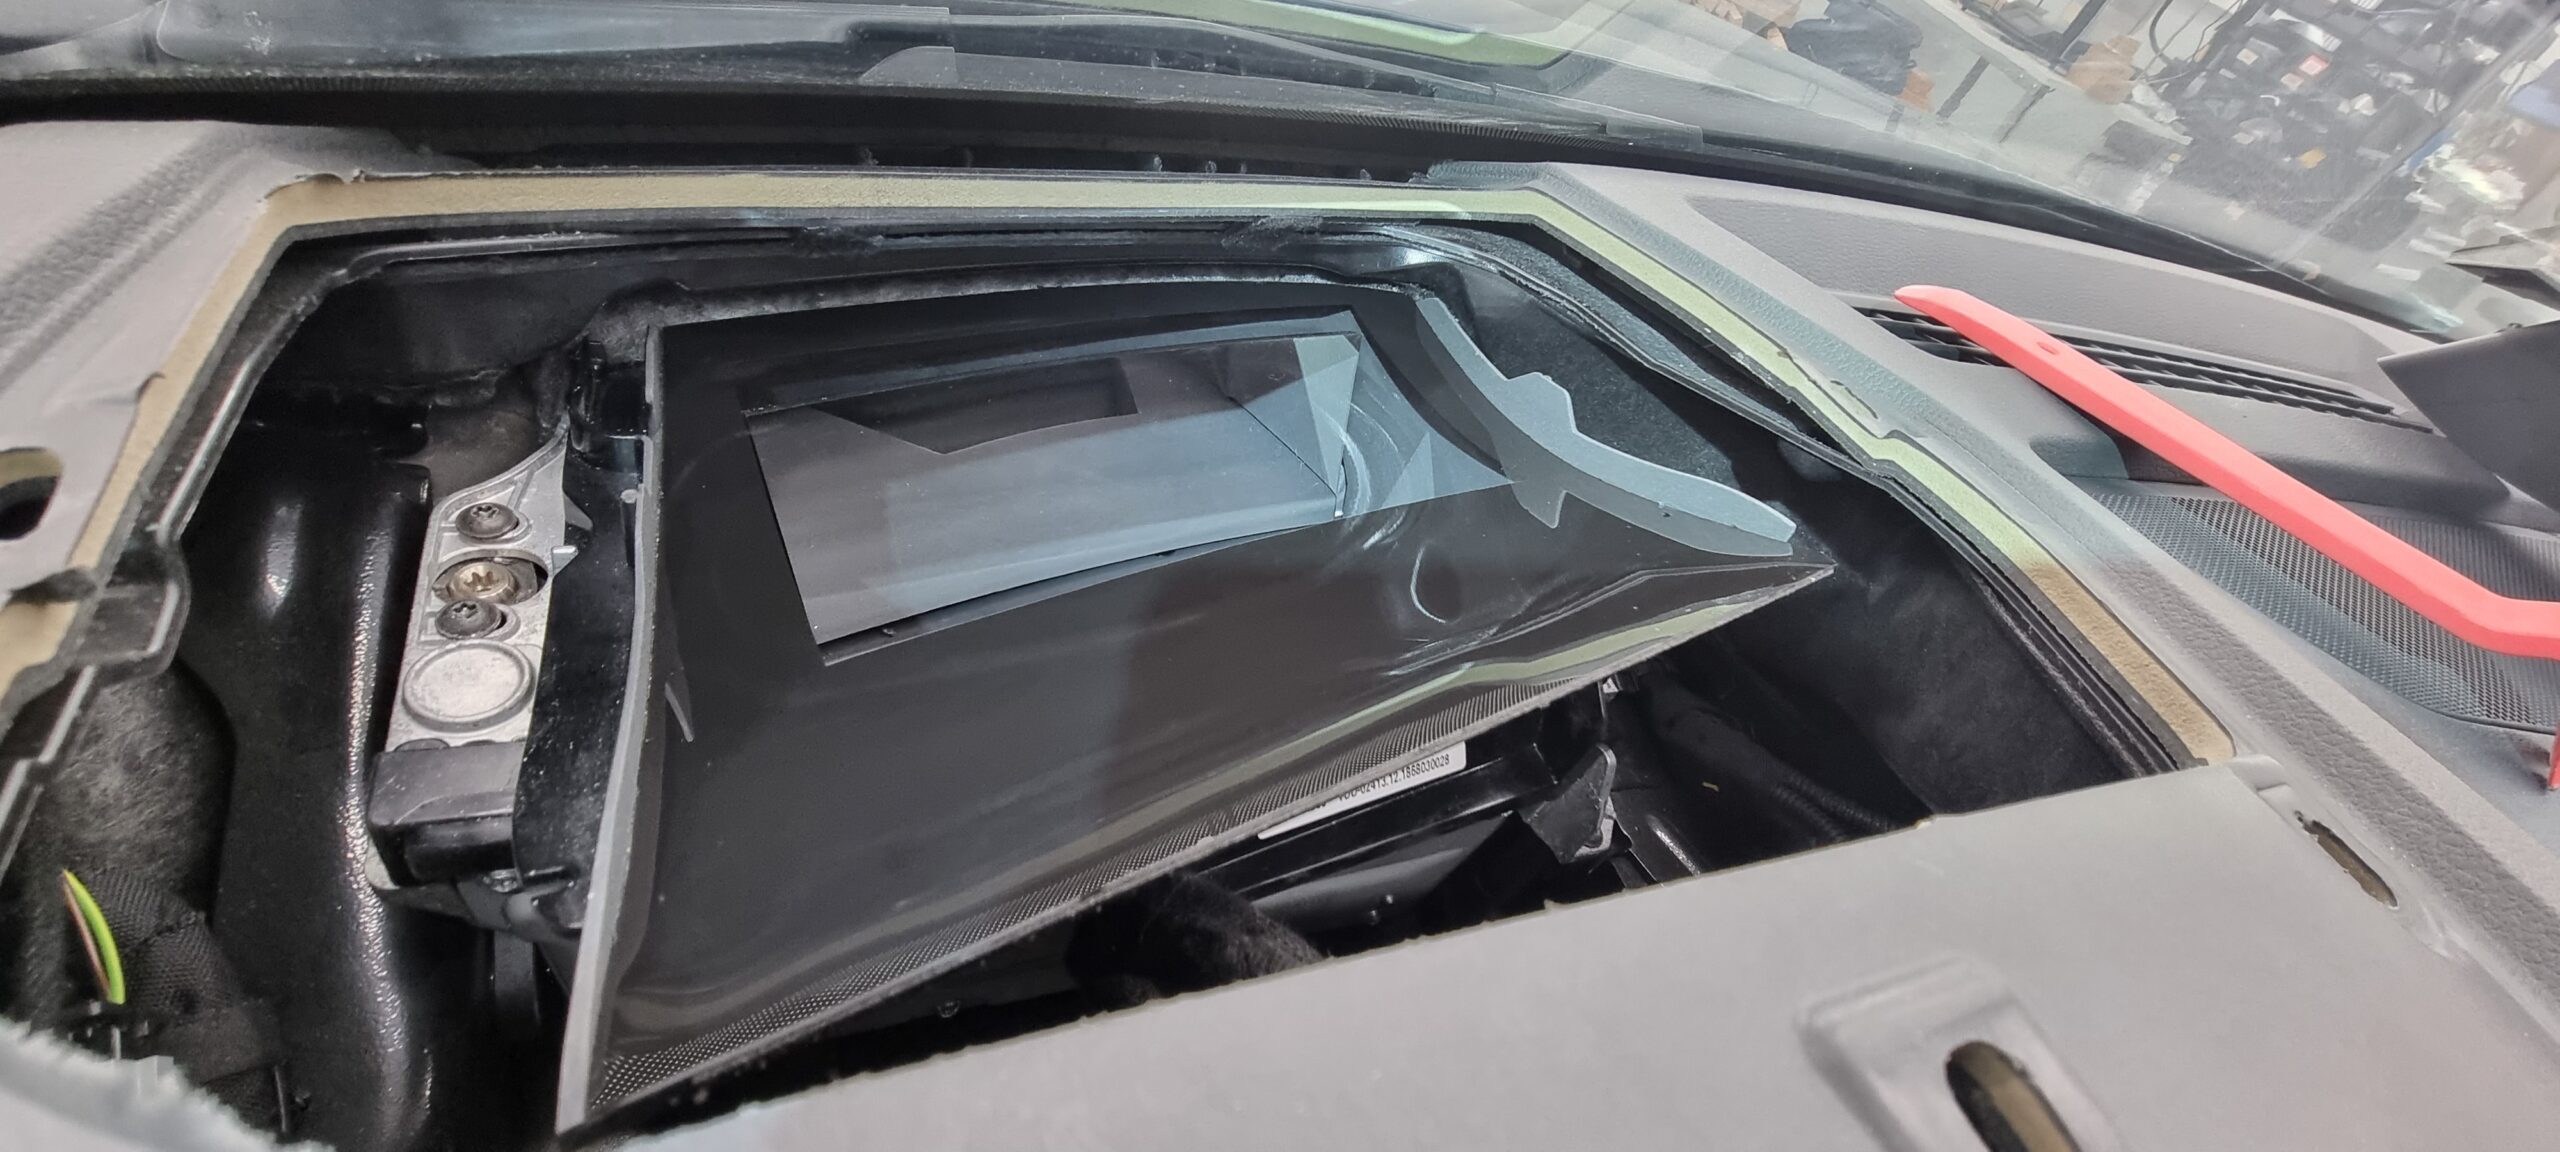
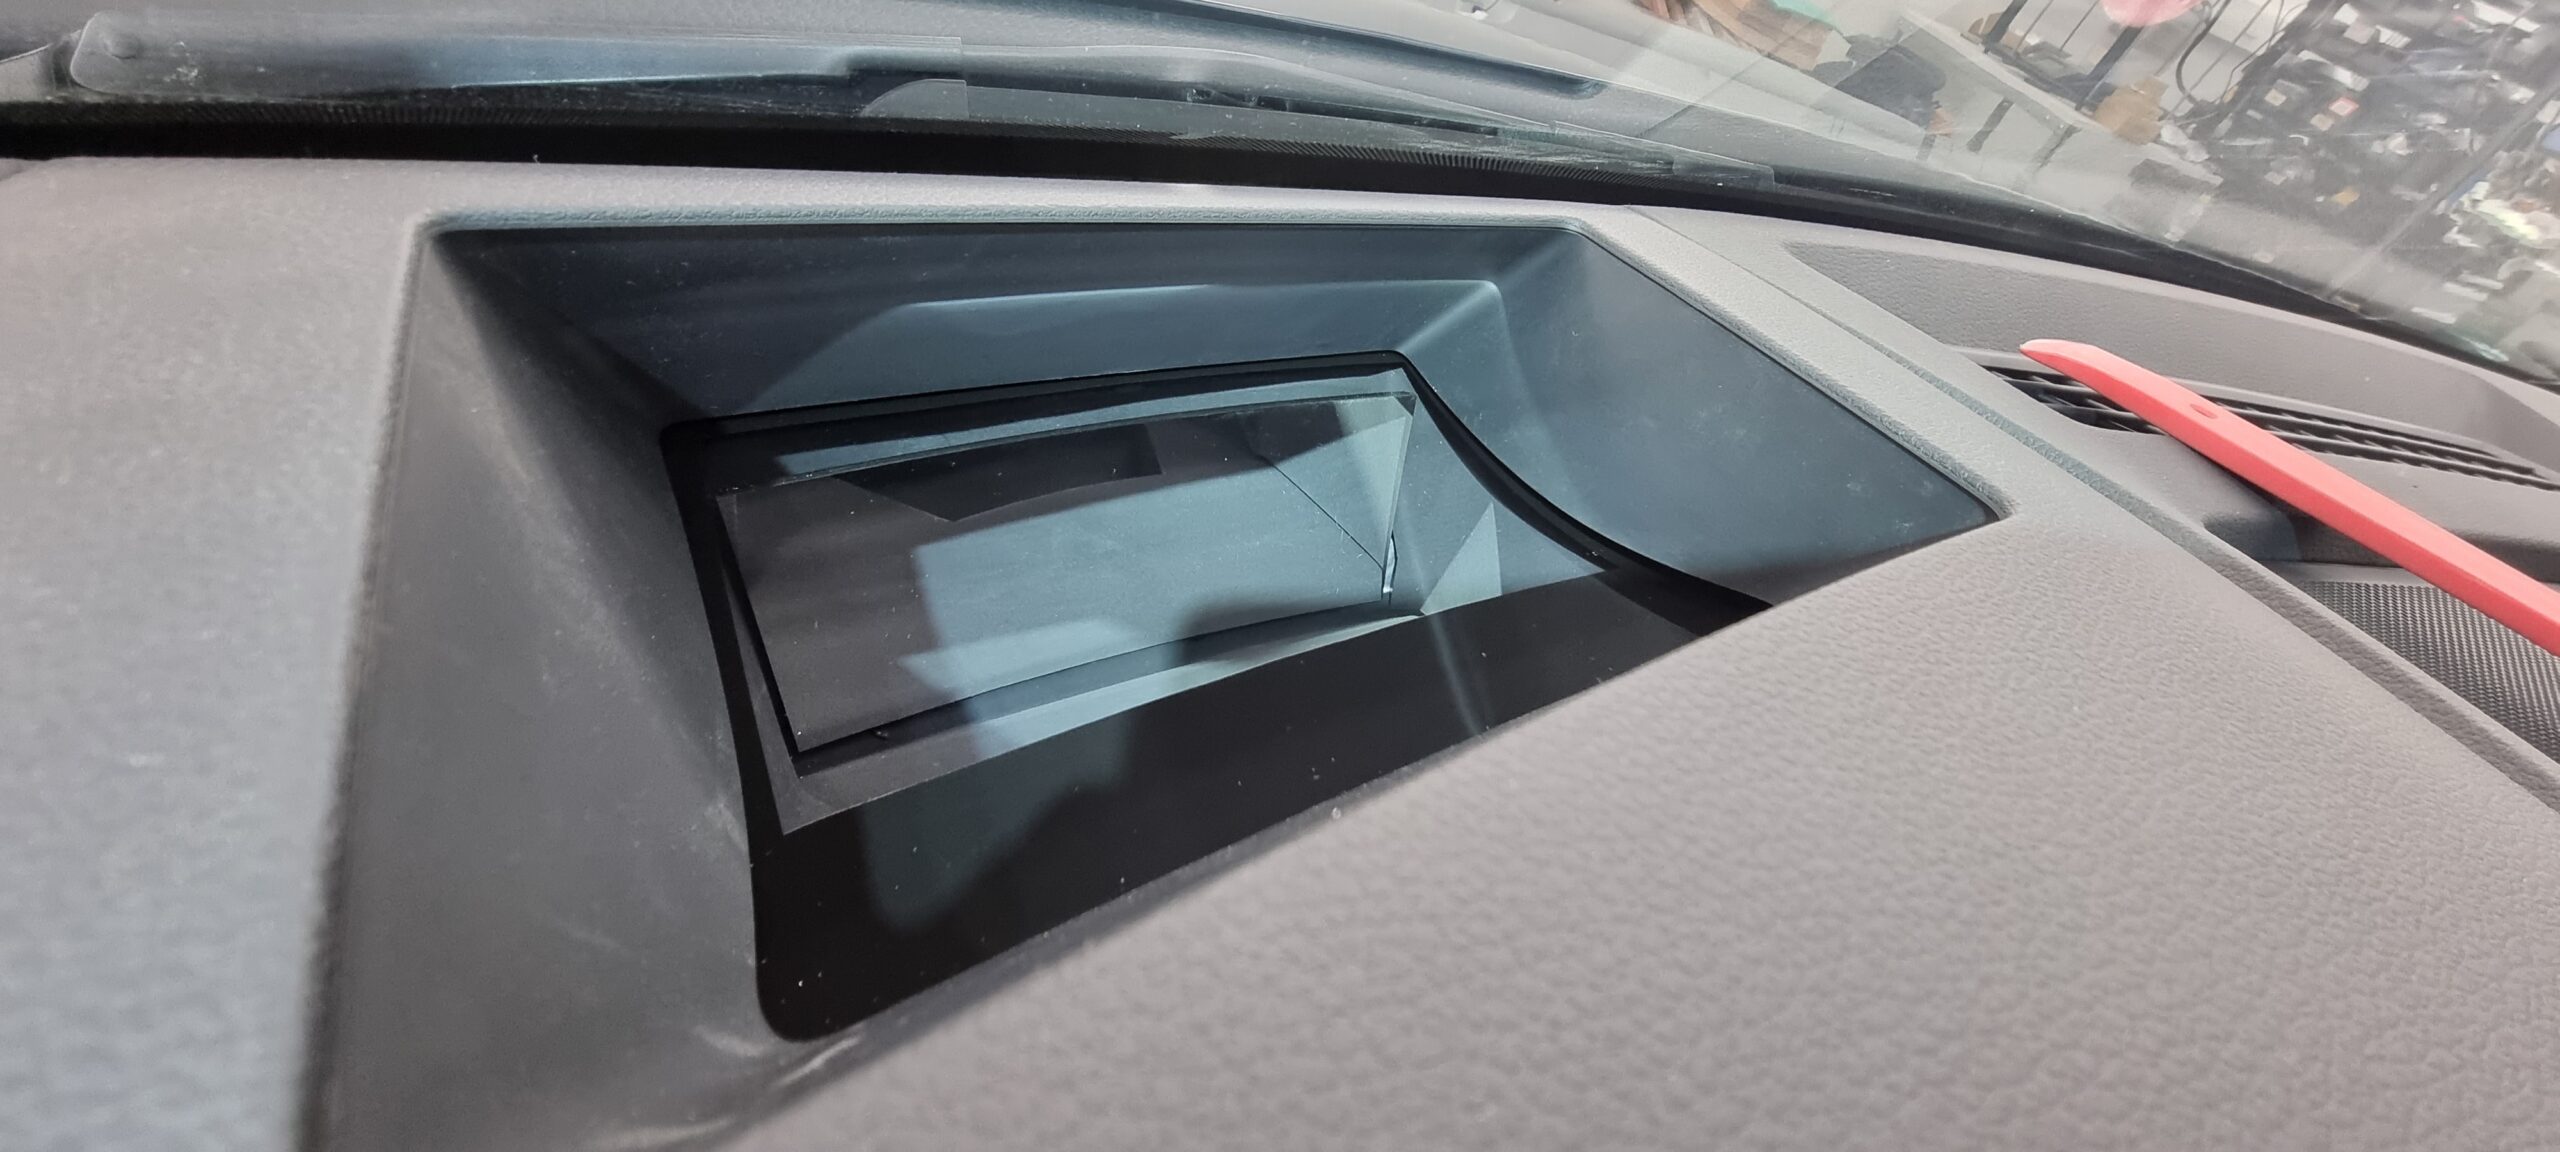
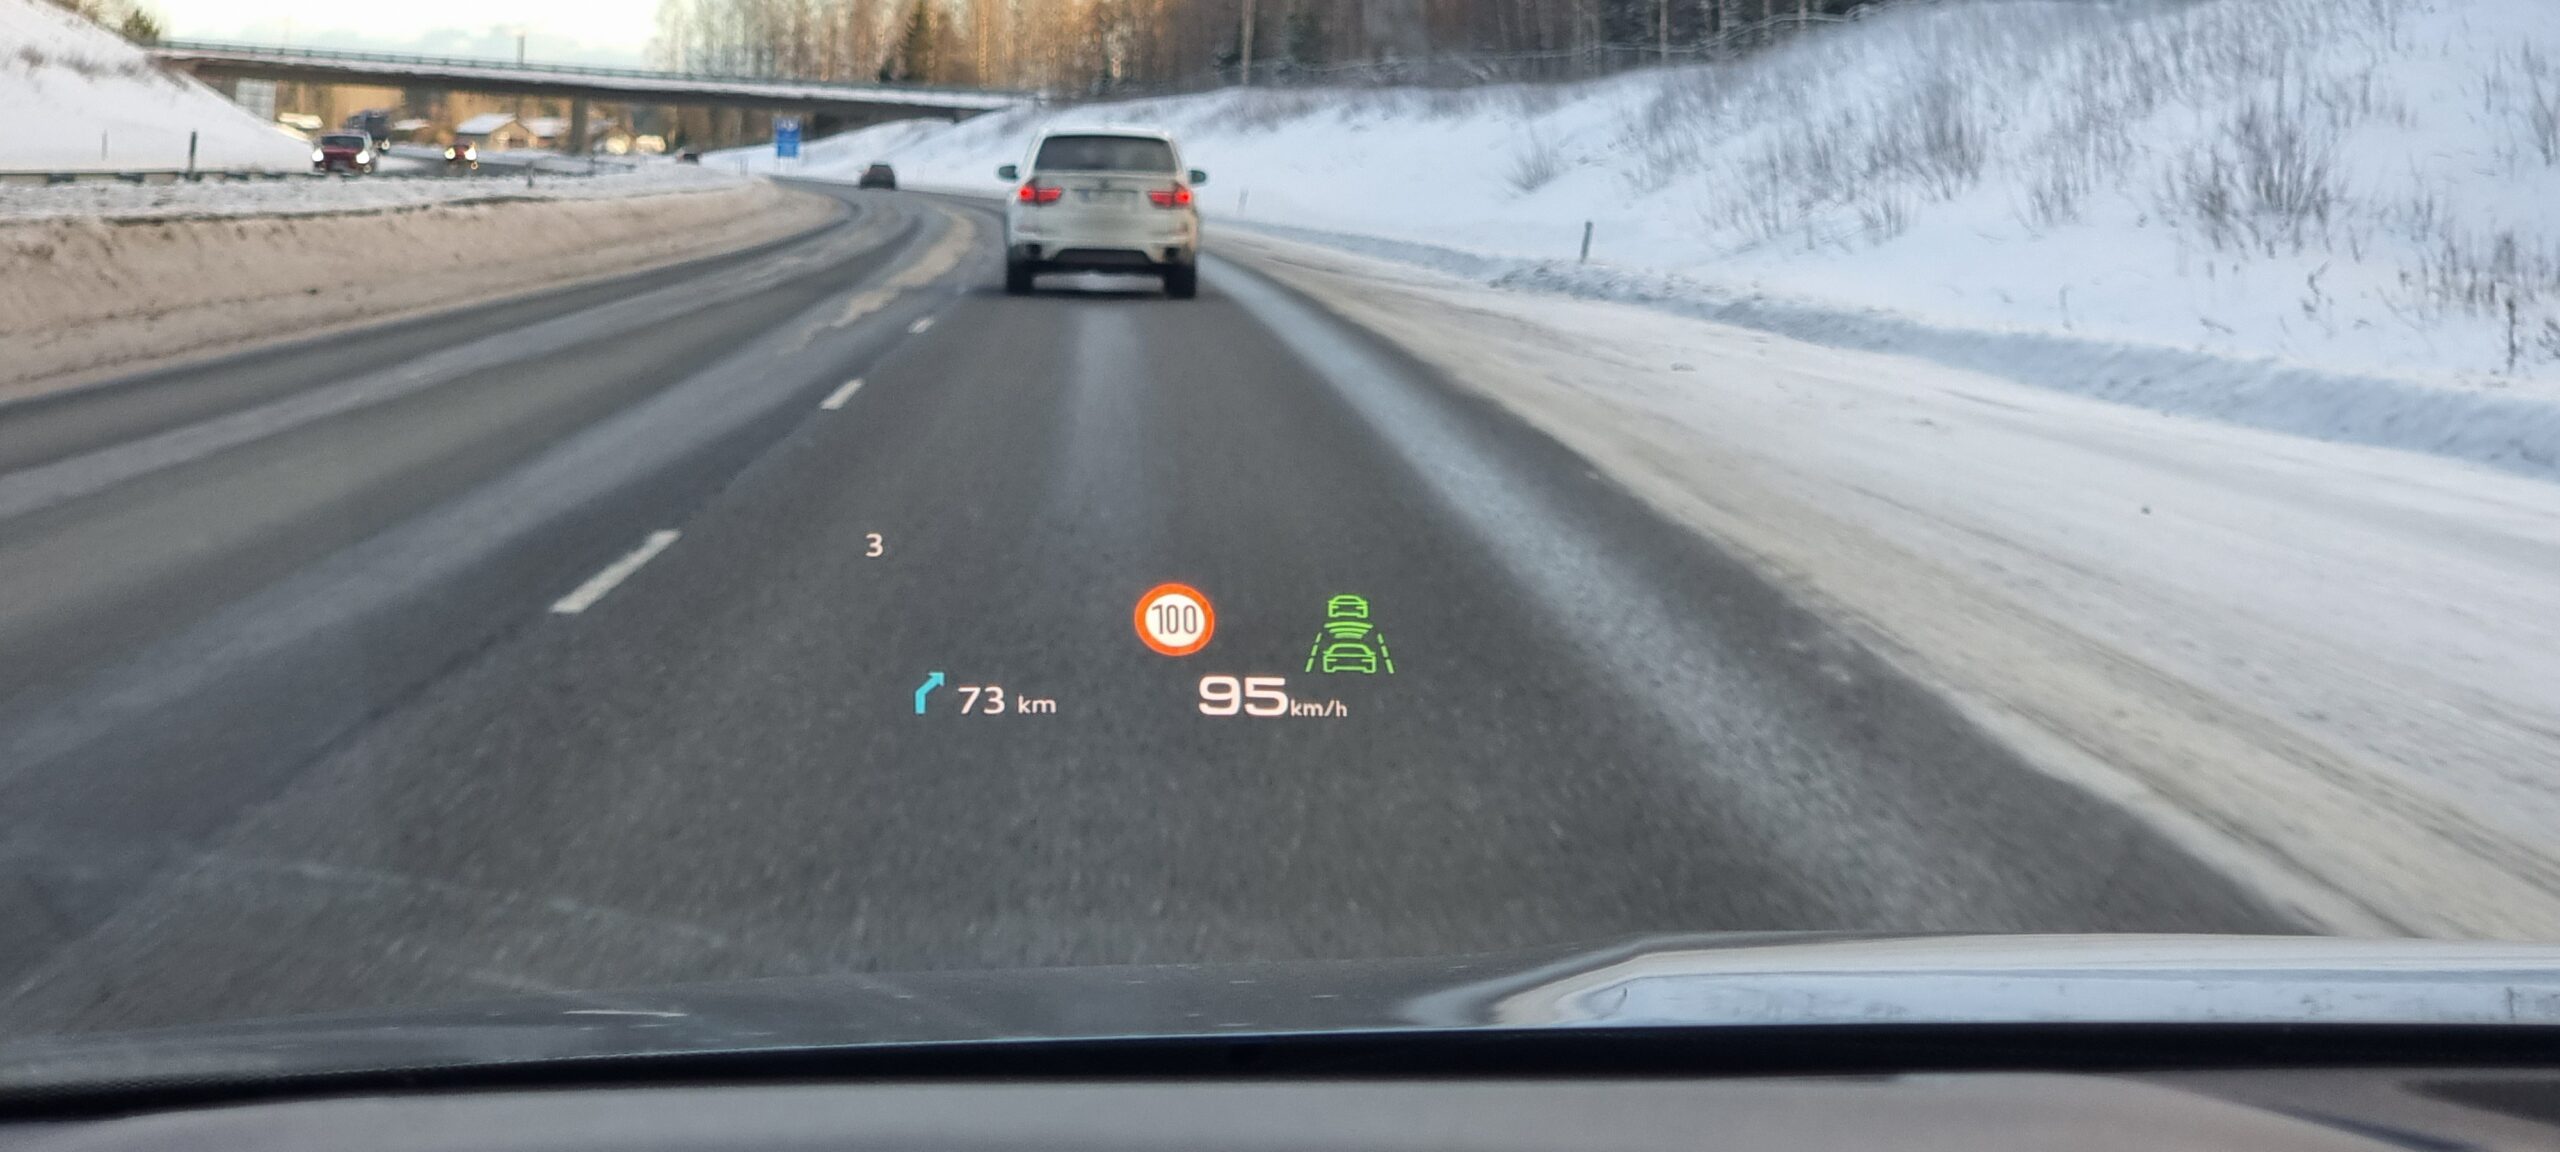
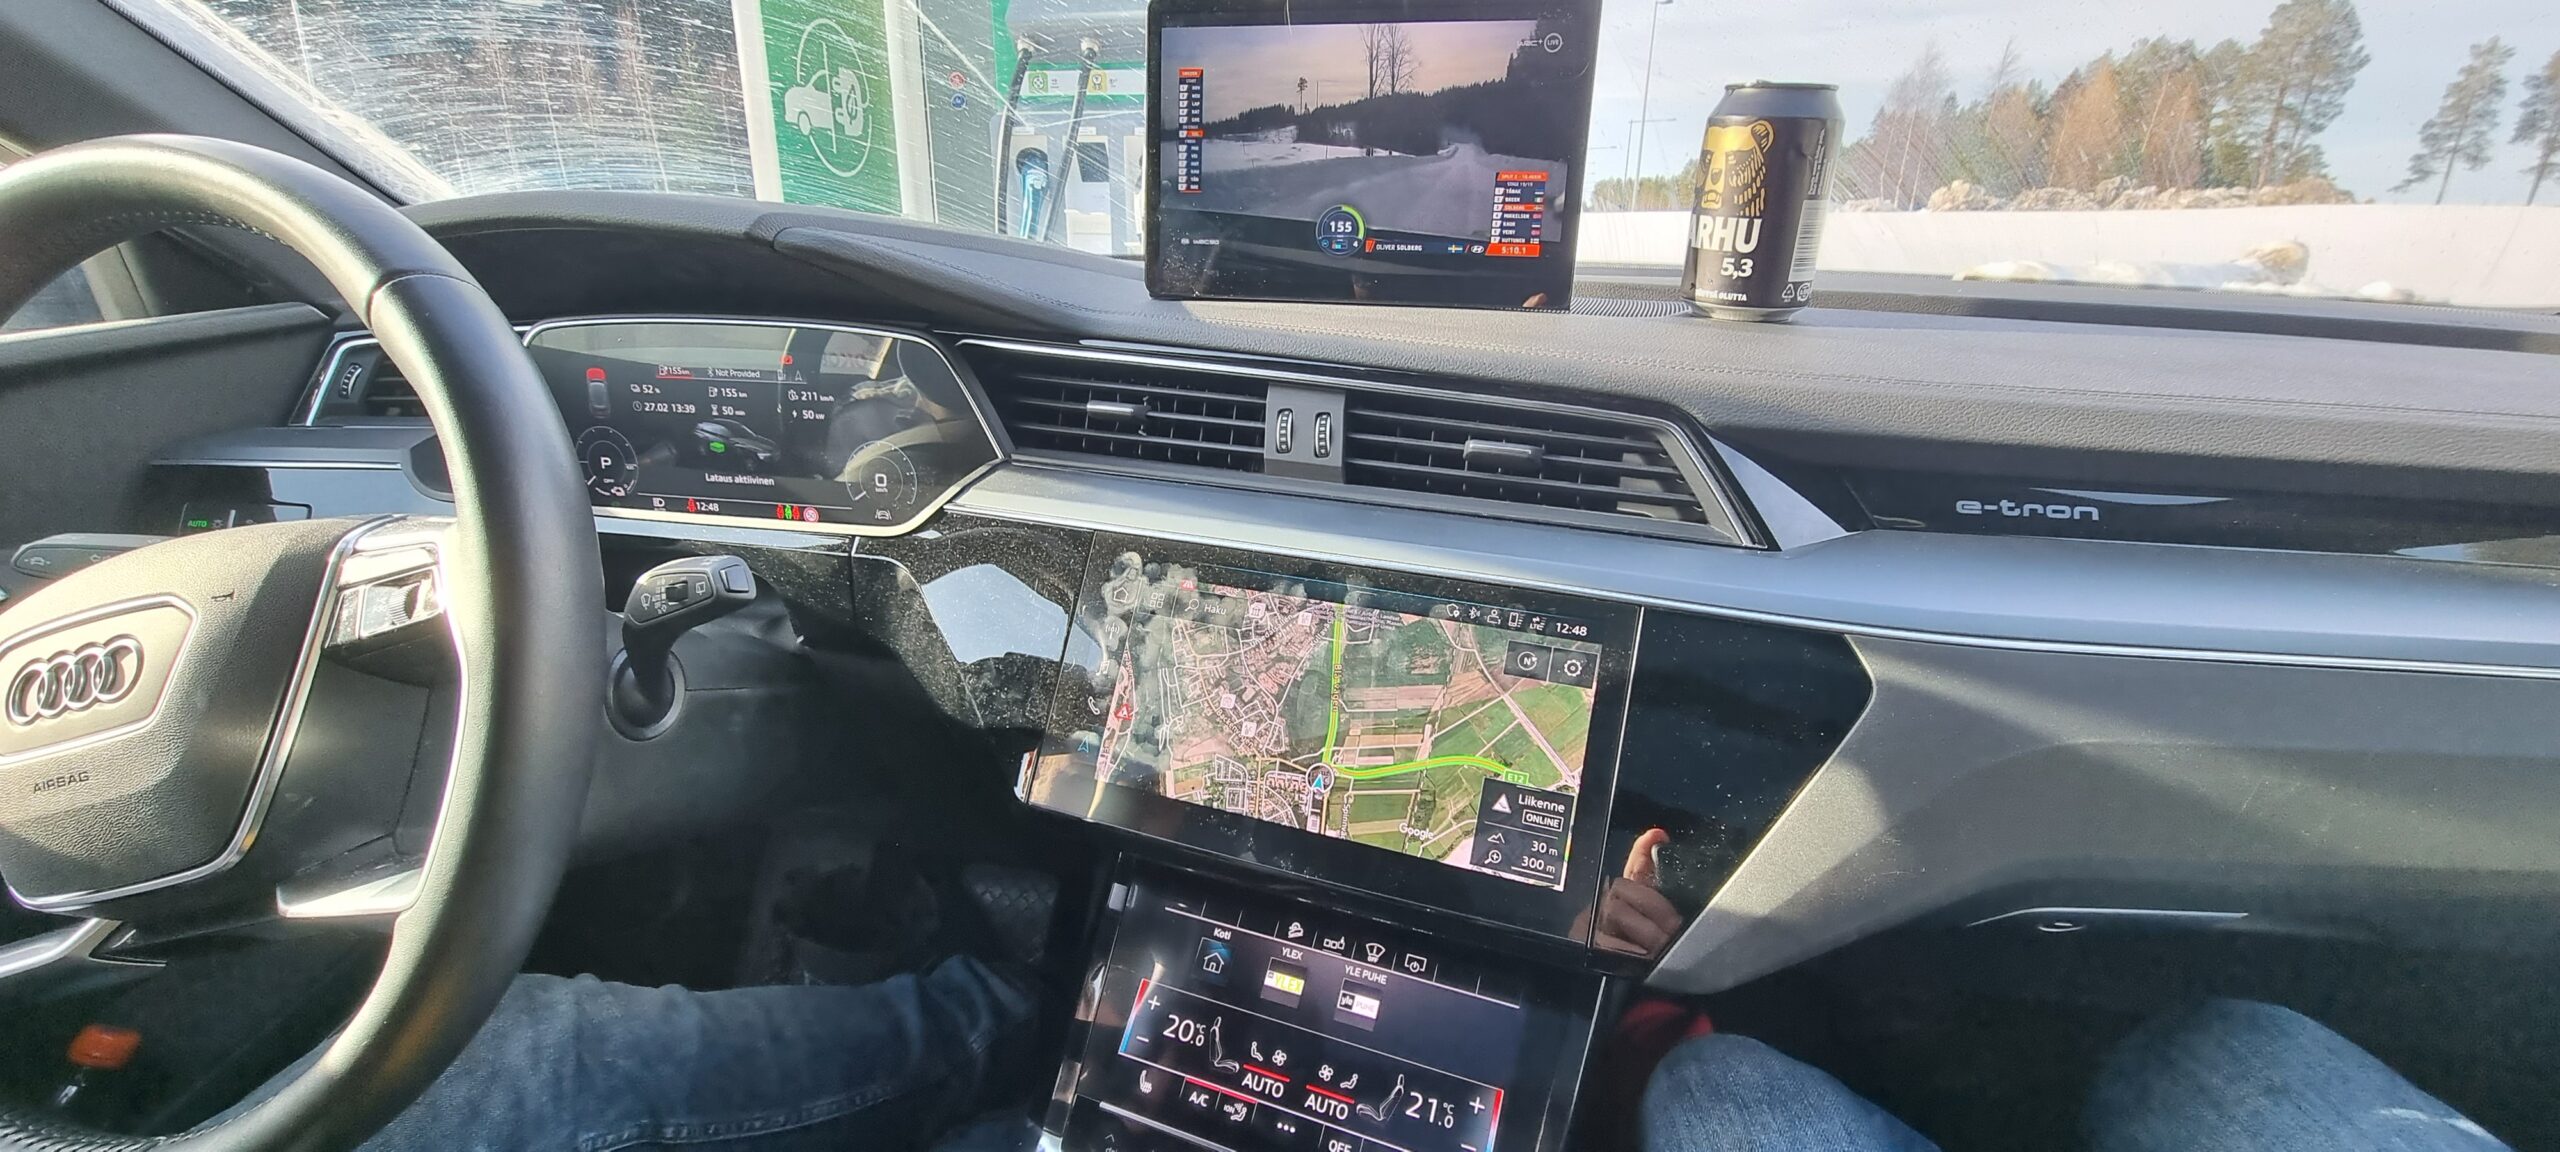
Kojetaululla on HUD-näyttö ja sitä jouduttiin vielä hieman parantelemaan. Kolarissa oli jokin osunut HUD:n suojakalvoon teki siihen sellaisen jäljen, että se heijastui lasillekin. Tein uuden kalvon PET-kalvosta, jota ostin metritavarana (yhden metrin). Tämä fiksaus onnistui erinomaisesti. HUD:sta on tullut myös yksi lempivarusteistani.

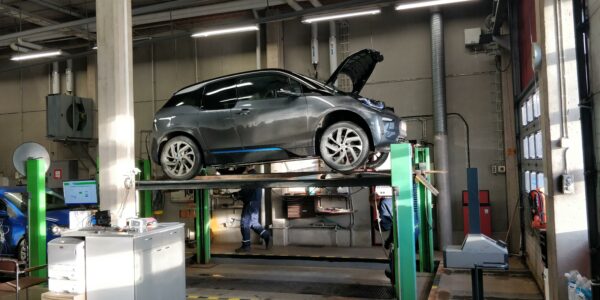
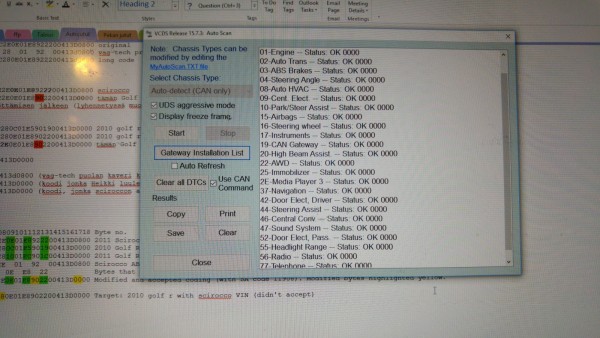
Audi kävi vielä Porin Käyttöautossa, missä turvavyöt ja etututkat kalibroitiin, joitain vikakoodeja poistettiin ja ohjainlaitteita sopeutettiin. Tammikuun lopulla Audi lopulta katsastettiin – ei huomautettavaa! Näin lähes viiden kuukauden projekti oli päätöksessään. Melkein.

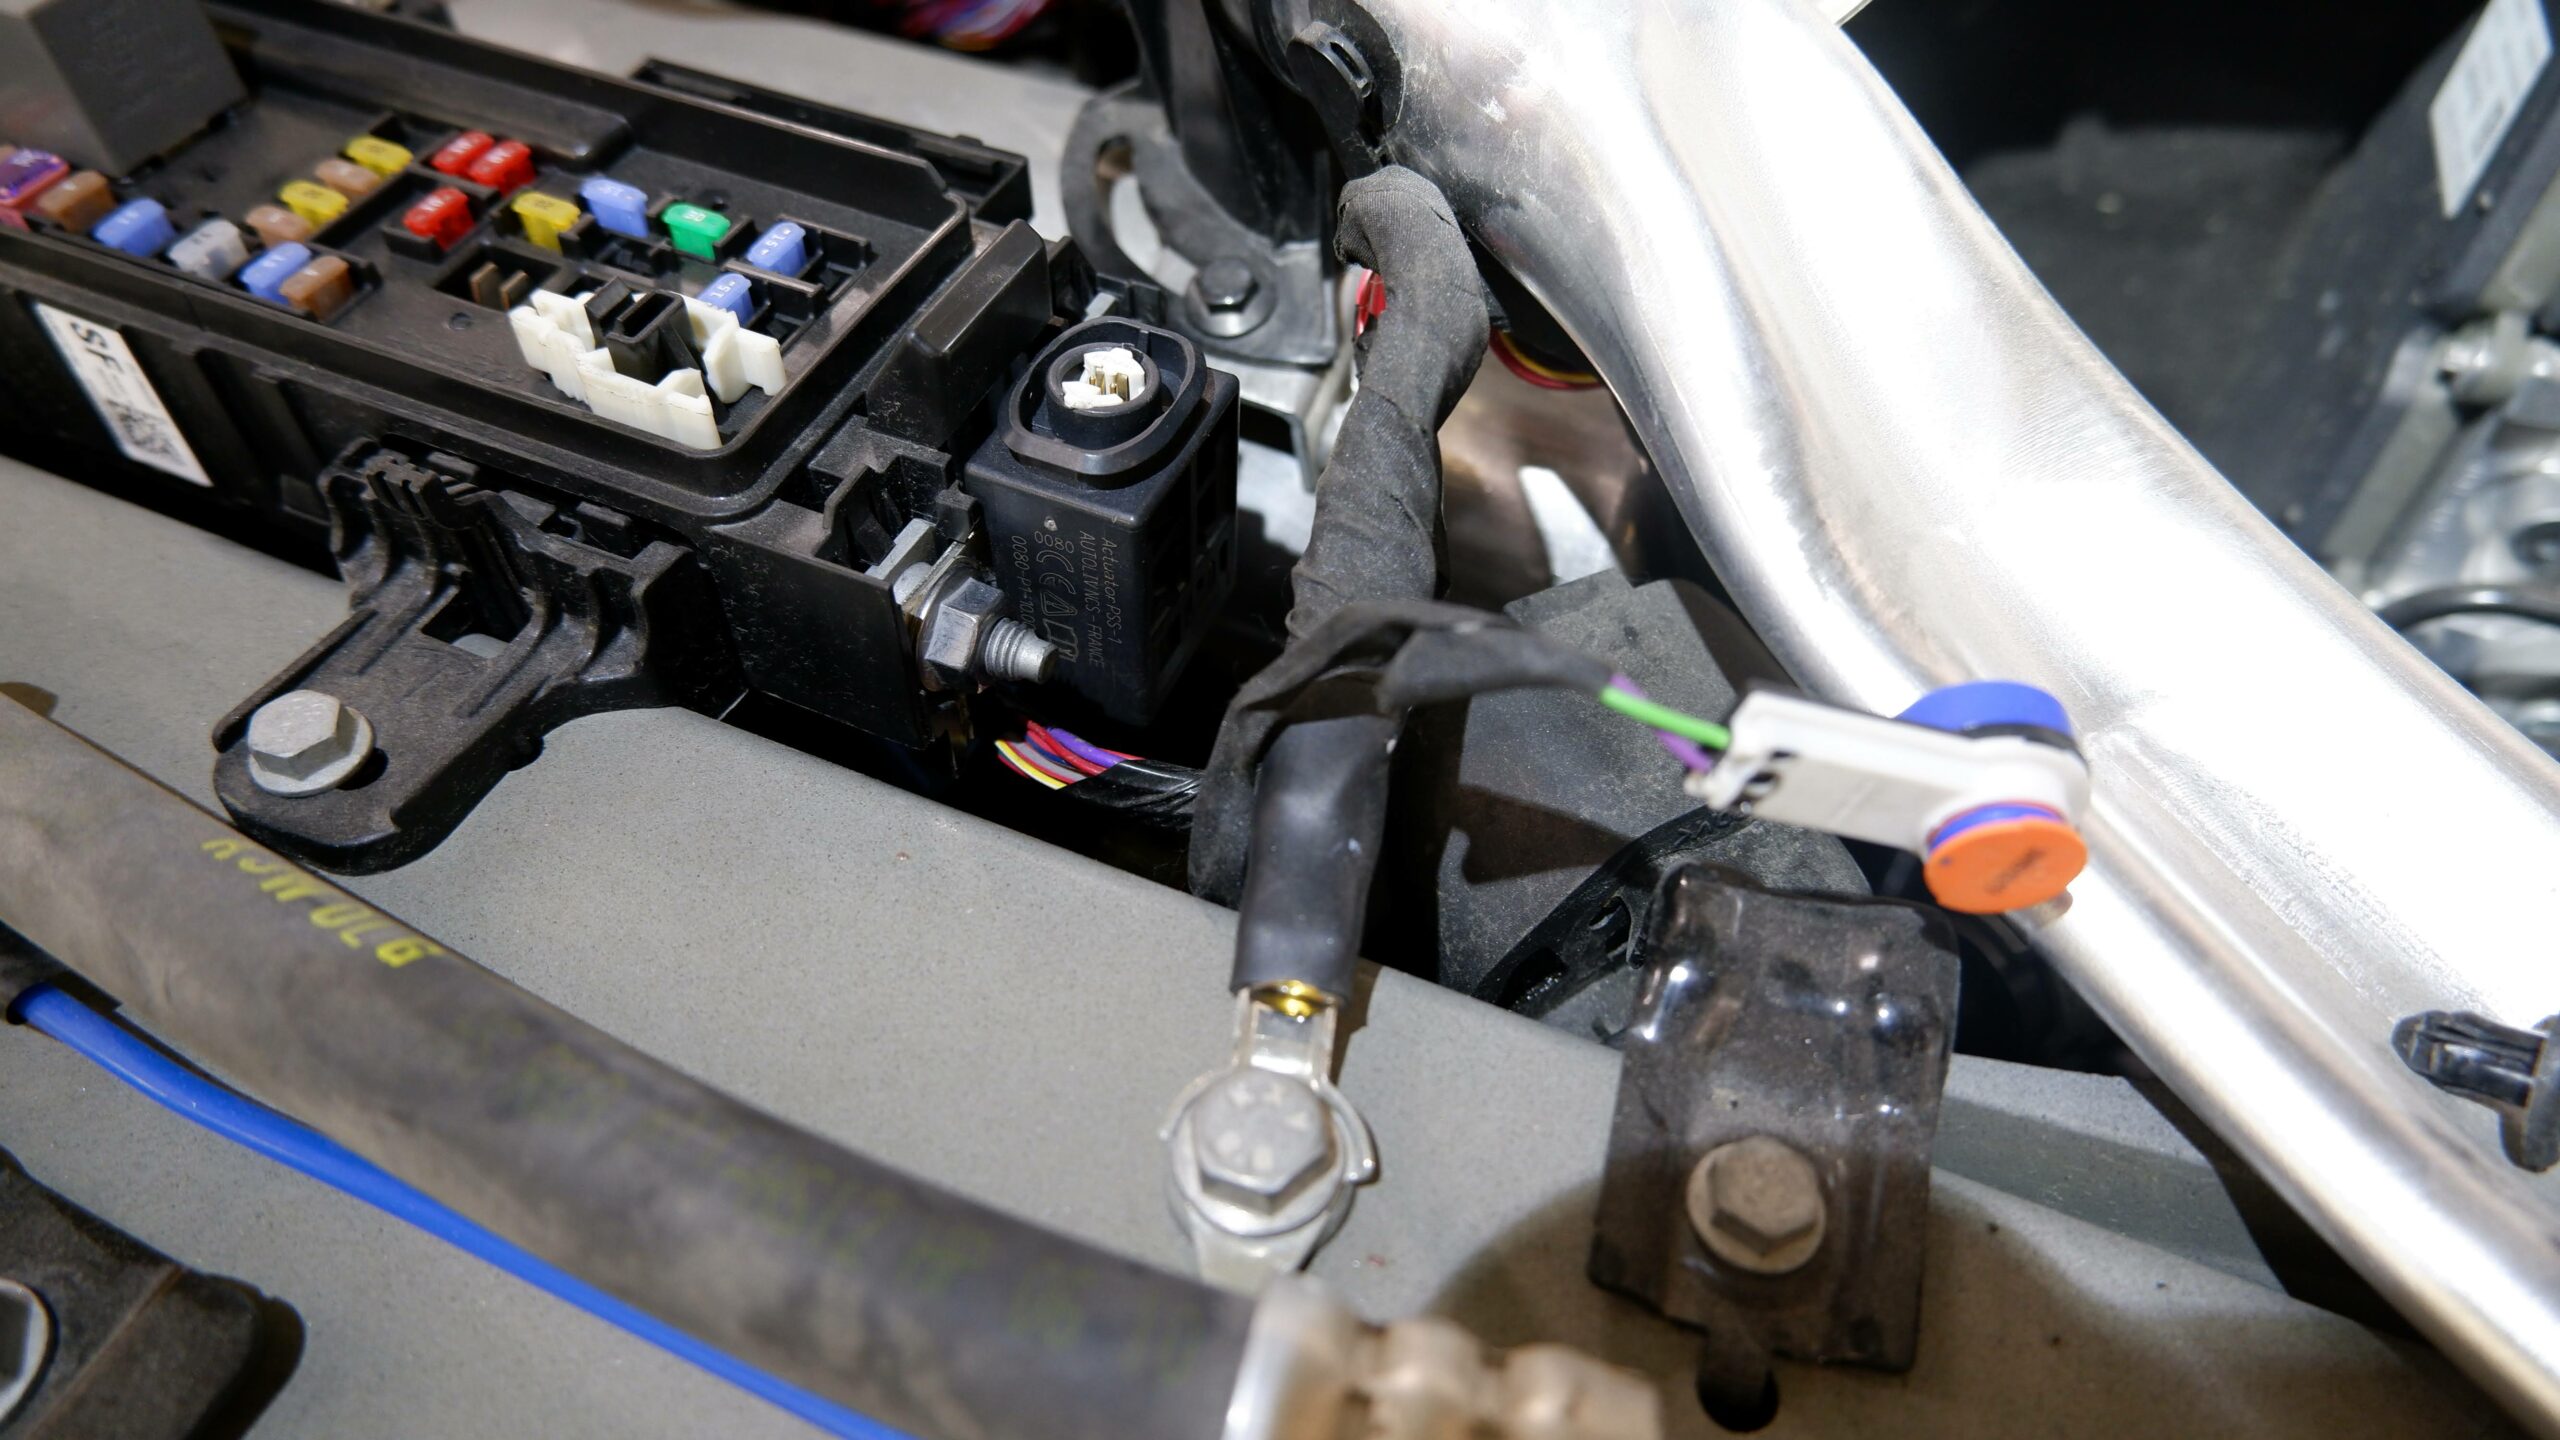
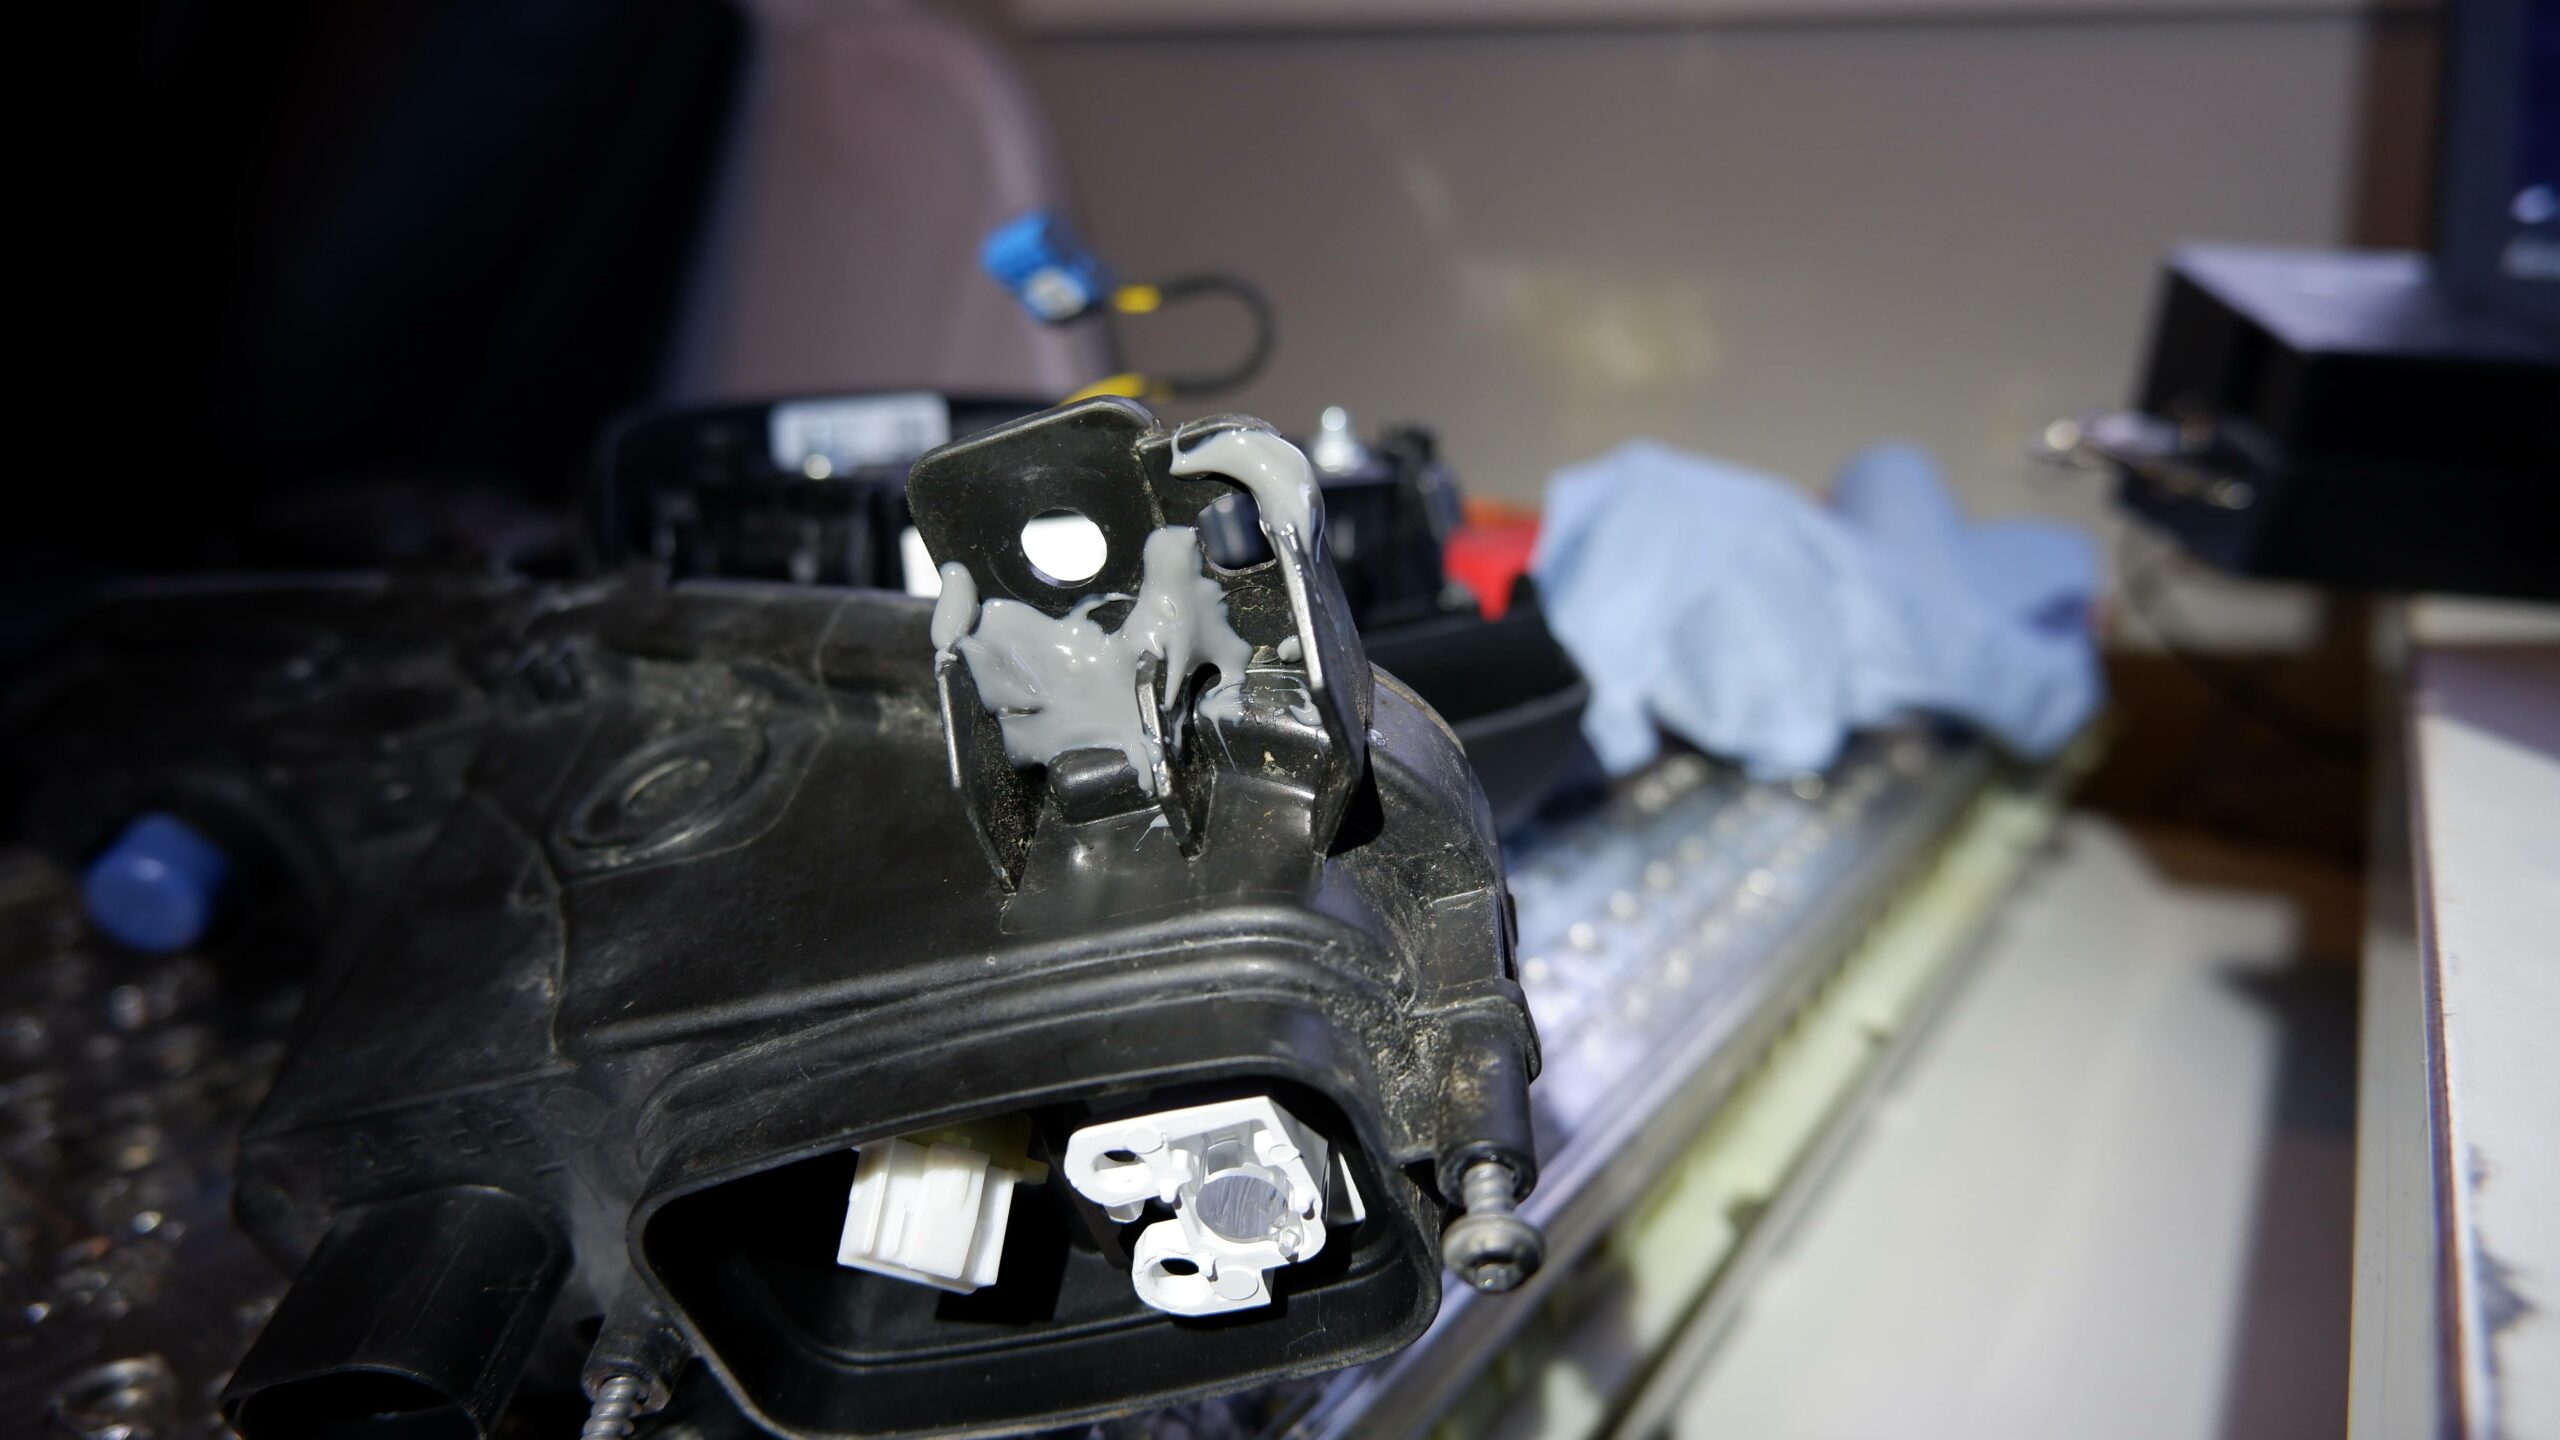
Latausportti moottoroitu suojakansi ei toiminut kuten piti ja tätä piti tutkia. Lokasuoja irti ja latausportti käteen. Moottorista (tämä siis oli Saksasta tullut varaosa) oli väliakseli poikki! Onneksi en ollut heittänyt auton alkuperäistä muuten rikkinäistä latausporttia menemään ja sain siitä varaosan.

Tällä kertaa ei muita tuunauksia kuin lievä madallus (ohjelmallisesti) sekä kattotelineet. Perheauto mikä perheauto…

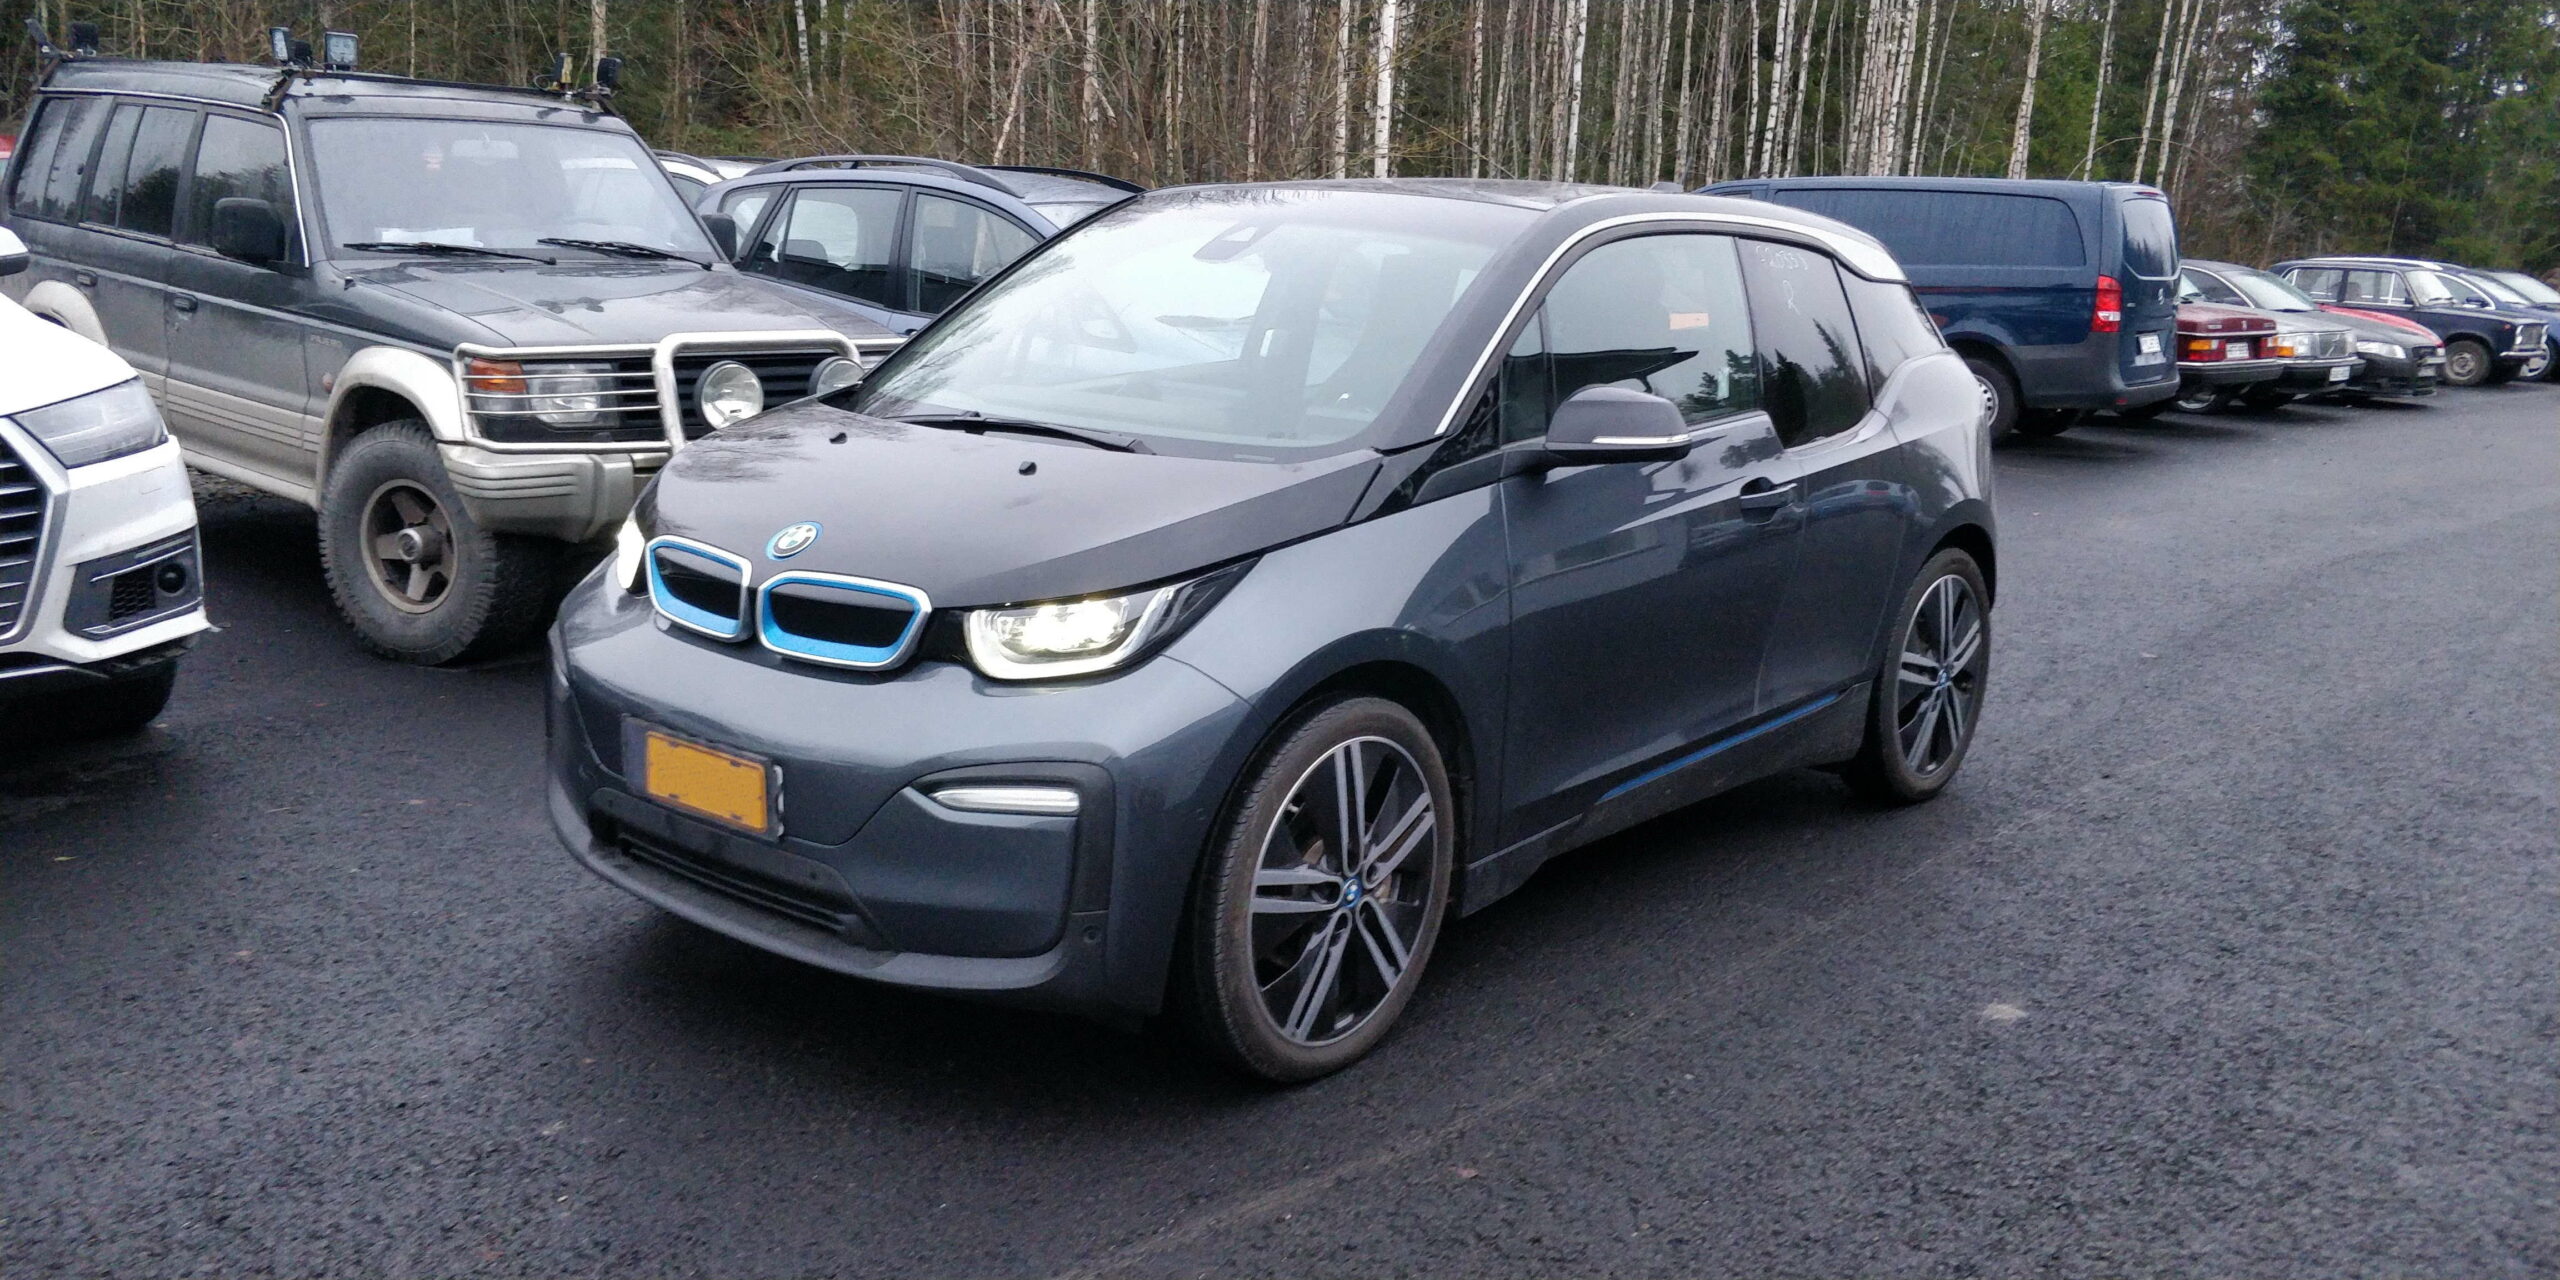
Todellinen koeajo suoritettiin Ruotsissa, kun lähdettiin Audilla MM-rallia katsomaan paikan päälle. Kuvassa katsotaan power stagea pikalaturilla matkalla satamaan – paluulaiva lähti niin aikaisin, että ei ehditty kyseistä EK:ta paikan päällä katsomaan. Auto pelasi hienosti ja sähköautosta ei muutenkaan ollut rallireissulla mitään haittaa.

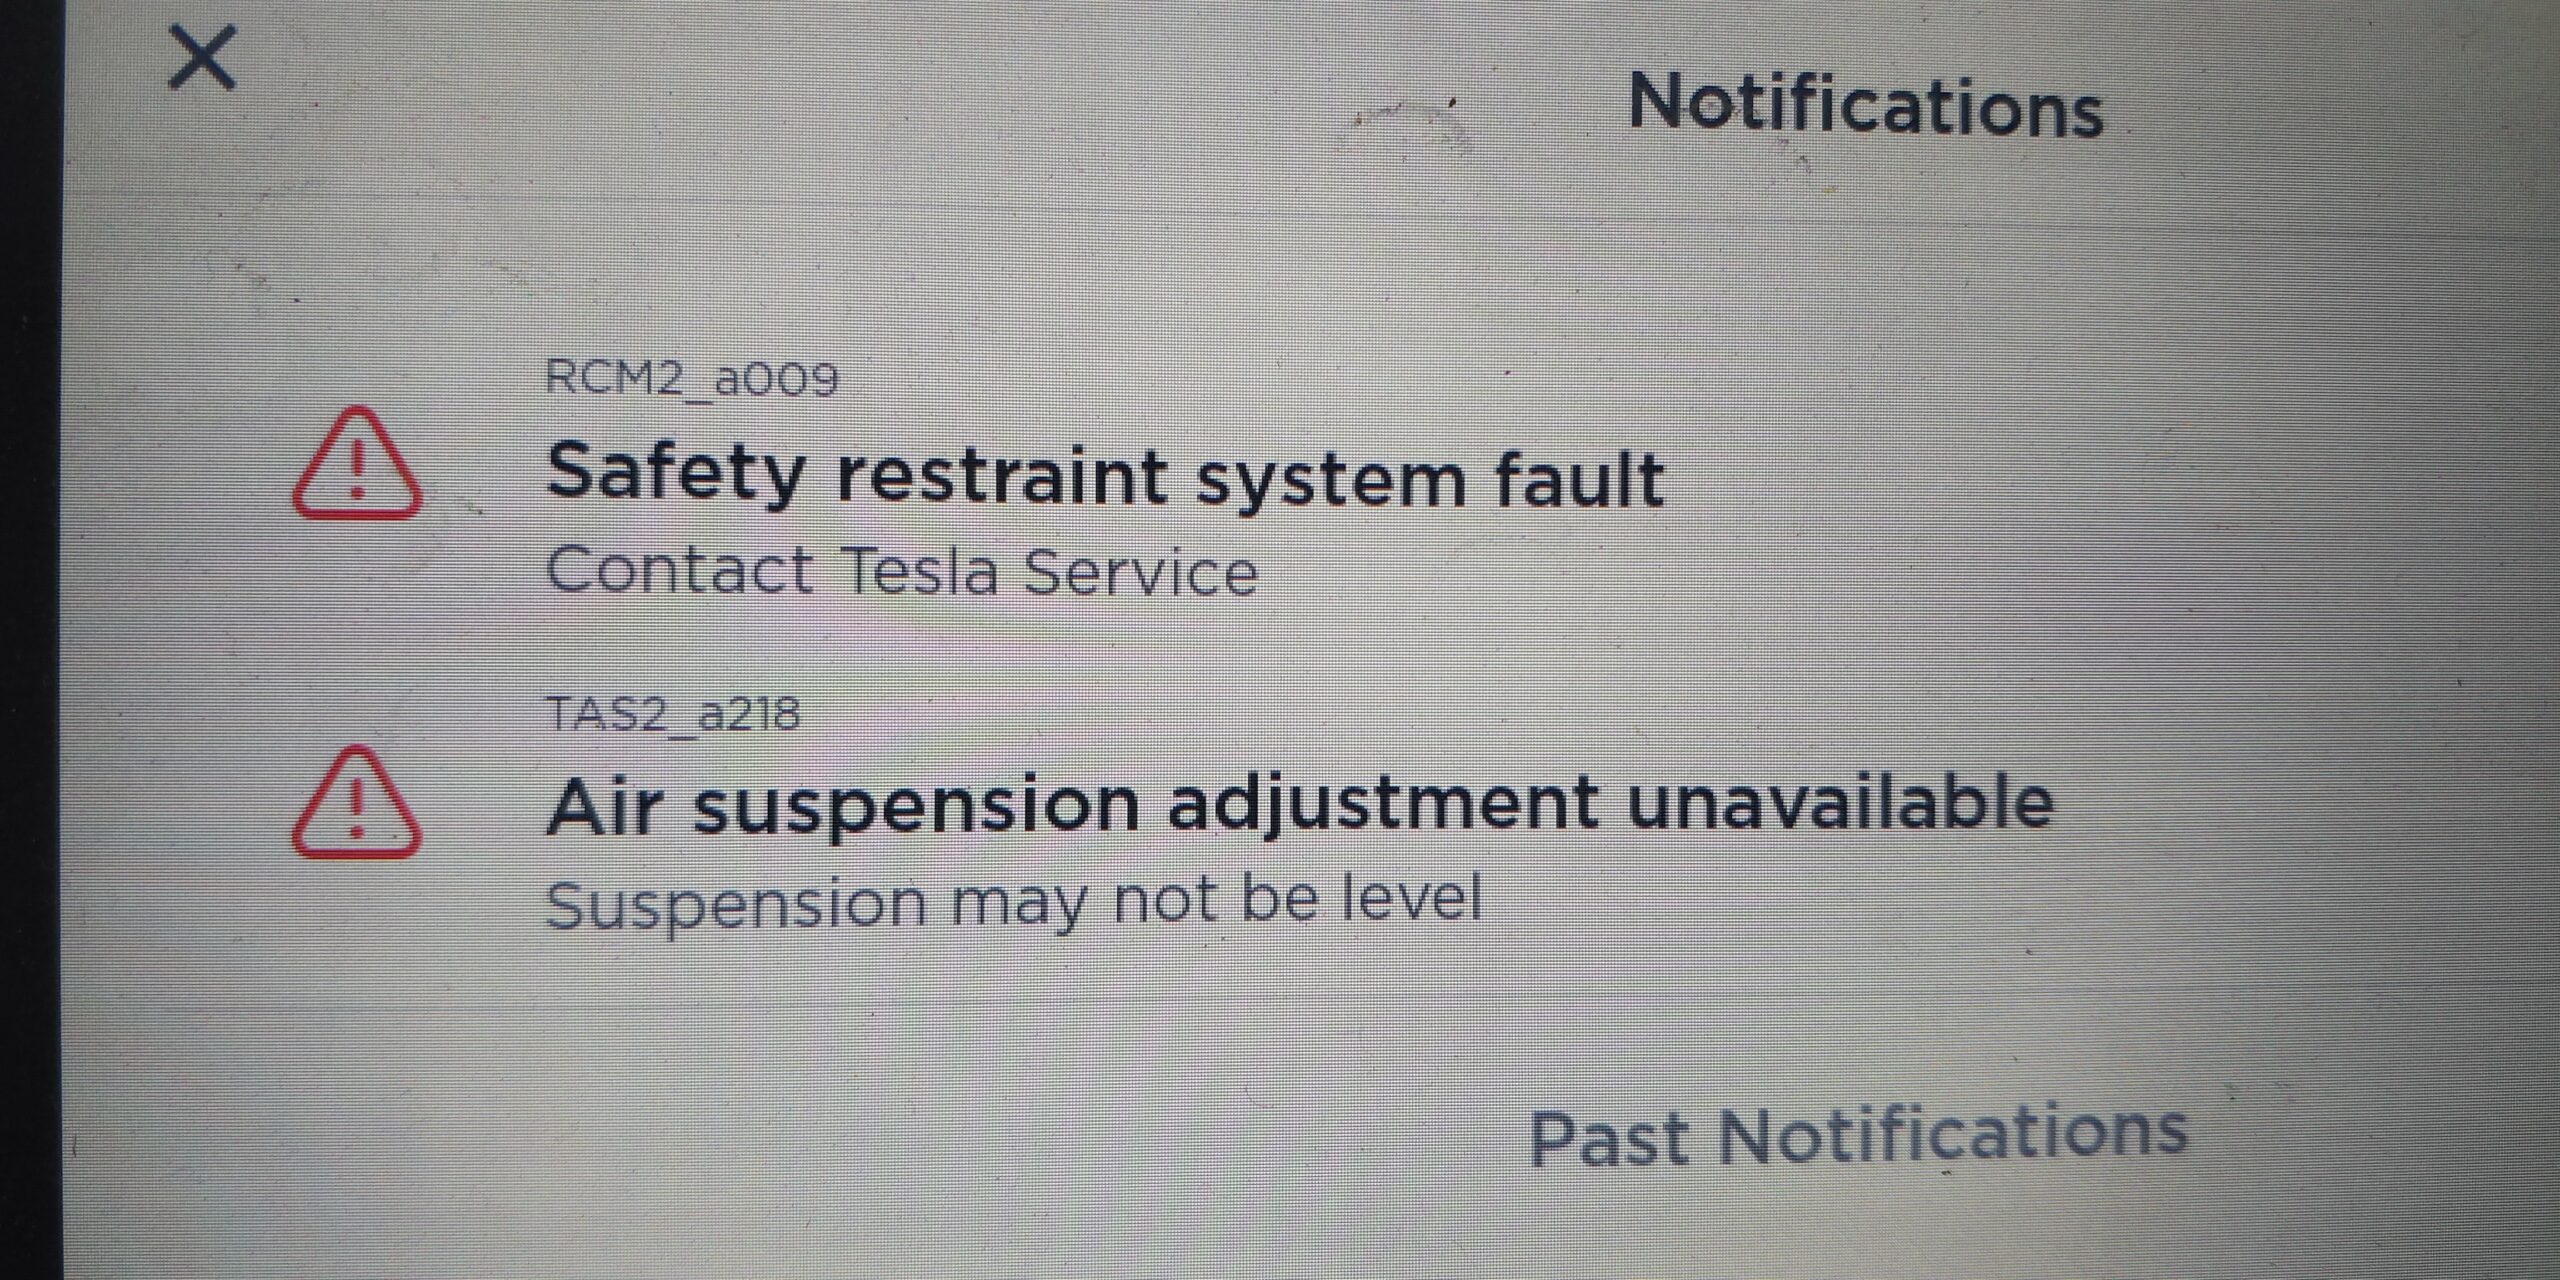
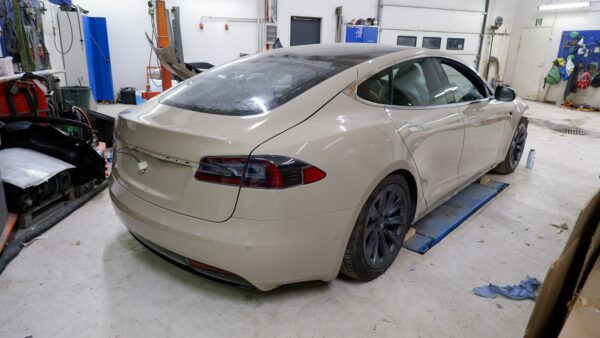
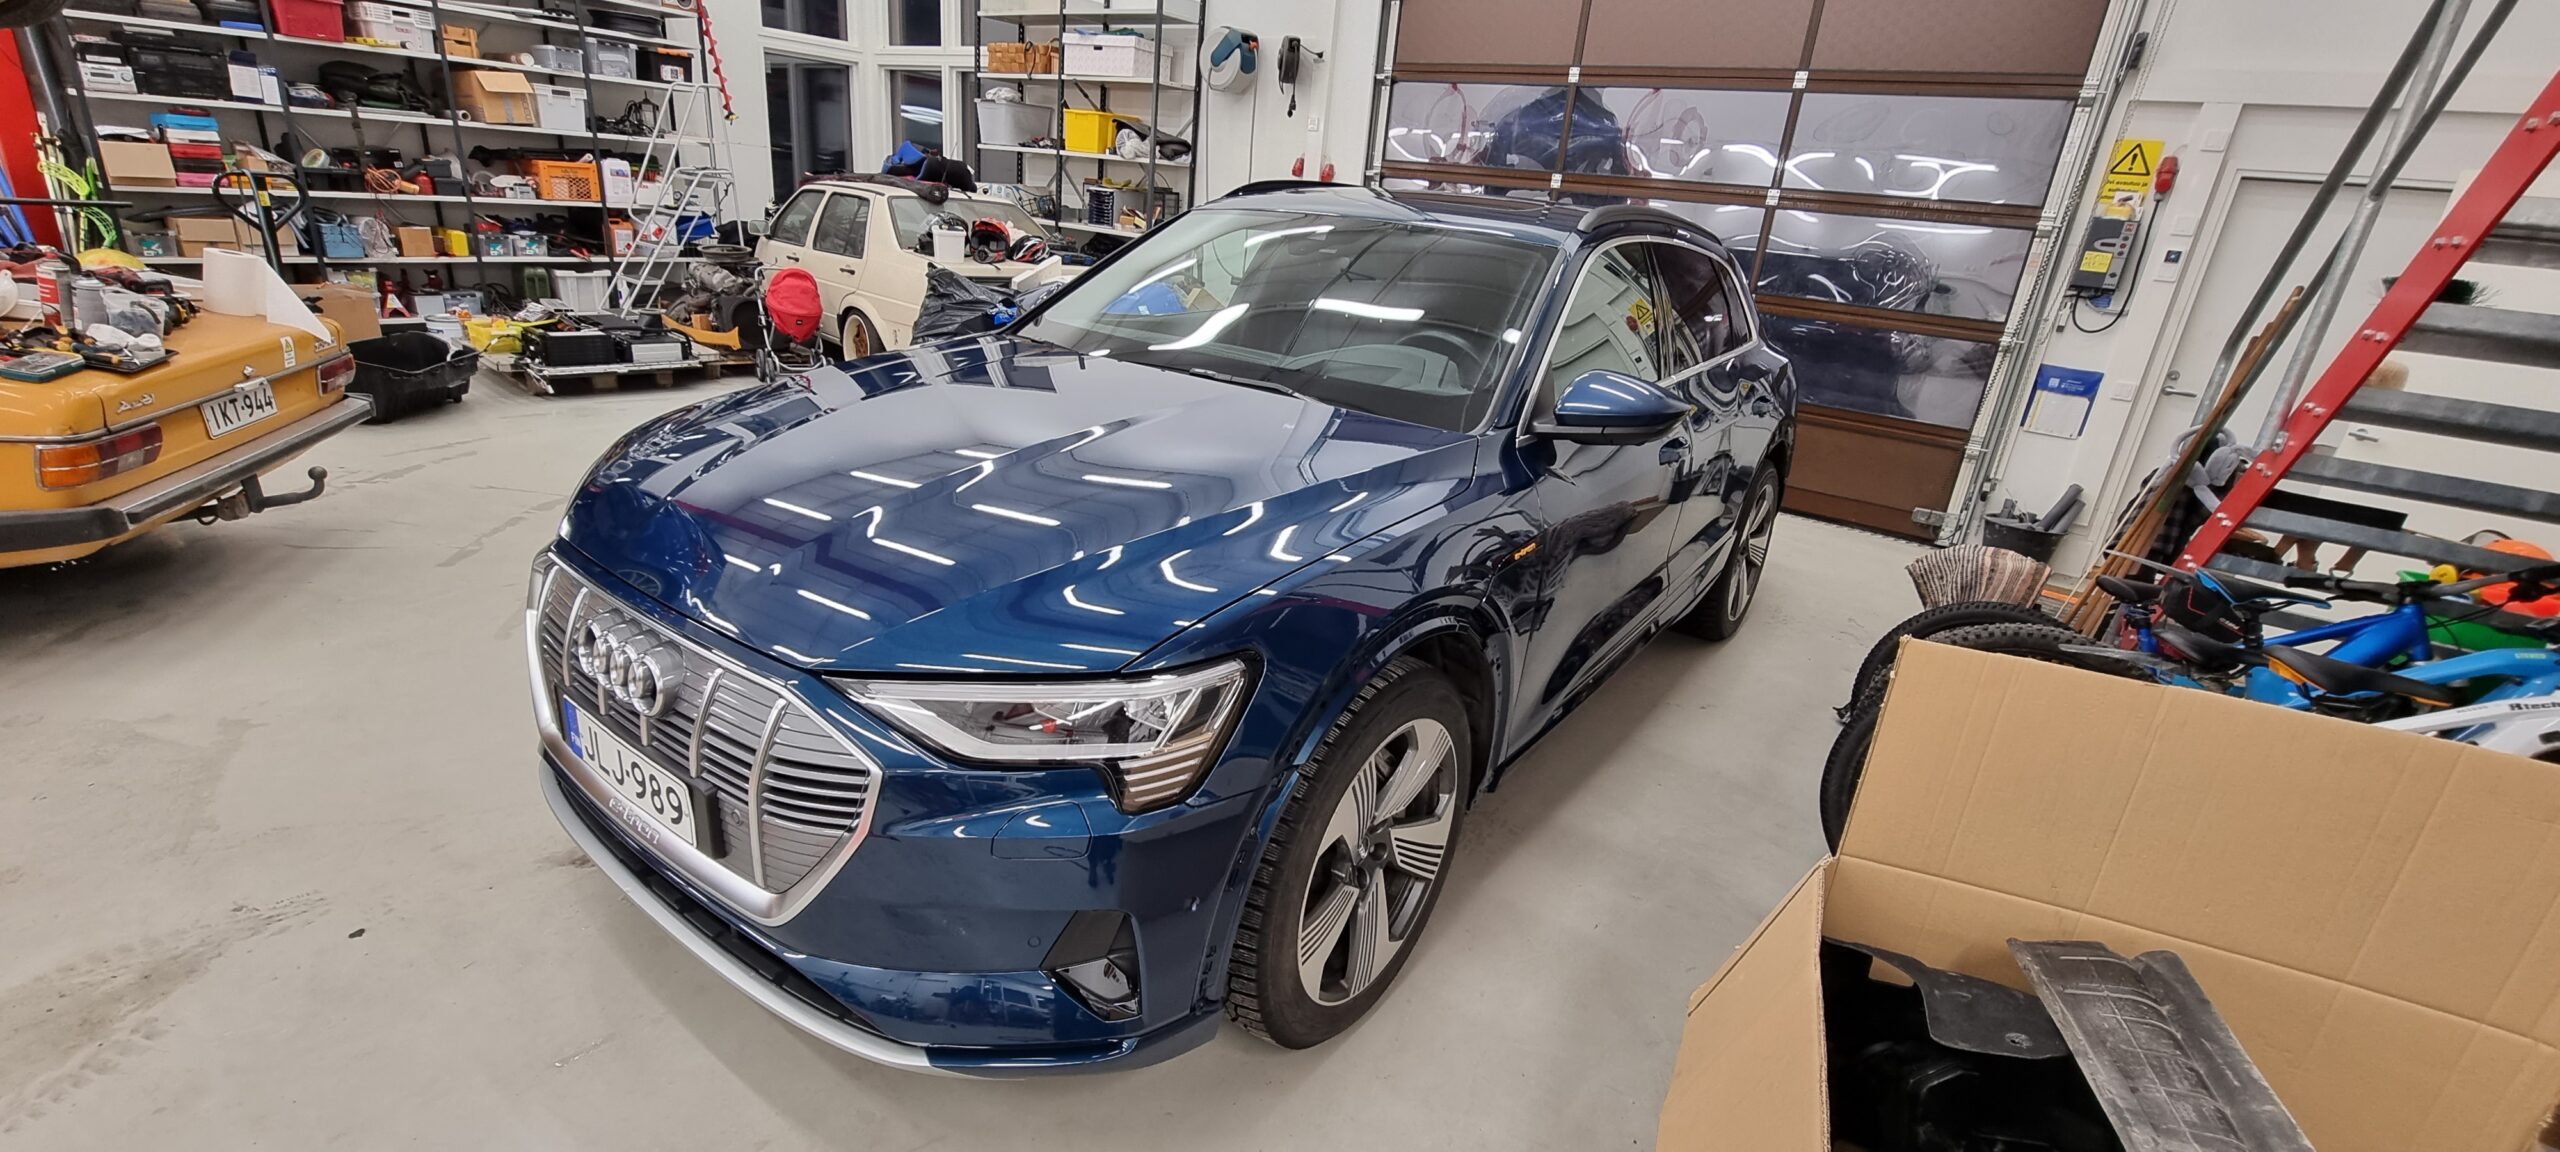
Näin parin kuukauden ajamisen jälkeen on tullut todettua, että e-tron on todella hieno laite. Kuluttaa hieman paljon sähköä, mutta muuten on kyllä mahtava peli. Pihasta kun valitaan Model S Teslan ja tämän välillä, niin lähes poikkeuksetta Audi siitä ensin aina lähtee. Moni asia on paremmin. Valot, penkit, ajettavuus, hiljaisuus nyt päällimmäisenä tulee mieleen. Ja lämmityslaitekin toimii kunnolla, toisin kuin Teslassa (jossa on jokin vika, mitä ei olla vielä saatu kuntoon). Yleinen laatufiilis on vaan paljon parempi. Toki joitain asioita on Teslassakin paremmin (lähinnä hieman enemmän tehoa ja näyttöjen käytettävyys joissain tilanteissa). Jos e-tronia mietit perheen sähköautoksi, niin suosittelemme lämpimästi.

RMX Forged ”paksu laihiksella” 22×10 ET27

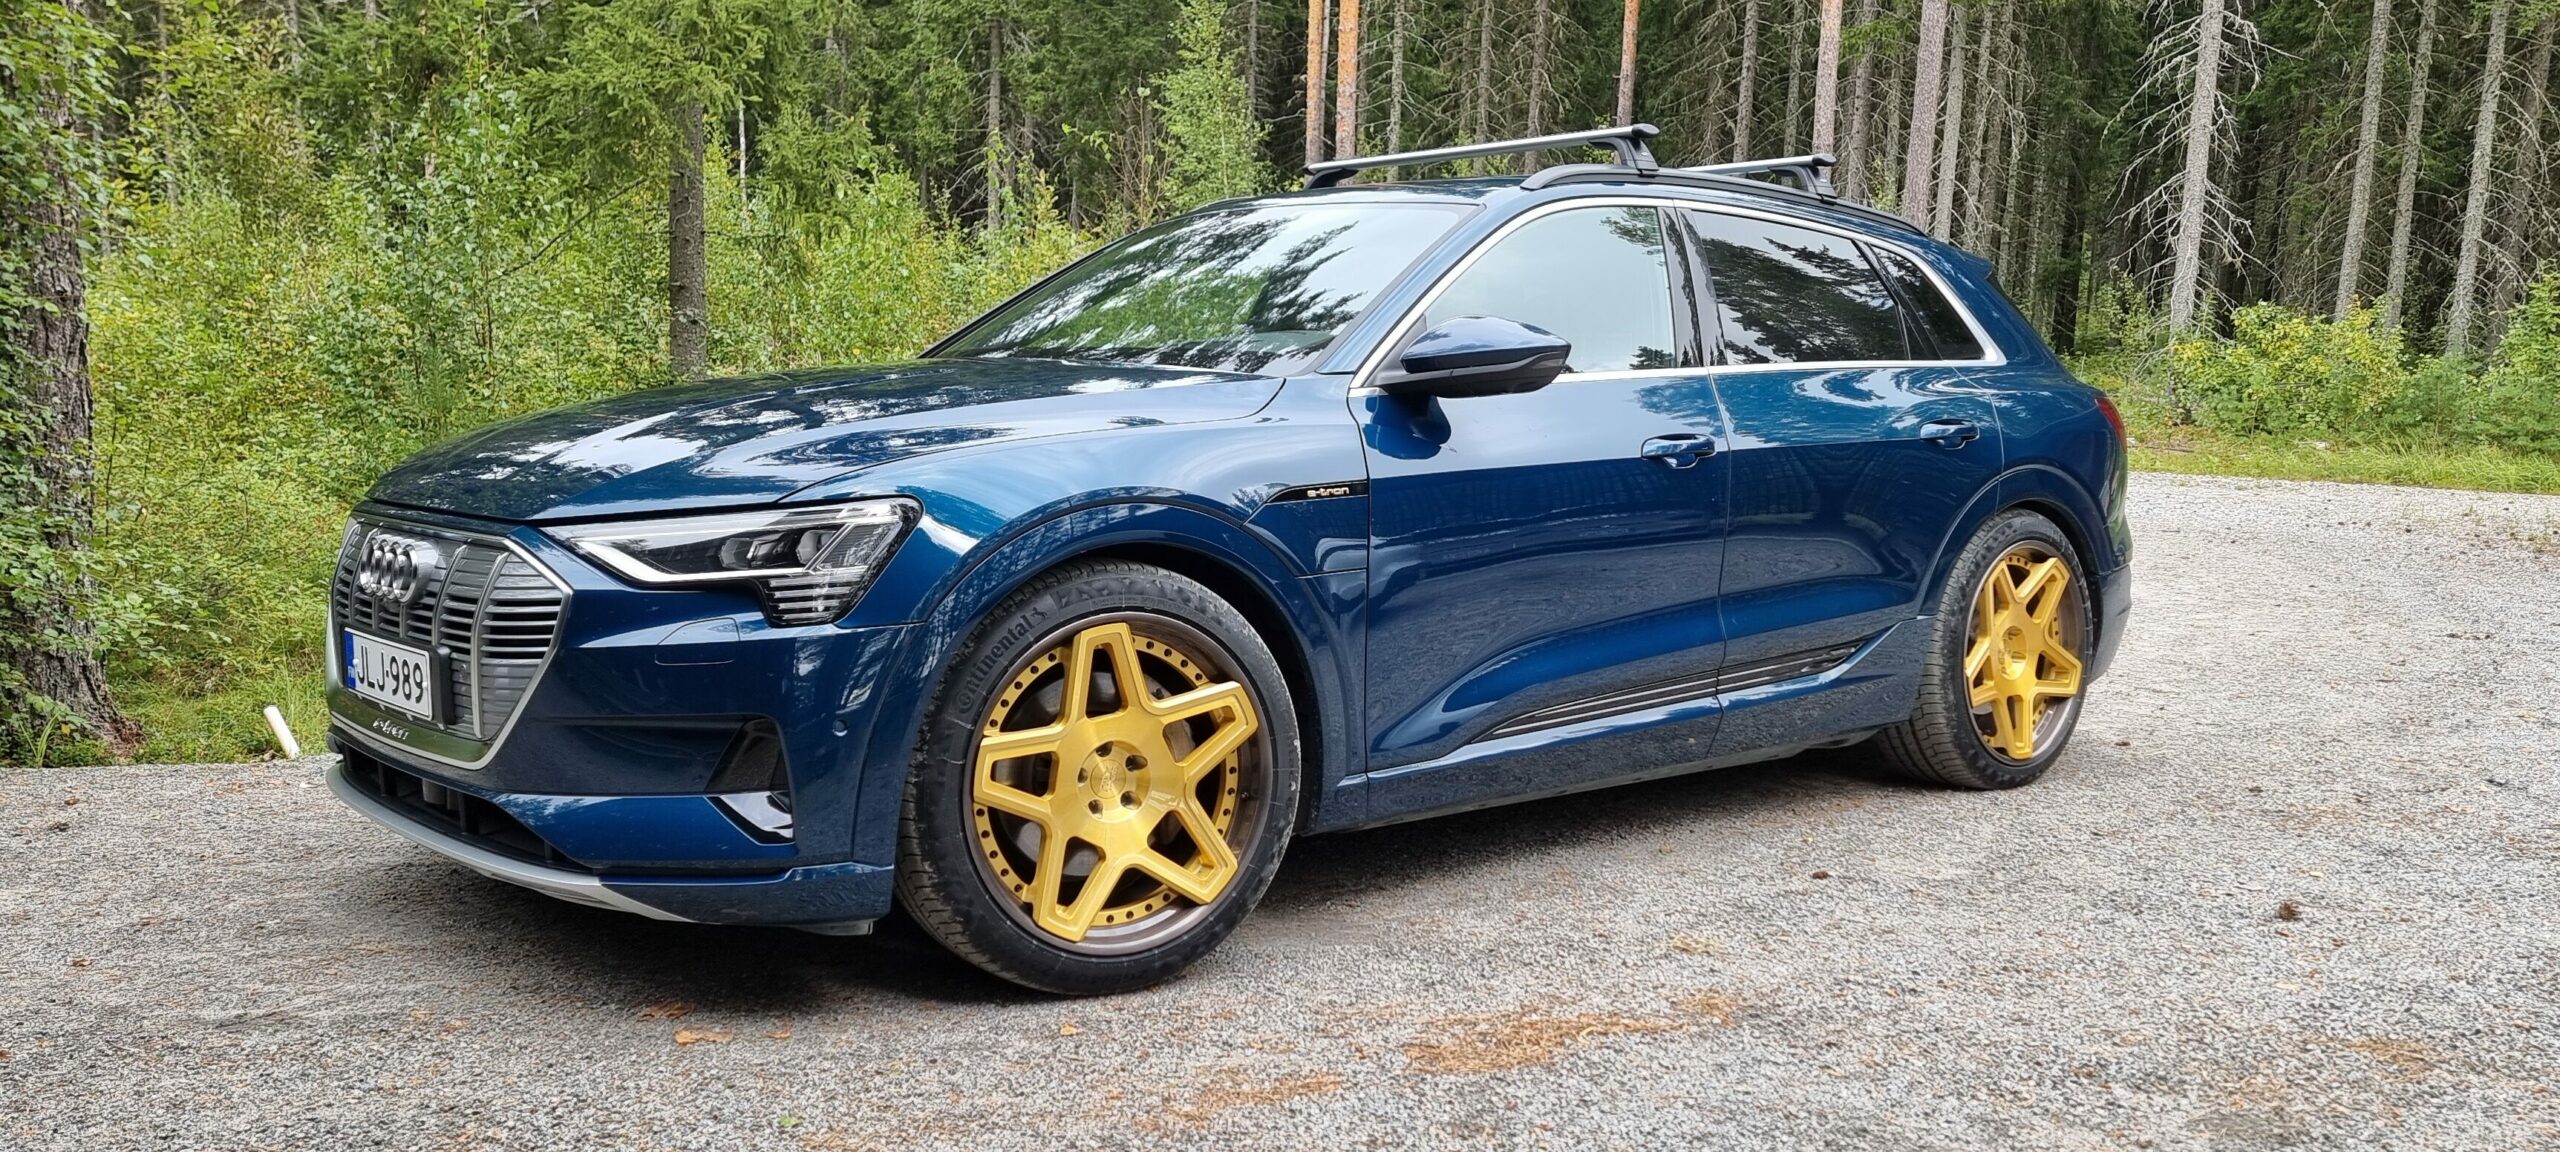
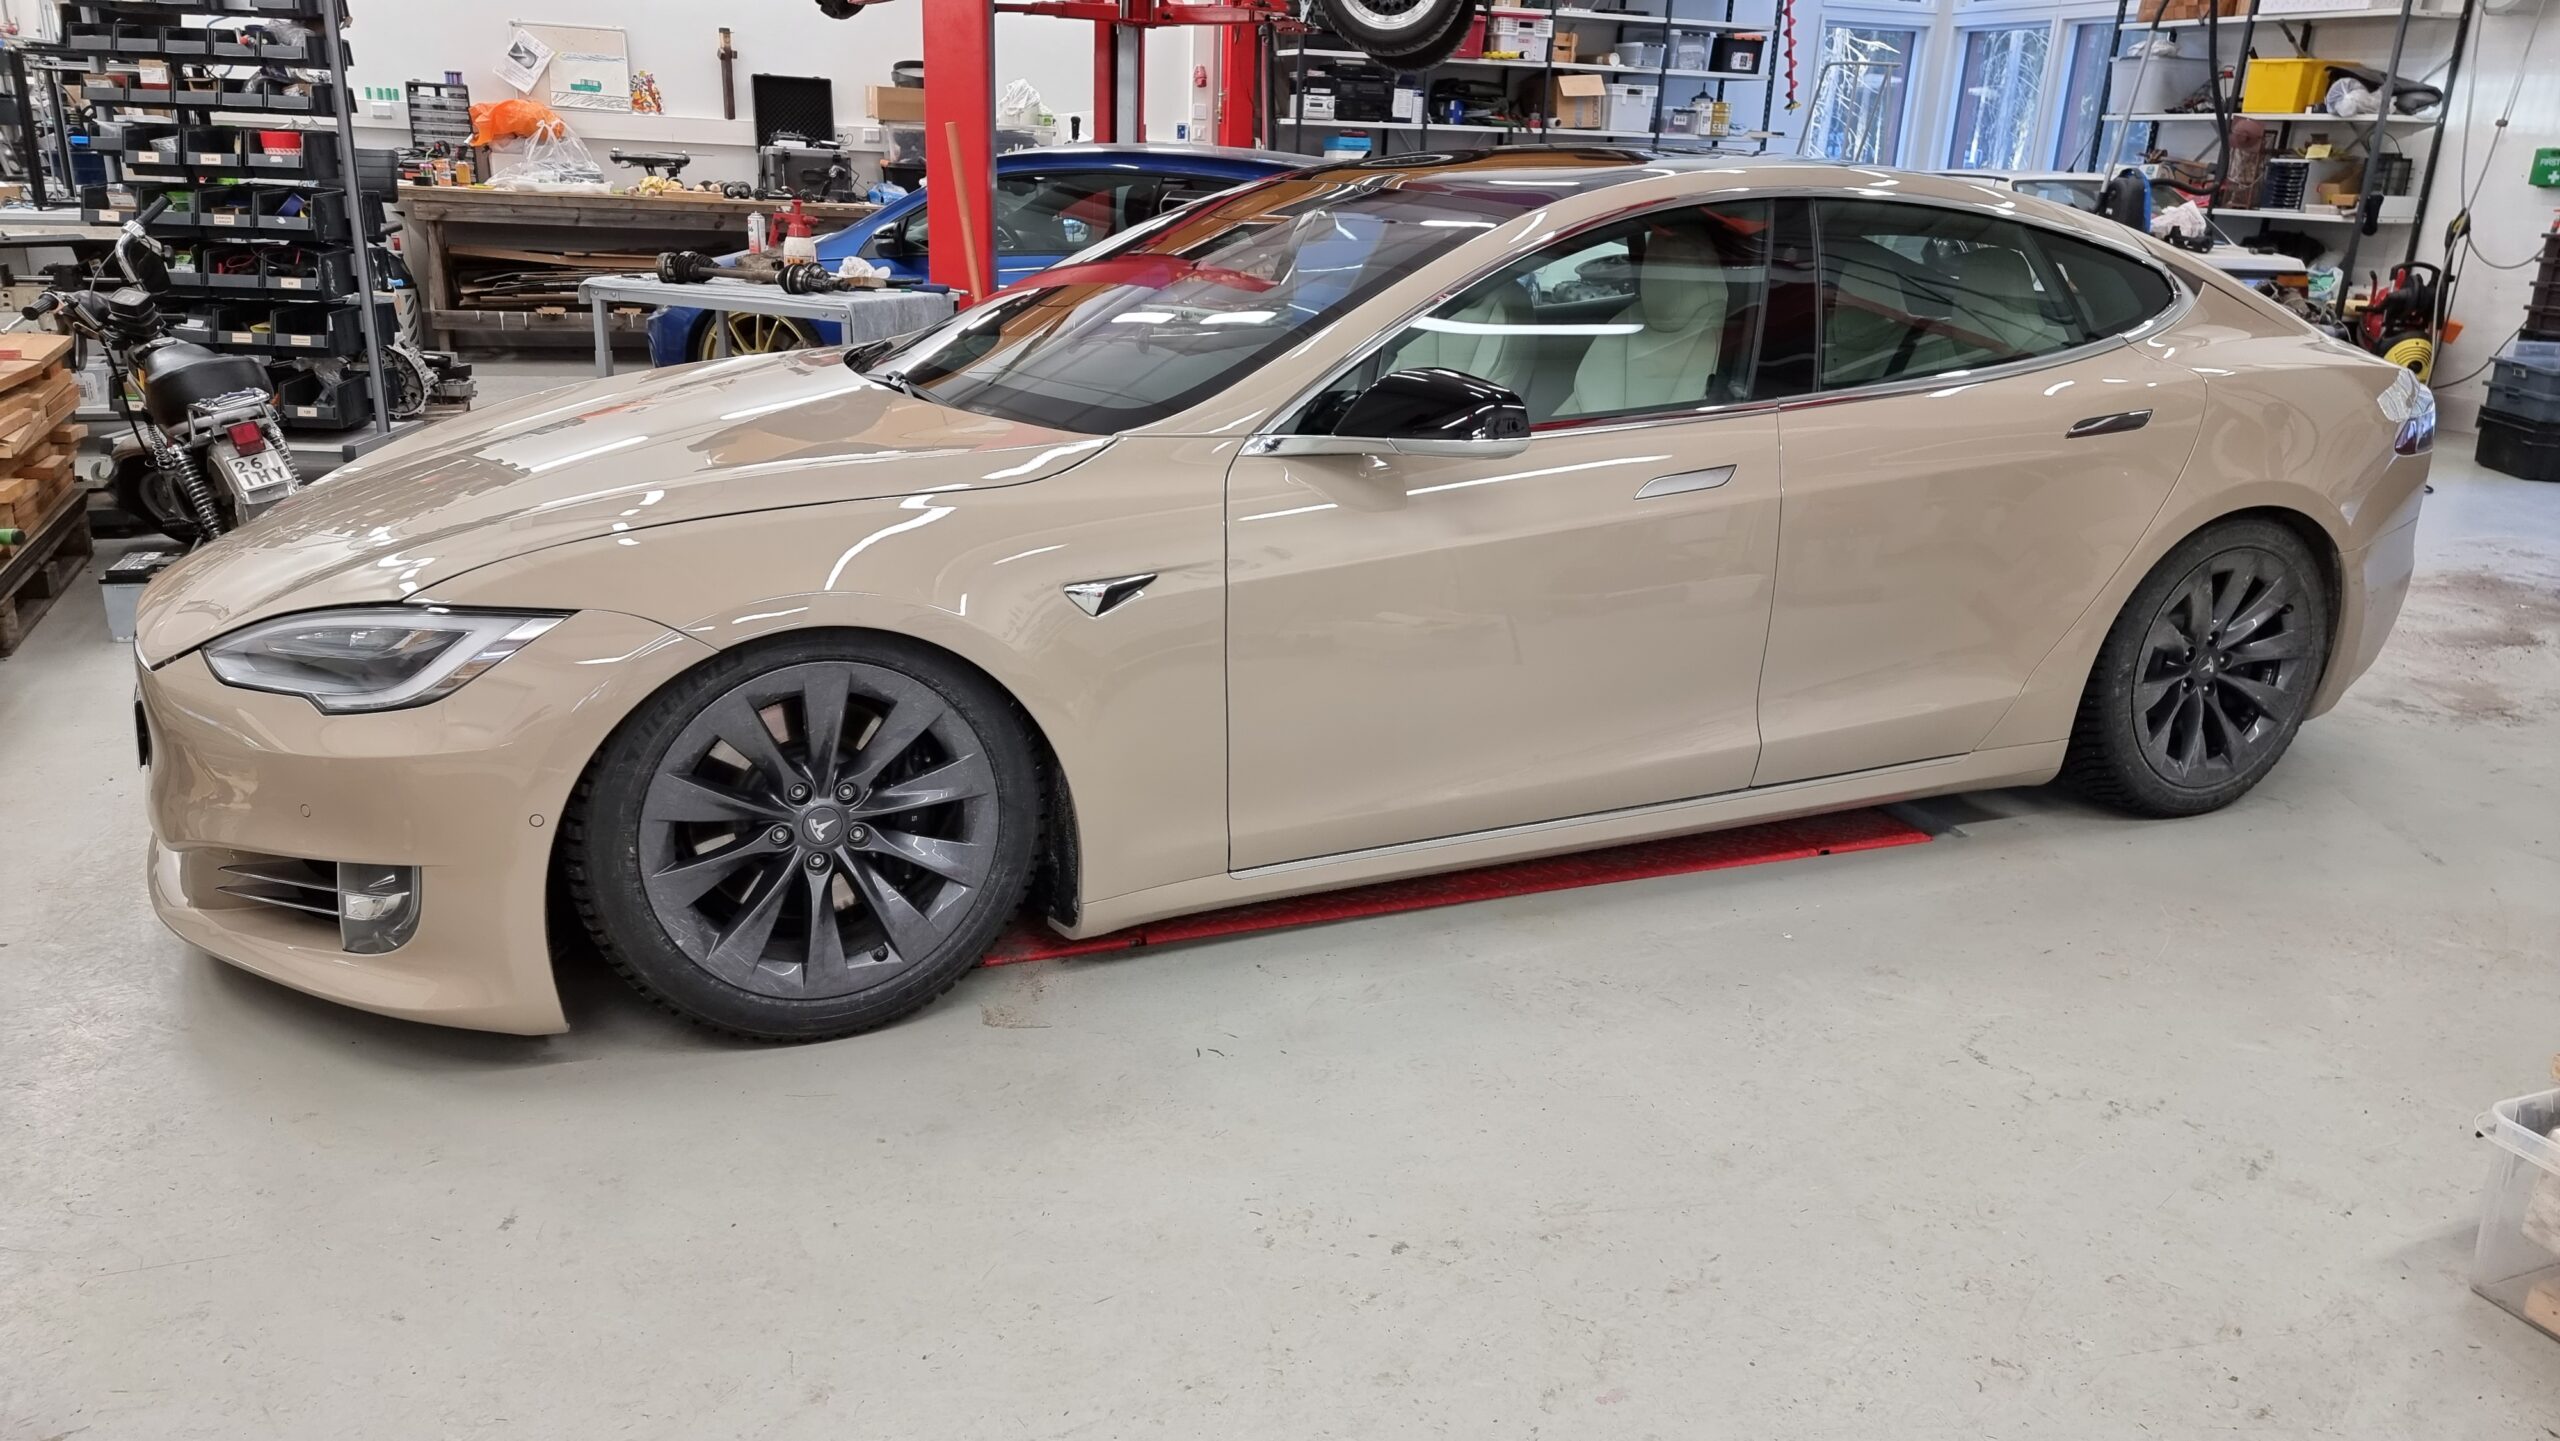
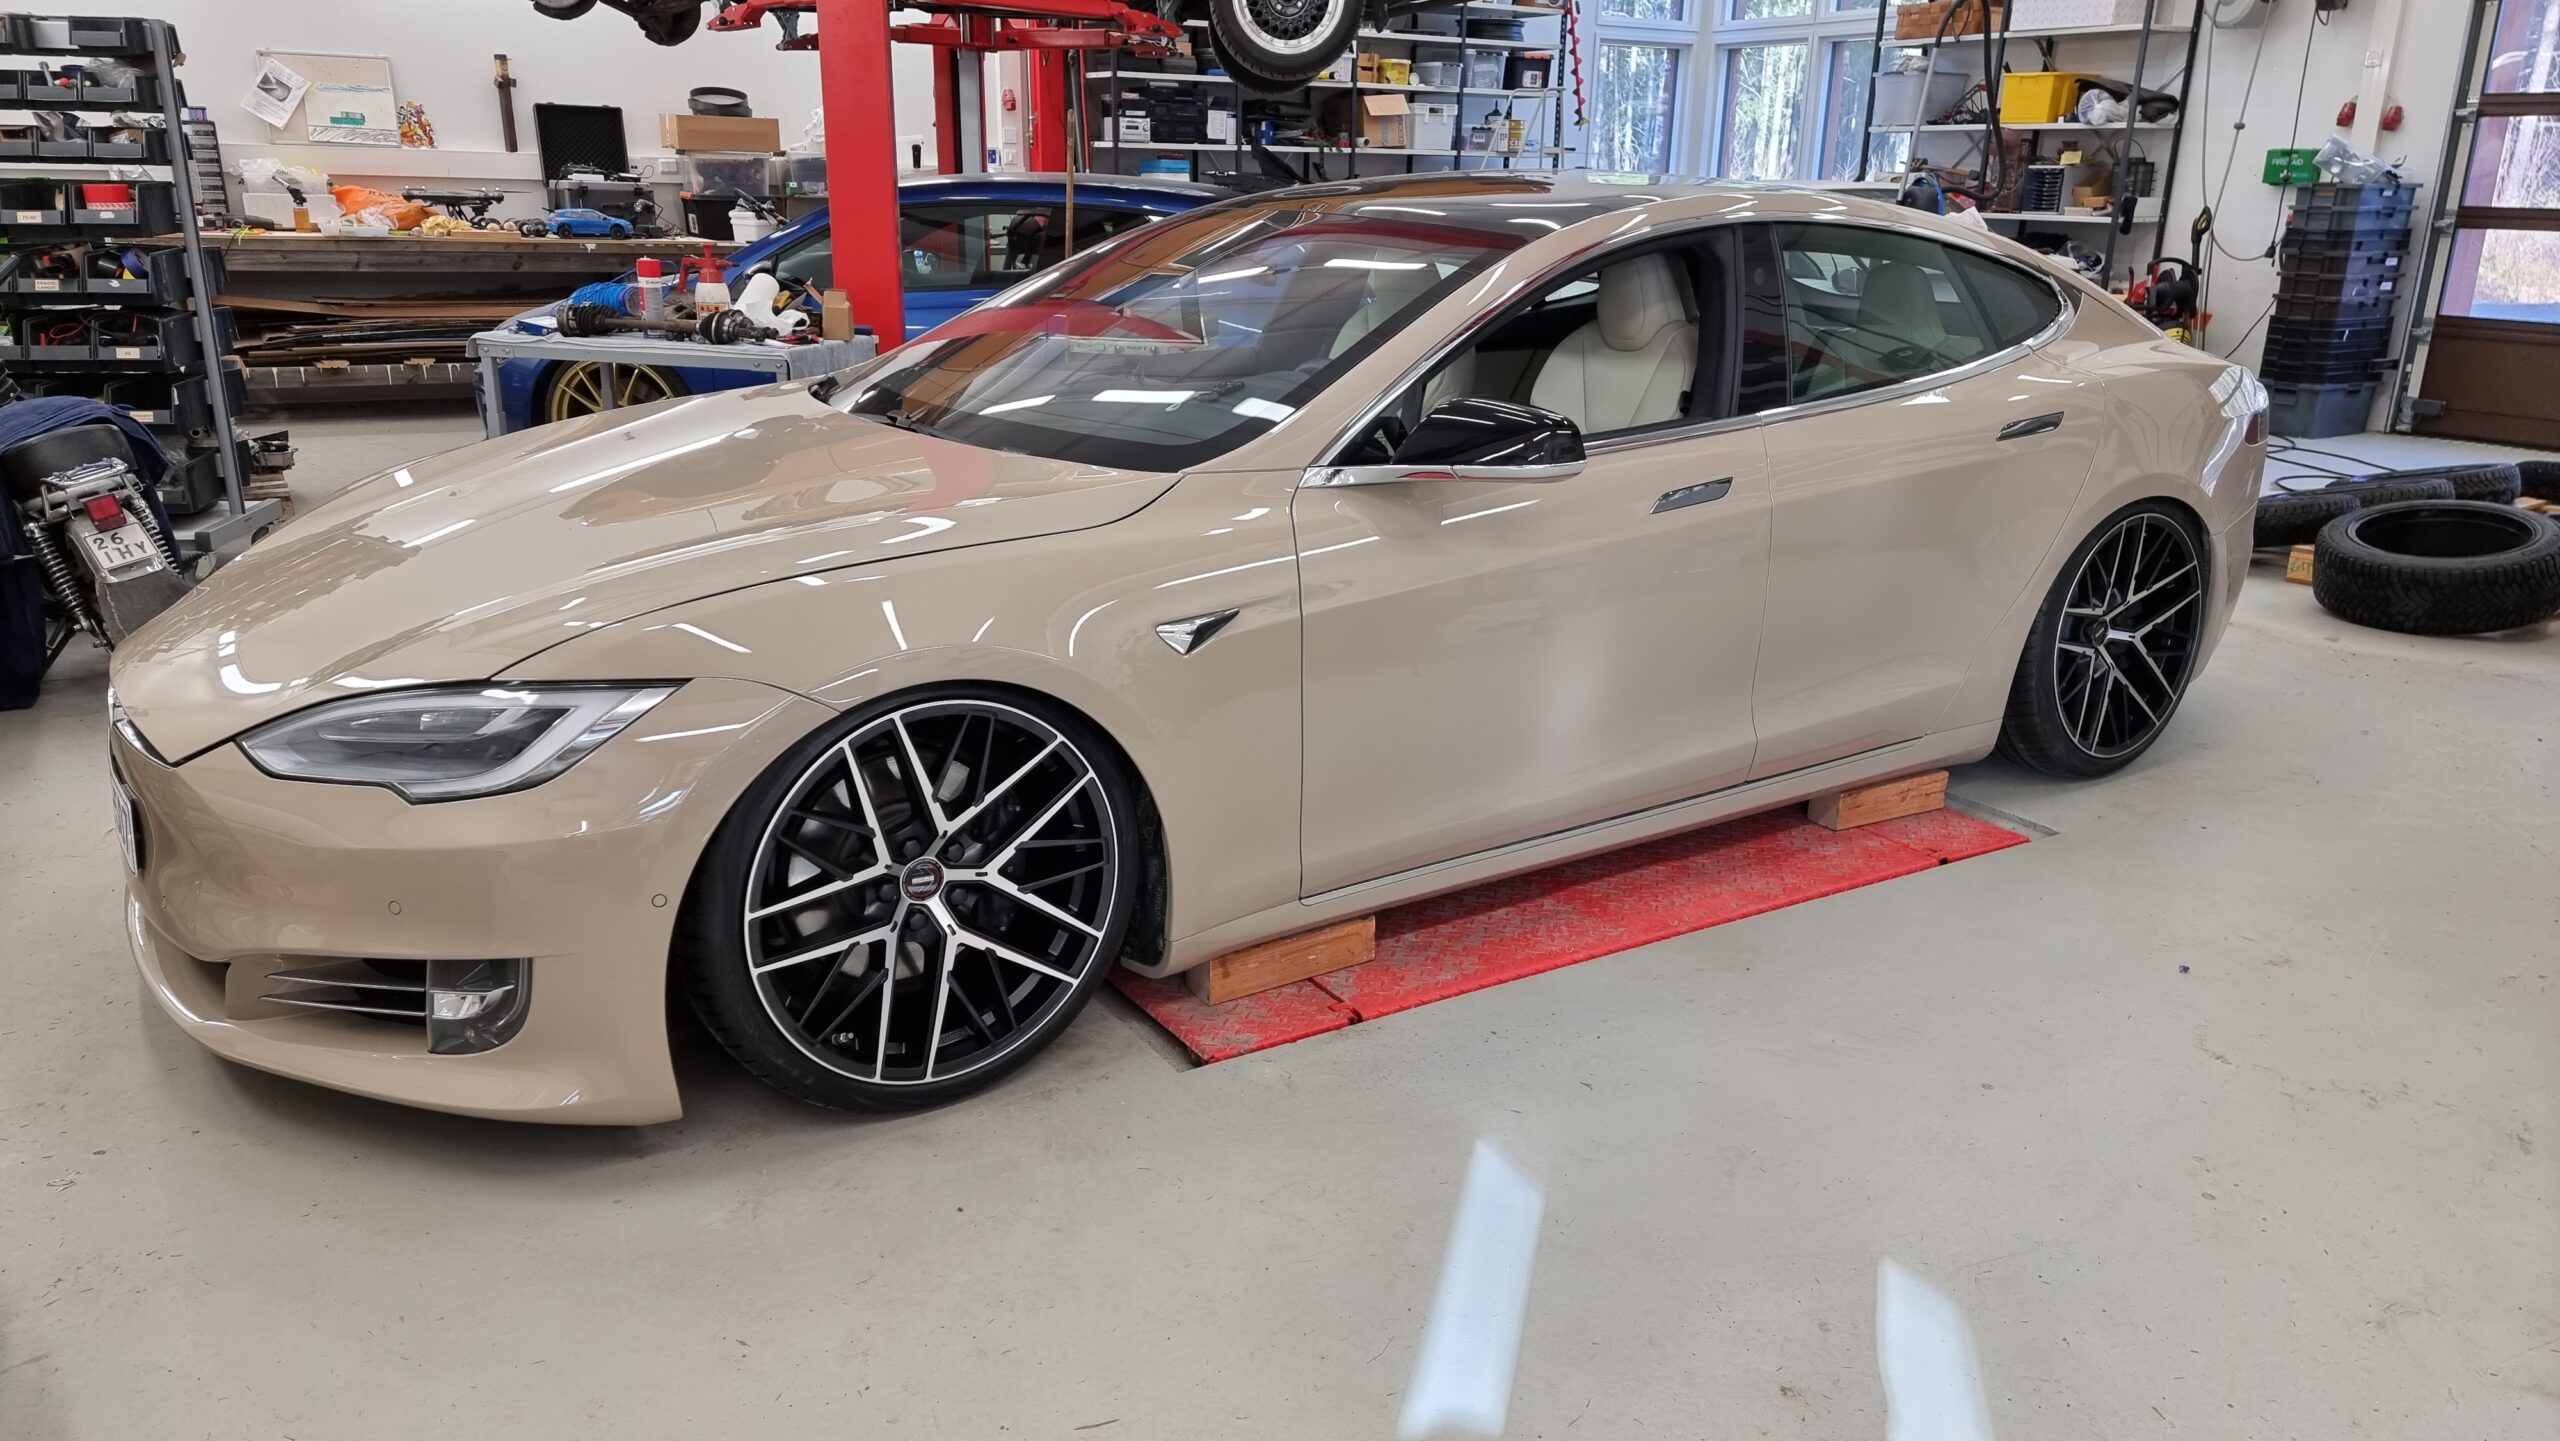
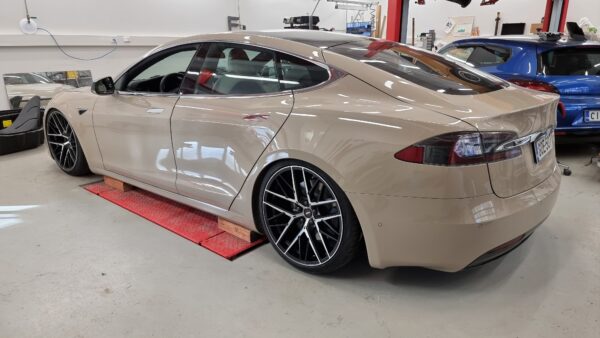
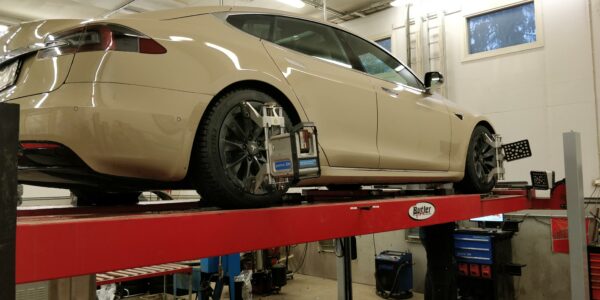
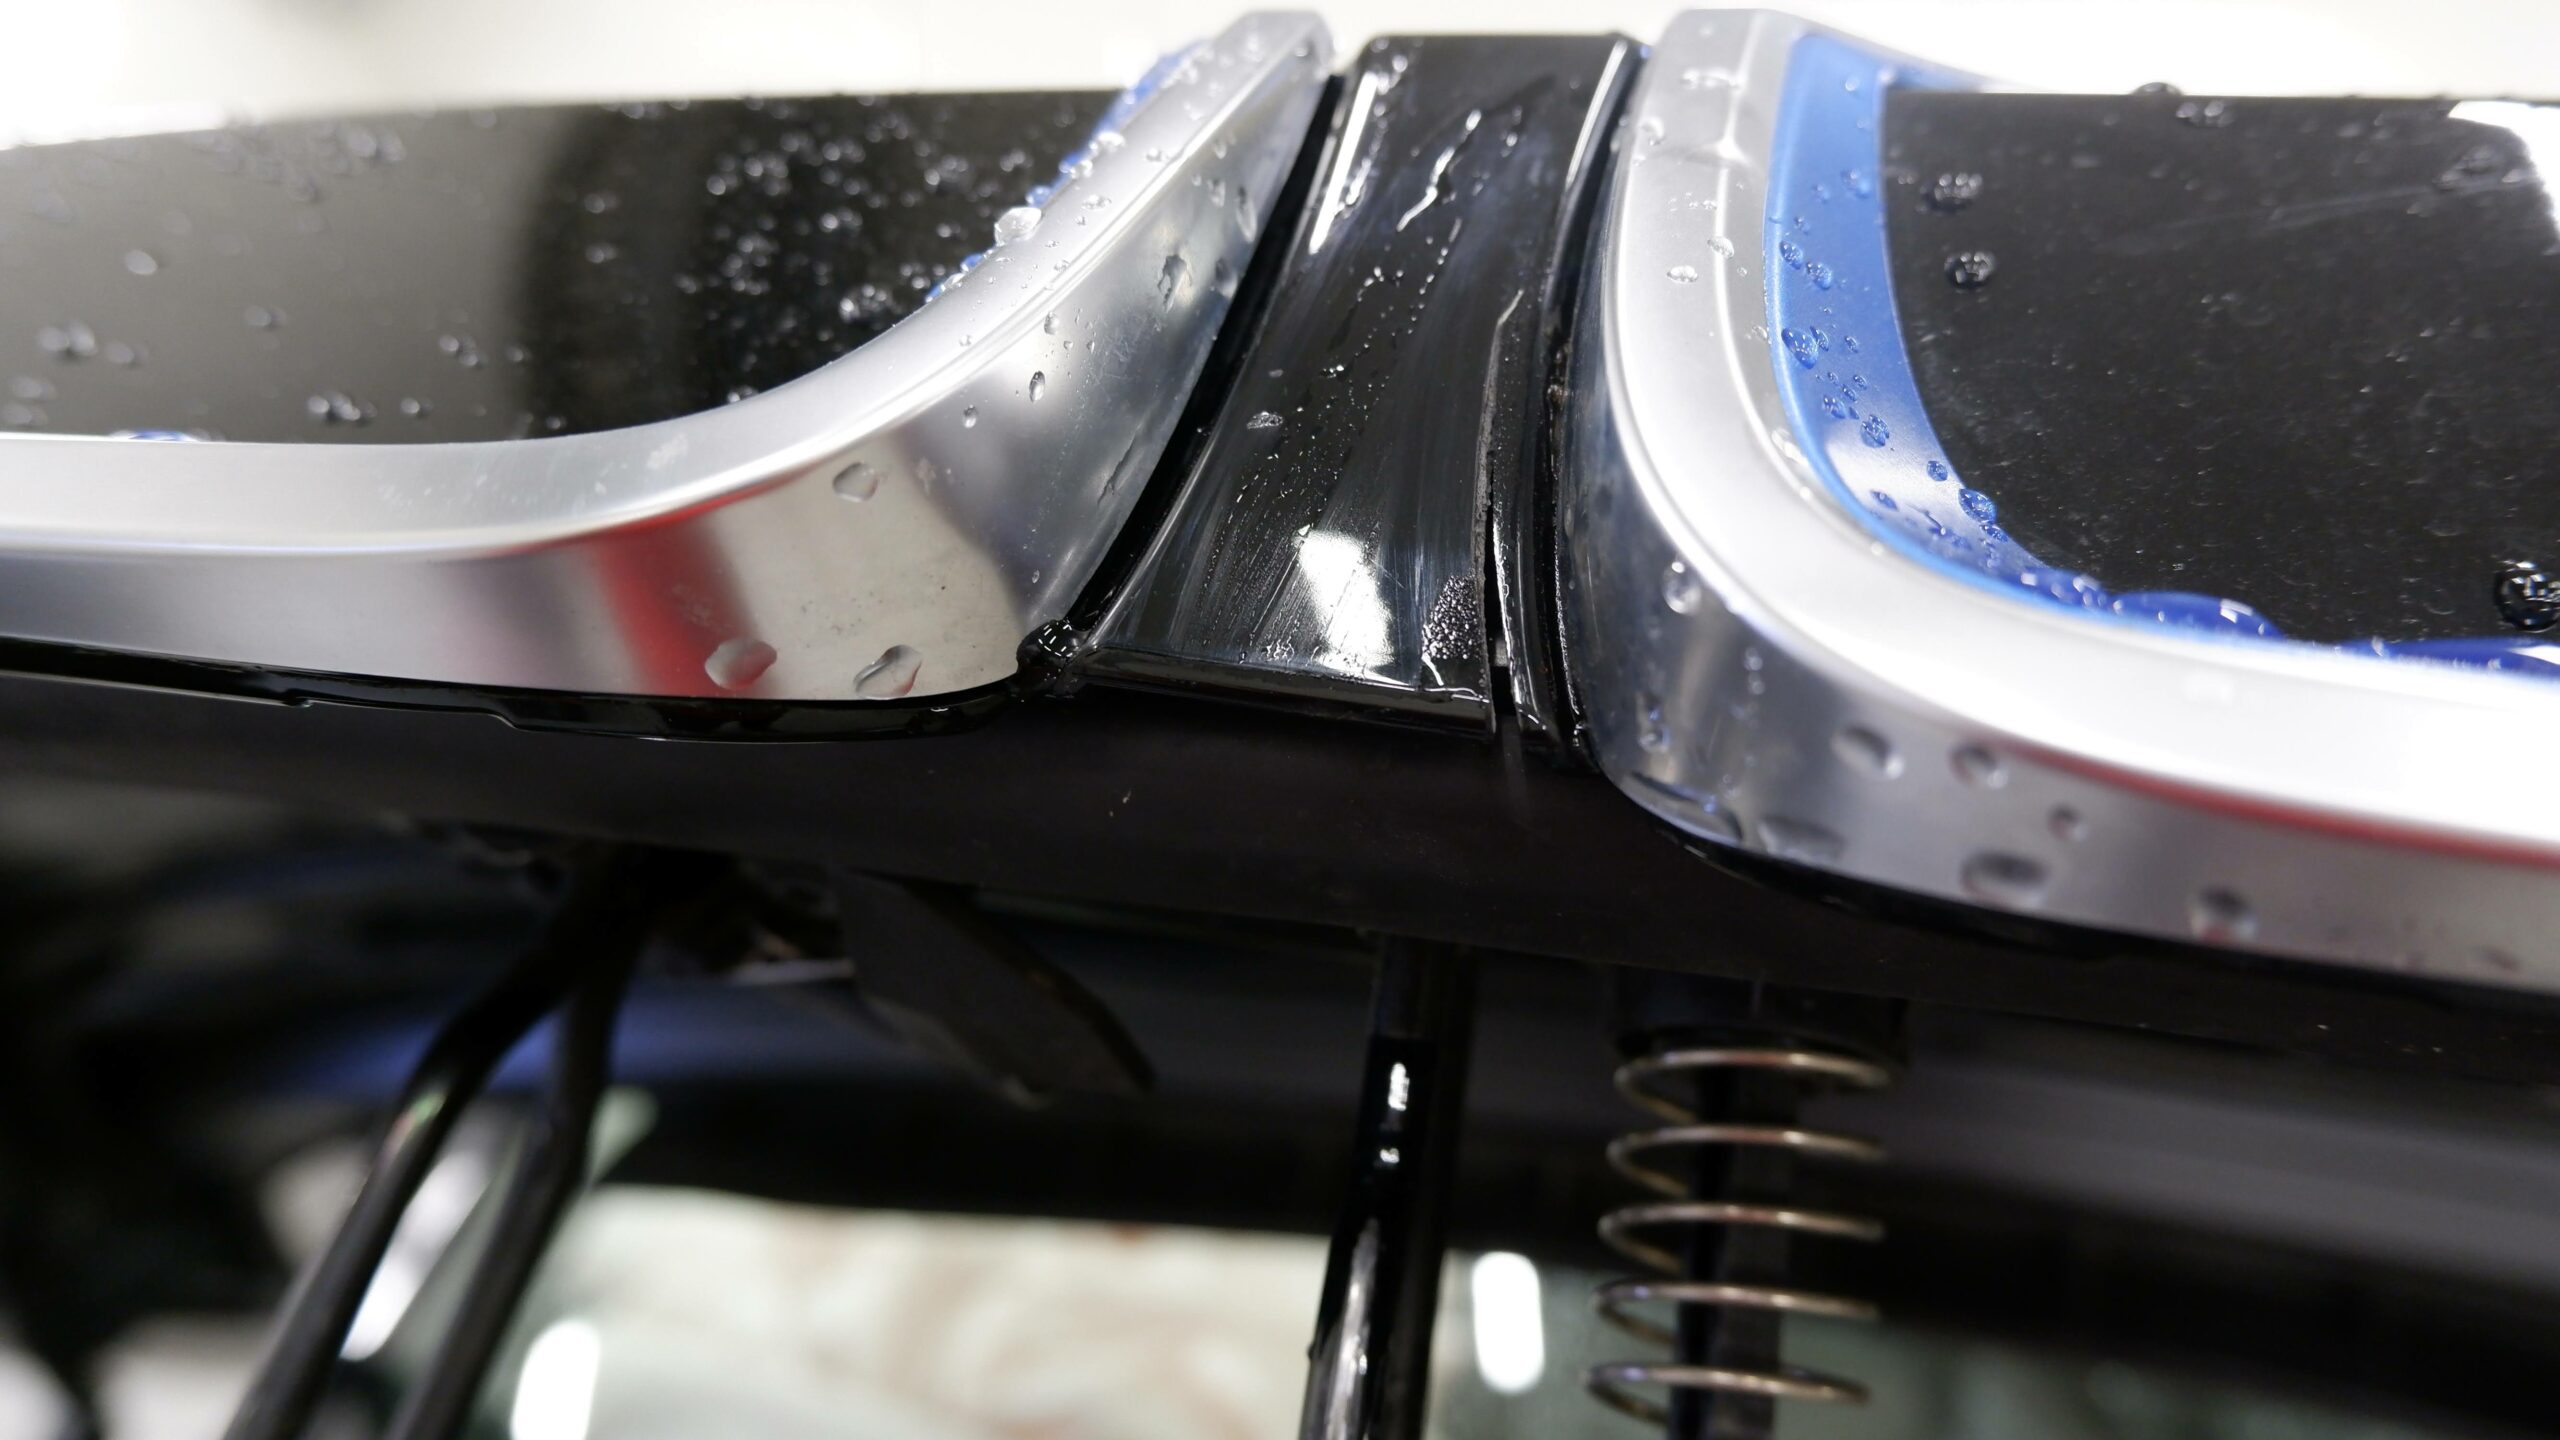
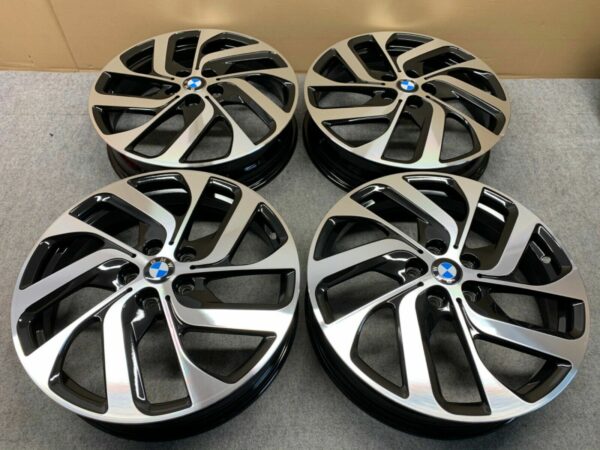
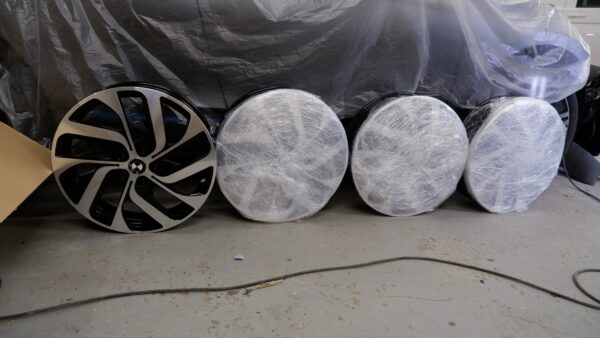
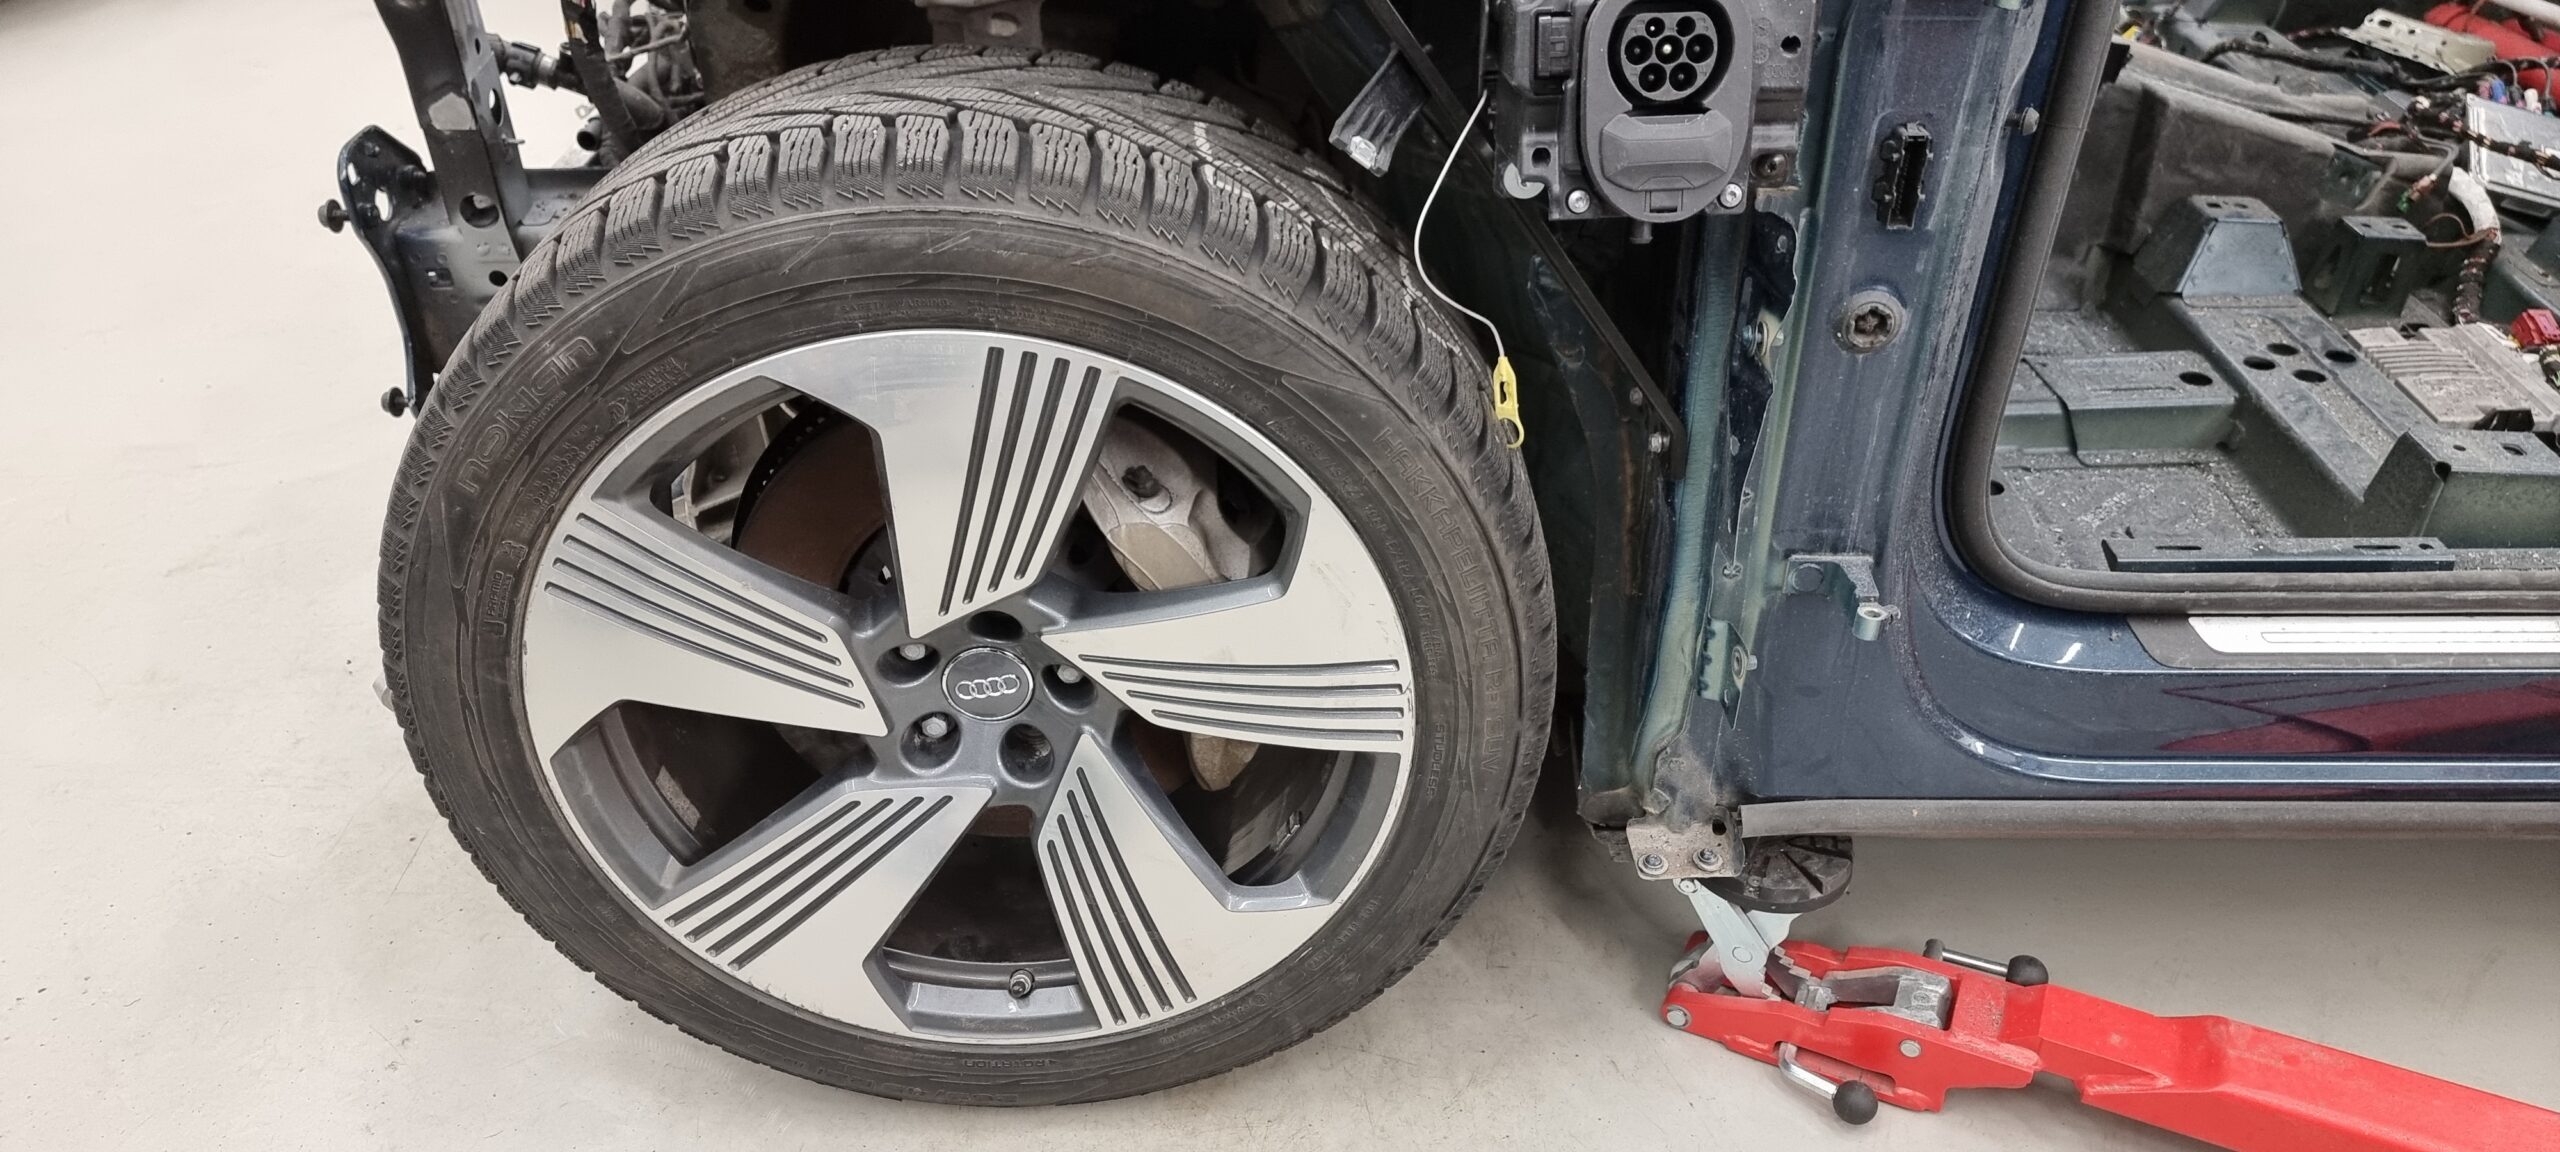
Loppukesästä 22 alle hommattiin alkuperäistä hiukan isommat vanteet. Vanteet toimitti RMX ja ne tehtiin mittatilauksena tähän autoon. Lähtökohtana oli RMX:n malli ”Paksu”, mutta niistä haluttiin vähän keveämmän näköiset, joten mallin työnimi oli ”Paksu laihiksella”.

Konan akkua tutkimassa

Hommasimme jo viime talvena Hyundai Kona -purkuautosta 64kWh akun, joka jäi sittemmin muiden kiireiden takia odottelemaan, mutta nyt joulun alla viimein saimme aikaiseksi perehtyä akkuun paremmin. Emme olleet kauheasti Konan akuista löytäneet tietoa netistä, joten pitihän sitä itse sitten selvitellä, mitä kaikkea näistä voisi rakentaa.

Akku on peräisin 2018-mallin n. 100 tkm ajetusta Konasta.

Auton muut osat ovat myynnissä Autokierrätys L&G:llä.

Akun kansi on kiinnitetty pulteilla ja muttereilla.

Konan akku on helppo purkaa. Peltinen kansi on kiinnitetty pulteilla ja muttereilla, eikä mitään liimoja ole käytetty lukuunottamatta akun päällä olevat kahdeksan pulttia, joiden läpiviennit on tiivisteen lisäksi suojattu massalla.

Tältä näyttää, kun kansi on pois päältä.

Peltikansi on helppo nostaa pois ja alta paljastuu tiivis nippu pussikennoista kasattuja moduuleita. Akun etuosassa on varattu tilaa elektroniikalle ja takana, takapenkin alla on akkumoduuleita kahdessa kerroksessa. Moduulien ja peltikannen välissä on styroksikappaleita suojana.

Etuosan elektroniikkaa ja jäähdytys-/lämmitysputkistoa

Etuosasta löytyy akun BMS master, kaksi BMS slave-moduulia, kontaktorit ja muuta akussa tarvittavaa elektroniikkaa ja lisäksi akun jäähdyttämisessä ja lämmittämisessä käytettävä glykoliputkistoa. Putkisto haarautuu kolmeen eri piiriin, joista reunimmaiset kiertävät myös takaosan päällekäin olevien moduulien kautta. Kuvissa näkyy myös akun reunoilla oleva tiiviste, joka on erillinen uusittavissa oleva komponentti. Paljon mukavampi huoltaa kuin esim. Tesla Model S:n akku, joka on liimattu kiinni.

BMS master
Kaksi BMS slavea ja kannen alla kontaktorit
Reunimmaisista moduuleista jäähdytyskierto jatkuu takaosan päällekäin oleville moduuleille.
Takana akun päällä on sulake ja huoltoerottimen liitin.

Akku koostuu yhteensä kymmenestä moduulista, joista aina kaksi on niputettu yhteen. Näillä ”moduulipareilla” on yhteinen jäähdytys ja slave-BMS, jotka taas ovat yhteydessä master-BMS:ään.

Mittasin moduulin jännitteen, tässä tapauksessa 38,4V eli selvästi yli puolillaan. Auton oman mittariston mukaan n. 70%. Akkumoduuli on 3p10s eli siinä on yhteensä 30 kennoa, joissa on aina kolme rinnan ja näitä ”minimoduuleita” 10 sarjassa.

Jäähdytysputket kiinnittyvät pikaliittimillä akkumoduulien alla oleviin jäähdytyslevyihin.
sähkö siirtyy ”lattakaapeleita” pitkin moduulilta toiselle.
Yhdessä johtimessa on tällainen ”sulake”.

Yllä olevassa kuvassa on ensimmäinen moduuli siirretty trukkilavalle. Vielä tässä kohtaa en huomannut, että takimmaiset, poikittain olevat moduulit ovat aavistuksen pienempiä kuin pitkittäin olevat. Ne koostuvat kahdesesta eri kokoisesta moduulista, 3p10s ja 3p9s. Yhteensä autossa on siis kahdeksan 3p10s -moduulia ja kaksi 3p9s -moduulia.

Yksi tällainen moduuliparipainaa n. 70 kiloa.

Moduuliparin moduulit on kytketty toisiinsa ”silloilla”.

Moduuliparien välillä kulkee myös BMS:n tarvitsema tieto kennojen jännitteistä. Molemmilla puolilla moduuleita kulkee ”väylä”, eli käytännössä kennojen navoilta vedetyt johdot slave-BMS:ille.

Moduulit irrallaan jäähdytysalustasta

Moduulit ovat muutaman pultin lisäksi kiinni jäähdytysalustassa lämpöä johtavalla massalla

Näitäkin voinee ostaa erikseen.

Purin yhden moduulin ihan mielenkiinnosta. Moduuli on nipussa ylä- ja alareunaa kiertävän metallikehikon avulla. Moduulien päissä on alumiiniset vahvikelevyt, se on puristettu kasaan ja sitten kasattu napoihin ”väyläpiirilevyt”, joiden avulla navat kytketään toisiinsa, sekä saadaan kuljetettuja kennojen jännitetieto BMS:lle. Kaikki on kasattu M5-pulteilla, mikä tekee kennojen jatkohyödyntämisen melko helpoksi.

Tämä moduuli koostuu yhdeksästä ”minimoduulista”, joissa kussakin on kolme kennoa rinnan kytkettynä.

Kolme rinnan kytkettyä kennoa on hitsattu toisiinsa kiinni, eli niitä ei ole järkevää enää purkaa erikseen.

Kukin kenno 218Wh.

Yksittäiset kennot ovat tässä tapauksessa LG:n valmistamia 218Wh kennoja. Kennoja on yhteensä 8*3*10+2*3*9=294 ja akun kapasiteetti siis 64092Wh. Moduulit ovat kapasiteetiltaan 6,54kWh ja 5,89 kWh. Yksi 6,5kWh moduuli painaa henkilövaa’alla mitattuna karvan alle 34kg.

Itse akkumoduuleissa ei ole ”älyä”, vaan niistä jännitetiedot kulkevat johtimia pitkin moduuliparin omalle BMS:lle. Liittimiä on montaa erilaista – uusiokäytössä kannattanee hyödyntää akusta purettuja johtosarjoja, jos ei onnistu löytämään jostain näiden ERNI:n valmistamien liittimien tyyppejä. Käytännössä siis kun kaksi moduulia on kytketty yhteen, pystyy jommasta kummasta päästä moduulia mittaamaan kahden peräkkäisen moduulin lähes jokaisen 3P-kennoryhmän jännitteen. ”lähes” siksi, että muutamaa keskellä moduulia olevaa kennoa eri pysty erikseen mittaamaan. Tai en ainakaan omissa nopeissa mittauksissani ihan joka kennon jännitettä liittimistä onnistunut löytämään.

Lämpötilatietoja mitataan varsin kitsaasti. Neljässä moduuliparissa on kussakin yksi lämpötila-anturi, yhdessä ei siis lainkaan. Lisäksi glykoliputkistossa on yksi anturi. Aika vähän, kun esim. Teslan jokaisessa 16 moduulissa on kaksi anturia jokaisessa.

Akun pohja on 7mm vahvaa alumiinia ja kun laskee mukaan muun rungon, ovat kennot n. 40mm irti akun pohjapinnasta. Aika lujaa saa tällaisen akun kiville ajaa, jotta kennot kunnolla vaurioituvat. Kylkikolariakin varten reunoilla on kohtuulliset vahvikkeet.

Aiemmin on tullut purettua Model S:n, BMW i3:n ja Renault Zoen akku. Jokainen omalla tavallaan erilainen. Koitetaan laittaa joskus kuvia näistäkin. Tällainen Konan akkumoduuli vaikuttaa oikein soveltuvalta uusiokäyttöön – joko jossain auton sähköistysprojektissa tai vaikka kiinteistön varavirta-akkuna. Moduuliin on helppo kytkeytyä M5-pulttien avulla ja kennojen jännitetiedot saa BMS:lle kohtuullisella vaivalla askartelemalla johtosarjan tai käyttämällä auton valmista, jos löytää soveltuvia liittimiä. Toki myös CAN-väylää tutkimalla lienee mahdollista käyttää Konan omaa BMS:ää hyödyksi, mutta emme ole löytäneet tähän mitään valmista aineistoa.

Isompia virtoja käytettäessä myös jäähdytys on mahdollista rakentaa valmiin jäähdytyslevyn ansiosta.

Jos olet kiinnostunut, voimme luopua näistä kyseisistä moduuleista (joista yksi siis purettuna kokonaan). Euroopassa näytään kauppoja tehtävän n. 130 eur/kwh hintaan. Kiinnostuneet ottakaahan yhteyttä heikki@pajalle.com / 040-500 6228.

Disclaimer: Hyundailla on ollut LG:n akuille takaisinkutsukampanja, joissa niitä on takuuseen vaihdettu, koska muutamia Hyundain sähköautoja on syttynyt palamaan. Emme siis suosittele näitä esimerkiksi asuinkiinteistön varavirta-akuksi ilman kunnollista BMS:ää, joka osaa mitata eristevastukset yms. olennaiset turvallisuuteen liittyvät asiat.

Finalizing the Tesla project

In the previous update the car was pretty much ready for inspection, but there were still some safety system related alerts and the air suspension was not working. Tesla normally self-clears the alerts when the problem is fixed but safety system or RCM (restraint control module) is an exception, as well as air suspension. Both are related to safety so I guess it makes sense.

To clear these alerts turned out to be a bit more difficult than we initially thought.

Remaining alerts

It was December 2020. Because at that time Tesla did not offer any kind of diagnostic tools and we did not know any aftermarket ones we contacted Tesla to get the alerts cleared. The first time slot for them was almost a month away, mid January. They said it's first time for them (in Finland) someone want something like this done. So we couldn't do much - just wait.

We had tried to gain access to Tesla's Toolbox (which is their own diagnostic application). According to their website (service.tesla.com) it was supposed to be possible to purchase a time limited access, workshop manuals etc. We created an account and tried to activate with a credit card, but it didn't just work. We called their "hotline" several times and always telling it was "another department" that takes care of this and come back. And they never came. It all looked like they never wanted to give access and the whole website was just created to fulfill EU requirements. My friends told me I should sue Tesla to court...

On the morning of 13th of January I drove the car to nearest Tesla service center (only two in Finland - this one was more than an hour away). The air suspension was not working and I could see from the MCU screen that the front was going down a bit all the time. Anyway, I was there when the service opened at the morning. I gave them the key and stayed there myself to wait and work with my laptop. After couple of hours they asked me to come to a small meeting room where they explained that things are not proceeding - they had not done their homework properly. They had now found that according to Tesla policy they would need to make a high voltage test before they are allowed to do anything else. They couln't even tell how much this test costs... "not several thousand euros". And even before that I need to request this test and make a report for them of all the repairs I've done to the car. And that's not all - they gave me a notice (SC-15-00-006 Salvage-Titled Vehicle Notification) where they explained that Supercharging will be disabled. They also gave me SC-18-00-007 Owner Notification and Acceptance of Unperformed Repairs with slots for signatures and vehicle information. That was not filled anyway.

I had heard from US stories about disabling SC from salvage vehicles, but I was hopeful this was only a US thing as I had written with a guy from UK who had taken his car to Tesla for similar crash alert clearing without losing the supercharging.

At this point I was pretty pissed off. We could get the alerts cleared. They had been able to fill the A/C system and adjust the headlights though. Although I don't know how they did the headlight adjustment when the suspension was not working and front was clearly lower than rear. And I had to pay 400 eur for all this.

On my way home I stopped by a DC charger (non-Tesla) and that still seemed to work. On my way home the front was still going down, but I could still get back home safely. I had already before explained my situation on a Facebook group and on my way home I was contacted by a guy who had contacts to Eastern Europe who might be able to help me. I then decided we will fix this car without any help from Tesla.

Testing DC charging in Pirkkala McDonald's.

The contacts in Eastern Europe needed an internet access to my car and a router so they could configure a VPN access to the car. After a couple of weeks it was time to try to clear the alerts. I had previously bought a Fakra diagnostic cable that was connected from the Autopilot computer's ethernet to the router and from that to the internet and to the computers of the helpful hackers in Eastern Europe.

VPN access to Eastern Europe.

At that time we did not understand yet what was going on, but in a few moments the car was in factory mode. I was following the displays of the car and instructions from the hackers. Every now and then they asked to reboot the car or gateway and install software updates that the car was downloading. Apparently they had Toolbox access and some other software they used to control the car.

In a factory mode you can get a thorough deepdive in the car and alerts you don't normally see on your dashboard. From these the RCM2 alert seems to be the only one causing the airbag indicator to stay on.
Fast Chg Allowed: NotAllowed

Anyway, after all this the hackers were able to clear the alerts from the air suspension, but not the RCM. I had to take the RCM module out of the car and send to the hackers for manually clearing.

The module is in pretty tricky position under the dash but eventually got it out and shipped to the guys in Ukraine. It took about a month until the unit came back. Plugged in the car and the alerts were gone!

Challenges with air suspension continues

Inspection passed, front down

So the car was finally OK and was able to pass the inspection in the end of 2021. After driving a few days the front started to drop overnight. For a long time we tried to find a leak - we thought perhaps there's a leak in valve block that had been removed during the repair process or perhaps it was damaged. No leak was found. Finally took the front strut and bag out and finally found a leak. We thought perhaps it had bent in the accident or something like this. Anyway, a new strut was ordered. 1500 EUR.

Apply pressure with air compressor and some leak detection spray.
While working with the suspension I installed some adjustable ride height sensor links.

It was also time to change summer tires so I decided to buy Momo wheels from Rimfix RMX has their own custom wheels but lead time was too long at this point. These Momo wheels were designed with Tesla spec so no need for spacers or any other adapters. The only challenge was the really long drive shaft end - couldn't fit the center cap to the wheel.

For that issue the fix was fairly simple... because I did not want to remove all four drive shafts I decided to cut them while still in the car. A bit sweaty process, but the end result was good.

Looking good with bags empty and 10cm blocks of wood on the lifting locations. The wheels are 9,5x21 ET 32. Also applied a Ceramic Pro coating on a new paint.

New front strut. Only need to use the cable from the original one.

Some people told that the suspension needs to be calibrated after changing a strut but that's not correct. Just replace and drive. For two days. Then failed the rear end...

Parked. The rear might be a bit too low...

While driving on a bag surface there was some weird noise coming from the back. Just like an exhaust was hitting rear axle on a classic car. While driving kids to school one morning there was a small pop from the rear and some whooshy sound after that... and rear down completely. That's how a rear bag failed. Was too lazy to figure out where that weird clatter sound was coming.

Rear strut disassasmbled.

This time I decided to study what was going on with the struts. I was hopefuly to be able to change only the airbag. Couldn't find the replacement anywhere.

Apparently the bag had been somehow wrinkled wihen the car was down and we applied pressure to the system. The bag had remained wrinkled inside the aluminum tube housing and couldn't straigthen up and while driving it eventually rubbed broken. That's another 1500 eur well spent! This time a new part was found from Tesla's local warehouse and didn't need to wait two weeks for a new part like with front strut.

Like this was not enough - after a few weeks of driving the front started to drop again... this time the reason was on driver side.

I did not care to check the front end while working on the rear. Also the front bag had somehow misaligned inside the aluminum housing. This had caused the bag to slowly rub itself broken. Probably this is the reason why the passenger side also failed in the first place. Now I also understood why I heard some banging noises when first manually filling the system at the paintshop.

Front strut disassembled.
Some rubbing inside the airbag. Leak is not big but probably this could not be repaired so I decided to order yet another new strut.

After spending 4500 eur for new struts I can really say I learned my lession on how to fill a completely deflated air suspension. An advice for all - try to fill the system while the car is at a lift.

I now have three good shocks waiting if some day there are aftermarket bags available for these adaptive air suspension struts.

Fast charging works

Although Tesla disabled Supercharging, other fast charging is till working on non-Tesla DC chargers. That can be seen on car's config on Factory Mode - when Fast Charging is 'Not Allowed', Other Fast Charging is still 'Allowed'. There's not been DC chargers on my neighborhood so charging has been almost completely AC charging at home.

At best I've charged at about 150kW, which I believe is the limit with the CCS adapter.

Afterwords

I'm writing this roughly a year later when I initially thought the car is ready. Just clear a few alerts and do the inspection. In practise I've driven the car since May 2021. Bought this for my own use and planning to keep it for a long time.. if something more appealing does not show up. Model S is a really nice car - especially being a ten year old model - and if you forget there's really limited service nework and for enthusiasts it's quite difficult to work with these cars.

During sring 2021 we also purhcased some diagnostic tools for Autokierrätys L&G to be able to do more with these cars - like put the car into Factory mode etc. However, Tesla keeps making life more difficult on updates - for example these new Intel based cars are really tricky to work with other than factory tools.

Speaking of factory tools - Tesla finally opened up access to Toolbox at fall of 2021. It's an external version so I assume they can still do more at official service center.

During a year we have learned so much about Teslas and now able to offer all kinds of services and repairs together with Autokierrätys L&G. We have for example replaced A/C compressors, repaired door handles and interior heater PTCs. All typical failure points of Model S.

Although my car does not have any warranty left, I feel not anguished. I feel whatever comes up, we can repair it. We have more and more contacts all over the world now. We support Right-to-repair and ready to do a bit more work to get the cars running without special tools from Tesla service. Life without Supercharging has not been an issue. There's been one single time it would have been nice to charge at SC. There's so many HPC chargers around and even cheaper than Tesla's. After all, we got this car ready and repaired way cheaper than buying similar non-damaged Tesla.

During fall 2020 we also disassembled one Model S battery pack to learn more. The battery was fully working but there was structural damage on the housing. These modules are going to another application -and we now have experience on how to repair these as well - check https://akkuauto.fi/
Model S front motor disassembled. This is also going to a conversion project and opened for changing the direction of rotation. Perhaps a limited slip diff also...

Speaking of heating - during winter there's been a bit of an issue with interior heating. It's heating, but not at full power. You need to keep full heat and blower at high speed to keep the windscreen clear. Tesla's cabin heating is not really this bad. At the time of writing this issue has not been solved - we've tried replacing the PTC and checking all sensors. Also no alerts.

Hunting the issue with Toolbox. For some reason Target Duty is only 38,5% even at full heat is requested.

Generally speaking heater issues have been an problem in Teslas this winter. Several Model S's have been requiring PTC heater change and simulteneously Model 3's and Y's have had problems with heat pumps. Californian car manufacturer still seems to need some more excercise on conditions at North. Also the door handles and door glasses are not hazzle-free during the cold months.

These should not be an issue in our next project car - Audi e-Tron.

Next project

Paintjob

Wow, almost a year before previous update. I wonder if I even remember what has happened since then.

So, we had to get the car running. The car was missing the so called fireman's loop or first responder cut loop. There's a high voltage interlock loop (HVIL) in the vehicle going through all the high voltage components. This fireman's loop is part of this circuit and if it's cut, the HV components can't be activated.

Replacement loop was bought from eBay

New loop was connected, but the car still didn't start up. First we thought that perhaps the main fuse in the HV battery pack was blown, but it was fine. Eventually we found that there's a pyro fuse at the fuse box in the frunk. That blows in a crash event and disables bit part of electric components in the car.

Tesla won't sell this fuse to customers so we had to improvise. Exactly the same part can be found from other cars like Audi or Mercedes. The only difference being a plastic piece inside the connector. It is possible to take this piece from Tesla fuse and place it in Audi fuse. Finally we had that great moment when we heard contactor clicks from the main battery.

In the end of October we had our Christmas moment when we received a lot of parts from Tesla - worth almost 15 000 EUR.

Not all parts were in perfect condition thouth. A corner in hood had bent a bit.
Also one of the bolts in hood was not properly secured.

Tesla promised to change the hood but we did not have time to wait so we fixed these little issues.

Next was the windscreen. At this point we still had not decided to change the color of the car. If we did, we would not have install the new windscreen.

After the windscreen we started to build the front of the car.

Originally we had not planned to change the car. A couple of days before the planned paint booth time the paintshop owner came to tell that if I want to change the color now's the time to decide. Never liked black anyway so it was a fairly quick decision. It was time to do some more disassembly.

Preparing the door openings
The air suspension did not work yet so we were pretty low at that point.

We did think of the color for a long time. At least three hours! Finally we found a tone that's as far as possible from original Tesla colors. Audi Exclusive Mocha Latte. The only problem was it's so exclusive we couldn't find the mixing formula anywhere.

Mocha Latte is a secret

Finally we found out, that Fiat/Chrysler Mocha Latte is pretty much the same color. At least close enough - so we used that.

The initial impression was a bit mixed feelings. It'll take some time to get used to it...
Remember to paint the parking sensors

Fog lights were not damaged in the crash, only had a few scratches. They were sanded and finished with a clearcoat.

We had a funny moment when a Fiat came to the shop for a windscreen change.

We had to trick the air suspension a bit to get the car to a ride height and wheel alignment. More about the air suspension in the next posting.

A detail of a bolt in lower suspension arm. You can't remove the bolt without first removing the HV battery.
A connector of the air suspension valve block. 12 volts to correct pins and compressor allows you to put some air in the bags and get the car up to a ride height.

In the next article the final touches. How to get the air suspension working and clear the remaining alerts from the SRS.

Airbag and dash repair

Tesla sells airbags only to their certified body shops so we had to opt for a used one. Well, obviously that was a bit cheaper also.

In our spare part the frame of the steering wheel airbag was different color. We removed the frame from the original bag and used it for our used spare part.
Here the steering wheel airbag has already been replaced and we're about to start replacing the passenger airbag and dashboard top trim.

Dismantling is started by removing the glove box. First you need to remove the trim around the glove box. They can be removed by just pulling. Good instructions can be found from FixYourTesla.com..

Glove box is fixed with six torx screws. After removing the screws just pull out and carefully remove the cables. Behind the glove box you can find the computer of Autopilot. Unscrew four nuts to lower the computer to get access to two bolts securing the passenger airbag.

To remove the dashboard top trim you first need to remove the trim of a-pillars. They are fixed with only one screw each, located behind the Airbag tags. From the lower end they are pretty difficult to detach, but come out after careful bending and pulling.

There are screws on both left and right end of the dashboard. Also two screws are found under a cover on top of instrument cluster. That cover can be removed by pushing downwards (first use a plastic tool to bend from the edge). Finally the dashboard cover can be removed by pulling upward until the spring-loaded tabs open one by one.

In our spare part the trim at the edge was also different color than in originally in our car so we decided to change that. The trim is plastic welded on the cover so we drilled out the welding spots and re-glued the original trim to our spare part.

Dashboard cover replaced. Our spare part is slightly different than the original - it has black alcantara piece at one edge. We think it fits really well on the black alcantara trim on the A-pillars and roof.

We also replaced the front seat belts and pretensioners since they had deployed at the accident. Unfortunately we did not take pictures of that but it's relatively straightforward by following the instructions at fixyourtesla.com.

It's a bit strange Tesla does sell seat belts and pretensioners to anyone unlike the airbags.

Clearing the alerts of airbag system was quite a bit more complex process, more about that later.

17 year of pajalle.com and a new Tesla project

Pajalle.com turns 17 years old today. Many projects are even older than that (started since mid 90's) but this URL was reserved 23.2.2004.

Like we told in our previous post, fall and winter have mainly been about EVs. In addition to the BMW i3 crash repair we've also been working with another interesting EV since September '20.

Tesla Model S Long Range 2020

We had just purchased a 2016 Tesla Model S P90Dfor parts, when almost a brand new salvage Long Range Model S showed up for sale at insurance company's website. Obviously this car was a facelift model unlike our parts car but we thought we could still use many parts and decided to purchase this car.

The car had been driven to a ditch and pretty much everything from the front was broken. The accident had actually happened pretty close to us (~50km), but it had been transported to Helsinki area for inspection.

The project was done in co-operation with Kolarikorjaus P. Gullans and Autokierrätys L&G. Heikki had been working at Auto-LG on a project related to EV recycling and also simultaneously repairing this car and i3 of a previous post.

Co-operation with Kolarikorjaus P. Gullans and Autokierrätys L&G.
After some hard work and winching the car was on a trailer at Vantaa where we picked up the car from.

Right side of the car did it a bit problematic, rear right corner airbag was empty and front right lower suspension arm was broken.

After connecting the 12-volt positive battery lead we got enough power to make the door handles and locks work and check the MCU for alerts.

A view from the office desk...
Diagnostics connectors of Tesla are located under the MCU, on top of a storage space. The storage is removed by pushing down.
Here are the connectors. For both we purchased some adapters. For a blue one a simple OBD-bluetooth adapter and a Fakra-Ethernet -adapter for a white one.

Since Tesla was a new brand for us there was a lot of new things to learn. There weren't any aftermarket diagnostic software for alert codes easily available, but at least we were able to read values from OBD with Scan My Tesla. This way we were able to check that the high voltage battery was in good condition. It had been stored at about 50% SOC and since it had been disconnected after crash it had maintained it's state of charge.

The voltages of cell groups were well in balance. Based on these values we were happy to say the high voltage battery was in good condition.

Next we lifted the care up and started to look at the damage more closely. At this this point we did not know how to make care run at it's own power we moved it around by pushing it manually.

The most expensive part of the car was obviously checked first. From underneath everything was fine. Just minor scratches and dirt while the car had been running at bank of the ditch. The battery housing is made of strong and relatively thick aluminum alloy.

At the front pretty much everything needs to be replaced. While the insurance company had been making their repair estimate they had dismantled a lot so it was relatively easy for us to remove the remaining broken parts. On the other hand it made the repair more difficult for us. We had never dismantled a Tesla and did not know what parts there actually should be.

The trunk was loaded with broken parts so at least there were some to look for parts numbers. What also made easier was the parts car we had purchased (even though it was pre-a facelift). Also a big help was Tesla's free online parts catalogue. Drawing by drawing we generated a long list of parts to purchase from Tesla. It took a lot of time but in the end we succeeded pretty well, not many parts had to be ordered later.

Here's a view of the front were you can see for example broken brackets of air suspension compressor. The chassis legs were straight, which was a big relief also. Since they are made of aluminum you can't just pull them straight. If they had been bent they'd need to be replaced. We had spare parts from the parts car available but now we did not need to do that.

We had to charge 12v battery constantly since at this point we had not connected the HV battery yet (didn't know how to do it).

Measuring front chassis legs with Autorobot's testing device.

In the image above you can see the windscreen broken by the deployed passenger airbag. New windscreen was not too expensive.

Ilmajousituksen venttiiliblokista oli yksi lähtö murtunut. Tästä syystä oikea takapyörä oli ”tontissa”.
After we removed the valve block the suspension was empty and car dropped down. Here it's not even as low as it could because of the blocks of wood under the car.

This opening post of this project is nice to finish with a photo of a connector housing of the air suspension compressor. The part is found from VW with a part number 1J0 973 852.

More to follow in the coming weeks.

Into an electric era

It's been pretty quiet on this site during recent years but we're still alive. Last six months has been extremely interesting time. We've partnered with Autokierrätys L&Gand Kolarikorjaus P. Gullans to learn about recycling and repairing of electric cars.

Tulossa on projektikertomusta mm. Tesla Model S:n kolarikorjauksesta, mutta aloitetaan nyt kevyemmin BMW i3:sta. Syksyllä tuli myyntiin kuvissa melko lievän näköisesti kolaroitu 2019-mallin isoimmalla 120Ah akulla varustettu n. 15 000 km ajettu i3 ja vähän jopa heräteostoksena auto jäi sitten meille käteen.

Syksy tekee tuloaan ja i3 kyydissä. Vinssillä trailerille, autoa ei pystynyt tässä vaiheessa ajamaan.
Heikki's first BMW ever is quite special.

Bemari otettiin sisään ja alettiin purkaa keulalta vaurioituneita osia pois. Mitään yllättävää ei tuntunut löytyvän. Pienet vauriot kaiken kaikkiaan.

Sisällä ”normaali” turvavarustejumppa, eli etubägit, vyöt ja kuljettaja puolen sivuverho rikki. Ja aika paljon lasinsirujen imurointia. Jopa vähän outoa, että turvavarusteet olivat lauenneet, koska keulan vauriot olivat niin lievät. Paljon pahemman näköisissäkin on bägit säilyneet ehjinä.

On the inside i3 is actually pretty cool car. B-pillar is integrated on the rear door and while the doors are open the cockpit is really spacious. The dashboard is modern even when this model has been available already since 2013.

Hinges of the hood were also bent a bit and had to be replaced. To remove the hinges we had to remove a bit more pieces around A-pillars.
The body of the i3 is made of carbon fiber. Pretty exotic choice has allowed to make the car really light for an electric car. The whole car with about 40kWh battery weights only 1345kg.
At first we though the windscreen has not damaged even though the airbag had inflated. Looking more closely we noticed the corner of the hood had hit the glass at the edge under the plastic cover of A-pillar. The glass had to be replaced.
To replace the curtain on the driver side we had to remove the roof lining. Easy after you realize you have to unscrew two screws from the top side on the sunroof opening. Also the middle attachment is pretty strong and in a difficult-to-reach place. Since the door opening is so large it's easy to get the lining out of the car.

Unfortunately during the process we damaged the surface of the panel during the work and had to repaint the panel also.

The paintwork was done by Kolarikorjaus P. Gullans.

There a "pyro fuse" on the 12V battery positive cable that can't be repaired. BMW sells (~250eur) a new piece of cable that can be used to replace the damaged piece. After this piece of cable was replaced it was possible to use the high voltage battery again and possible to drive the car. Some people of Facebook groups said a safety box inside the high voltage battery need to be replaced but that was not the case at least with this car.

The windscreen is large, but very light. New windscreen is about 300 eur.
New parts to the front.
The winter was coming and we had to buy wheels for winter tires. The tire size is pretty special. The summer tires are 20" and winter tires are not available in that size. There's 19" studless winter tires from a few suppliers in 155/70-19" so we had to buy 19" wheels. We decided to buy the asymmetric wheels from early models. In these wheels the left and right side wheels are different.
The eBay order didn't go as planned. The previous image was from the sales ad but these where what we received - all equal. In the end the vendor replaced two of the wheels and we even got the pressure sensors so all good now.
Almost ready...

After the paintwork it didn't take too much time to assemble the car. A few crash related fault codes had to be cleared (thanks EV Diag / Matti Hautamäki). The car was ready for inspection to get it road legal again.

The local inspection provider had not seen i3 before but that didn't stop approving the inspection... after they found the VIN code from underneath the passenger seat.

i3 has been a funny project. From the outside the car looks quite special, some like and most don't at the first glimpse. Our own eyes have used to it and it feels good to drive with the cars that looks a bit odd. The car looks tiny, but it actually pretty big from the inside. There's enough room on the back seat also. For our family the only downside is that we can't fit our dog's cage on the trunk.

On the traffic i3 is a really good car. As an electric car it reacts very fast when pressing the acceleration pedal and with it's 130kW motor it accelerates 0-100km/h in about 6 seconds. Regenerative braking is pretty strong and it's easy to drive with one pedal only. In the city traffic the car is really handy with it's sub-10 meter turning circle.

At first for a person used to drive with Volkswagens the steering felt a bit stiff but you got used to it pretty fast. ESP takes care that no matter how slippery it is you can't get this car go sideways. And it goes well in pretty deep snow also.

When writing this we've driven two months with the car. It has practically replaced Scirocco on jäänyt seisomaan ja i3:sta on tullut allekirjoittaneen käyttöpeli. ”Nurkka-ajoa” ajaa akullisella olosuhteista riippuen 150-250 km – kesällä ehkä pidempäänkin. Aika paljon sähköä pätkäajossa menee mukavuuslämmitykseen, kun auton lämmittää valmiiksi ennen ajoon lähtöä ja minulla tätä tulee tehtyä 3-4 kertaa päivässä. Autoa on tullut näin ollen ladattua pari kertaa viikossa öisin kotona.

i3 will probably go for sale once we can get our Tesla project to pass the inspection, hopefully pretty soon.

Myydään/For sale: Scirocco R 4motion

In English a bit later below.

Viiden vuoden jälkeen on tullut aika luopua Sciroccosta. Sciroccoa ei ole koskaan nelivetona tehtaalla tehty, tämä yksilö on Trafin poikkeusluvalla muutettu ja muutoskatsastettu Golf R tekniikkaa hyödyntäen. Kaikki muutokset on toteutettu alkuperäisin VW-osin ja tehtaan korinkorjausohjeita noudattaen. Tarkka kertomus muutoksesta löytyy tästä. Ei kolaroitu. Muutoksen jälkeen ajettu lähes 100tkm ilman mitään ongelmia.

Toista nelivetoista aitoa Scirocco R:ää ei ole tullut vastaan koko maailmassa, joitakin ”perusmalleja” on netissä näkynyt – ei yhtään Suomessa kilpa-autoja lukuunottamatta. Tämä on siis Suomen ainoa katulaillinen neliveto-Scirocco.

Auto on siis aito Scirocco R eli jo alun perin tehokkain ja näyttävin malli. Nelivedon lisäksi autoon on asennettu APR Stage 2+ viritys, jonka myötä alun perin 260hv tehot kasvoivat n. 360 hv:aan ja vääntö 500 Nm:iin. Muutoksessa korvataan korkeapainebensapumppu, downpipe ja imuilman otto & suodatin VW Racingin osilla. Myös DSG-laatikko on uudelleenohjelmoitu. Näiden muutosten myötä tämä yksilö mm. kiihtyy 0-100 tasan neljässä sekunnissa.

Scirocco on hyvin pidetty ja hyvässä kunnossa. Kaikki toimii kuten pitää, ei lommoja eikä ruostetta. Toki pieniä käytön jälkiä 130tkm jälkeen on.

Faktat:

  • vm. 2011
  • Ajettu 130tkm
  • Neliveto Golf R:stä
  • 2.0 TFSI APR Stage 2+ (360hv, 500Nm)
  • DSG-automaatti (APR-ohjelmoitu)
  • Täydellinen huoltokirja
  • H&R coilover alustasarja
  • Kahdet renkaat ja vanteet:
    • O.Z. Ultraleggera HLT 8,5×20″ (juuri ostettu uudet renkaat)
    • Scirocco R alkup. Talladega 8×18″ vanteet Hakkapeliitta 9 nastoin talvella
  • Bi-Xenon + LED-päiväajovalot
  • P3 lisämittari (mm. ahtopaine, imuilman lämpö, rpm, 0-100 jne)
  • RNS-510 Navi + Dynaudio
  • Bluetooth HF+Audio
  • Peruustuskamera, parkkitutka takana.
  • Aux-in + multimedia interface
  • Monitoimiratti rattivaihteilla
  • Automaatti-ilmastointi
  • Valoautomatiikka
  • Vakionopeudensäädin
  • Penkinlämmittimet
  • Isofix

Hinta: 32.900€. Rahoitus onnistuu tarvittaessa.

Puh. 040-500 6228 / heikki@pajalle.com


For sale really unique and rare VW. Scirocco was never manufactured as 4WD/4motion, this specific car has been modified by using parts from Golf R. The modification has been fully approved with special permission from Finnish traffic authority Traficom. All modifications have been made with OEM VW parts by following factory instructions for body modifications. Detailed description of the work with lots of pictures can be found here. The car has been driven for almost 100 000 km after the modification without any problems.

As far as we know this is the only genuine Scirocco R in the whole world that has been modified as street legal AWD. In addition to Golf R Haldex drivetrain the car has been equipped with APR Stage 2+ tuning (high pressure fuel pump, downpipe, VW Racing air intake, ECU & DSG remap) which increases the original 260hp to 360hp and 500Nm of torque. This allows Scirocco to accelerate from 0 to 100 km/h in 4.0 sec.

The car is in very good condition. No collision damage, no dents or rust. Naturally after 130t km there are some scratches and marks of use.

Details:

  • Haldex AWD from Golf mk6 R
  • 2.0 TFSI APR Stage 2+ (360hp, 500Nm)
  • DSG (APR remap)
  • Full service plan @ authorized VW dealers
  • H&R Coilovers
  • Two sets of wheels & tires
    • O.Z. Ultraleggera HLT 8,5×20″ +brand new tires
    • Original VW Talladega 8×18″ for winter tires
  • BiXenon + LED DRL
  • P3 Gauges additional gauge for boost pressure, intake air temp, 0-100, rpm etc.
  • RNS-510 Navigation + Dynaudio
  • BT HF with audio over bluetooth
  • Reverse camera & parking radar at rear
  • Aux-In + multimedia interface
  • Multifunction steering wheel with paddle shifting
  • Automatic long beam headlights
  • Cruise control
  • Front seat heating + Isofix at rear seats

Price: 32.900EUR. We can assist in transportation.

Contact: Heikki Jaakkola, +358 40 500 6228 / heikki@pajalle.com

Pari viime kesää alla ovat olleet O.Z. Ultraleggerat (20″).
Ennen Ultraleggeroita alla olivat Bentley kiilloitetut Mulliner-vanteet (myös 20″).
Kuva American Car Show:sta pääsiäisenä 2016. Scirocco oli näytillä Suomen Volkkariyhdistyksen osastolla.

MOT inspection

A few words about the inspection and getting the modification fully street legal in Finland.

A conversion like this requires a special permission from the officials. Scirocco was never made AWD so they can’t just approve something like this on a regular annual inspection. We had to get the permit and it meant quite a bit of paperwork.

When we did the application we explained everything in detail and how all the body modifications were done according to VW’s instructions (instructions were attached as appendices). We explained all the parts that we used, showed parts lists and images from ETKA and we also had to get documentation from the manufacturer’s representative (importer in Finland) to certify that the brakes are working as they’re supposed to. For the actual inspection it was enough that we took a full scan of the car with VCDS, signed by a local car service.

It took about a month for the officials to handle the application. They asked some additional questions once but anyway the whole process was much faster than expected and we were pleasantly surprised how well the authorities were co-operation on a modification like this.

Inspection

At the inspection we also had to identify where all the parts were originated (to prevent usage of e.g. stolen components). At the same time also the H&R coilover suspension was checked and included on the list of modifications. The actual inspection was fast, not much different from a regular annual MOT, but the paperwork took longer, more than an hours.

As a final word for this process we have to say that it for sure made it easier to get the approval when we had a complete donor car which was very close to Scirocco from the chassis point of view. It was relatively easy to make the application and show where all the components were coming from. It would have been much more difficult to explain everything if the parts had been source from several different vehicles or even made some parts by ourselves.

Syncro emblem is from Heikkis’ mk2 Jetta Syncro.

ESP – pain in the ass

As I wrote on the previous post, ESP became quite a headache. Actually we drove with the car for almost two years before we were finally forced to get it done because the annual inspection was closing (in Finland you don’t need to do MOT every year for such new cars).

This image says it all – Scirocco’s ABS unit was not happy about the newly installed Haldex controller.

We got fault codes saying we had issues in Powertrain data bus (18055 – Check Coding of ECUs on Powertrain Data Bus). ABS was functioning as it should, just ESP was out of the game. It did not prevent driving, but was obviously a safety issue and MIL light was on. We tried different codings, tried to learn how the coding works. Long Coding helper in VCDS was not very helpful with ABS unit (only a few bits are documented) but we were able to find something by Googling and asking help from Ross-Tech’s forum (Ross-Tech is the maker of VCDS). Eventually we were able to learn what each of the 18 bytes were meaning. Even last five numbers of the VIN were encoded on the coding.

It helped a lot that we had similar Golf R from the same MY so we could compare the coding. Even the ABS unit had exactly the same part no, so we were adamant that there’s a way to code.

So we were trying to generate a code that was similar to Golf R but embedded with VIN digits from Scirocco. Golf was not identical, it had DCC suspension so we still had some bits that we were not sure if they were correct or not. Still, we couldn’t get it done – Coding out of range it was every time.

Many persons from Ross-Tech forums offered help and proposed all kinds of codes, none of those worked. Eventually we realized that the ABS unit communicates with the cluster to learn about the model of the car – when the cluster says the car is a Scirocco, it won’t accept coding as a Golf. And Scirocco can’t be AWD. And vehicle type can’t be changed on the cluster with VCDS.

We found a guy somewhere in Poland who was willing to modify the EEPROM on the cluster but at the same time we decided to try something else. We took the cluster from the donor Golf R and plugged it in Scirocco. The connector is the same.

At least the cluster was working (which was something we expected it to do). Immobilizer kicked in as expected also (Golf cluster and Scirocco ECU won’t work together without tweaking).

Best part was that now ABS unit was happy to clear all the fault codes! Now that the ABS/ESP was handled, we only had two issues remaining: 1. Immobilizer 2. Physical fitment of the Golf cluster. After all the puzzling with the ESP these seemed like minor issues.

We only had one key remaining with Golf so we decided to take it and fit Scirocco’s key blade to the Golf key fob. That way we could keep Scirocco’s original key lock. For cluster-ECU communication there’s two options – take the ECU also from the Golf or disable the Immo from Scirocco’s ECU. Both work well – we decided to keep the Immo and take the ECU from Golf. Now both cluster and ECU were from Golf. Now when someone plugs a tester in the OBD the car seems like a Golf with Golf VIN.

Physical fitment to the cluster was a bit more work. We were comparing the clusters and realized that essentially they are similar, just the outer casing is different. We decided to tear down both and were able to swap the Golf cluster internals inside Scirocco’s cluster casing!

Finally! No fault codes or MIL lights!

There’s only two downsides with the way we did the cluster modification. The 2010 Golf R cluster apparently does not understand automatic long beam headlights. The feature still works, but it just don’t show the symbol that this feature is activated. Sometimes this causes confusion to a person who’s not used to driving with this car.

Another is a bit more unpleasant – you can’t totally deactivate ESP from ESP OFF button. 2010-2011 cars are generation where you can only disable traction control but it still keeps ESP active. This means you can’t have all the 4wd drifting fun on wintertime without taking some ESP fuses off. Apparently they changed this in later models so it might be possible to swap some newer ESP parts in but so far we haven’t done that.