ARCHIVE / PAJALLE
Scirocco R 4motion
From buying and upgrading the Scirocco to its all-wheel-drive conversion: Golf R running gear, body modifications, wiring and road approval.
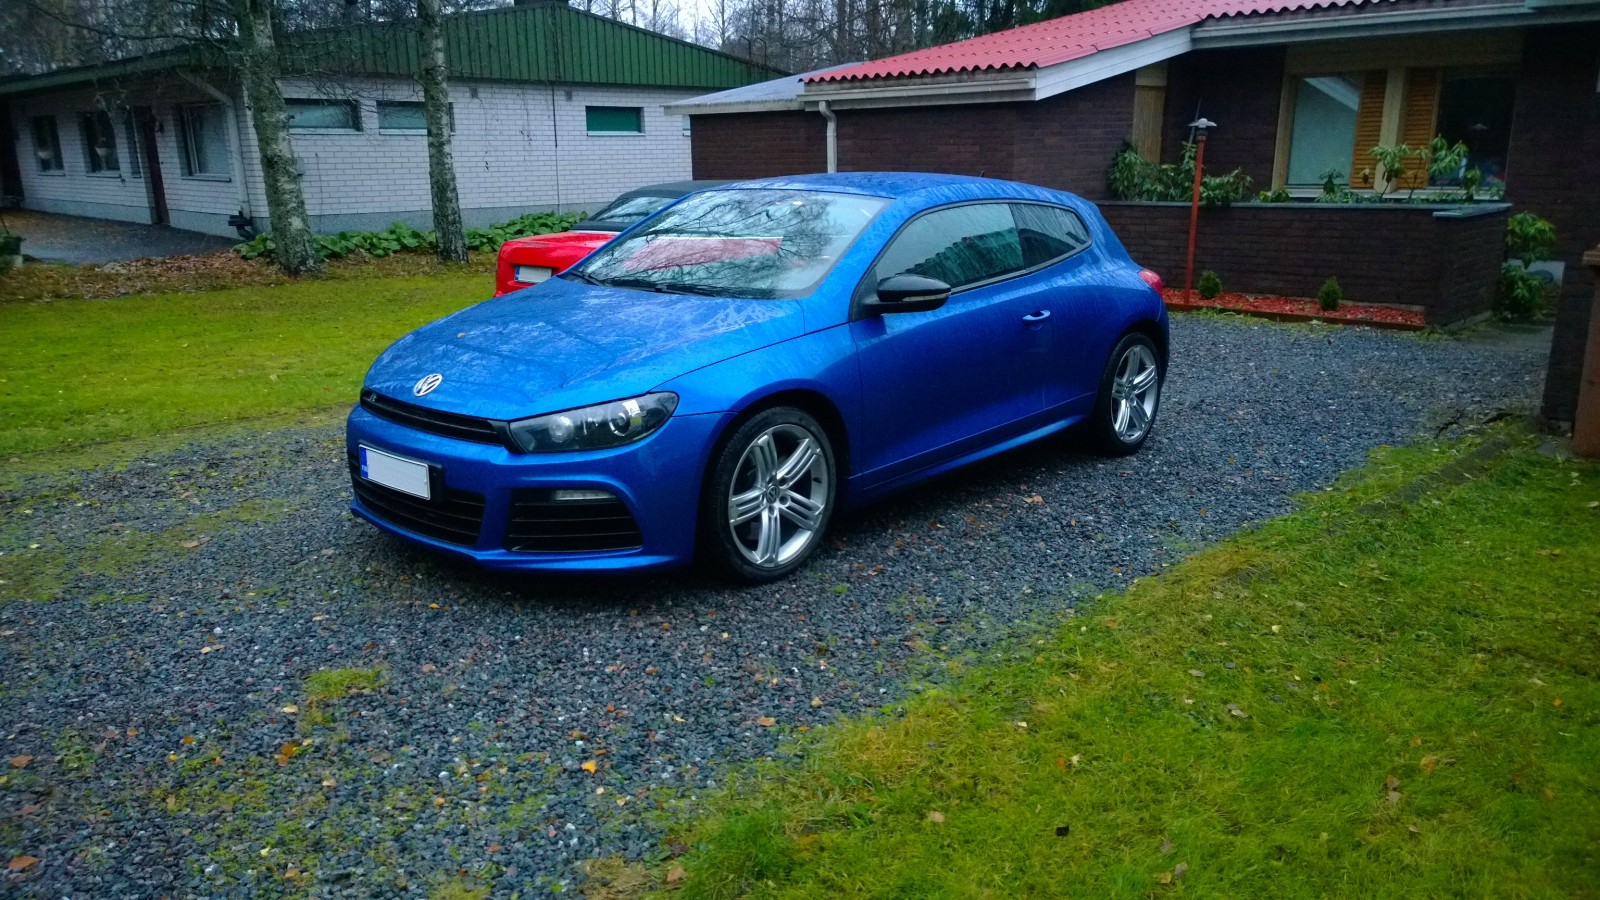
2013-10-27 · A Scirocco replaces the Superb
After advertising the Superb for a while, it was finally time to let go of our main family car of just over two years. A little sad, really: it had worked brilliantly and was a great all-rounder. Loads of room, and enough power to tow a trailer almost without noticing it.
I hadn't planned to replace it straight away, but things change. Even before finding a buyer for the Superb, I'd test-driven one VW Eos, then another. By the time it sold, I had quite a case of Eos fever. There was a lovely two-litre turbo in Tampere, but we couldn't agree on the price.
Driving to Tampere to hand over the Superb, I wondered whether the Scirocco R I'd test-driven in the summer was still at the local Rinta-Jouppi dealer. It was. So after handing over the Superb, I caught a TKL bus to Hatanpää to talk Scirocco deals. And somehow I ended up buying it.
For anyone unfamiliar with Sciroccos, the R is the most powerful version: a 265 hp two-litre turbo. Sportier equipment and a slightly more aggressive look too, as the pictures probably show.
We'll spend the winter thinking about what to do with it. It still sits a bit like an SUV, but it'd be a shame to spoil the excellent suspension. Any lowering needs some thought. There's no sat-nav, so that's probably on the list, along with a few other extras missing from this fairly basic example.
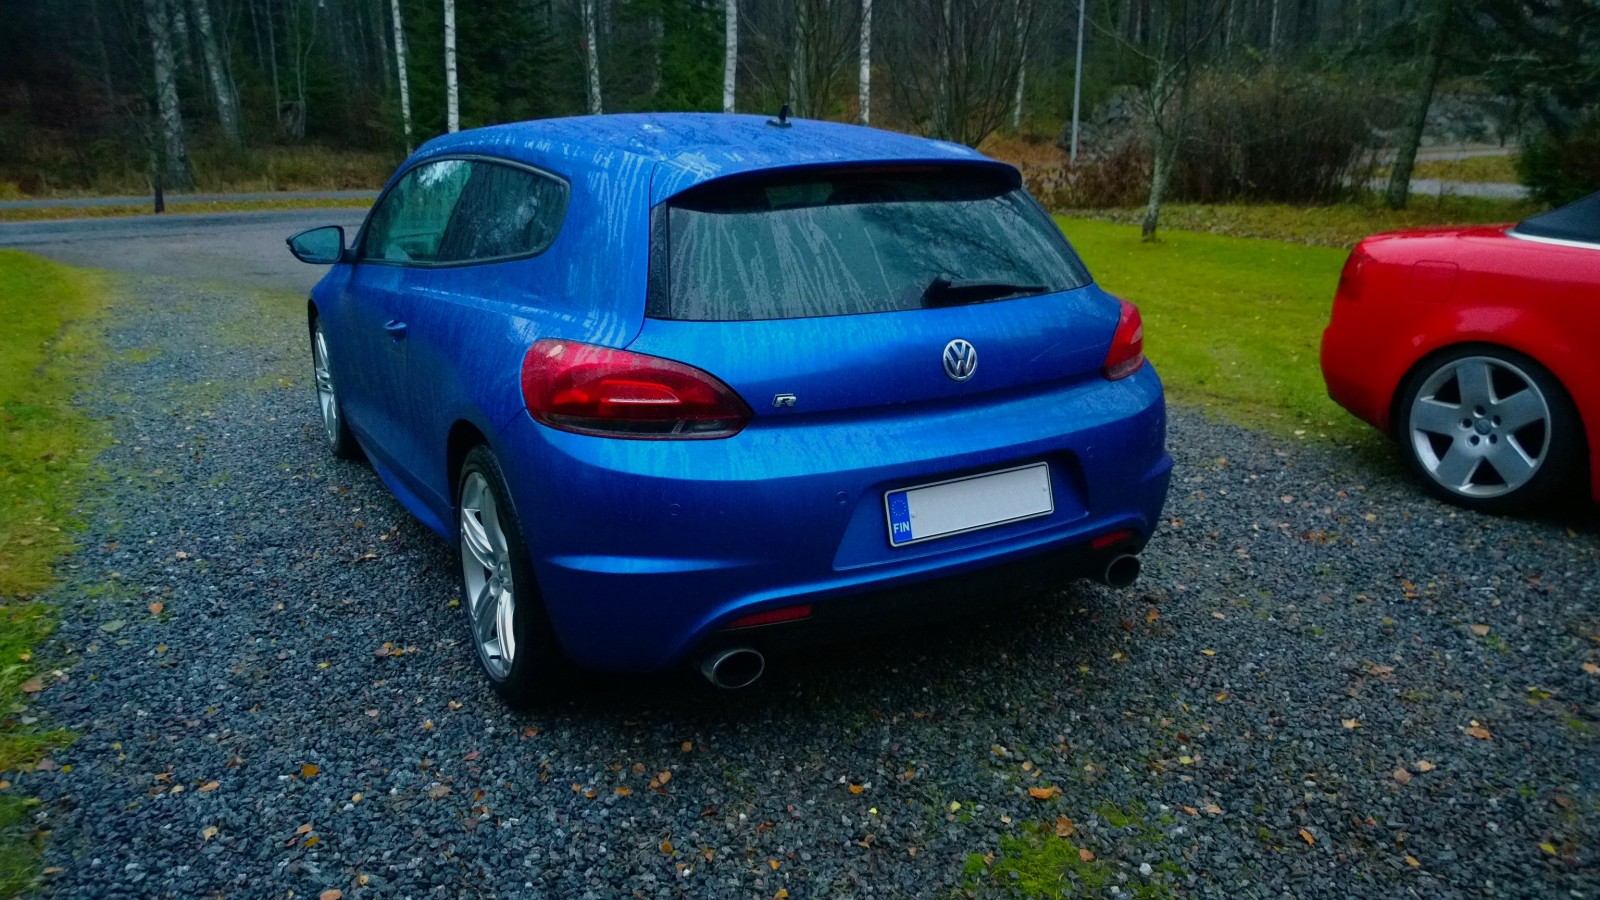
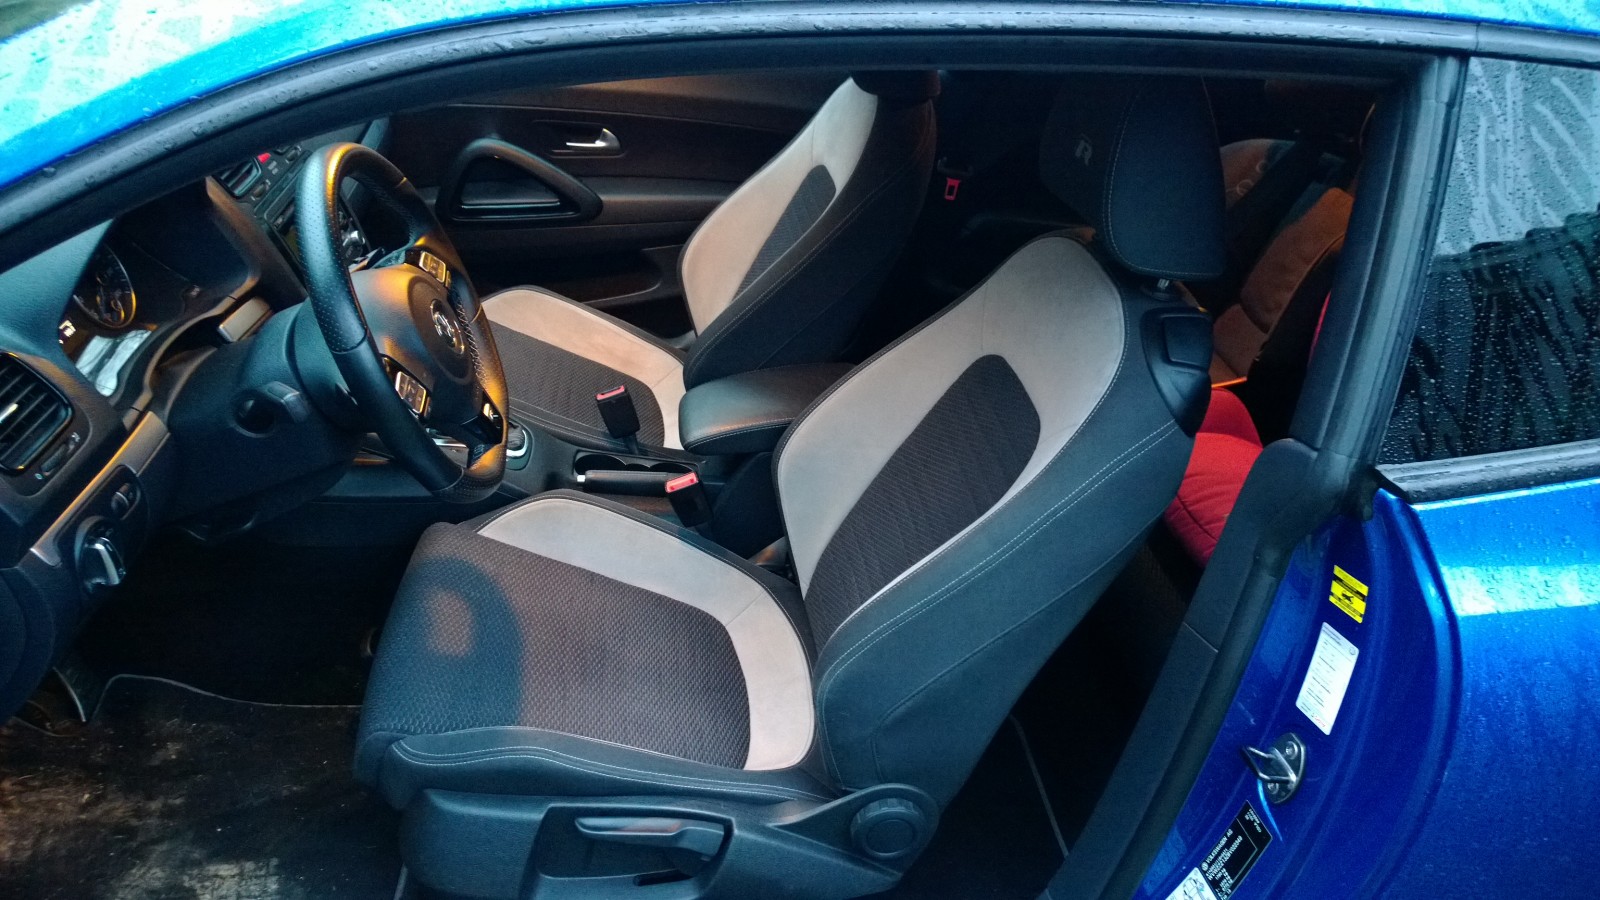
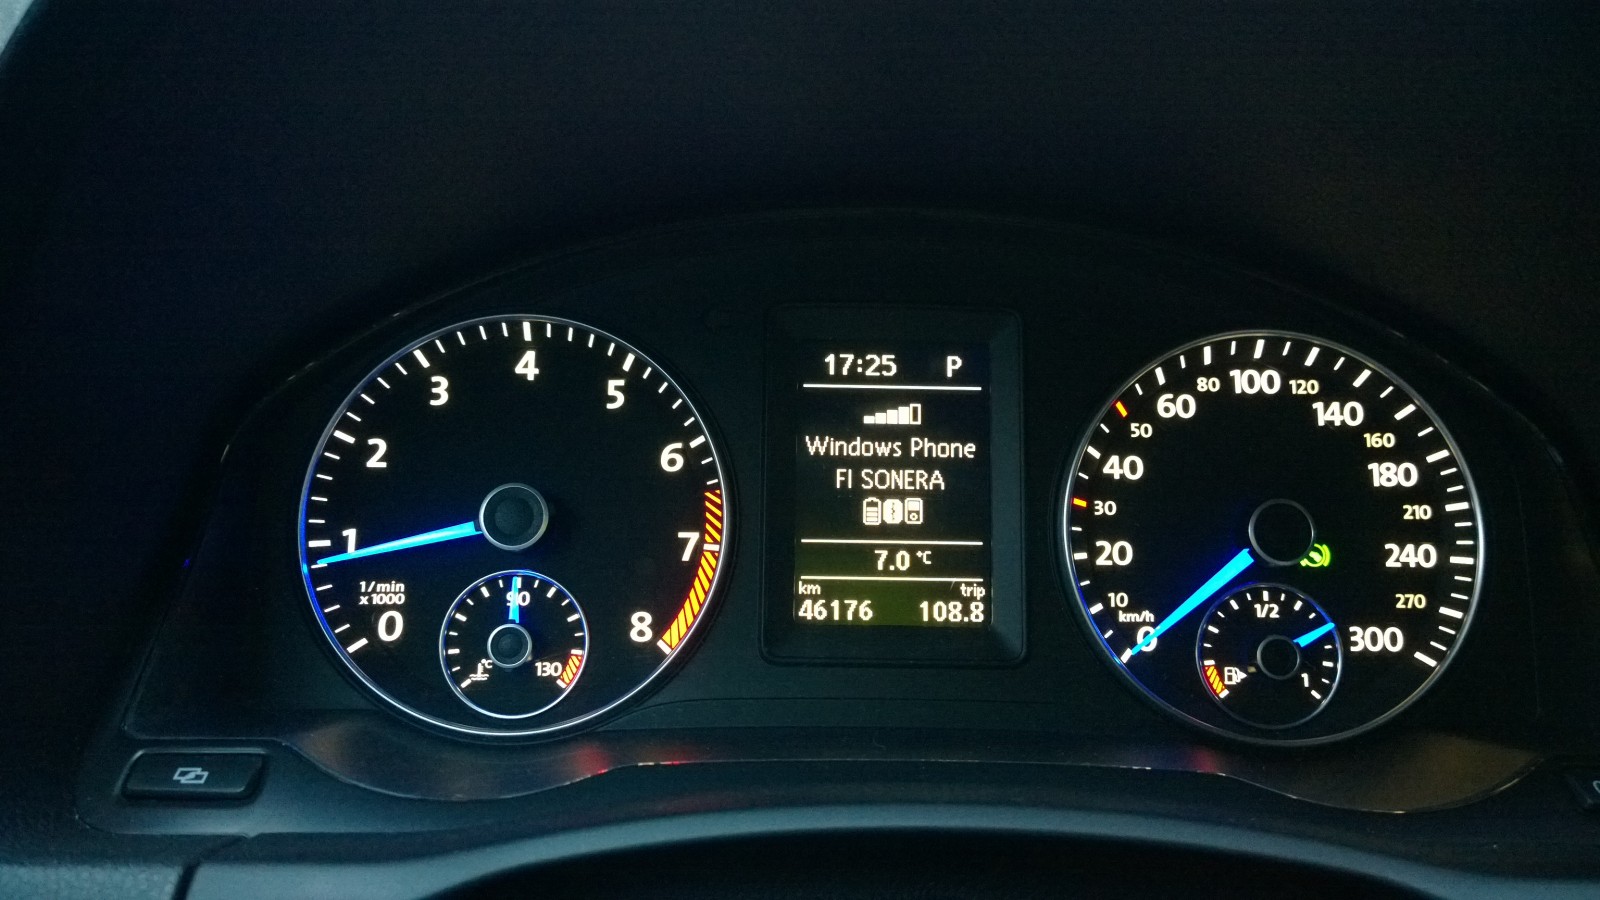
My wife is absolutely delighted that we now have two such practical family cars: the A4 Cabriolet and this R. I don't see the problem. The child seats fit in the back just fine, and there's room for a pushchair in the boot if we still needed one 🙂
– Heikki
2013-12-28 · Retrofitting cruise control to a Golf Mk5/Mk6-based car
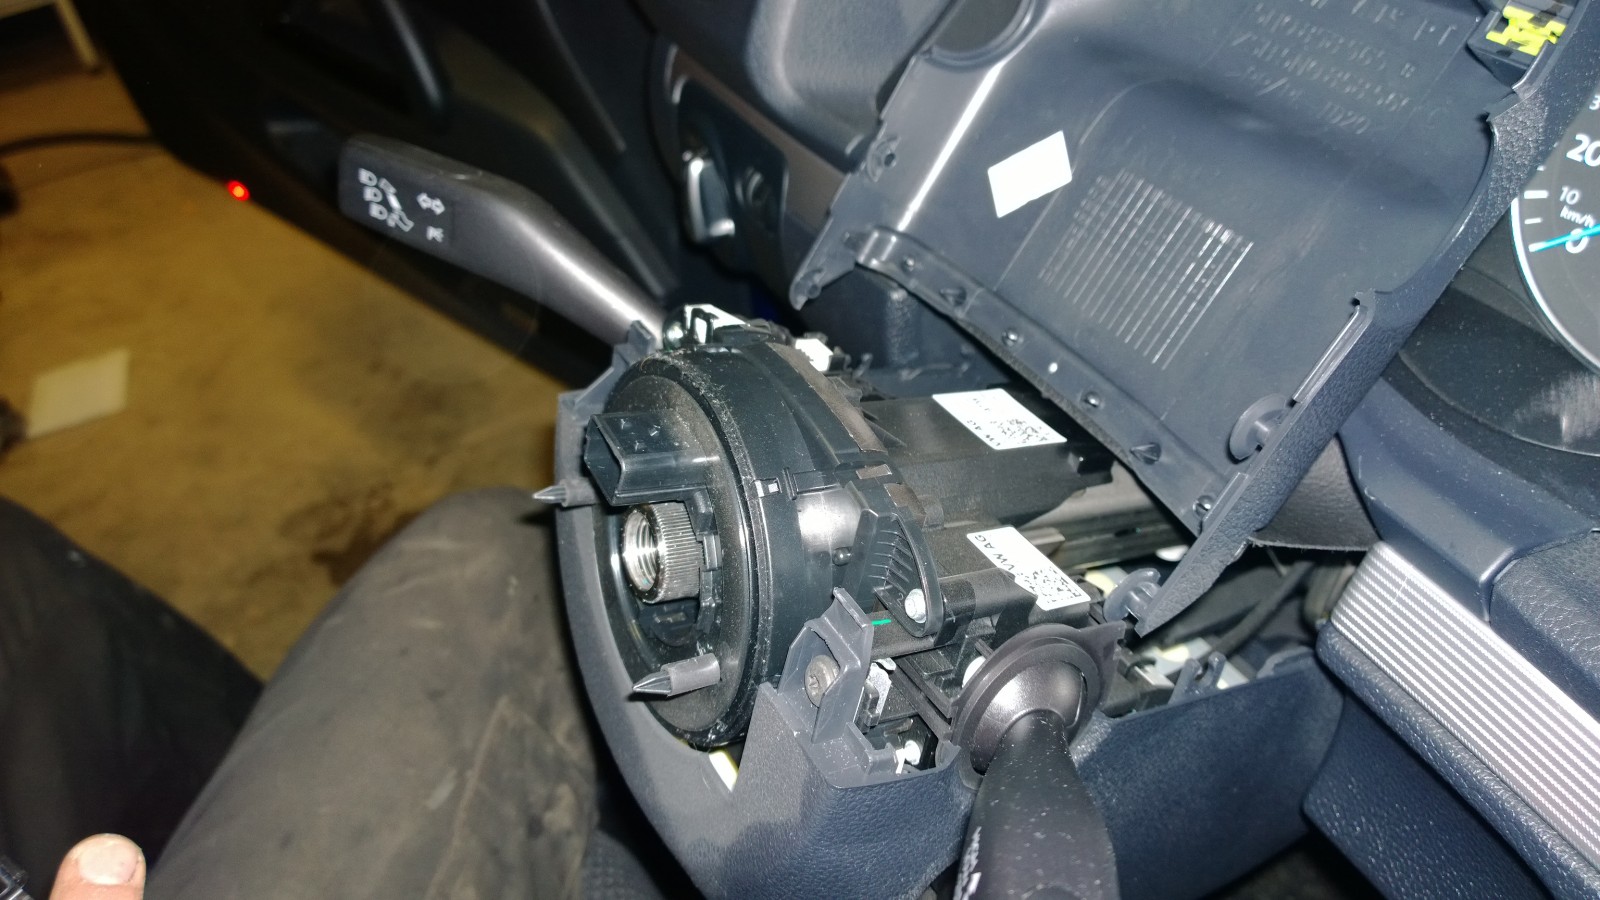
Heikki's Scirocco was basic enough to have no cruise control. Luckily, retrofitting it isn't too expensive. You need the right indicator stalk and, in some cases — ours included — a steering-column control module.
This also applies to many other cars sharing the same platform: Golf 5/6, 1P Leon, 1Z Octavia, 3T Superb, 5L Yeti, Eos, 2K Caddy, 5N Tiguan, 1T Touran…
There's also a little guide to removing the steering wheel on these newer cars. Not quite as easy as on older Volkswagens.
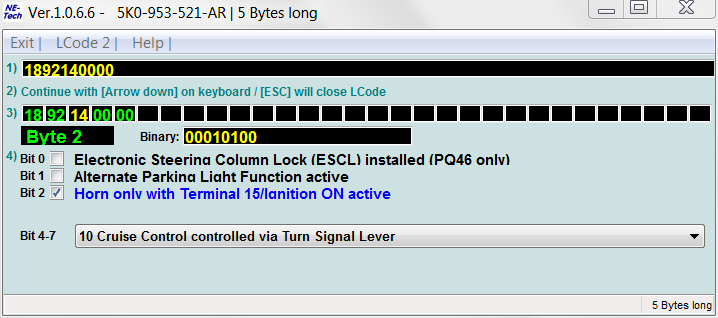
Start by reading the steering-column control module's coding with VCDS and saving it. Ours was 1892140000. Cruise control is already enabled in this screenshot; originally it wasn't, and doesn't need to be at this stage.
Time to dismantle. Details in the captions. Start with the road wheels and steering wheel pointing straight ahead.
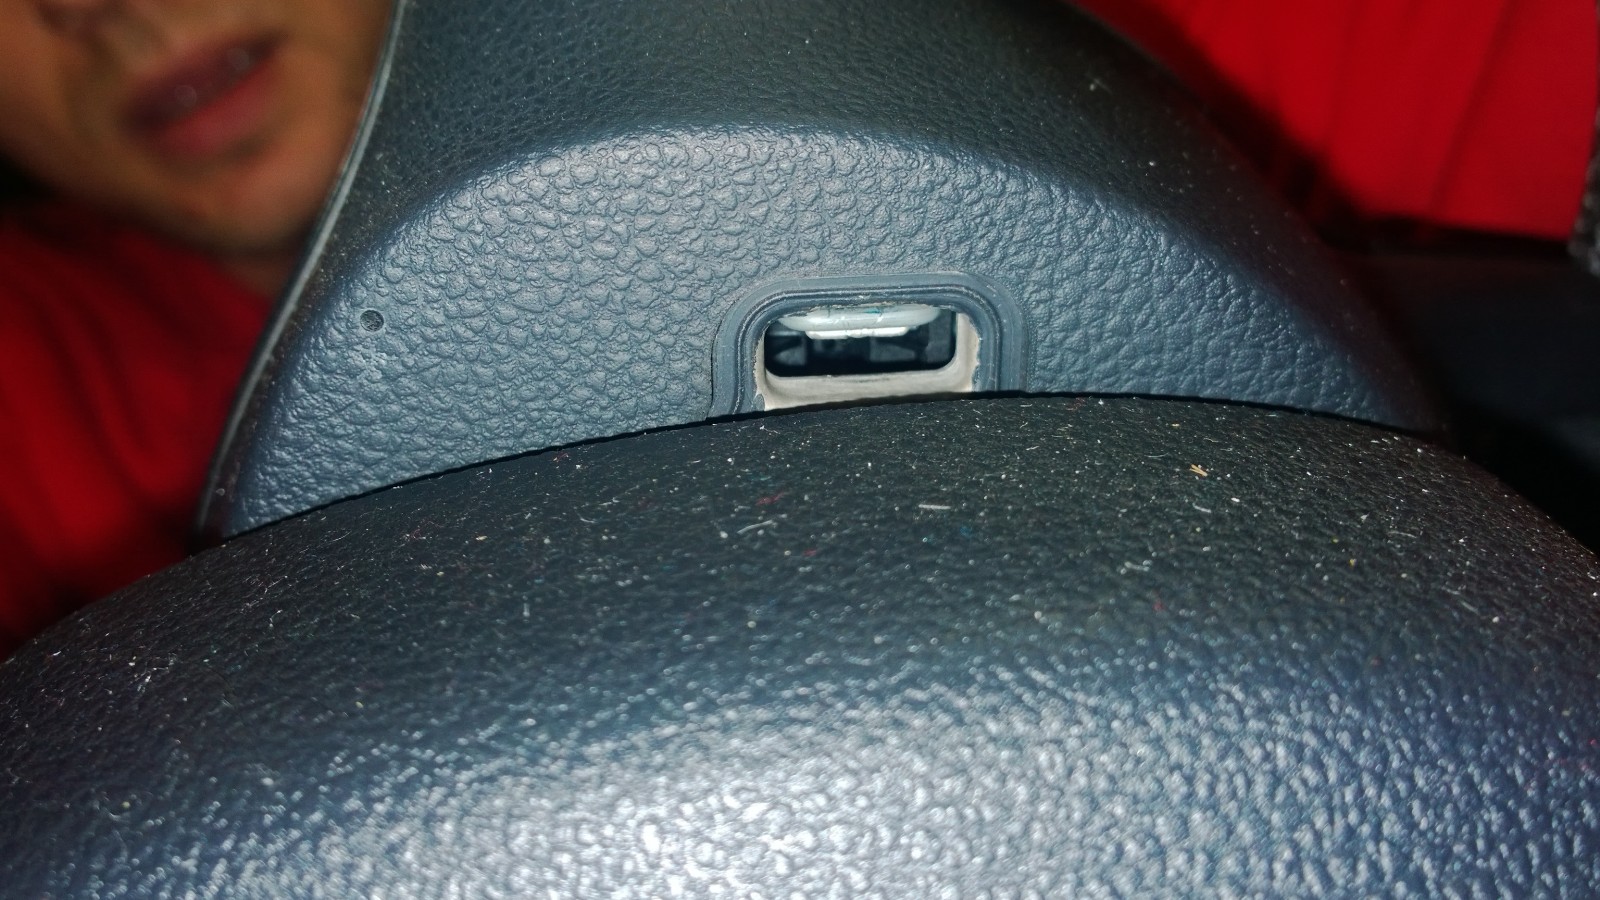
Turn the steering wheel 90 degrees. Behind the steering wheel there is a hole where the spring peeks out.
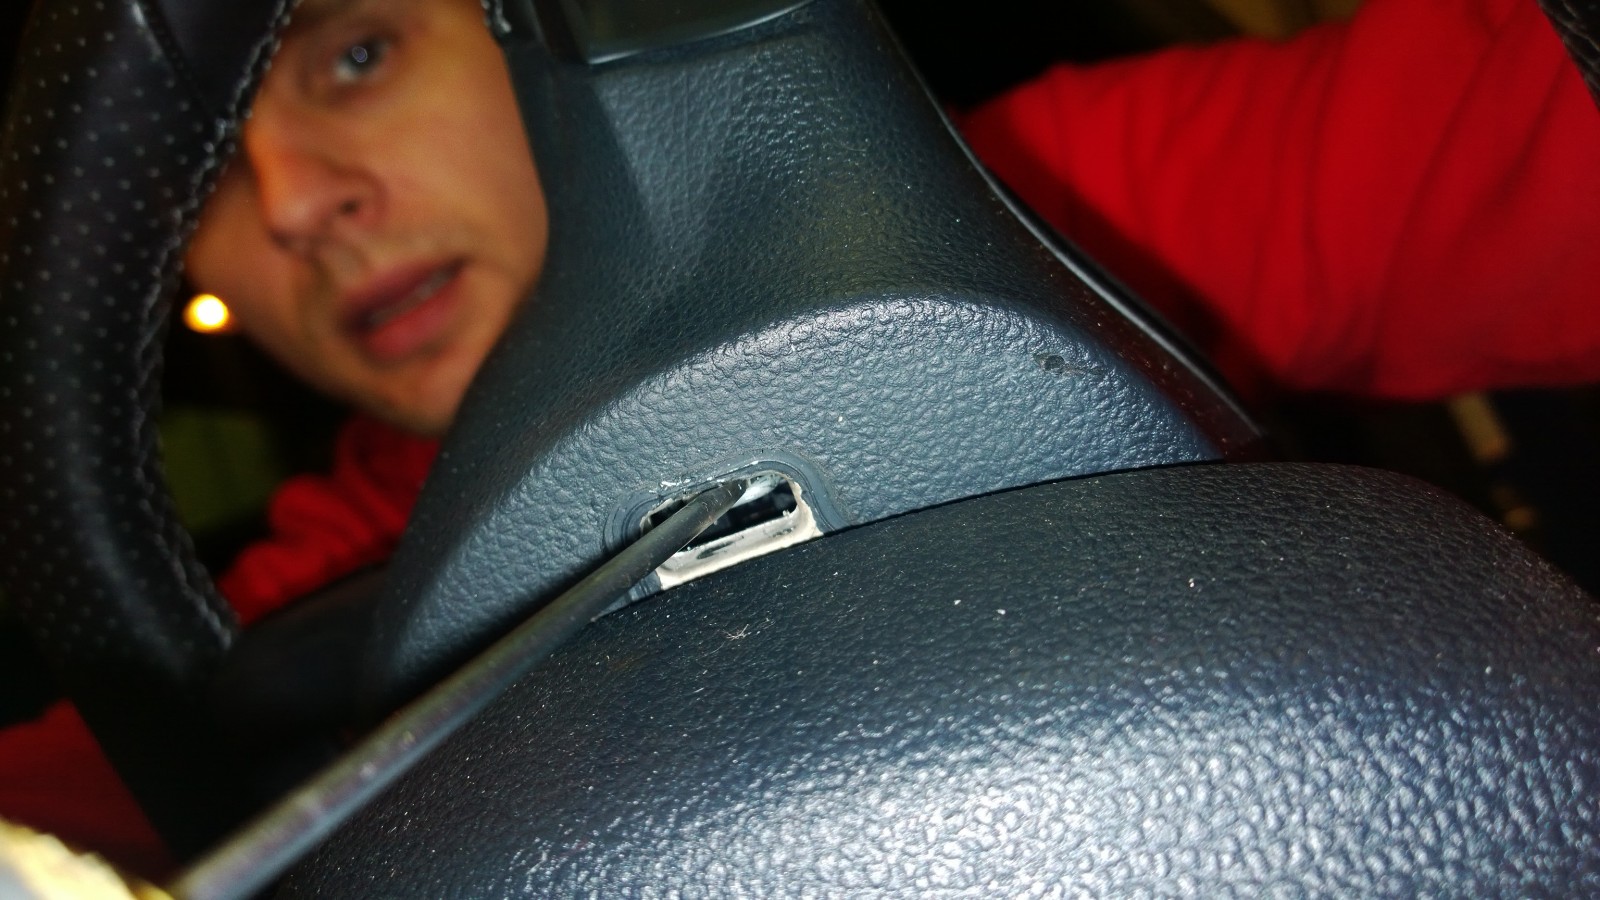
Use a suitable screwdriver to lever the spring down over the retaining tab, while gently pulling the airbag outwards. Turn the wheel half a turn and repeat on the other side. The airbag should then come free.
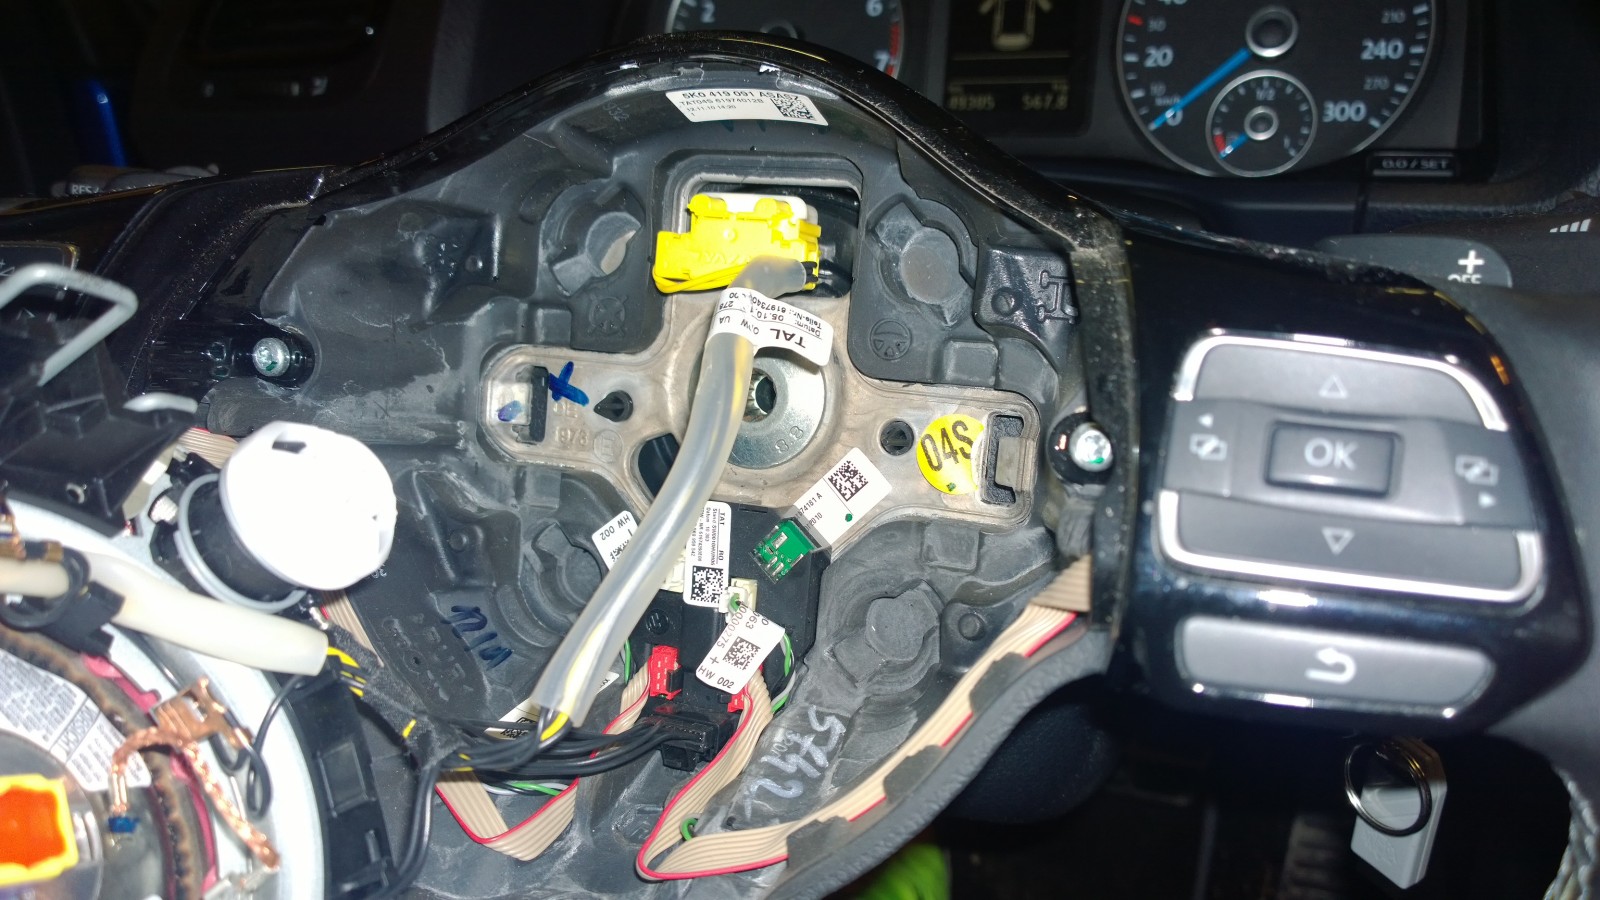
Airbag released, wiring still attached. The retaining tabs are beside the blue X and yellow 04S sticker. Next, unplug the airbag and horn wiring. At least switch the ignition off, and preferably take the key out too — it'll need to come out shortly anyway. The steering wheel bolt takes an M12 XZN bit.
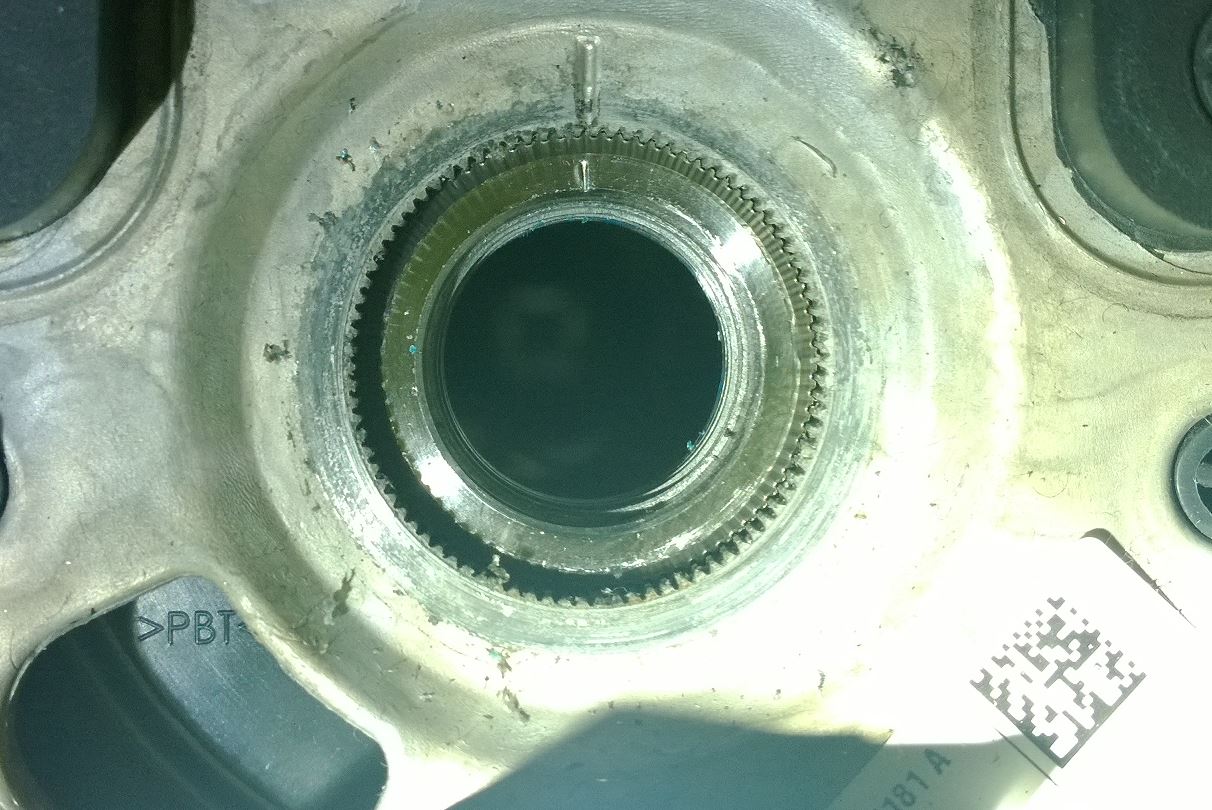
The correct position of the steering wheel is marked on the steering wheel and on the steering wheel shaft.
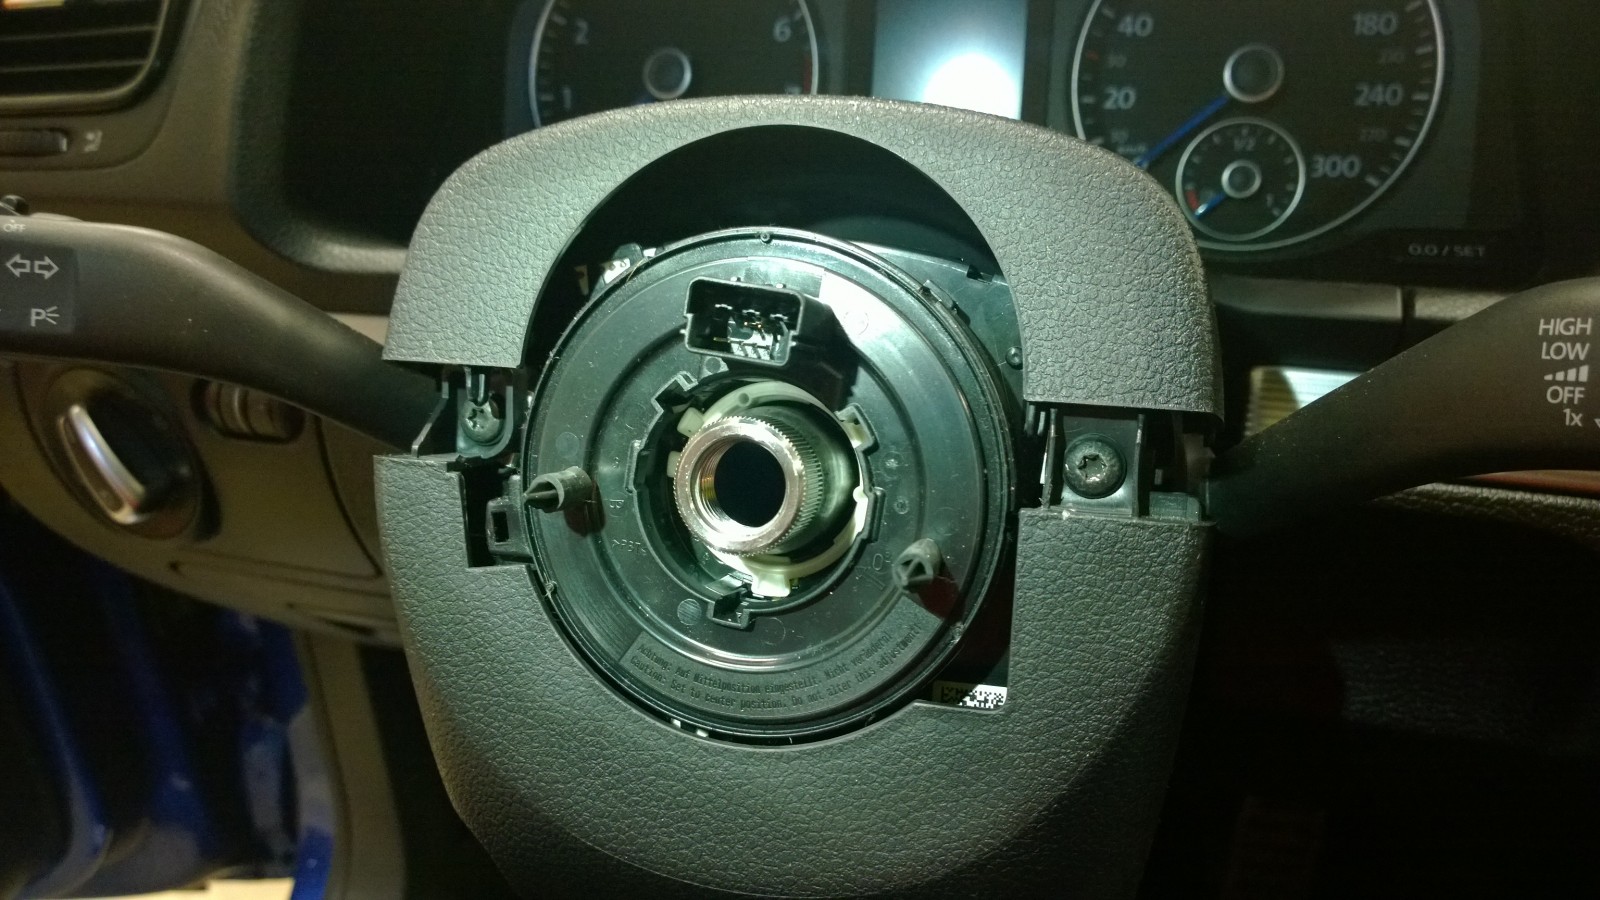
Carefully lift the upper steering-column shroud. Underneath are two Torx screws, with another below. With the covers off, the control-module and clock-spring assembly is exposed. Unplug the wiring and remove the module's three Torx screws.
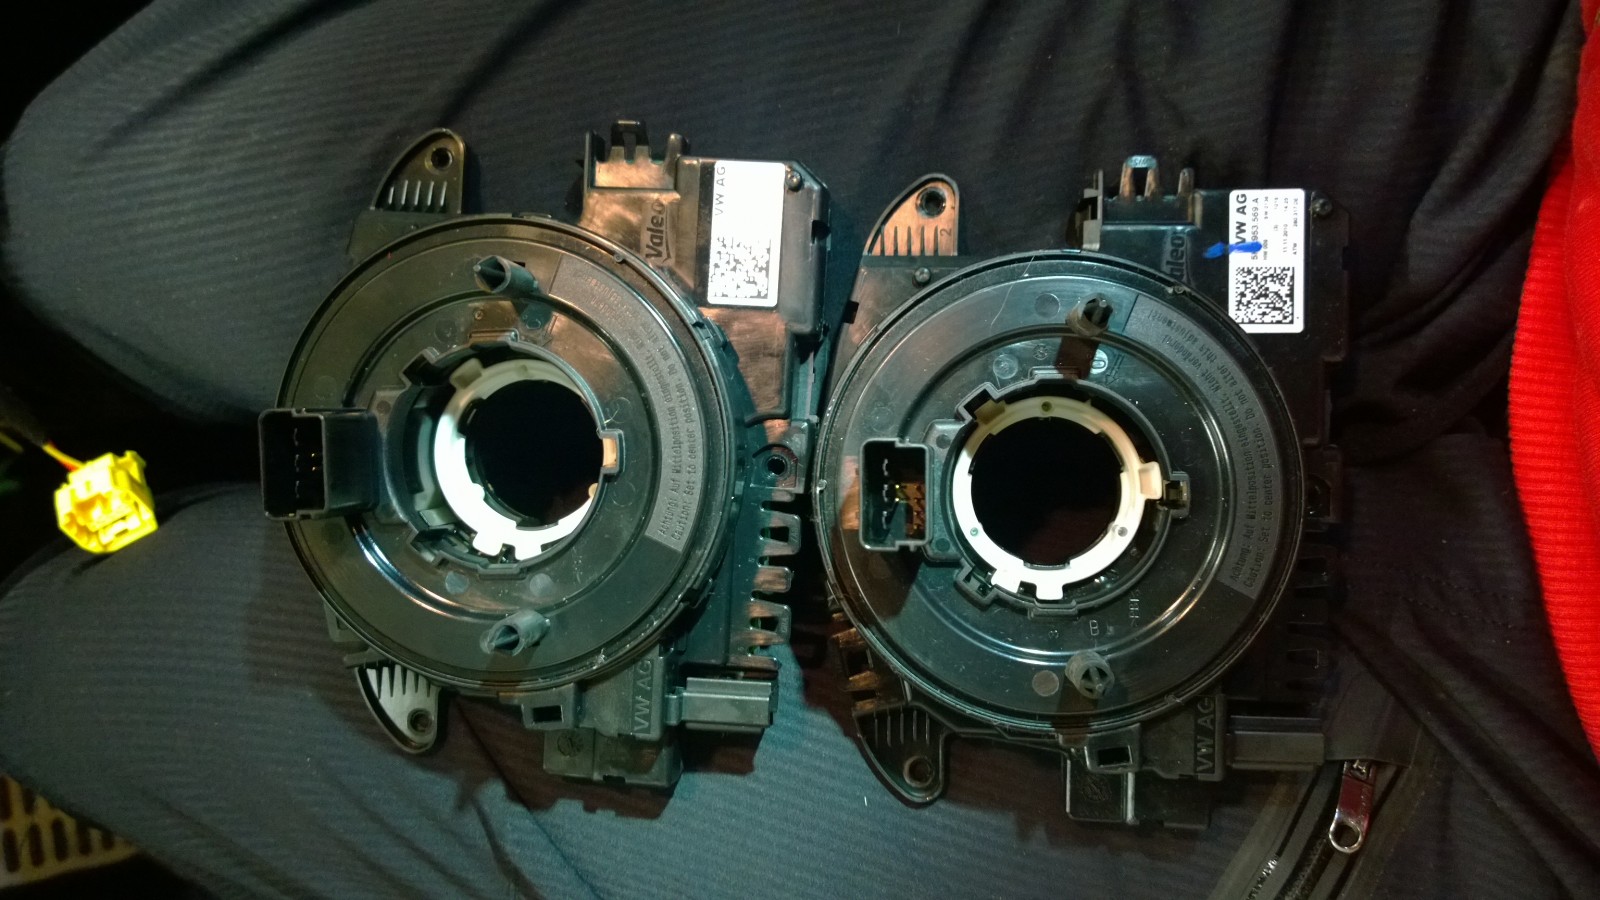
Original and replacement modules. The original didn't support cruise control. Its part number is on the sticker shown here, and differs from the number displayed in VCDS. Ross-Tech's wiki lists which versions support cruise. Our original 5K0-953-569-A accepted the coding, but cruise still wouldn't work. An H-suffix version from eBay sorted it. €84 including postage.
There are three physically different module types. Make sure you get the right one if replacing it.
I got carried away and forgot to photograph the stalk swap itself. Nothing unusual there, though; common sense gets you through it.
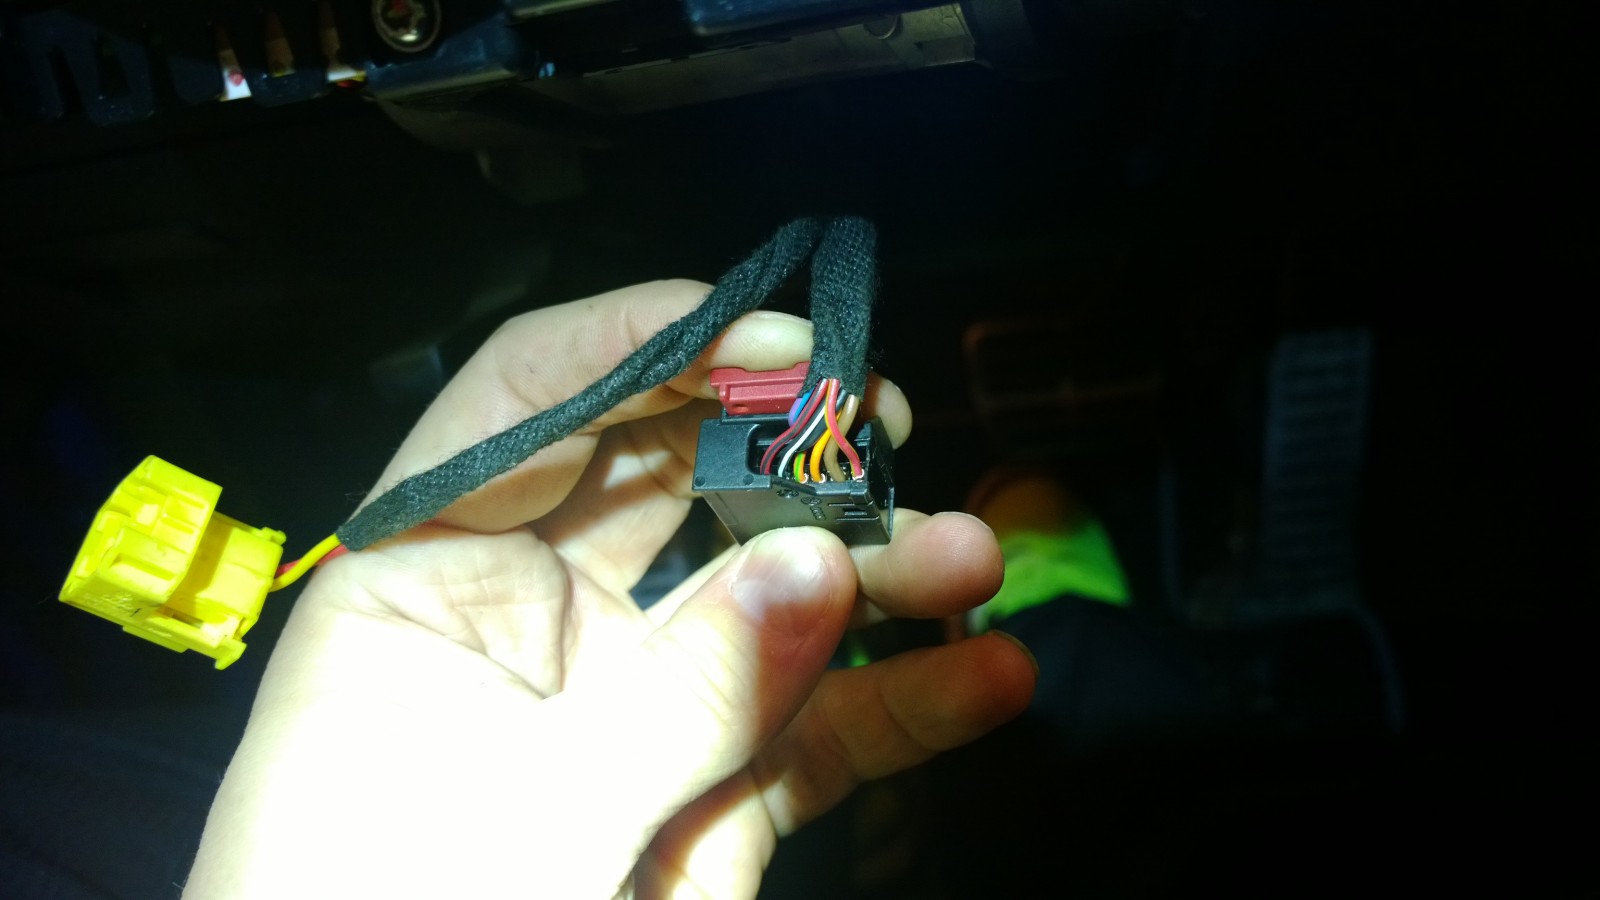
Also check for a wire at pin 5 of the black 16-pin connector, black-and-white here. Apparently some cars don't have it. If missing, a wire needs running from here to the engine ECU: pin 18 of the 94-pin connector on the Scirocco.
Then everything back in place in reverse order.
If replacing the control module and clock spring, make sure the clock spring is centred. It turns about 2.5 revolutions either way with the wheel. Fit it a turn or two off-centre — perhaps because it was removed with the wheel turned — and the first full steering input will break it…
With the screws tightened and the wheel and airbag back in place, finish the coding with VCDS. If the control module was replaced, use the original module's coding with CCS enabled.
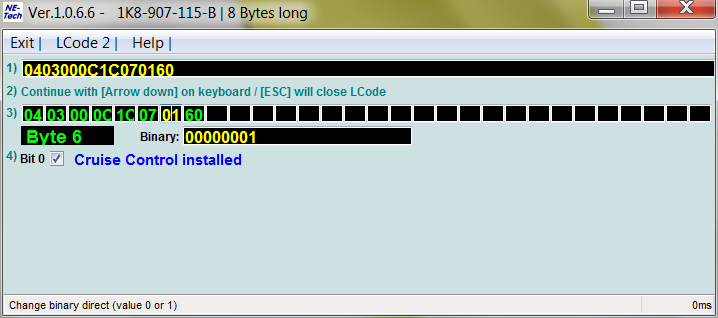
CCS also needs enabling in the engine ECU's coding.
That should do it. Switch cruise on at the stalk and its indicator appears in the instrument cluster.
2013-12-31 · Sat-nav for the Scirocco
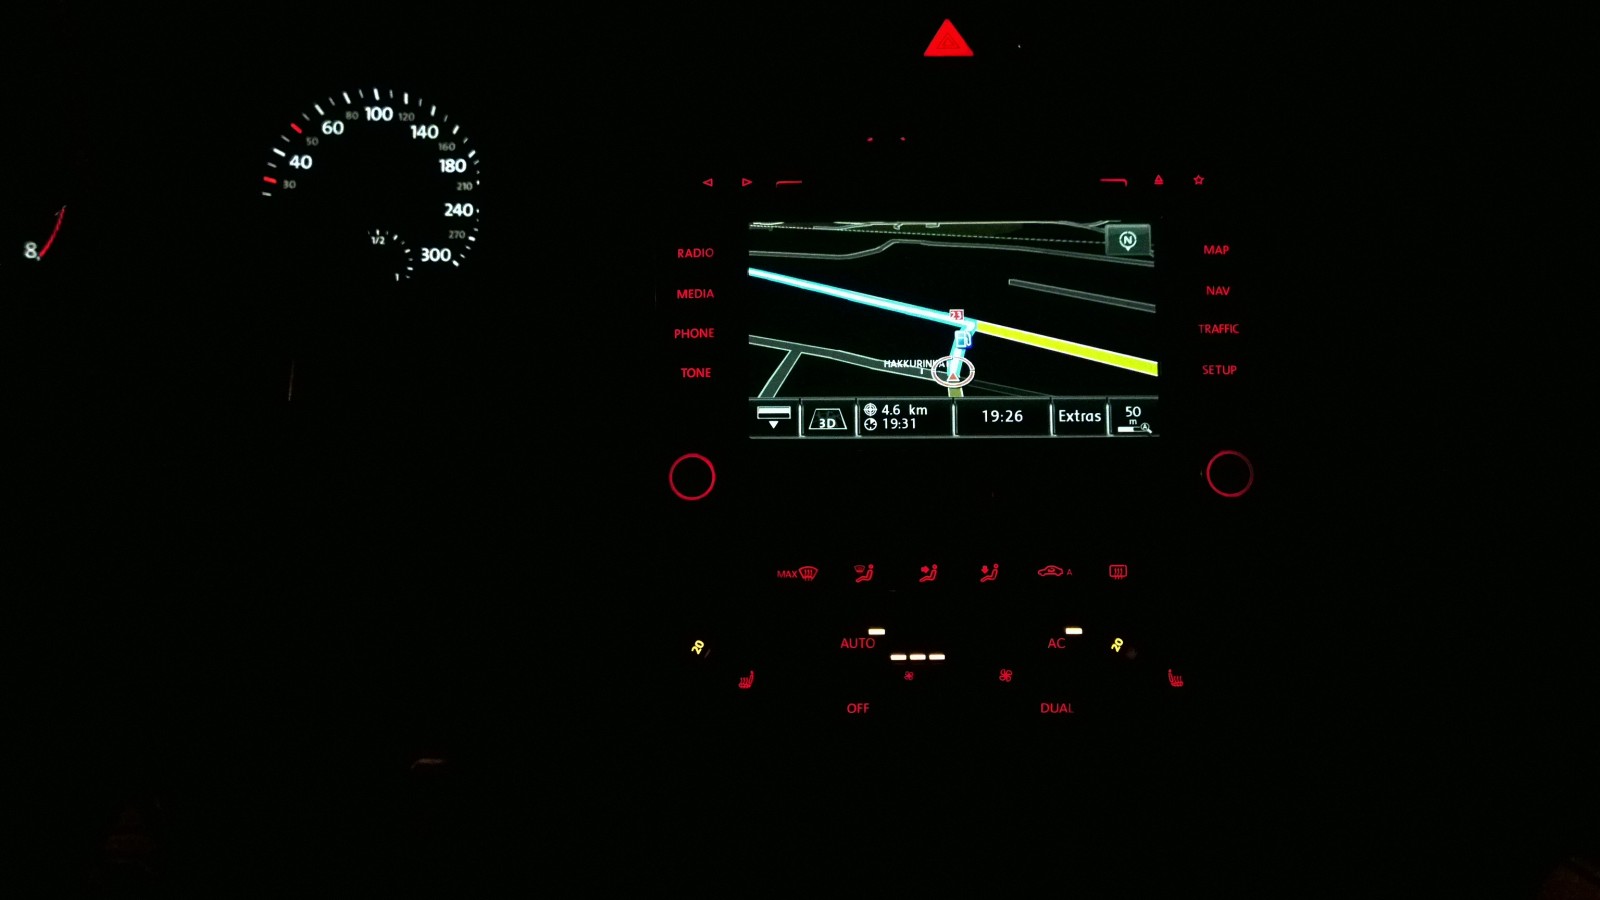
To mark the last day of the year, we continued adding extras to the basic-spec Scirocco. Pekka had sourced an RNS-510 from a 2012 Passat at a Swedish breaker, so in it went to replace the original RCD-310.
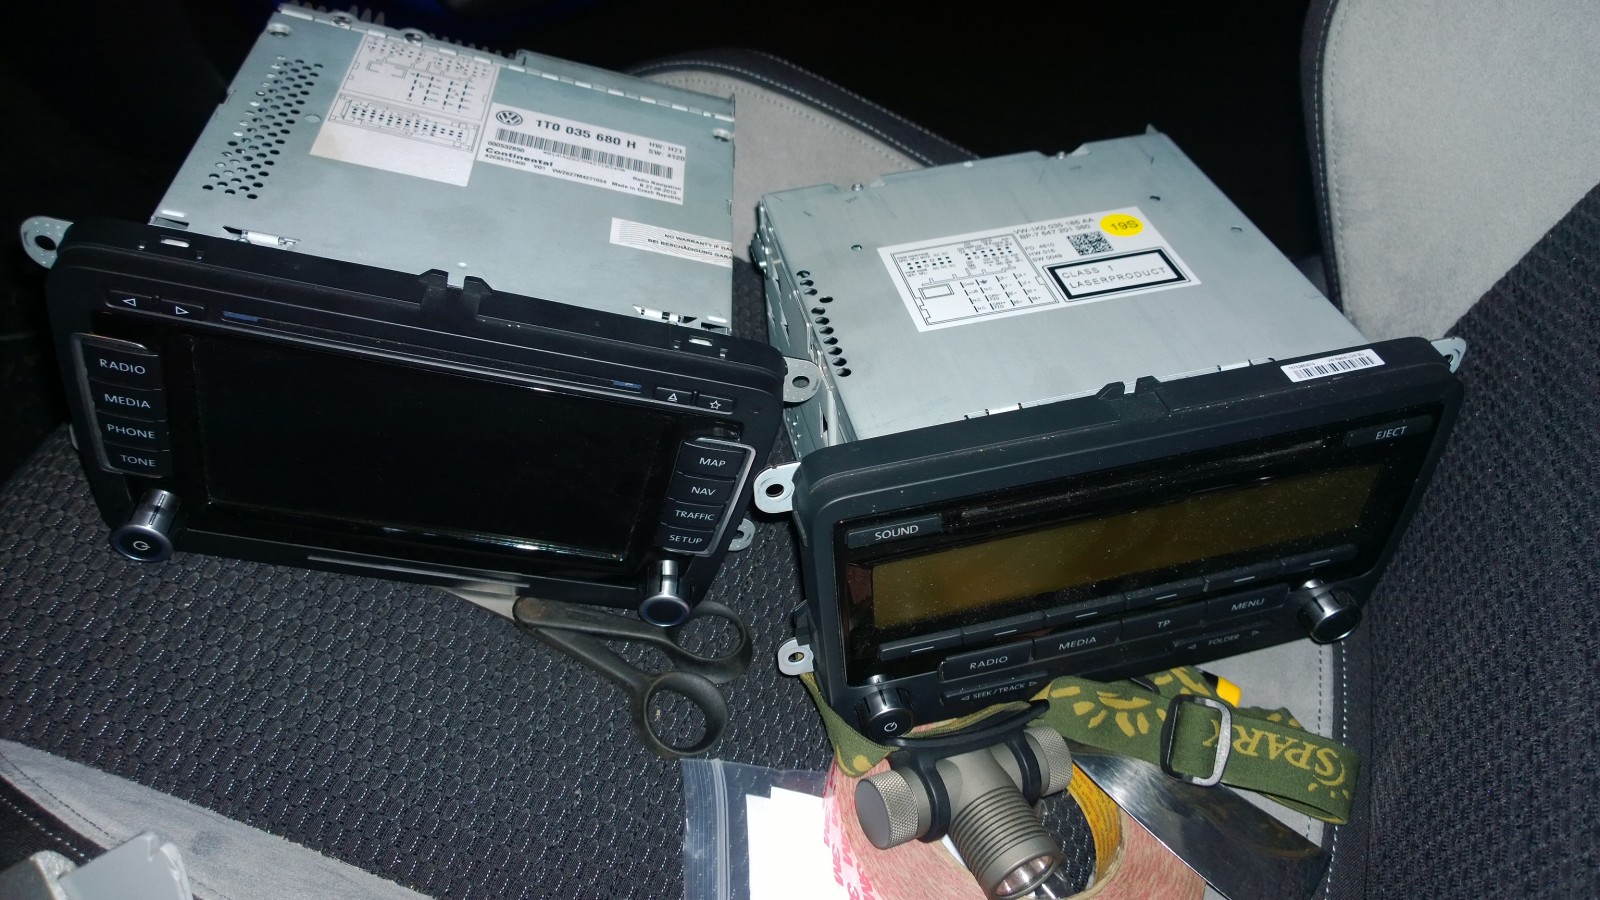
RNS-510 on the left, RCD-310 on the right
Heikki got a little carried away fitting it and forgot some photos, so the pictures below aren't quite in chronological order. Explanations in the captions.
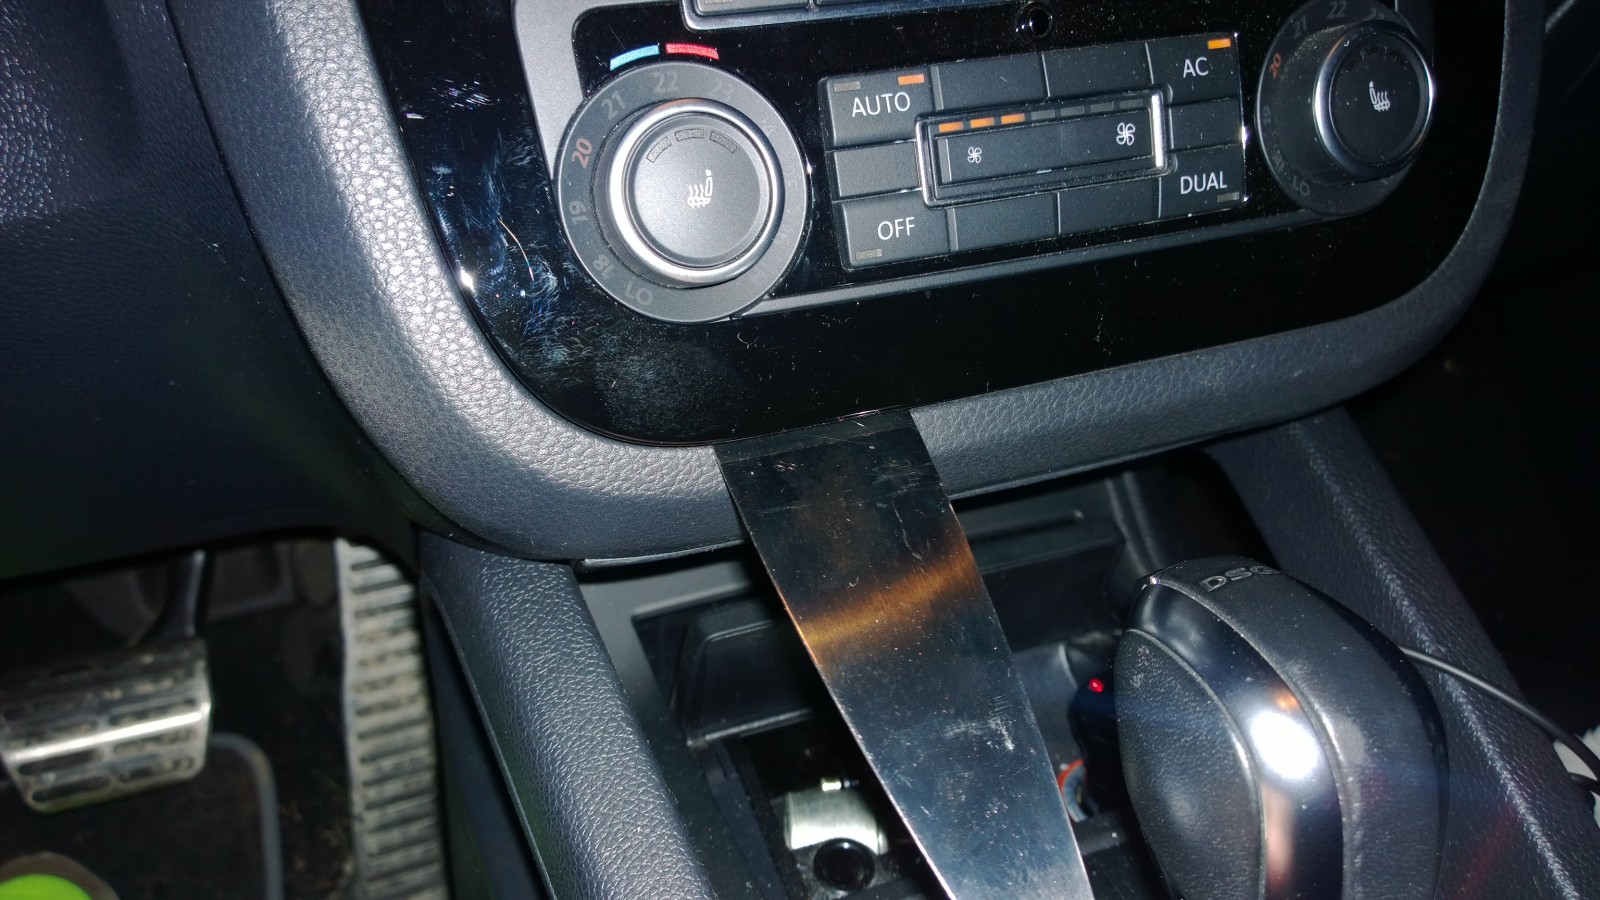
Prise off the head-unit surround, starting at the bottom. A wide trim tool helps.
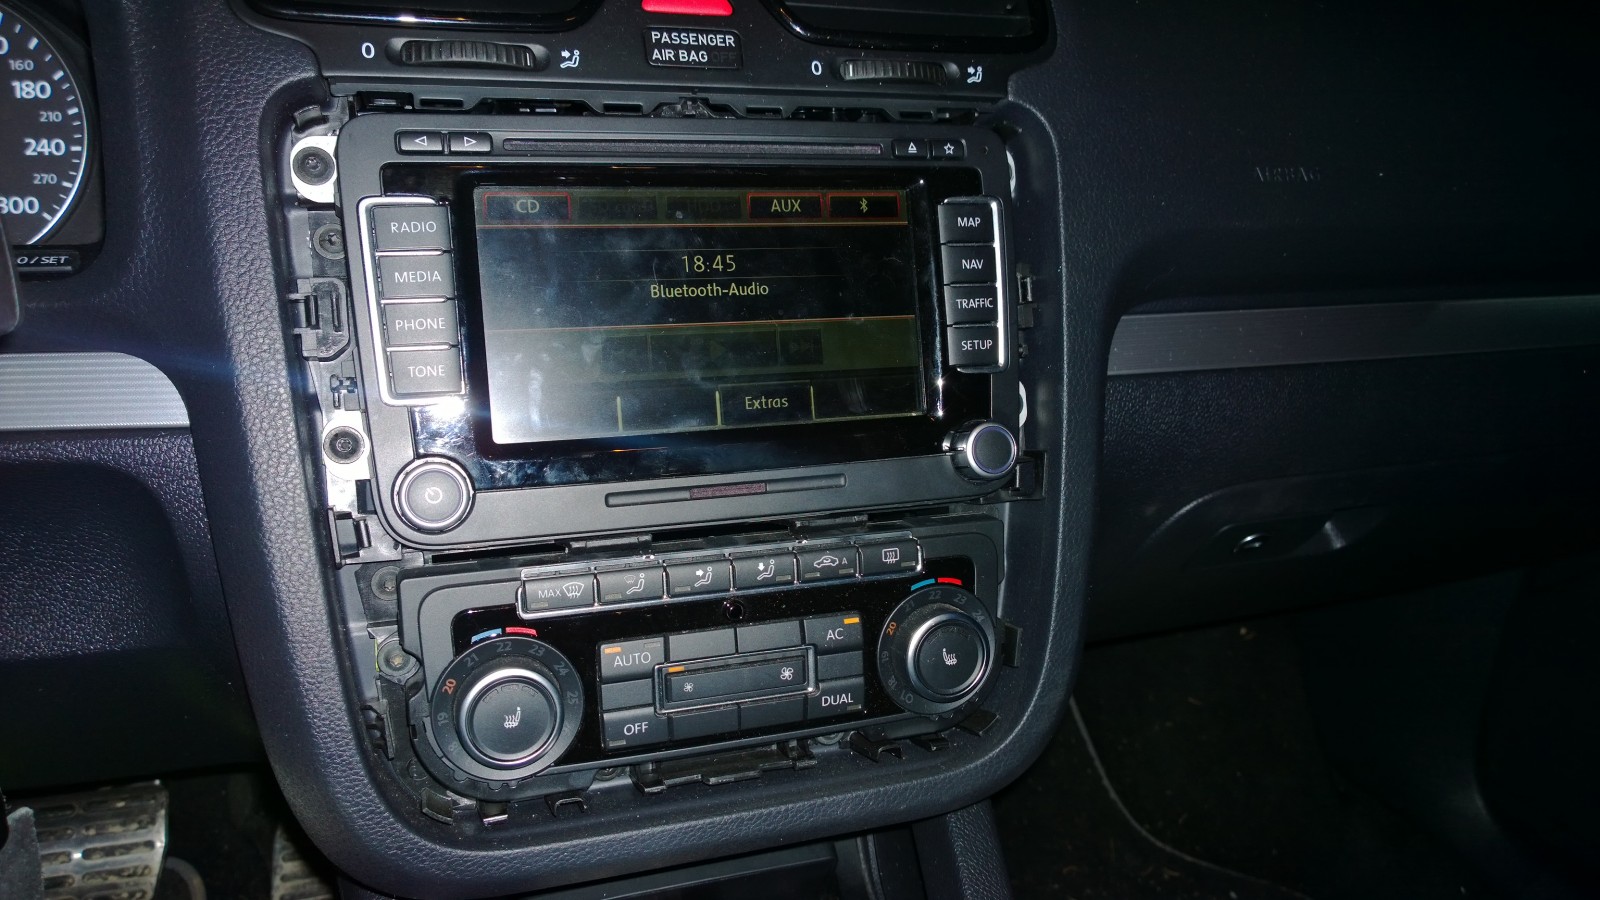
Surround off. Four Torx screws hold the head unit. The RNS is already fitted in this photo.
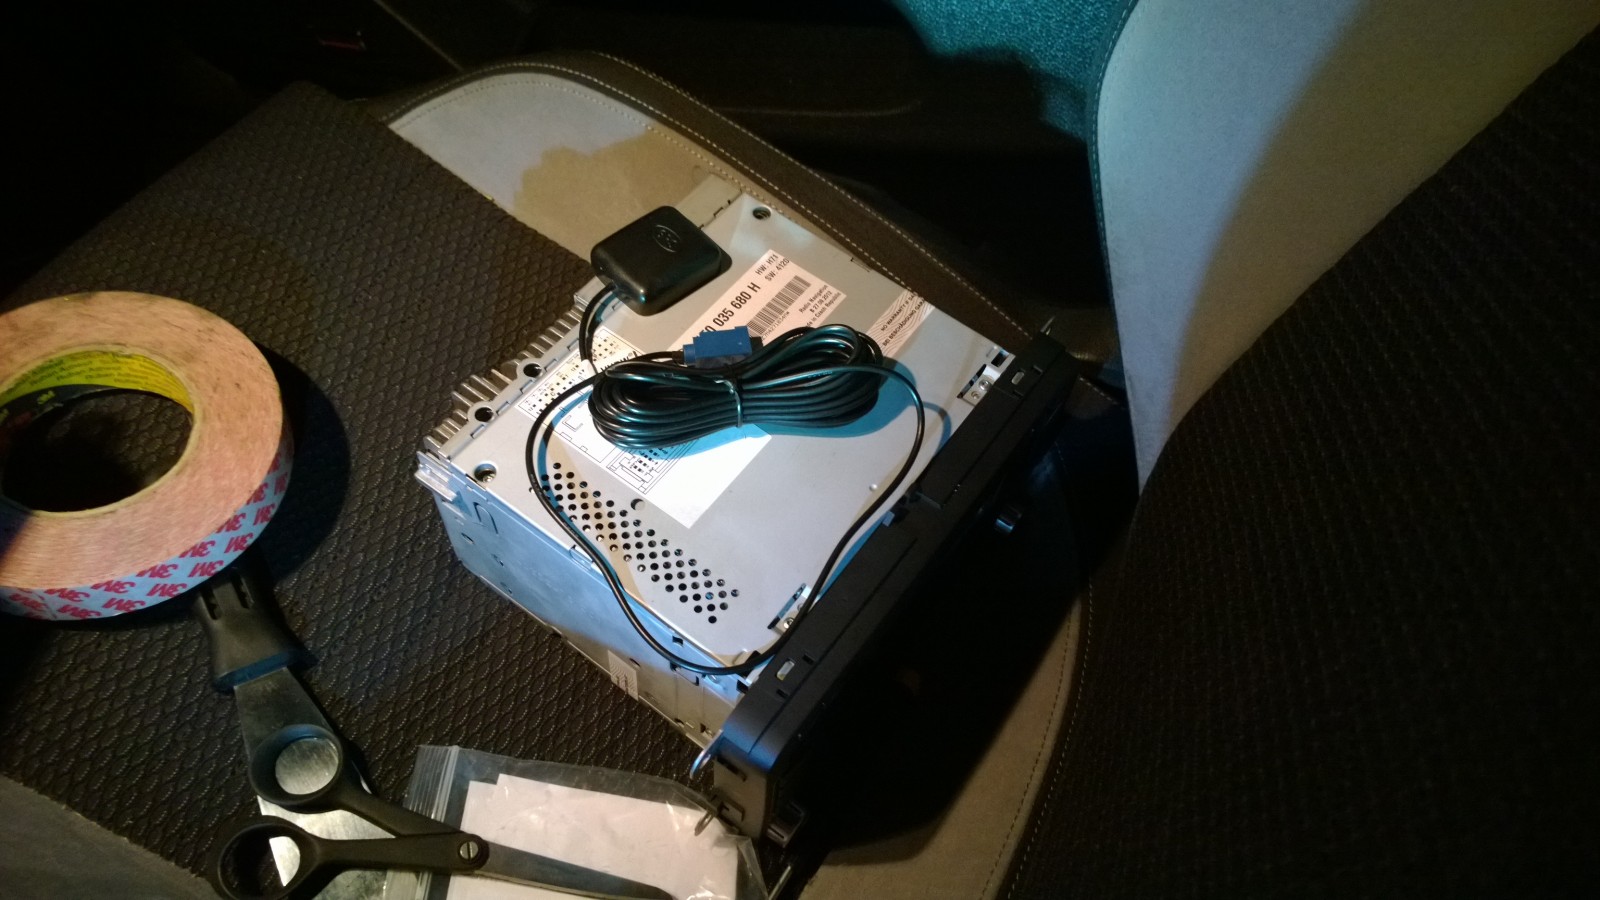
Naturally, the roof aerial had no GPS capability. Being a cheapskate, I bought a €10 GPS antenna on eBay instead.
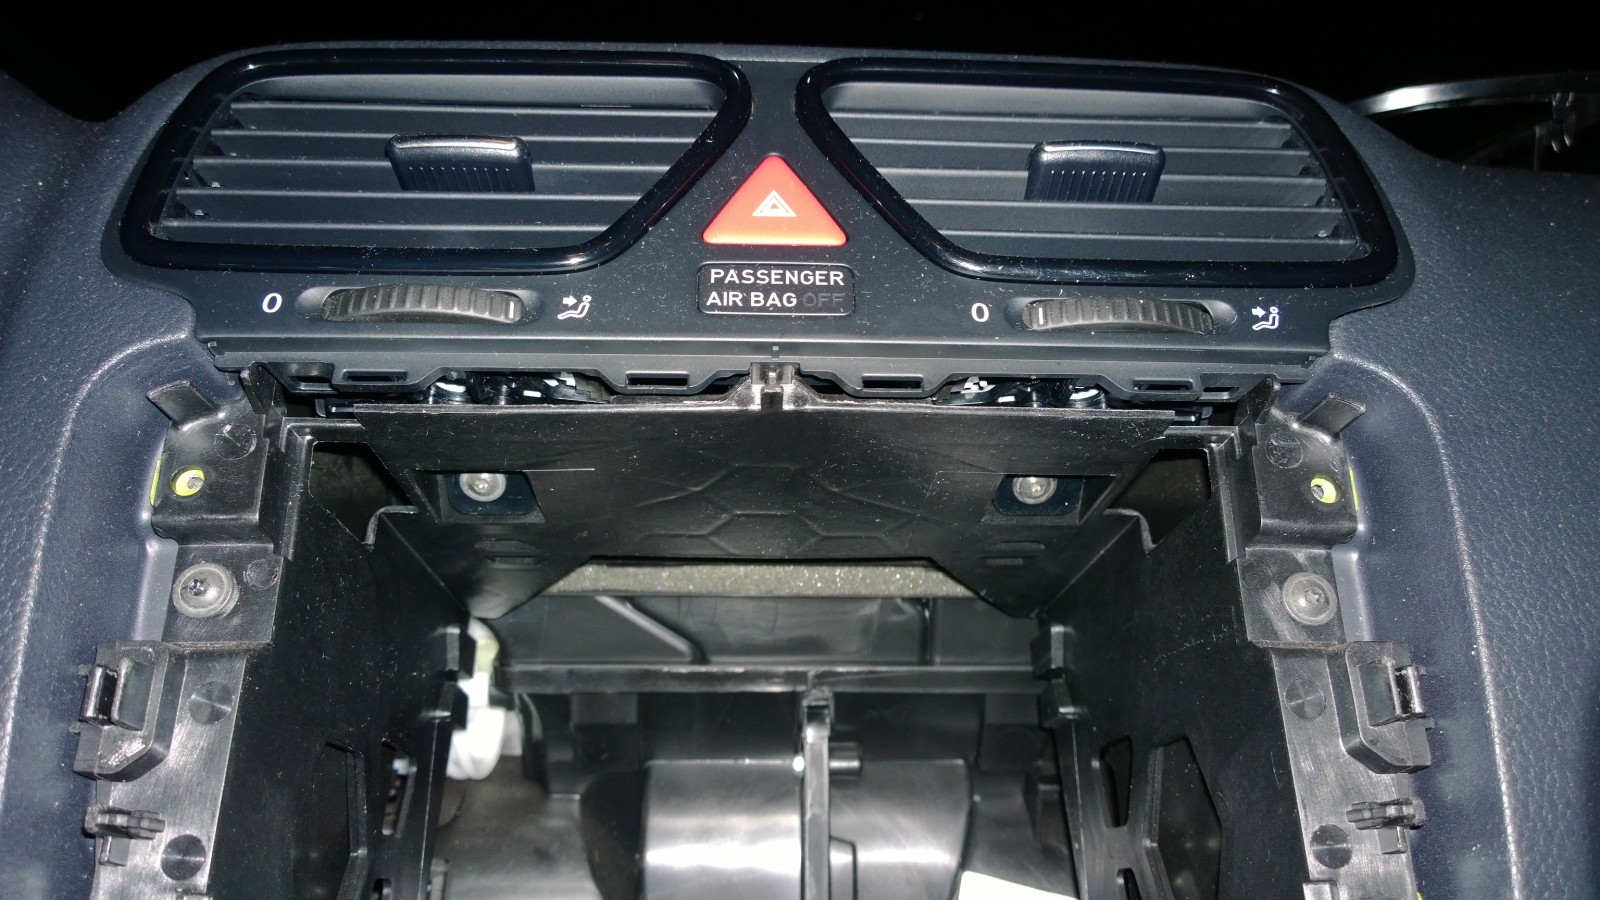
This antenna can sit inside the dashboard. Remove the air vents: two Torx screws accessed through the head-unit opening release the vent assembly.
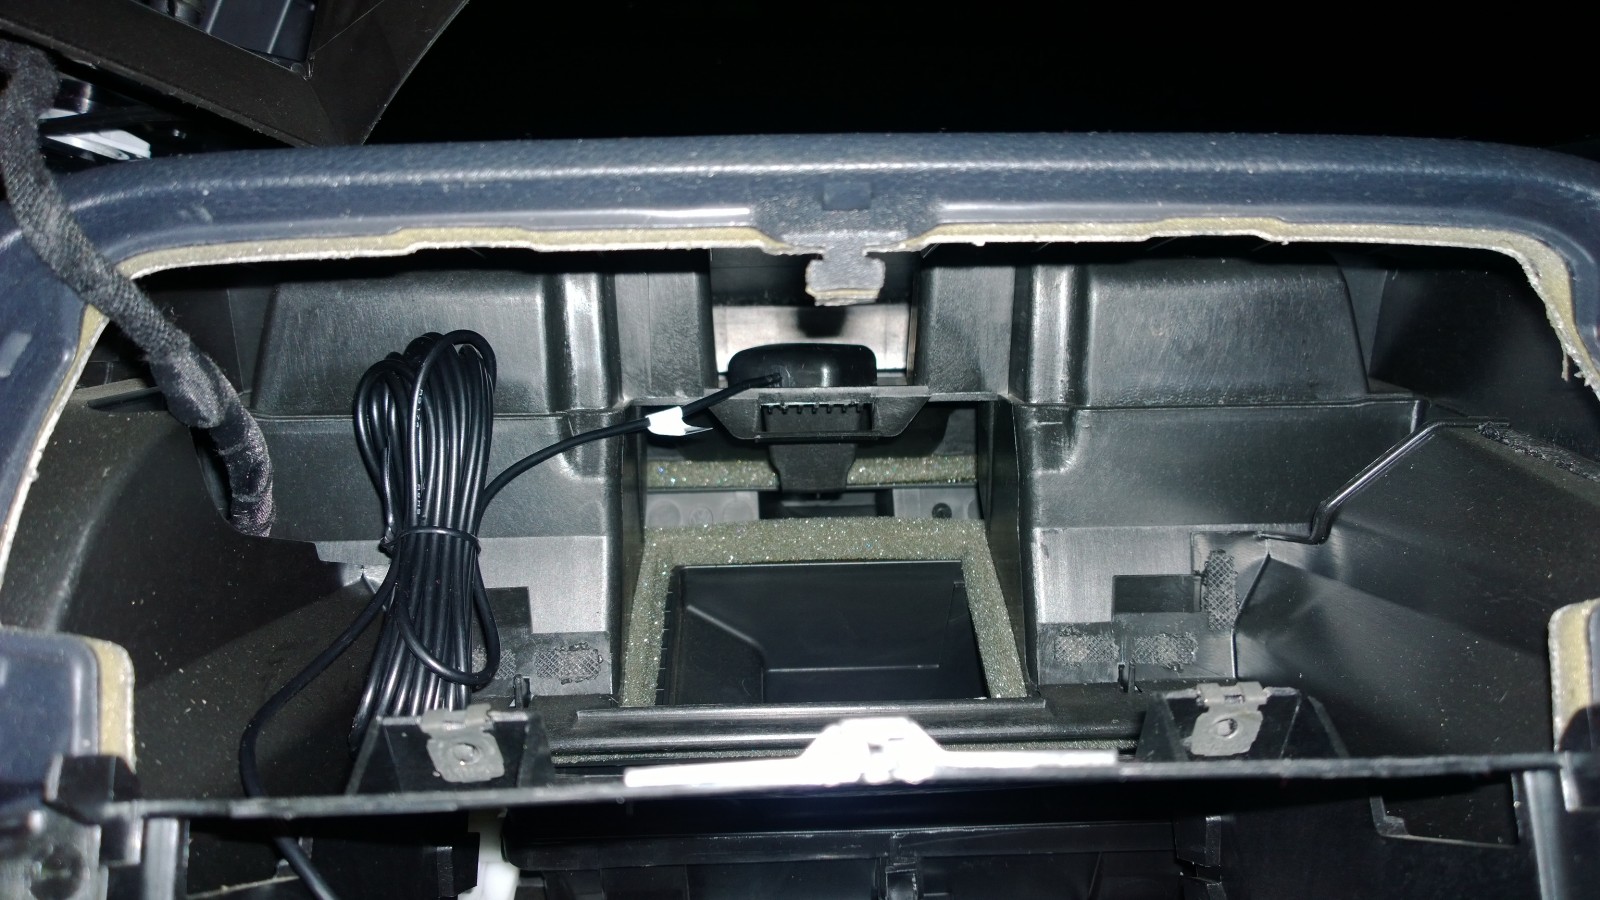
A handy space behind the vents takes the antenna. Then put everything back in reverse order.
On first startup, the unit asks for its PIN. That either comes with it or needs obtaining from a dealer, which requires the VIN of the donor car.
Finally, VCDS coding. Tell the CAN gateway that navigation is now installed, then configure the navigation unit for the car. No screenshots this time.
2014-02-13 · A new project arrives
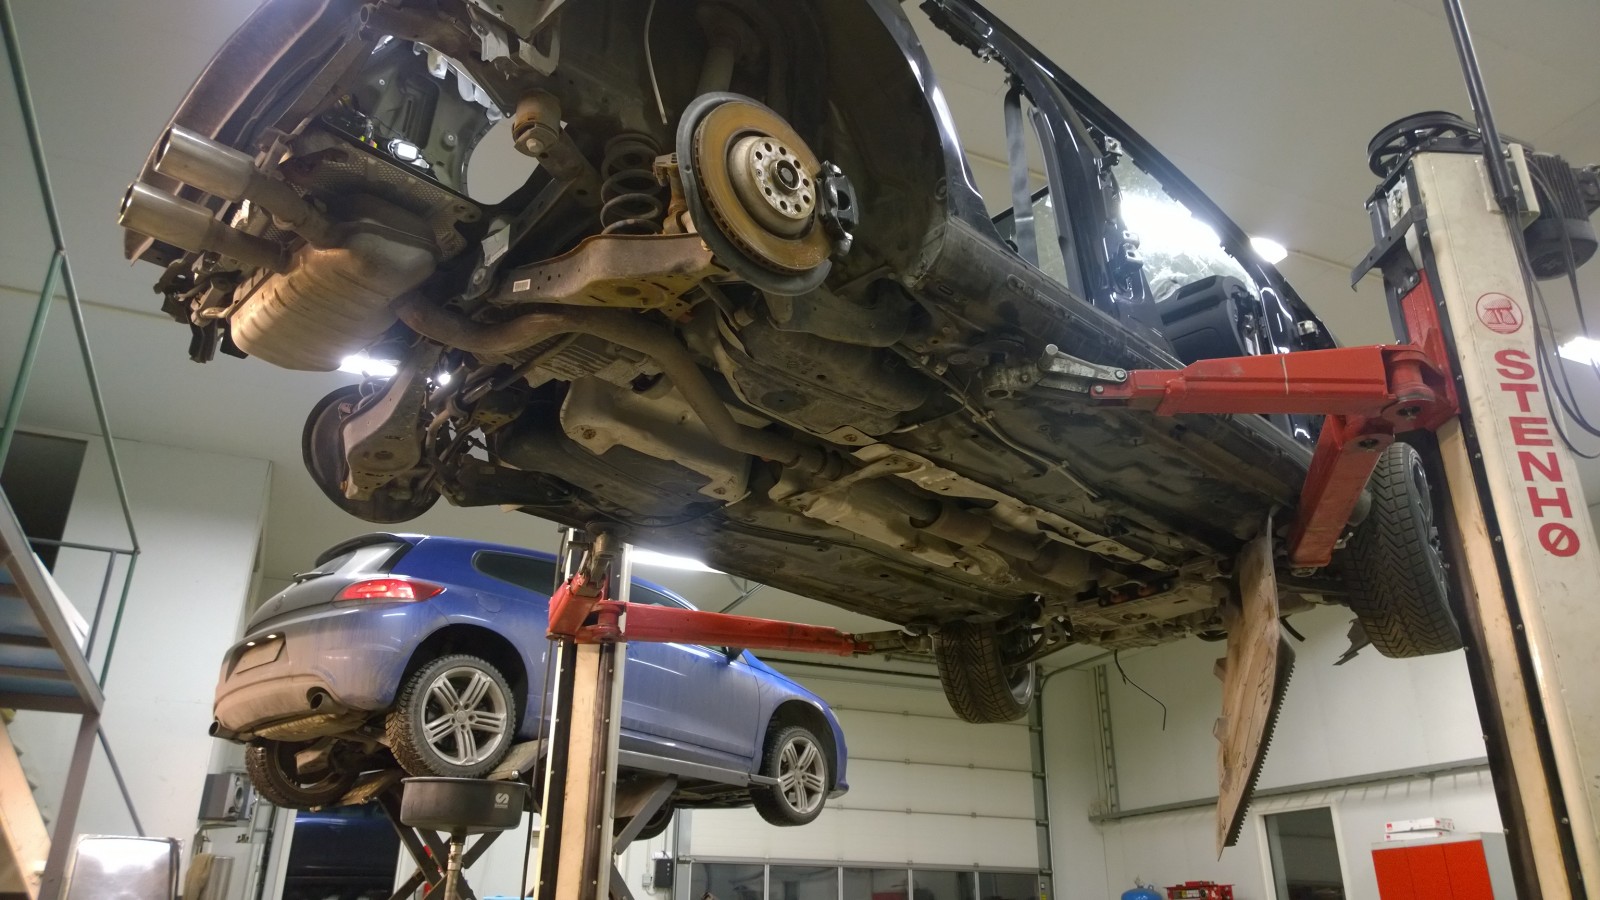
A new project arrived at the garage. Let's see what comes of this…
2014-02-17 · An evening with the wiring loom
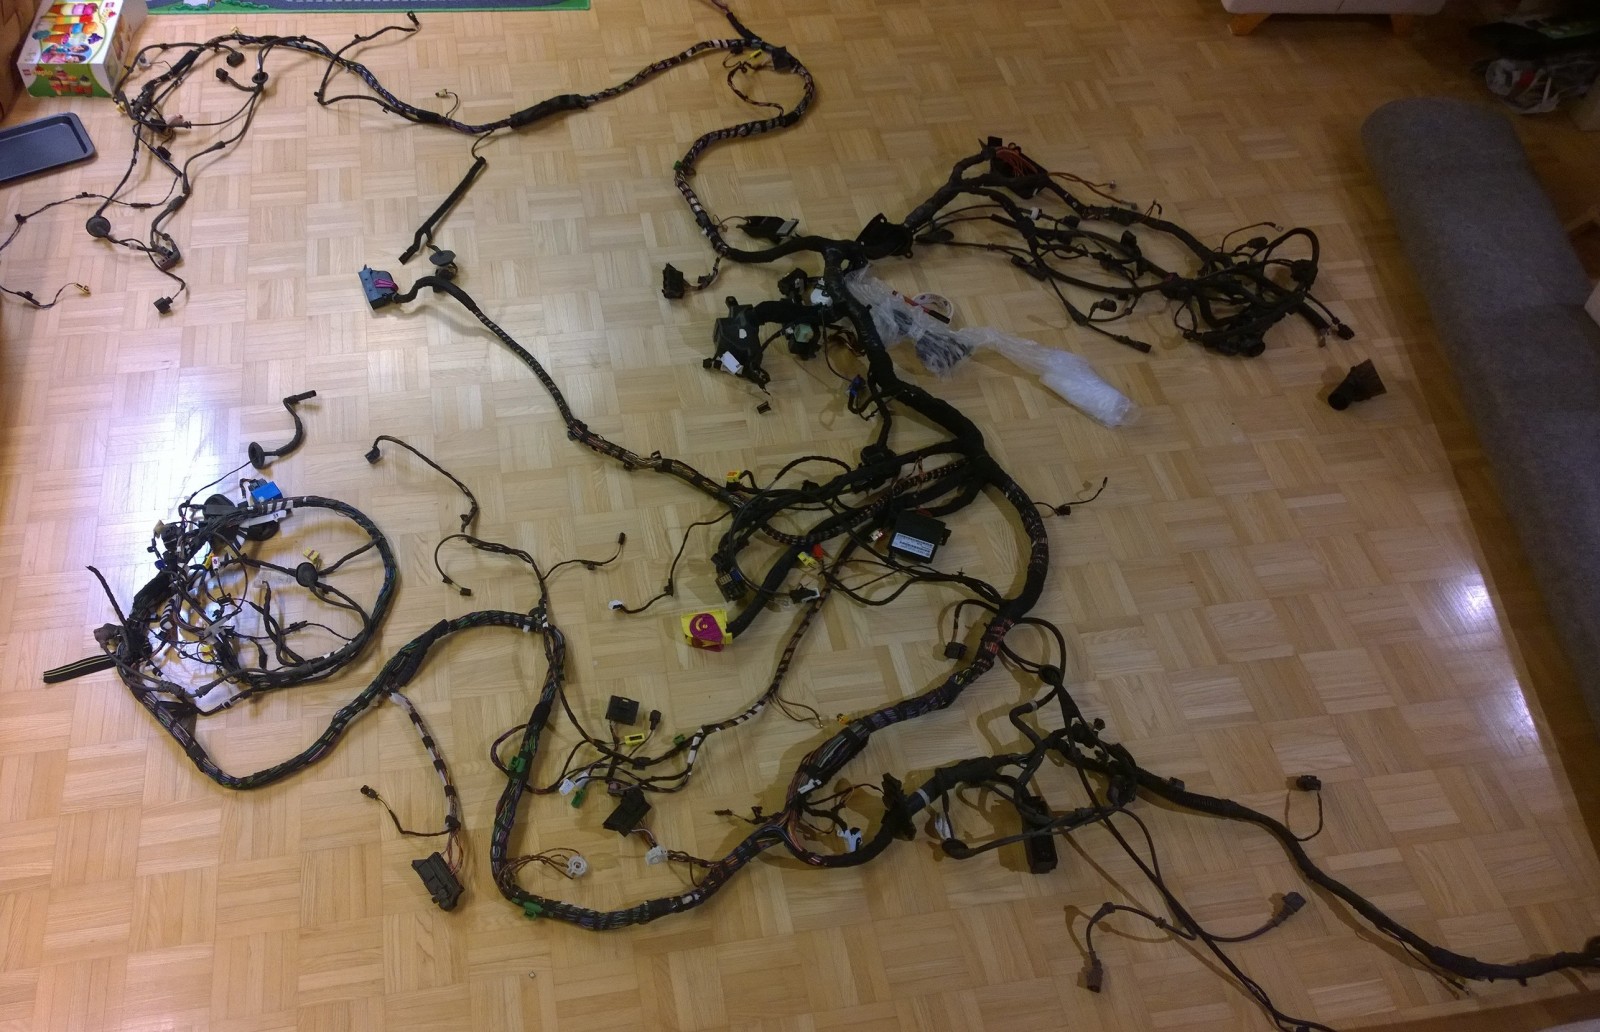
The Golf's wiring loom is providing some evening exercise. It fills the living-room floor nicely. I weighed it out of curiosity too: 16.5 kg for that tangle.
2014-06-17 · Plastidip test
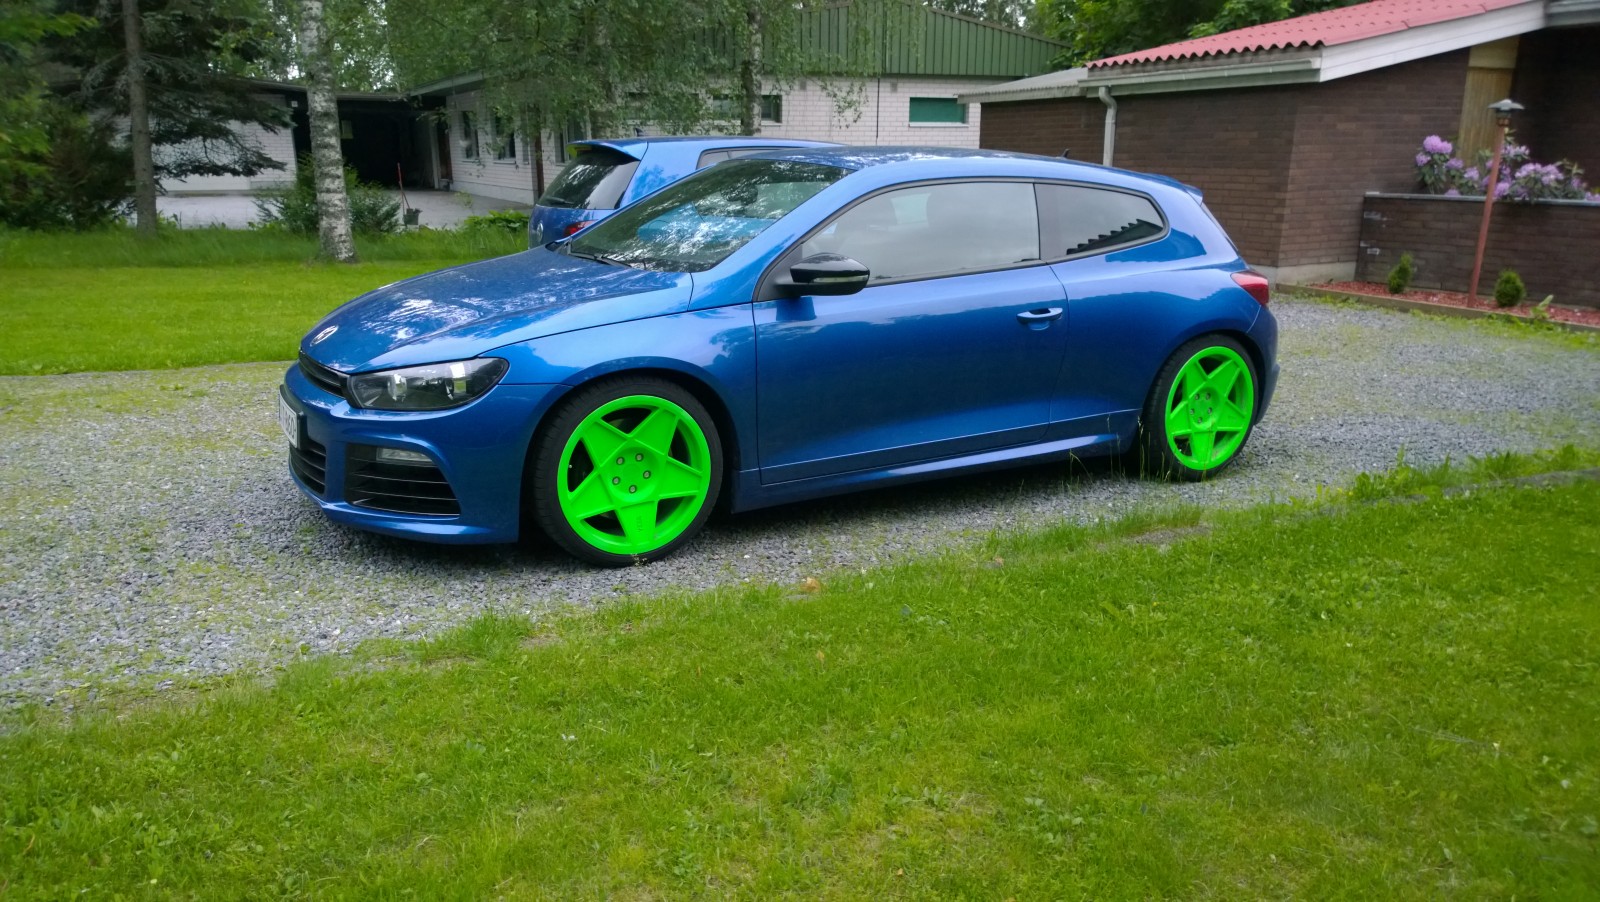
I like them. Plenty of people probably won't…
I've never liked the Scirocco's wheel finish. I accidentally bought these partly polished ones when I wanted solid white. Time to see what Plasti Dip could do. I'd never tried the stuff before.
They'll certainly turn a few heads now. I like them, though I suspect plenty of people won't 😉
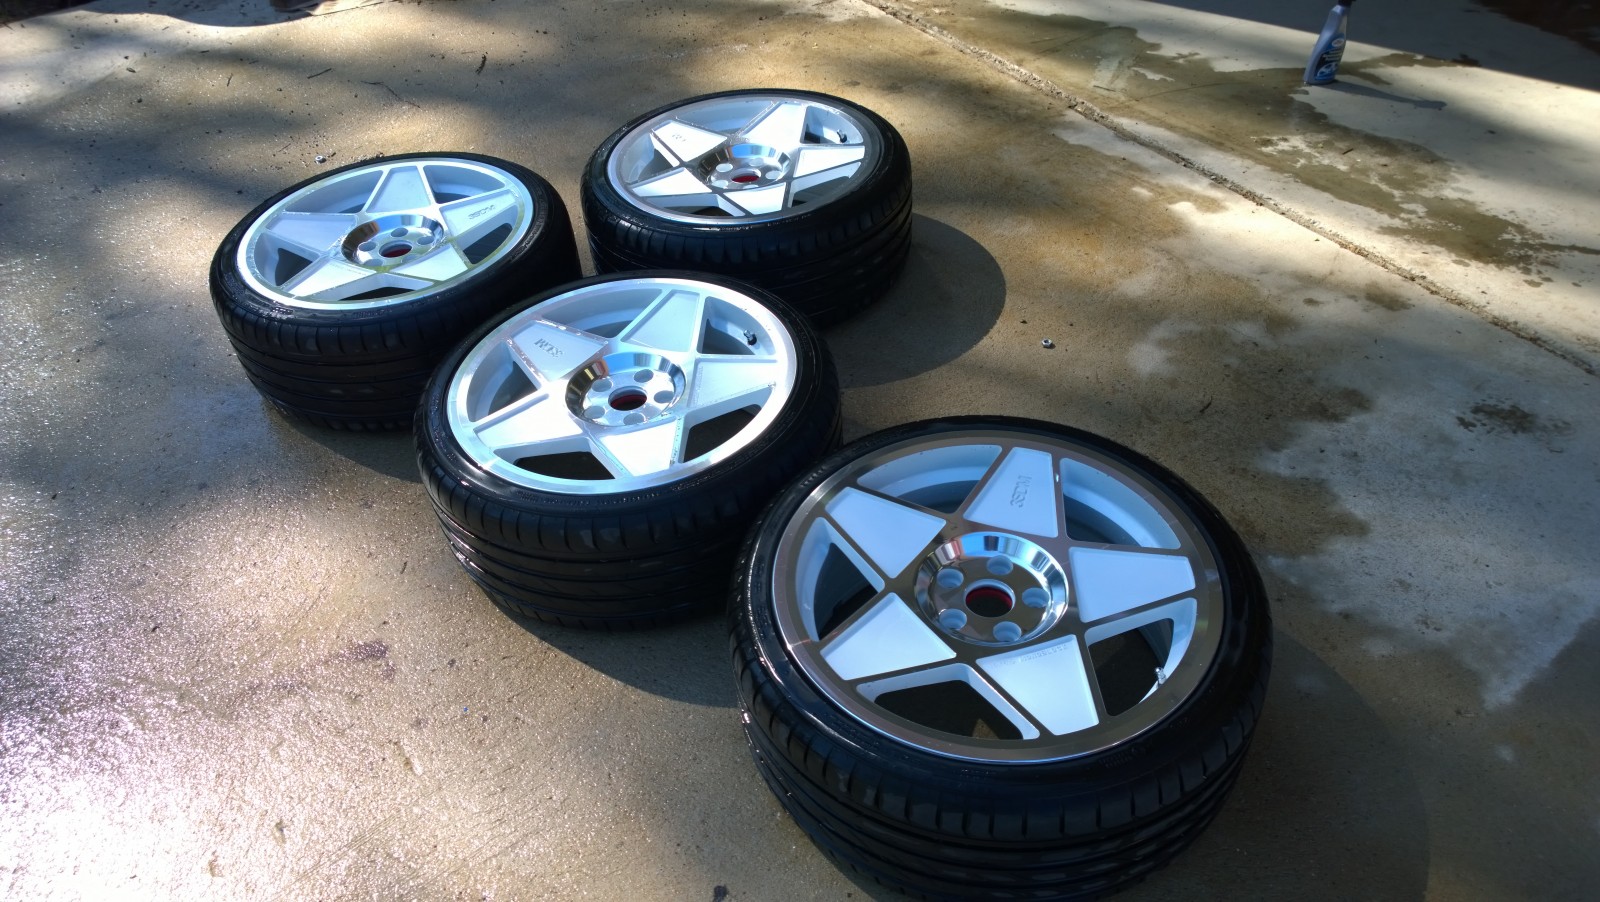
First, give the wheels a thorough wash.
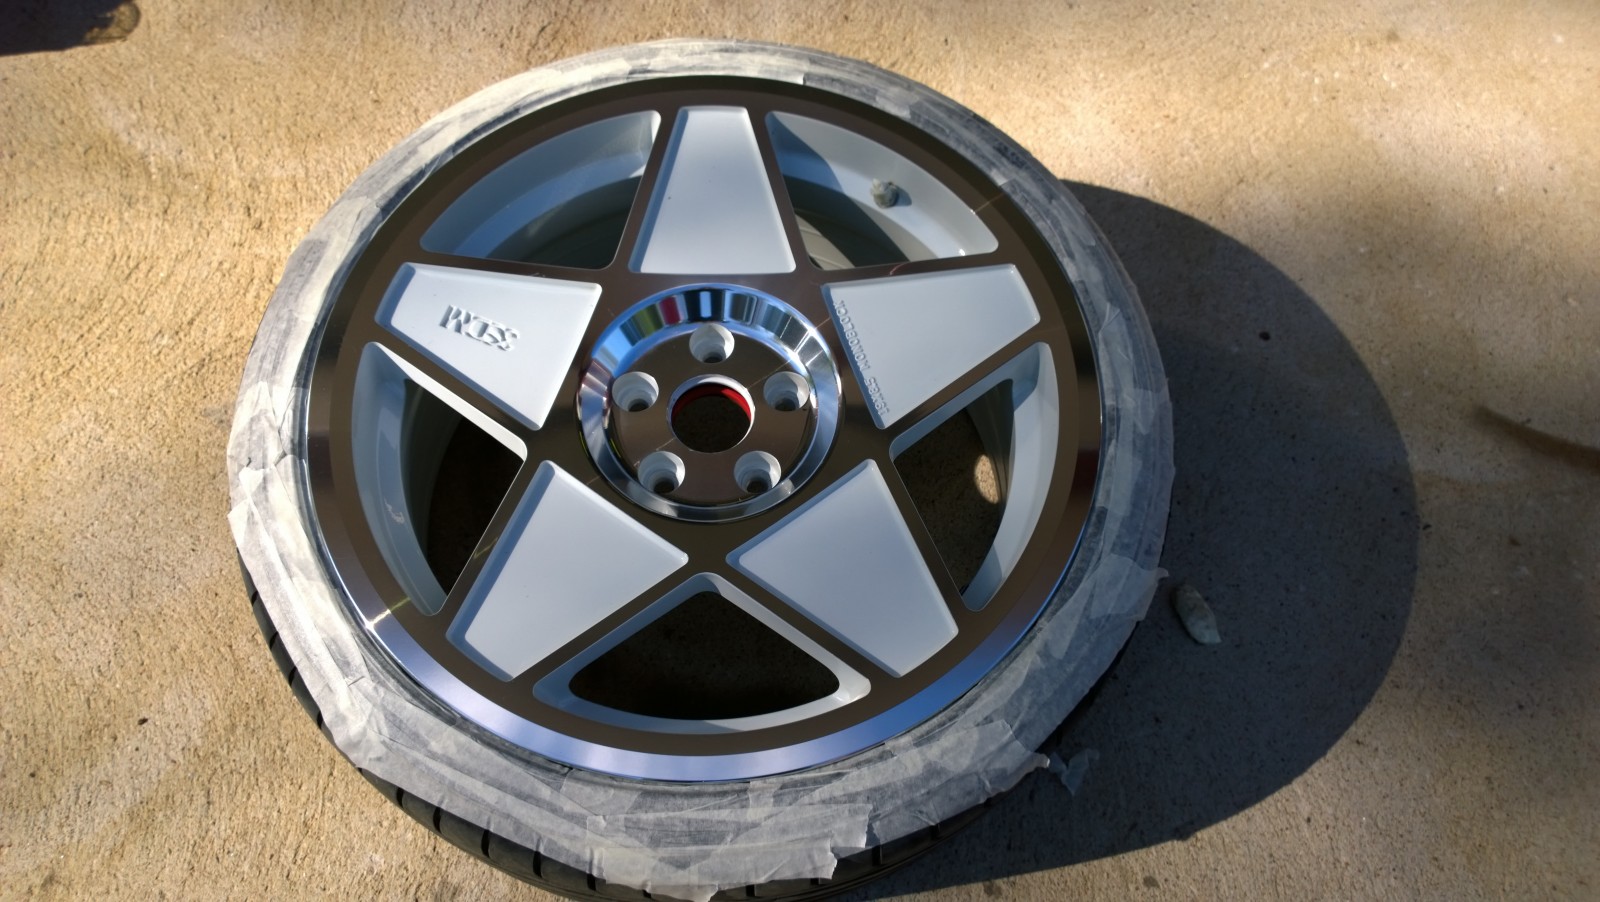
A bit of masking to protect the tyres. You can peel overspray off afterwards, but this seemed easier.
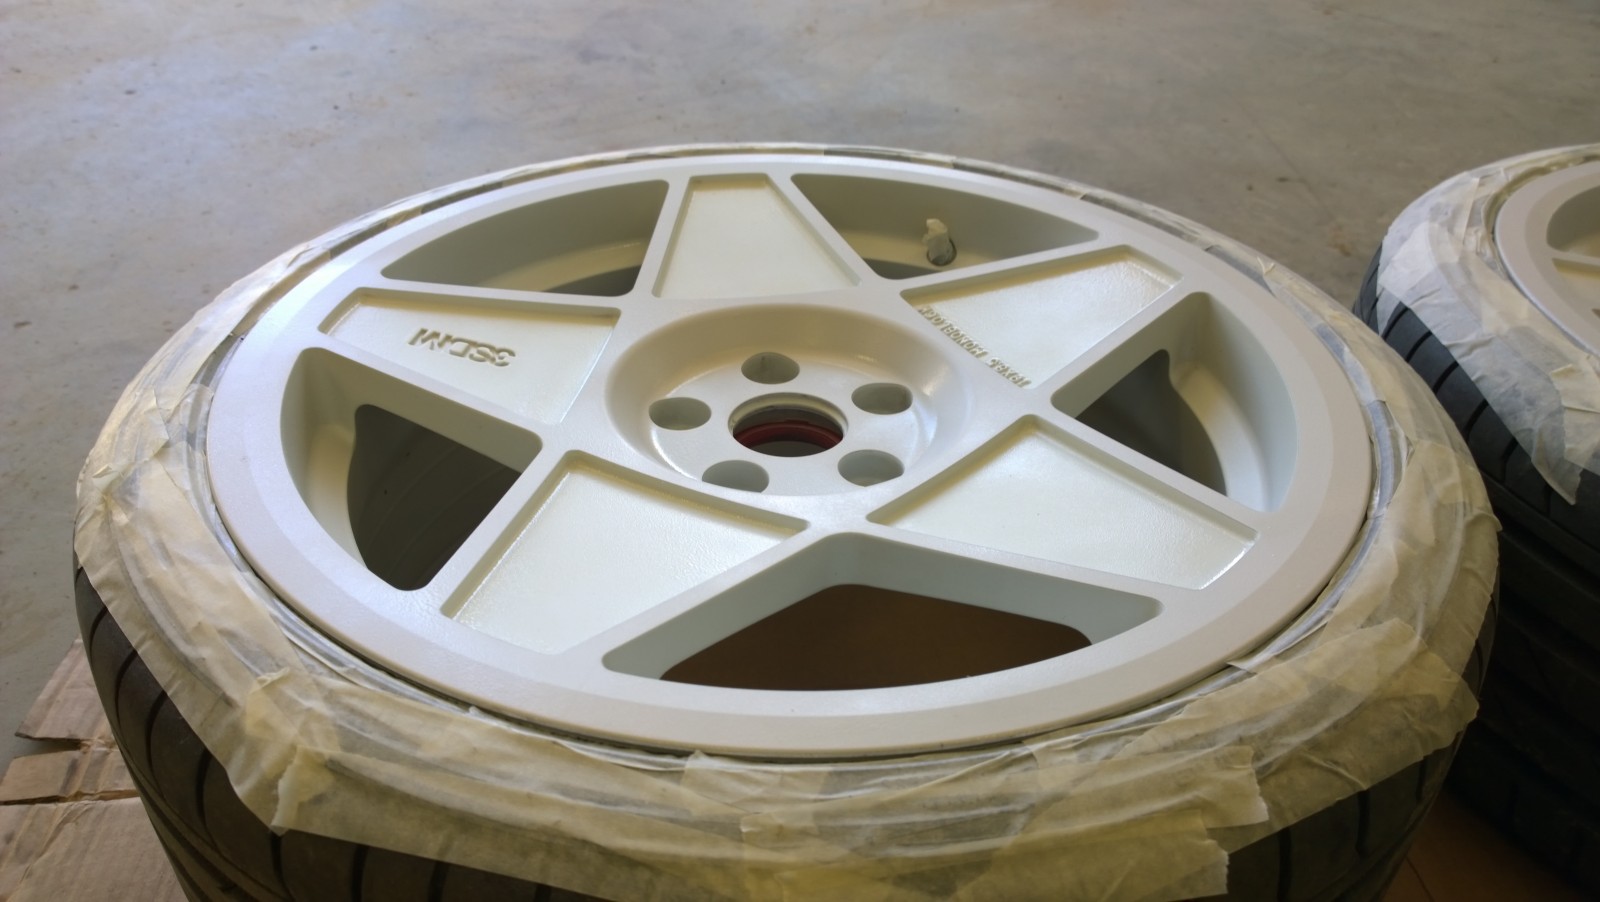
White Plasti Dip first, for an even base colour. One can only just covered all four wheels. Another would have helped cover the stone chips better.
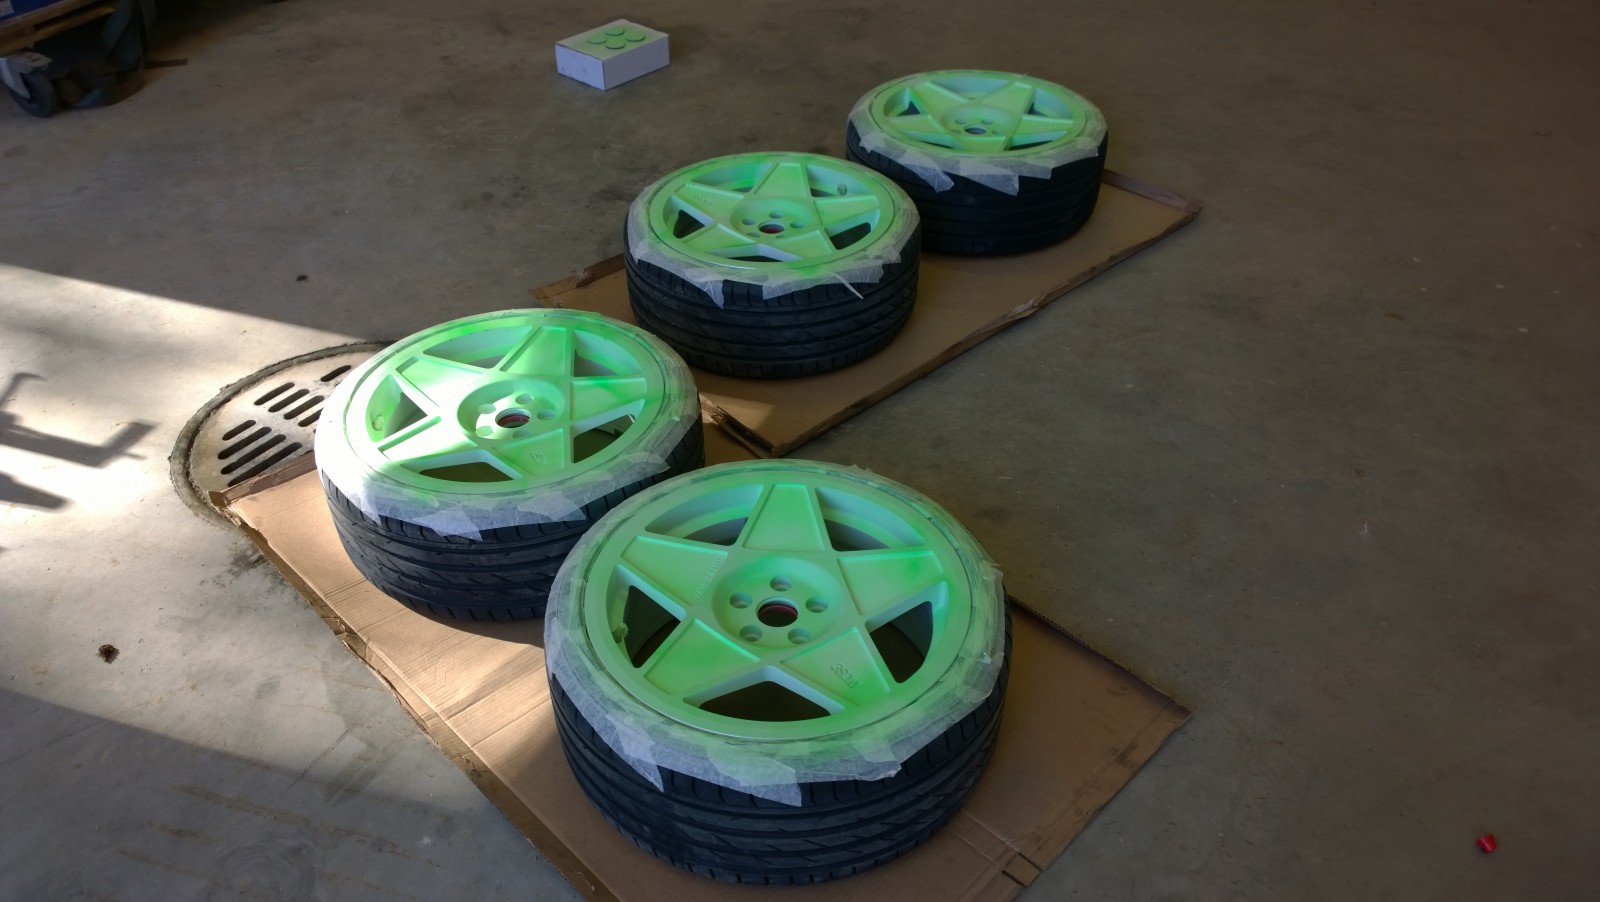
First light mist coat. The colour is Blaze Green.
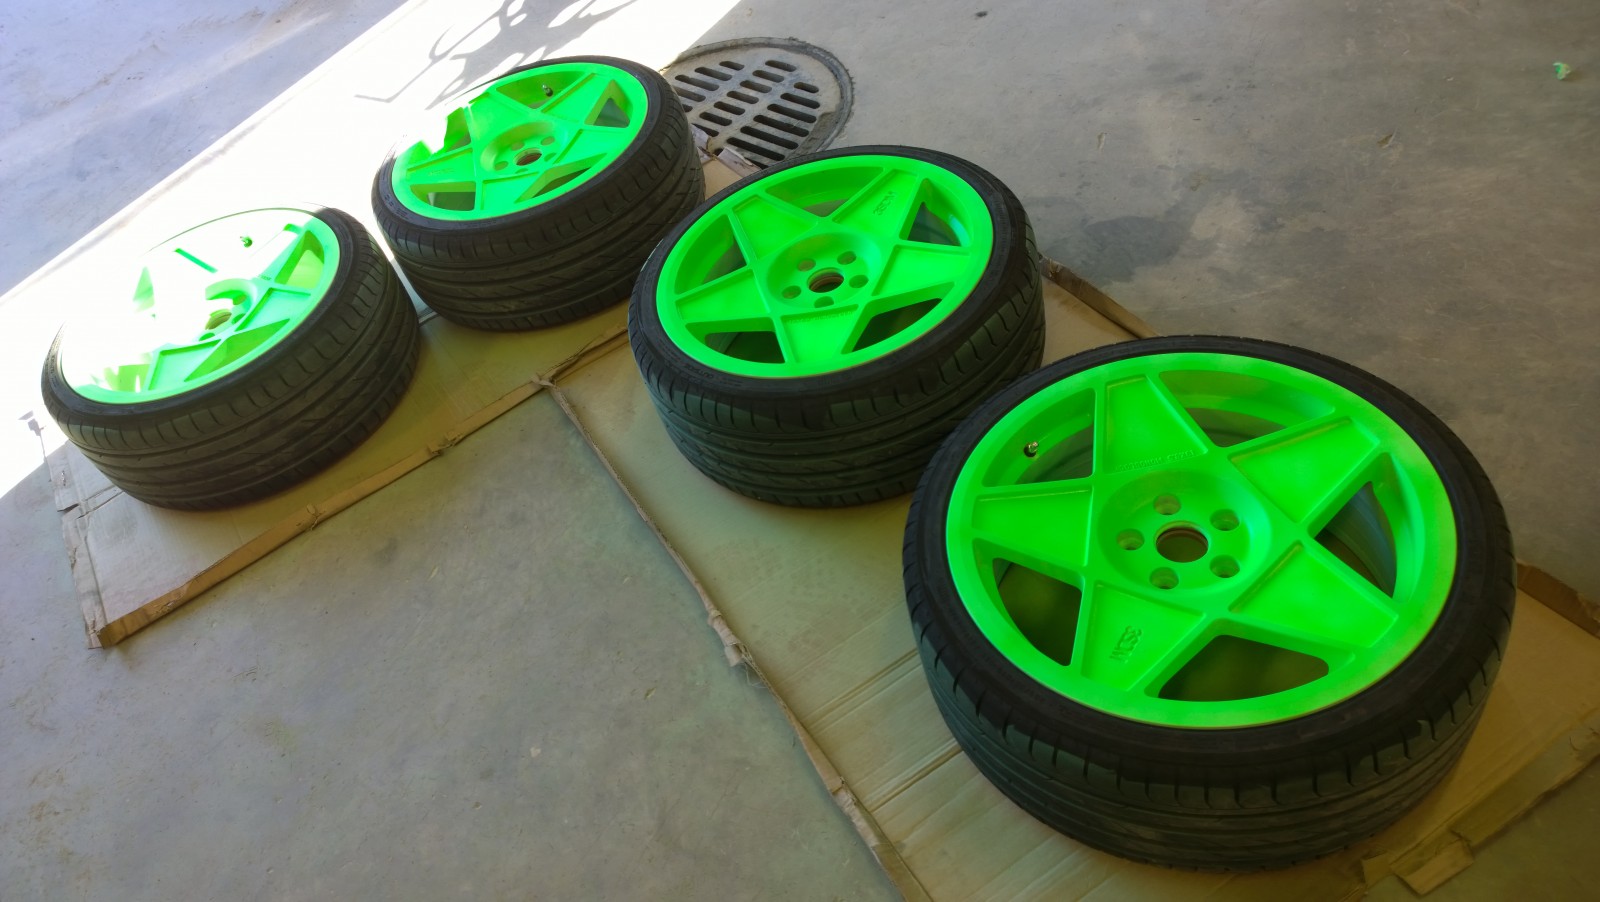
Four or five coats. I ran slightly short, leaving a few areas a bit thin. Five cans went onto four wheels; another one or two would have been useful…
And to finish, a parcel arrived via Matkahuolto today. A few more bits for the car. Wonder what they could be…
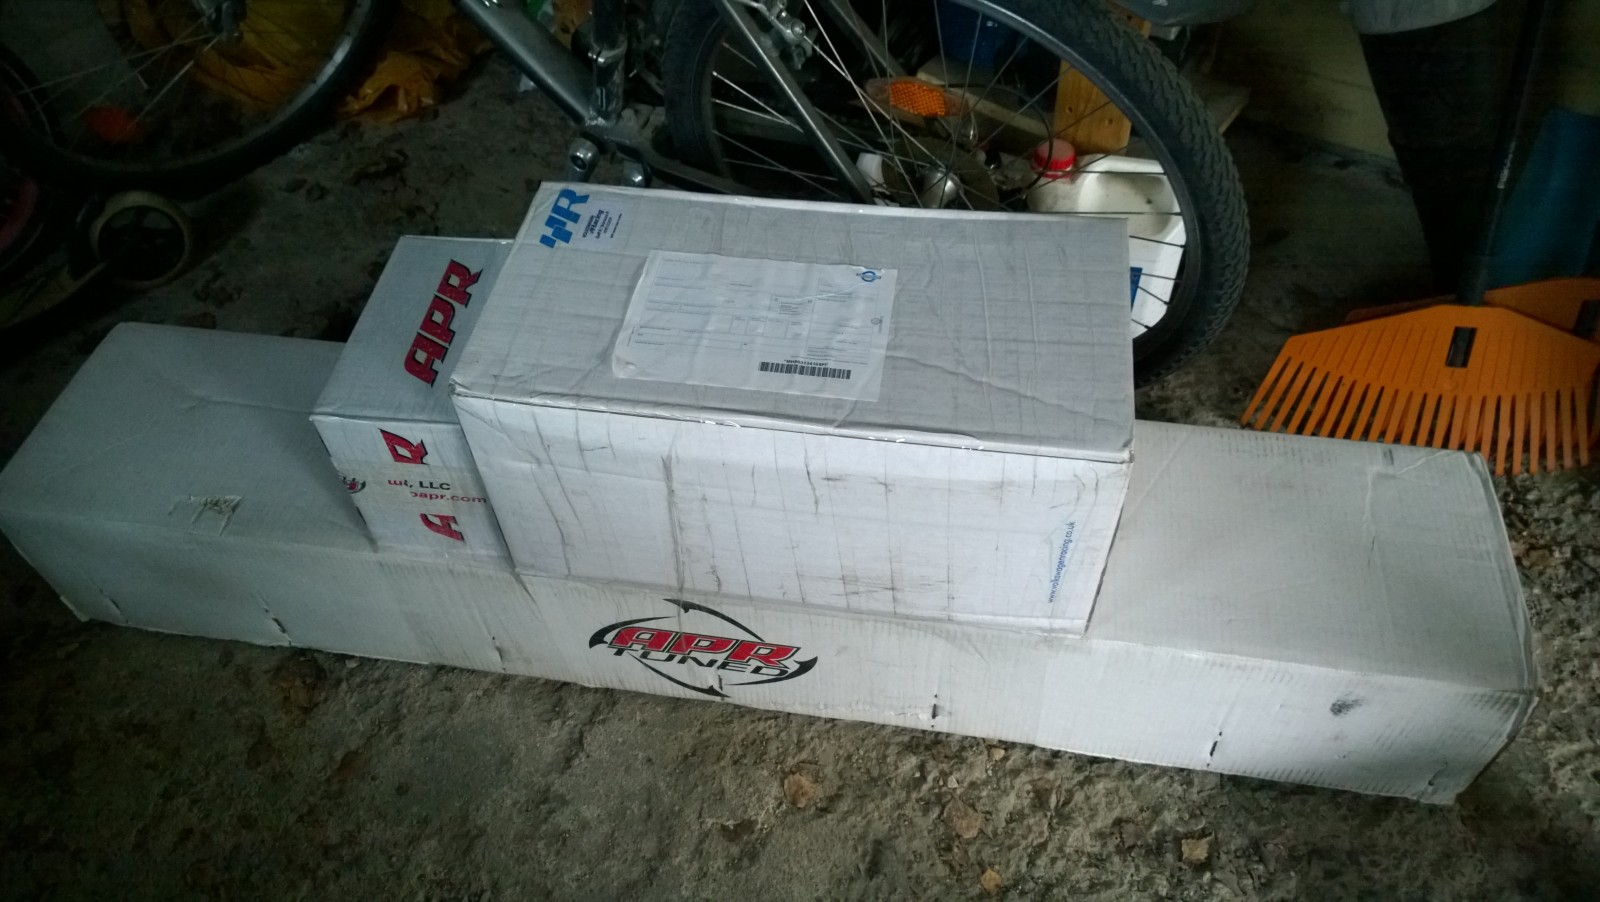
A parcel from Matkahuolto… wonder what's inside.
2014-07-26 · An extra gauge for the Scirocco
I spotted an interesting gadget on social media: a digital gauge built into an air vent. Hardly essential in a road car like this, but it looked so good in the photos. They'd even made a version matching the Scirocco R's instrument colours. Naturally, I ordered one to try.
Fitting was fairly simple. Instructions on the manufacturer's website.
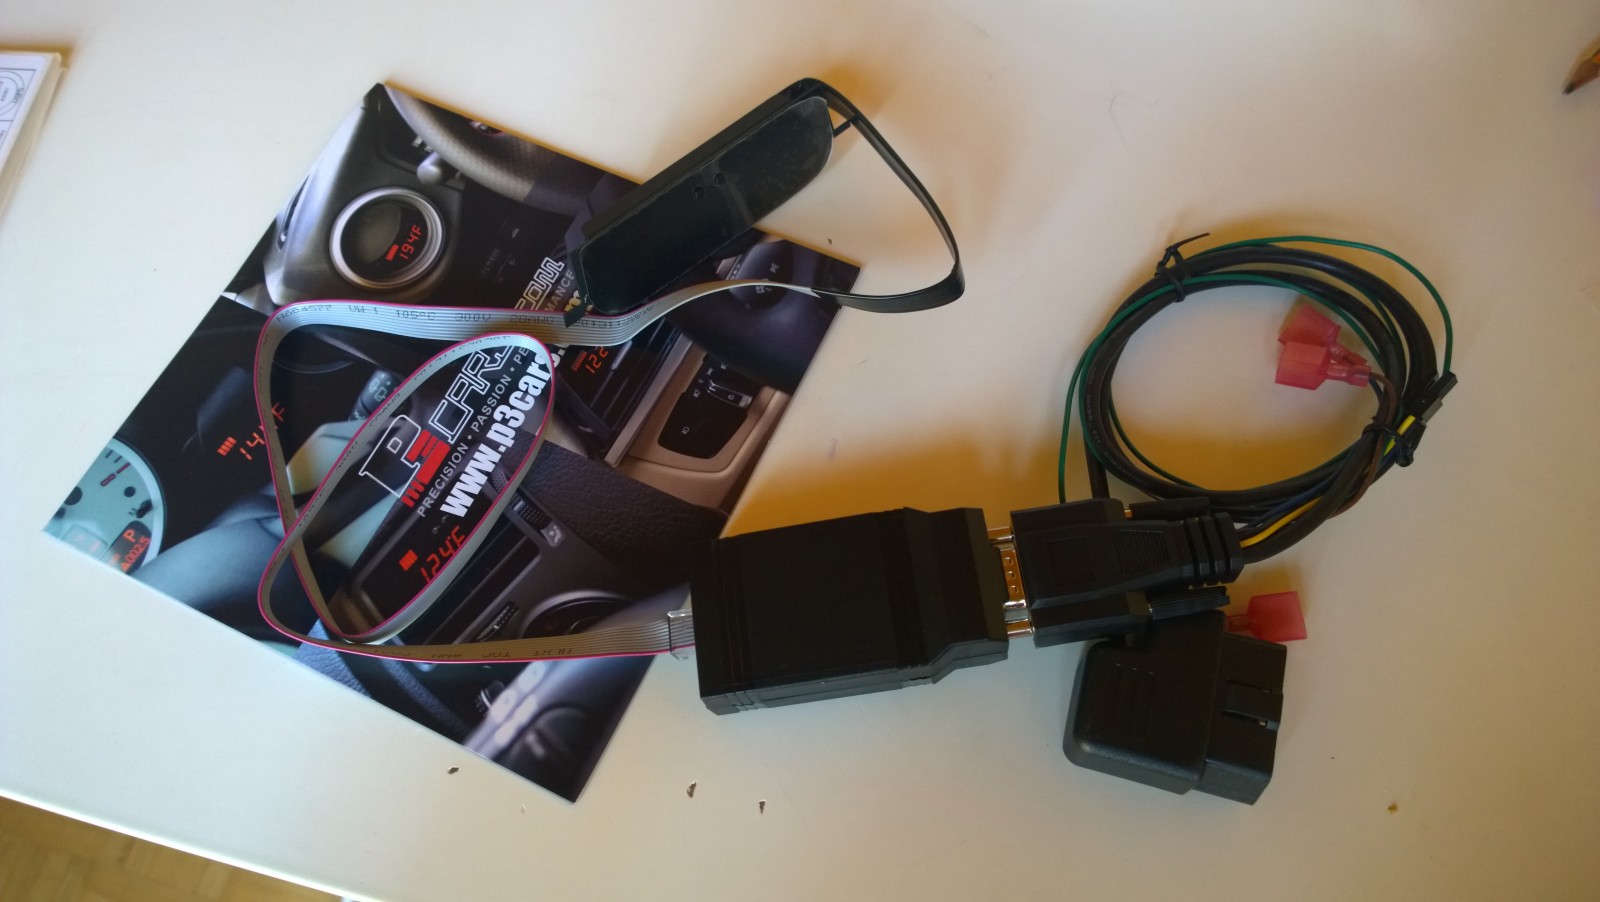
Package contents
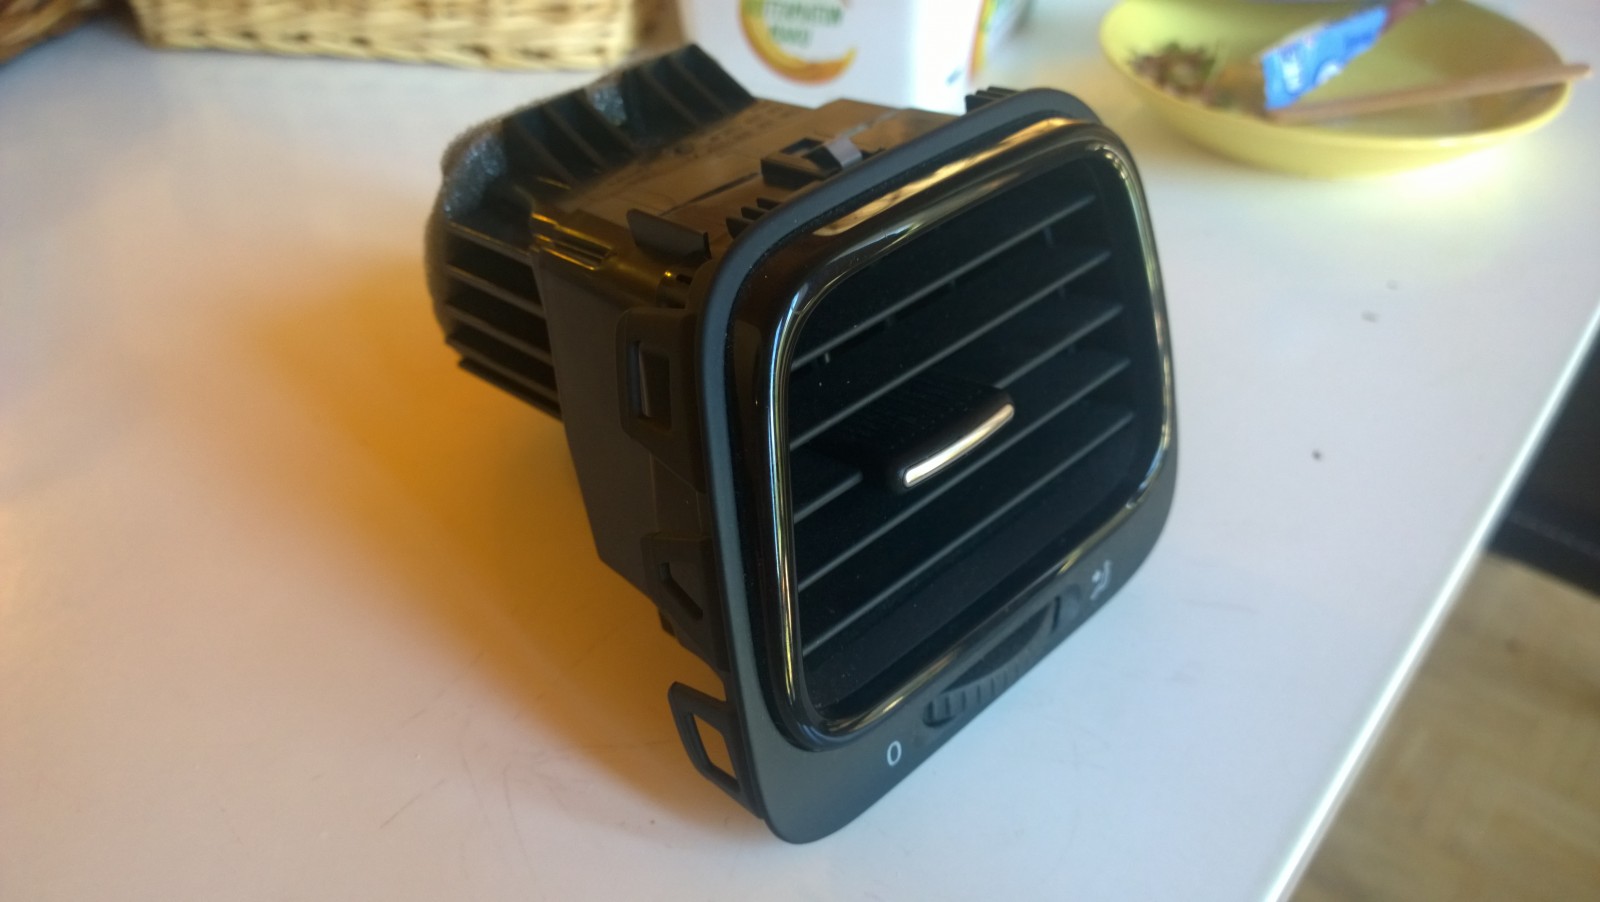
Left-hand air vent removed.
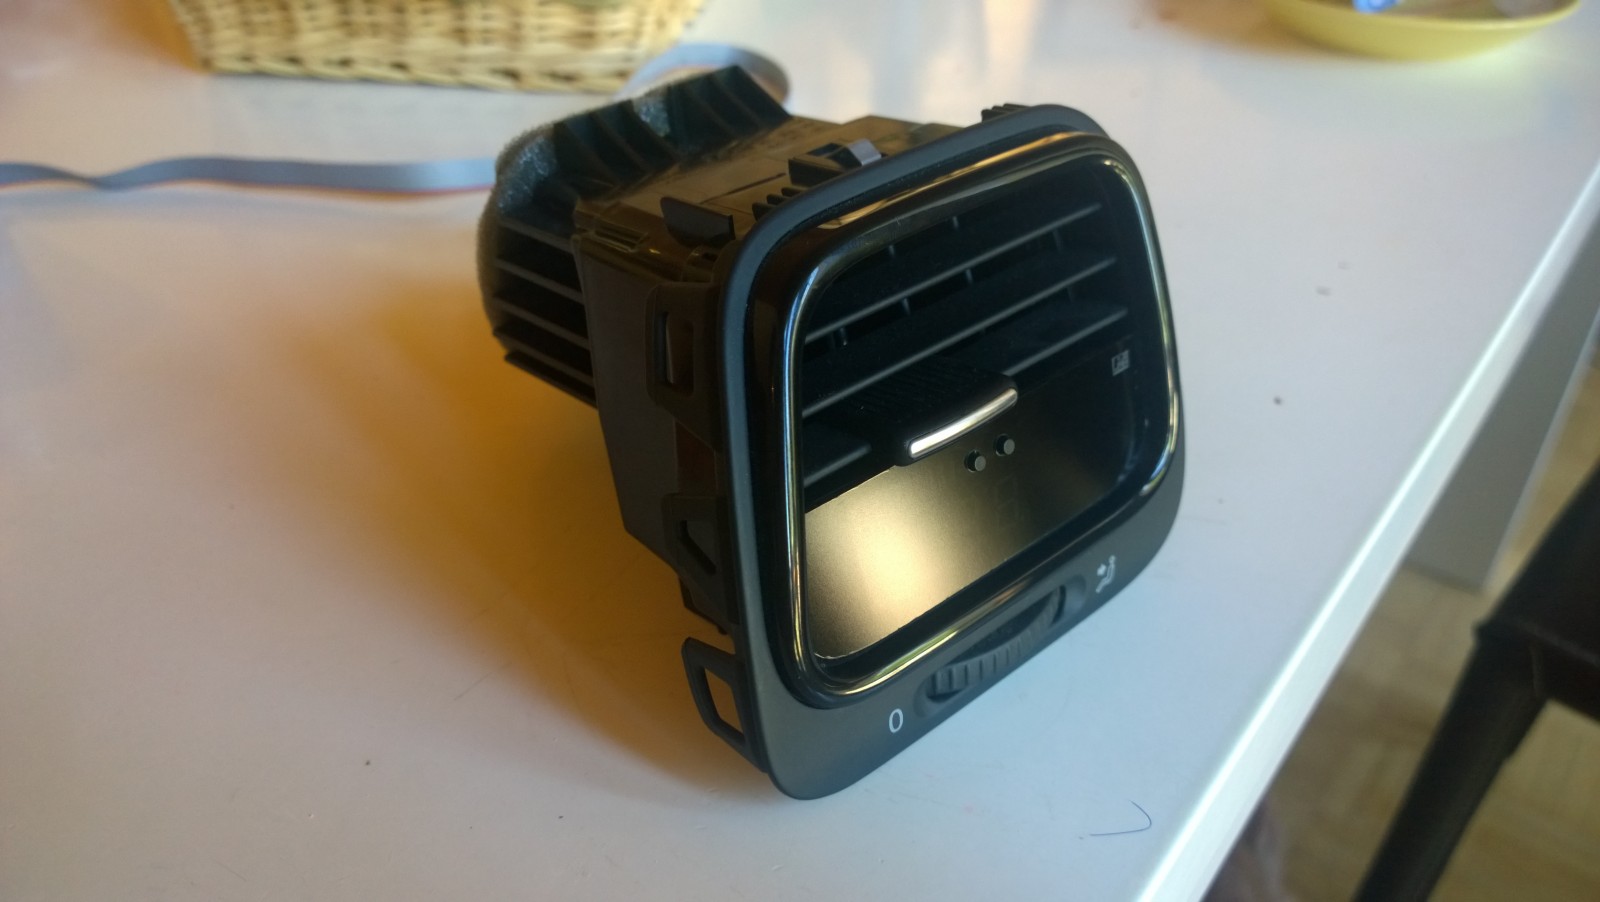
Display fitted into the vent, replacing the bottom two slats.
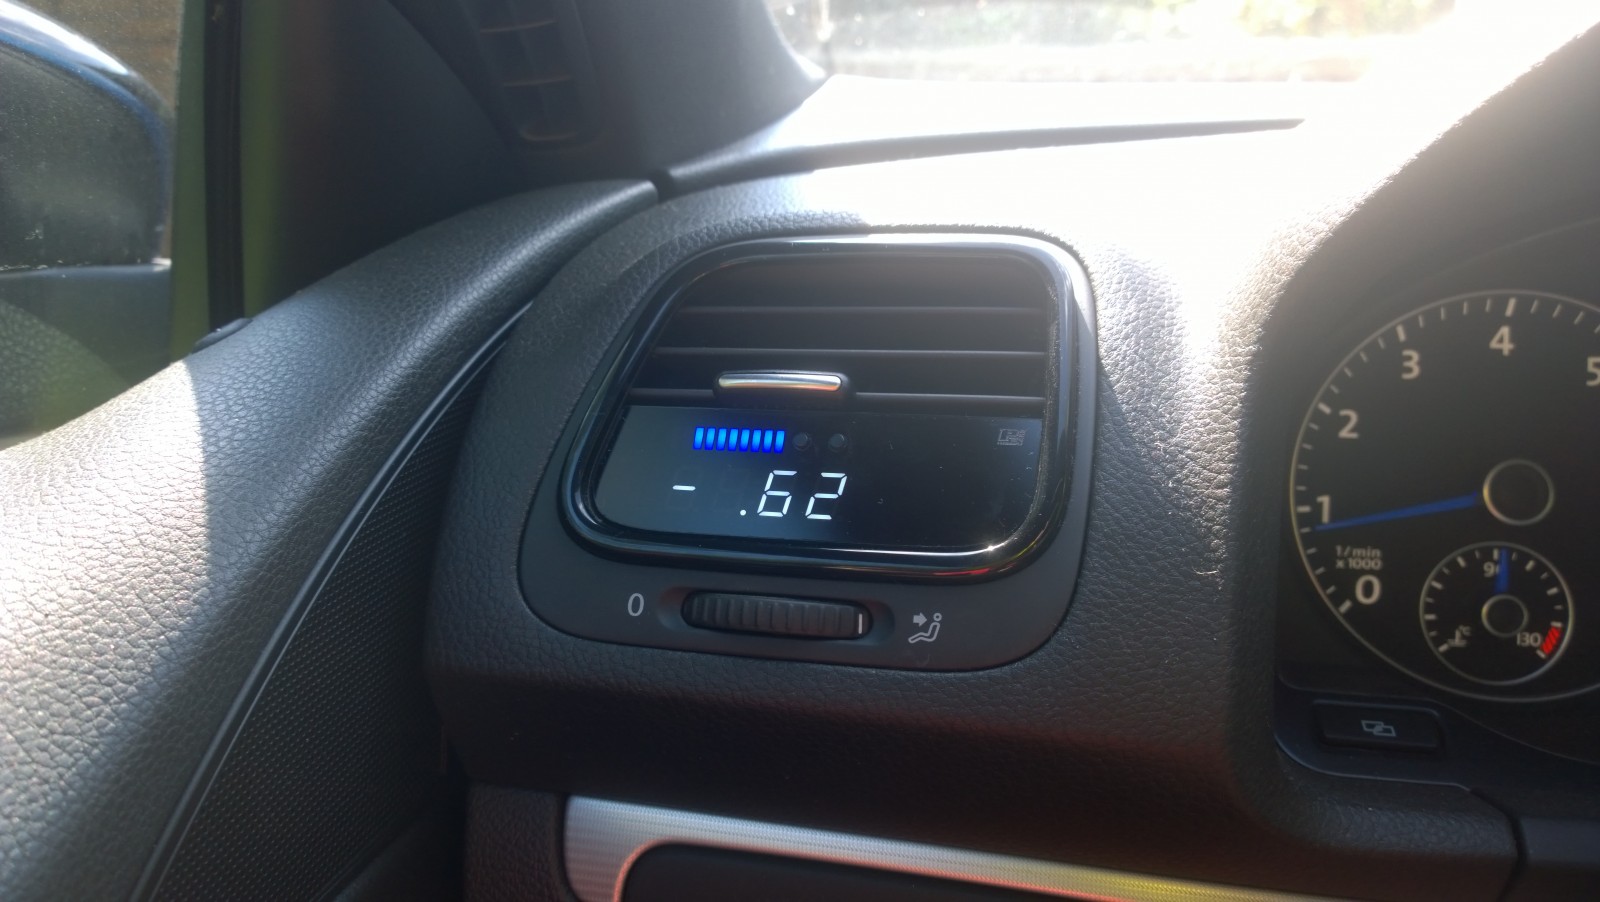
All fitted. The buttons cycle through boost pressure, intake-air and exhaust temperatures, throttle position, rpm, speed and 0–100 km/h time, among other readings. Here it's showing manifold pressure at idle.
Oh yes, the price… about €500 including shipping and import duty. Delightfully expensive 🙂
2016-01-26 · Scirocco 4motion project coming up
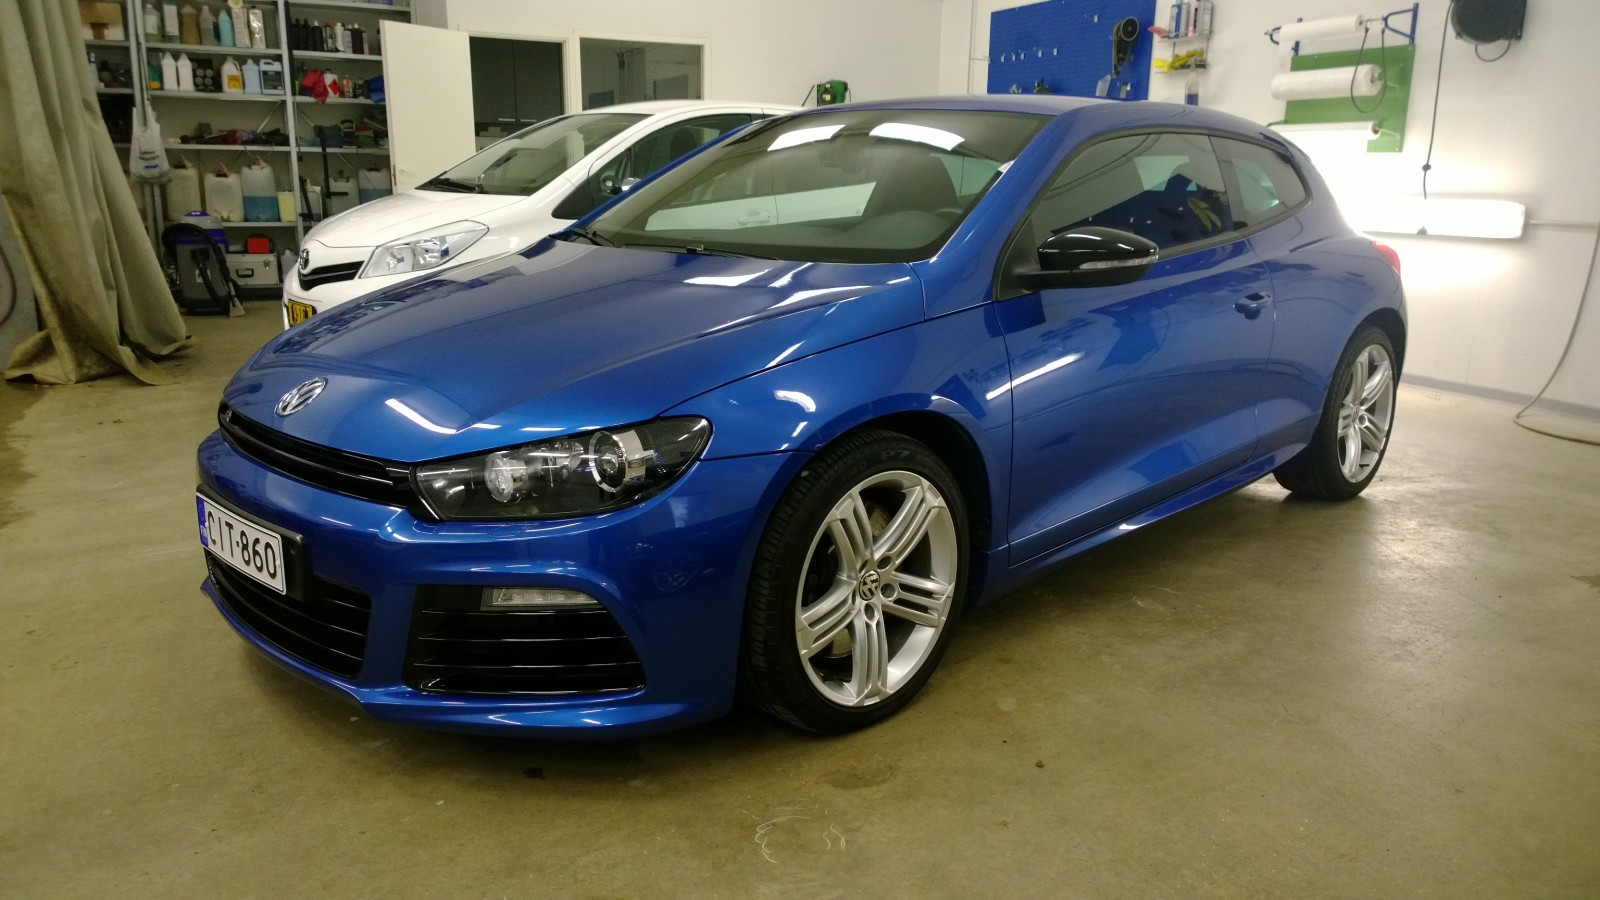
After couple of days after purchasing the car it was taken for Ceramic Pro 9H coating.
Photo: Scirocco in November 2013, still FWD.
We converted the Scirocco R to all-wheel drive, obtained a special permit from Trafi and had the conversion inspected. Finland’s first road-legal AWD Scirocco is now a reality. The project has attracted interest from abroad too.
Car modification is very controlled in Finland. The law is strict, especially for modern cars. If you want to keep the car legal, in many cases you need to get a special permit from authorities. And it’s not easy to get, it involves a lot of paperwork and paperwork is not the ambition of car enthusiast… that’s why many give up and either keep the modifications secret or don’t even bother. We didn’t give up and decided to give it a shot and see if we could convert a mk3 Scirocco to all wheel drive and still keep it street legal. Hopefully this works as an example for other fanatics and encourages them to build their dream cars and still be able to drive them on our every day racking and ruining roads.
The whole thing started in late 2013 when the author (Heikki) sold his Superb and bought a 2011 Scirocco R. Friends tried to warn, winter was coming and it would be no fun to drive a fwd car after Superb V6 which had AWD. And man they were right. I tool less than a month when we started to build a vision of converting the Scirocco to AWD. We knew that Scirocco is based on the same platform as mk6 Golf (PQ35). We didn’t know exactly how similar they were, but had a gut feeling that the project should be doable: Take the drivetrain from Golf and mount it on Scirocco.
Originally we were looking for just the drivetrain but eventually decided that it was safest to buy a more complete car in case we needed some parts we didn’t know we needed. And we’re glad we did. We started to look for wrecked mk6 Golf R’s, as they were the closest match to Scirocco R. Finally we found one good donor car from Sweden. At that time there was a WRC rally in Sweden, so we decided to take a long weekend trip and see the rally, buy the car and bring it to Finland with us .
During next couple of weeks we’ll try to describe what and how we did. Now, after the job is done, it’s easy to say it’s not that difficult at all. But when we started it, we didn’t really have any examples available, we had to figure out many things just by ourselves. Not to forget the paperwork that is required to get the permit.
Hope you will enjoy and leave feedback for us! If you want to know something more, leave us a question!
pajalle.com team
2016-01-30 · Start of the Scirocco 4motion project
As we wrote on the opening post, we went to Sweden to see a WRC rally and while we were there, we bought a crashed 2010 Golf R. Big part of the parts were already sold (including doors and interior), but it still had exactly what we needed: drivetrain and some body parts that we needed. The engine was extra, but we believed it’s easy to sell.
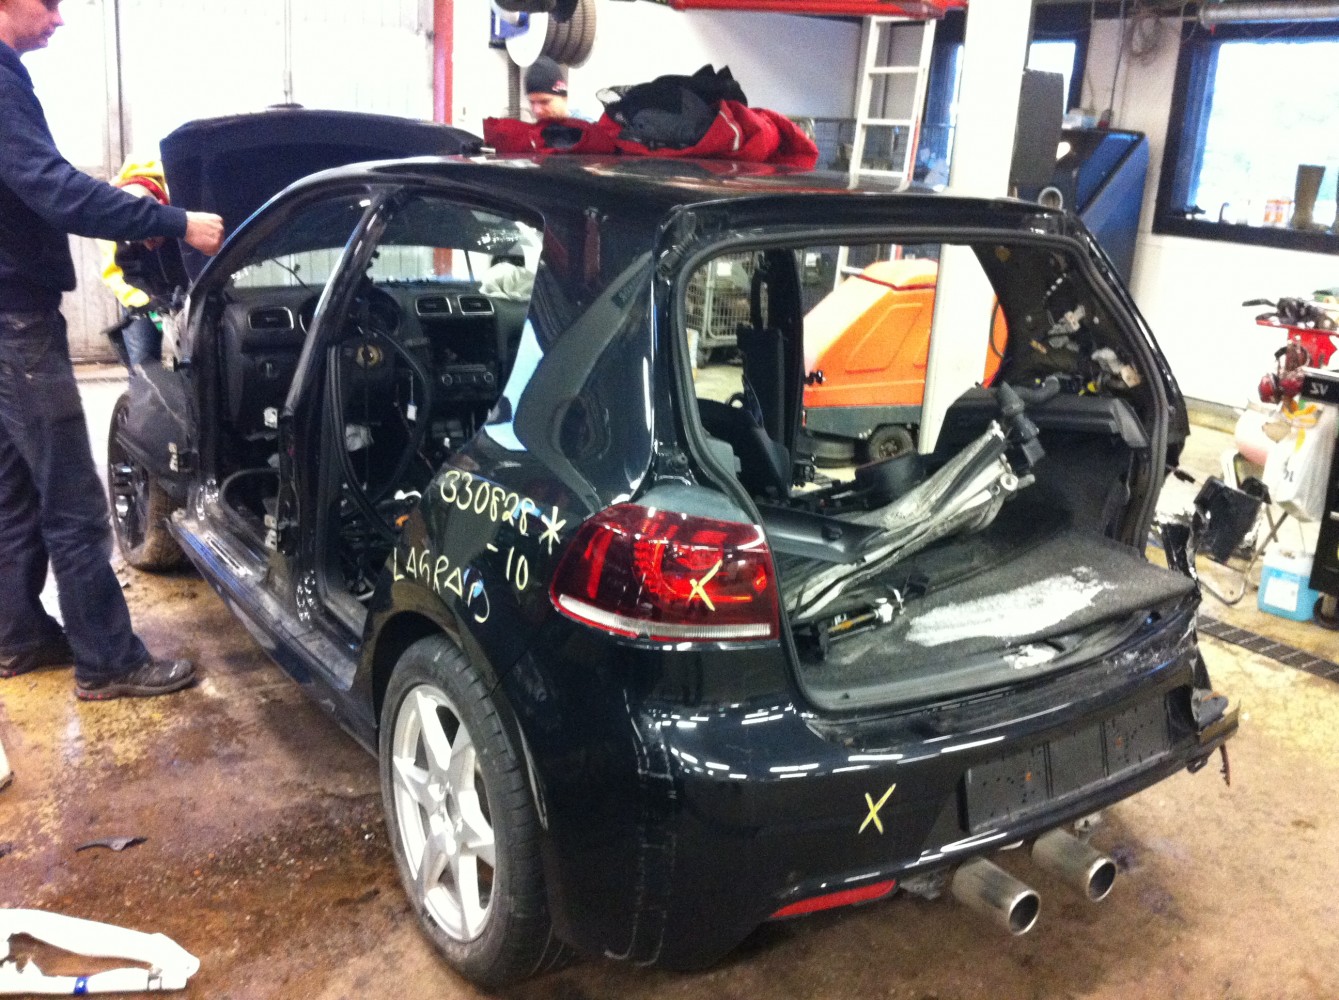
Golf R at car breakers where we bought it. It had been crashed from the front and right rear corner.
It was not that easy though, the breakers was not allowed to sell the whole car… to avoid that some crazy Finns would repair a car that has been ruled for demolishing. So we had to “destroy” it first. We decided to cut the roof off – we thought we might use some other parts like pillars and sills for some other car repair.
We tried to cut the A-pillar, but that wasn’t easy due to reinforcements inside.
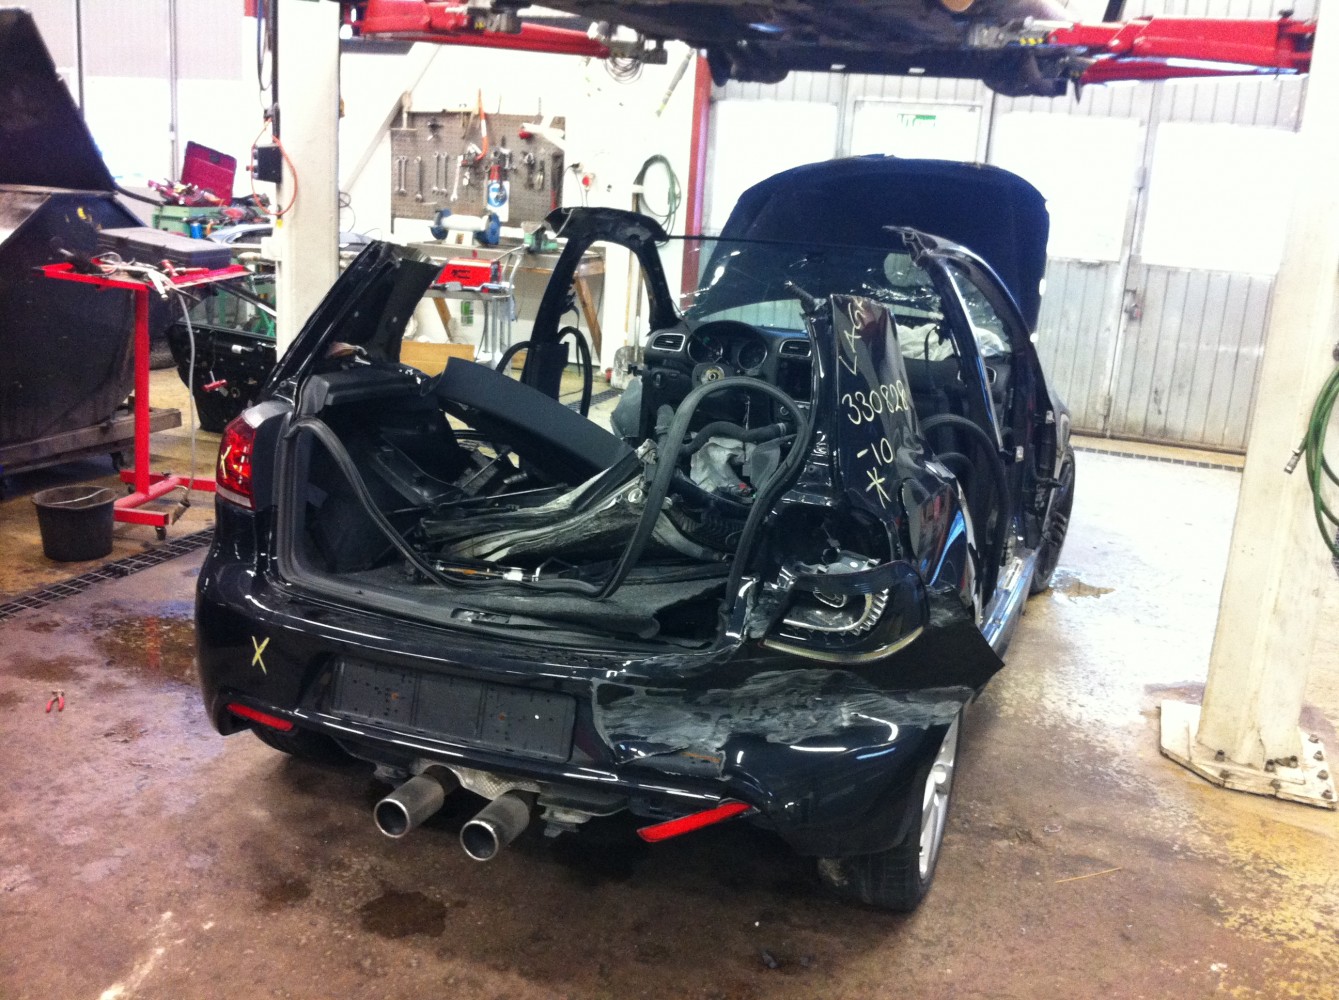
Finally the roof was cut open and we were allowed to lift the car to the trailer.
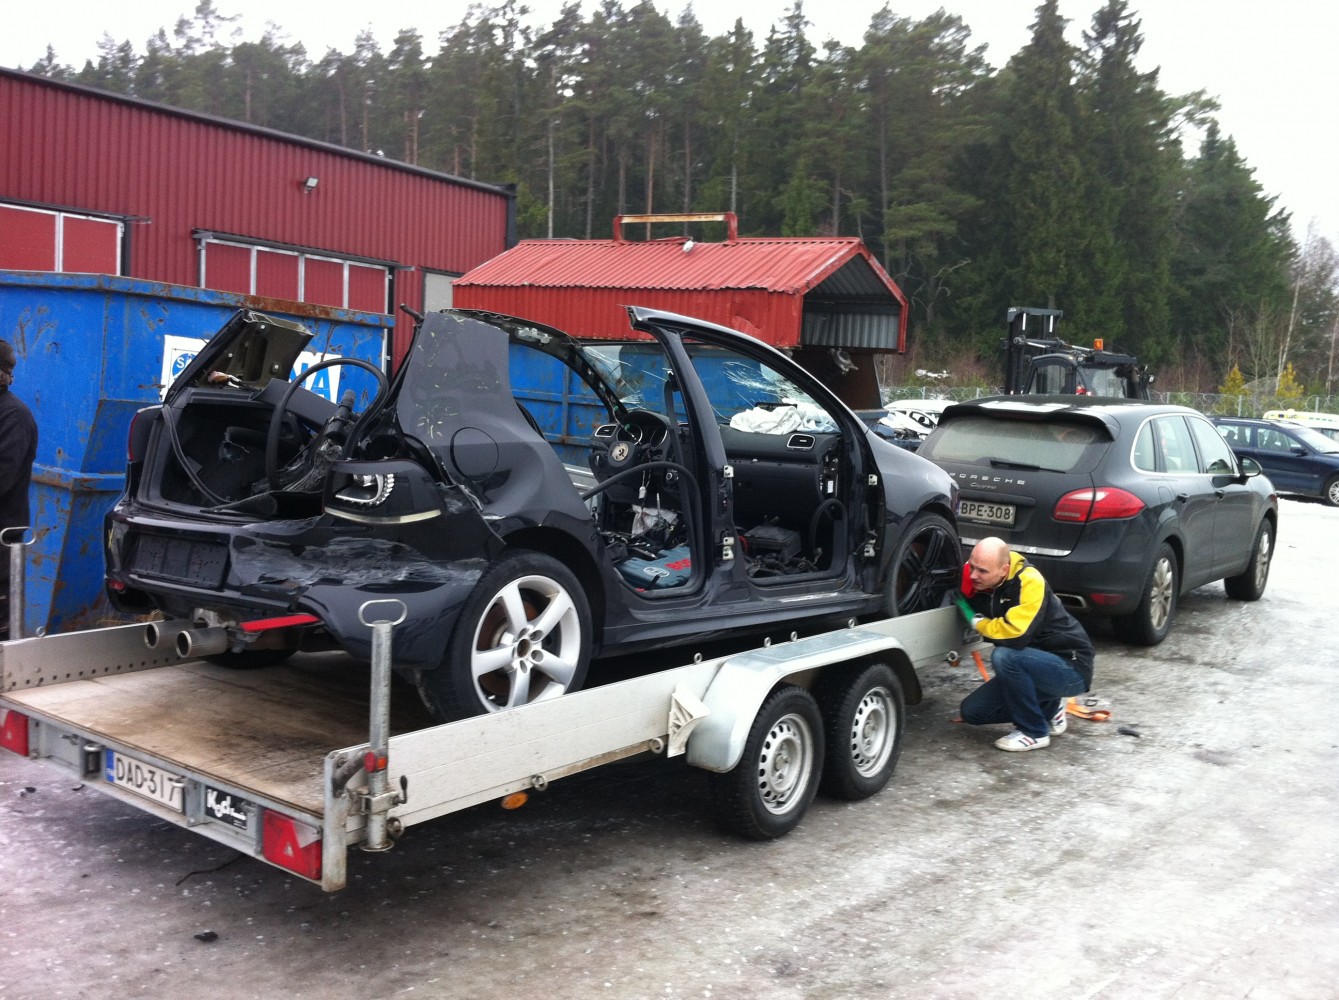
Golf on our trailer
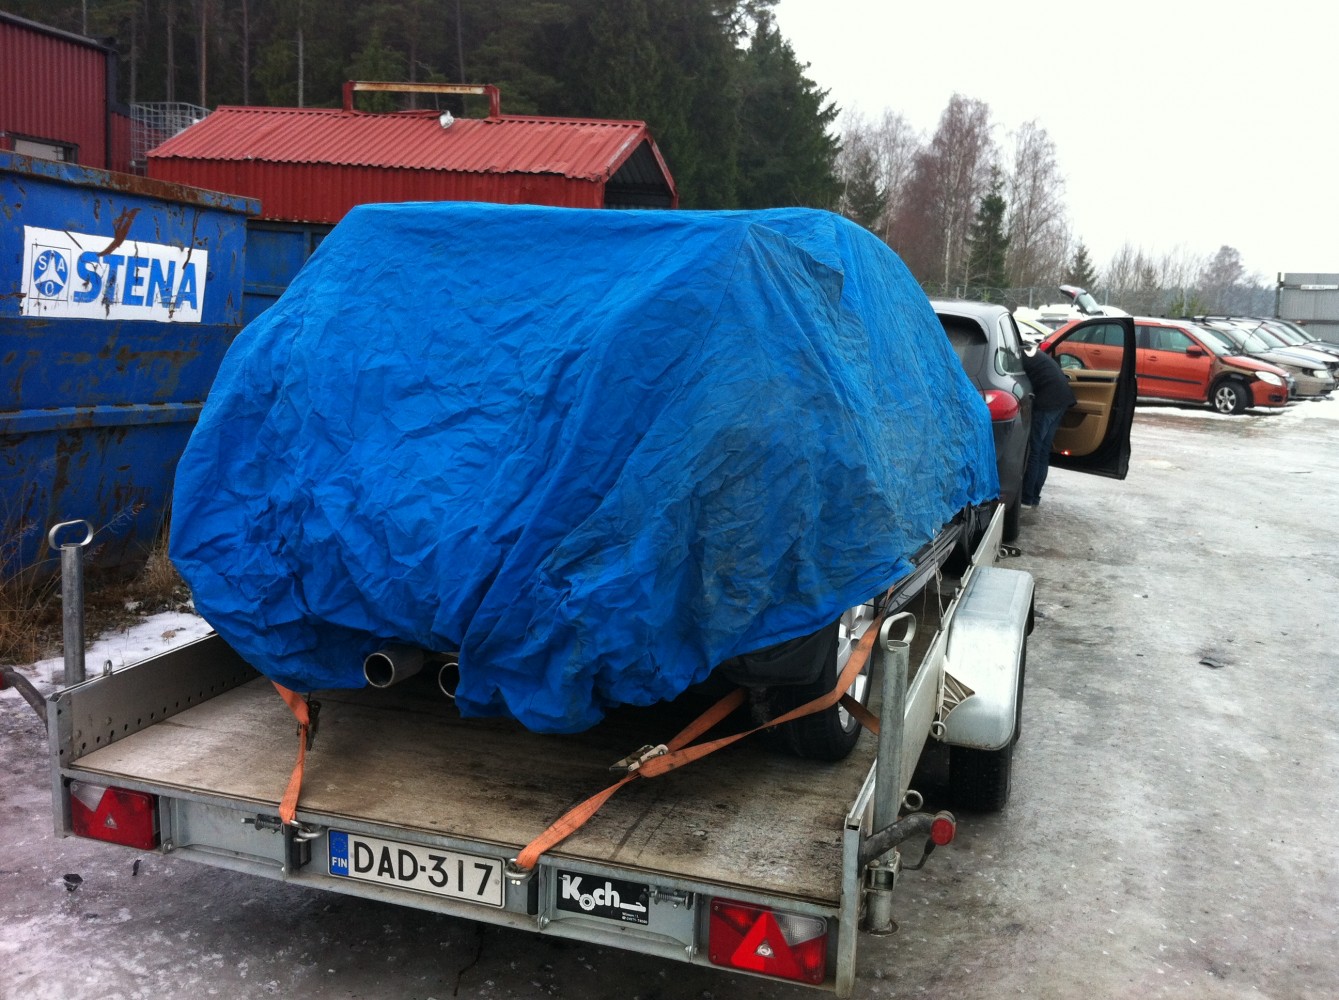
Nice package. Note the exhaust… 🙂
February 13th we were back to Finland and Pekka’s garage. Golf on one lift and Scirocco on another – we were finally able to compare how different the cars were.
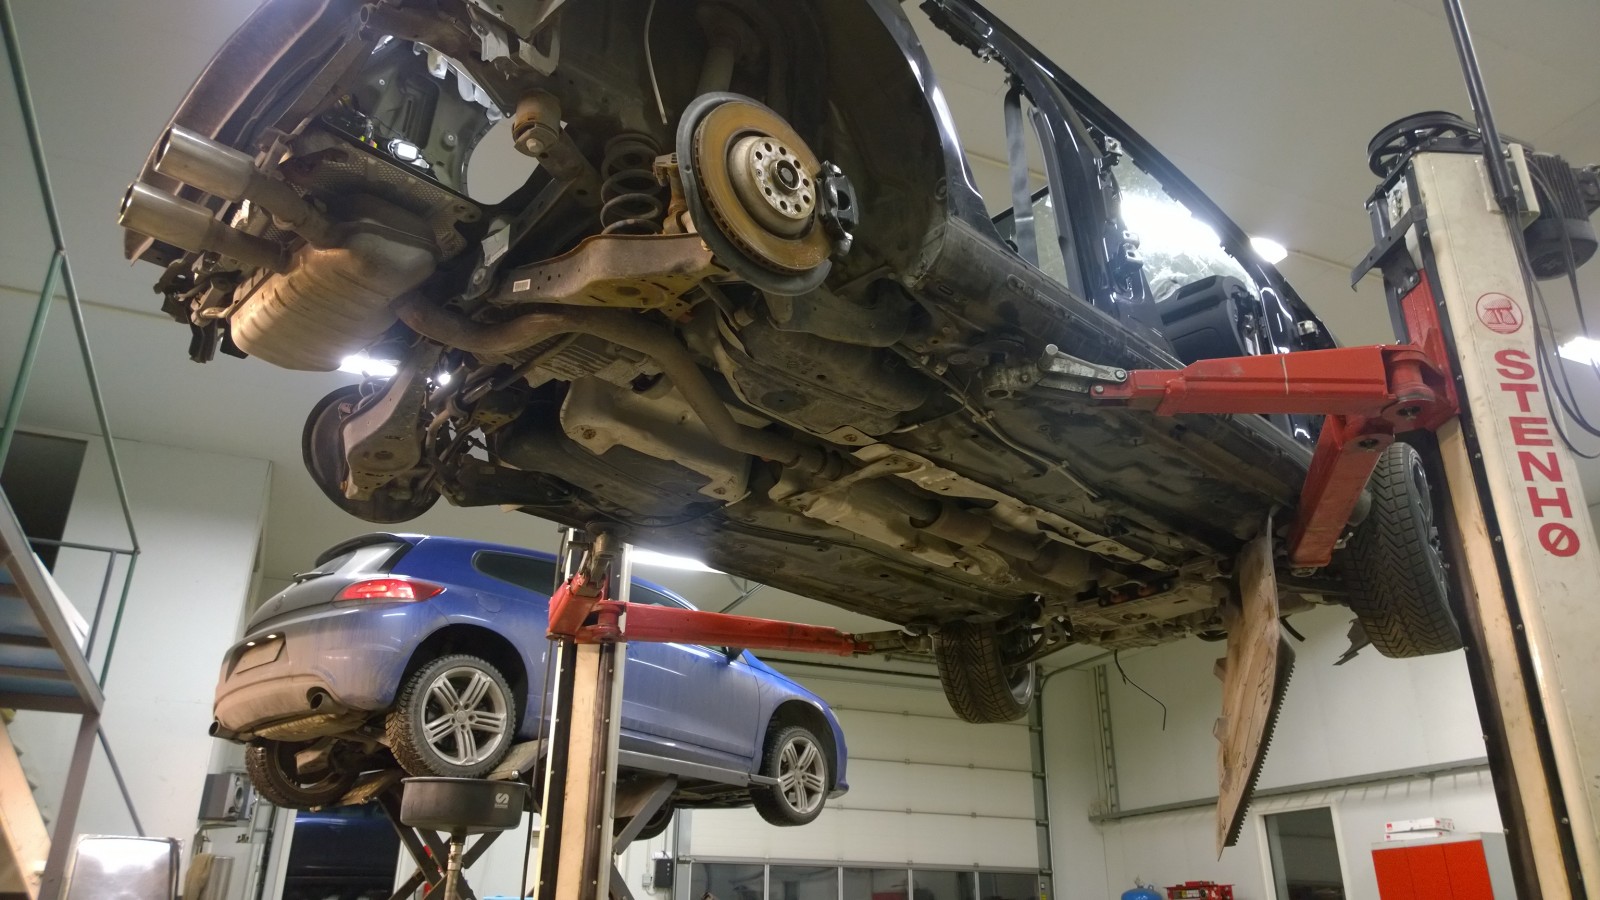
Scirocco and Golf on lifts – comparing what’s different. Not too much – project looking good at this point.
2016-01-30 · Tearing Golf R down
So we had Golf the donor car at Pekka’s garage. We did some quick comparison to Scirocco and didn’t see anything too difficult. We’d been comparing already from ETKA and it was pretty much as we expected. The trunk floor was clearly different, otherwise the body was pretty much similar. It looked that we’re able to cut the trunk floor from Golf and swap it to Scirocco. It was time to tear the Golf down.
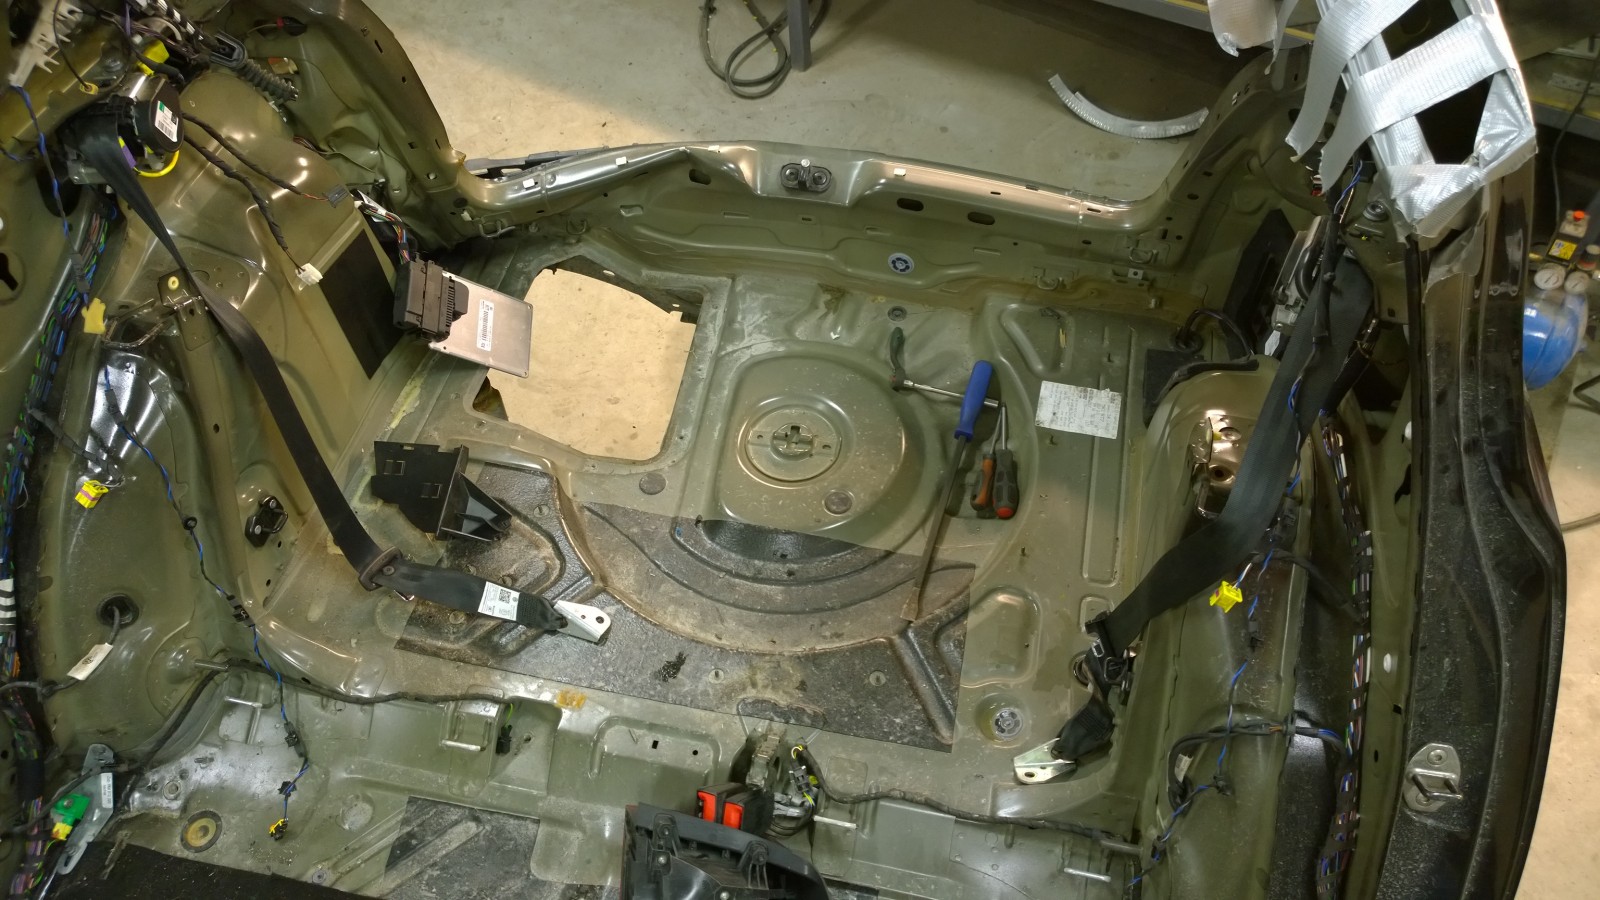
A view to the Golf trunk floor
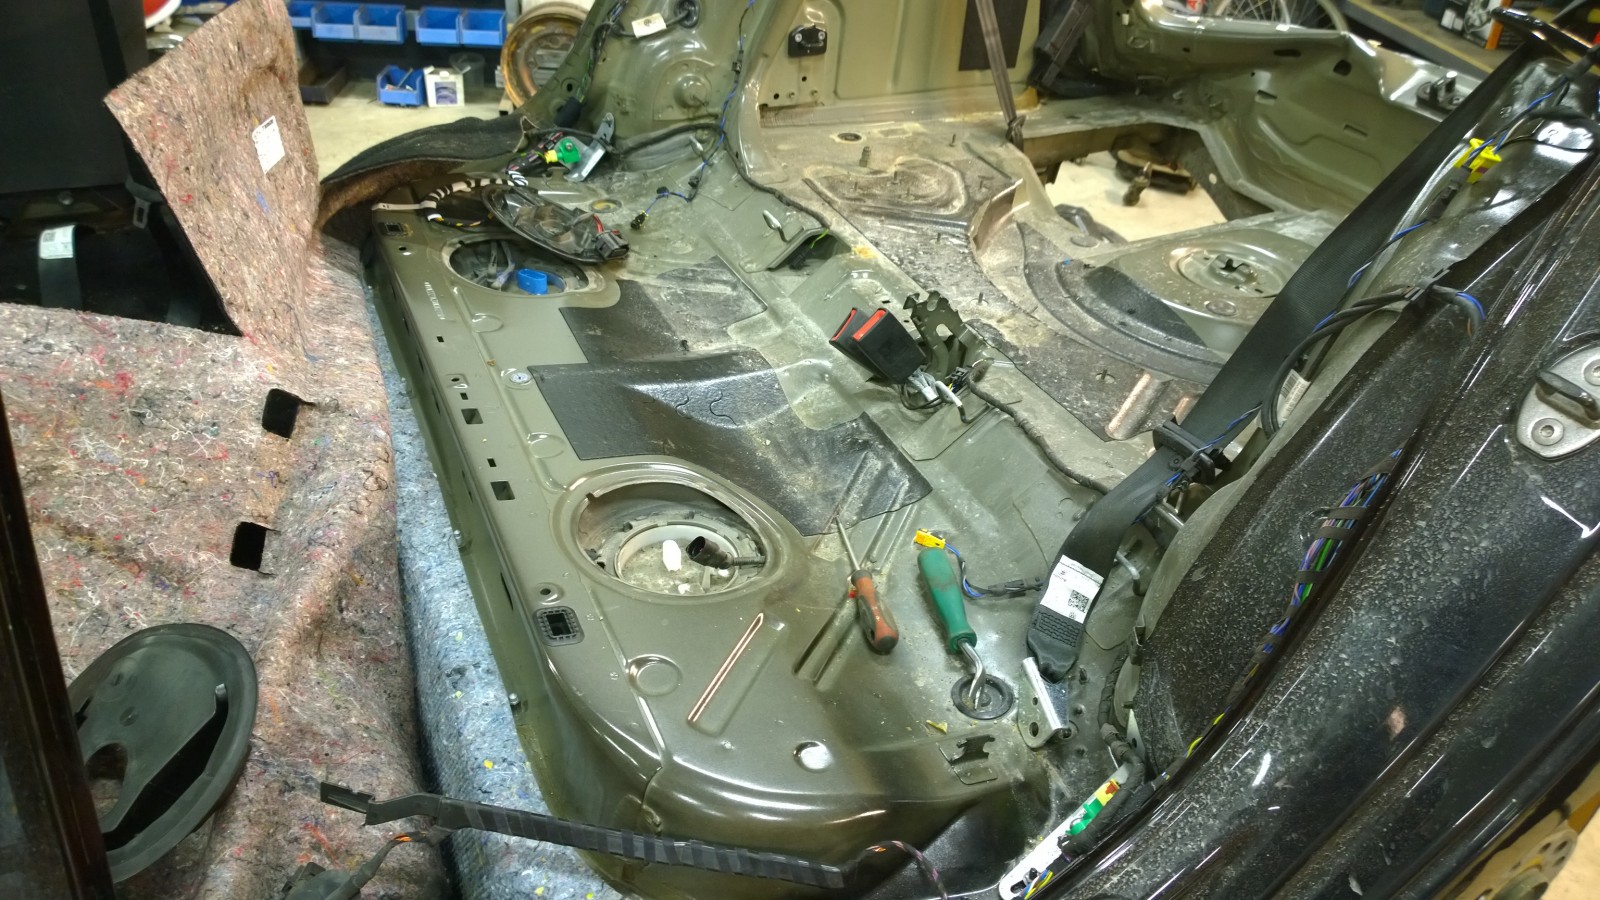
Golf floor under the rear seat. The only difference to Scirocco is the hole to tank on the driver side.
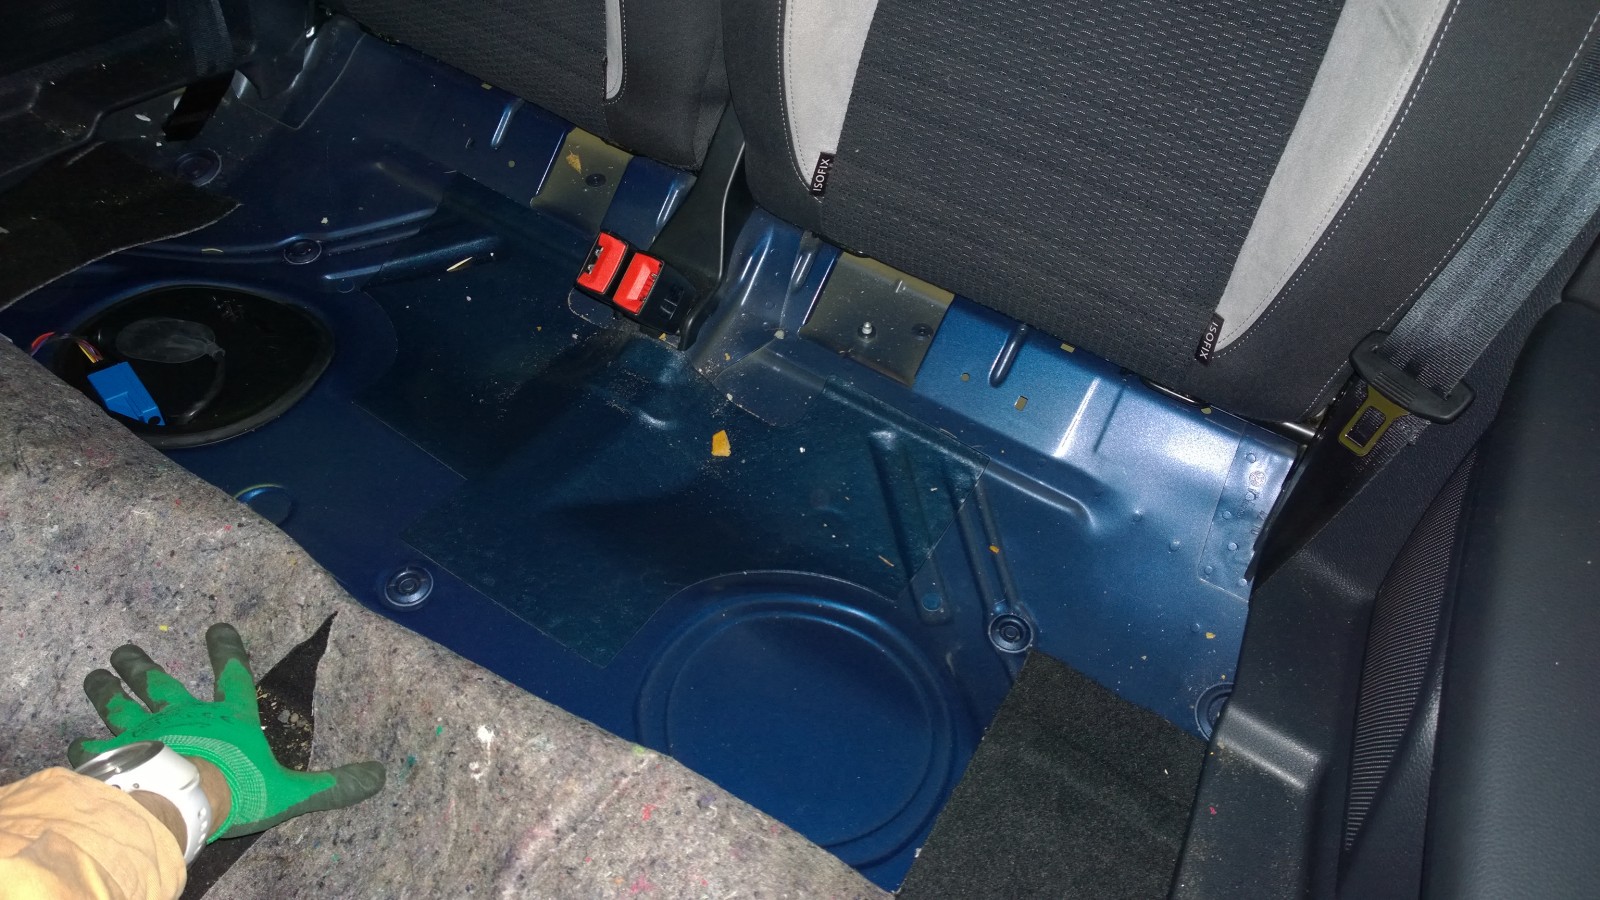
Scirocco floor under the rear seat.
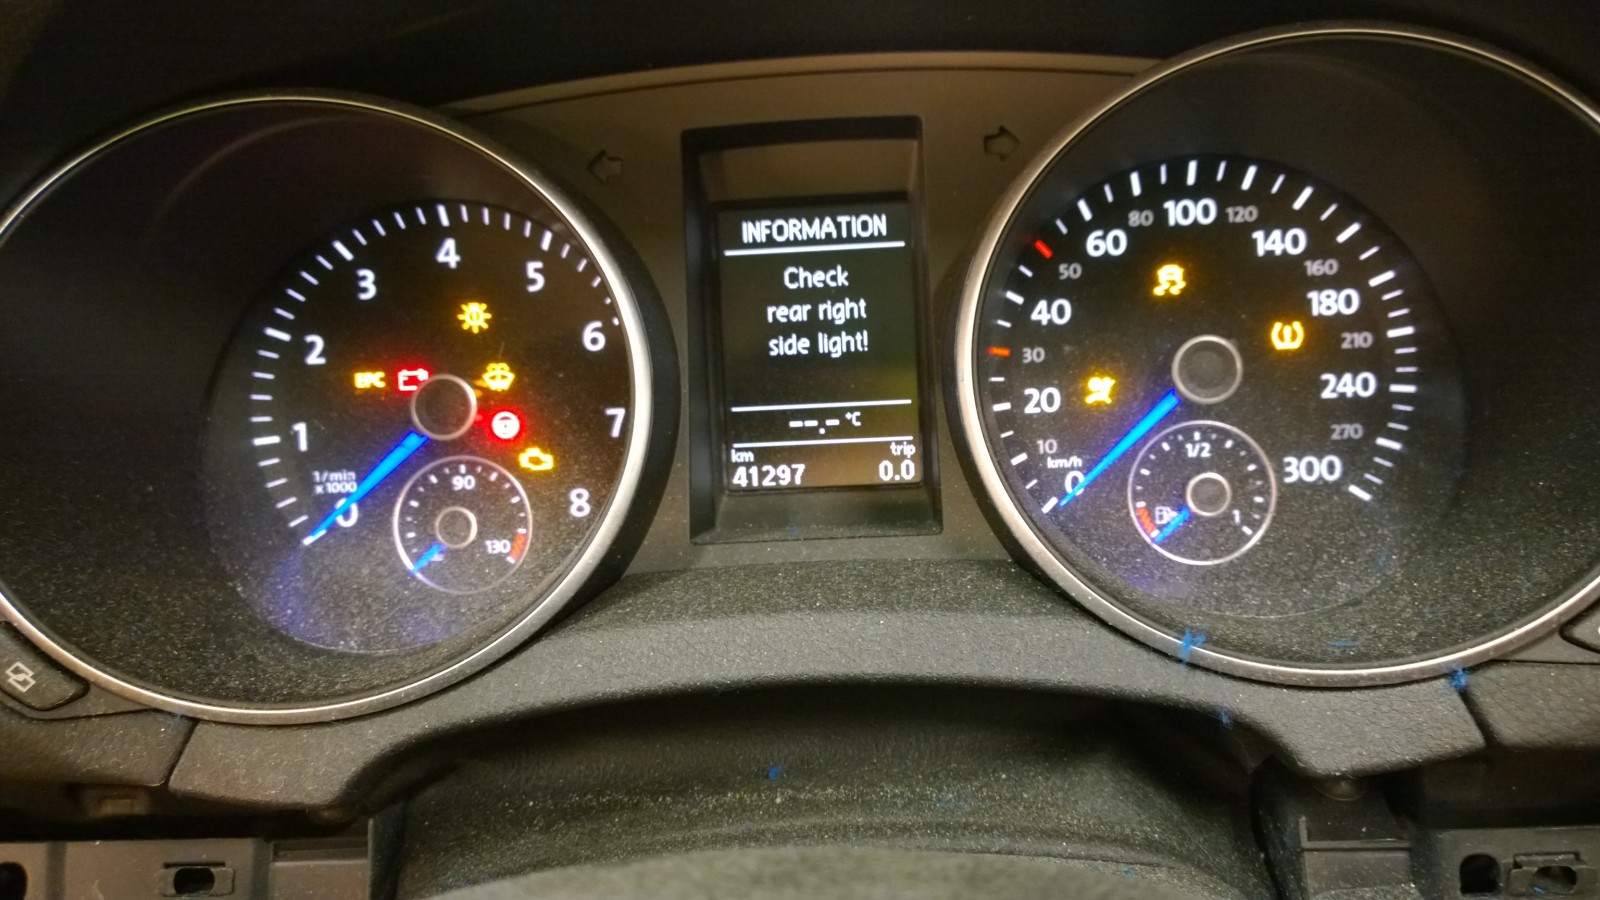
We weren’t able to start the Golf engine to try if it works, but at least we turned the ignition on and were able to read fault codes and see that the cluster works.
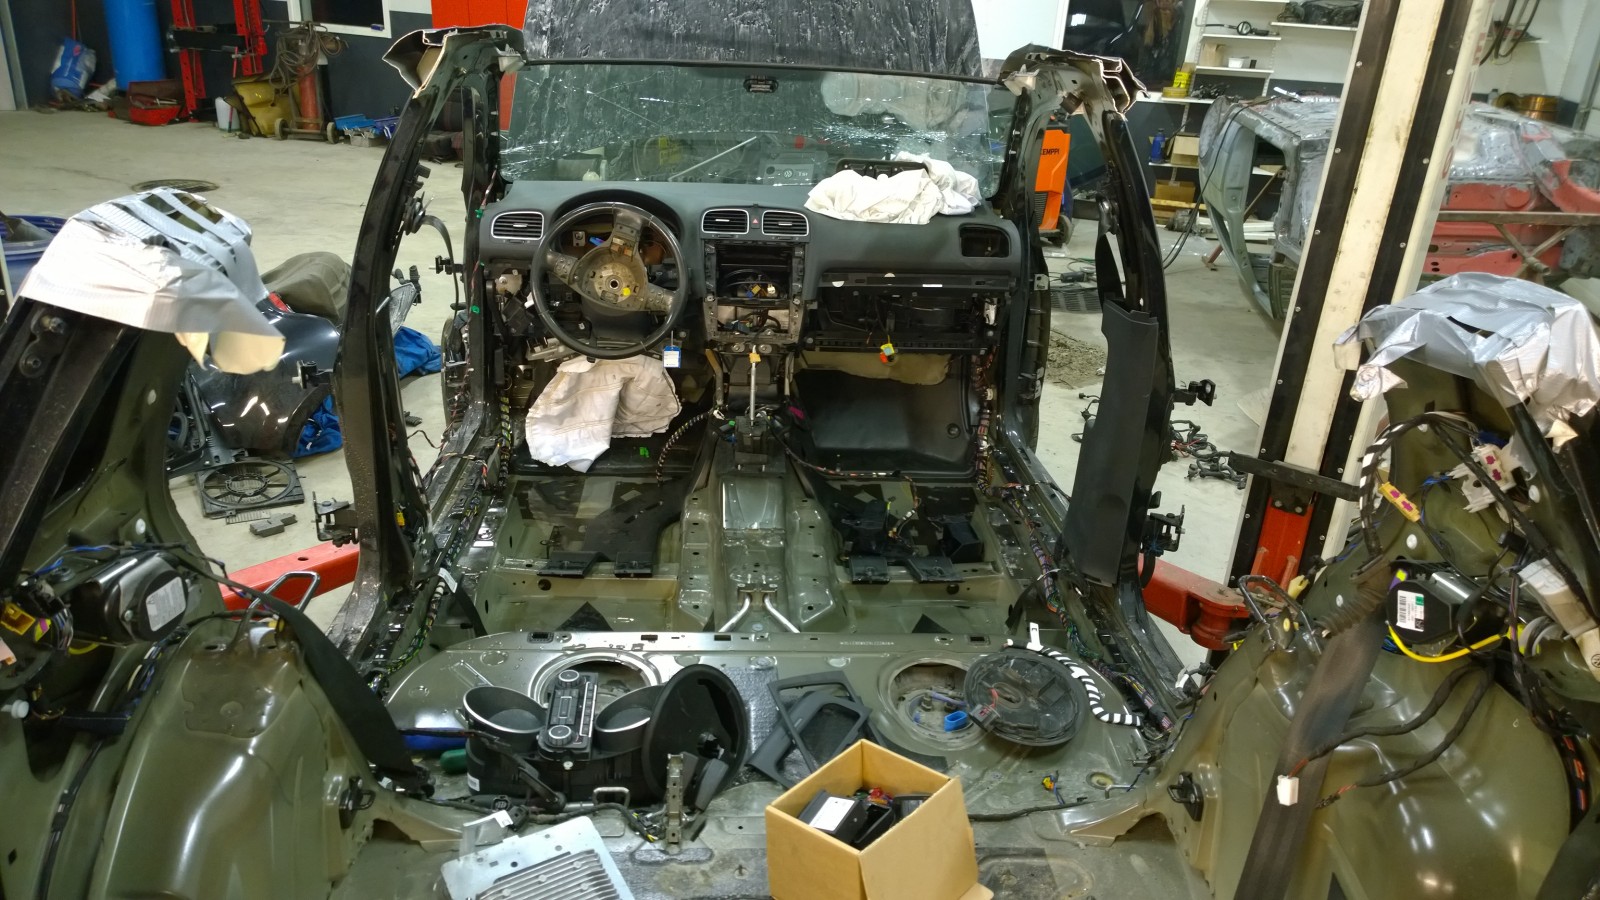
Disassembling the Golf
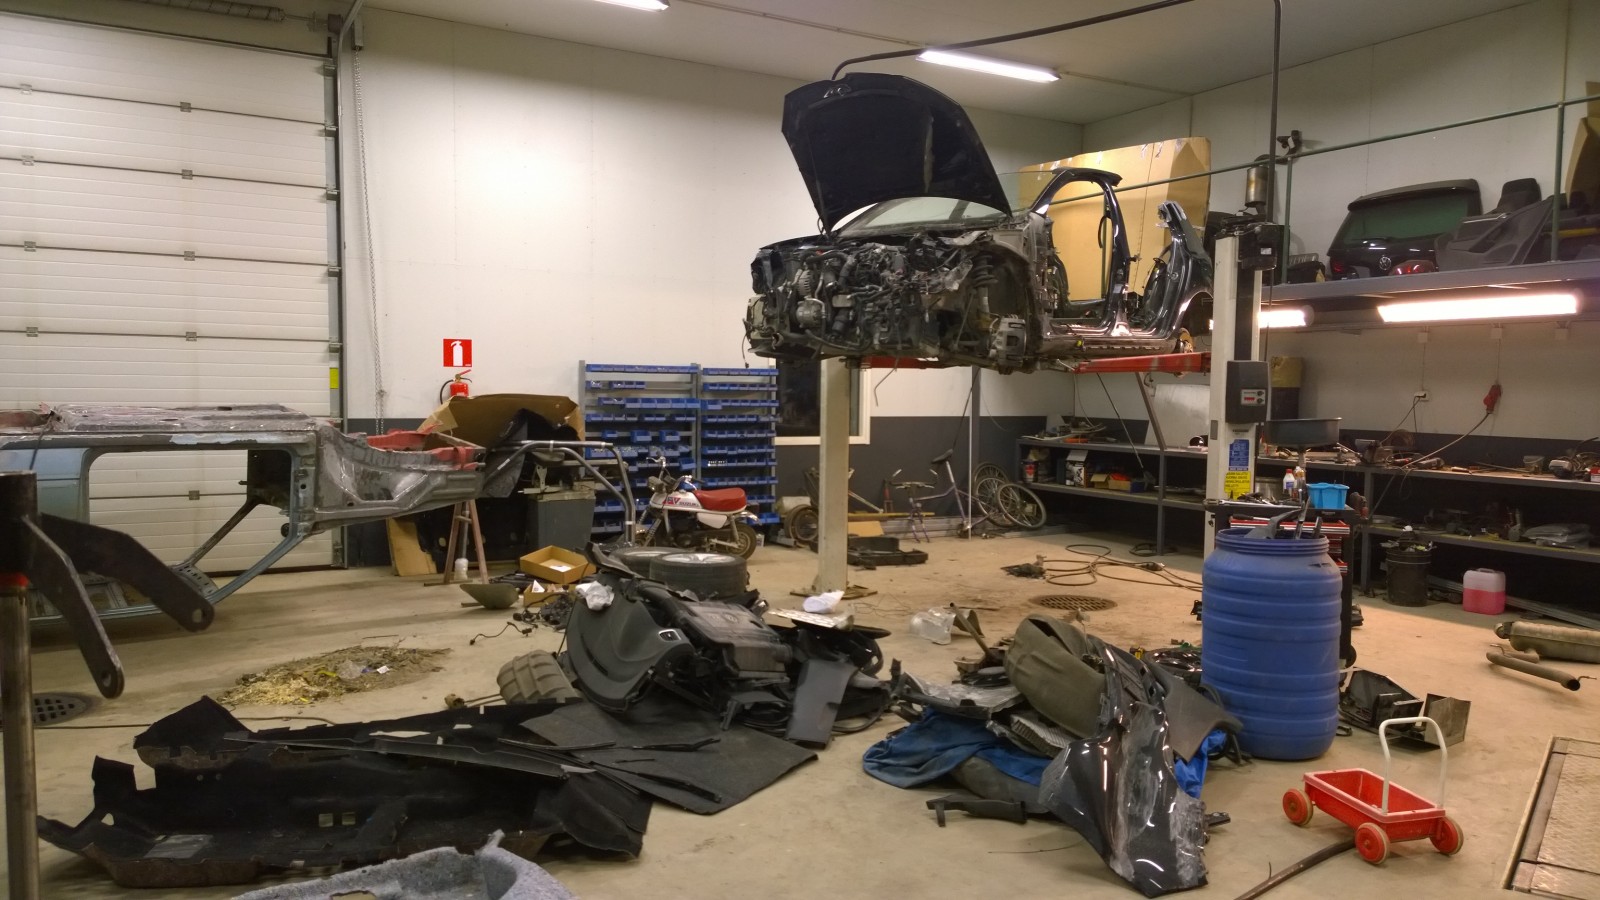
Disassembling continues…
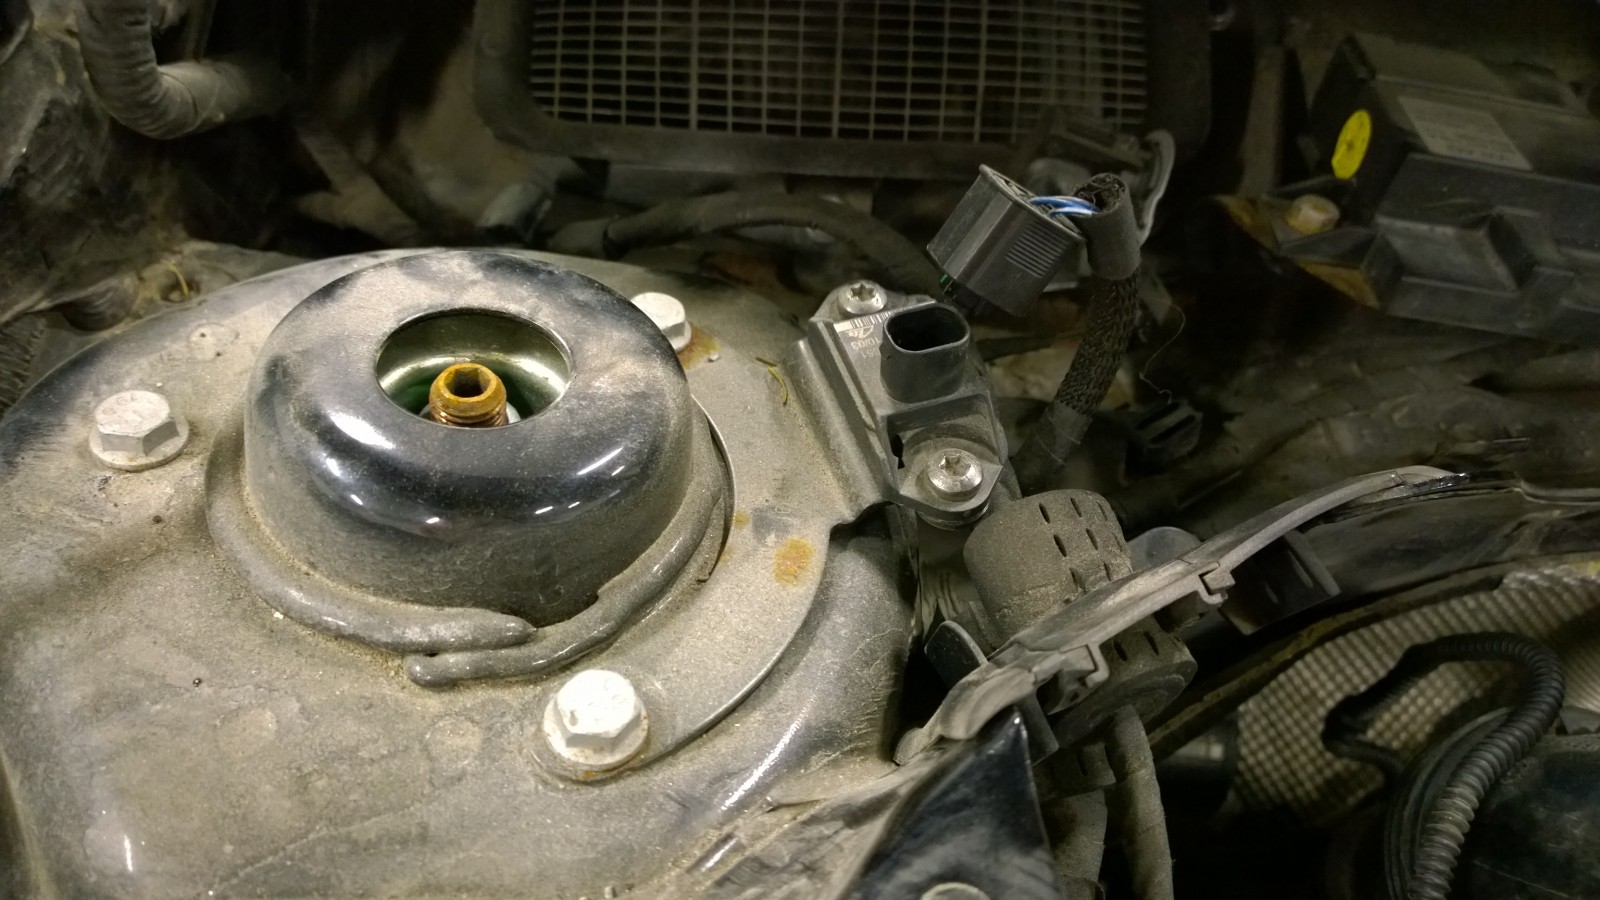
DCC sensor. There’s one of these on each corner of the car. Our original plan was to install Golf DCC suspension to Scirocco, but decided to skip the idea. The work with wiring harness would’ve been just too much.
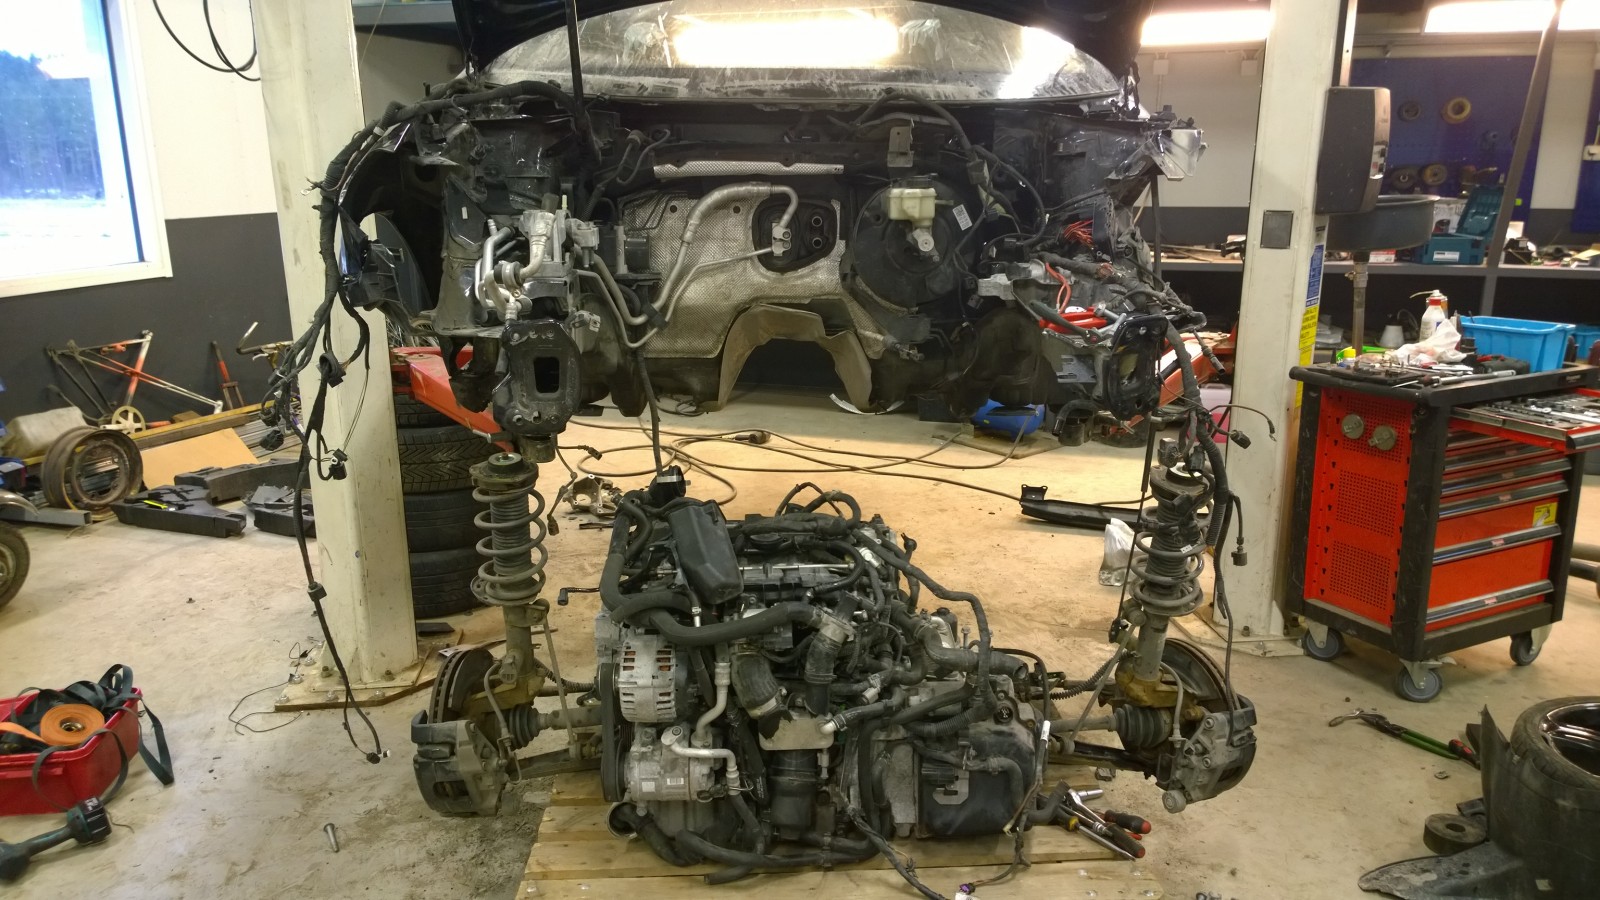
Engine, transmission and front axle dropped off.
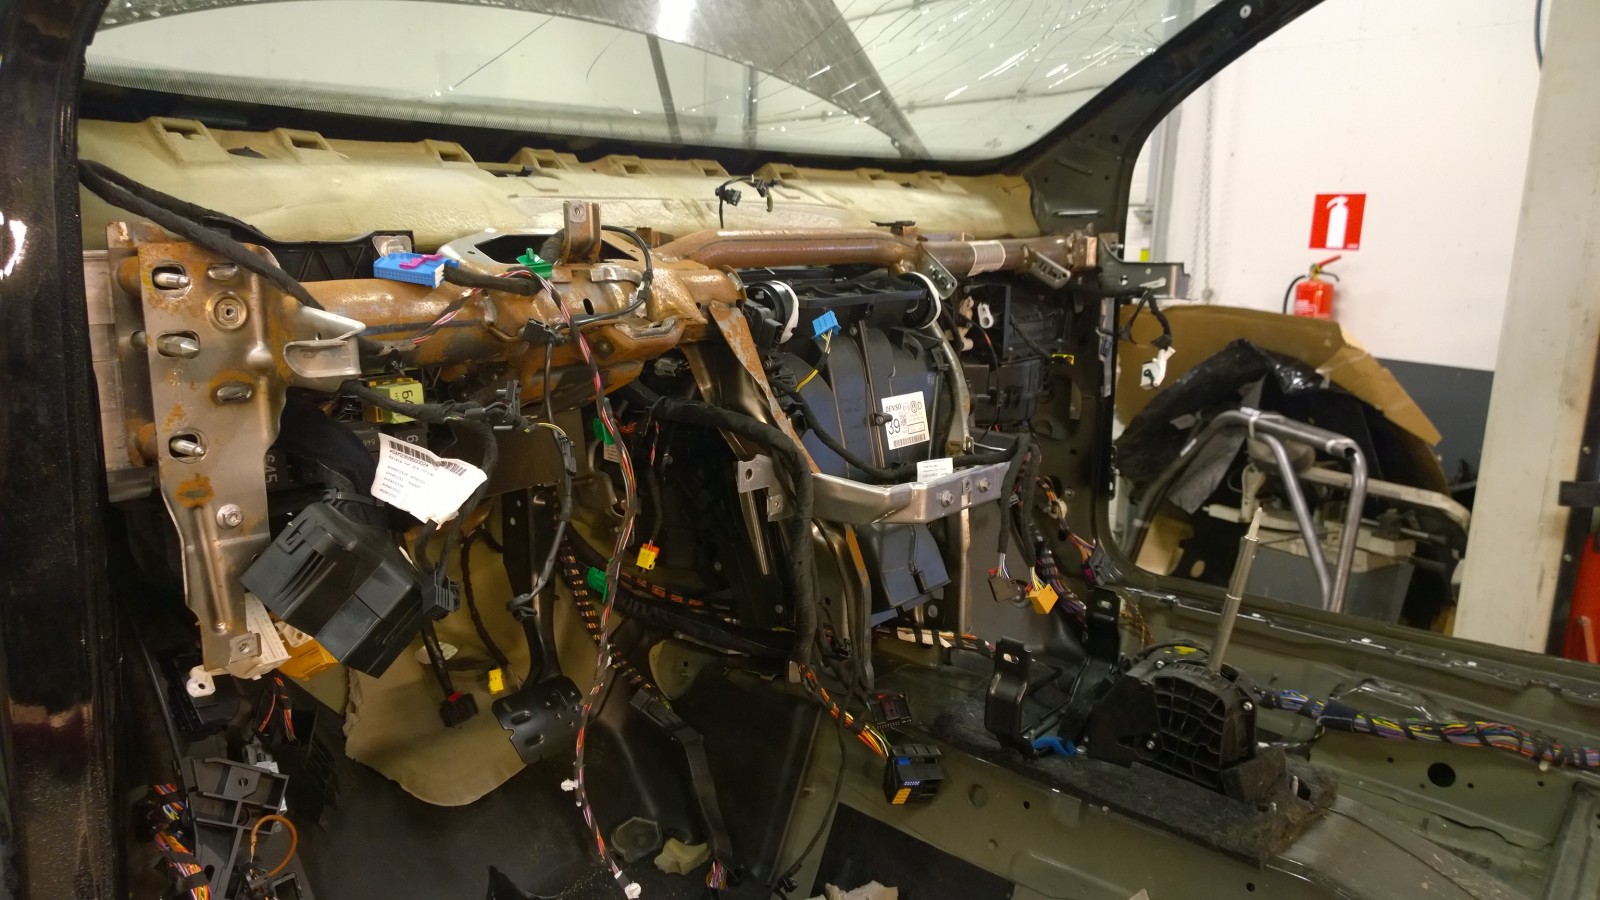
Dash out, removing the dash support bar and blower box together with wiring harness.
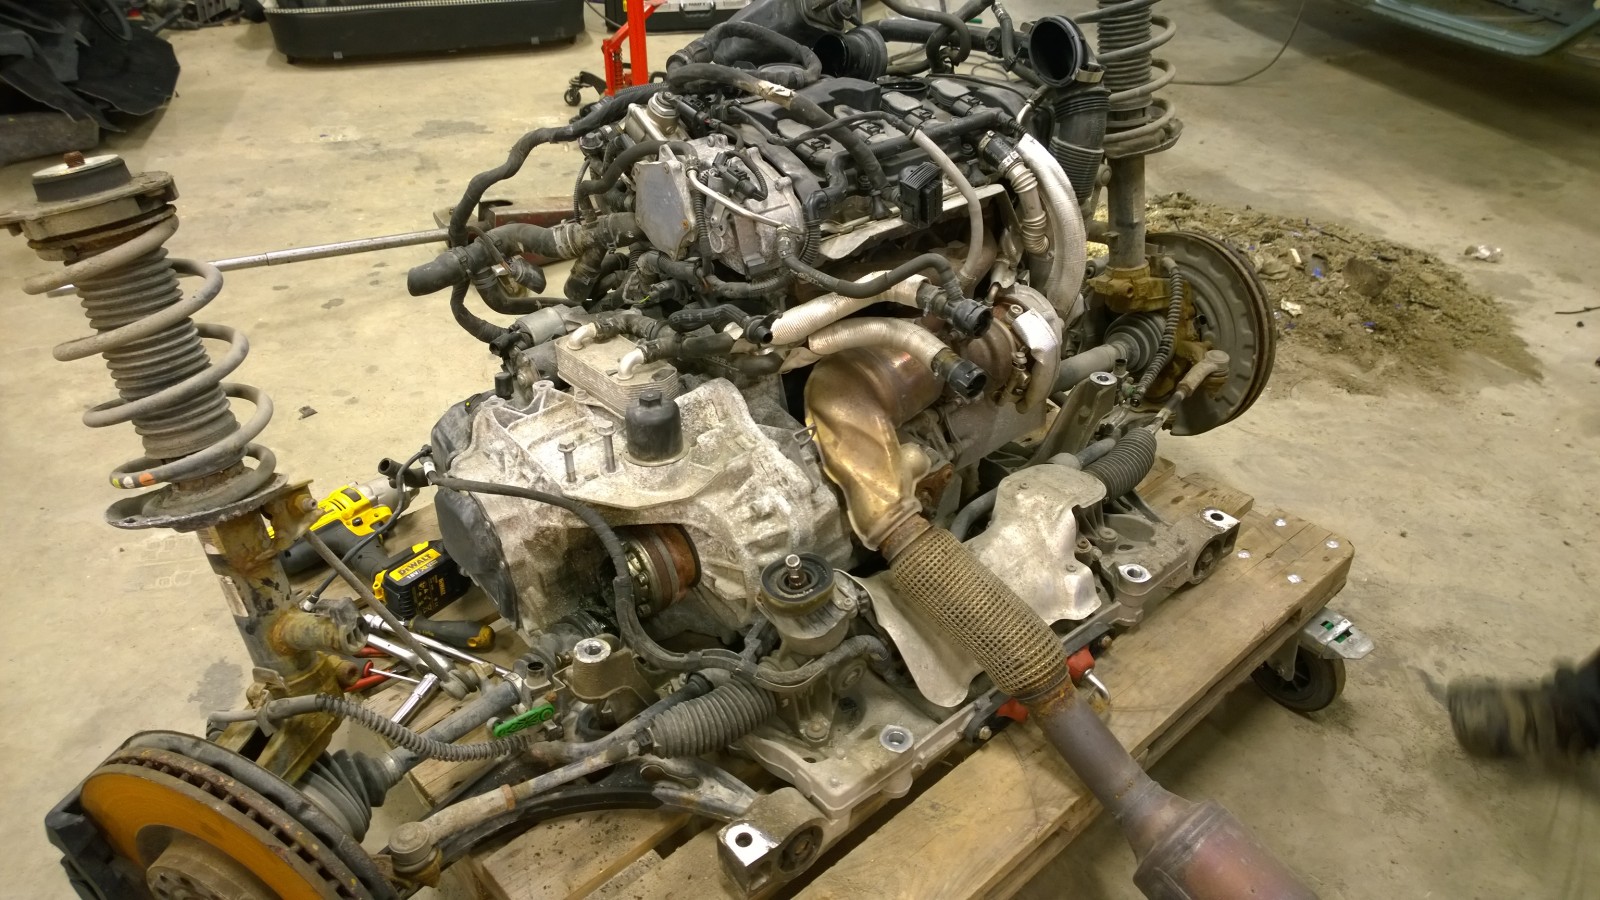
View to the engine and gear box. Practically the only difference to Scirocco is the gearbox which has the output of the drive shaft to rear axle. Because of that drive shaft the exhaust down pipe is different too.
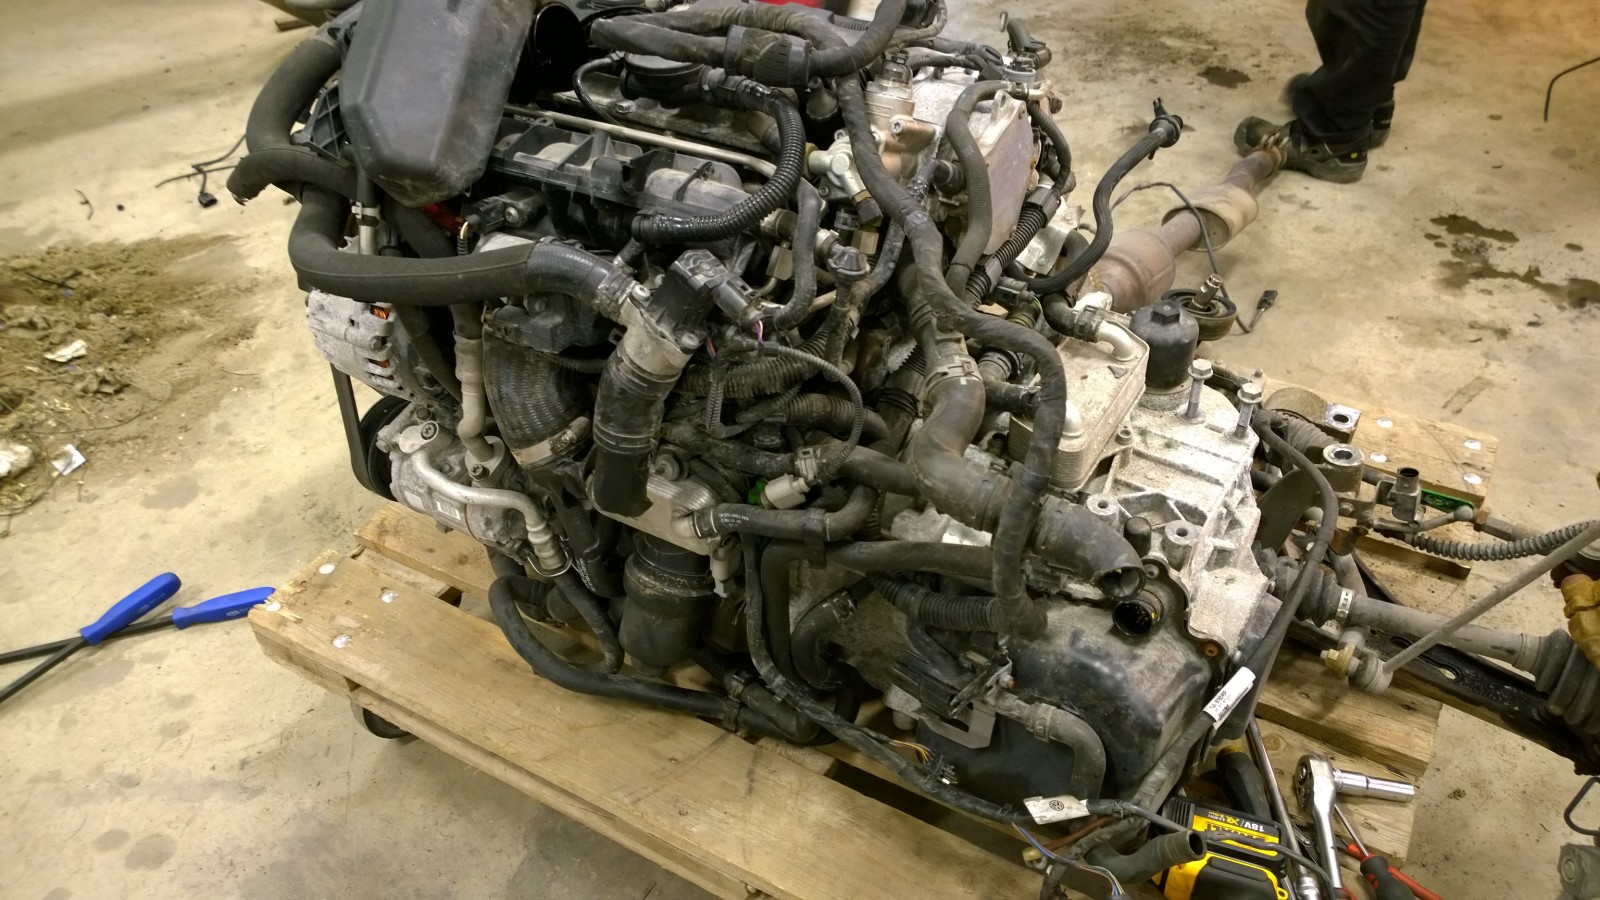
Another view on the engine and gearbox. We were able to sell the engine pretty soon.
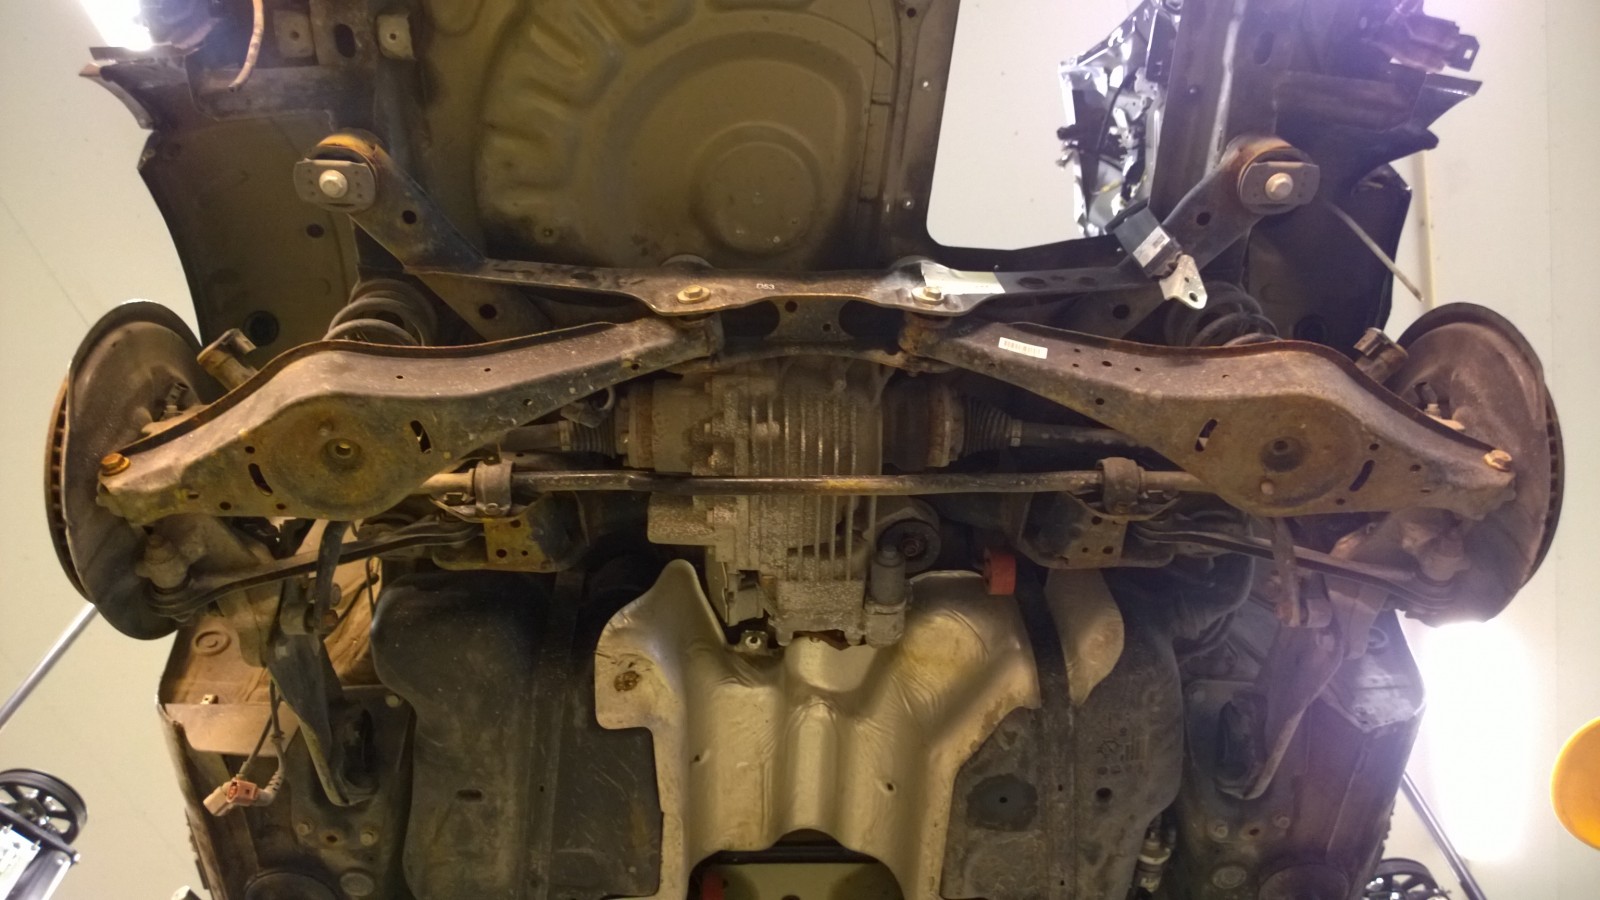
Rear axle
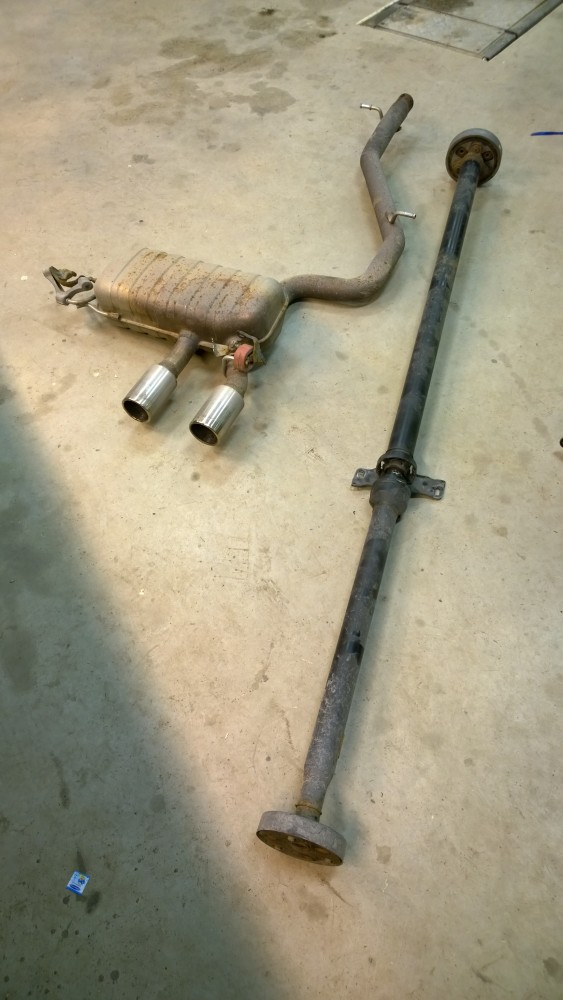
Drive shaft from front to back and Golf exhaust.
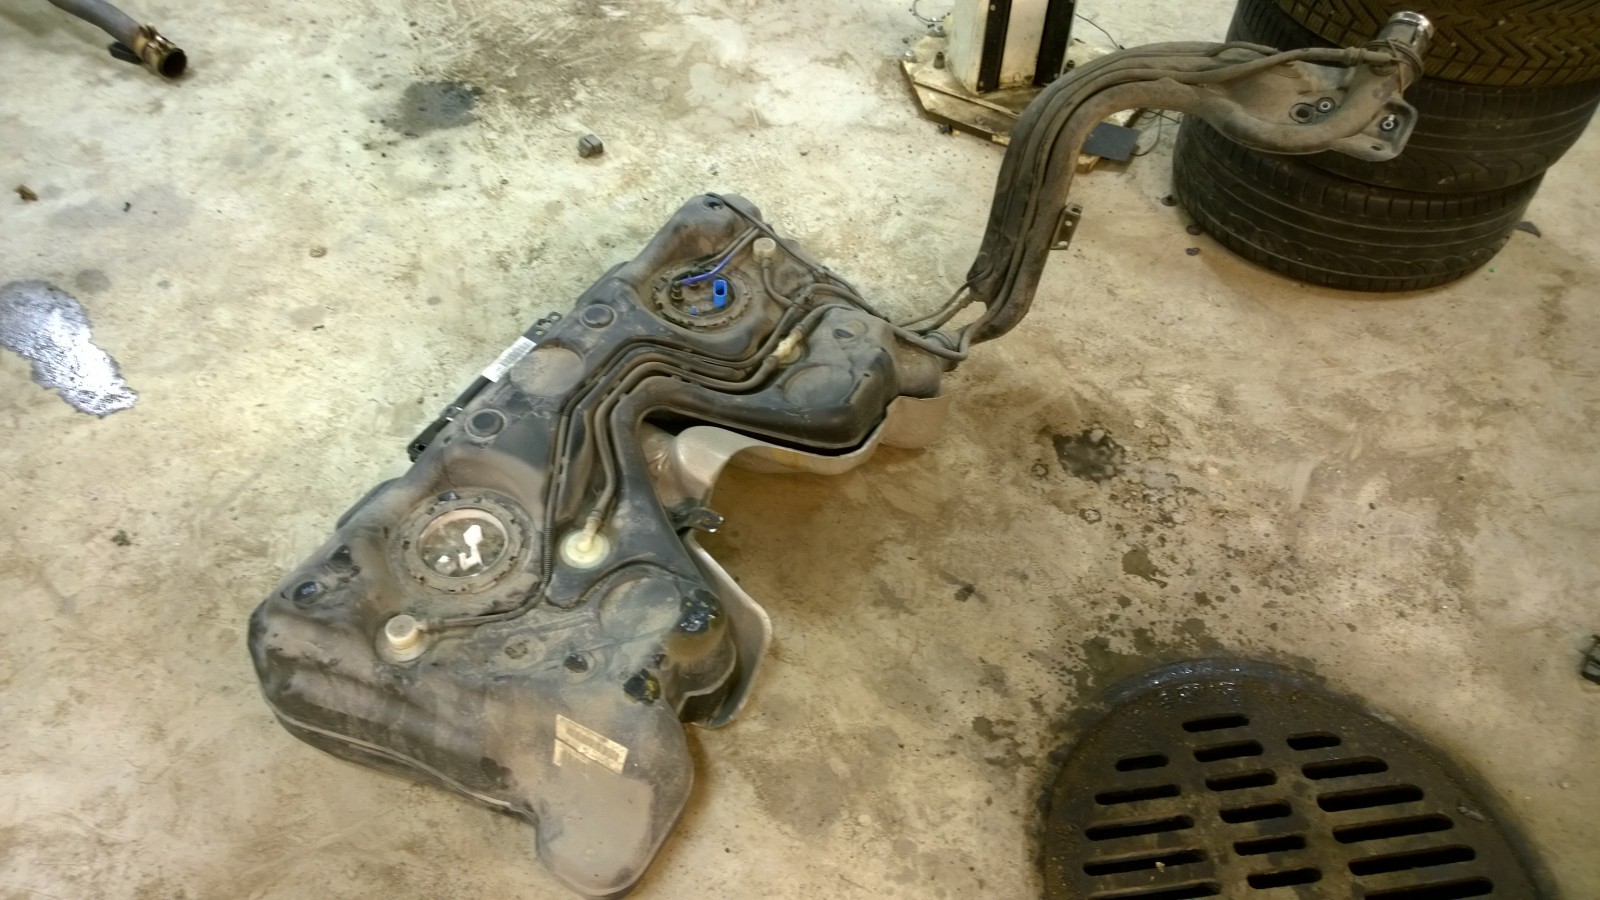
Golf fuel tank.
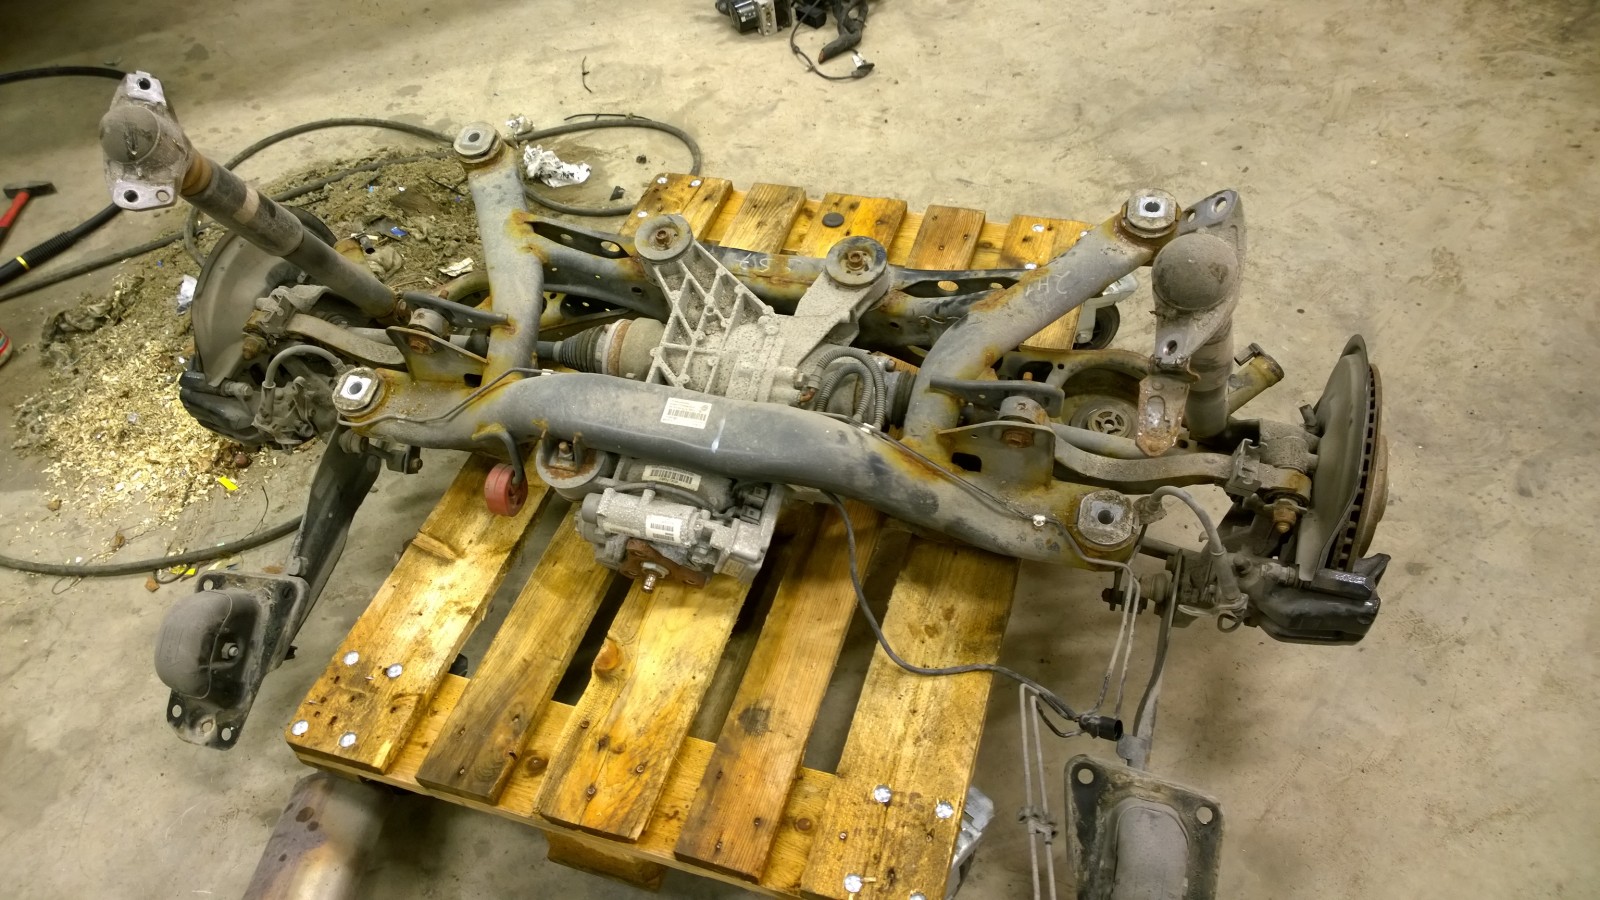
The rear axle came down pretty easily.
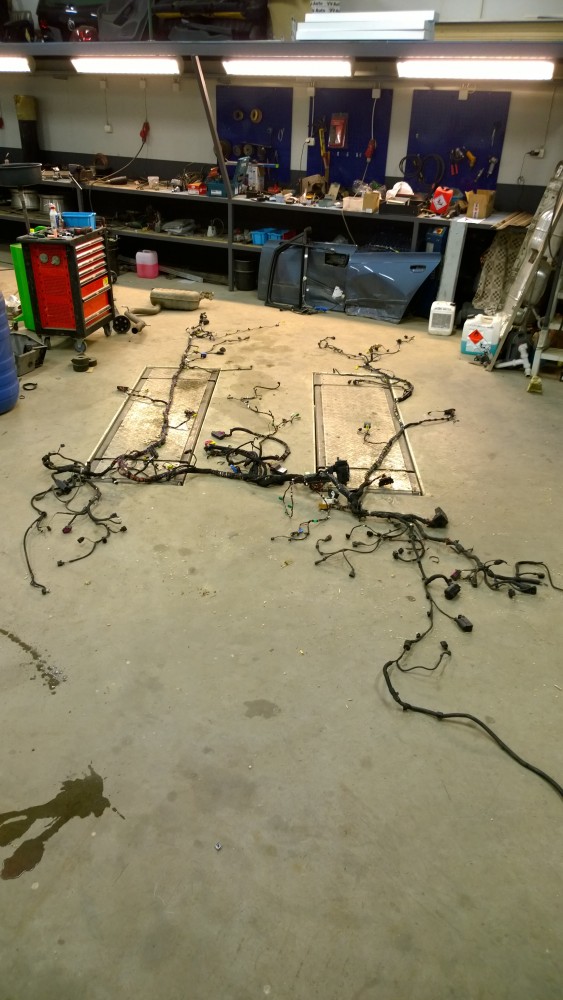
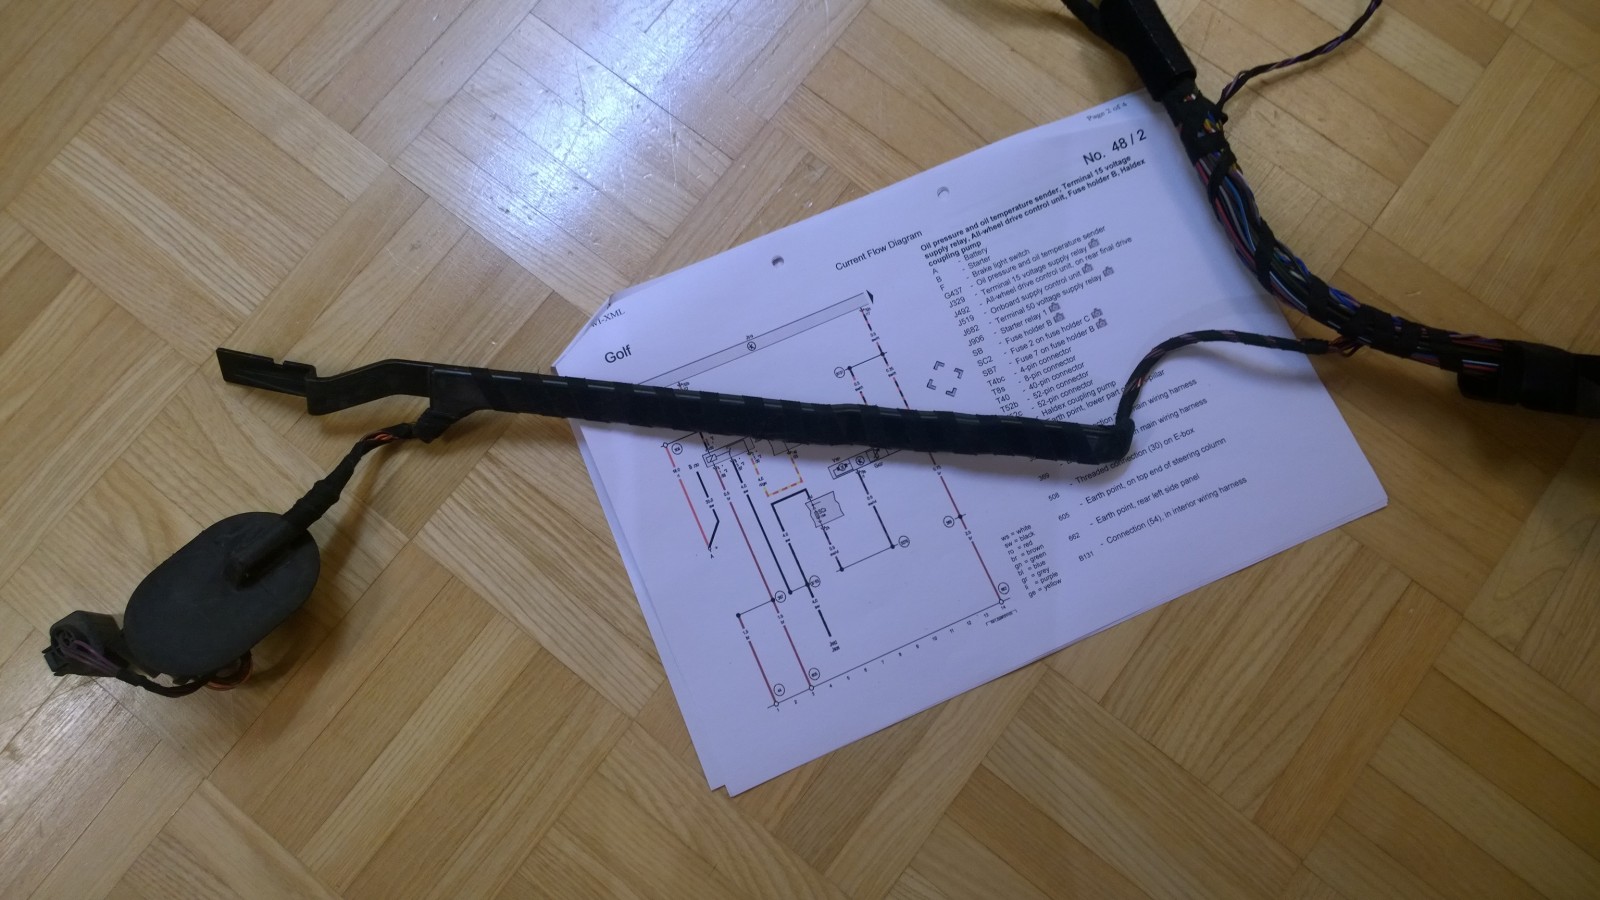
Wiring loom
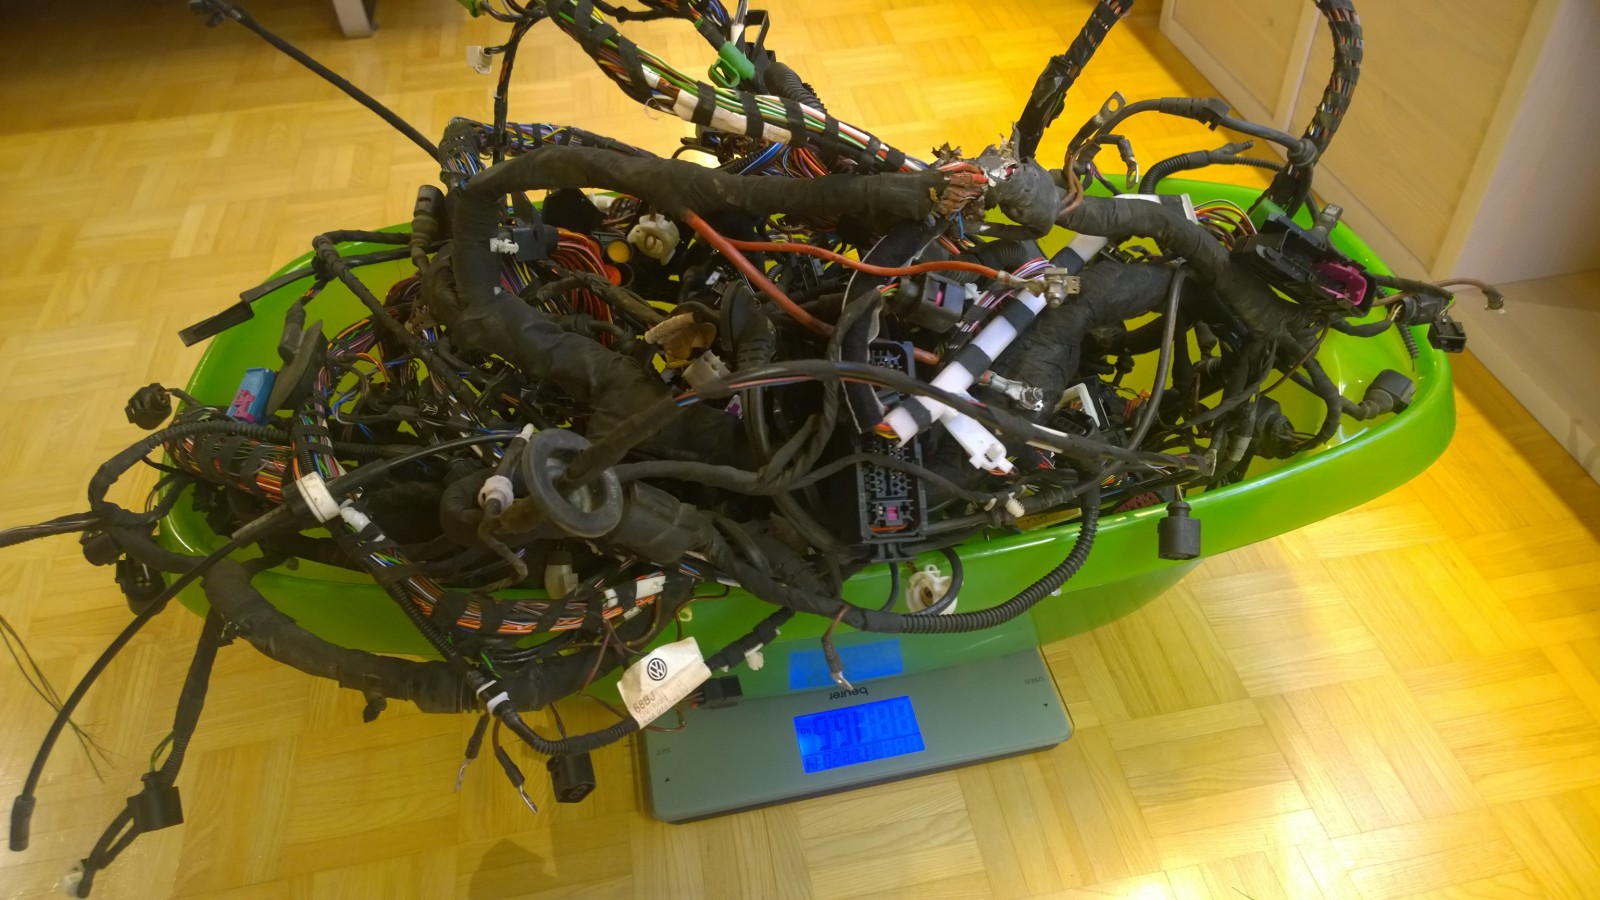
Just out of curiosity we decided to wight the loom. Scale reading: 16,5kg.
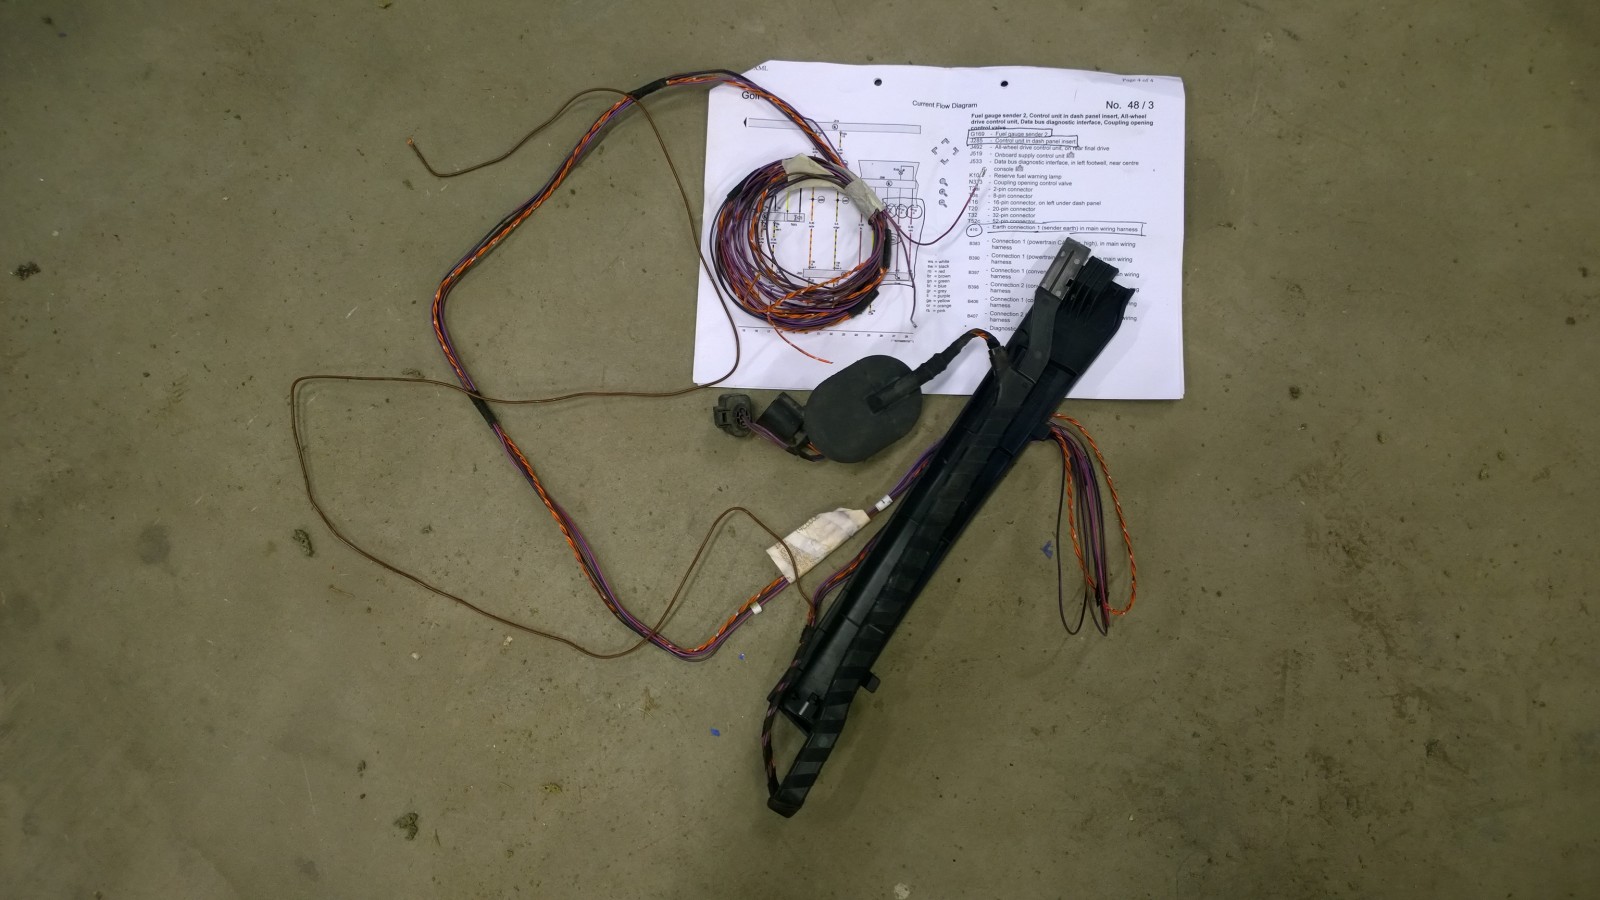
And this is all we needed: wires to Haldex controller (5 wires) and couple to fuel sender.
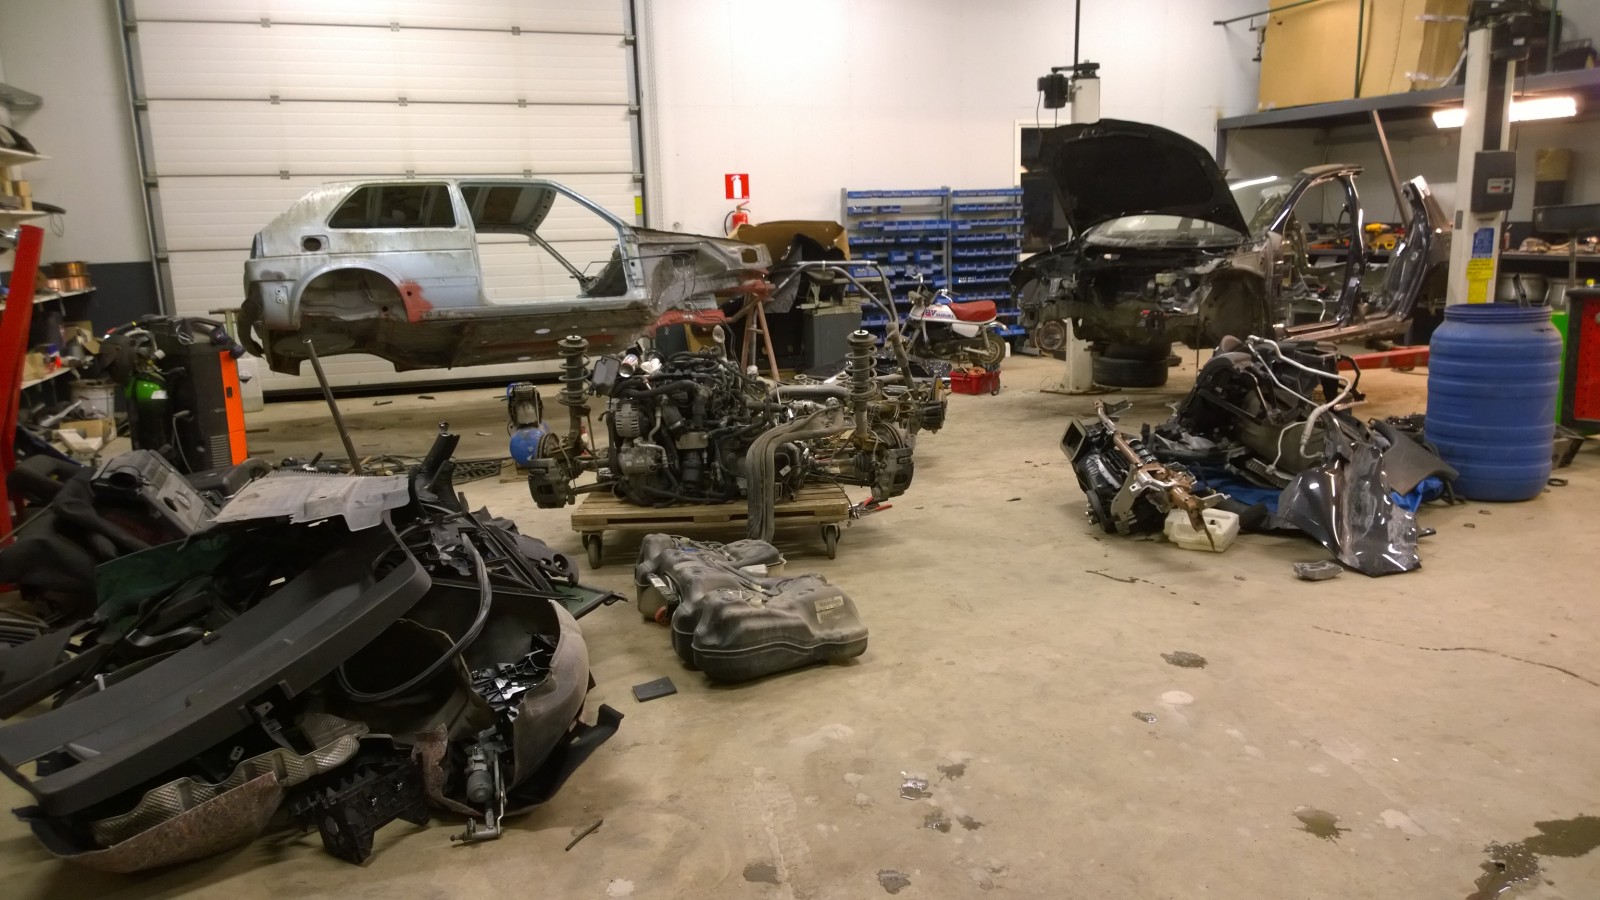
Pekka’s garage full of Heikki’s car’s and parts. He wasn’t too happy about it…
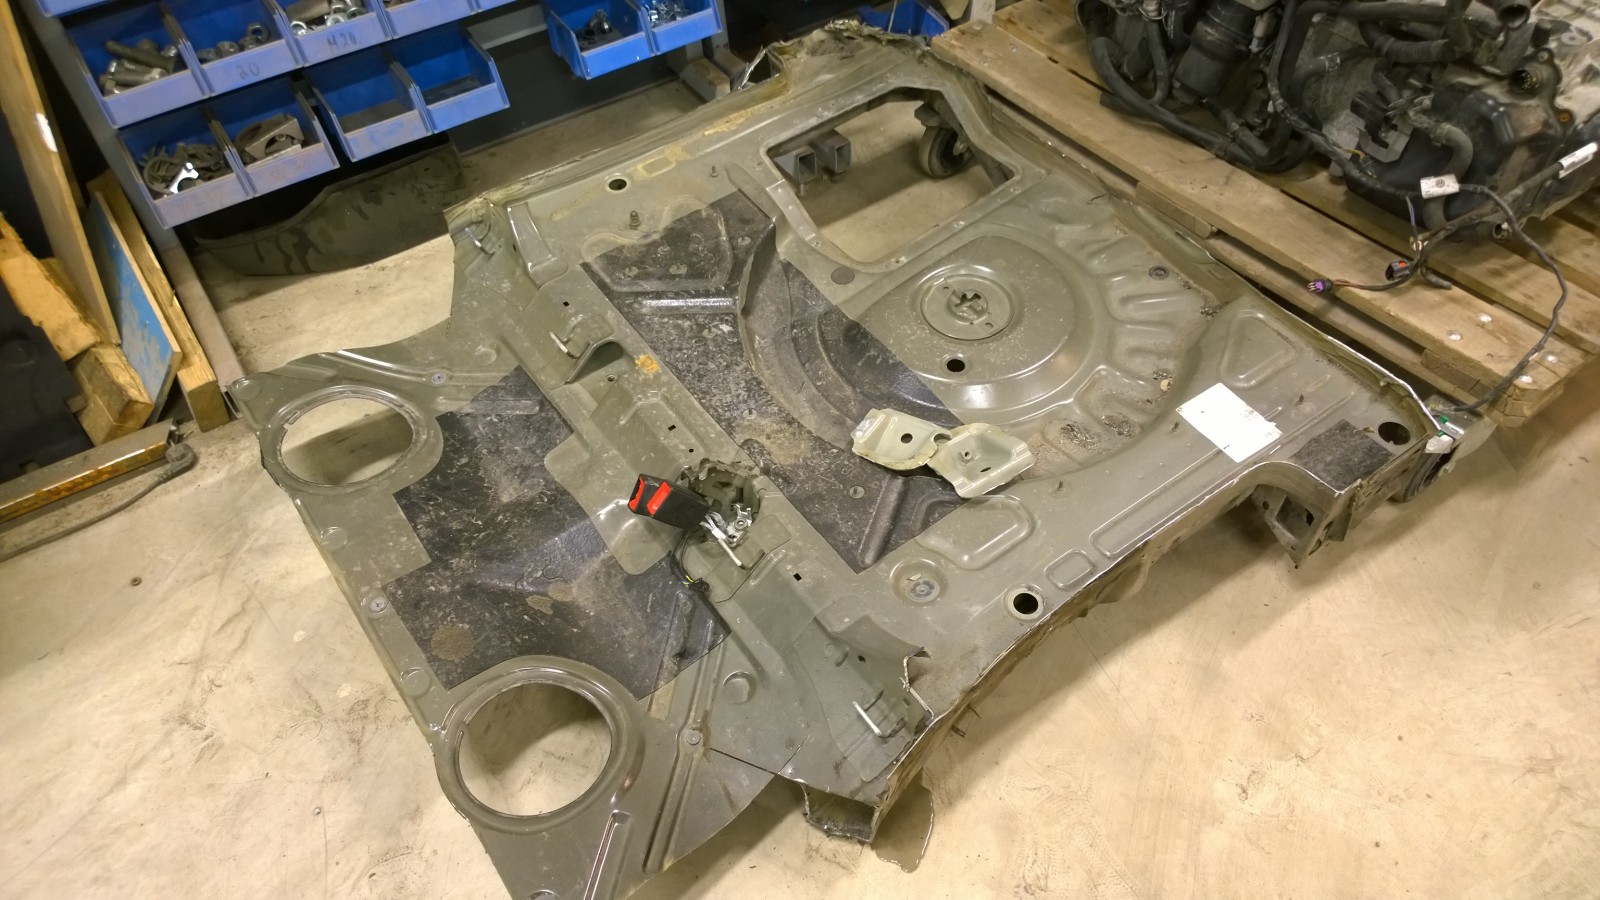
And this is what we needed from the body.
Finally we were able to make some space to the garage and bring Scirocco back in.
2016-02-01 · Scirocco in, rear axle out
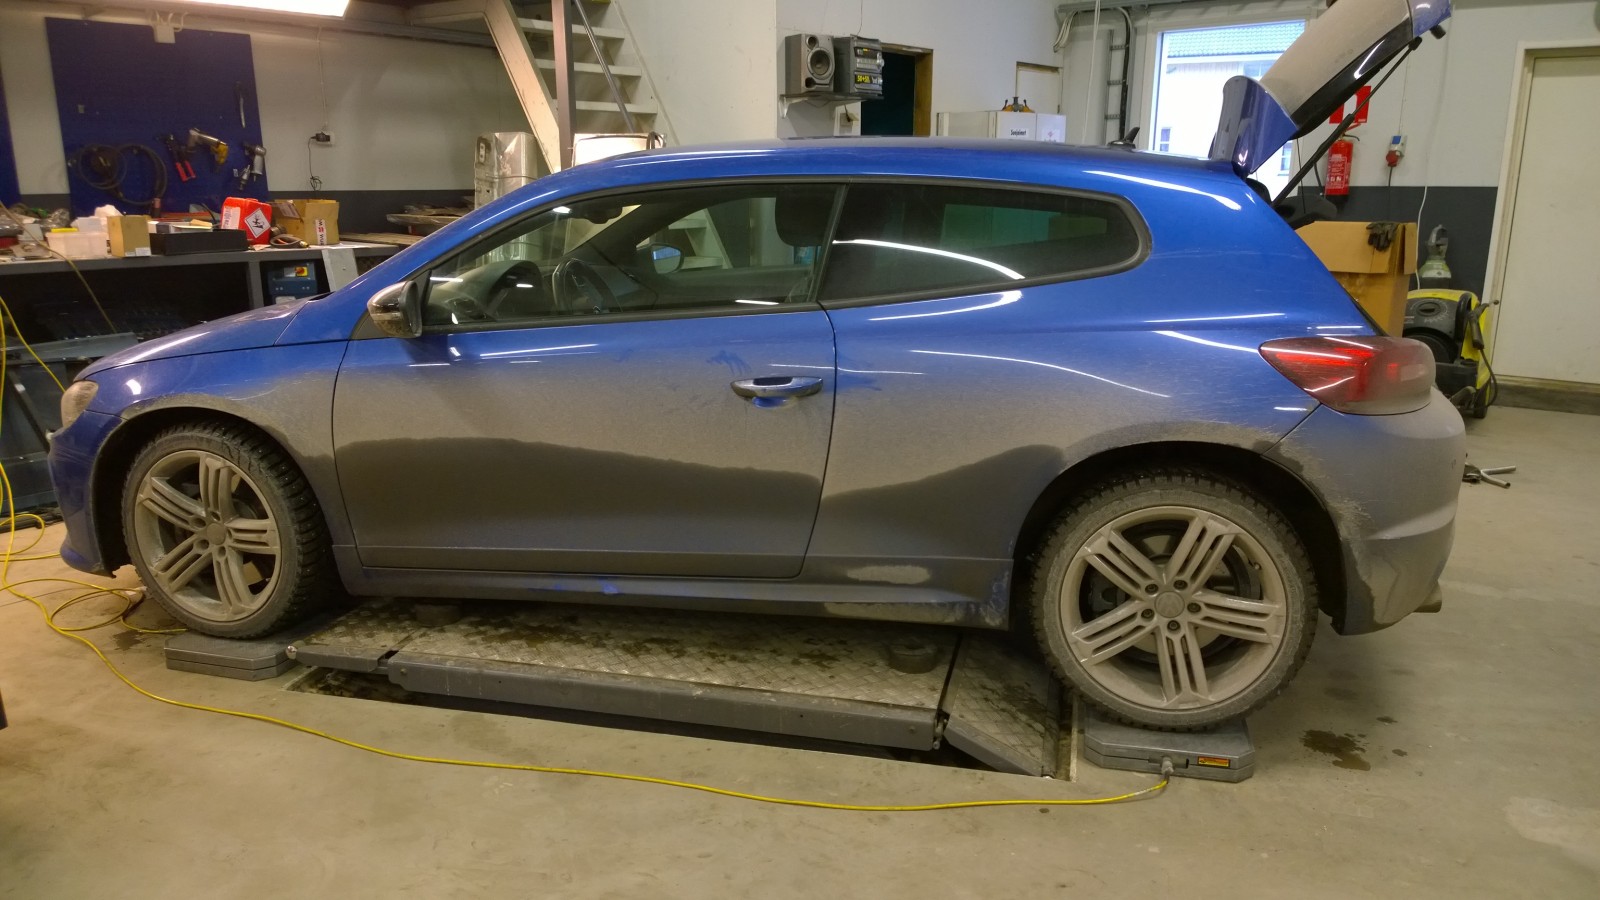
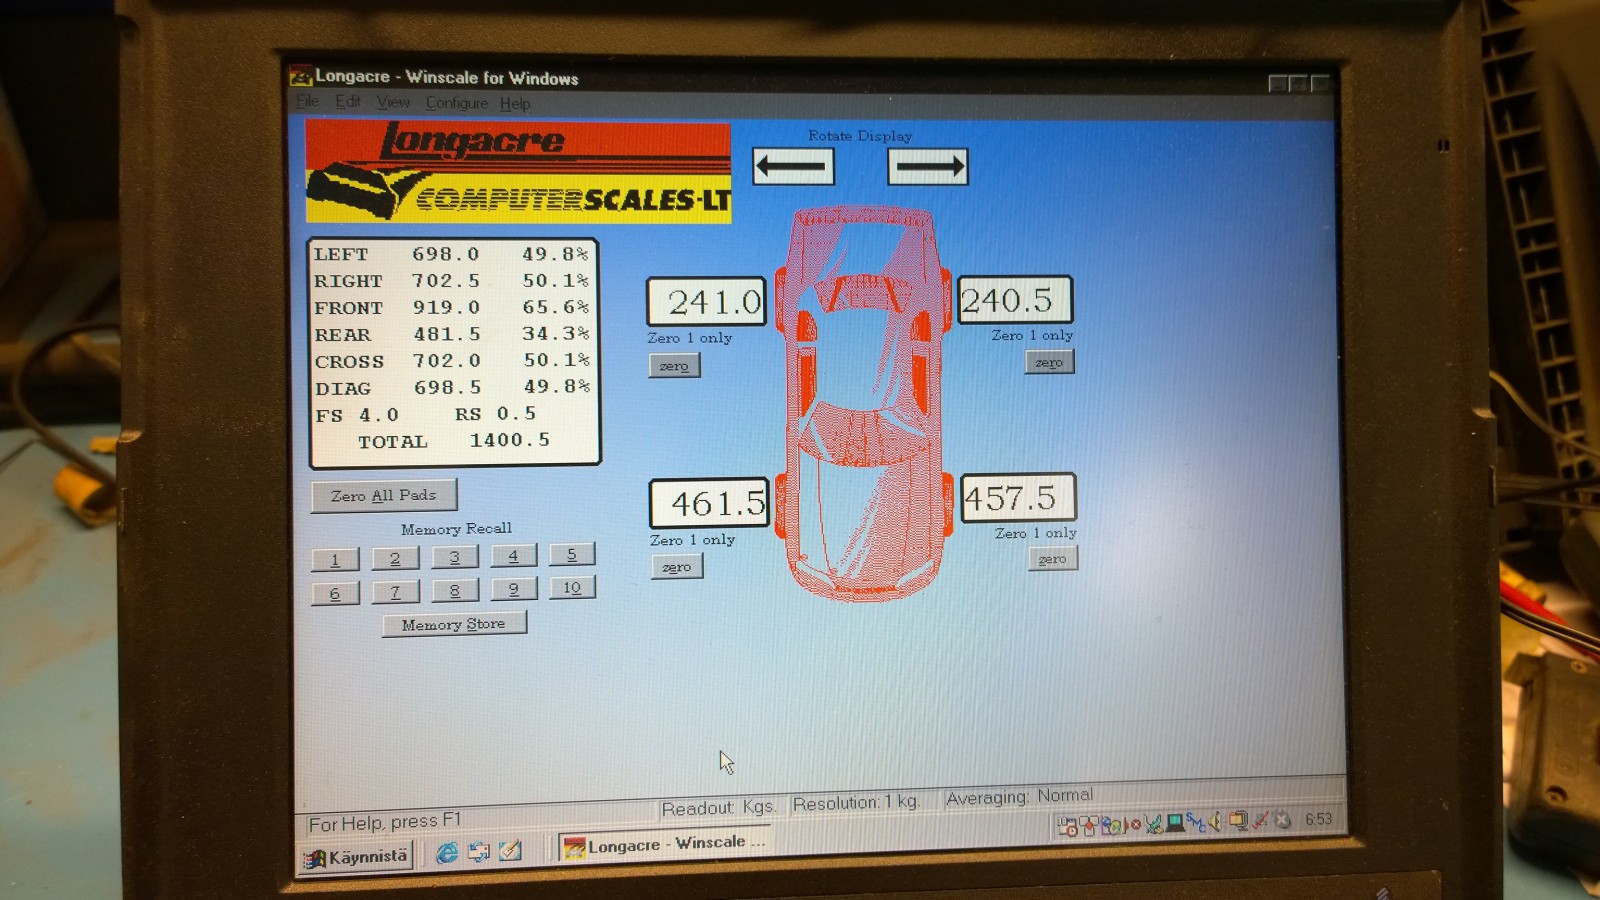
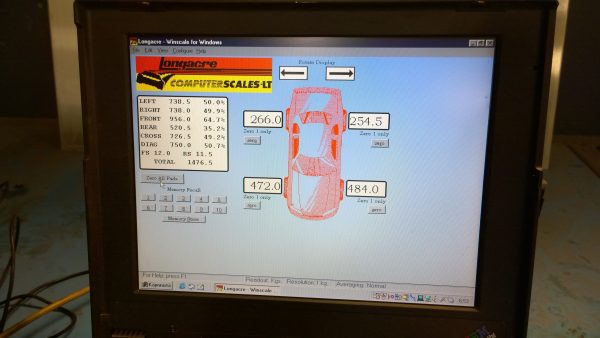
Before we started to tear down Scirocco, we set it on scales to see the axle weights (needed for regulatory paper work).
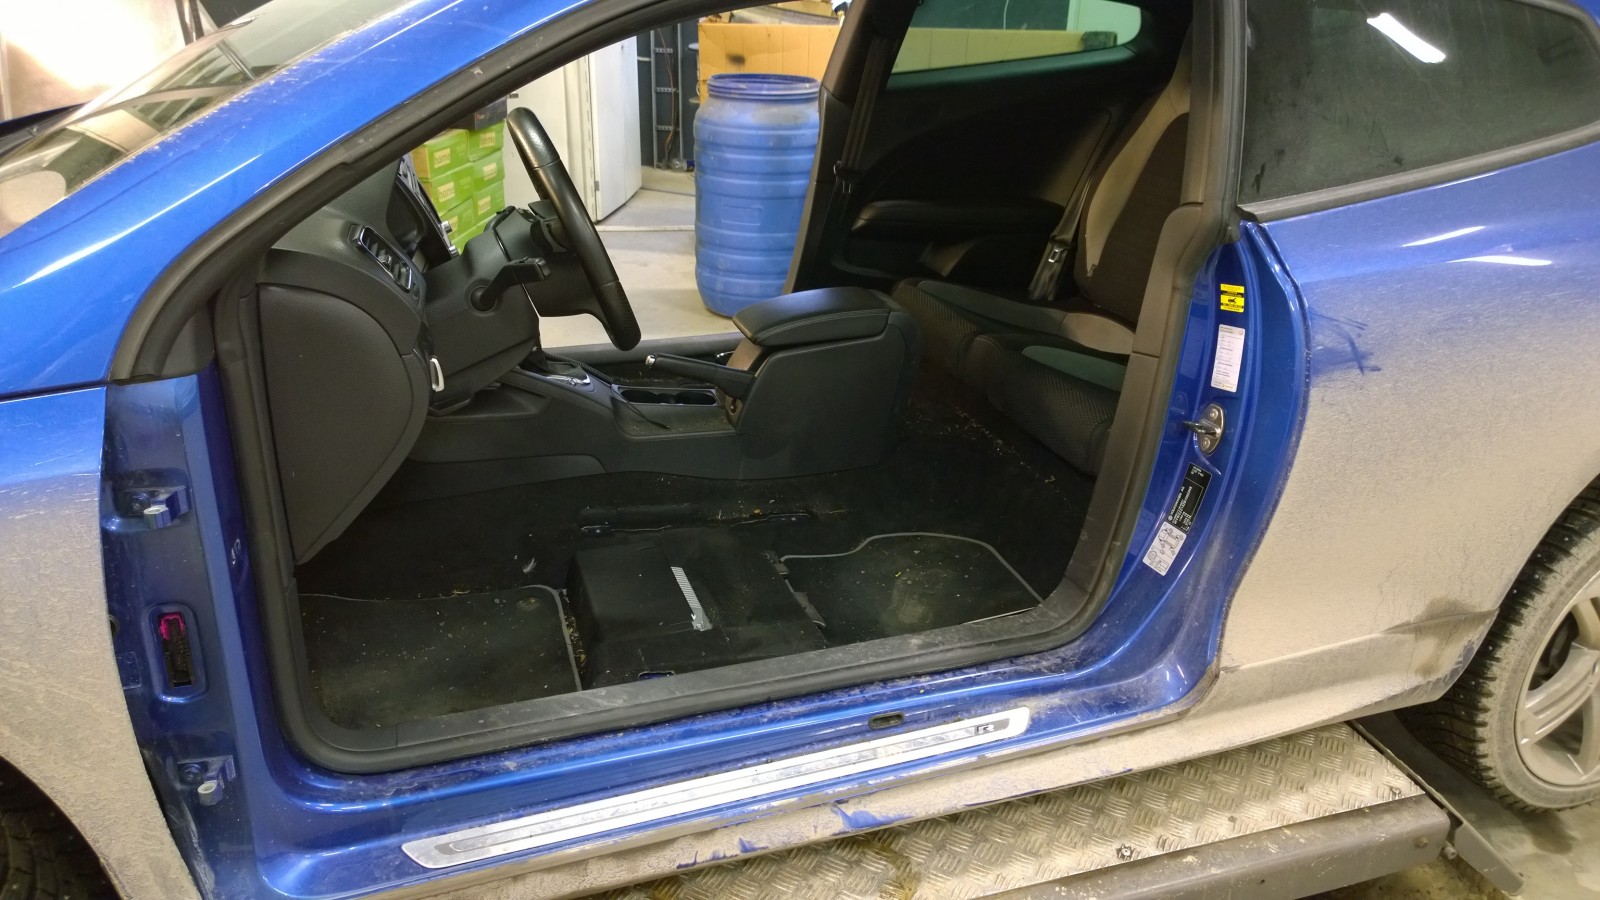
Front seats out
We also had to tear down the dash partly – some wiring needed to be connected inside the dash (more about that later).
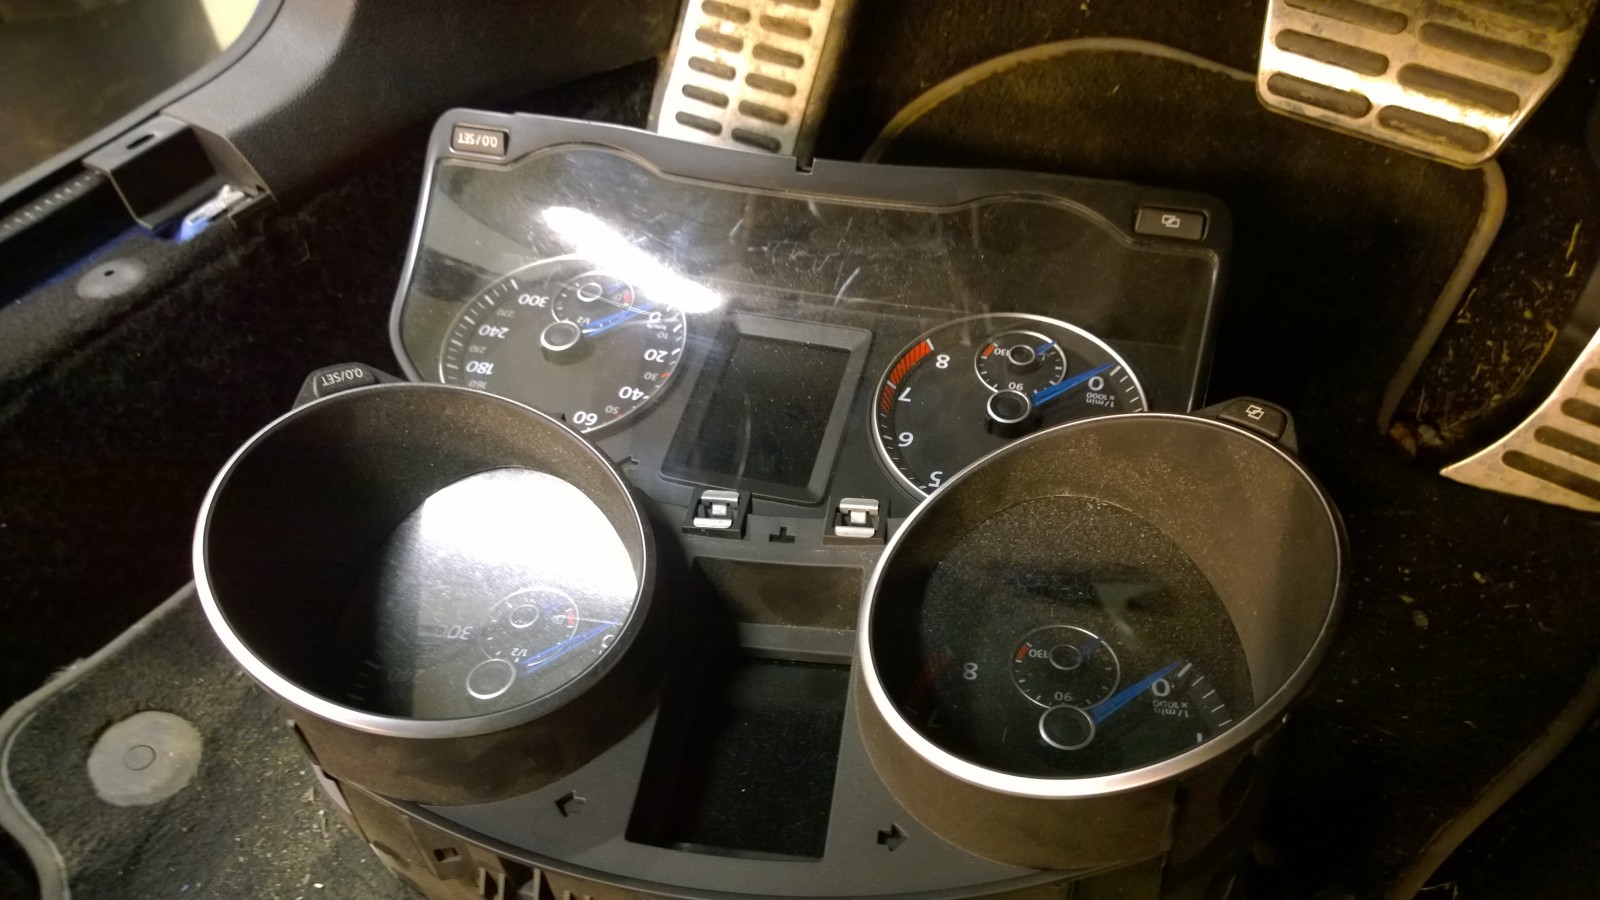
Comparing Scirocco (back) and Golf clusters.
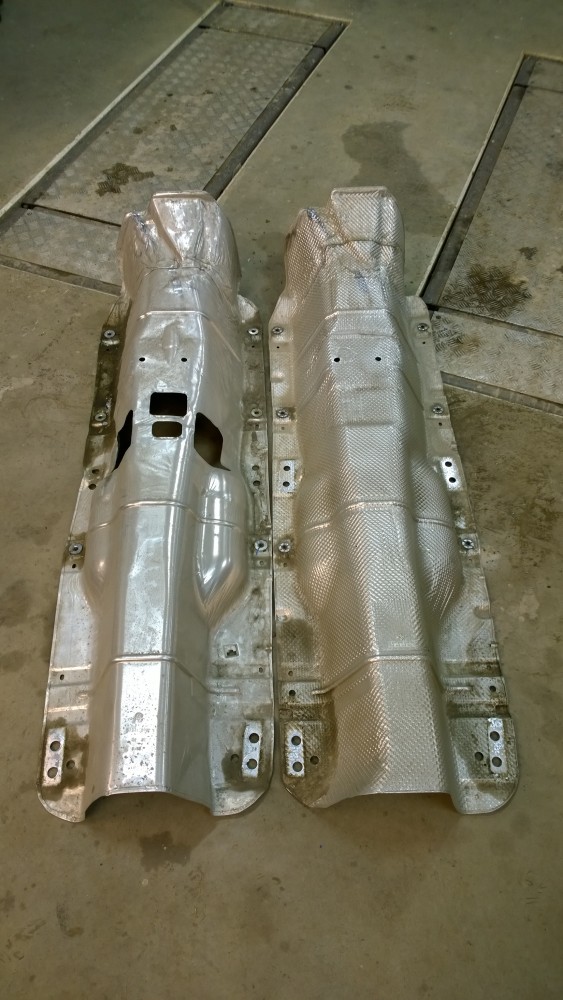
Heat shields under the car. The only difference between Scirocco and Golf are couple of holes needed for drive shaft support bearing.
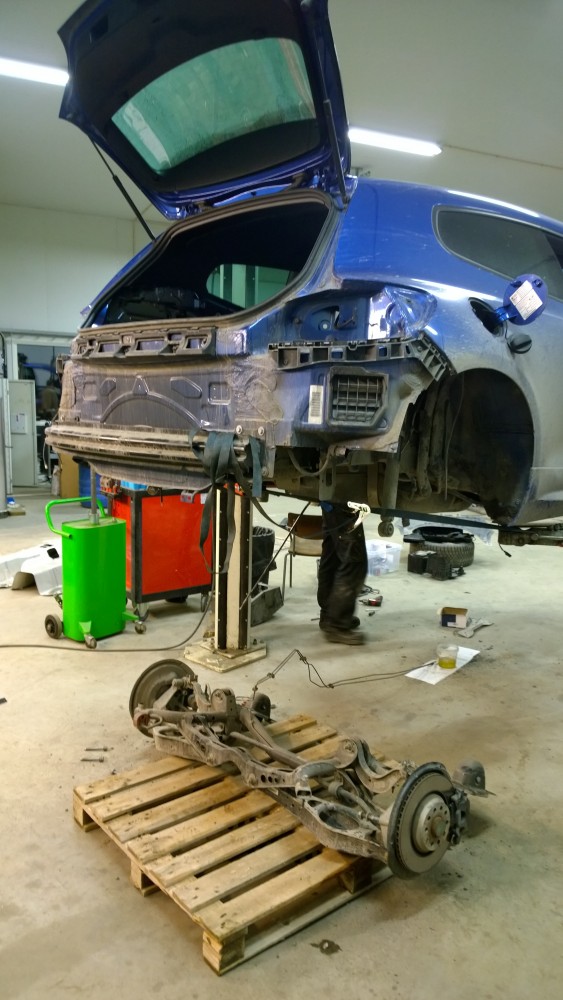
Rear axle dropped off – this took only a few minutes.
Next we decided to change the gearbox. Unfortunately we were so busy doing the actual job we forgot to take a lot of pictures. Anyway, first we had to drop down the subframe – together with steering gear.
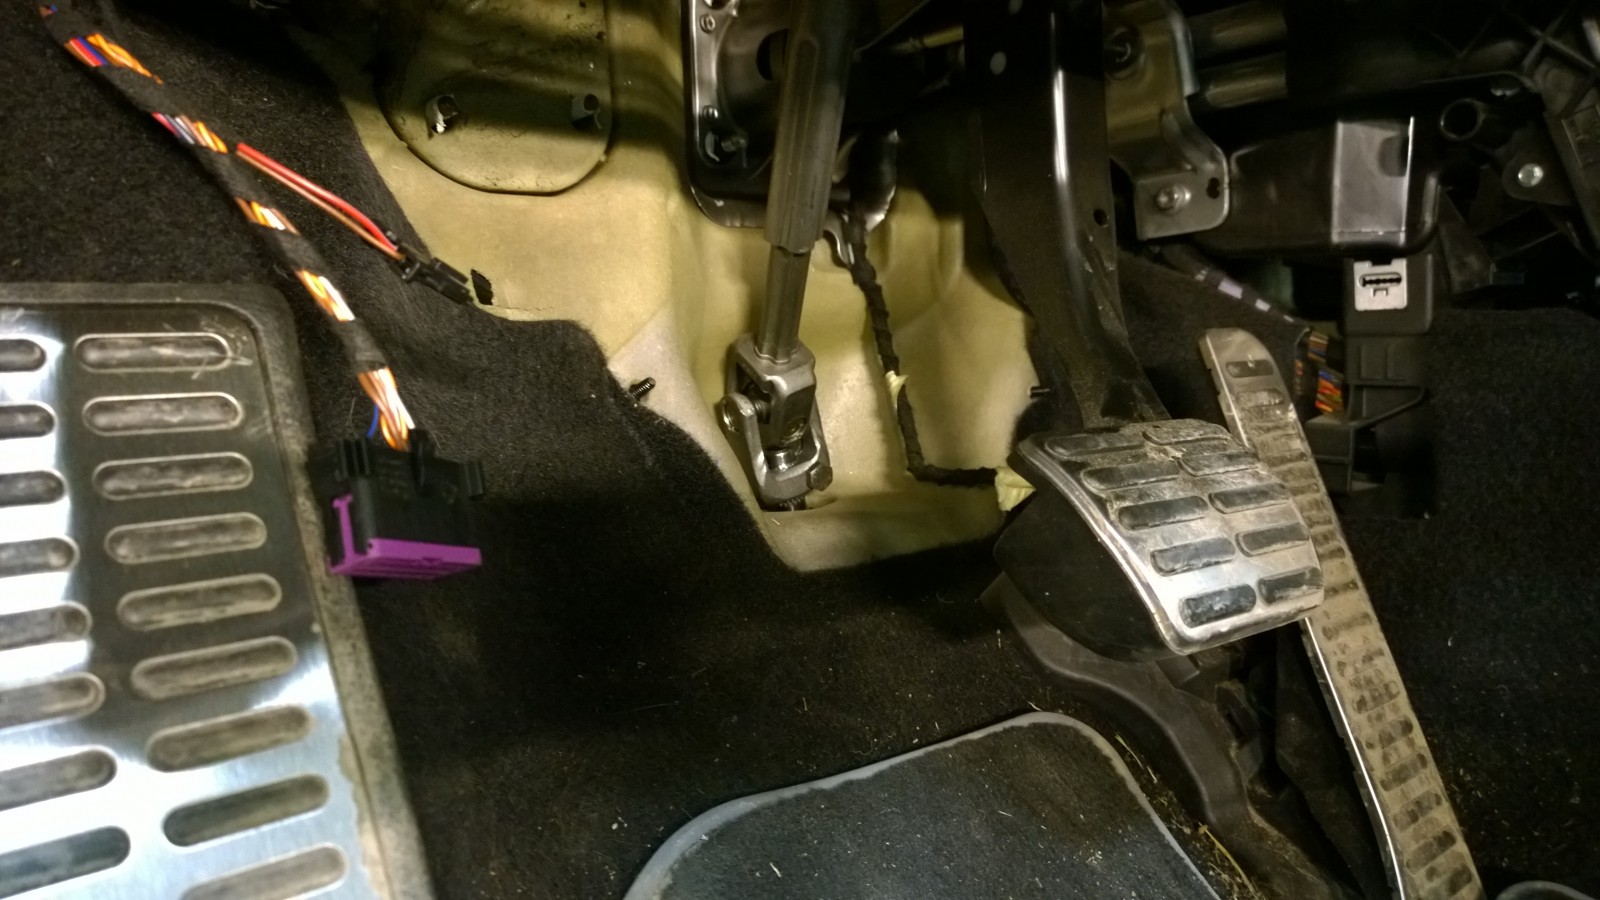
To be able to drop down the front subframe and steering gear we opened the steering shaft.
It would have been a clever move to remove the steering wheel too – my 4 year old son had too much fun “driving” the car and while the steering wheel was now free to rotate as many cycles as he wanted, he broke the slip ring behind the steering wheel…
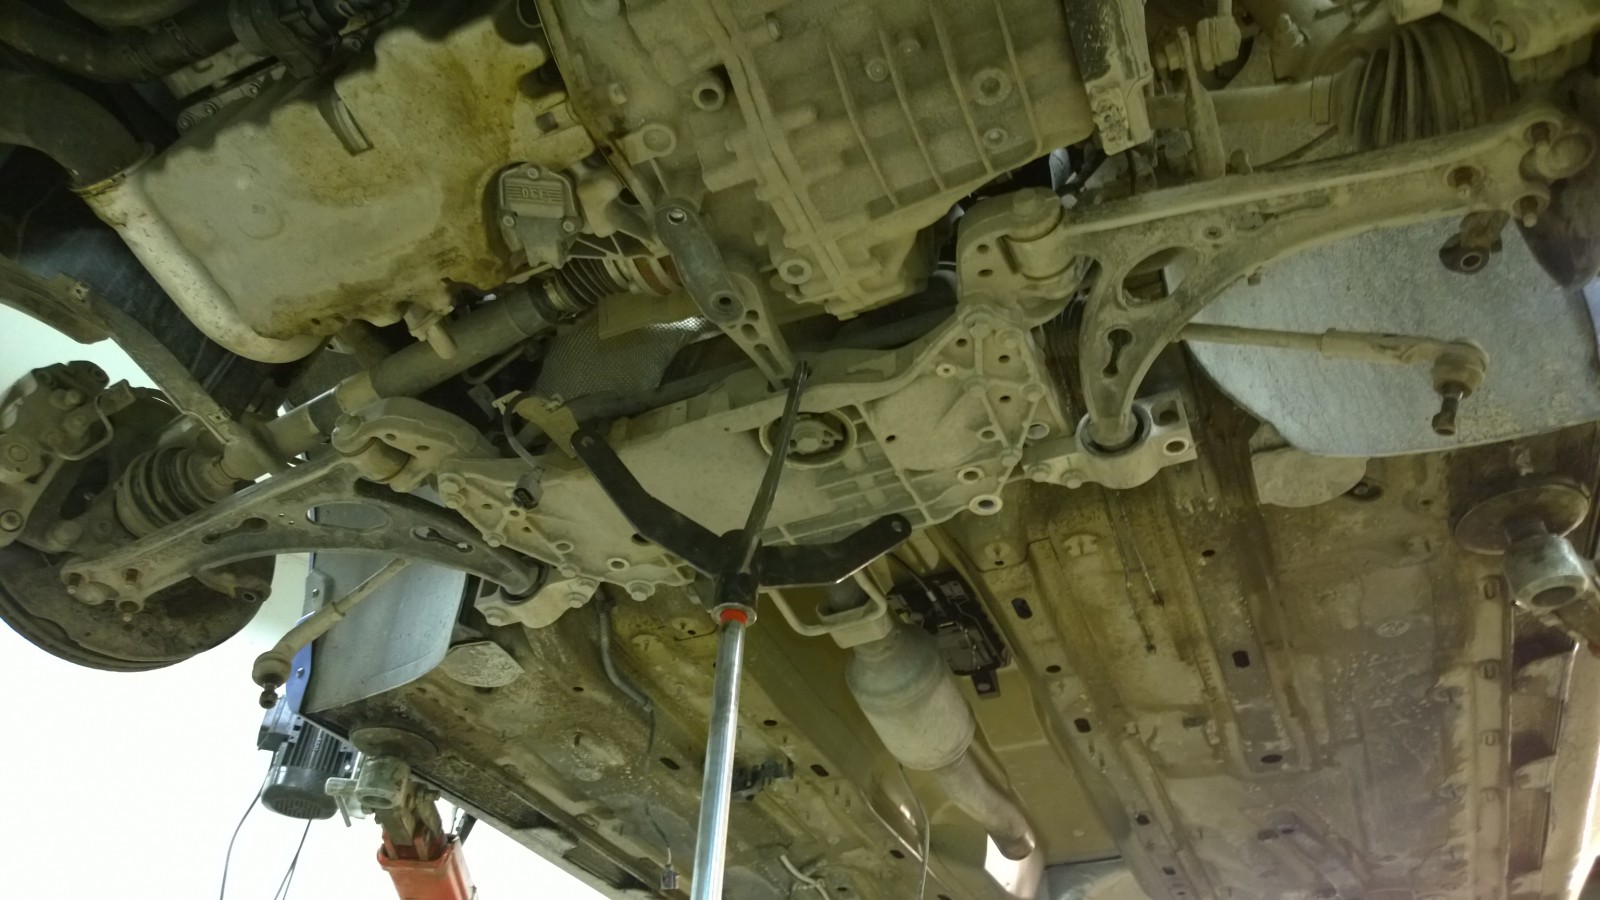
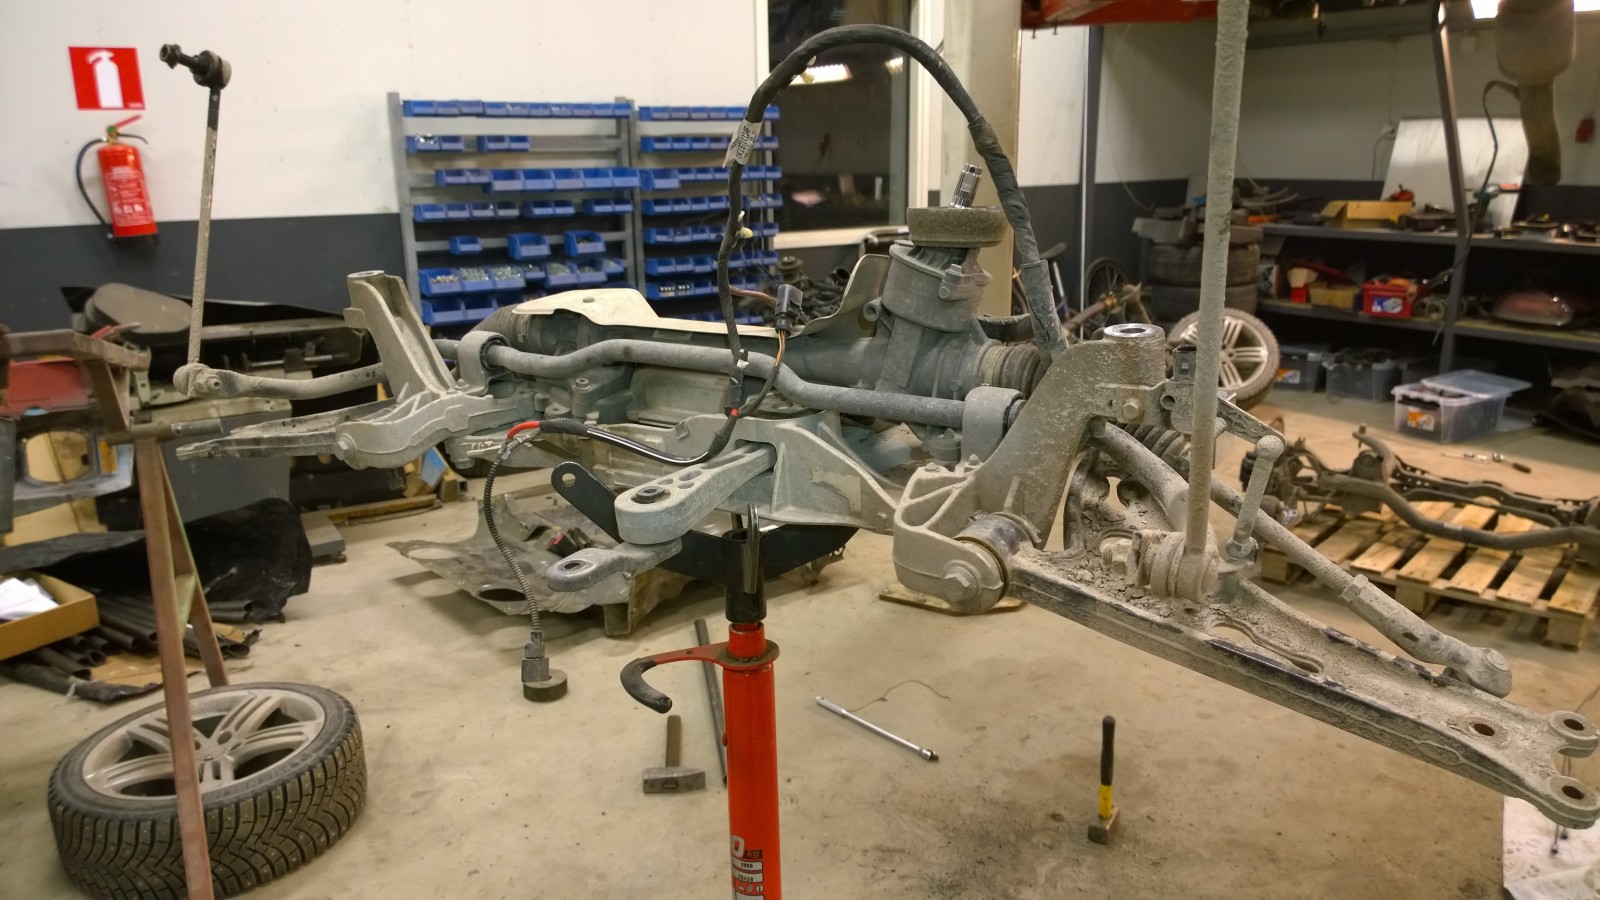
While the engine was supported from the top side, it was now easy to remove the gearbox and replace with the box from Golf. We compared the Scirocco and Golf gearboxes and they were identical (including gear ratios), the only difference is Golf’s angle drive.
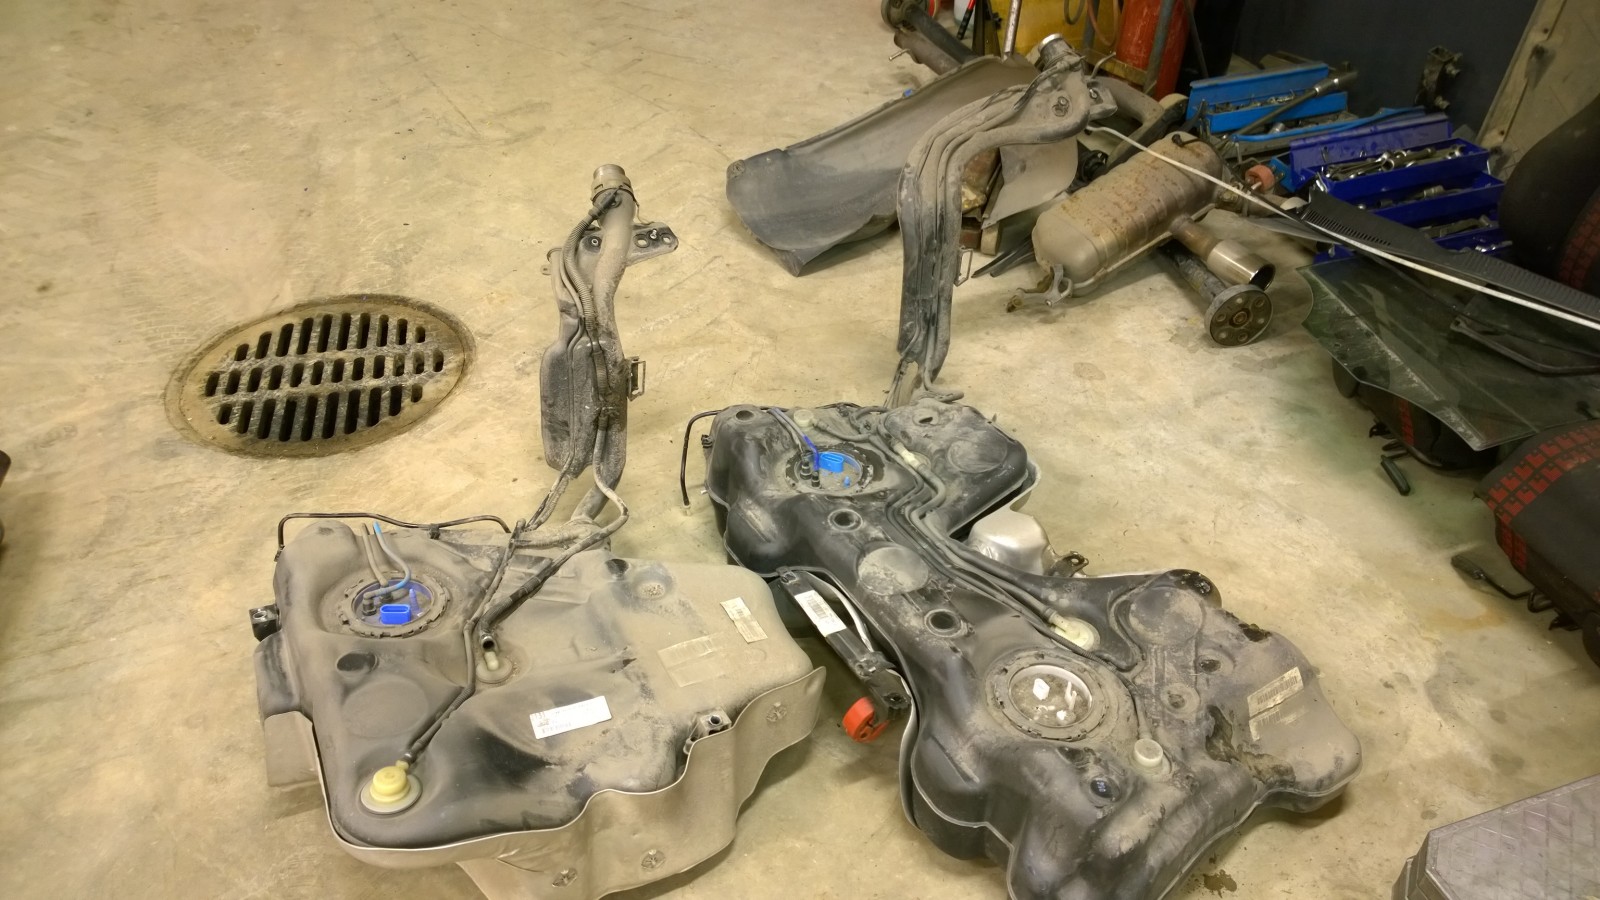
Scirocco’s fuel tank (left) is quite different from Golf’s.
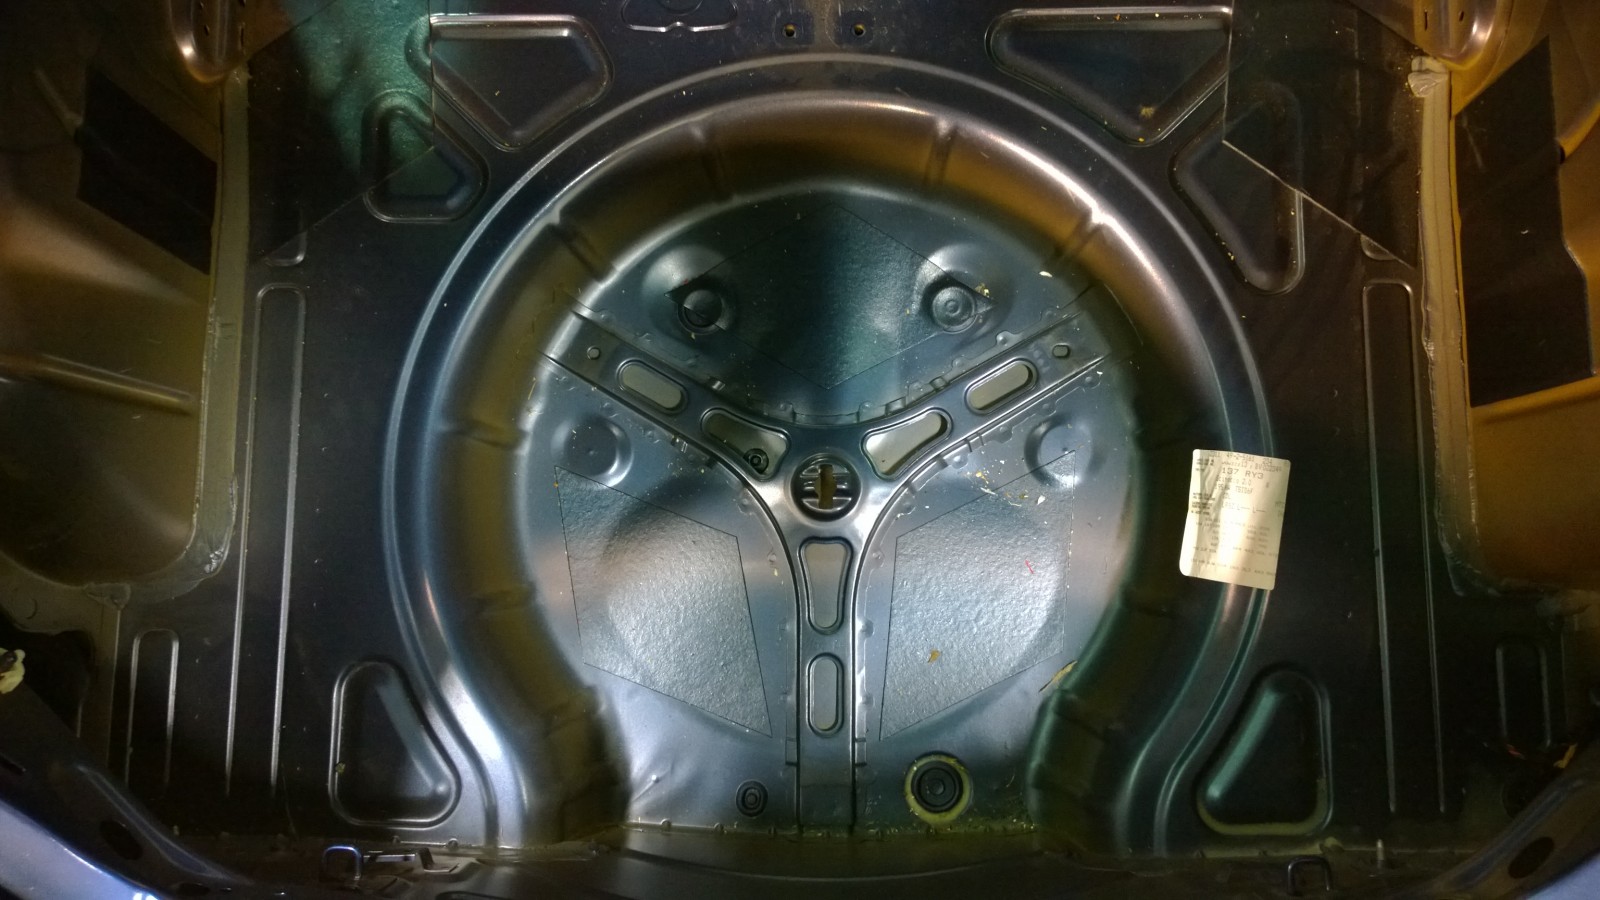
Scirocco trunk. Spare wheel space is a lot deeper than in Golf. This is the reason why we need to switch the floor to make room for rear diff. We’ll post a comparison photo a bit later.
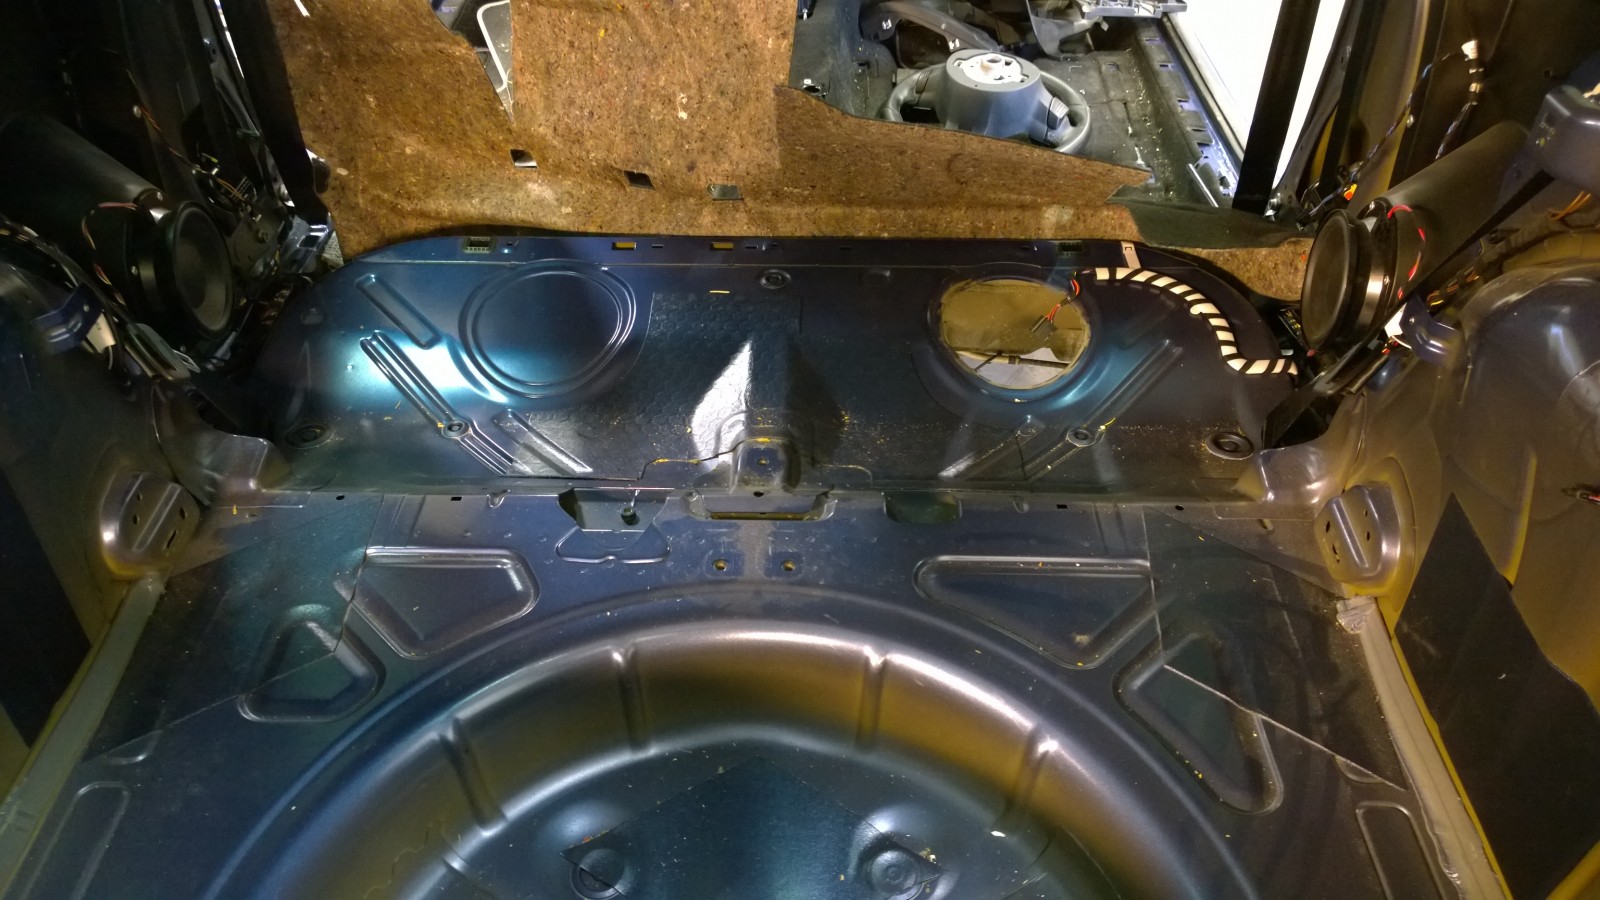
Under the rear seat is the opening for fuel pump and gauge sensor. In Golf there’s a hole on both sides.
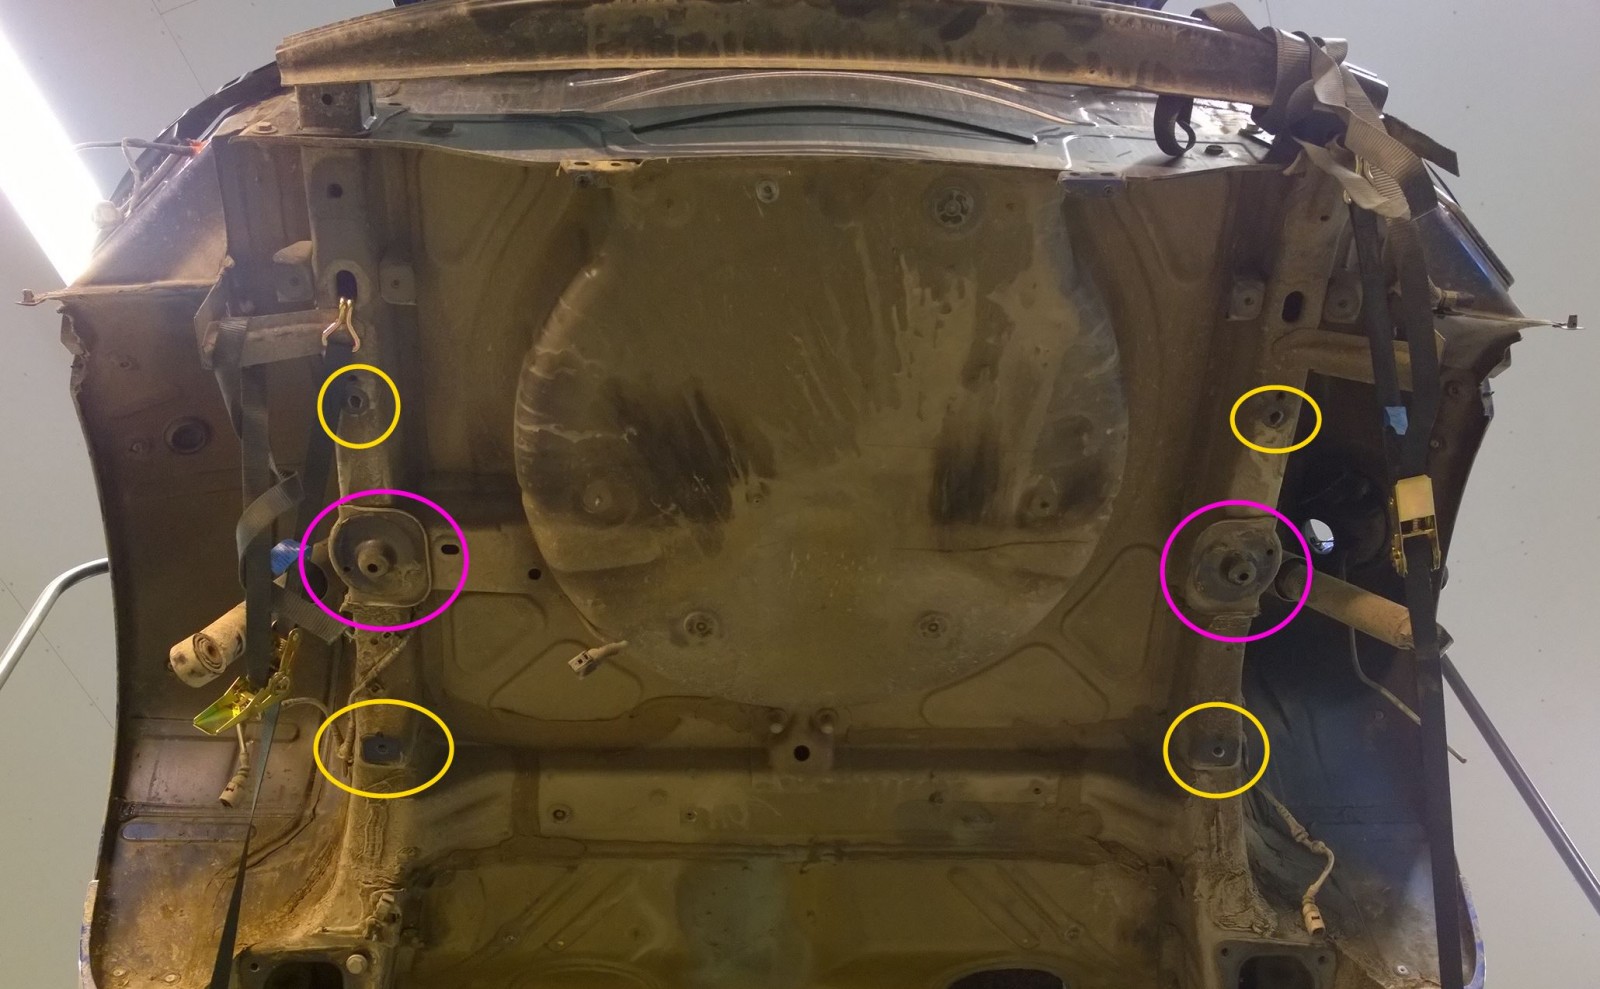
On the underside everything is same as in Golf except the spare wheel area. Rear axle bolts into the same locations (yellow circles). Springs attach to the areas marked with purple.
In next post we’ll replace the trunk floor.
2016-02-09 · Scirocco 4motion trunk floor replacement
As described on earlier posts, pretty much the only major body modification needed for 4motion retrofit is replacing the trunk floor with a floor from Golf. We did this by following VW’s instructions. The only difference is that in VW’s instructions they use brand new floor, we started by first removing the floor piece from our donor car.
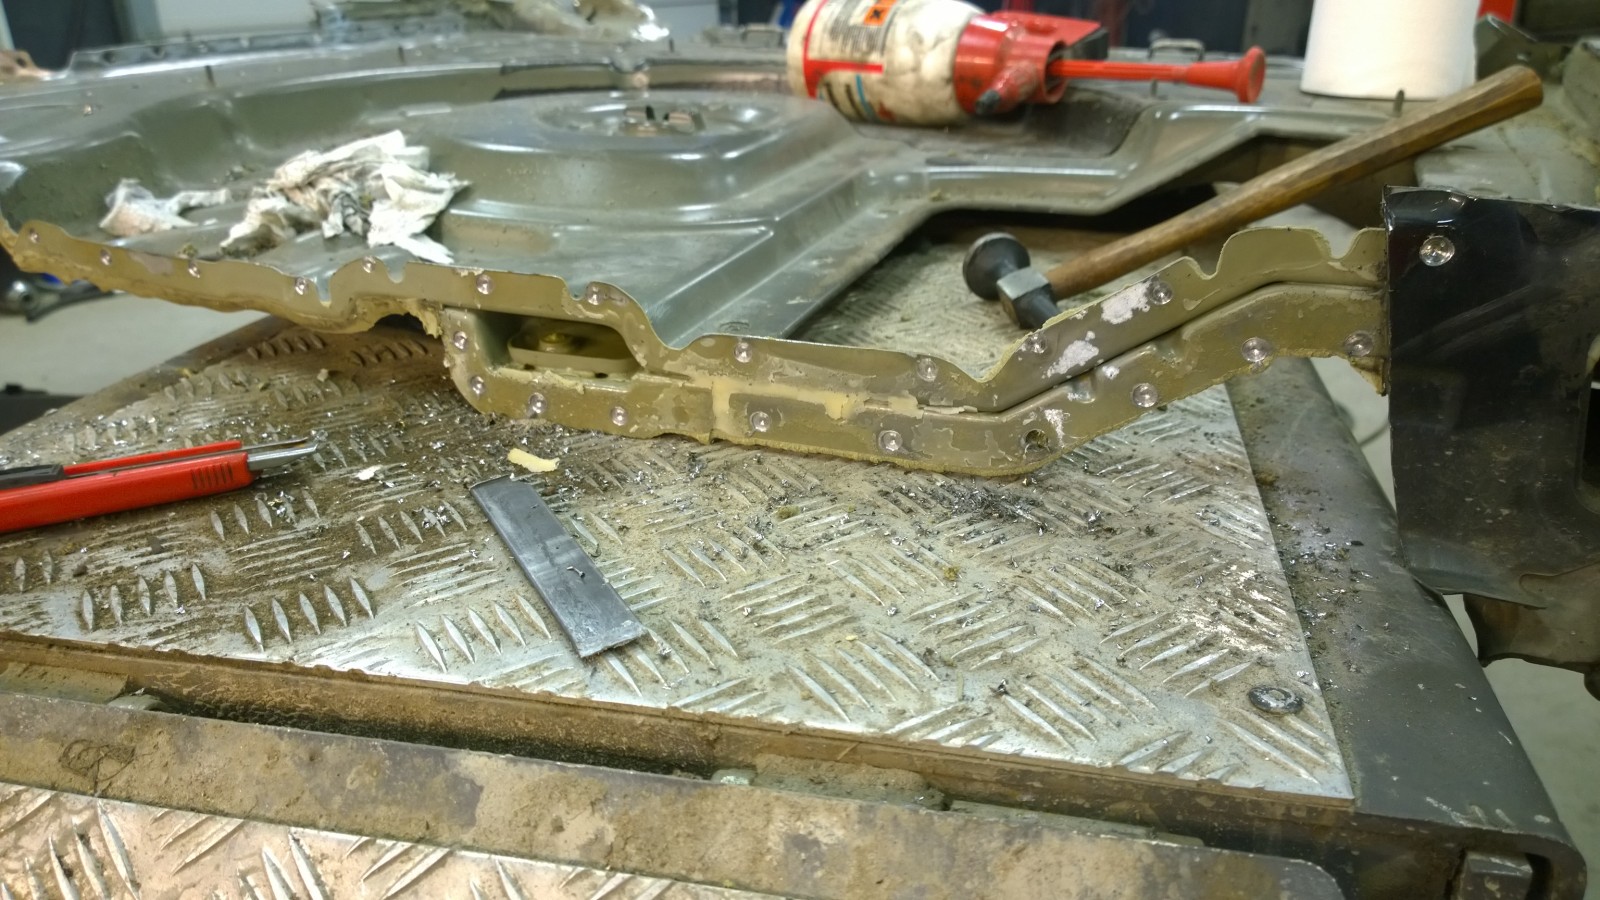
Golf trunk floor being drilled and chiseled from a larger piece.
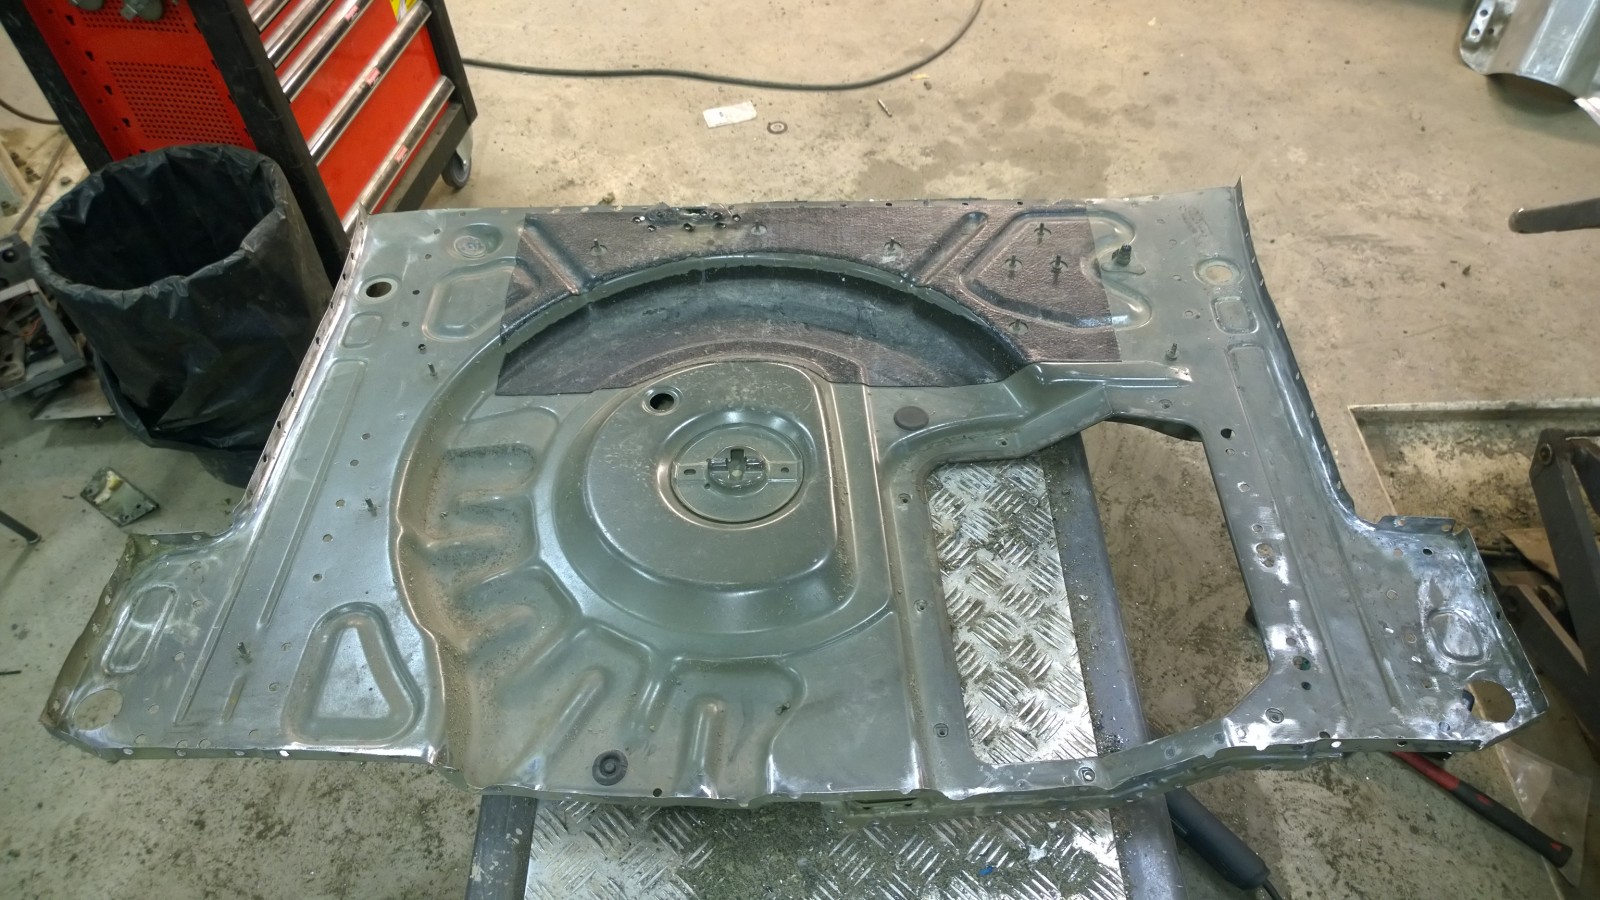
Ready to be installed to Scirocco. The large opening is for battery – some Golf models have battery on the trunk. This one has a metal plate to cover the hole.
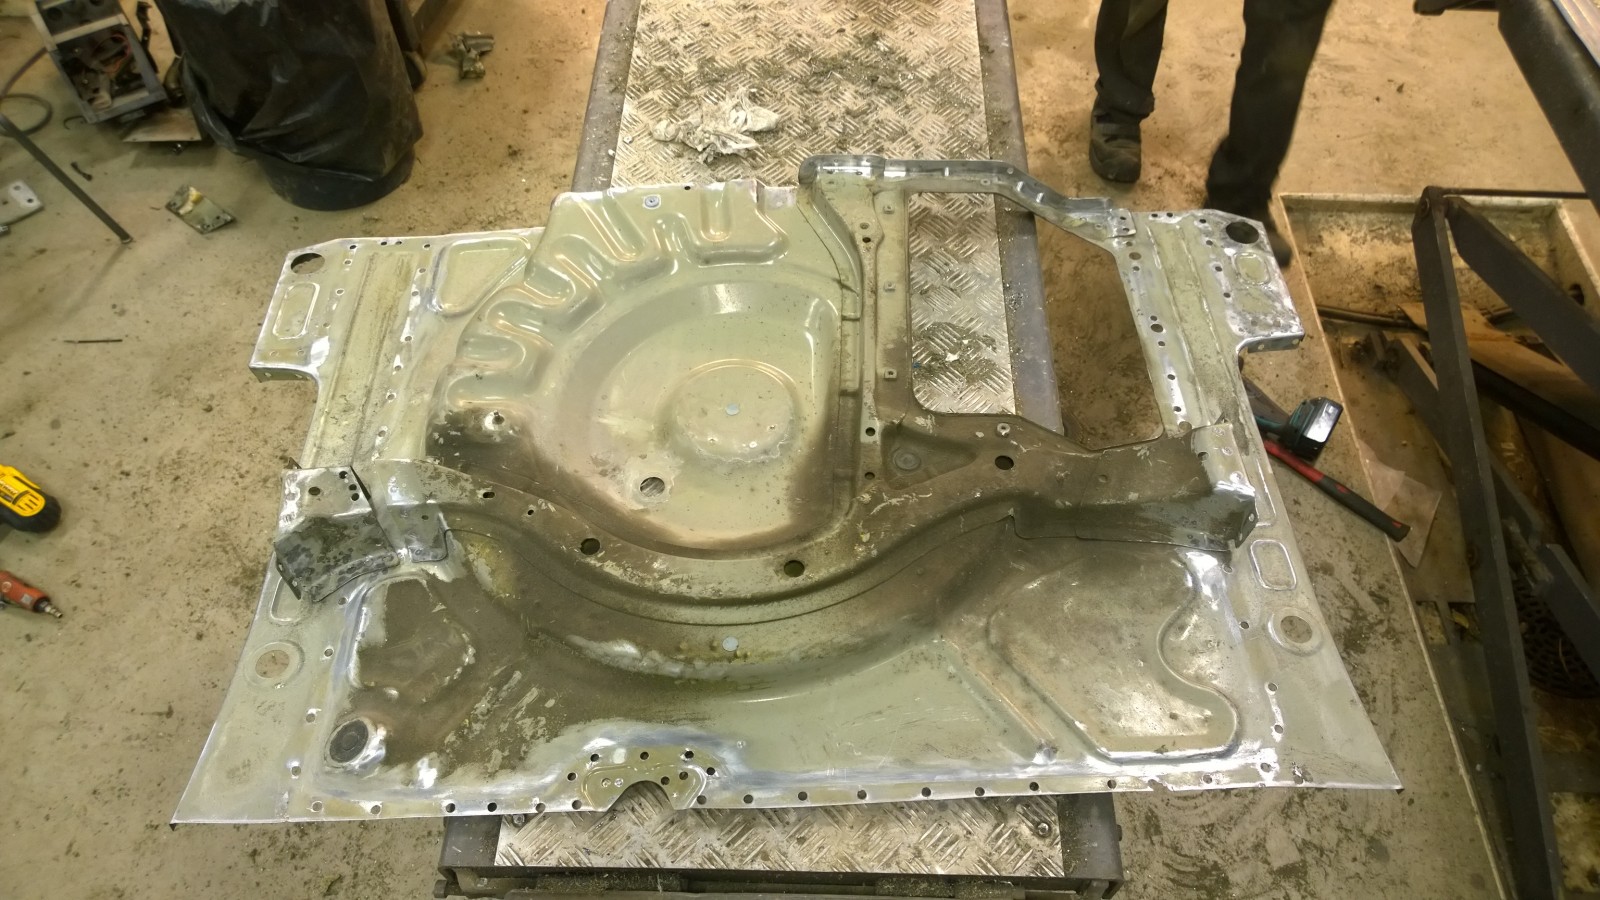
View from the underside
Then it’s time to start cutting the Scirocco…
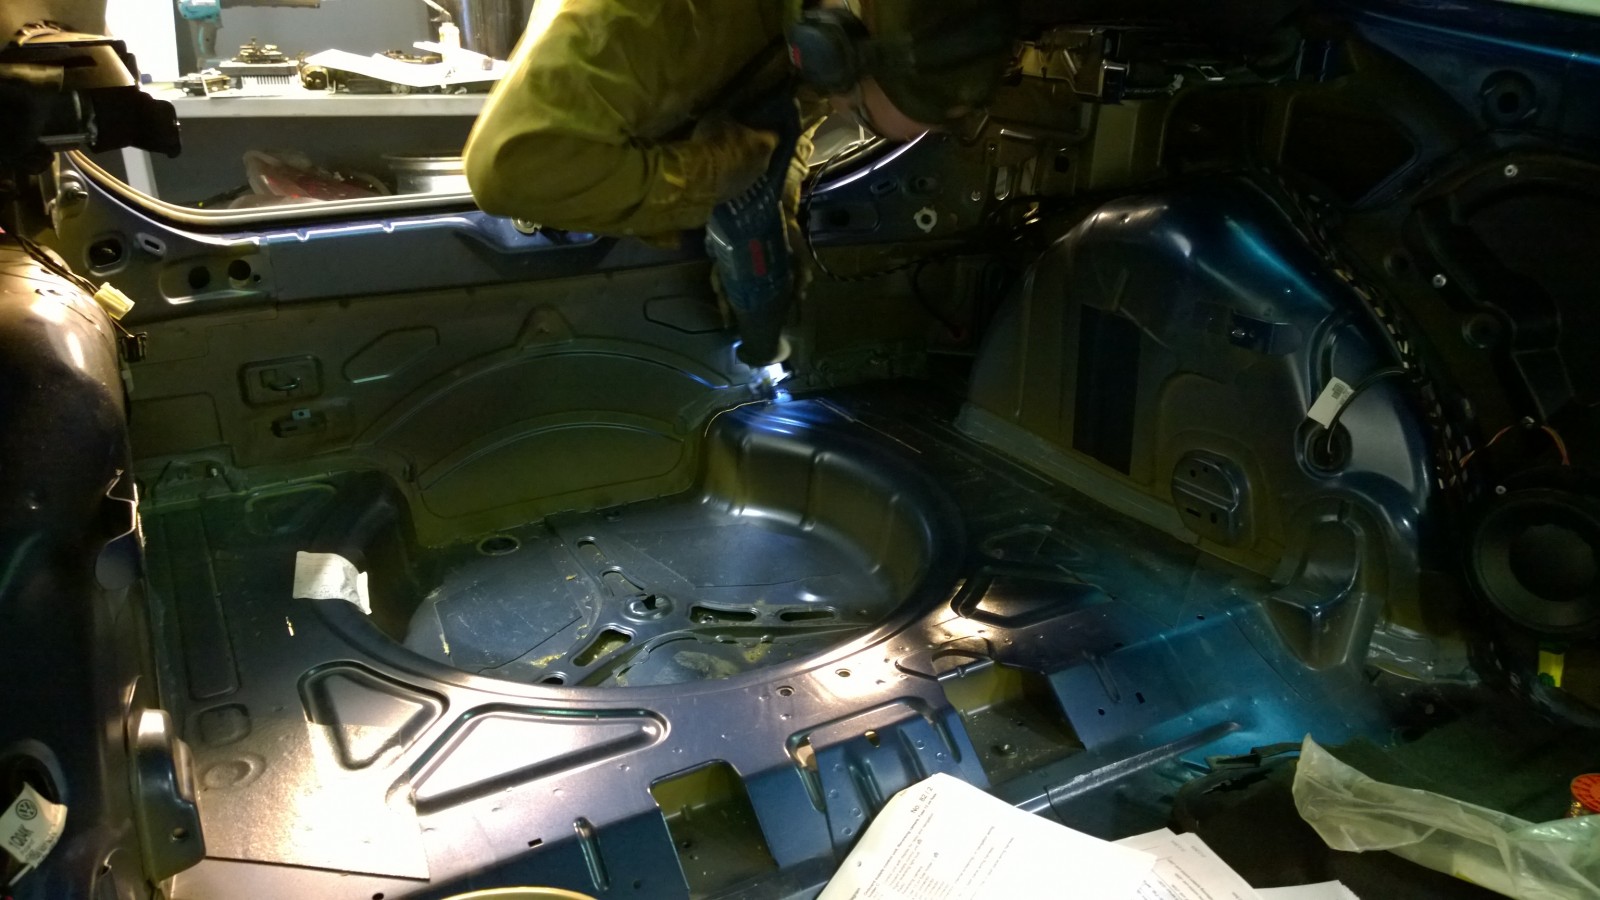
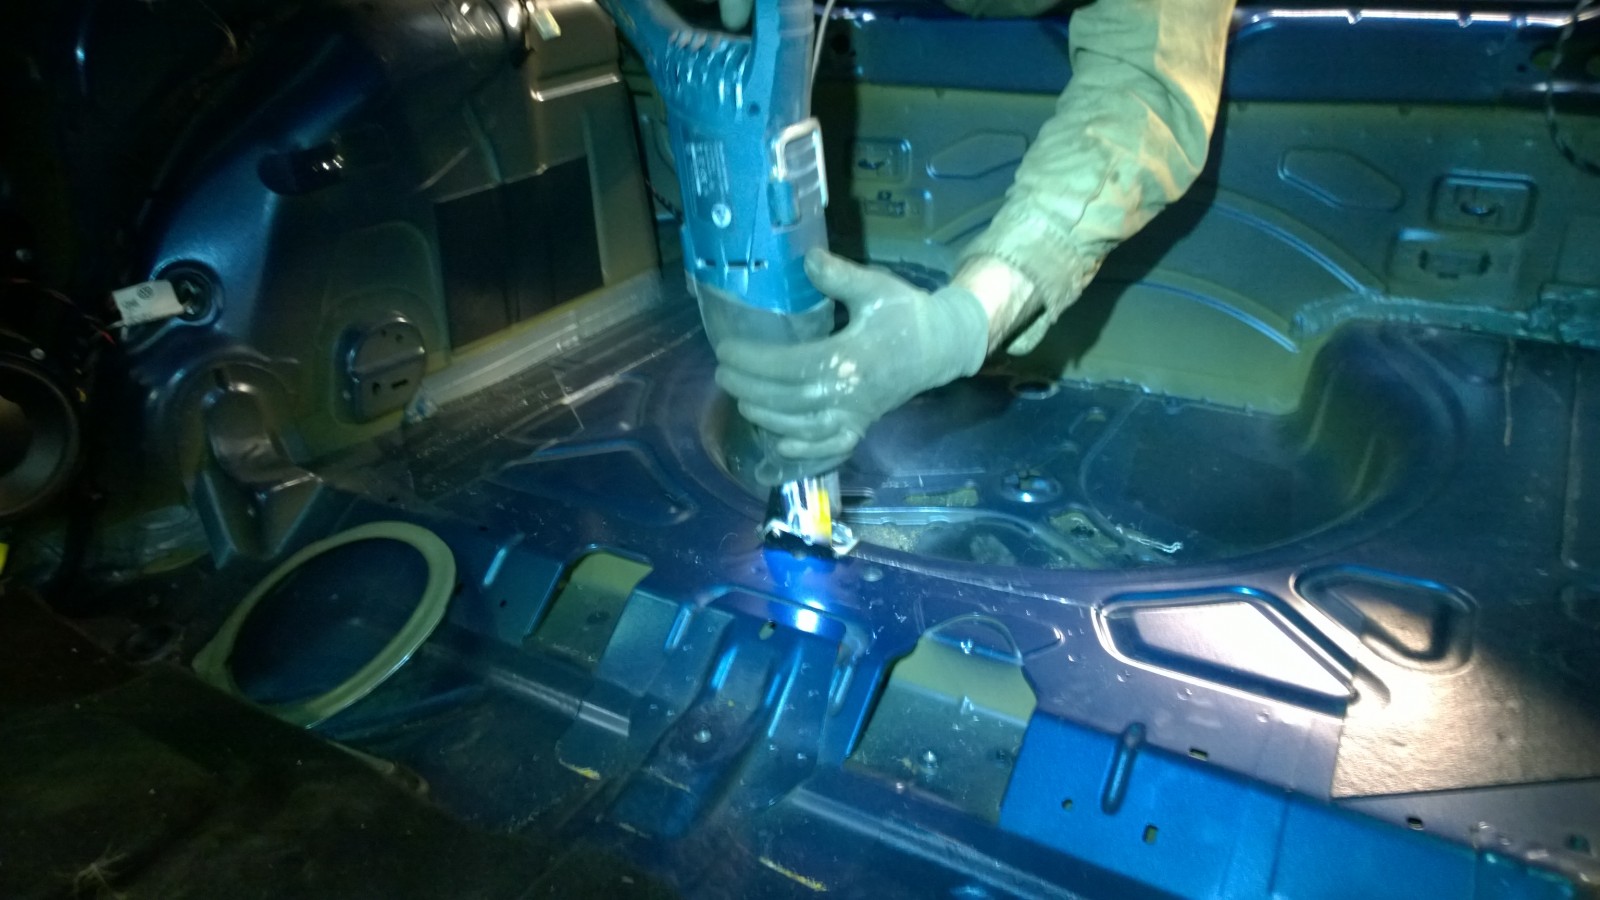
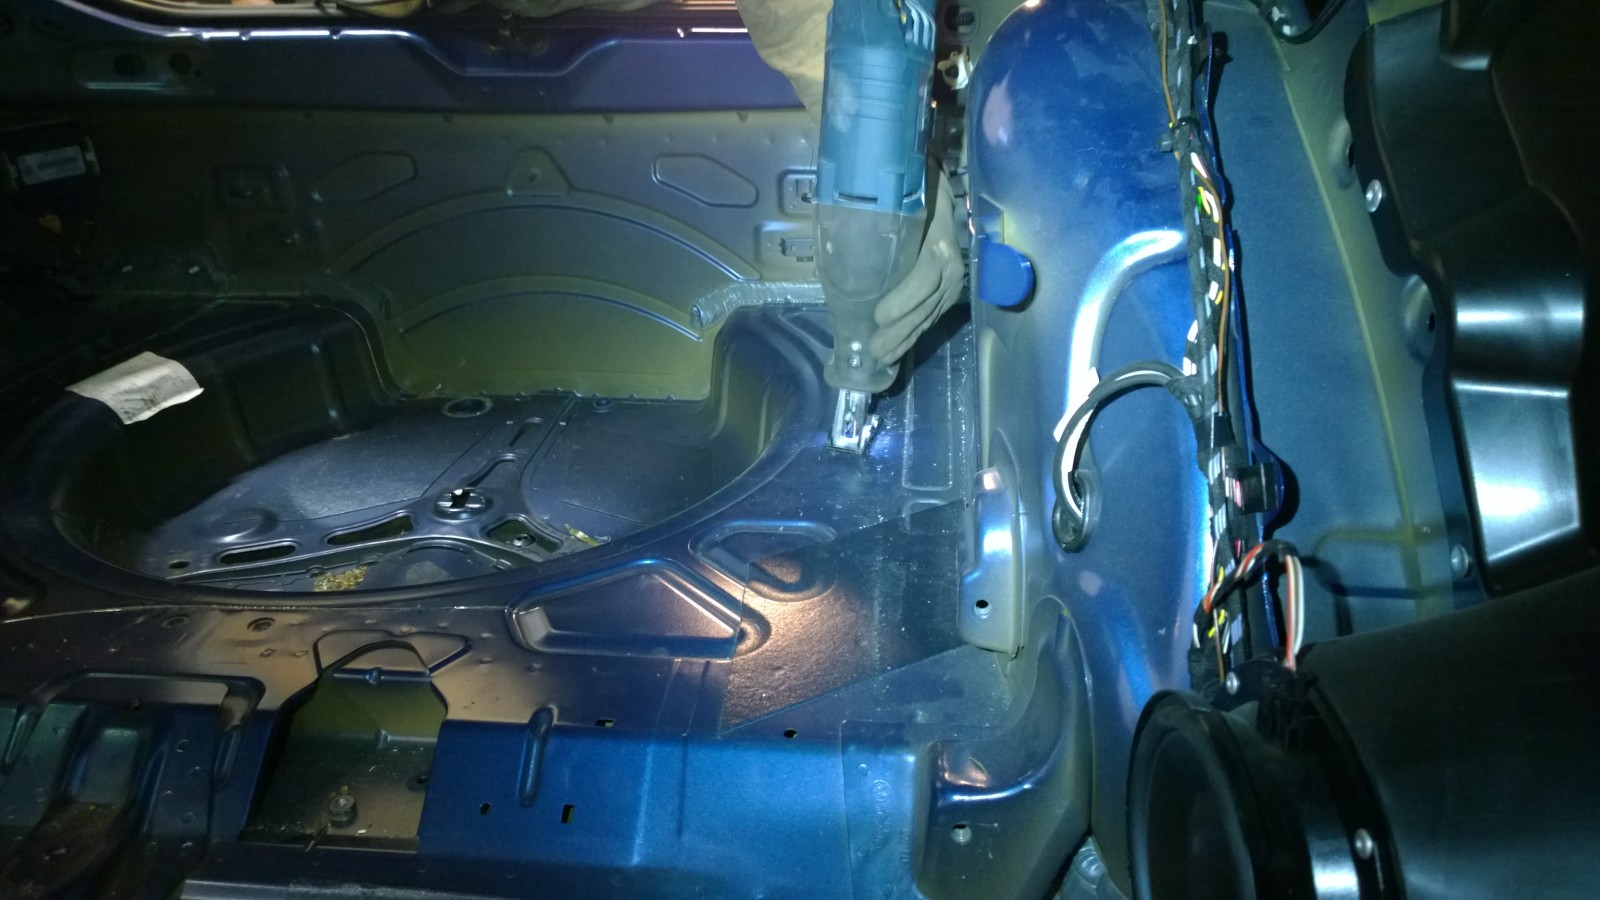
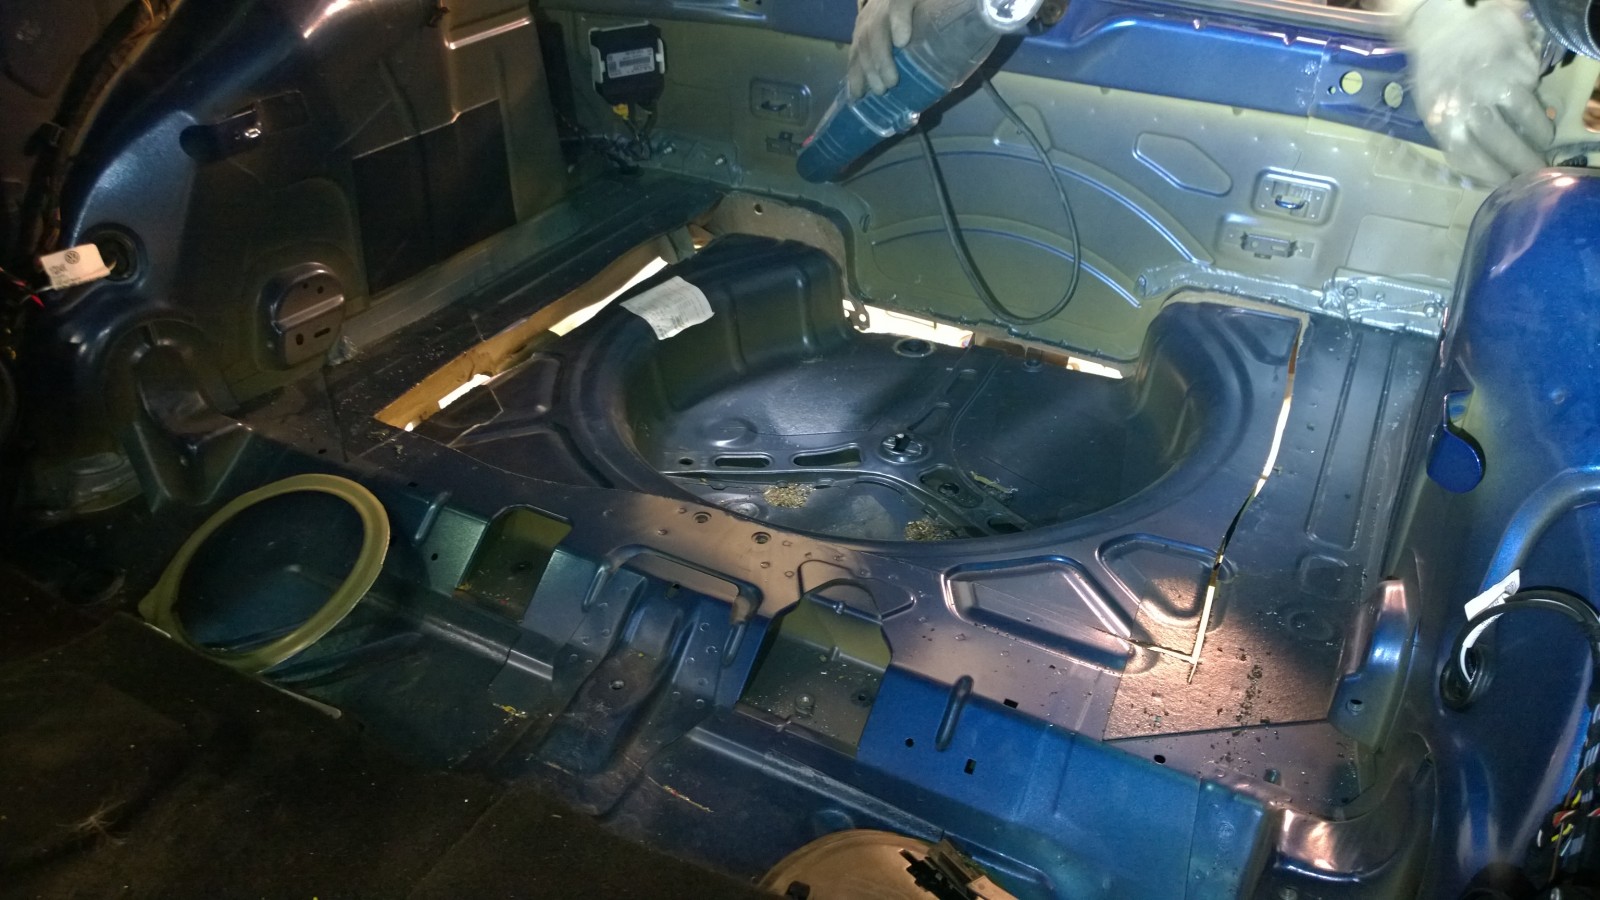
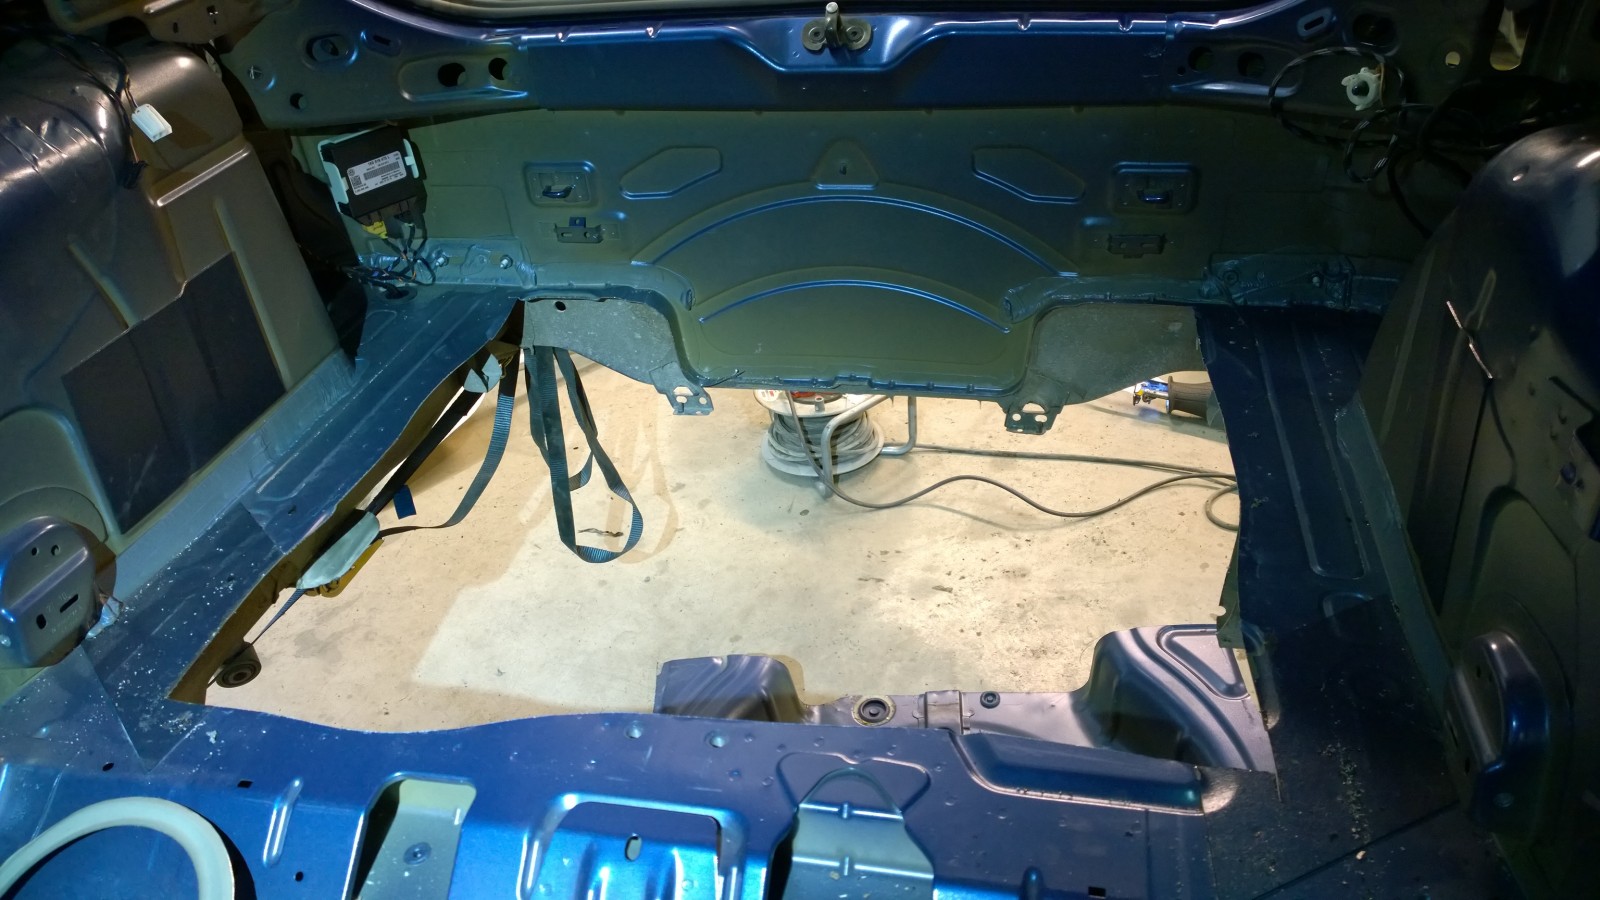
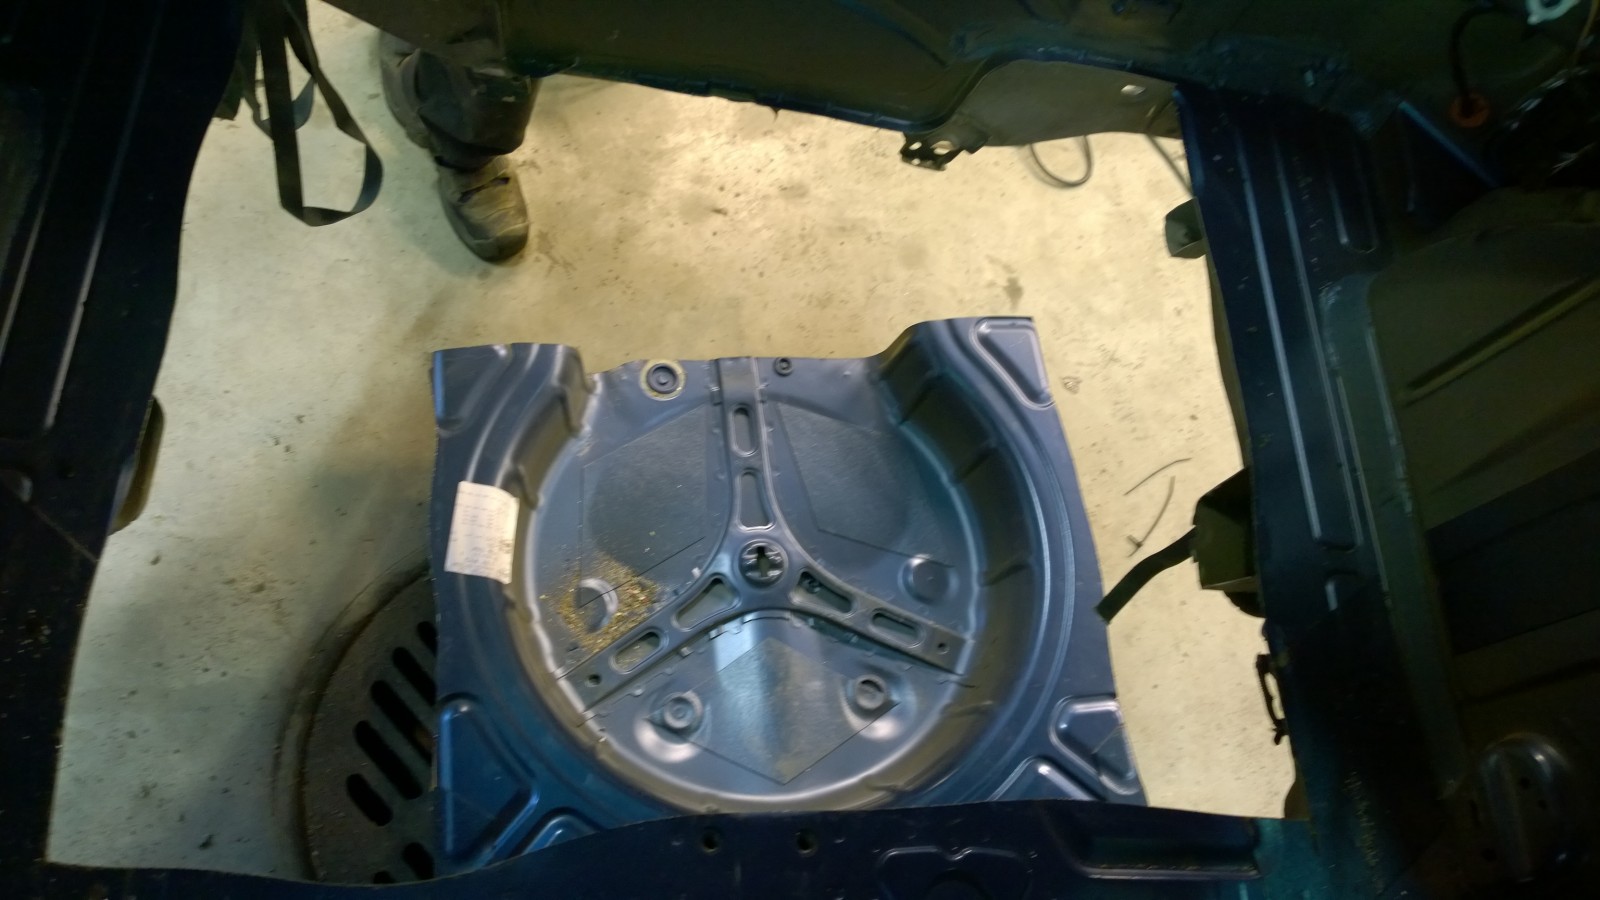
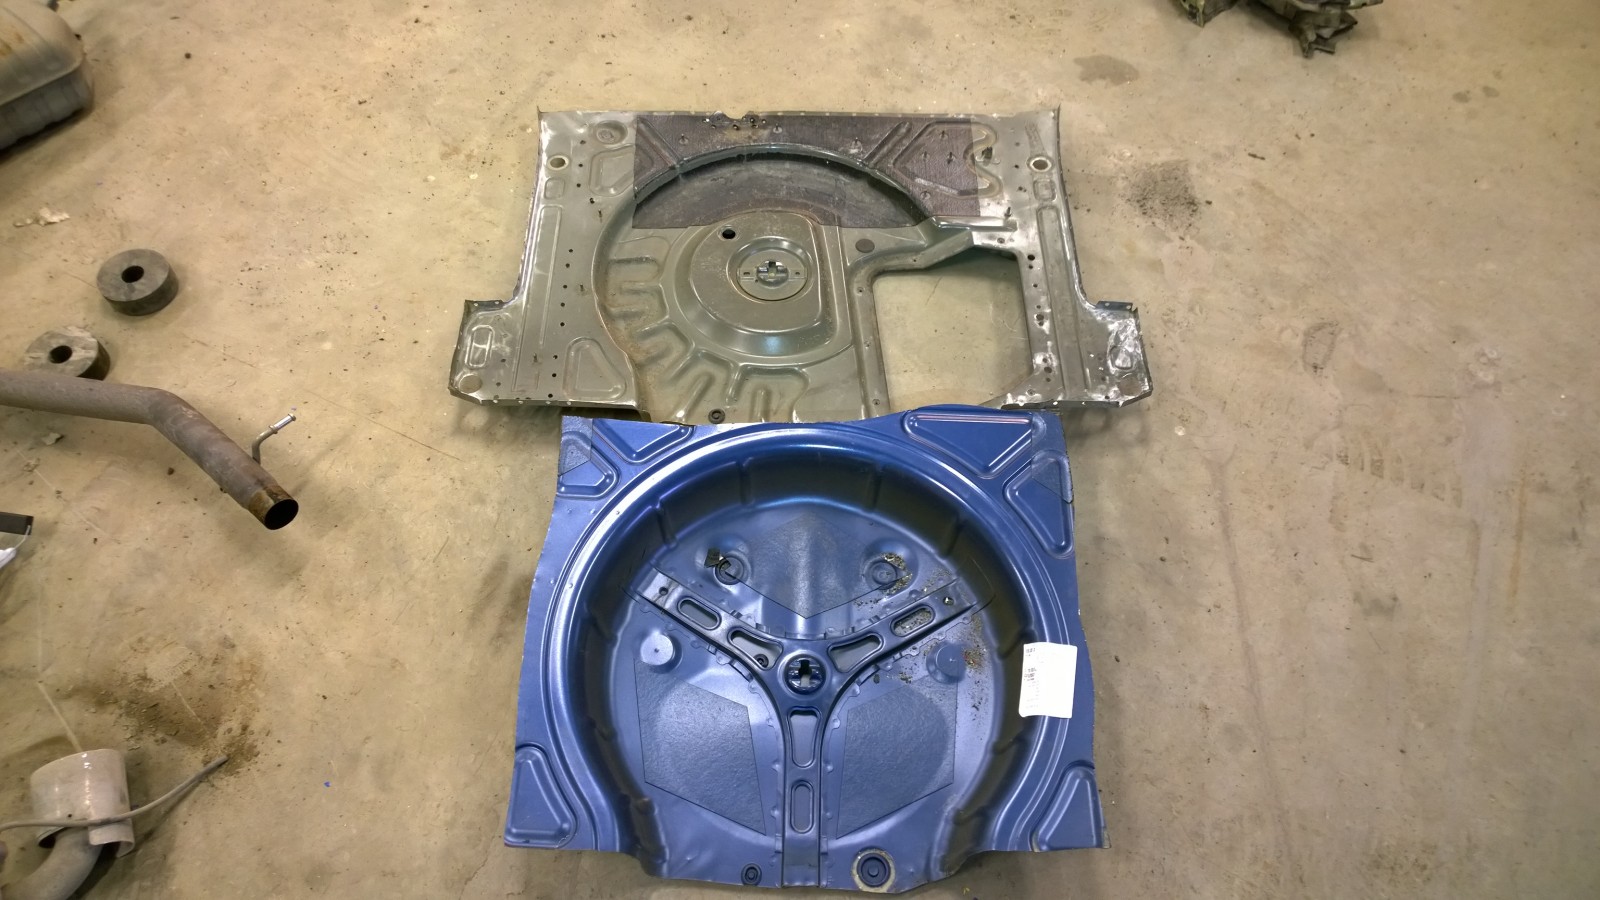
Comparing Golf and Scirocco floors. The difference in spare wheel space depth is remarkable.
Golf 4motion has a styrofoam spacer on the trunk to give space for the spare wheel. We’re not going to use that to keep the trunk volume original. We’re going to replace spare wheel with a tire repair kit.
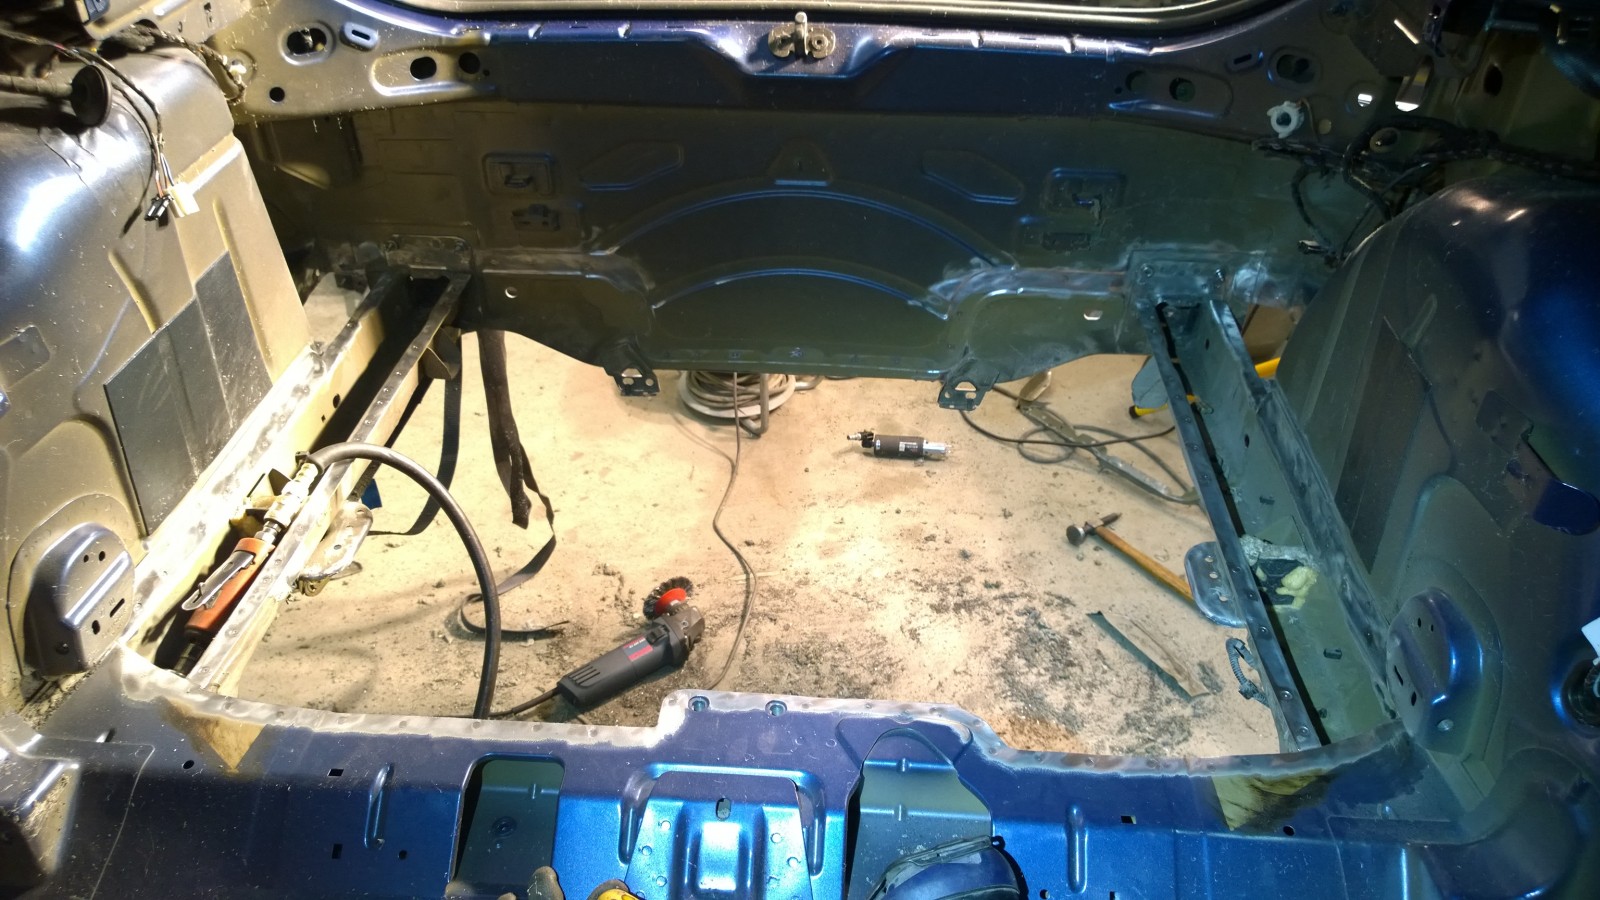
After cutting the excess materials out we’re ready to test fit the Golf floor piece.
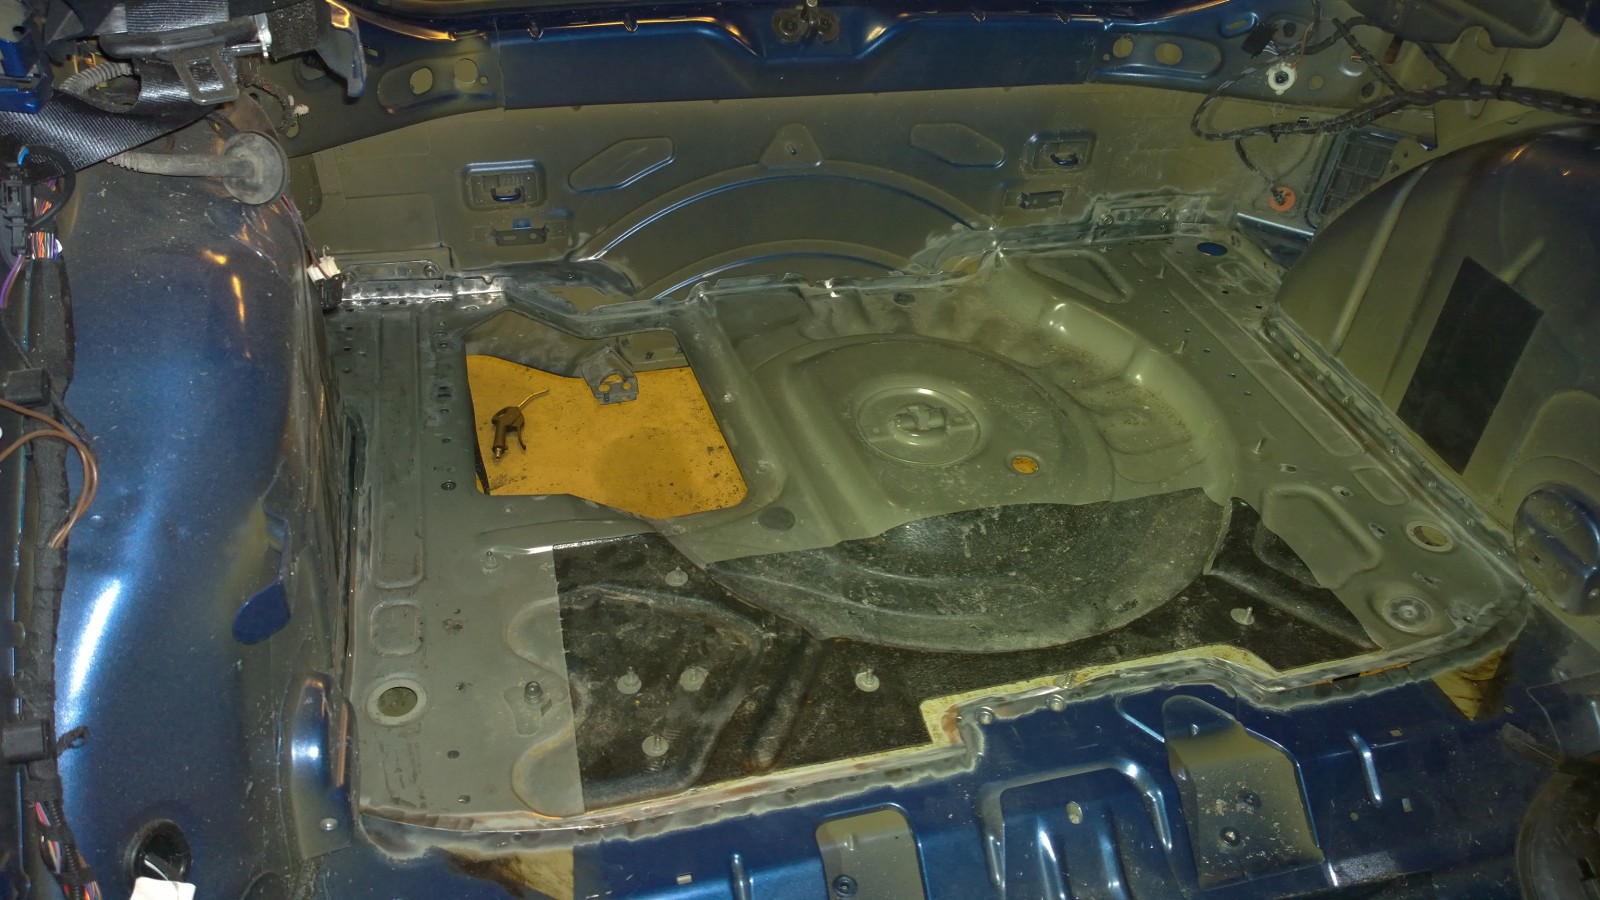
Like a glove…
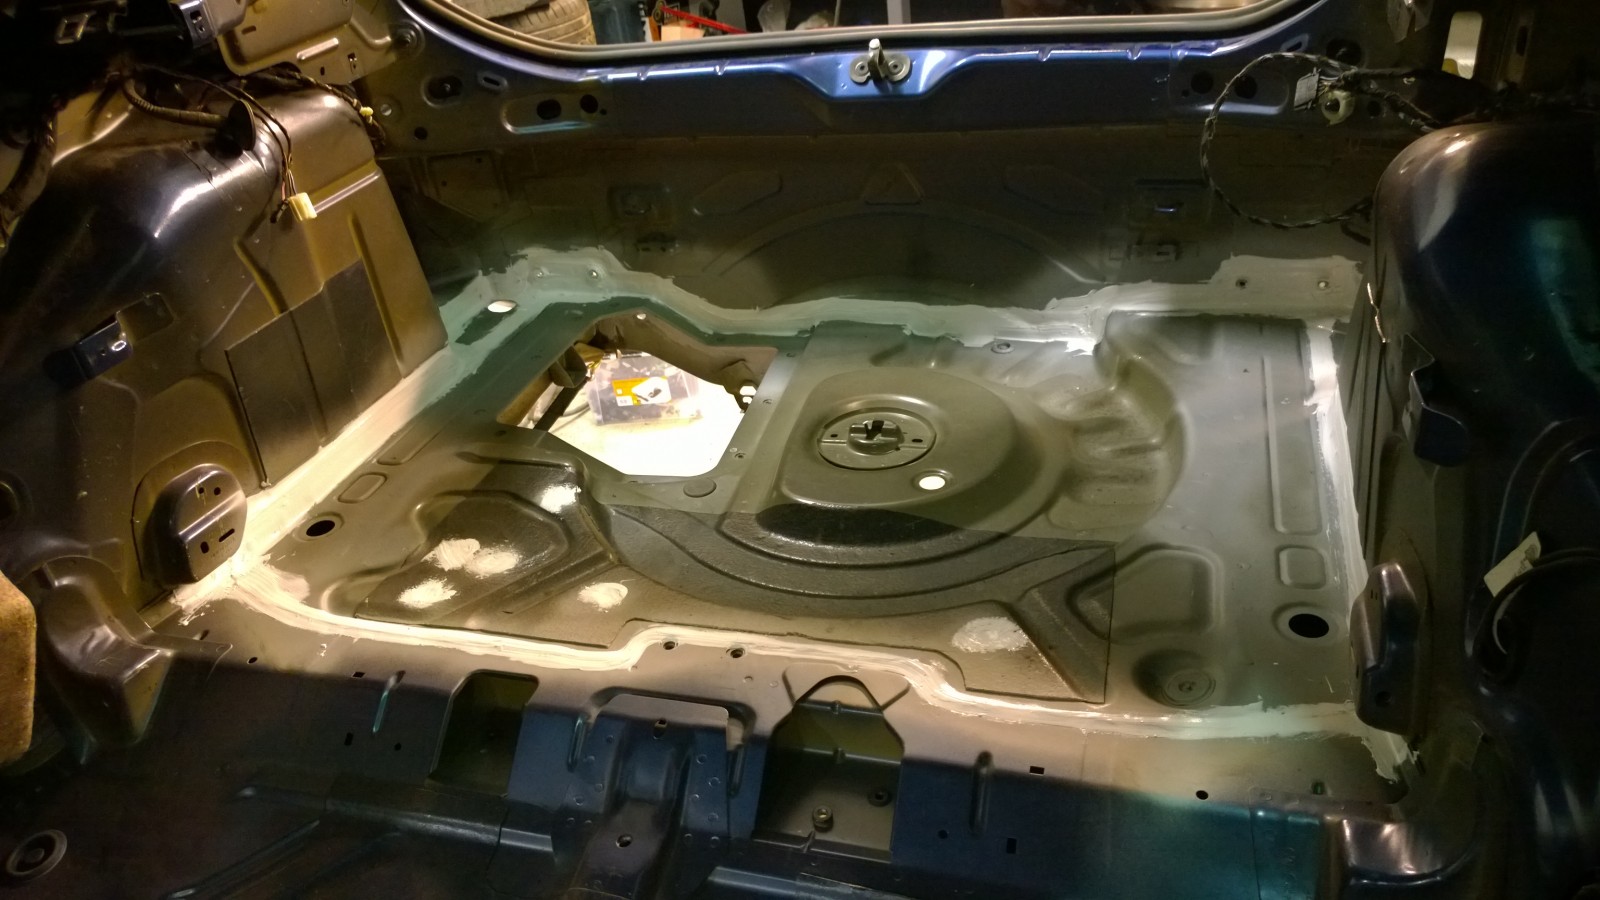
After welding some protective coating is applied
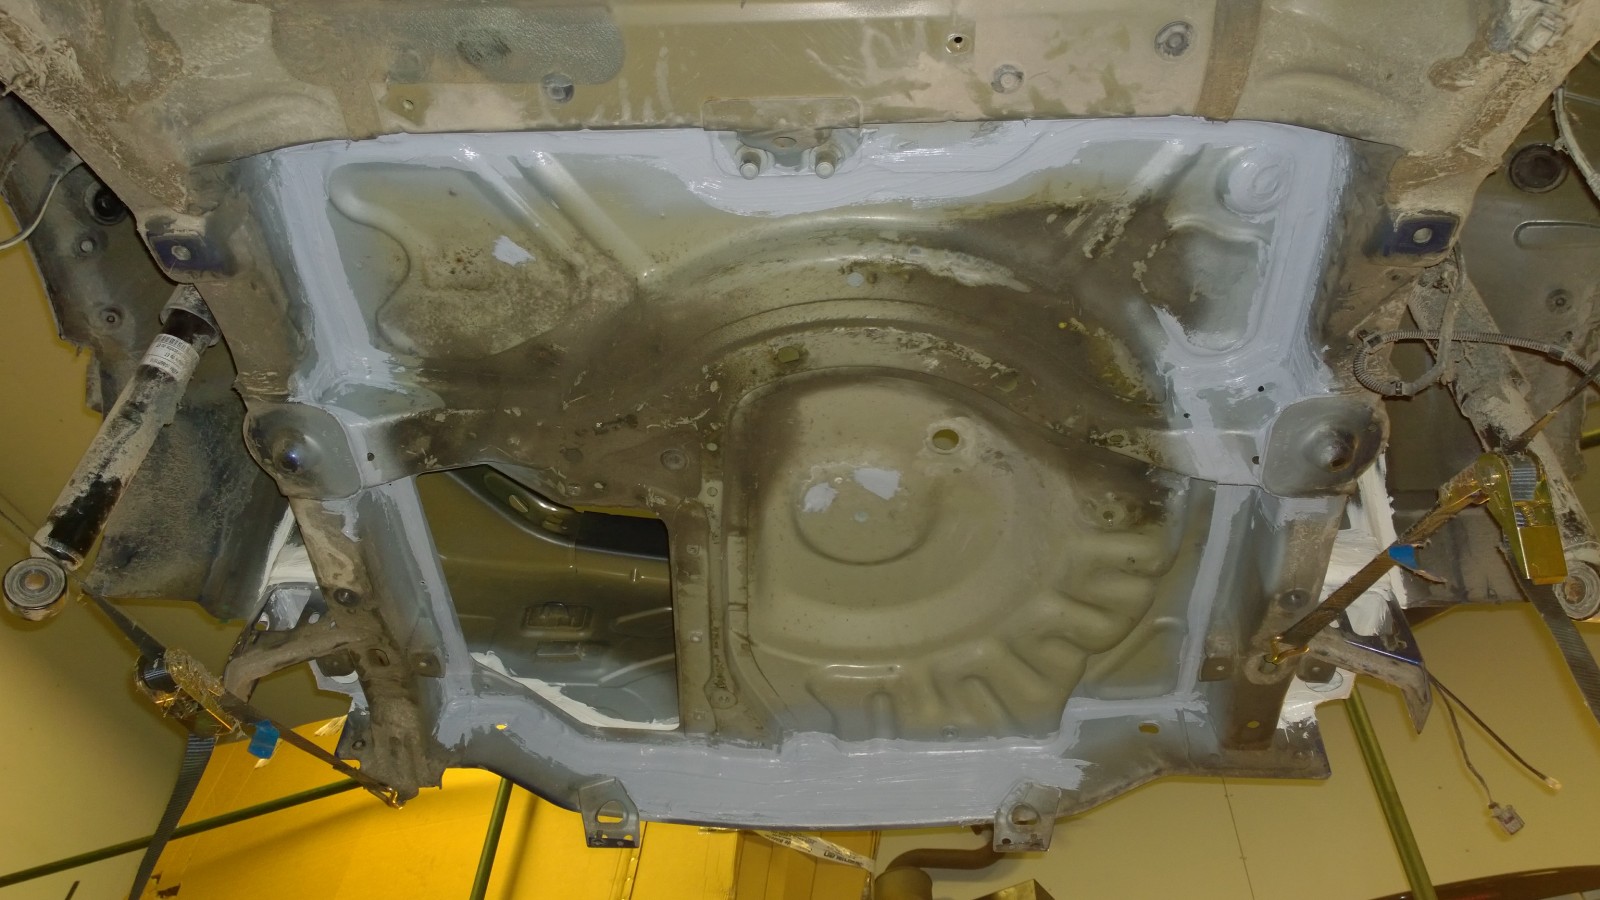
Also protected from the under side.
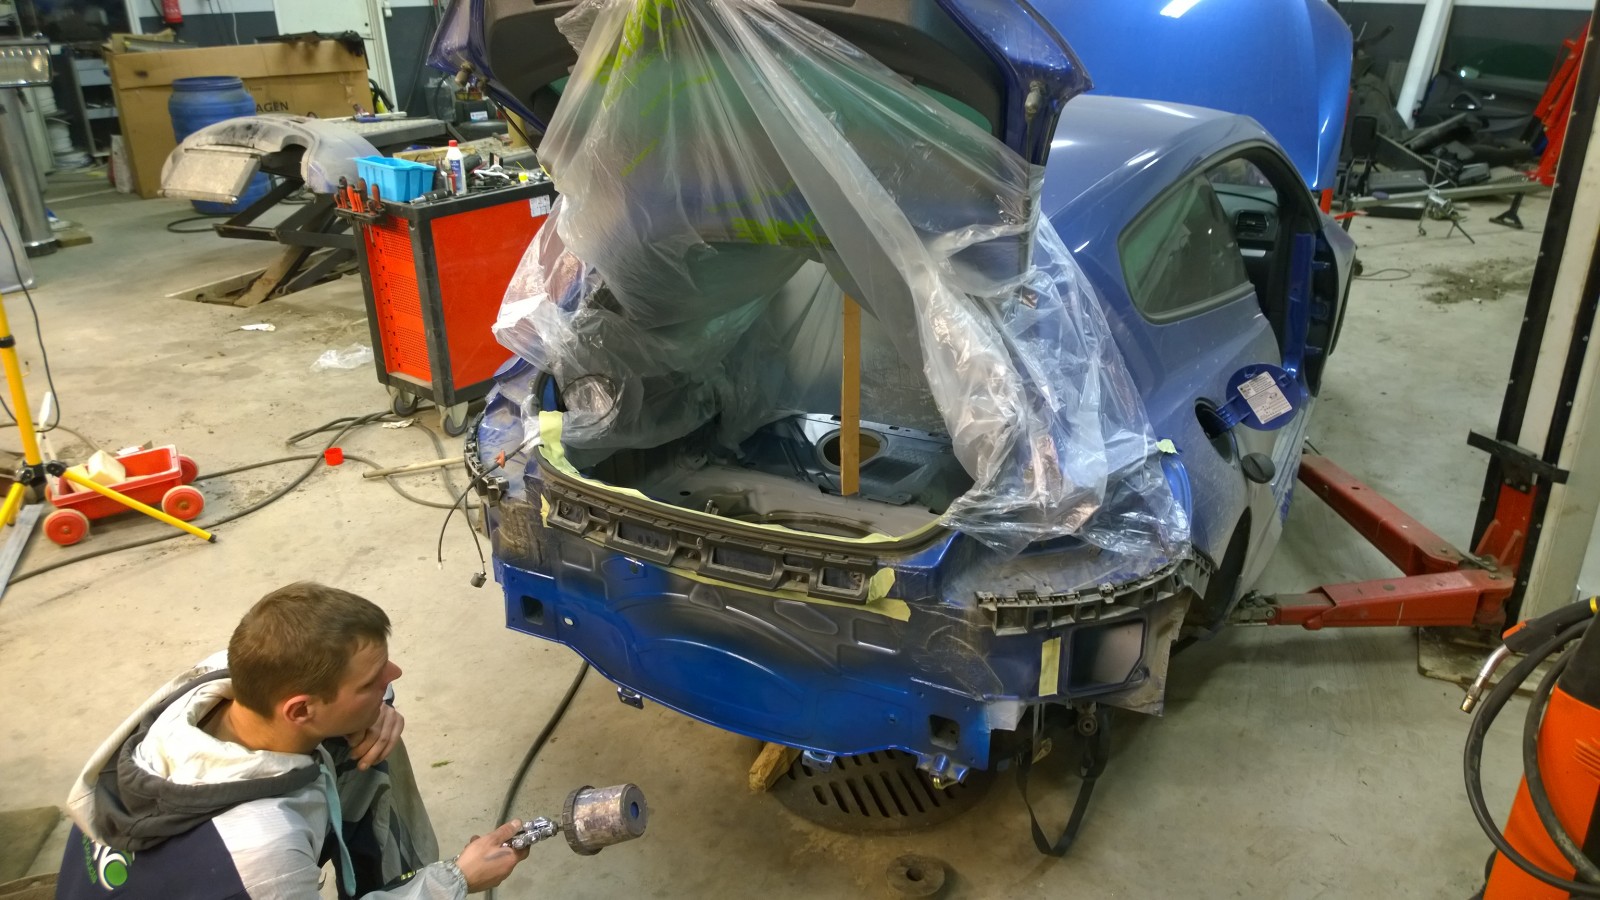
Finally we applied some fresh paint.
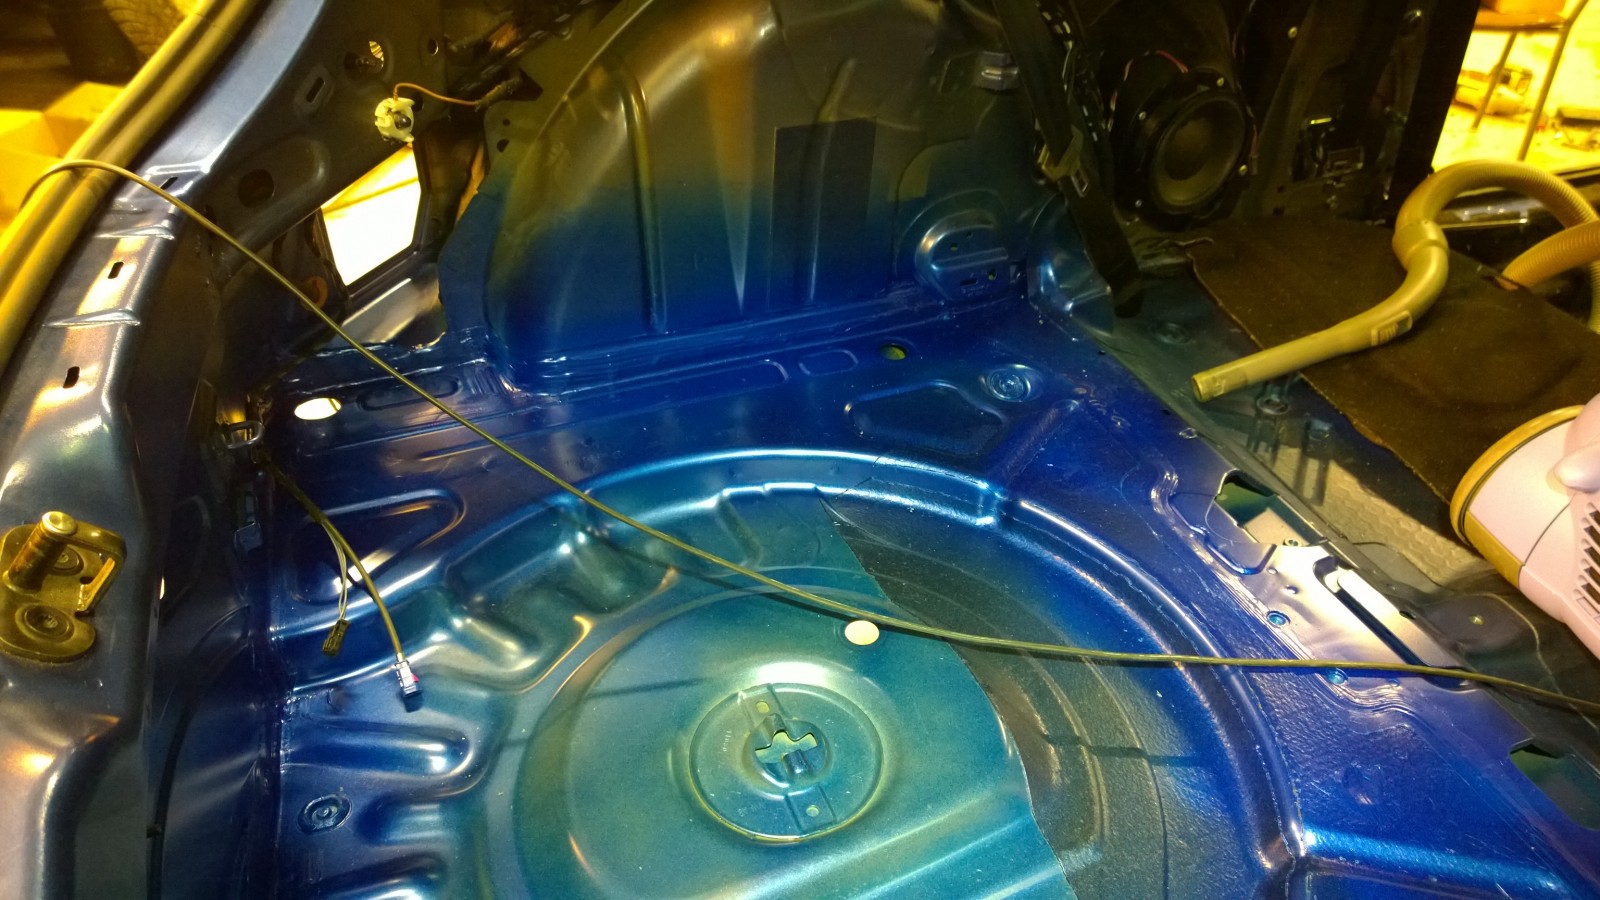
2016-03-09 · Preparing Scirocco for 4motion rear axle
In addition to trunk floor replacement some smaller modifications were still needed. First is the fuel tank.
Scirocco’s fuel tank (left) is quite different from Golf’s.
We can’t just swap the Golf tank to Scirocco. The above photo shows clearly the reason: The filler pipe is different. In Golf the filler cap is way more back (about 20cm). In Scirocco that’s where the rear lamp is located, so we could even think of further body modifications – so we had to modify the tank.
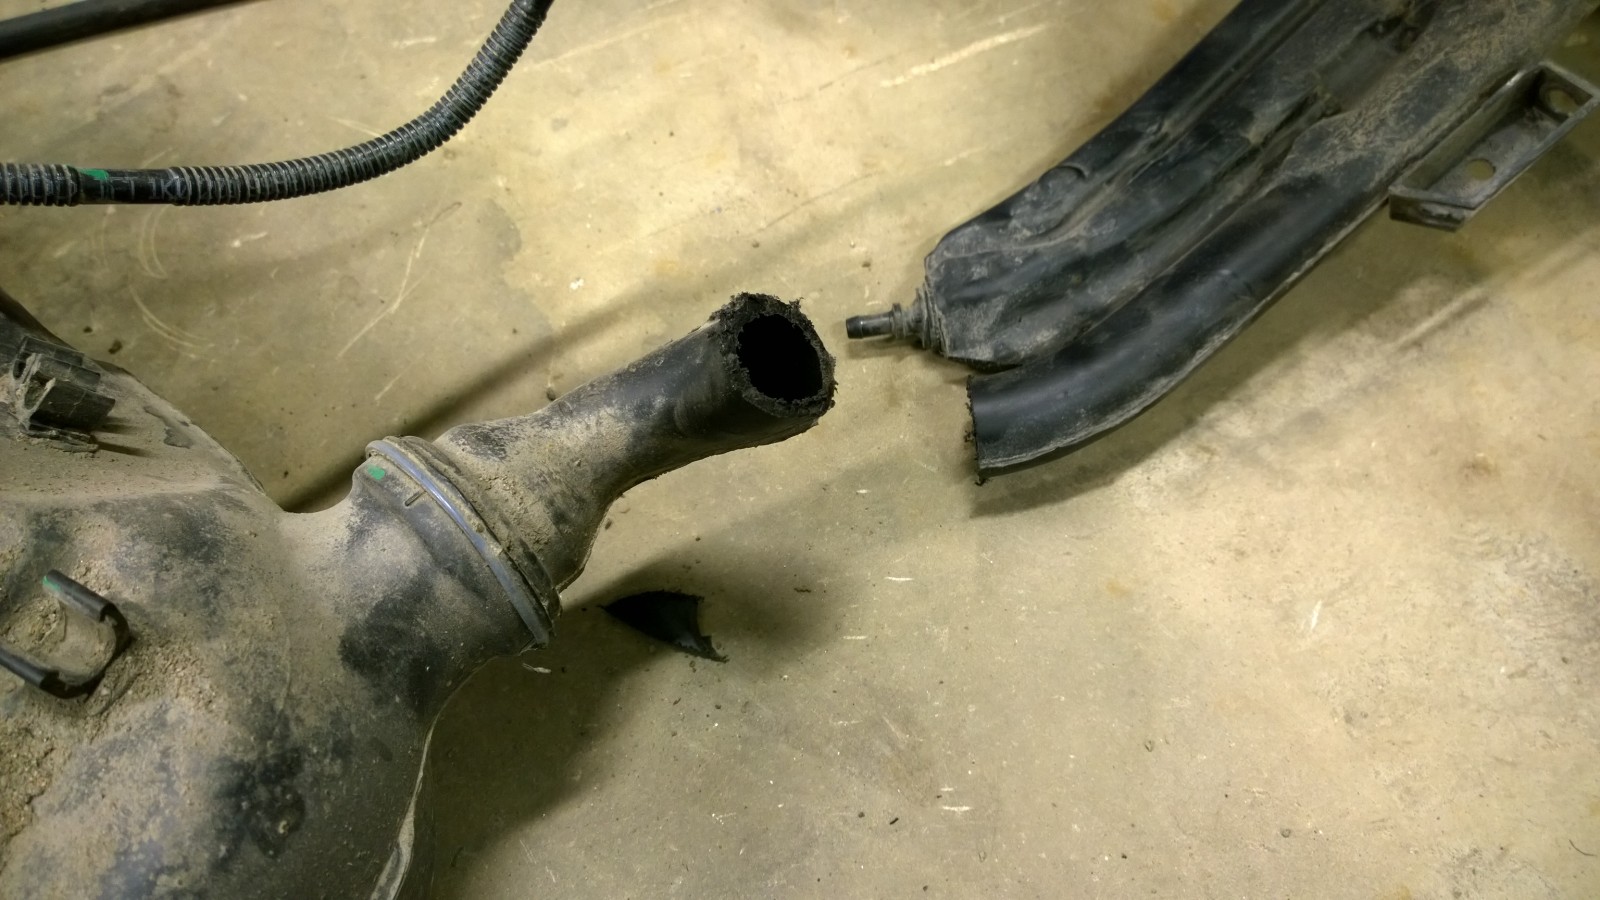
We cut the filler pipe from both Golf and Scirocco fuel tanks.
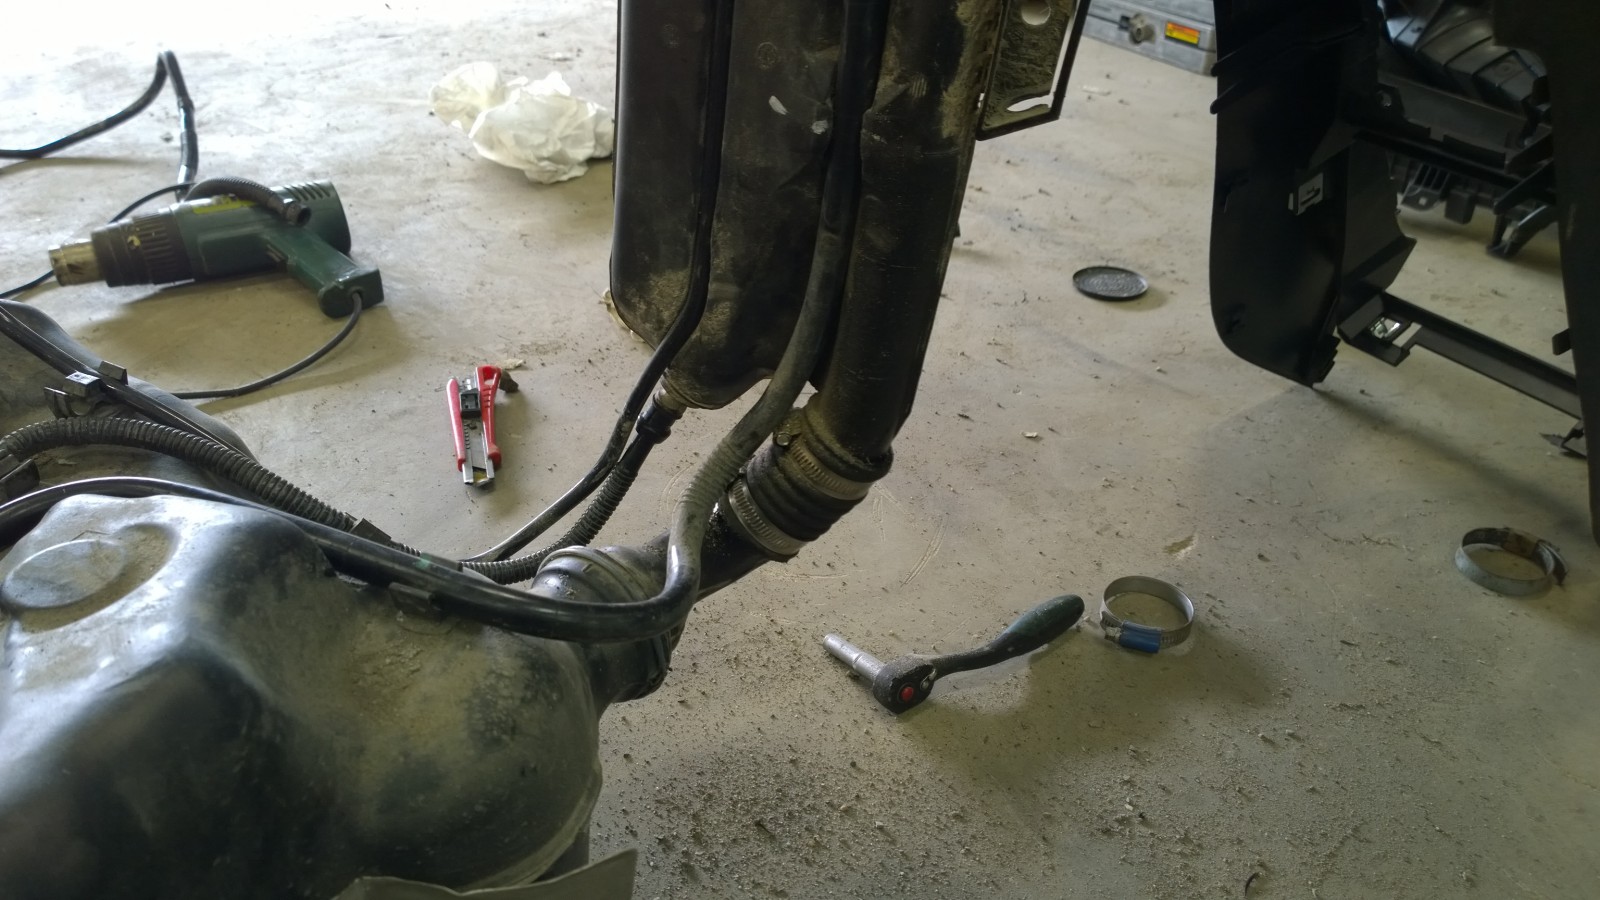
Scirocco filler pipe was connected to Golf tank with pretty simple method – small piece of petrol resistant hose and couple of hose clamps. After four years we haven’t had any kind of leaks.
It was also necessary to cut another hole to the floor under the rear seat to get access to the fuel tank. The opening gives access to the second fuel level sender and the wiring to the Haldex controller also goes through this hole.
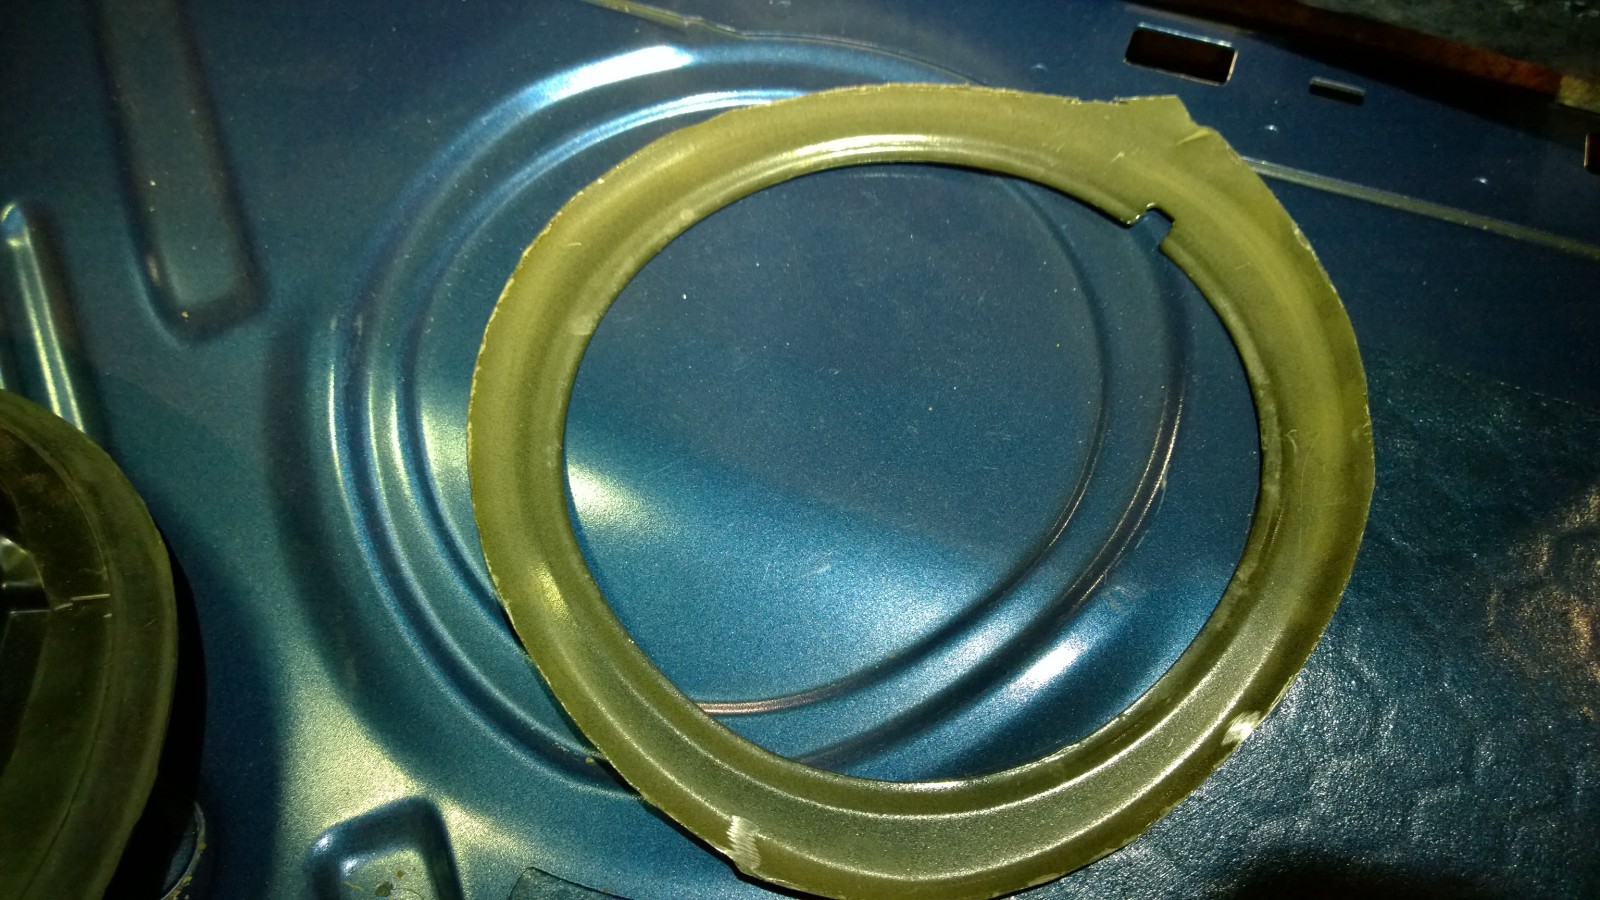
We used Golf floor piece as a template for cutting the hole. There’s already a molded space for the hole.
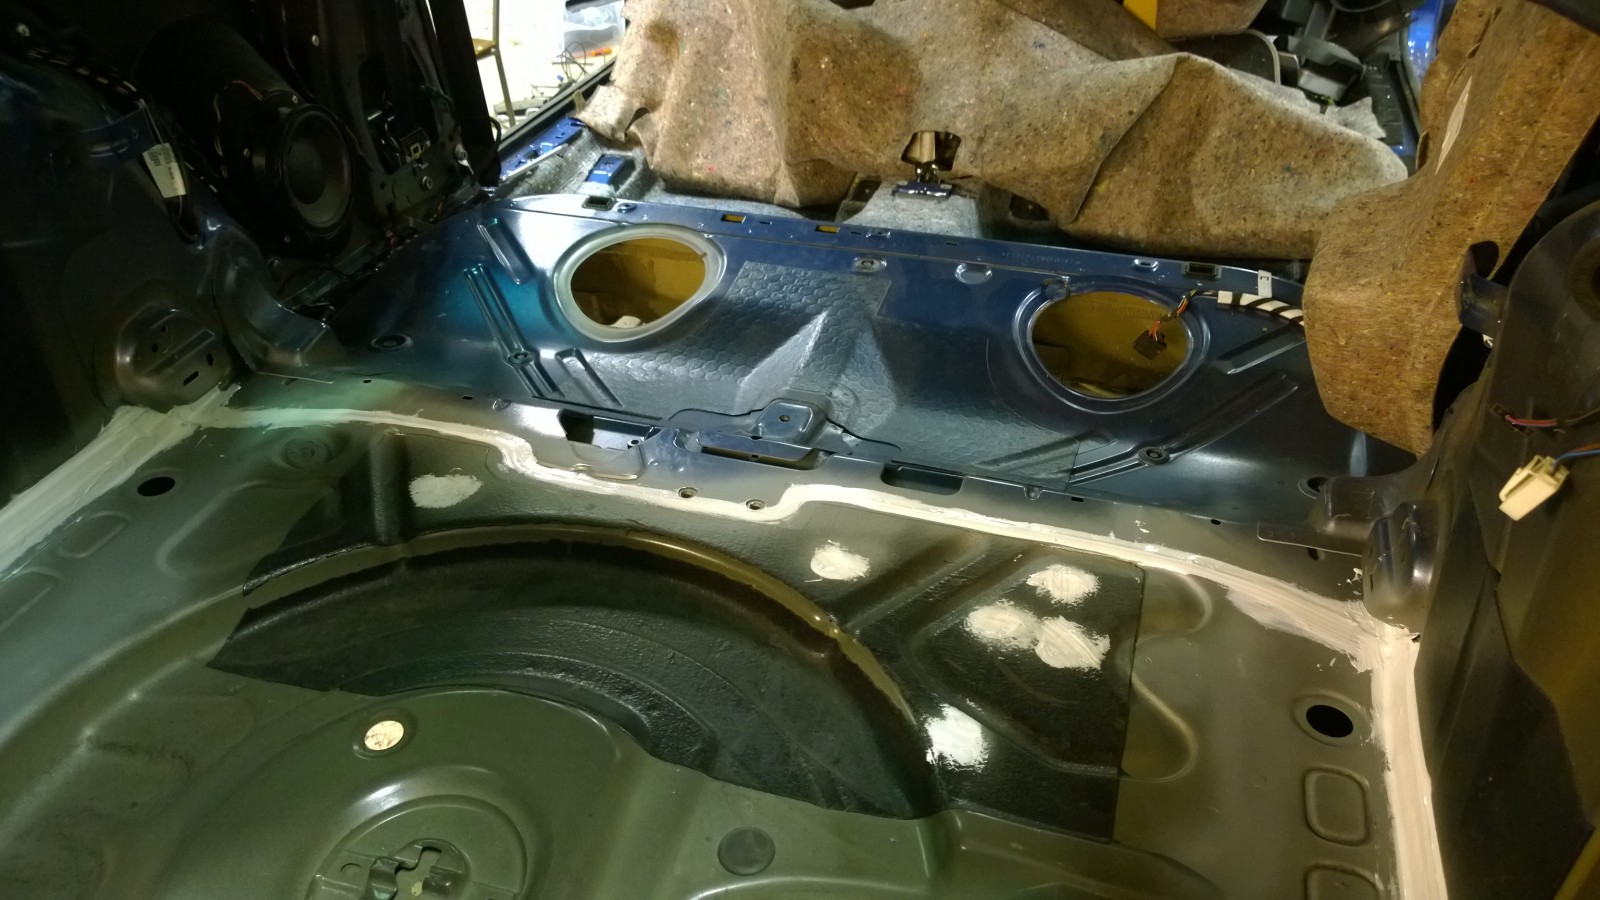
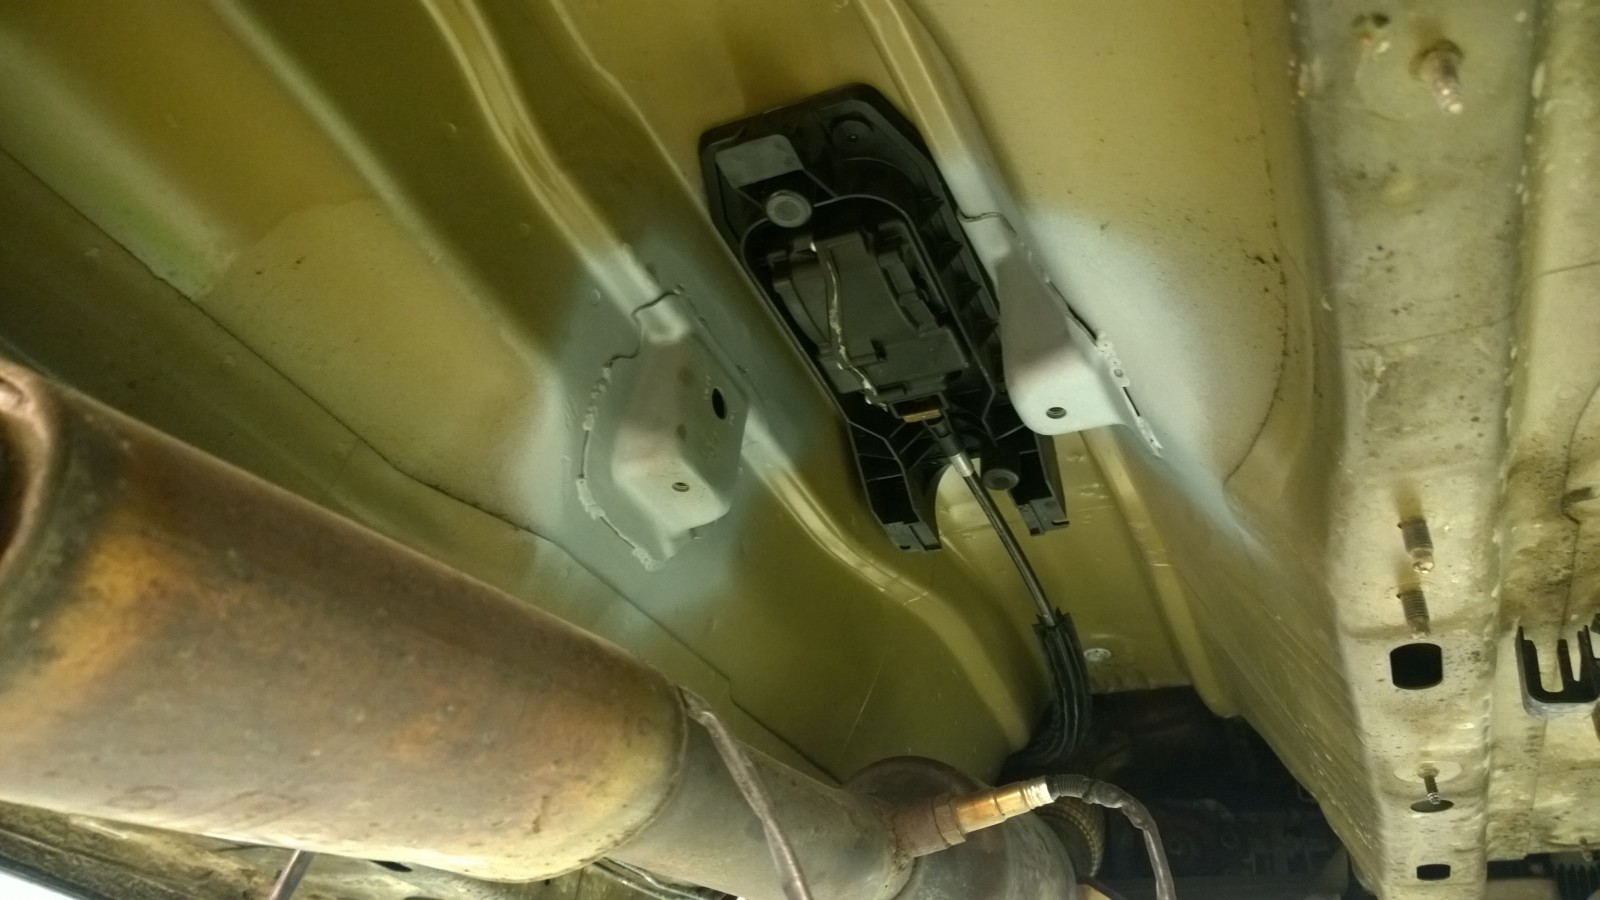
The drive shaft support bearing required brackets – these were cut from the donor Golf.
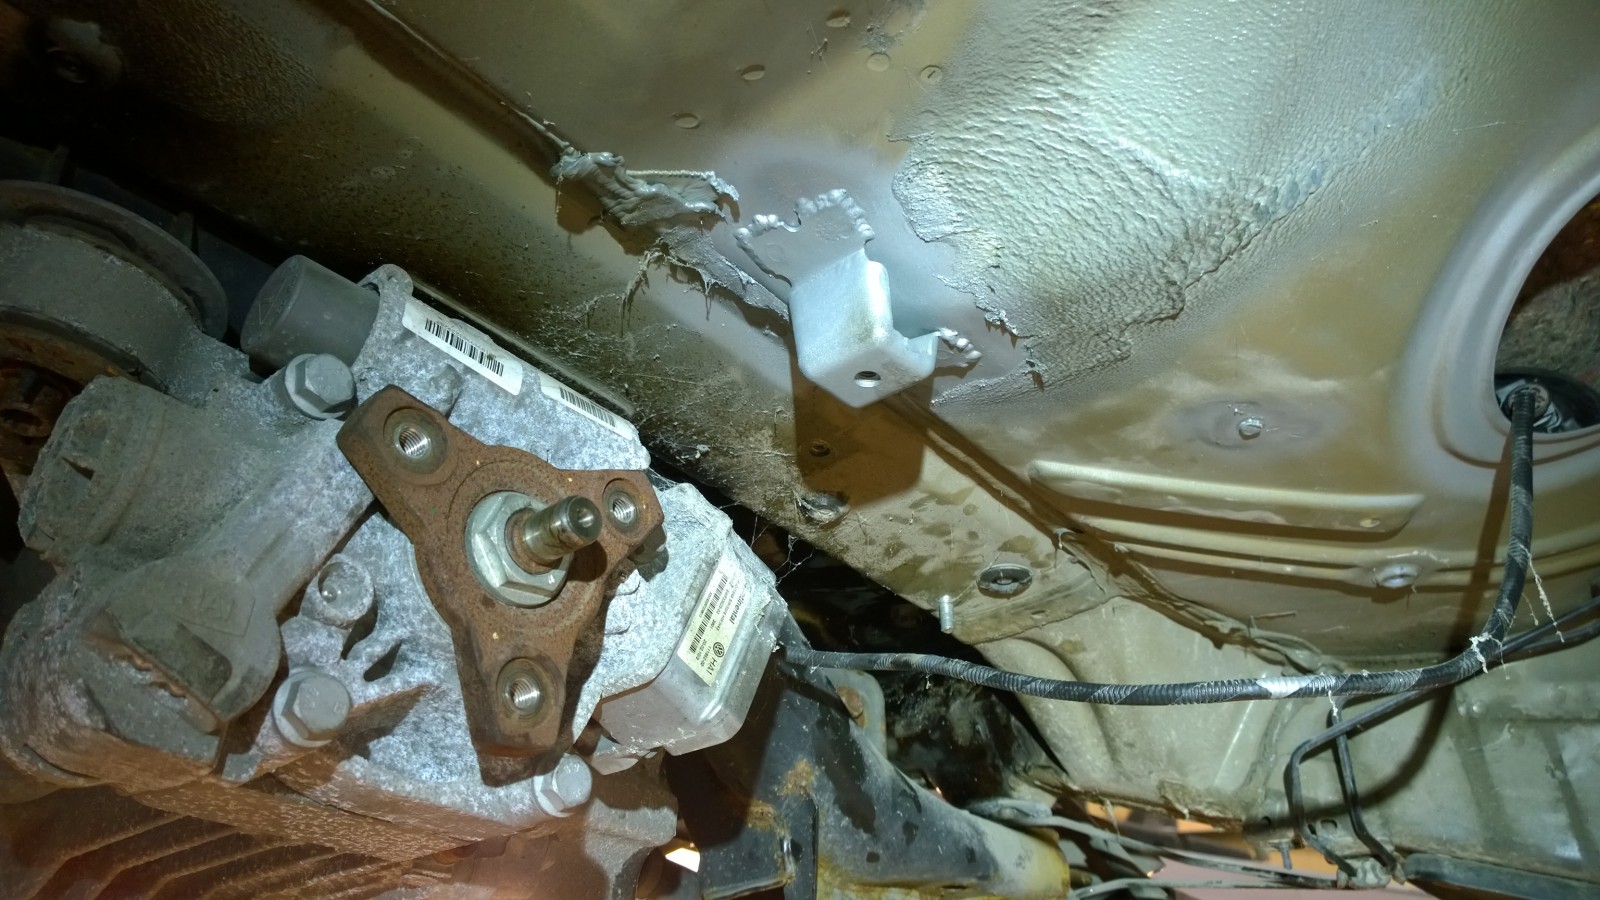
In this photo we already have the rear diff installed, but that’s not the point here. Two of the fuel tank brackets/nuts are different from FWD, this was also taken from the Golf.
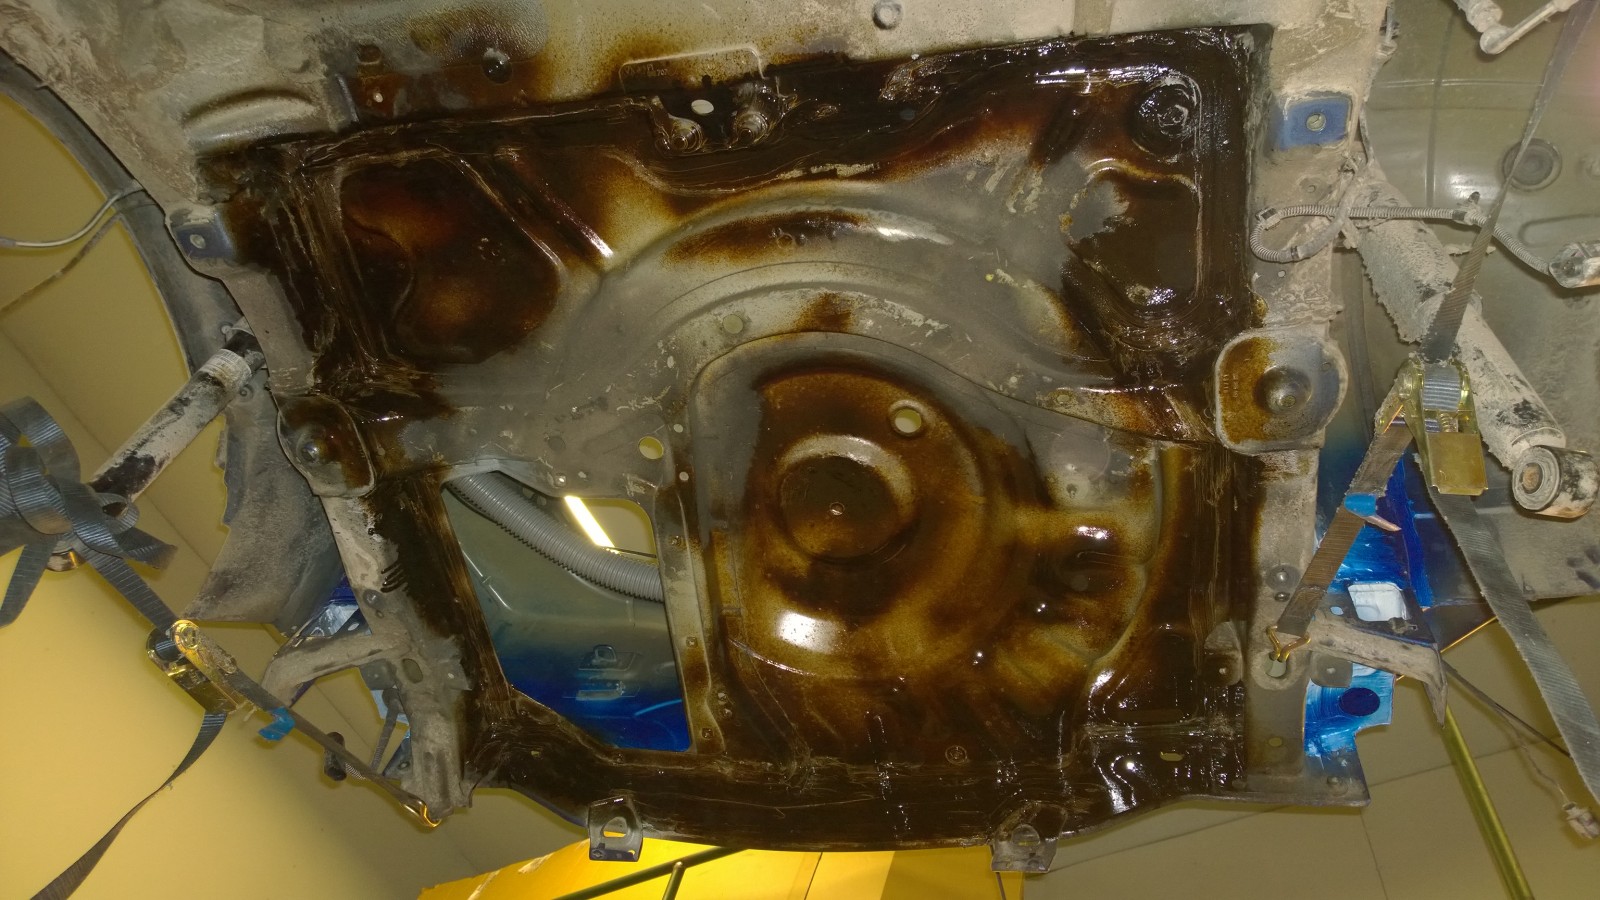
Some rust protection was also applied.
Finally we’re ready for installing stuff. To be continued…
2019-03-26 · Rear axle, drive shaft & exhaust installation
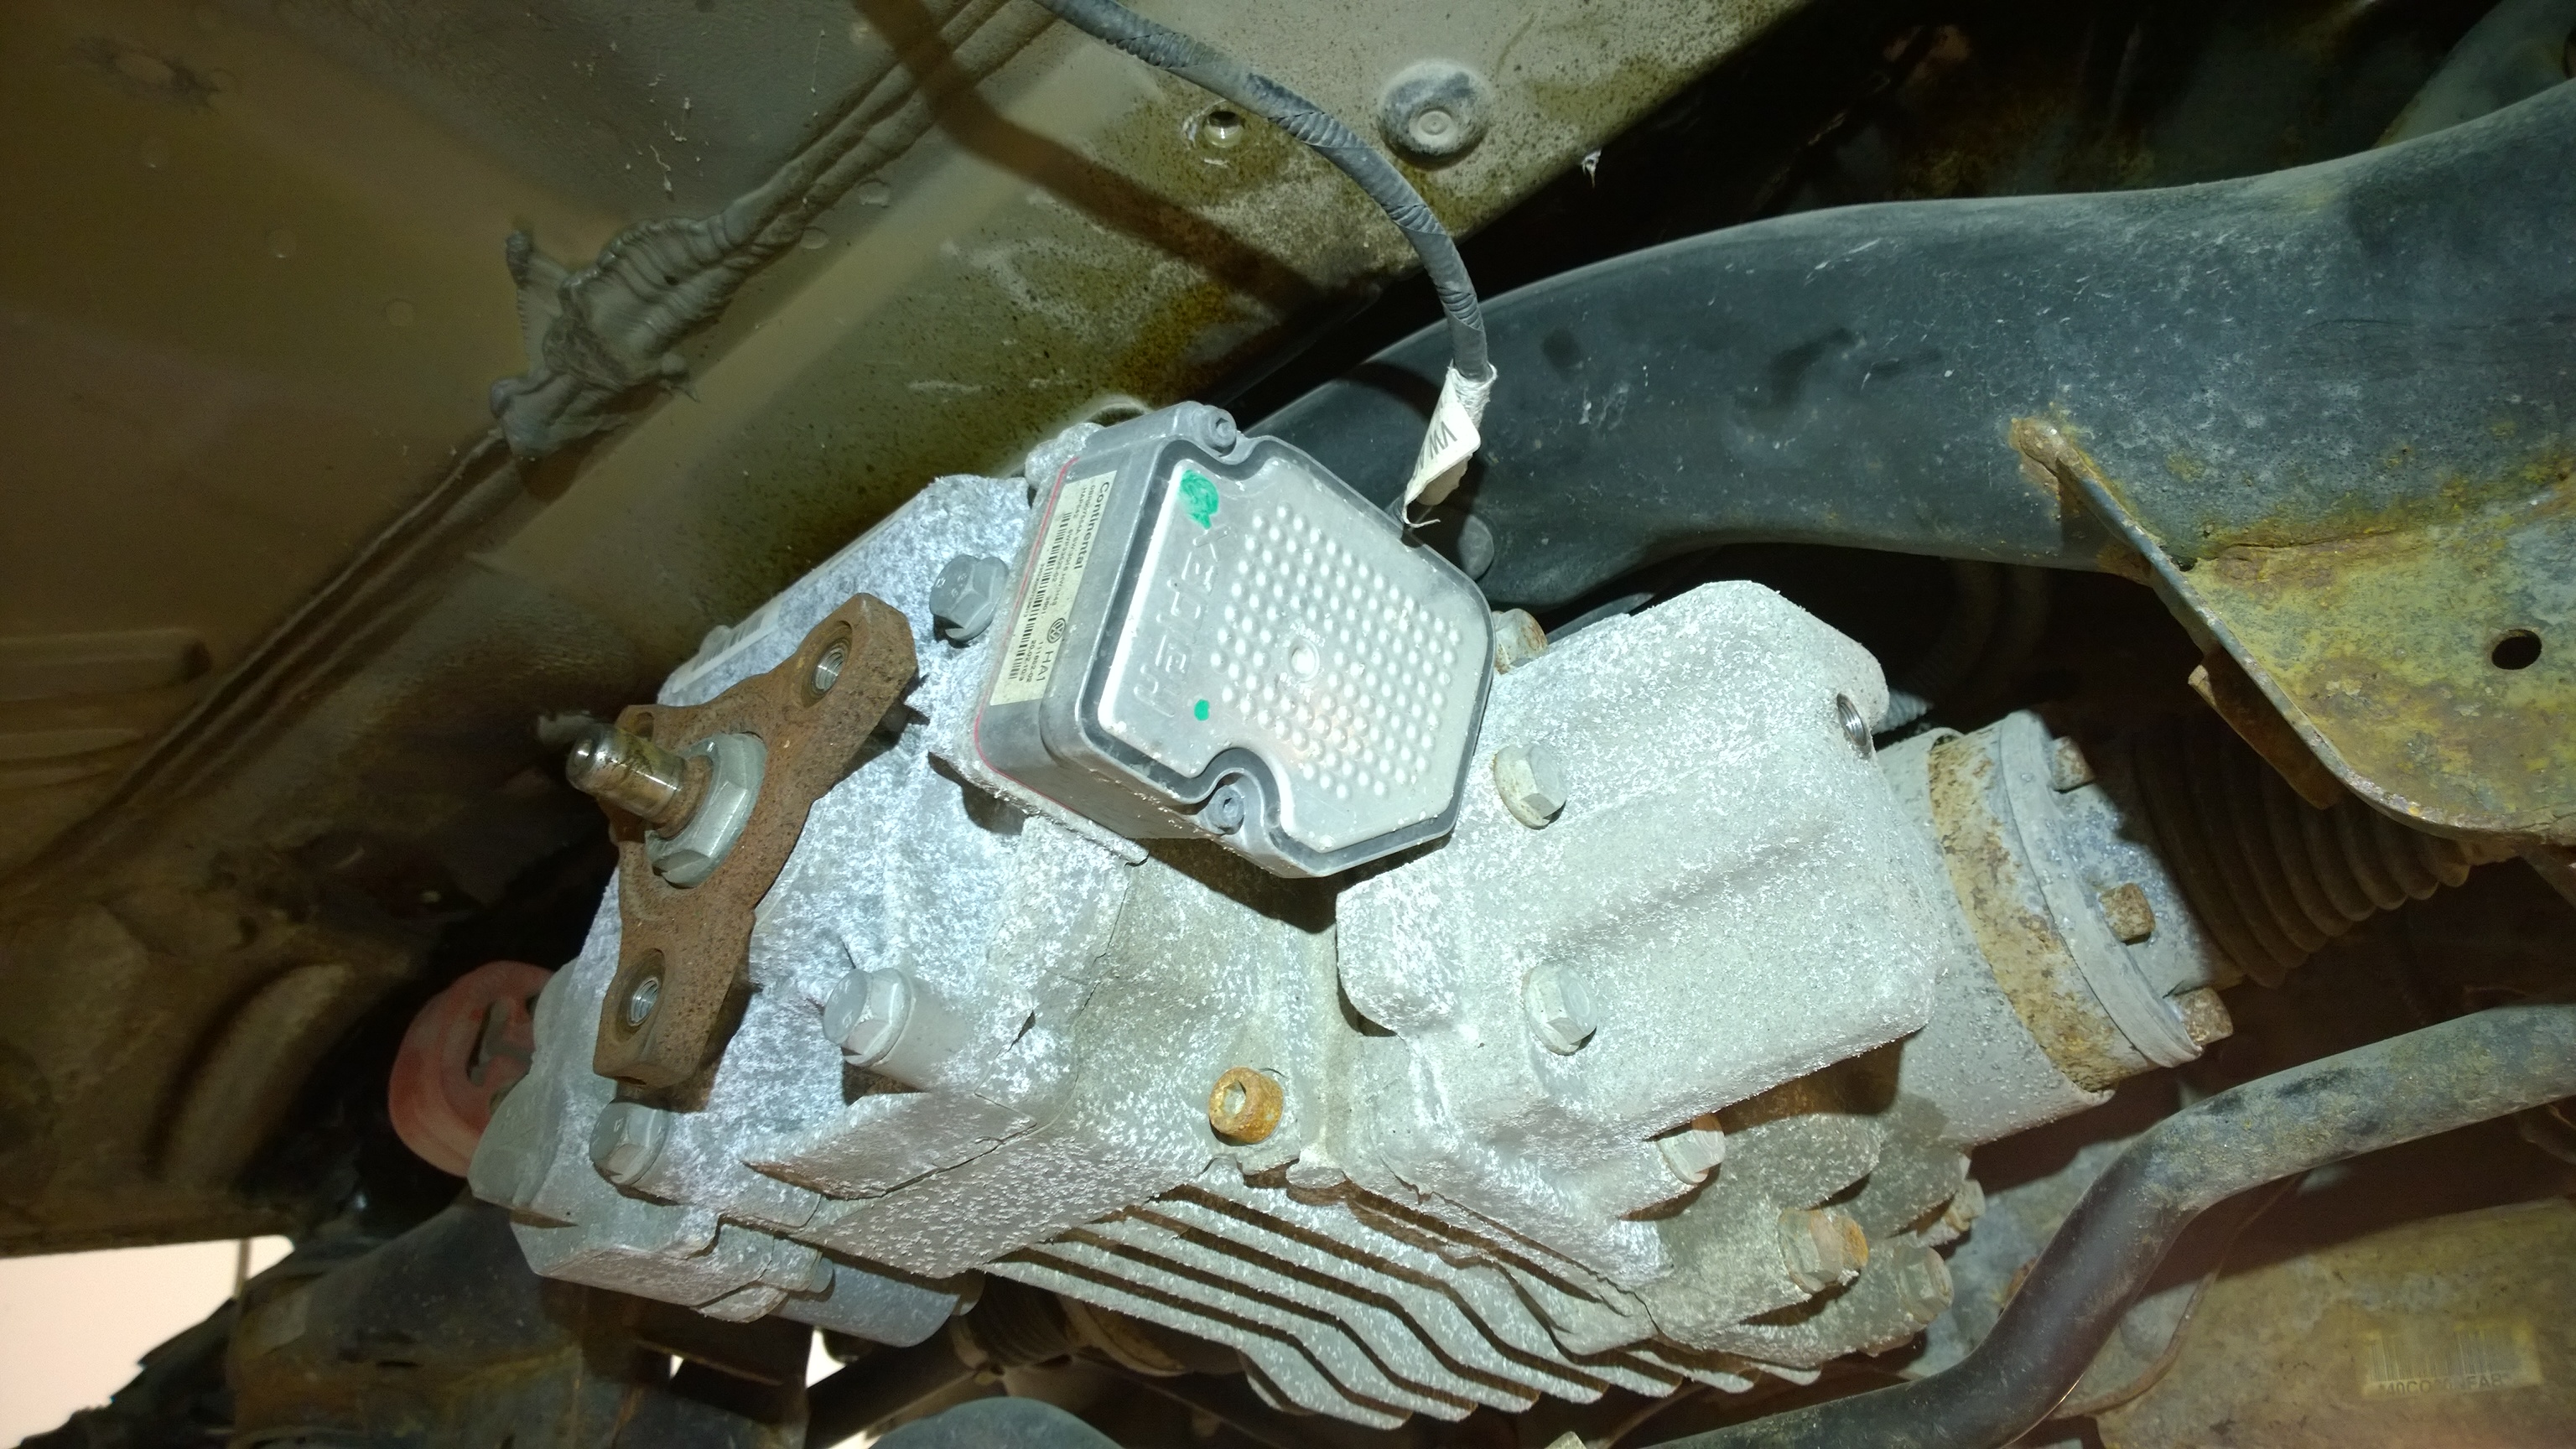
Finally it was time for fitting the rear axle and other parts of the drivetrain/chassis.
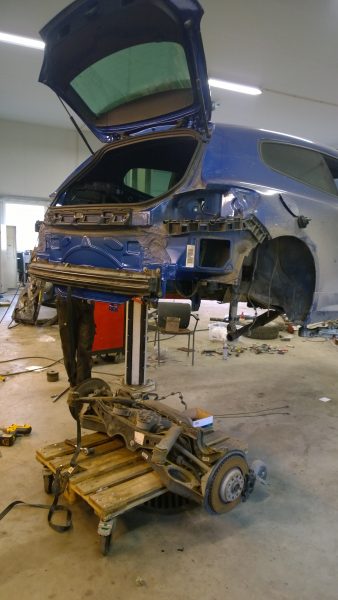
4motion rear axle going in. Bolt-on.
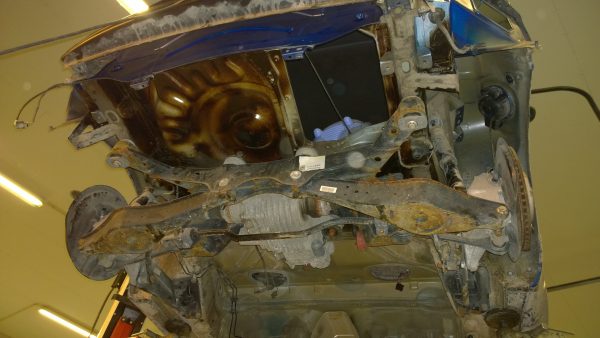
In the photo taken with the flash some parts look really rusty – it’s not really the case. The Golf was only 41k km driven.
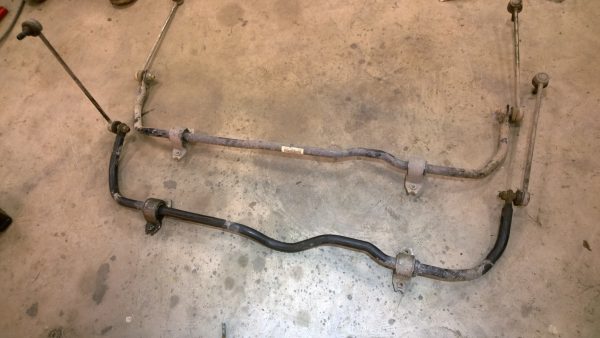
When we were fitting the drive shaft we realized that also the antiroll bar was slightly different. In 4motion there’s an extra curve for the drive shaft.
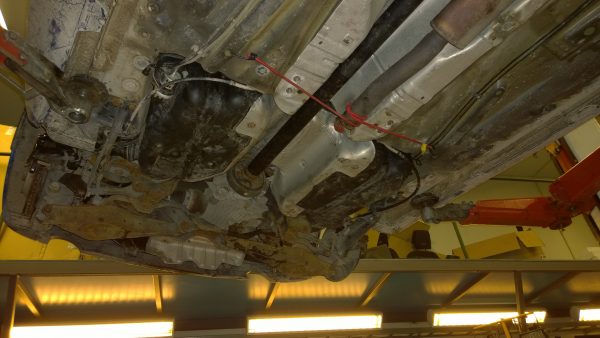
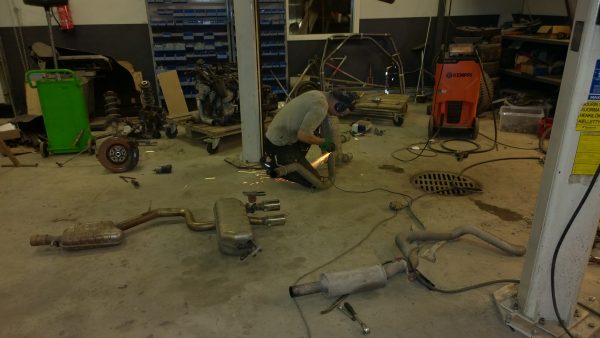
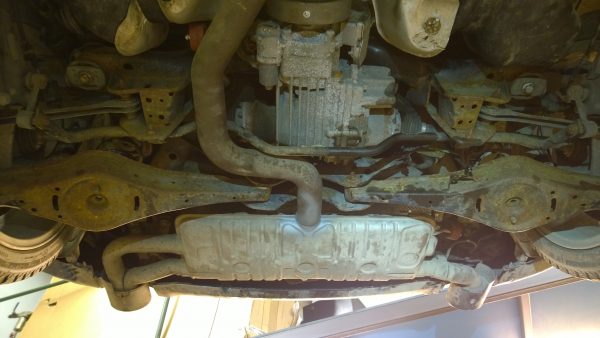
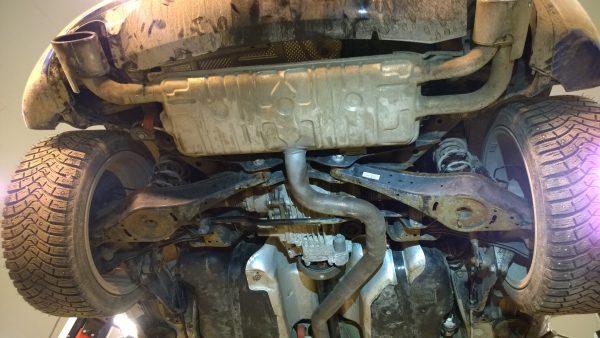
Drive shaft installed, exhaust being built, see more pictures of that below. The exhaust is otherwise from Golf except the the rear silencer which is Scirocco’s original. Golf has dual pipes in the middle.
2019-03-26 · Interior
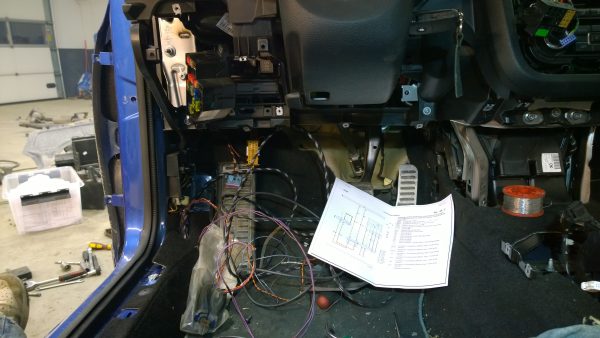
When the interior was anyway taken out we decided to install rear camera (apparently from some Bentley model). The camera unit was installed on top of the license plate and wiring naturally goes all the way to RNS-510. Not sure if rear camera was an option for Scirocco in 2011?
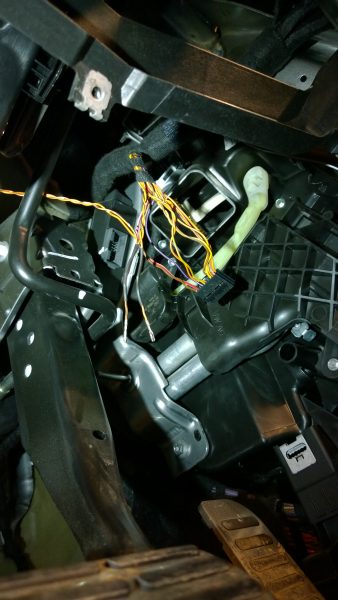
CAN-wires from the Haldex control unit were connected close to the connector of CAN gateway.
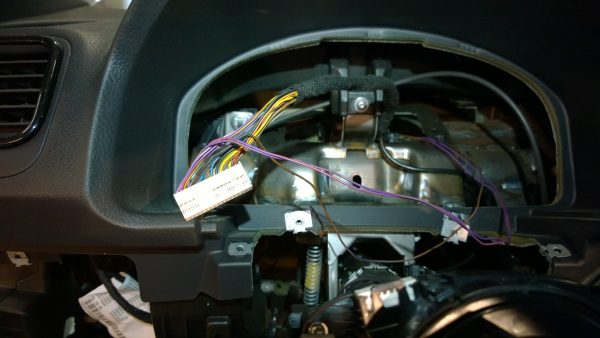
Fuel sensor wires were connected to the instrument cluster. For some reason the fuel level indicator still does not show exactly full tank when it should.
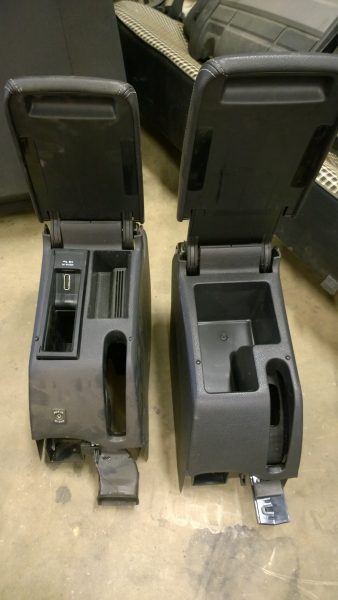
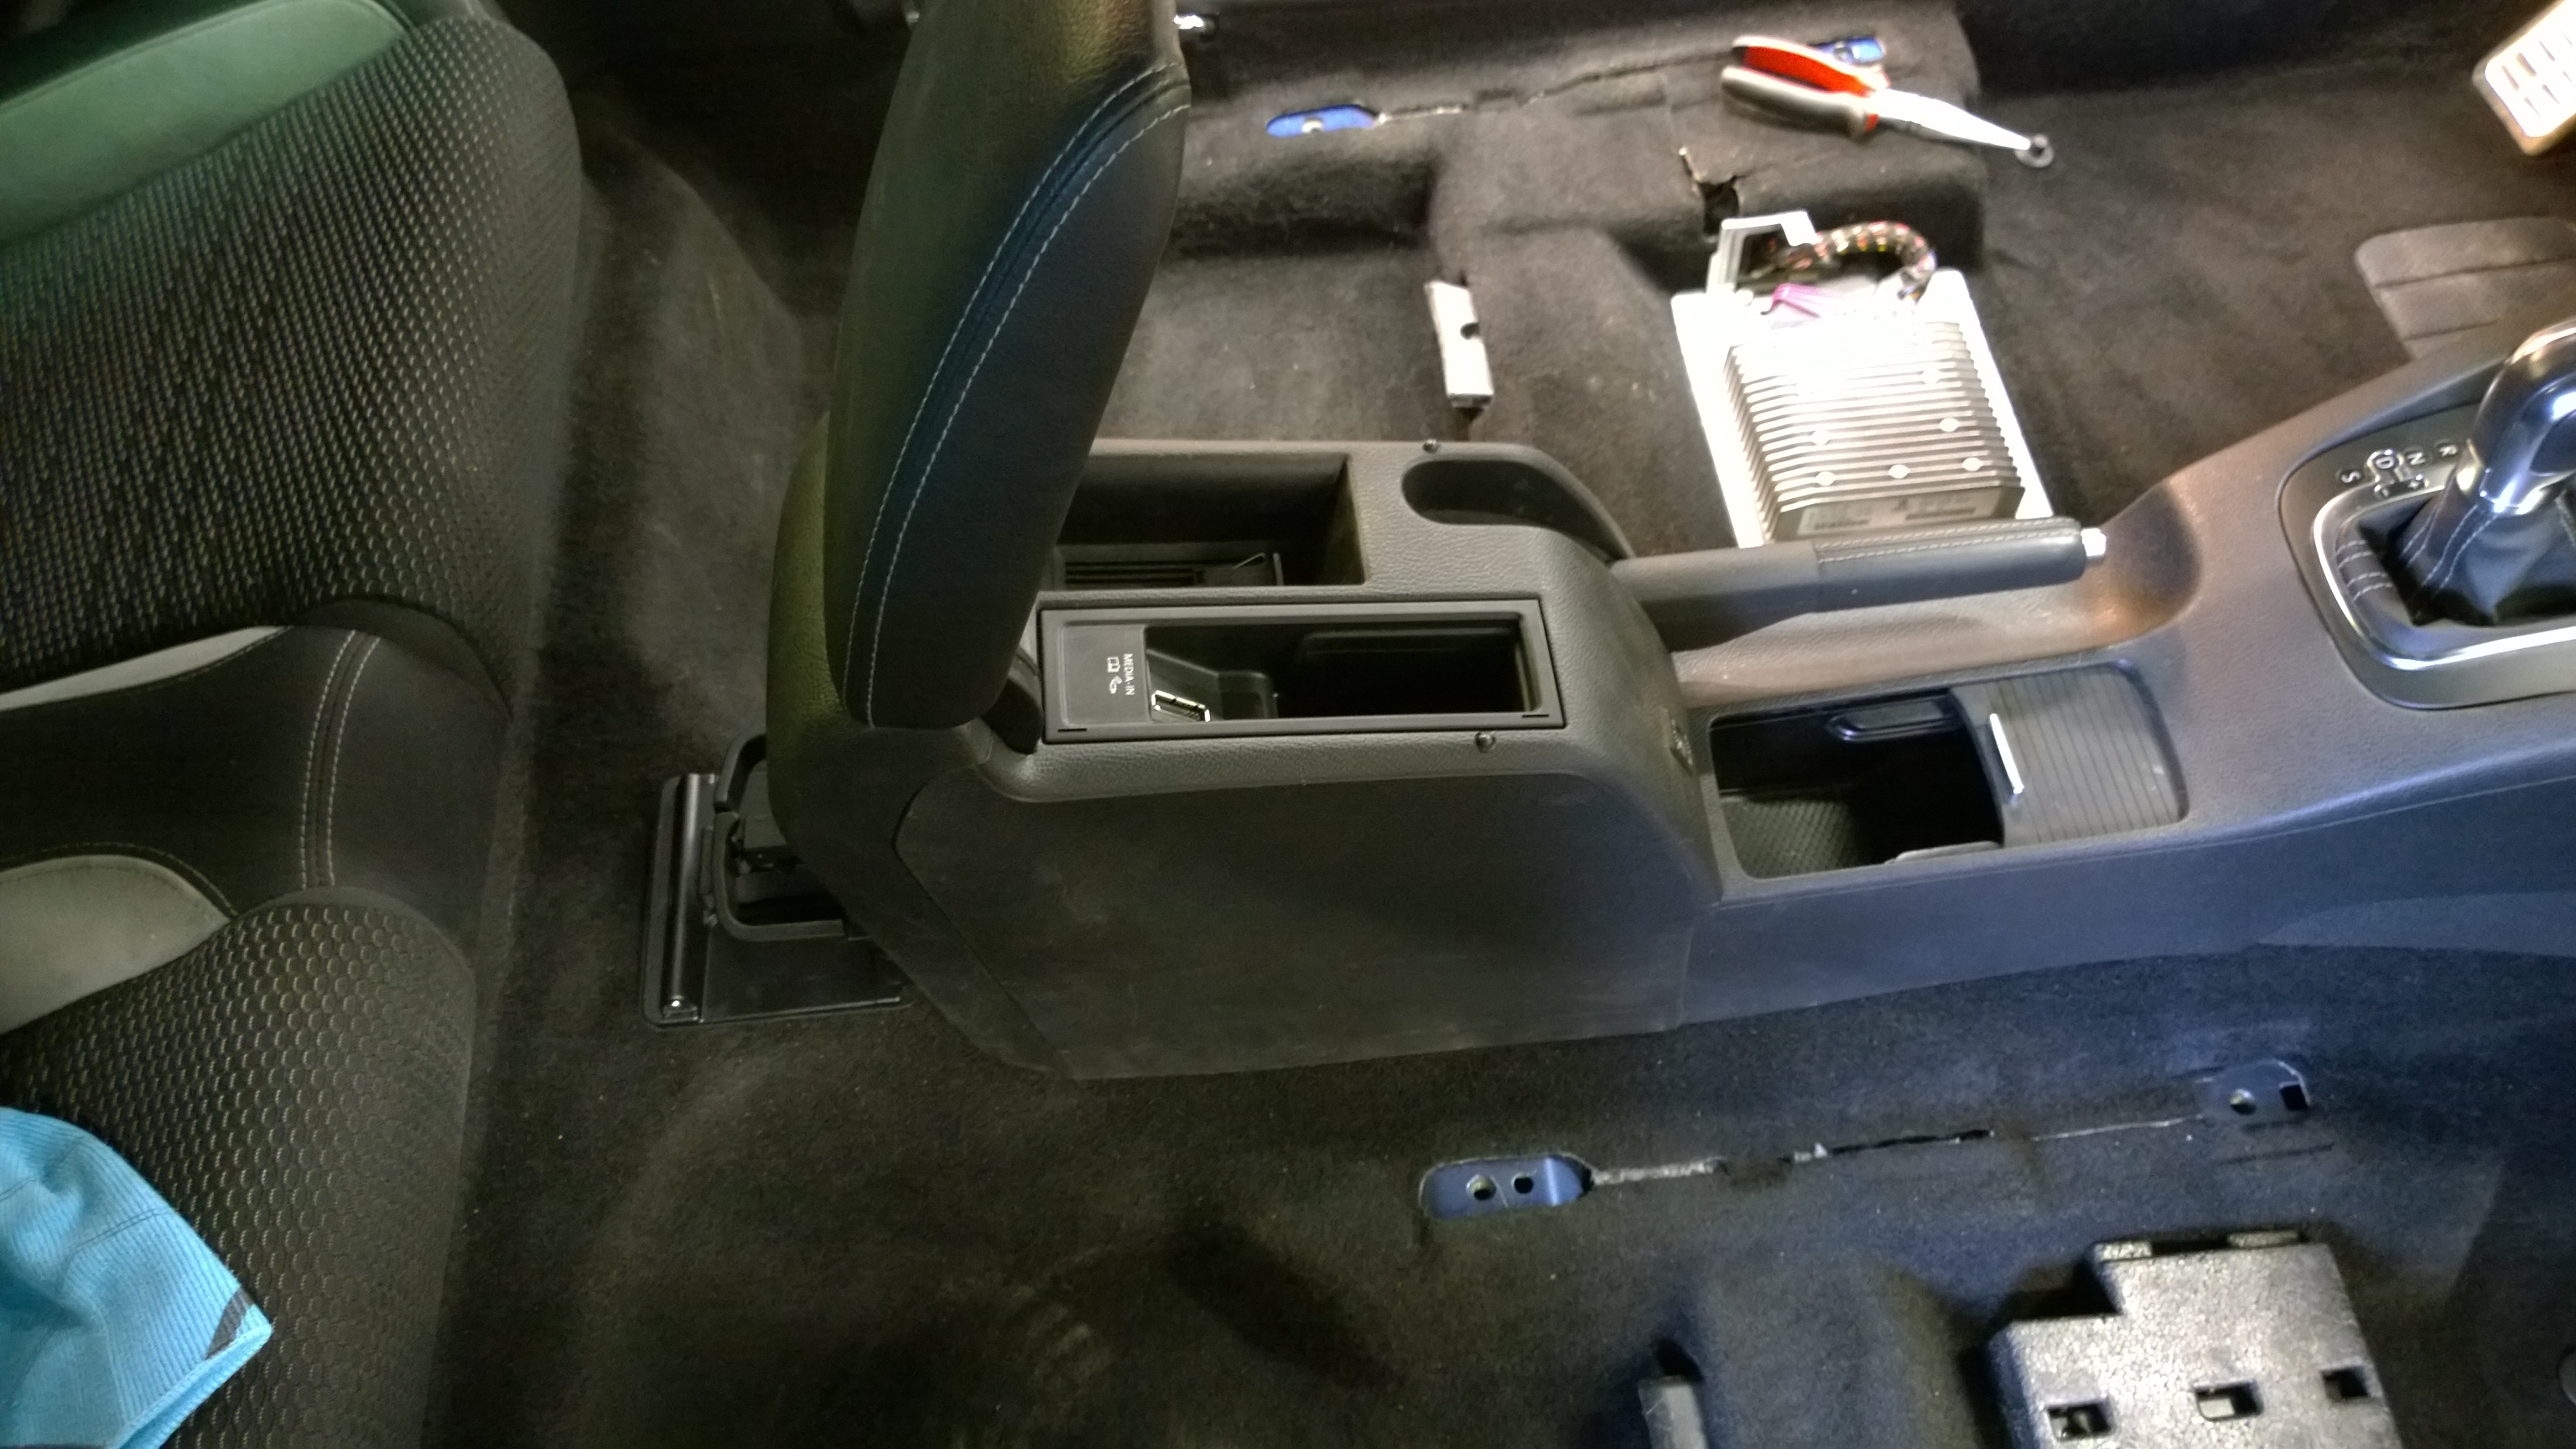
We updated the center console arm rest from Golf as well. It has AUX-IN and media interface (some wiring was needed for that as well) as well as cup holder for the rear seat.
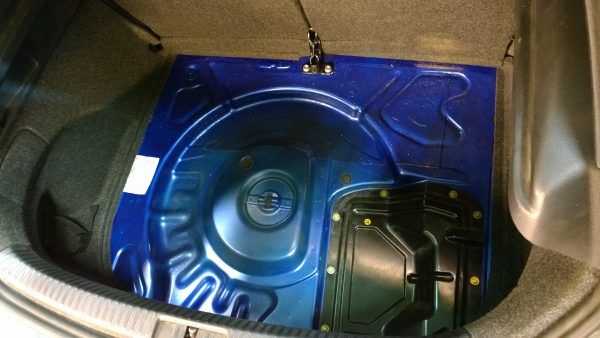
Trunk almost ready. We wanted to keep the original volume for the trunk so we don’t have space for spare tire any more. There’s still enough space for a bottle of sealant and an air compressor. When the carpet is on, you can’t really see the difference to the original. You could also fit the spare tire but then you’d sacrifice some space from the trunk.
2019-03-26 · Increased weight
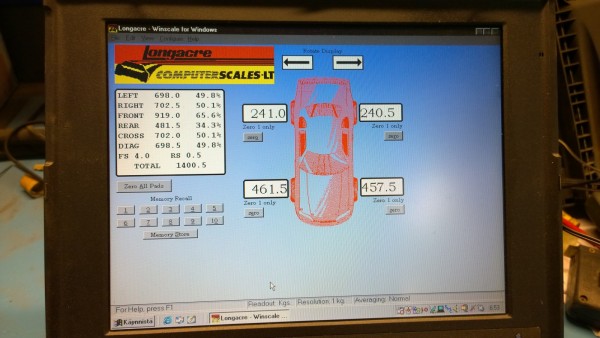
Before
After
The pictures above show the changes in weight. Total increase was 76kg (37 front, 39 back). This means that we could still keep all four seats (the law in Finland states that we can’t increase the overall total weight. Now we just can’t carry heavy luggage when all four seats are occupied 🙂
2019-03-26 · Scirocco running on all four weels!
It had been 2,5 weeks since we started to take parts from the Golf we bought from Sweden. Only doing this in weekends and evenings. Now it was only some coding with VCDS to complete the project. Well – we thought so.
It was easy to get the AWD working. Just a few ticks on check-boxes (CAN gateway & engine for sure, don’t remember if there were something else as well). On the test drive AWD was working perfectly. The only issue remaining was ESP – that became a bit longer story and there’s another post about that. All other units were happy with no fault codes except ESP.
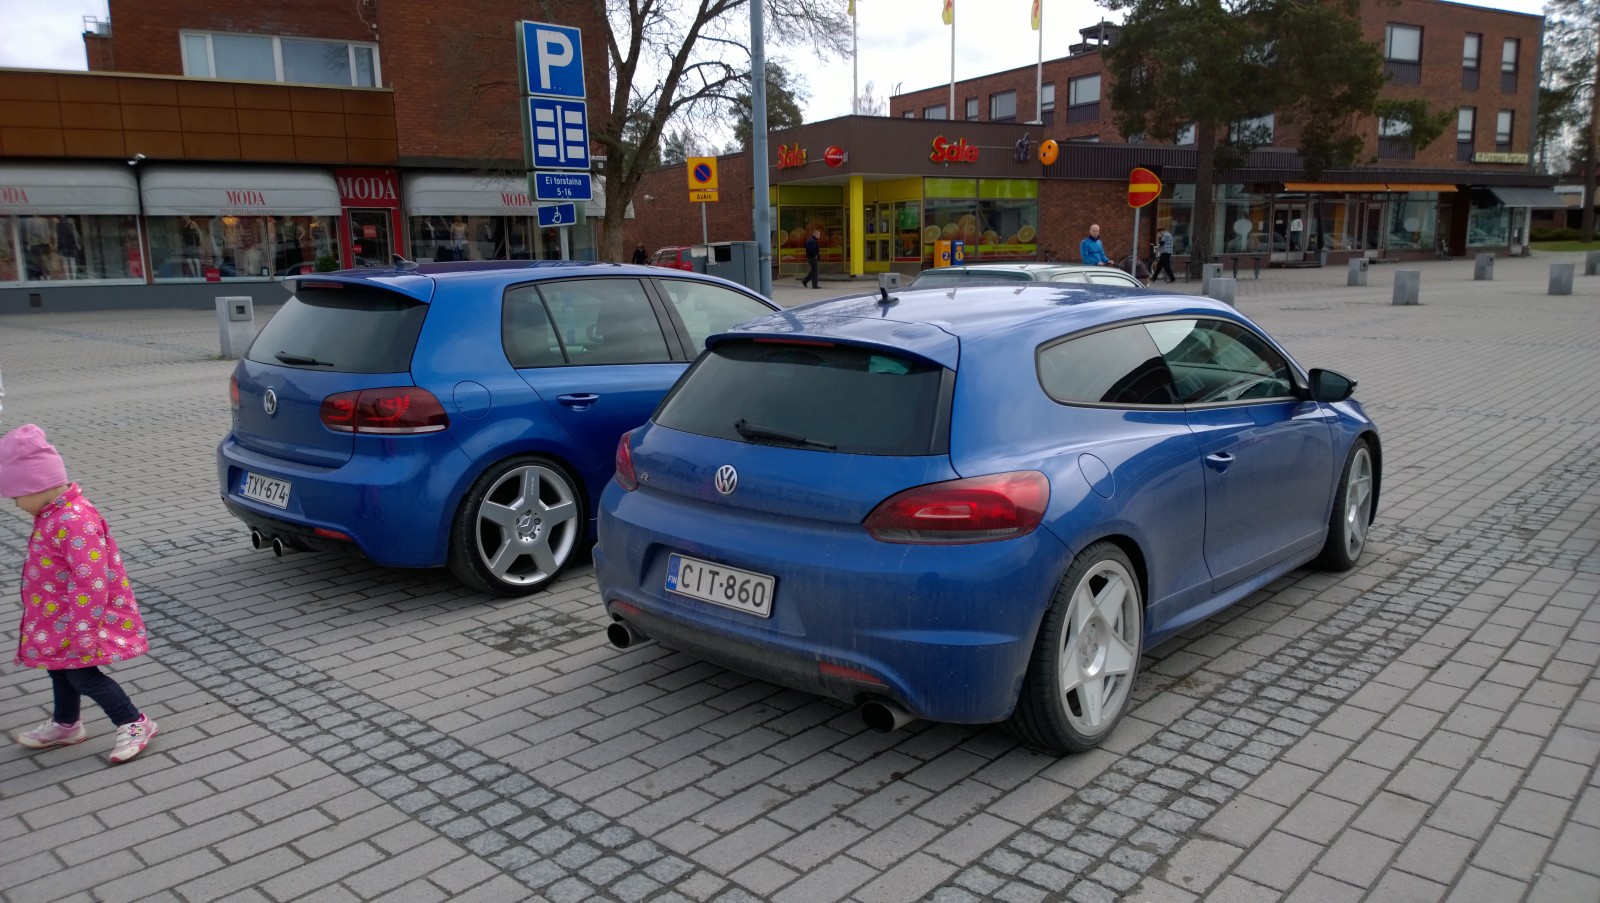
The title picture is from a market square of our home town together with 2011 Golf R that we had at the same time.
2019-03-27 · ESP – pain in the ass
As I wrote on the previous post, ESP became quite a headache. Actually we drove with the car for almost two years before we were finally forced to get it done because the annual inspection was closing (in Finland you don’t need to do MOT every year for such new cars).
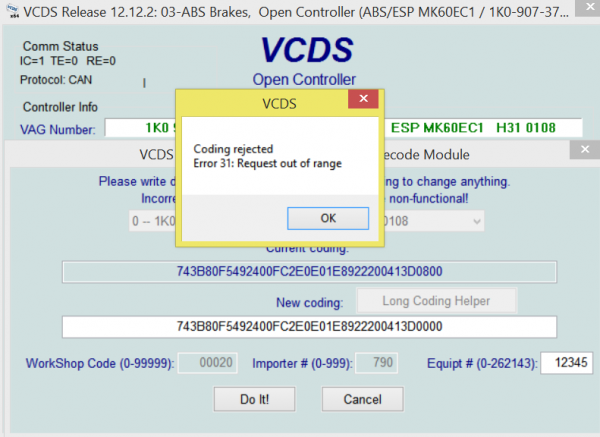
This image says it all – Scirocco’s ABS unit was not happy about the newly installed Haldex controller.
We got fault codes saying we had issues in Powertrain data bus (18055 – Check Coding of ECUs on Powertrain Data Bus). ABS was functioning as it should, just ESP was out of the game. It did not prevent driving, but was obviously a safety issue and MIL light was on. We tried different codings, tried to learn how the coding works. Long Coding helper in VCDS was not very helpful with ABS unit (only a few bits are documented) but we were able to find something by Googling and asking help from Ross-Tech’s forum (Ross-Tech is the maker of VCDS). Eventually we were able to learn what each of the 18 bytes were meaning. Even last five numbers of the VIN were encoded on the coding.
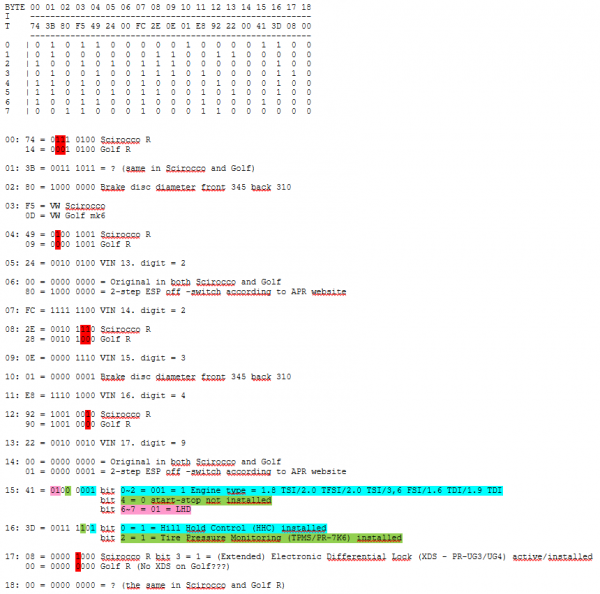
It helped a lot that we had similar Golf R from the same MY so we could compare the coding. Even the ABS unit had exactly the same part no, so we were adamant that there’s a way to code.
So we were trying to generate a code that was similar to Golf R but embedded with VIN digits from Scirocco. Golf was not identical, it had DCC suspension so we still had some bits that we were not sure if they were correct or not. Still, we couldn’t get it done – Coding out of range it was every time.
Many persons from Ross-Tech forums offered help and proposed all kinds of codes, none of those worked. Eventually we realized that the ABS unit communicates with the cluster to learn about the model of the car – when the cluster says the car is a Scirocco, it won’t accept coding as a Golf. And Scirocco can’t be AWD. And vehicle type can’t be changed on the cluster with VCDS.
We found a guy somewhere in Poland who was willing to modify the EEPROM on the cluster but at the same time we decided to try something else. We took the cluster from the donor Golf R and plugged it in Scirocco. The connector is the same.
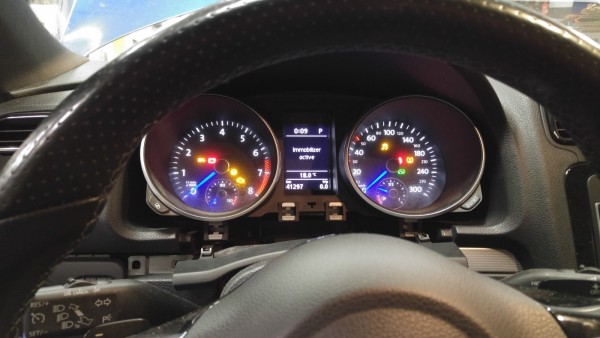
At least the cluster was working (which was something we expected it to do). Immobilizer kicked in as expected also (Golf cluster and Scirocco ECU won’t work together without tweaking).
Best part was that now ABS unit was happy to clear all the fault codes! Now that the ABS/ESP was handled, we only had two issues remaining: 1. Immobilizer 2. Physical fitment of the Golf cluster. After all the puzzling with the ESP these seemed like minor issues.
We only had one key remaining with Golf so we decided to take it and fit Scirocco’s key blade to the Golf key fob. That way we could keep Scirocco’s original key lock. For cluster-ECU communication there’s two options – take the ECU also from the Golf or disable the Immo from Scirocco’s ECU. Both work well – we decided to keep the Immo and take the ECU from Golf. Now both cluster and ECU were from Golf. Now when someone plugs a tester in the OBD the car seems like a Golf with Golf VIN.
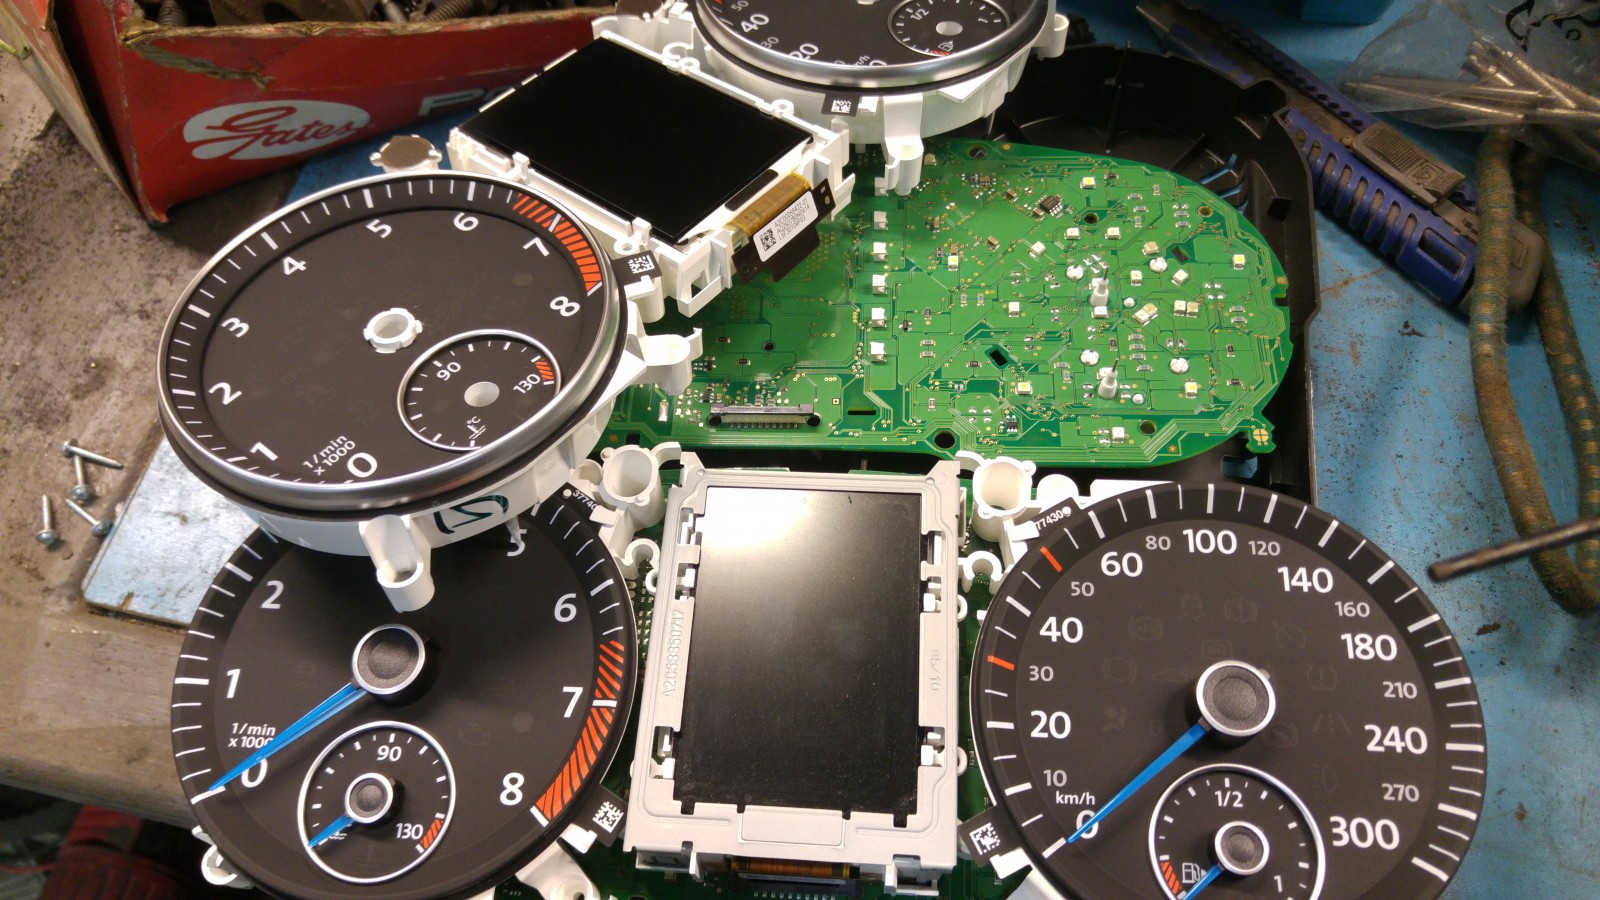
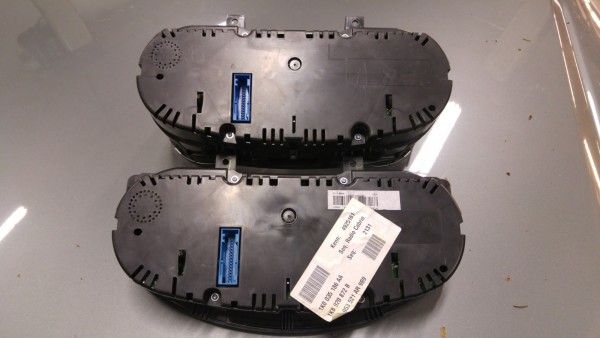
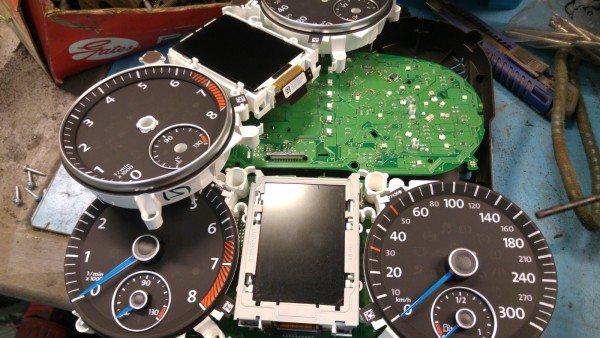
Physical fitment to the cluster was a bit more work. We were comparing the clusters and realized that essentially they are similar, just the outer casing is different. We decided to tear down both and were able to swap the Golf cluster internals inside Scirocco’s cluster casing!
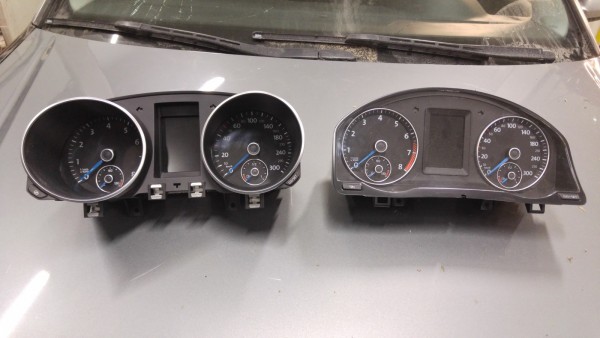
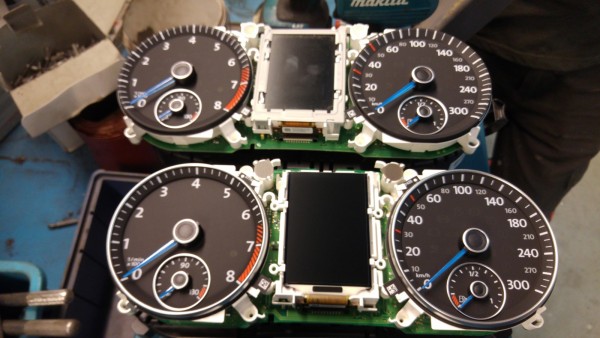
Minor differences on the dials.
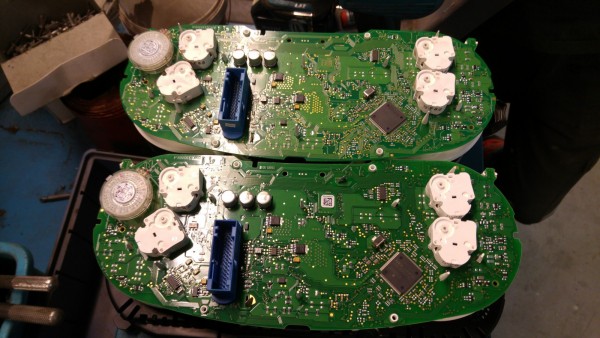
PCBAs are identical
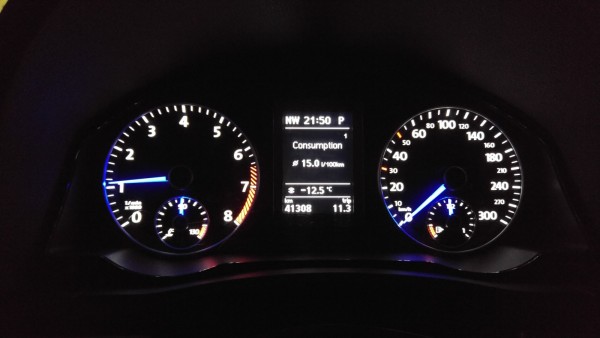
Finally! No fault codes or MIL lights!
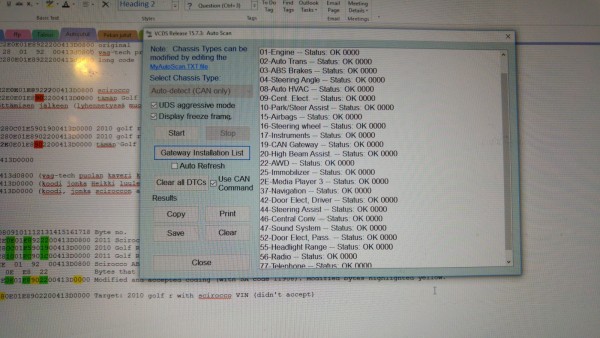
There’s only two downsides with the way we did the cluster modification. The 2010 Golf R cluster apparently does not understand automatic long beam headlights. The feature still works, but it just don’t show the symbol that this feature is activated. Sometimes this causes confusion to a person who’s not used to driving with this car.
Another is a bit more unpleasant – you can’t totally deactivate ESP from ESP OFF button. 2010-2011 cars are generation where you can only disable traction control but it still keeps ESP active. This means you can’t have all the 4wd drifting fun on wintertime without taking some ESP fuses off. Apparently they changed this in later models so it might be possible to swap some newer ESP parts in but so far we haven’t done that.
2019-03-27 · MOT inspection
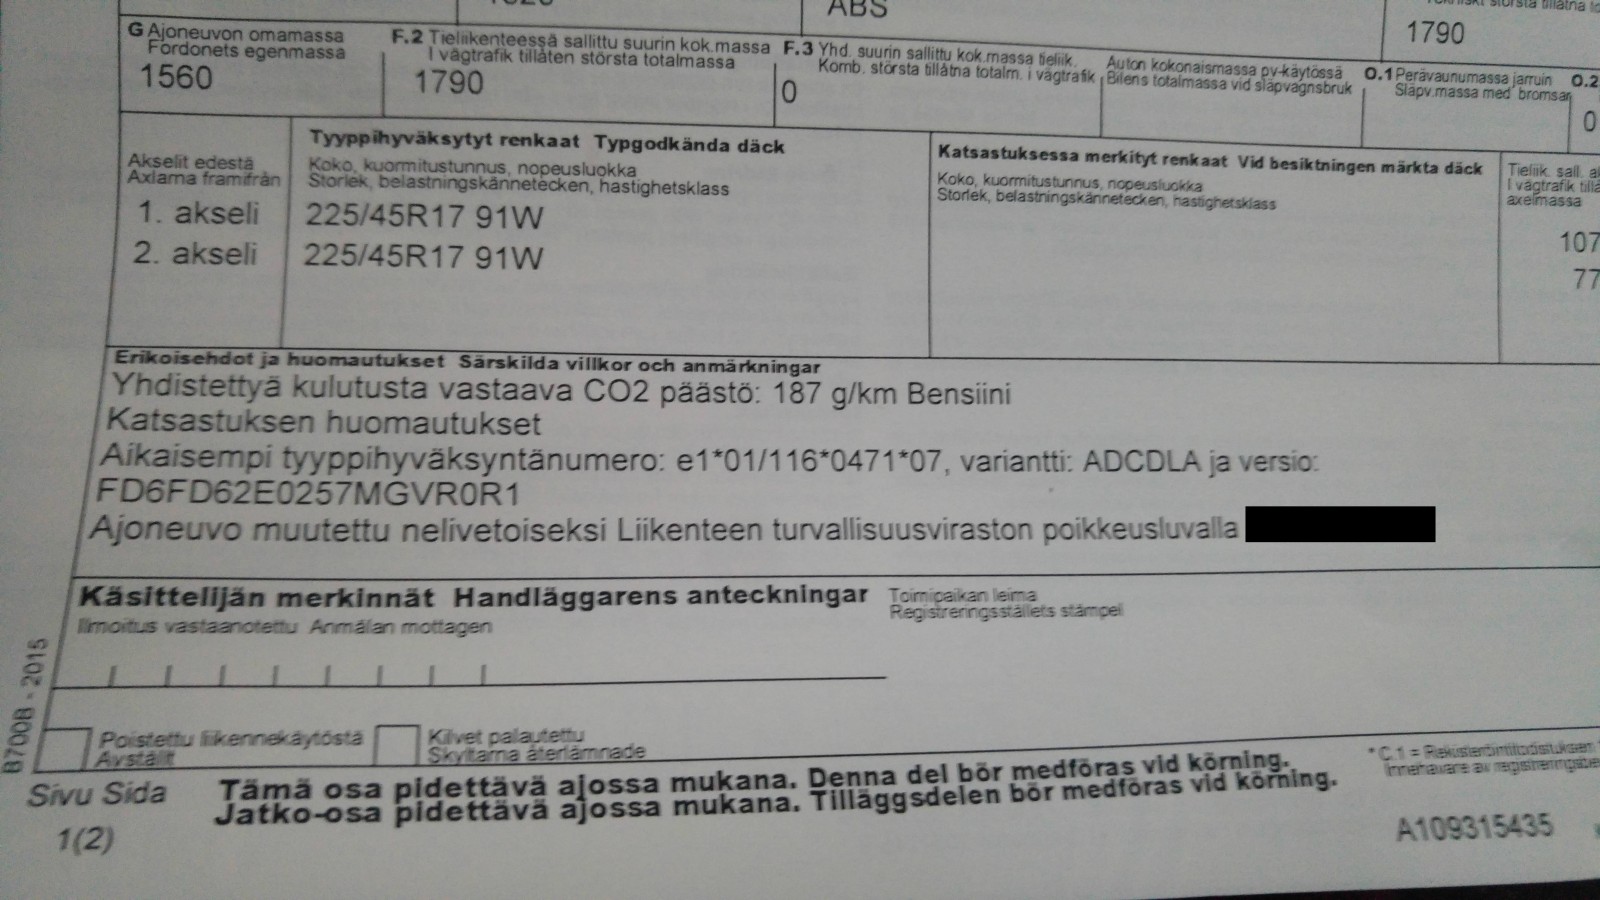
A few words about the inspection and getting the modification fully street legal in Finland.
A conversion like this requires a special permission from the officials. Scirocco was never made AWD so they can’t just approve something like this on a regular annual inspection. We had to get the permit and it meant quite a bit of paperwork.
When we did the application we explained everything in detail and how all the body modifications were done according to VW’s instructions (instructions were attached as appendices). We explained all the parts that we used, showed parts lists and images from ETKA and we also had to get documentation from the manufacturer’s representative (importer in Finland) to certify that the brakes are working as they’re supposed to. For the actual inspection it was enough that we took a full scan of the car with VCDS, signed by a local car service.
It took about a month for the officials to handle the application. They asked some additional questions once but anyway the whole process was much faster than expected and we were pleasantly surprised how well the authorities were co-operation on a modification like this.
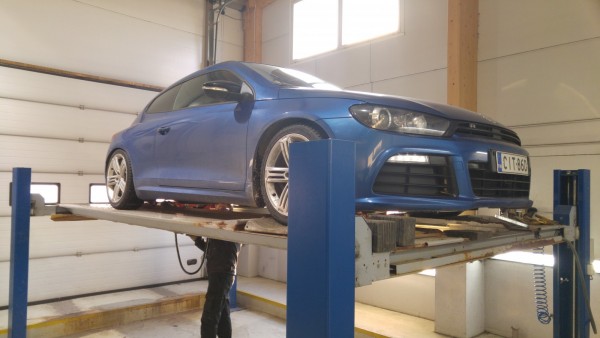
Inspection
At the inspection we also had to identify where all the parts were originated (to prevent usage of e.g. stolen components). At the same time also the H&R coilover suspension was checked and included on the list of modifications. The actual inspection was fast, not much different from a regular annual MOT, but the paperwork took longer, more than an hours.
As a final word for this process we have to say that it for sure made it easier to get the approval when we had a complete donor car which was very close to Scirocco from the chassis point of view. It was relatively easy to make the application and show where all the components were coming from. It would have been much more difficult to explain everything if the parts had been source from several different vehicles or even made some parts by ourselves.
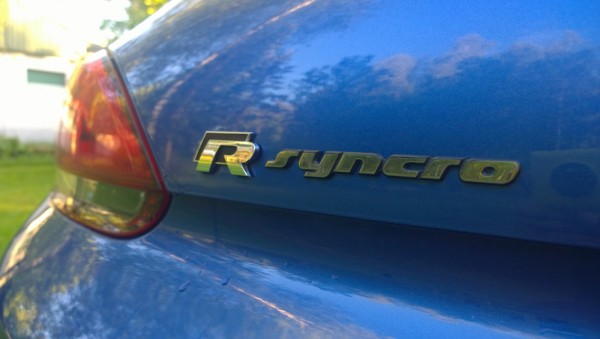
Syncro emblem is from Heikkis’ mk2 Jetta Syncro.
2019-04-02 · For sale: Scirocco R 4motion
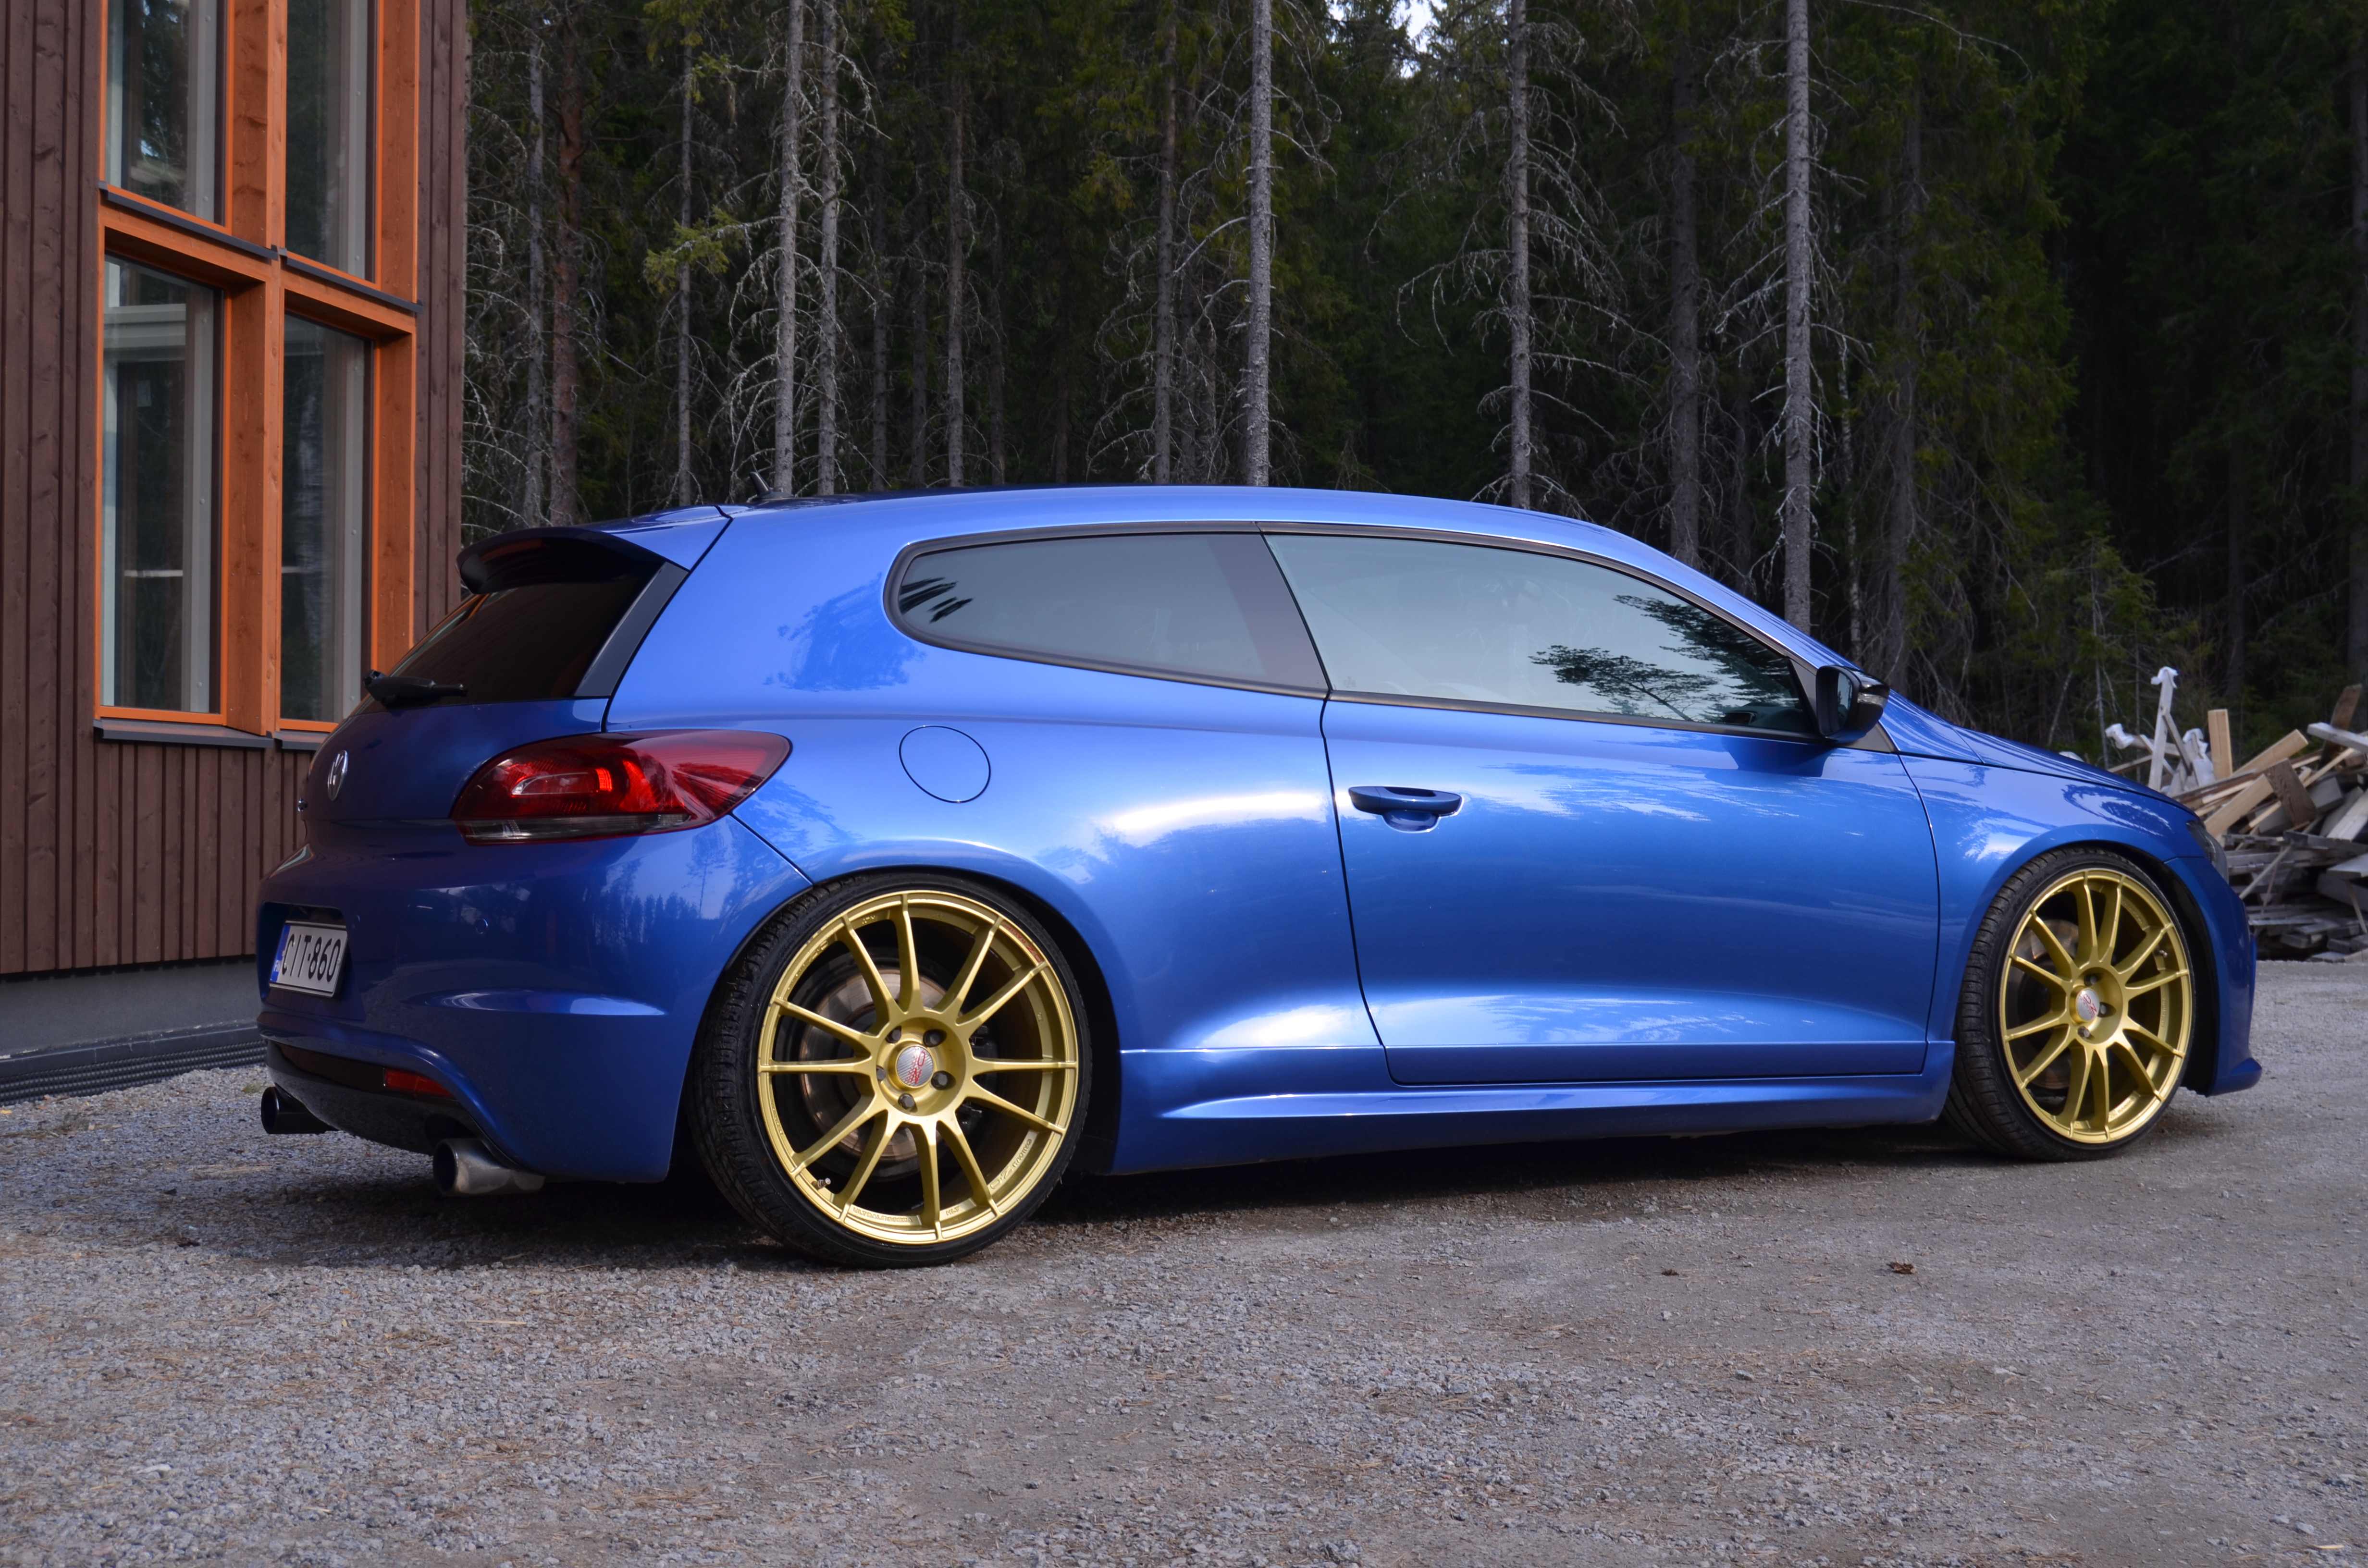
For sale really unique and rare VW. Scirocco was never manufactured as 4WD/4motion, this specific car has been modified by using parts from Golf R. The modification has been fully approved with special permission from Finnish traffic authority Traficom. All modifications have been made with OEM VW parts by following factory instructions for body modifications. Detailed description of the work with lots of pictures can be found here. The car has been driven for almost 100 000 km after the modification without any problems.
As far as we know this is the only genuine Scirocco R in the whole world that has been modified as street legal AWD. In addition to Golf R Haldex drivetrain the car has been equipped with APR Stage 2+ tuning (high pressure fuel pump, downpipe, VW Racing air intake, ECU & DSG remap) which increases the original 260hp to 360hp and 500Nm of torque. This allows Scirocco to accelerate from 0 to 100 km/h in 4.0 sec.
The car is in very good condition. No collision damage, no dents or rust. Naturally after 130t km there are some scratches and marks of use.
Details:
Haldex AWD from Golf mk6 R
2.0 TFSI APR Stage 2+ (360hp, 500Nm)
DSG (APR remap)
Full service plan @ authorized VW dealers
H&R Coilovers
Two sets of wheels & tires
O.Z. Ultraleggera HLT 8,5×20″ +brand new tires
Original VW Talladega 8×18″ for winter tires
BiXenon + LED DRL
P3 Gauges additional gauge for boost pressure, intake air temp, 0-100, rpm etc.
RNS-510 Navigation + Dynaudio
BT HF with audio over bluetooth
Reverse camera & parking radar at rear
Aux-In + multimedia interface
Multifunction steering wheel with paddle shifting
Automatic long beam headlights
Cruise control
Front seat heating + Isofix at rear seats
Price: 32.900EUR. We can assist in transportation.
Contact: Heikki Jaakkola, +358 40 500 6228 / heikki@pajalle.com
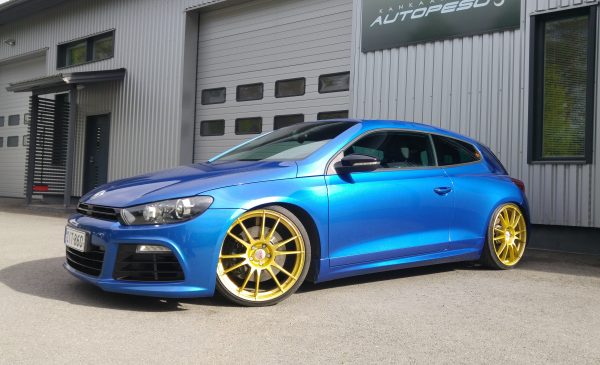
For the past couple of summers, the car has been running 20-inch O.Z. Ultraleggeras.
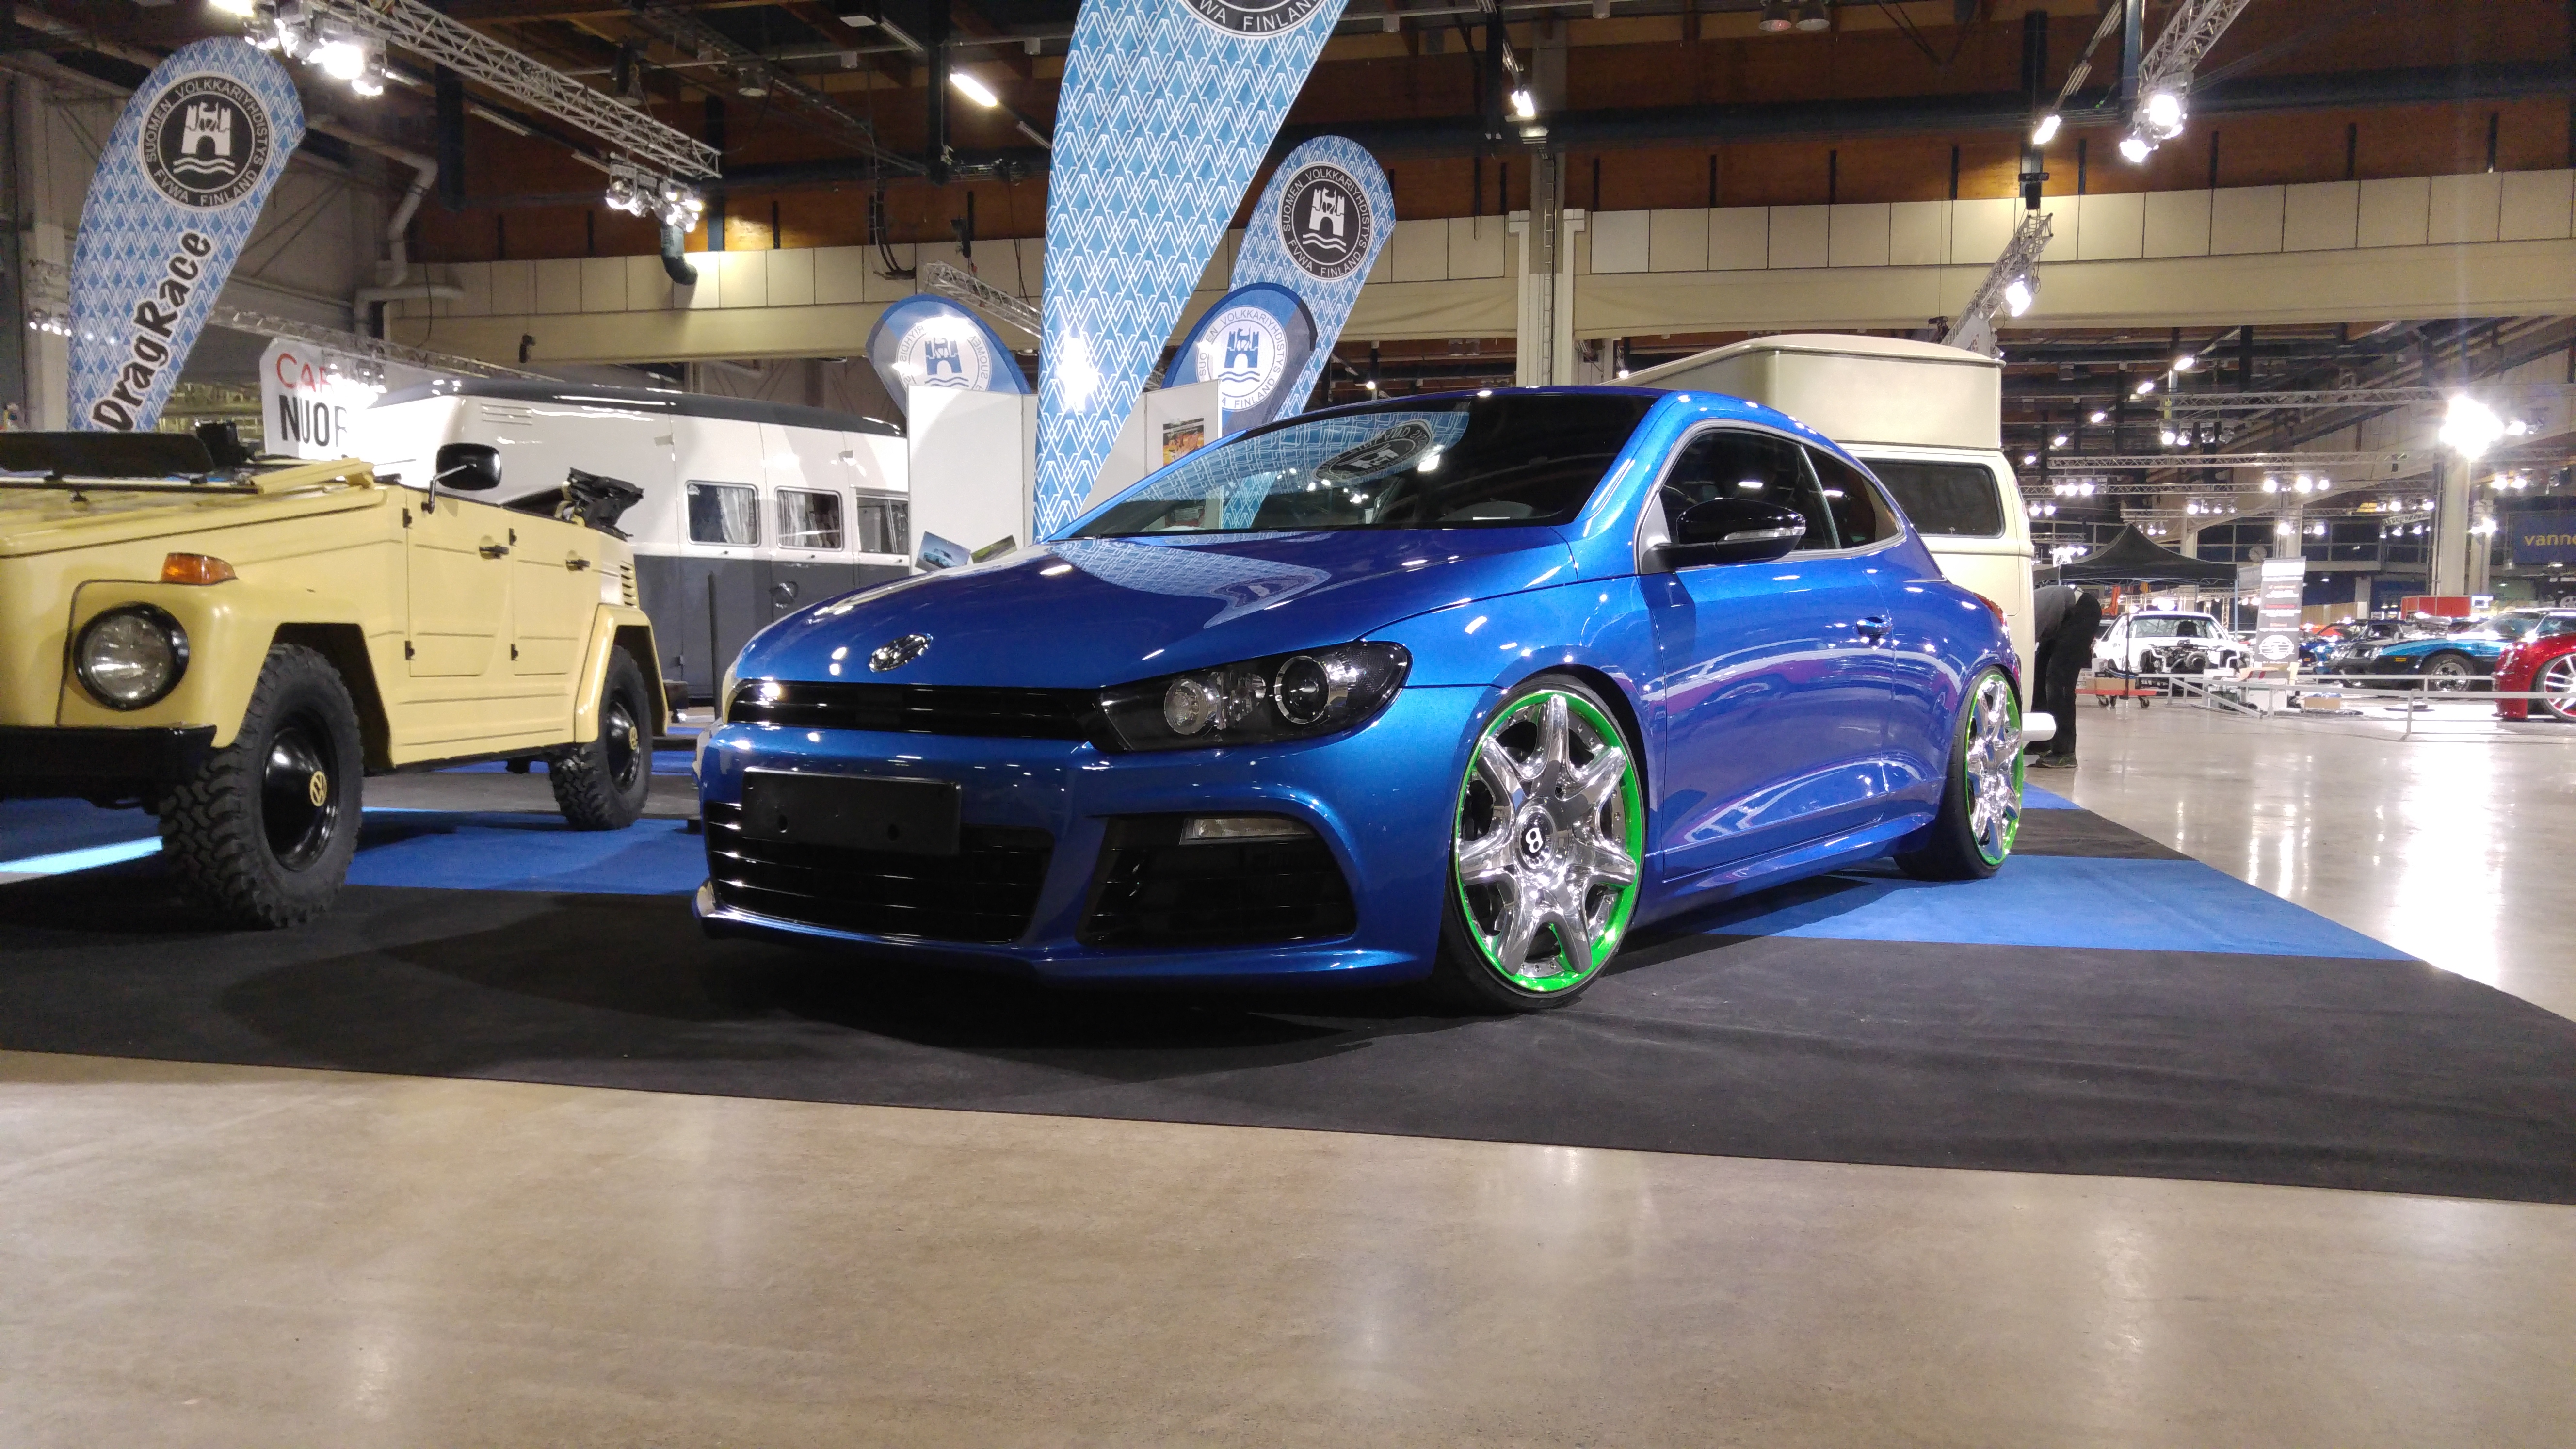
Before the Ultraleggeras, it wore polished Bentley Mulliner wheels, also 20-inch.
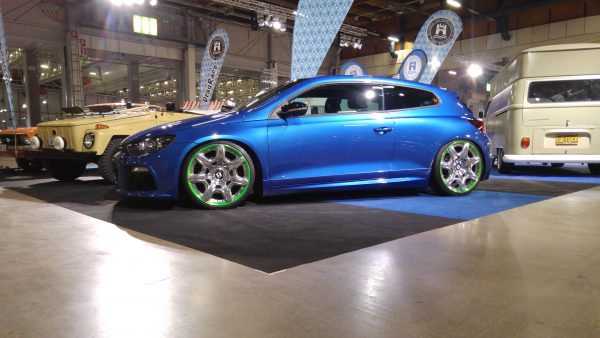
At the American Car Show over Easter 2016, on the Finnish Volkswagen club’s stand.
Includes original English text and AI-assisted translations.