ARCHIVE / PAJALLE
Cabrio GLI
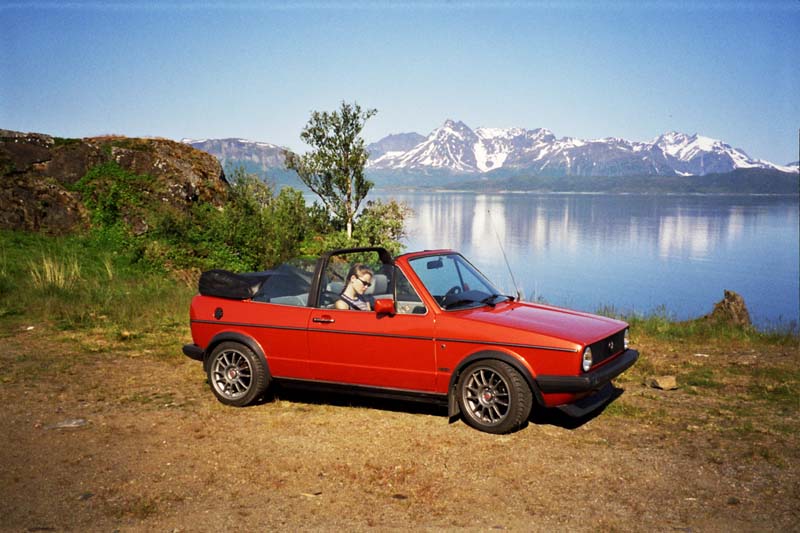
A Golf Cabriolet GLI engine swap, bodywork, electrics, suspension and a replacement roof.
Fitting the engine in
VAG group does not have a convertible with an engine... one has to be made.
First we need something to start from, a VW Golf Cabriolet 1,8 GLi '87.
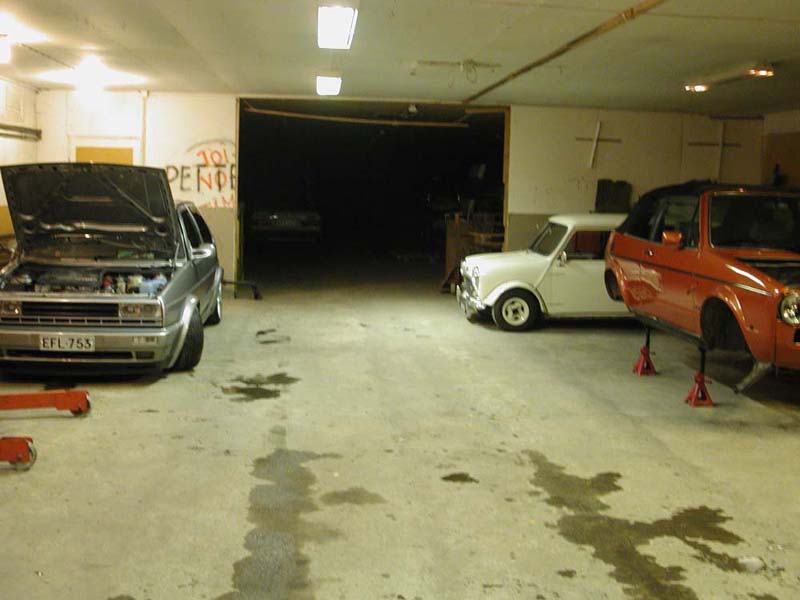
The garage.
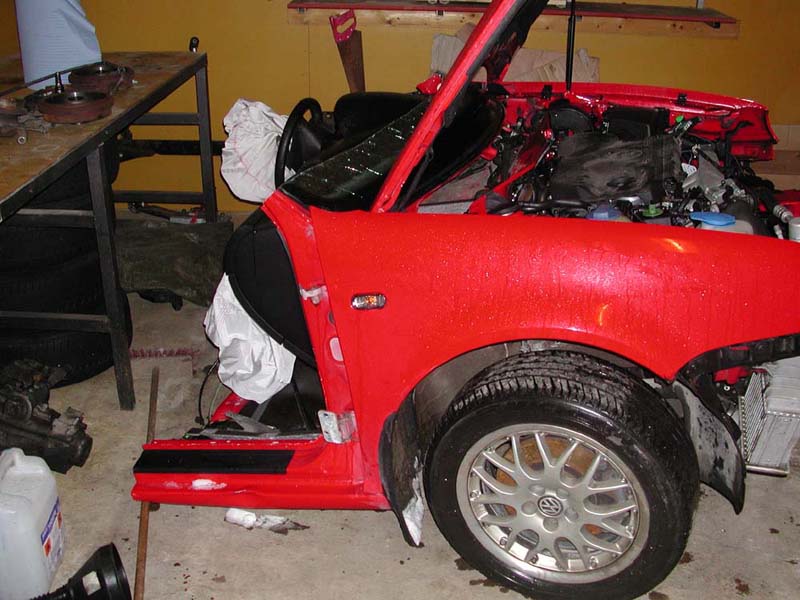
Some essential parts were taken from a front of a '99 Golf GTI.
The GTI had been slightly crashed in the front and had been then cut into peaces. The front was imported from Sweden to Finland. In Finland a crashed Golf like this would have been fixed.
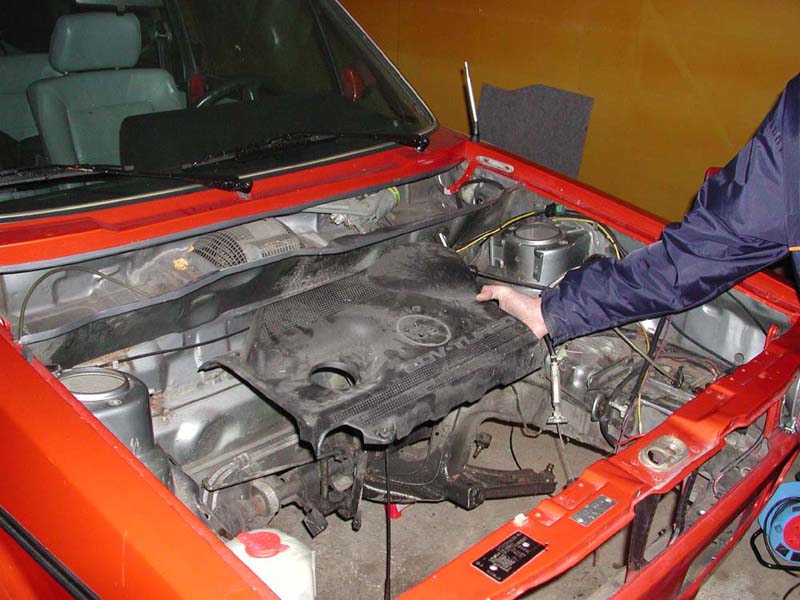
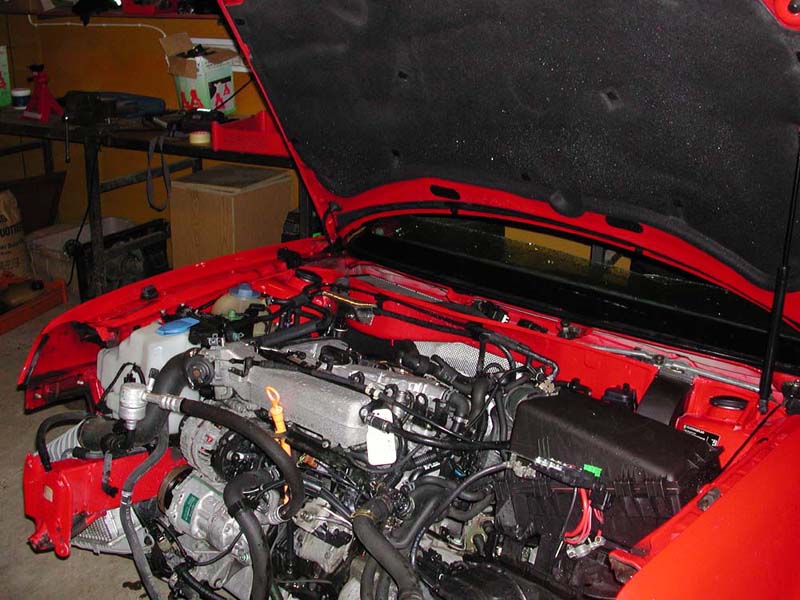
The engine cover installed, some mounts missing.
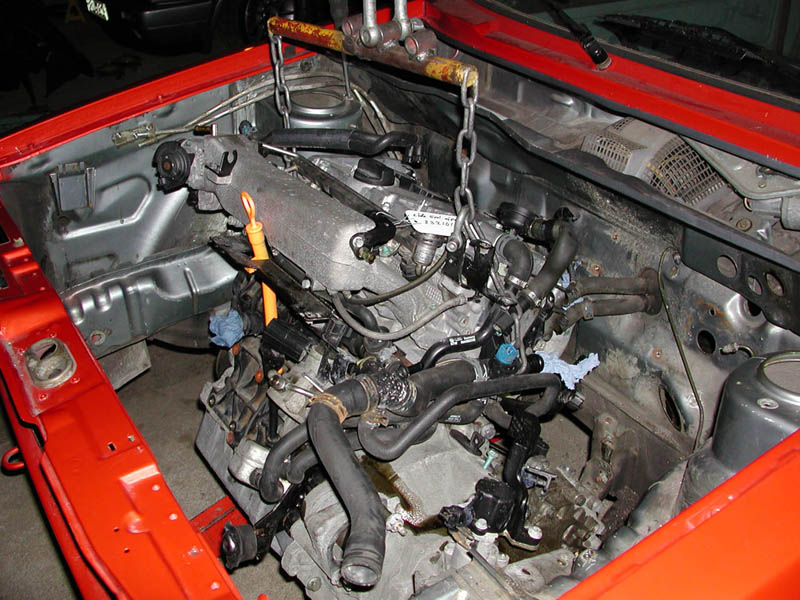
Fitting the mounts in the Cabrio's engine room.
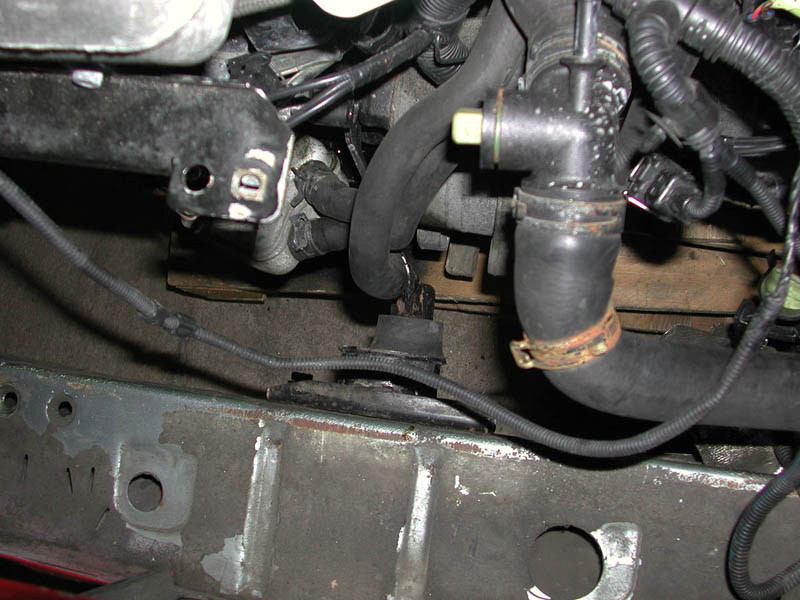
Cabrio's original front engine mount sets the place for the engine.
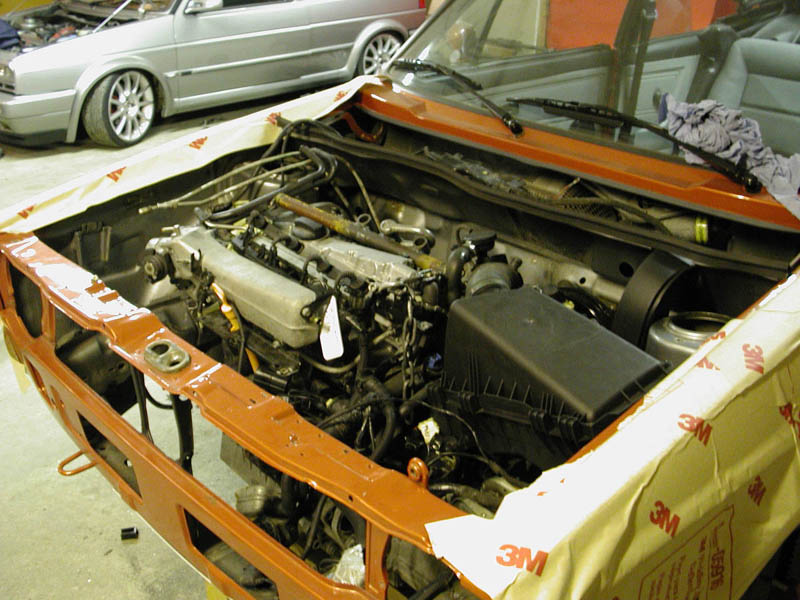
The engine and the transmission in the engine room... supported by some wooden jacks.
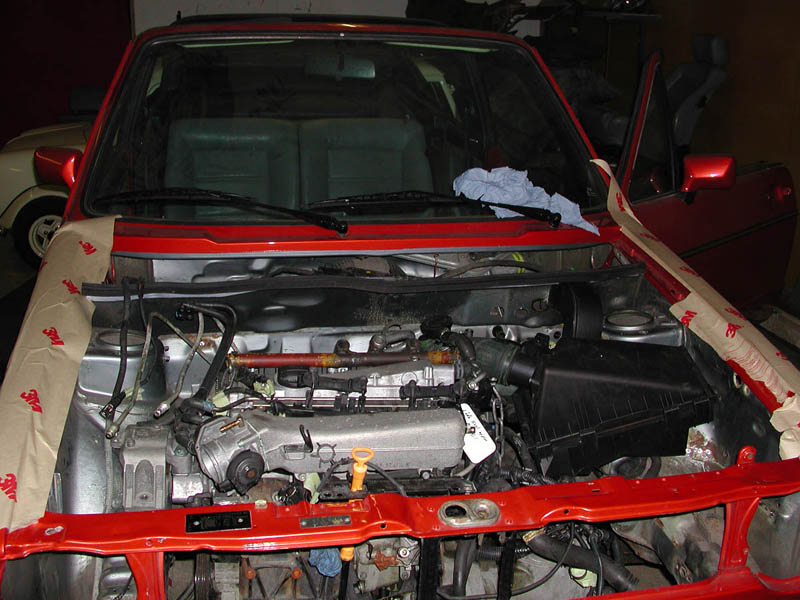
The original air cleaner fits well in the engine room.
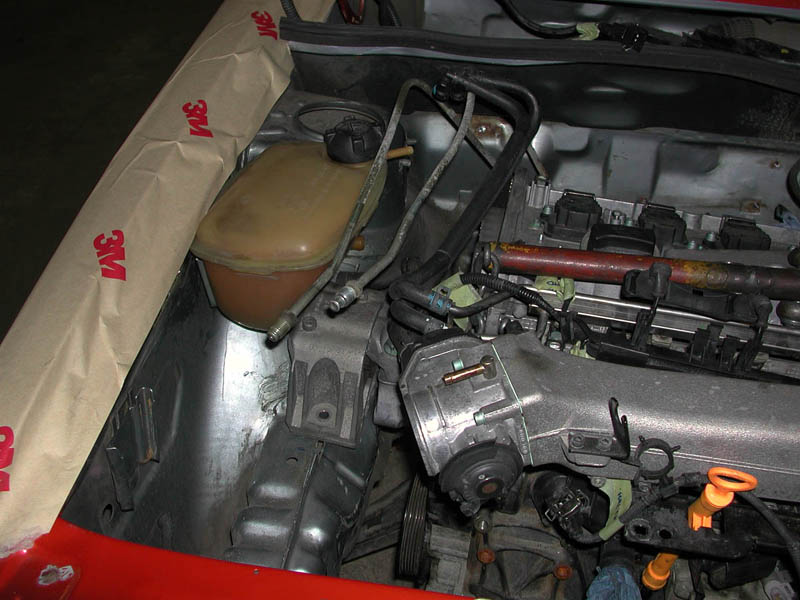
The right engine mount is taken from the GTI.
Little body modifications
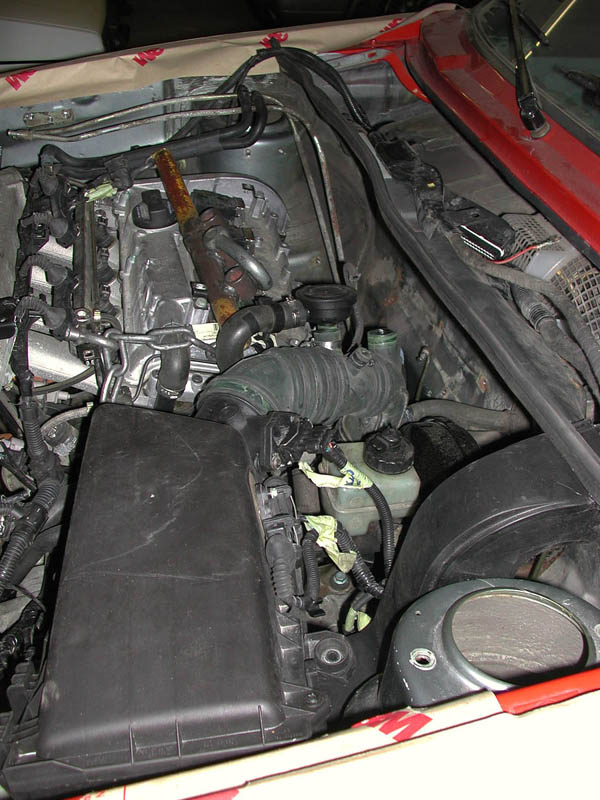
Behind the engine there's plenty of room... for example for a Full Pull charger :D
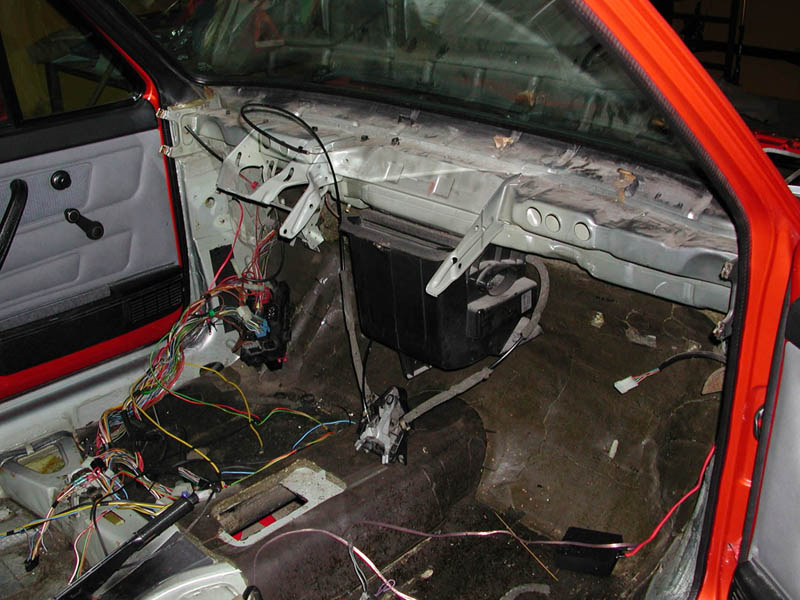
Making the wirings in the interiour.
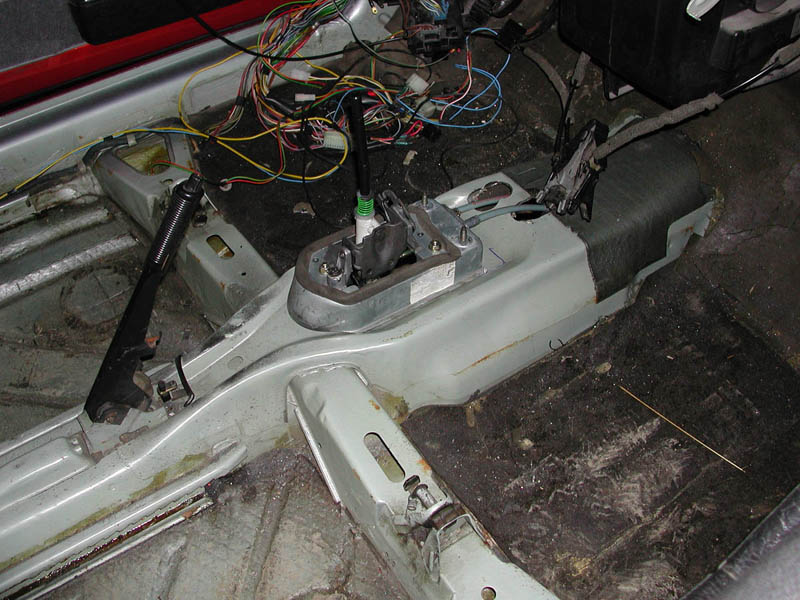
The 5-speed transmission (02J) is operated with a cable driven stick.
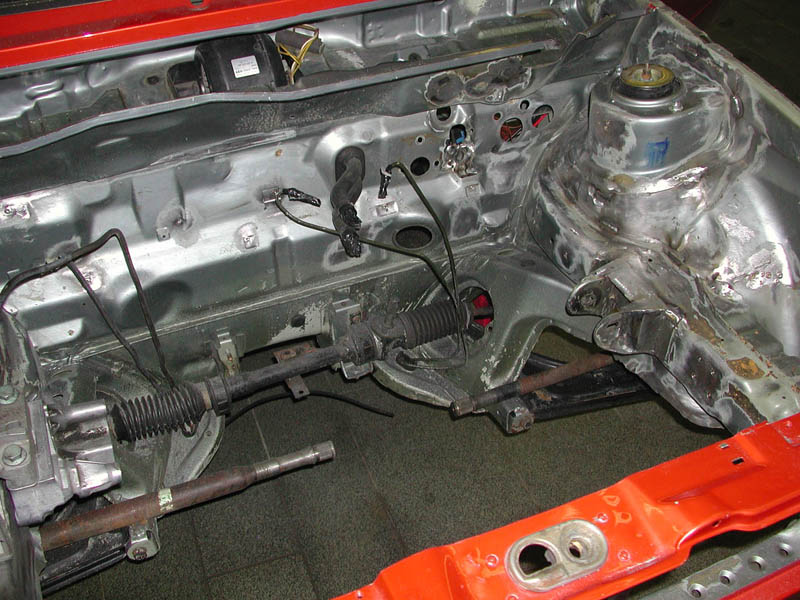
All the extra holes were filled and mounts removed.
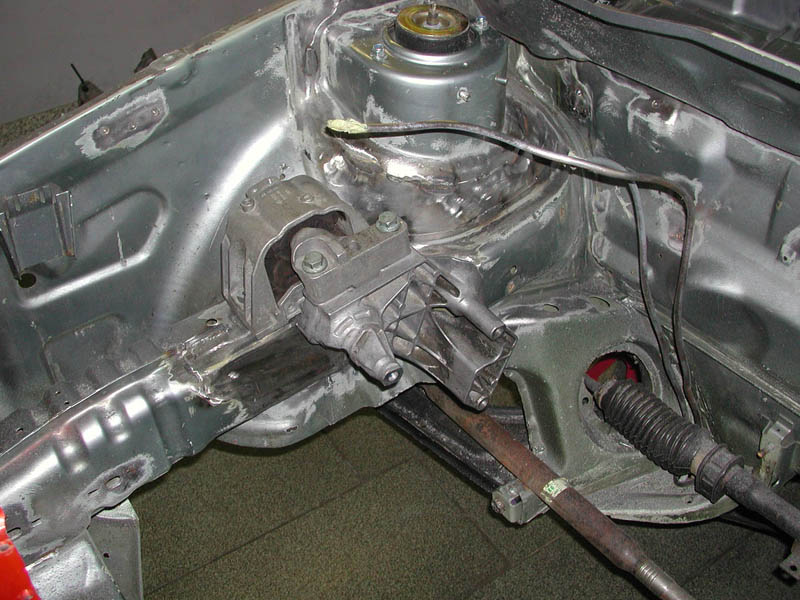
Golf 4 engine mount installed.
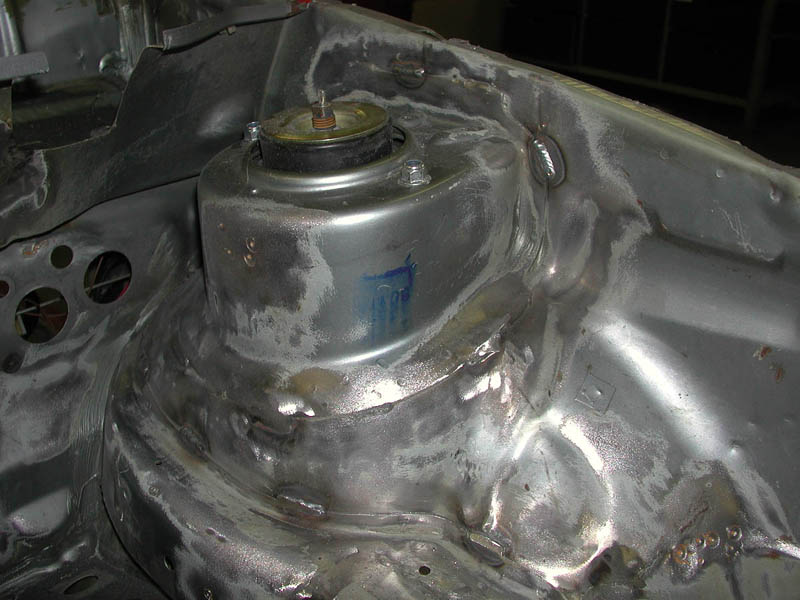
Some reinforcement welding was also done.
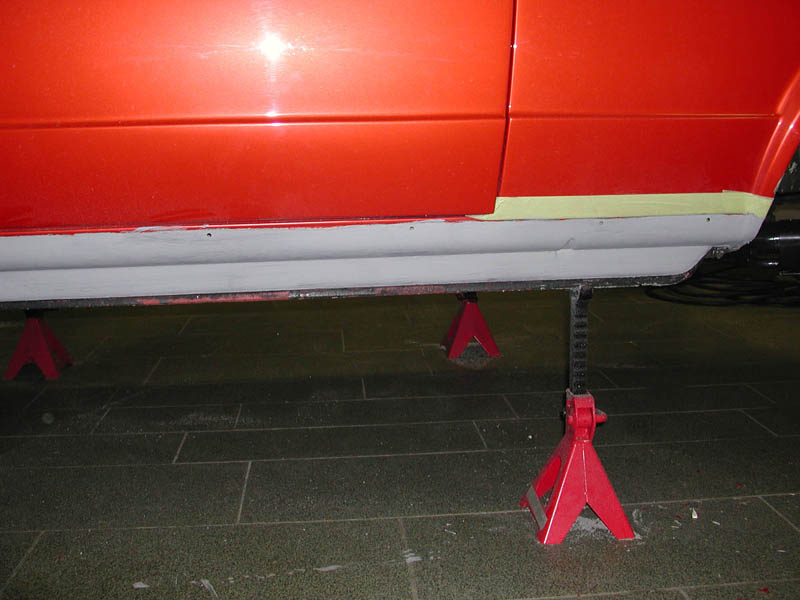
The skirts were cleaned from stone chip protector.
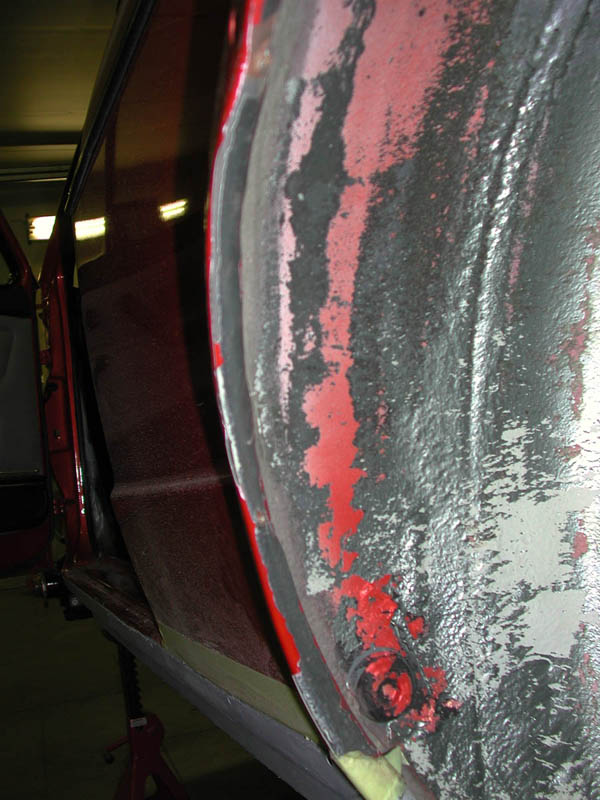
The wheel arches were rolled in.
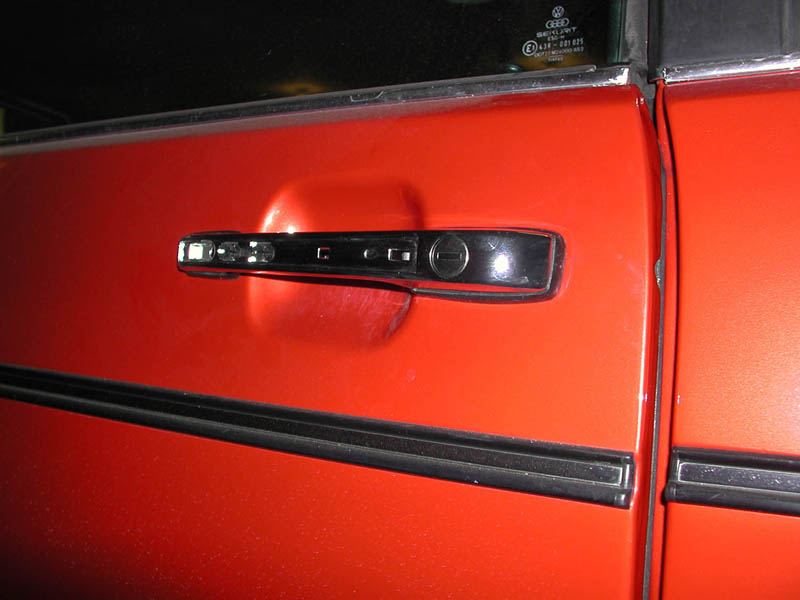
A must in every tuning-Volkswagen: Audi door handles.
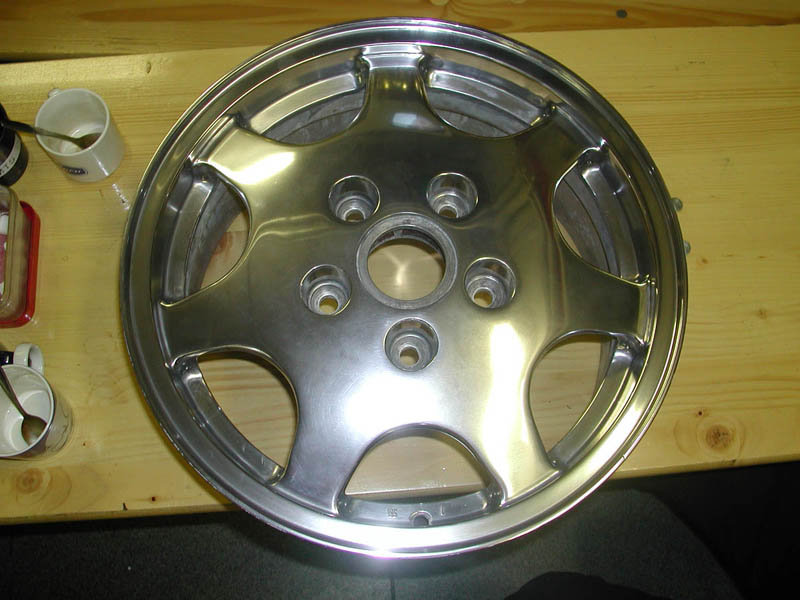
The wheels: Audi RS2 winter wheels, 7" x 16".
Suspension and brakes
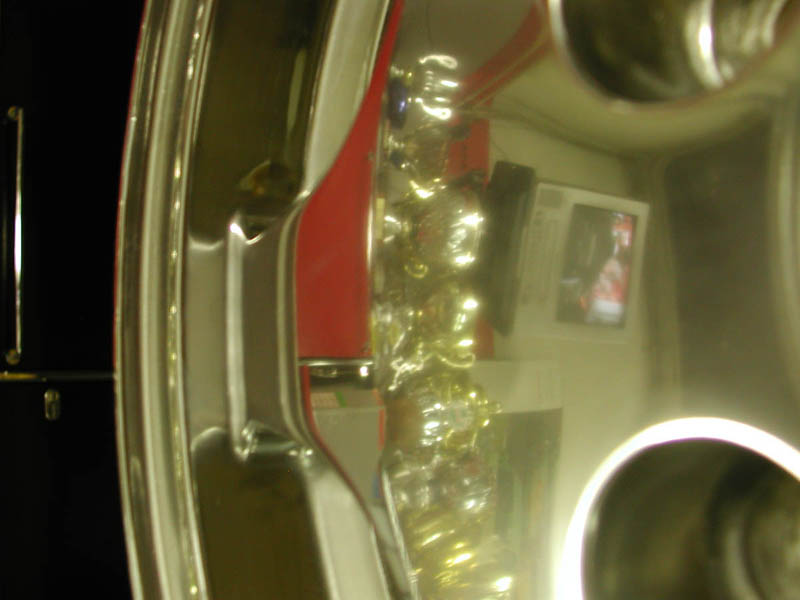
Some oxide was wiped out of the wheels.
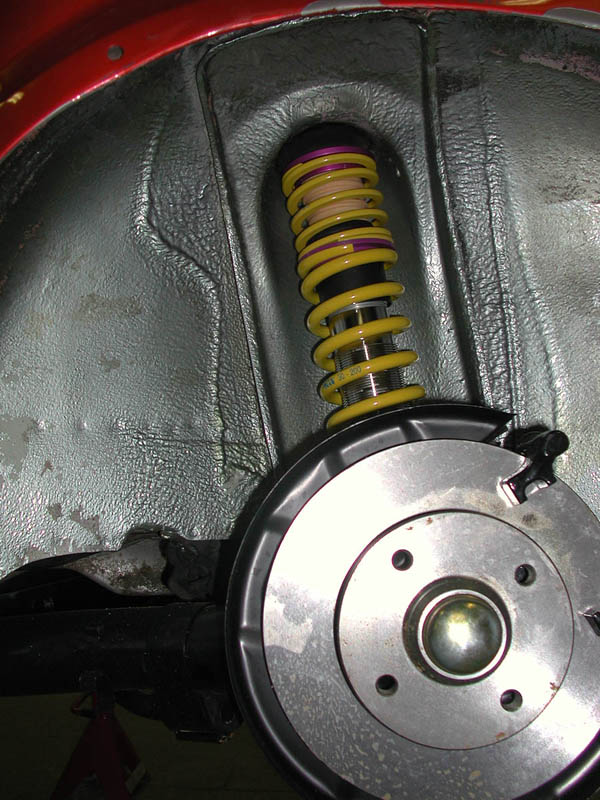
Rear brakes from VW Golf G60. The only easy modification in this project...
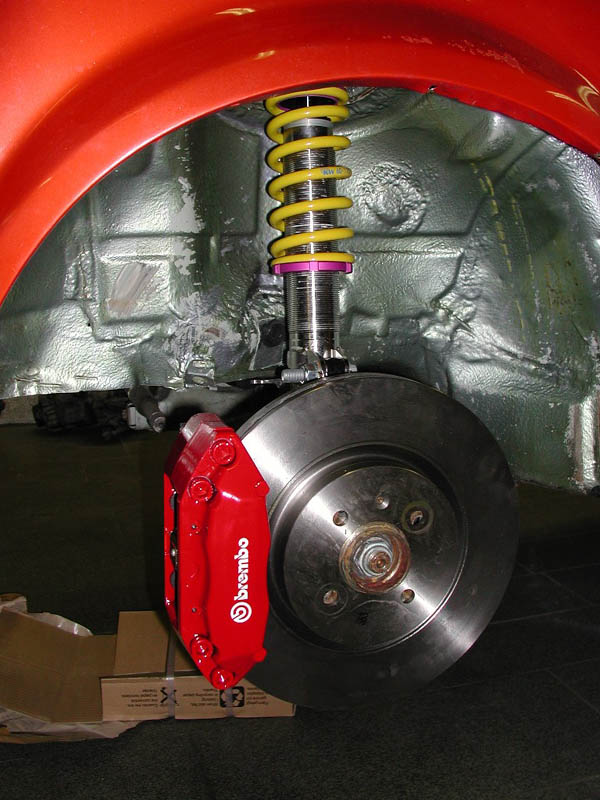
The front calibers are from Seat Ibiza.
The earlier budjet suspension was a disappointment, it was now replaced with a KW's Variante 3 suspension with adjustments to all possible directions.
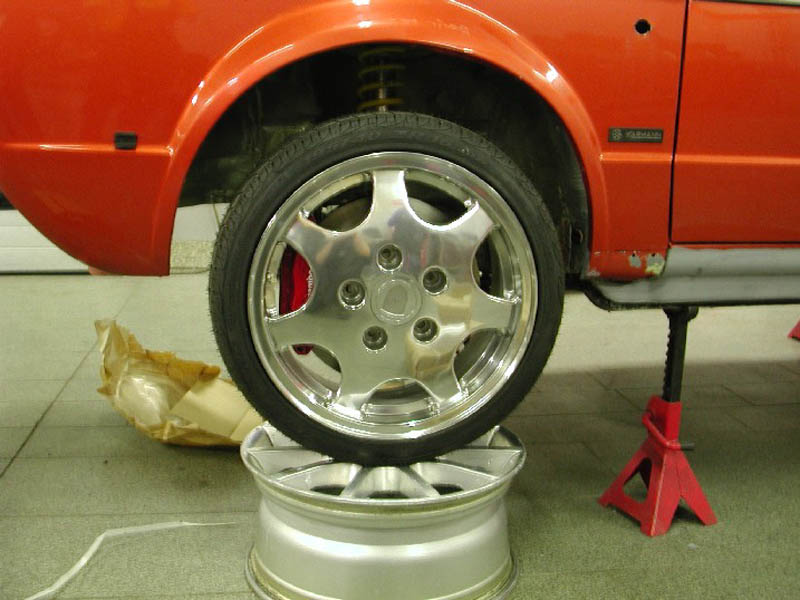
The caliber housings fit well inside the 16" wheels.
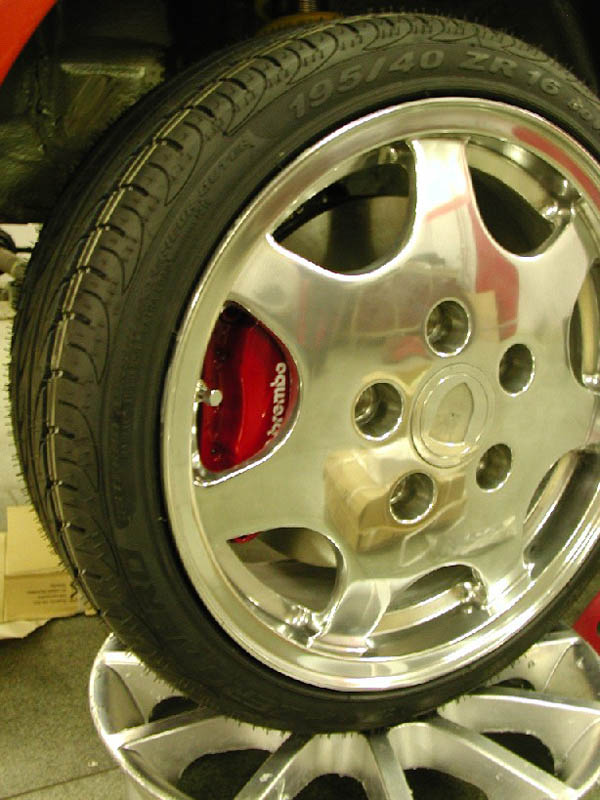
The tires: Pirelli P-Zero Nero, 195/40 R16.
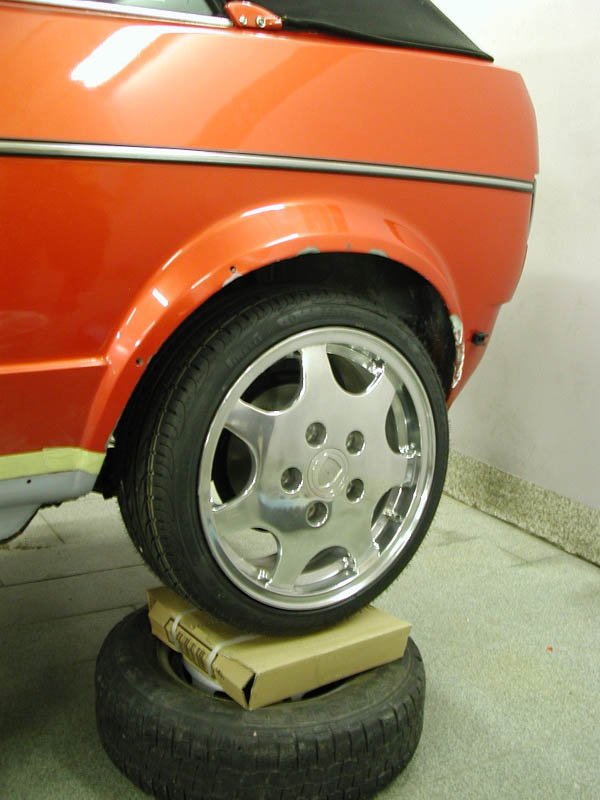
Fitting the rear wheels.
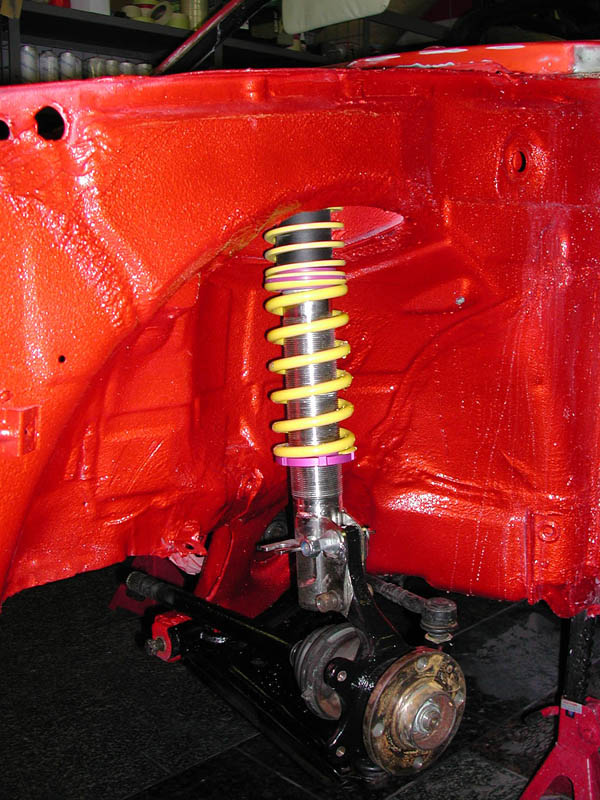
The wheel housings were washed, treated with stone chip and corrosion preventive coating and painted. All the axle parts were sandblasted and repainted.
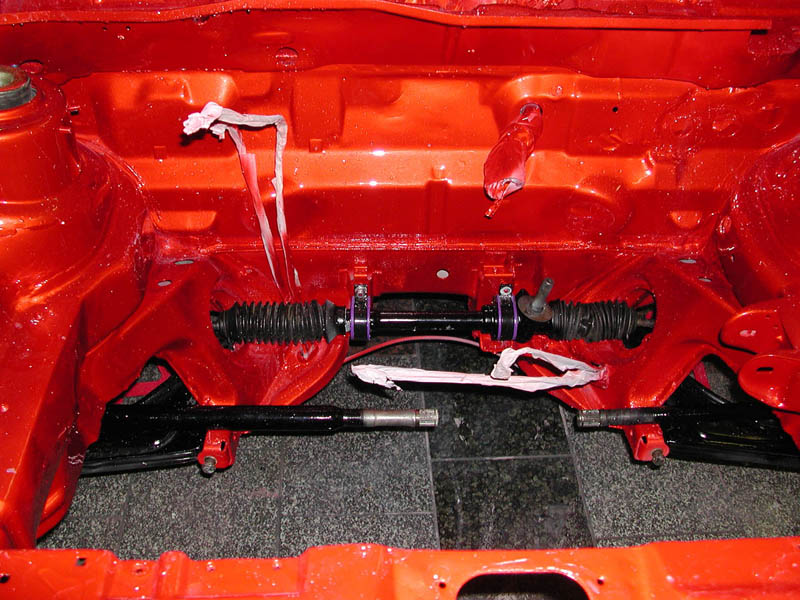
The engine room after paintjob.
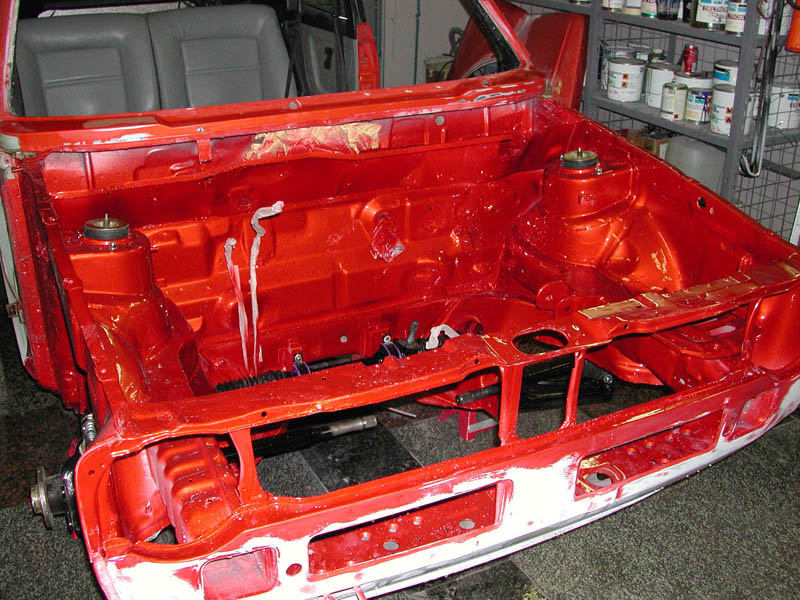
After painting the engine room, a decision was made to paint the whole car. The old paint was not so old, but it had some flaws.
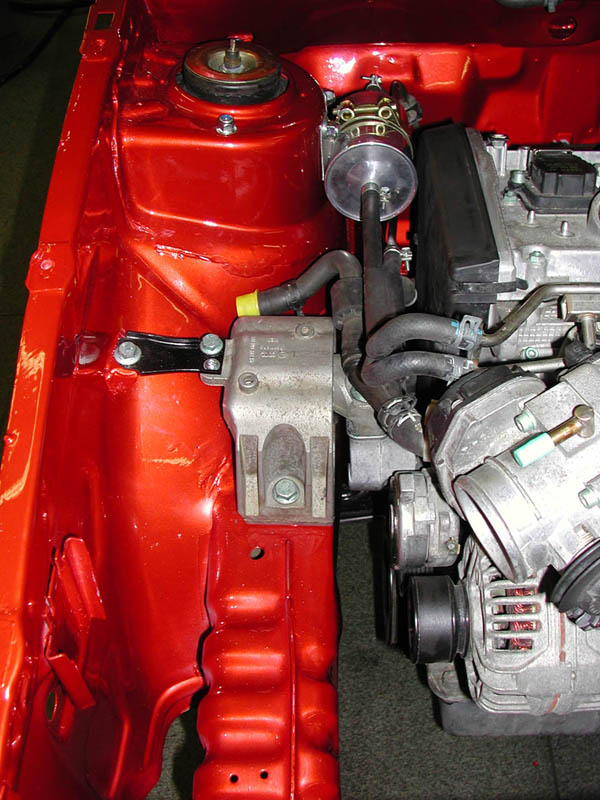
The right hand side engine mount fixed.
The wiring
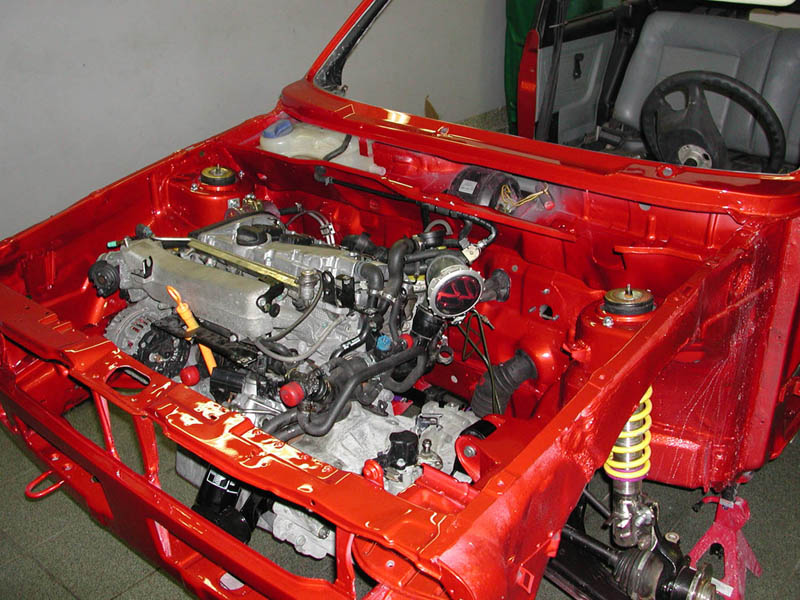
First time the engine is sitting there without extra wooden supports and jacks.
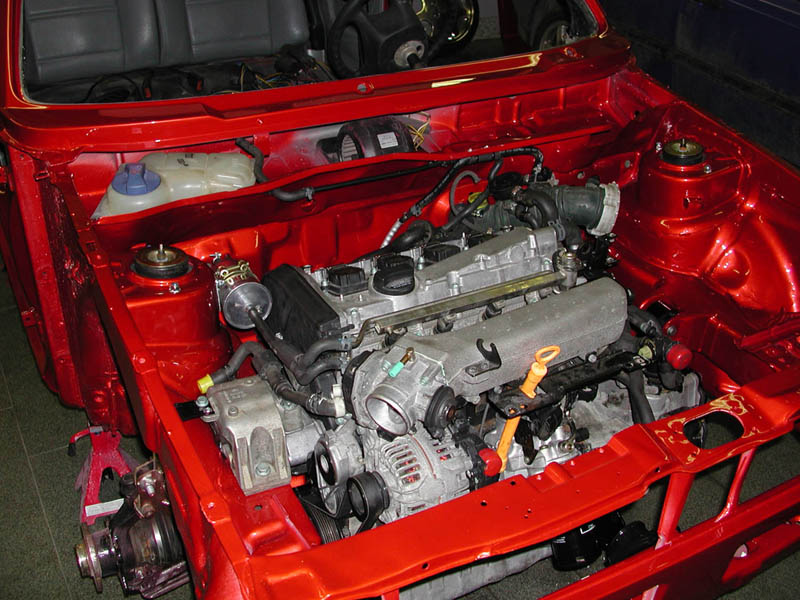
The only place to fit the expansion tank of water cooling was on top of the cross panel.
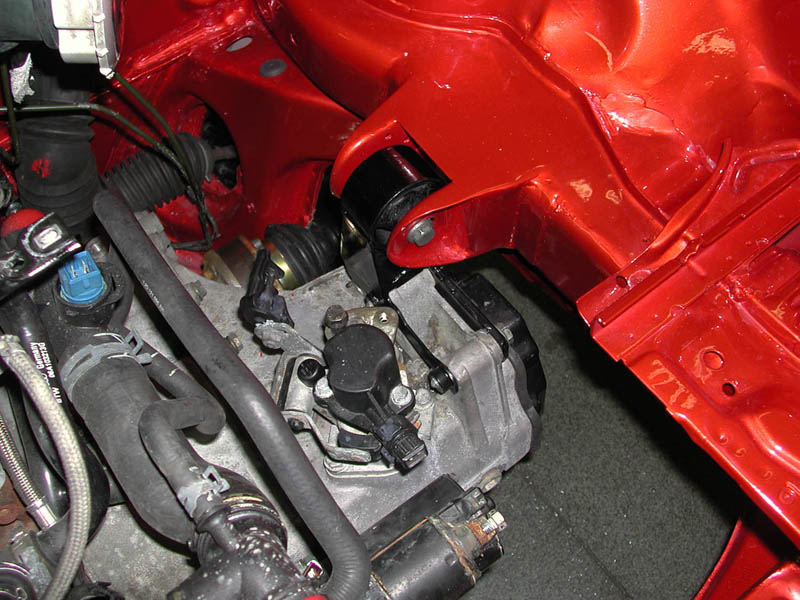
The transmission mount.
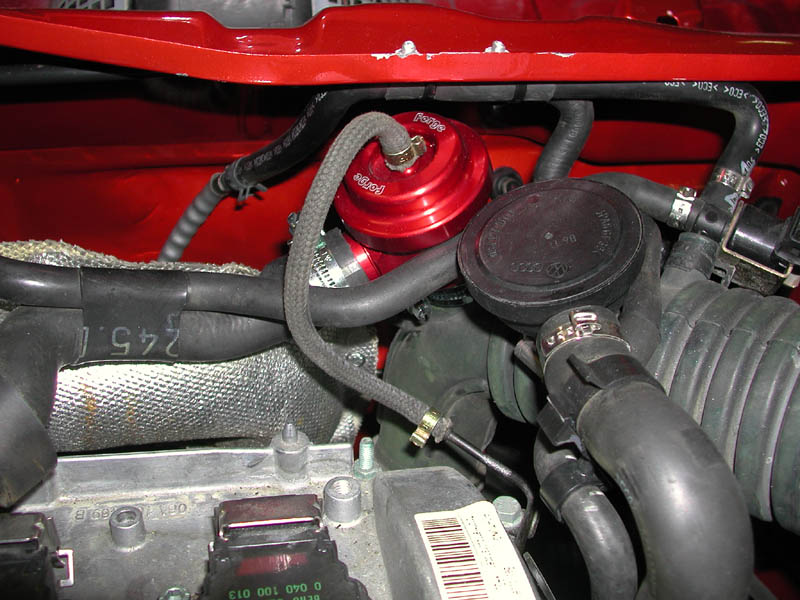
Forge DVR by-pass valve.
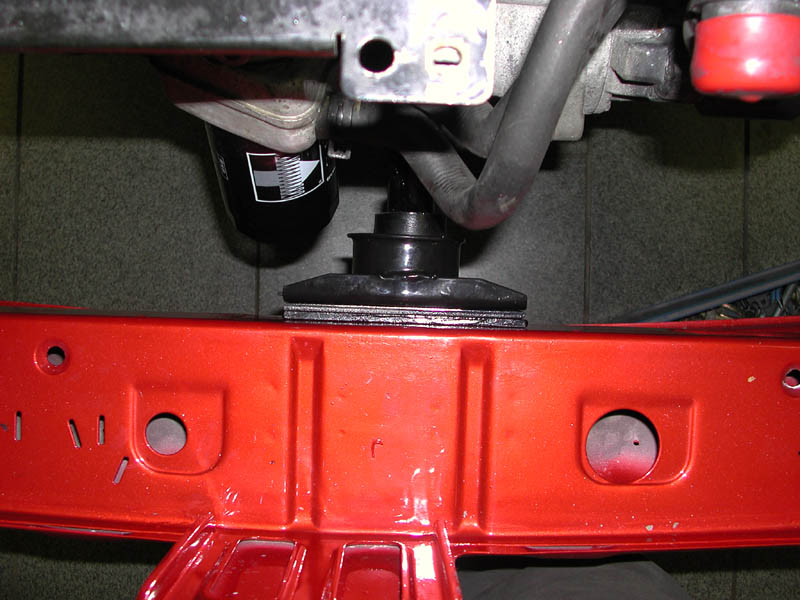
A little shim under the front mount.
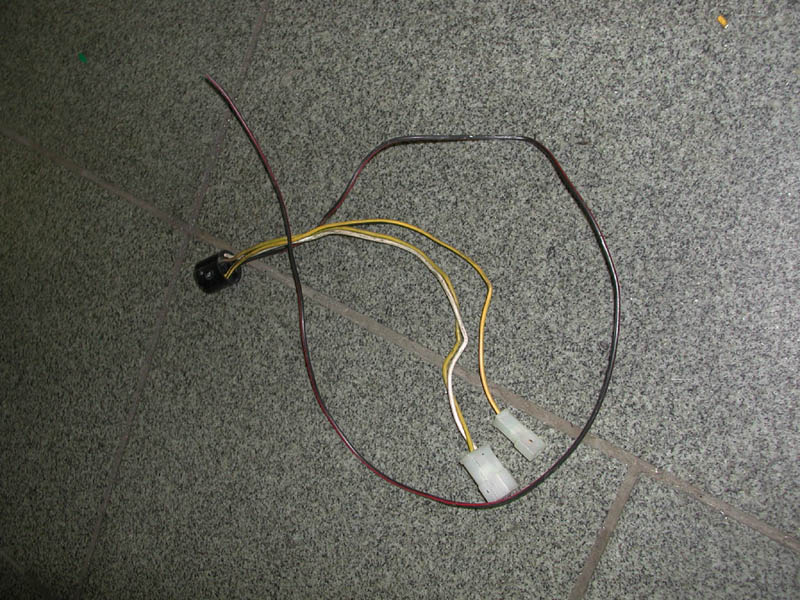
All that was utilized from the original wiring loom of the Cabrio.
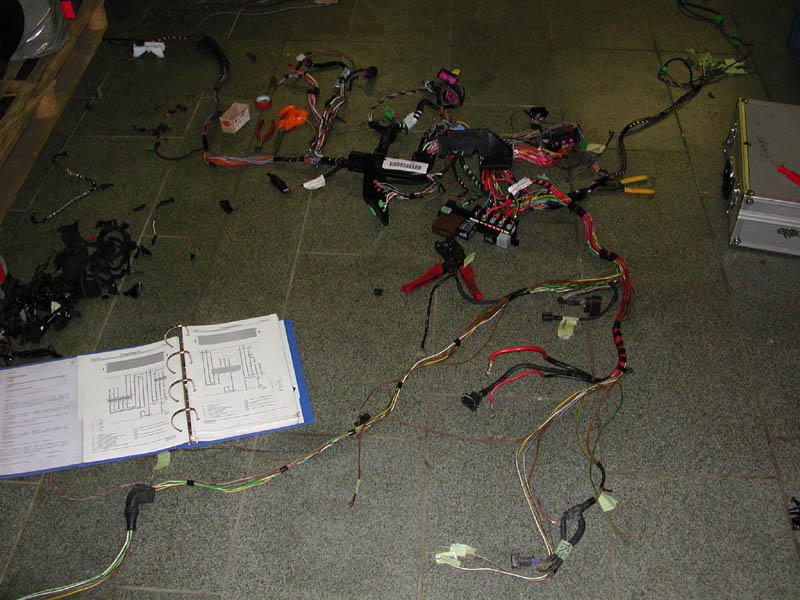
Working with Golf 4 wiring looms... big thanks to Tero.
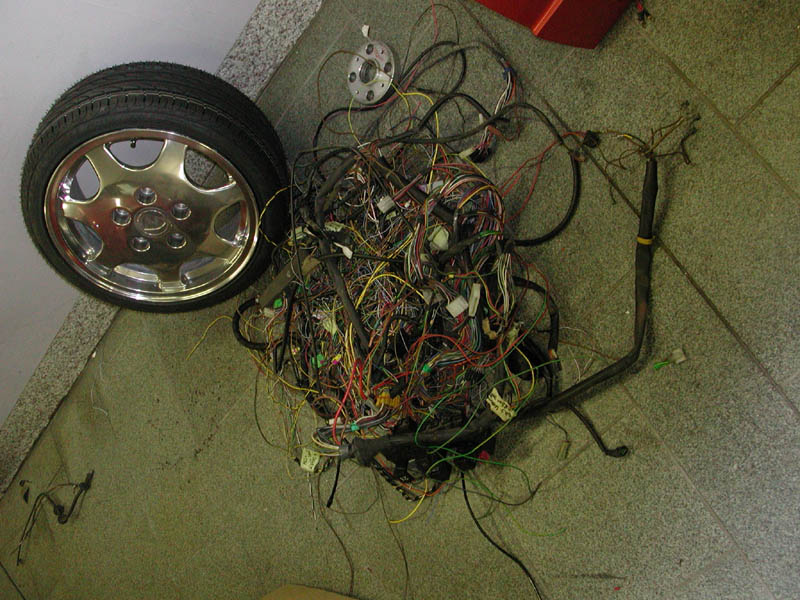
Some excess wiring.
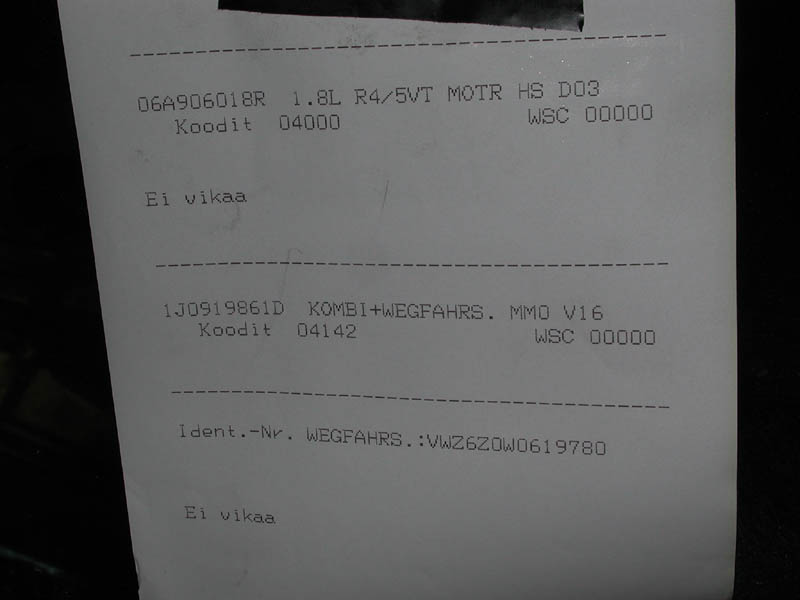
Although all that wiring was removed, the diagnostic system says after turning on the ignition: no fault.
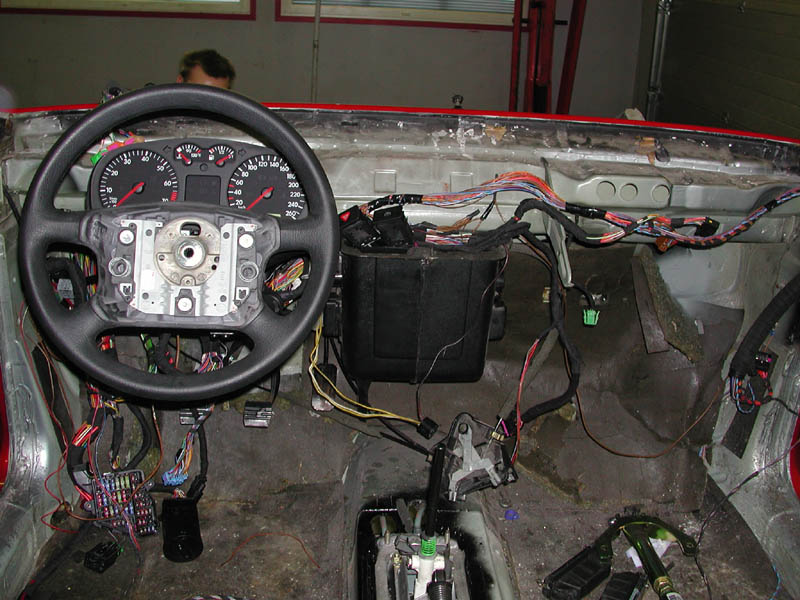
The wiring loom of the dashboard in final test before taping it all back together. Because of the immobilizer the instruments cluster and the ignition/starter switch lock had to be taken from the Golf GTI.
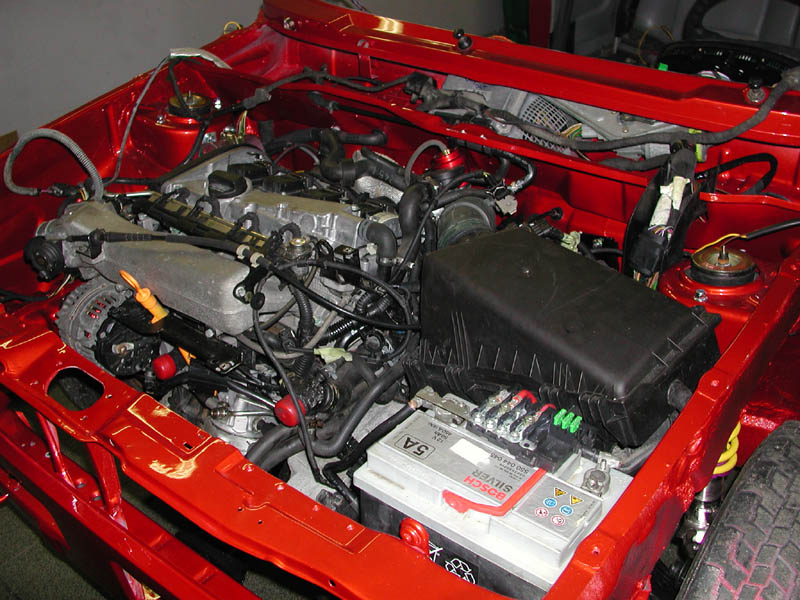
Johtosarjan koeponnistus konehuoneen puolelta.
FMIC and the exhaust
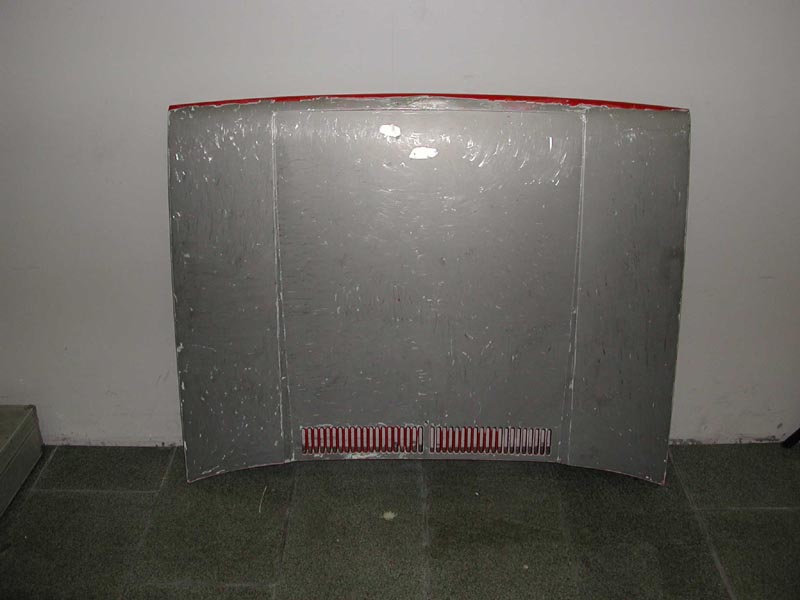
The hood had at least 6 layers of old paint, so all the paint was removed with hot air and putty knife.
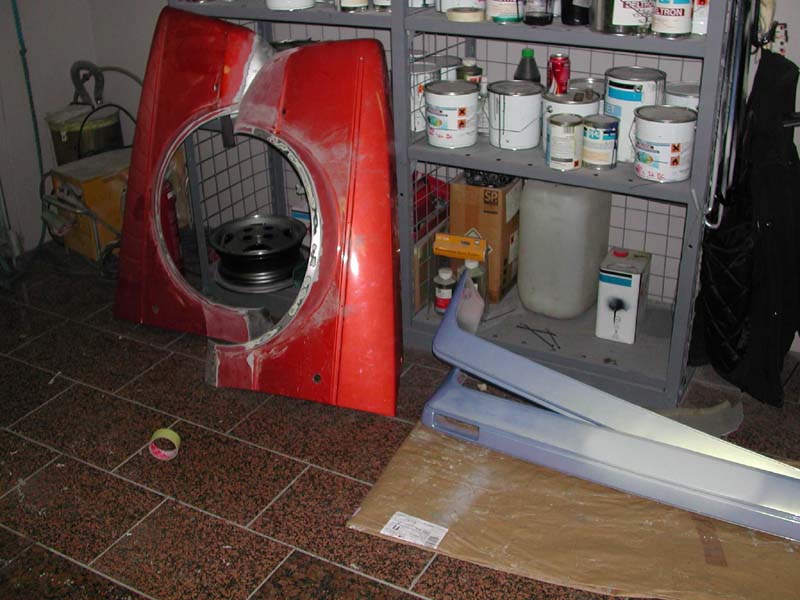
Front fender aches were finilized with a rubber hammer. Some earlier owner had already smoothed the bumpers... only the colour was a little bit 'individual'.
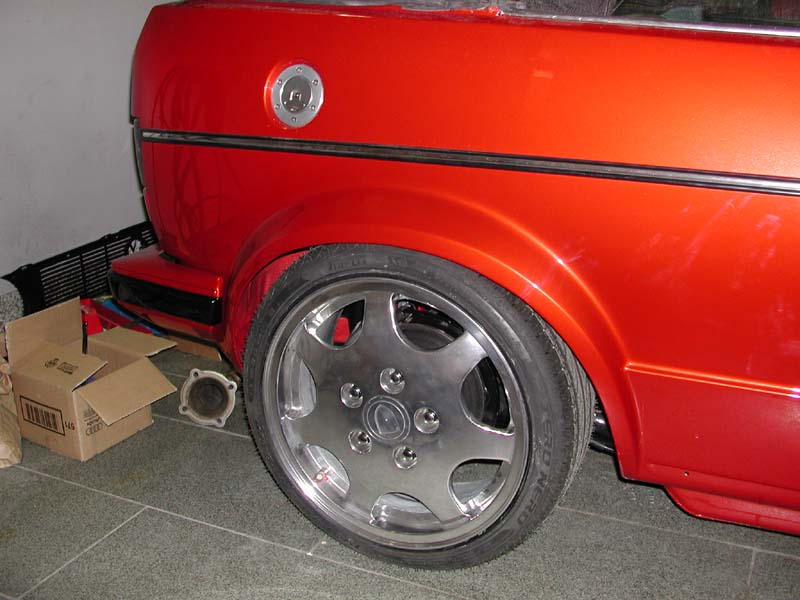
While the Autoracing's fuel filler flap was installed, the only rusty part of the car, the fuel filler pipe, was fixed too.
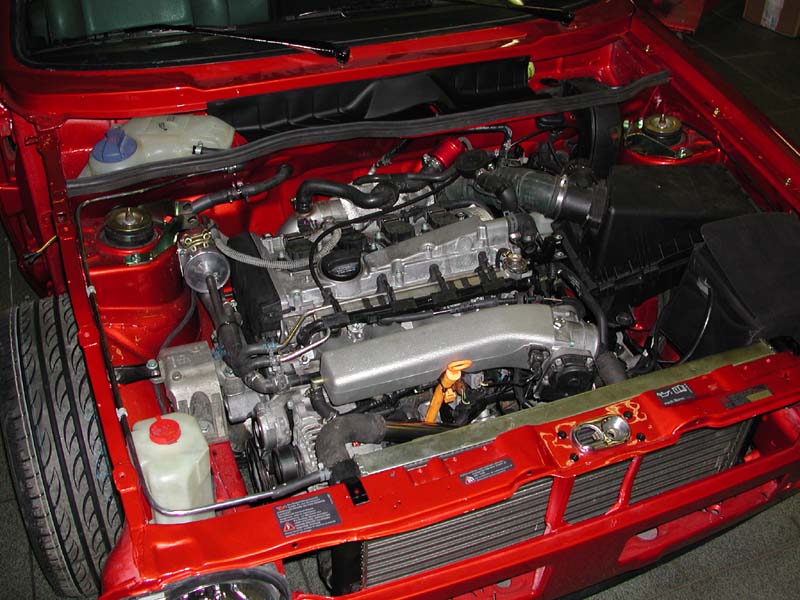
Because the air filter is on the driver's side, Audi S3 intake manifold was installed to make it easier to make the intercooler pipes.
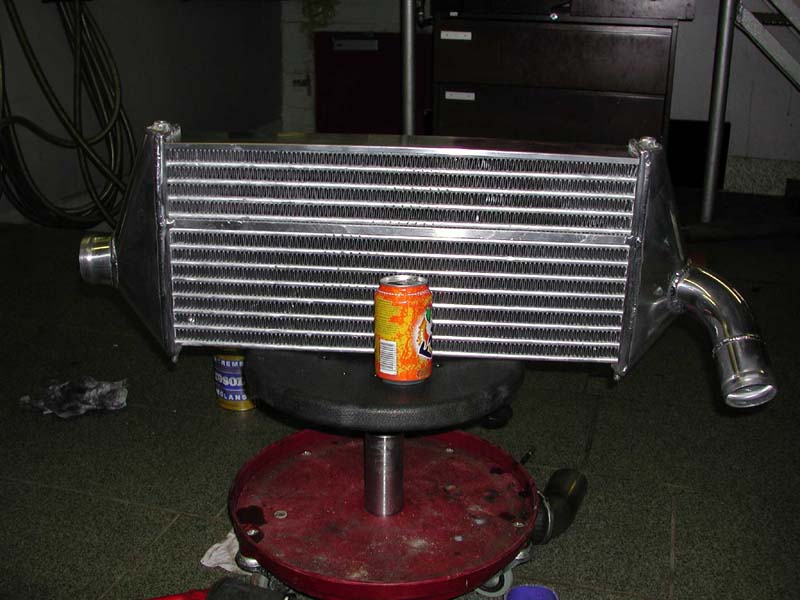
The intercooler size is 540 x 250 x 60 mm, made by Pro-Mo.
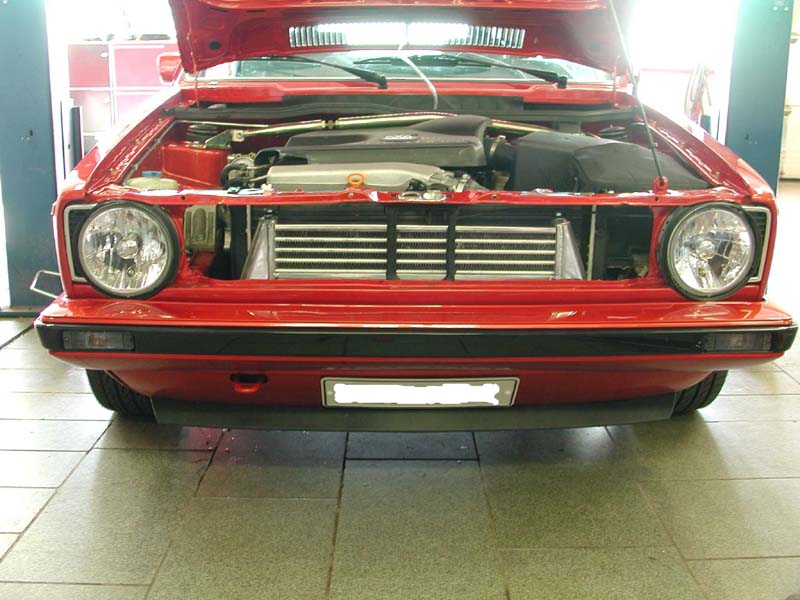
The intercooler just fits in front of the radiator and behind the front grille, so the original look in the front can be maintained. However, most of the intercooler is behind the bumper, so the cooling power might not be the best possible.
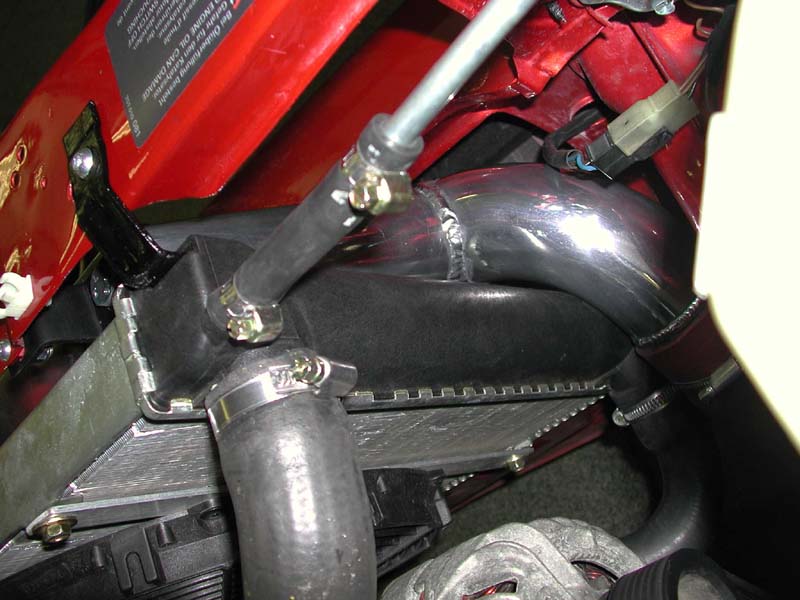
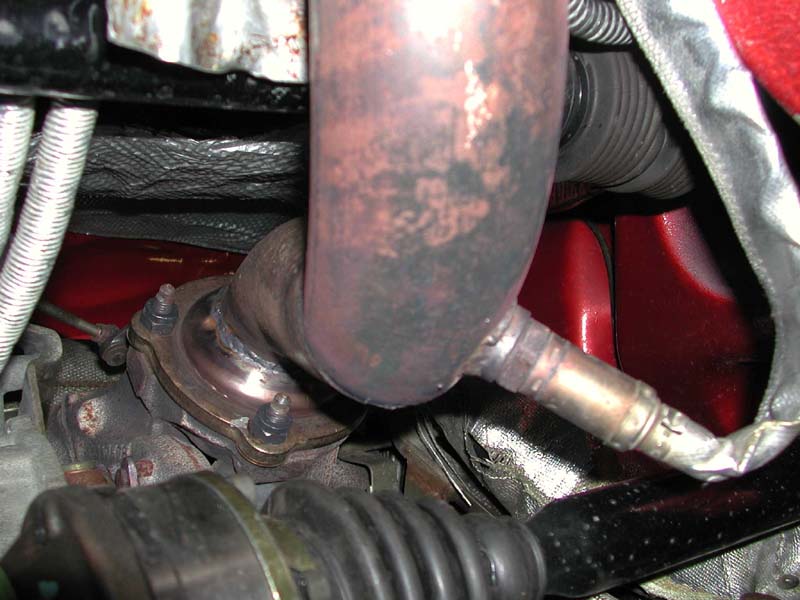
The beginning of the exhaust pipe is self made, with a diameter of 60mm. The catalyst is not needed in such an old car. The down pipe is modified from a used Golf 4 Kit Car rallye car exhaust pipe.
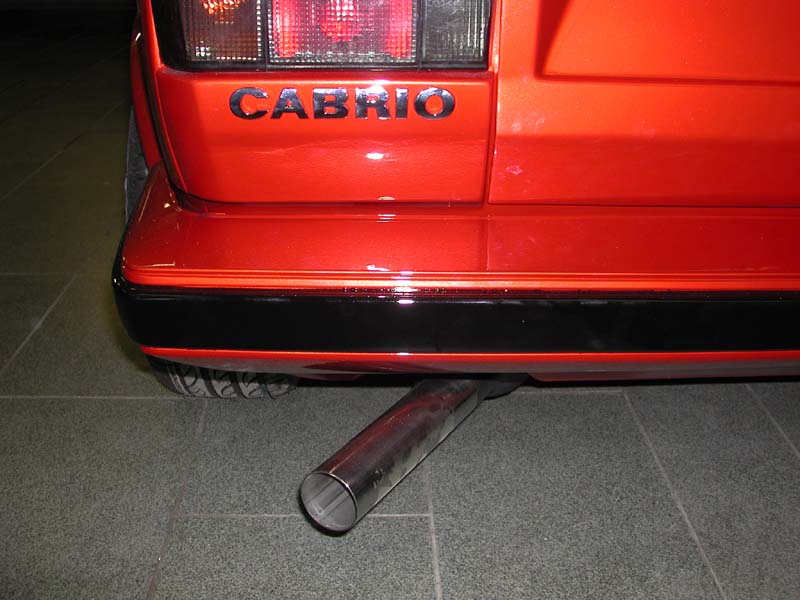
The rest of the exhaust pipe is Supersprint's N-class racing pipe with one silencer.
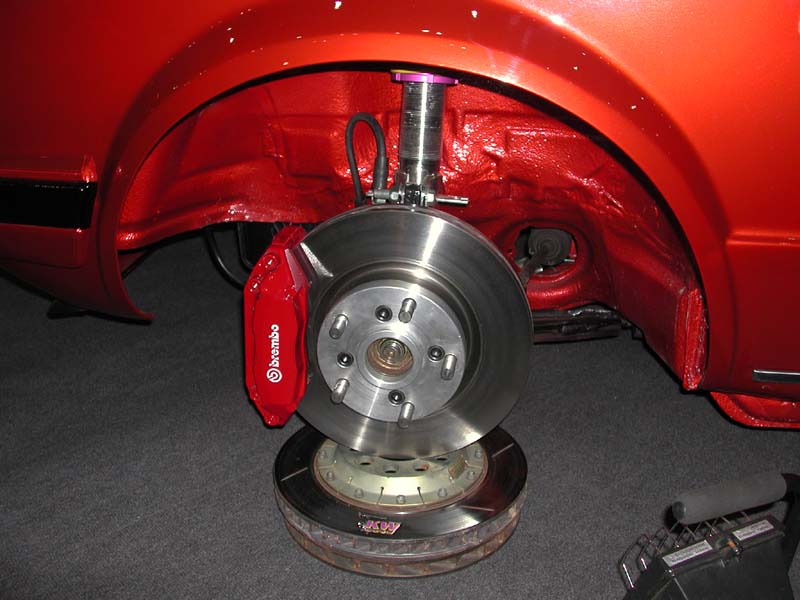
Tommi´s Billet made the bolt pattern adapters.
Final finetune
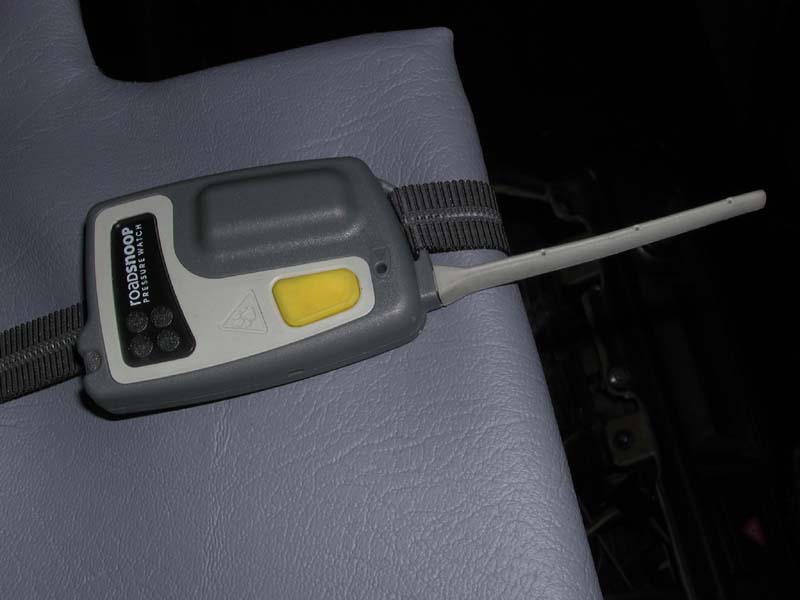
A Road Snoop pressure watch sensors were installed inside the tires. The receiver in the image will alert if the pressure in the tire falls over 10%. A nice addition especially in the low profile tires where it's difficult to see the drop of pressure.
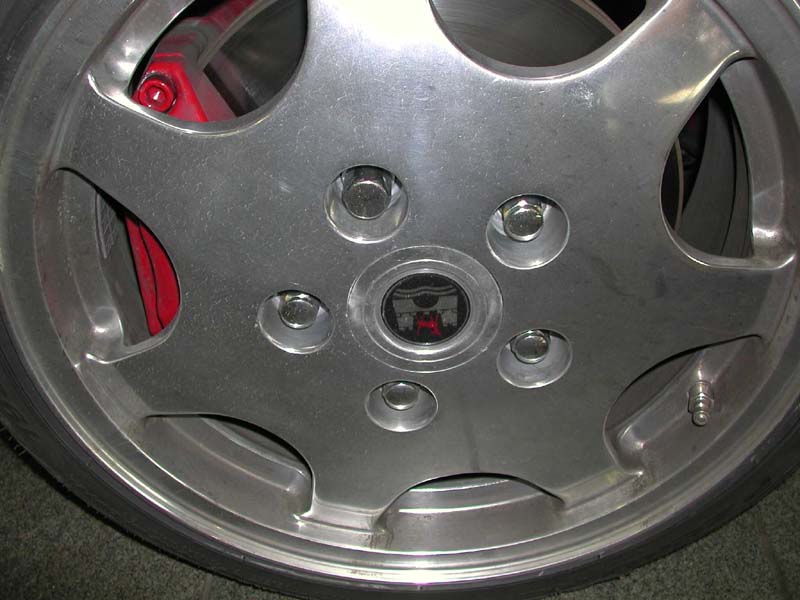
The Stuttgart armorial was replaced with a Wolfsburg one... after all this ain't no Porsche.
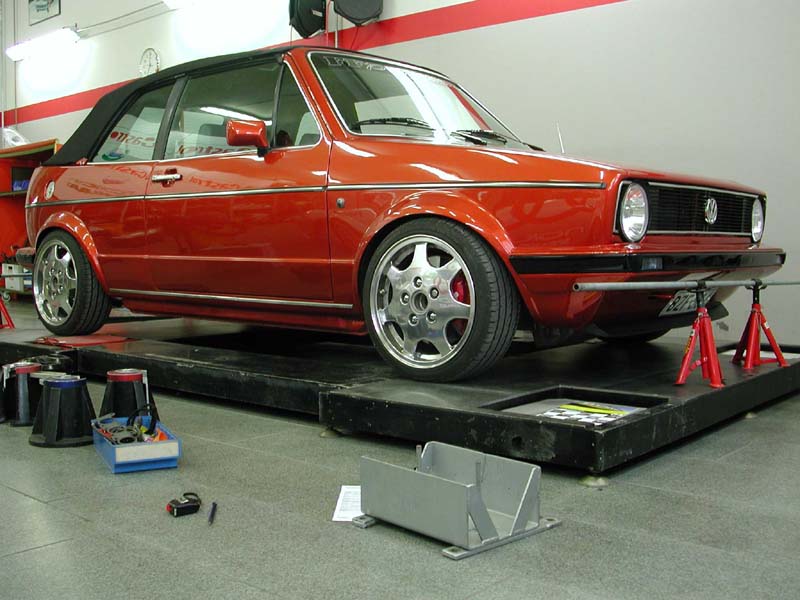
The car in the setup table for the suspension setup. First the weight of each corner was set with the scales, then the height (the Finnish law says that the height of the lowest part of the body has to be at least 8cm from the ground) and finally the steering angles were adjusted.
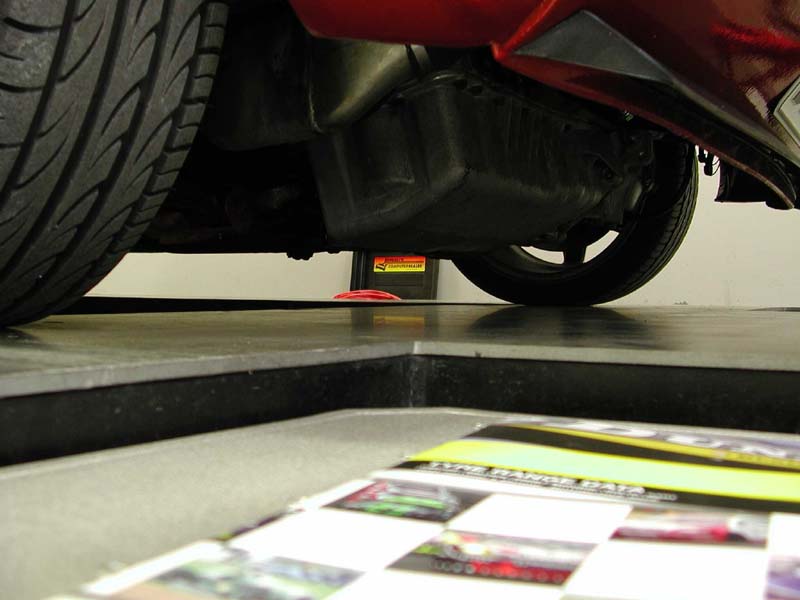
The lowest part of the car is the oil sump.
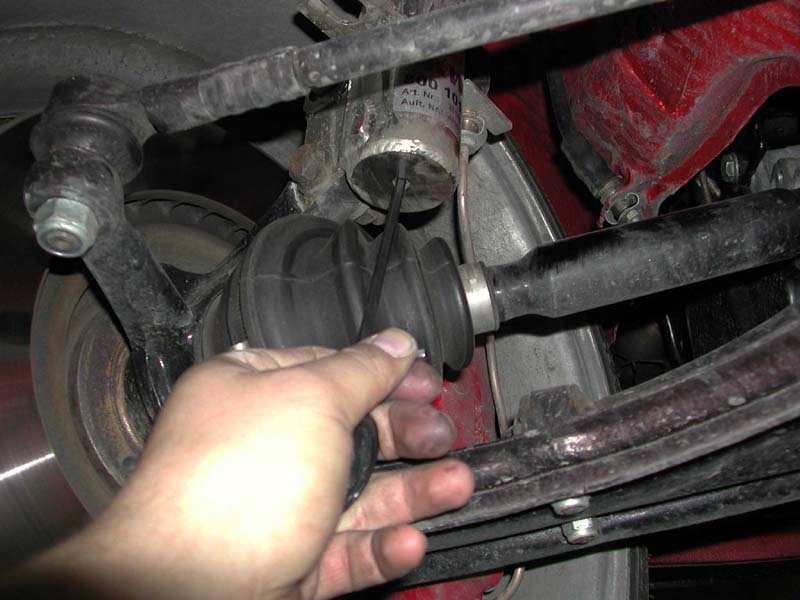
KW Variante 3 suspension has the adjustment for both compression and rebound. With these adjustments it was possible to get the suspension surprisingly comfortable although it is still really progressively hard. The wheels don't scrape the arches even with heavy load.
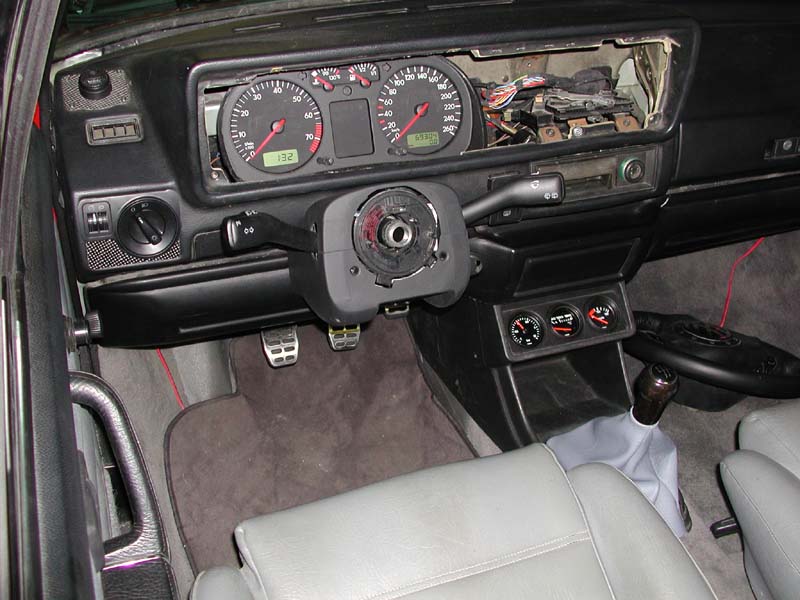
Golf 4 instruments cluster and all the switches were installed to the original dashboard. The current steering wheel is from Audi S6 Tiptronic, but it will propably be replaced with the VW's 3-spoke leather wheel.
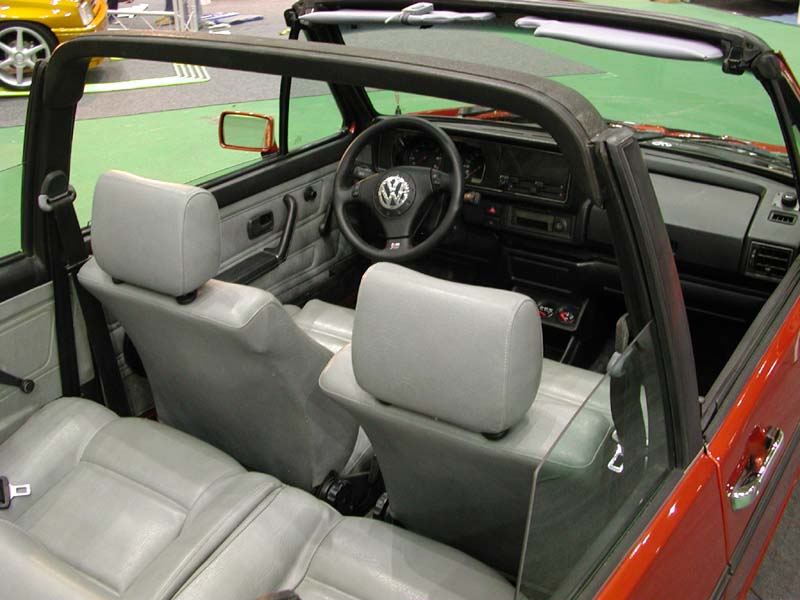
The rest of the interiour is the gray "leather" interiour of the Cabriolet.
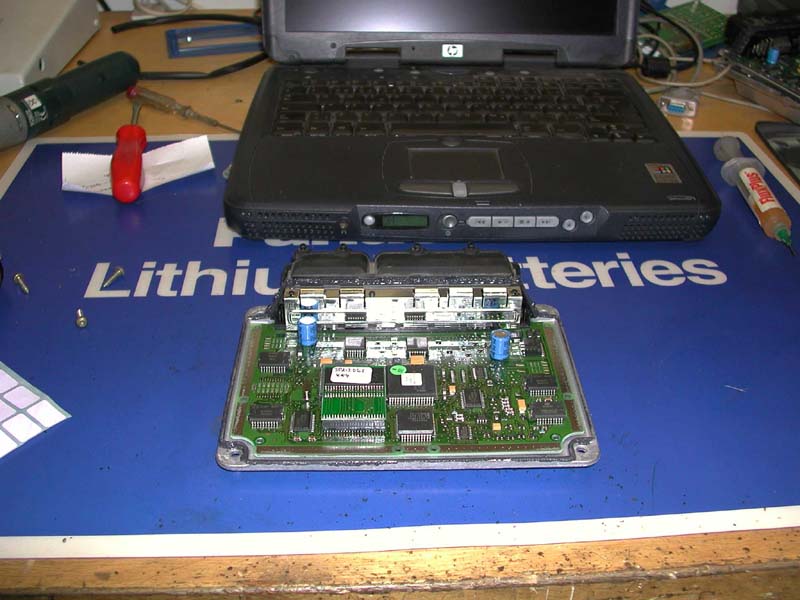
The ECU was modified to serve the engine perfectly (still remembering the limitations of the Finnish law). Now the engine output is pretty nice 98kW instead of the original 66kW.
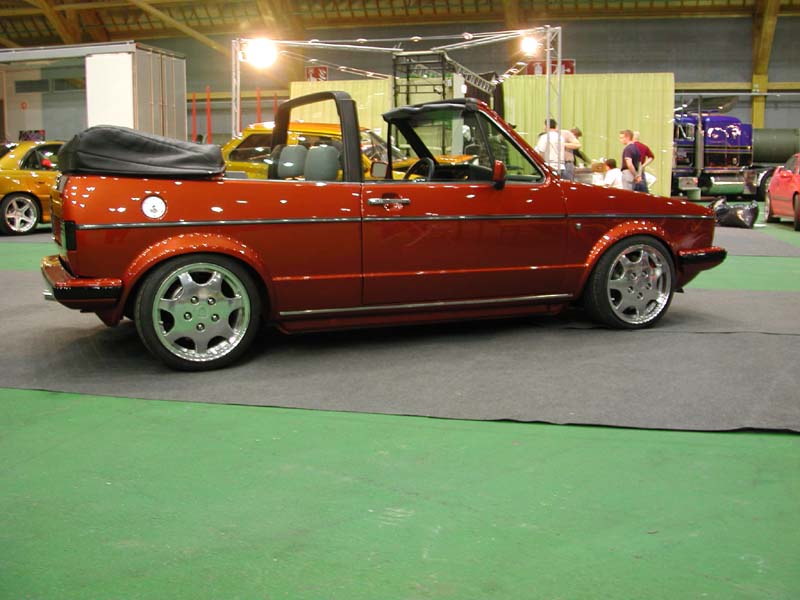
Finally thanks to all who were helping with this project, especially:[br] + LMS, especially Mikko (painting) and Hanski (TIG welding)[br] + Chicken Shit Racing
Most of all, thanks to Tero, who's help was priceless, especially before the show in Tampere.
Repairing the roof - part 1
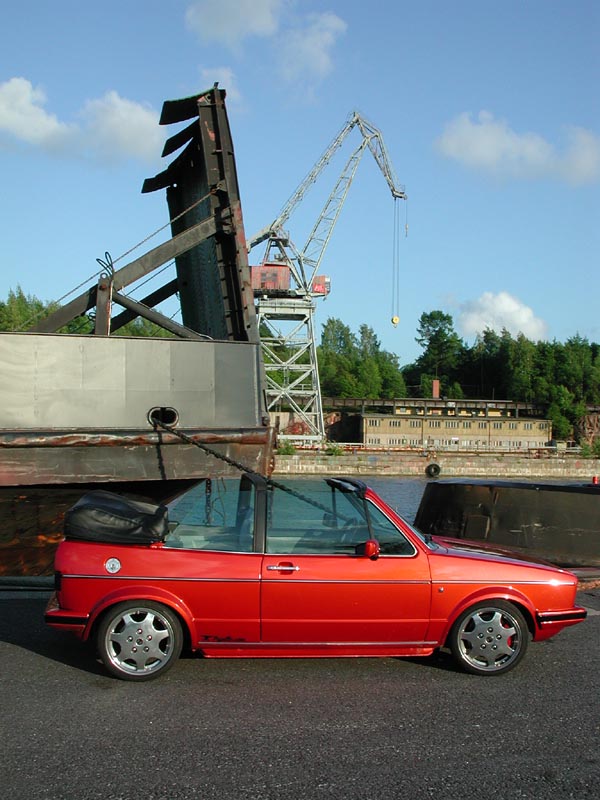
Sorry, not further translated yet :(
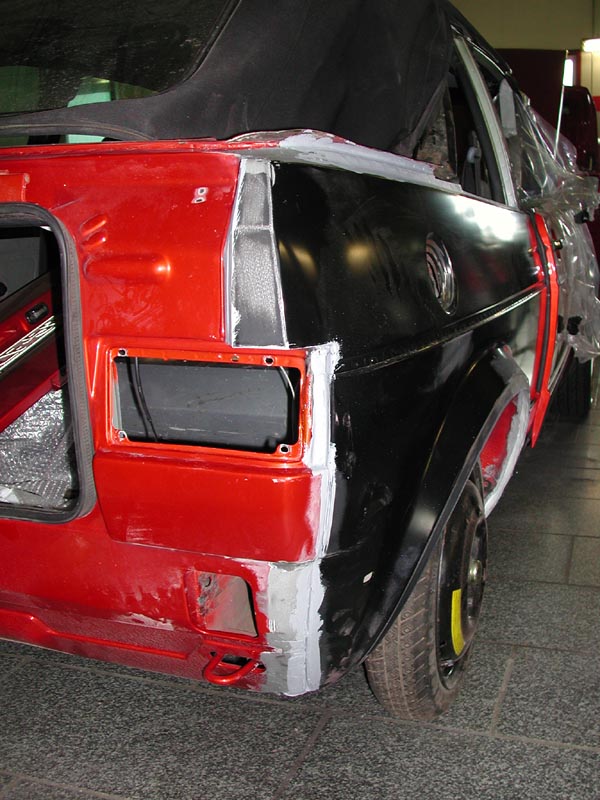
We briefly visited the workshop to repair sides battered on the road and occasionally the sump. Mechanical trouble was remarkably absent.
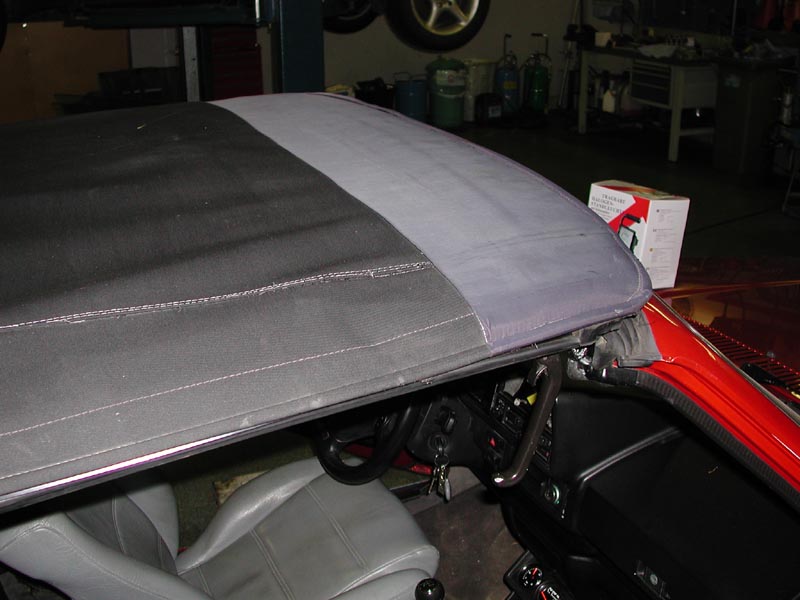
Ten thousand kilometres later the car returned to Pajalle to continue the work left unfinished the previous winter. A sound roof covering had already been planned a year earlier, but a little prioritising of hobby funds postponed it to this garage season. The old fabric had been slashed during the previous owner's time and its front section repaired. Dopi at MDComprex supplied the new covering in August, but inspiration to fit it has been slow to arrive.
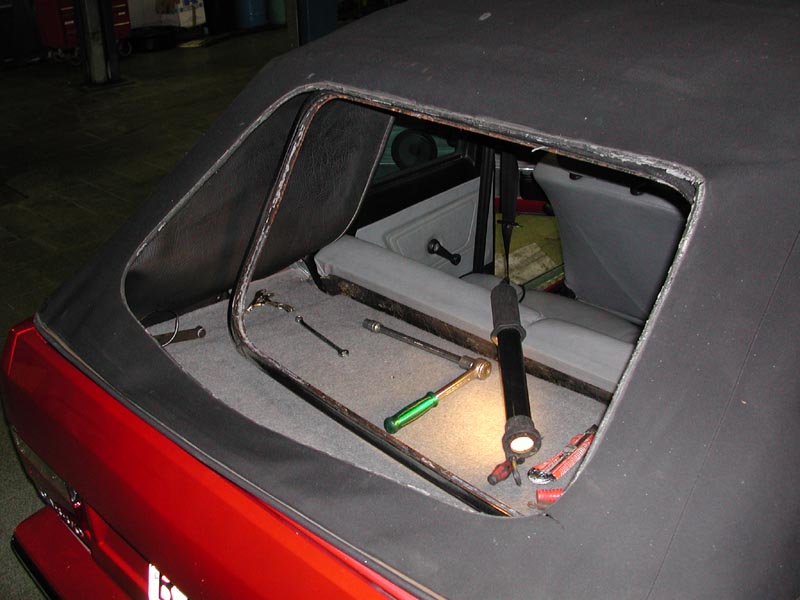
Removing the roof covering begins with taking out the rear window and detaching the fabric from its frame. The rear window is ordinary rubber-mounted glass in a metal frame.
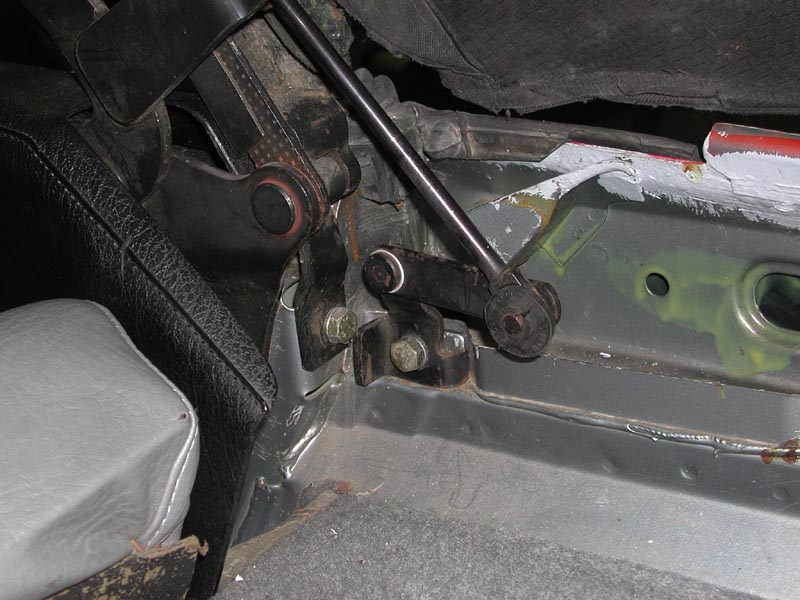
Detach the lower lining sections—the inner 'rear-pillar' trim—from the clips at the top of the boot. This gives access to the rear fabric tensioning cable near the roof hinge. We have already removed the cable in the photo to save time.
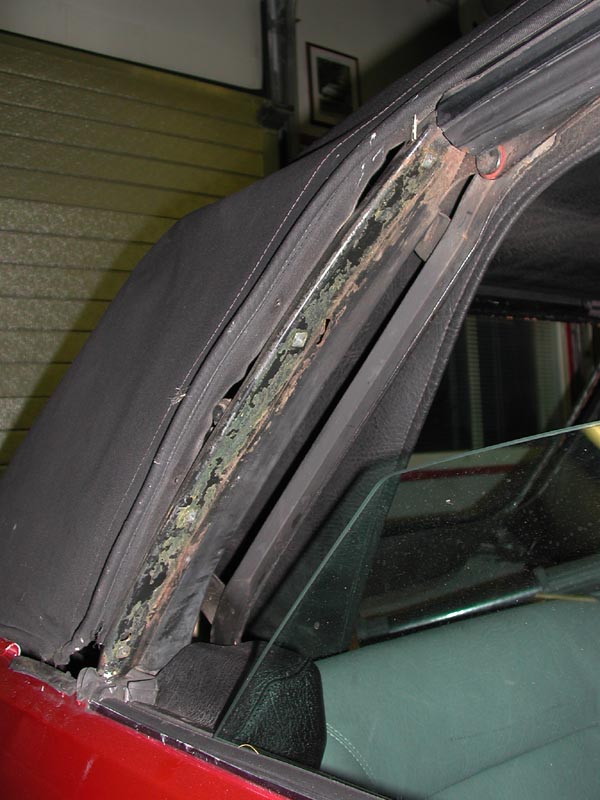
Remove the side-window seals carefully, as they are probably rather brittle, and unscrew the metal strips underneath from the roof mechanism. Release the tensioning cables along the edges at their front ends. Both cables on my car were broken.
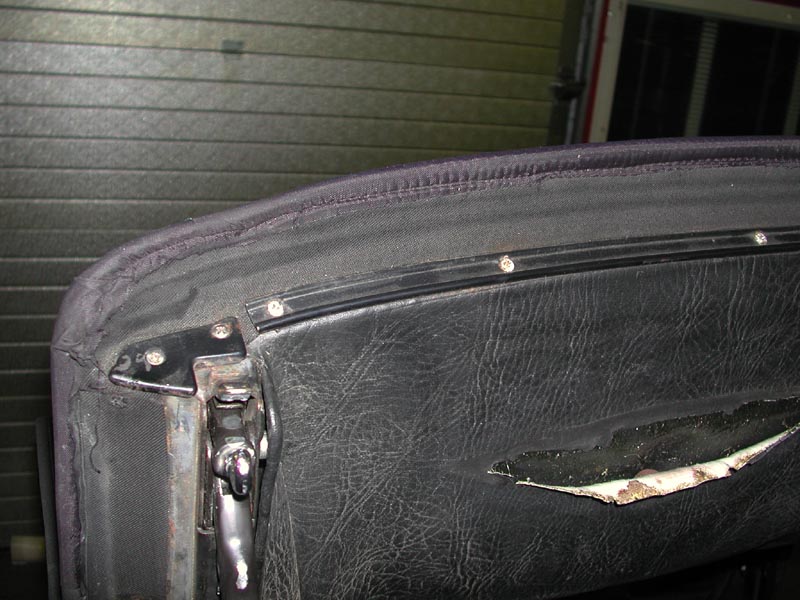
Unscrew the long front strip and corner brackets, then remove the fabric from the frame. This covering was not original and had been glued very firmly to the frame beneath the strips.
Repairing the roof - part 2
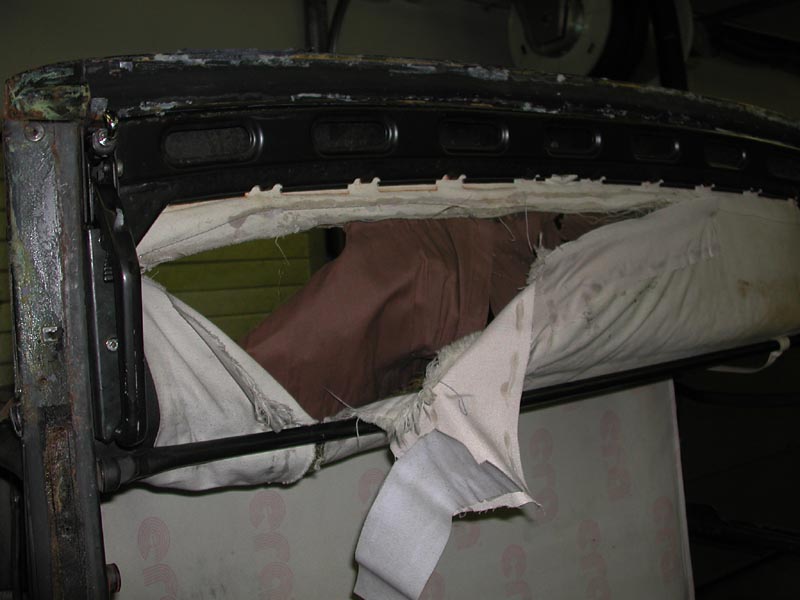
The intruder had also damaged the padding and insulation between the inner and outer layers. Luckily Dopi supplies those too.
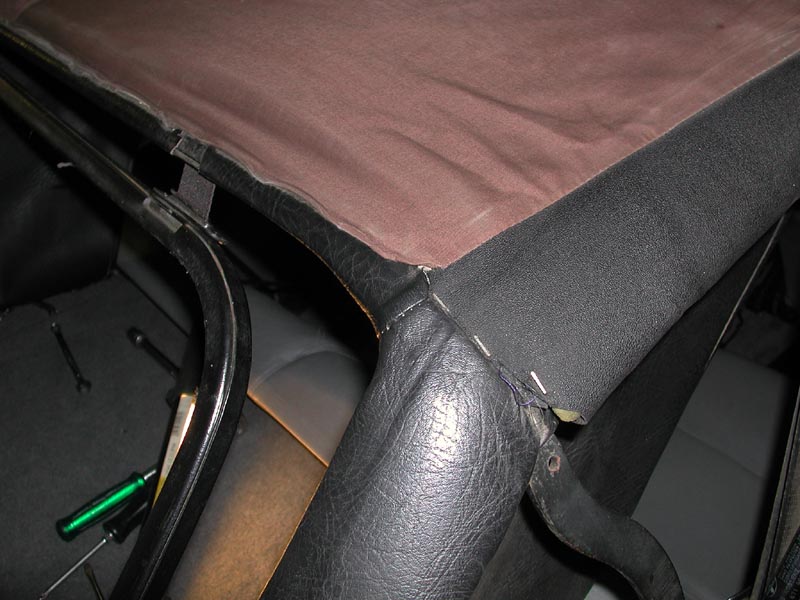
The insulation is firmly stapled to the main bow above the rear window.
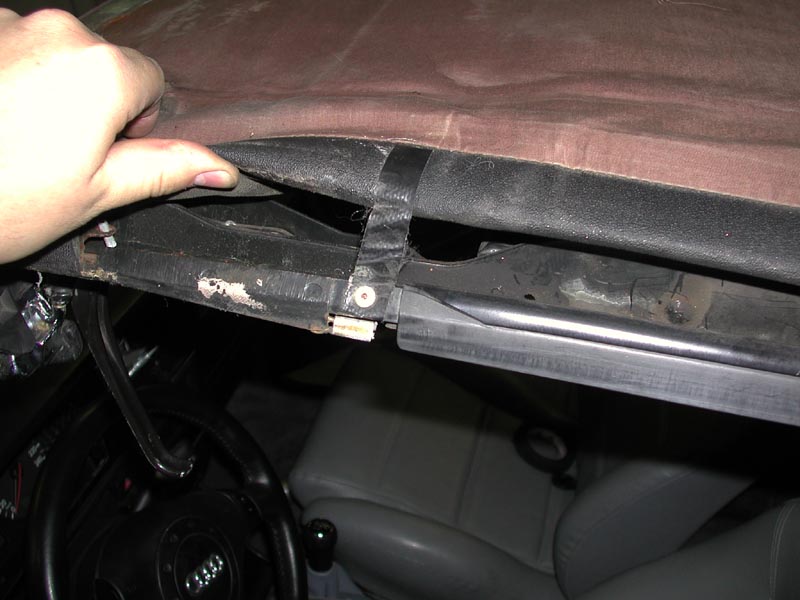
At the sides it is attached to the bow with pop rivets...
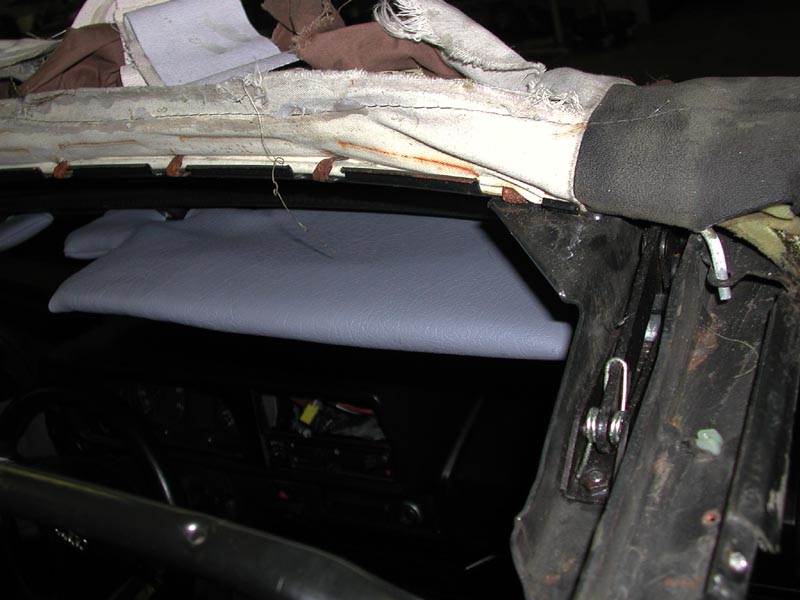
...and at the front with metal tabs.
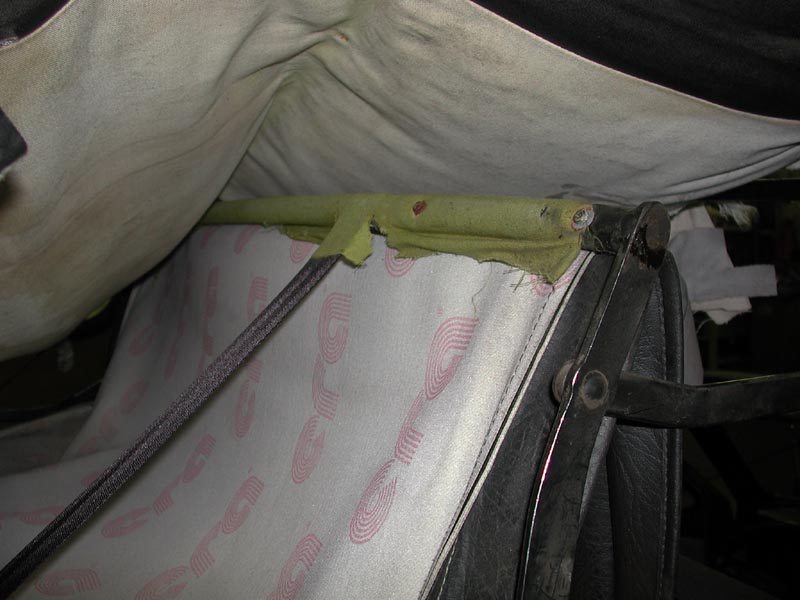
The headlining is glued to the roof bows via fabric strips. Those strips had completely perished, so it was amazing that the vinyl hadn't dropped into our laps while cruising during the summer.
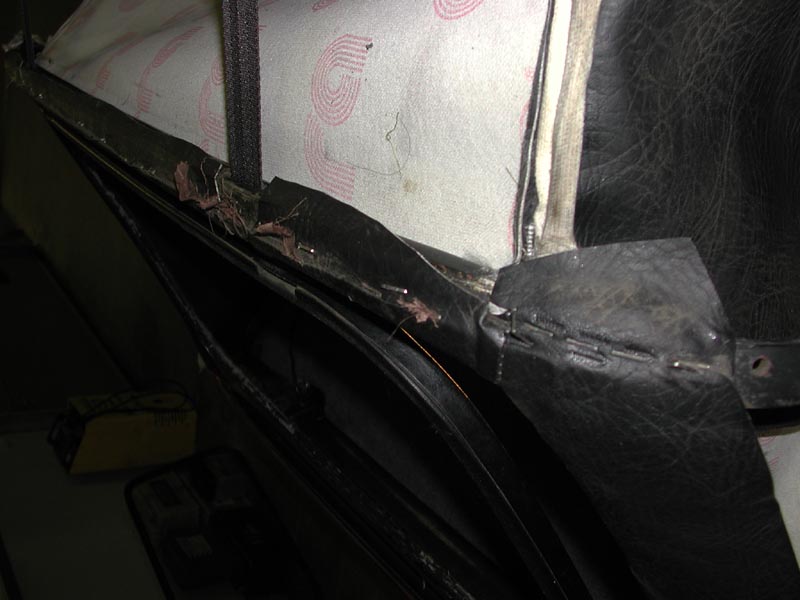
At the back the lining is stapled to the same main bow as the padding.
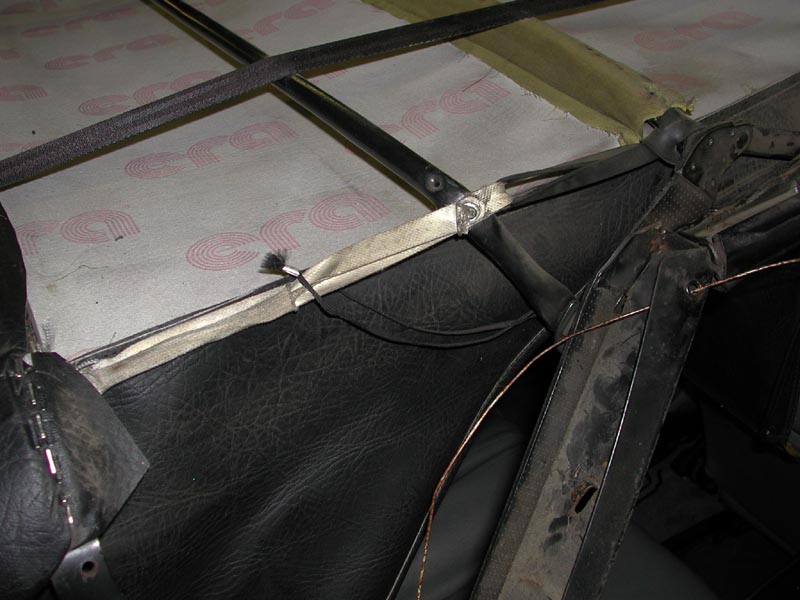
The roof mechanism contains about ten different elastic loops and straps that make the bows move in the right sequence. Around half were broken. The lining attaches to these loops at the sides and beneath the same front strip as the outer fabric.
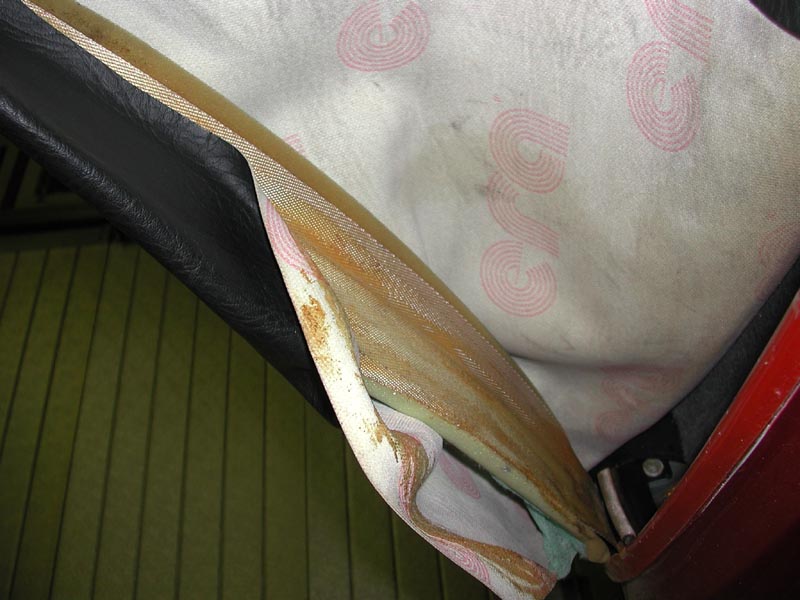
At the rear corners the lining was glued to lengths of seat-belt webbing supporting the window.
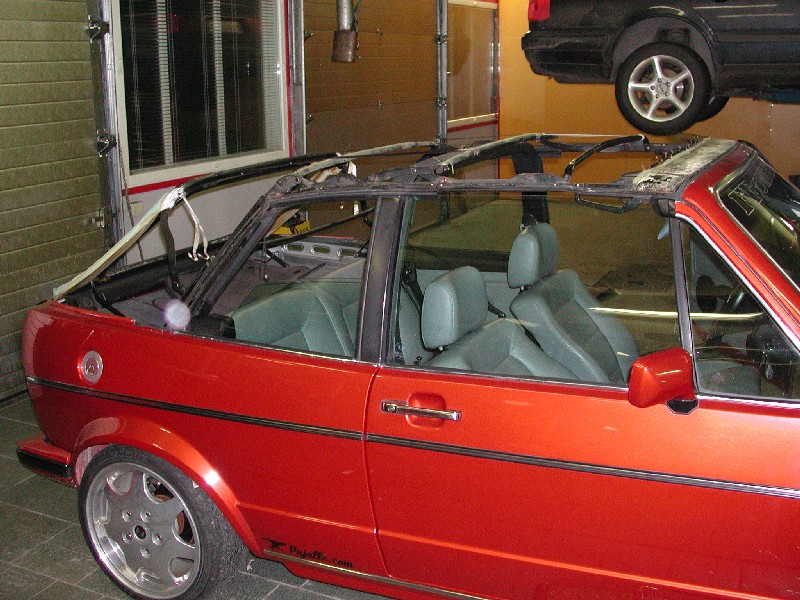
The soft-top mechanism ready for restoration.
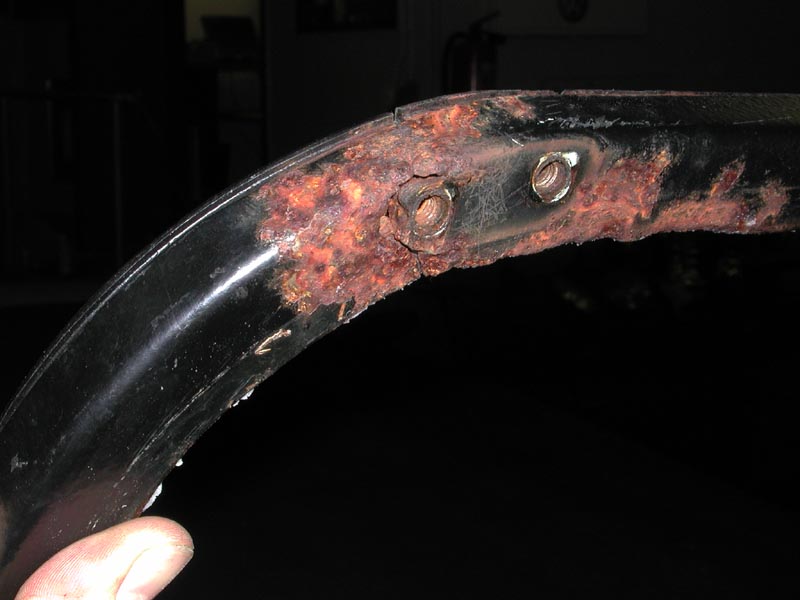
Plenty to restore.
Wintertime make up
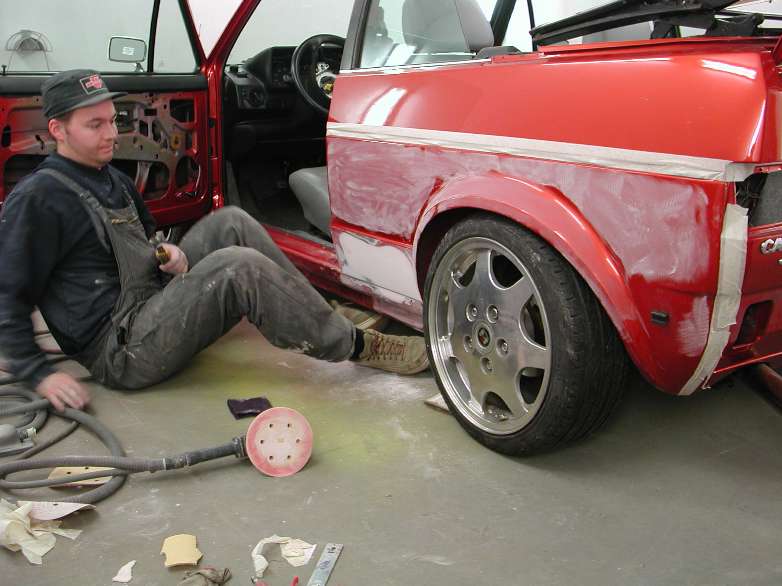
While waiting for roof-repair parts, it was a good opportunity to fix some of last summer's knocks and a few prototype problems we'd discovered.
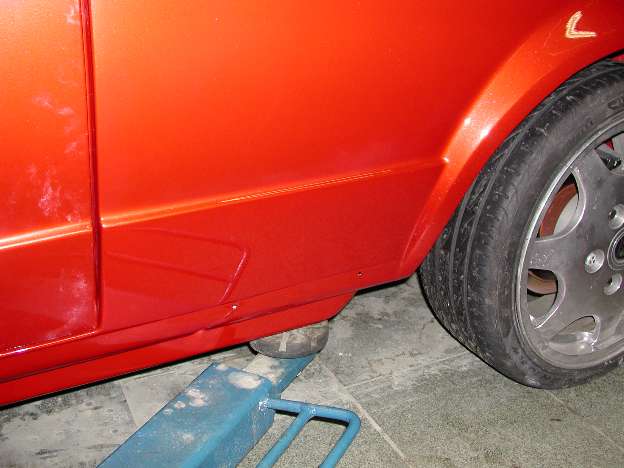
The jack-damaged side familiar from the GTI Magazine cover is like new again, thanks to Mikko Ranta-Aho.
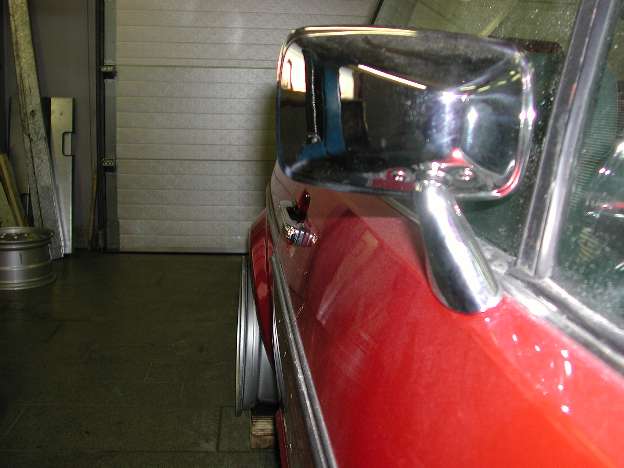
The mirrors became more retro. They're held on mainly by faith, so we'll probably return to the originals after the shows.
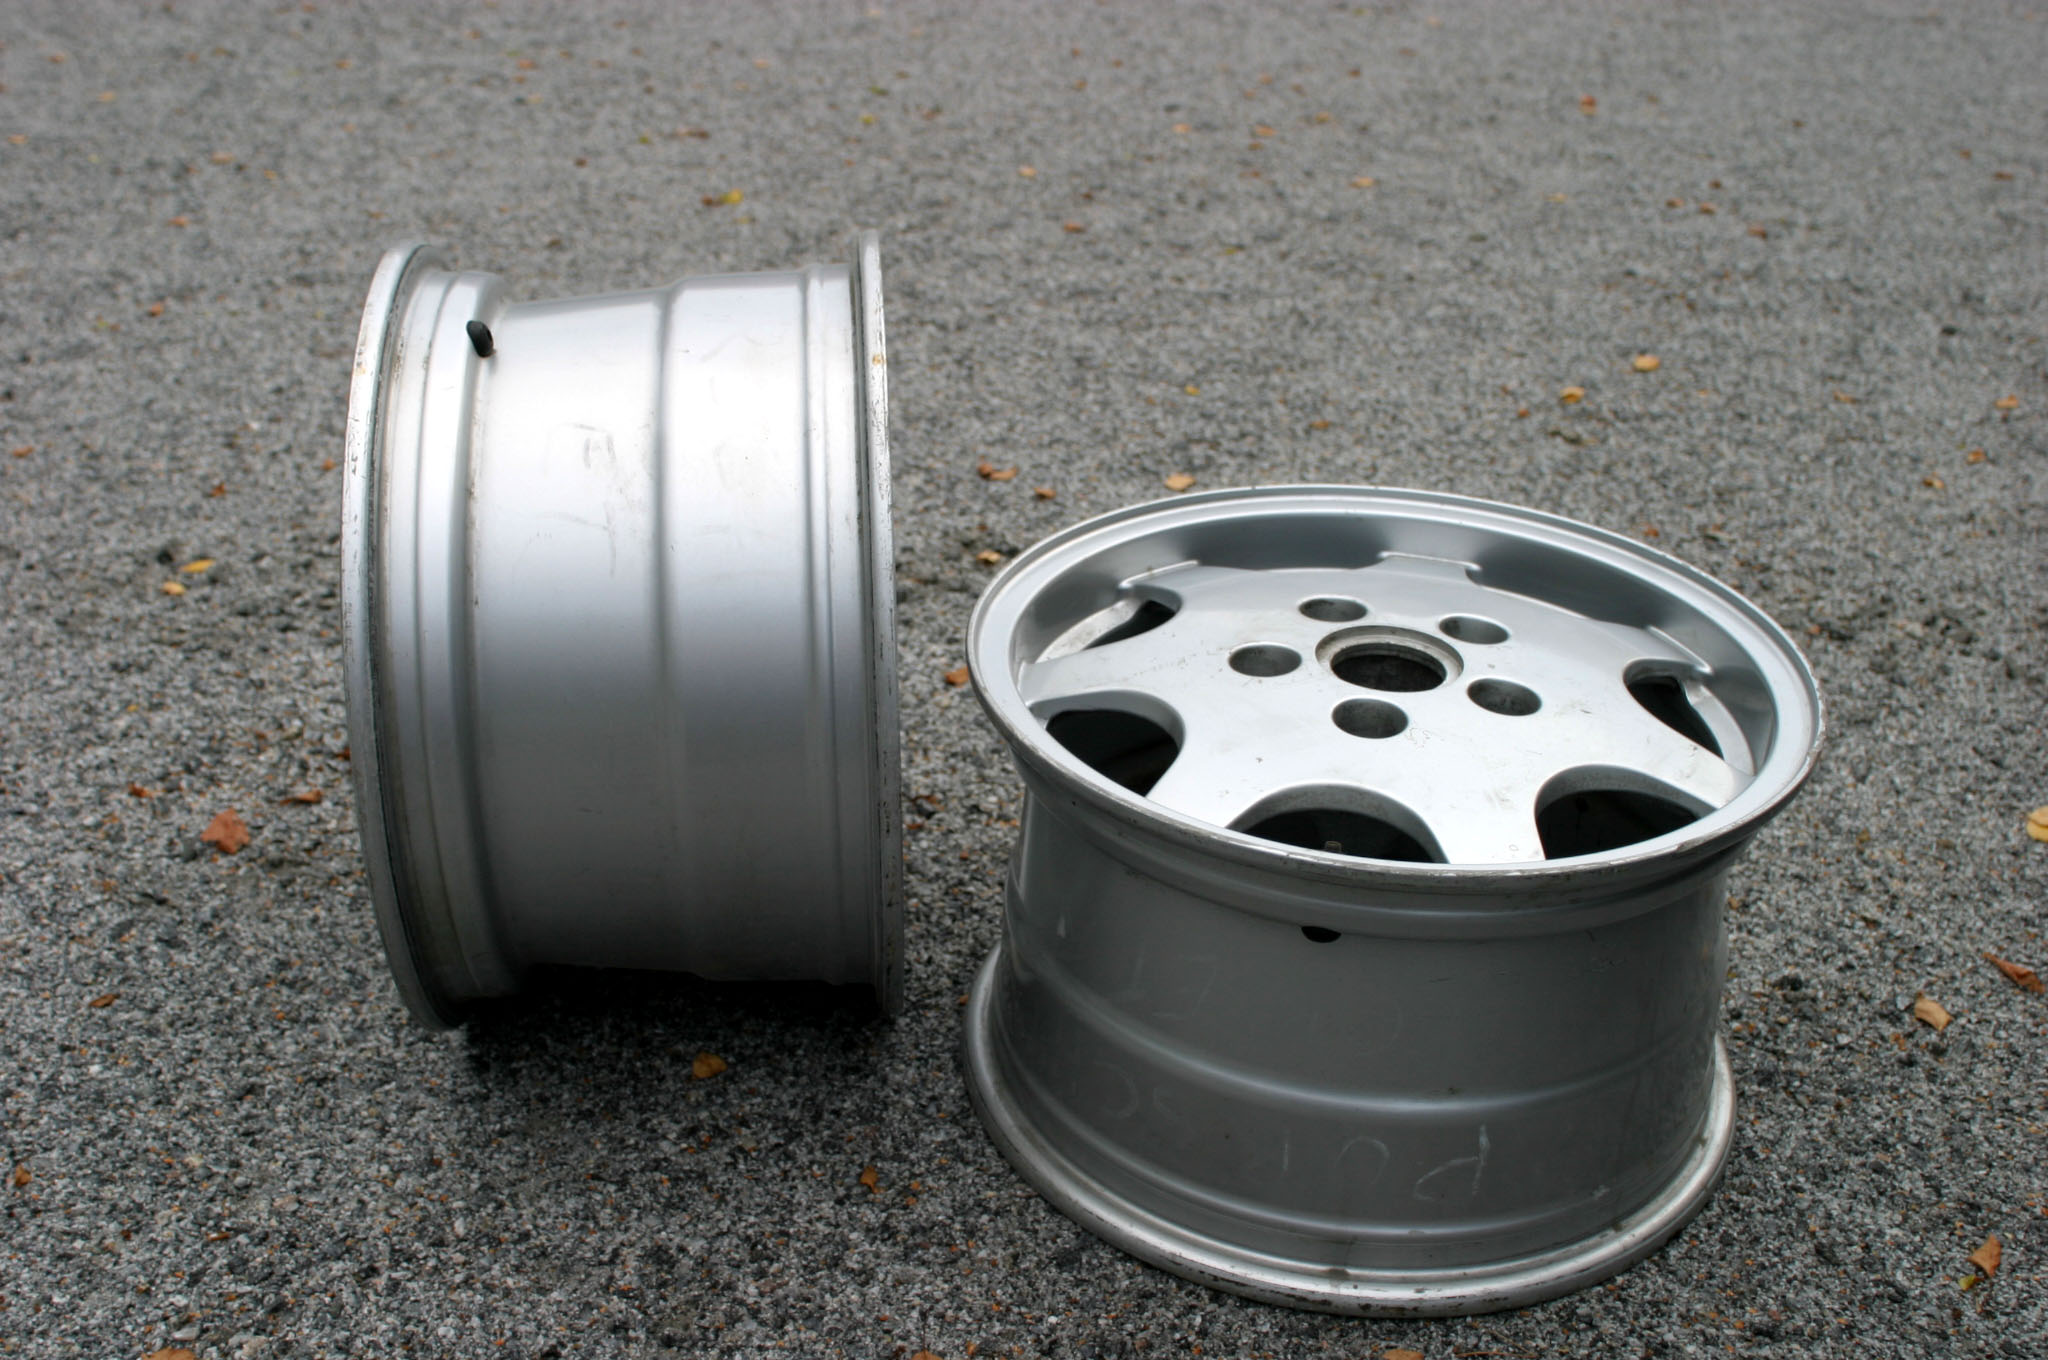
Some nice barbecue stools turned up in a garage. Apparently last winter's misery of wheel polishing has already been forgotten.
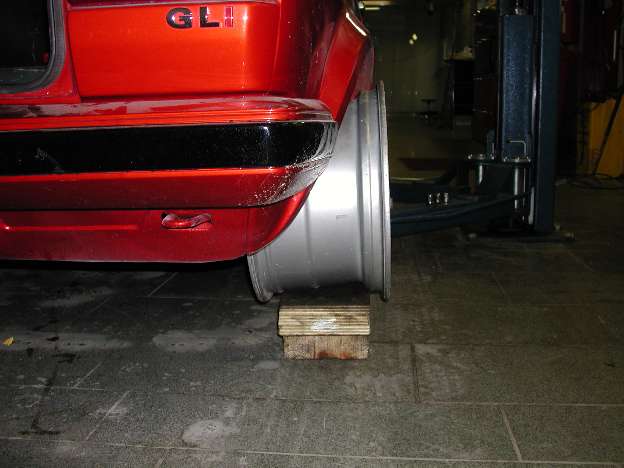
Needs a little BDA-style arch extension??
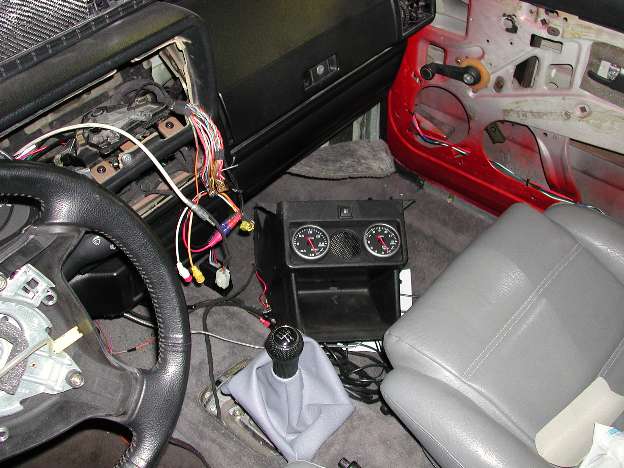
On the electrical side we installed central locking and a few Apexi gauges with their control units. During the turbo upgrade, a hole for the exhaust-temperature probe was made in the K04 turbine housing flange.
Repairing the roof - part 3
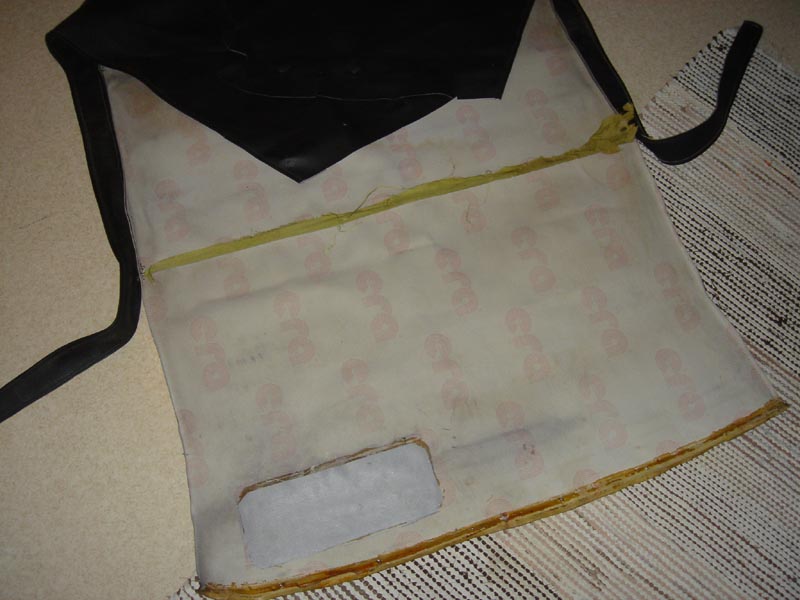
The headlining had been slashed and the previous owner had repaired it with vinyl and Eri Keeper glue. A new lining was expensive enough to encourage a DIY saving. We needed a piece of new material for the front section, a sewing machine, an evening's work, Mum as consultant and a little swearing.
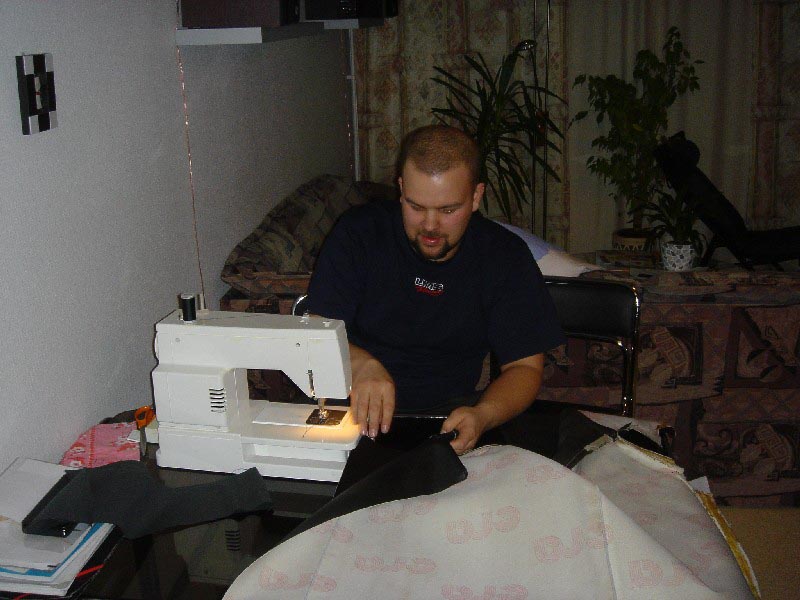
And it is going beautifully.
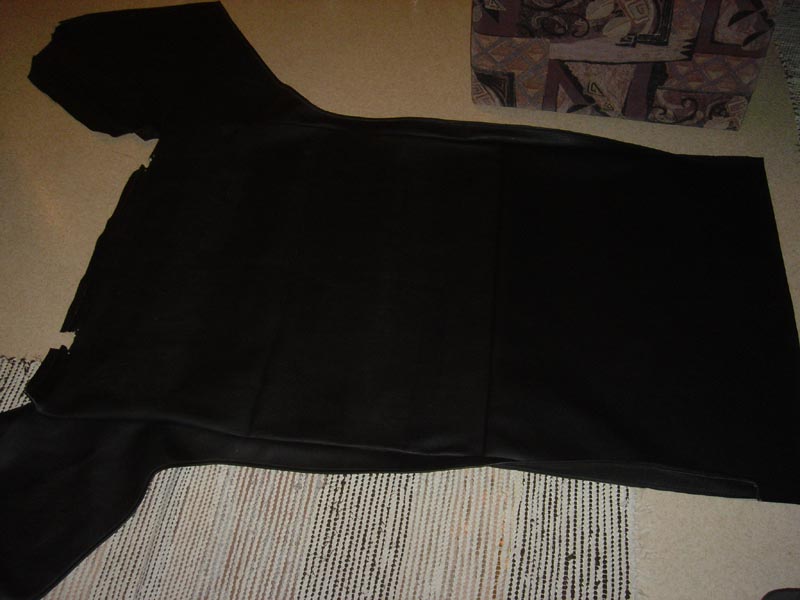
Three hours later the headlining is like new. You wouldn't spot the replaced section unless you knew.
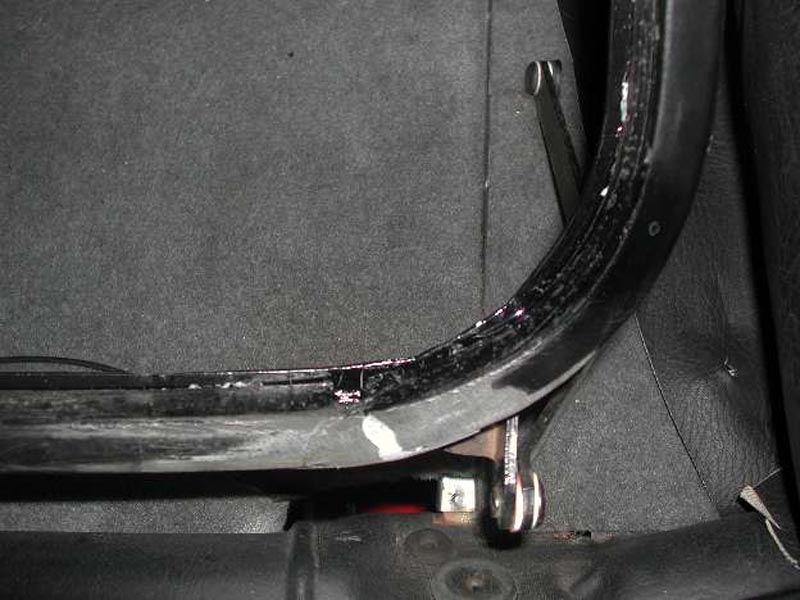
A new rear-window frame costs over 500 euros. Perhaps the importer forgot to convert old-model parts prices from Finnish marks to euros. Two evenings of sandblasting, grinding, welding, painting and gluing made the frame usable. Not the prettiest, but it does its job.
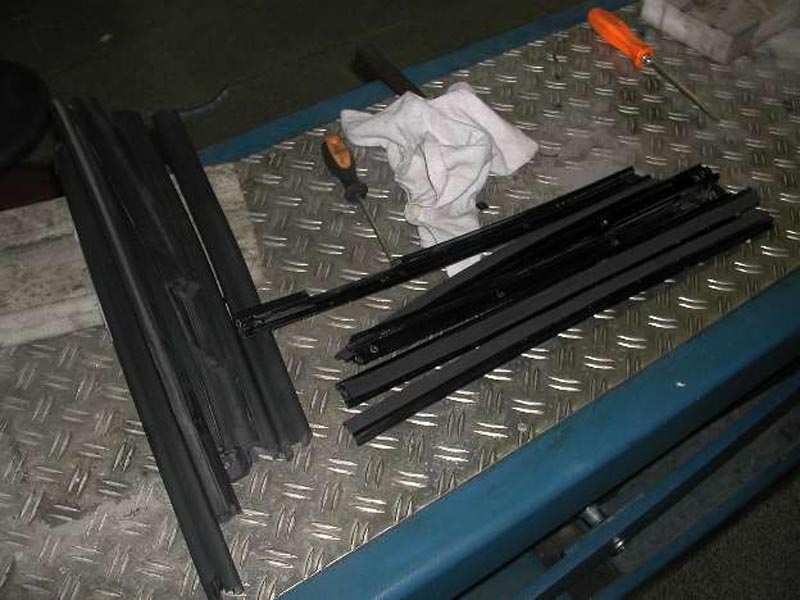
All the seals could have done with replacement, but a complete set would have cost almost 2,500 euros. We revived the sound ones with various chemicals and bought some universal seal material by the metre from Etola.
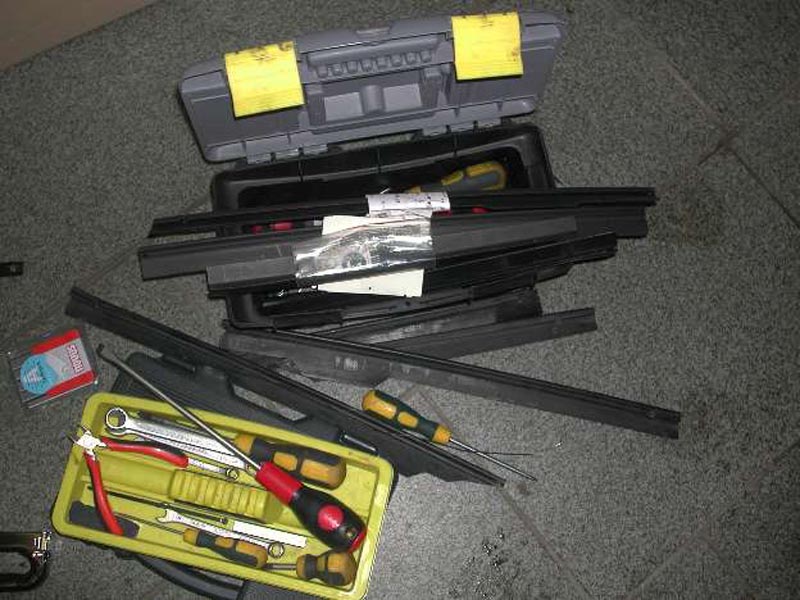
A few new seals were found cheaply as old stock at Autotalo Laakkonen in Kuopio. For fitting the roof, have a sharp utility knife, a powerful staple gun and 1.5 litres of contact adhesive ready.
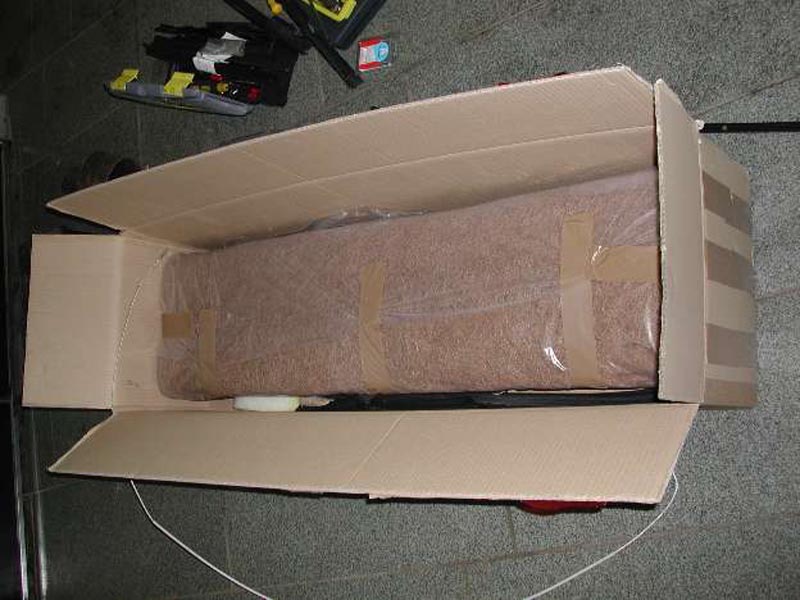
MD Comprex supplied the roof insulation kit. The fabrics and hemp padding come separately and are assembled on the roof frame with contact adhesive.
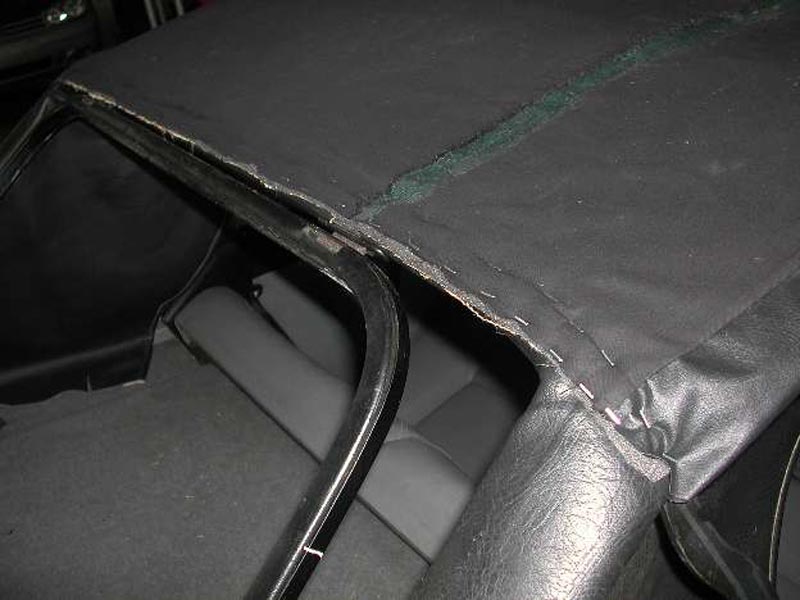
At the back the padding is stapled to the roof bow. Its plastic is very hard, so staples from the cheapest construction staplers won't penetrate.
I ended up buying two staplers: a cheap one and a working one.
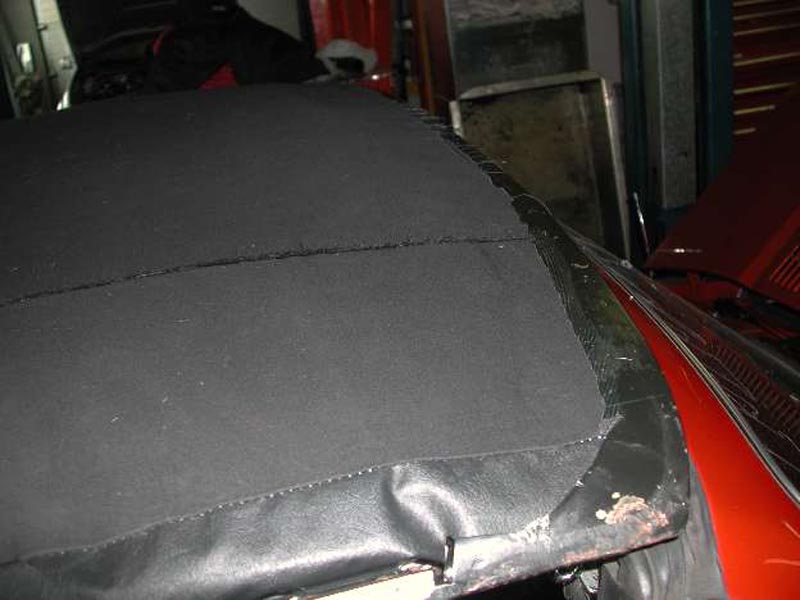
The front of the insulation is glued to the frame.
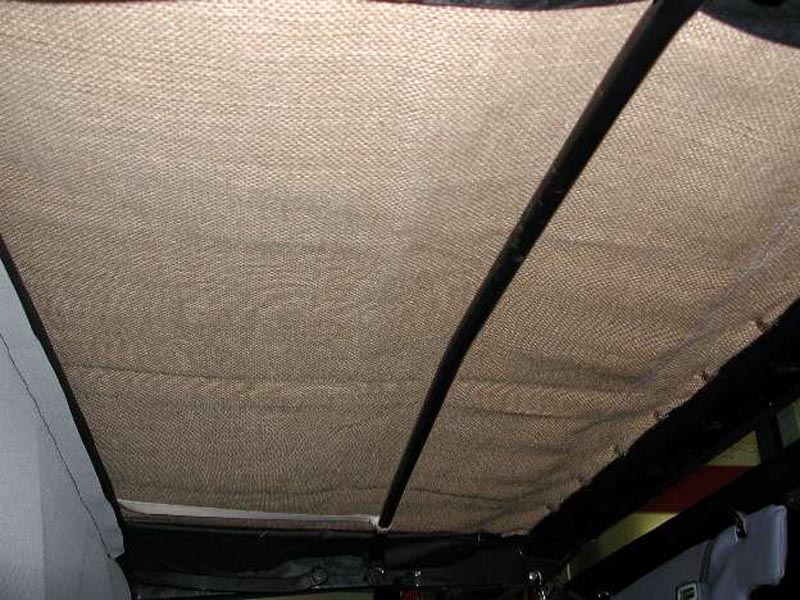
The hemp mat viewed from below.
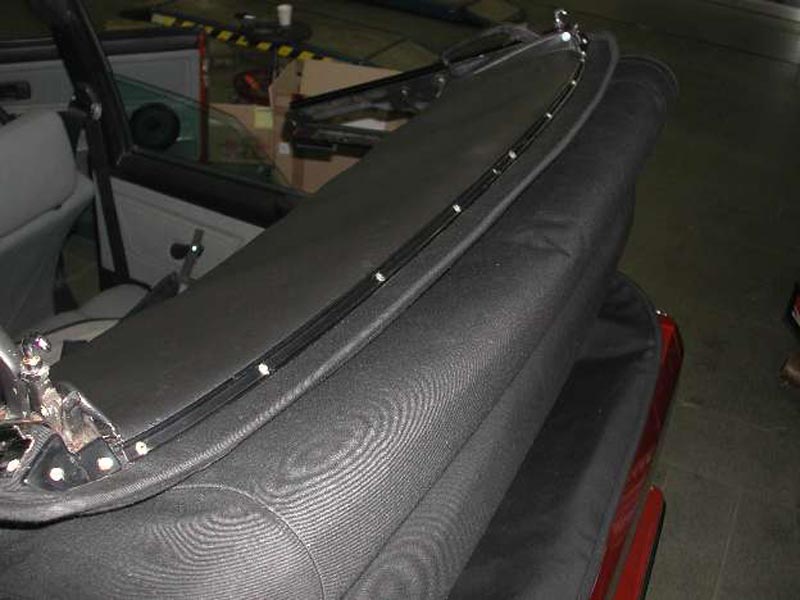
The outer covering and inner lining are tensioned under the same strip at the front of the roof mechanism. Contact adhesive makes this much easier.
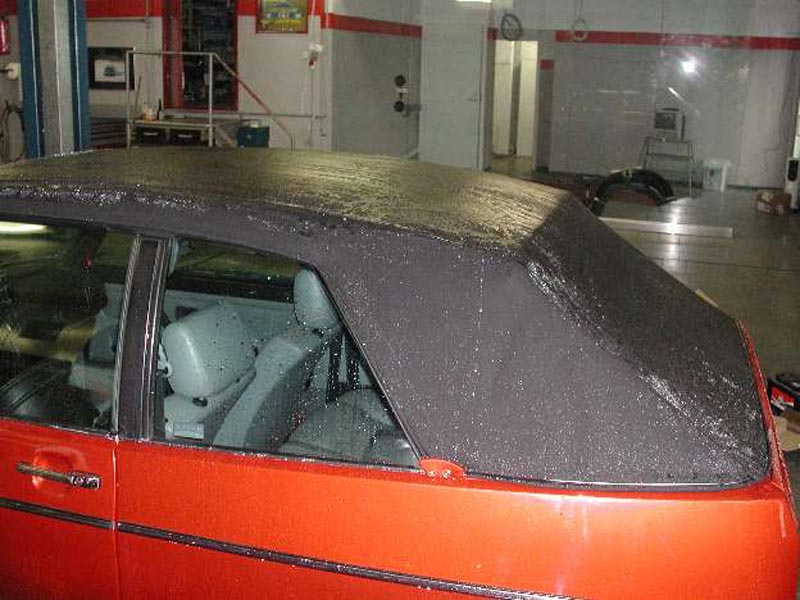
Then attach the rear and side cables, which I made from universal bicycle repair-cable kits, and the roof is assembled. The new padding and fabric were so tight that I didn't dare force the roof shut. Wetting the roof and prolonged stretching brought the front catches into their driving position. It is really taut now, with none of the billowing in the airflow that the stretched, patched old roof had.
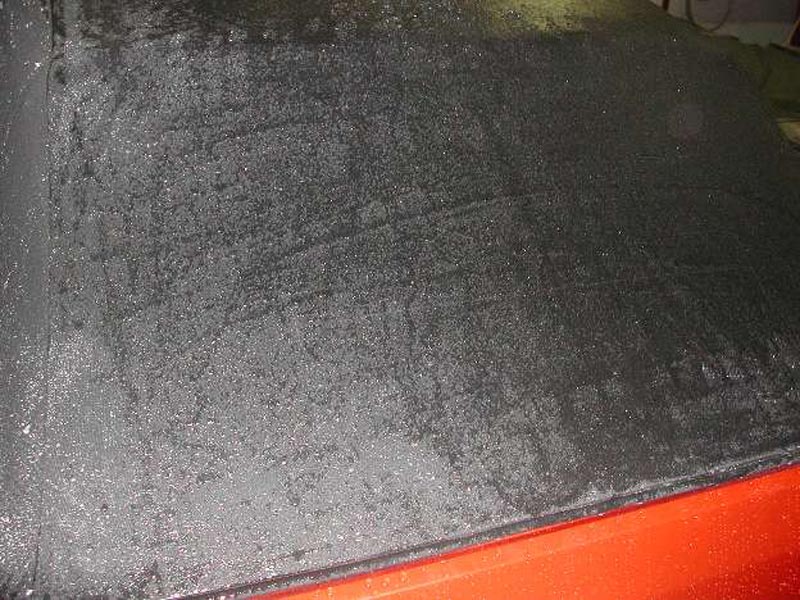
Finally the new fabric was treated with Auto Glym Cabriolet Canvas Top care product. Water runs off like a goose's back. The rear window is still out for now. We'll let the fabric and padding settle for a few weeks so the window opening ends up in exactly the right place.
Includes original English text and AI-assisted translations.