ARCHIVE / PAJALLE
Vento TD
Heikki’s Vento. Minor crash repairs and restrained modifications.
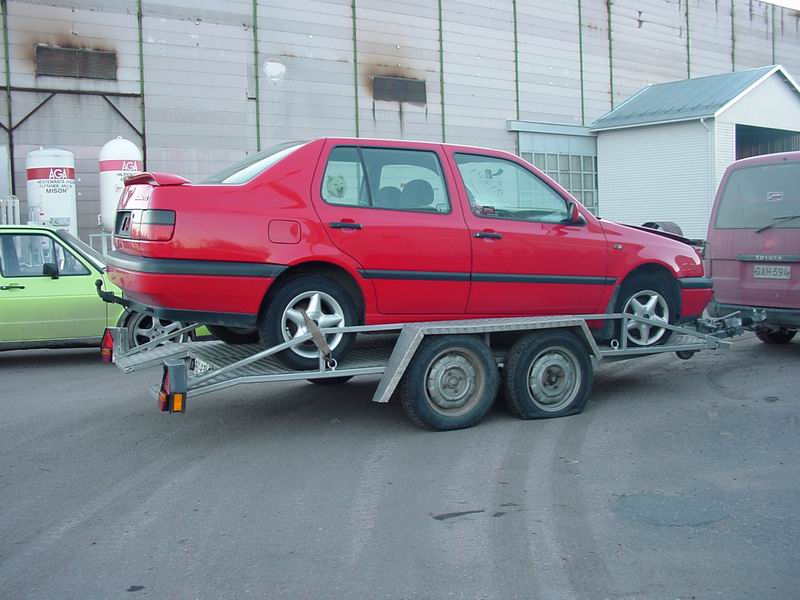
Crash damage — part 1
Sorry, not translated yet :(
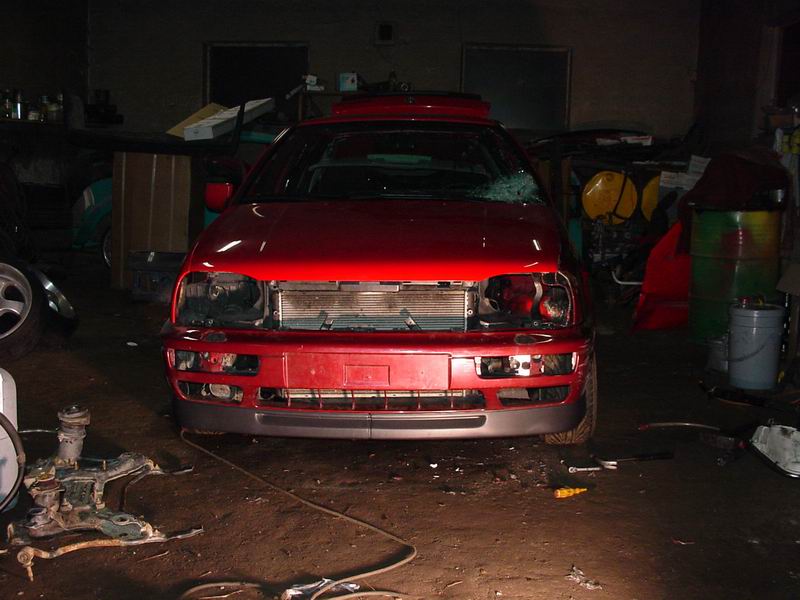
Heikki hadn't even seen a photo of the car — he was abroad on business — but Pekka persuaded him to go halves on this red Volkswagen from Autovahinkokeskus. A 1996 model with just over 230,000 km on the clock.
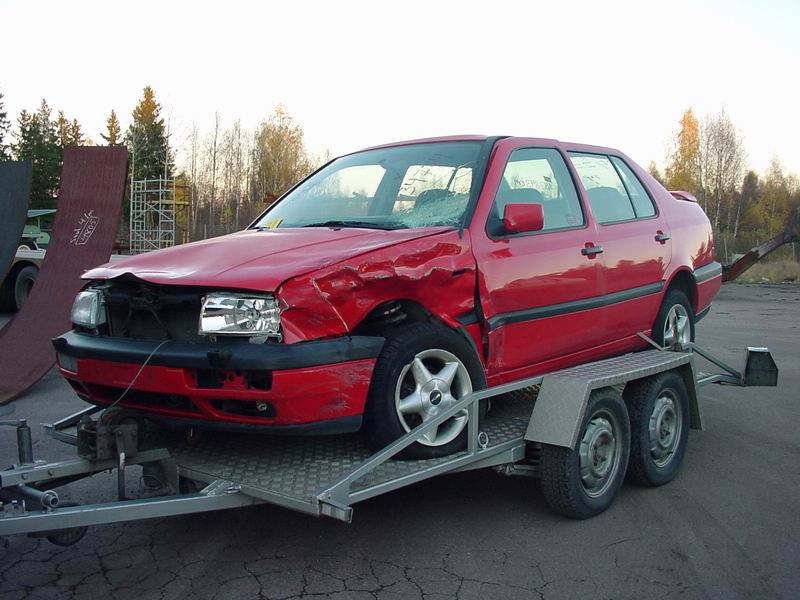
As you can see, it took a hit to the front left corner. The front wheel has moved backwards and several other front-end parts are damaged. As our crashed-car expert, Pekka reckoned the repairs wouldn't be terribly expensive and most of the parts needed could be found in our own or a friend's stores.
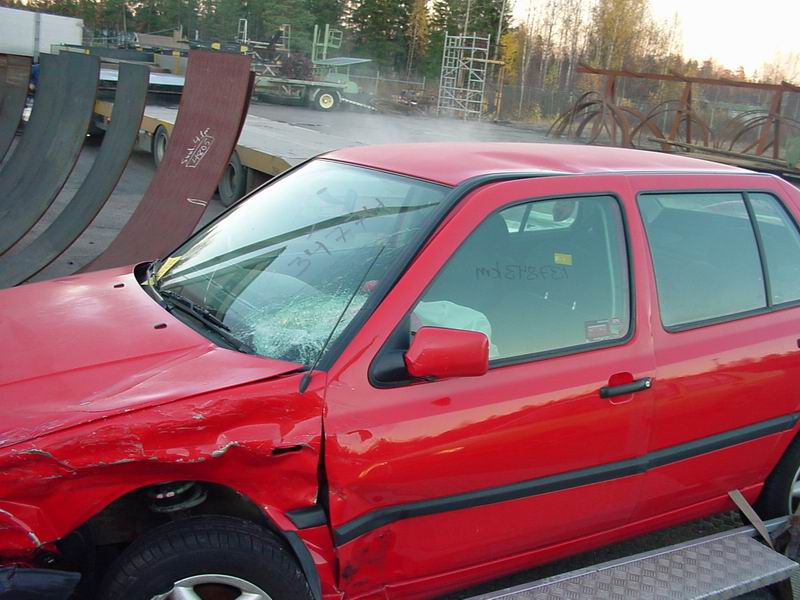
The left A-pillar has been pushed upwards a little and there's a dent in the roof. It should straighten out once the car is on a body alignment bench. Pekka is convinced, at least. The windscreen is broken, but we already have a new one. We still need to find a mirror.
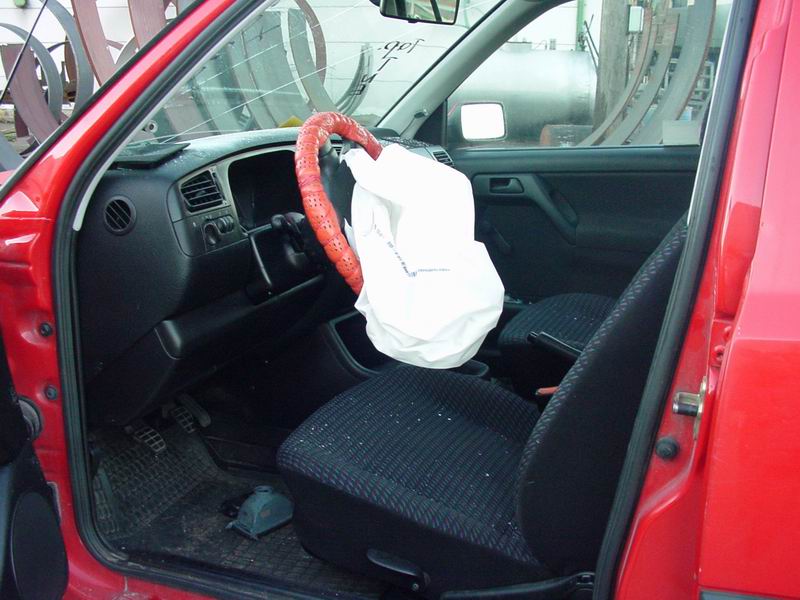
The airbag did its job. The previous owner had fitted a steering wheel cover that 'matched' the car's colour. That was the first part we removed :-)
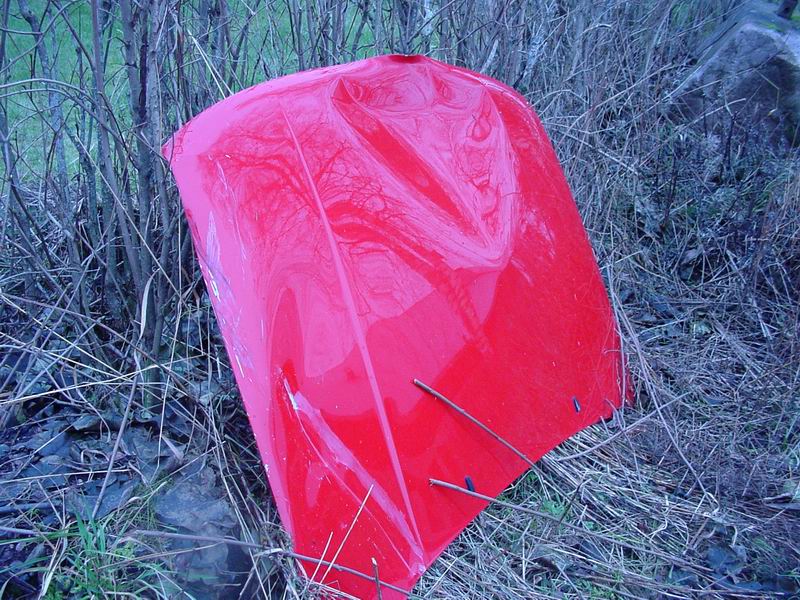
The bonnet is beyond saving. Thanks to some overenthusiastic firefighters, it apparently had to be forced open. We'll fit a Golf bonnet and convert the rest of the front to match: Mk3 Golf headlights, grille and bumper. A Vento bumper would work too, but it's Golf ones we have in storage...
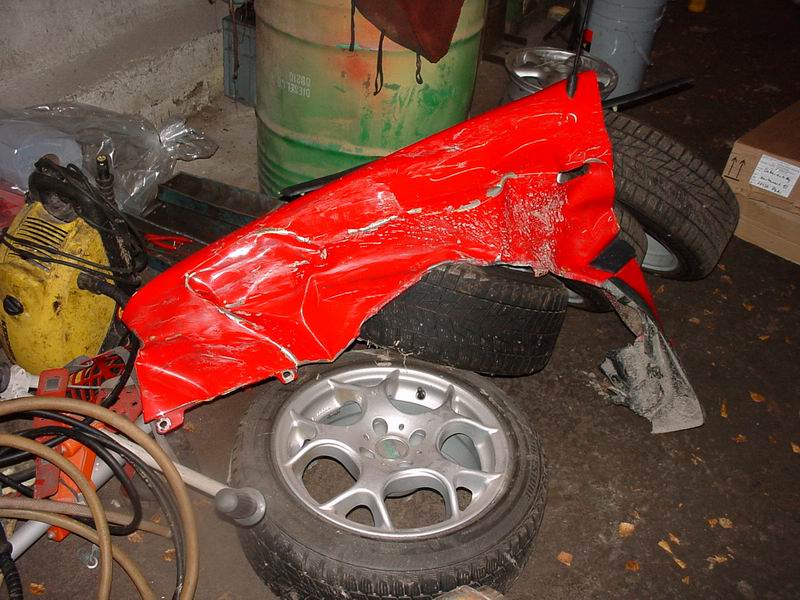
The wing has a few ripples...
Crash damage — part 2
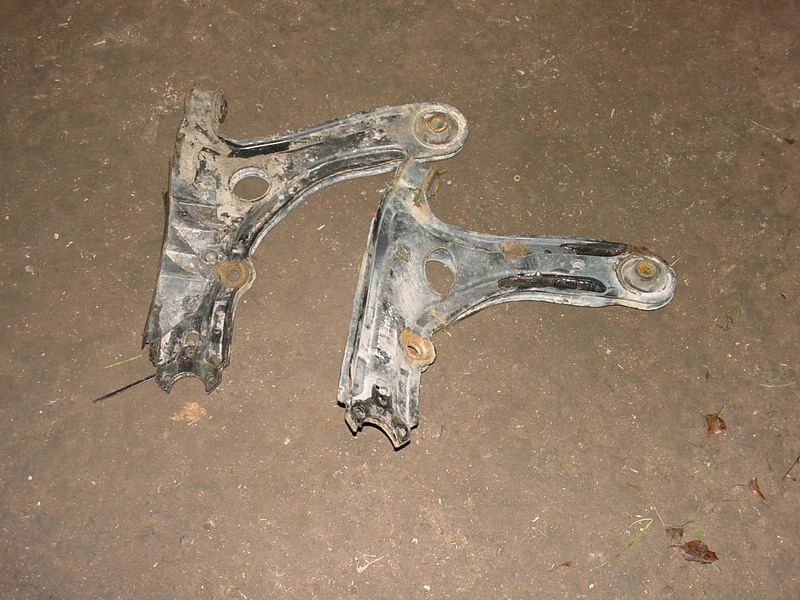
The front wheel had moved backwards by 'a few' centimetres. Here are a straight lower control arm on the left and the bent one.
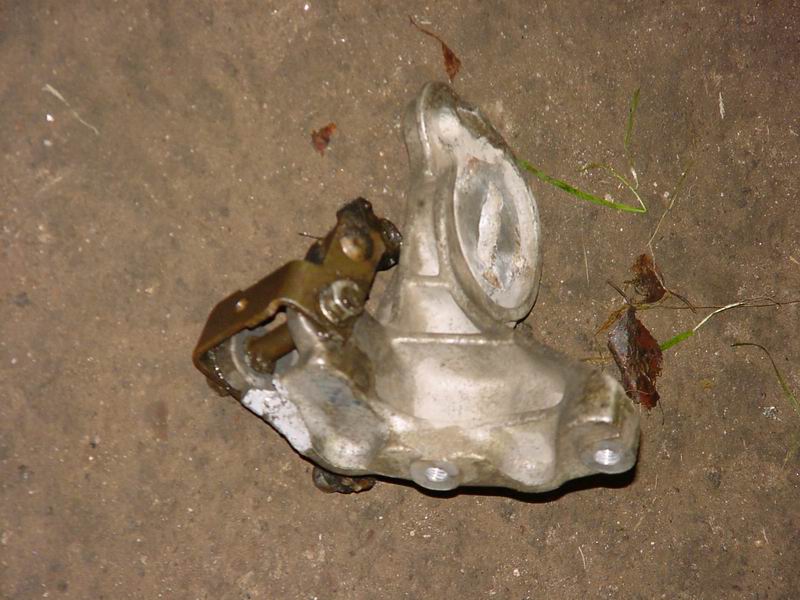
One of the three mounting points on the gearbox bracket attaching it to the subframe had broken. Replace it.
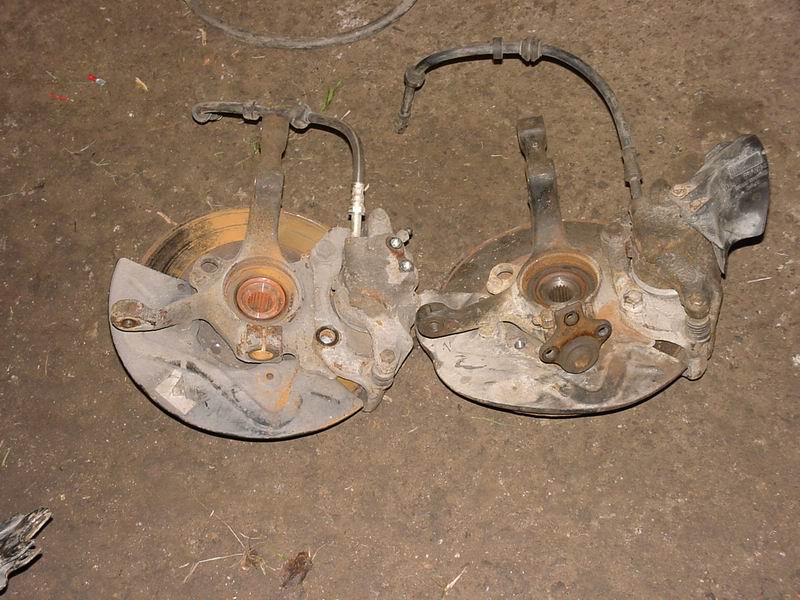
The hub was bent, shown on the left. Replace it.
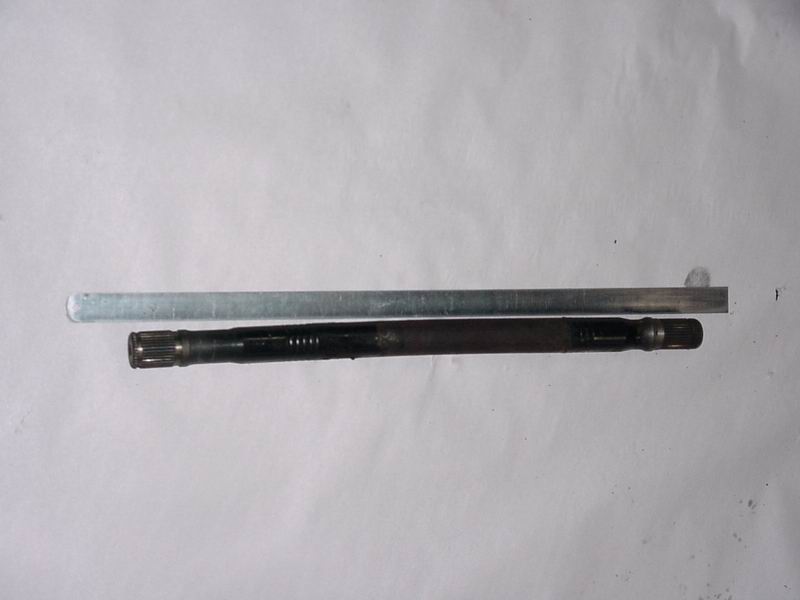
The driveshaft was bent too. Replace it.
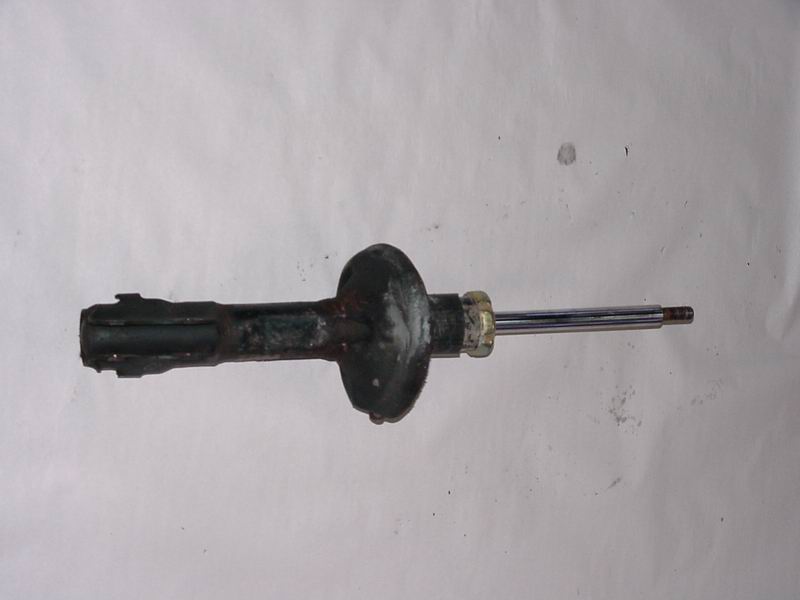
The shock absorber also needed replacing because it was bent.
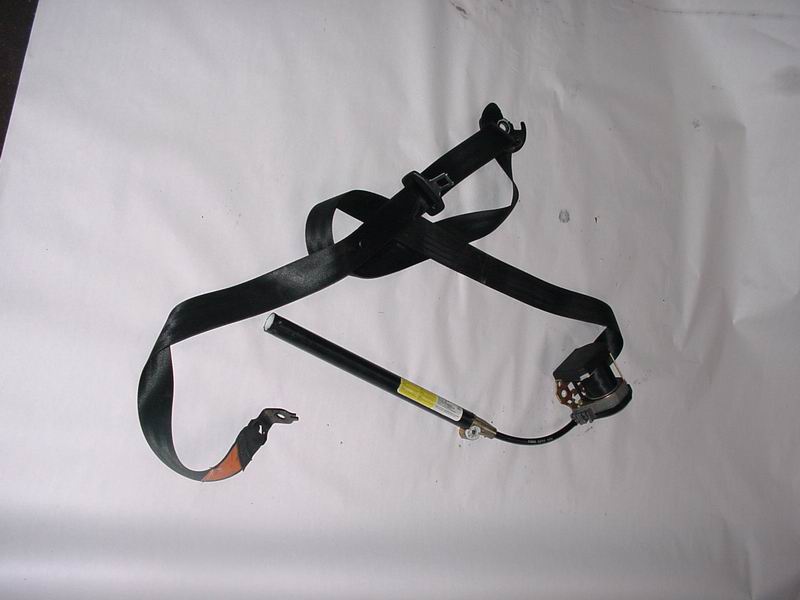
Along with the airbag, the seat belt pretensioners had fired... So the belts needed replacing too.
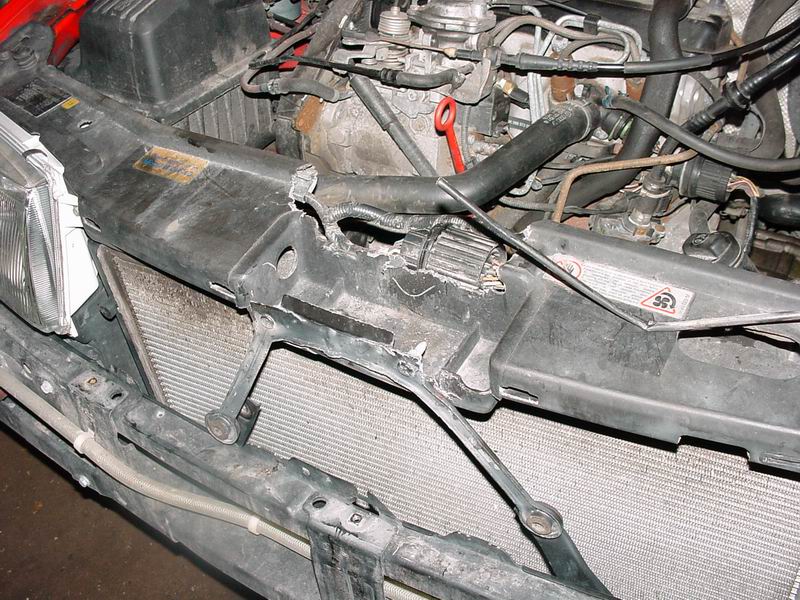
The front panel was broken in the middle where the bonnet had been forced open. The release cable was snapped too.
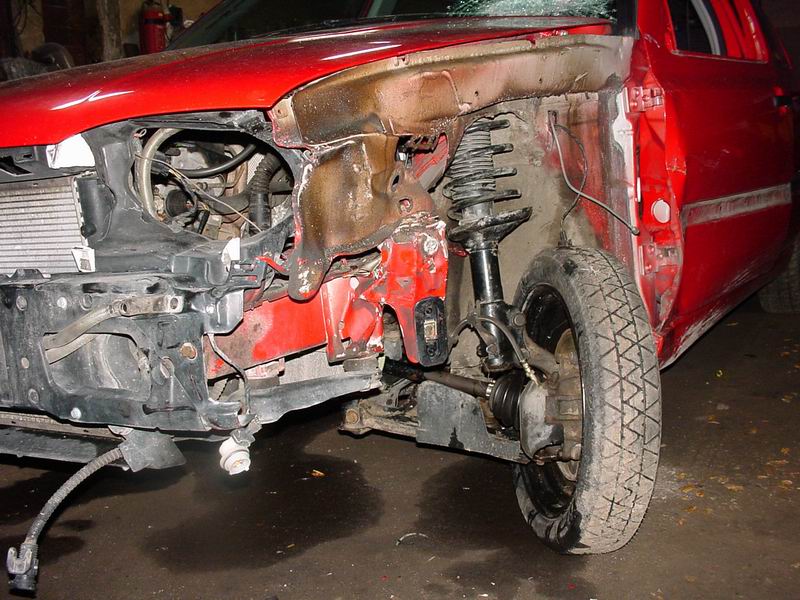
This photo already shows sound parts in place: hub, driveshaft, lower arm, shock absorber and so on. The brakes work again after replacing the broken brake pipe. The bent bumper mounting bracket is still visible and will be replaced too. A big hammer should take care of the rest.
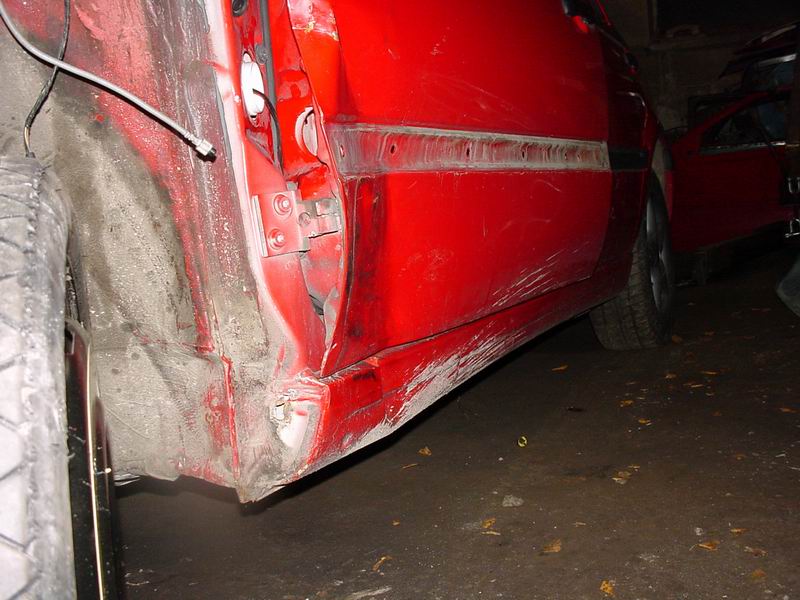
The sill is pushed in a little and the door is in quite a state.
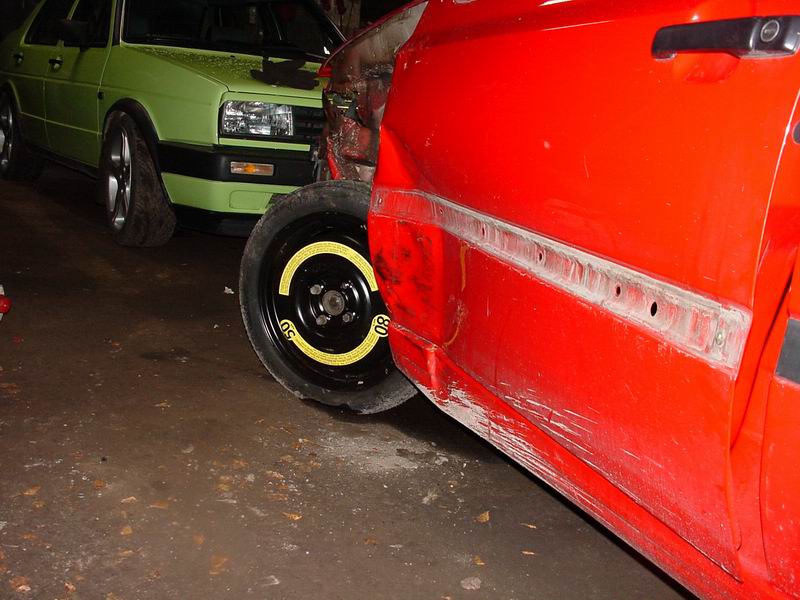
The sill should straighten out; the door will be replaced.
Let the repairs begin
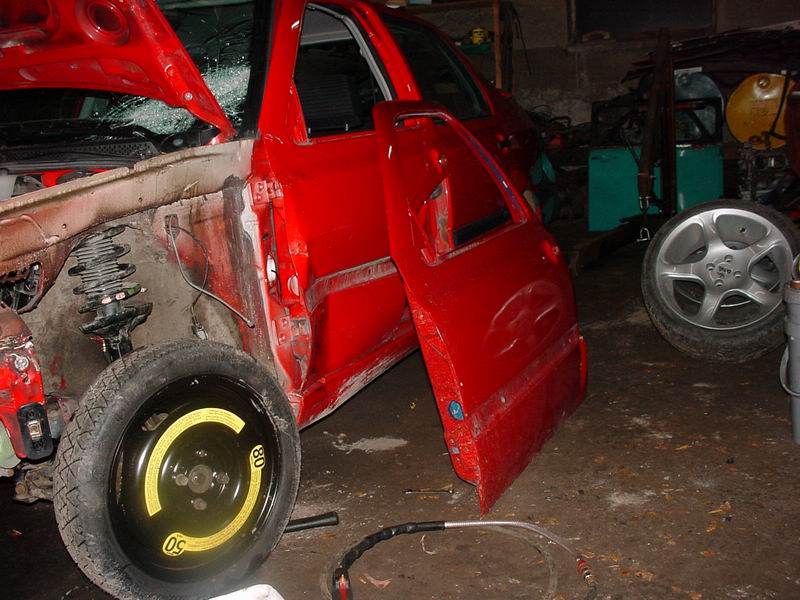
The old door and the slightly damaged 'new' one. Pekka will turn these two into one perfect driver's door.
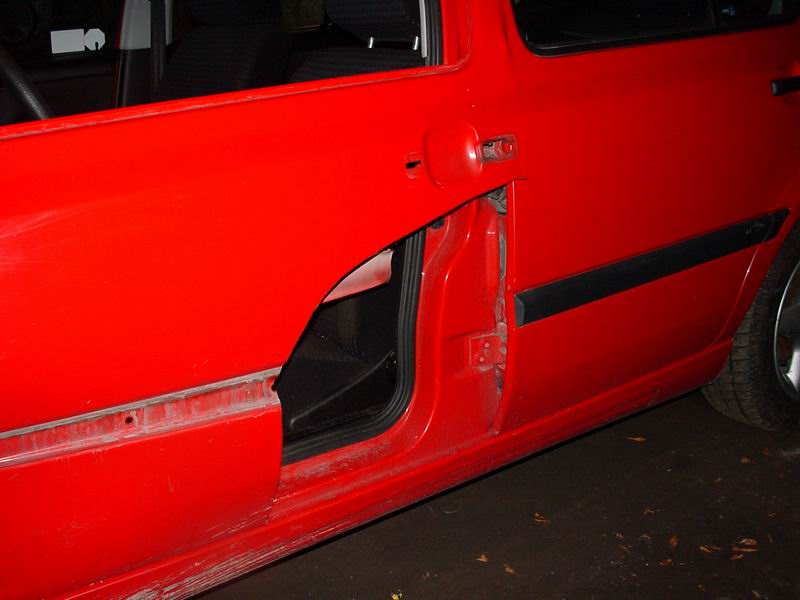
We'll reuse the rear corner of the original door.
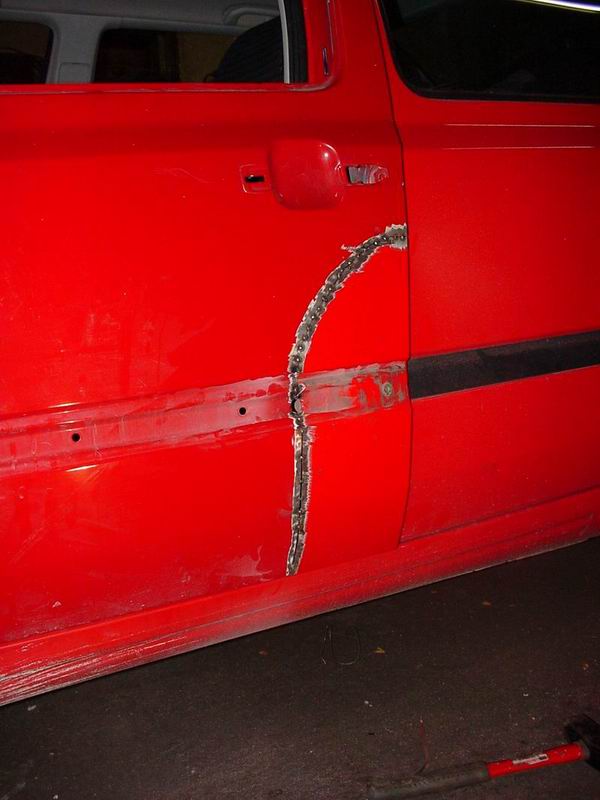
The door is already straight here, with the repair piece tacked in. If anyone asks, we can say a section was replaced — the front section :-)
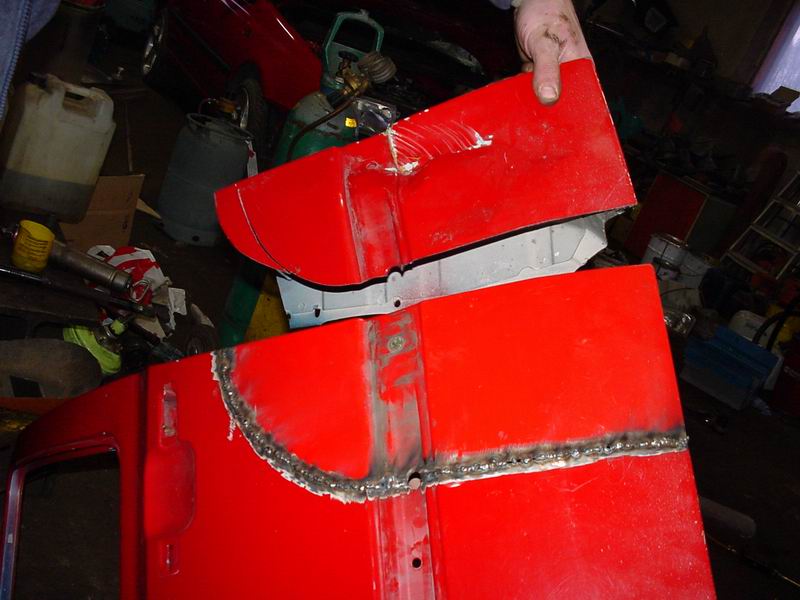
Once more: the dented rear corner replaced with a straight one. A skim of filler and proper rust protection inside, and you won't tell it from new!
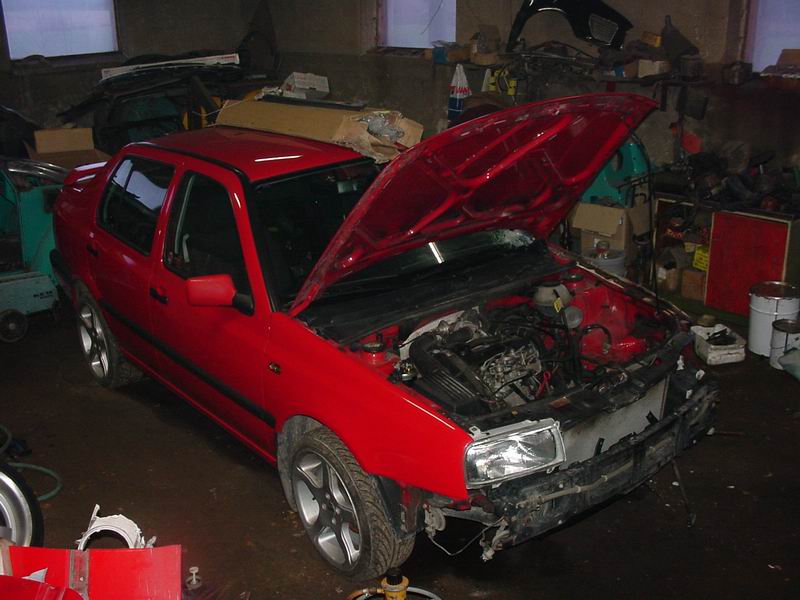
This was the situation on 12 November 2001, on the Jetta's 17-inch wheels. It looks quite a tractor. A suspension kit will be ordered by spring at the latest.
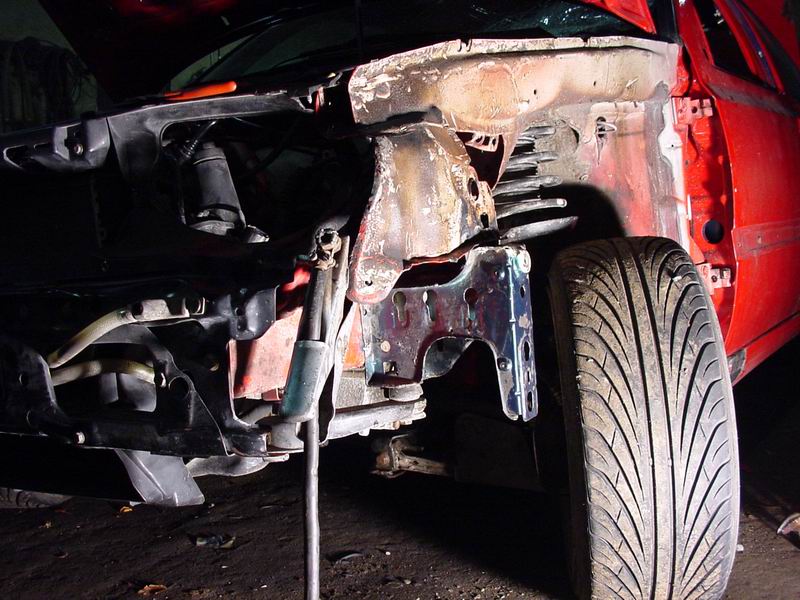
The 'new' bumper mounting bracket in place. Soon we can try the bumper too.
On the alignment bench
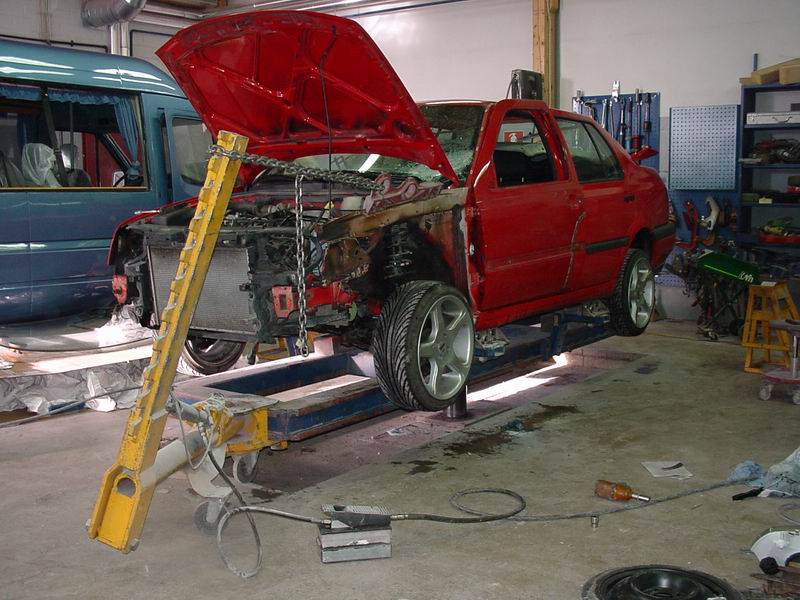
19 November 2001. The Vento went on the body alignment bench. In this photo a pull is in progress.
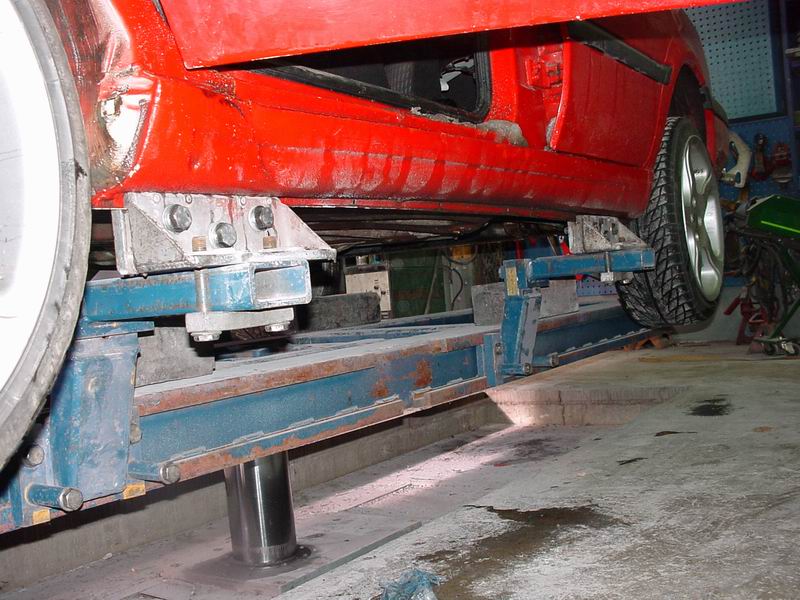
The car is clamped to the bench at four points along the sills. A powerful hydraulic ram then pulls different parts of the body in the required directions.
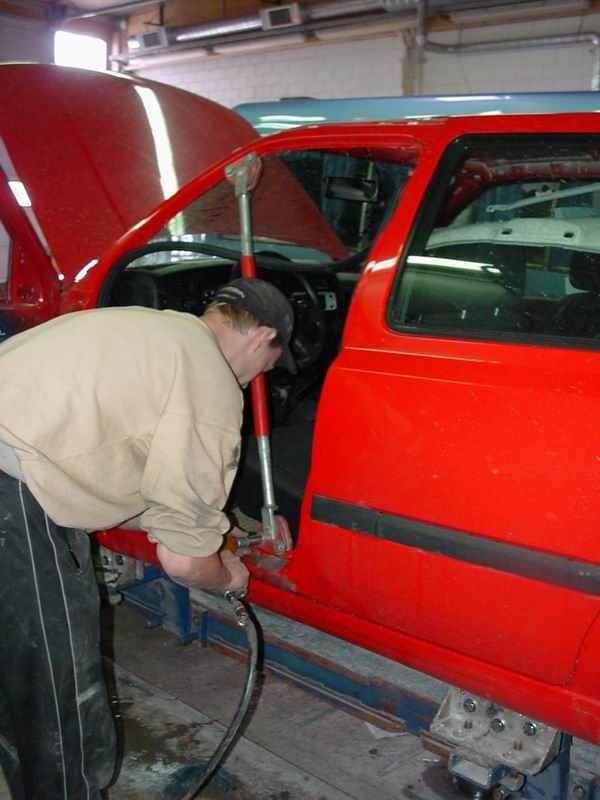
Some hand work was needed too: the body was surprisingly difficult to bring back to its dimensions. Pekka had expected a few pulls to do it, but in the end it took the whole day. It turned out well, though! We also decided the lower crossmember would probably be replaced. It's bent, and there's no point straightening it when a friend has a straight one.
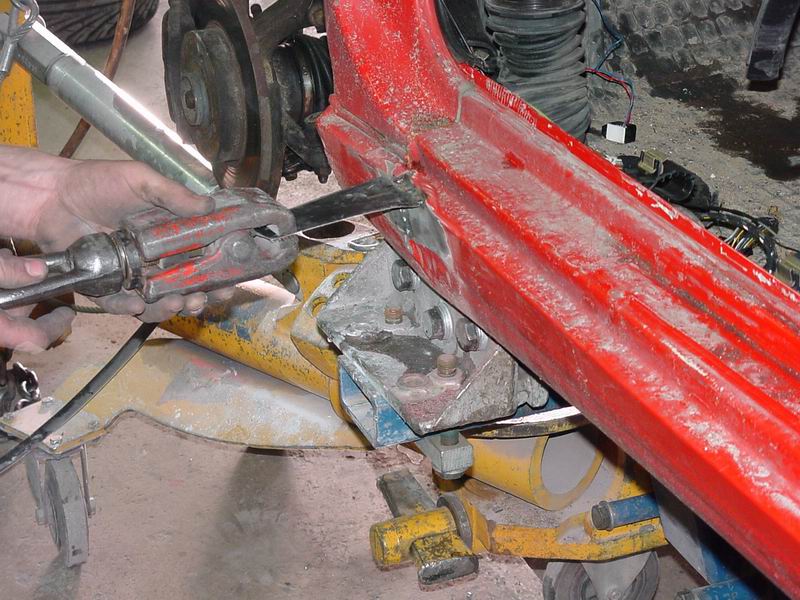
The sill was pulled out the traditional way with a slide hammer.
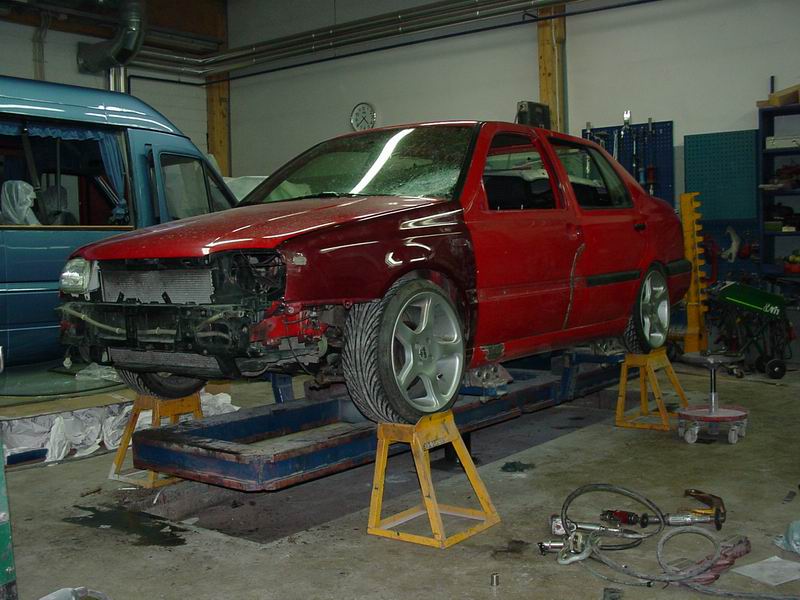
The doors, wing and bonnet fit nicely. The final adjustments will be made back in our own garage. This photo features artificial lowering: the car is still clamped to the bench by its sills, with stands under the wheels and the body being pulled down :-)
Boot lid
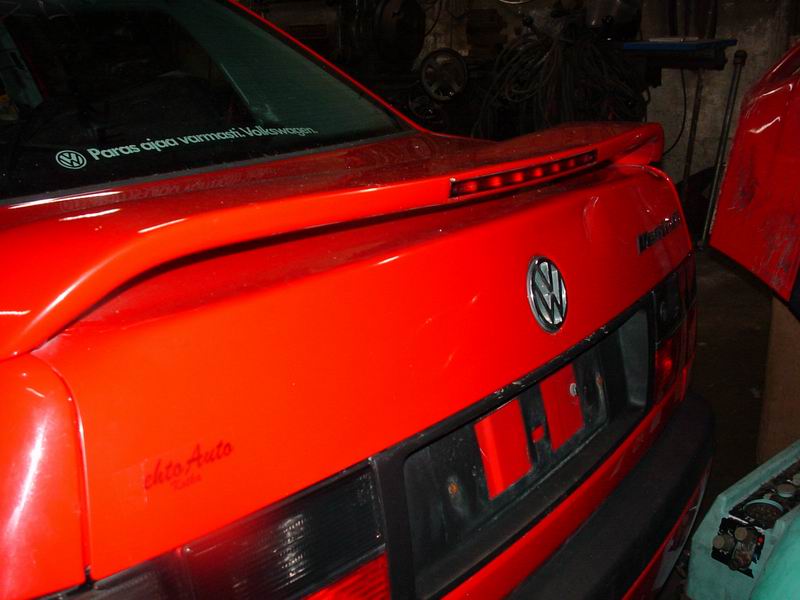
The boot lid needed attention too: a small dent between the VW badge and model lettering. The rear spoiler sagged strangely, but heating it straightened it nicely, so no replacement was needed.
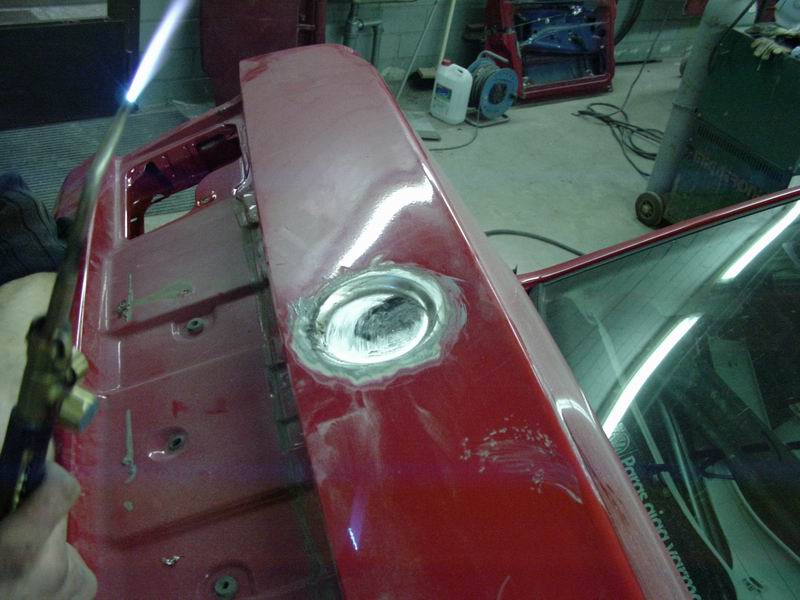
Body solder is used to remove the VW badge from the boot lid. There's a recess behind the logo, which we filled with solder. Before soldering, the paint has to be thoroughly ground off and the metal cleaned separately with tinning compound.
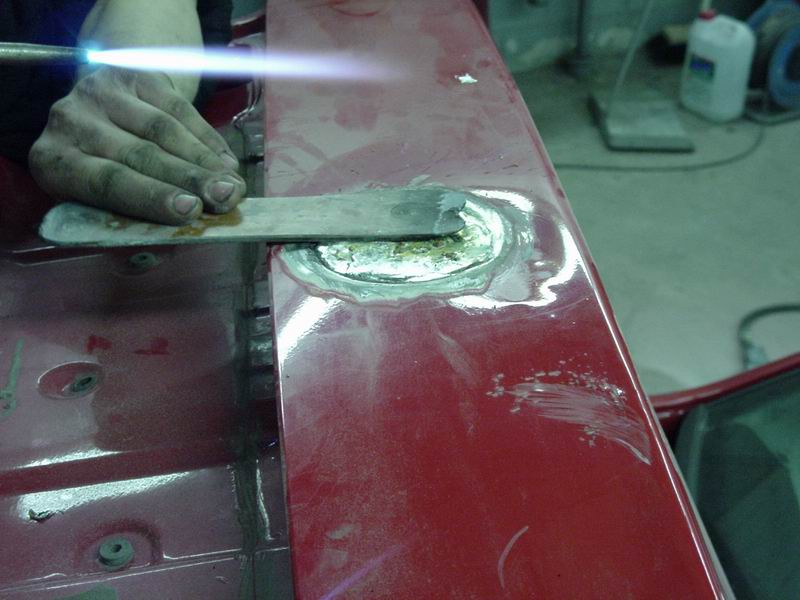
The solder is melted with a gas flame and roughly smoothed with a paddle. Once set, the excess is filed off. Done properly, it may need no filler at all! This one will, though, as the lid has other small dents needing filler.
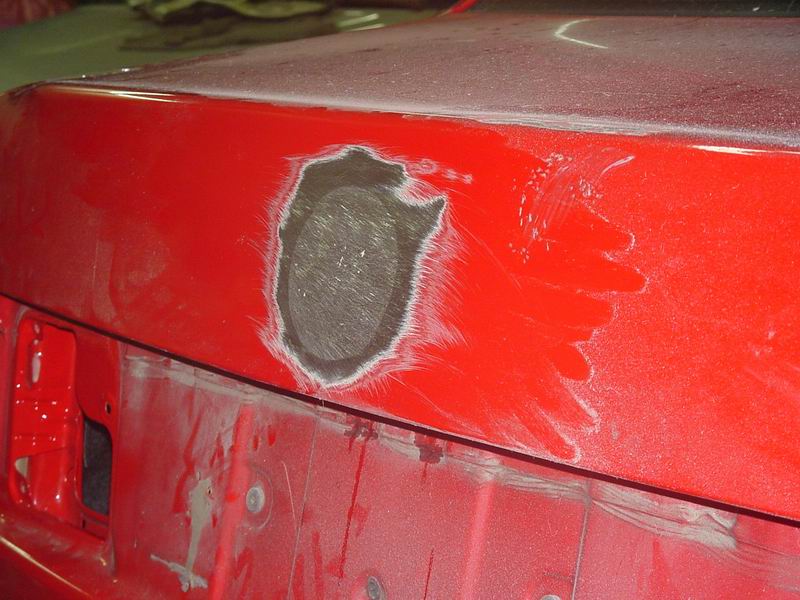
The excess solder removed.
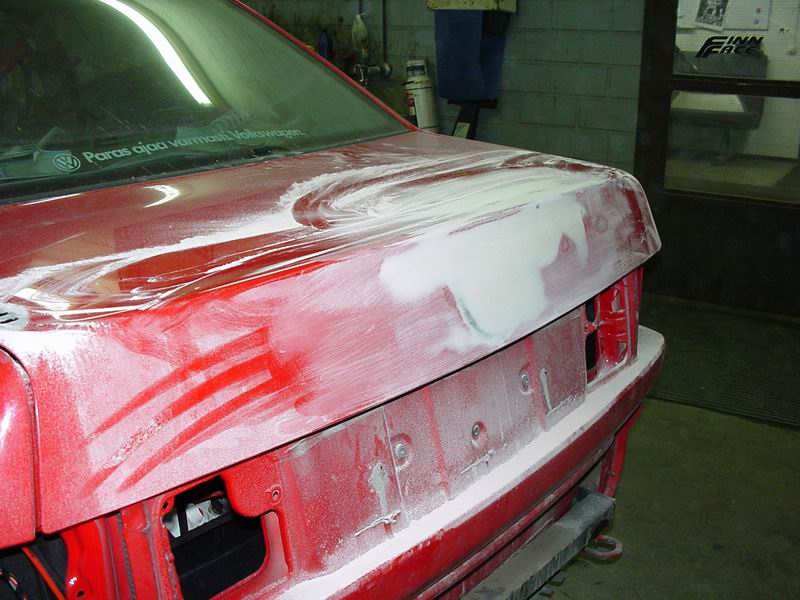
A skim of filler.
Before painting
Trying the bumper. Naturally the VR6 front lip from Kenny had to go straight on to see how it looked.
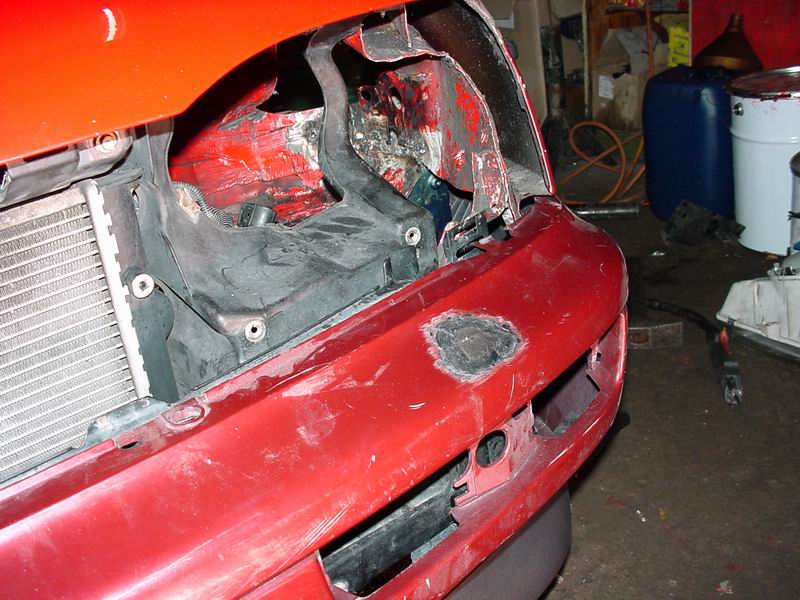
Pekka did some plastic welding on the bumper, filling the headlamp washer holes. The upper part will be painted black.
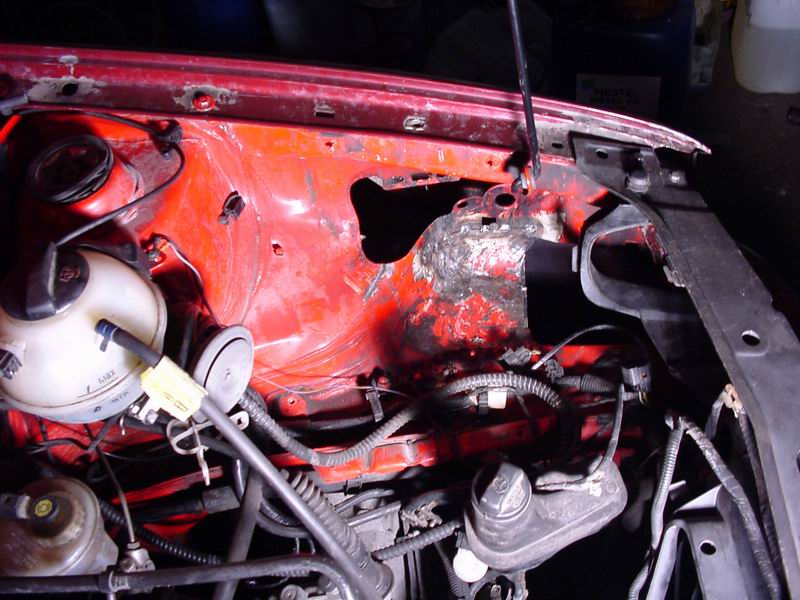
This shows the inside of the front corner. It's a shame we didn't photograph how mangled it was, because it really was. In places the metal was folded three layers thick, but somehow Pekka straightened it so well that after painting you'd hardly know anything had happened to it.
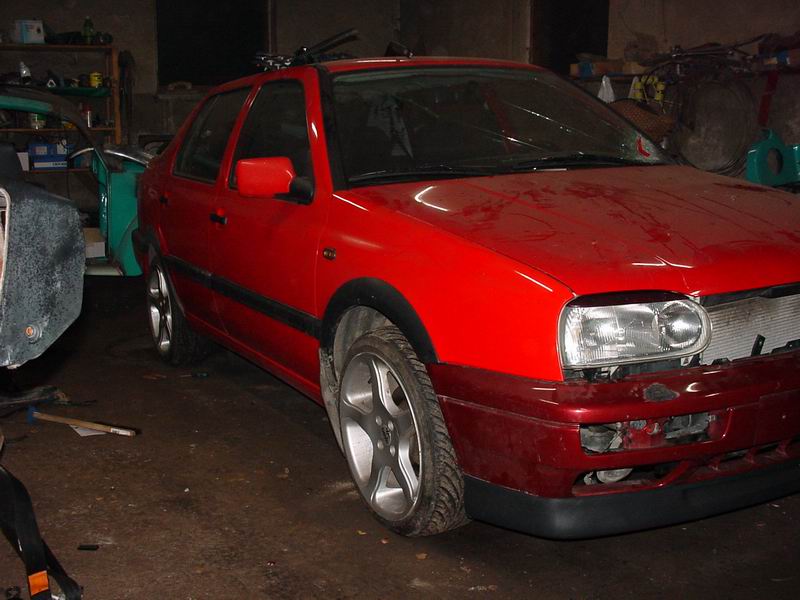
A friend has spare GT side mouldings and plastic arches. We had to try them on and look at the result for a while. I think I'll leave them off, though. They can always be fitted later if I change my mind.
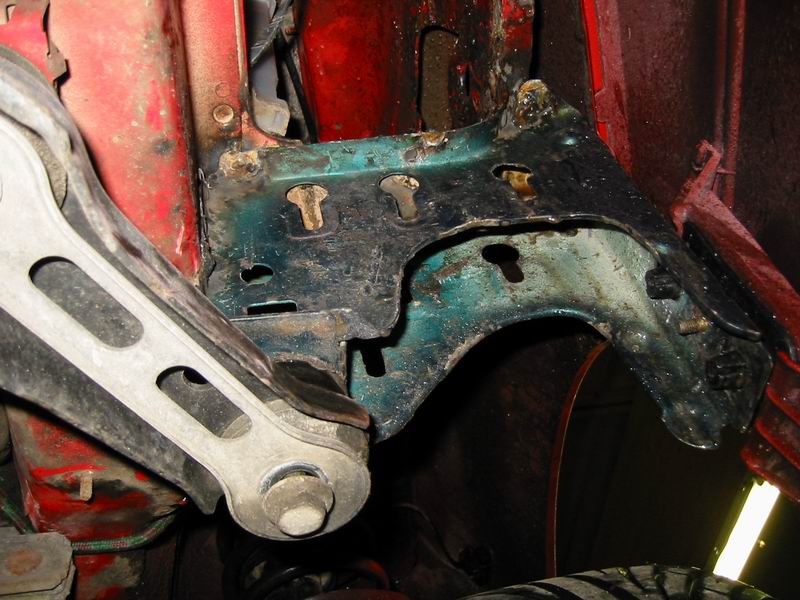
This view from underneath clearly shows the replaced bumper and wing mounting piece. We found that used too... More savings ;)
Paint preparation
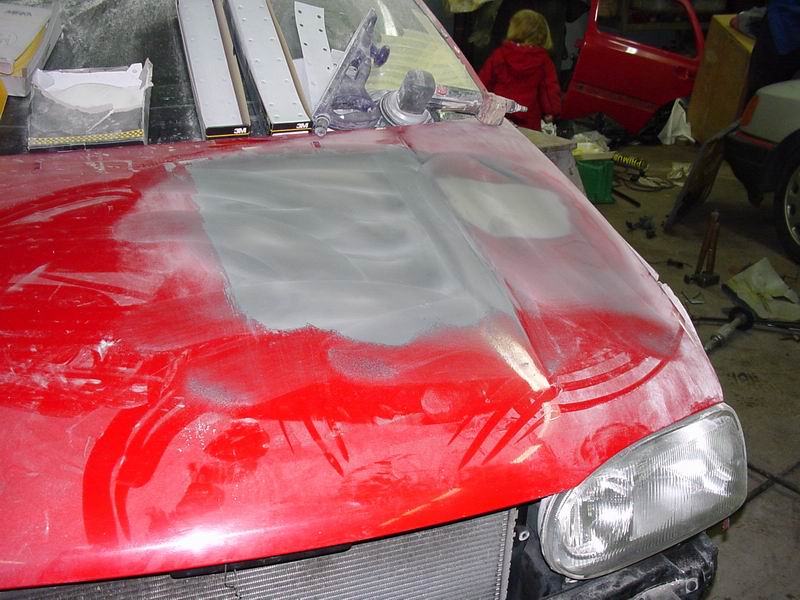
The bonnet had a dent too, so filler was unavoidable. Here a guide coat of 'ash' has been applied over the filler to reveal small low spots that might otherwise go unnoticed.
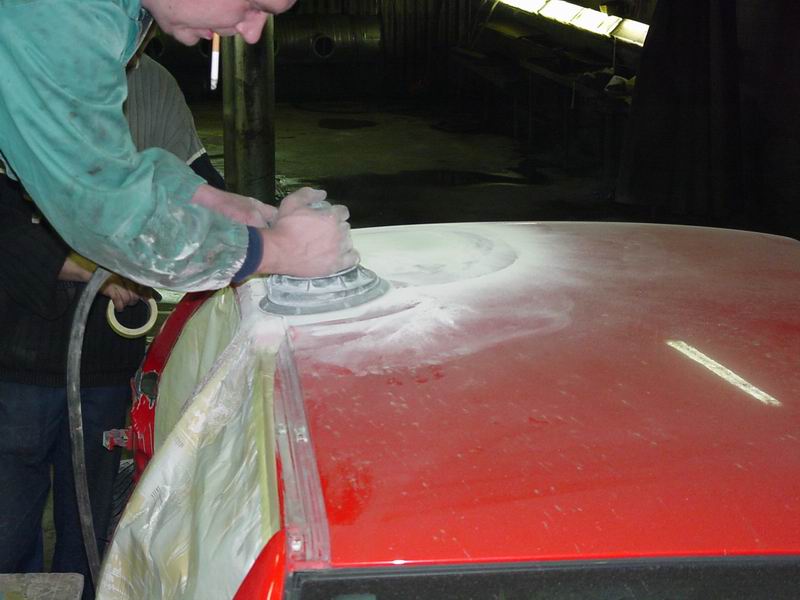
Working on the roof.
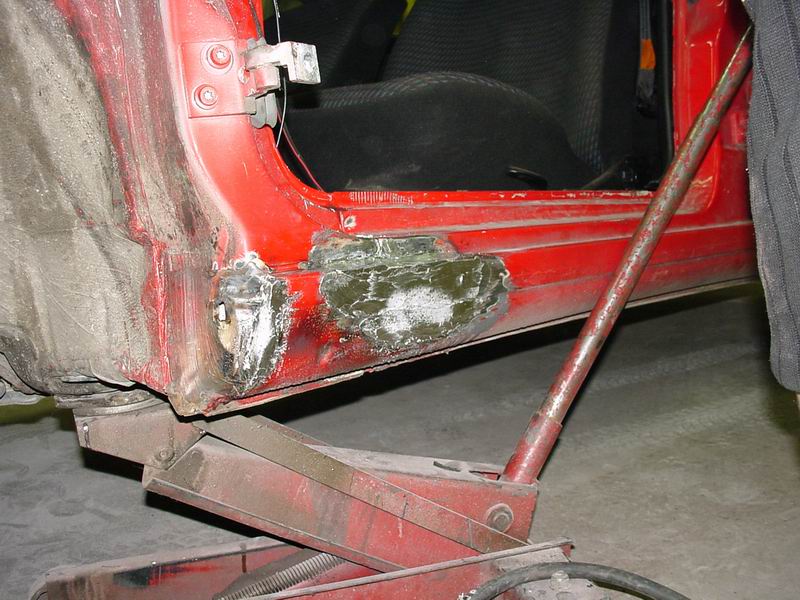
A little body solder on the sill...
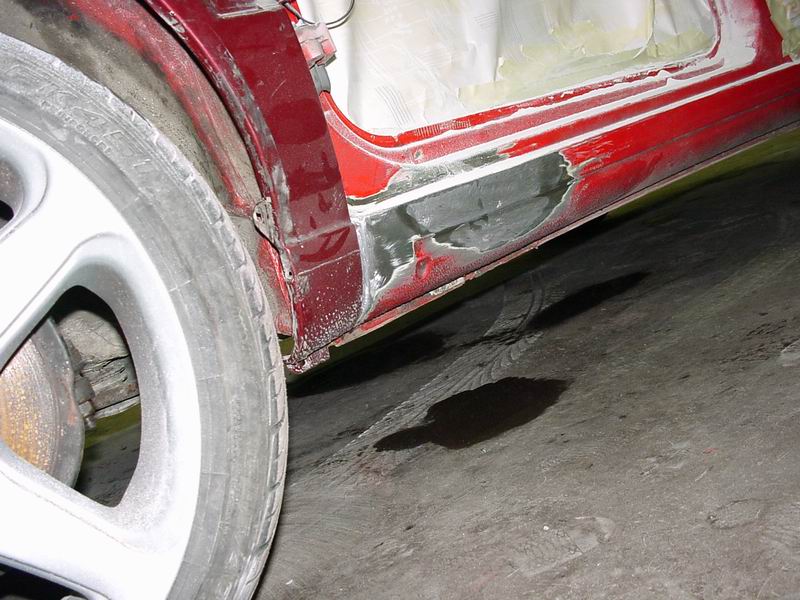
...and just a little filler on top.
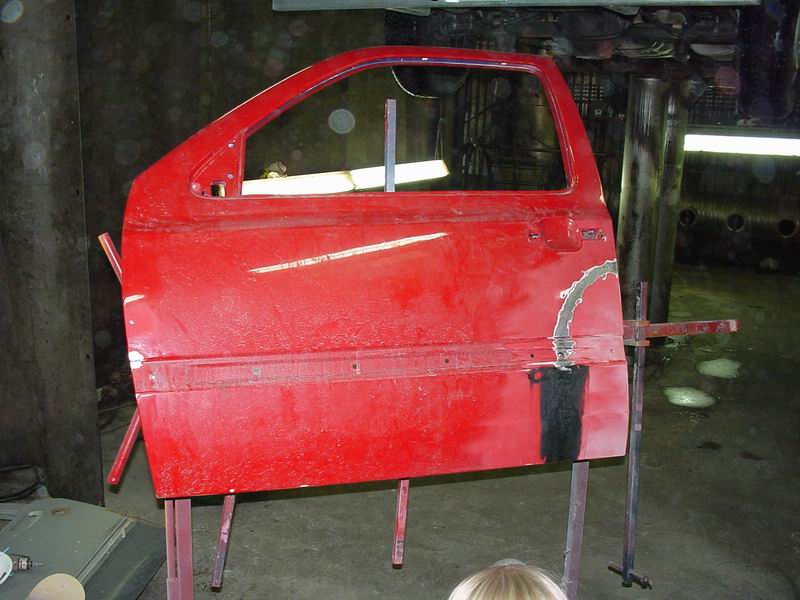
The same for the door.
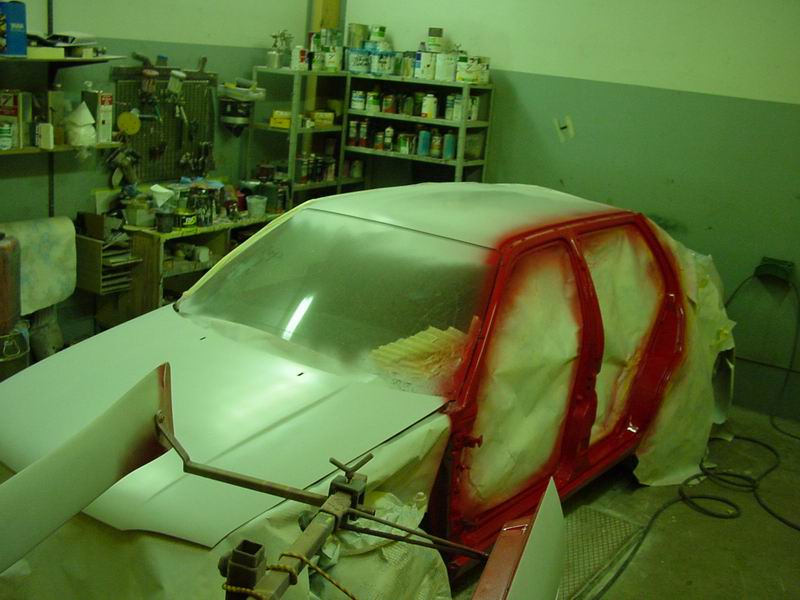
The door openings were painted first. You can also see the primer-surfacer already applied to the roof, bonnet and boot lid — the areas that had been filled.
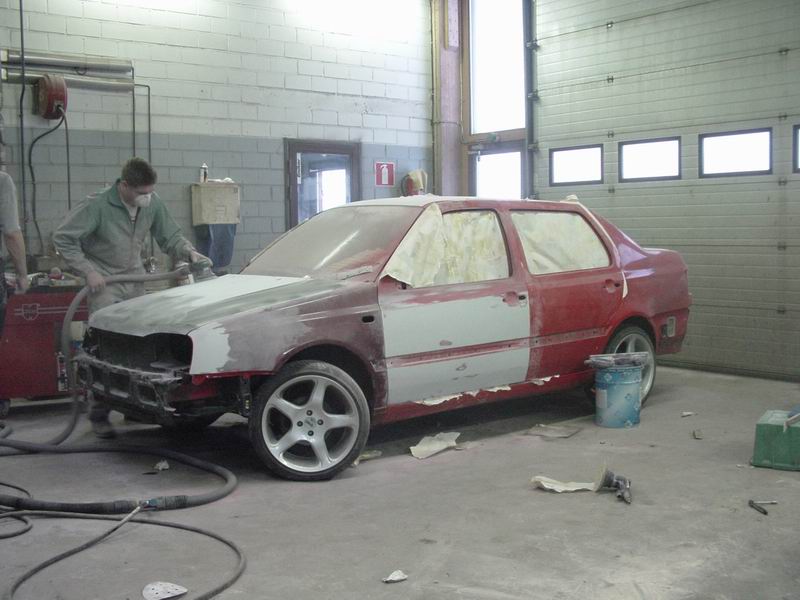
The rest of the preparation starts here. The doors are on and we're doing the final sanding before painting. We decided to respray the entire car, even though one side didn't need painting in full. At least there won't be any colour differences.
Painting
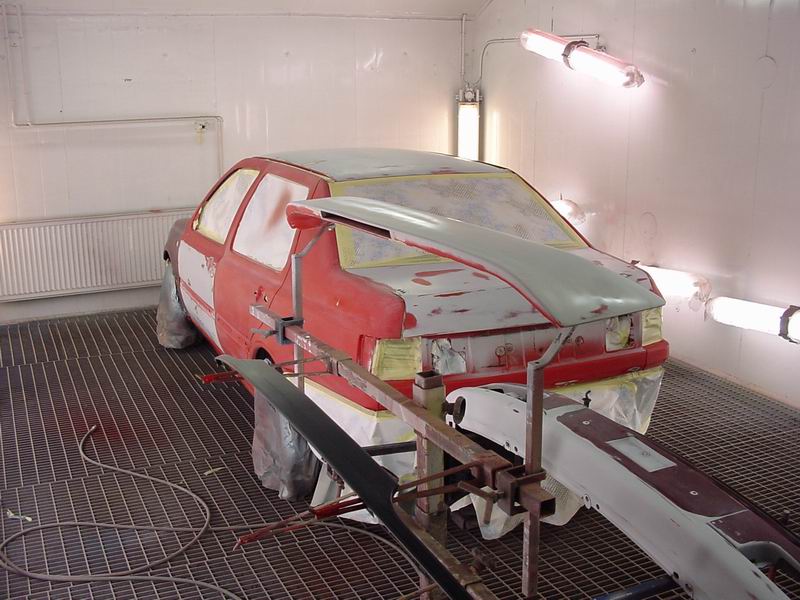
The Vento moved into the 'oven' for painting. The space has proper heating, lighting and extraction to remove excess dust and debris. We only removed the broken windscreen now; until this point it had usefully protected the interior from dust.
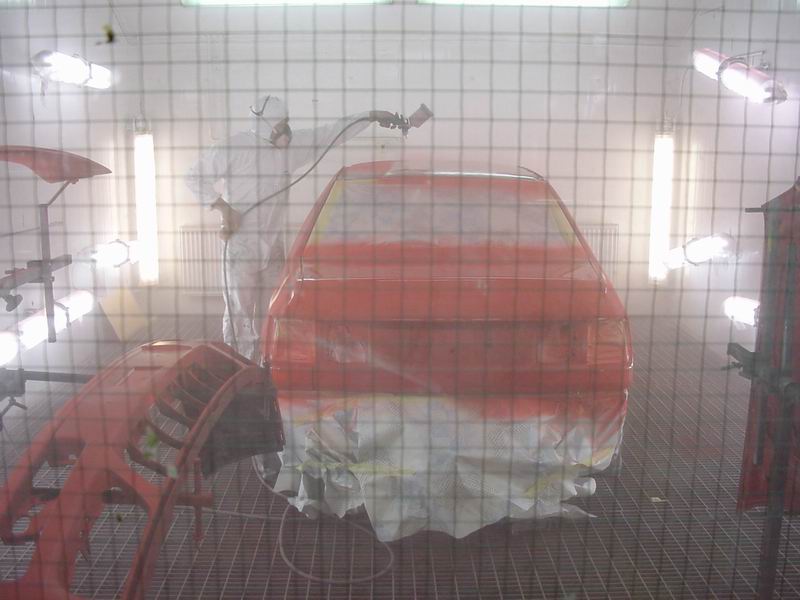
Painter T. Tammi at work. First comes a tinted undercoat so the actual basecoat covers better and stone chips won't expose grey primer so easily.
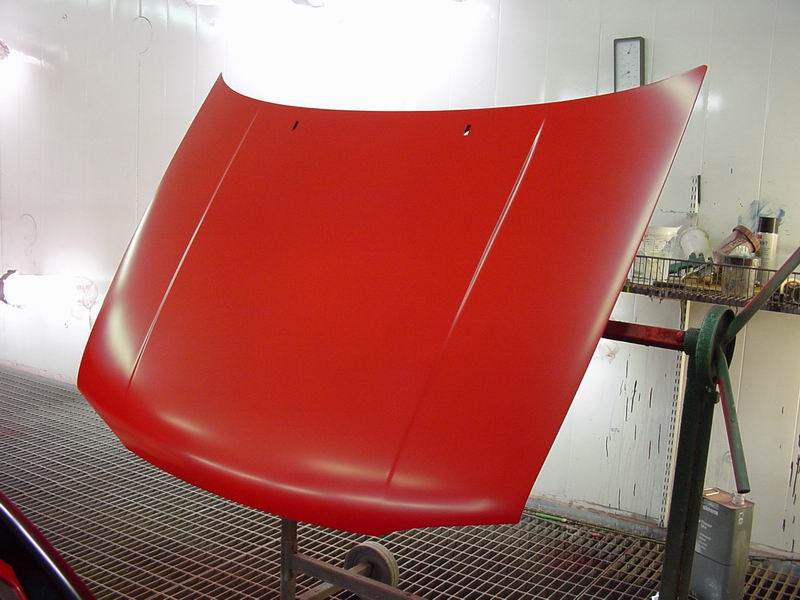
The bonnet coloured, meaning the basecoat is on. Clear coat still has to go on to give it its shine.
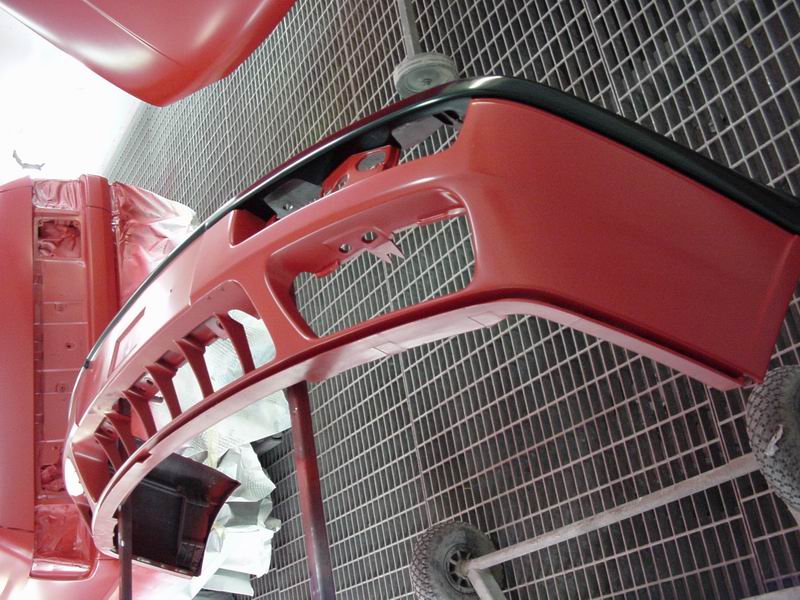
First the bumper got red basecoat. Once that had dried, the upper section was painted in gloss black basecoat.
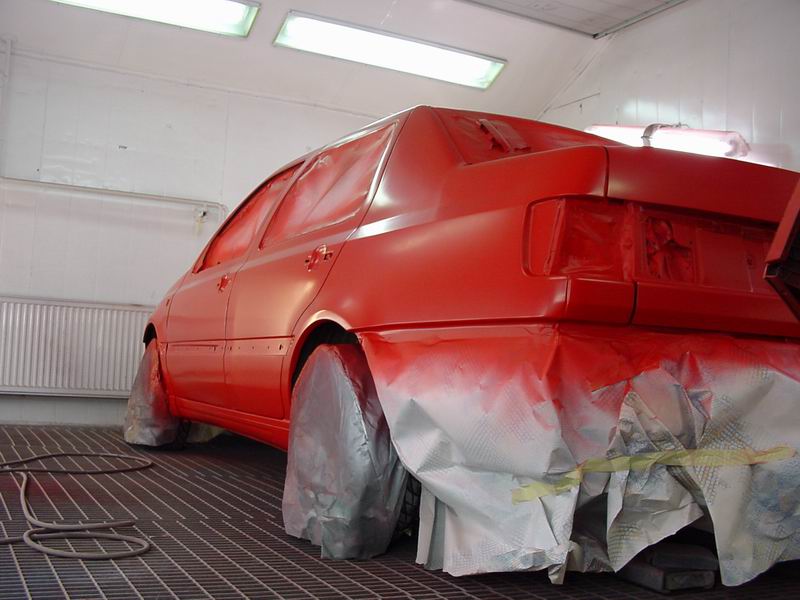
The car itself in colour...
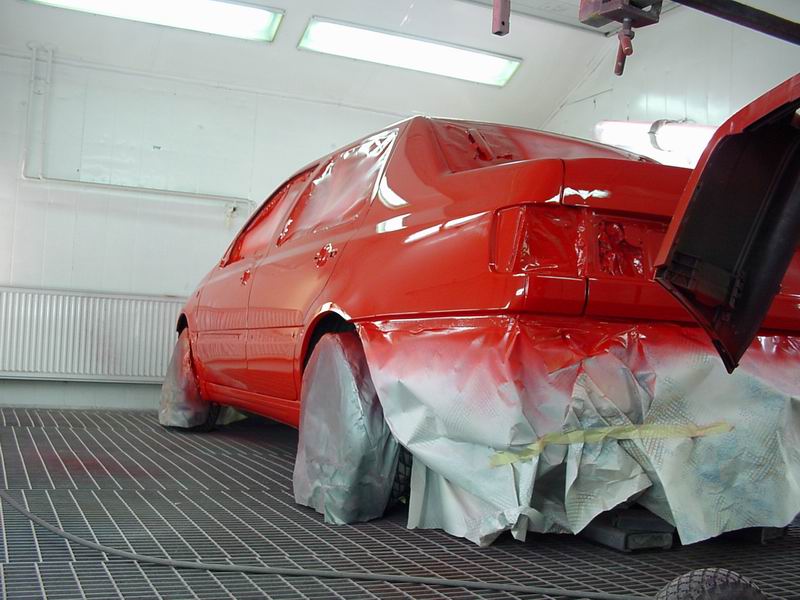
...and then clear-coated. Three coats of clear went over the basecoat for enough shine. Sharp eyes will spot the obligatory paint run™ in this picture — which can be sanded out :-)
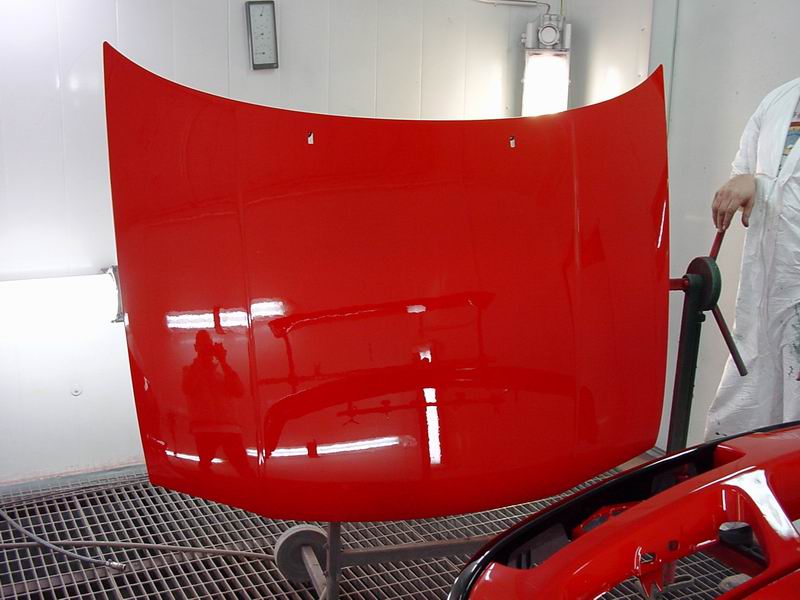
The clear-coated bonnet. Lovely shine!
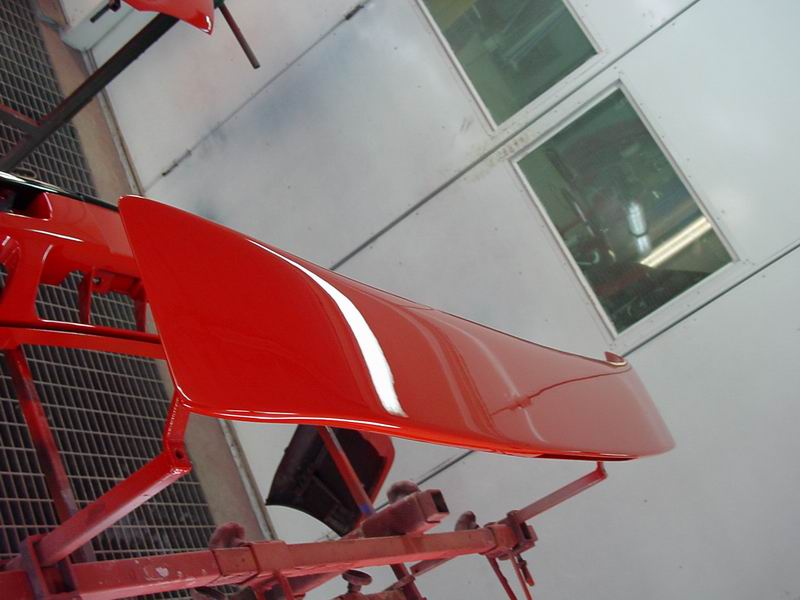
The clear-coated rear spoiler. This turned out nicely too! It's the same spoiler that was sagging. Apparently the holes had been drilled in the wrong places and the spoiler forced into position; we had to enlarge the holes a little. The original surface had strange hollows too. Now it's smooth and shiny!
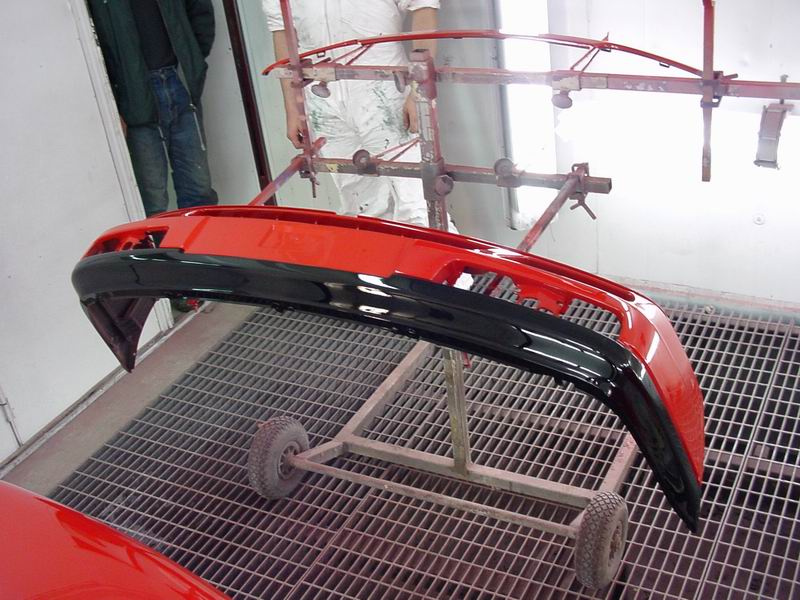
The clear-coated front bumper. Painting and gloss-coating the upper section is an experiment. If it looks good, we'll make the side mouldings and upper rear bumper glossy too. If it doesn't, the front bumper will get a matt textured finish.
Reassembly
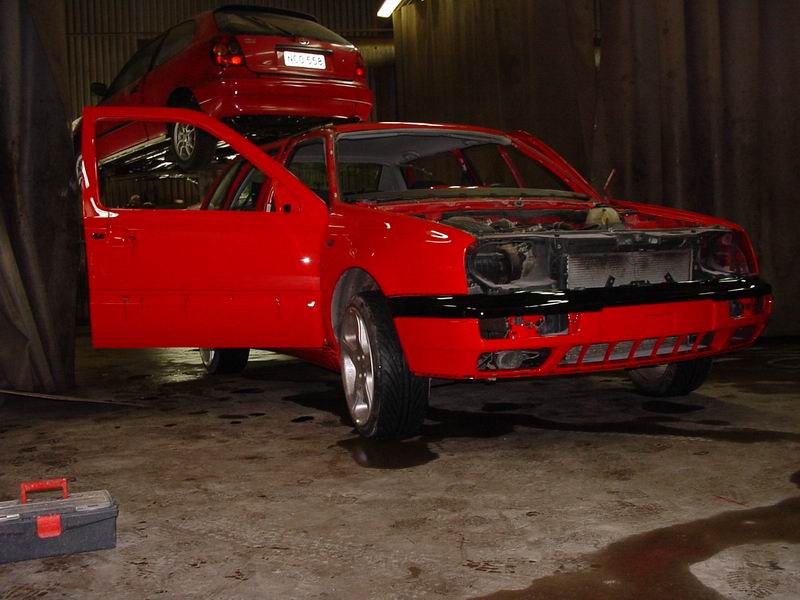
This is how the Vento looked with the masking removed and the bumper lifted into place.
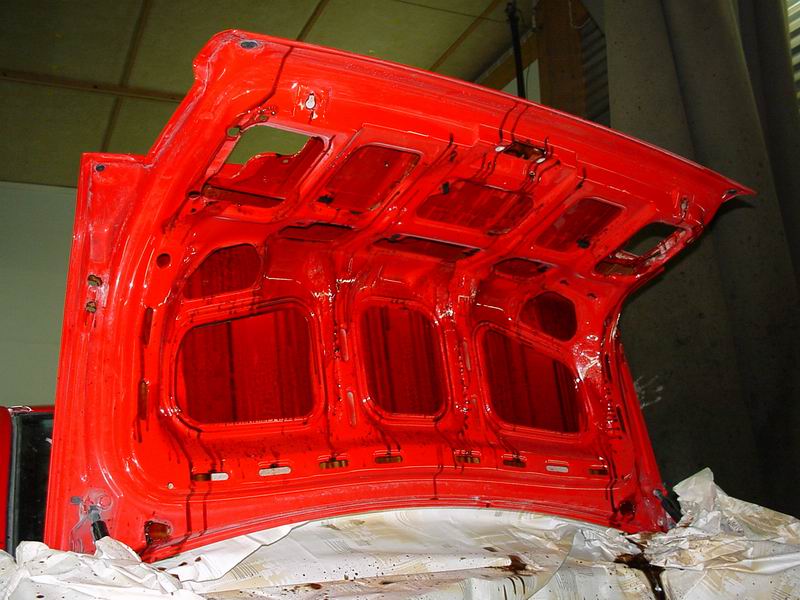
Pekka immediately filled the doors and boot lid with cavity wax so I could start reassembly. He didn't skimp on it... Feeding the wires into the boot lid was quite a messy job.
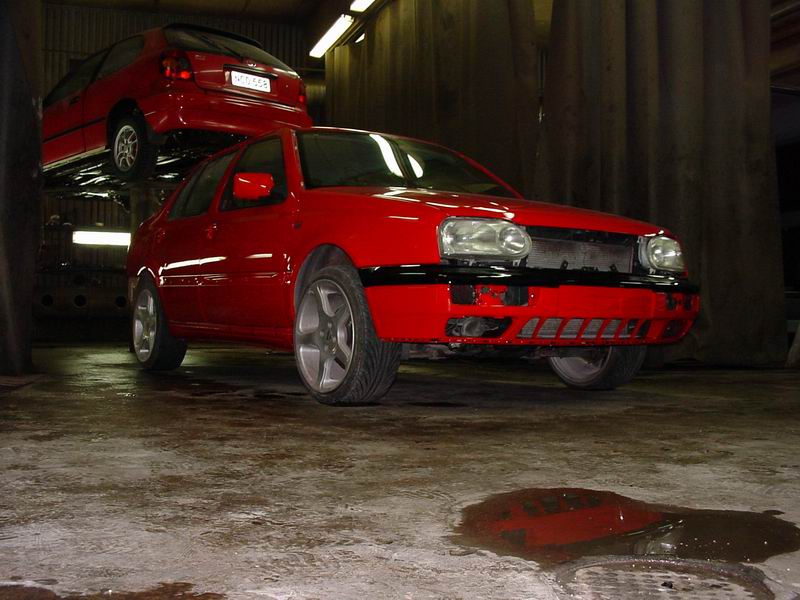
Here we are: doors assembled, an intact windscreen bonded in, and the bonnet back on too. Still wearing ordinary GT headlights for now. It looks rather like a tractor...
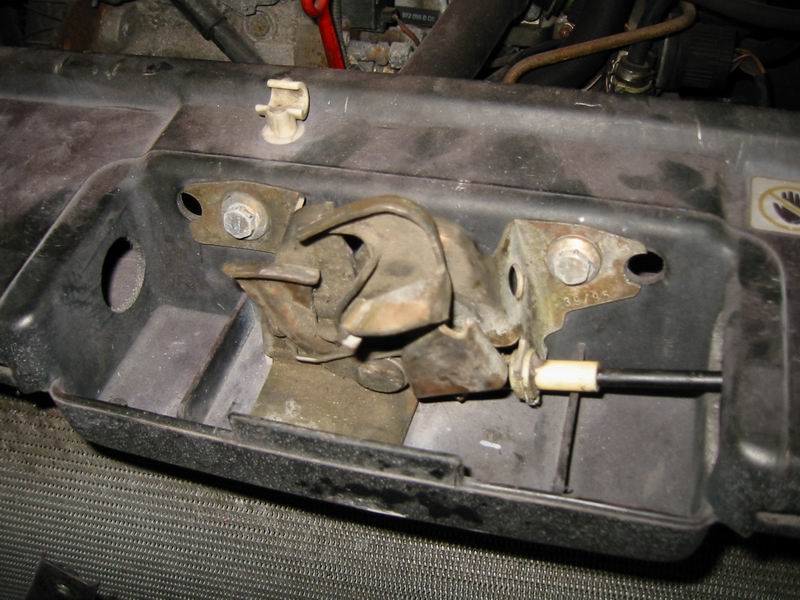
Finally we fitted the bonnet lock, so no more tying it shut with wire when moving the car.
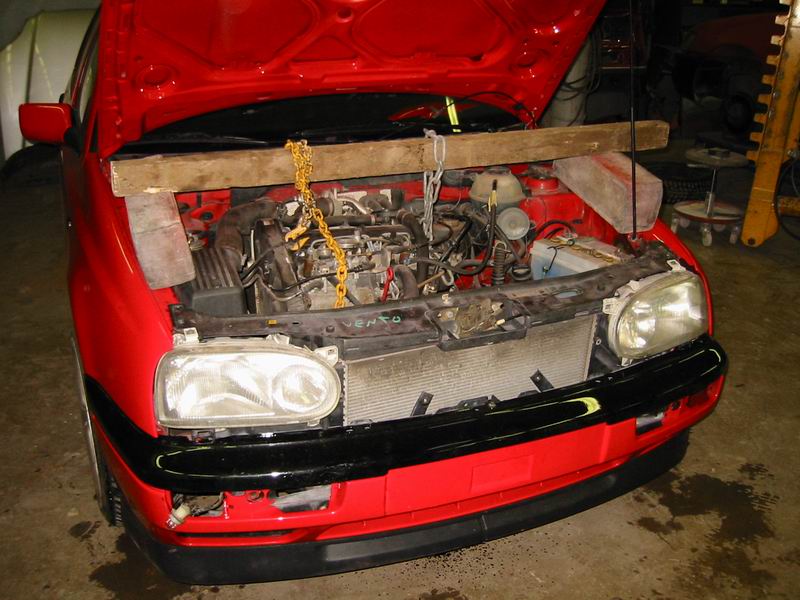
The bigger job was replacing the front subframe. First the engine was supported from above so the subframe could be dropped out underneath.
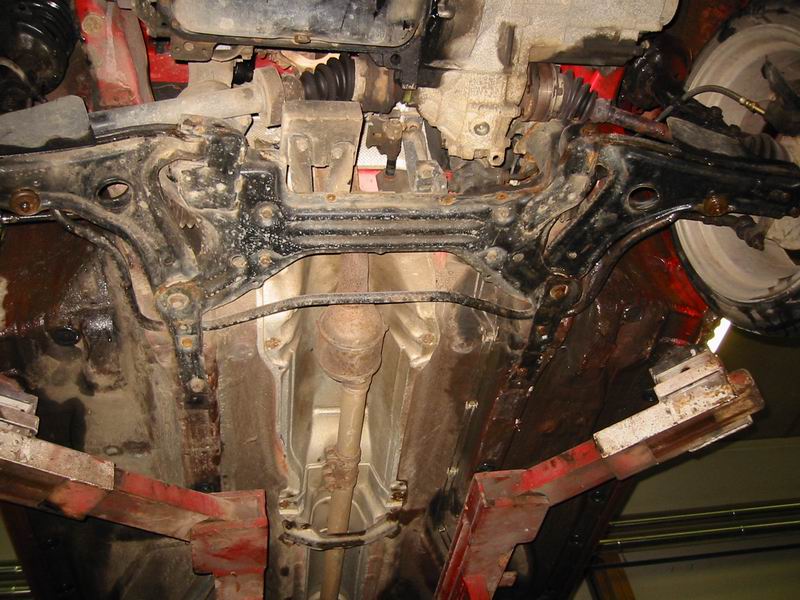
The view from below. Before the subframe can come out, the lower control arm bolts, steering rack bolts, subframe-to-body bolts and anti-roll bar bolts have to be removed... And before lifting the engine, of course, the rear engine and gearbox mounting bolts too.
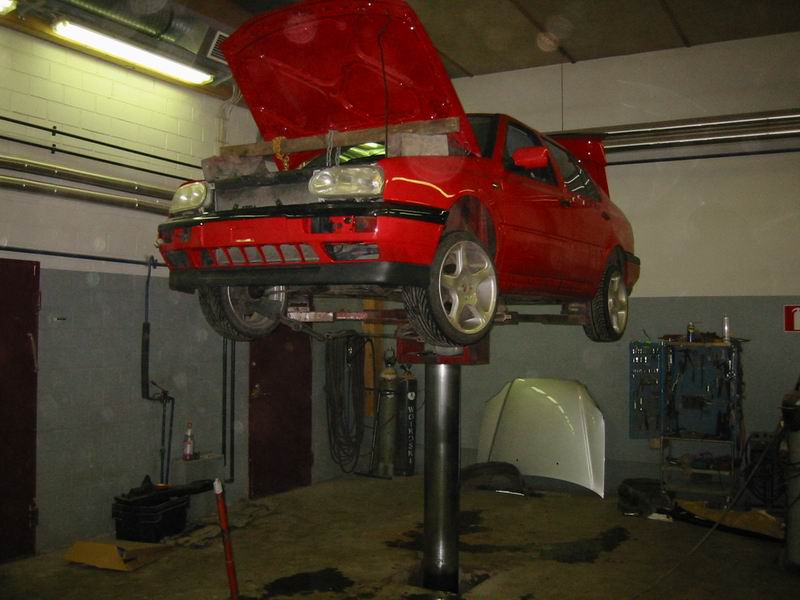
The car on the lift. The old subframe seems to be out already and the replacement going in. A lift makes jobs like this so much easier. If only I could have one in the home garage someday...
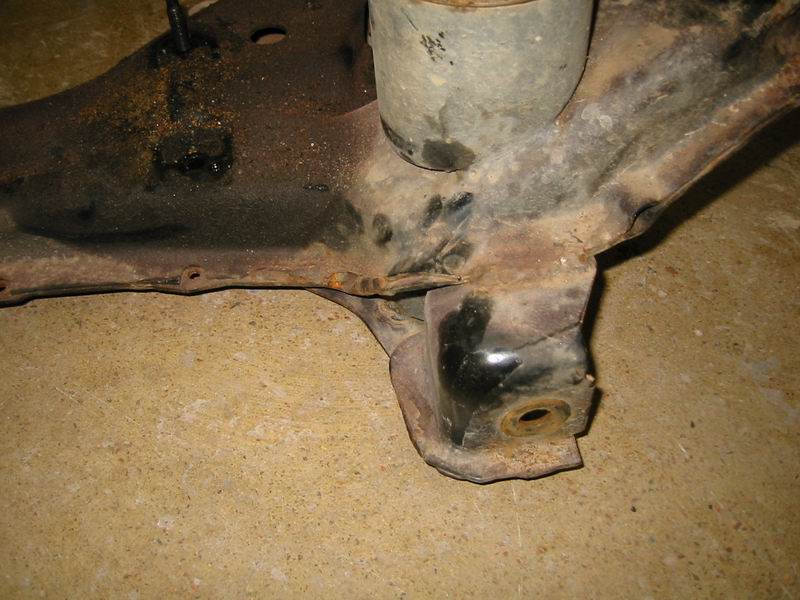
Here you can see the bent subframe mounting ear. Just a millimetre or two out here puts the wheel a centimetre too far back.
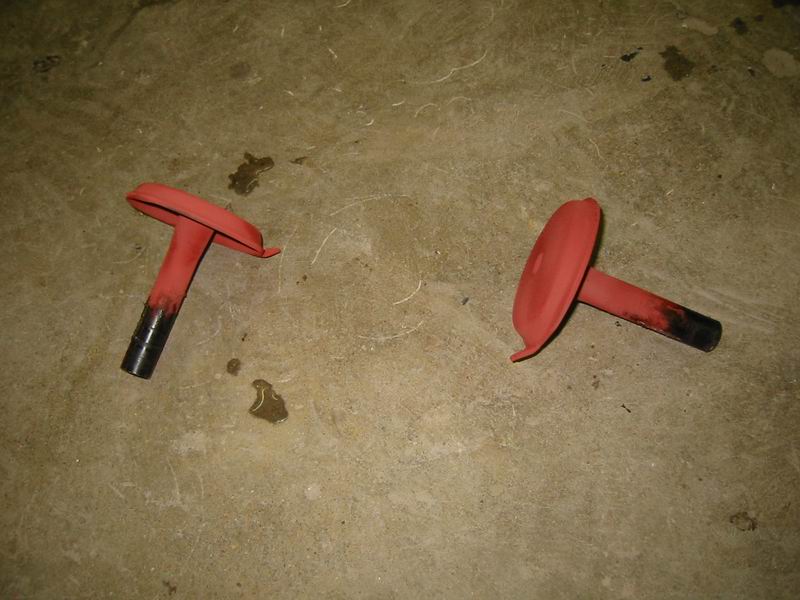
With the engine supported and the subframe removed, we repaired the bent engine mounts. Both front and rear mounts were bent. Compared with the Mk2 equivalents, the nice thing about these Mk3 mounts is that they can be repaired. Once the Mk2 hydraulic mounts break, they're useless. These mushroom-shaped parts usually bend in a crash as the engine shifts a little. We heated them, hammered them straight and painted them, then assembled and refitted the mounts.
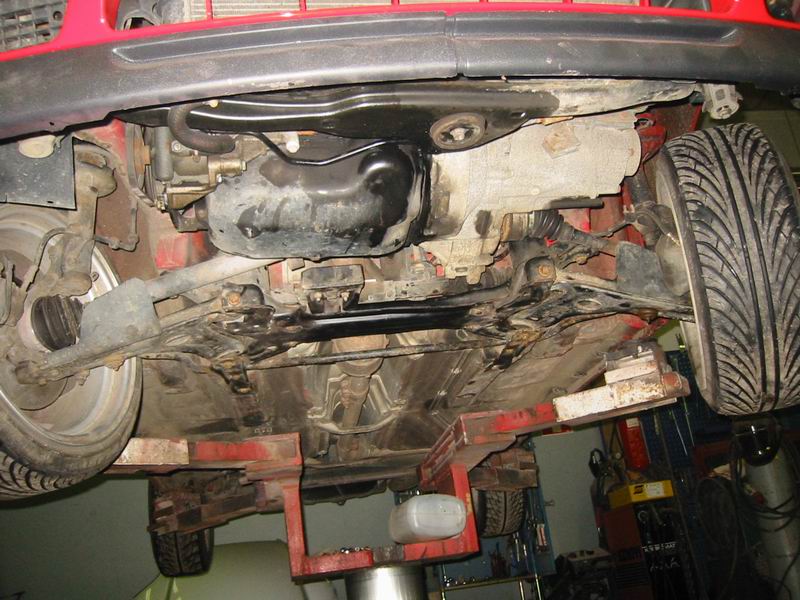
The sound subframe is now in place. We measured the wheel positions and they're roughly right. We'll allow a little over a millimetre of difference. It could be corrected by adjusting the subframe, but we couldn't face undoing the bolts again when the next measurement would probably be out the other way... :-)
A little oil spilled when we removed the filter to get it out of the way while repairing the front mount.
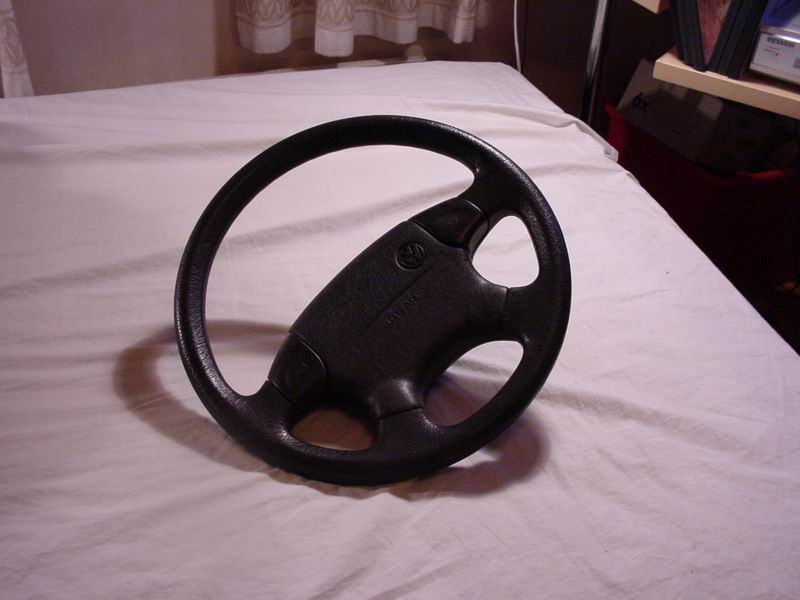
The steering wheel with an intact airbag, found second-hand.
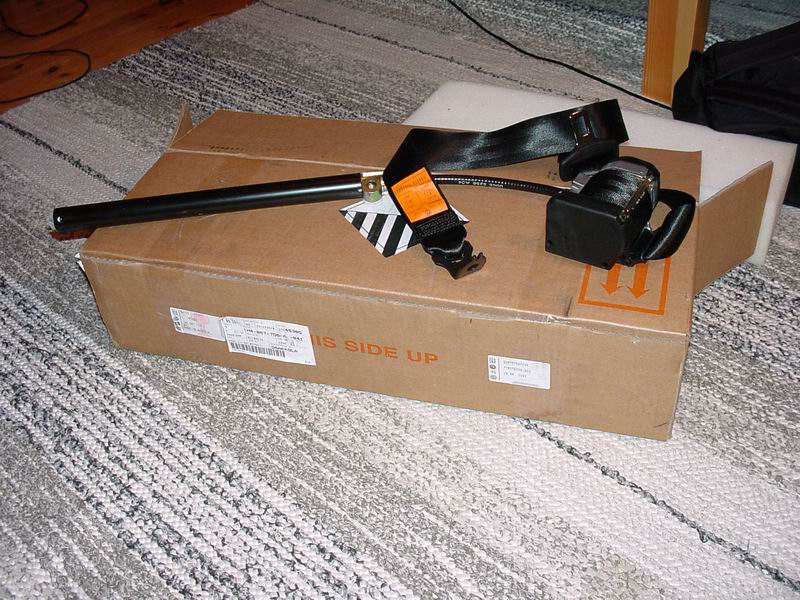
New seat belts. The headlining went back in at the same time.
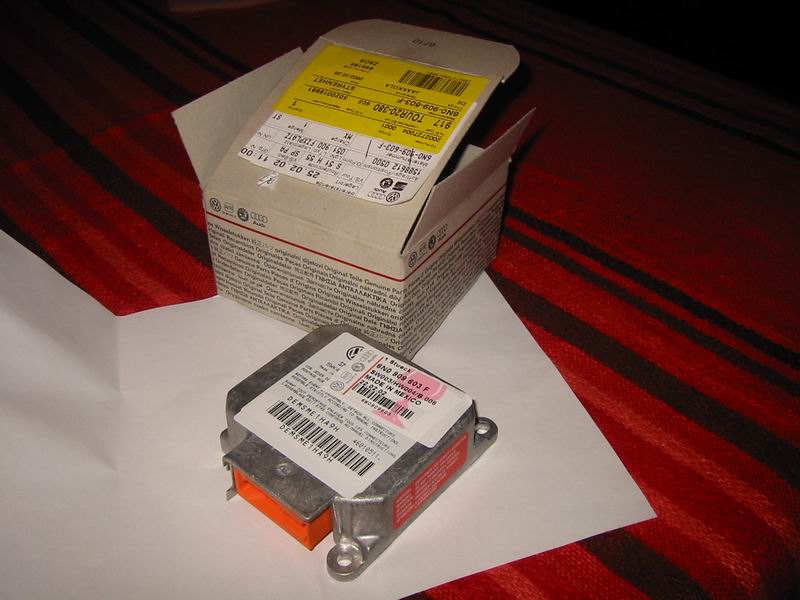
The new airbag control unit goes under the dashboard on top of the crossmember. In a crash where the airbag deploys, the control unit becomes unrepairable... As do the seat belts if their pretensioners fire.
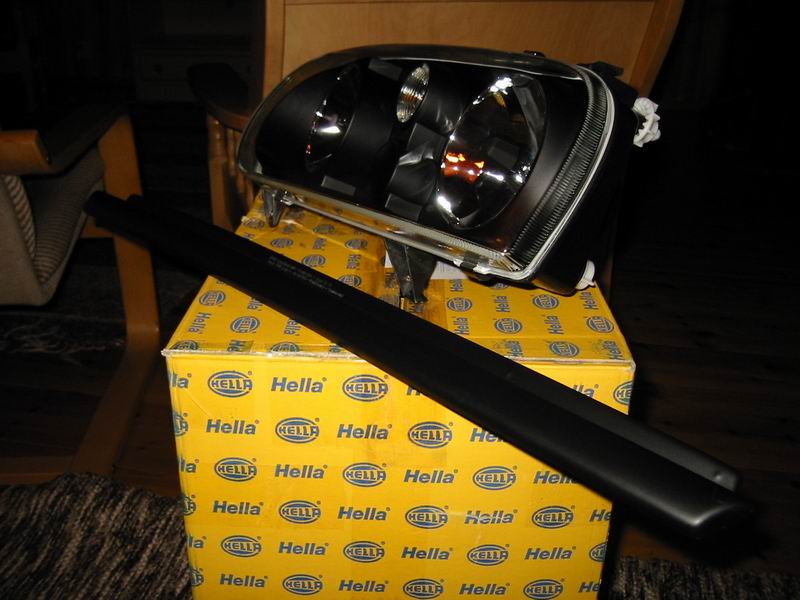
The remaining parts from Kenny's Car Styling. The Hella headlights look great, and unusual. A Bonrath grille spoiler came too, but didn't seem to fit properly... It eventually went on Pekka's Variant.
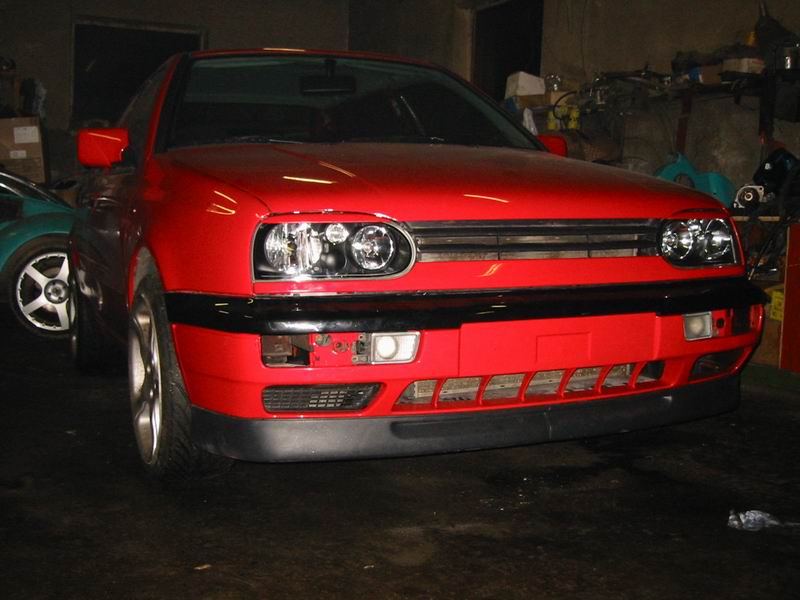
The lights installed. Quite a mean look, isn't it? The eyebrows still need repainting and the indicators and fog lights securing properly... And the light switch needs replacing with one for front fog lights.
Ready for inspection
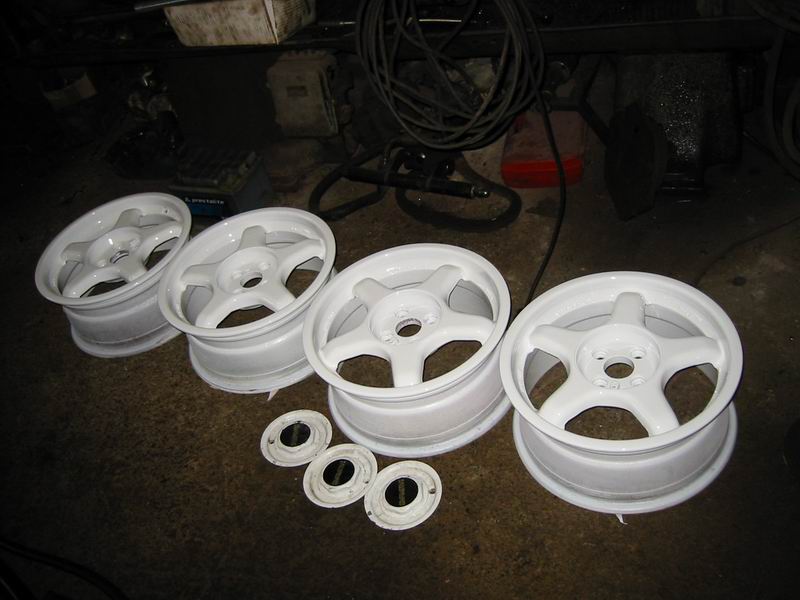
More painting done. These are the used Compomotive wheels I bought for winter and had repainted.
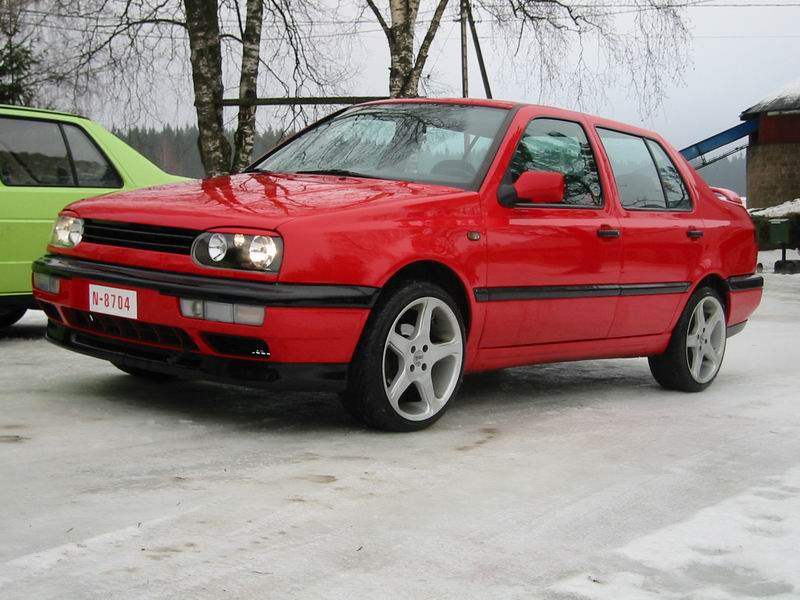
Still on summer tyres here... In January. As you can see, we did paint the mouldings after all, along with the front and rear lower trims and the grille. We're about to head to Pori for wheel alignment.
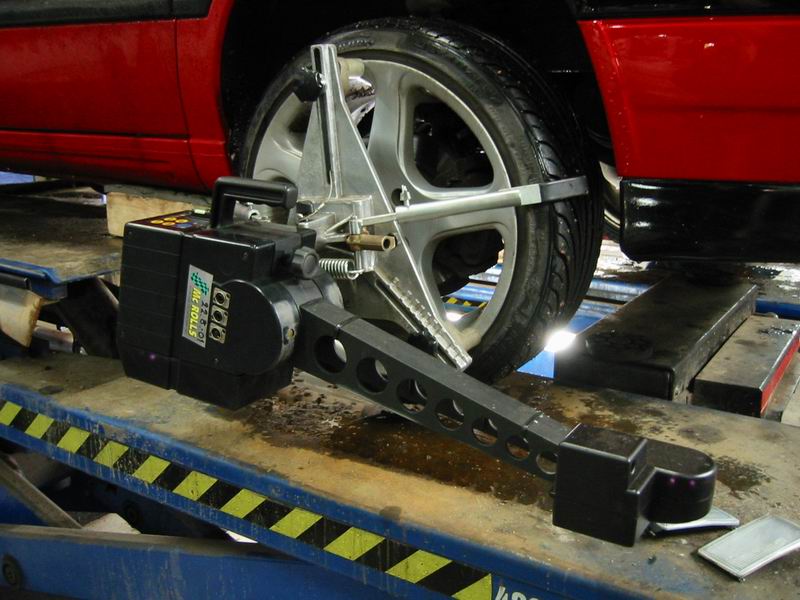
Four-wheel alignment at Automarkku, Pekka's workplace. It's computer-operated: each wheel gets one of the devices shown, which sight each other optically and transmit measurements by radio to the computer, or whatever the central unit is called.
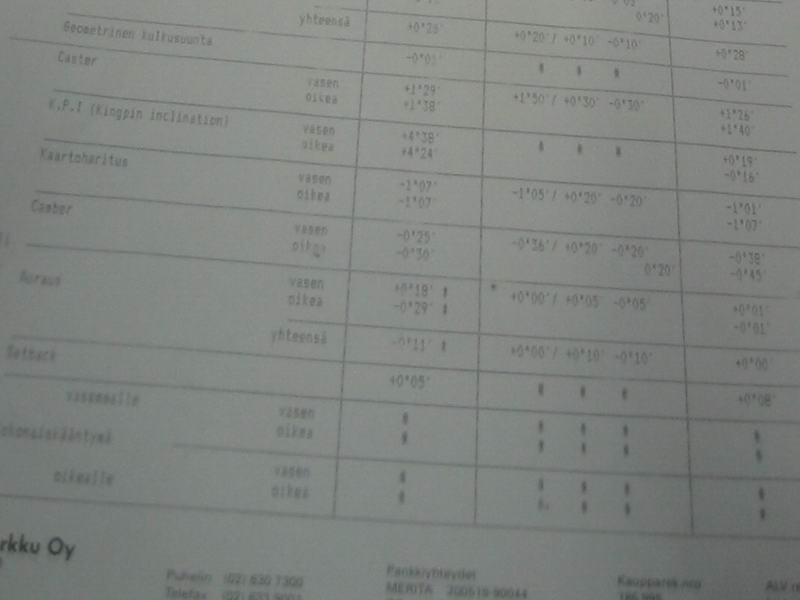
Overall it was a small adjustment job. Practically only the toe needed changing. We reduced the camber a little too, although it wasn't necessary. With less camber the tyres shouldn't catch the arches as easily.
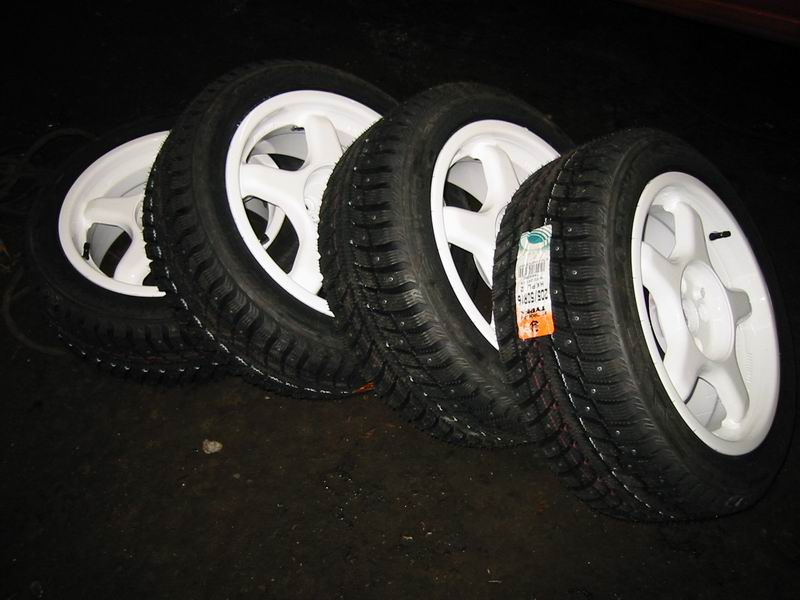
The tyres arrived and are already fitted: Nokian Hakkapeliitta 2s, size 205/50 R16. I'd once decided never to buy studded tyres again, but broke that promise. Perhaps the Blizzaks on the Jetta, now in their third winter, had shaken my confidence in studless tyres a little too much. Anyway, these Nokians are good! I could almost say never again to studless tyres...
The Vento finally got the insurance inspector's approval. Then it was just a matter of waiting for paperwork from somewhere in Helsinki before the inspection. It felt good to drive between Kankaanpää and Pori for the wheel alignment. It's so quiet compared with the Jetta. The suspension was horribly soft, though, again compared with the Jetta. There was a planned improvement for that.
Rustproofing and washing
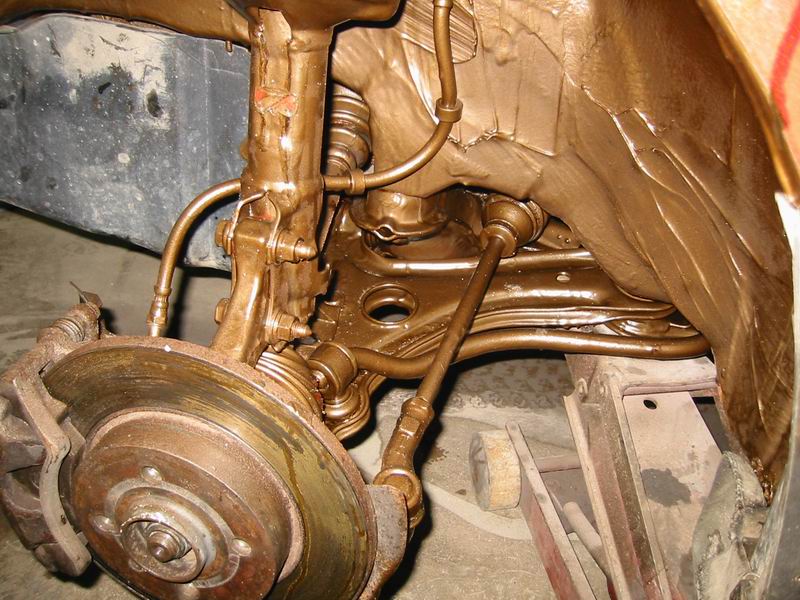
Waiting for the paperwork left time to rustproof the car. This time a proper rustproofing company did it, so I didn't get any photos of the work. Here's an idea of how the front suspension looks afterwards.
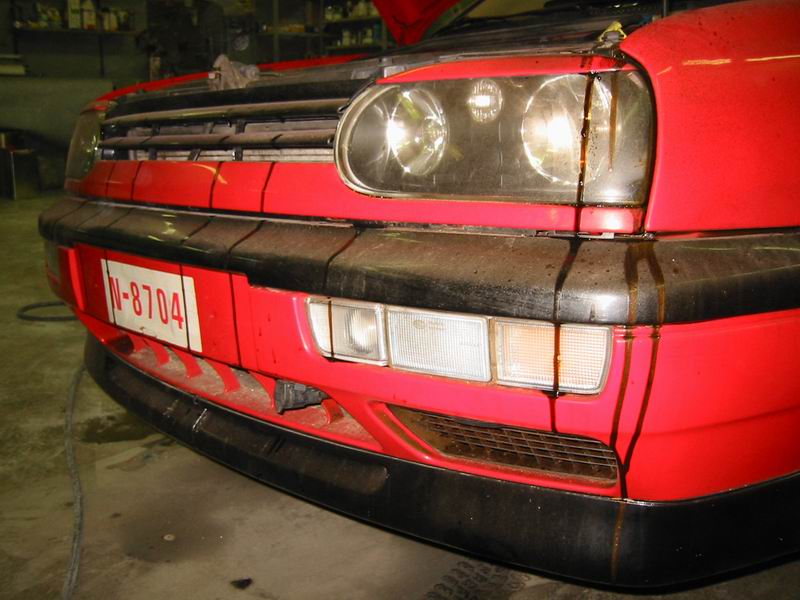
The stuff was everywhere, and cleaning off the excess was a big job. Plenty of solvent was needed, and some still remained in a few places...
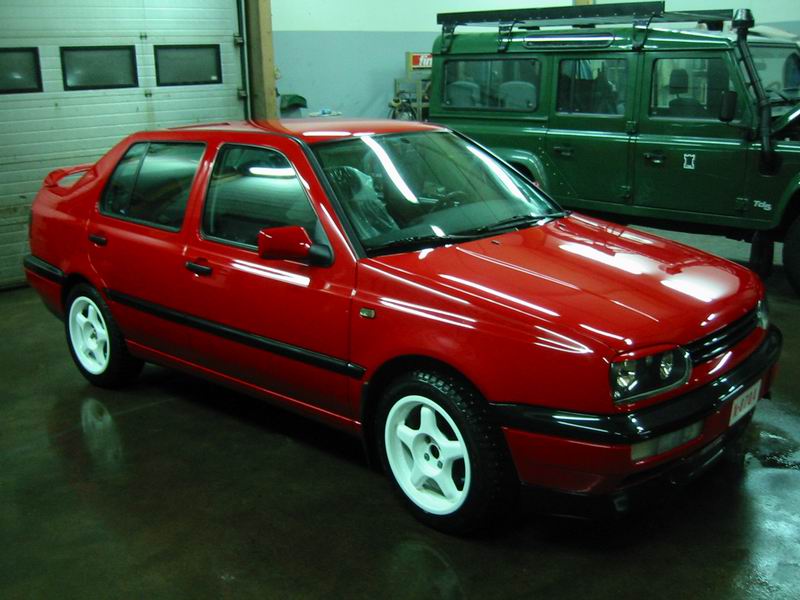
...but this is how it looked after a few solvent washes. Not bad, if I say so myself.
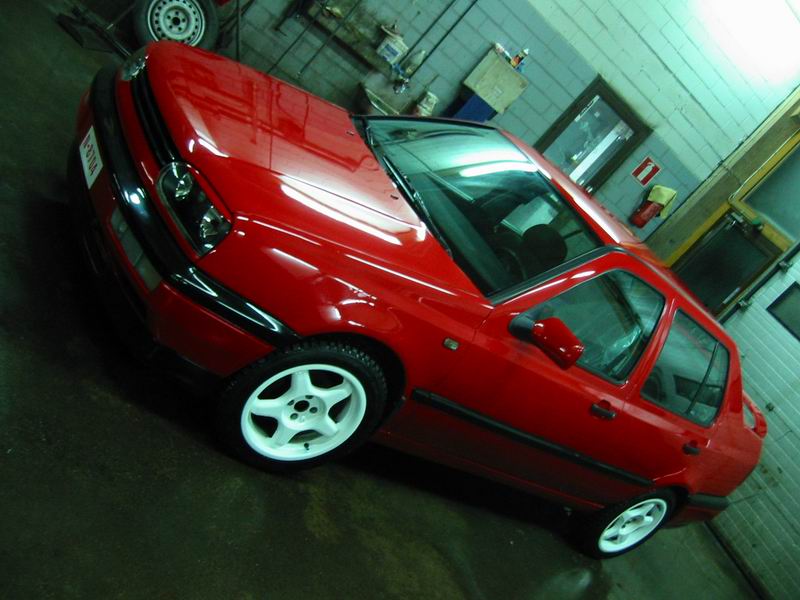
And from the other side.
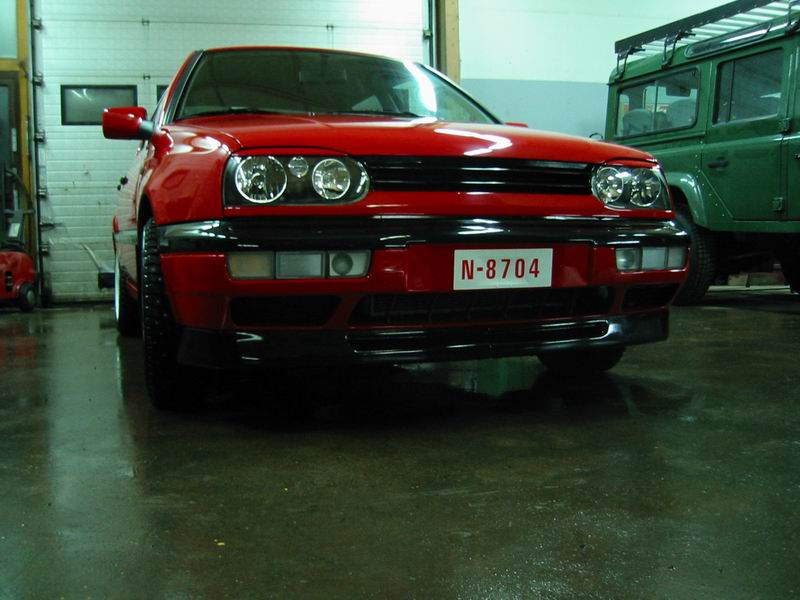
Now there really was nothing left but waiting for the insurance company's paperwork. The Vento was more or less ready, though the suspension swap was still ahead and it was time to start thinking about summer wheels and tyres...
Yes. That's it. The inspection was a formality. Well, they suggested checking a lower control arm bush when fitting the proper suspension kit; it was eventually sorted by tightening the bolt.
Nothing left but driving :)
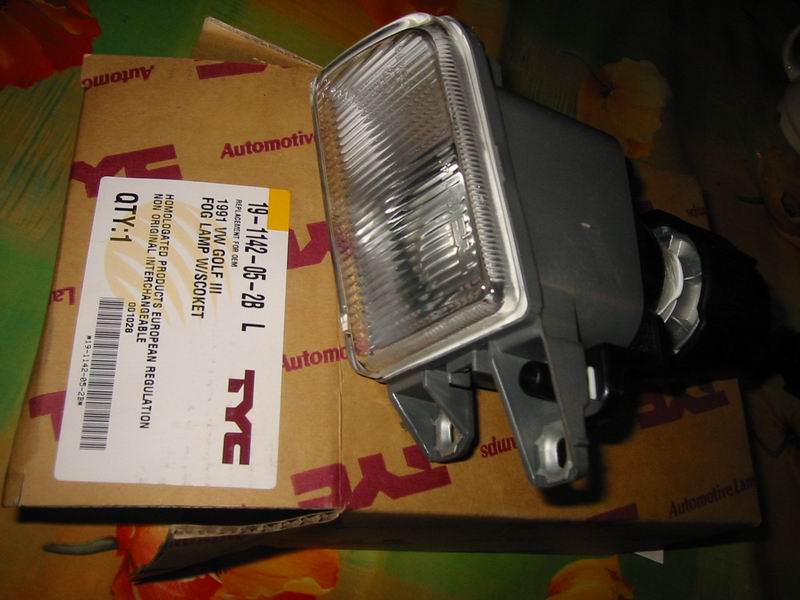
The Vento got new fog lights too. Something odd happened to the ones in the earlier photos: they MELTED beside the bulb holders. We thought the underbody protection chemicals might have reacted with the holders; we couldn't find any other sensible explanation. It now has new aftermarket fog lights, and they weren't even expensive.
Electric windows
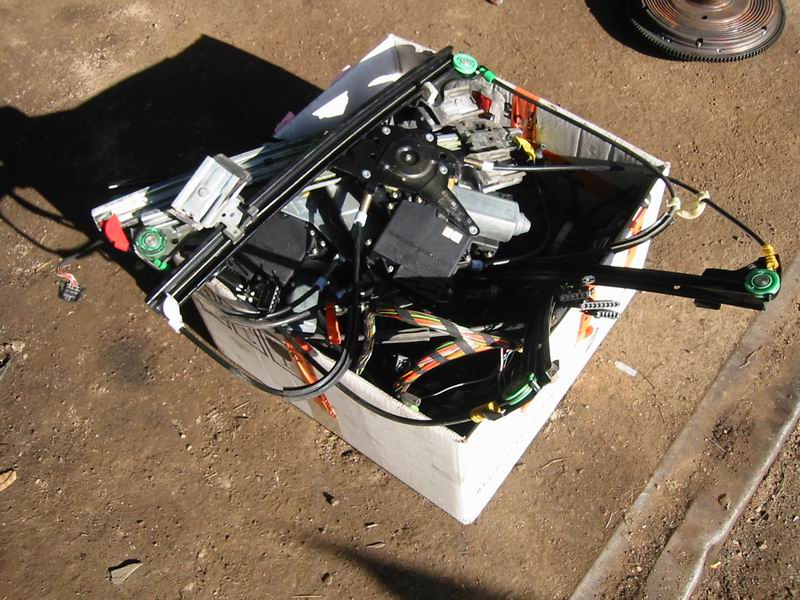
I decided to fit electric windows to the Vento. Here's a box of parts I removed from Pekka's tax-free Golf the previous winter. Installing original electric windows means changing quite a pile of wiring and therefore removing plenty of trim. On the first evening I removed the door cards and the original comfort wiring loom for the central locking, electric mirrors and windows, and so on.
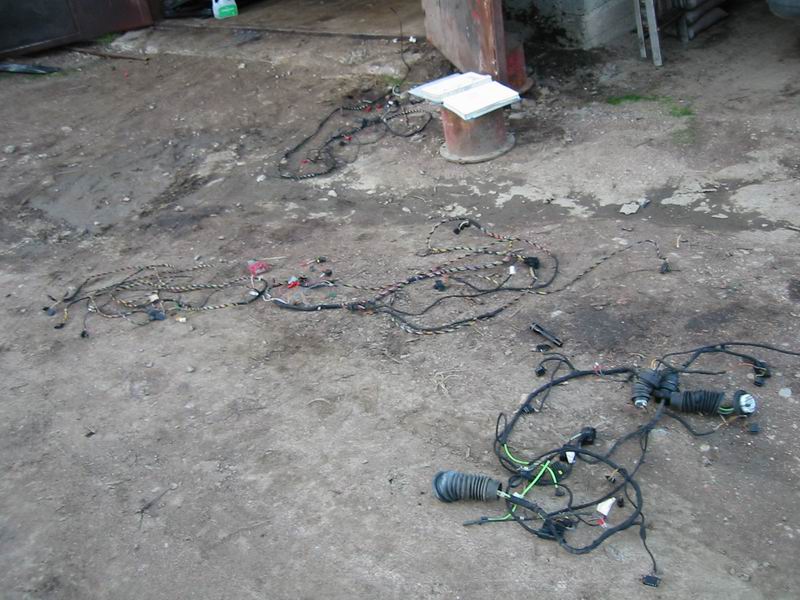
At the bottom right are the door looms, in the middle the 1994 Golf comfort loom, and on the left the equivalent 1996 Vento loom, which lacks the electric-window wires. At the top is the 1994 Golf rear loom, used to work out the connector and wiring differences.
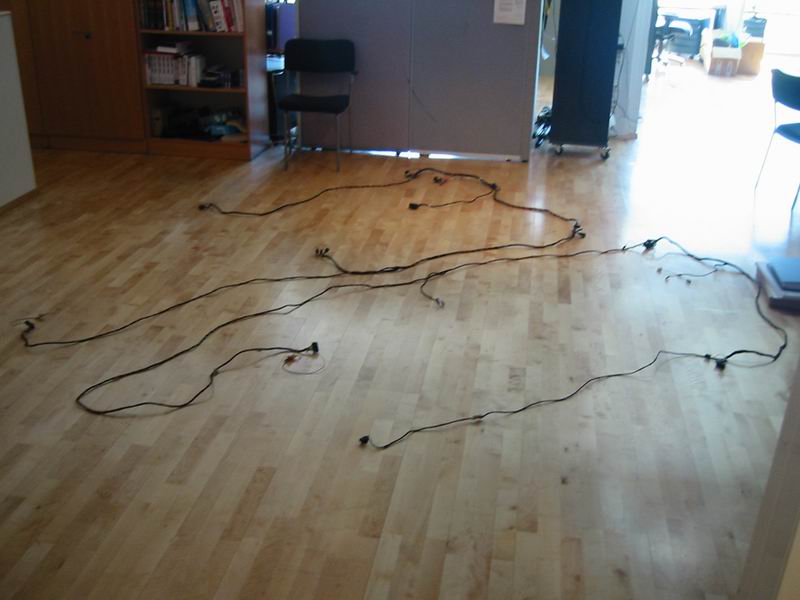
VW's engineers had changed the wiring a little between 1994 and 1996, mainly the connectors. A few wire colours differed just to confuse things, and a wire for the door warning light on a better-equipped model was missing. The 1994 Golf loom is on the left and the 1996 Vento one on the right. The cable to the rear central locking pump is a different length and runs along the opposite side, just like the pump itself: left in the Vento, right in the Golf.
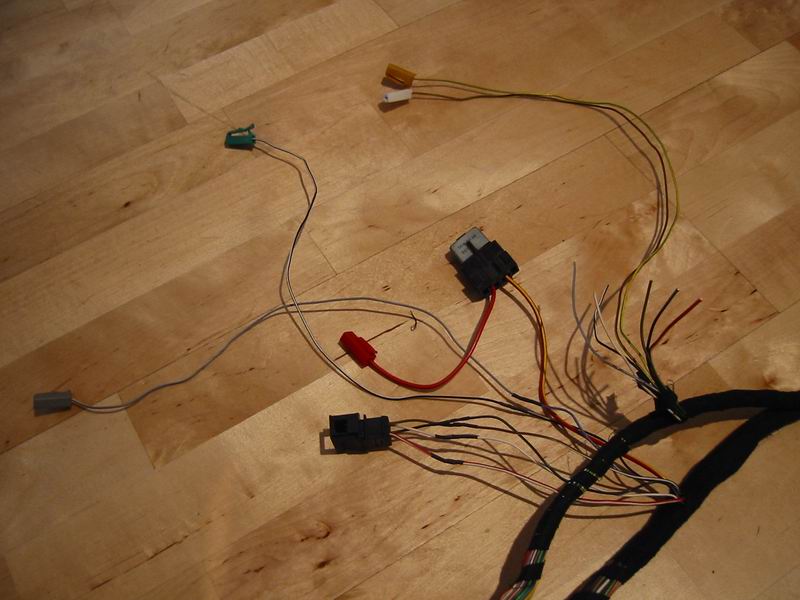
The connection to the rest of the car's electrics was therefore different on the older model, so the loom needed modifying for the Vento's newer wiring. Here the connector and wires cut from the original Vento loom are joined to the 1994 loom. The wire colours even mostly match :-) The rear part also needed extending so the central locking pump could stay in its original position, the only place it sensibly fits.
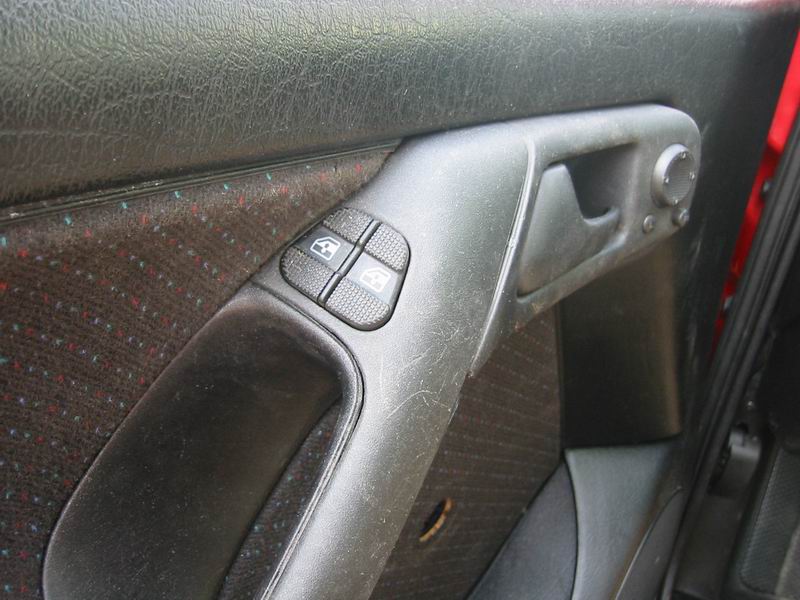
Finally everything is together, and it even works! Quite luxurious :-) It was puzzling when all the windows opened 10 cm on disarming the alarm, but reprogramming the alarm fixed that. I still needed neat plugs for the old winder holes in the door cards... Naturally the driver controls both front windows...
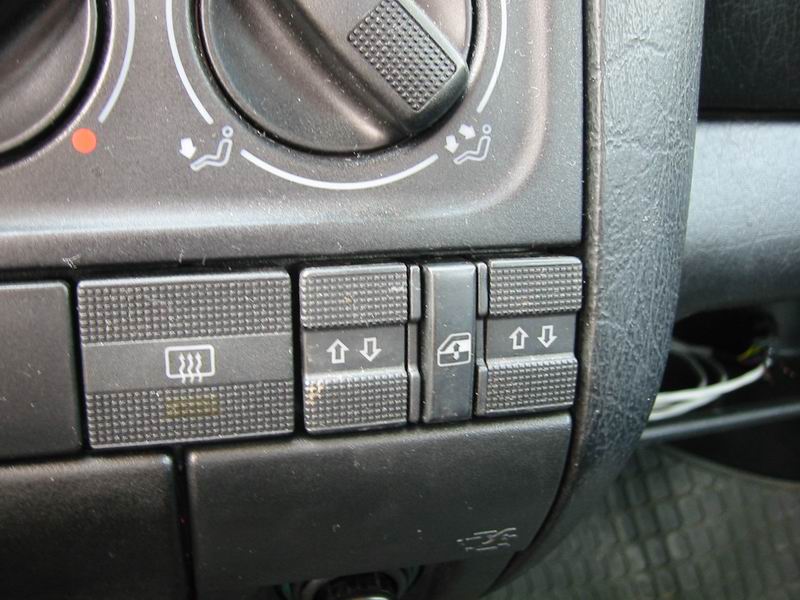
...and the rear ones too. The rear door handles also have their own window switches, like the front door handles.
Wheels, suspension and brakes
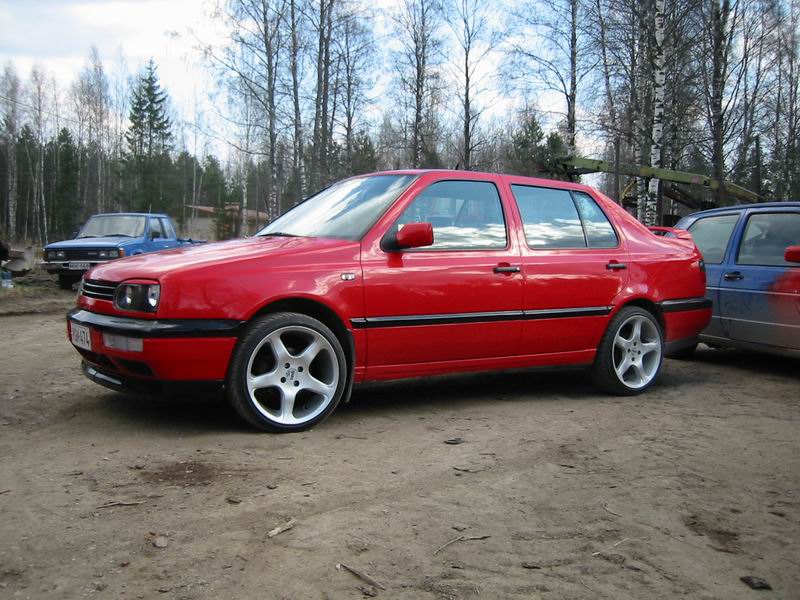
The Vento's spring look. Standard suspension, with the DBV Nizza wheels previously on the Jetta: 8x17 inches with 205/40 Falkens. I'd ordered O.Z. Superleggeras ages ago, but O.Z. had delivery problems. Eibach Sportline 45–50 mm springs and Koni Sport dampers are also on the way.
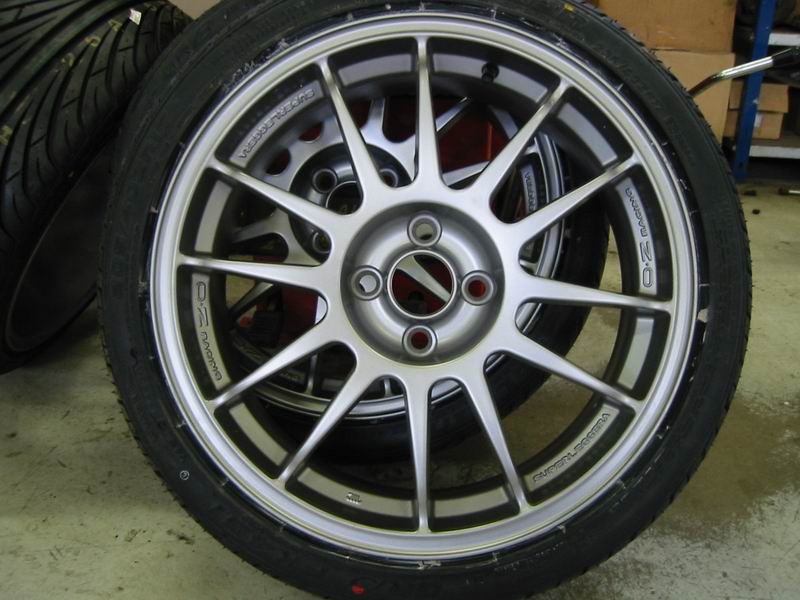
O.Z. quality. First nearly two months of waiting, then faulty wheels. All four had a manufacturing defect: the centre bore and outer rim were in the right places, but the entire 'star' was 3 mm off-centre!!! You could see it just by comparing the outer lip widths. Unbelievably poor quality control from a company supposed to make quality wheels!
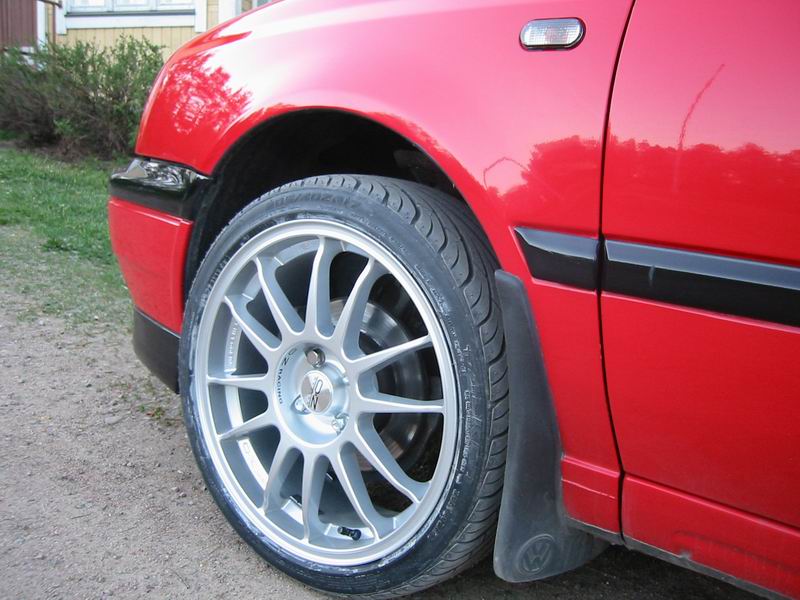
...and nearly another two weeks waiting for replacements. This time they were faultless, at least. The colour changed too. The best thing about Superleggeras is their weight: about 7 kg each, 6 kg less than the DBVs shown above! They're really pleasant to drive on, and bumps don't feel as sharp. Then there was still the wait for the springs...
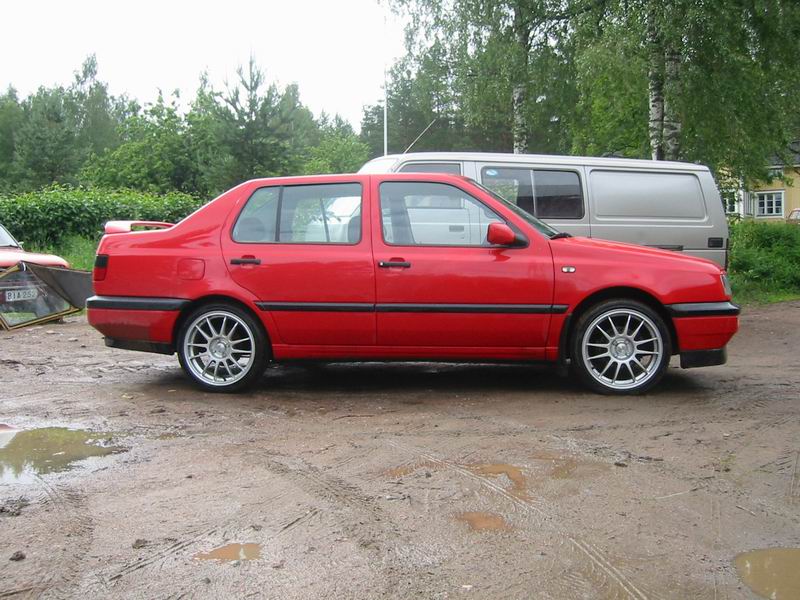
FINALLY, after nearly two months, the lowering springs arrived. Here's the side profile before lowering.
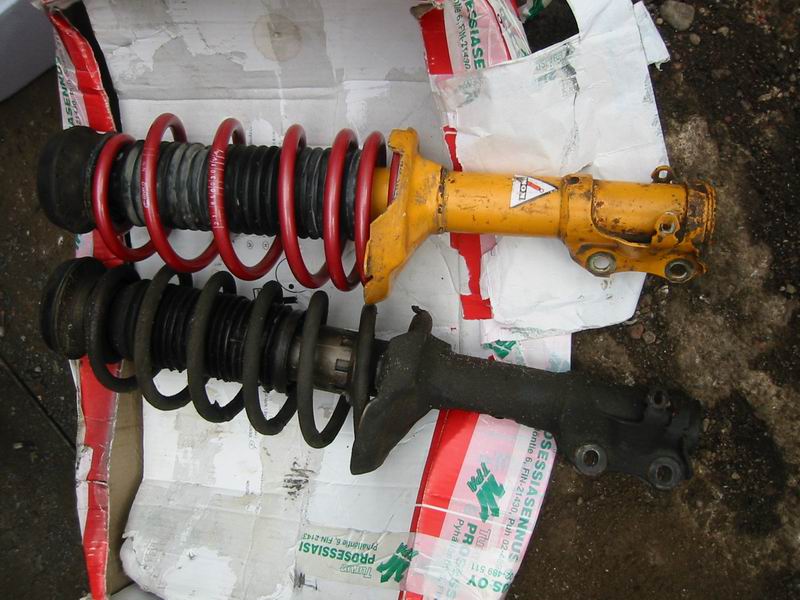
The original assembly below, and above it a quick-adjustable Koni Sport with an Eibach Sportline spring, supposedly lowering by 45–50 mm. At the rear the circlip-adjustable spring seat is set to its highest position so the back doesn't drop too far. The springs are always Golf springs, and the Vento is heavier at the rear. The same trick worked on the Jetta...
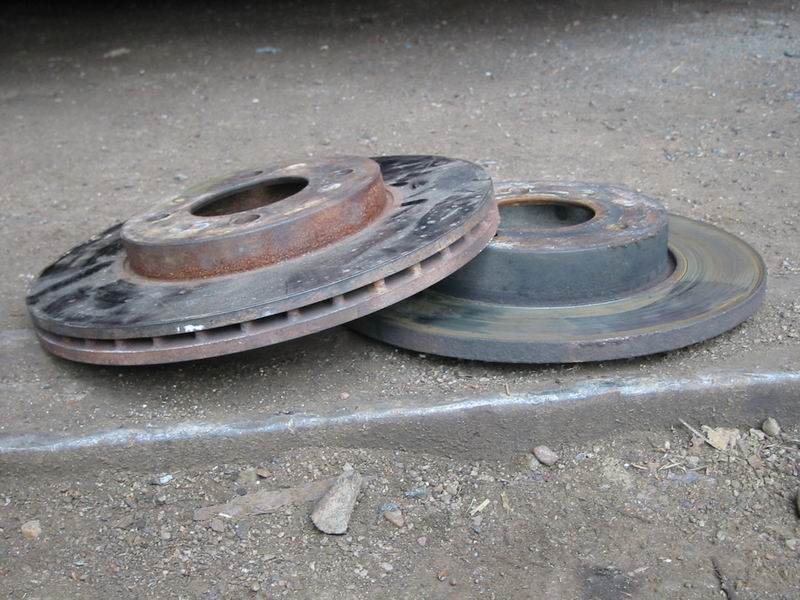
With the wheel off, we decided to fit slightly better front discs too. The old standard ones tended to fade. These vented ones should stand a little more braking.
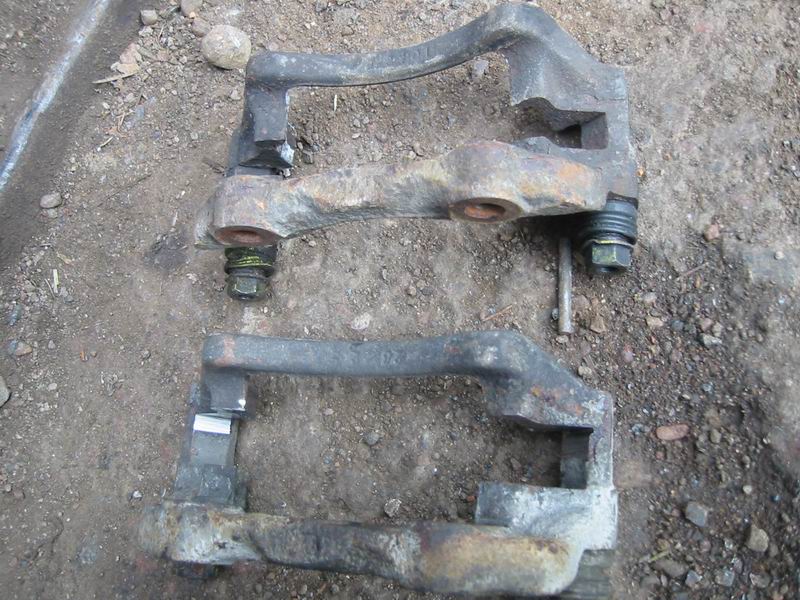
The caliper carriers needed a little machining to fit the thicker discs... The disc slot had to be widened outwards by the difference in disc thickness.
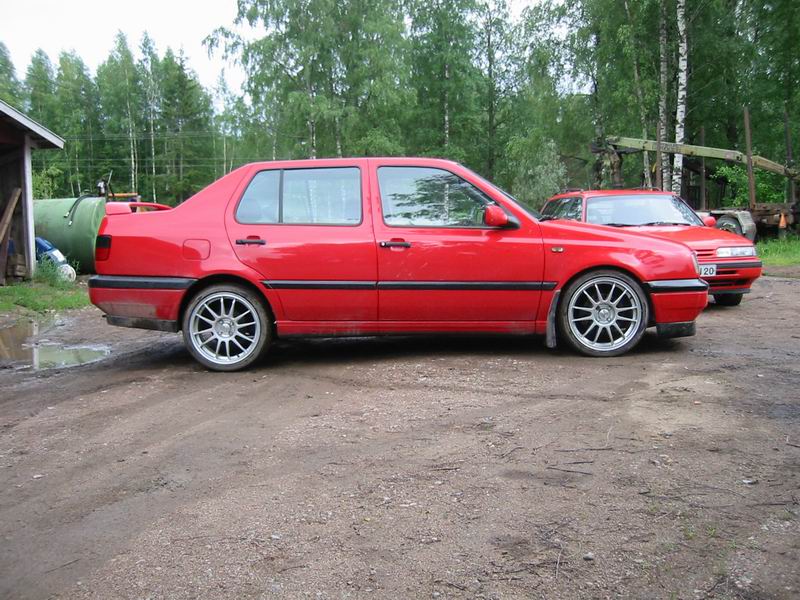
The front lowered, with the rear still at standard height... You can see the difference!
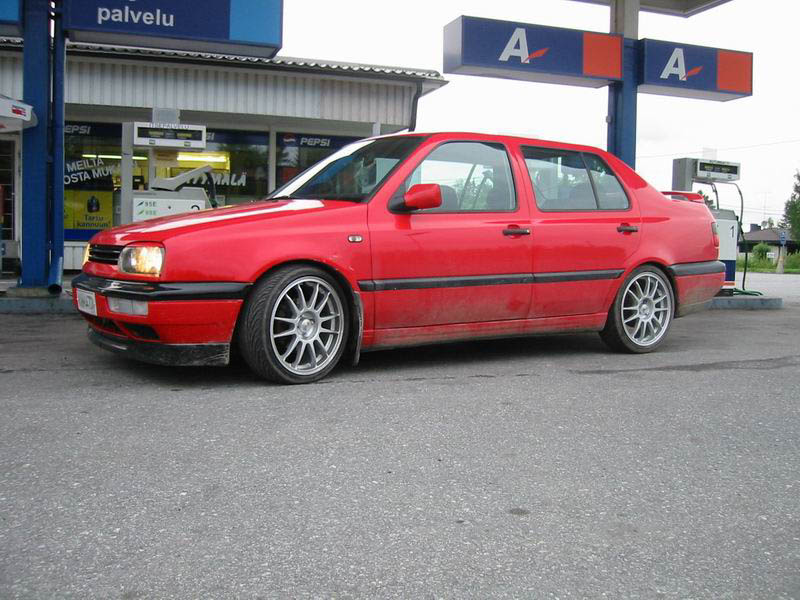
And here it is finished. Fairly balanced. The back looks a little lower, though there's quite a lot of stuff in the boot. At least nobody will call it an SUV or tractor now. And it's absolutely brilliant to drive.
Miscellaneous photos — part 1
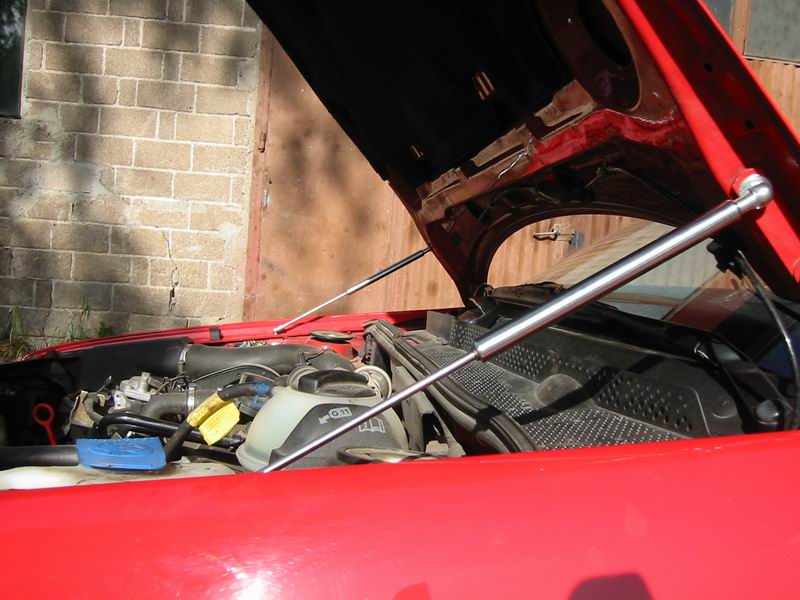
A little tuning.
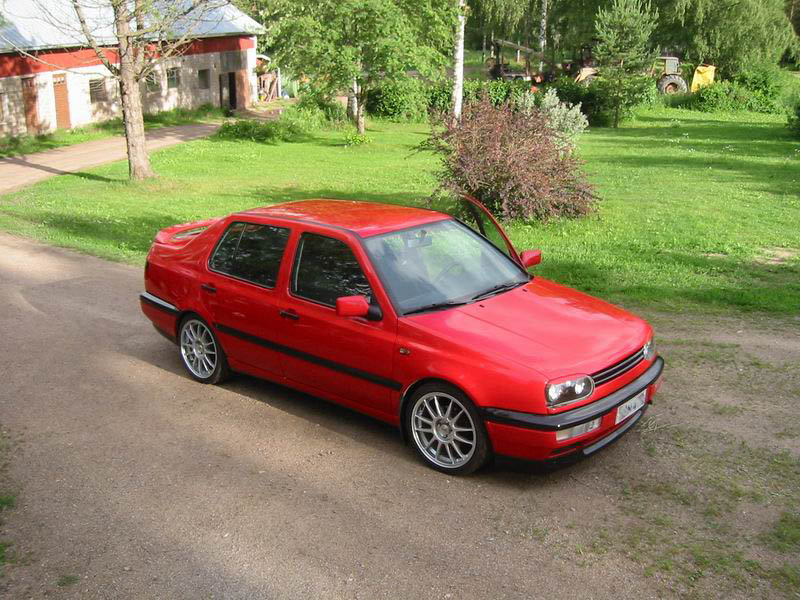
A slightly cleaner Vento.
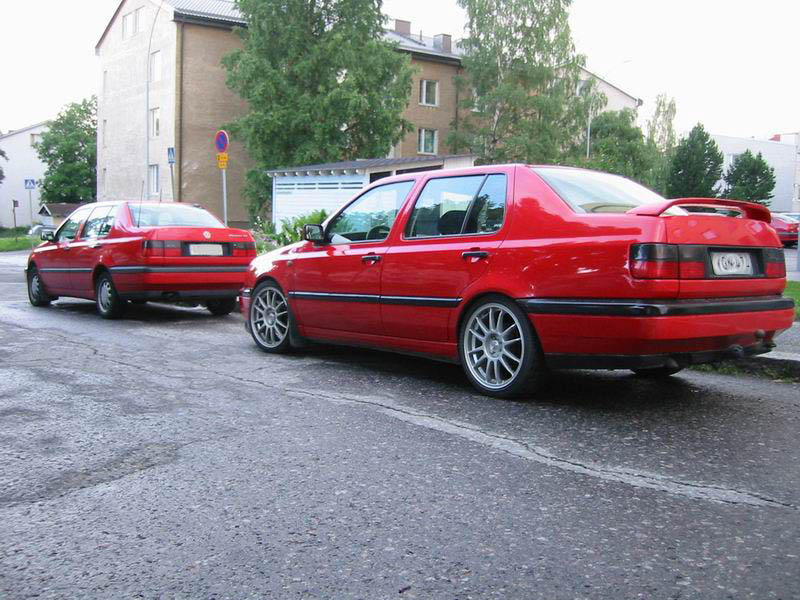
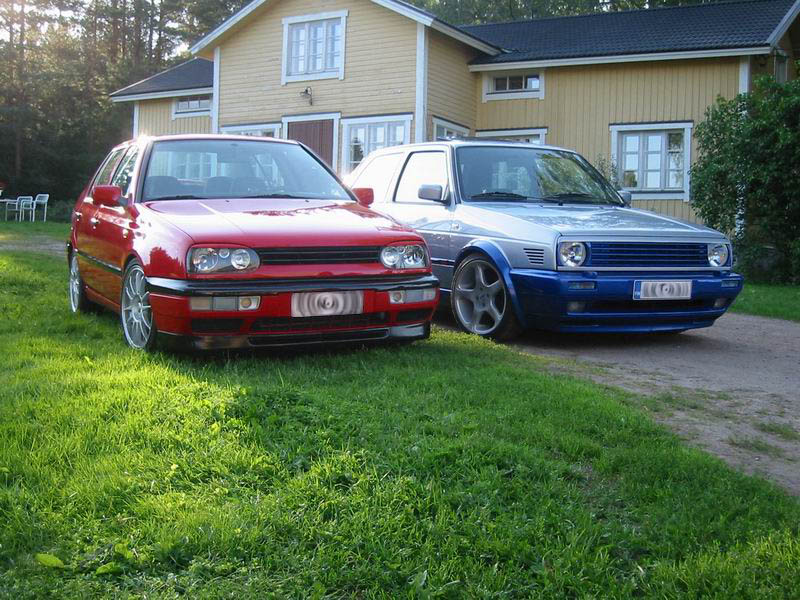
On a visit to Tampere I happened to park in just the right place for some nice comparison photos of a standard car and a mildly modified one. Hopefully the owner of the car in front doesn't mind me 'borrowing' it :-)
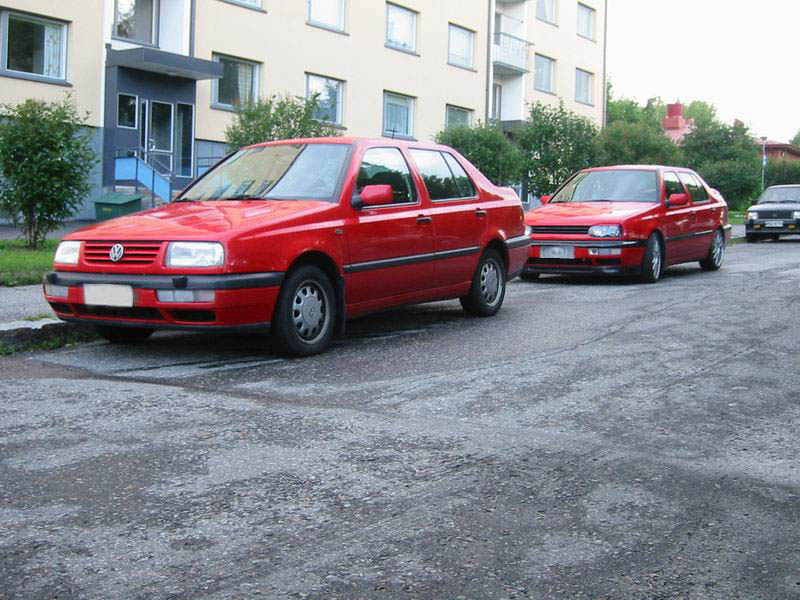
Which would you take?
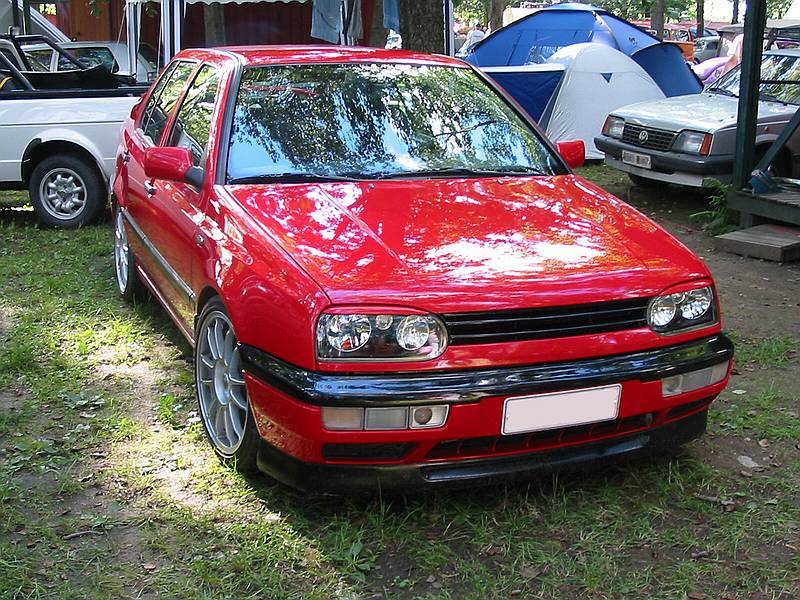
A photo from the Finnish VW Association's 20th-anniversary summer event in Pälkäne. To my surprise I won the 'Best H2O' trophy. The judges appreciated economy, family values and tasteful modifications :)
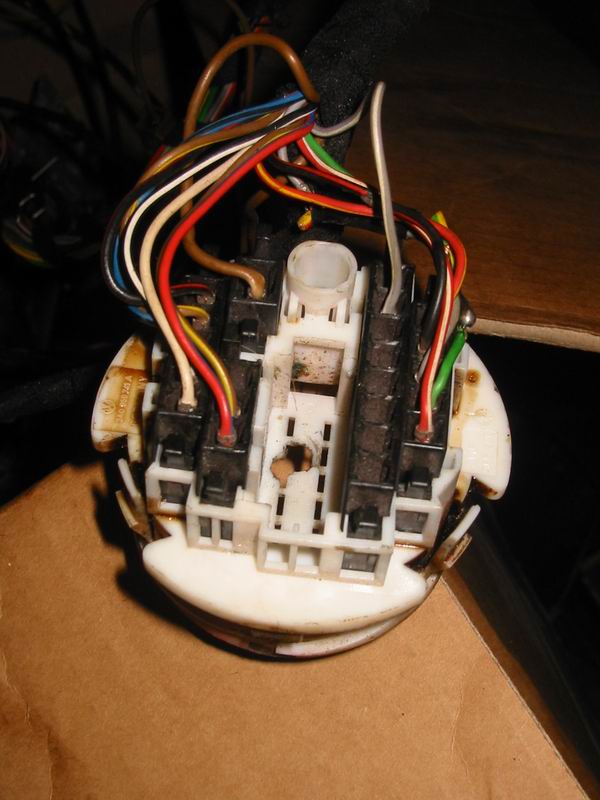
Installing component speakers. Speaker wires had to be run into the front doors. I spent ages looking for the right connector, or even its part number, but couldn't find it. In the end I simply drilled holes in the door-loom connectors and ran the speaker wires through those.
Miscellaneous photos — part 2
The Jaakkola brothers setting off for Bug Run in June 2002.
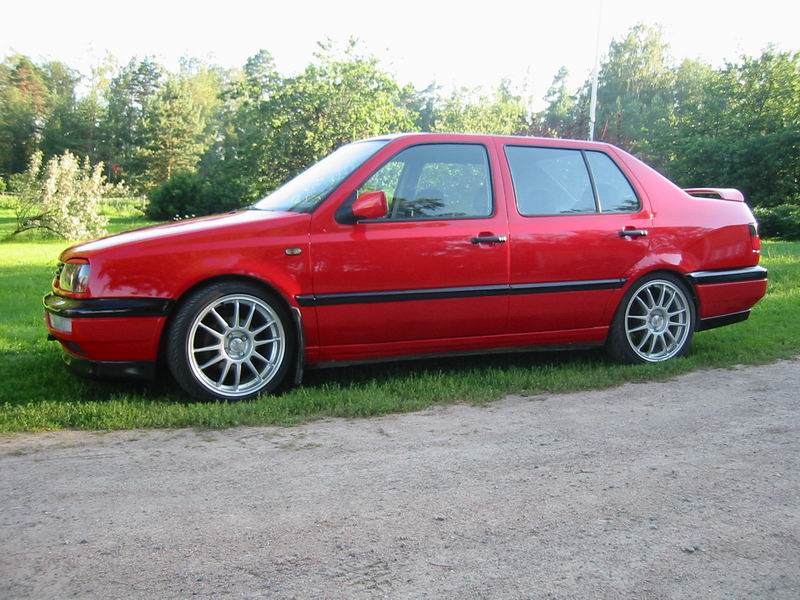
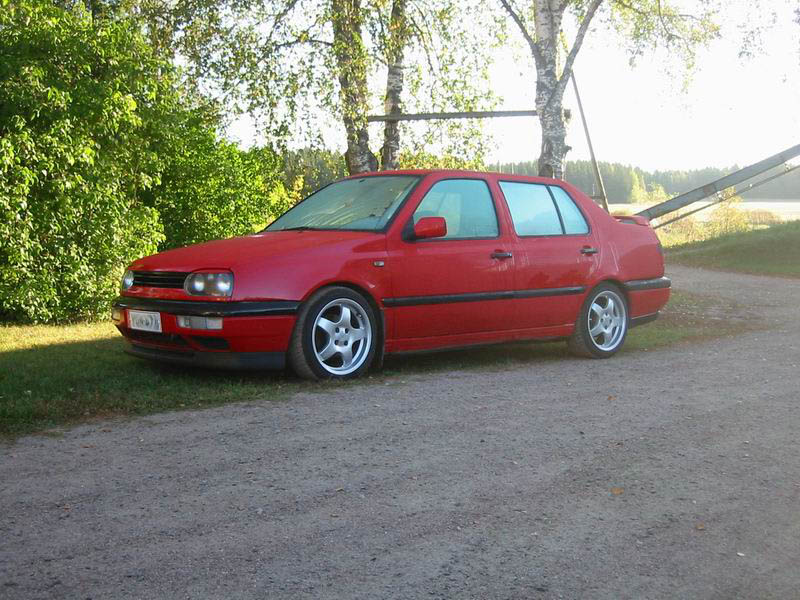
In late summer I tried a friend's Melber wheels on the Vento too. They suit it quite well.
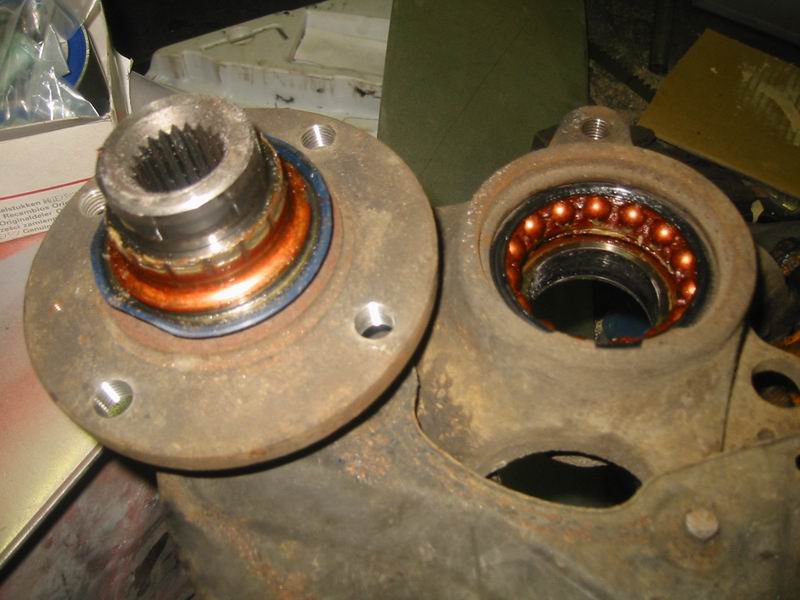
A wheel bearing made noise for ages in early winter 2002... I still drove over 5,000 km on it. It was pretty dry when opened up. We also replaced a worn lower ball joint.
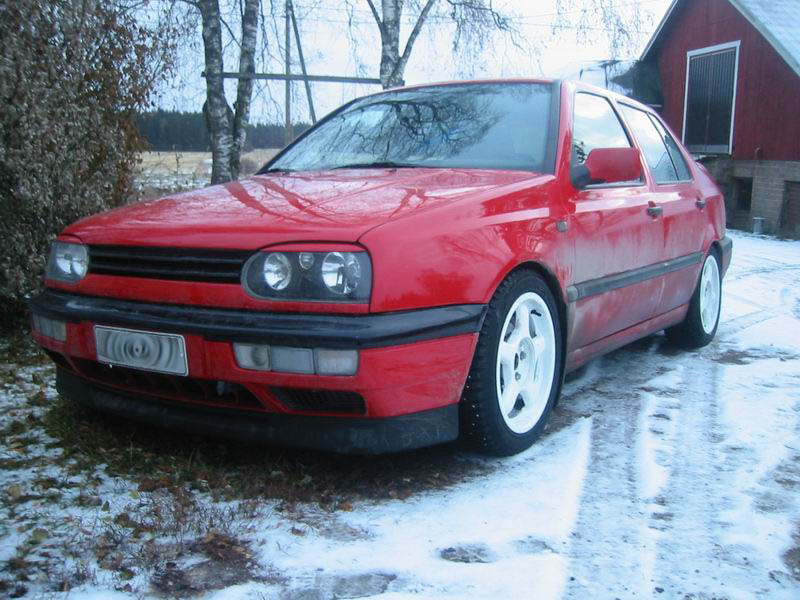
The Vento's winter 2002/2003 look.
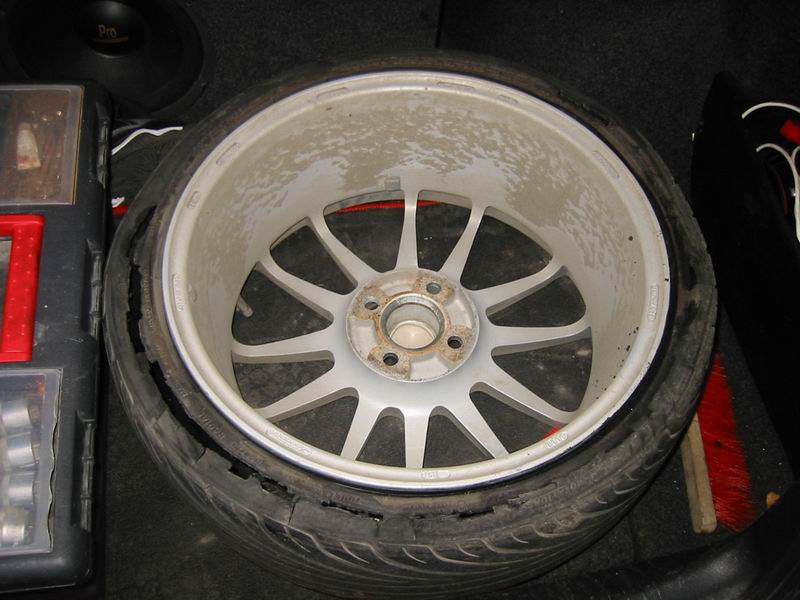
In spring I'd driven less than a week on summer tyres when a rear tyre failed... You don't immediately notice a tyre that low-profile going flat. It felt a bit vague and the steering wheel was slightly off-centre. I planned to check the pressures at a petrol station, but didn't quite make it before blue smoke appeared in the mirror and bits of rubber started flying...
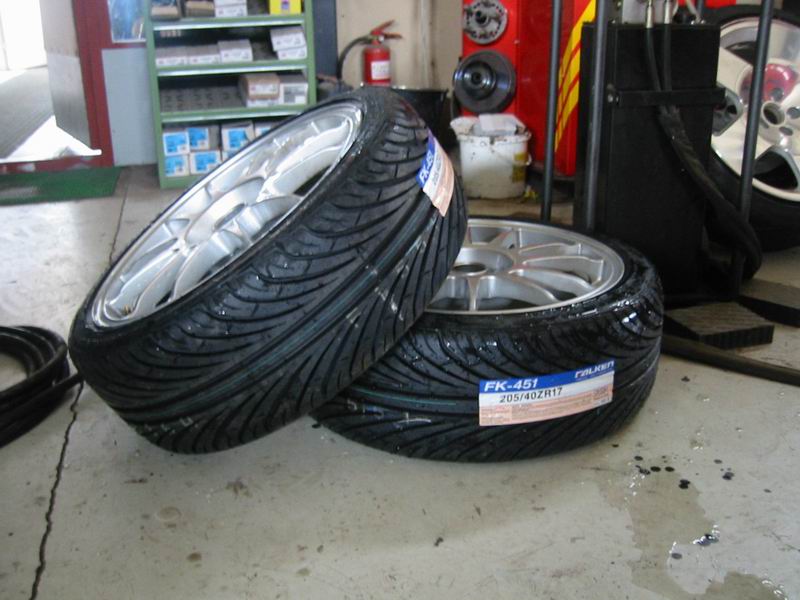
Well, I would have bought new tyres anyway, as the fronts already needed replacing. Driving without having the wheel alignment adjusted isn't a good idea.
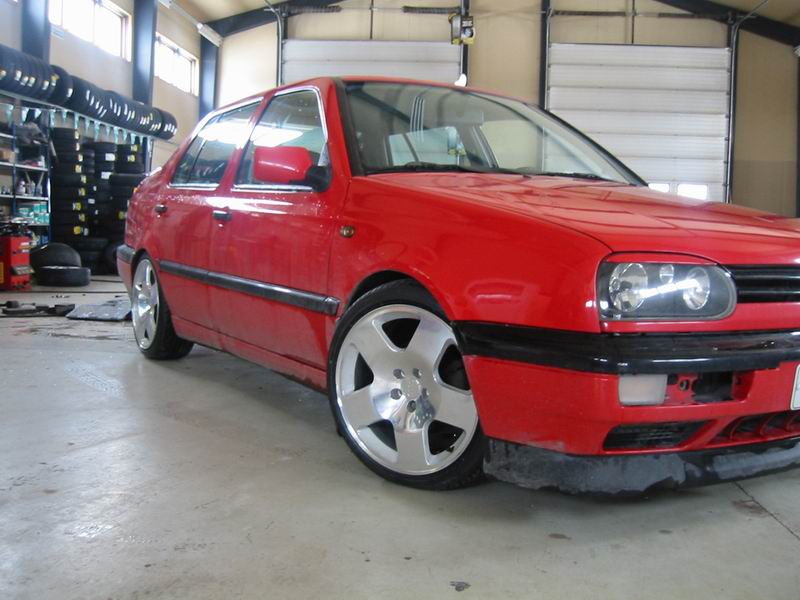
While changing the tyres I tried the Audi TT Parabol wheels destined for my brother's Golf... Pretty cool!
A little more power
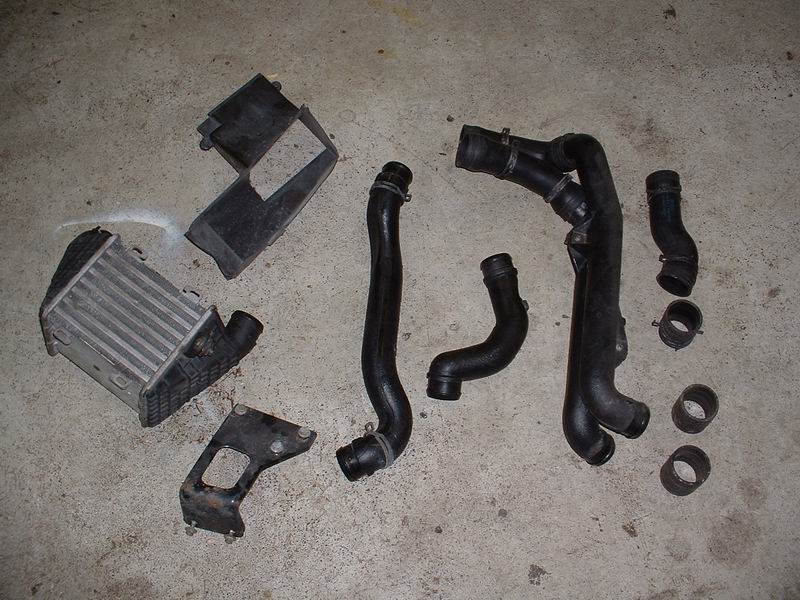
It was finally time to give the Vento a little more power. The job started with an intercooler: an original TDI one, which should be quite adequate. Almost all the pipes are TDI parts too. The manifold 'adapter', the 90-degree bend on top of the inlet manifold, is from a 1.6 TD. The original has the EGR connection attached and couldn't really be used because the adapter had to be turned 180 degrees.
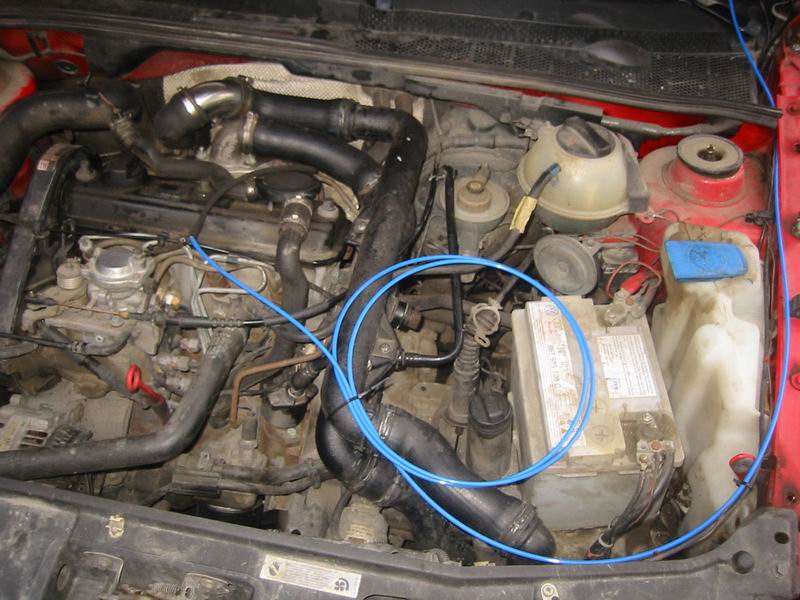
All the other pipes are original or from a TDI, except the short stainless section on top of the inlet manifold... That's from a milking pipeline system :)
The blue hose in the picture is a temporary pressure line for the boost gauge.
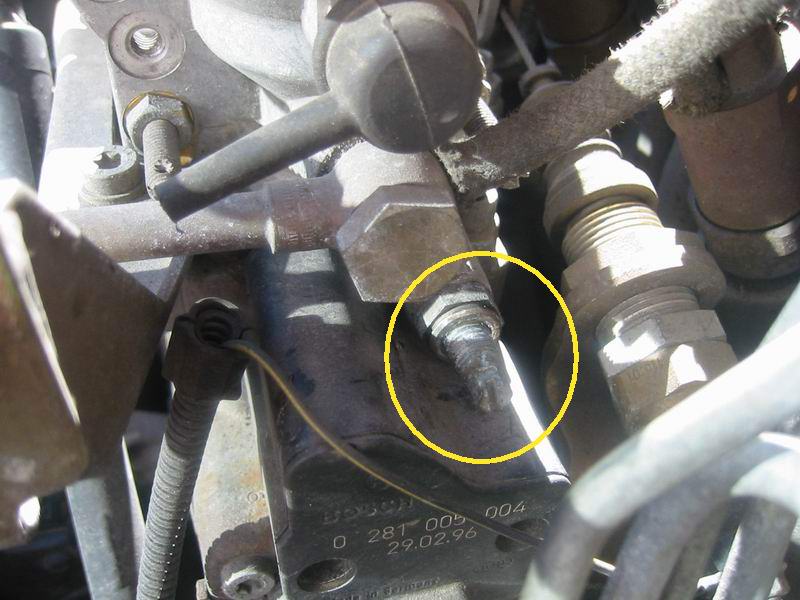
To make the TD go a little better, it needs more fuel. The easiest starting point is removing the seal from the fuel adjustment screw, loosening the locknut and turning the screw clockwise to increase fuelling. The locknut is tightened again afterwards, of course.
Increasing fuelling raises the idle speed, which can be reduced using another screw at the back of the pump.
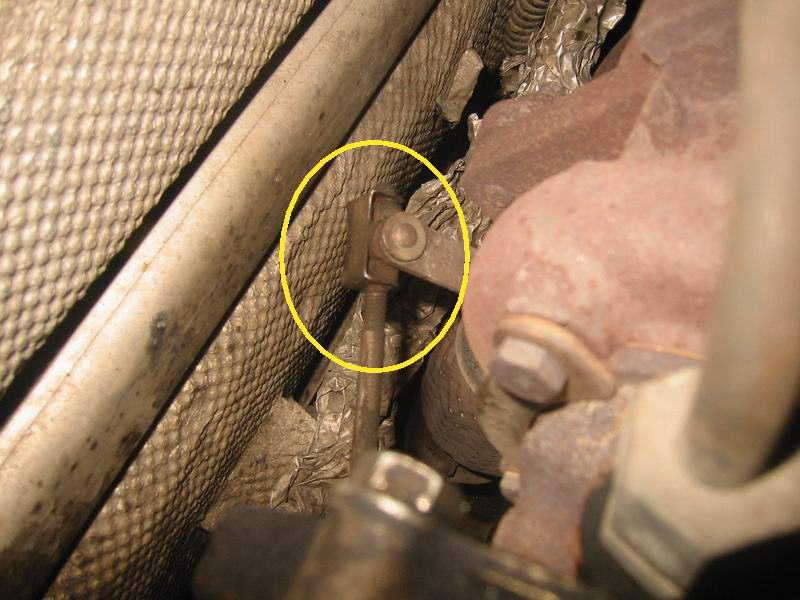
Once the engine gets 'enough' fuel, boost can be raised by adjusting the wastegate rod. Some models use a screw on the wastegate; here the rod is effectively lengthened. First remove the retaining clip, then back off the nuts as far as the rod's length allows.
With these changes, the gauge showed boost increasing from 0.6 to 0.8 bar. The seat-of-the-pants dyno suggests perhaps another 10–15 hp, putting it fairly close to a 1Z-engined 1.9 TDI. Smoke isn't excessive either.
In the field and on the track
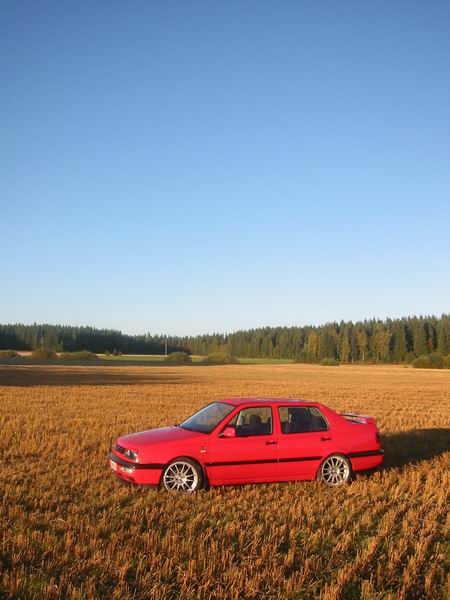
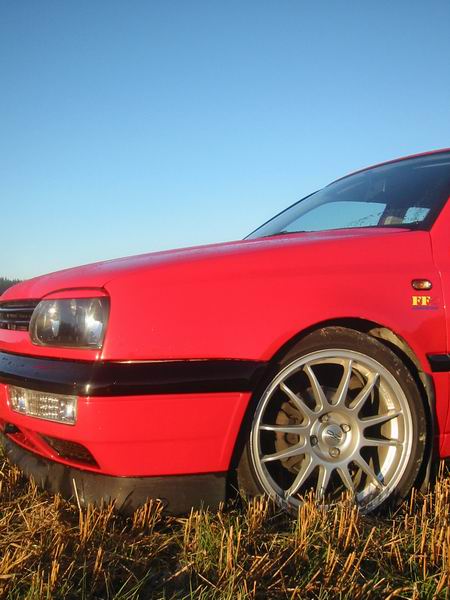
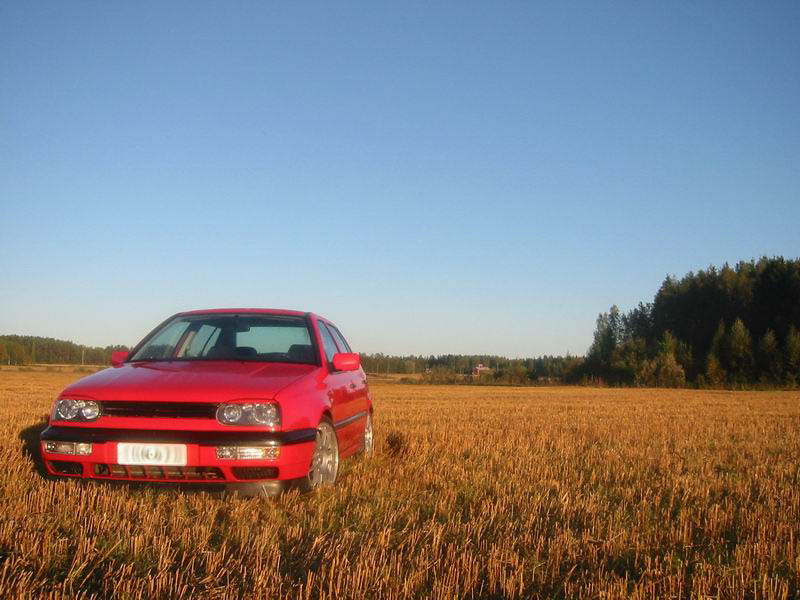
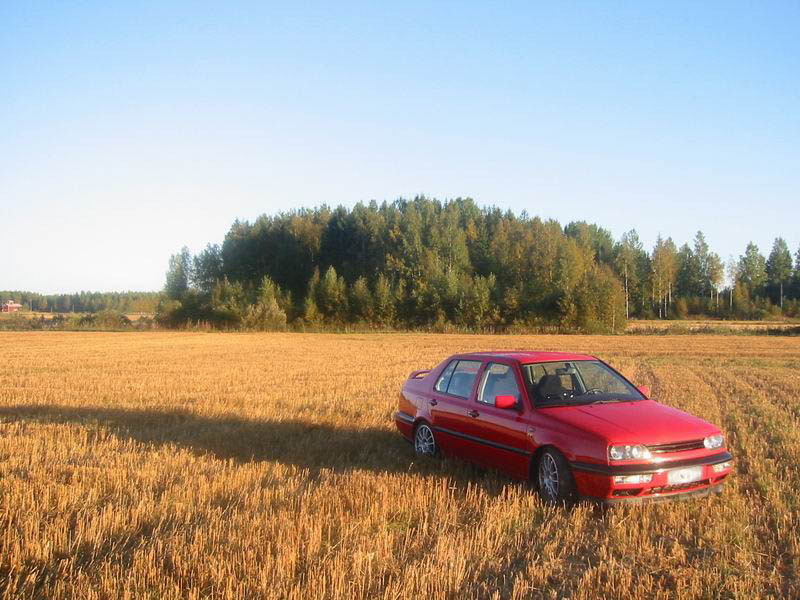
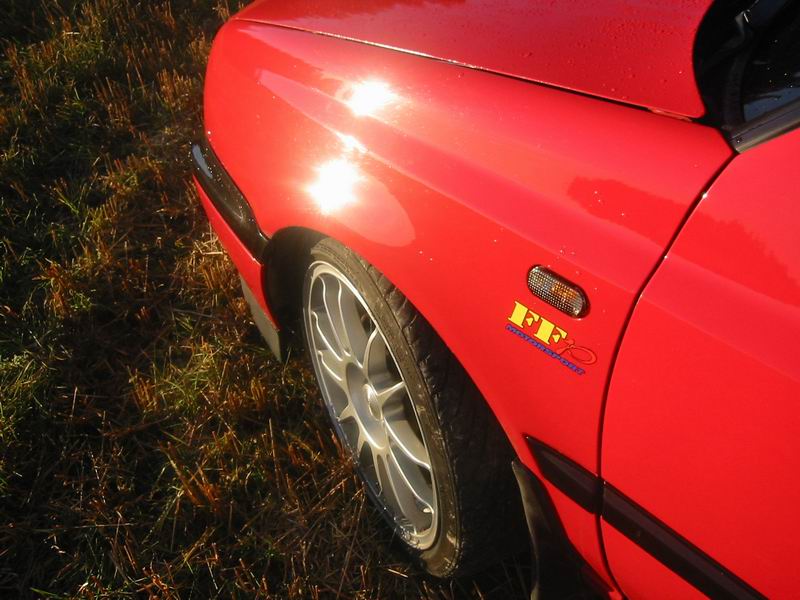
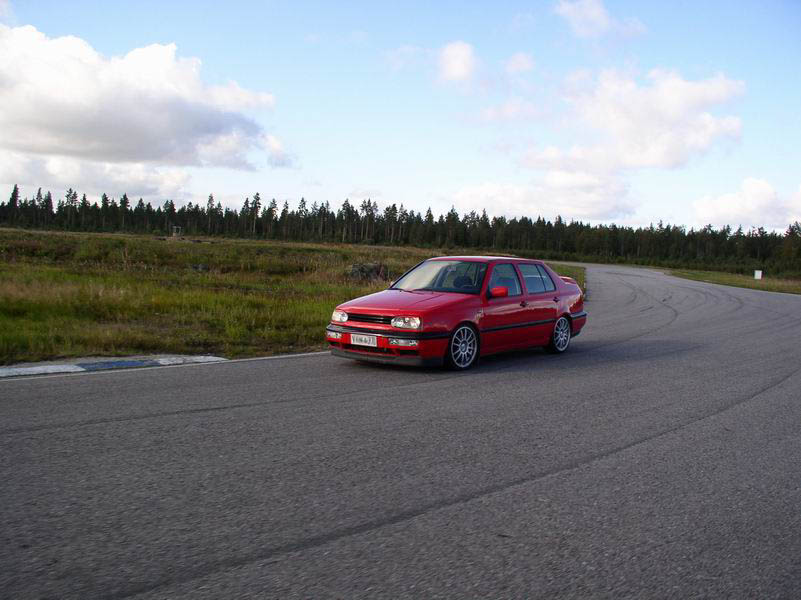
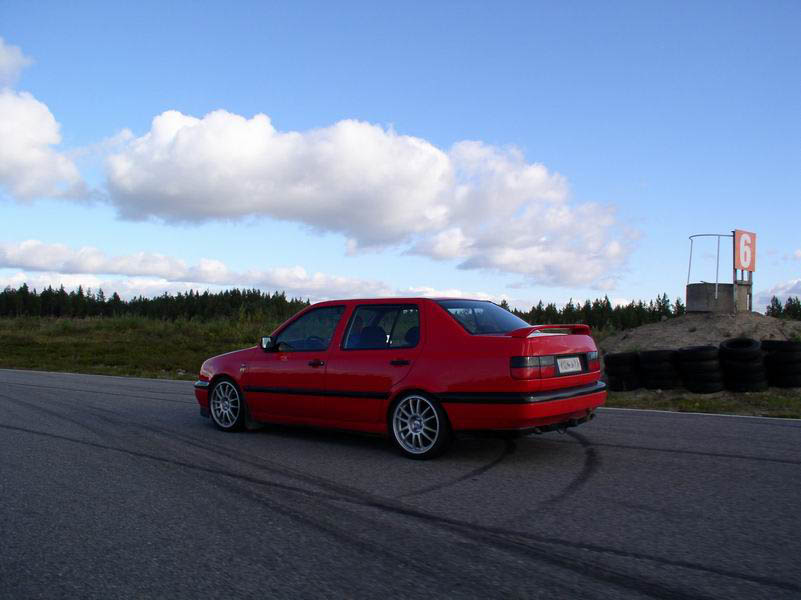
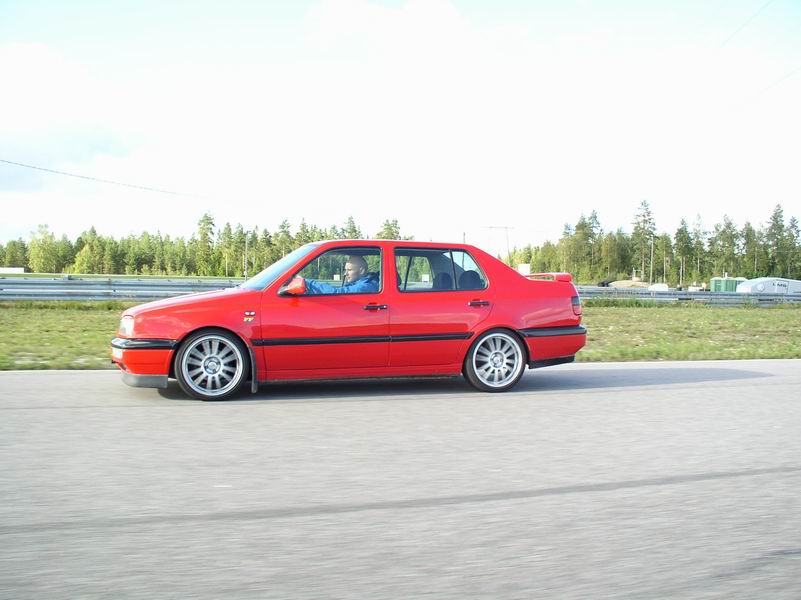
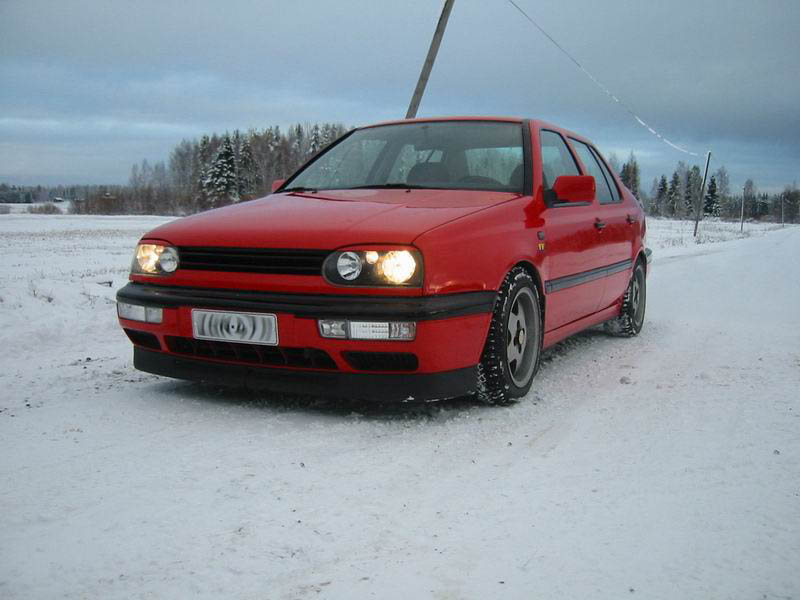
It too was eventually sold when the Seat arrived, in December 2003.
Includes original English text and AI-assisted translations.