ARCHIVE / PAJALLE
Golf 2 TDI
One of Peksi’s best-known projects: a Golf 2 built twice with a newer 1.9 TDI drivetrain. A “little” accident during the first summer explains the second build.
The beginning
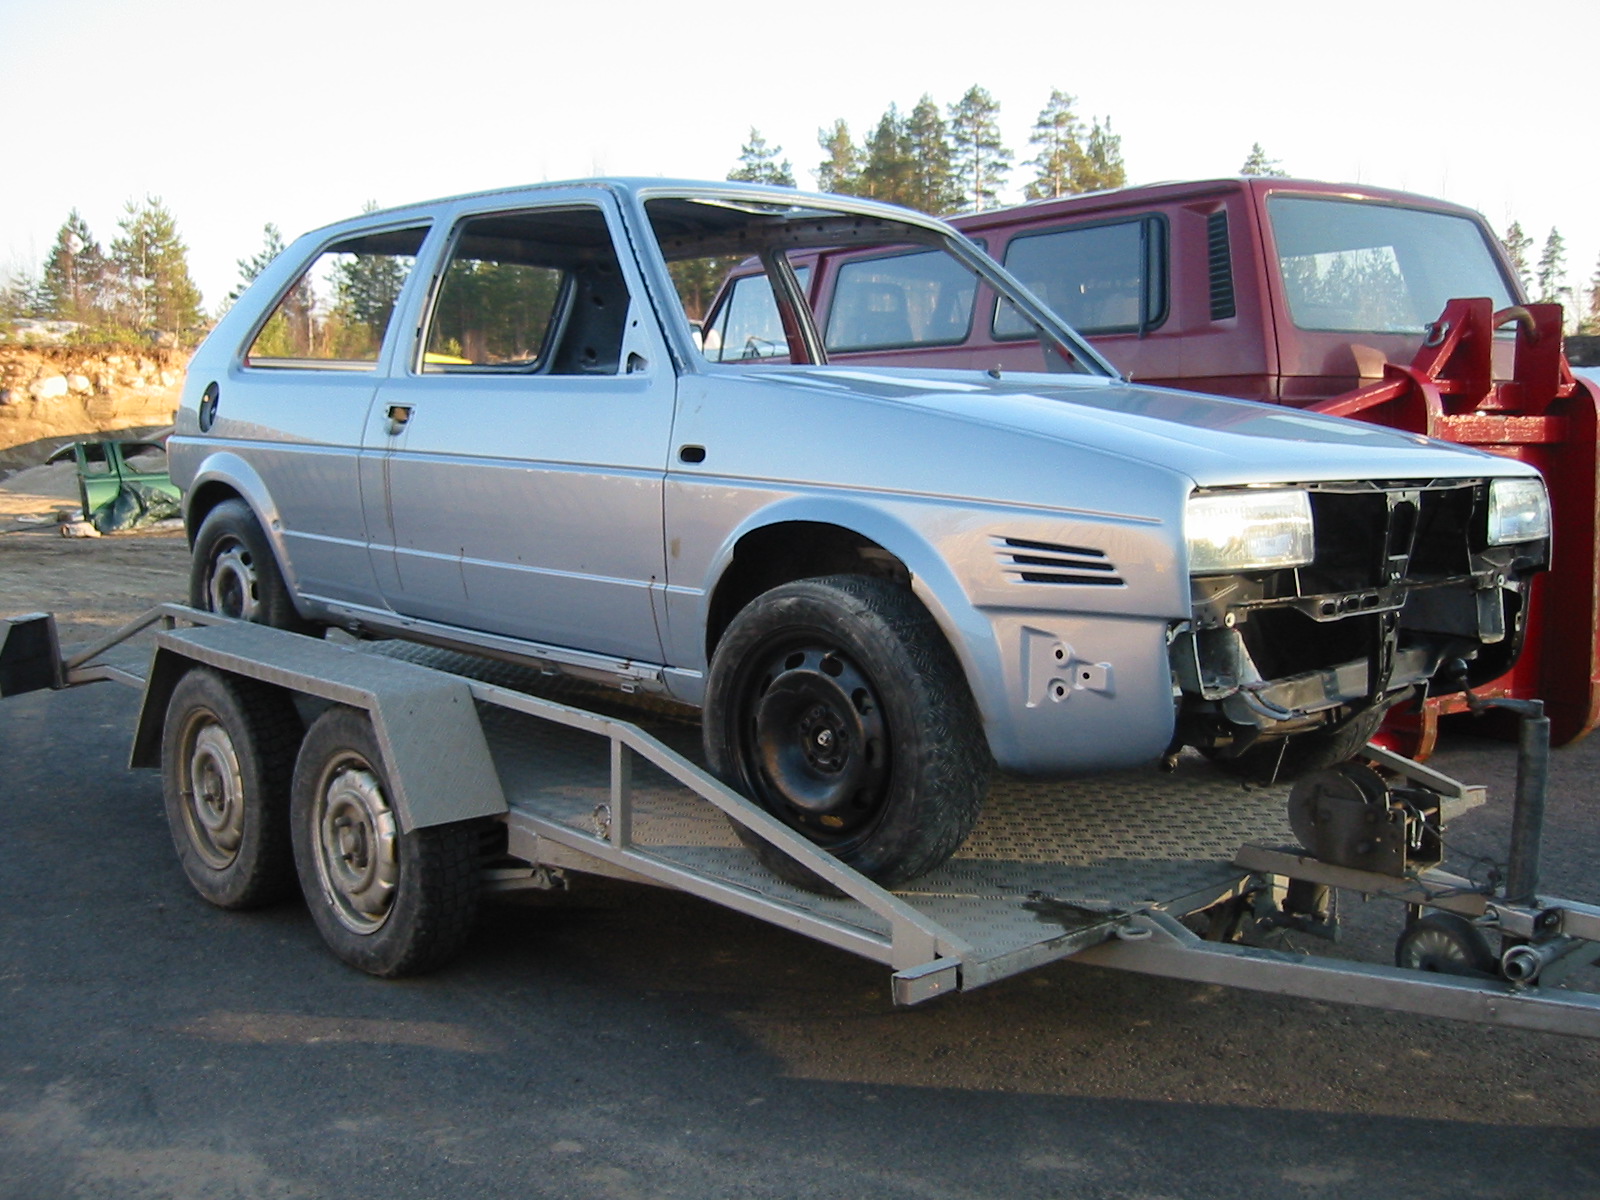
Pekka had been driving several year with a 500+ tkm driven '84 Golf. Eventually he got a feeling that it was about the time to have some more modern technology under the hood. Pekka sold the '84, but still liked the looks of the second generation Golf... so the new project would also be built on a mk2/A2 Golf. The idea was to build something that every guy on the neighbourhood wouldn't ever have.
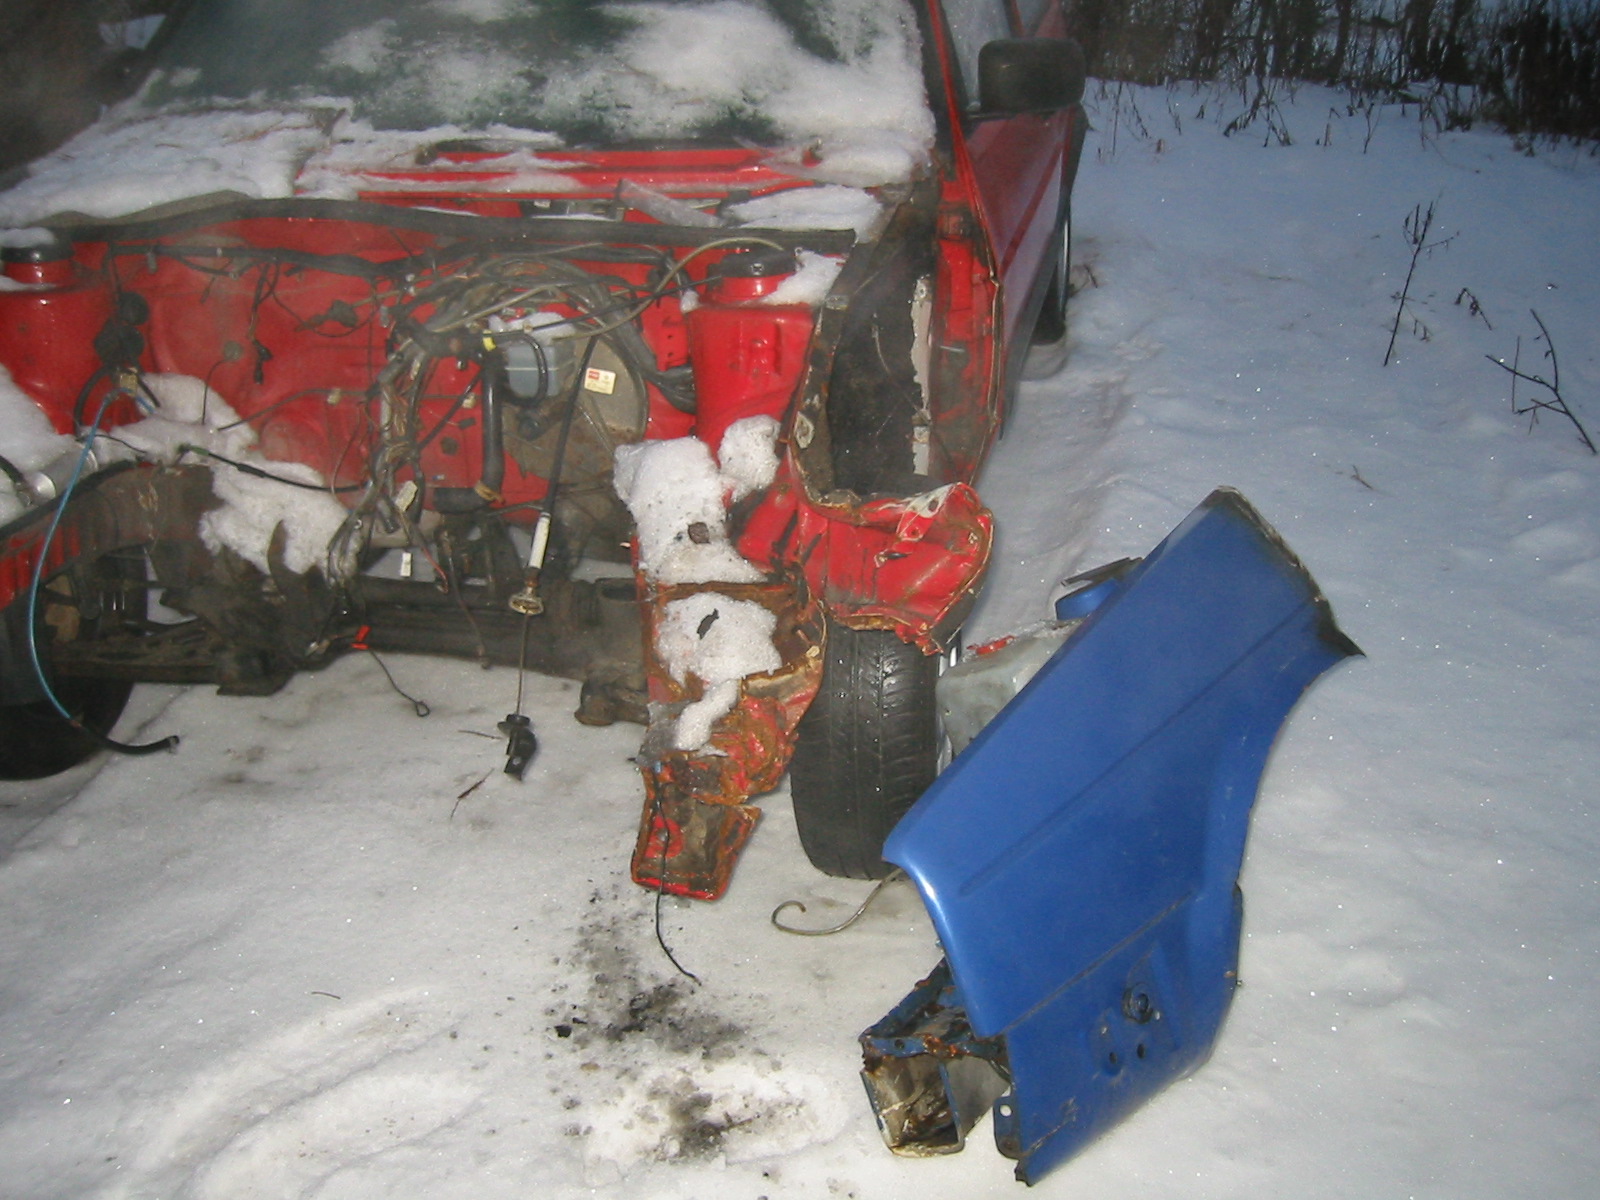
First thing to do was to find a suitable Golf body. This time Pekka found a pretty rustfree, slightly crashed (sorry about the bad picture) '88 Golf GT. Best of all, the engine and the transmission were already removed.
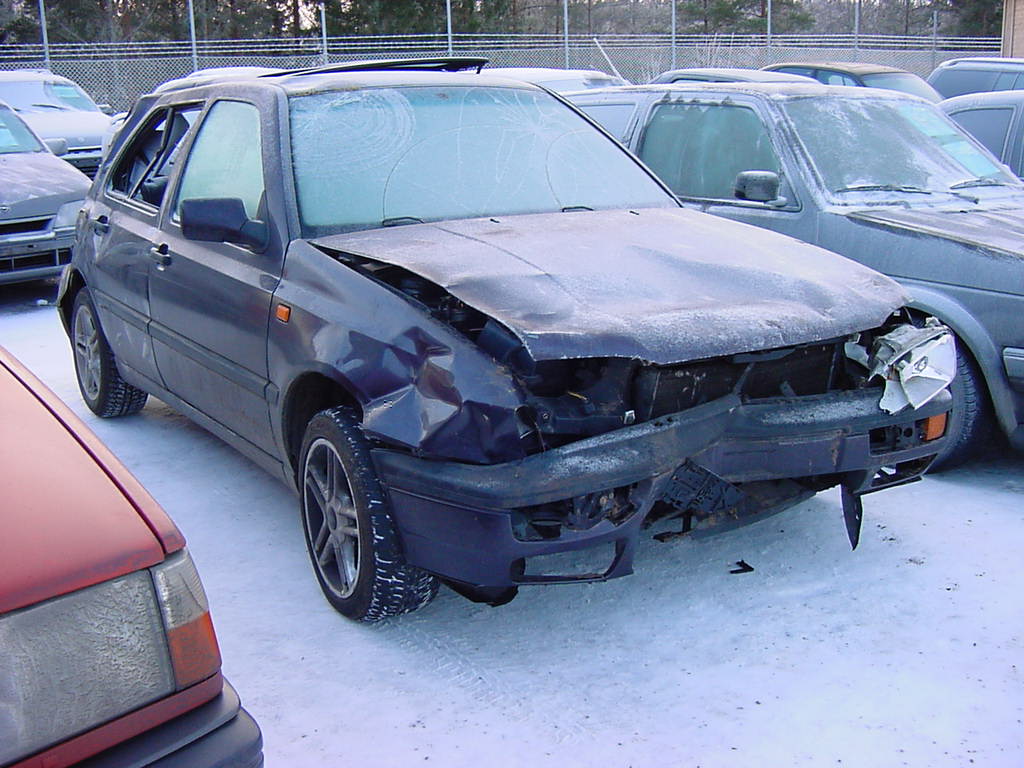
Because the target was to have a car with more modern technics, next thing to do was to buy a car with such a package. A suitable donor car was located from Tampere, it had been imported to Finland from Germany by Autio.net.
A suitable donor turned up at Autio in Tampere. Imported from Germany, it's a 1994 Golf with a 1.9 TDI drivetrain and crash damage all round. About the only usable panels are the right front door and left rear door. Well, a friend did use the left rear corner shown here to repair his own Golf... The mechanical parts are in perfect condition, though.
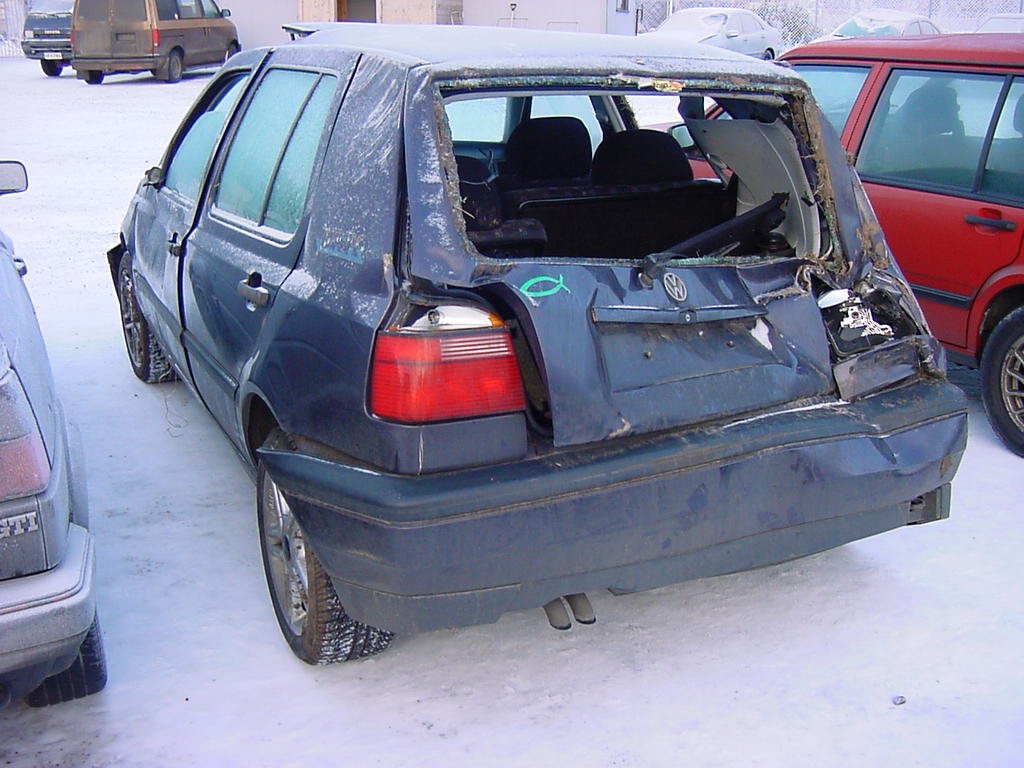
A '94 Golf 3, 90hp 1.9TDI, crashed all over... basicly the only body parts that could be used were the right front and left rear doors. The engine was still fine, no damage on it.
1st crash repair
First the minor crash damage in the front left corner was fixed.
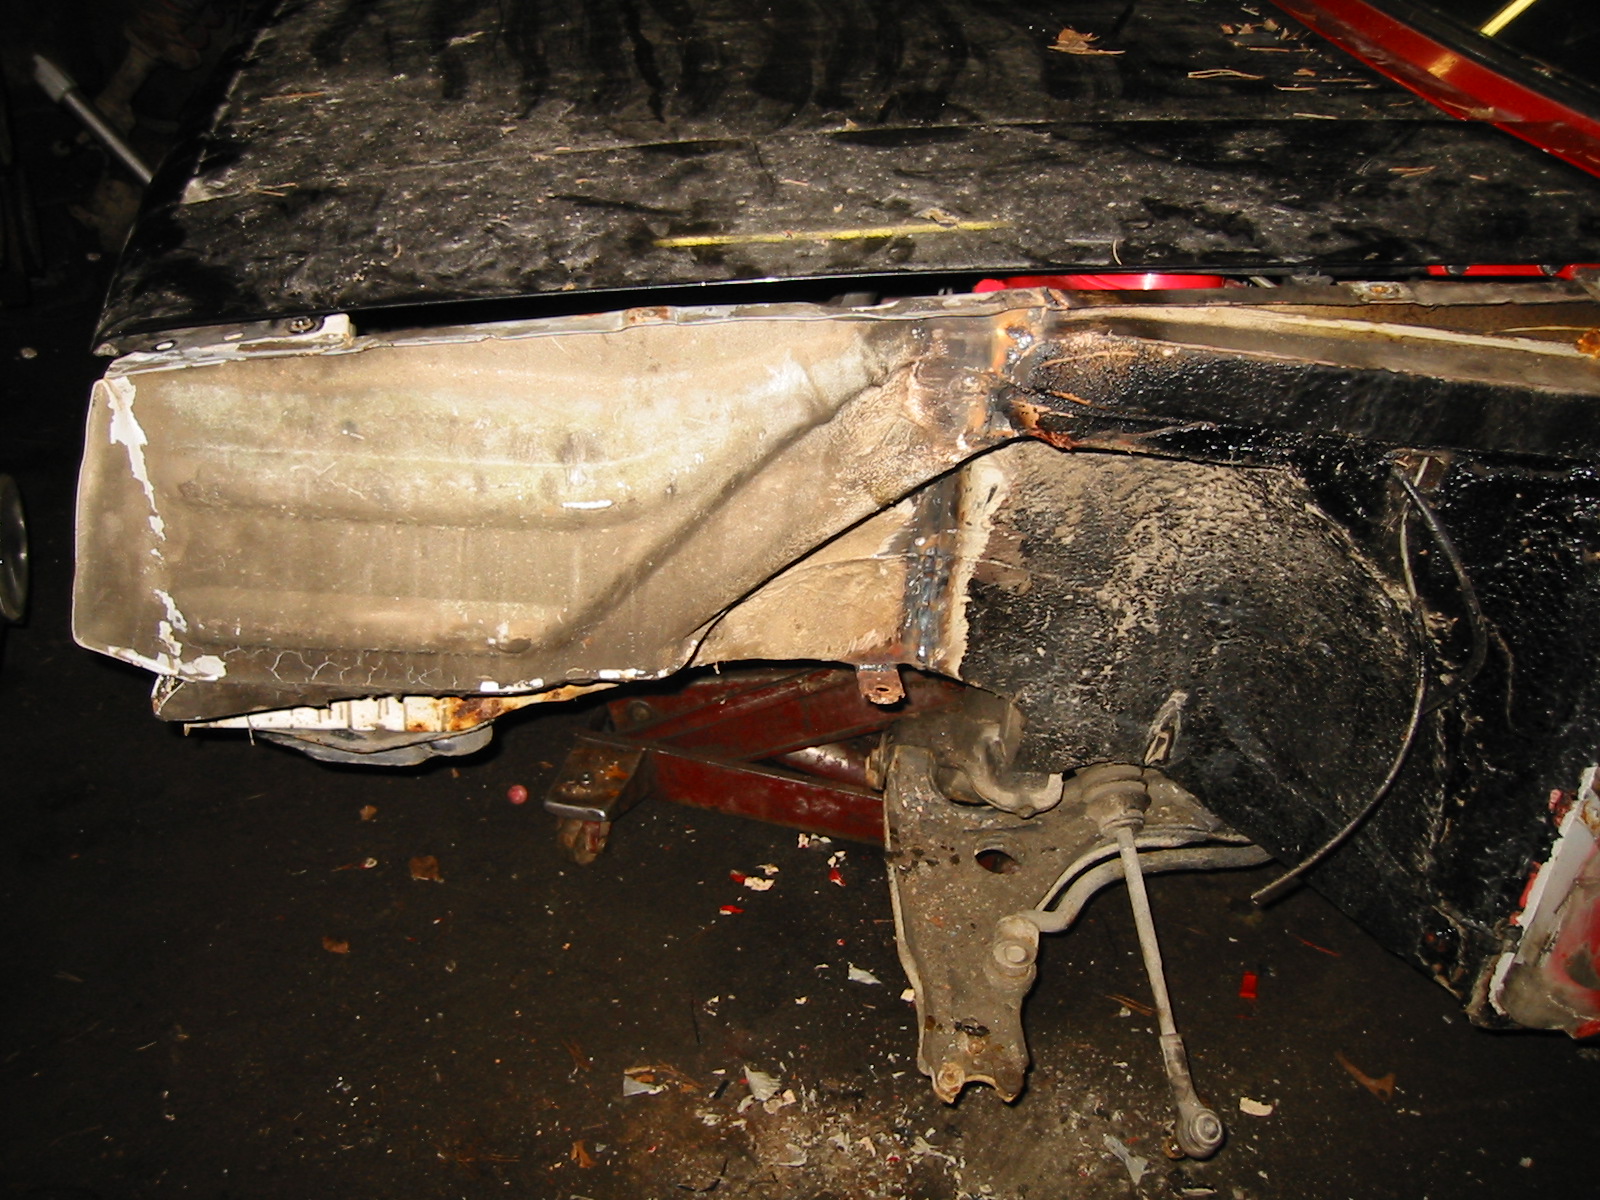
Only part of the left side member needed to be changed... luckily we had a suitable part waiting on our yard... just a little cutting and welding and the front corner was good as new :)
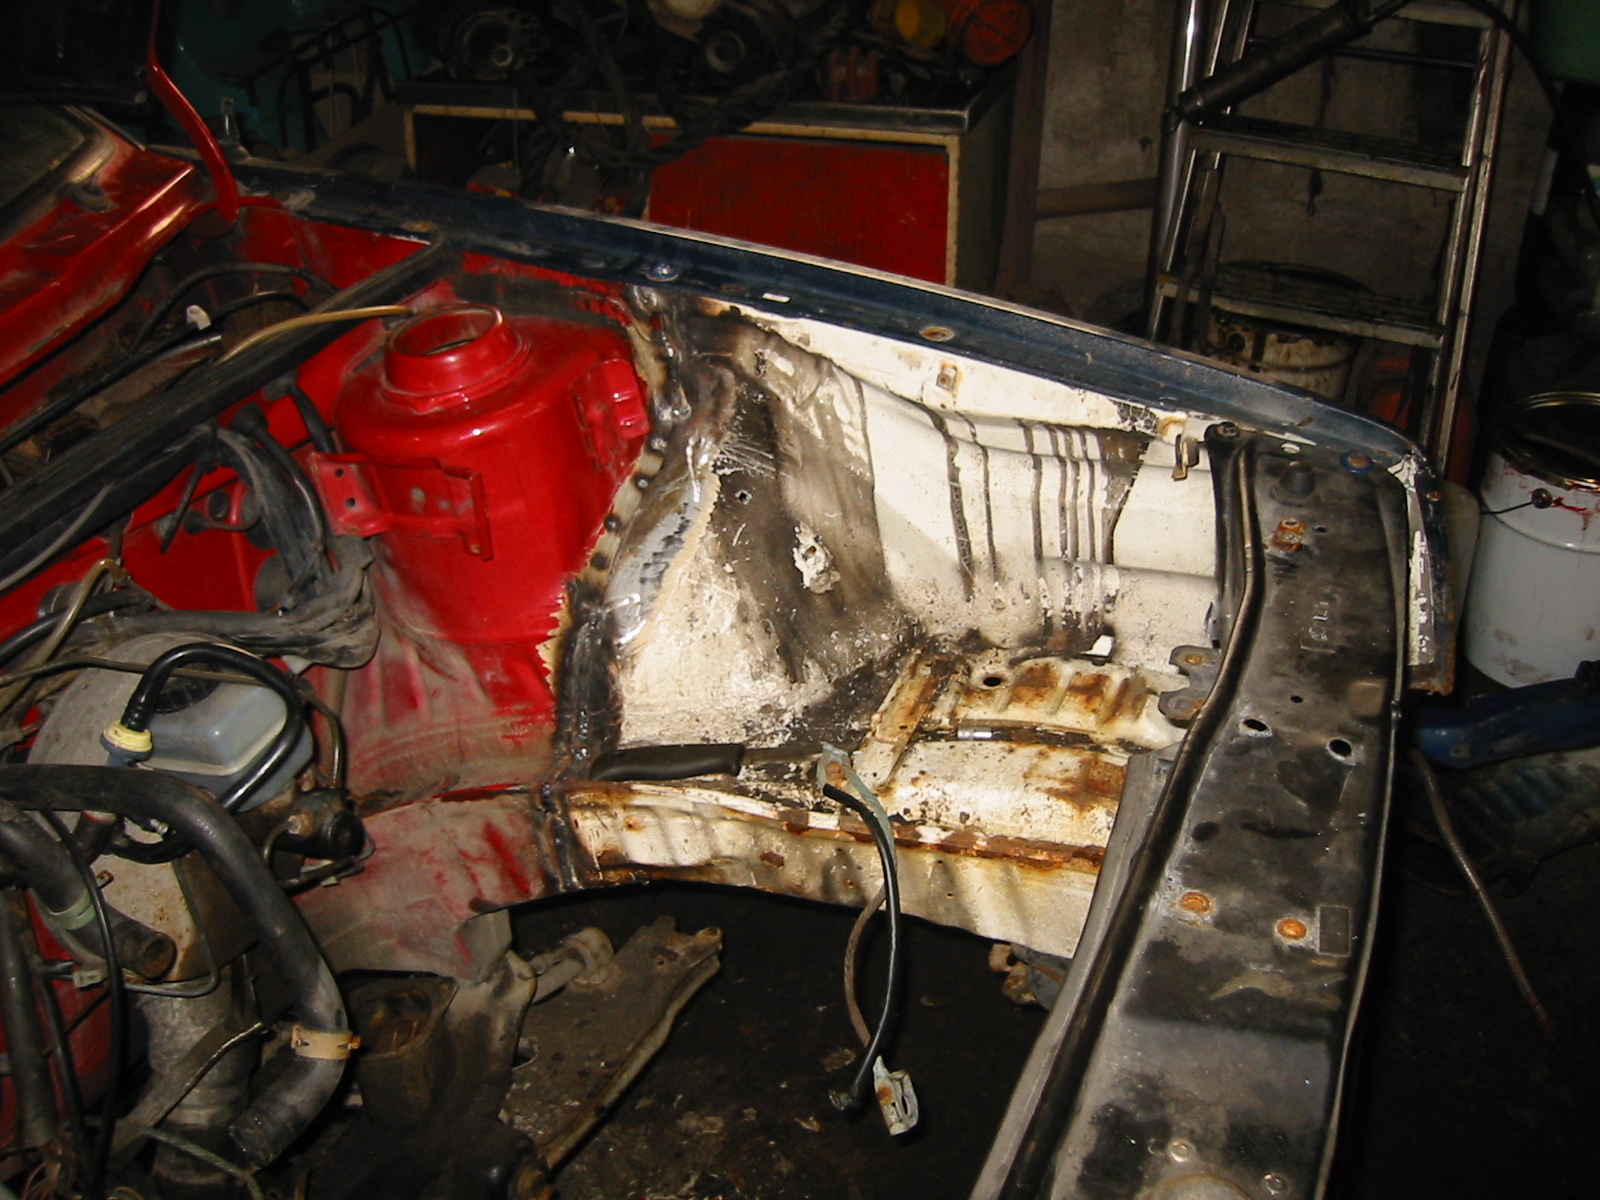
A view from the inside. The crash repair seemed to be quite an easy job... so this page turned out to be pretty short...
Sunroof
Pekka decided to fit the electrically operated glass sunroof from Golf 3... because the project car originally didn't have a sunroof at all.
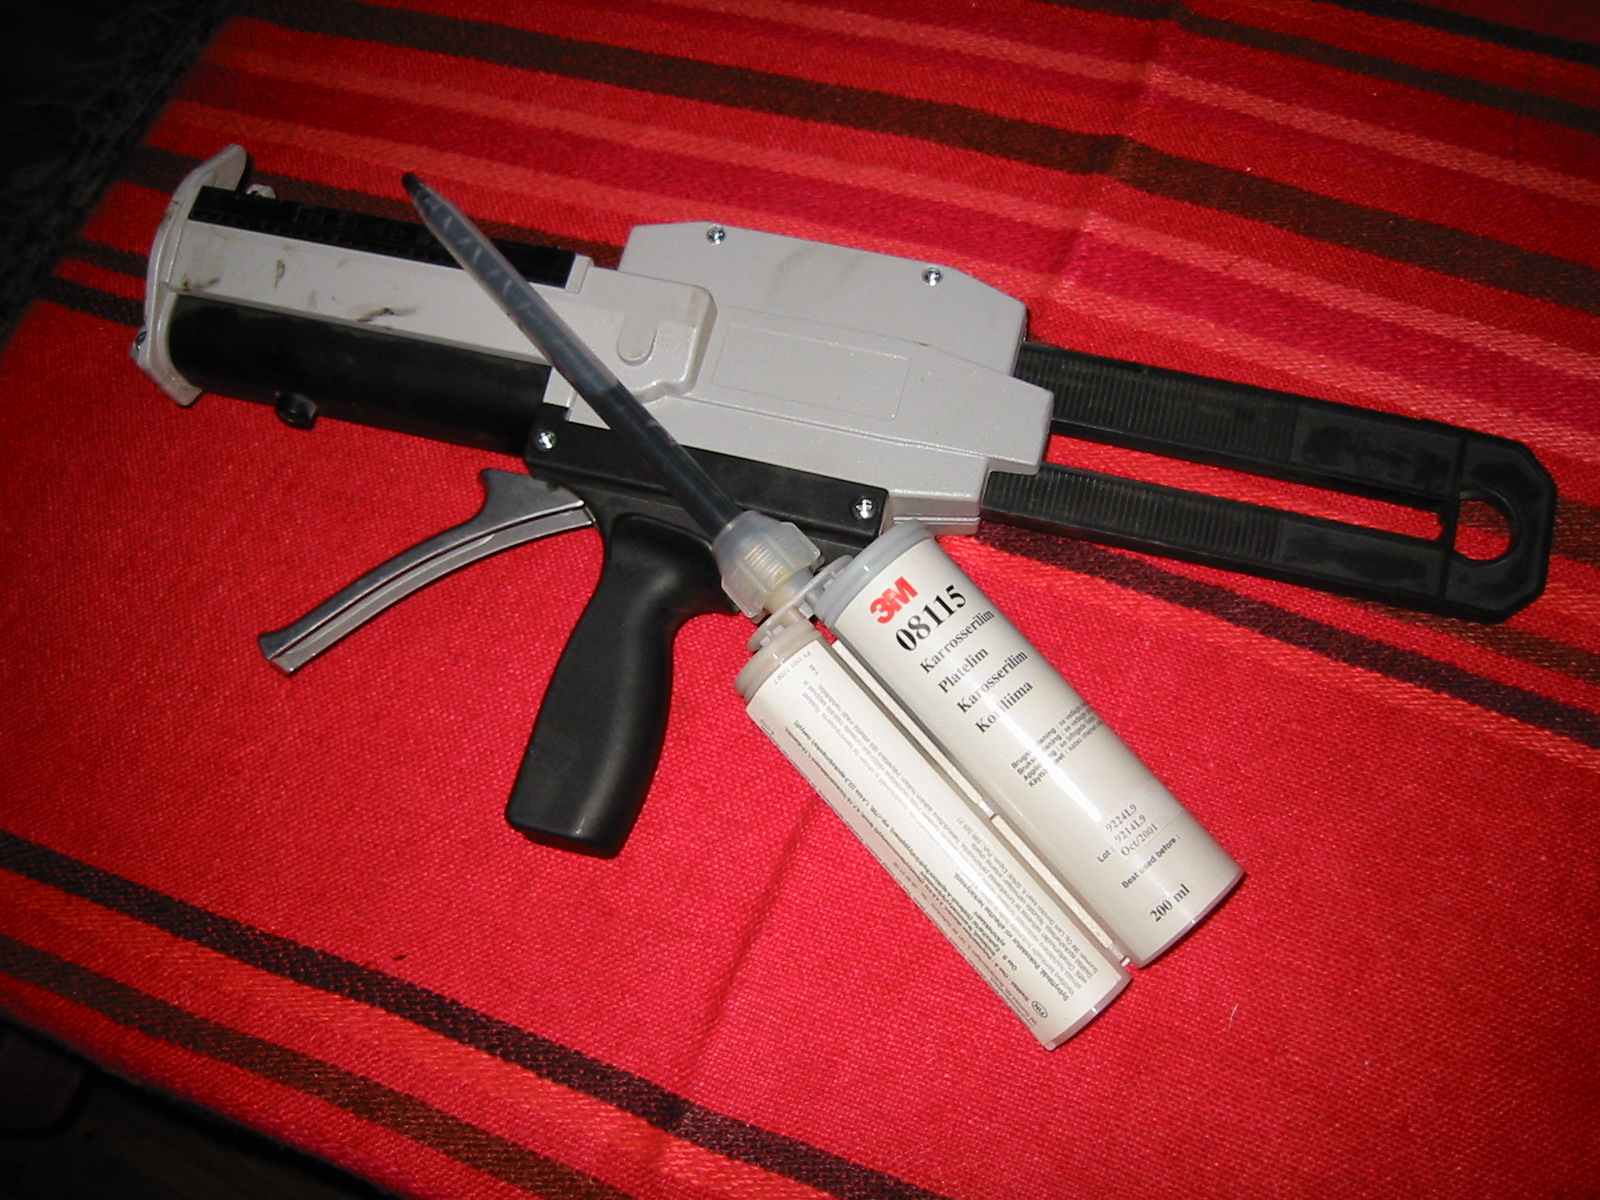
The new sunroof was attached to the roof with glue.
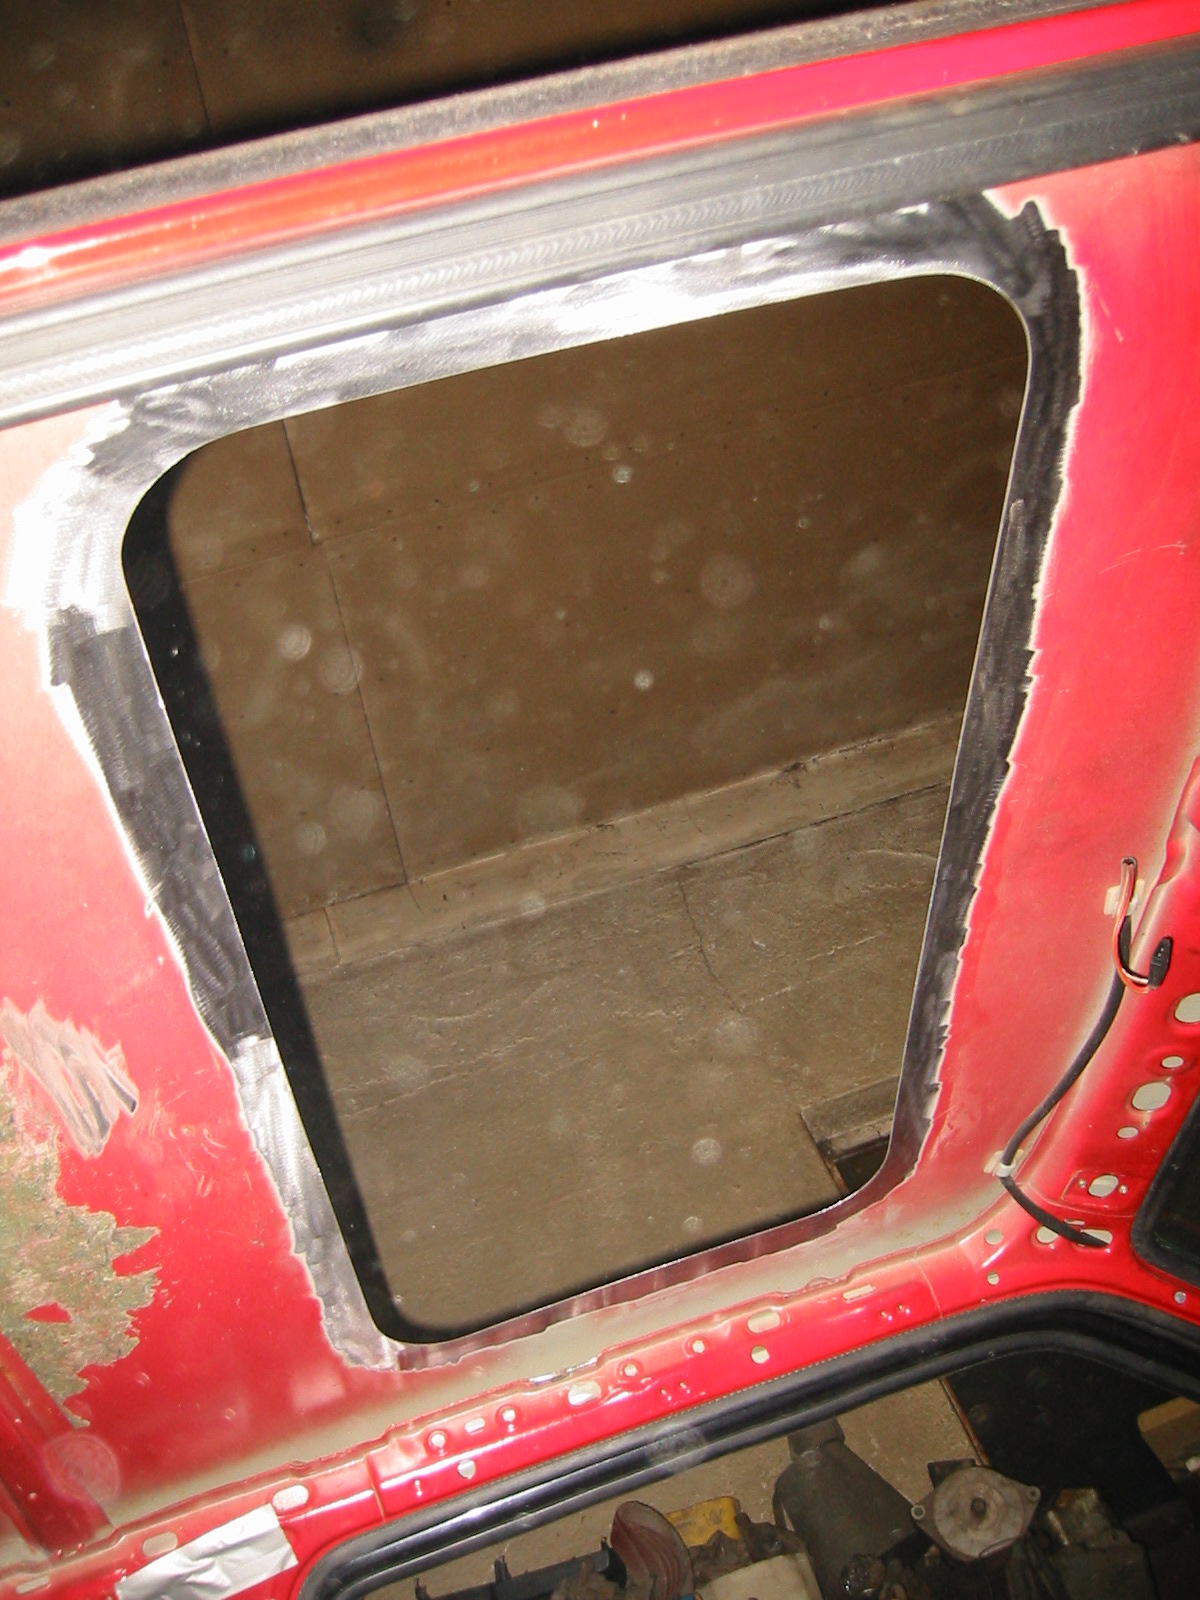
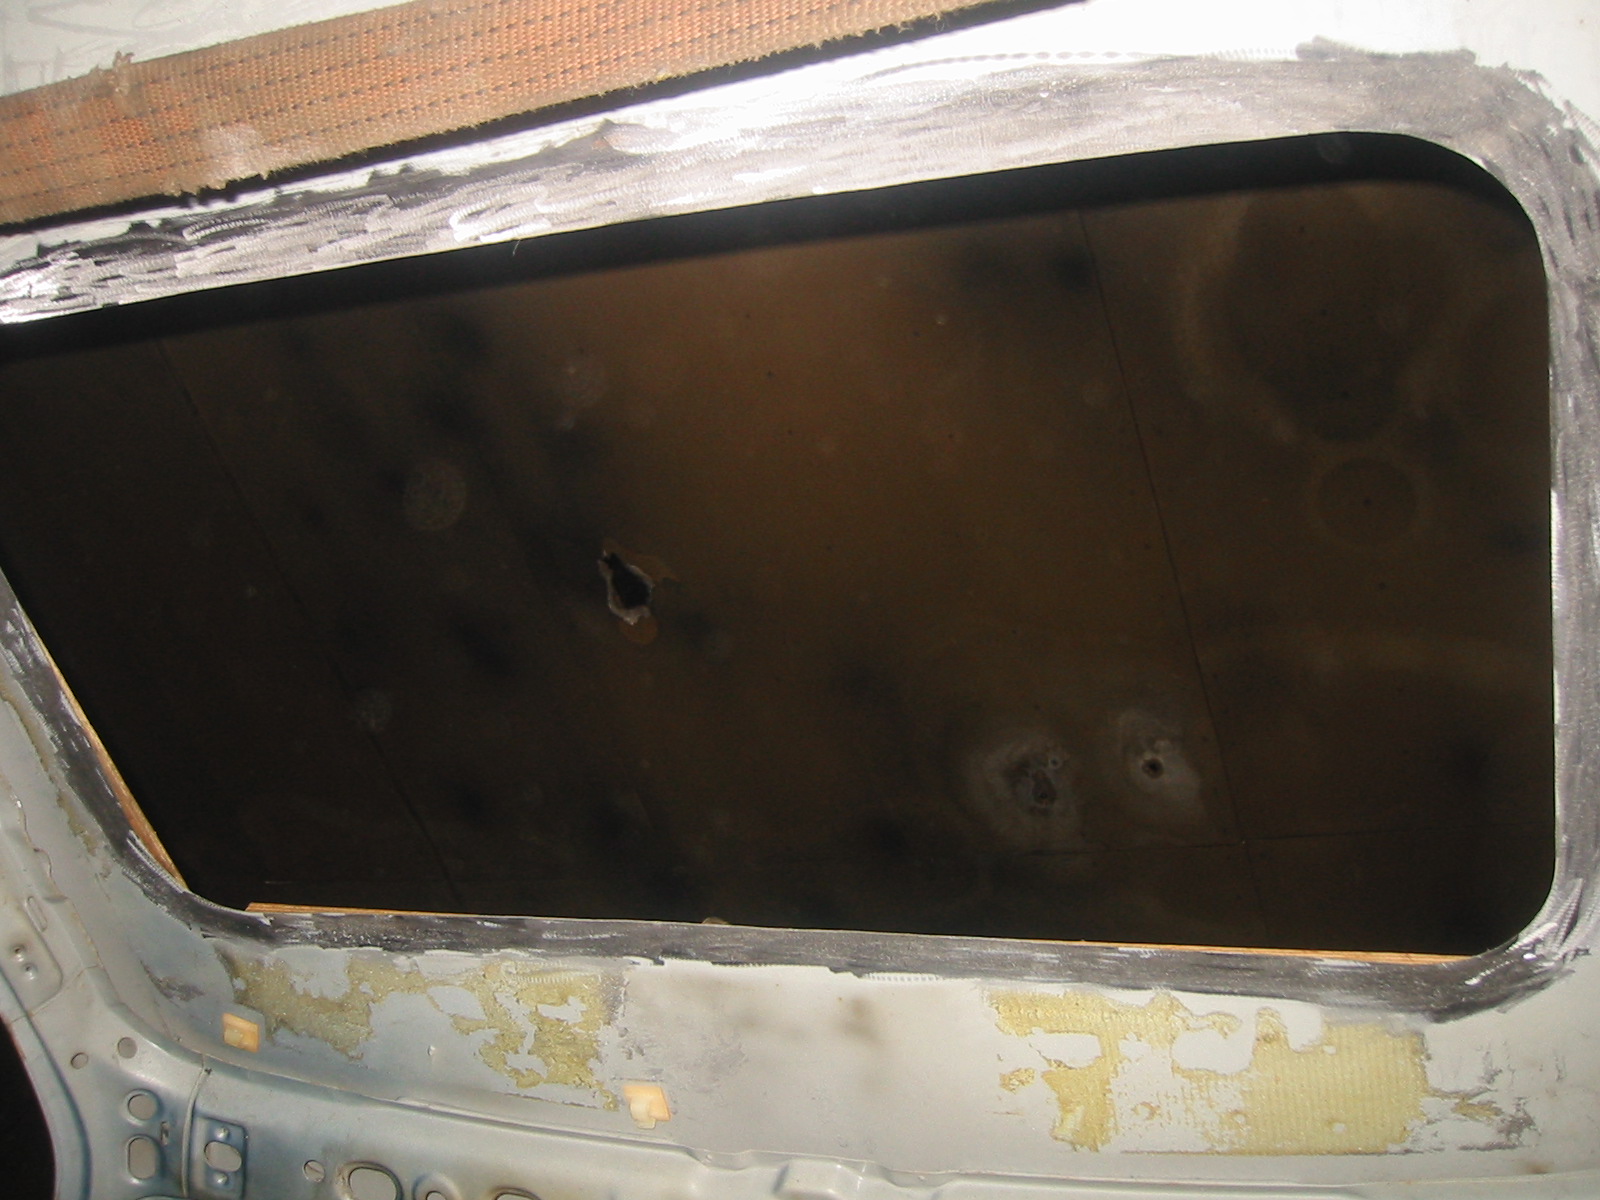
First a hole was cut into the roof with a pneumatic saw. All the paint was removed from the borders of the hole.
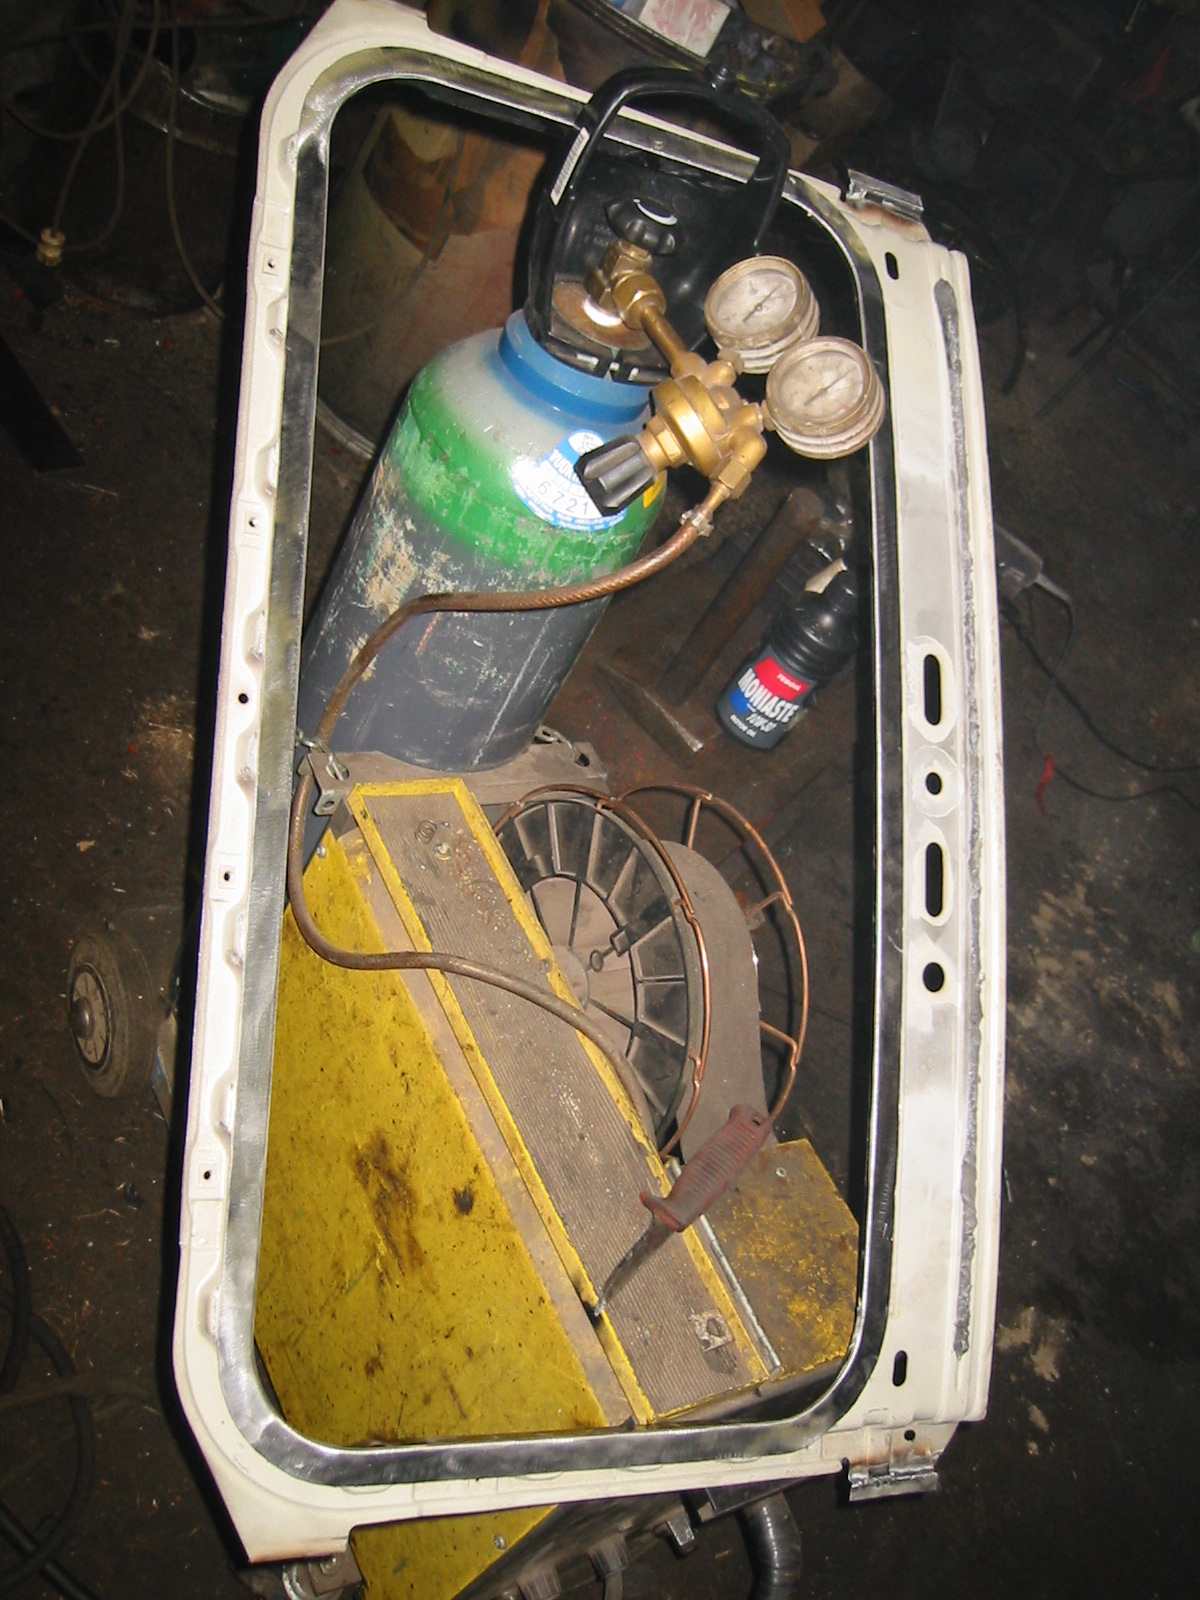
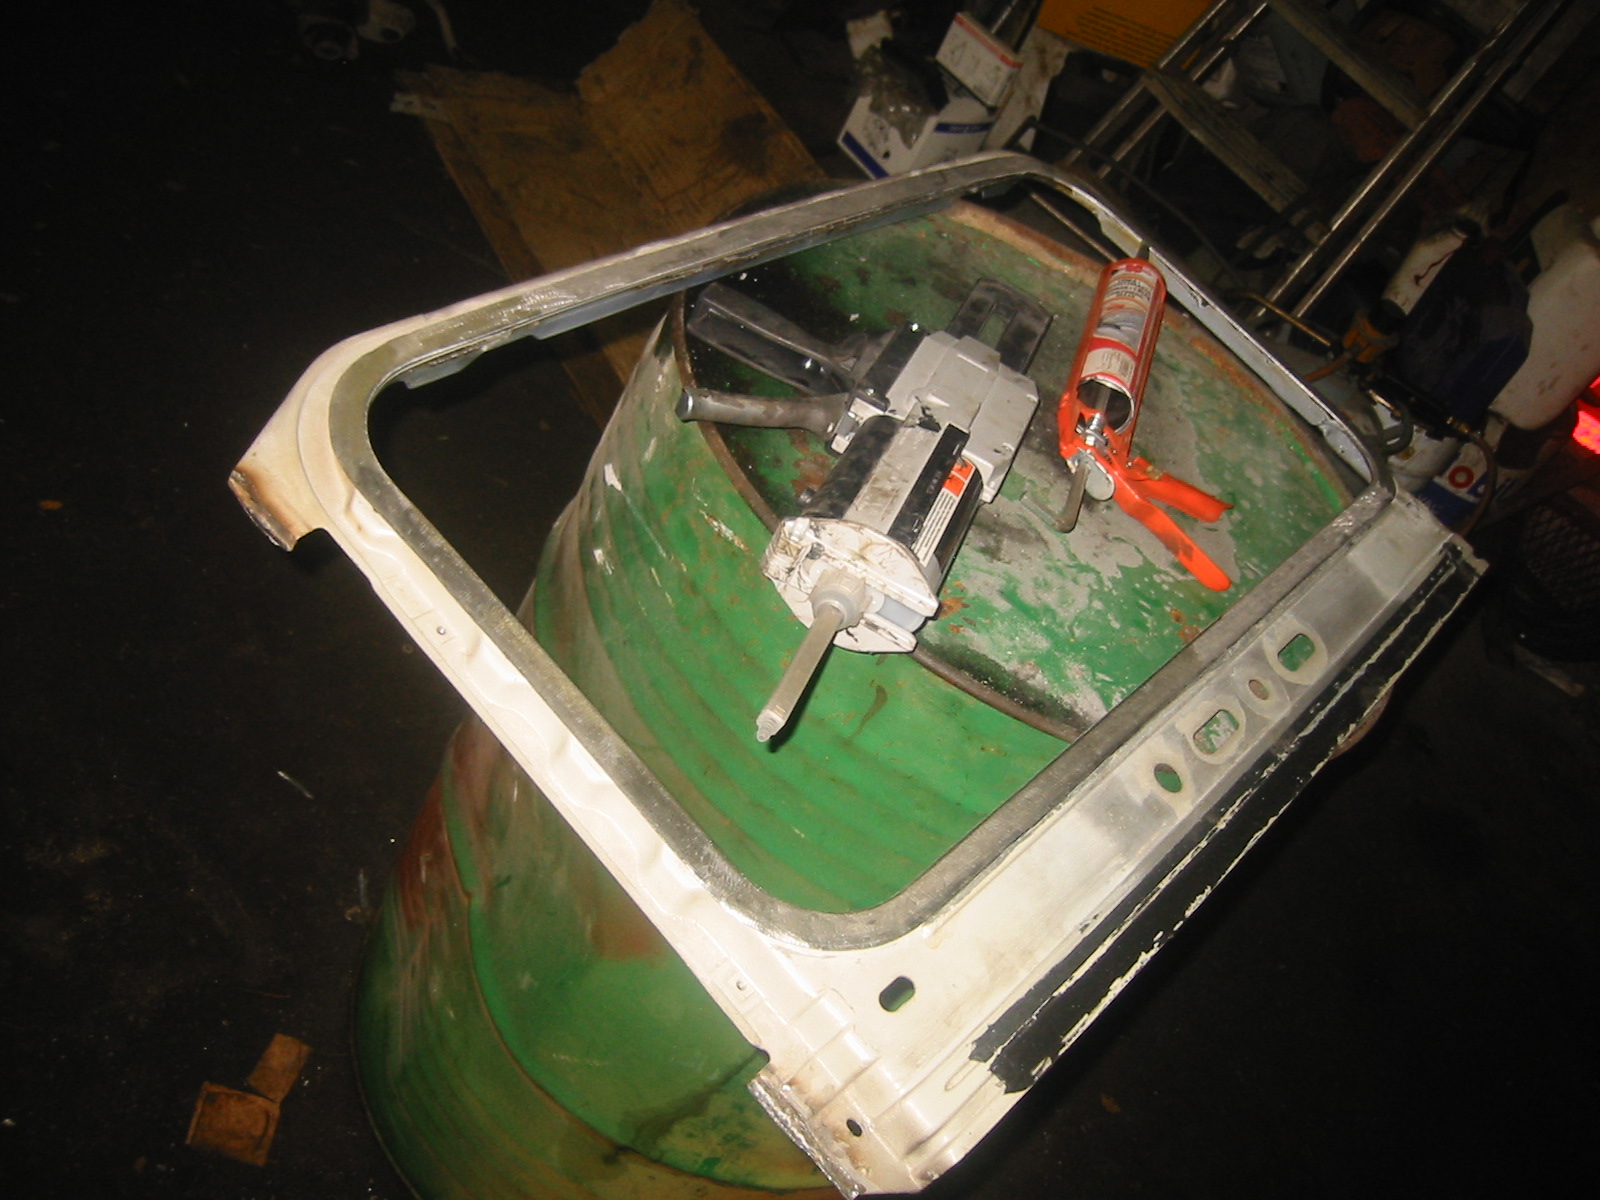
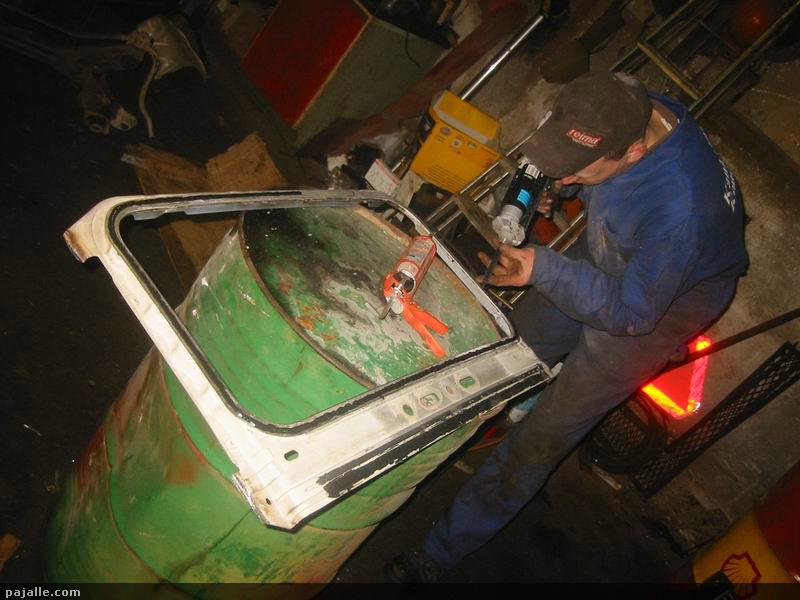
This is the body of the sunroof mechanism, from Golf 3. The mechanism of the sunroof is attached to this part. All the paint was also removed from the top surface.
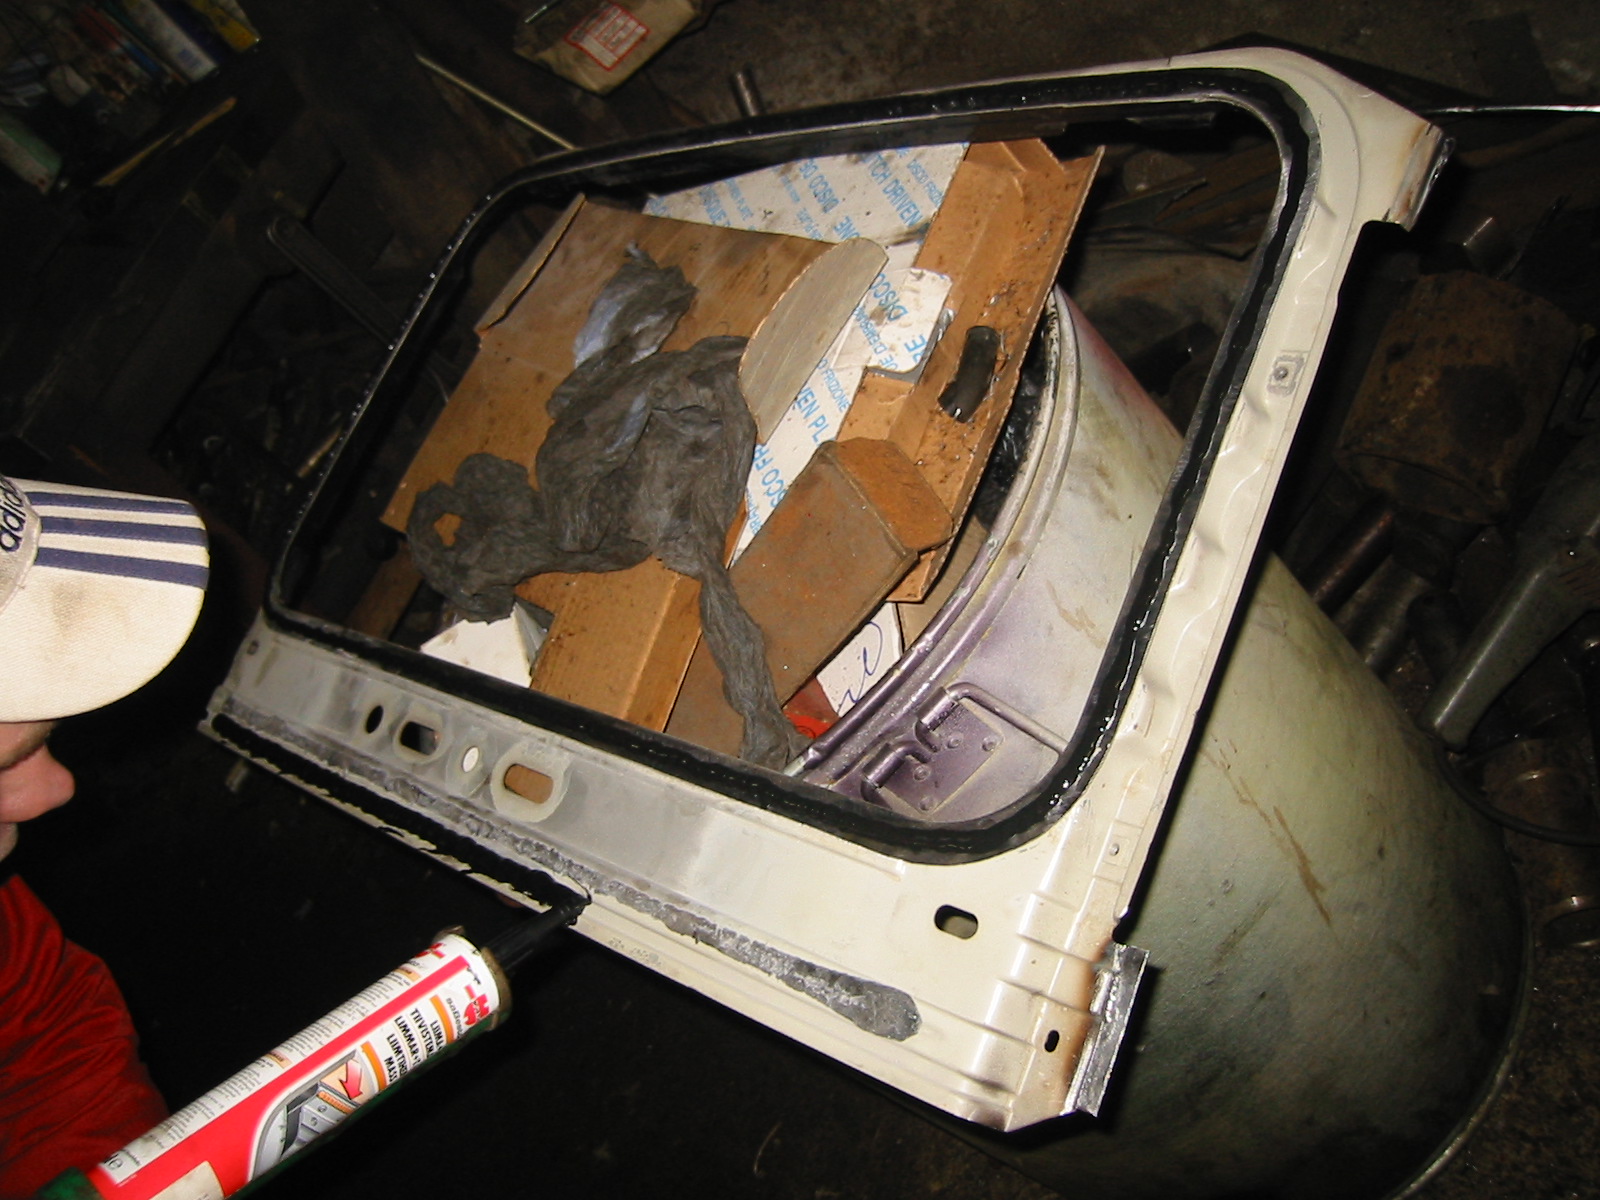
The glue was then applied to the surfaces where the paint was removed. Normal silicone glue was also applied to enforce the structure.
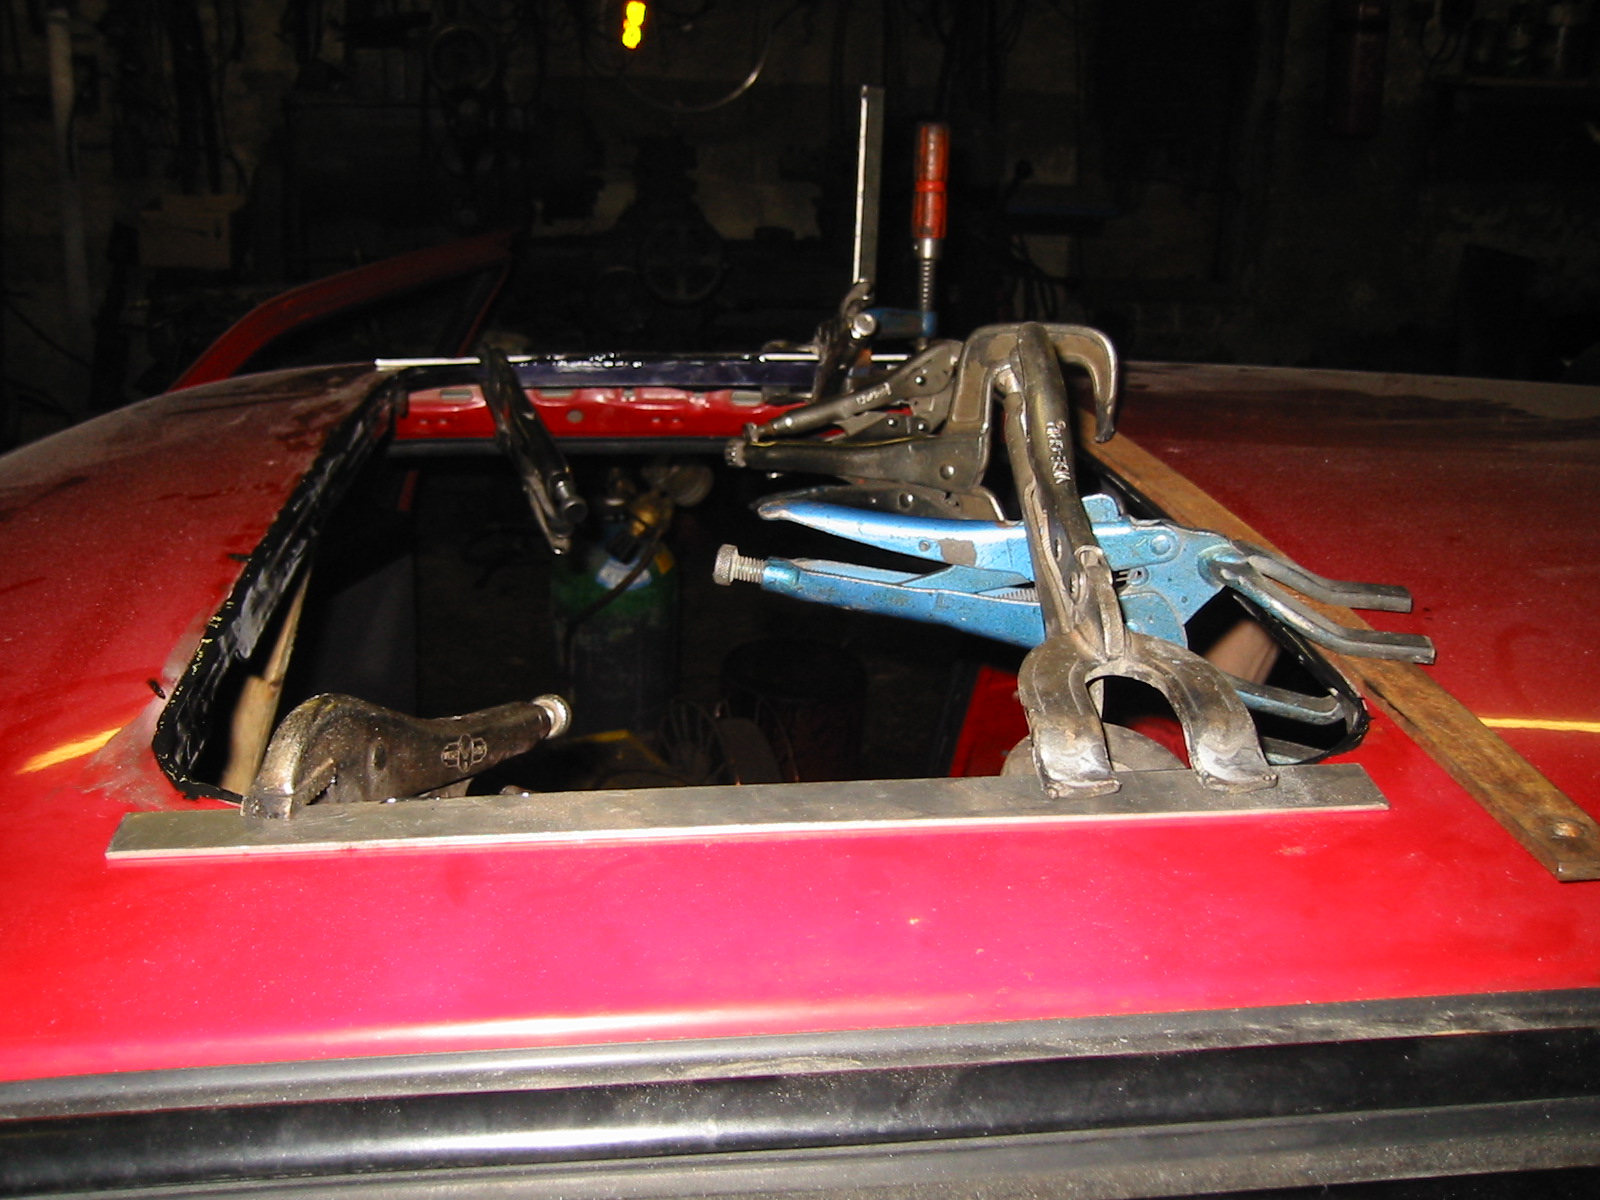
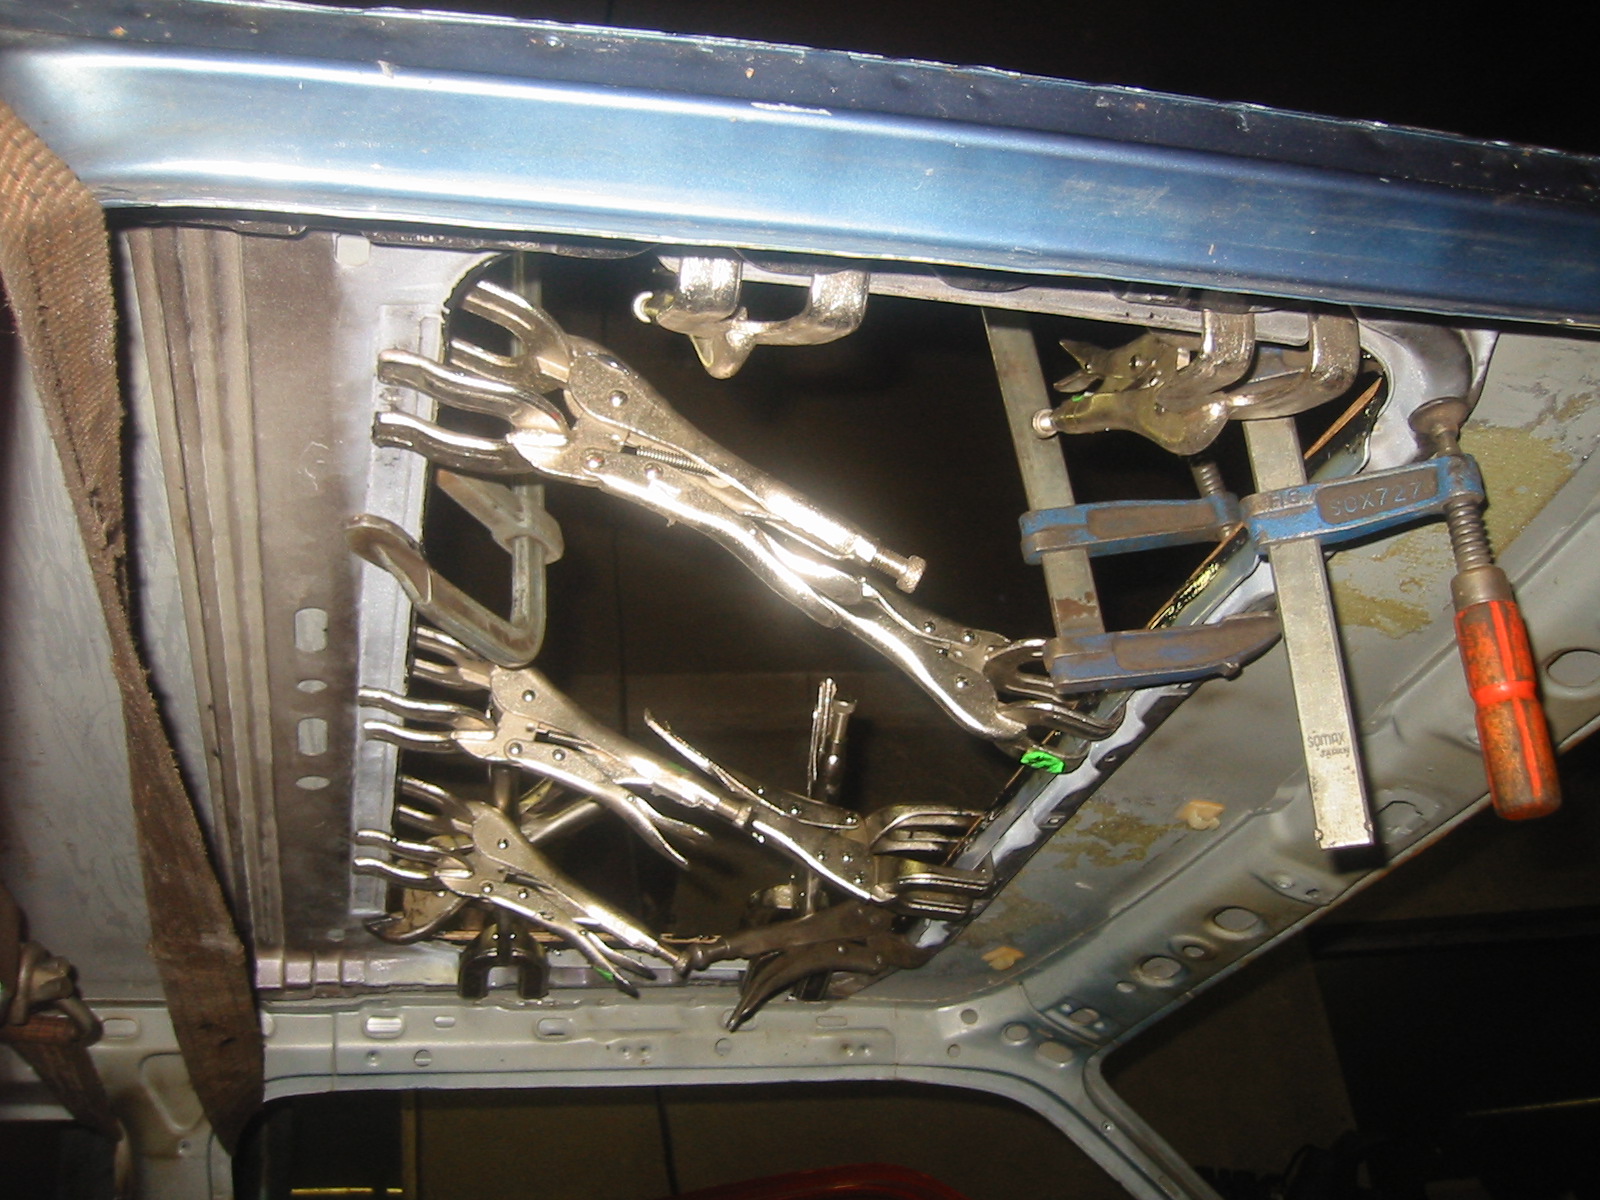
After that the frame was attached to the roof from the bottom side. It's importat that there's enough glue and lots of clamps.The glue gets REALLY hard, so it was important not to mess with it.
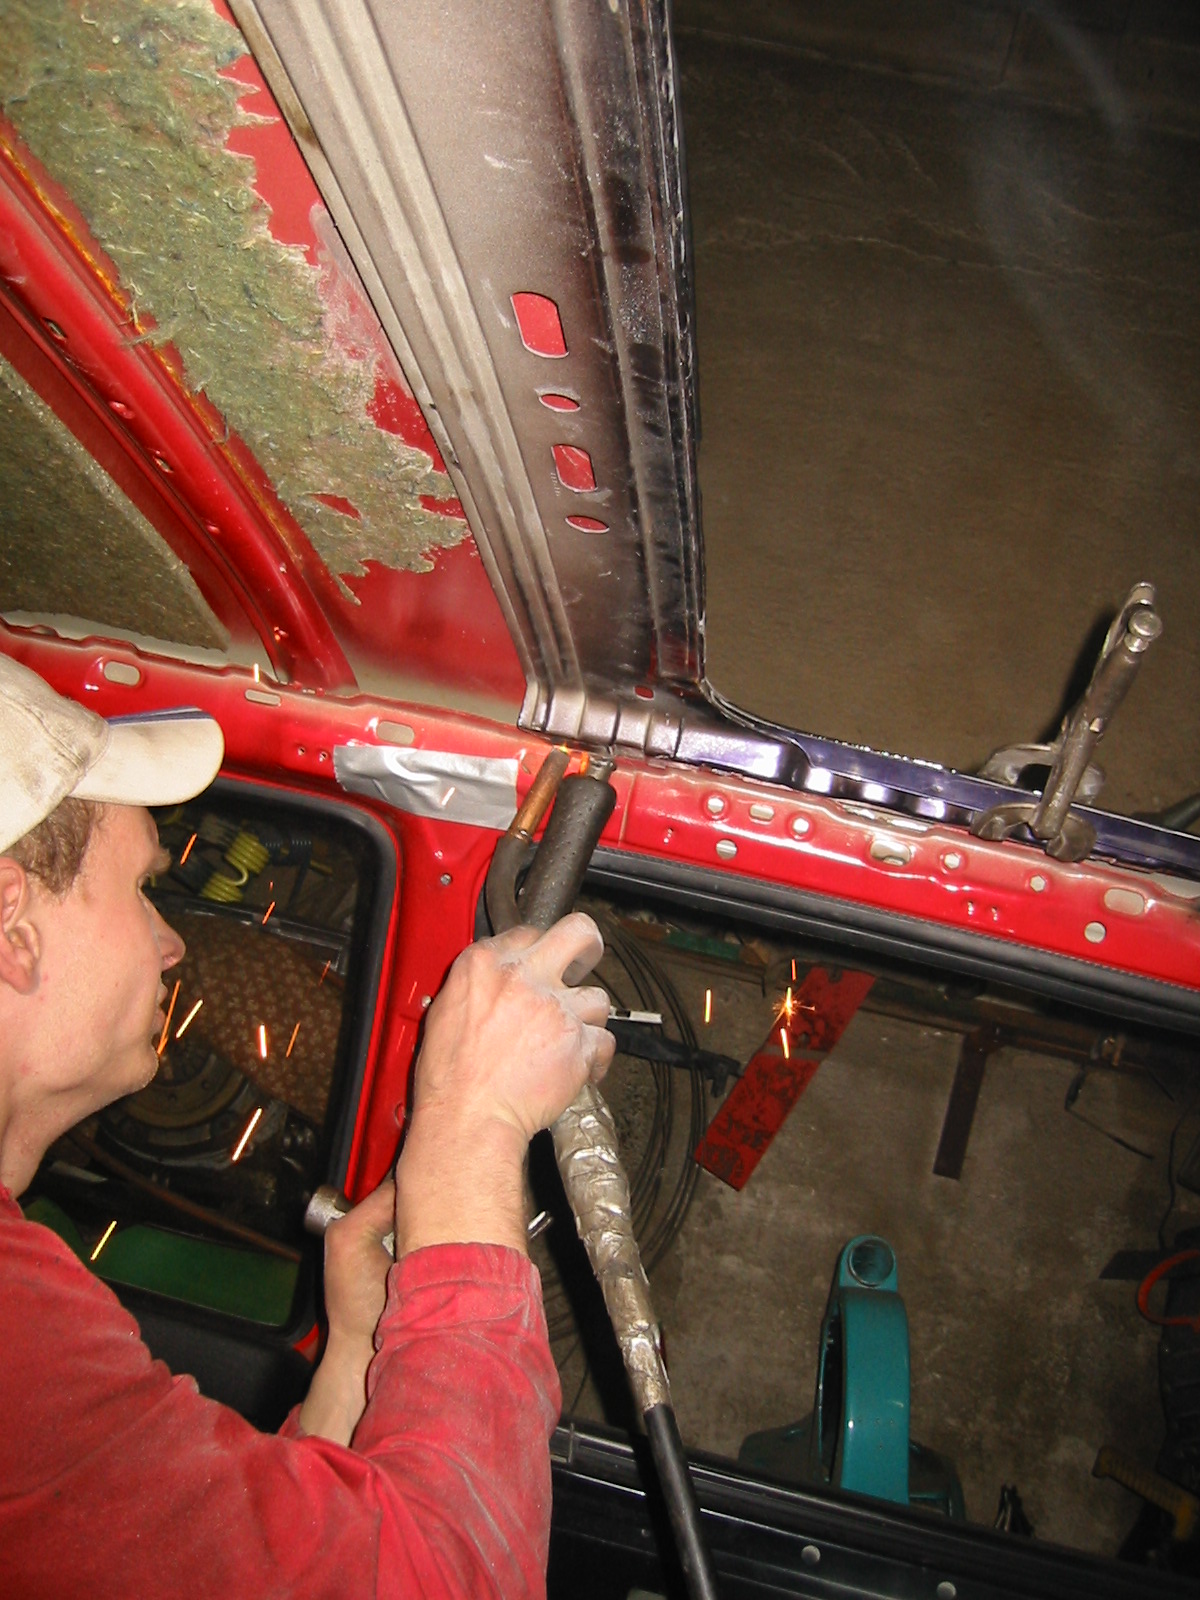
From the bottom side the edges of the frame were still welded to the body.
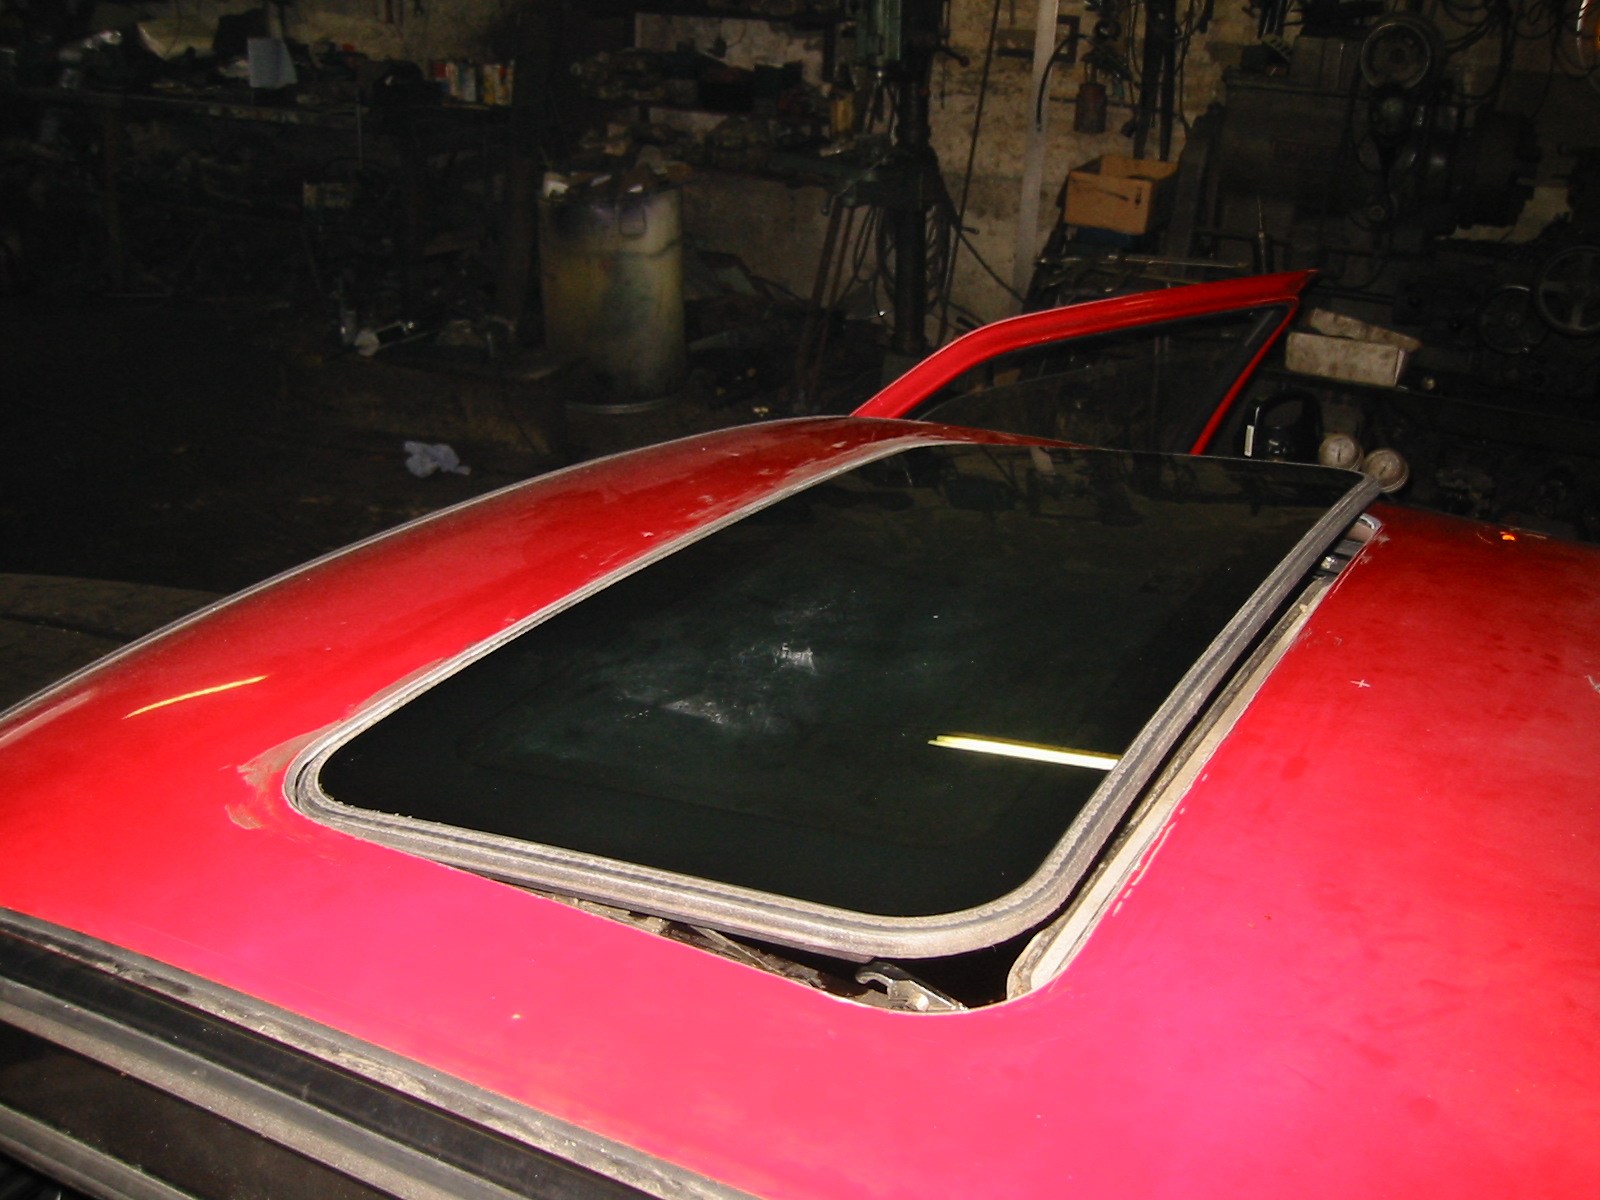
Here the mechanism and the glass sunroof is already assembled. It has two functions, in addition to sliding inside the roof it'll also rise from the back... driven with an electronic motor too :)
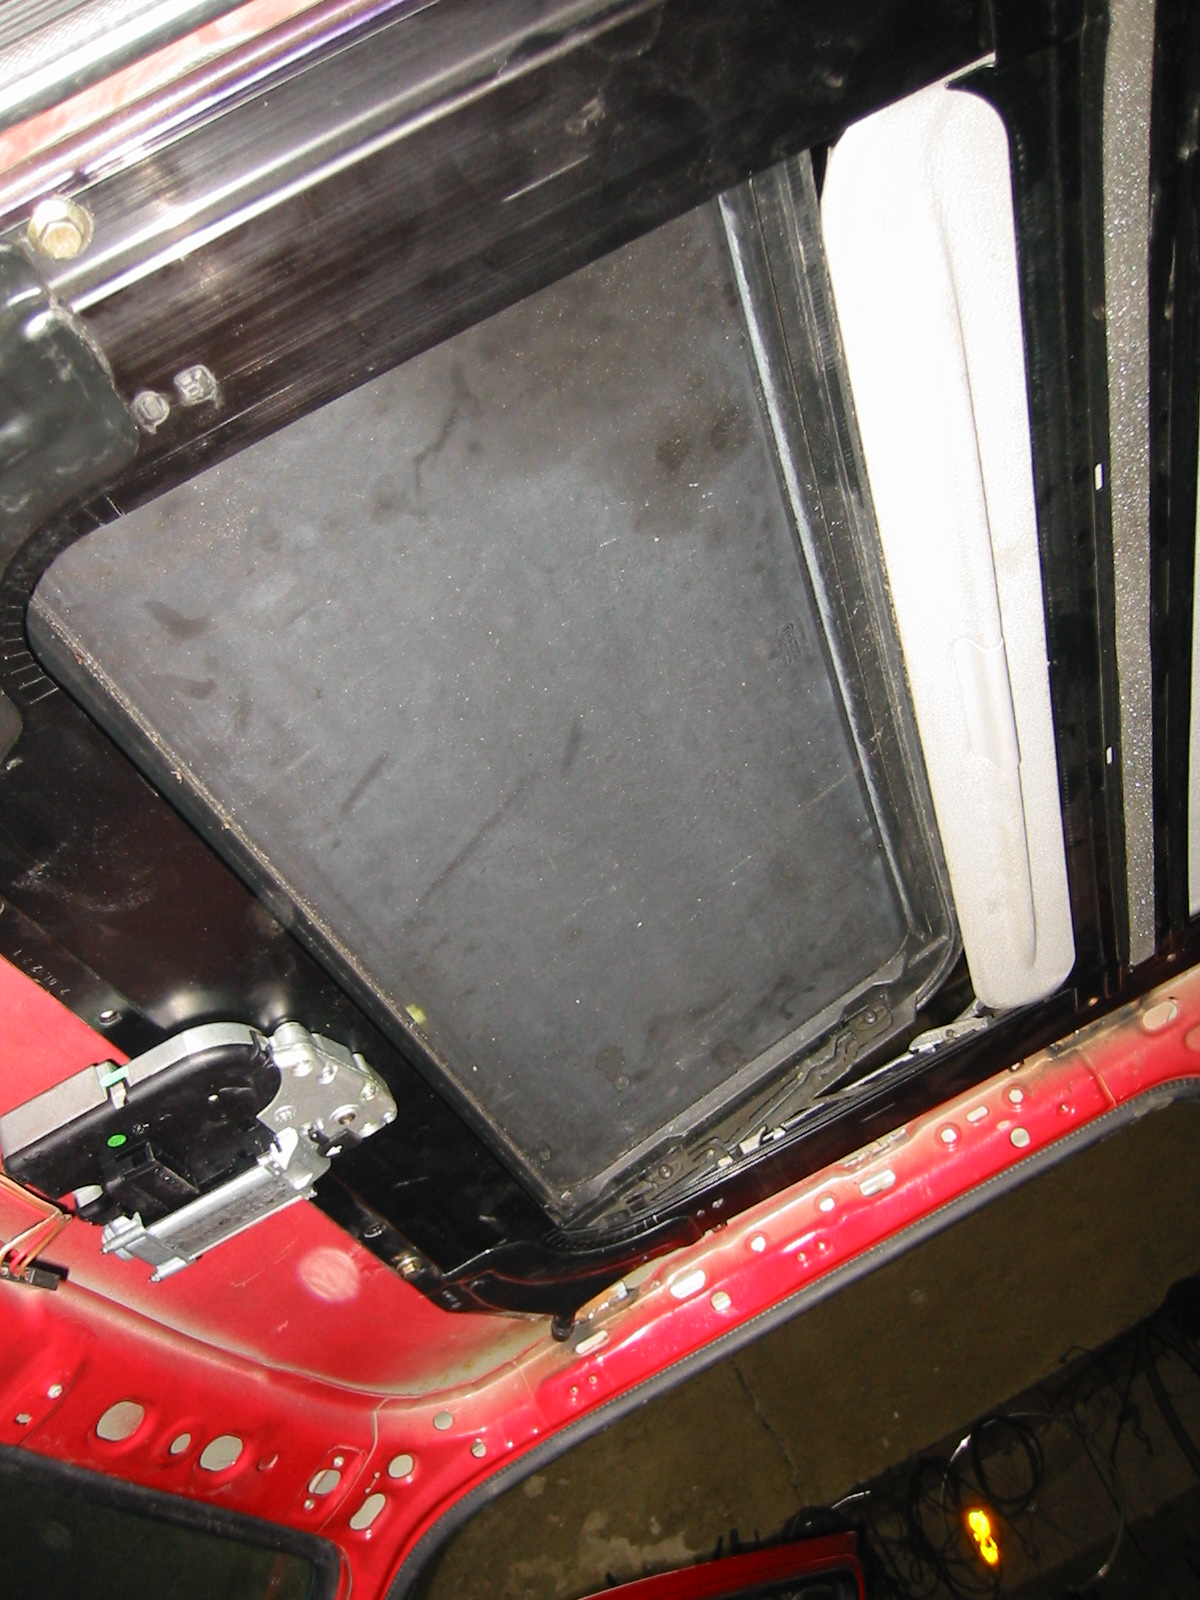
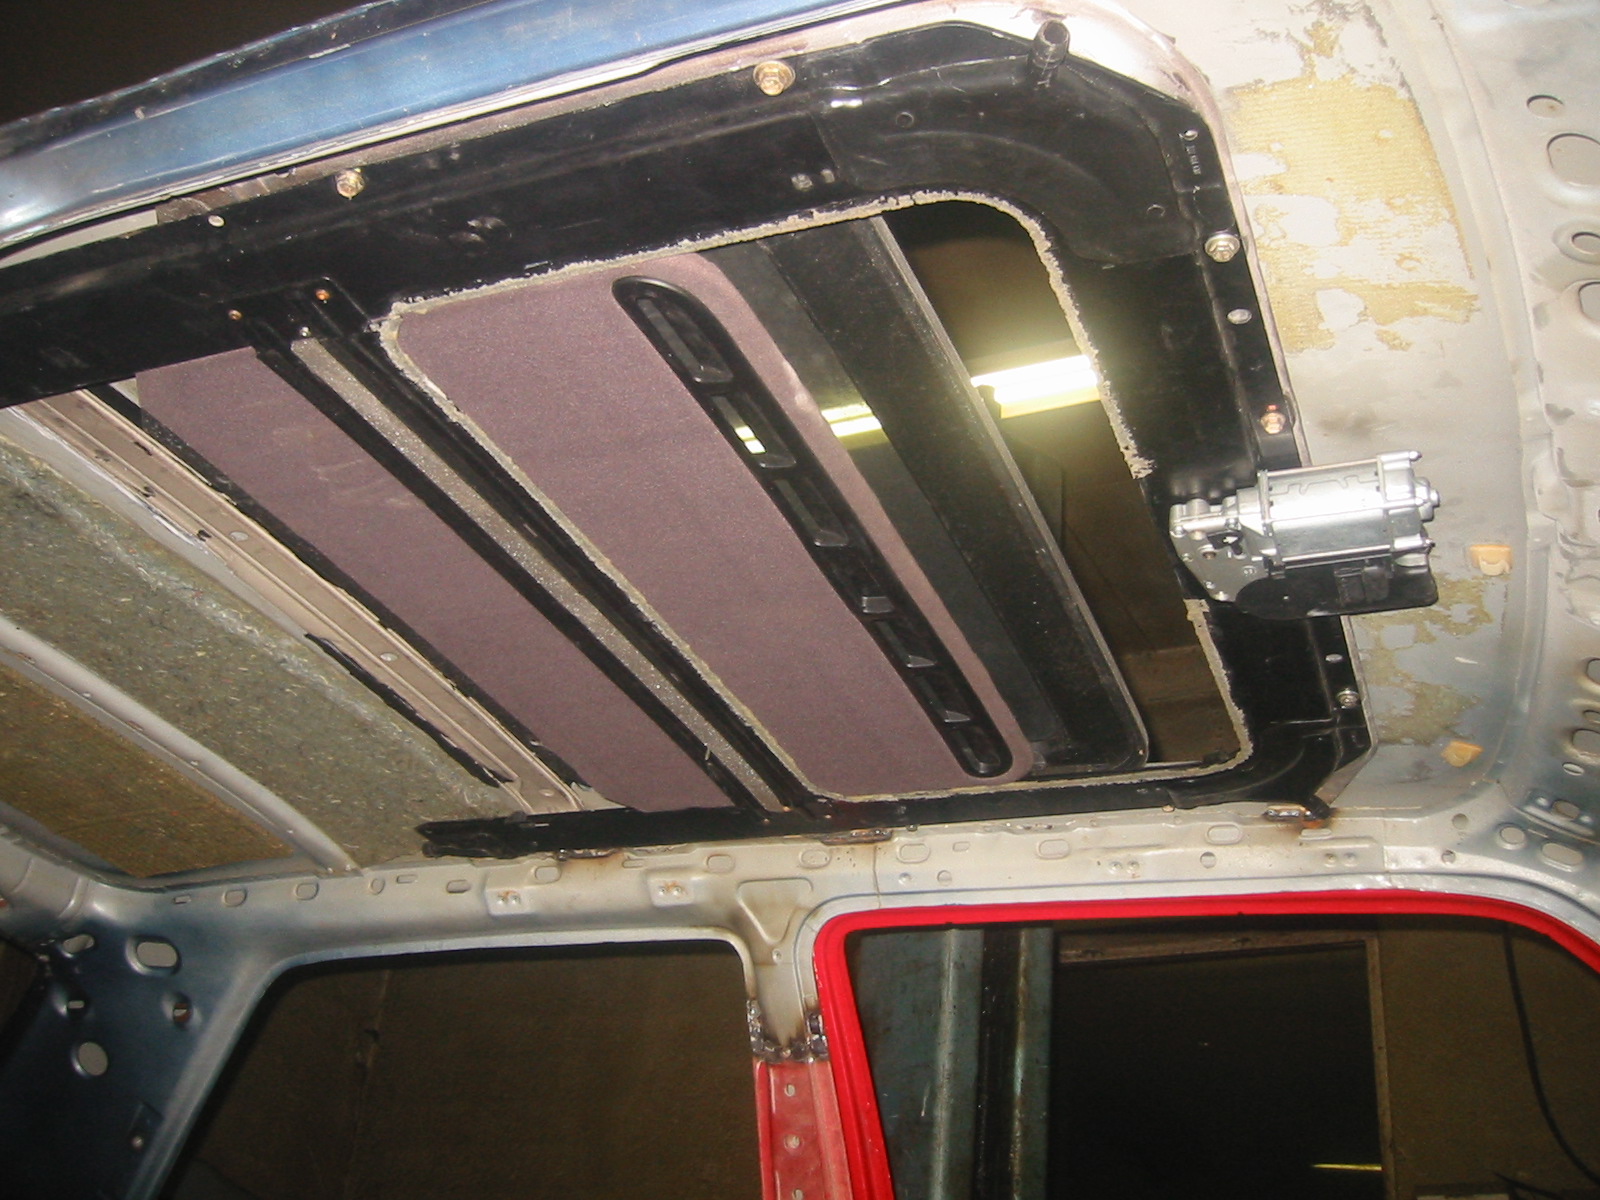
From the bottom side the motor can be seen. The original mechanism was a little bit broken, new parts were bought to fix it.
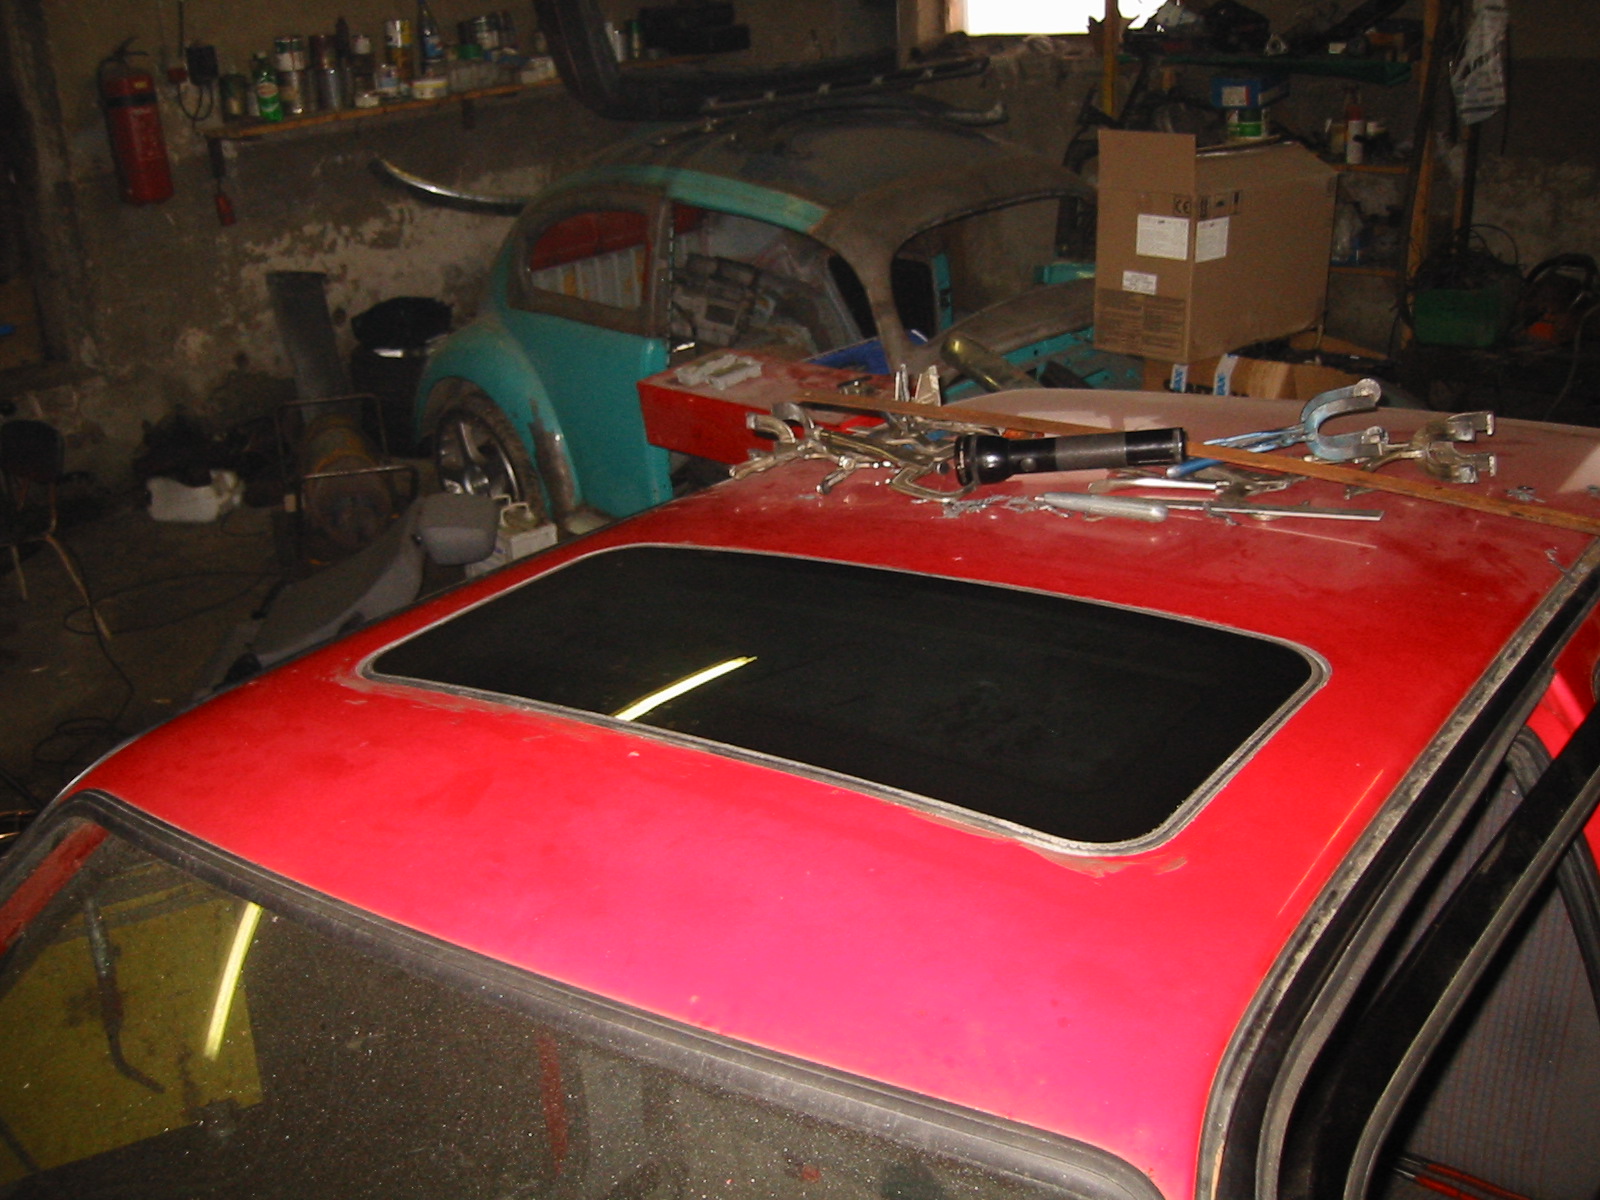
One more image with the roof closed. Fits really well. You can't find so many of these in Finland...
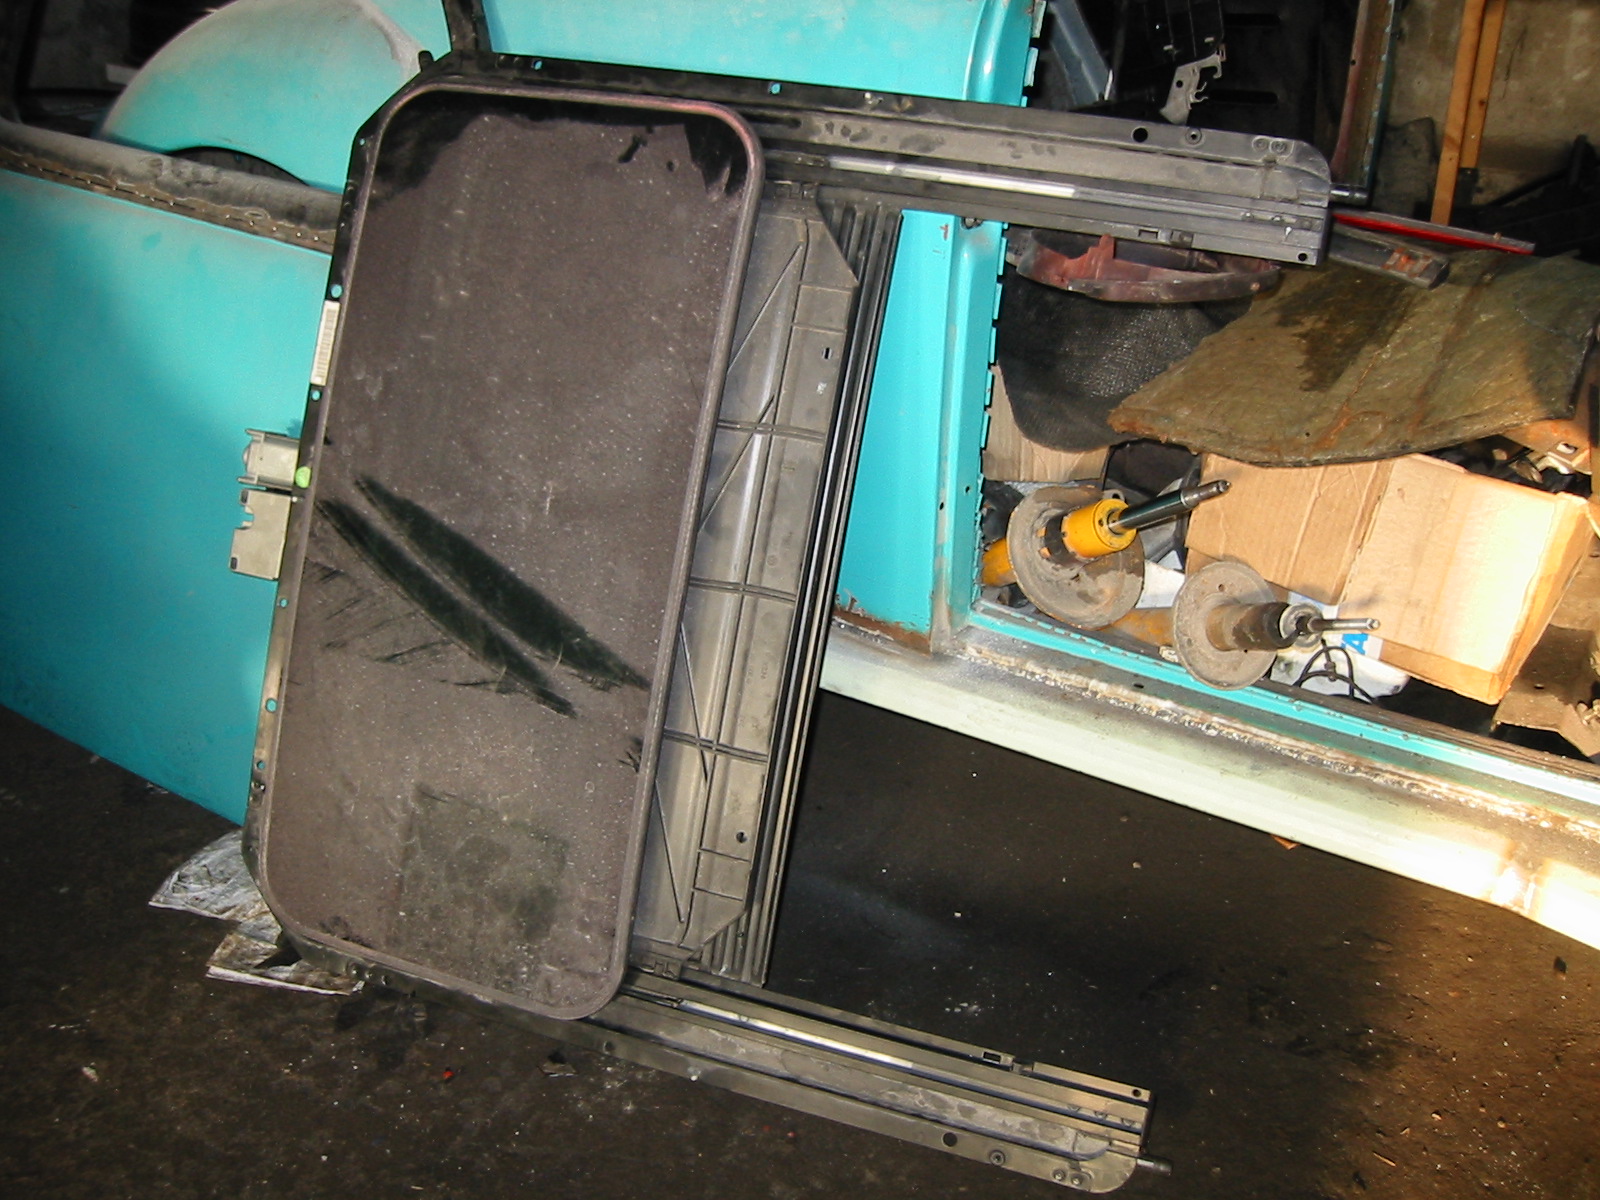
Still an image of the Golf 3 sunroof mechanism that was fit in the Golf 2.
Dashboard - part 1
Golf 2 dashboard looks like it's from the '80s (oh really?). It was time to try a dash swap... in many German tuning magazines it seems to be some kind of must to swap the dashboard to something more modern. Pekka decided to fit the Golf 3 dashboard.
Another reason for this swap was the electronics. The car will have the TDI engine from Golf 3... so it's much easier to use Golf 3 instruments panel and wiring than try to make the Golf 3 engine electronics work with Golf 2 instruments. Now it's basicly just fitting the complete front wiring from Golf 3 to Golf 2.
Pekka had never seen such swap live, just some images from magazines written in the language he didn't understand. Also in the magazines one can normally just see the results, not any project images... so it was quite an experiment for Pekka.
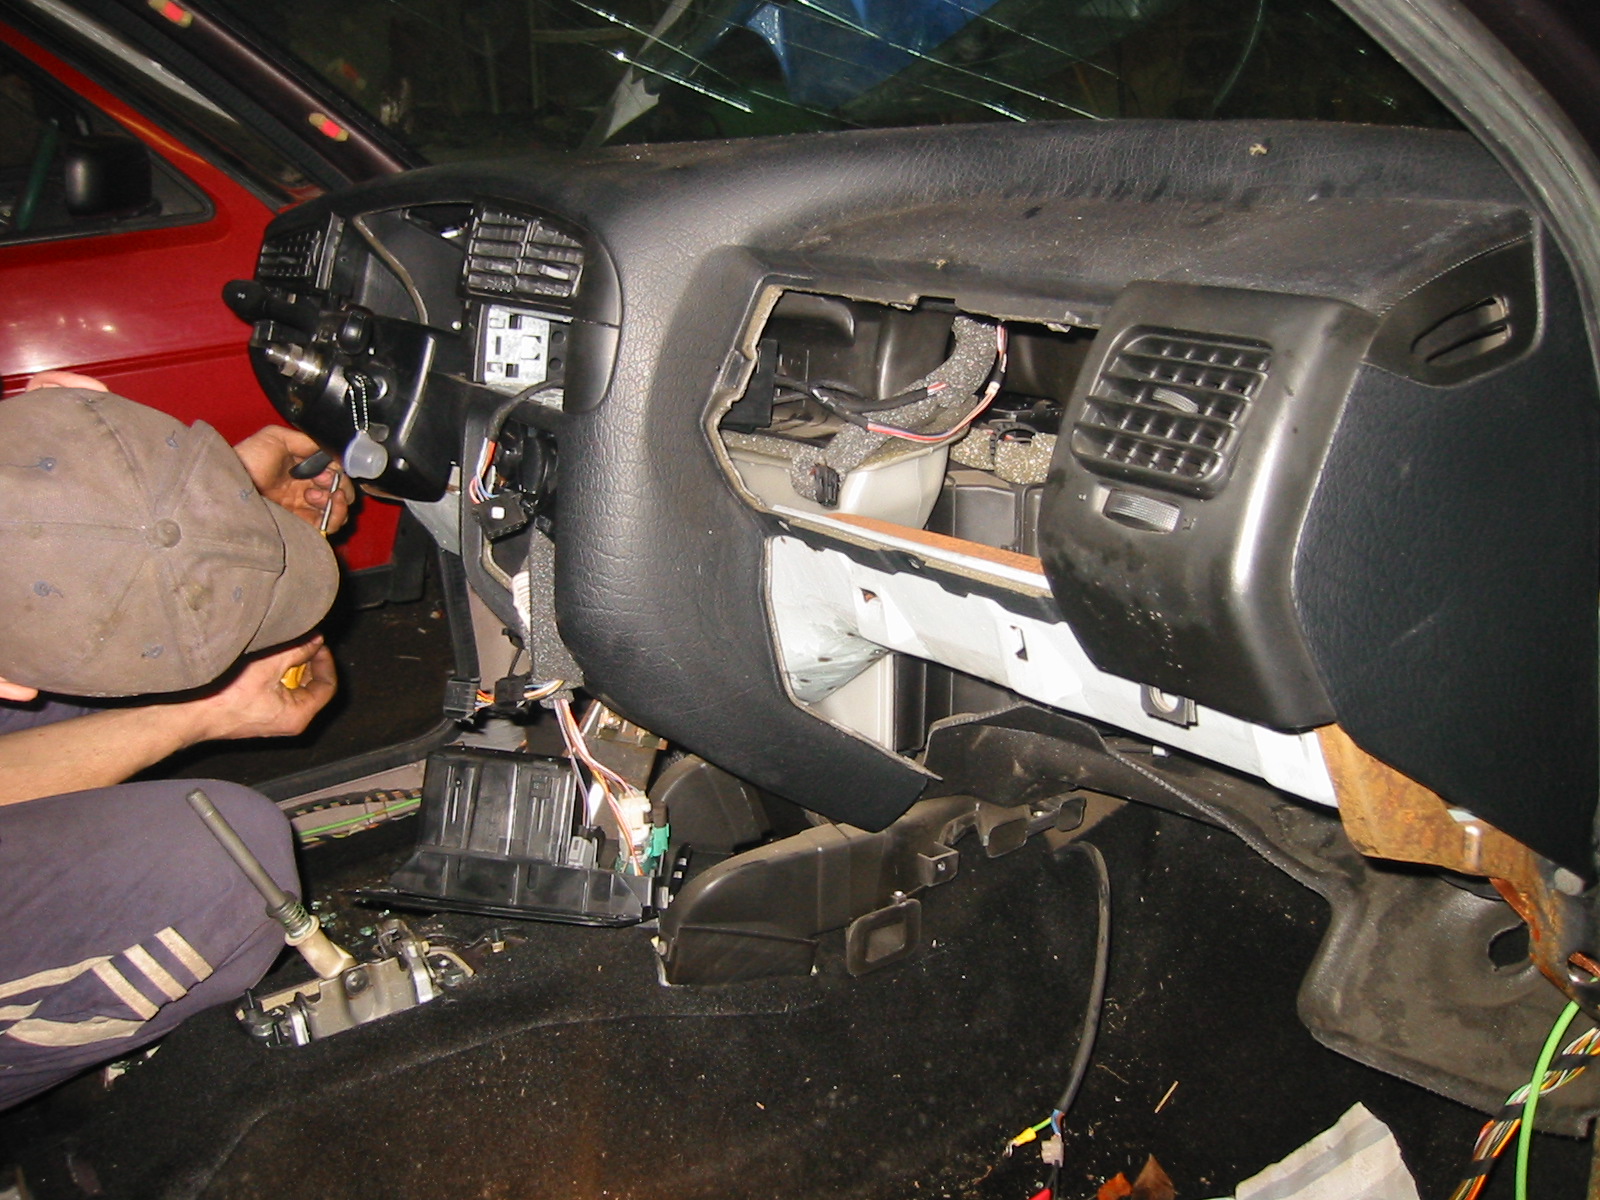
First operation is to remove the dashboard from the donor car.
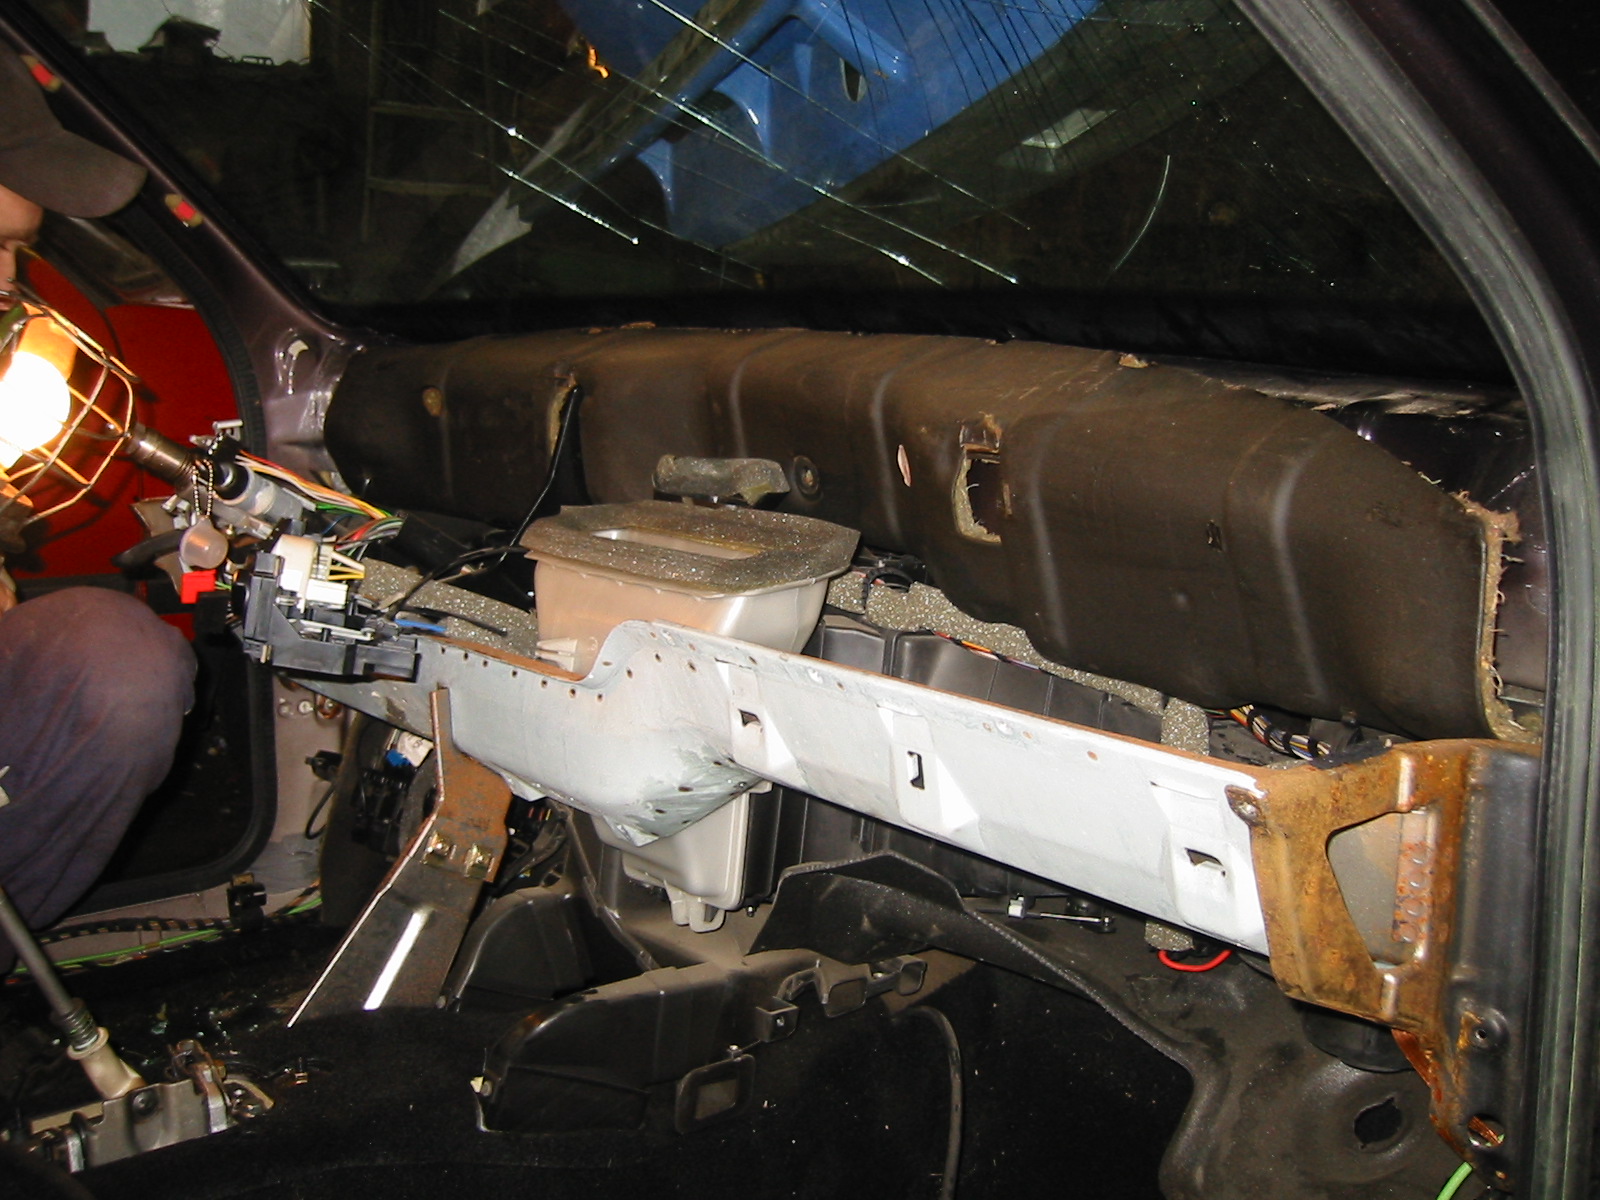
Golf 3 dashboard consists of two parts; the actual dashboard that everyone can see, and a metal beam inside. For example the palkista johon kiinnittyvät mm. osittain polkimet ja ohjaustanko.
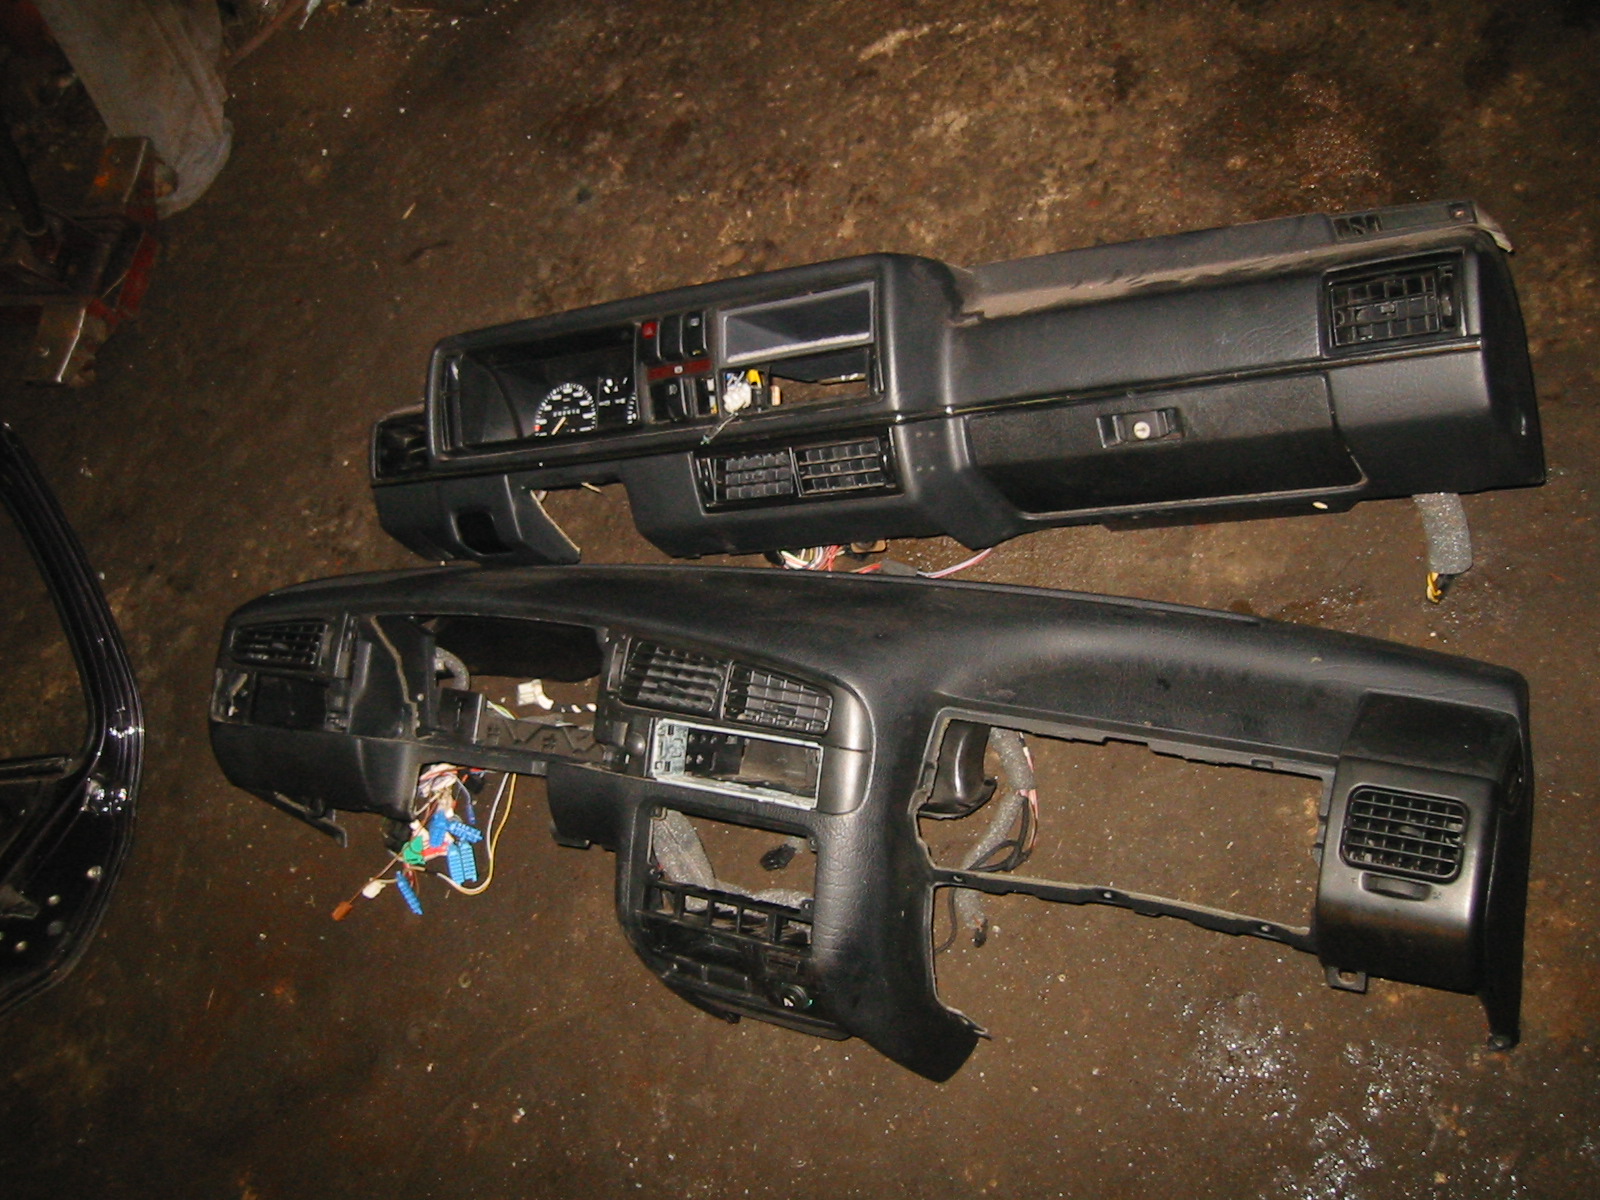
Sorry, so far the English translation ends here :(
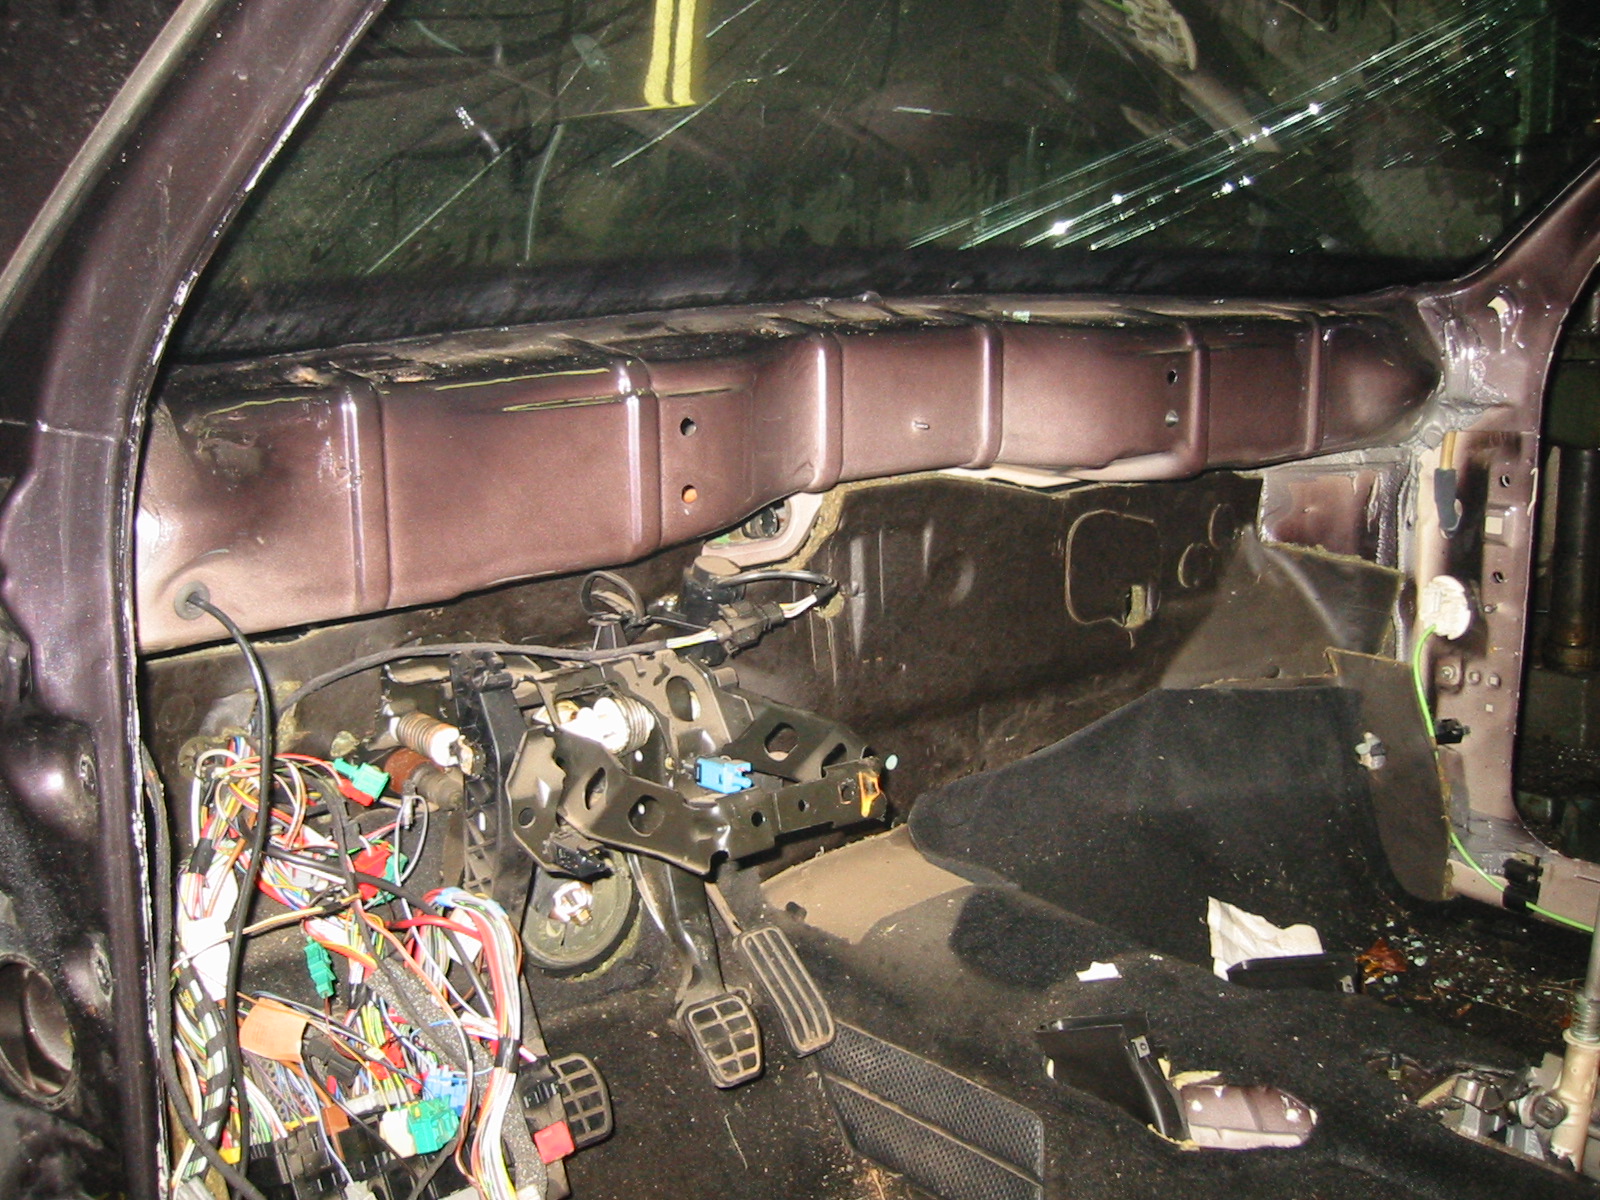
The Mk3 dashboard completely removed. Quite a bundle of wiring left. Even this is missing the rear loom, which yours truly saved for the future electric-window installation in the Vento. There's more wiring inside the dashboard itself.
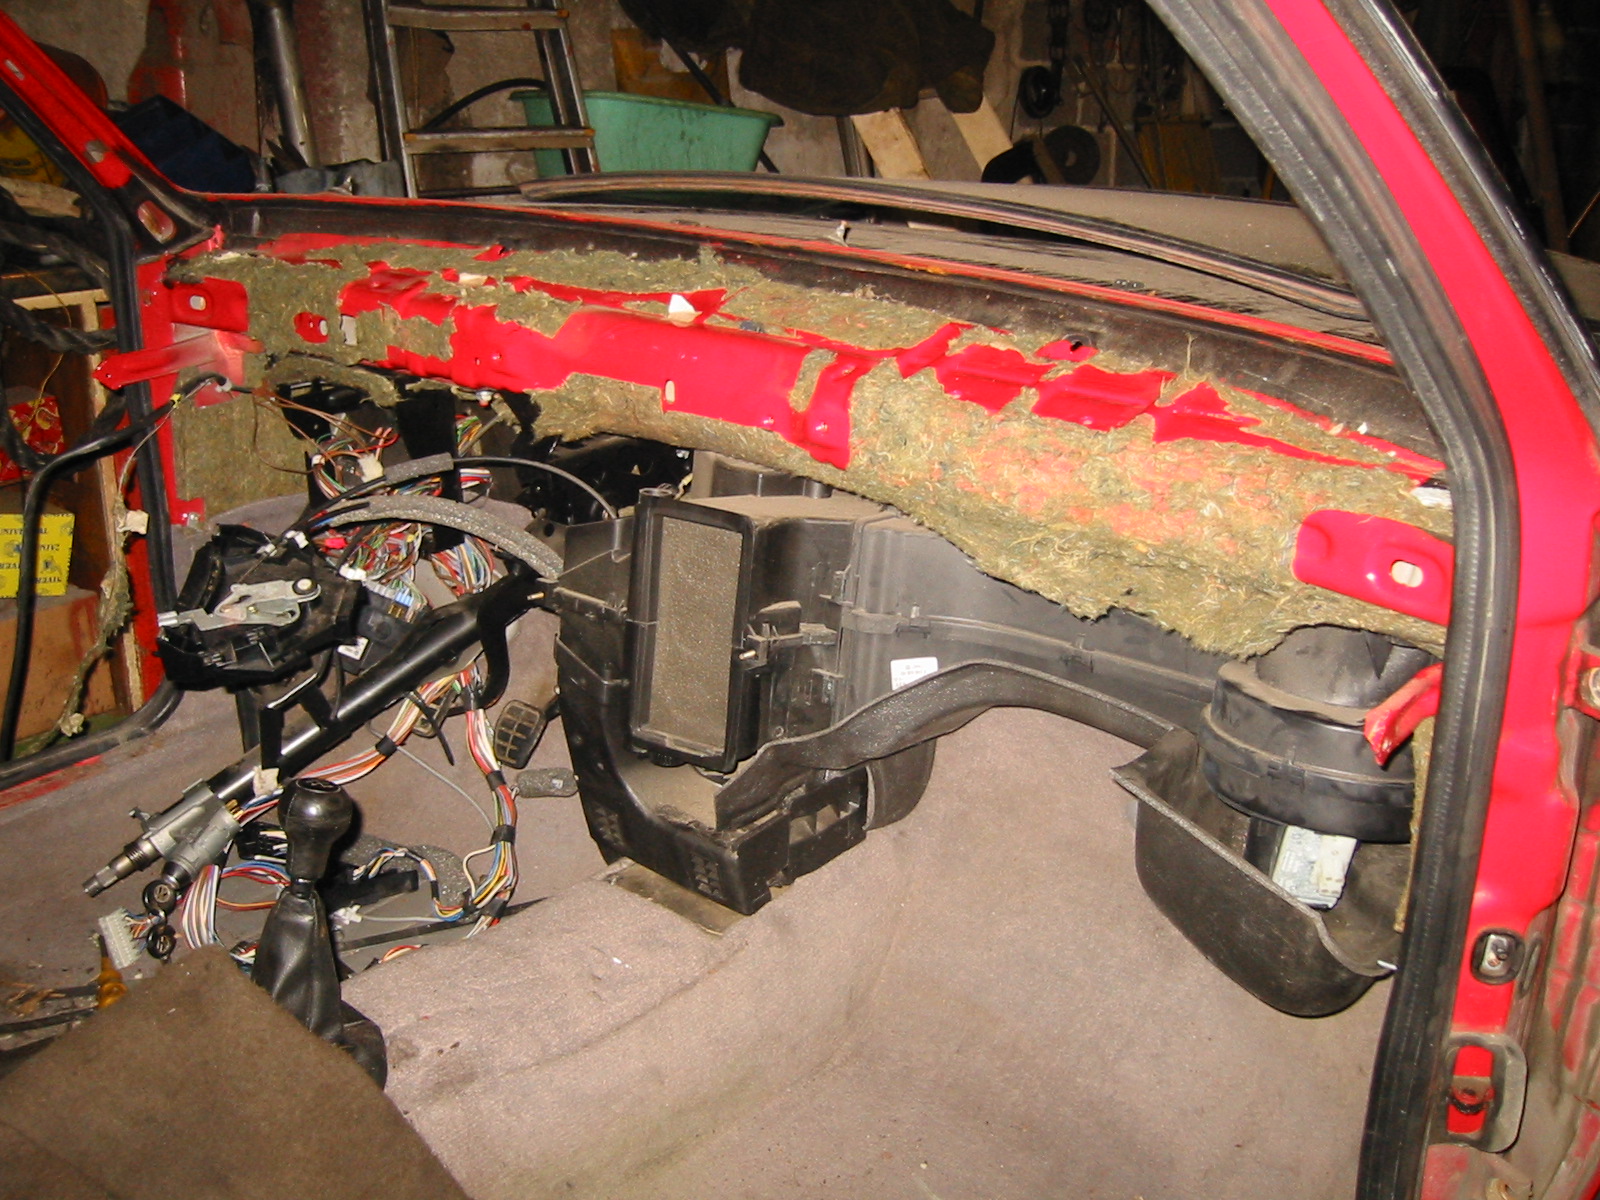
And here is the Mk2 with its dashboard removed. You can immediately see that the crossmember supporting the front edge of the dash is quite different in size and shape.
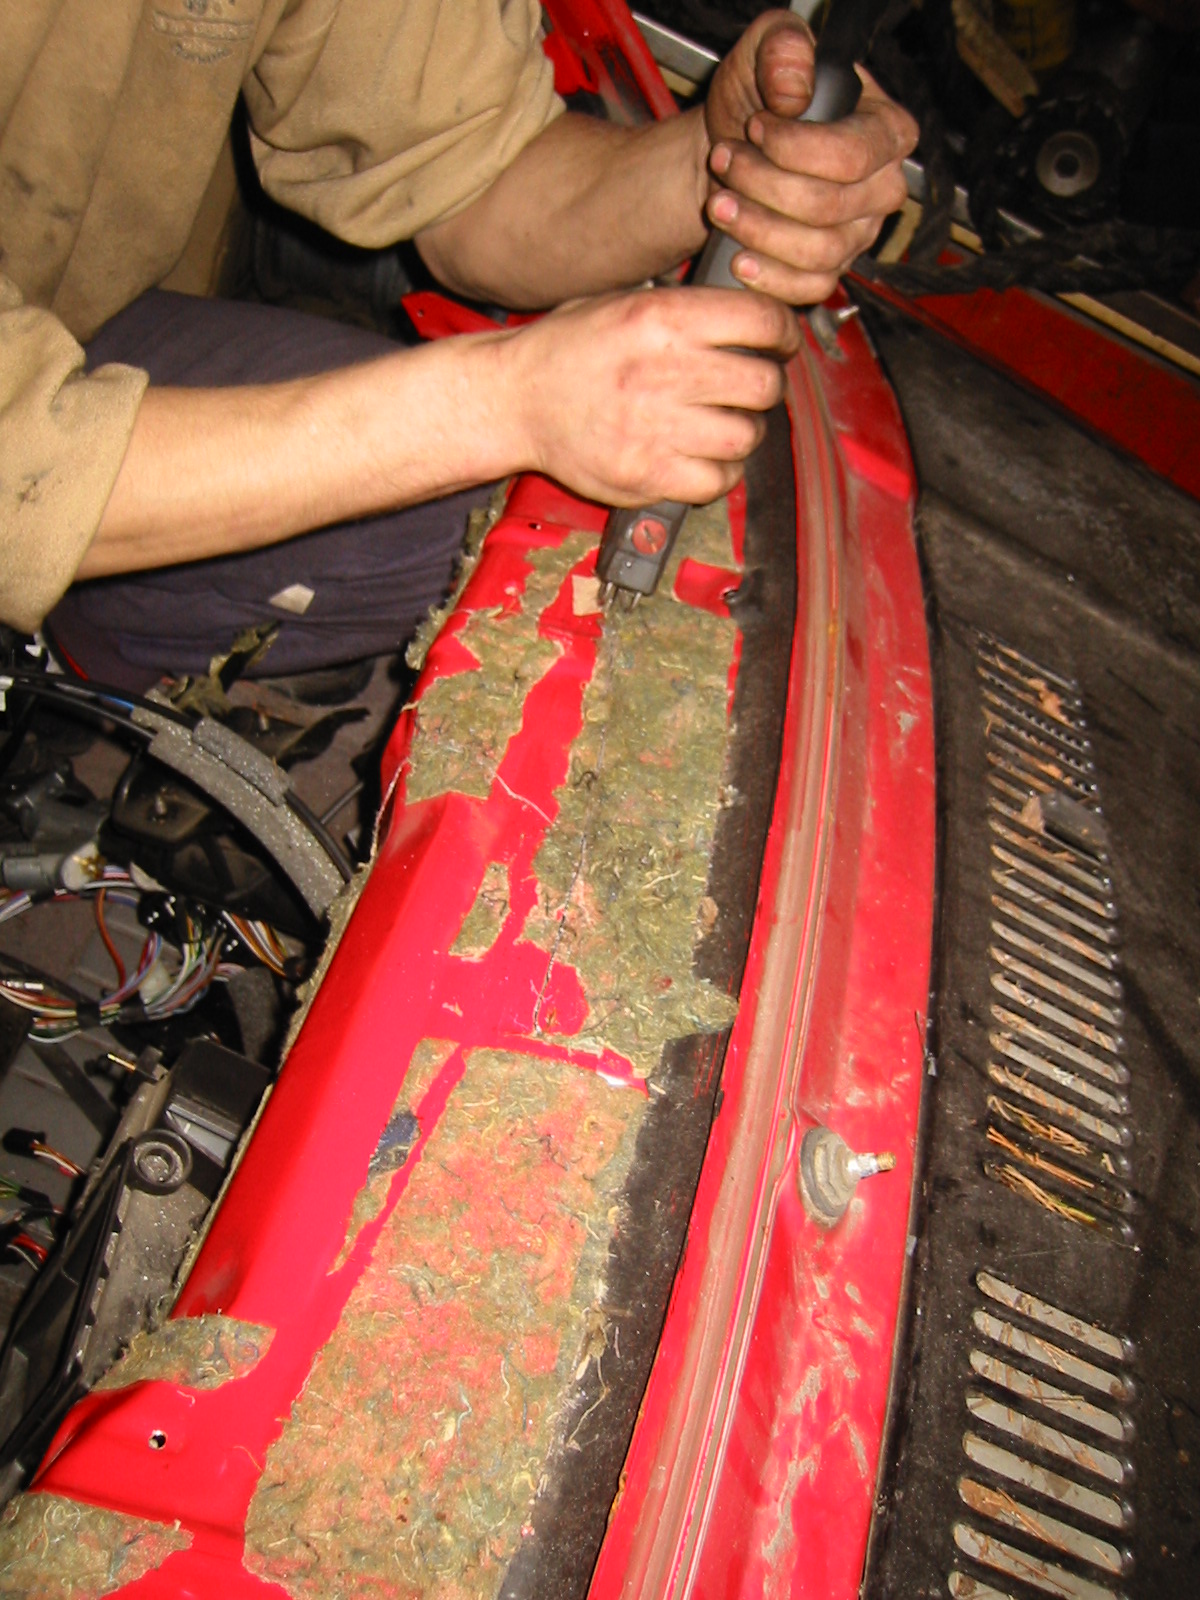
We started by trying the dashboard shell in place. It didn't look impossible; it might even fit. We immediately realised the front crossmember would need heavy modification, if not complete removal. Out came the saw, starting with the biggest obstructions.
Dashboard — part 2
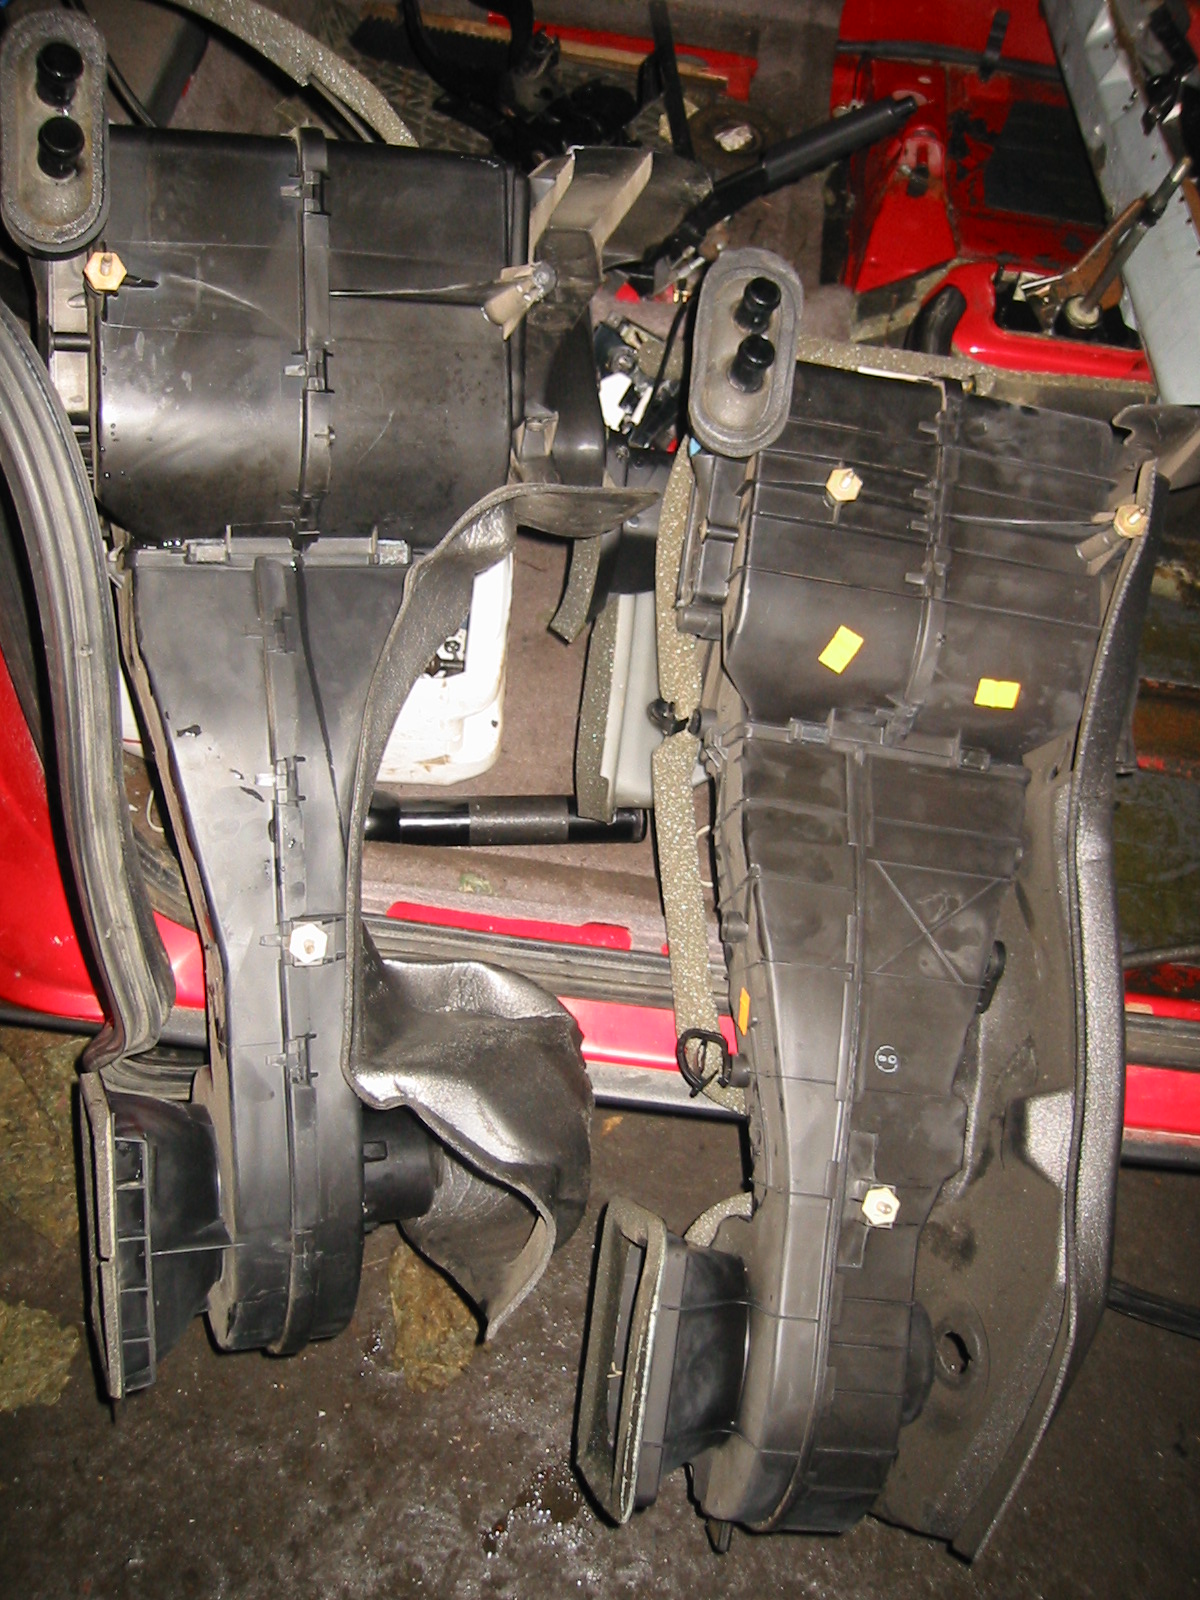
Once the shell was roughly in place, we figured fitting the heater next would make sense, as the dash more or less rests on it. That would also ensure the air ducts lined up. Here are the Mk2 and Mk3 heater units side by side. Basically quite similar, but 'surprisingly' the mounting points are slightly different.
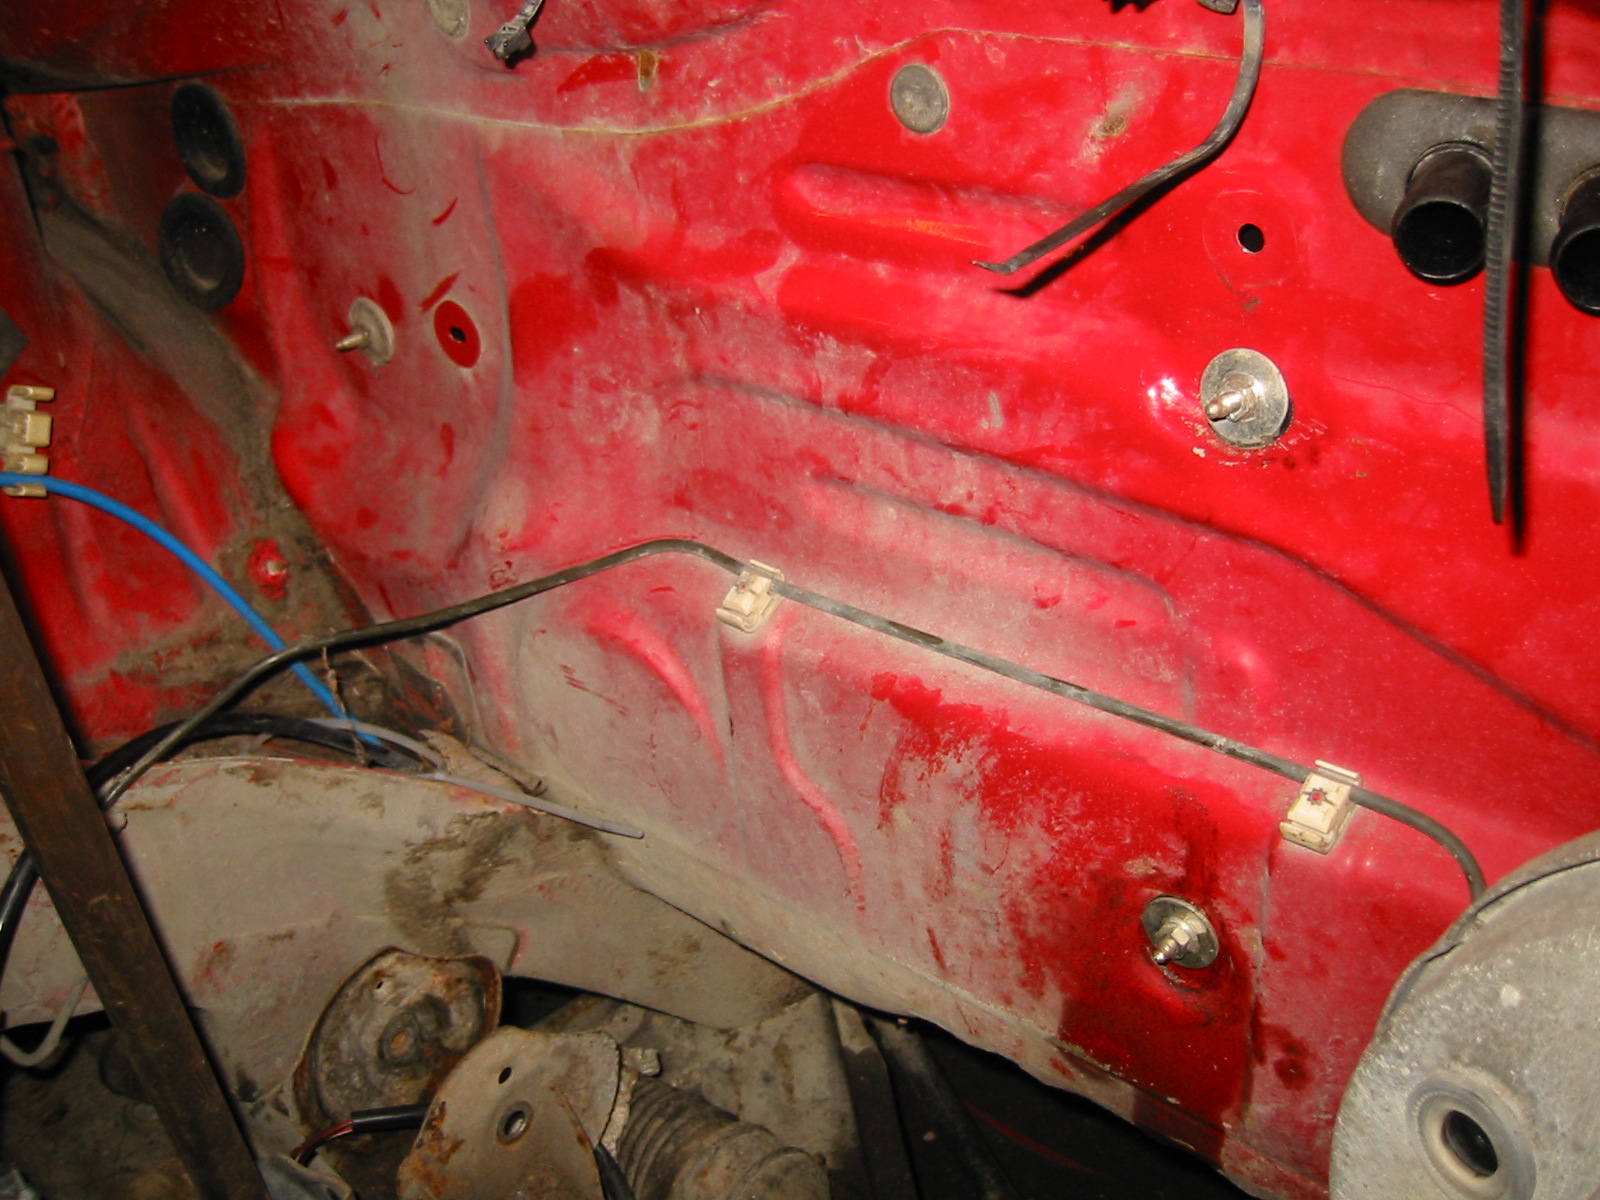
This is how far the mounting points had to move. We used the heater matrix as our reference, keeping it where the Mk2's original one sat. We considered replacing the entire bulkhead too, but left it as it looked much easier this way.
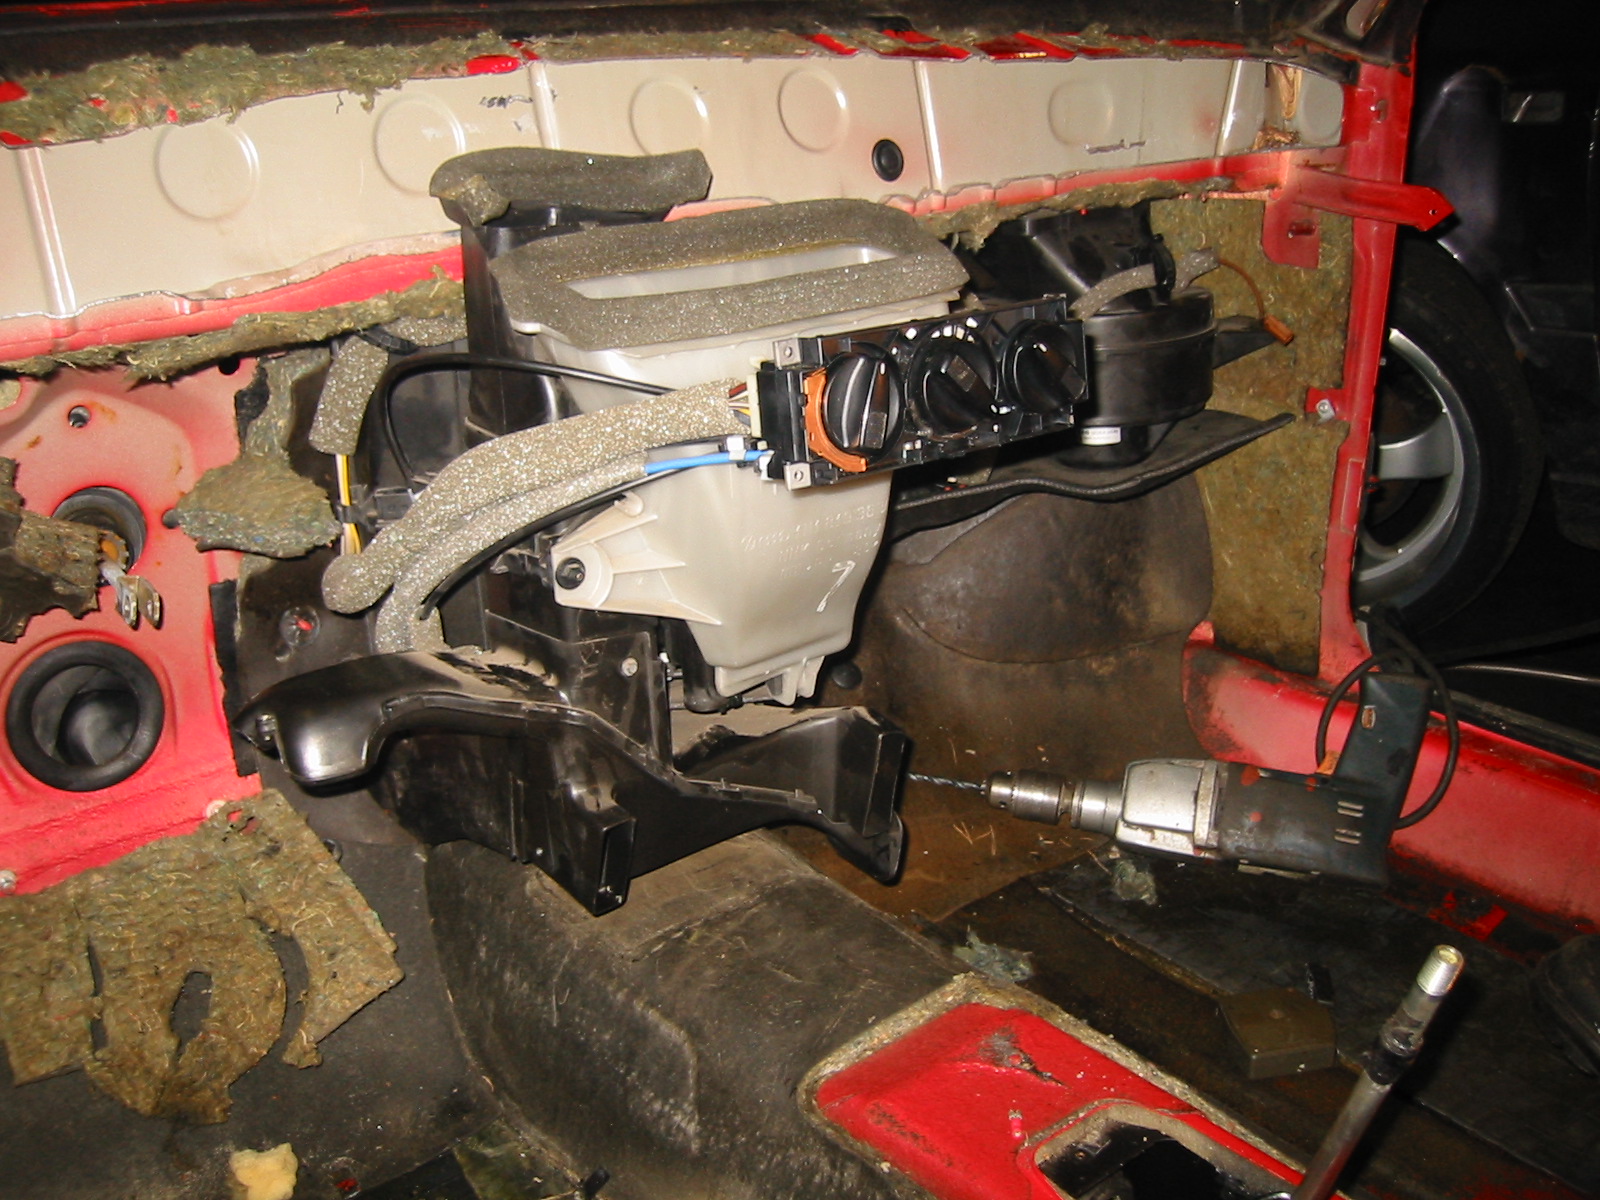
The heater installed. Everyone probably knows how much nicer the Mk3 heater controls are to use than the Mk2's :)
You can also see the cut-up crossmember behind the dashboard. Later we'd have to adapt the corresponding Mk3 member to replace the relevant parts.
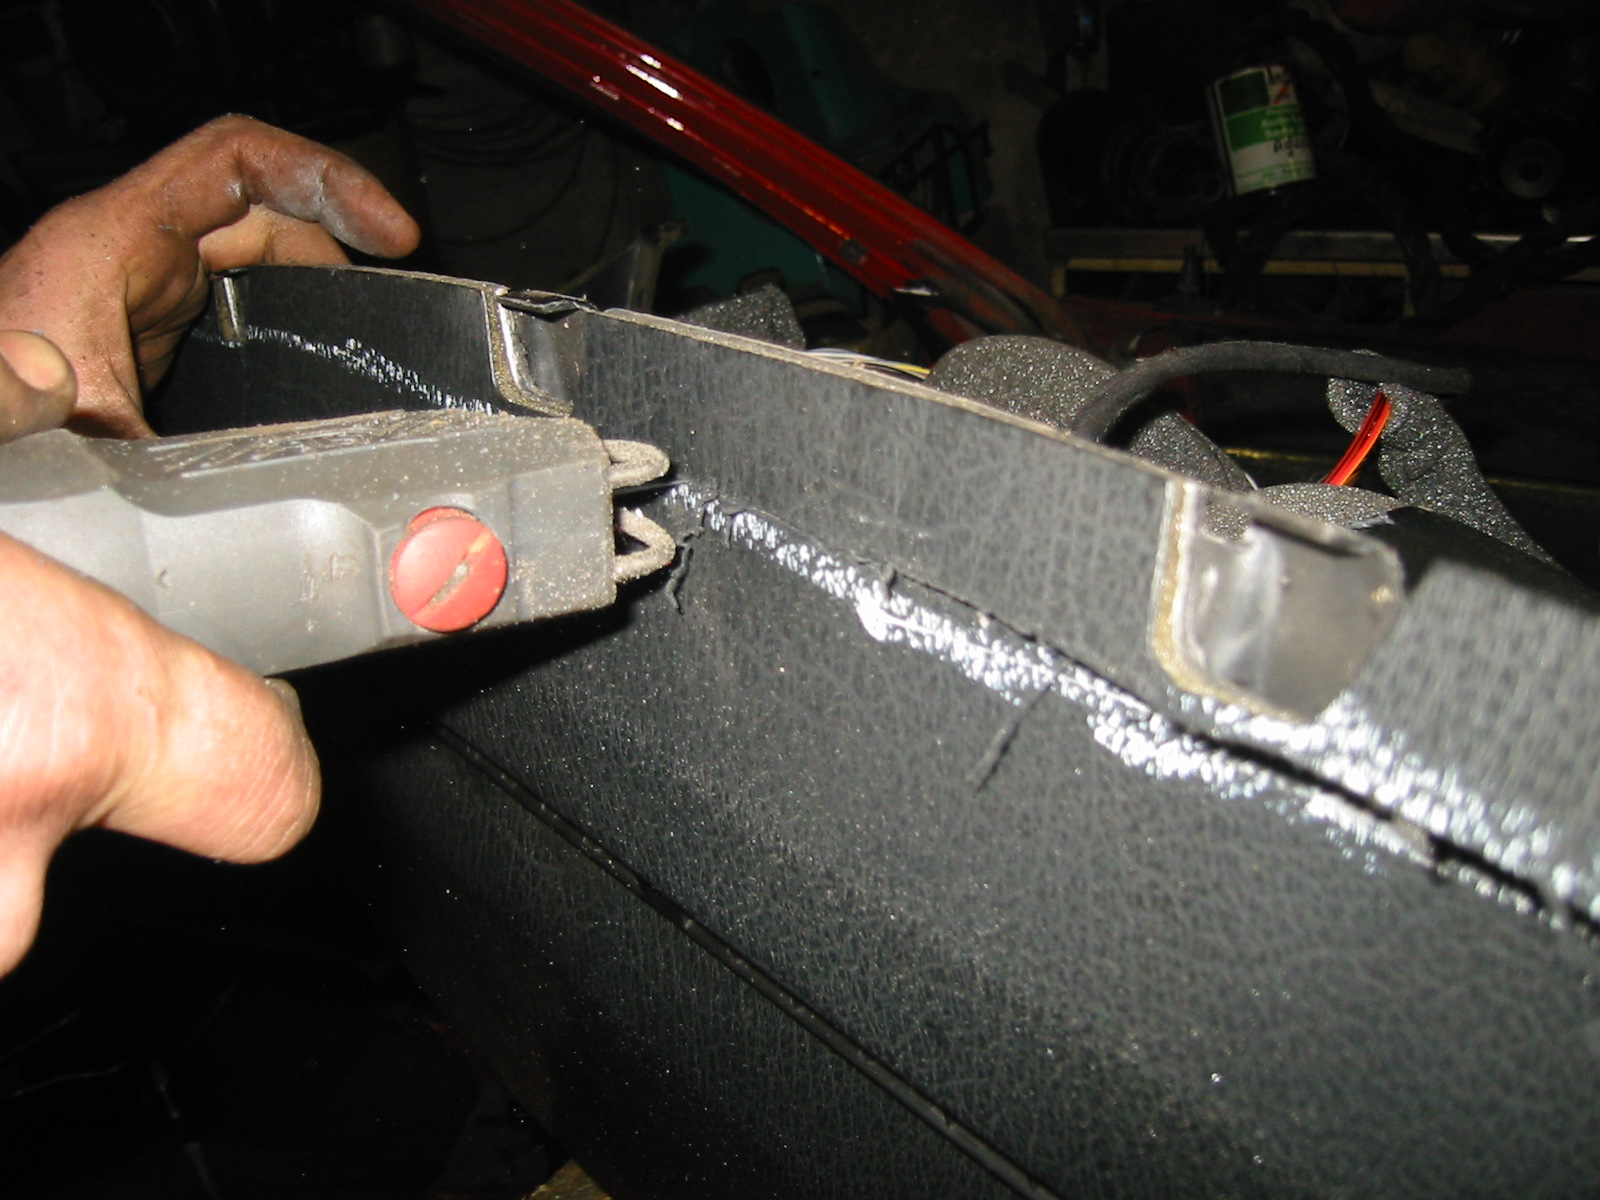
With the heater installed, we got serious about fitting the dash shell. It was immediately clear a few centimetres had to come off its depth. The Mk3 windscreen's front edge is more curved than the Mk2's, so we cut off a strip tapering towards the sides. In fact nothing came off the ends; the centre was trimmed by the amount shown.
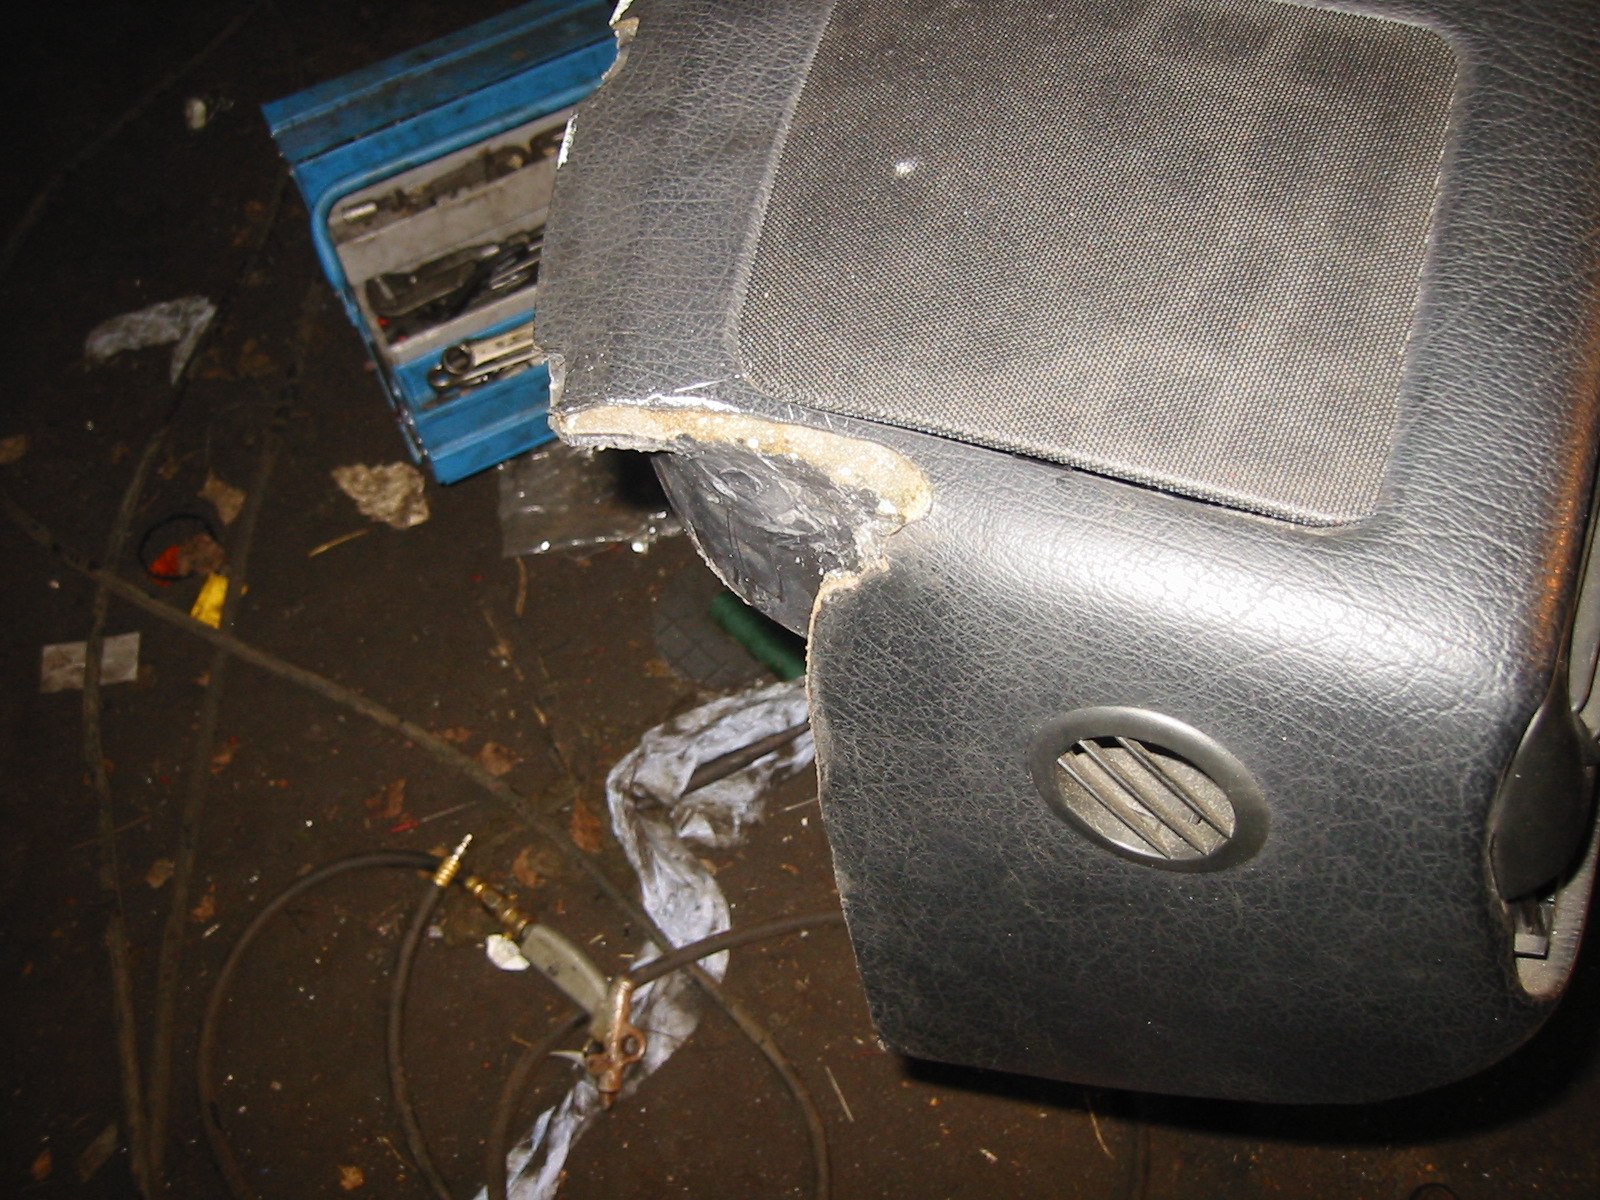
We also cut the notch shown into the left end so the dashboard would fit between the A-pillars.
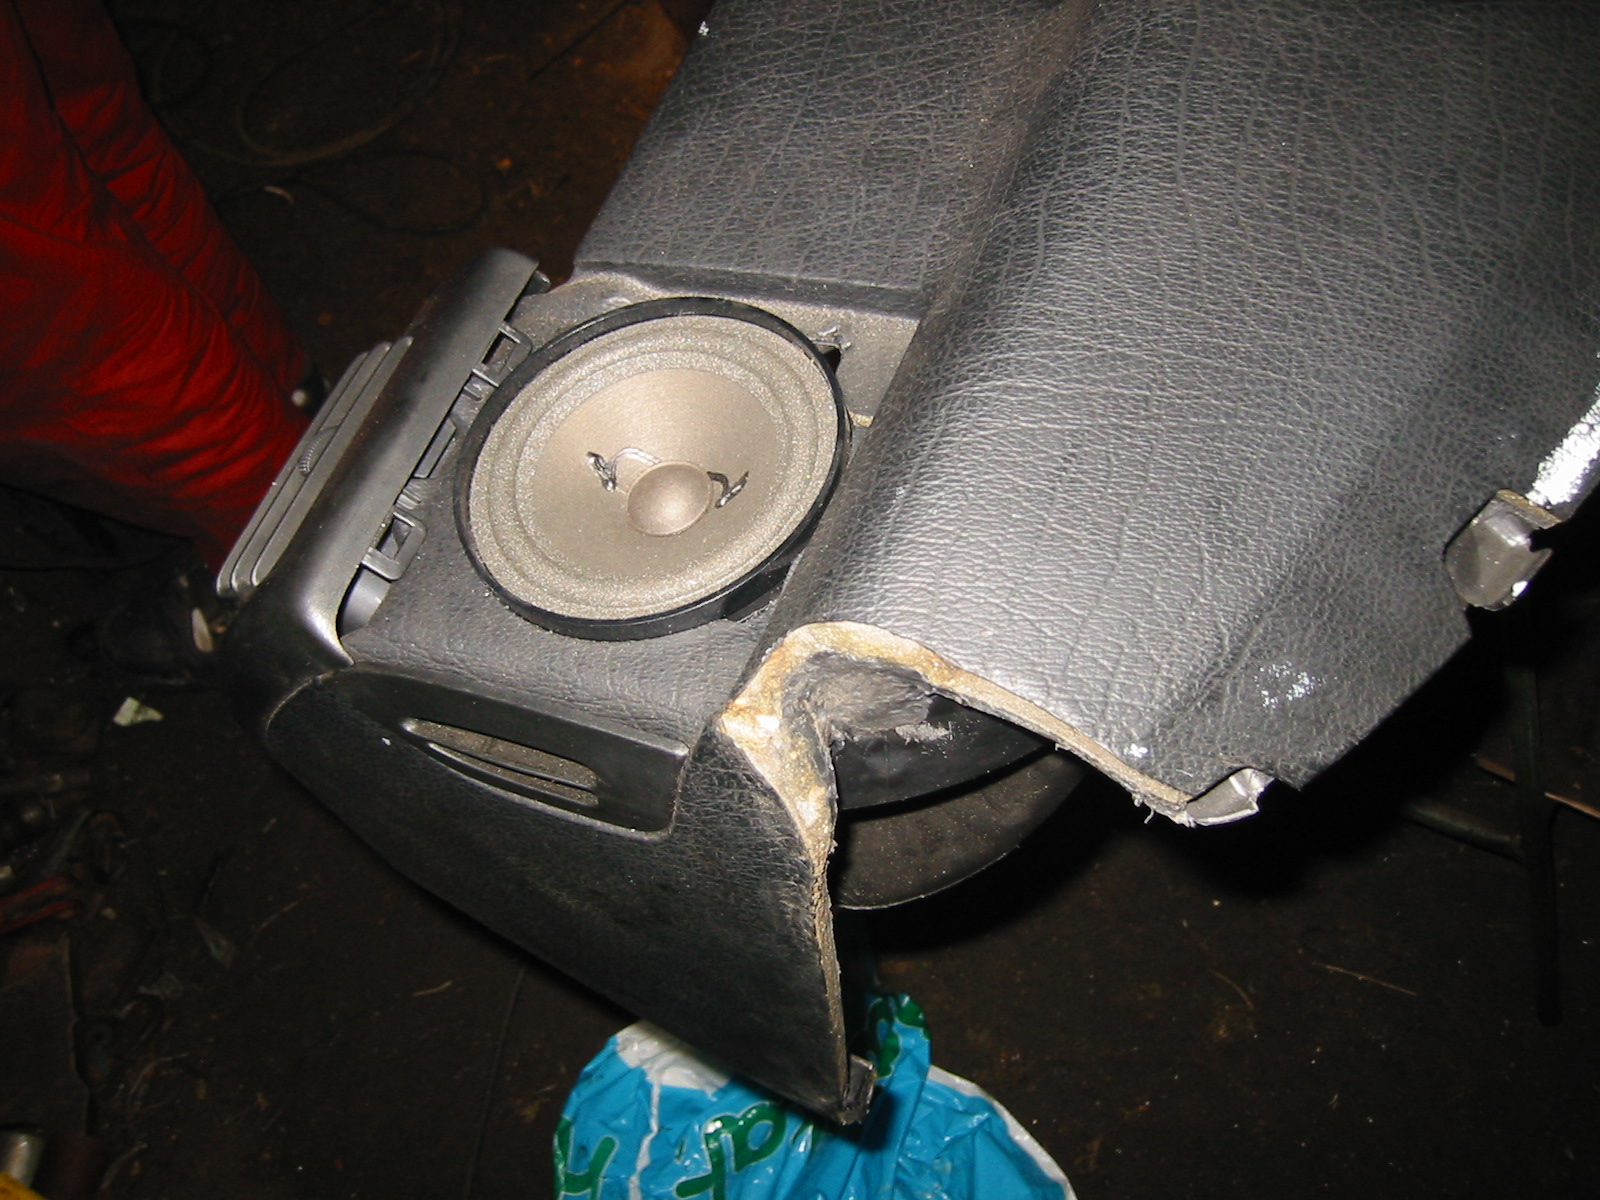
The matching notch at the right end. Cutting these opened up the air ducts, which needed plastic welding to repair.
Dashboard — part 3
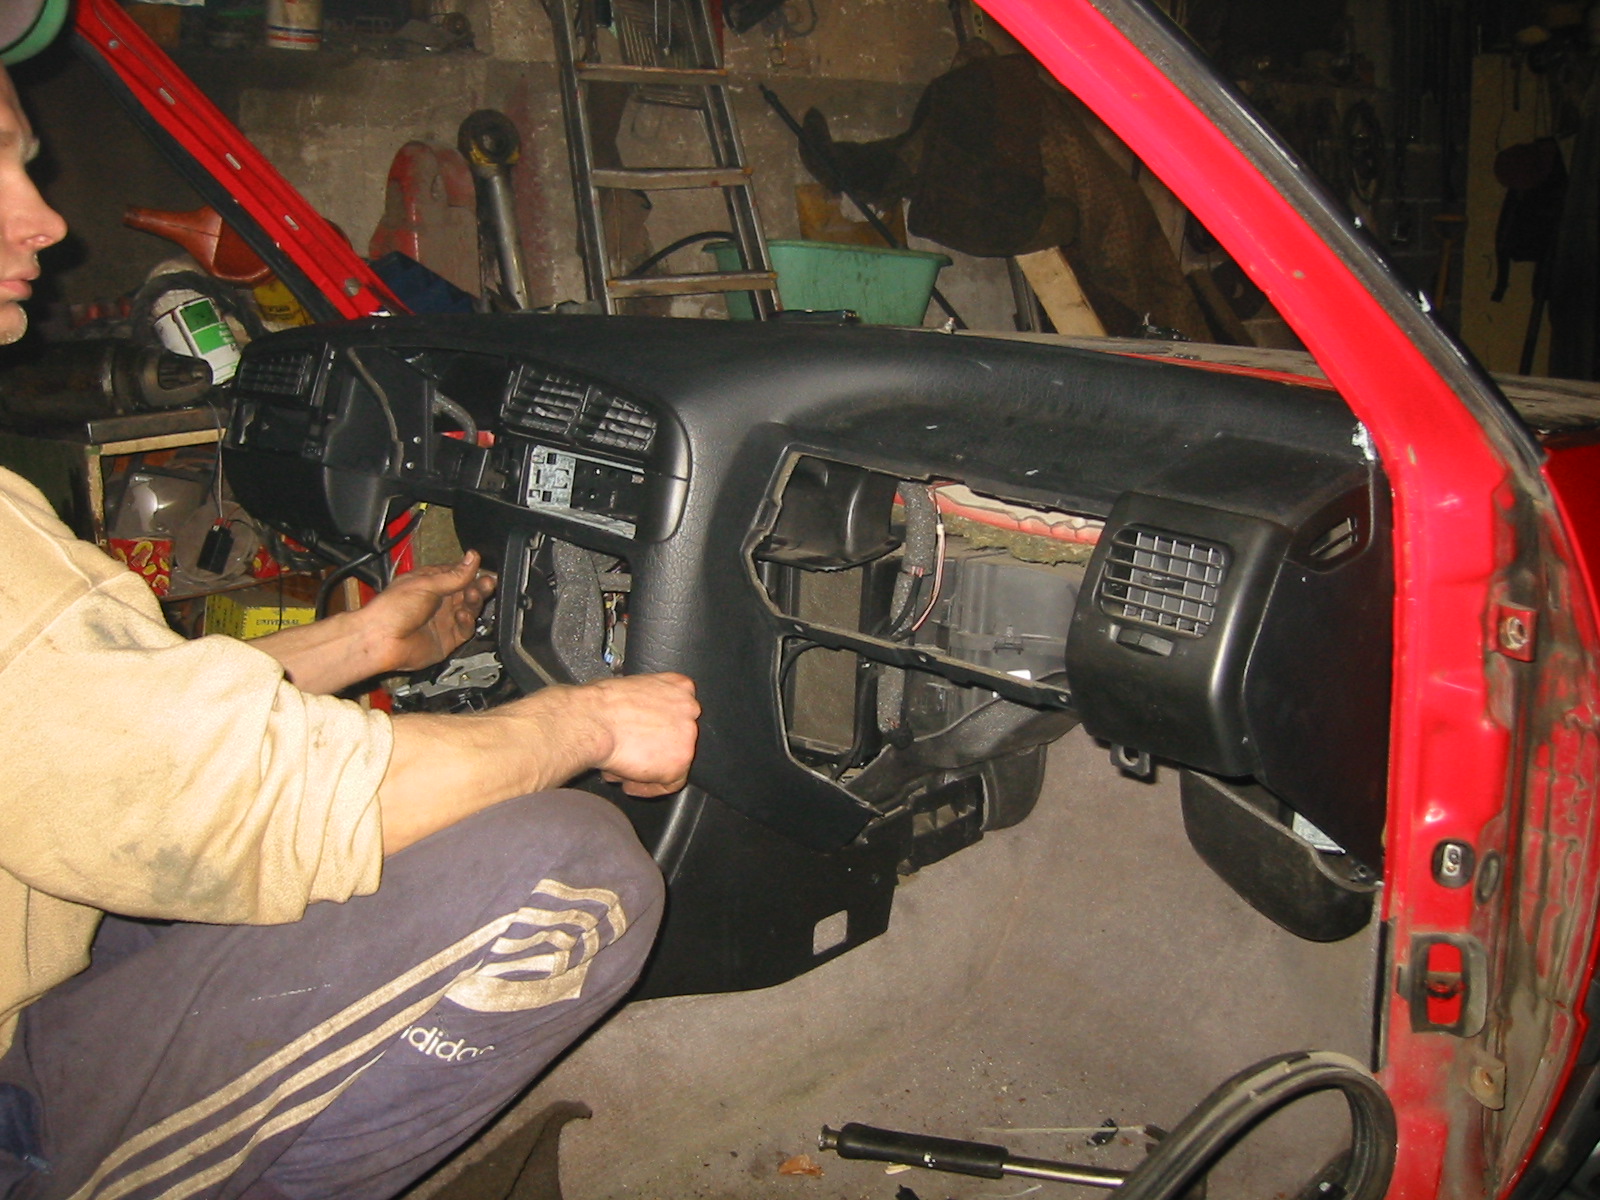
Another trial fit. The dashboard went in and out many times, with a little trimmed off a corner before trying again. It only just fits between the pillars, with some force.
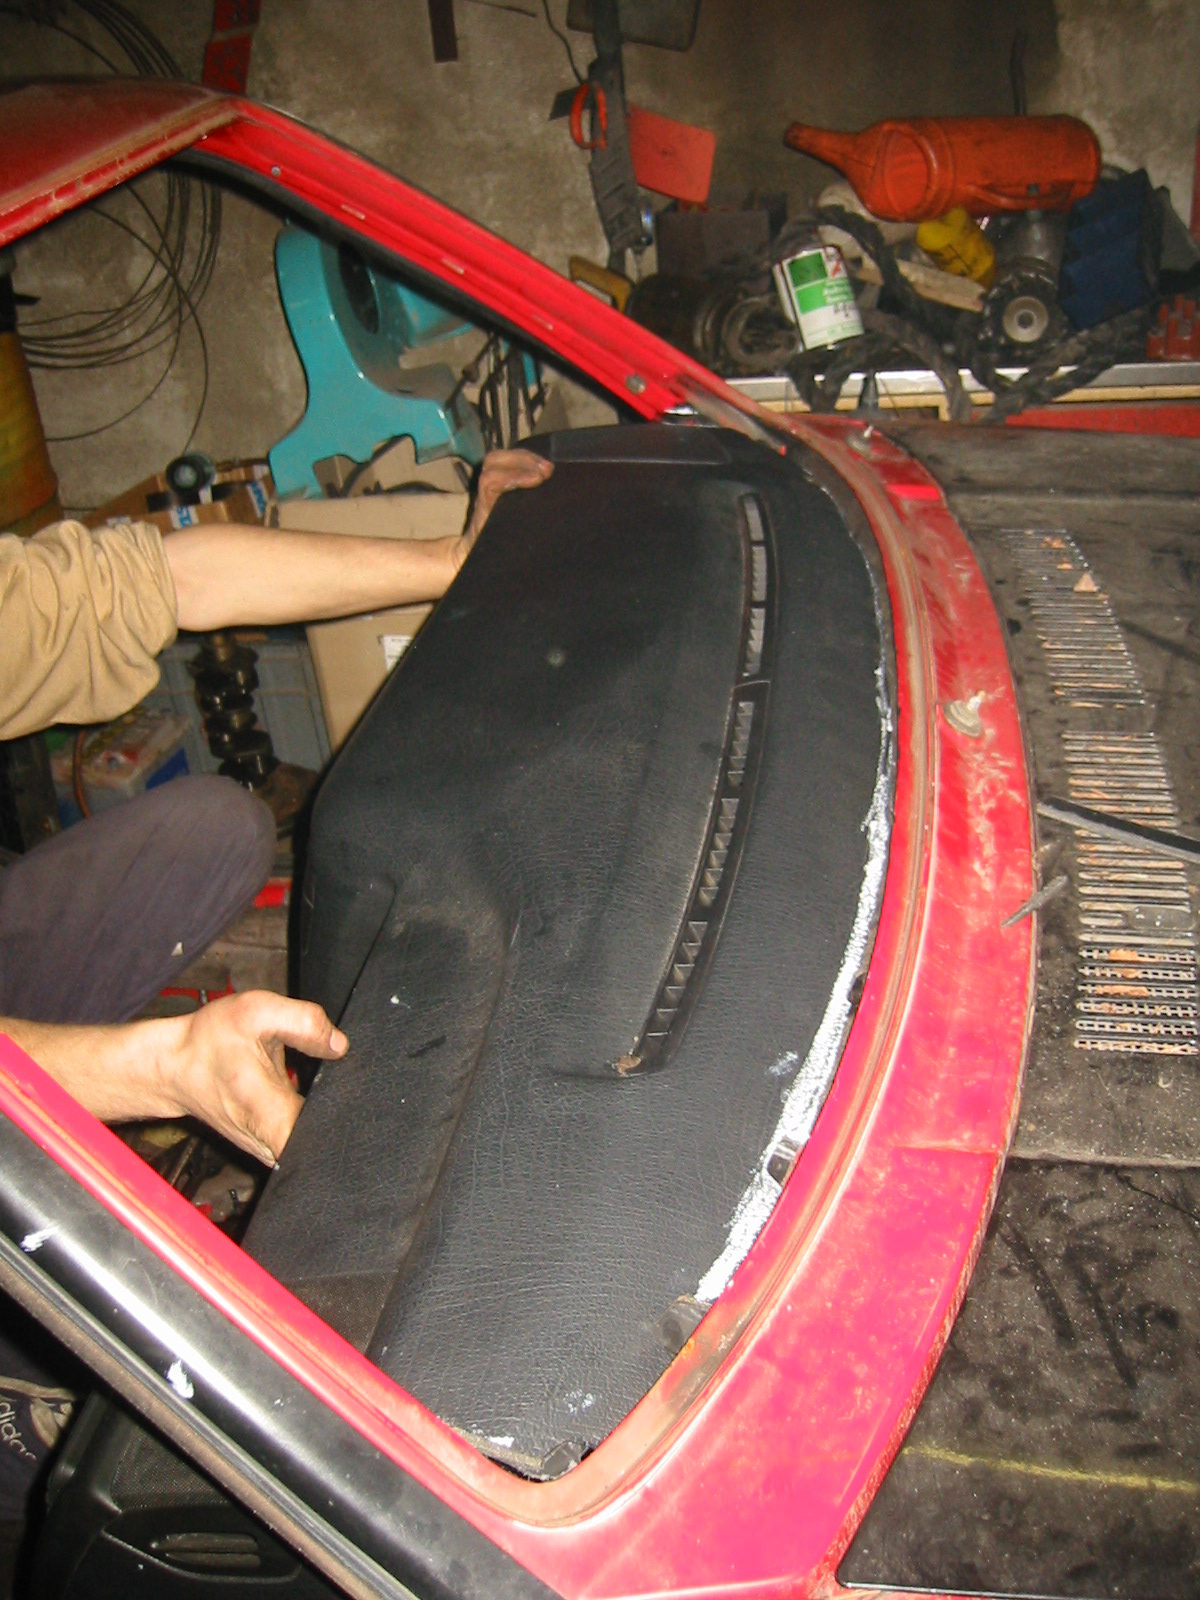
The view from above. We actually got the front-edge cut right first time; the corners needed more work.
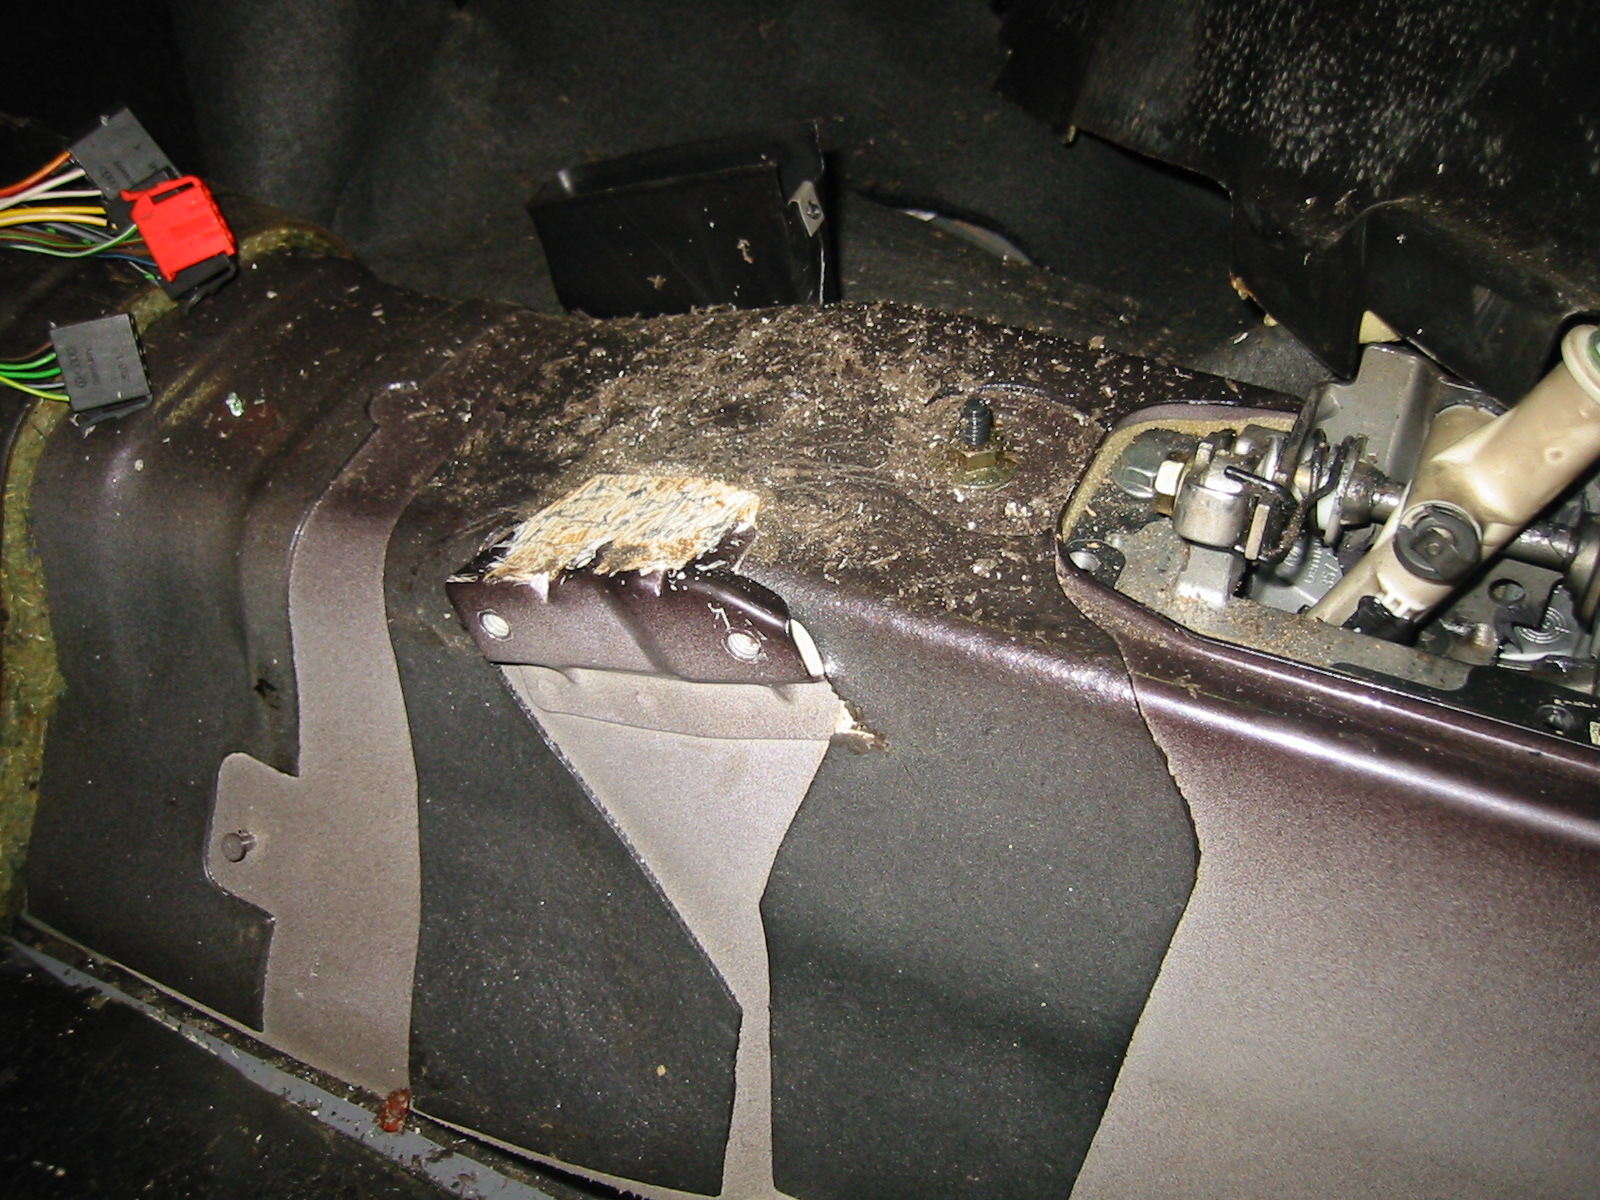
In the Mk3, the beam inside the dashboard also attaches to the body structure. The bracket shown was removed from the Mk3...
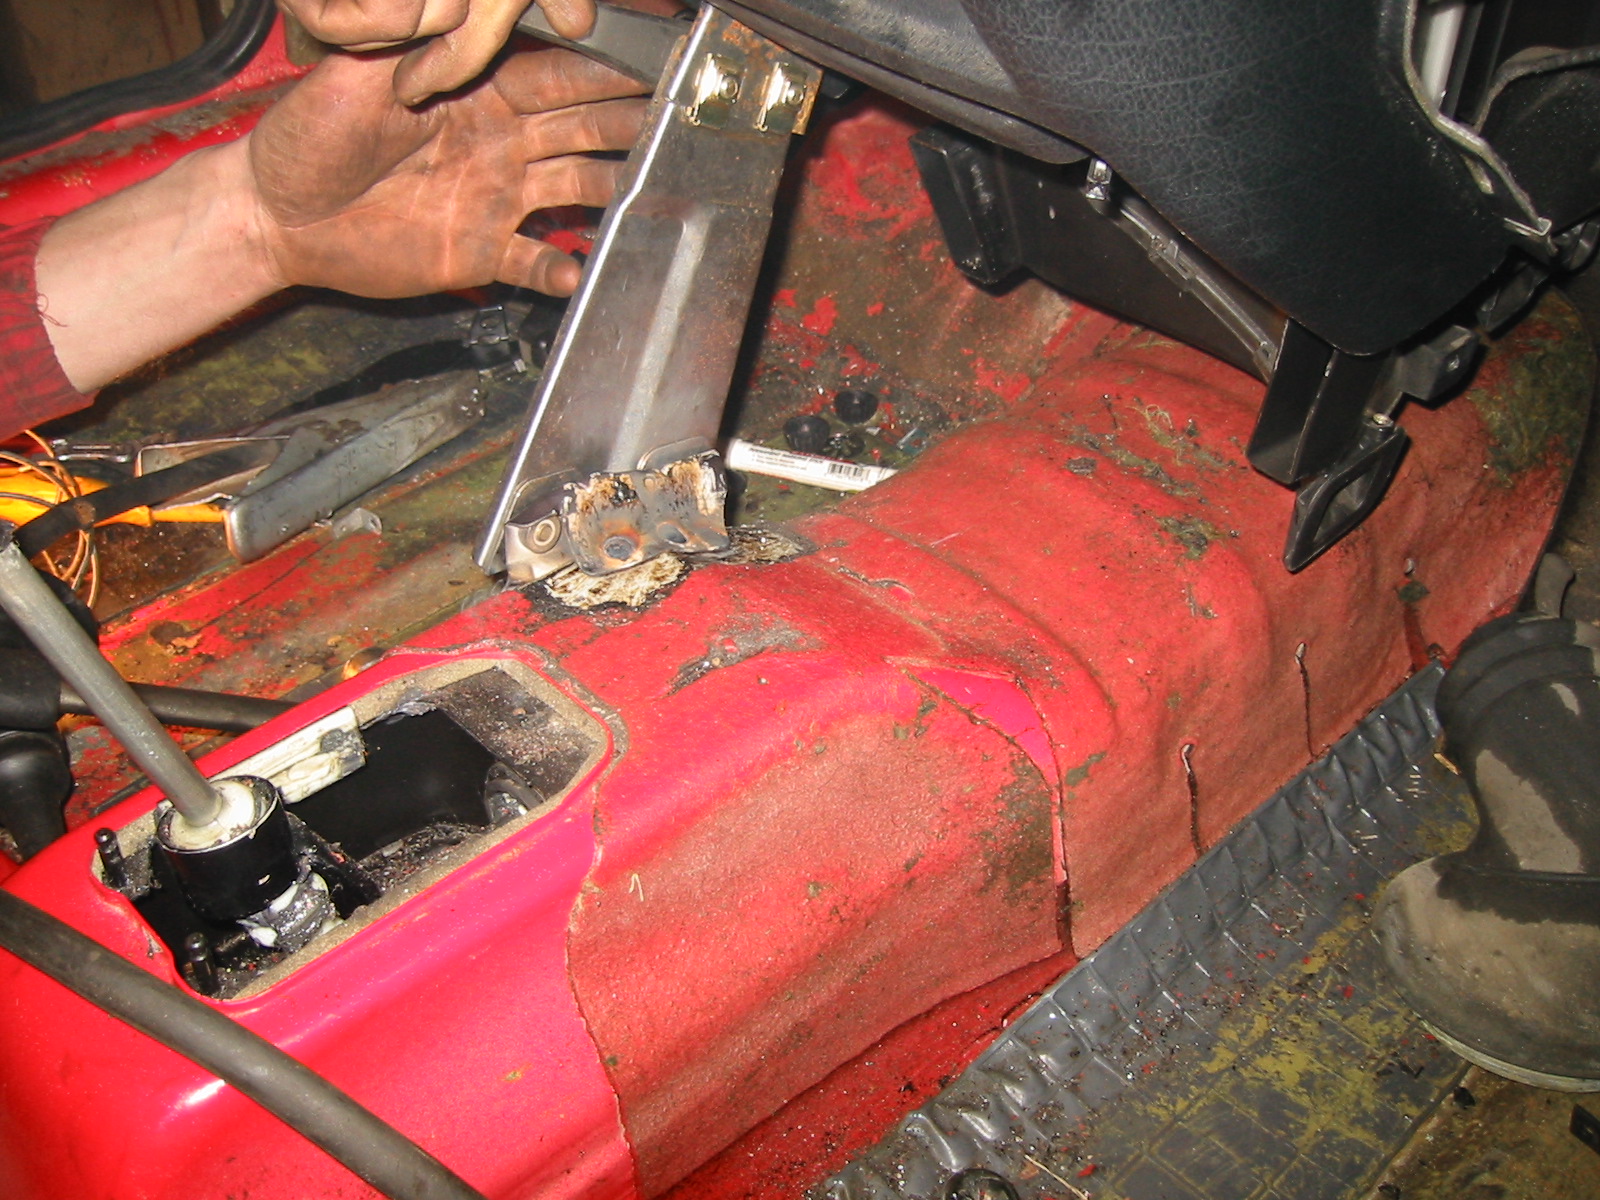
...and fitted to the Mk2's centre tunnel. The Mk2 tunnel is a little lower, so the bracket needed some hammering.
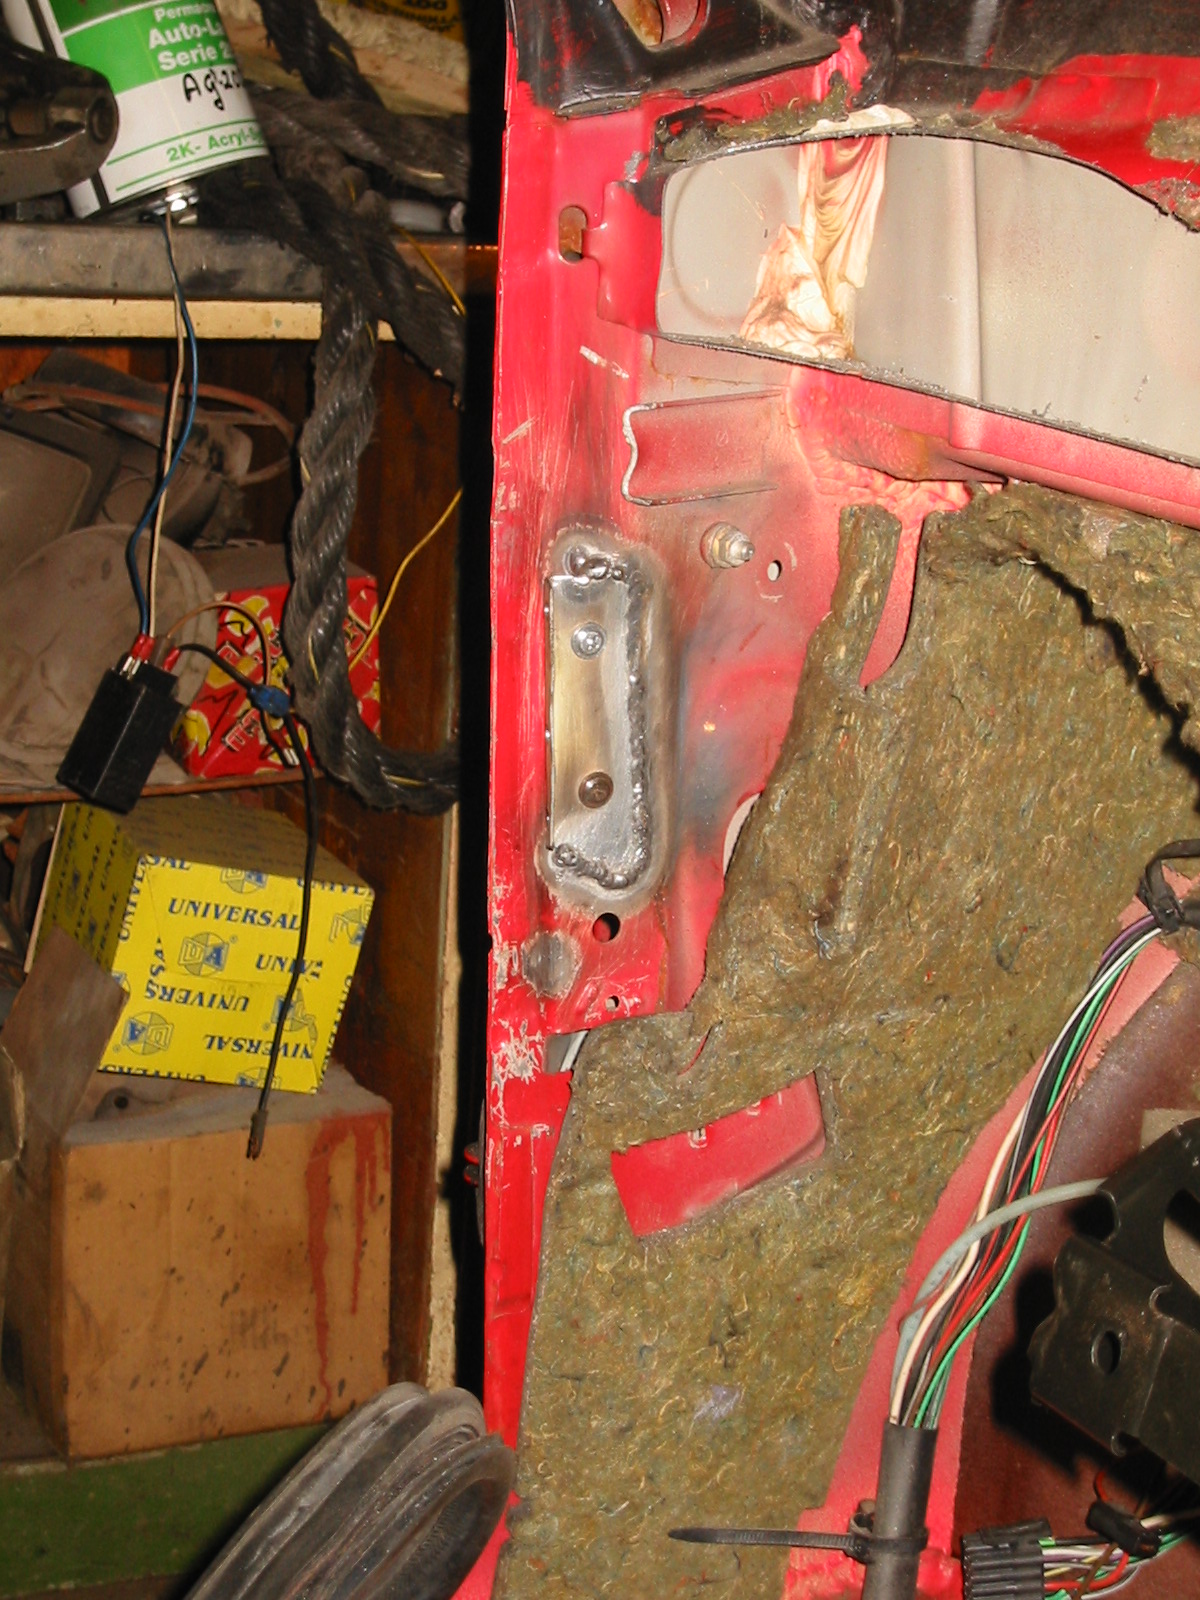
The ends of the dashboard beam needed modifying to fit between the Mk2's more closely spaced pillars. Pekka welded new homemade brackets to the pillars, to which the modified beam ends bolt.
To position the brackets, we bolted the beam into the dash shell, fitted the dash in its correct position, then welded the brackets to the door pillars.
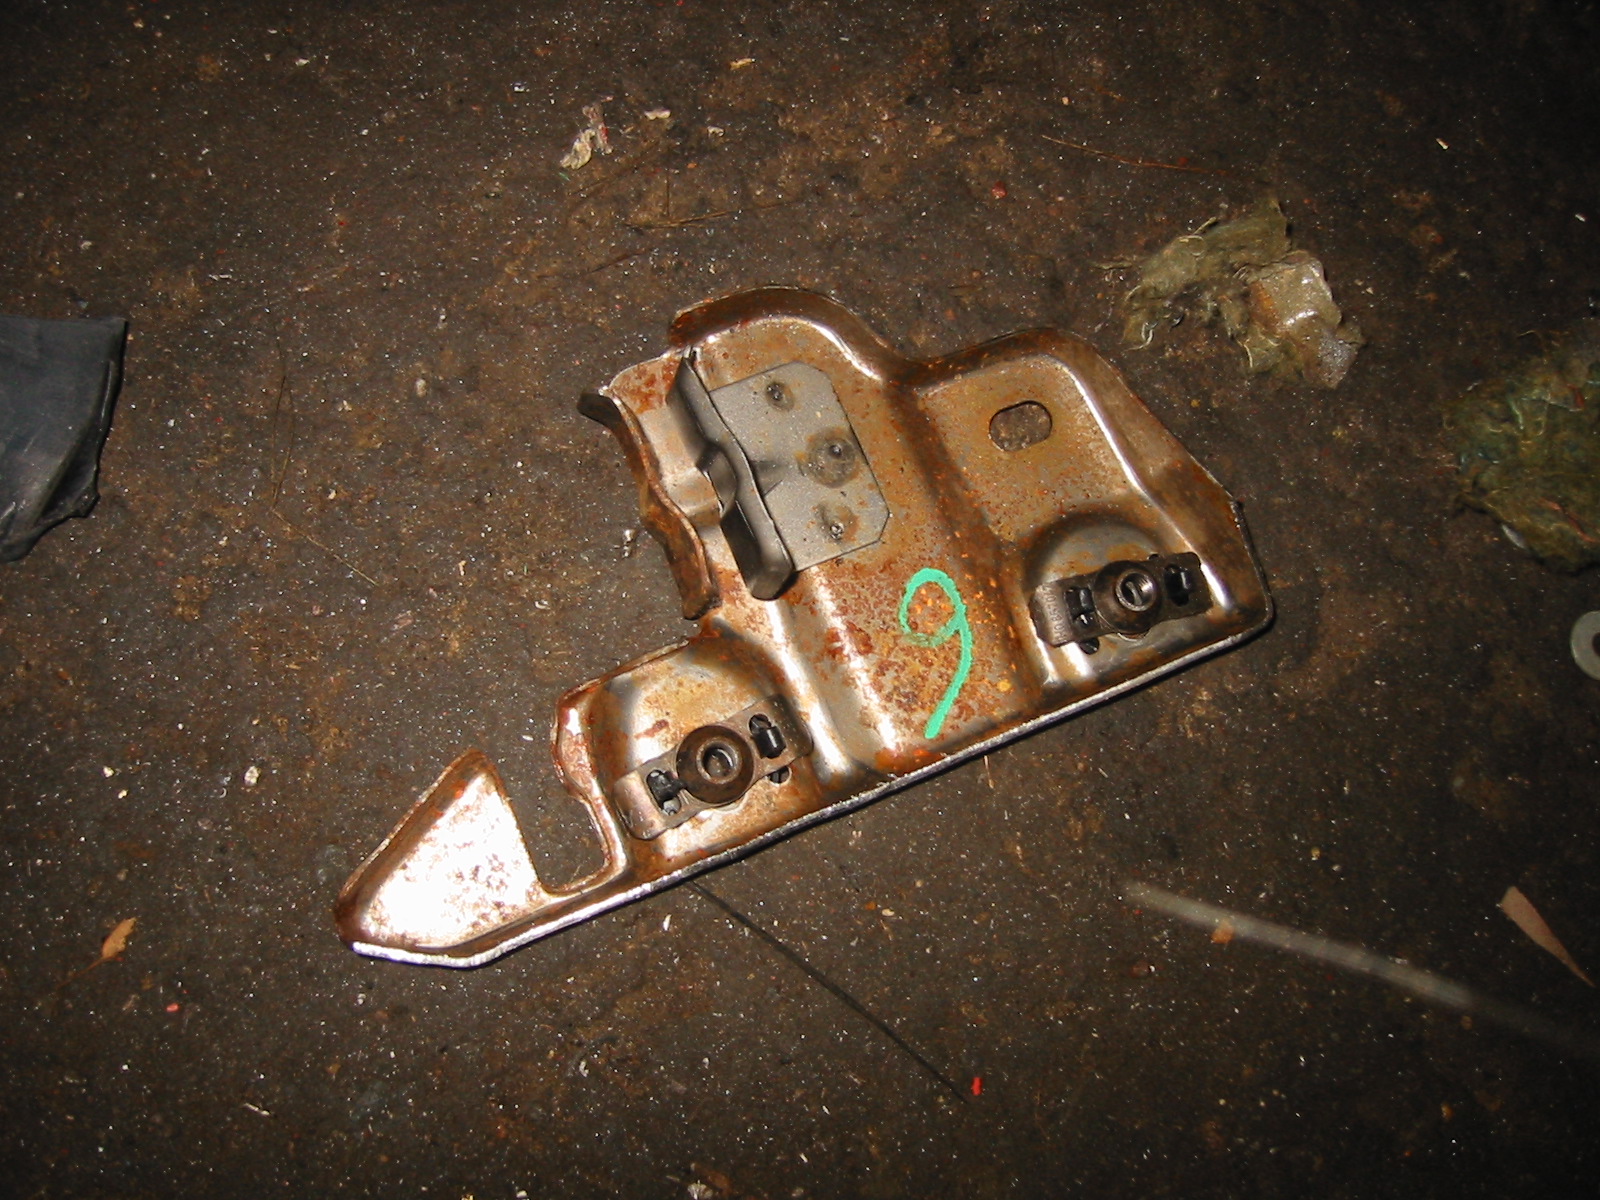
Pieces like these came off both ends of the beam.
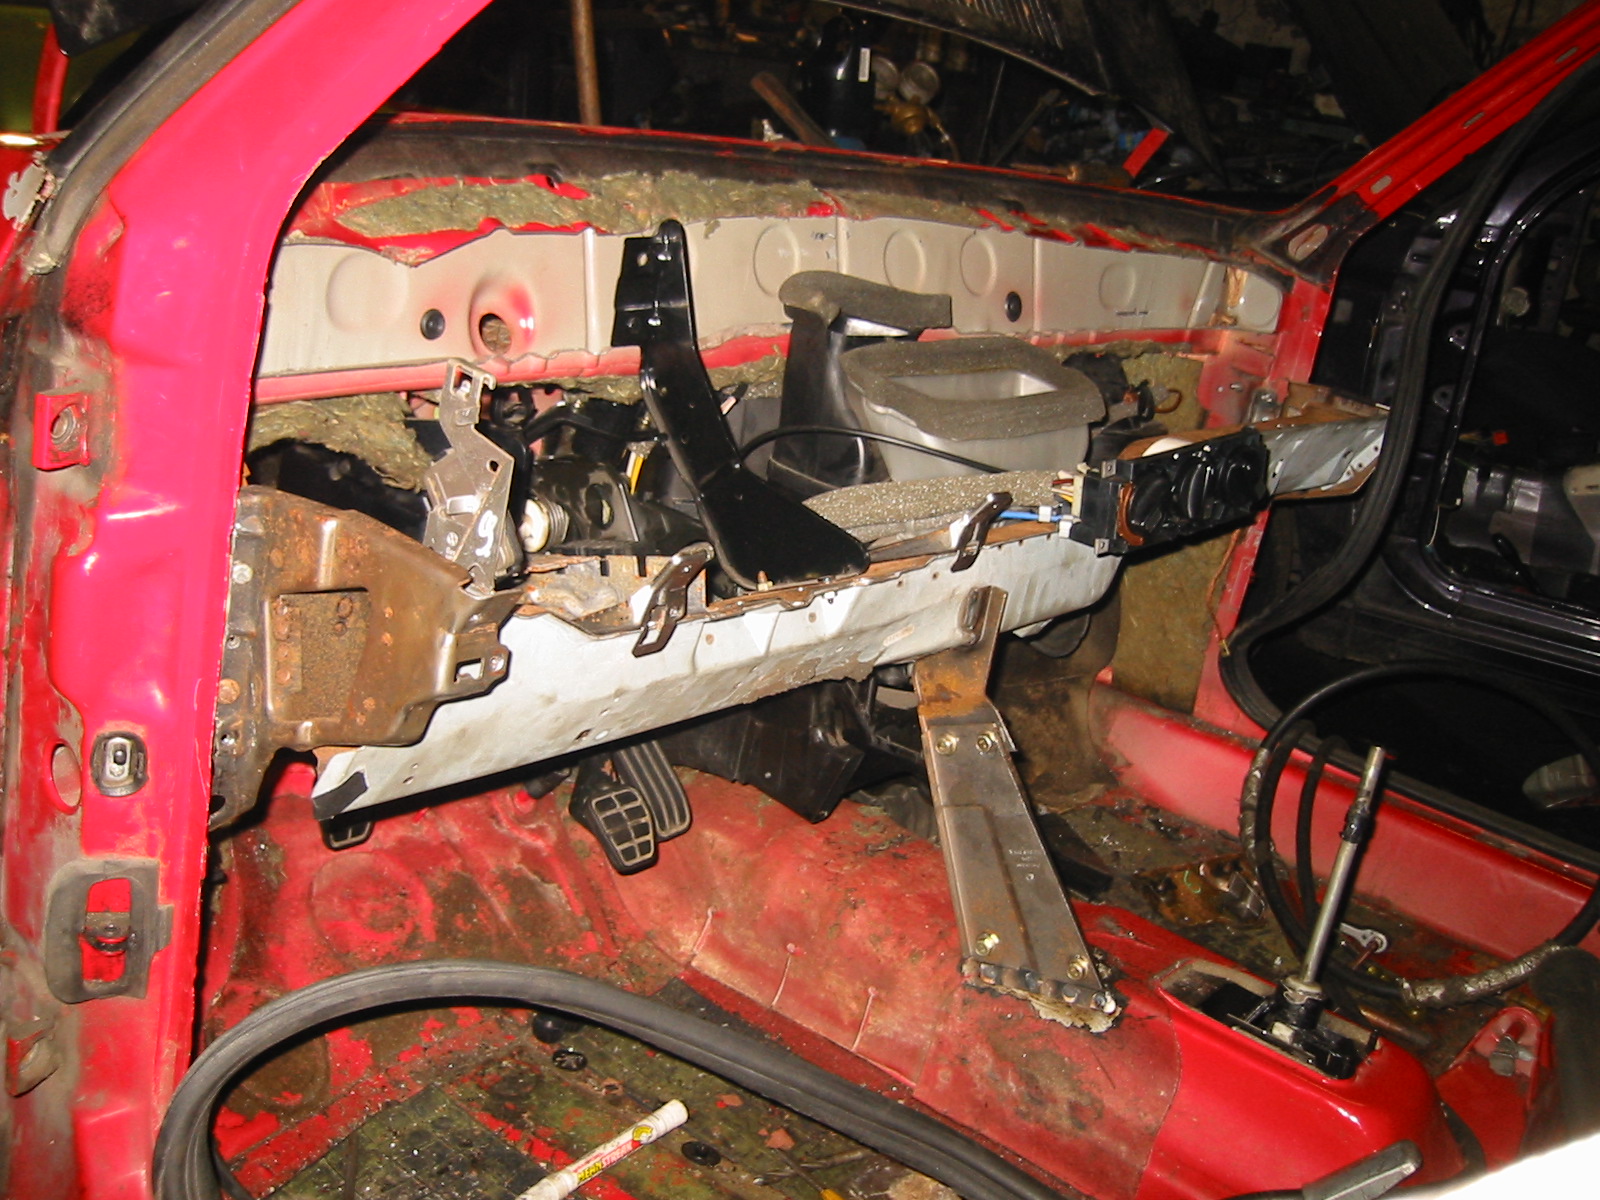
Here the beam is bolted in. Quite a sturdy thing: once the dash shell is bolted to it, there won't be much movement or vibration.
Dashboard — part 4
The dashboard goes back in, and we try the seal. It needed a little trimming before it could be forced between the dash and pillar. It's tight, but fits with lubricant :-) and looks good.
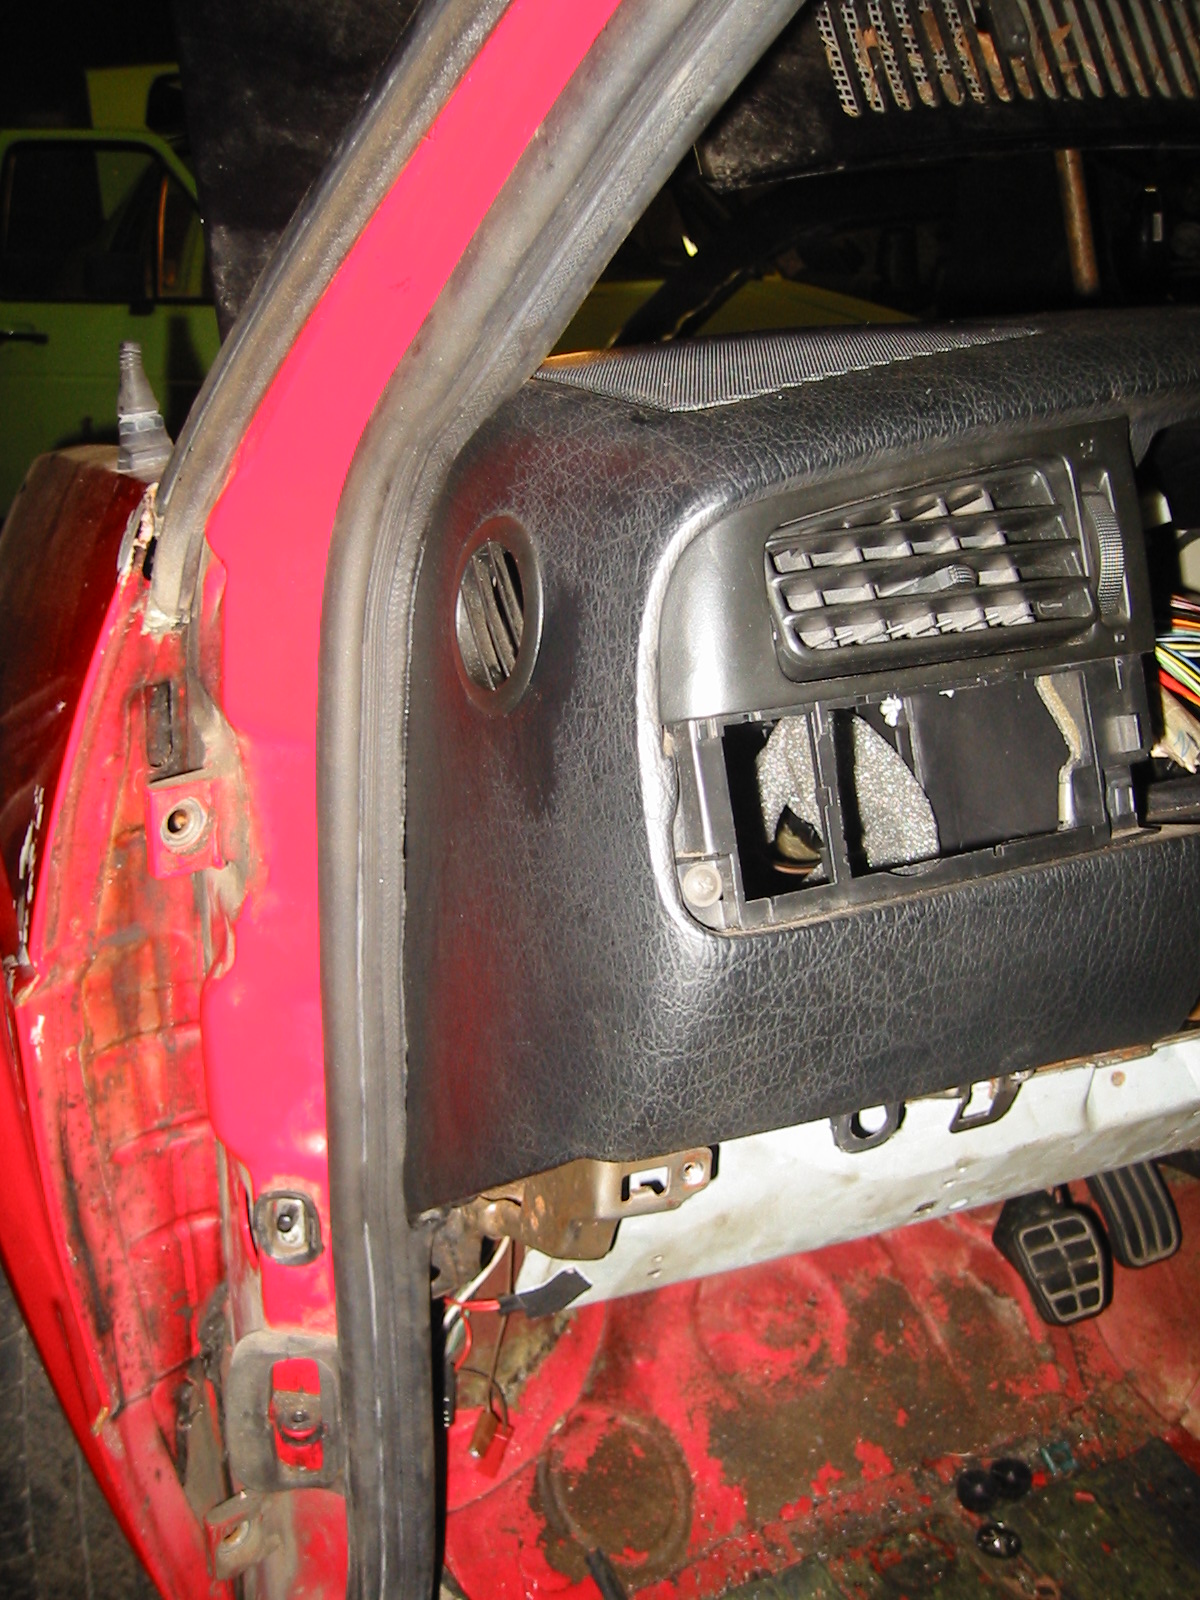
The door only just closes with its trim fitted. The trim touches the dash, but it closes without much force. The side air vent points directly into the door card, making it rather useless.
The mirror adjustment knob will need moving, or we'll convert to electric mirrors and put the switch somewhere better.
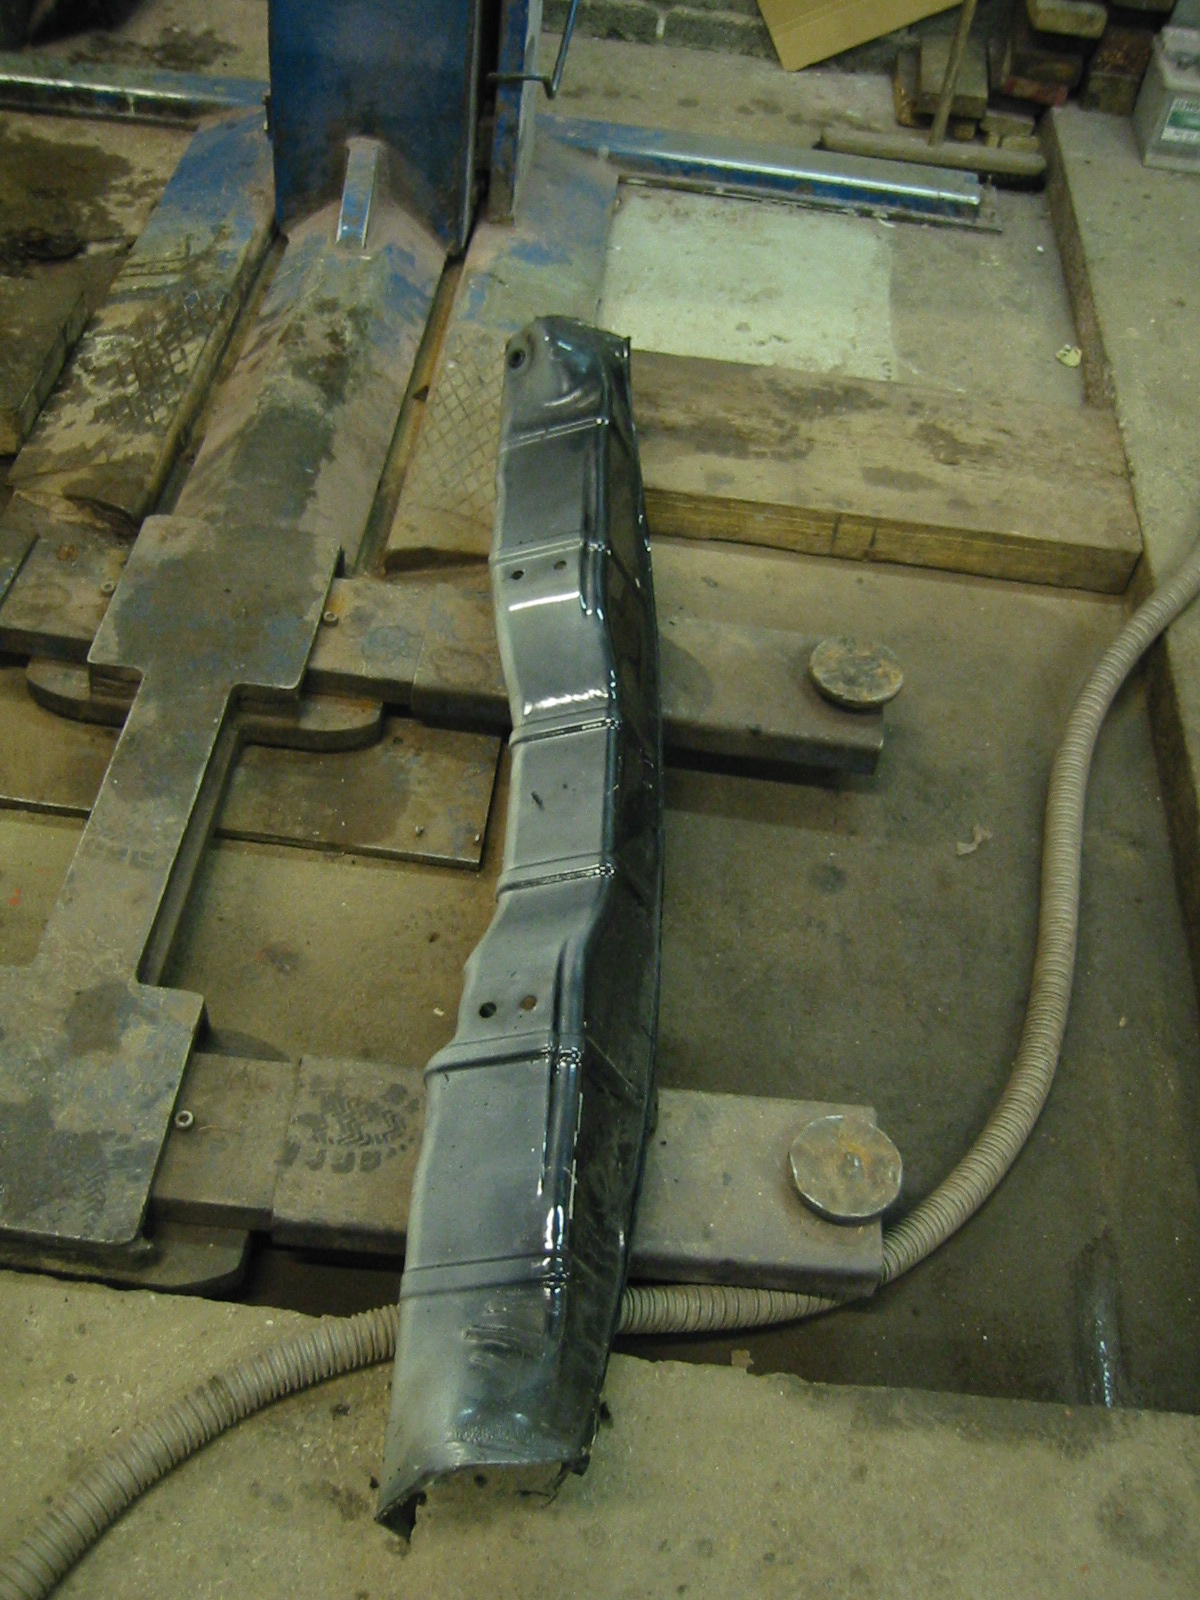
Peksi initially intended to leave out the crossmember cut from behind the dash. After sleeping on it, he changed his mind, so we cut a Mk3 member from a friend's donor shell. That was easier than taking it from our 1994 car, which still had its windscreen in. This member should at least strengthen the body and make the dashboard area much stiffer than a standard Mk2.
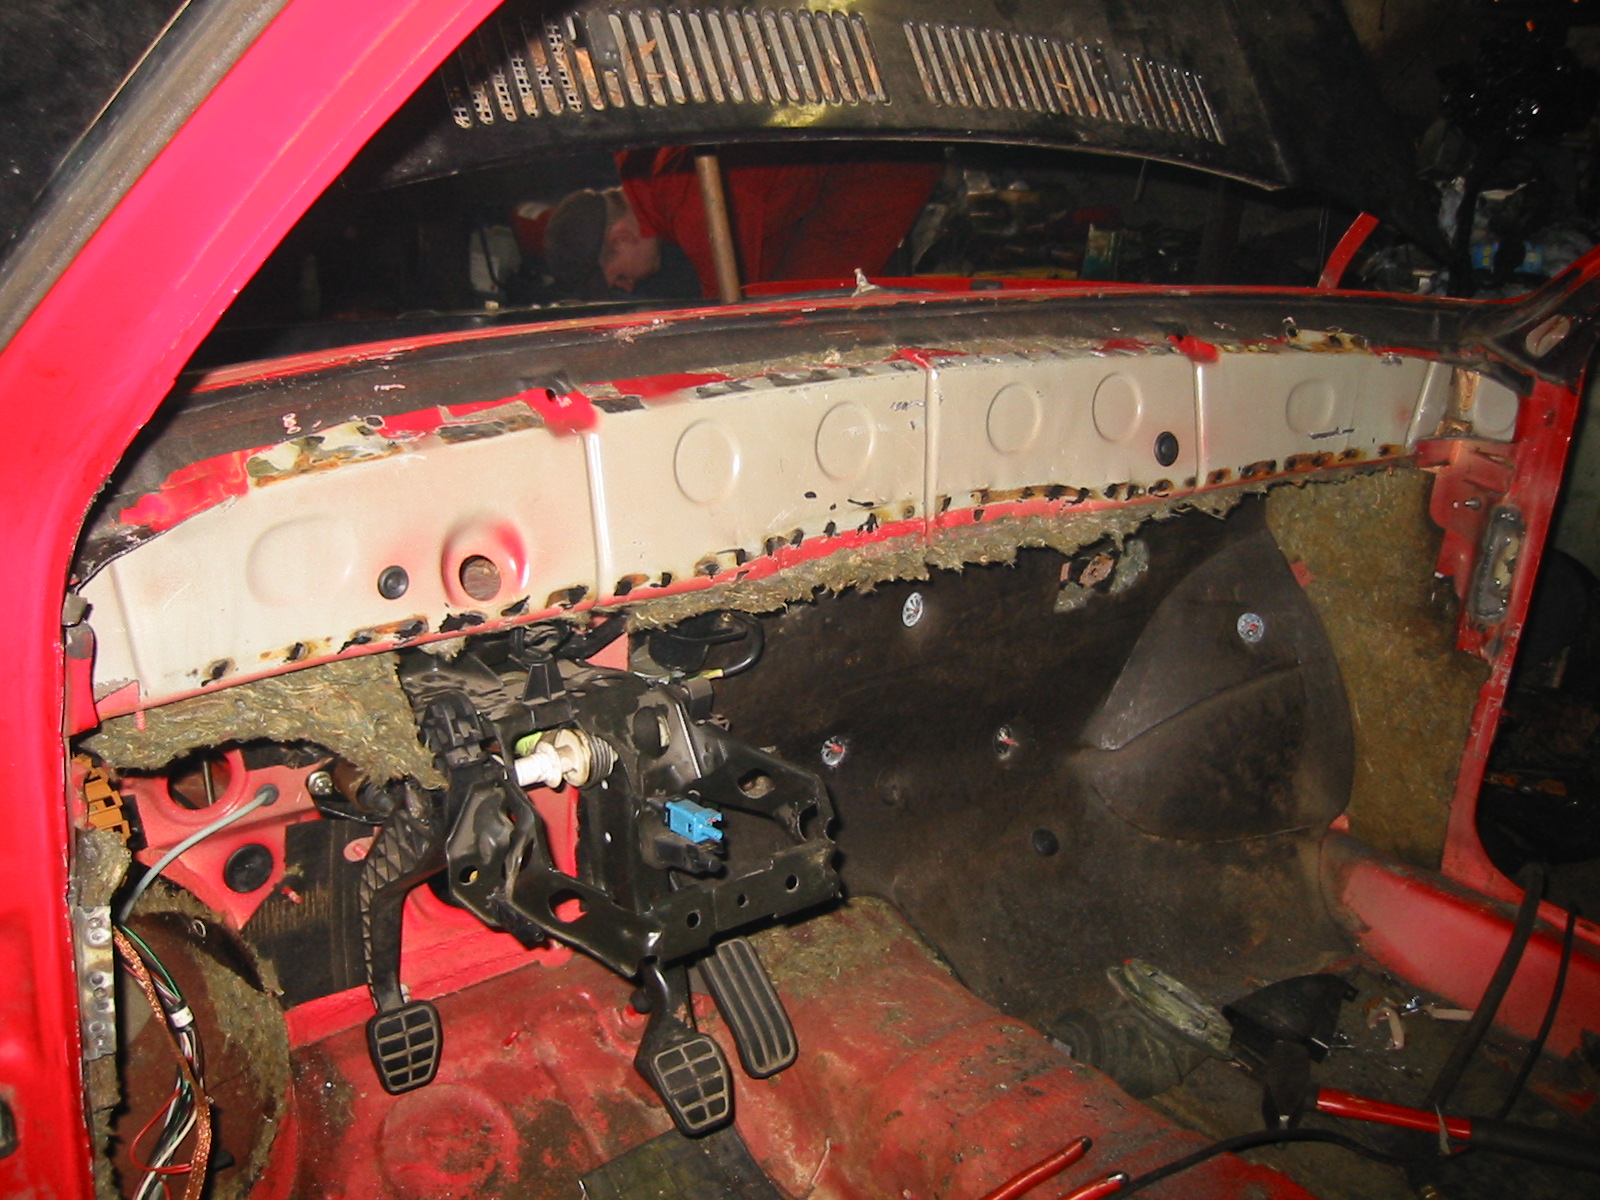
Fitting began by removing the remaining Mk2 crossmember pieces. Some was left in the corners to support the structure.
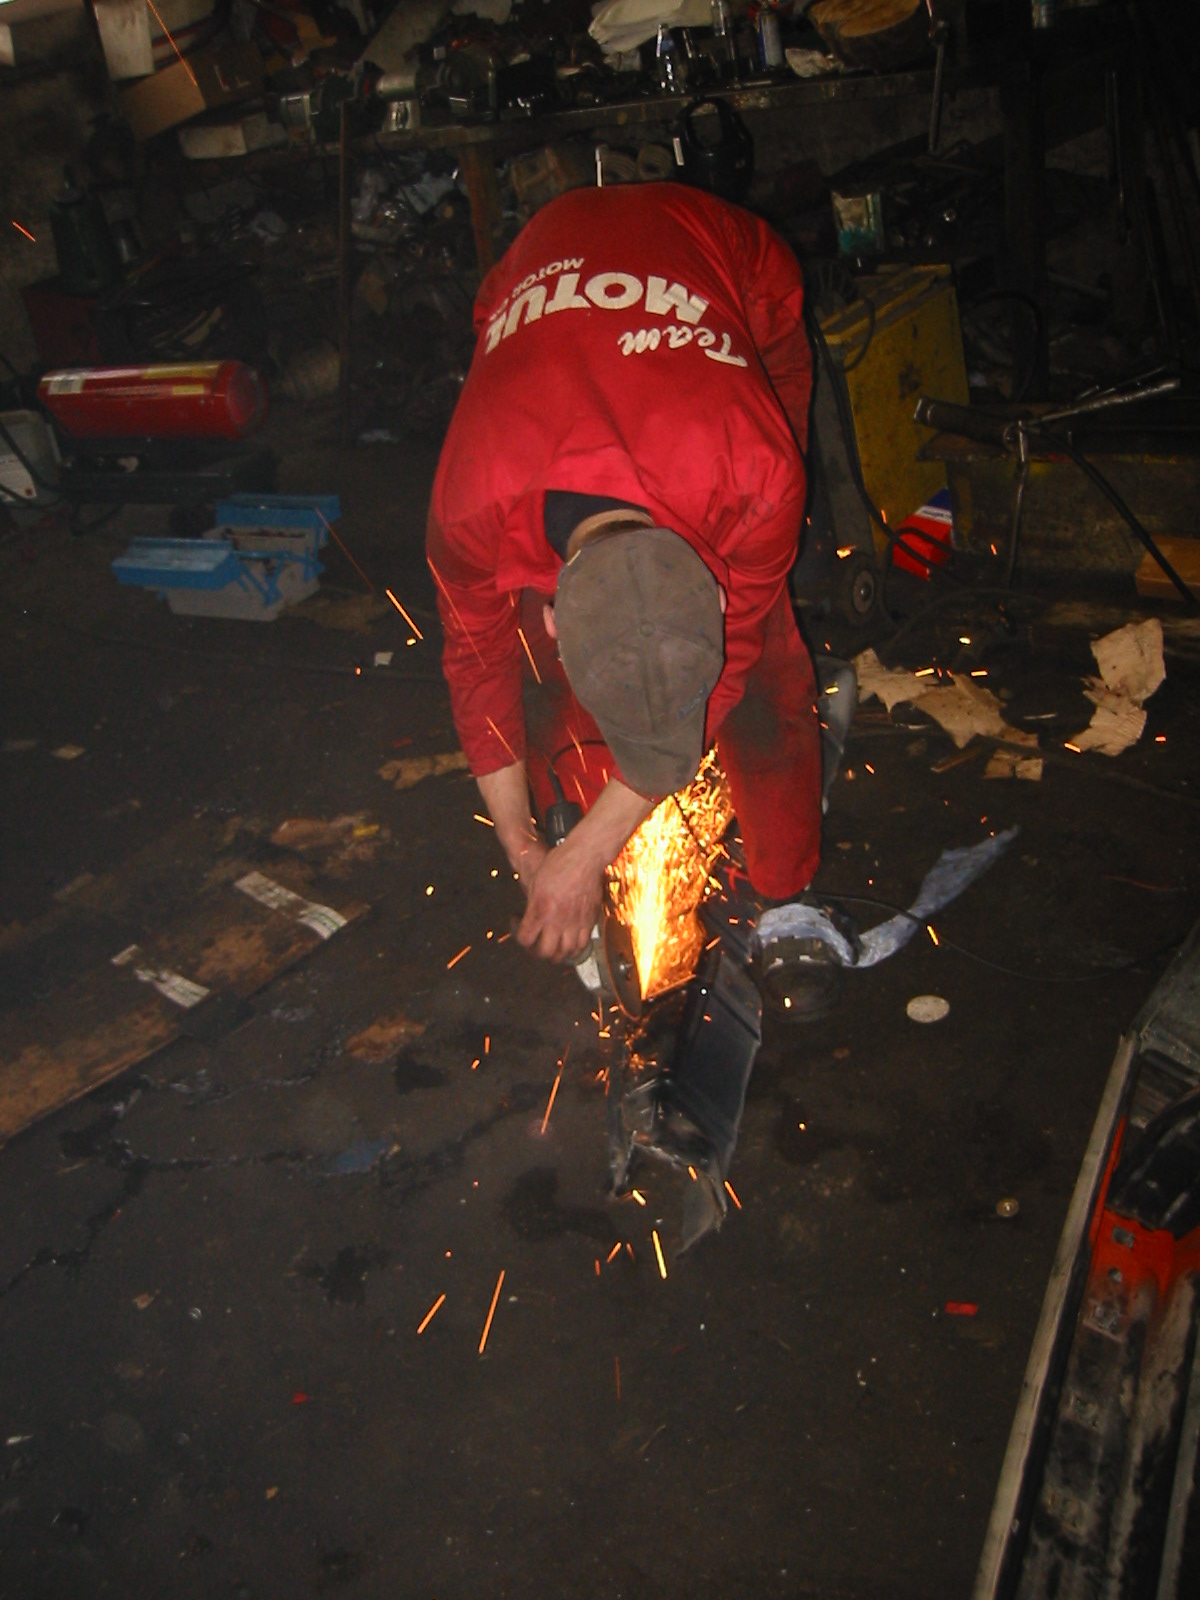
Then we started cutting the larger excess sections off the Mk3 member. Grind, try, saw, try, and so on, until we realised it simply wasn't going to fit.
We cut it into three pieces and tried fitting just the ends, as the middle looked hopeless.
Eventually there was barely anything left of the ends either, so we abandoned the entire member. We'd have to find another way to support the dash's front edge. Reinforcements would still be welded into the corners to support the body.
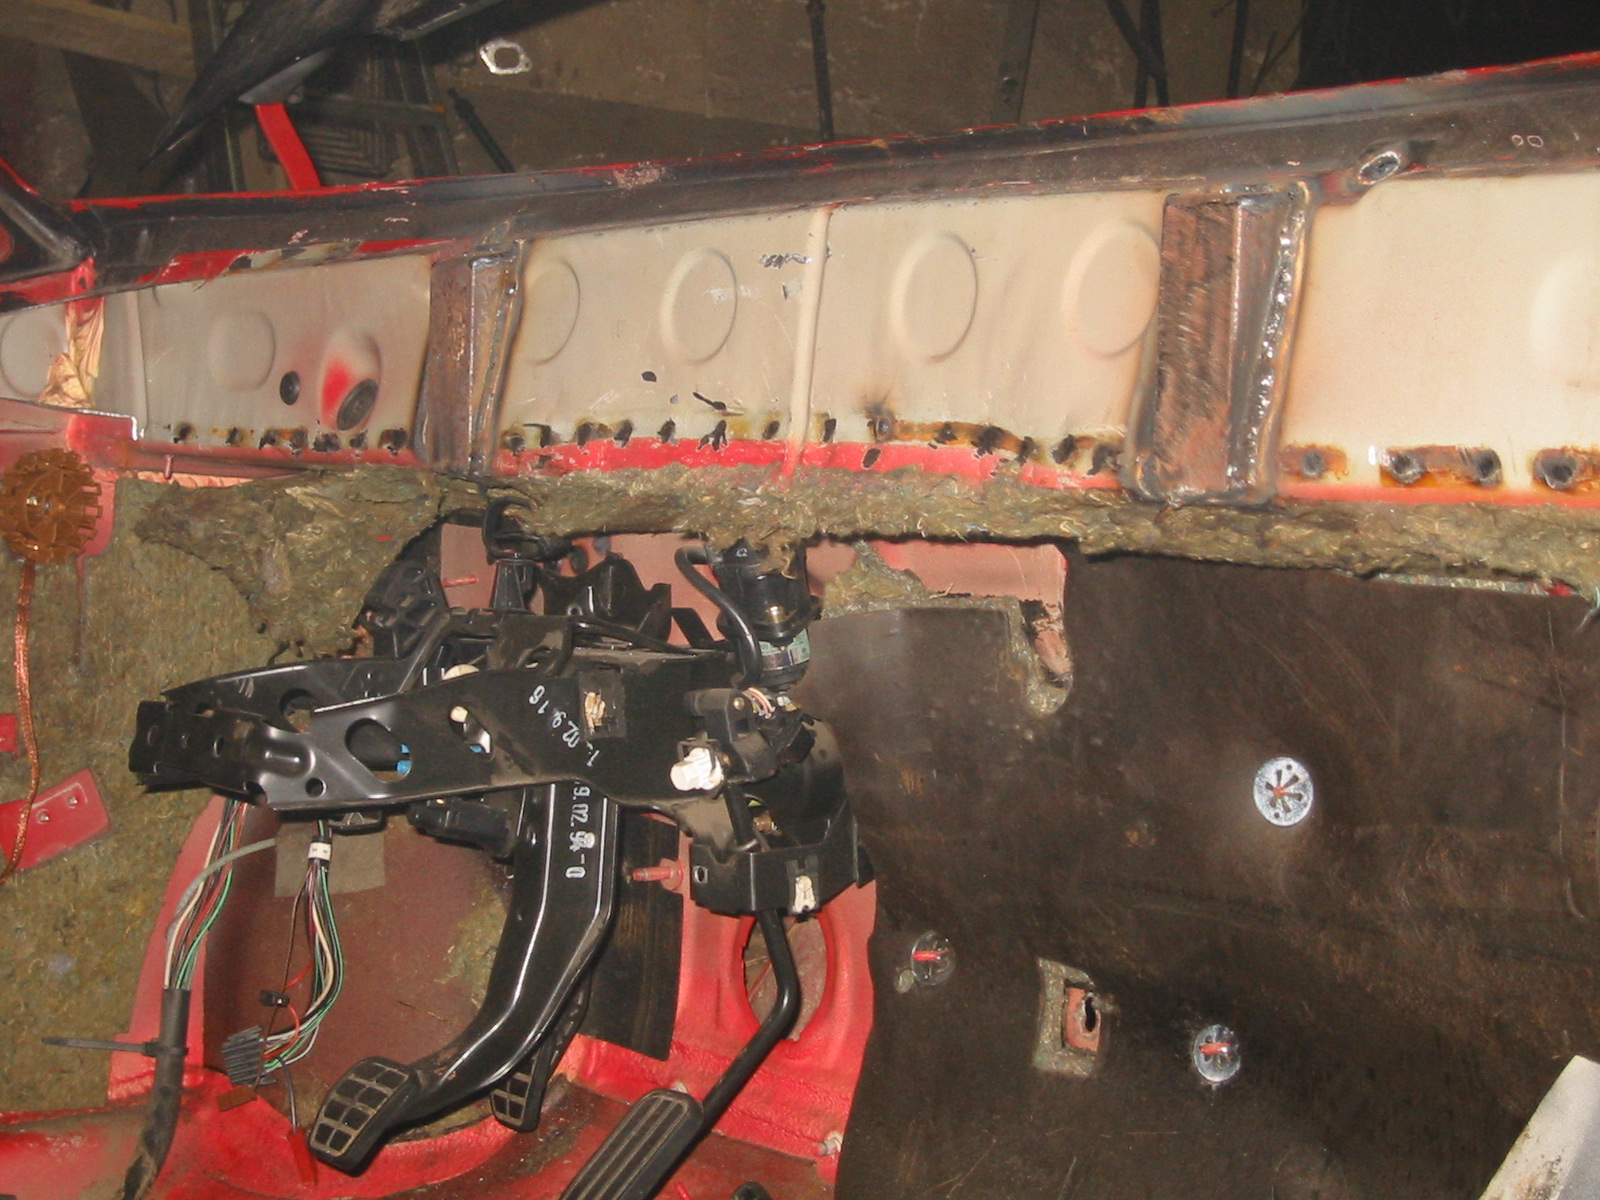
These are the brackets we ended up with. Pretty simple... That's how close the Mk3 dash front mounts come to the remaining metal!
The internal dash beam helped with alignment: a support rod runs from the pedal area to the front of the dashboard at the left-hand bracket.
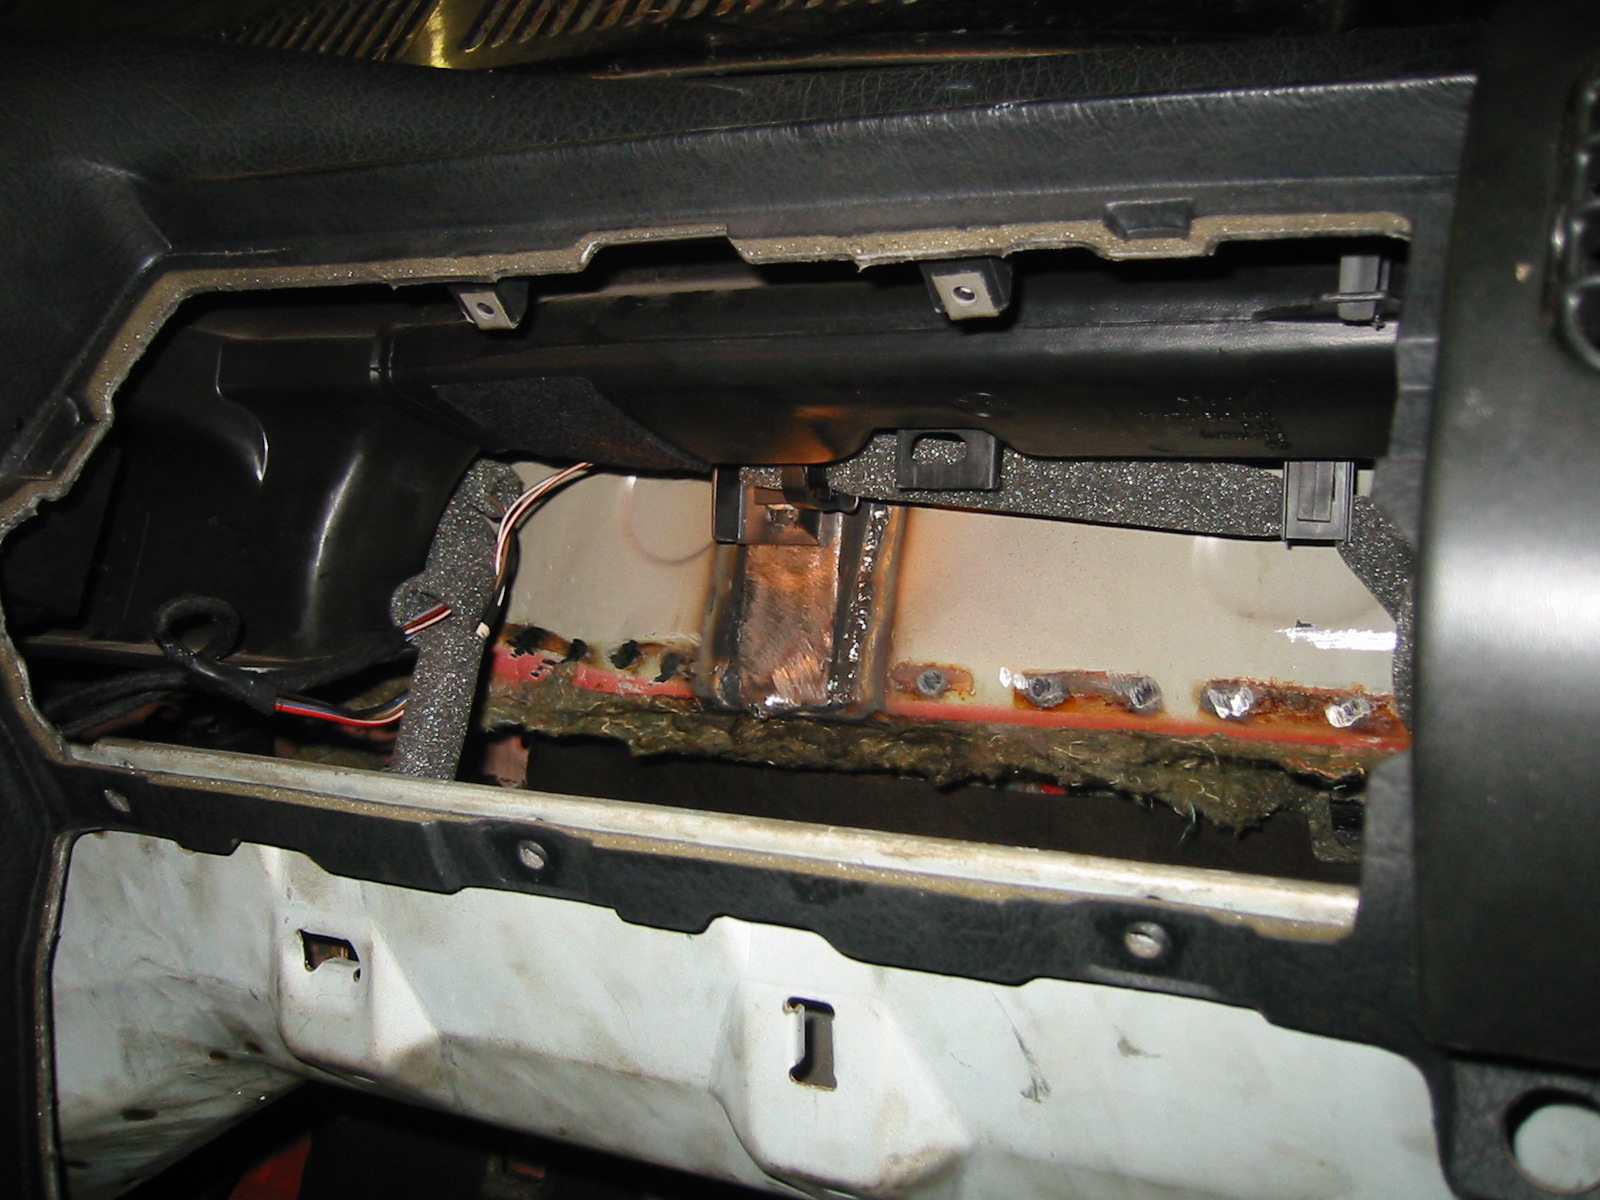
And the dashboard goes back in again. There's the mounting point behind the glovebox.
Dashboard — part 5
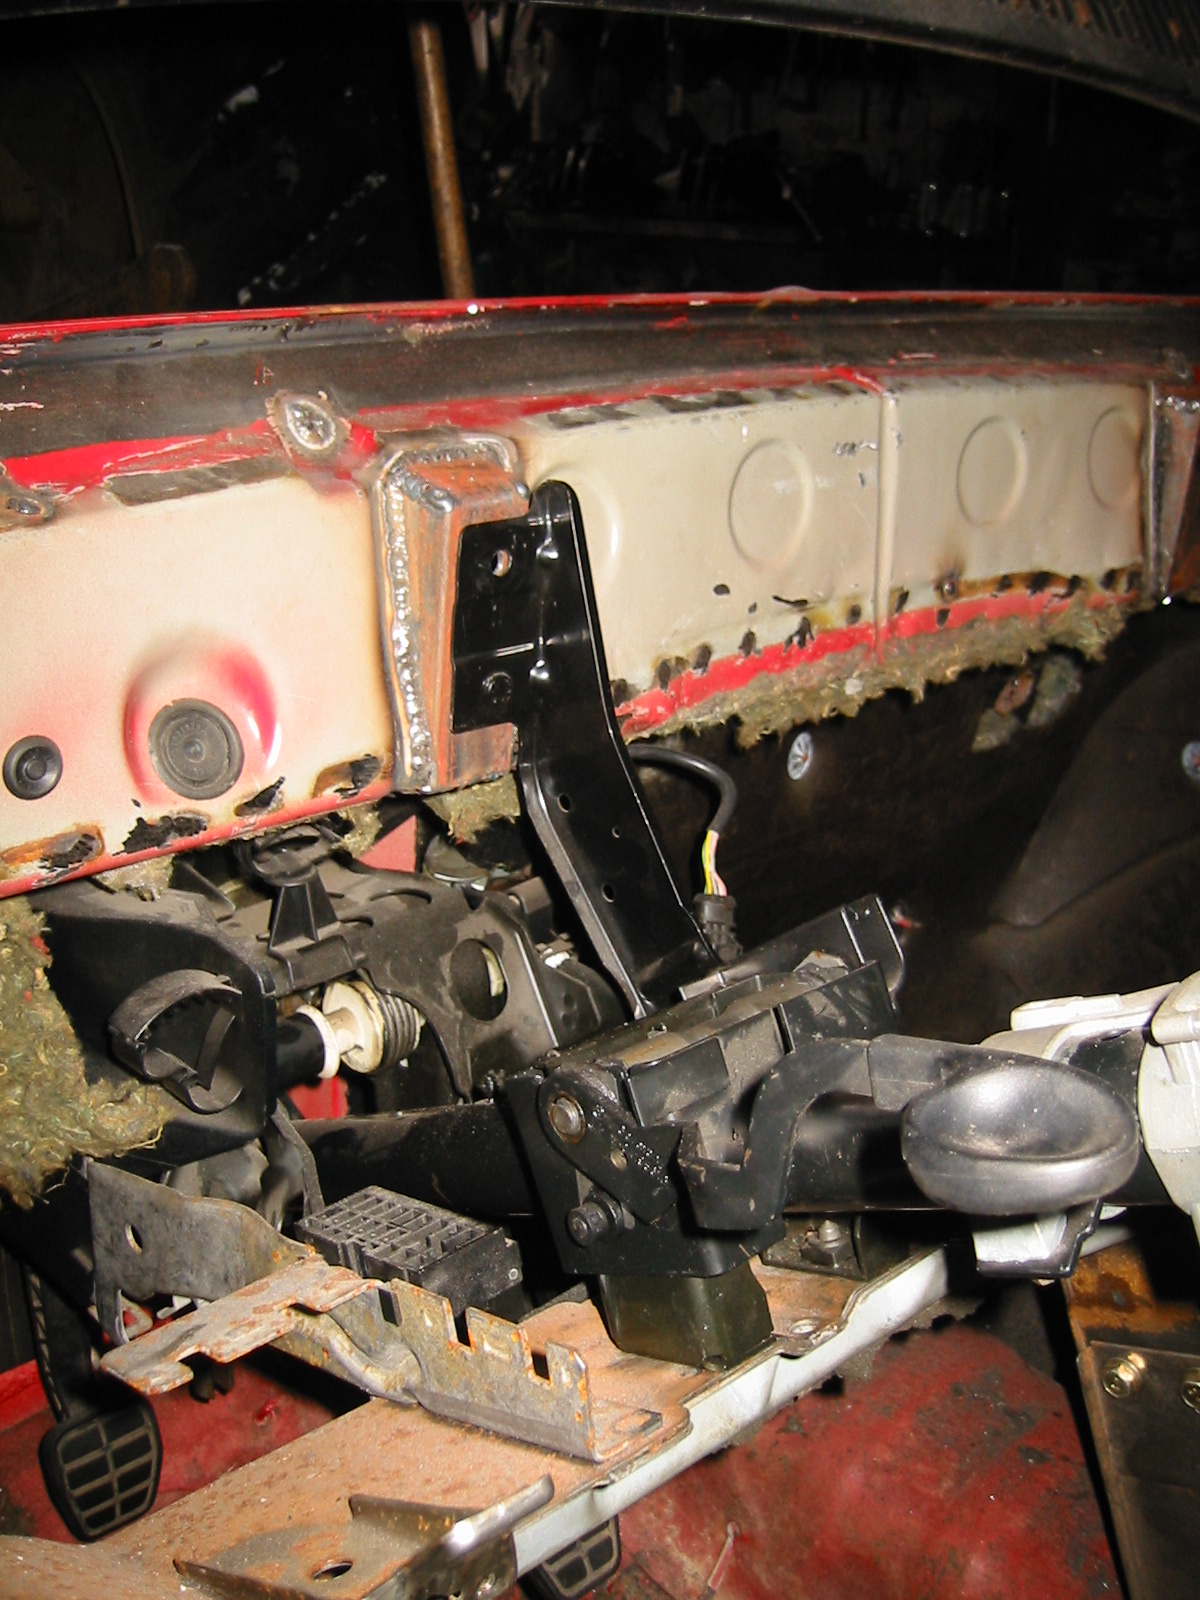
Here you can see how the beam's centre support lines up with the bracket welded behind the dash.
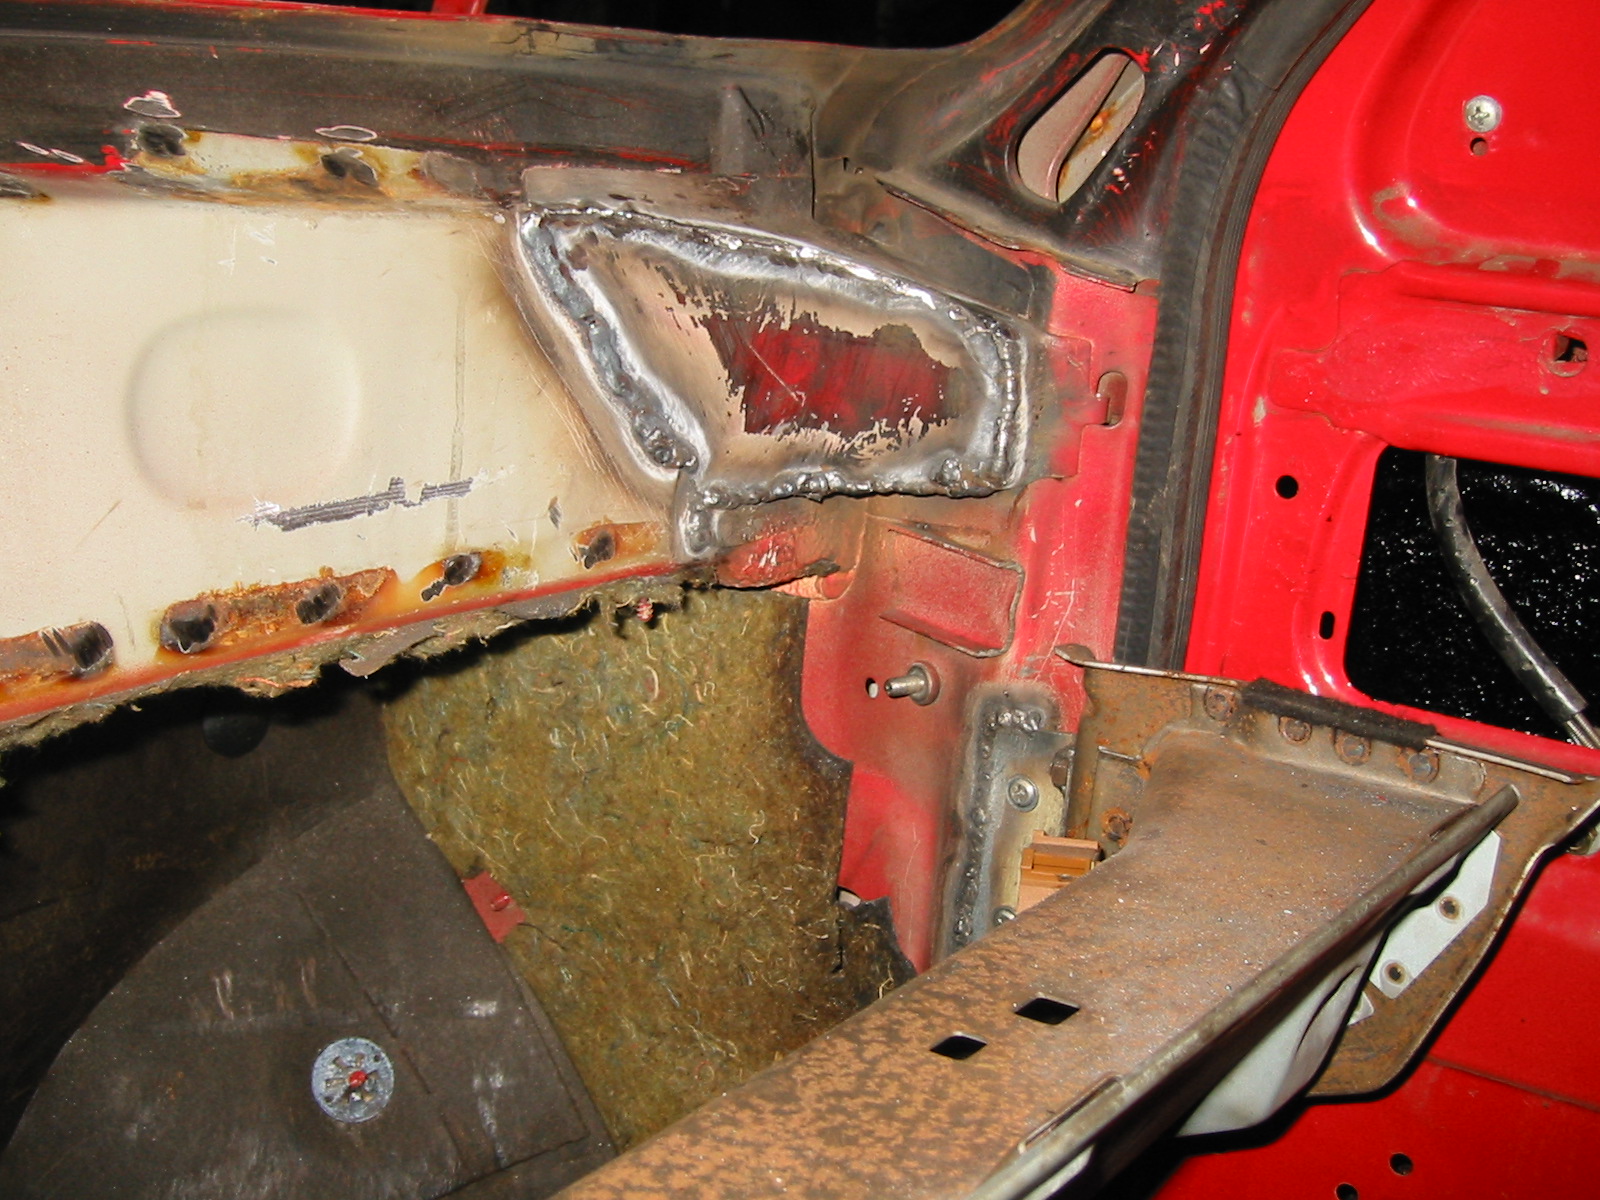
The reinforcements welded into the corners.
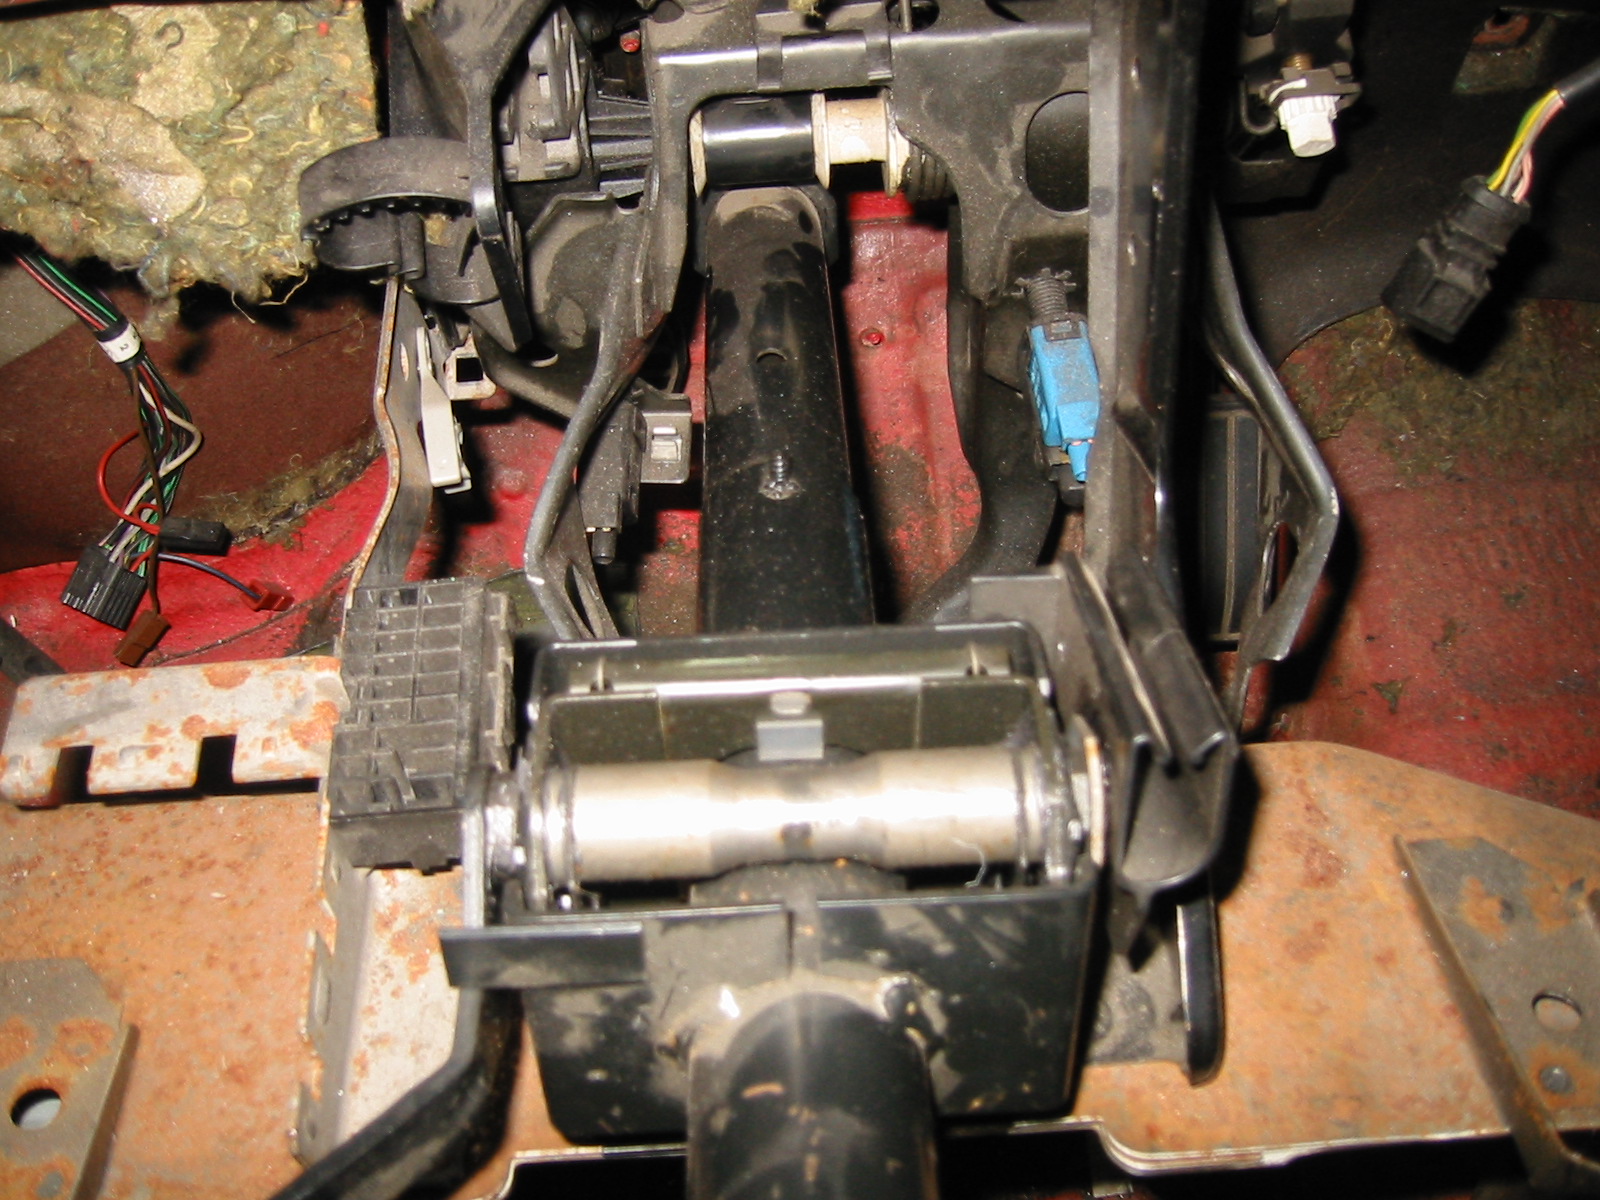
The pedal mounting needed a little modification, and holes had to be drilled through the bulkhead for the clutch cylinder. The height-adjustable Mk3 steering column simply bolts in.
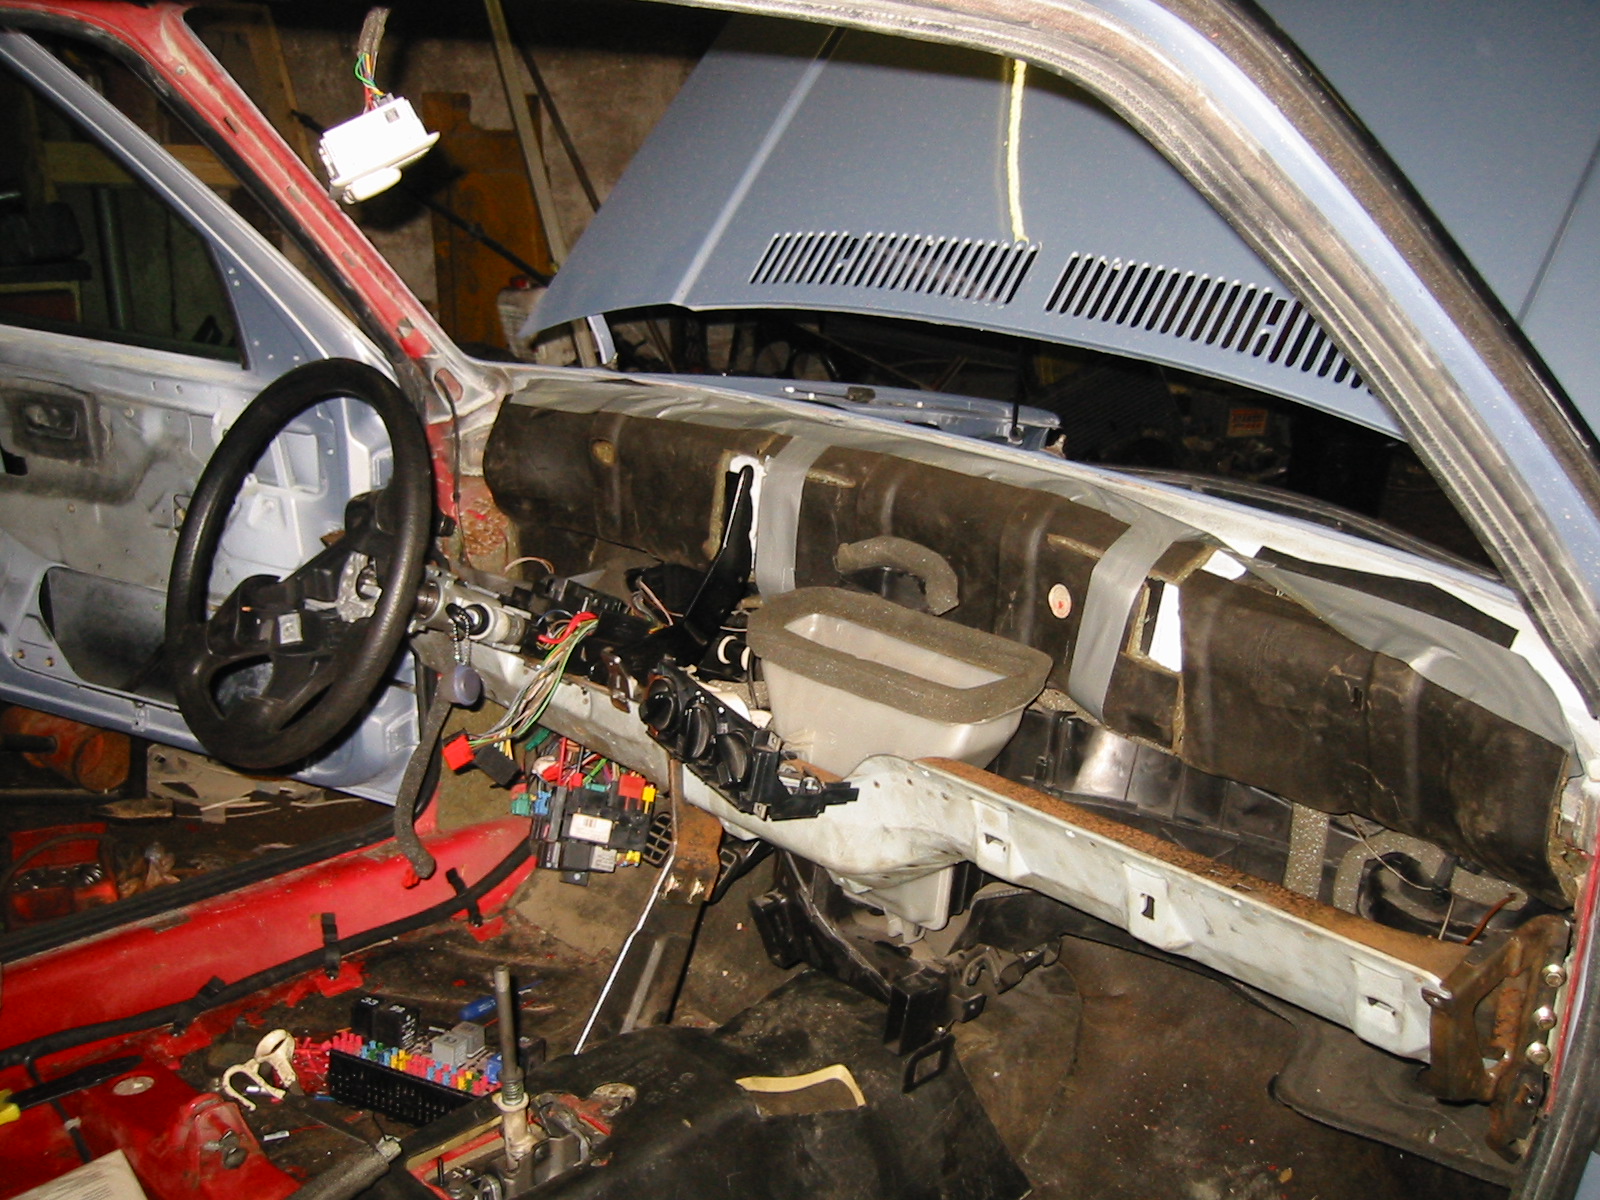
The sound insulation was made from the Mk3 material by cutting it into three pieces and trimming off the excess. Temporarily secured with tape :-) It fits so tightly that it hardly needs anything else to hold it. The lower insulation is original to the 1988 car.
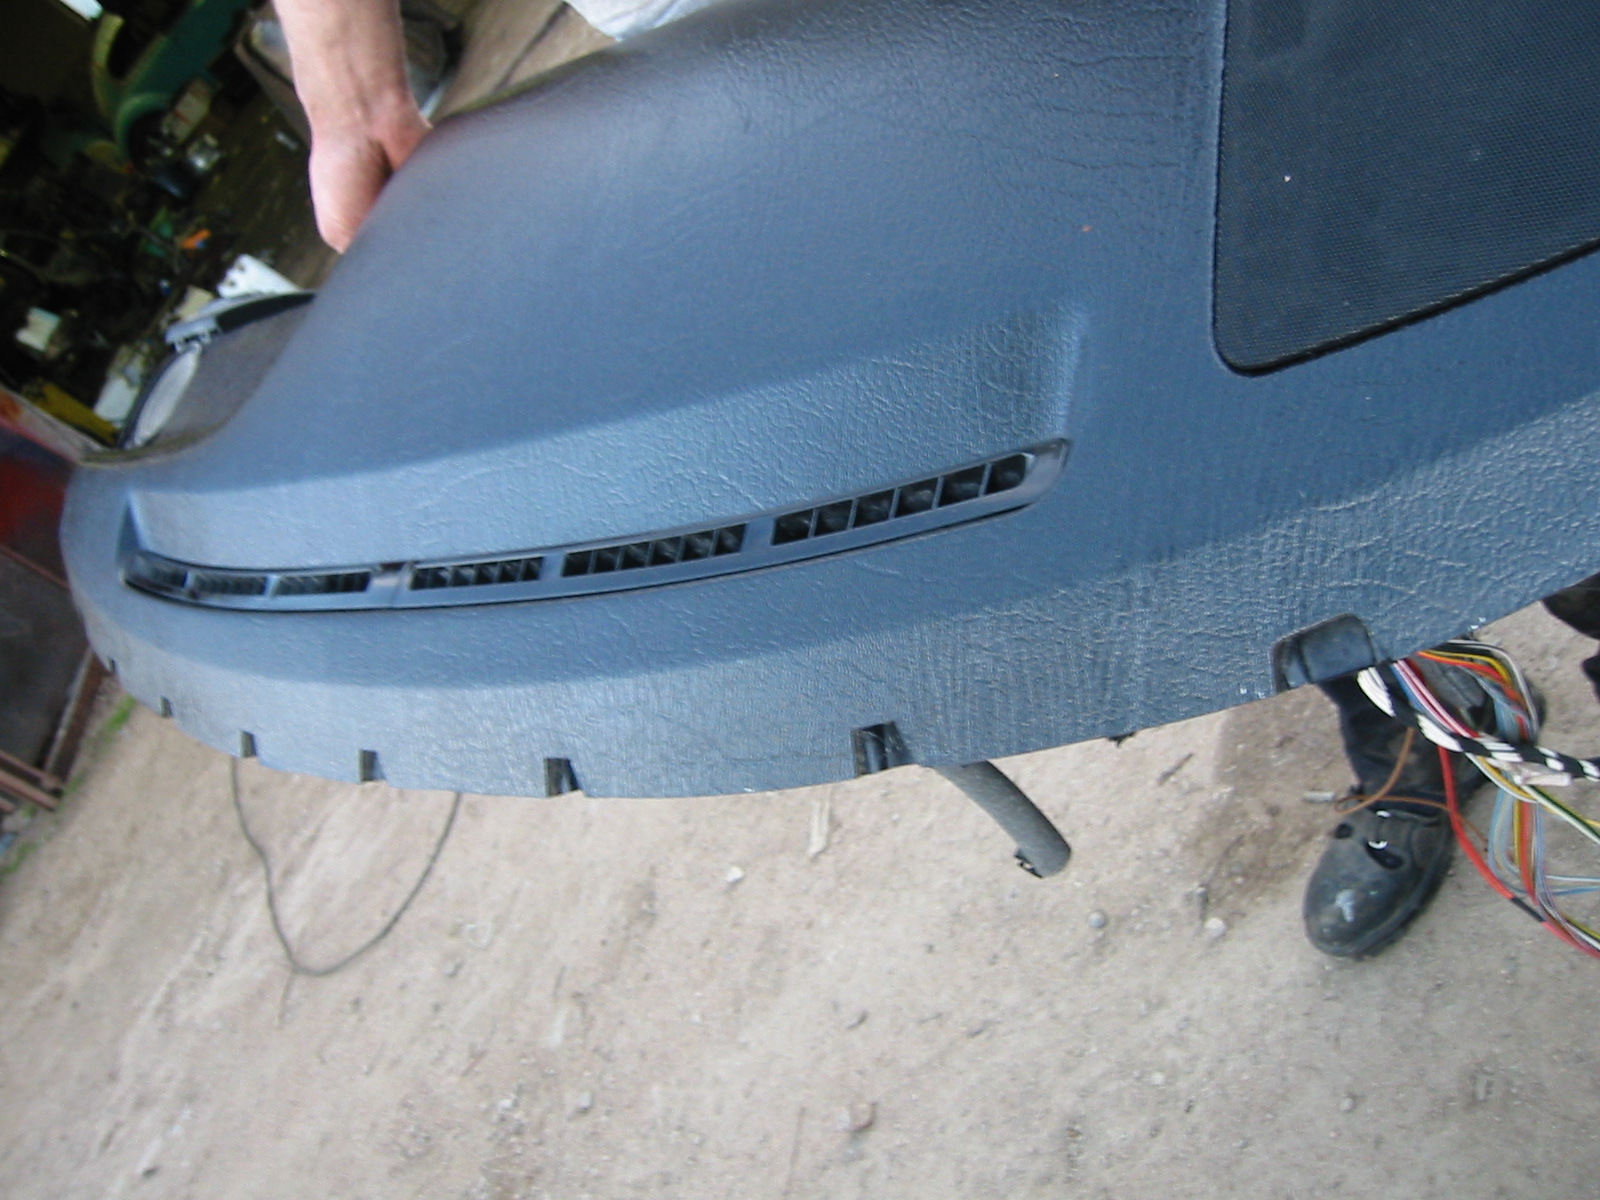
The finished front edge of the dashboard. Air reaches the windscreen through those little slots.
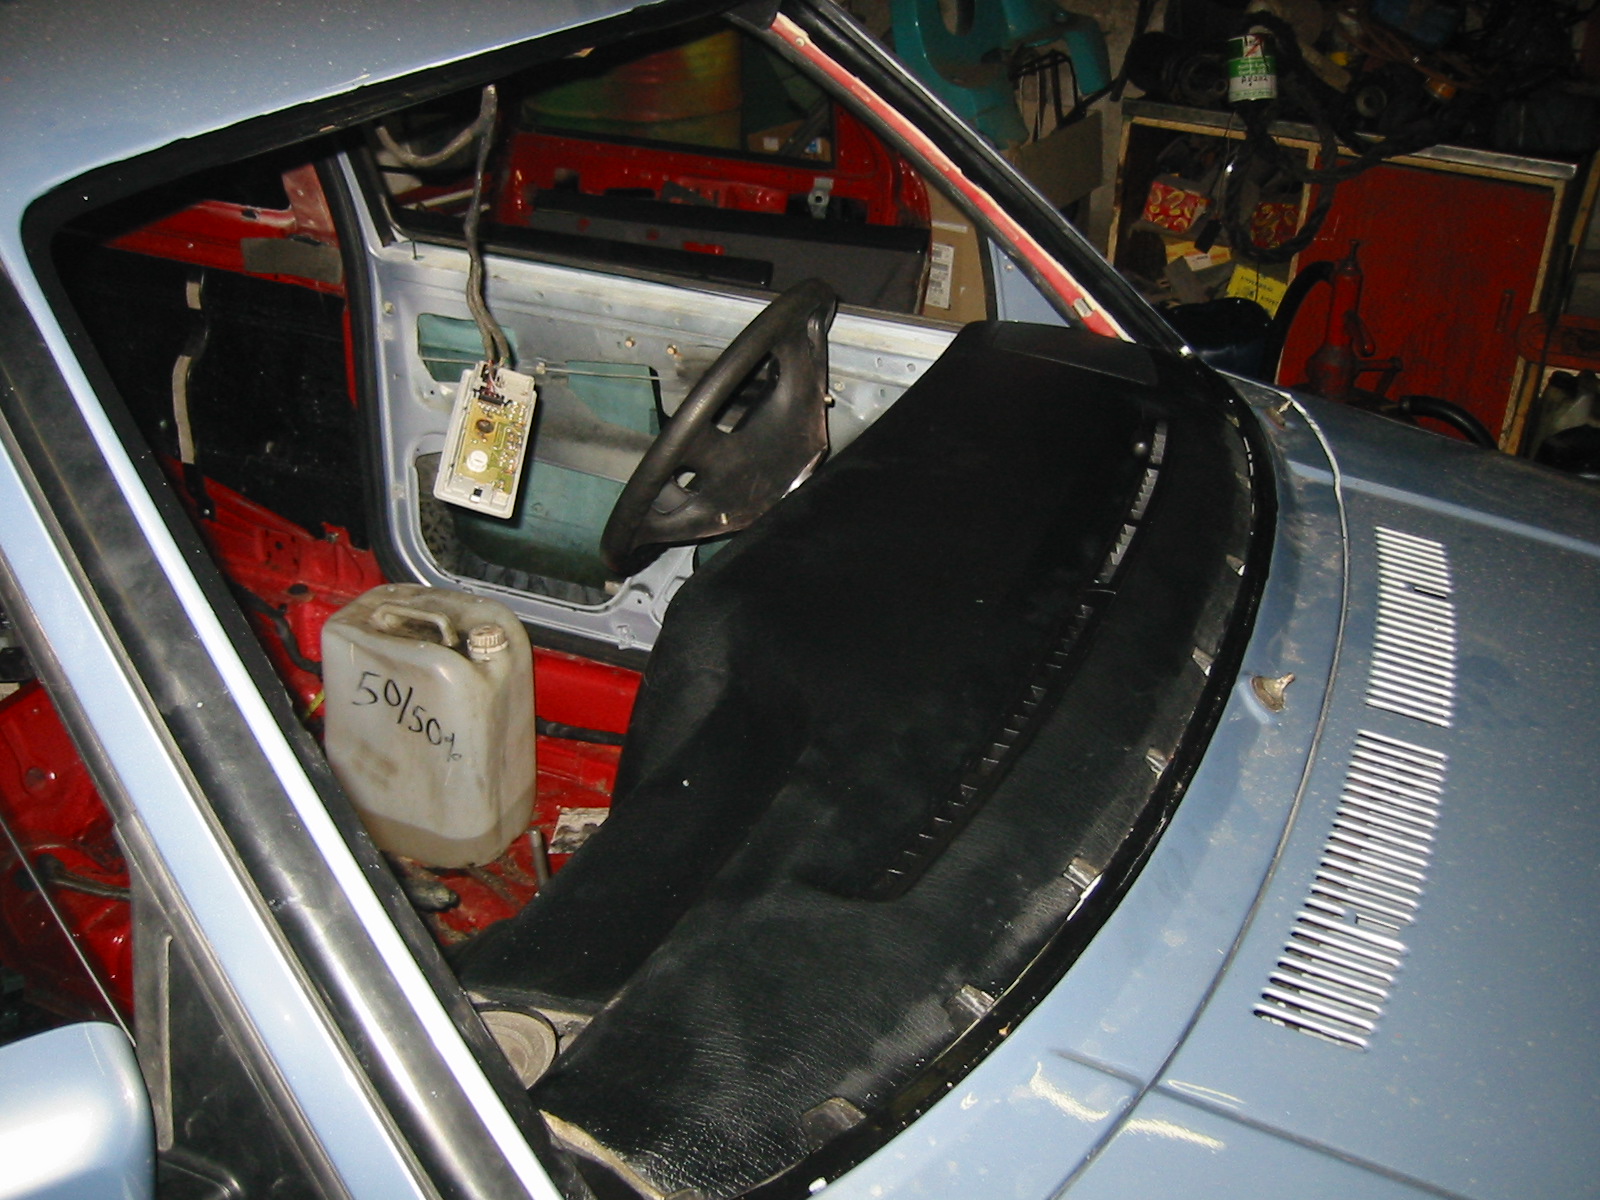
And the dashboard finally installed. A very tight fit, but it just went in. We won't be eager to remove it again any time soon.
The dashboard project was now more or less finished. Essentially only the instruments, switches and so on remained to be screwed in. Wiring wasn't much of a concern because the drivetrain came from the same car as the dashboard. With an older drivetrain, the electrics would surely have been quite a headache.
Wings and G60 arches
With the dashboard fitted, it was time to tackle the body so we could eventually get to painting... Expect Pekka's usual modifications, such as a smoothed tailgate, T4 intake grille and so on.
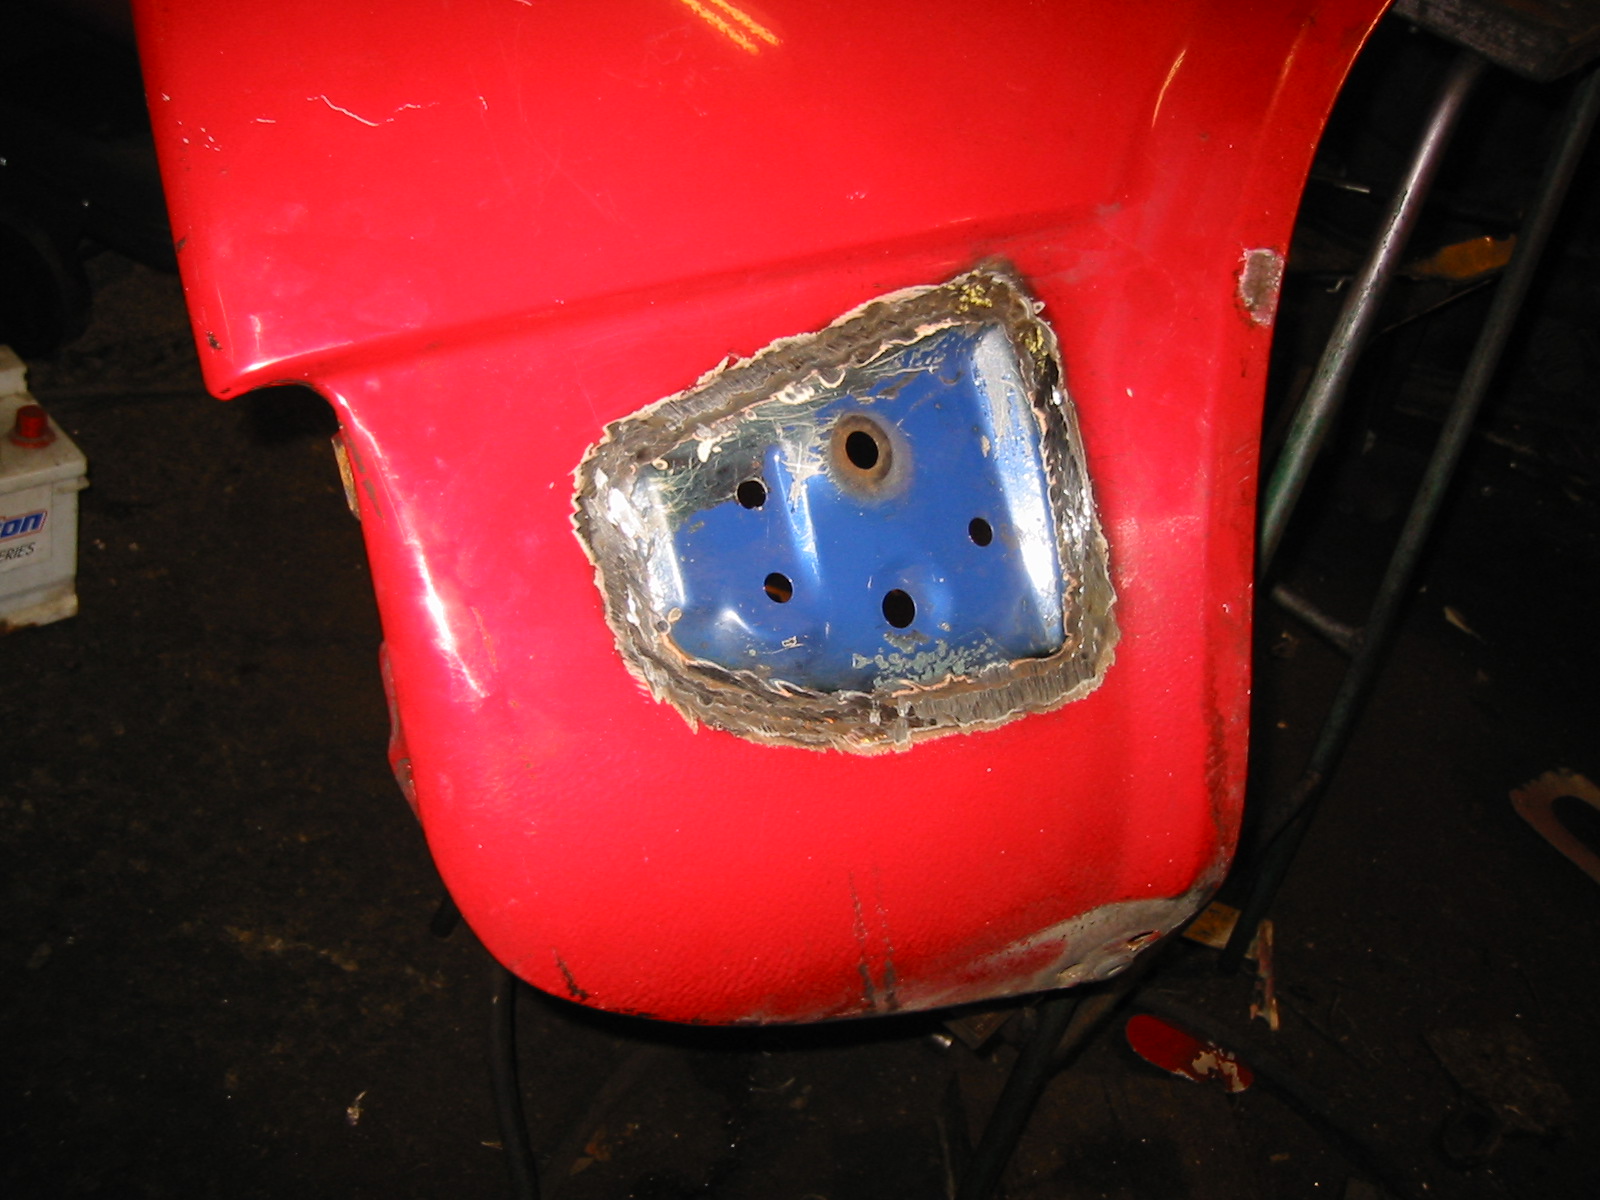
Being thrifty, Peksi wasn't going to buy newer wings just to mount the big bumpers. The old wings can easily be modified to suit :) Just take some sections from damaged bumpers, cut and weld.
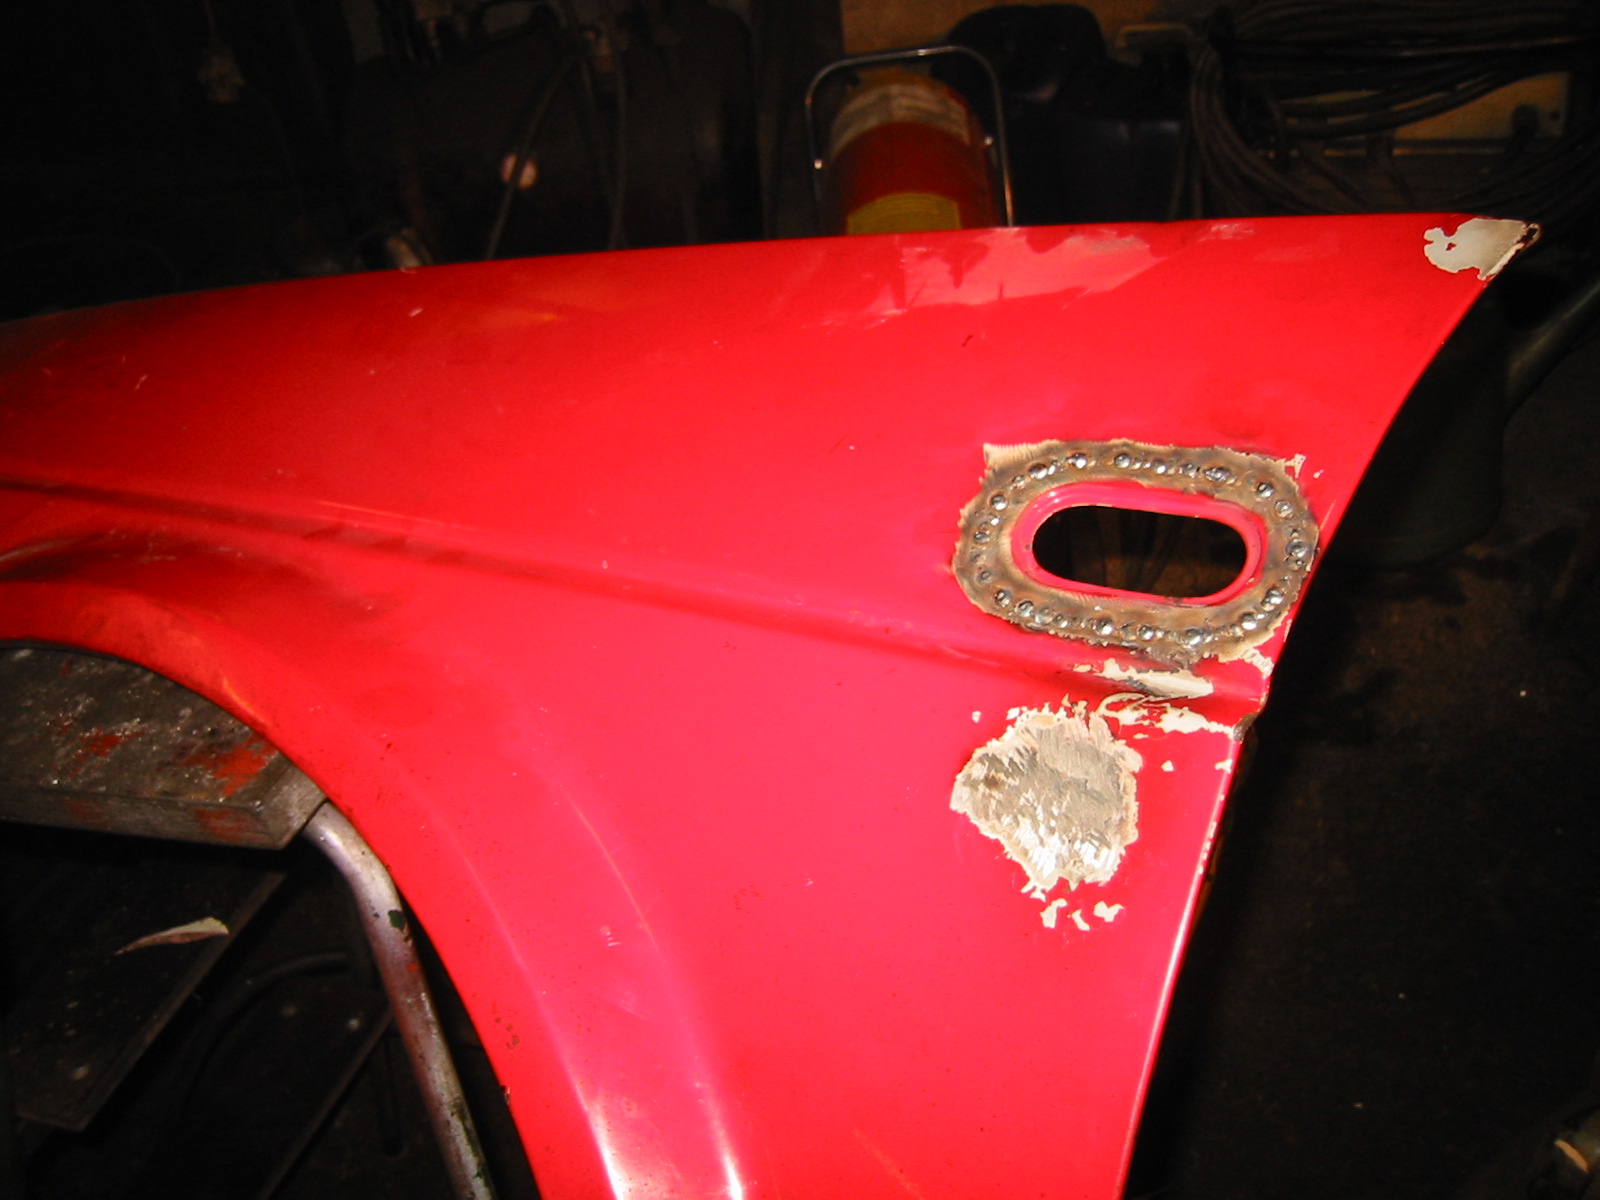
Peksi also decided to update the side repeaters a little...
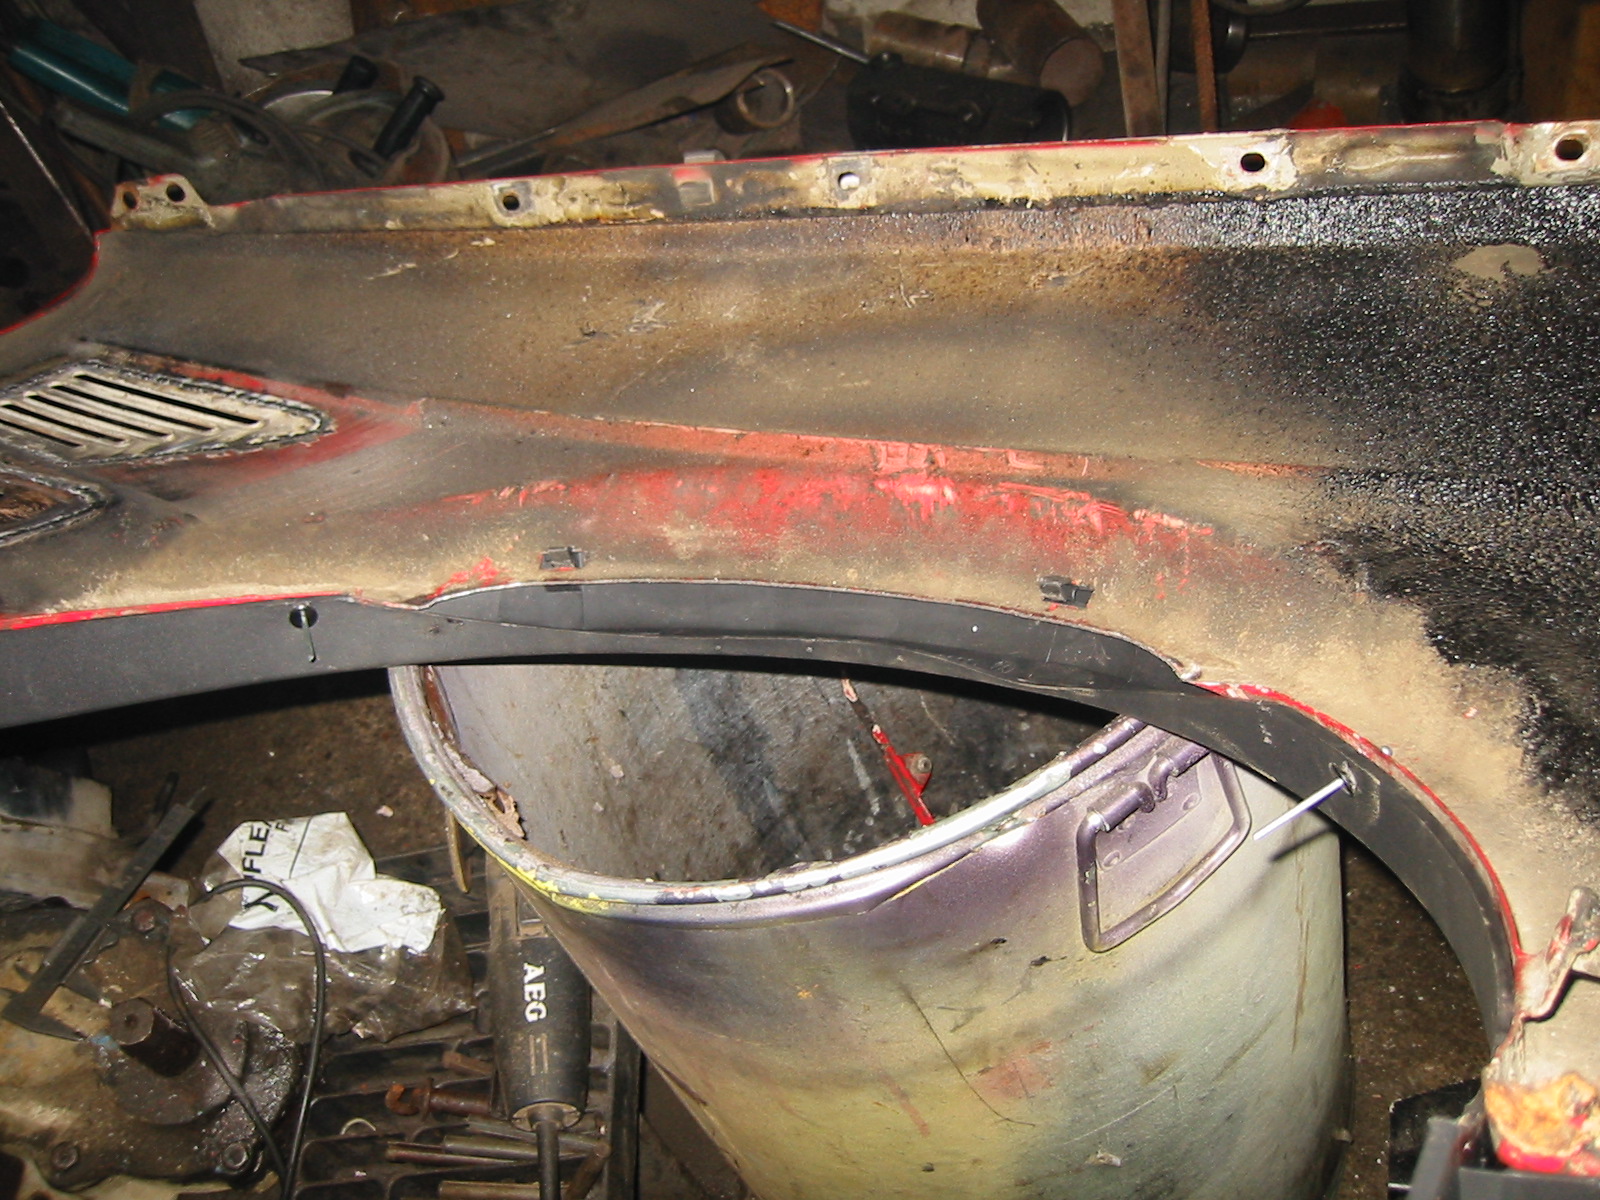
Pekka ordered new G60 plastic arches from VW. They weren't terribly expensive. The G60 wings are slightly different too, so Peksi modified these ordinary ones to match.
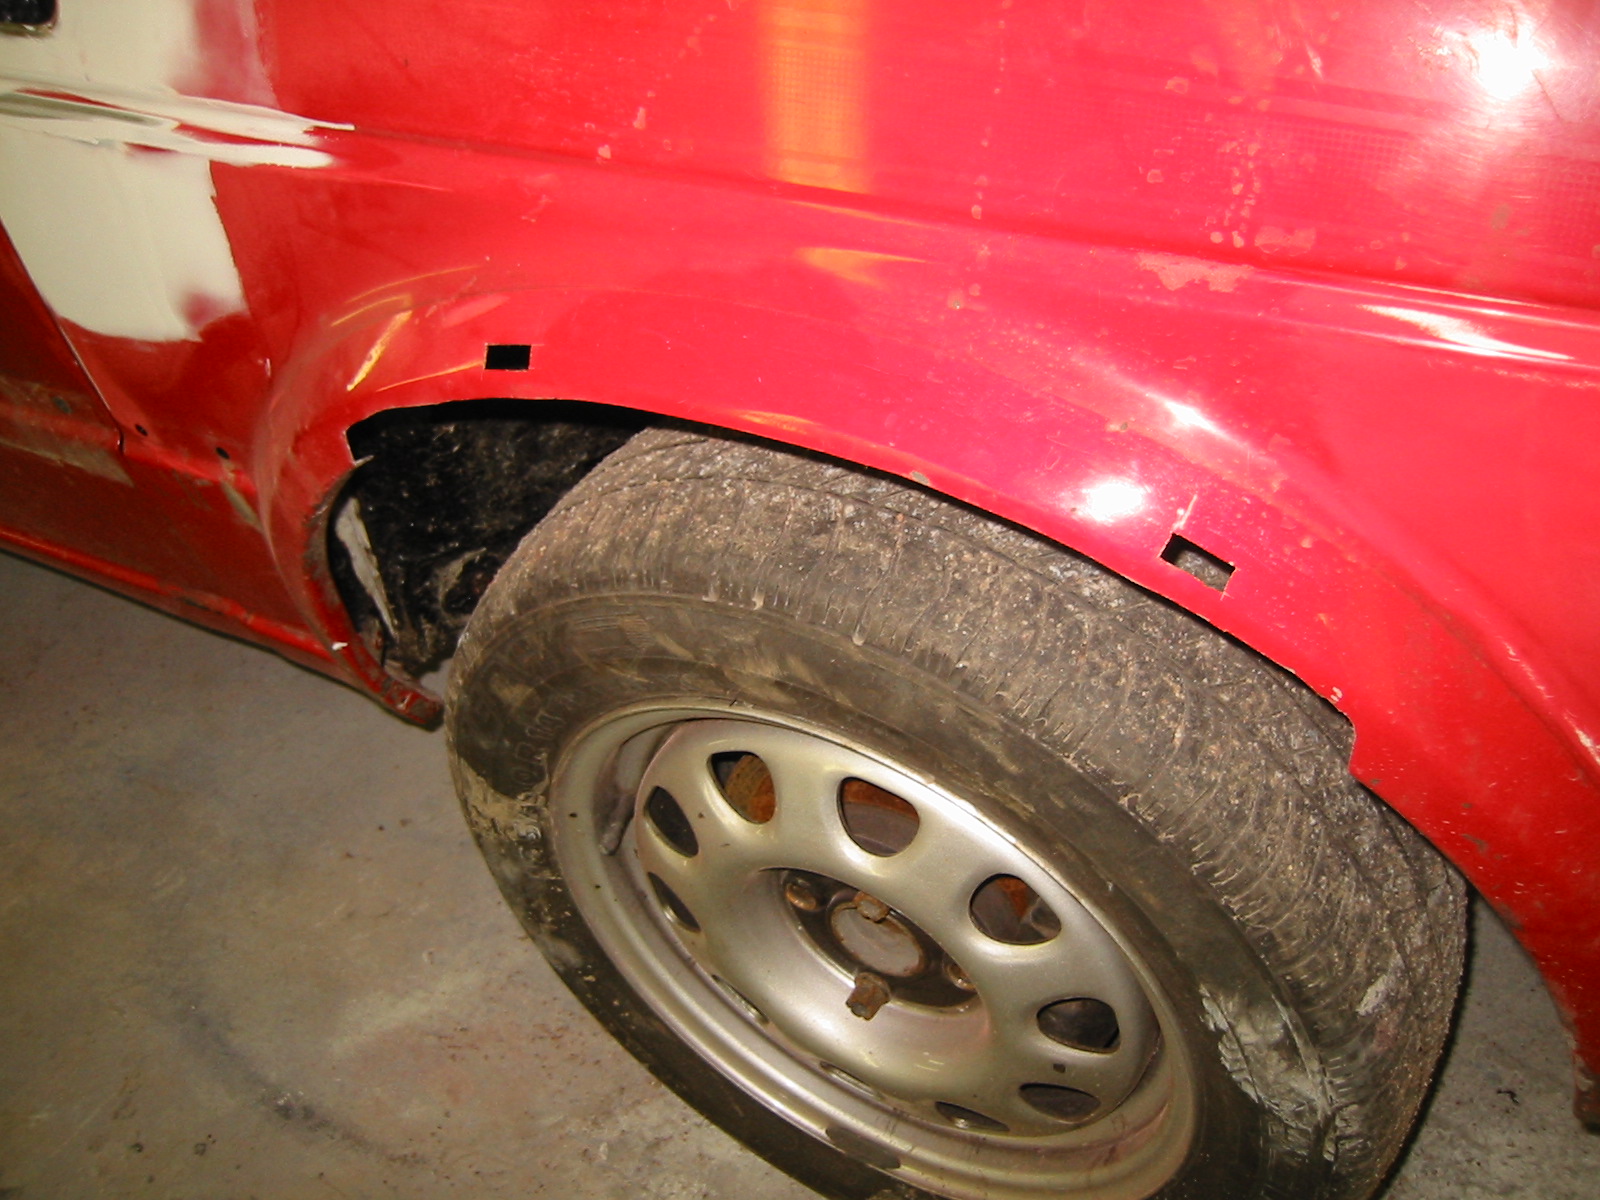
Holes were made in the wing for the arch mounting tabs. A little excess metal was also cut from the wheel opening. The G60 arch already has a corresponding recess. Its inner wheel liner is different too: it extends further out and attaches to the same tabs projecting through the wing.
Air intake grille
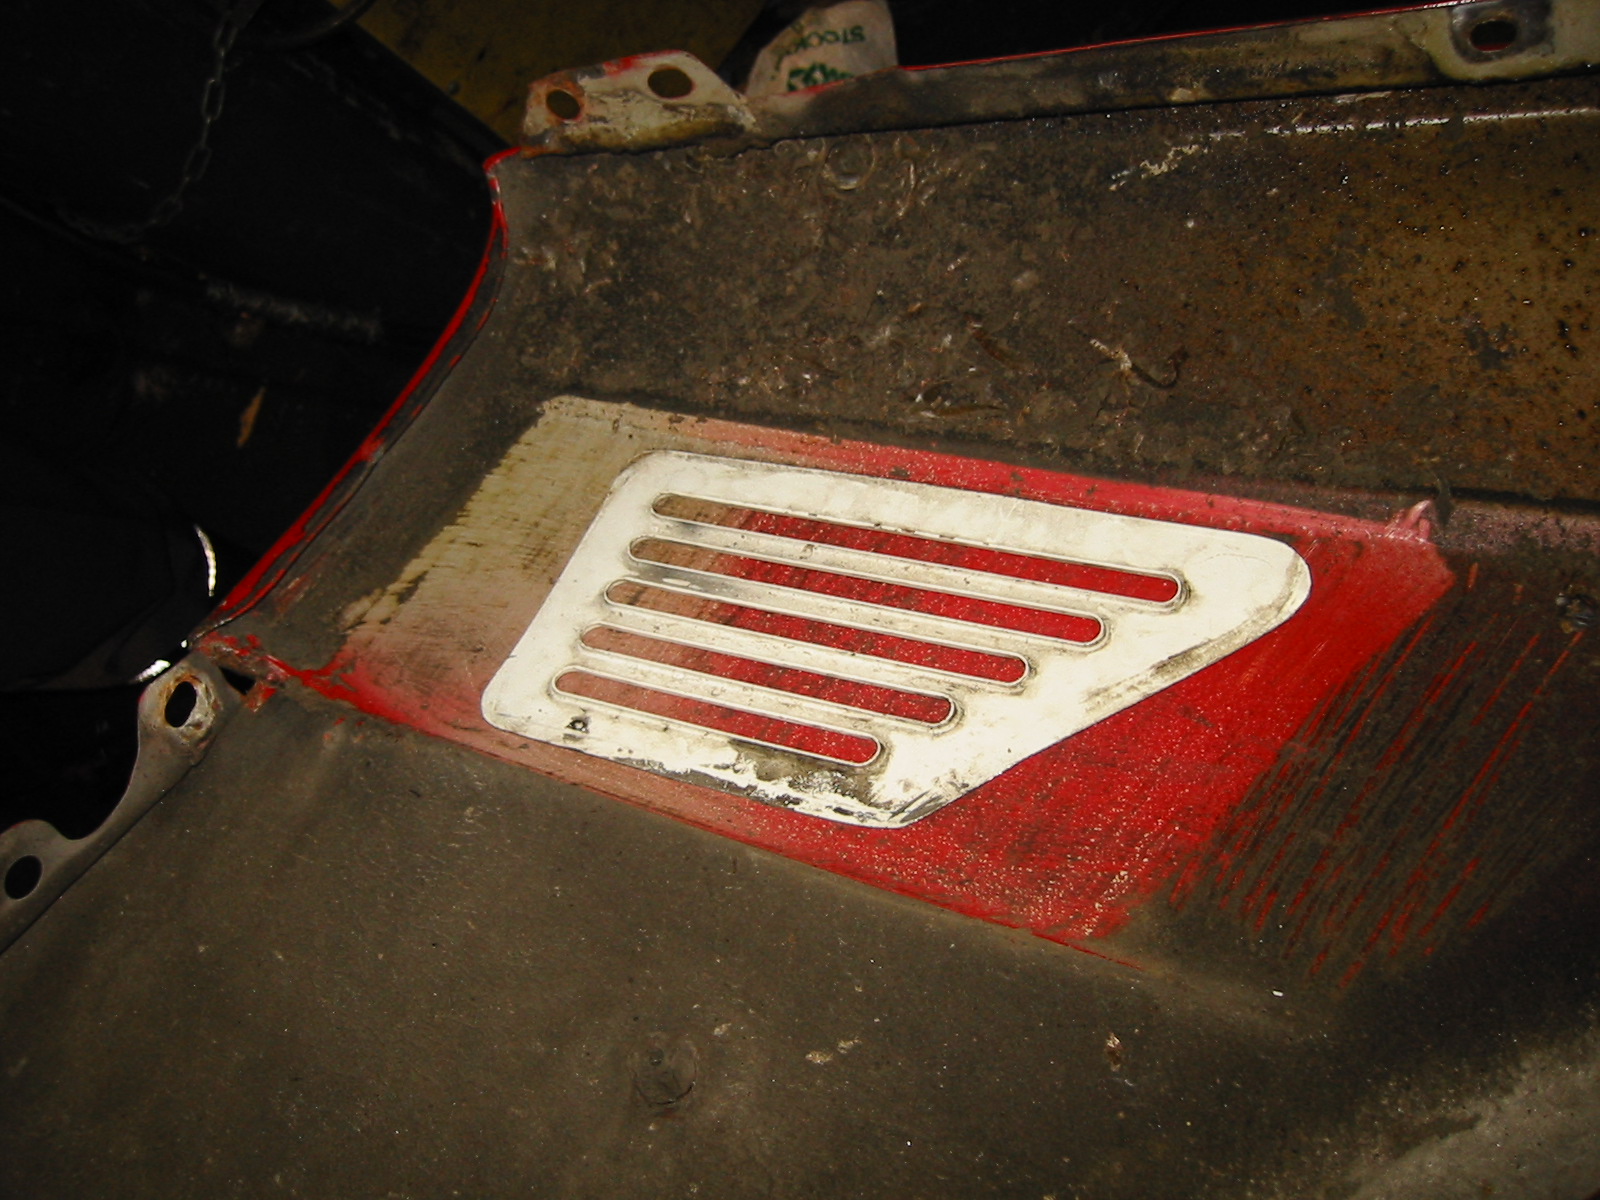
Installing a grille starts with finding one (!), in this case from a Transporter. It's positioned on the inside of the wing.
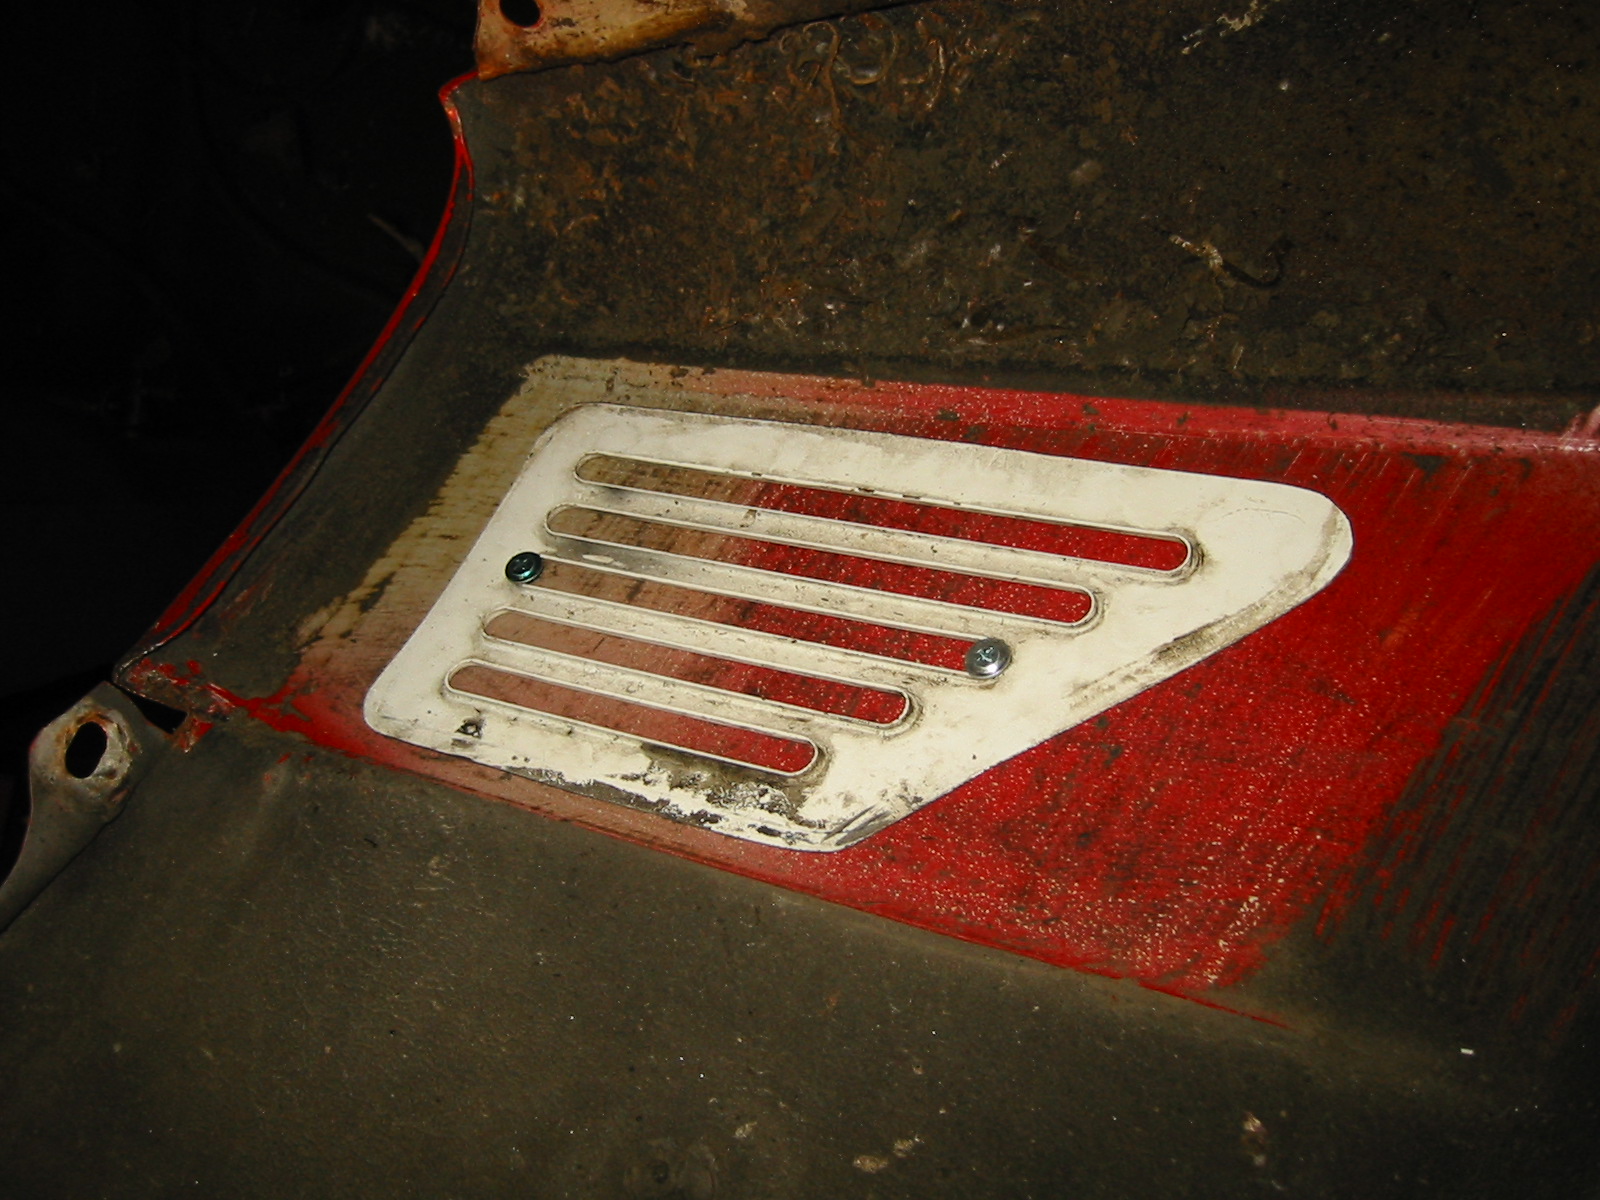
Then secure it with a couple of self-drilling screws. And that's it... Well, not quite.
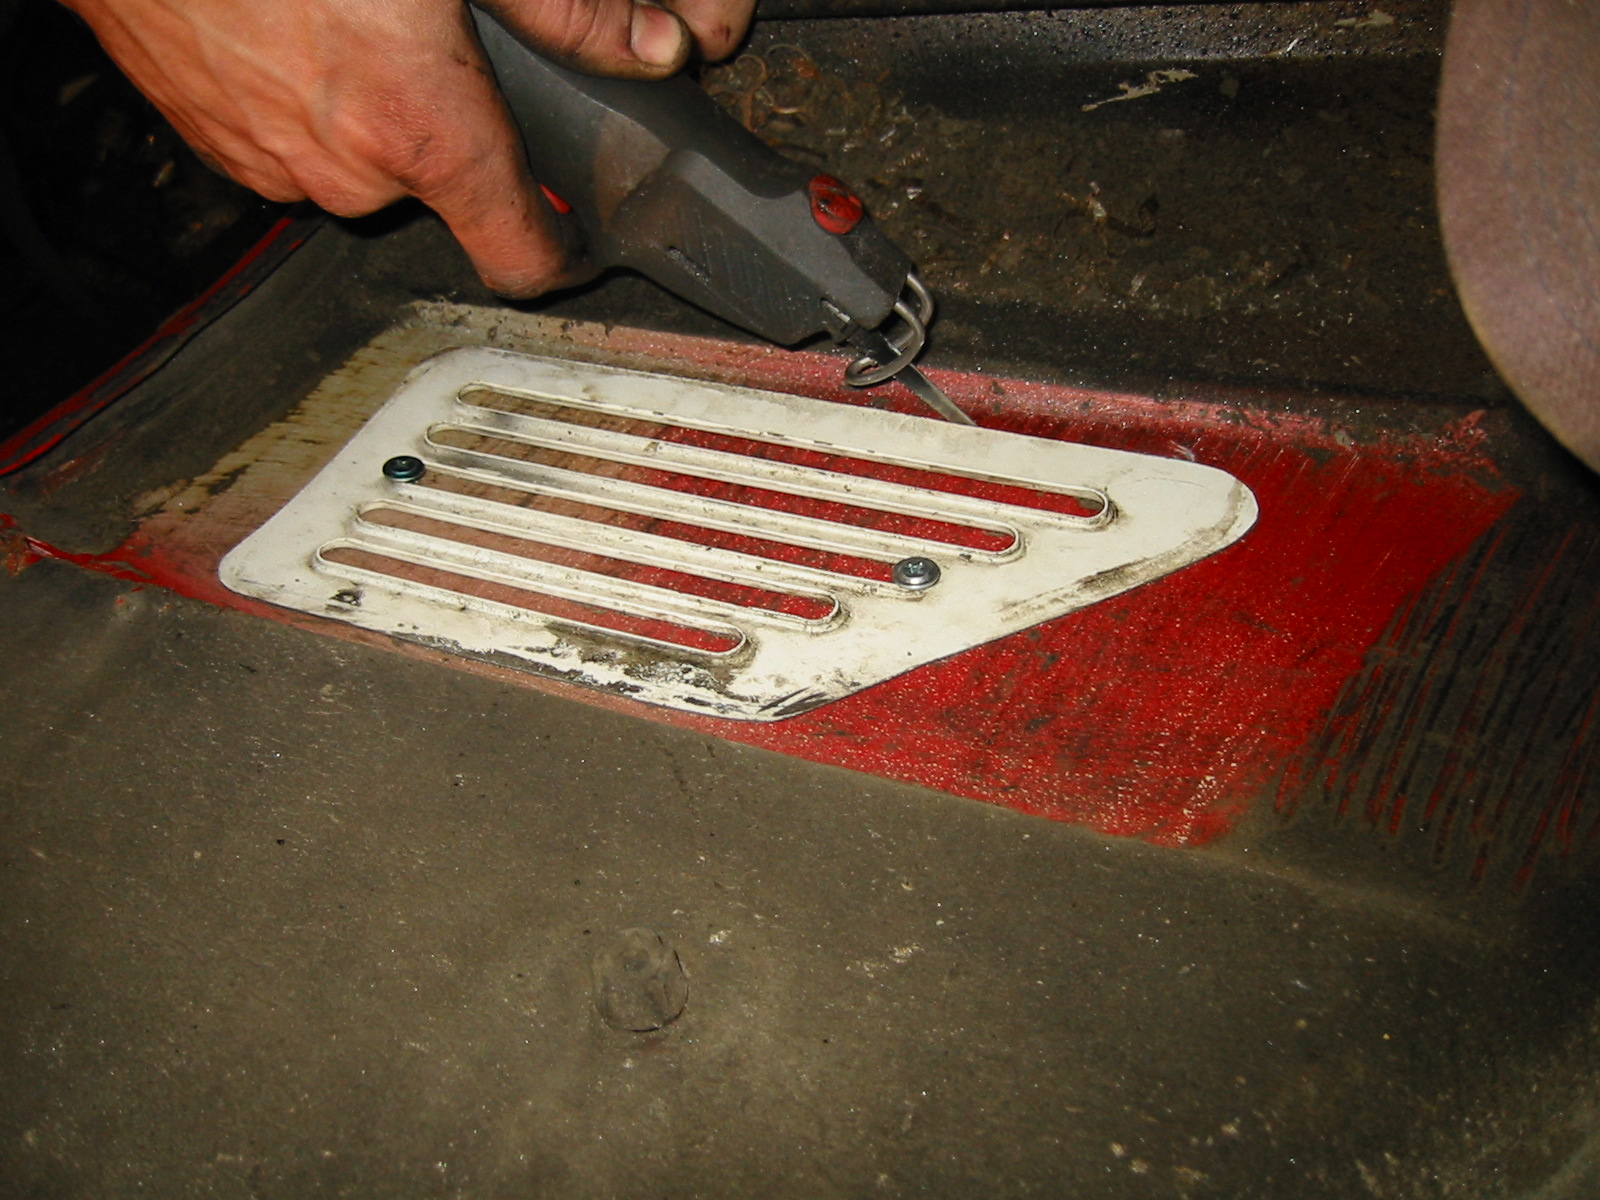
Next, take the saw and start cutting around the grille.
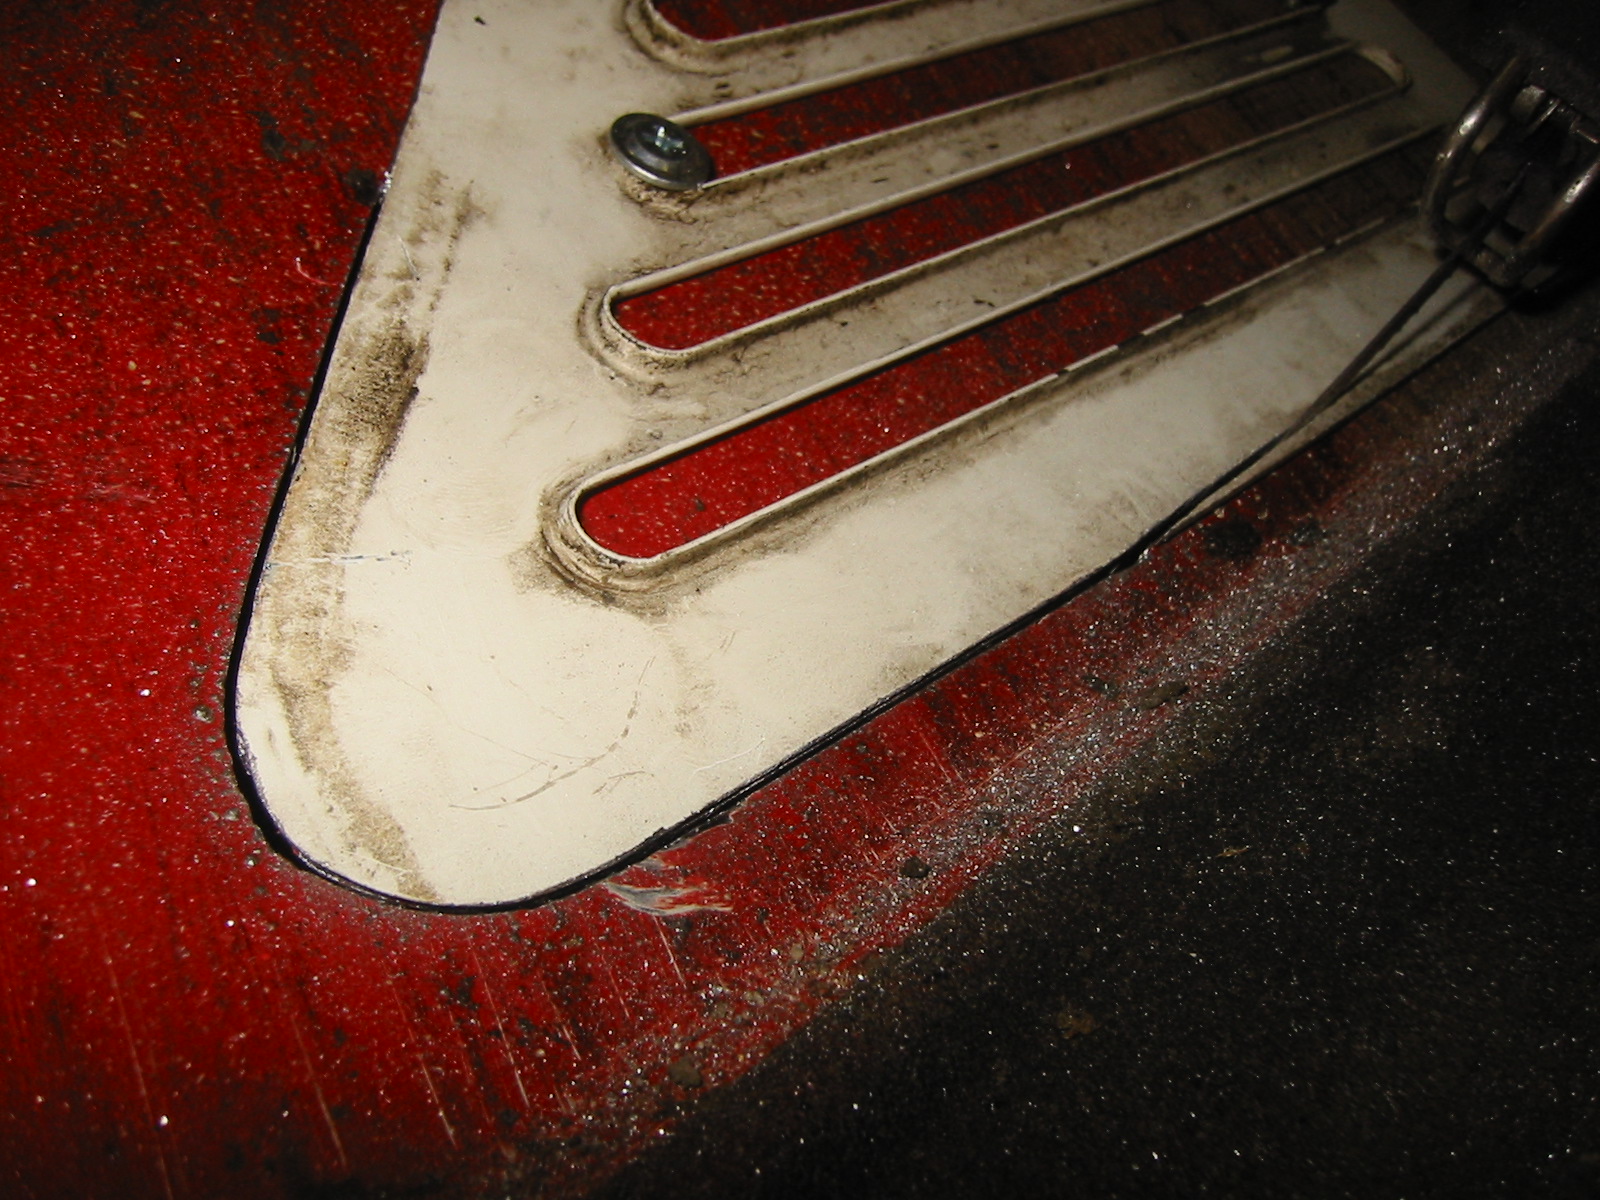
Like this. It doesn't matter if a little excess comes off the grille panel too. Don't cut all the way round yet. The saw leaves just the right gap for welding.
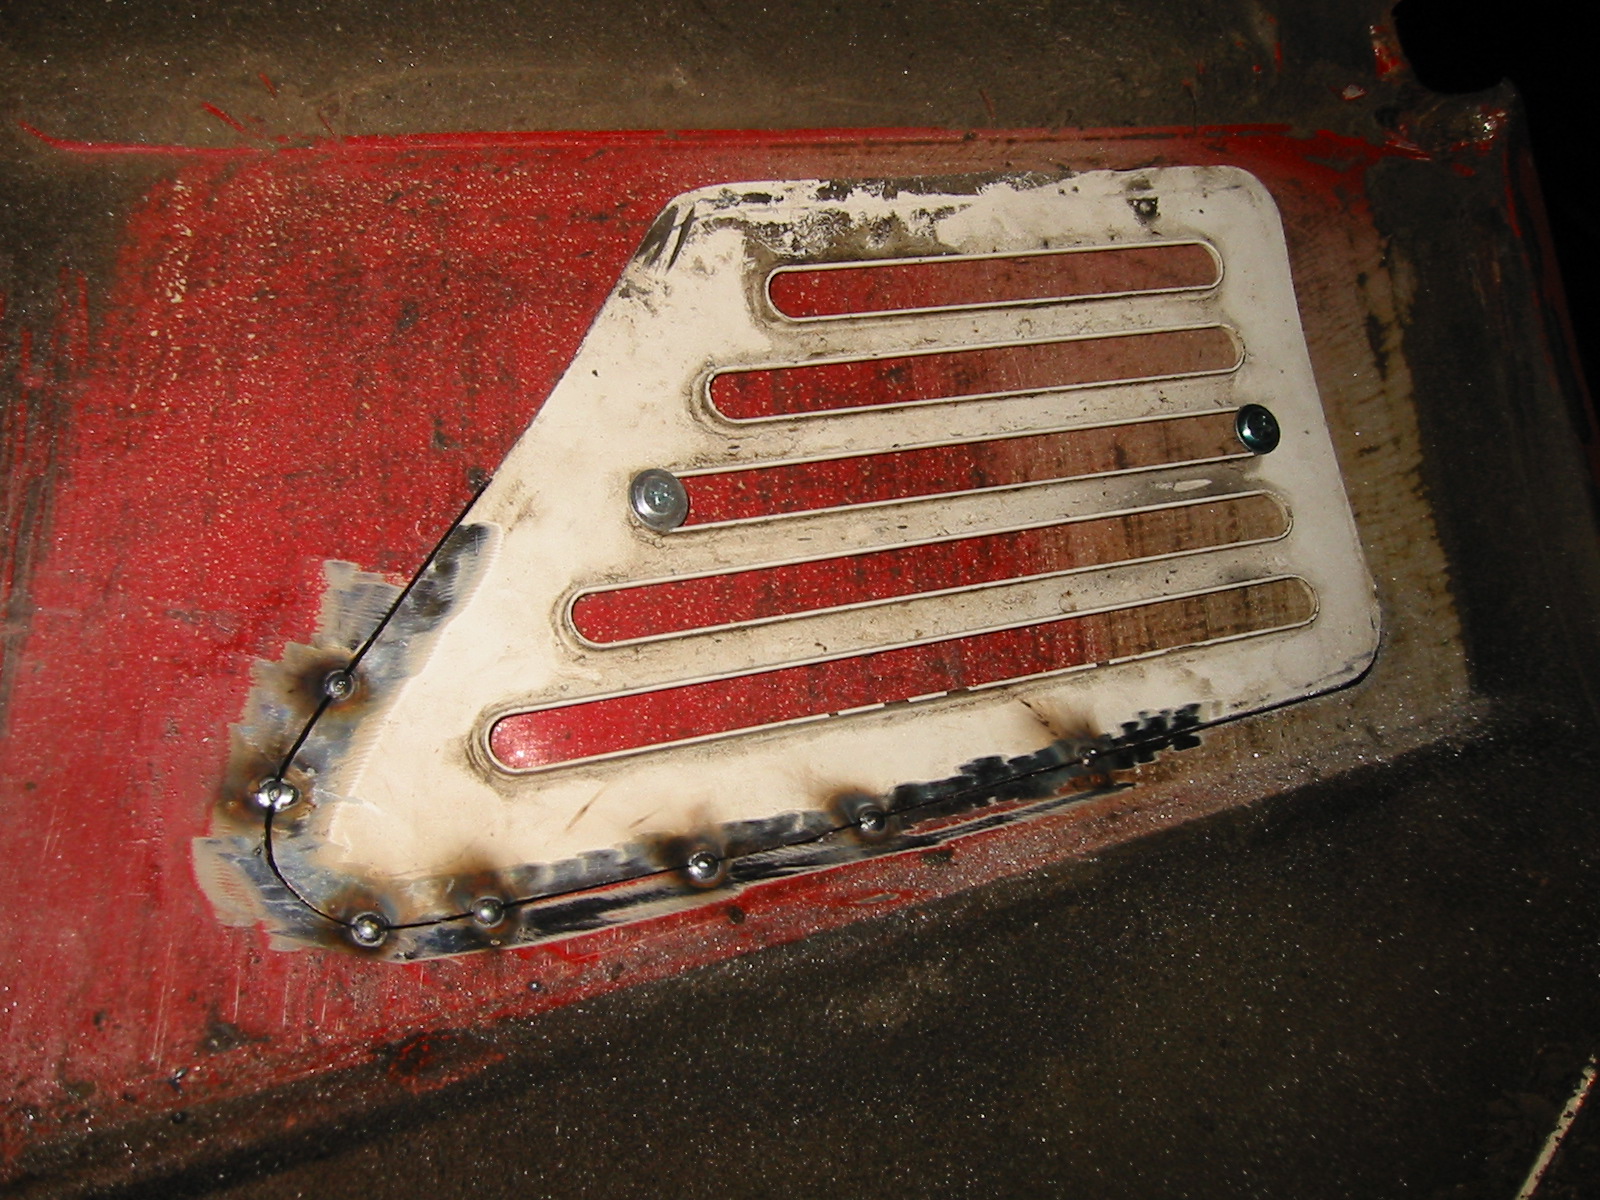
After cutting about halfway round, bend the lower sheet out of the way and tack the grille in... Then cut the rest, remove the screws and tack the remaining edge.
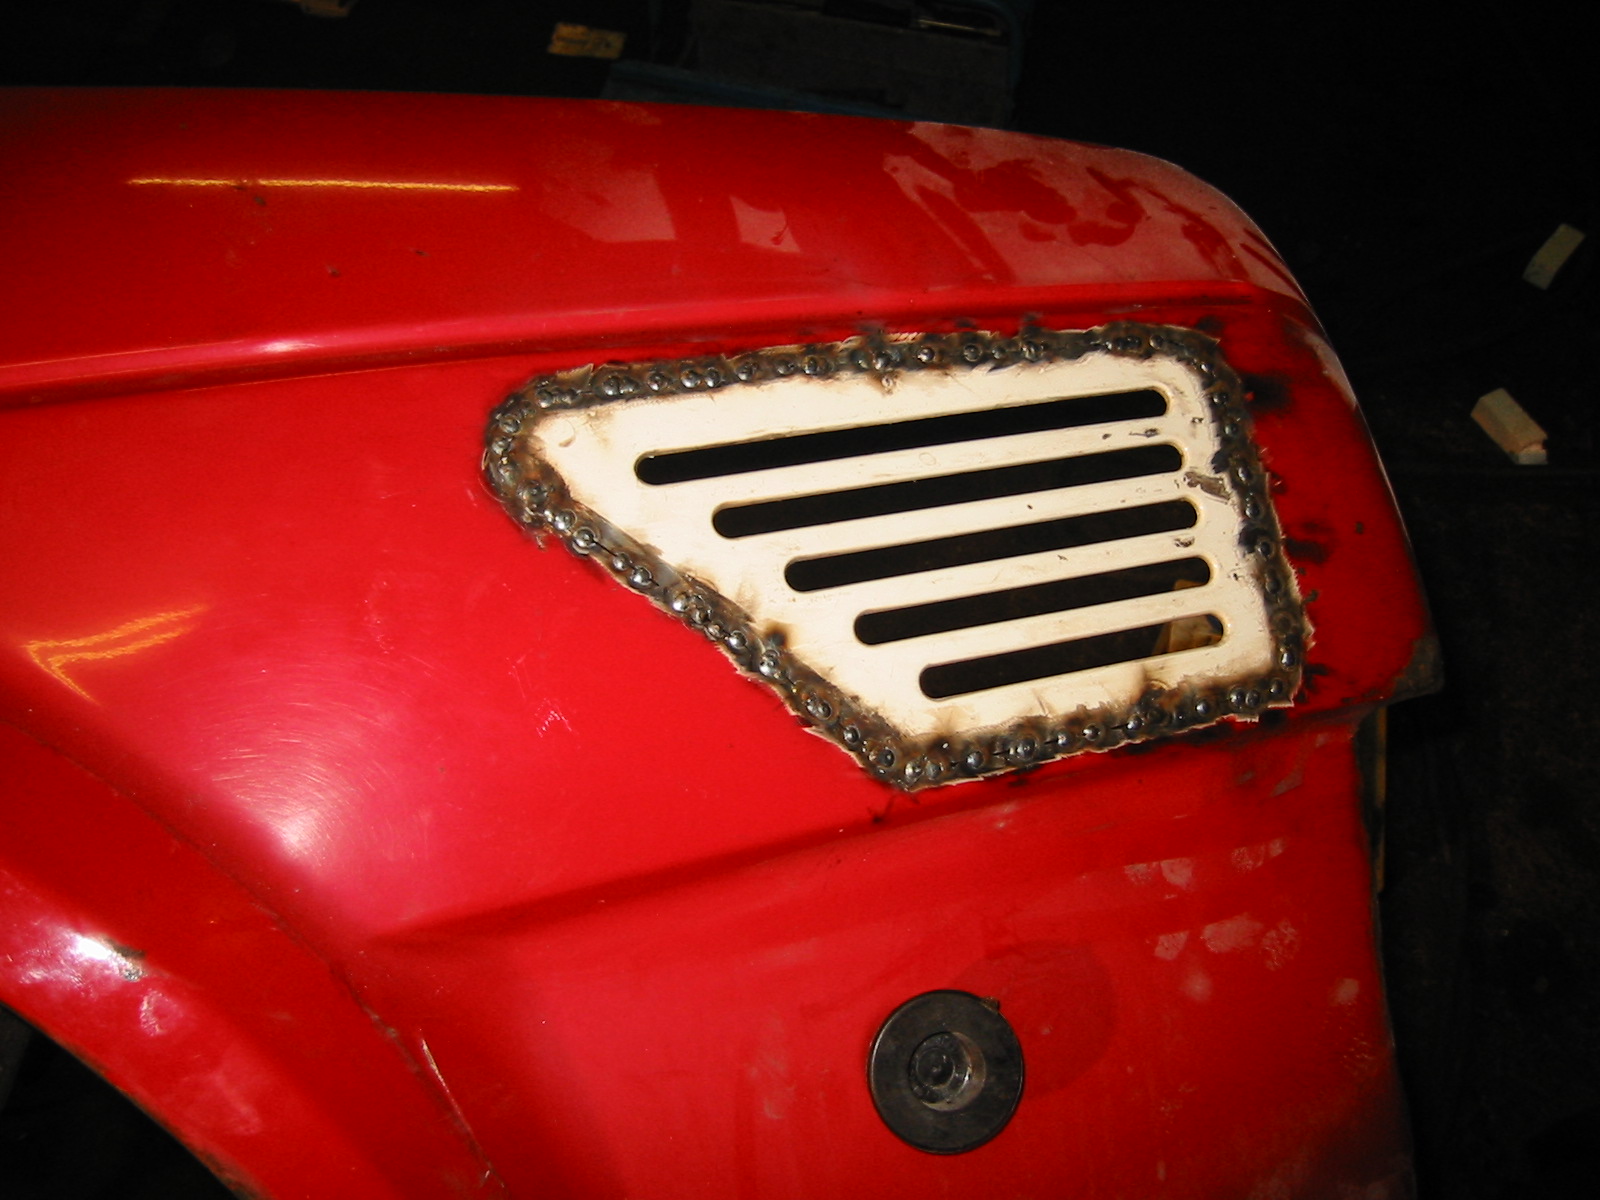
Finally weld it in carefully, allowing cooling time between welds so the panel doesn't distort too much. There's still some welding left here.
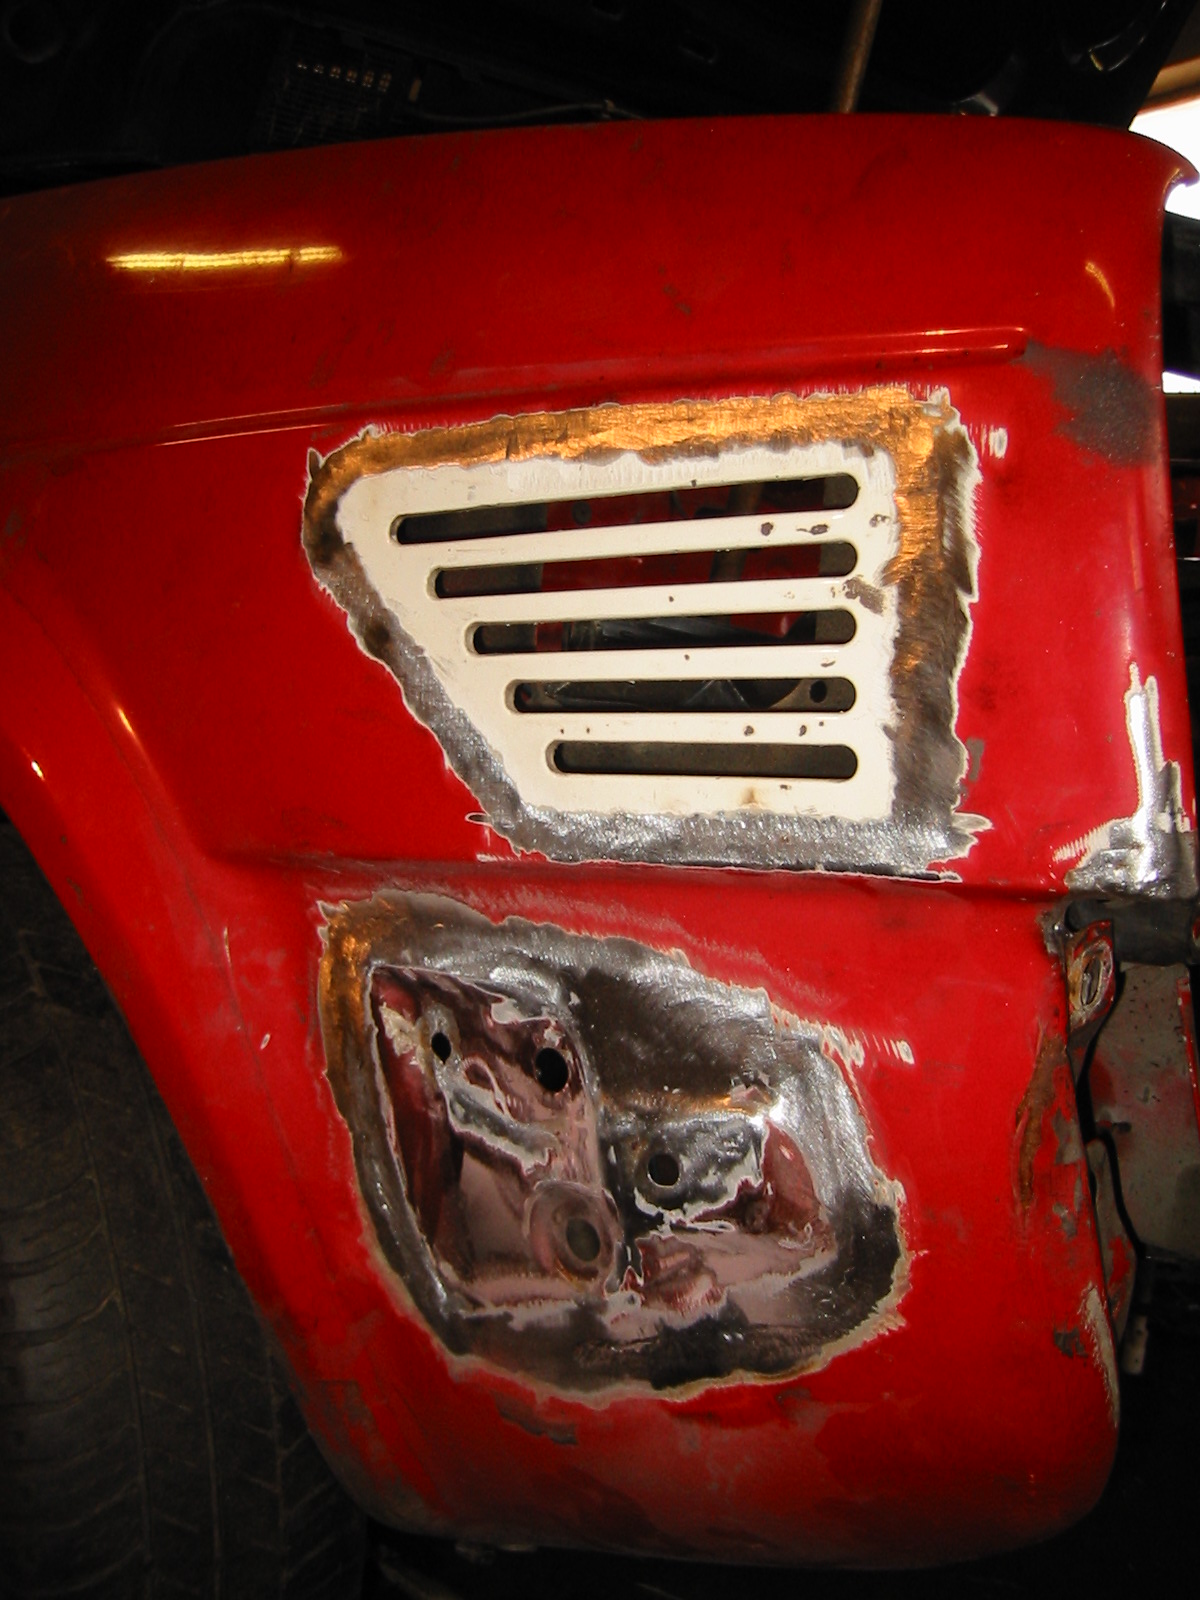
After welding, grind it smooth and that's it. A small skim of filler and paint.
The bumper mounting area below the grille has also been replaced. Peksi took that from a thoroughly mangled wing too...
Smoothed tailgate
Pekka made his first smoothed tailgate years ago and has done many since. It's becoming routine.
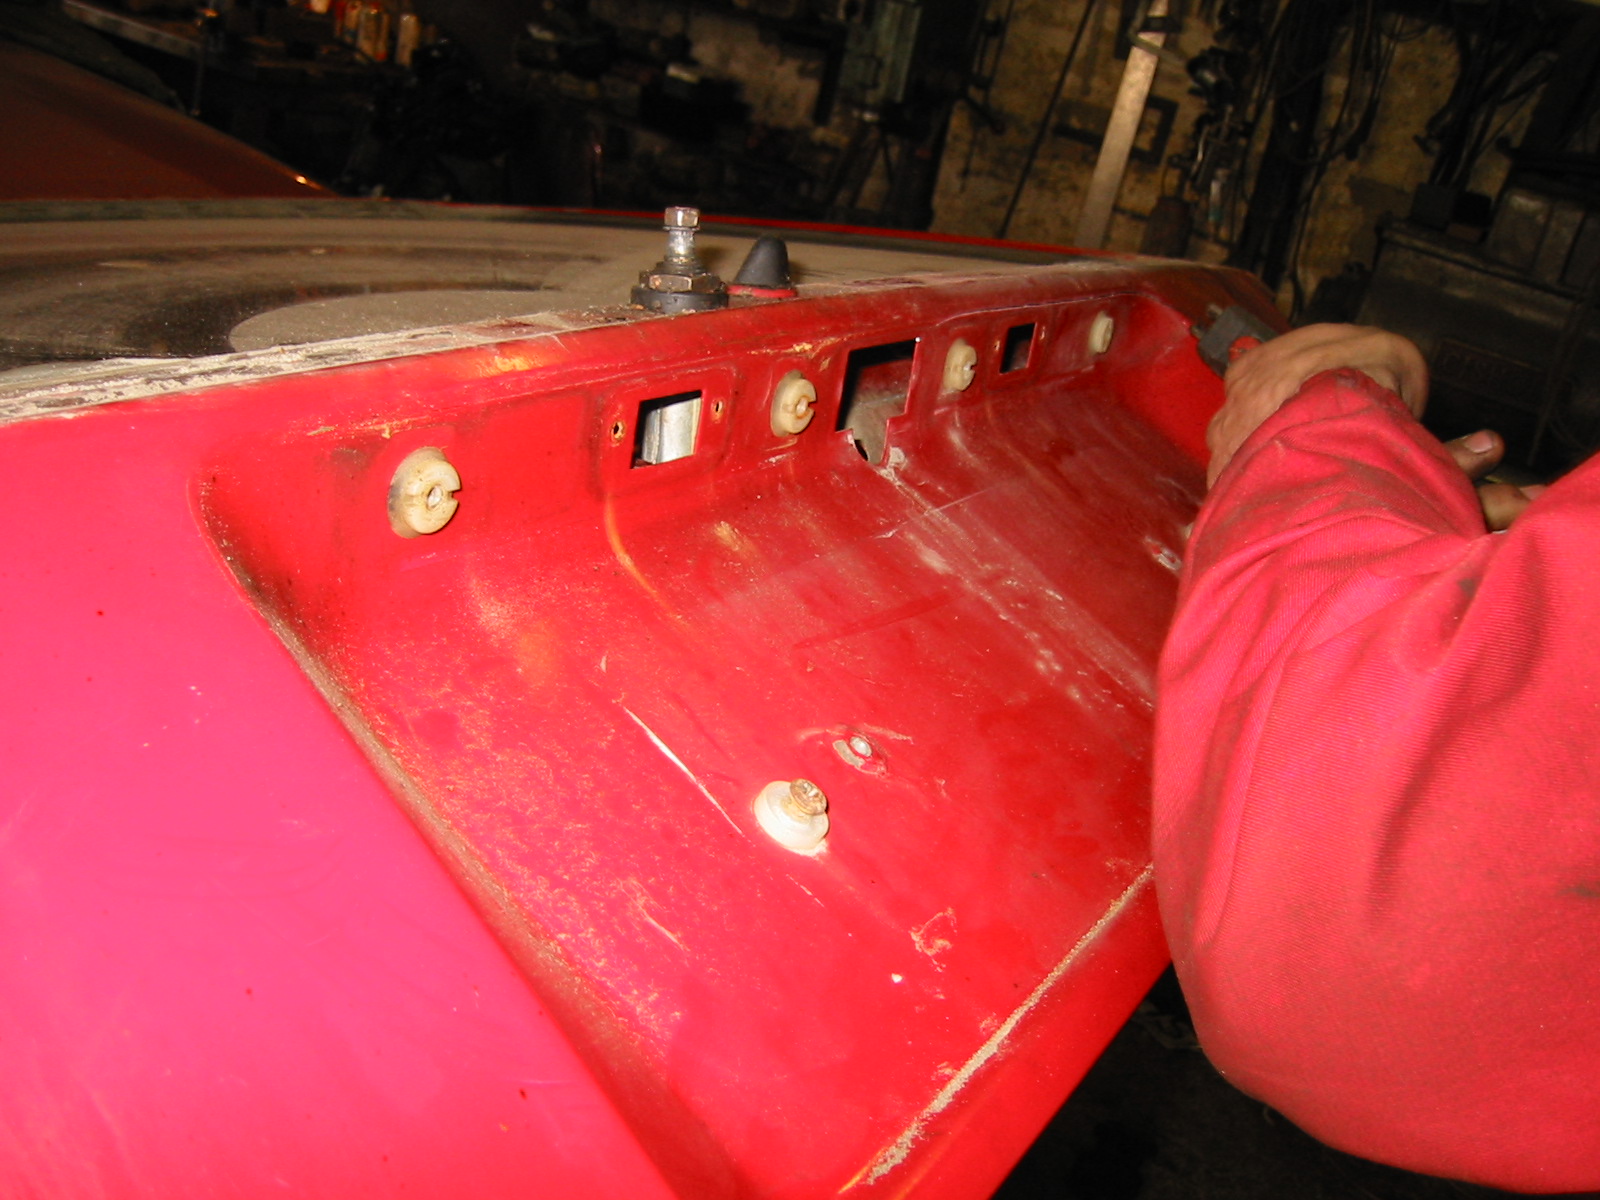
First cut out the old number plate recess. Leave a little of the folded edge to weld the new panel to later.
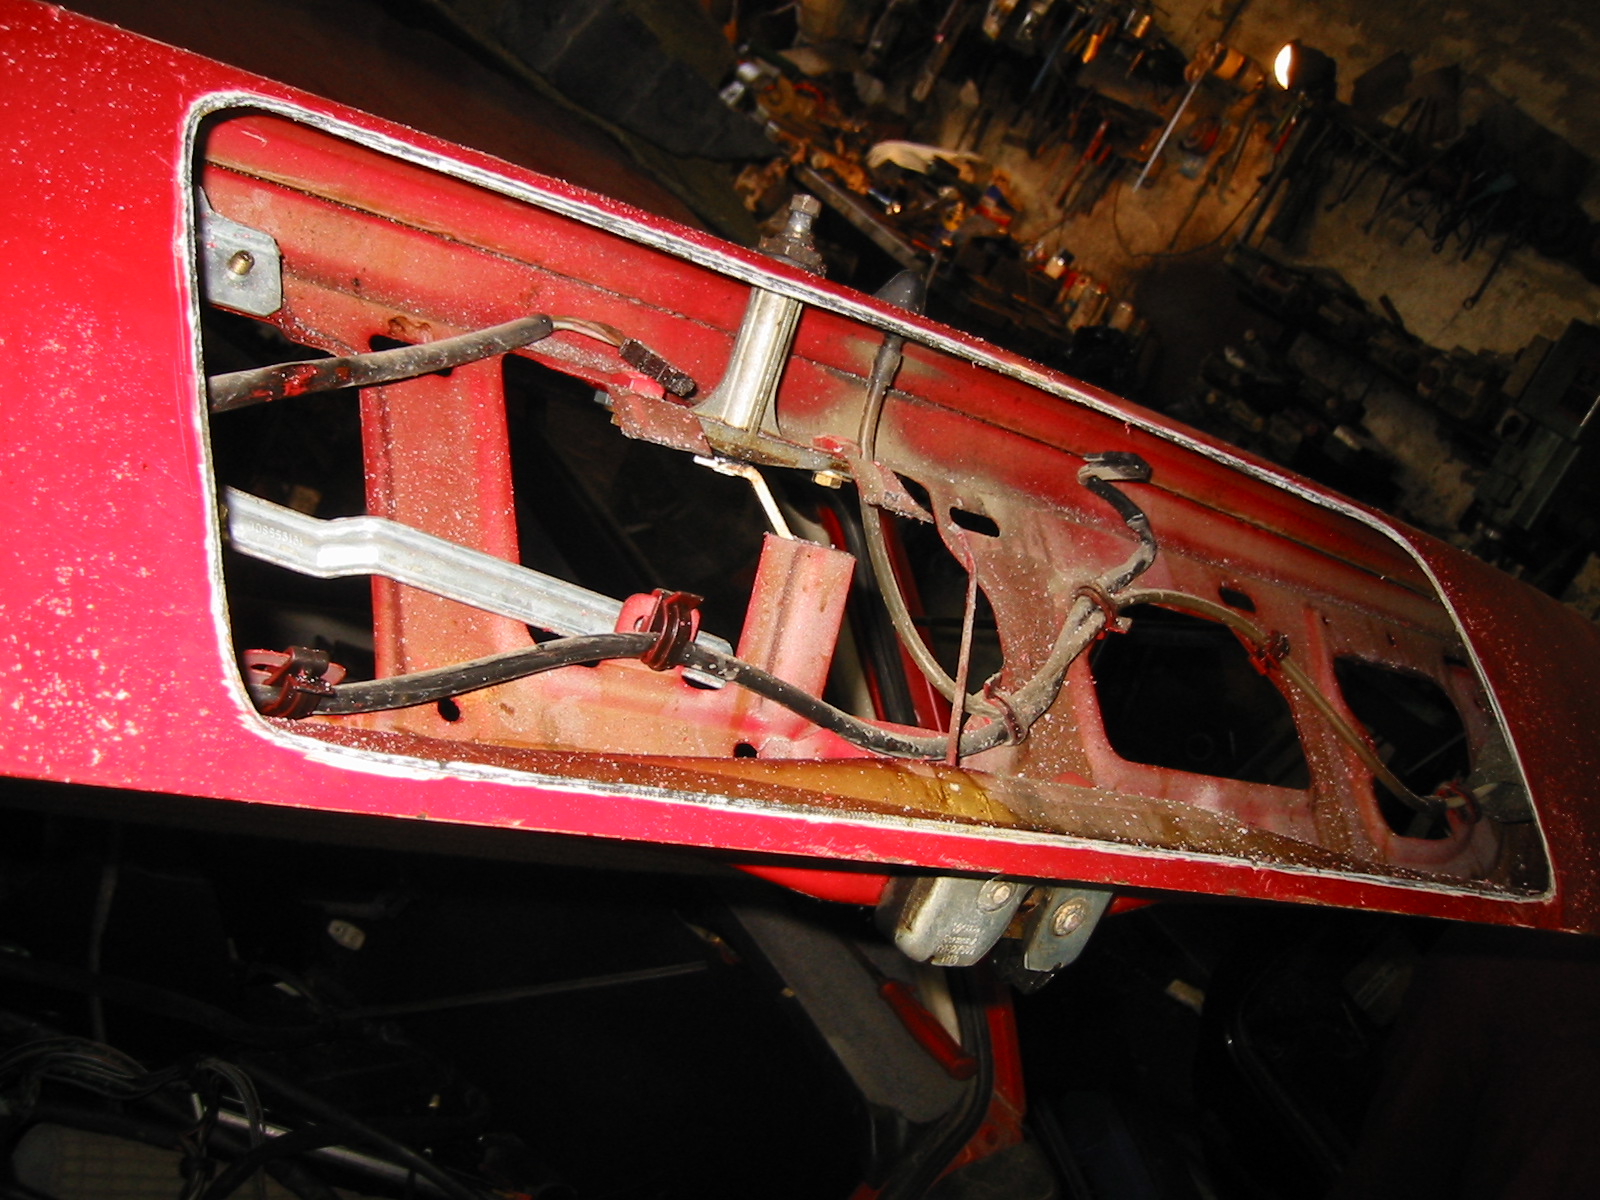
The tailgate from inside. Some people leave the old recess in and put another panel over it. Removing it takes a couple of minutes, avoids trapping moisture between the panels and leaves much more room for the release solenoid.
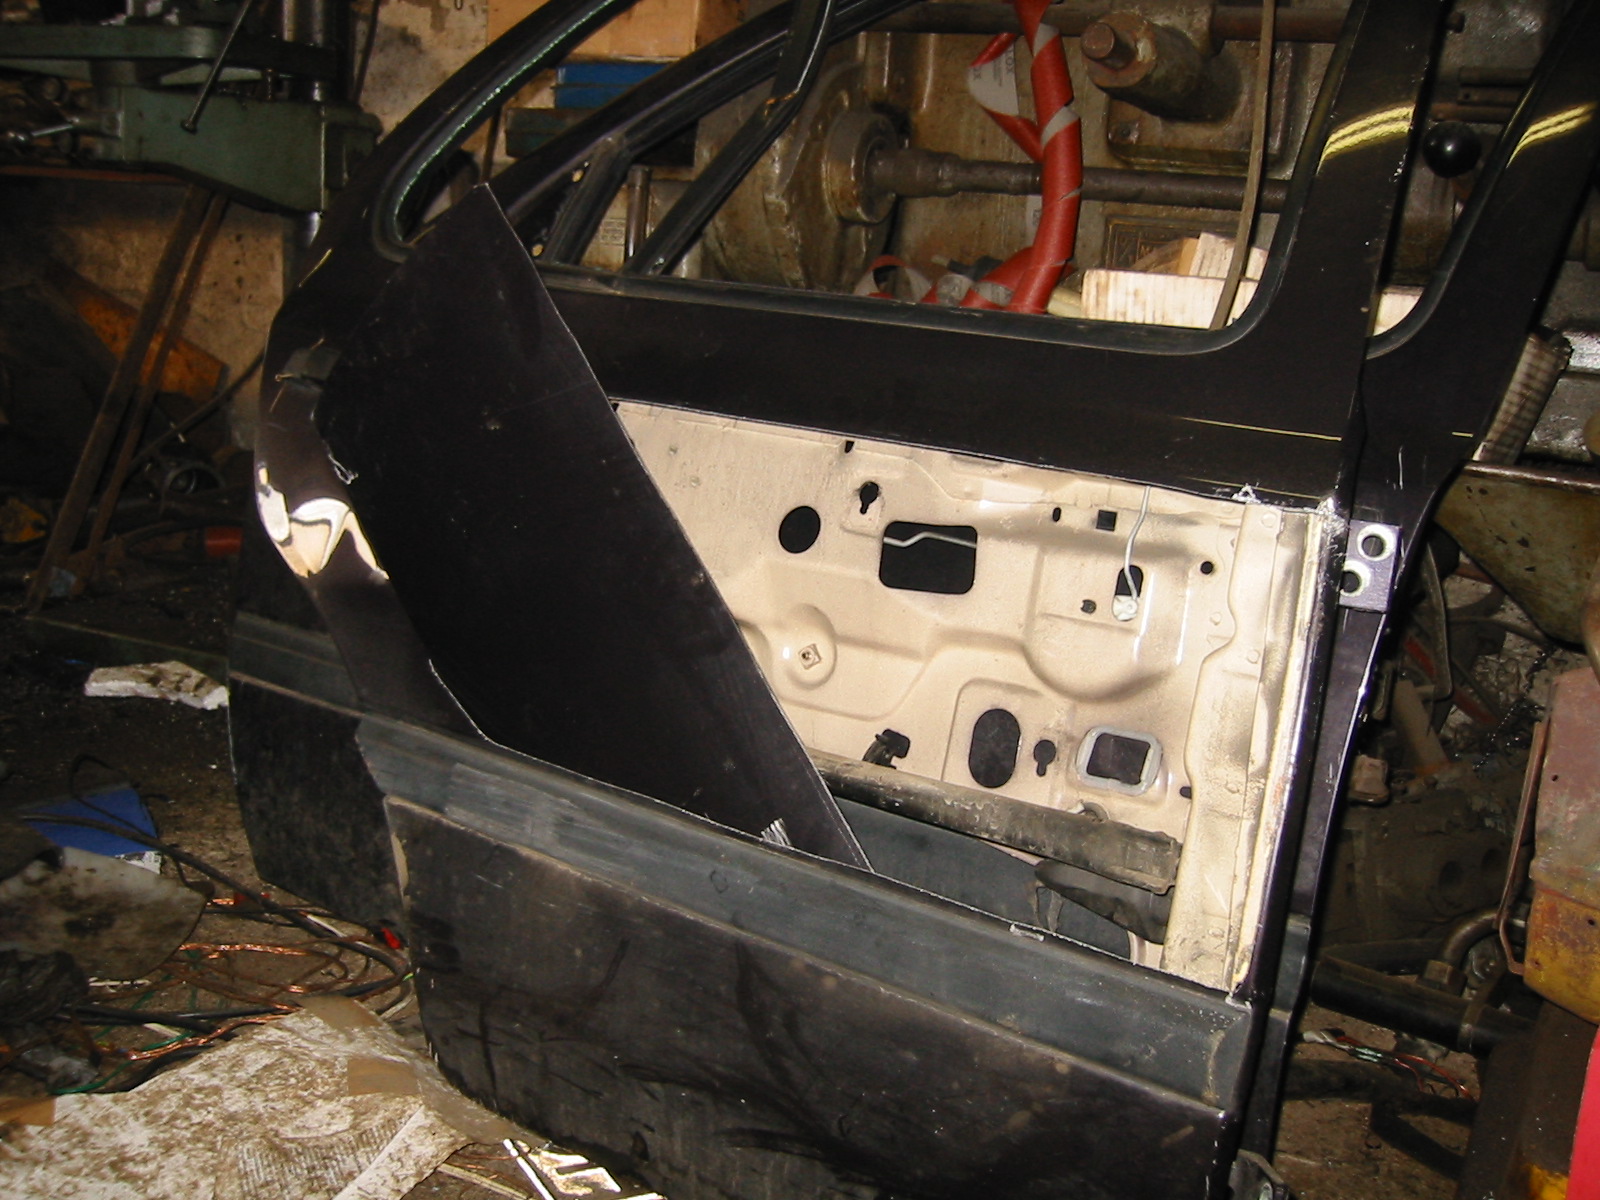
It's worth using an already slightly curved panel, because the tailgate isn't completely flat. Flat sheet would need bending or a kilo of filler on top. A suitably curved piece came from the donor's rear door, which was too badly crash-damaged to be useful otherwise.
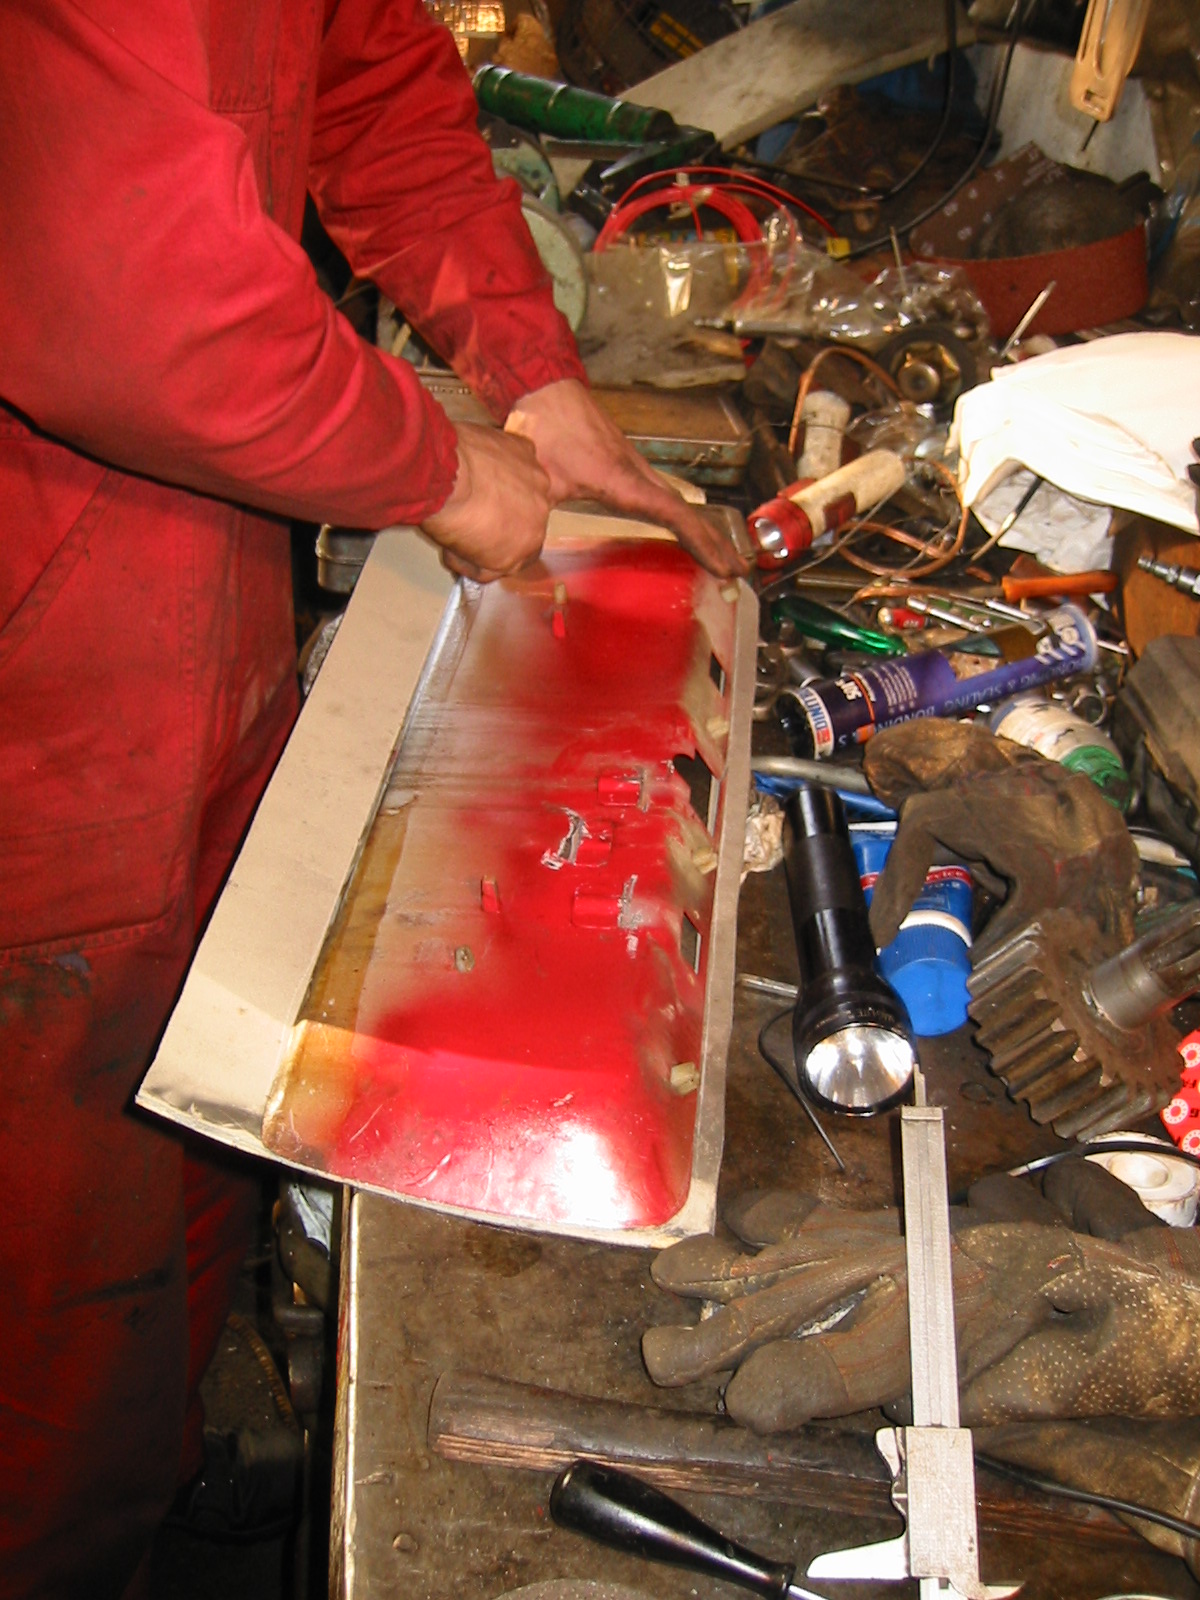
The removed panel makes a good template for marking and cutting a correctly sized piece from the door skin.
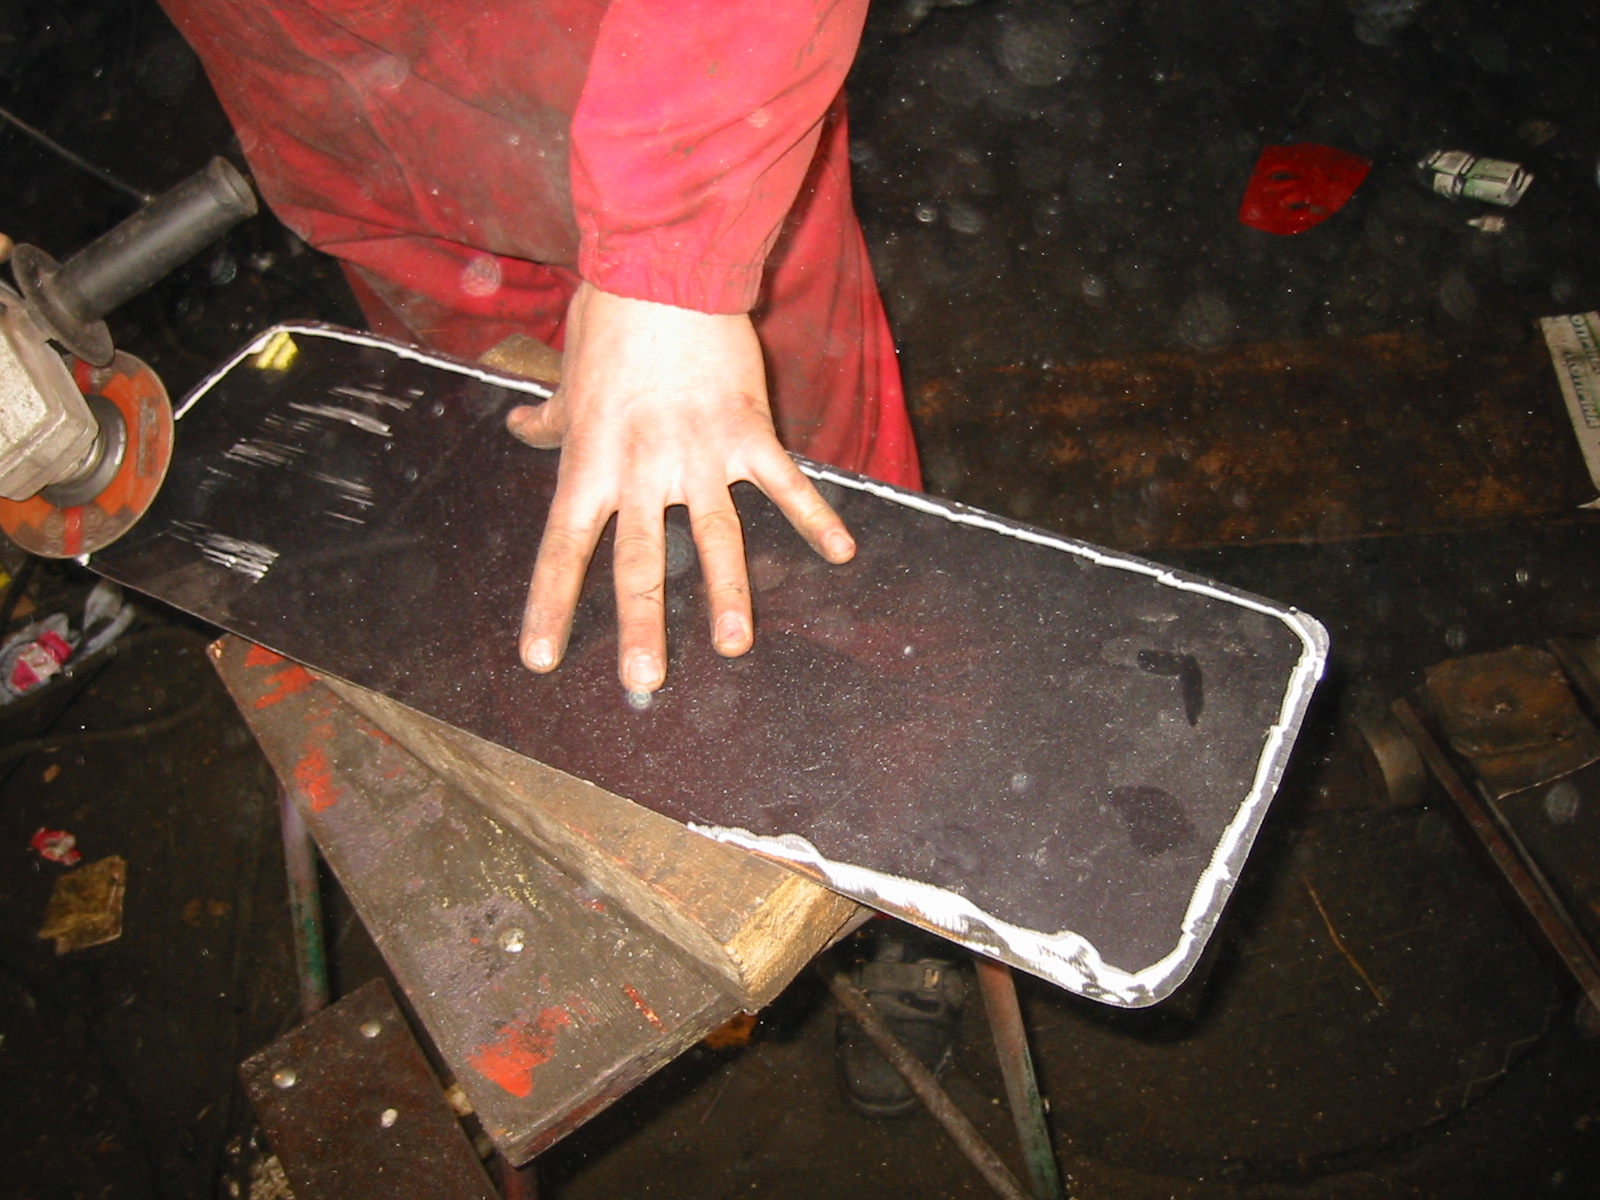
A little more grinding around the edges to make welding easier.
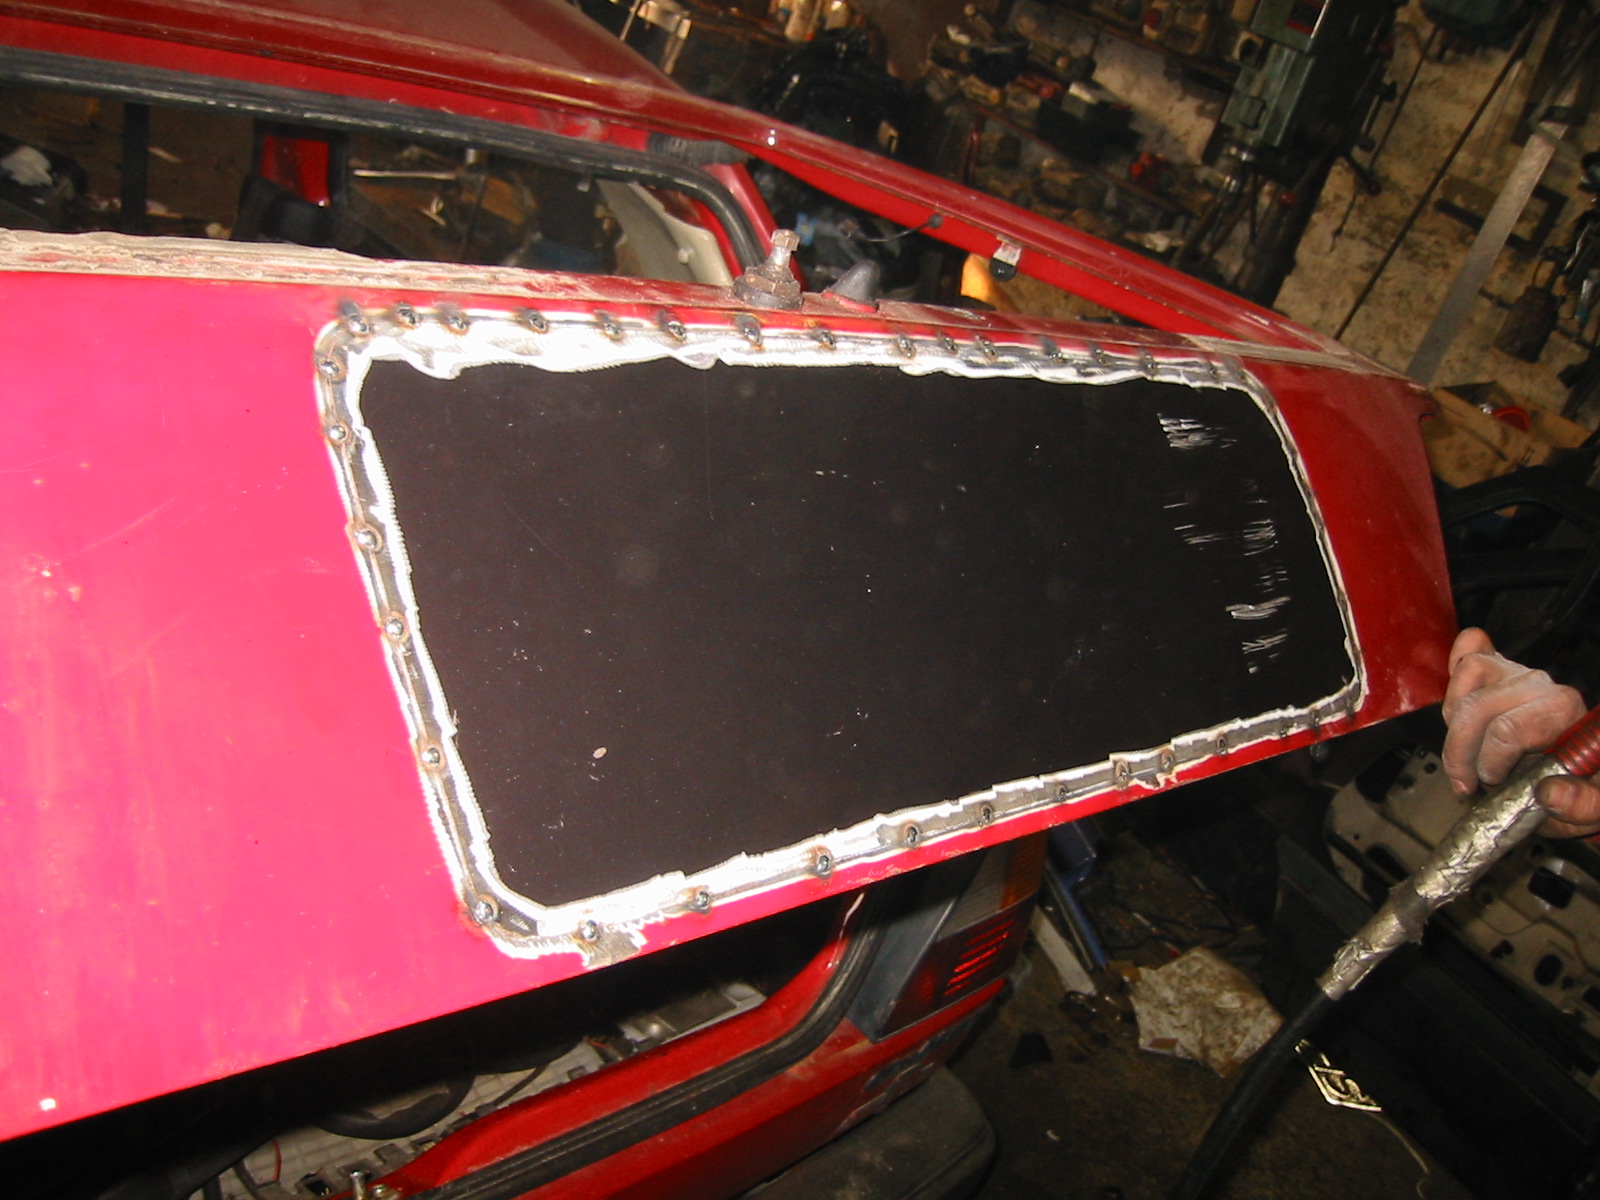
Tack it in.
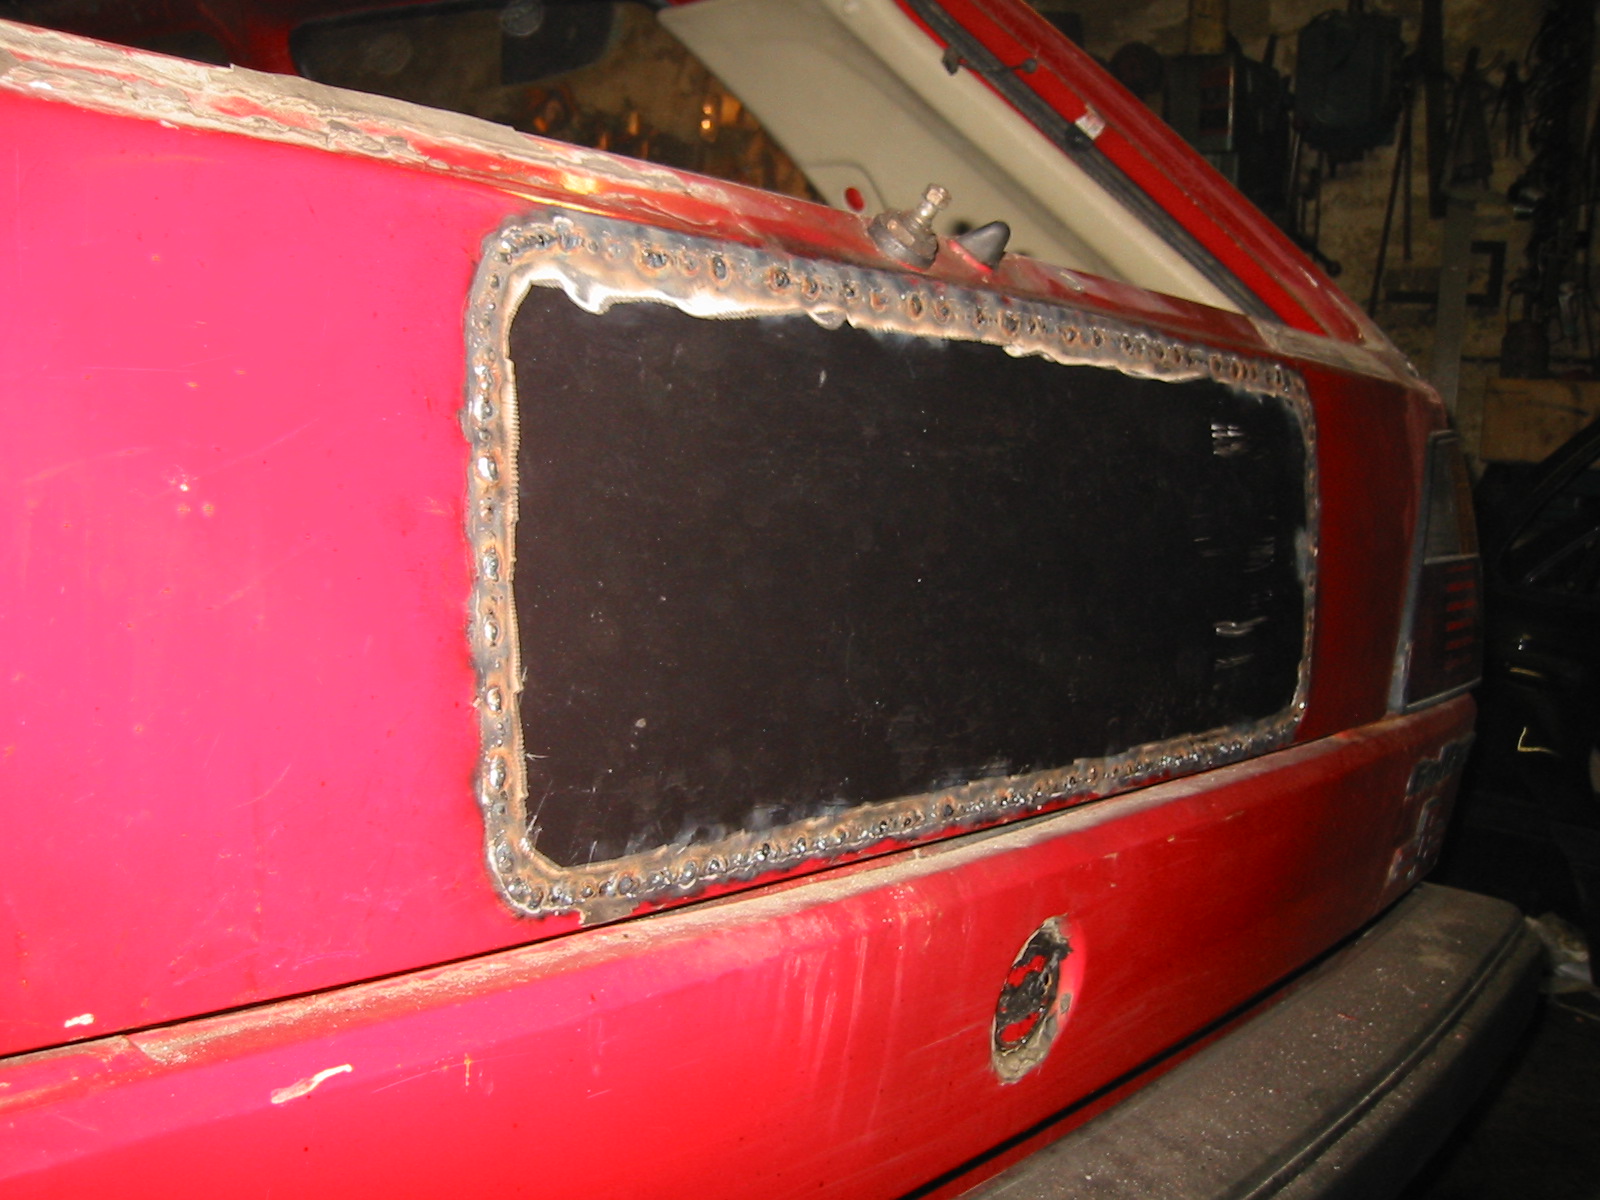
Again, weld it properly and patiently, letting it cool between welds. That's nearly it: grind, a little filler and paint. Everything will be painted together, of course, since the whole car is being resprayed.
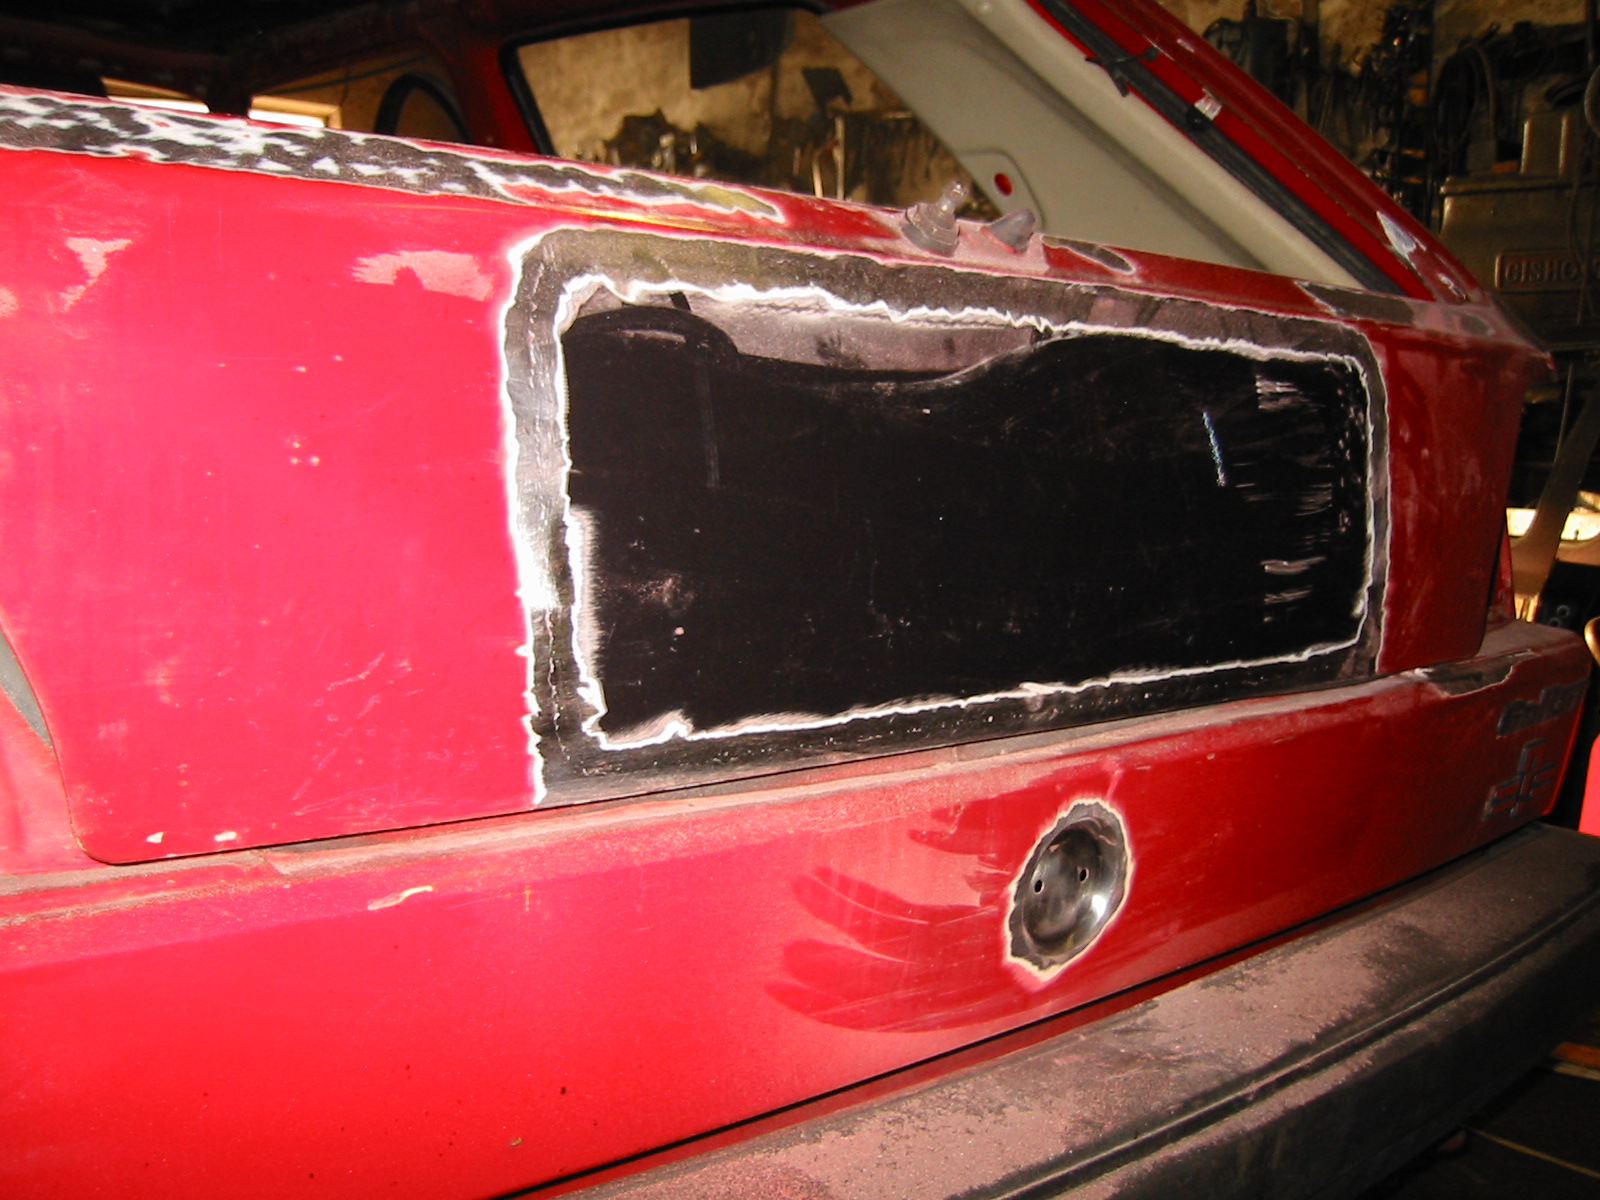
One more picture after grinding...
Audi door handles
Mk2 Golf handles are flimsy things, as anyone who's used them probably knows. Audi handles look better too. Peksi got Audi rear-door handles without locks. Making the locks work would have been a big job, so he'll settle for remote central locking. And hope it works... :-)
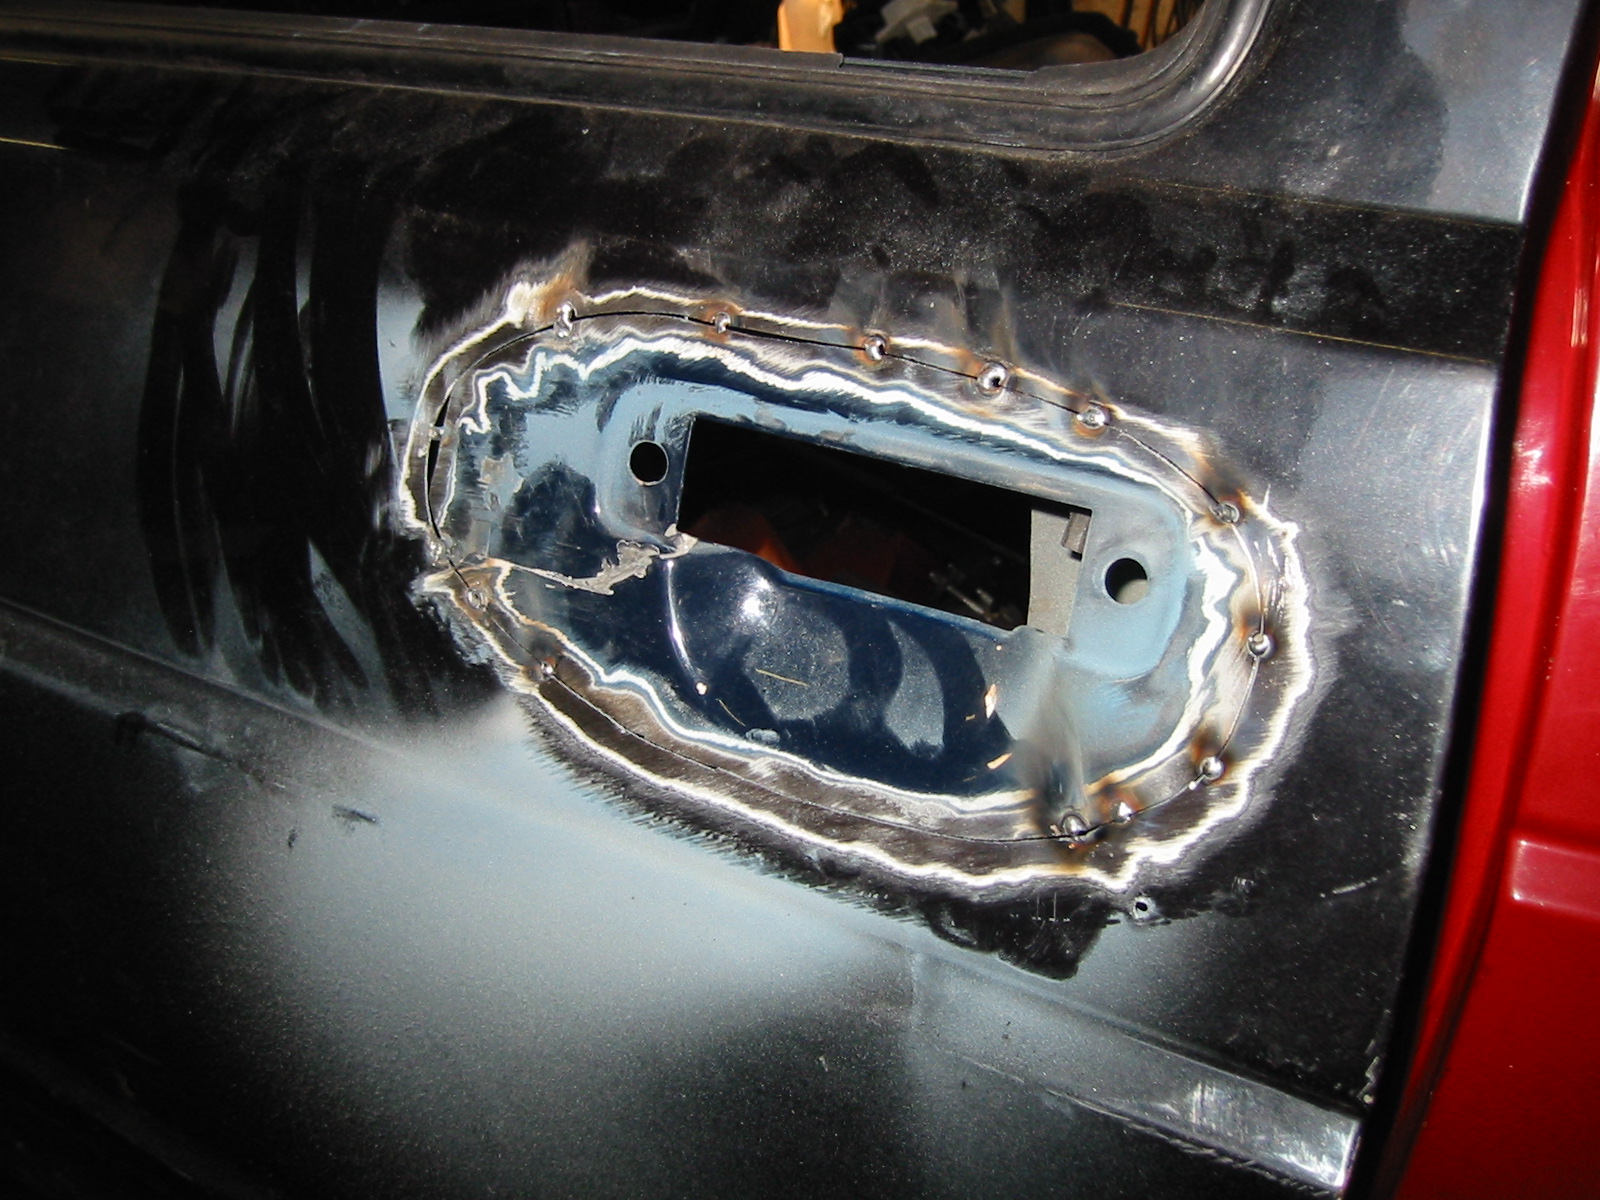
Fitting the handles is fairly straightforward, about as difficult as the T4 intake grille. Cut out the old handle and fit the new one. The latch mechanism must be changed, but it's bolt-on. Then fit and weld the handle mounting panel.
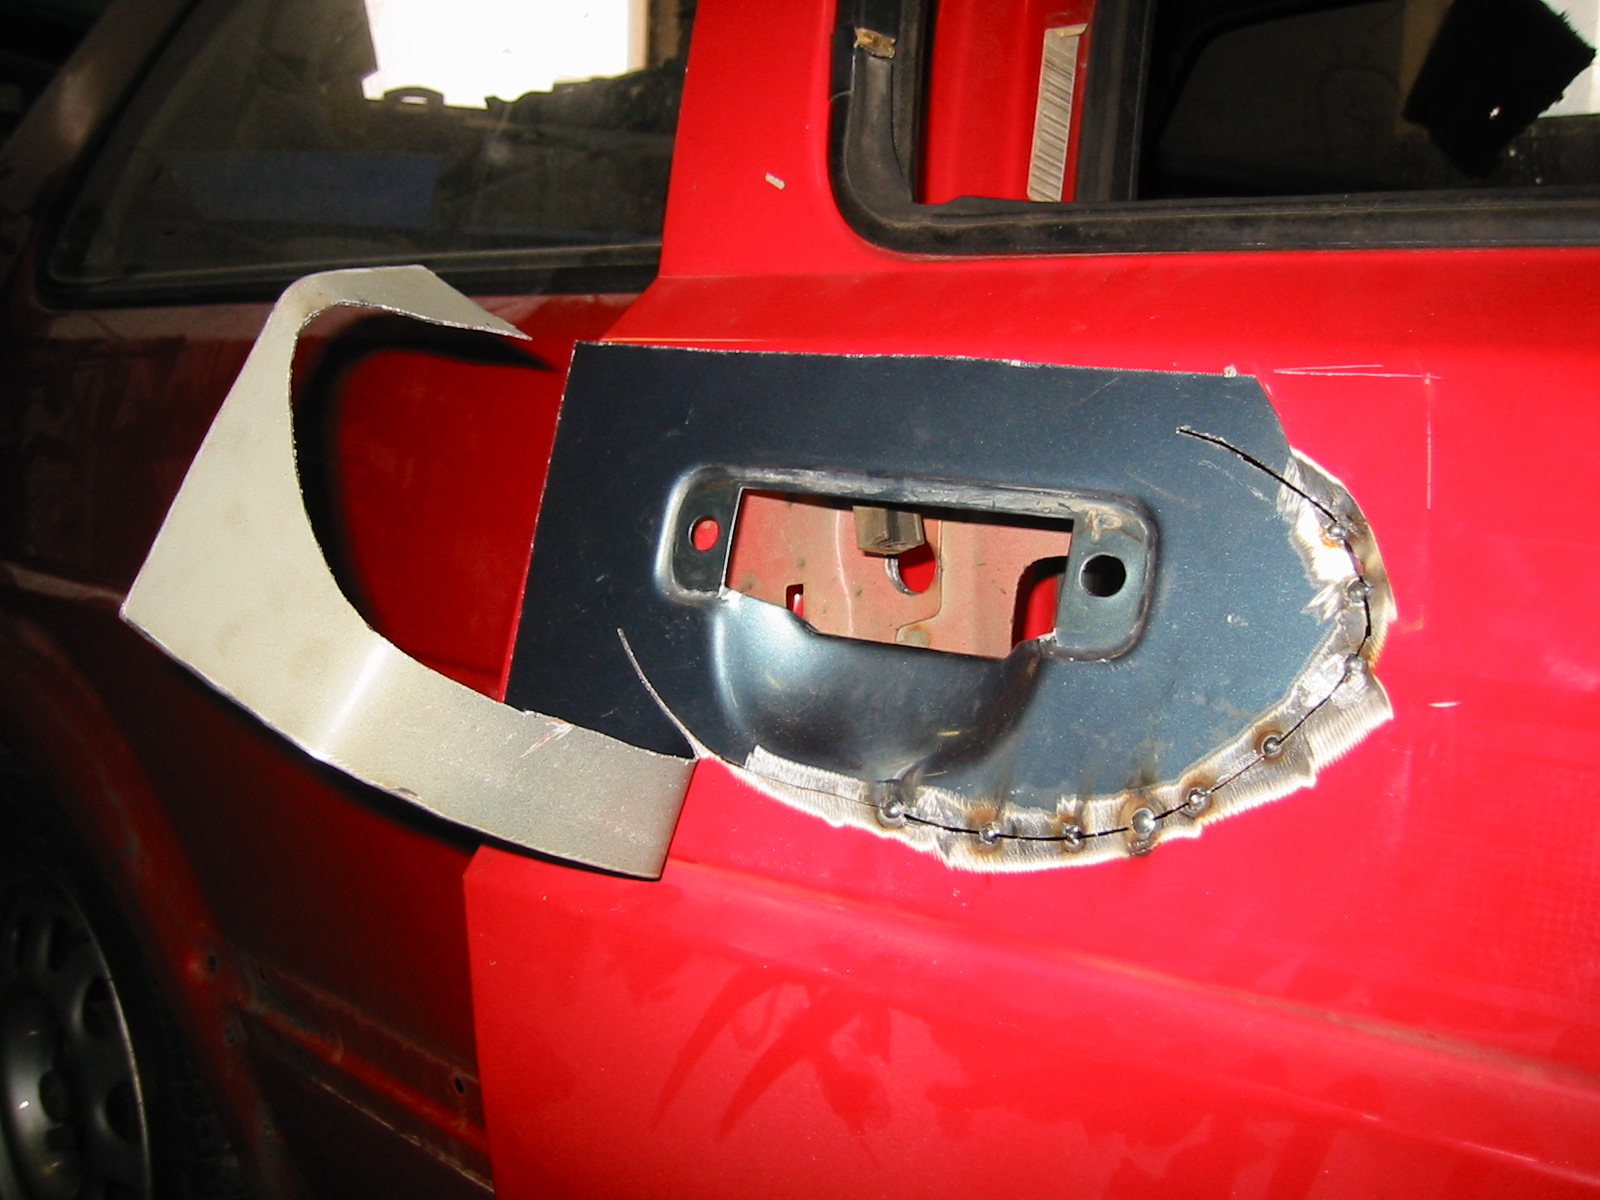
Welding the passenger-side handle panel. Cut ahead with the saw and tack behind it. Simple.
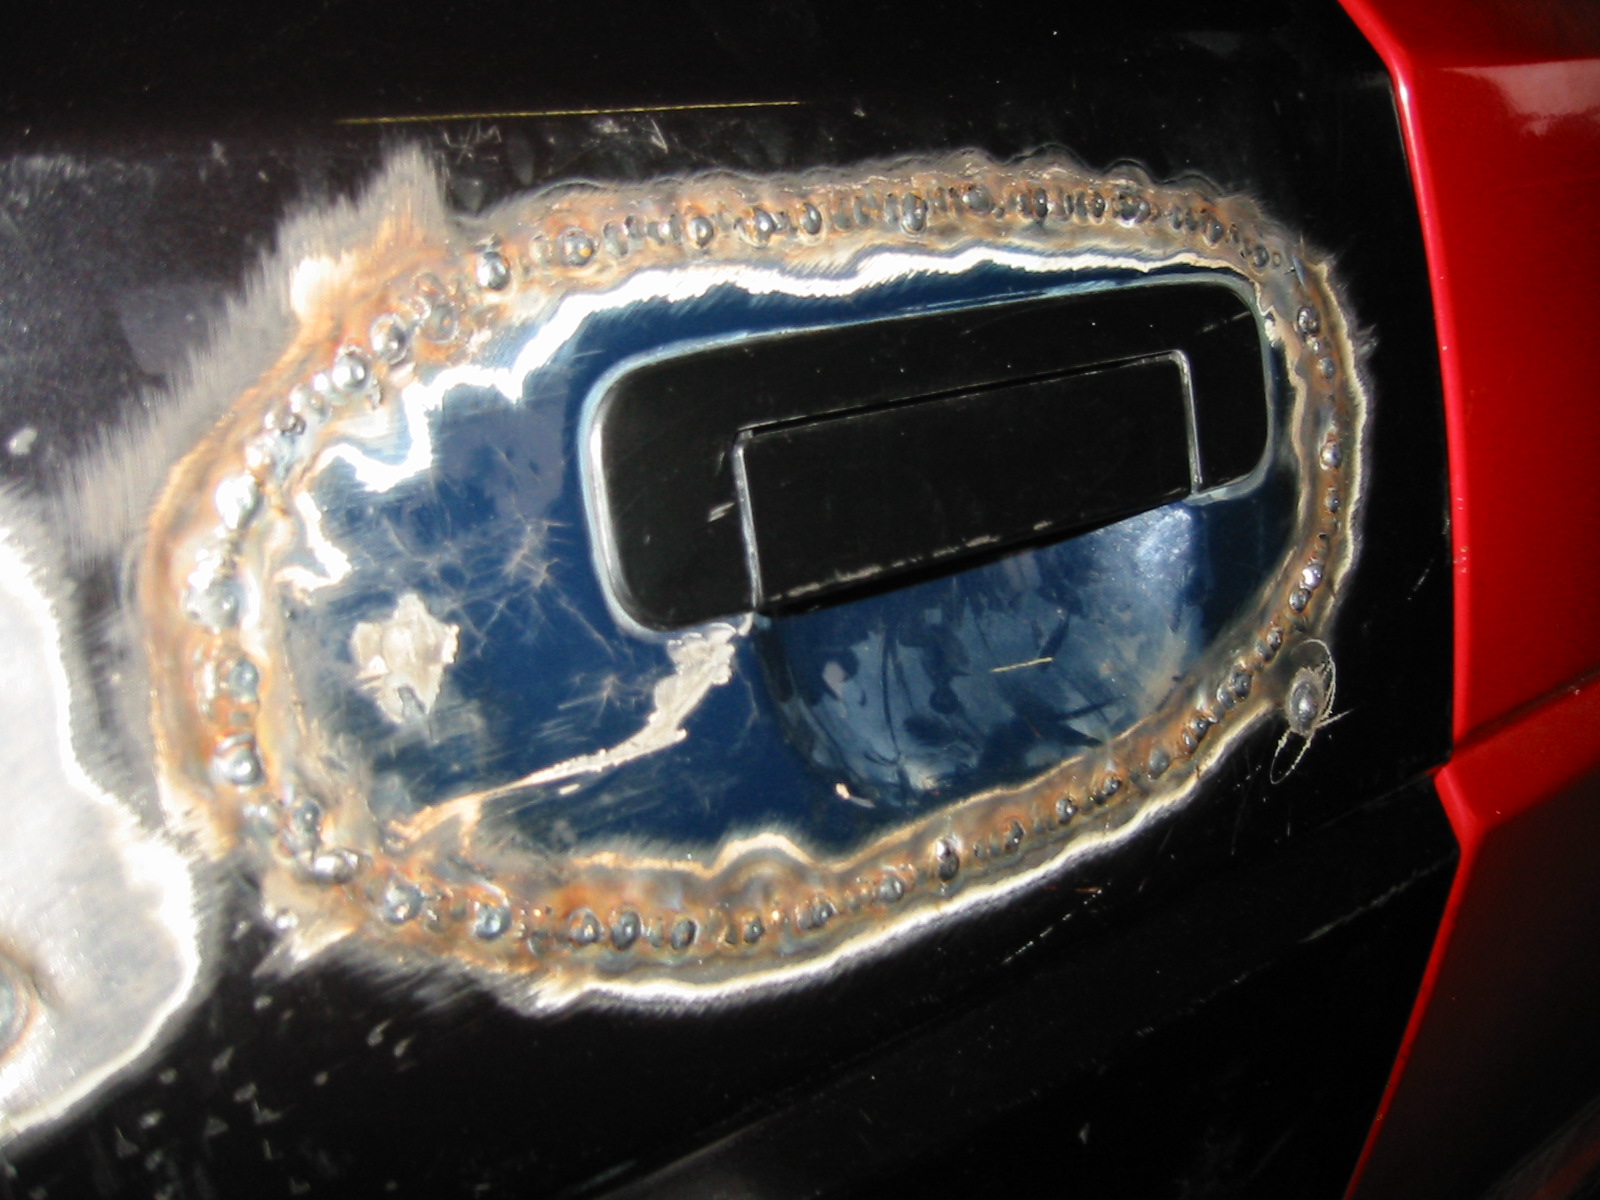
Again, trying to avoid too much panel distortion. The handle is fitted here and works like a dream.
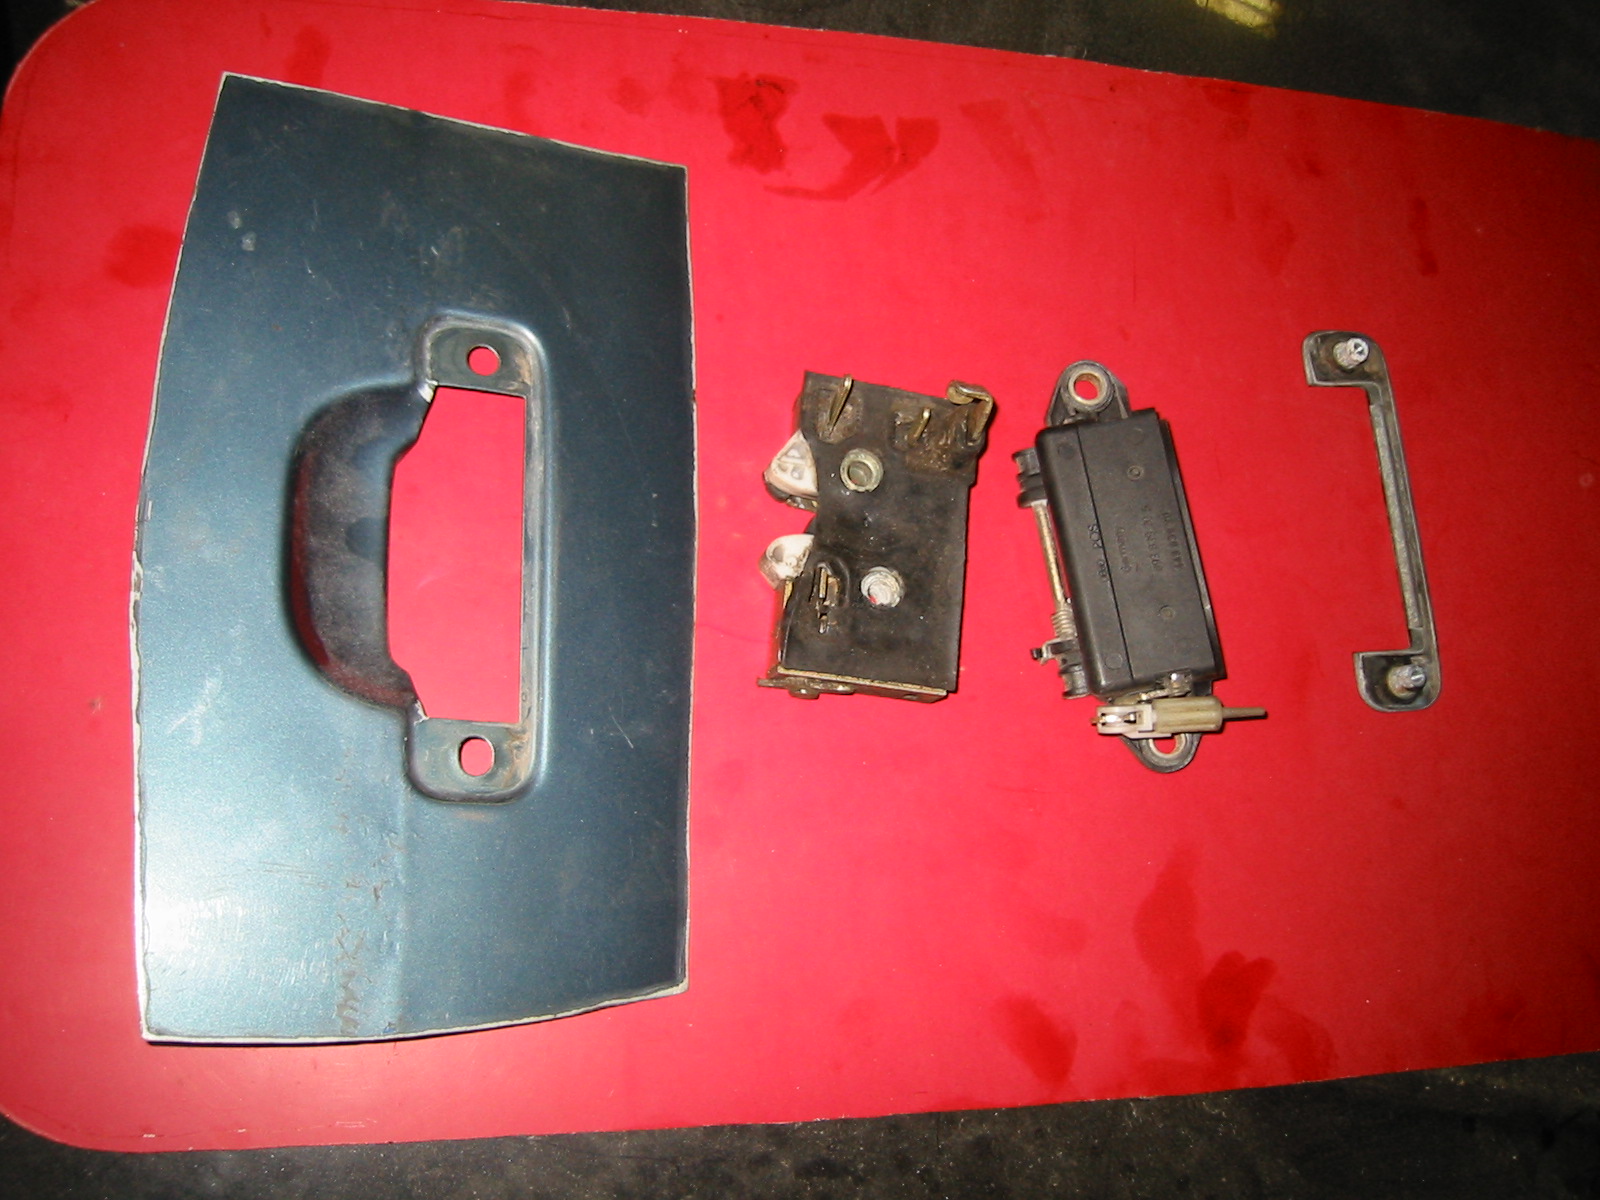
Here are the parts needed for the handle conversion. I think the handles are from an Audi 100 or 80.
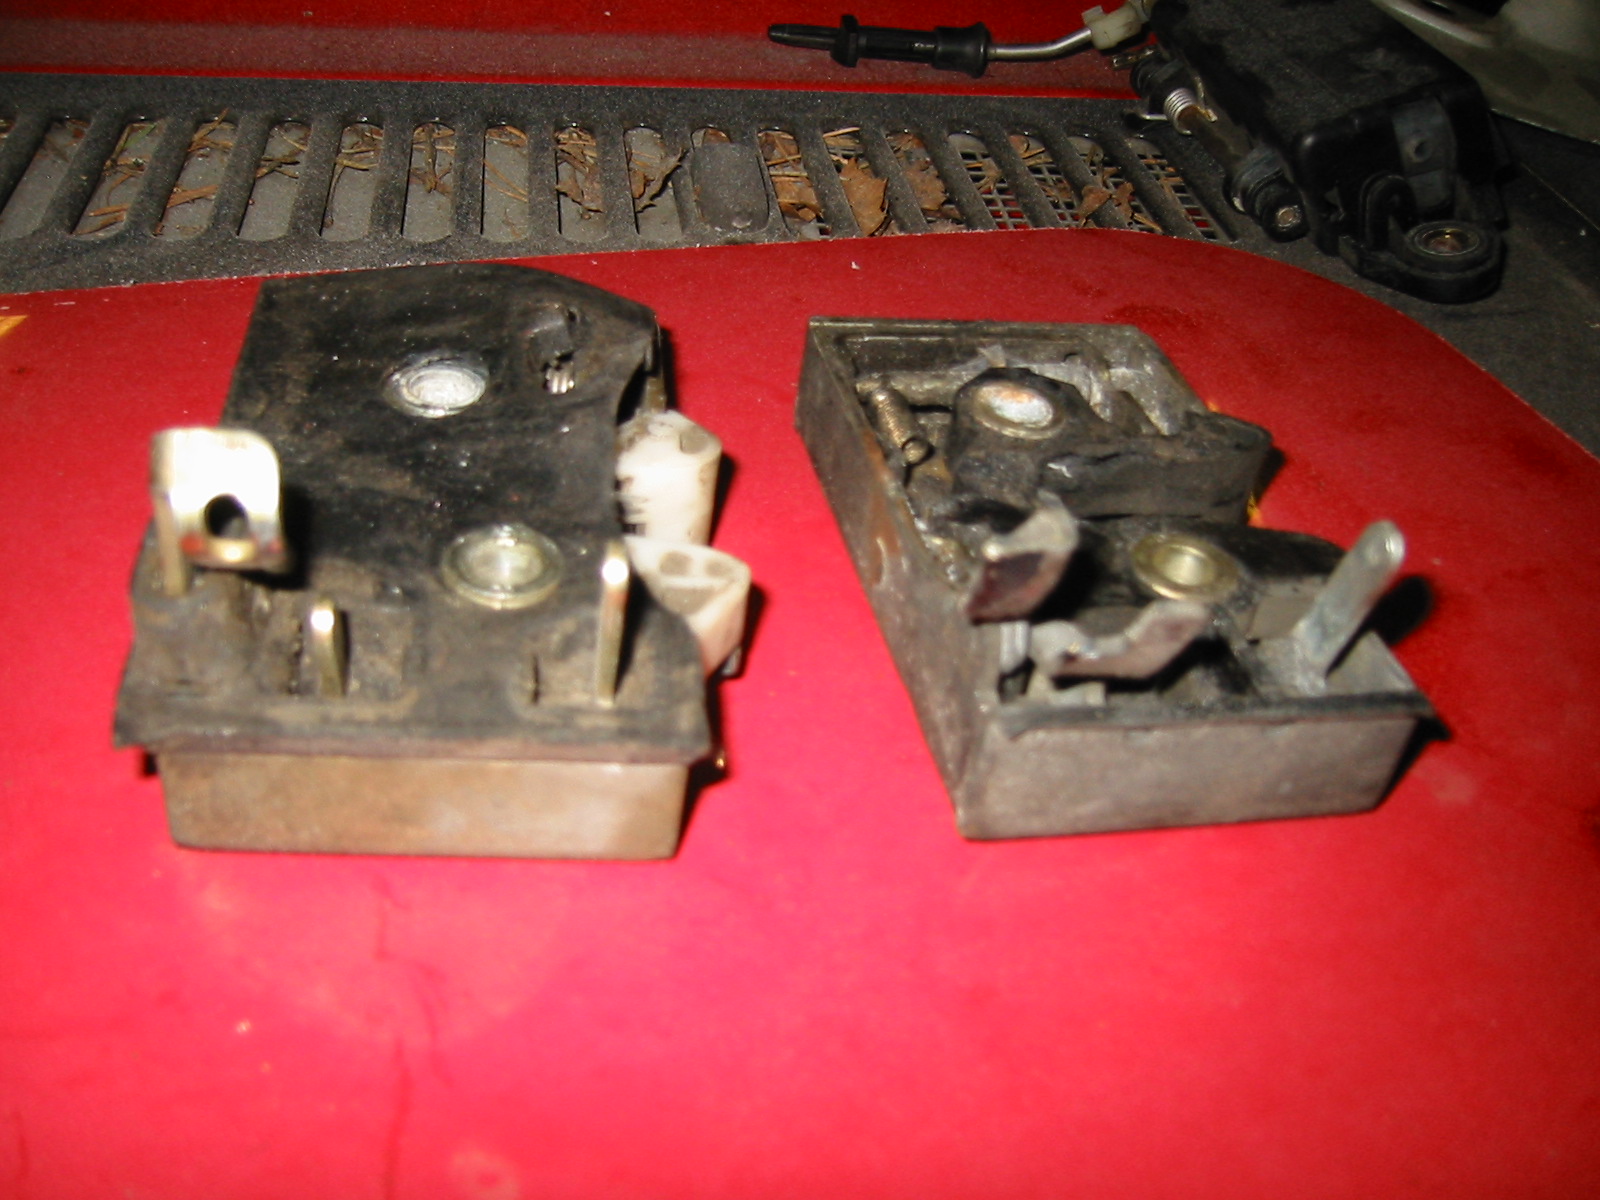
Golf and Audi latches side by side, in a slightly blurry photo; the Audi one is on the left. Not a huge difference, but the levers differ slightly. And as mentioned, they're bolt-on. A rod from the handle goes into the hole visible in the lever.
Grille and number plate recess
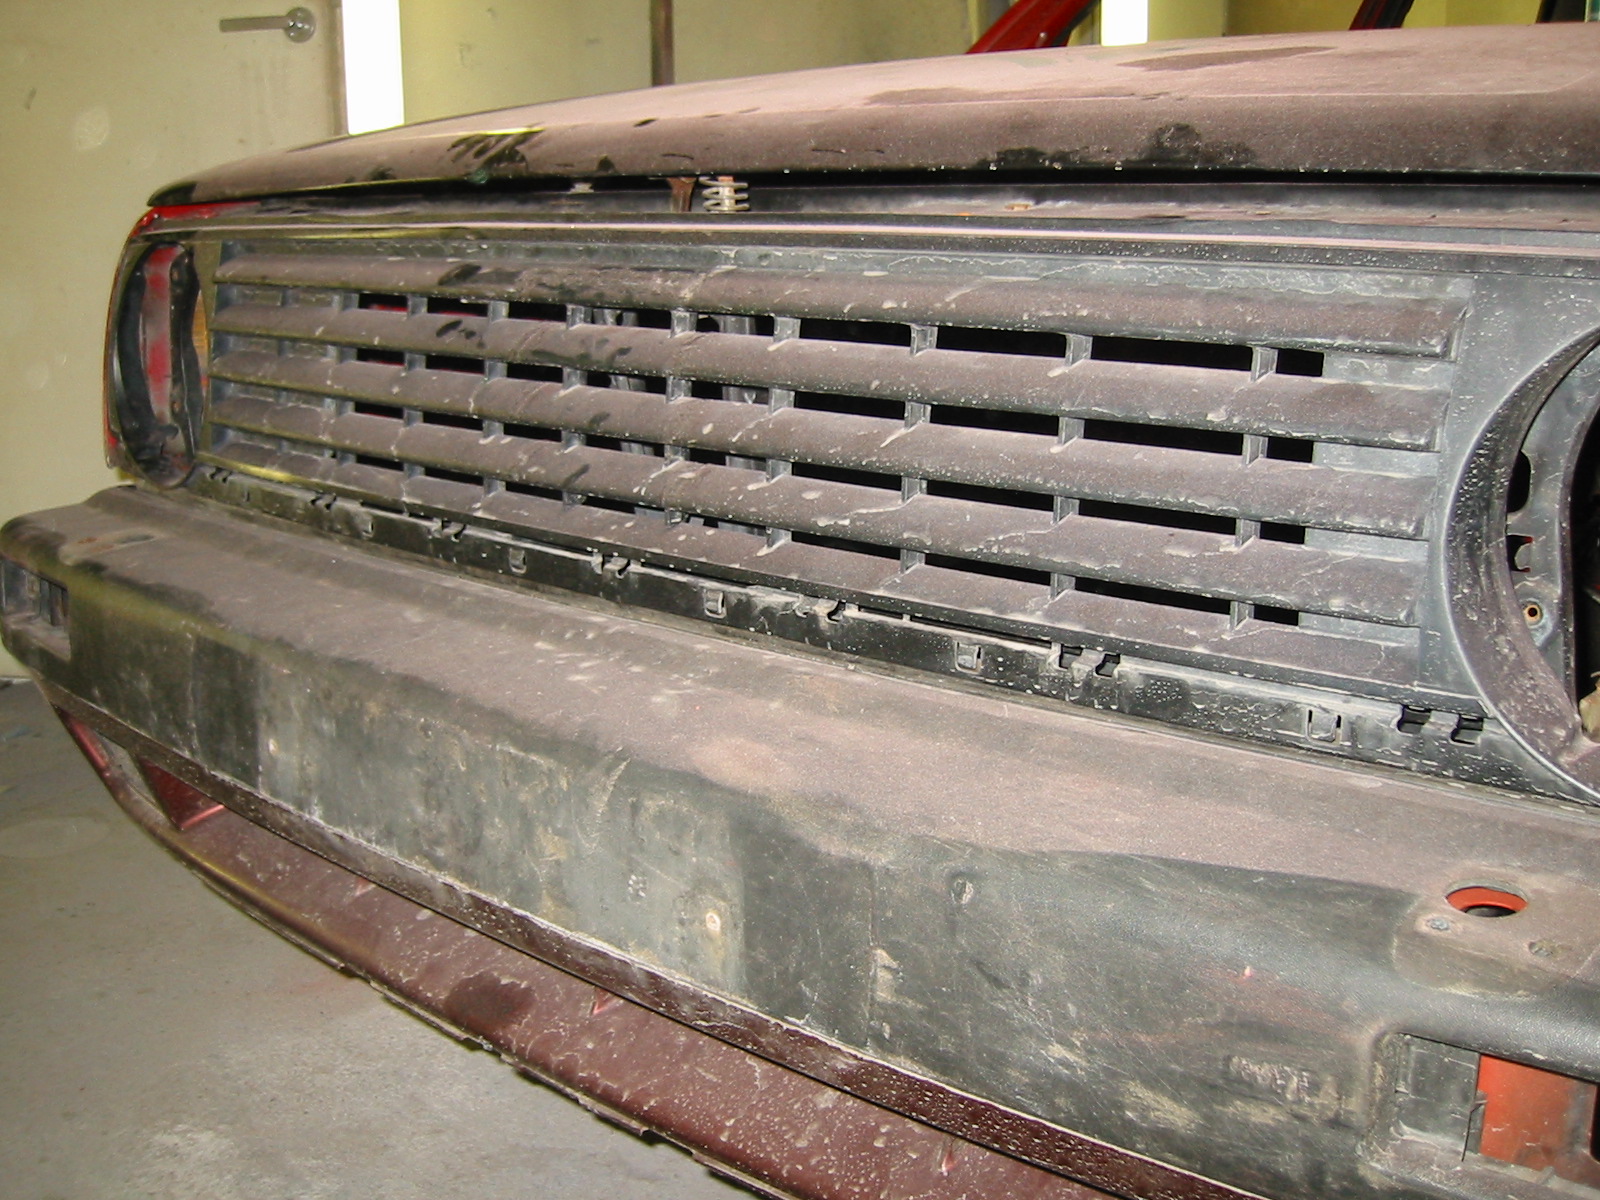
Peksi made the debadged grille himself. Just cut out the badge and replace it with straight slats from another damaged grille.
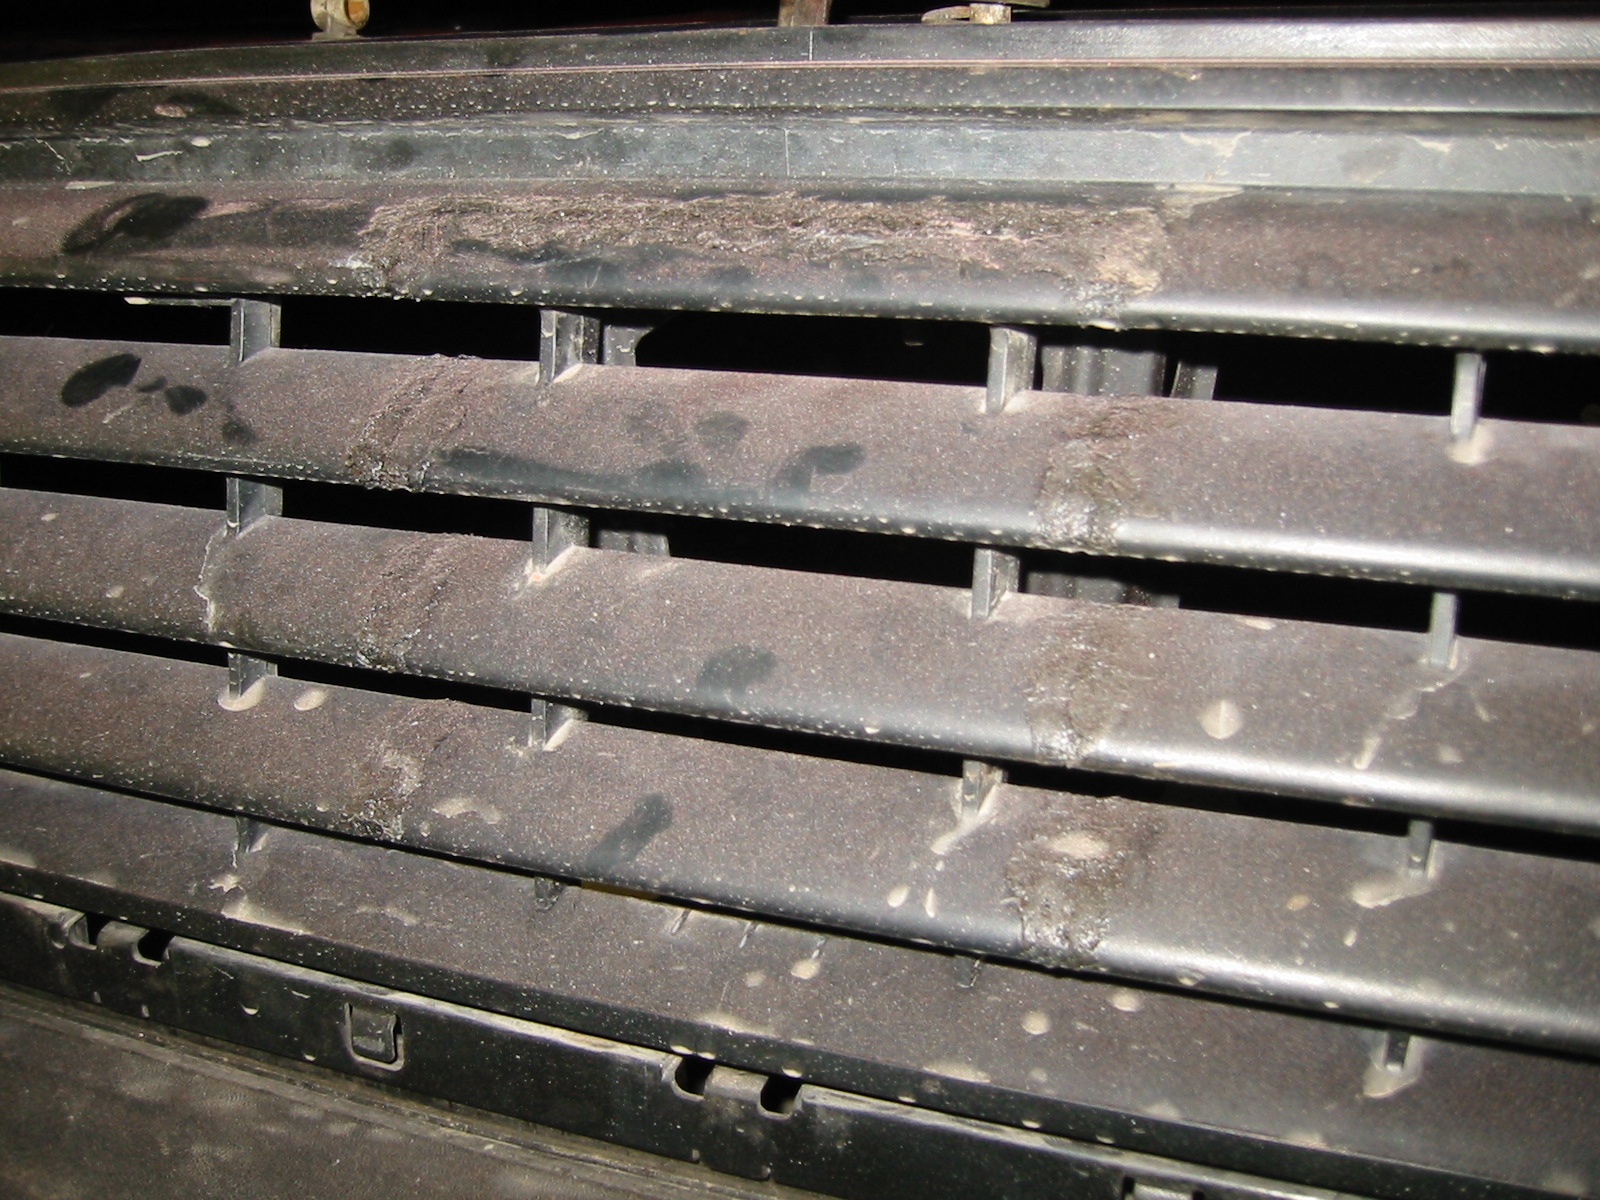
A little plastic melting and that's it. Some preparation and paint still to come.
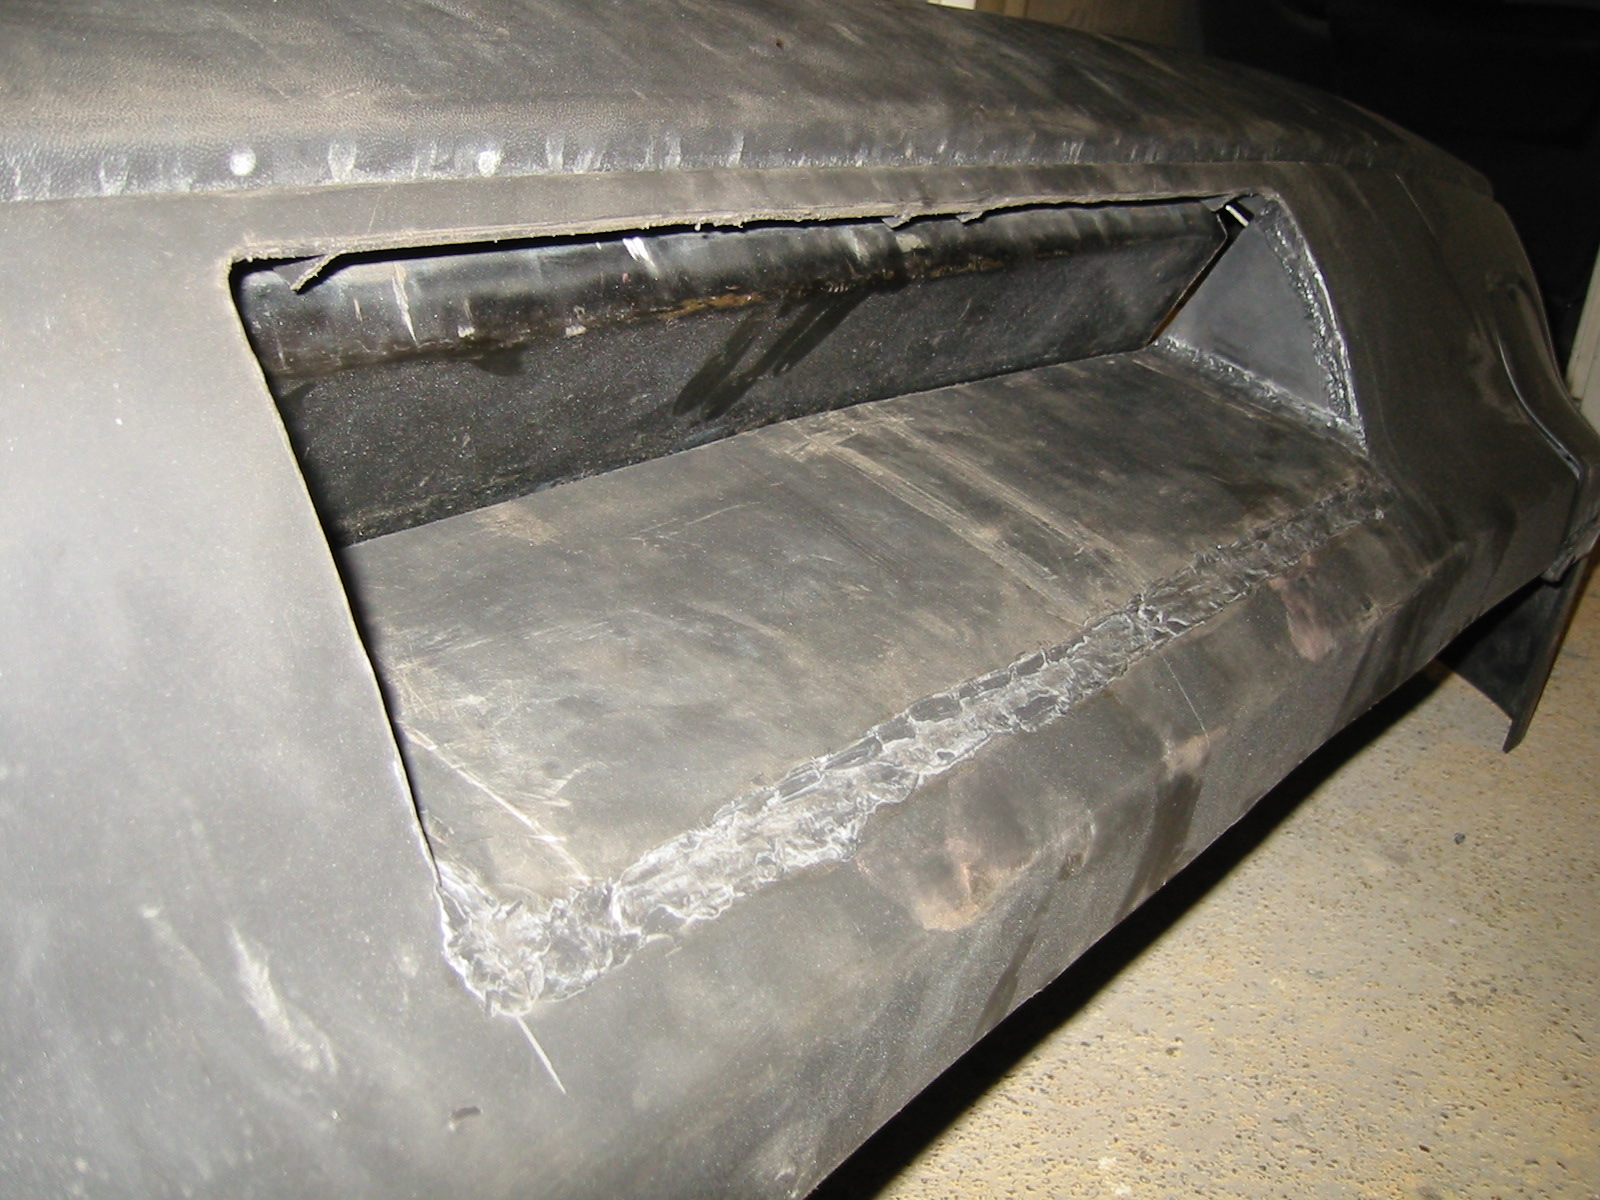
The number plate recess is already nearly finished here. Peksi was busy while the webmaster was away on business, so there are only photos of the completed recess. Here's how it's done: cut an opening slightly larger than the plate in the bumper, then cut a section from the bumper beam in the same place...
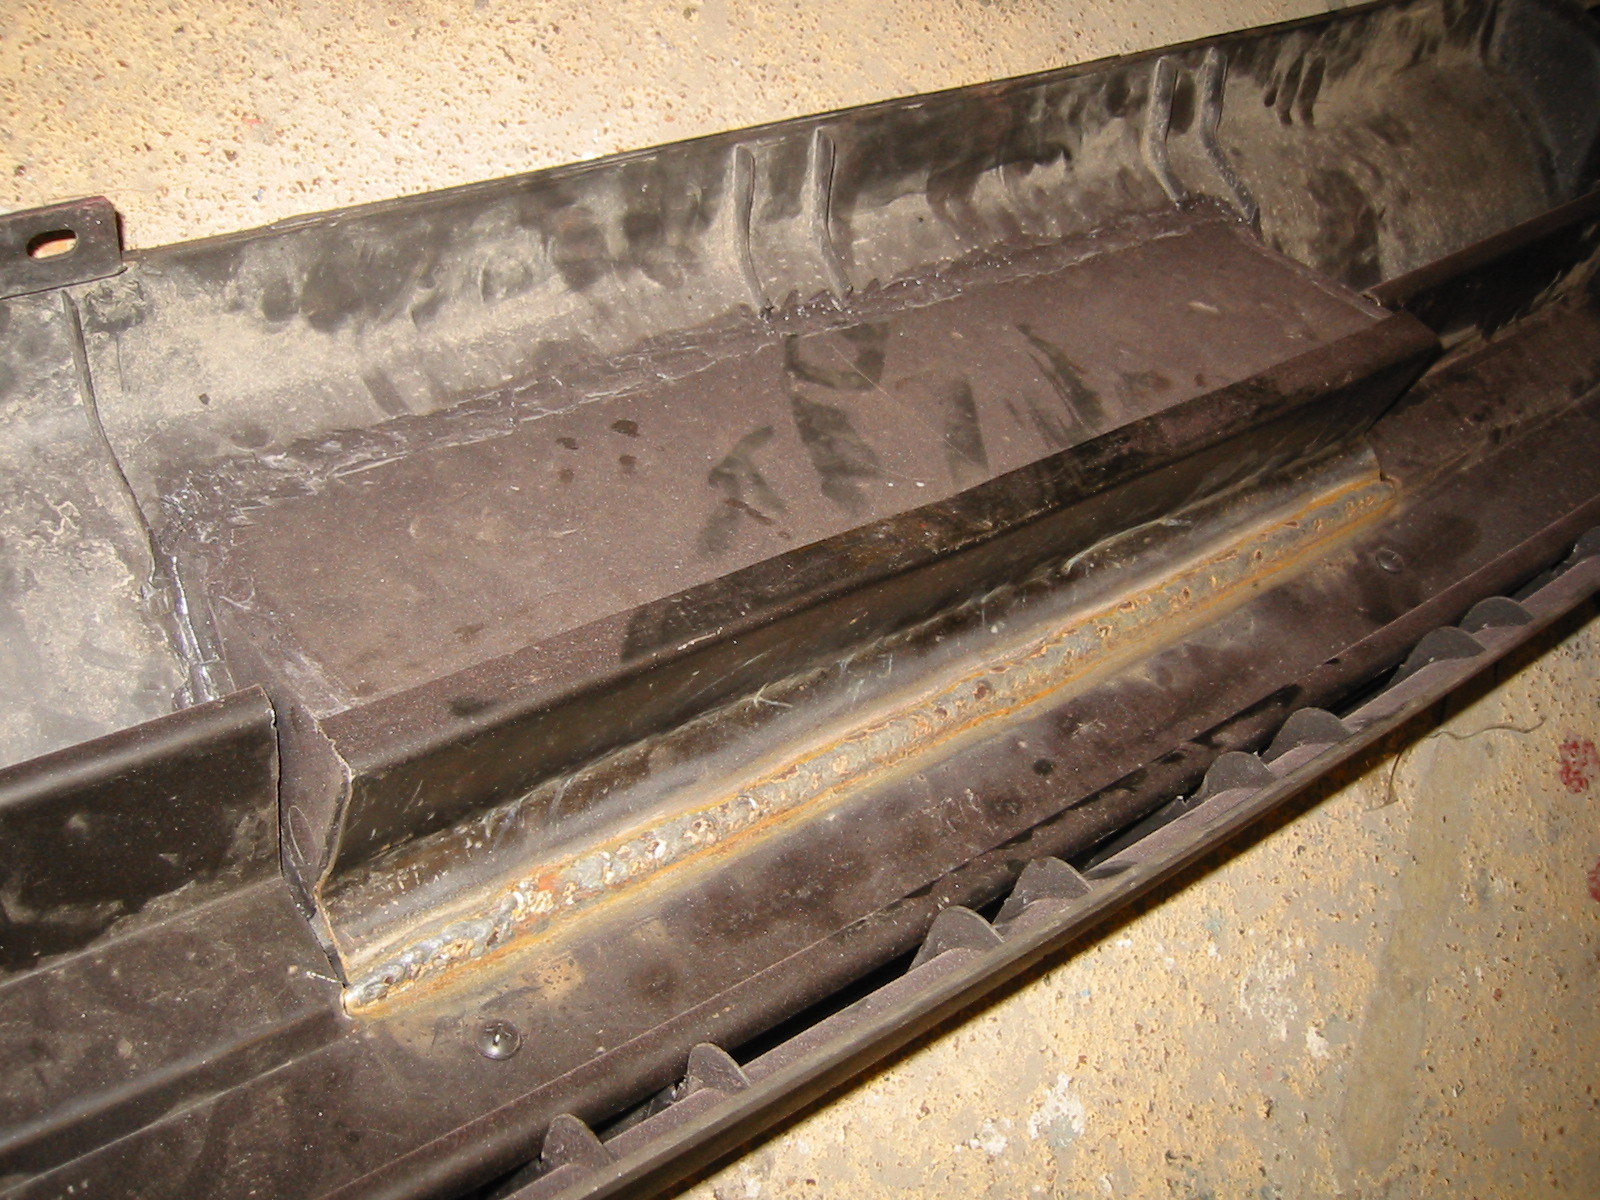
...modify the removed beam section a little and weld it back. The number plate lights will attach here later. Plastic-weld the removed bumper section into a vertical position, and find enough plastic from another bumper to fill the sides.
Third brake light
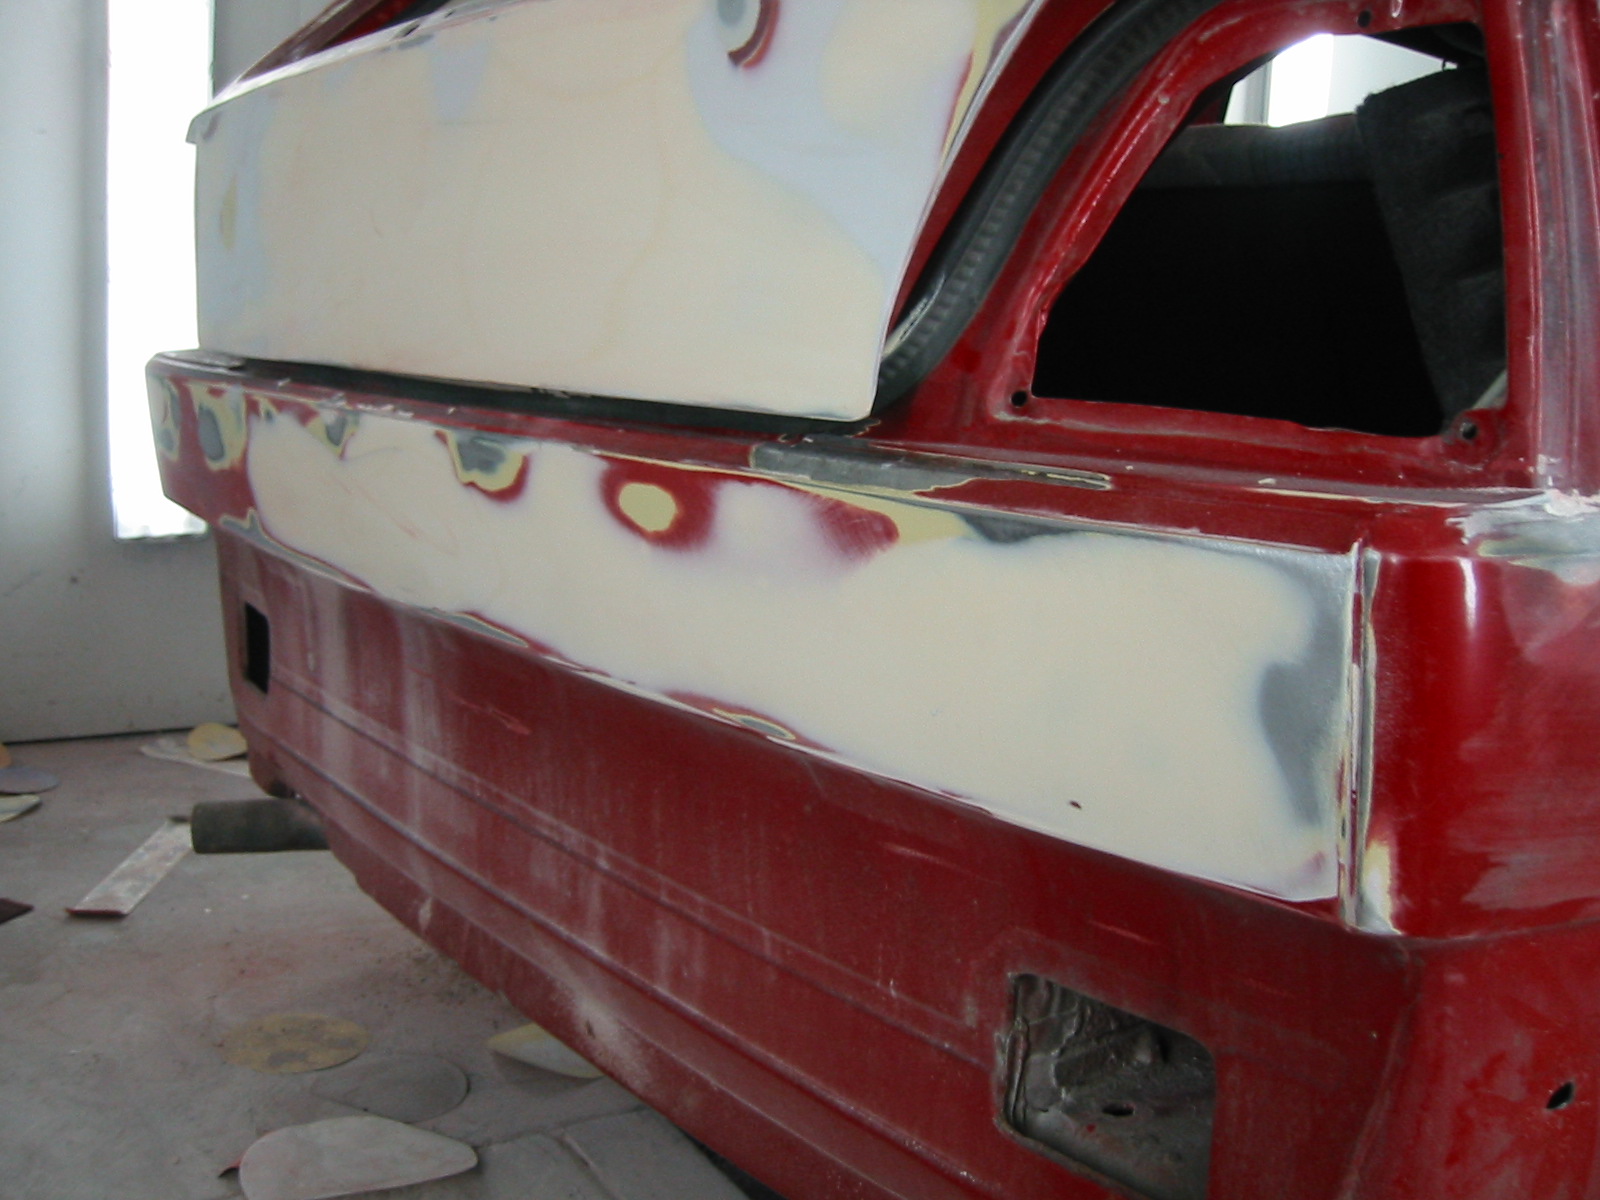
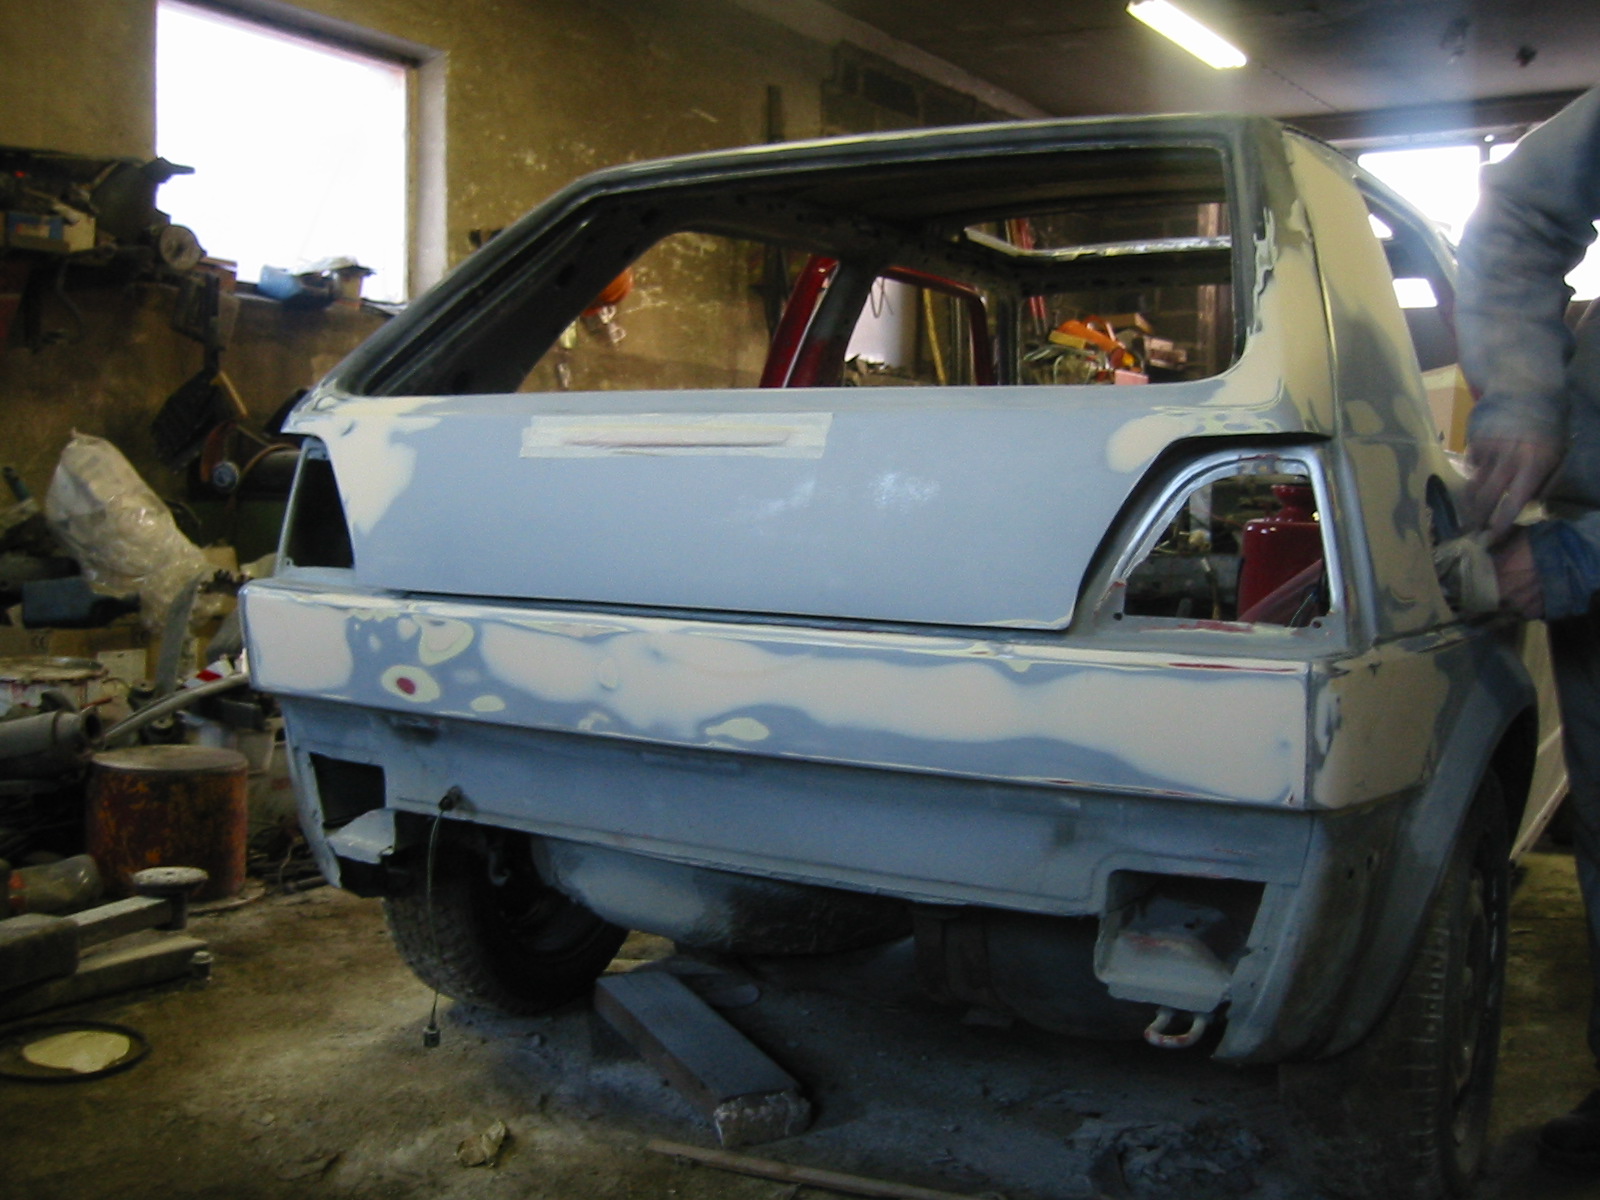
Unnecessary holes and recesses beneath the tailgate were smoothed out. Most of the tailgate preparation was already done when Peksi had the brainwave of adding a third brake light from a Japanese car, specifically an Almera.
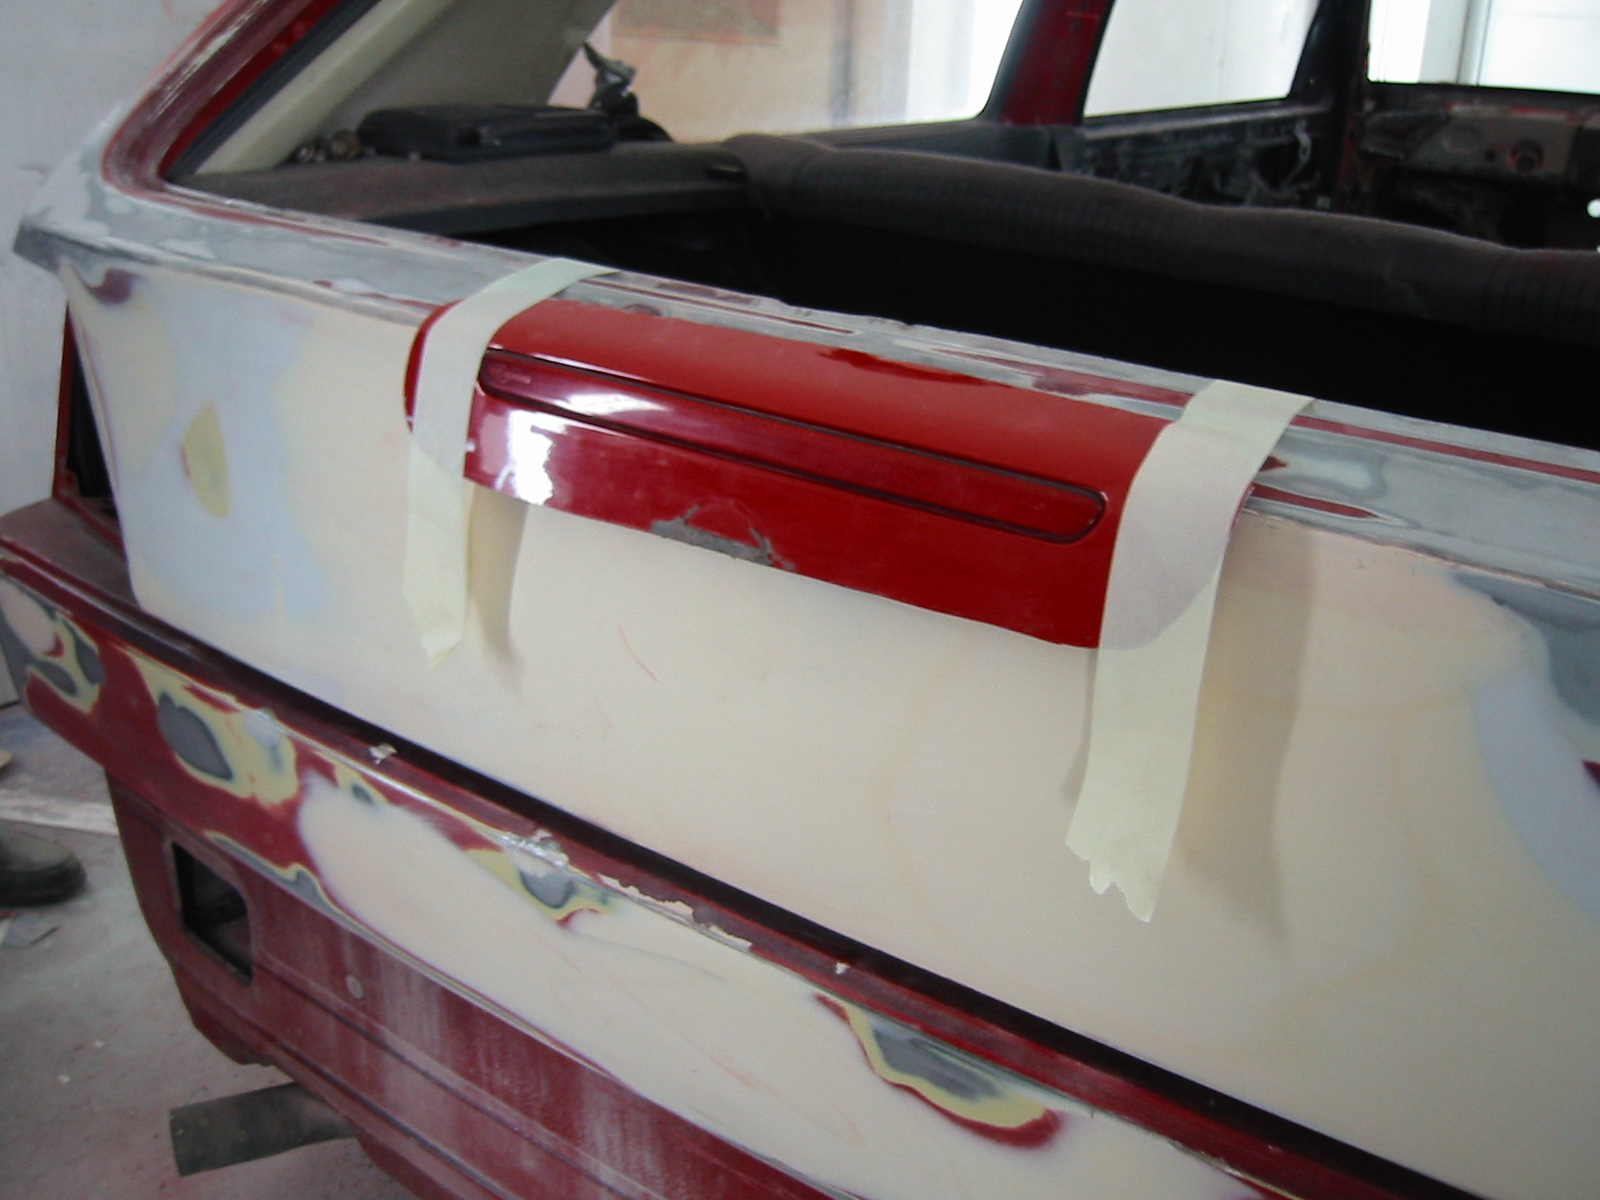
Yes, it'll be attached with more than masking tape... This also means leaving out the rear wiper, as it no longer fits behind the brake light. The colour is now decided too: Chalcedonblau, a Mercedes silver with a hint of blue.
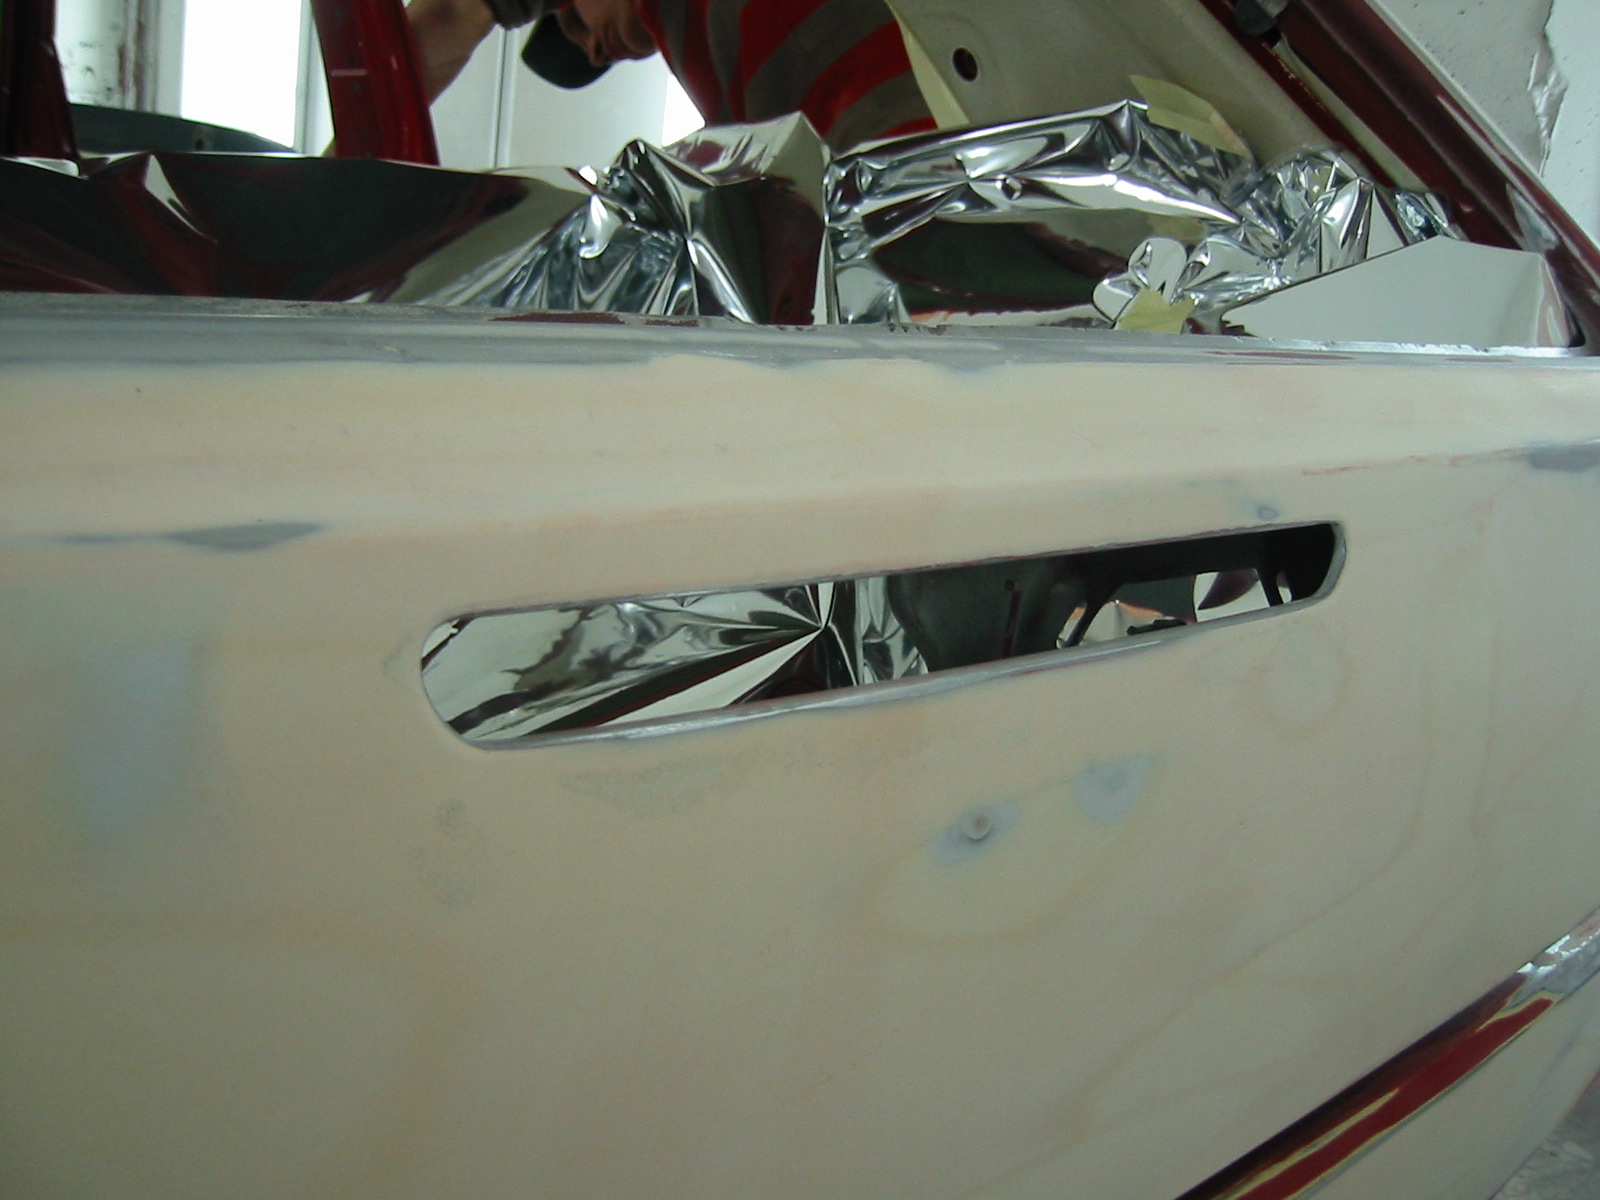
This is how it turned out...
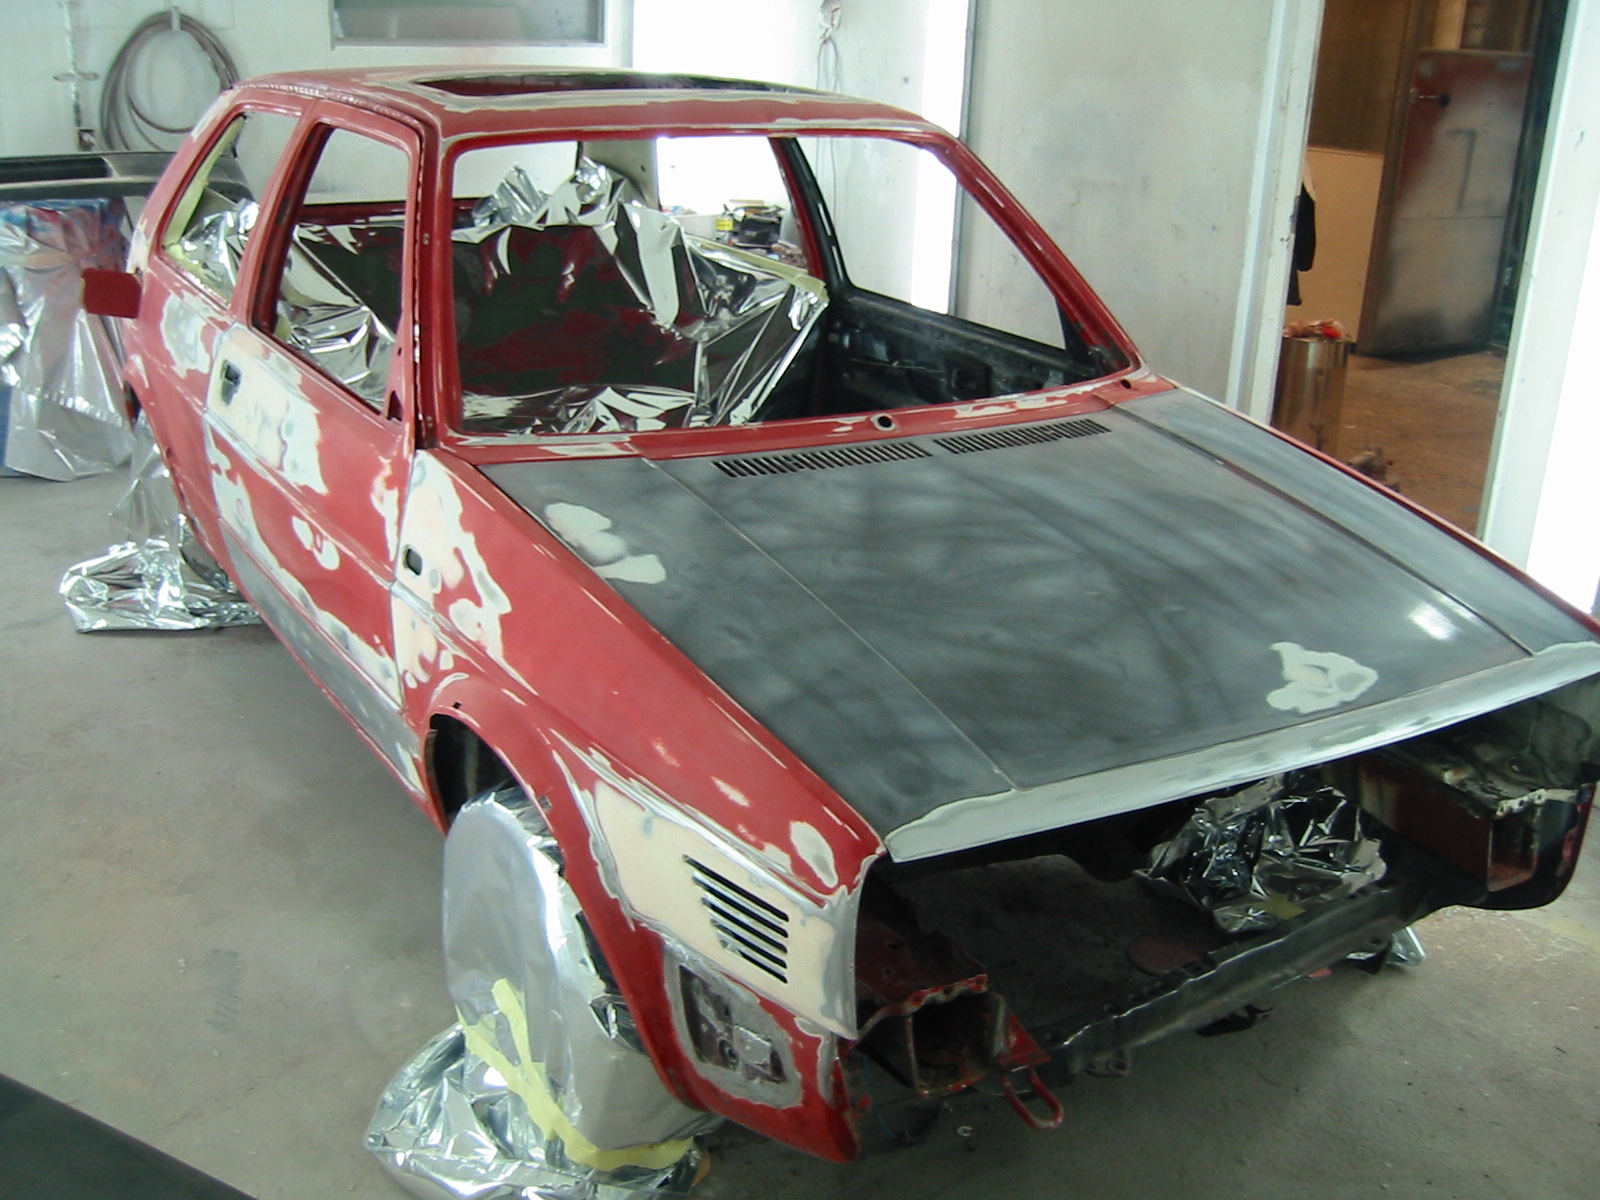
Gradually getting ready for paint.
Painting — part 1
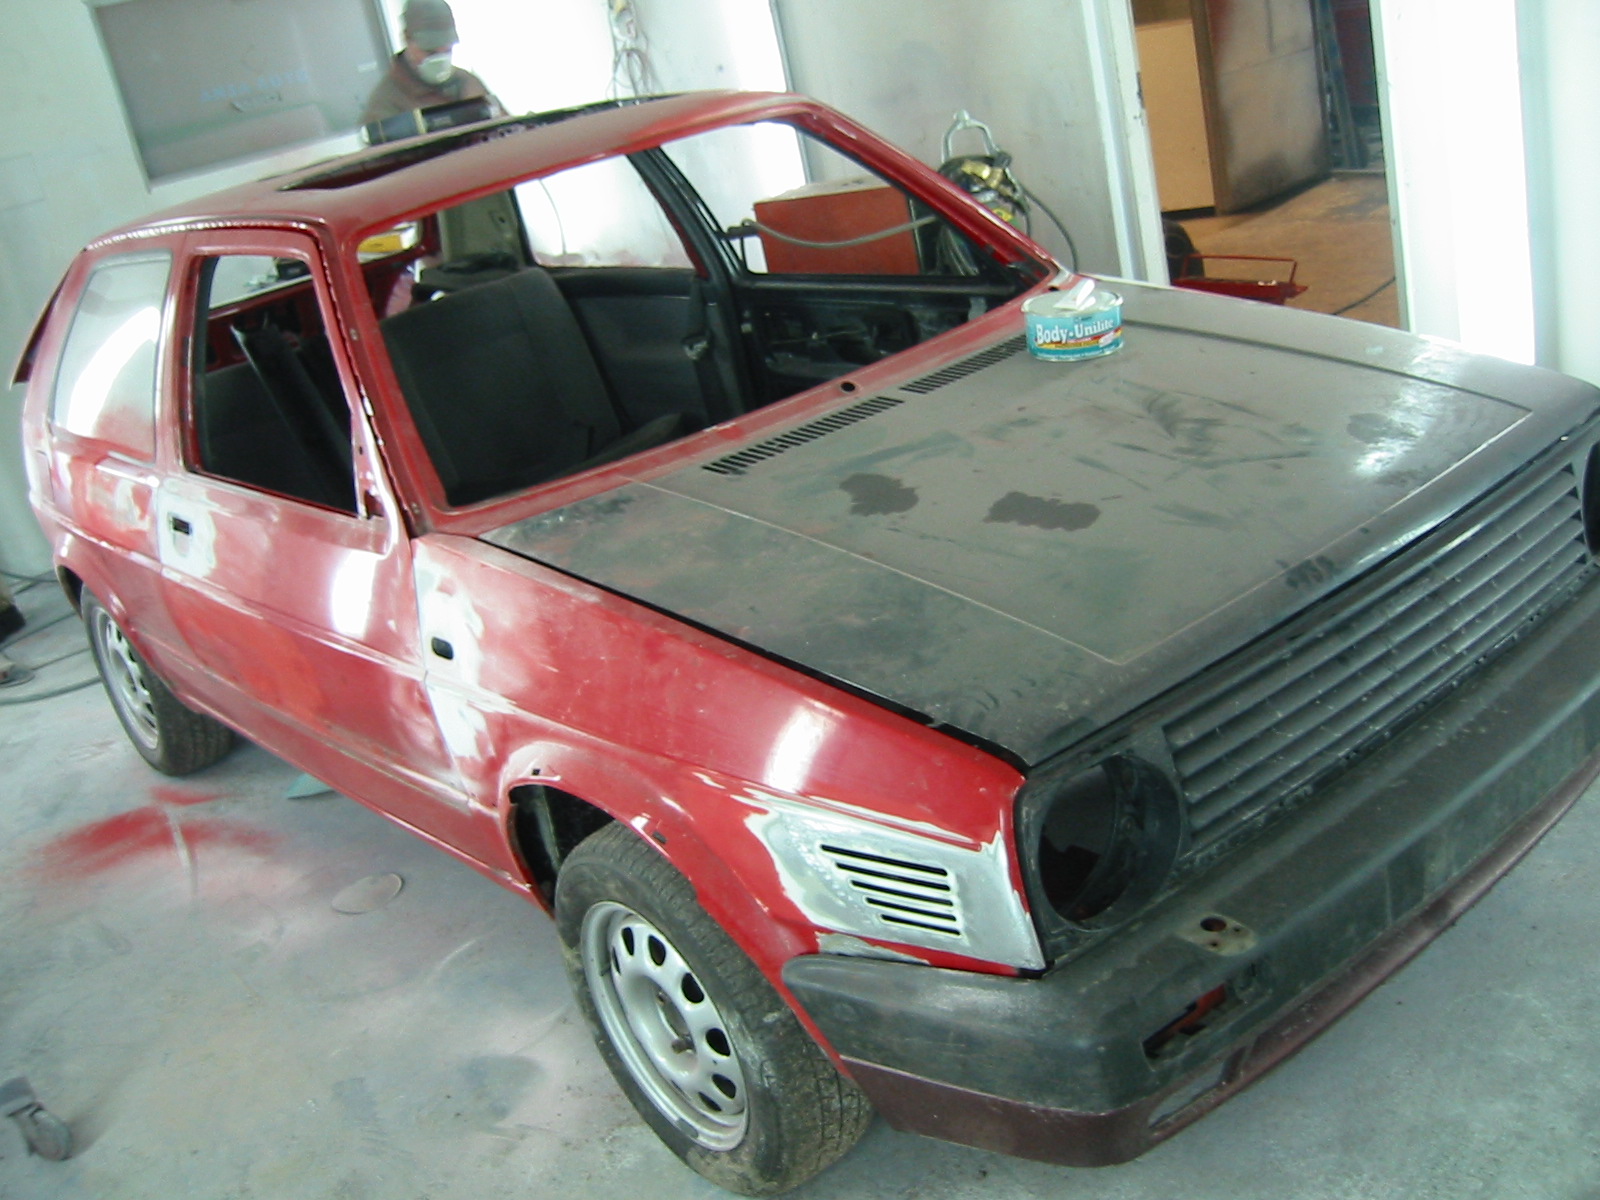
Finally, around Maundy Thursday, the car was getting ready for paint. Preparation and painting used Sikkens products at Harjun Pintakäsittely in Lohikko, Kankaanpää. The company specialises in heavier vehicles, but can manage a little car like this too... :-)
The Golf ready for painting after filling.
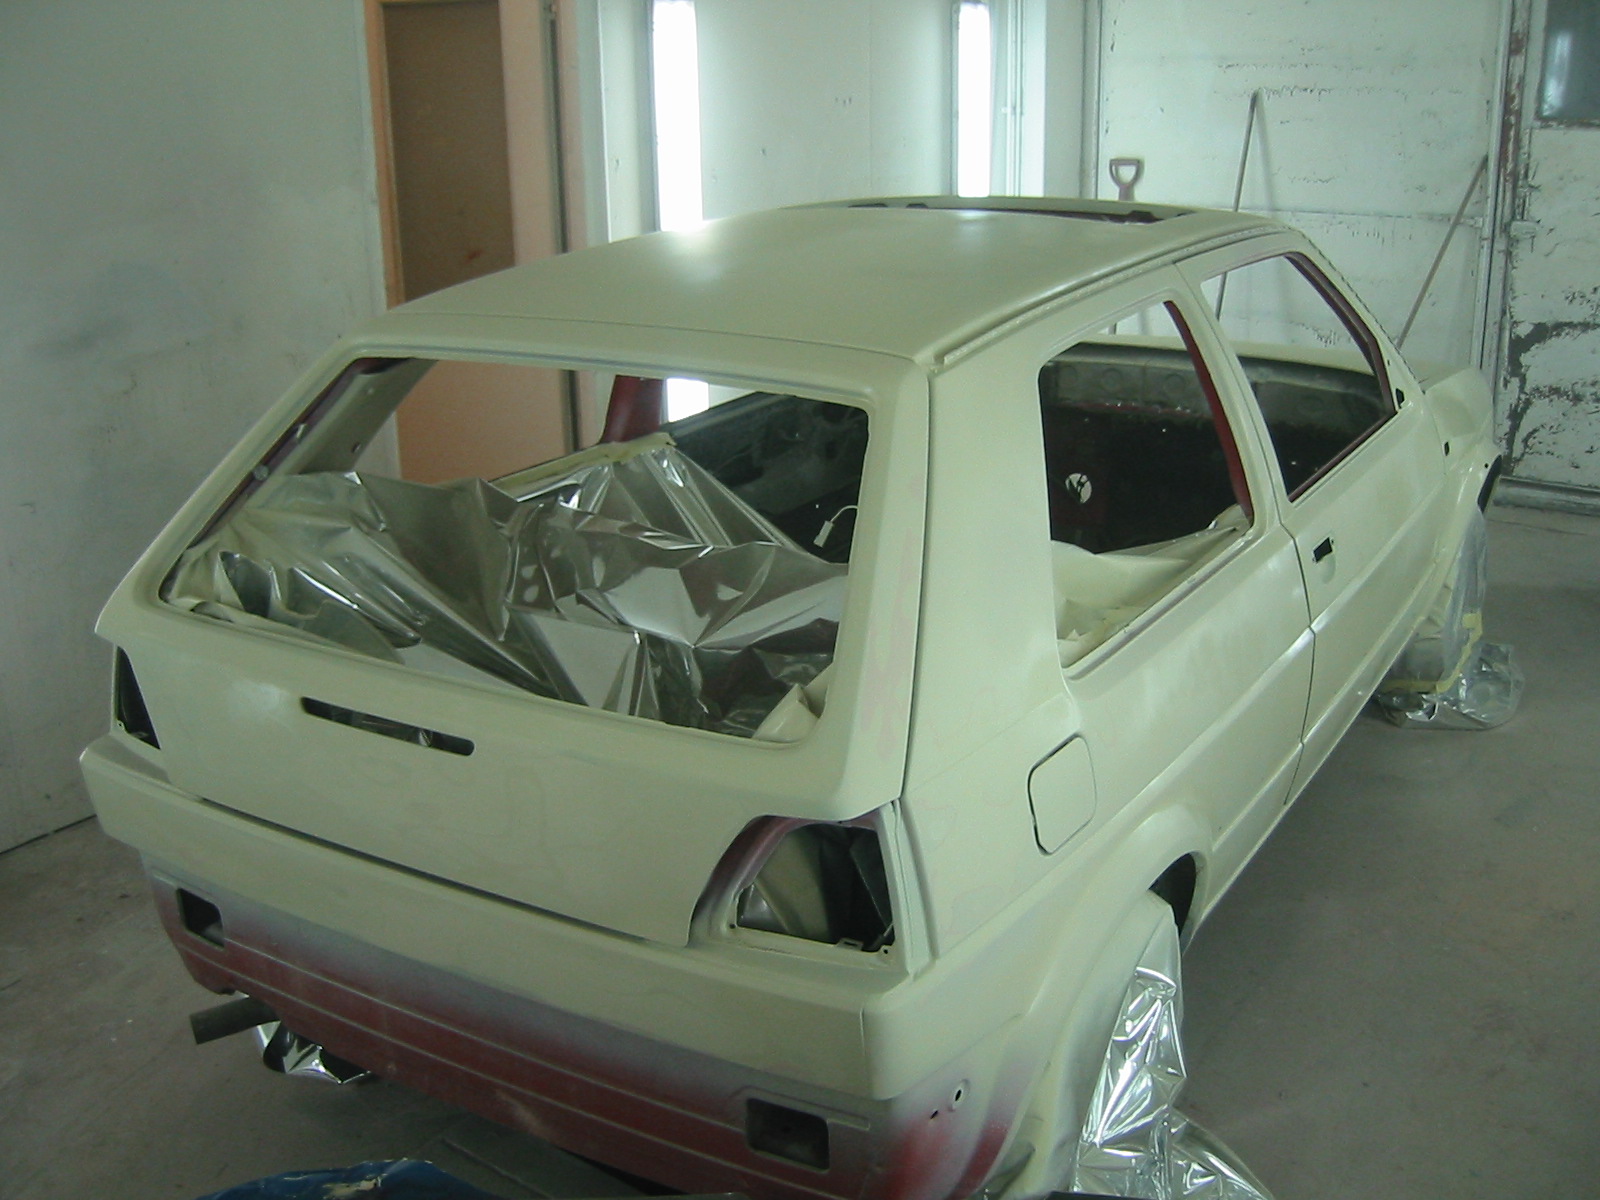
First a thin primer coat, this time a Sikkens commercial-vehicle product combining anti-corrosion and etch primer, also suitable for galvanised surfaces.
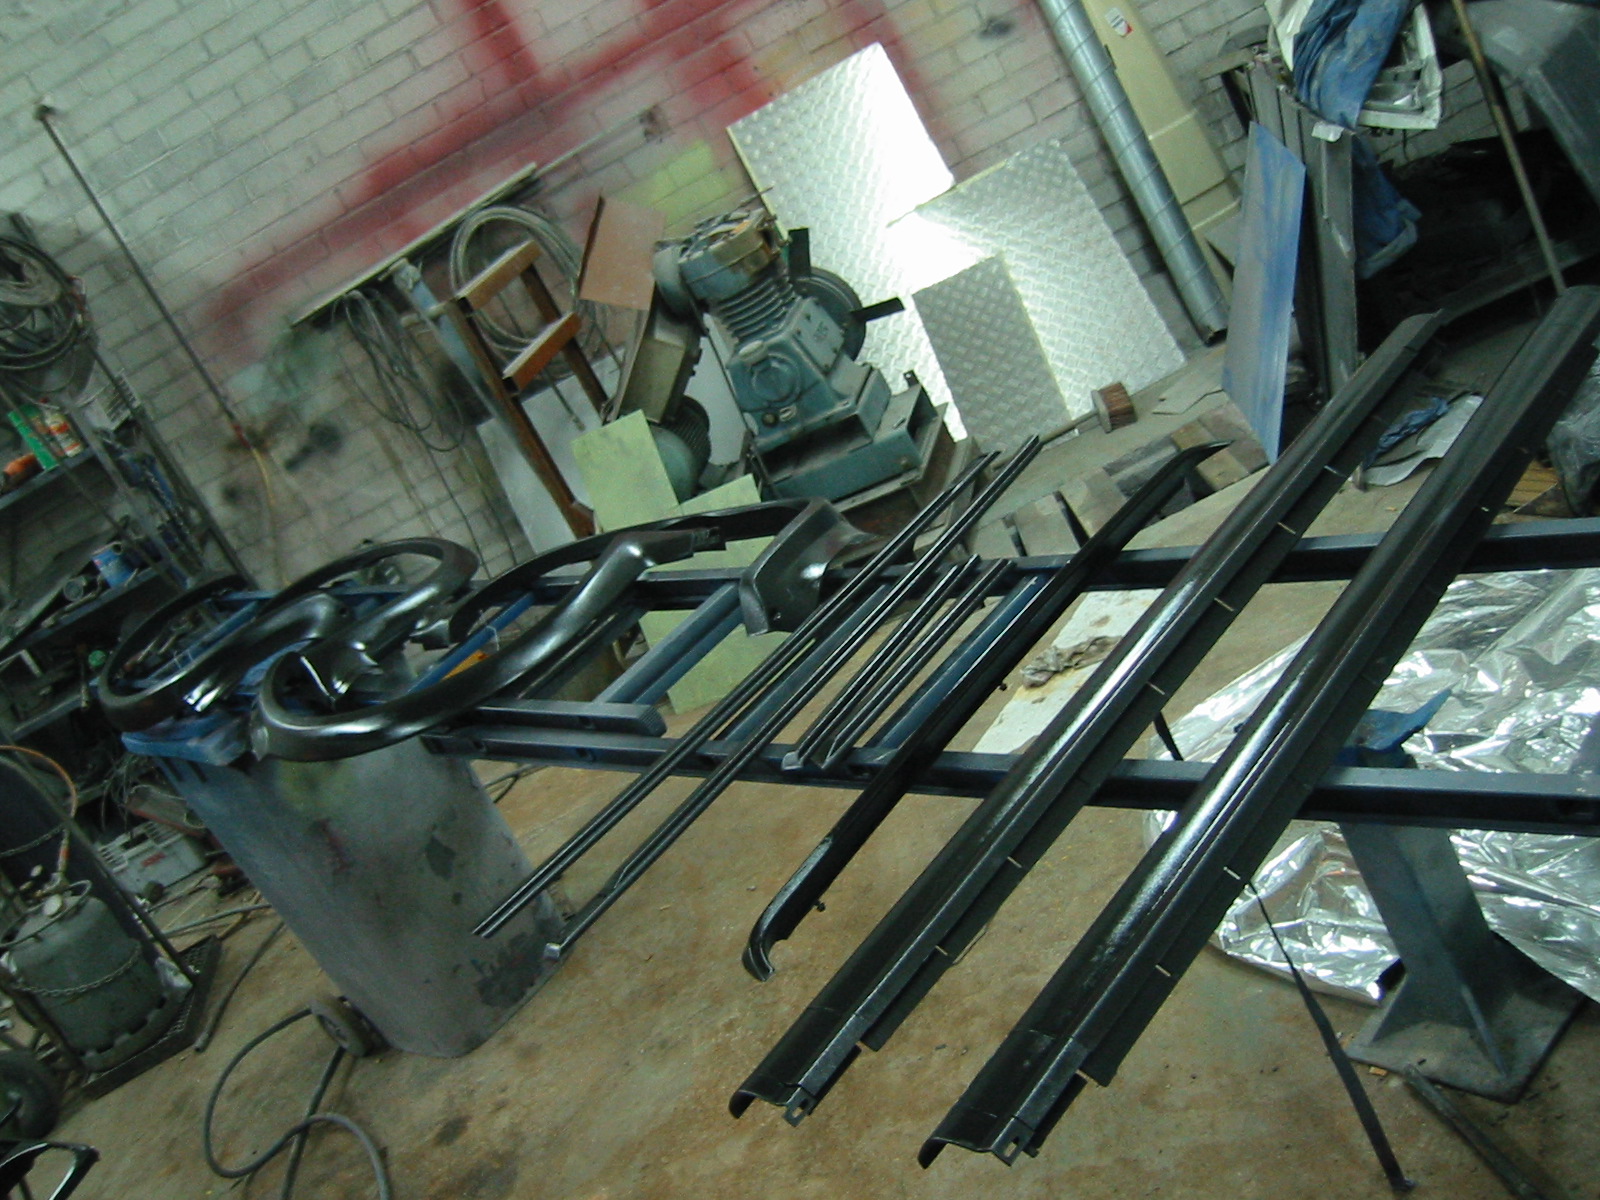
The plastic parts first got adhesion promoter after a light sanding.
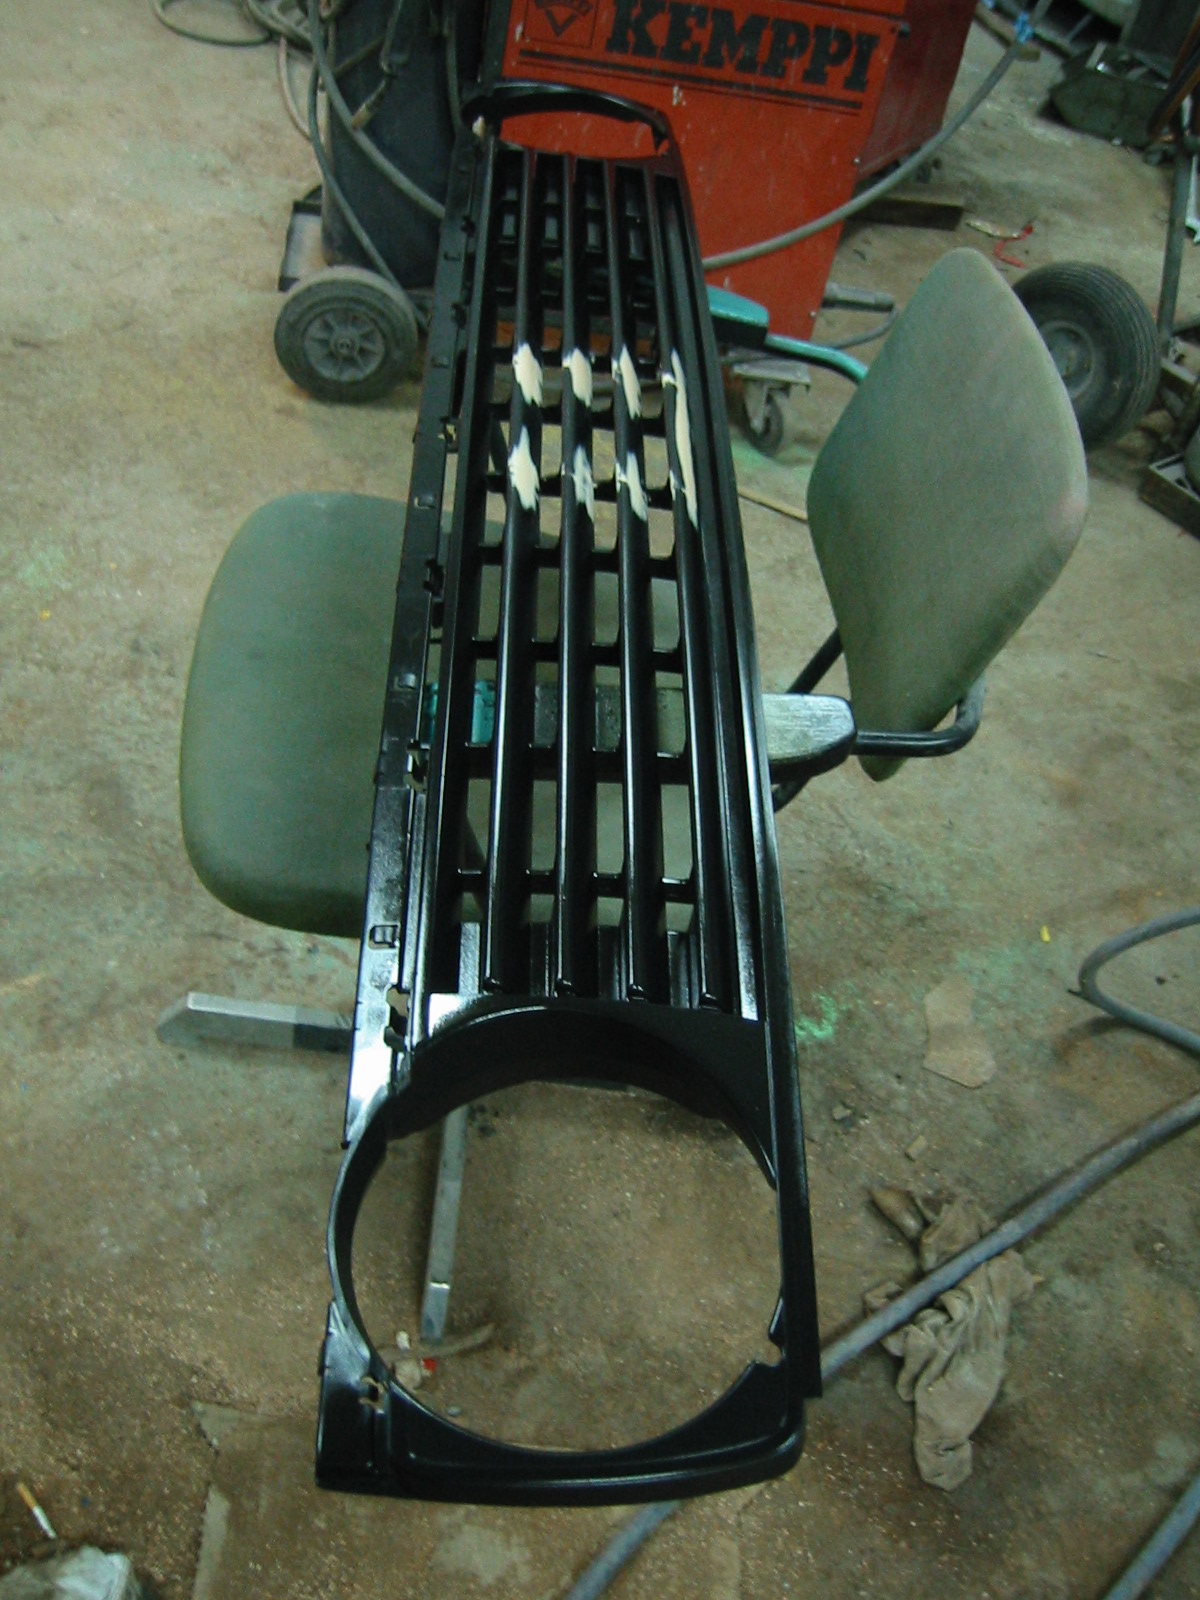
The grille too. Peksi initially planned to paint it body colour, but changed his mind later.
Painting — part 2
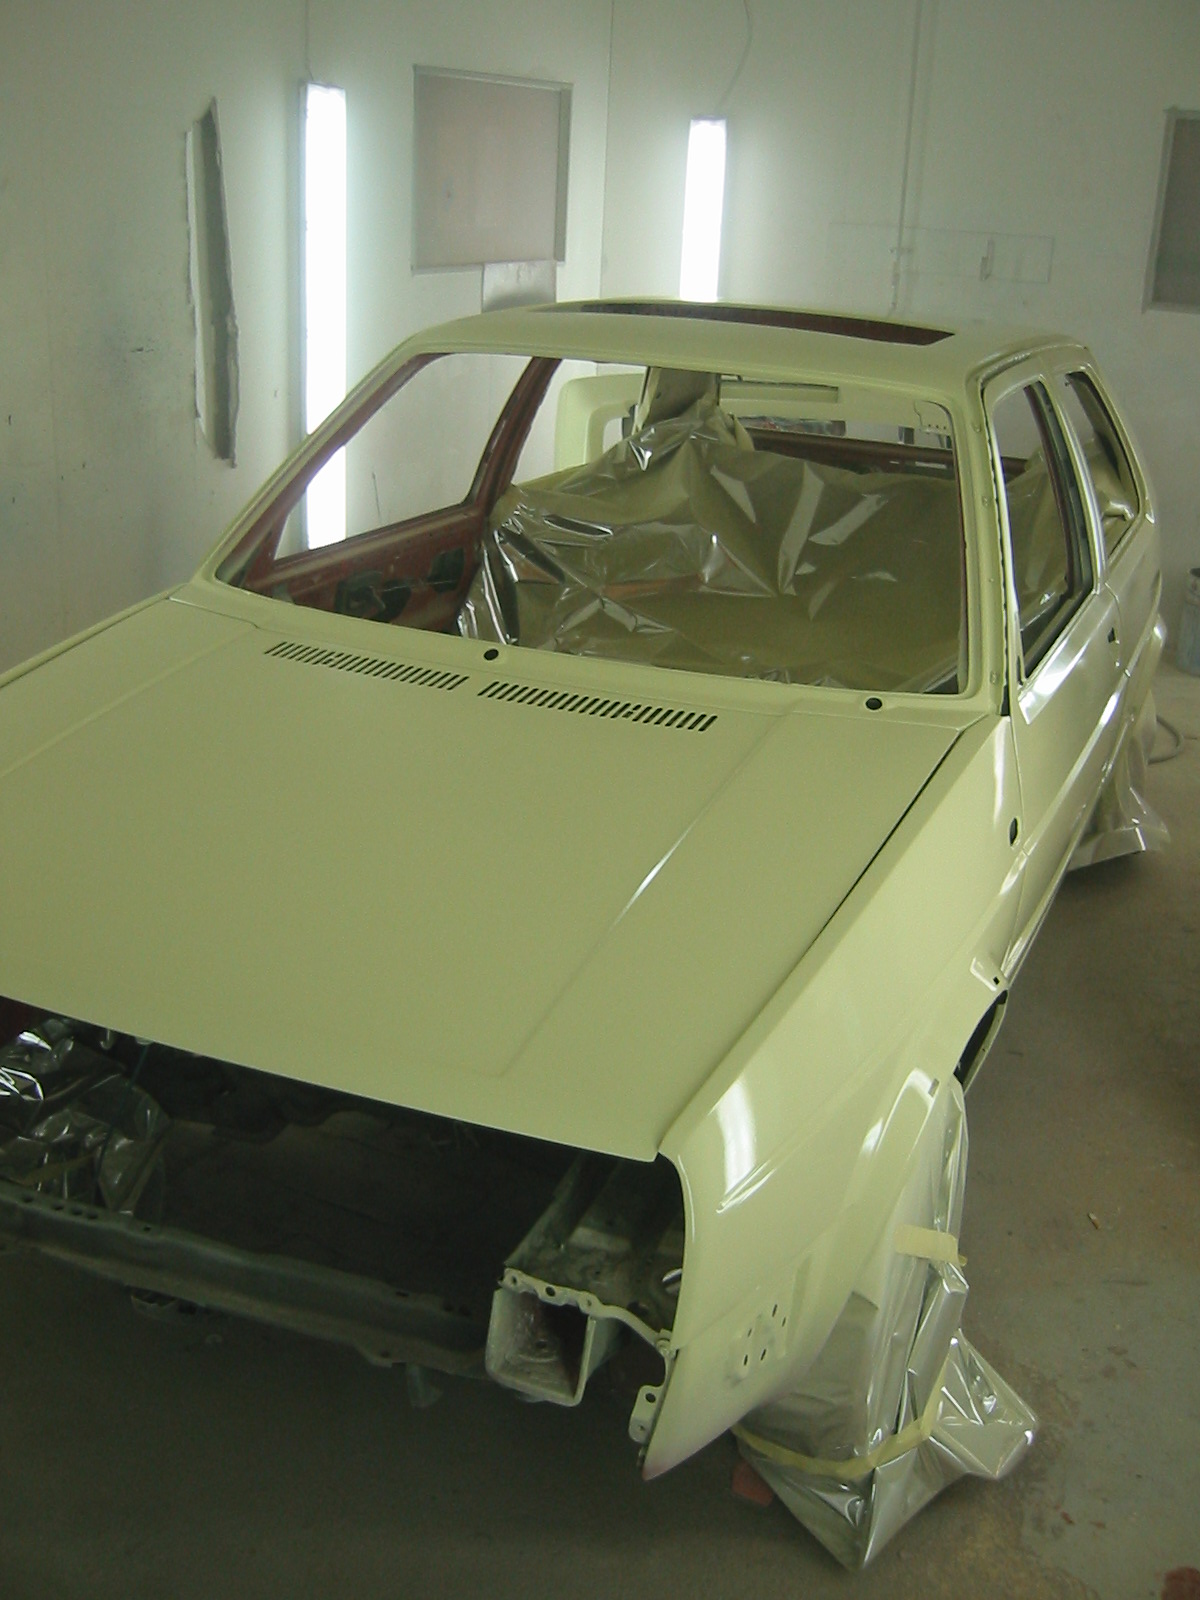
Primer-surfacer over the primer.
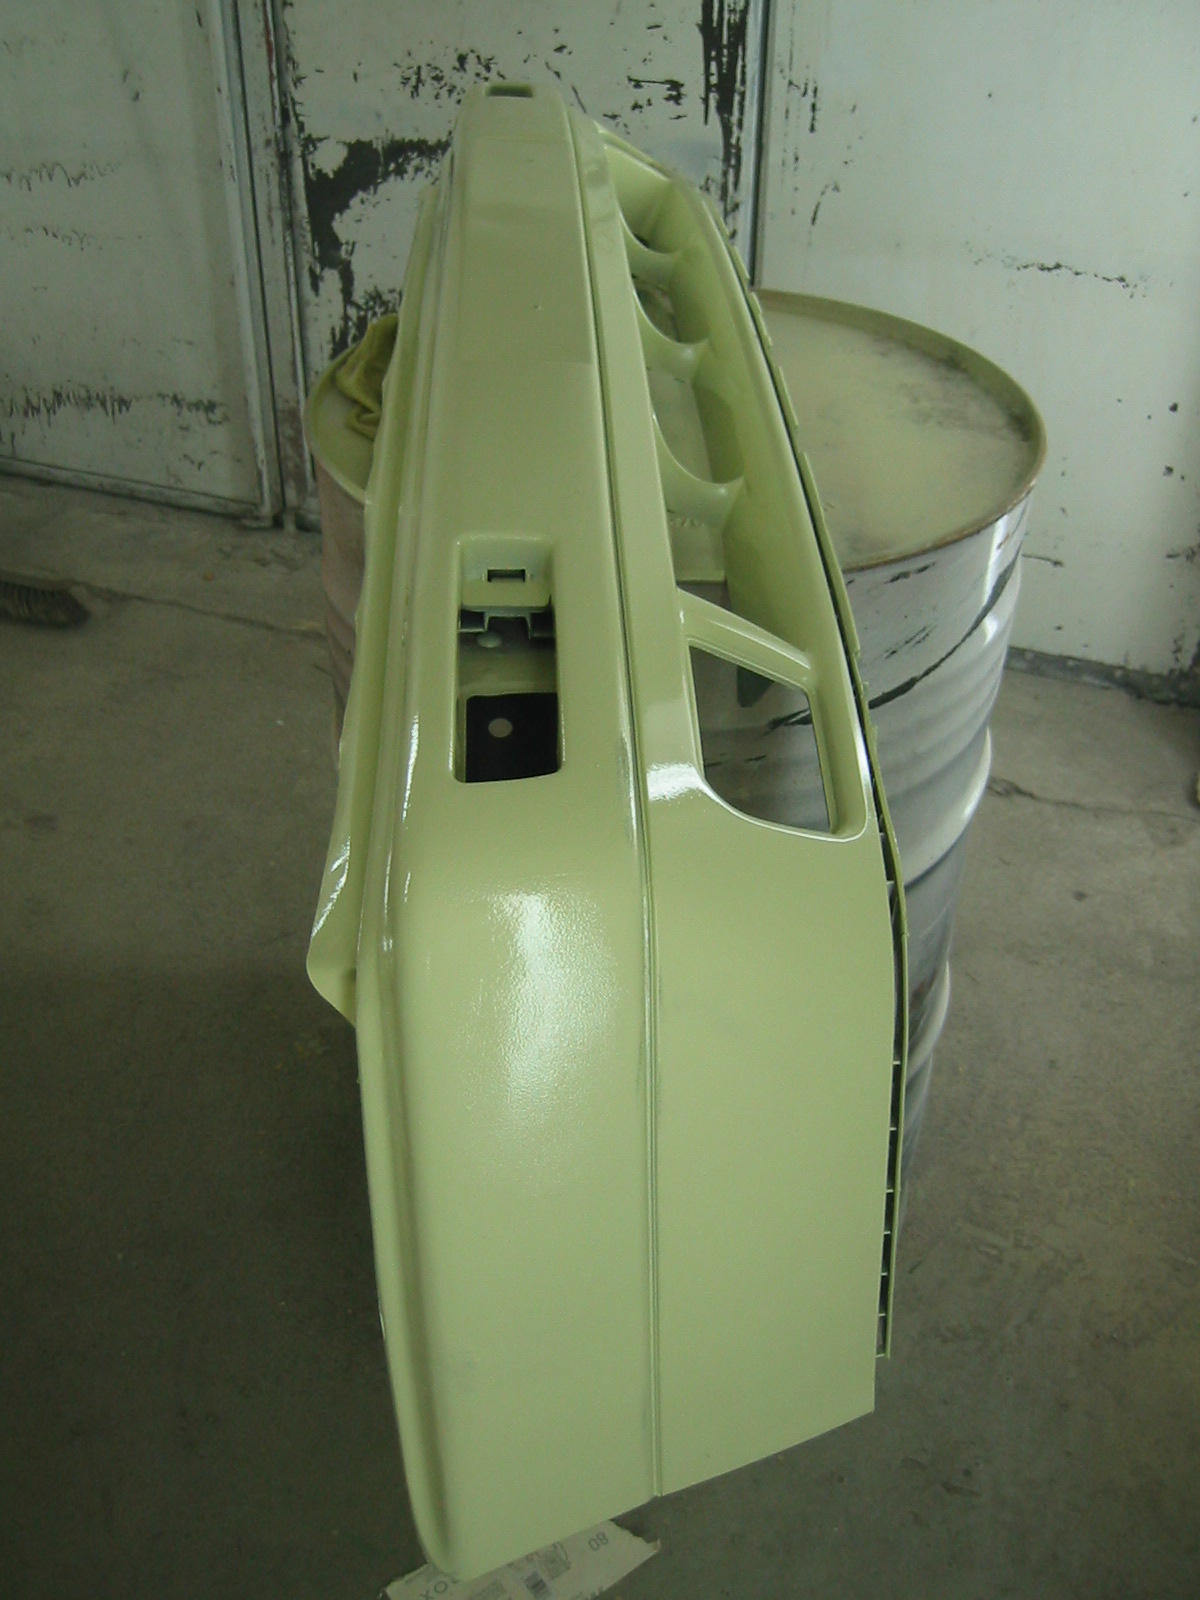
On the bumpers too...
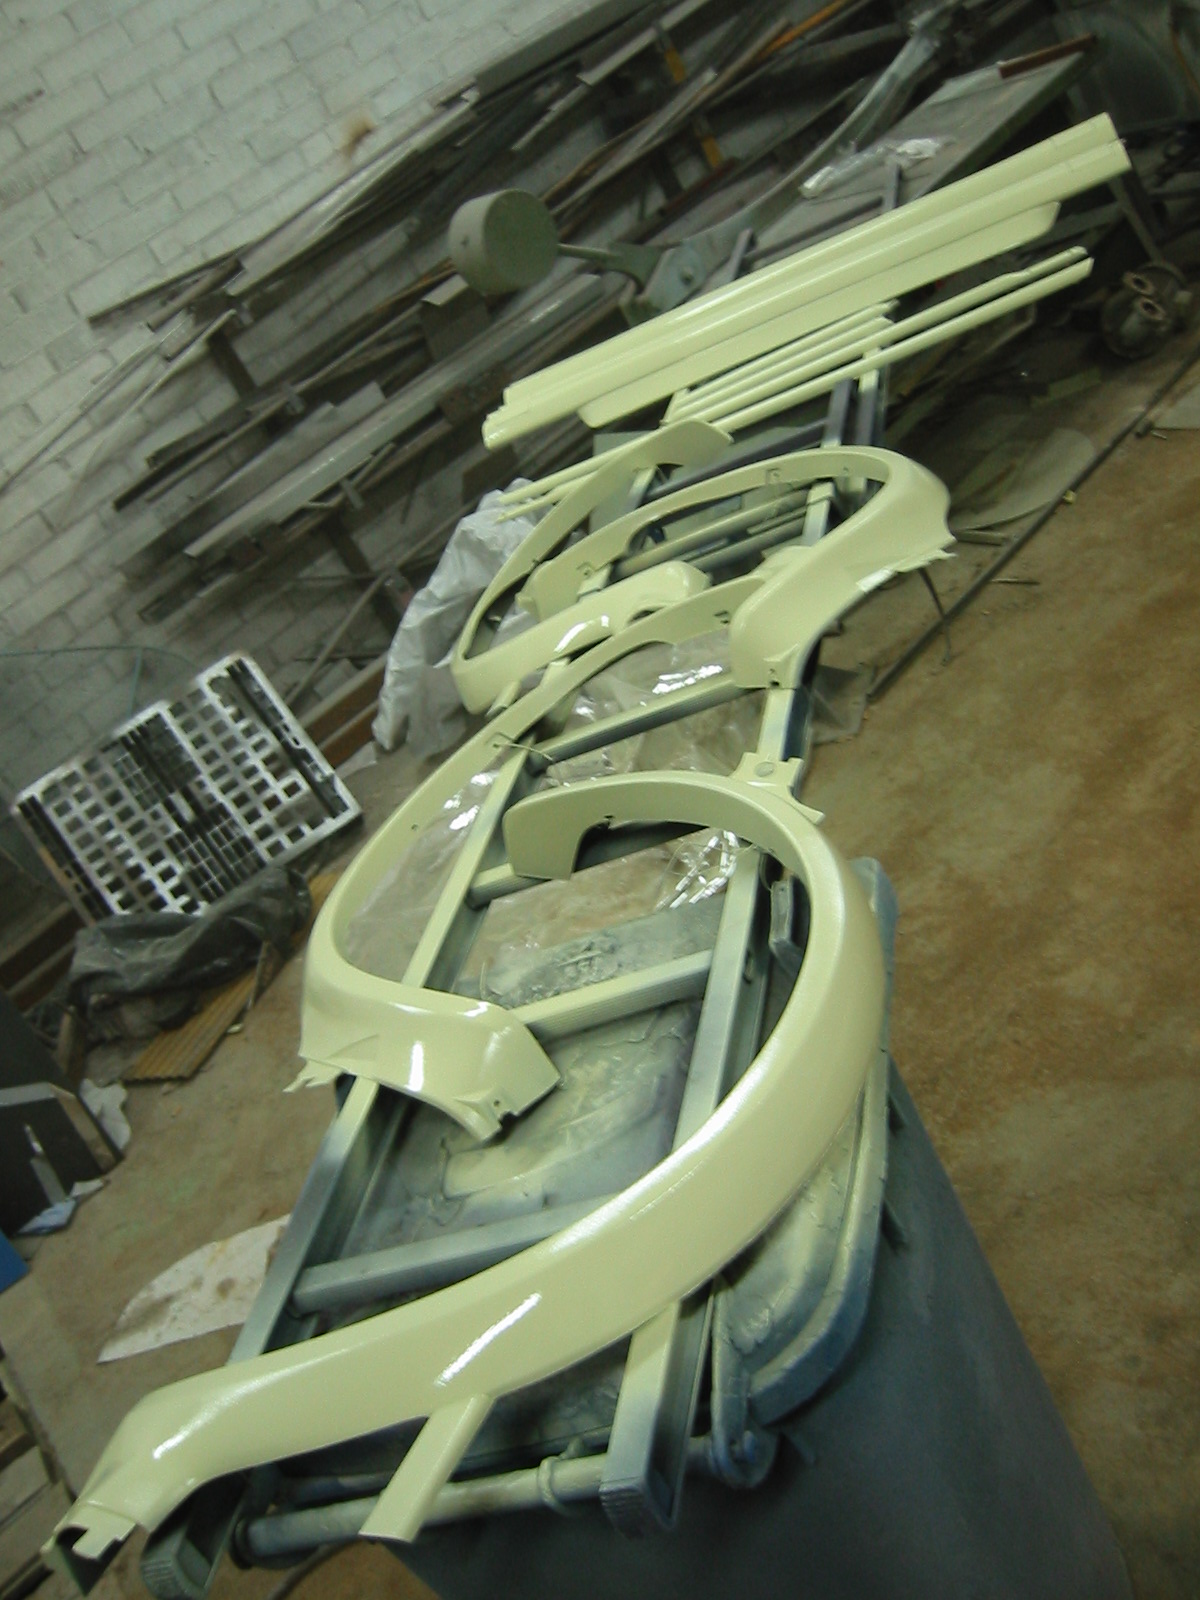
...and the other plastic parts, which were also supposed to be body-coloured.
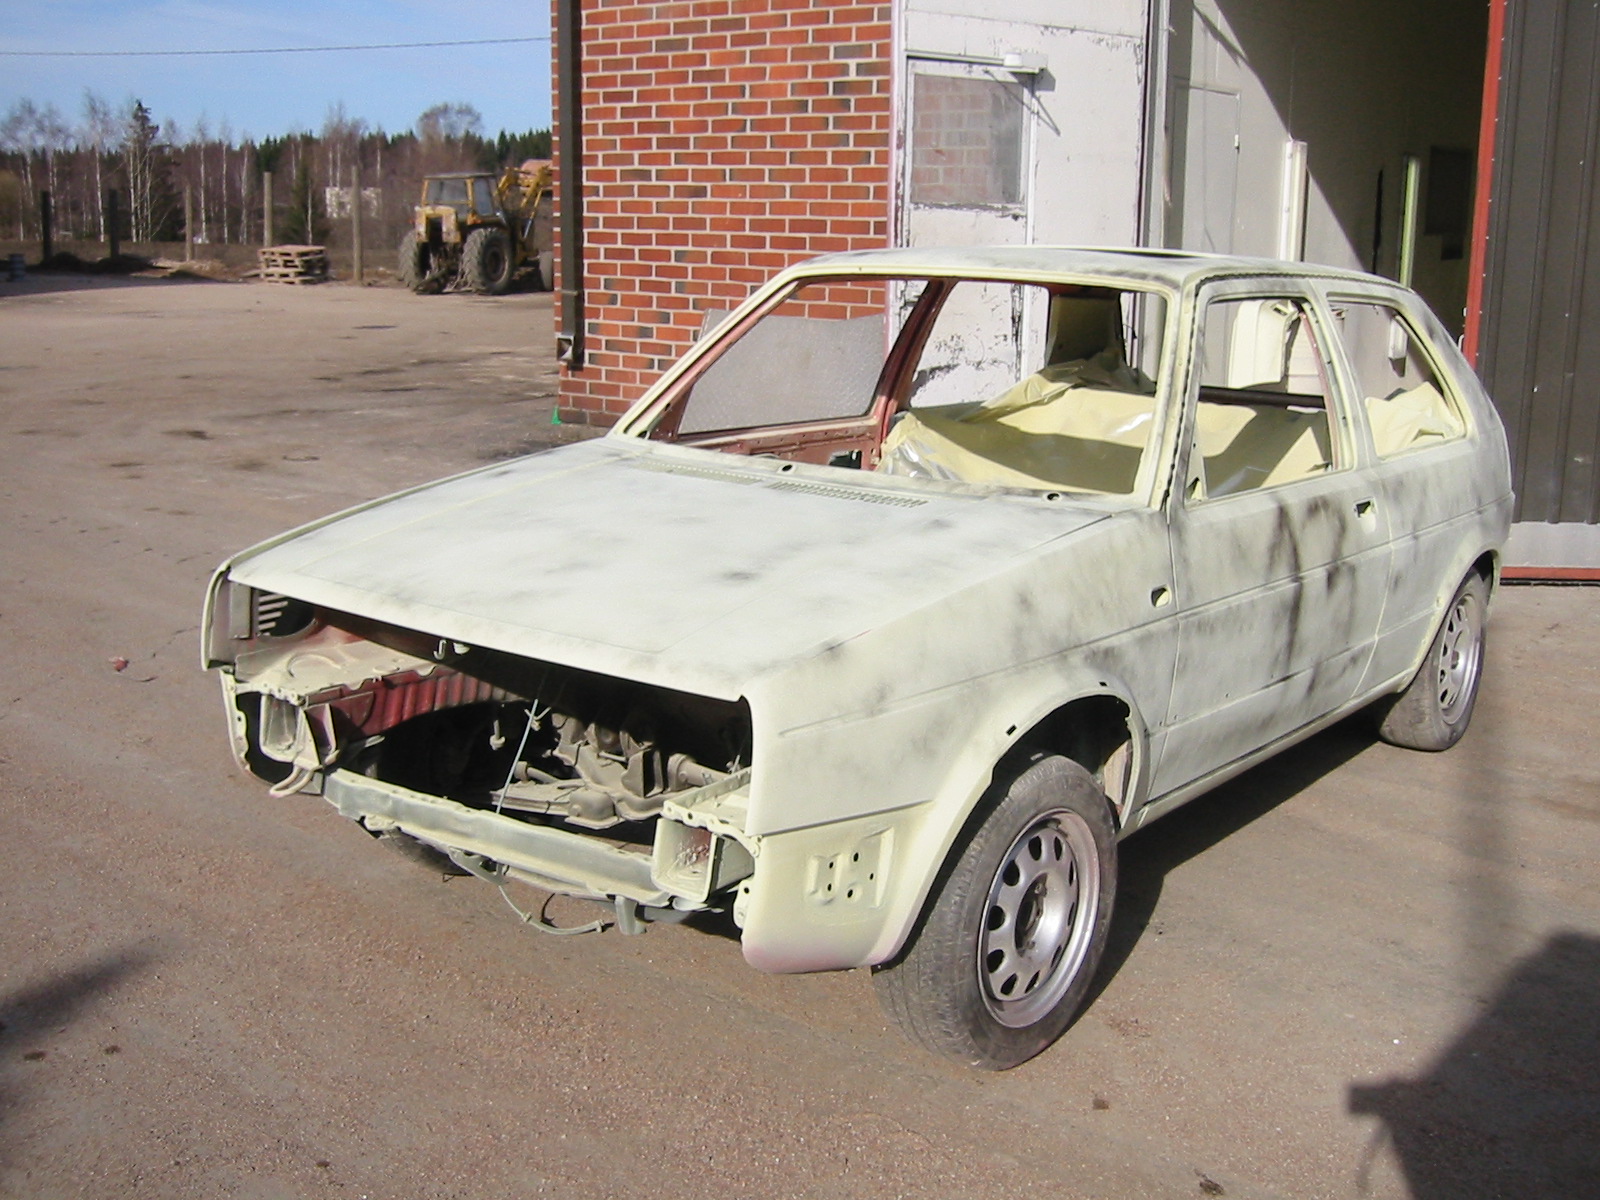
A little more preparation... Just one final sanding with fine 400-grit paper, then finally paint. A light matt-black guide coat makes the last sanding easier, showing where you've sanded and where you haven't.
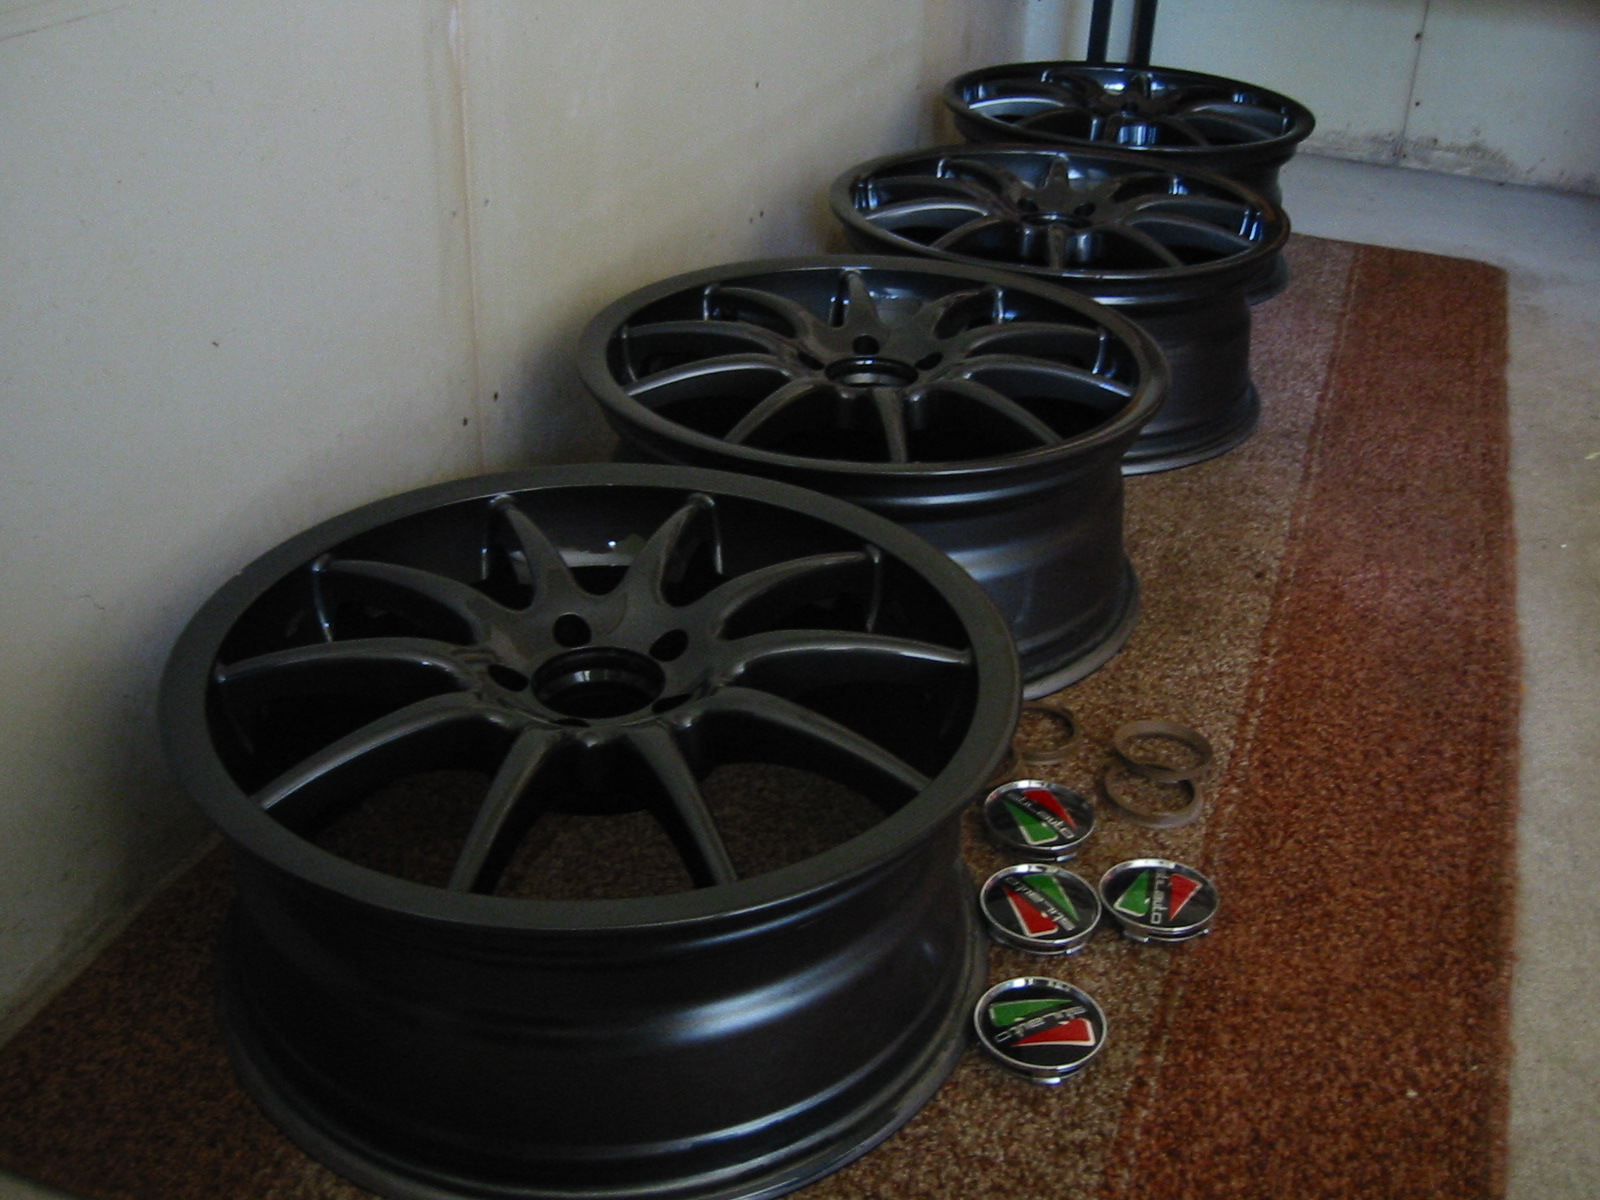
Peksi painted the wheels a little darker than their original colour.
Painting — part 3
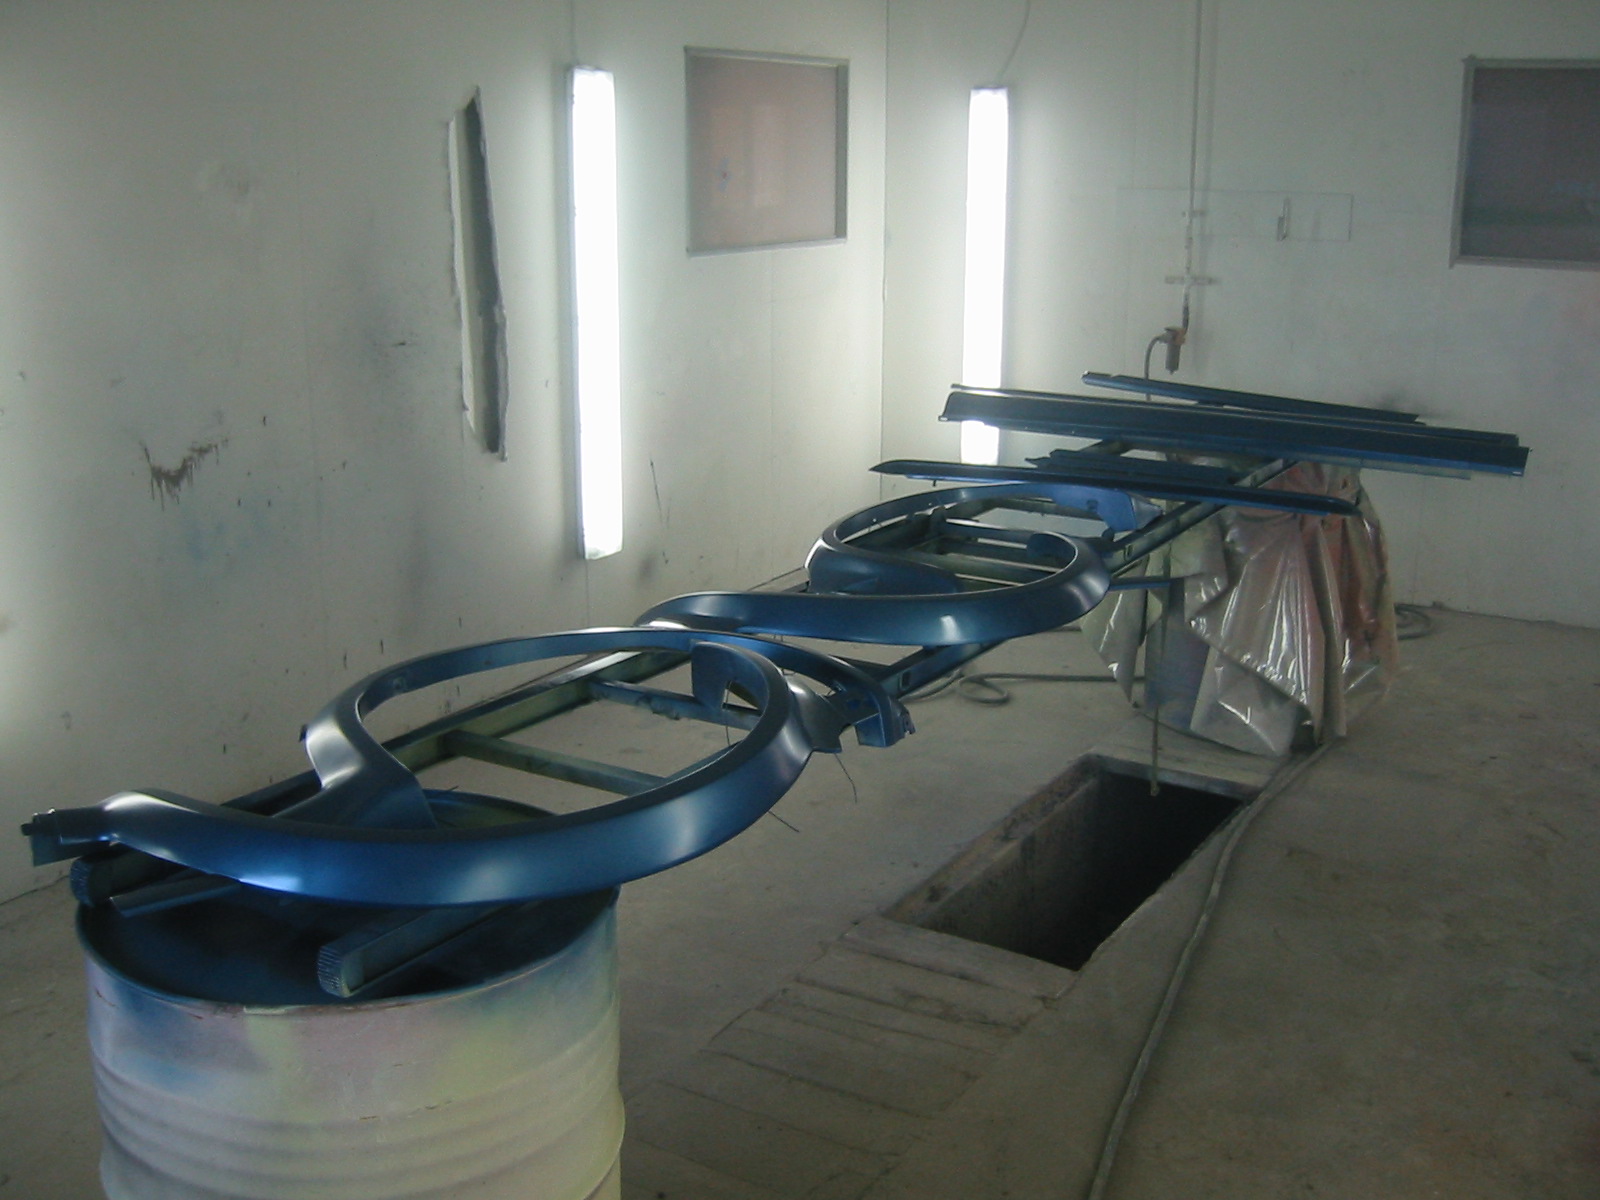
Peksi suddenly decided the arches and other plastic parts would be blue. First a tinted undercoat, using some paint found in storage: PPA paint.
PPA = 'the best from under the table' :-)
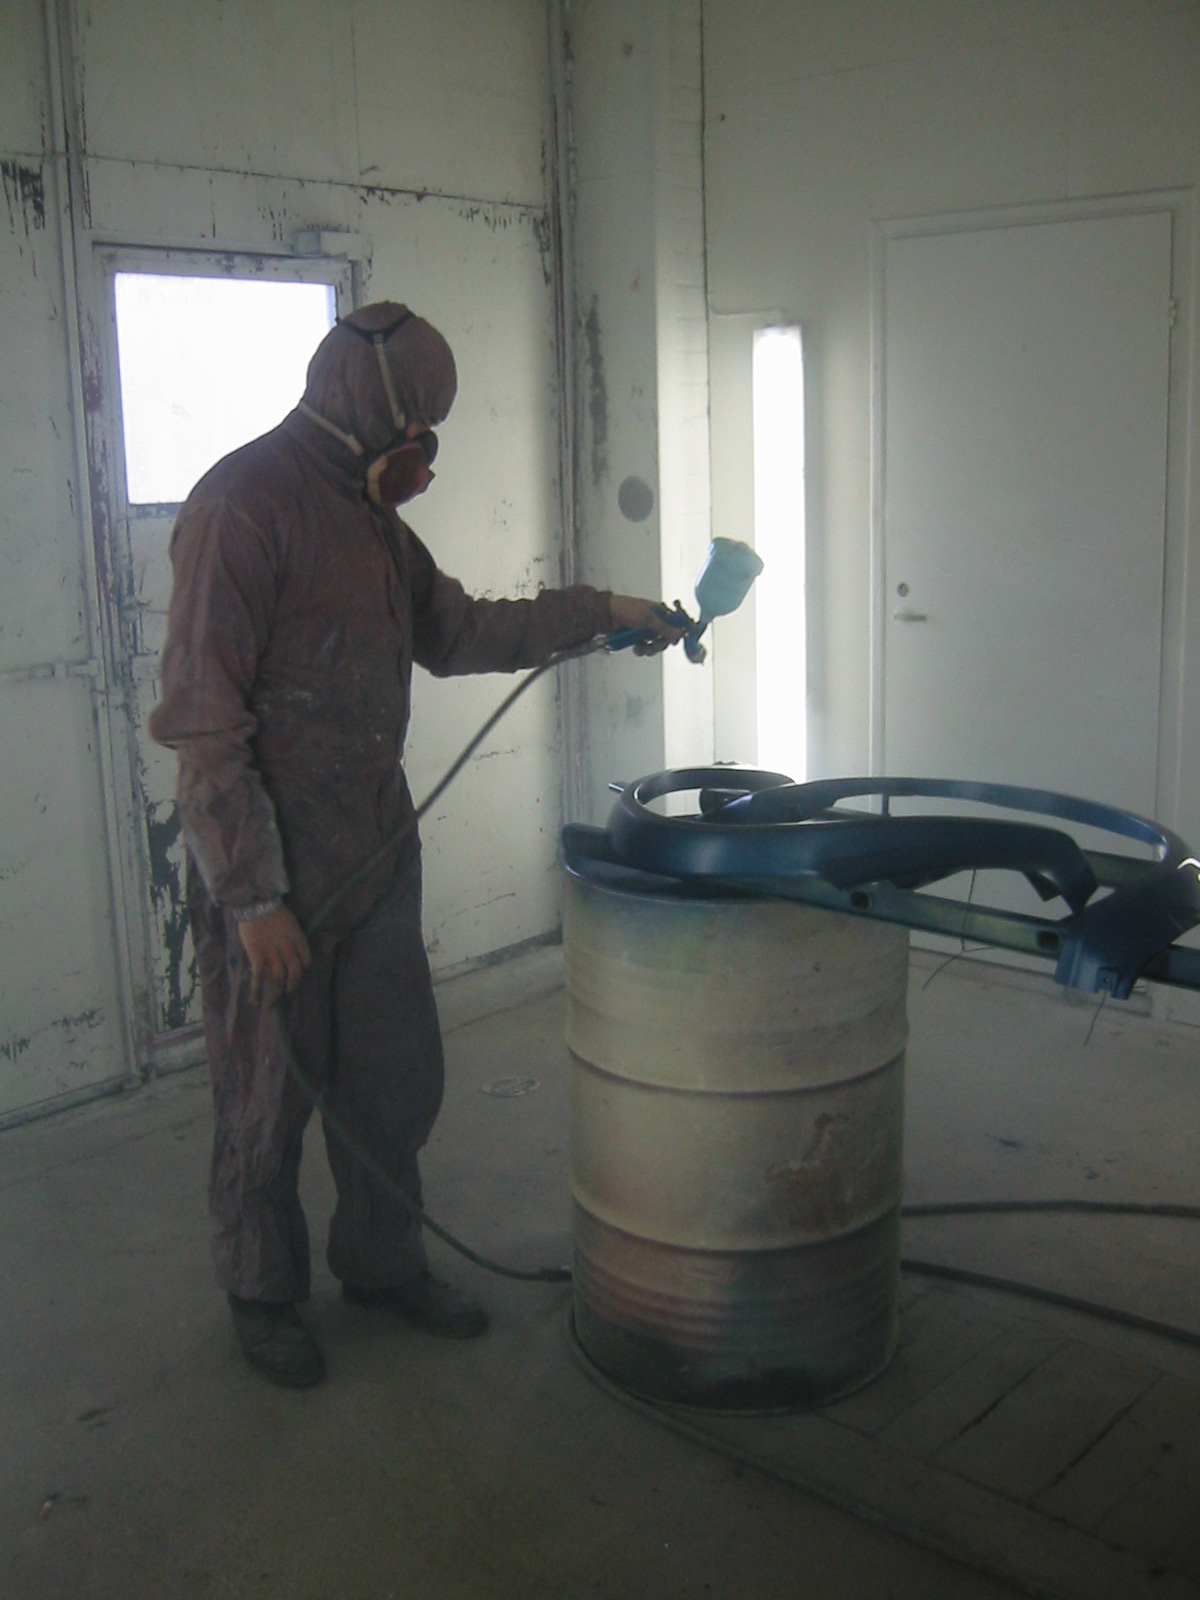
Then the actual colour. Painter T. Tammi at work. It's a Chrysler blue with a slightly purple tint.
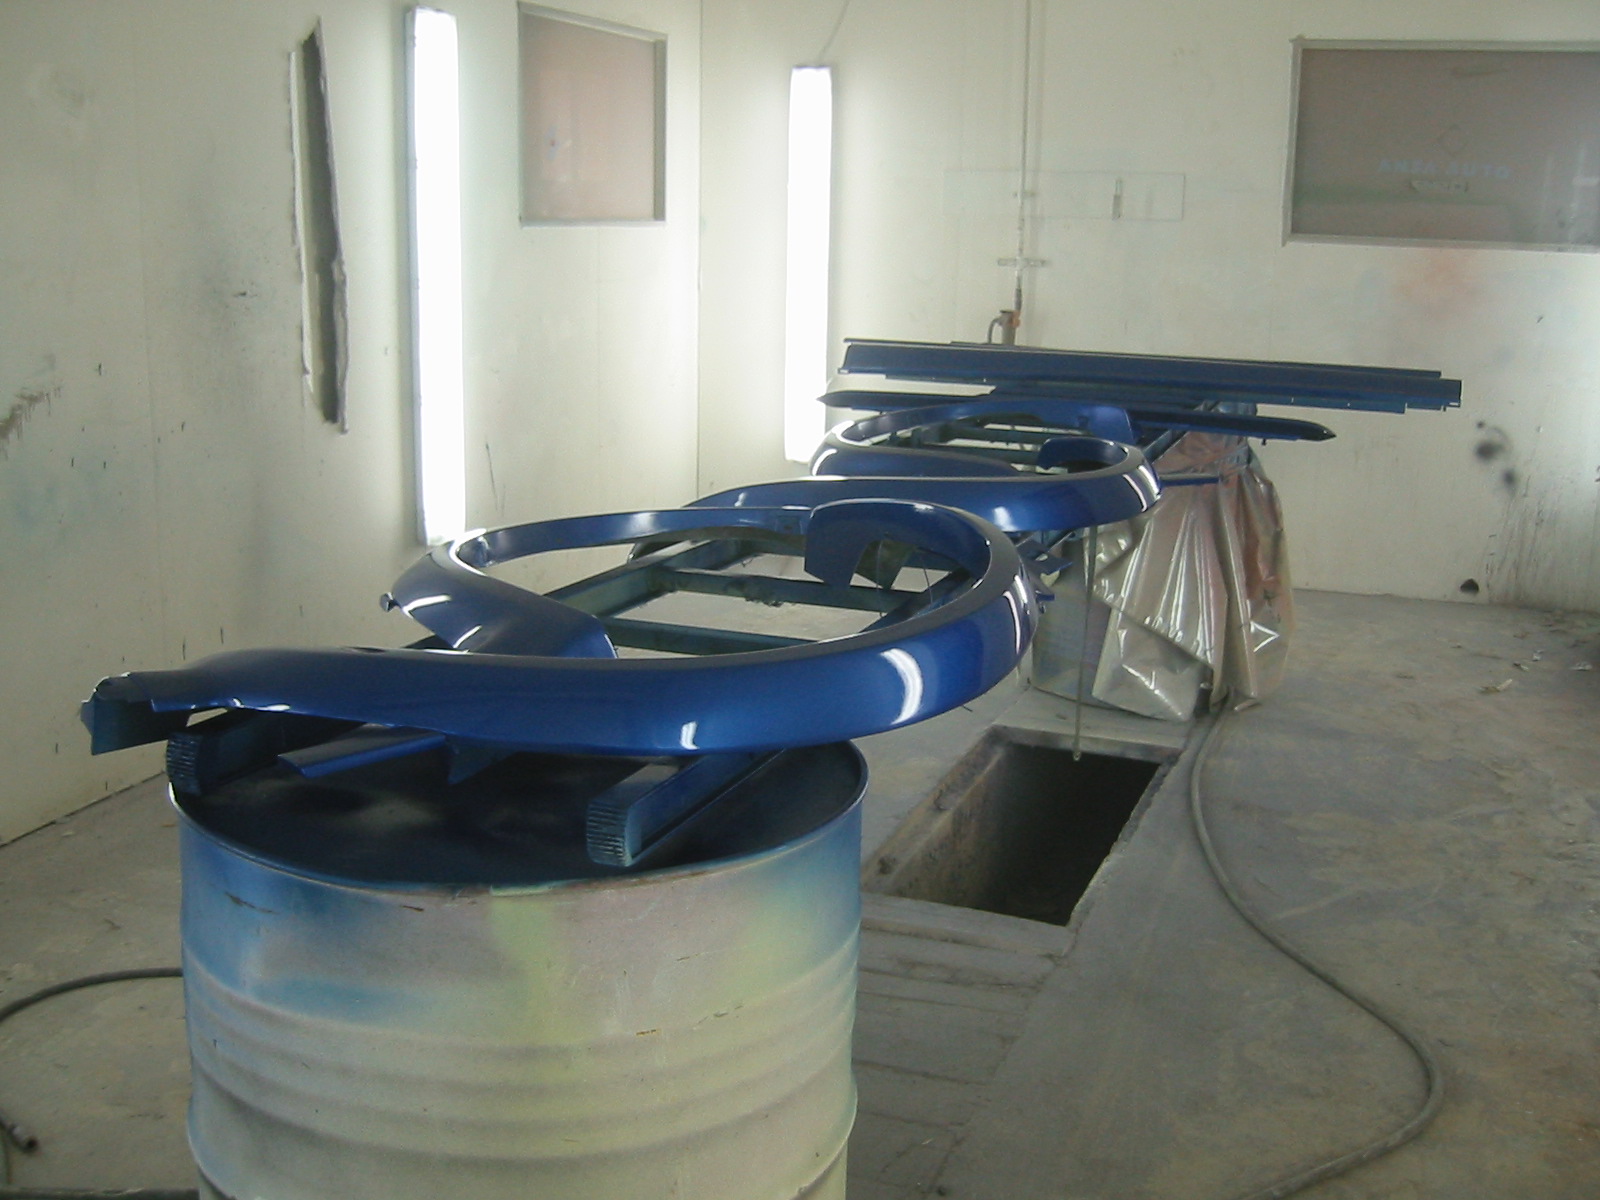
Finally clear coat, only one coat applied when this photo was taken... The photo doesn't do the colour justice: in person it's darker and more purple.
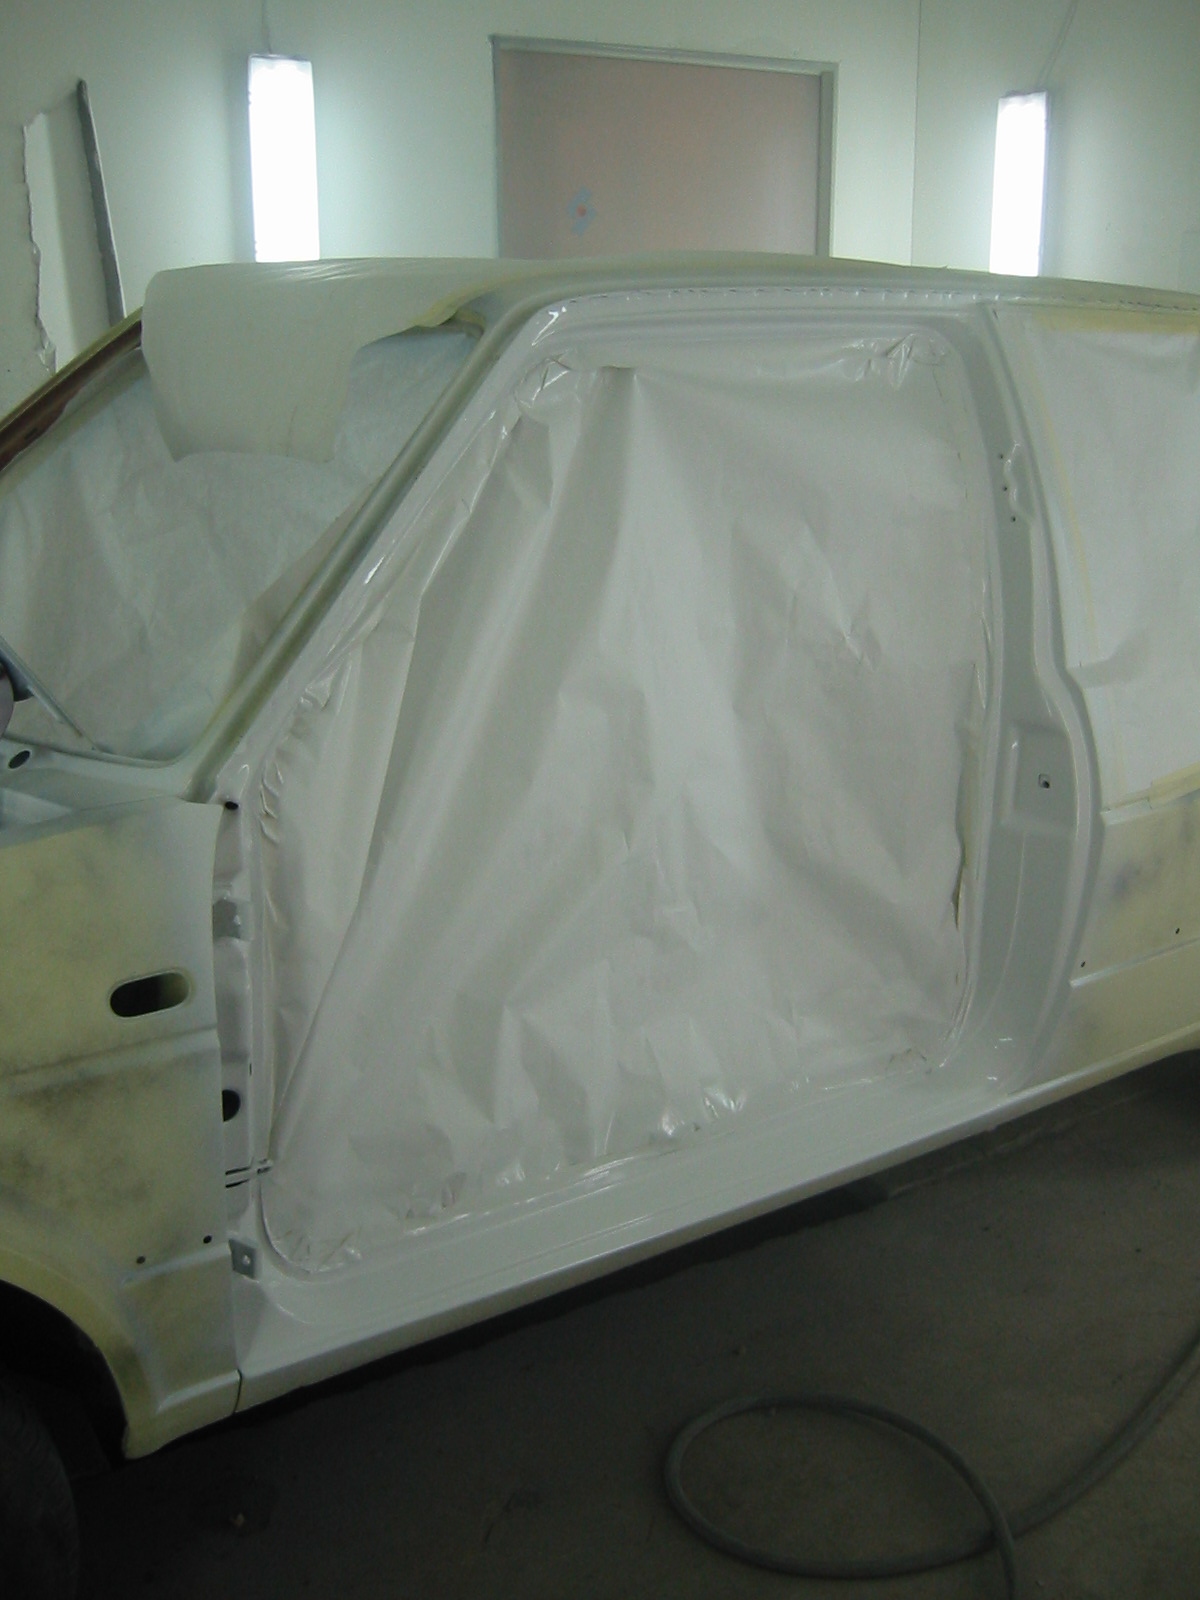
Painting the body started with the door openings and engine bay. First a light tinted undercoat over the red.
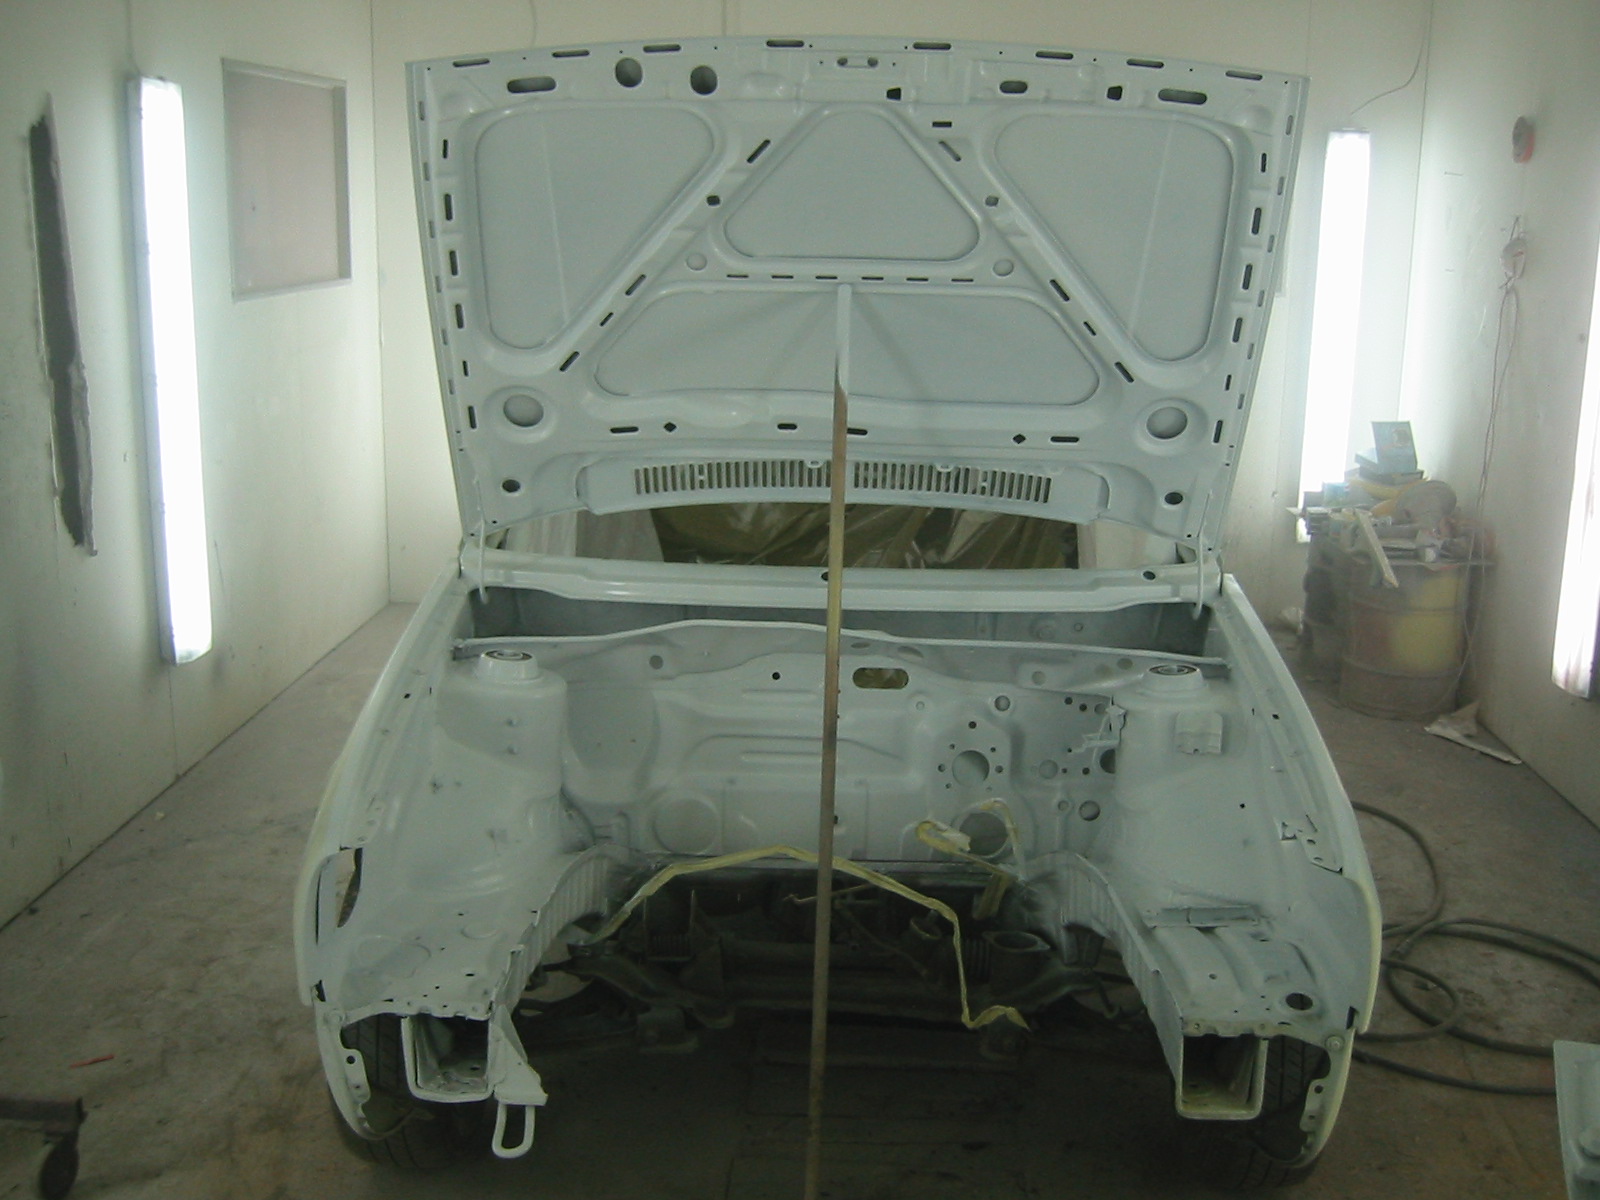
The same in the engine bay. Silver doesn't work well directly over red: it simply won't cover.
Painting — part 4
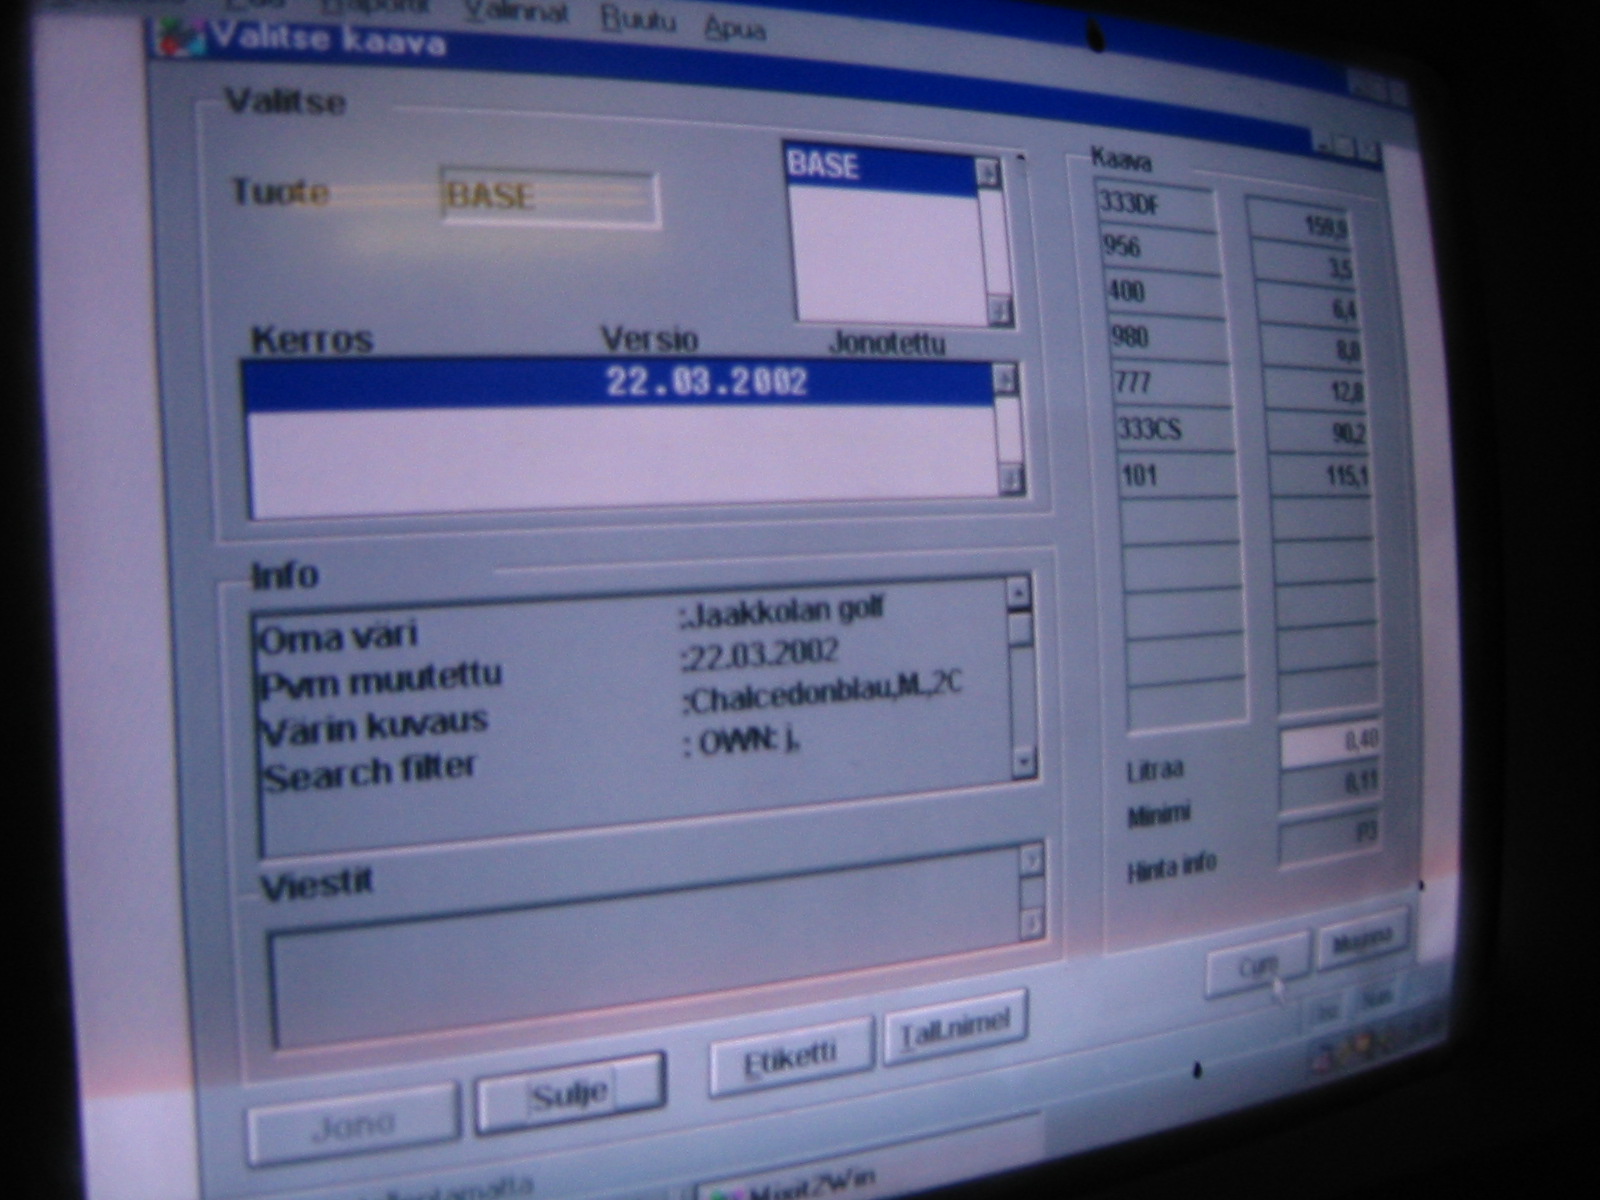
Time to mix the colour itself: Mercedes Chalcedonblau.
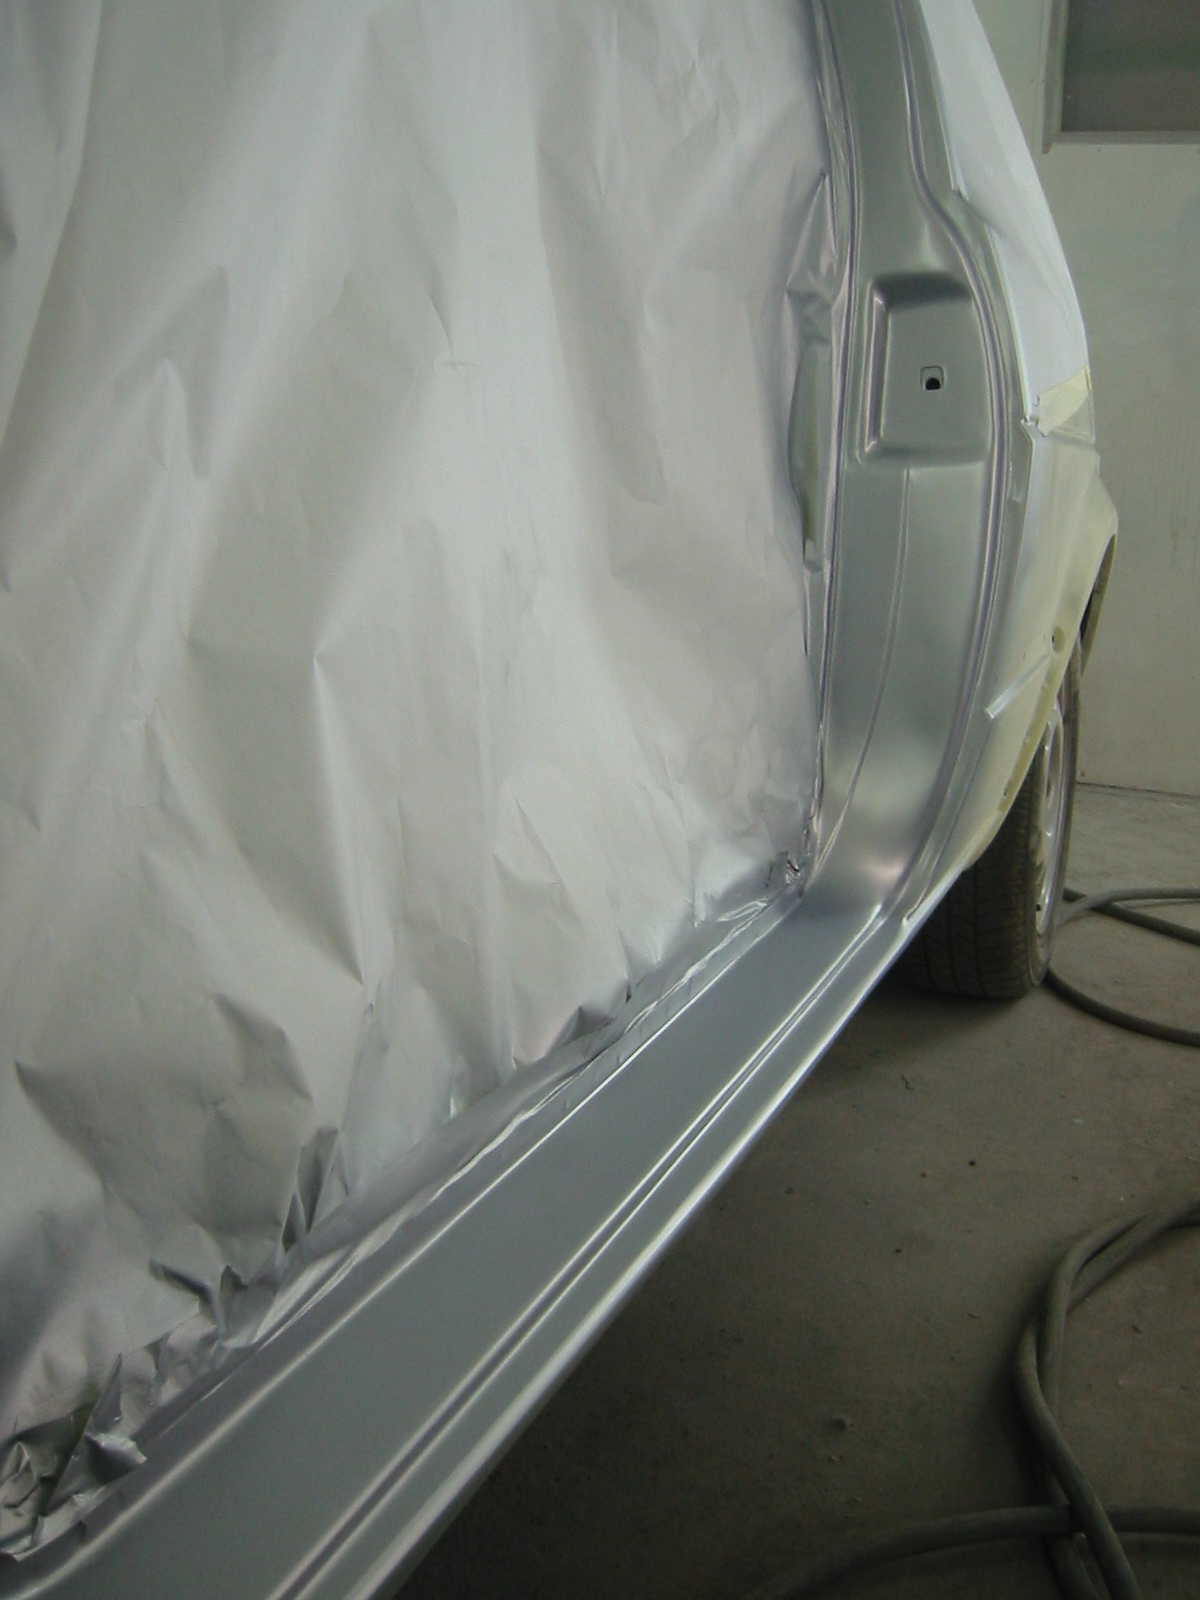
The painted door opening.
The engine bay and underside of the bonnet too.
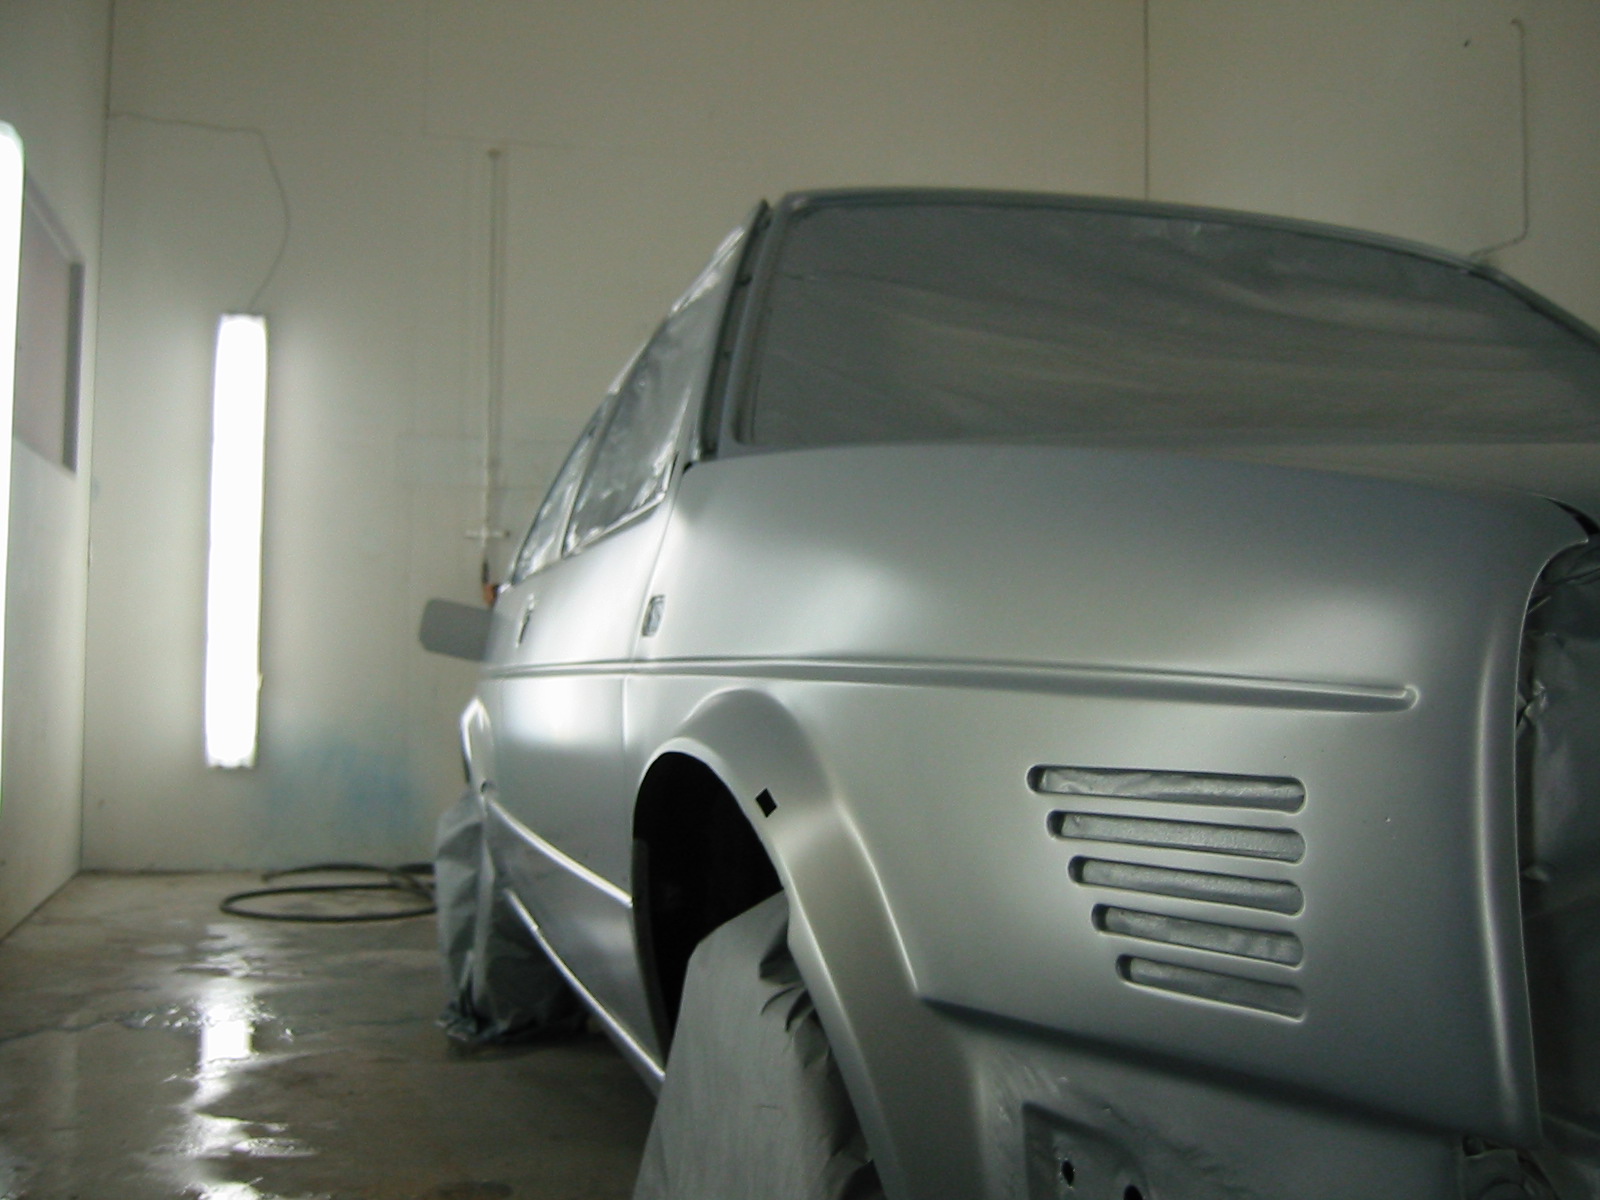
The topcoat finally arrived from Sikkens. The car was painted with water-based paint, the painter's first experiment with these 'watercolours' too :-)
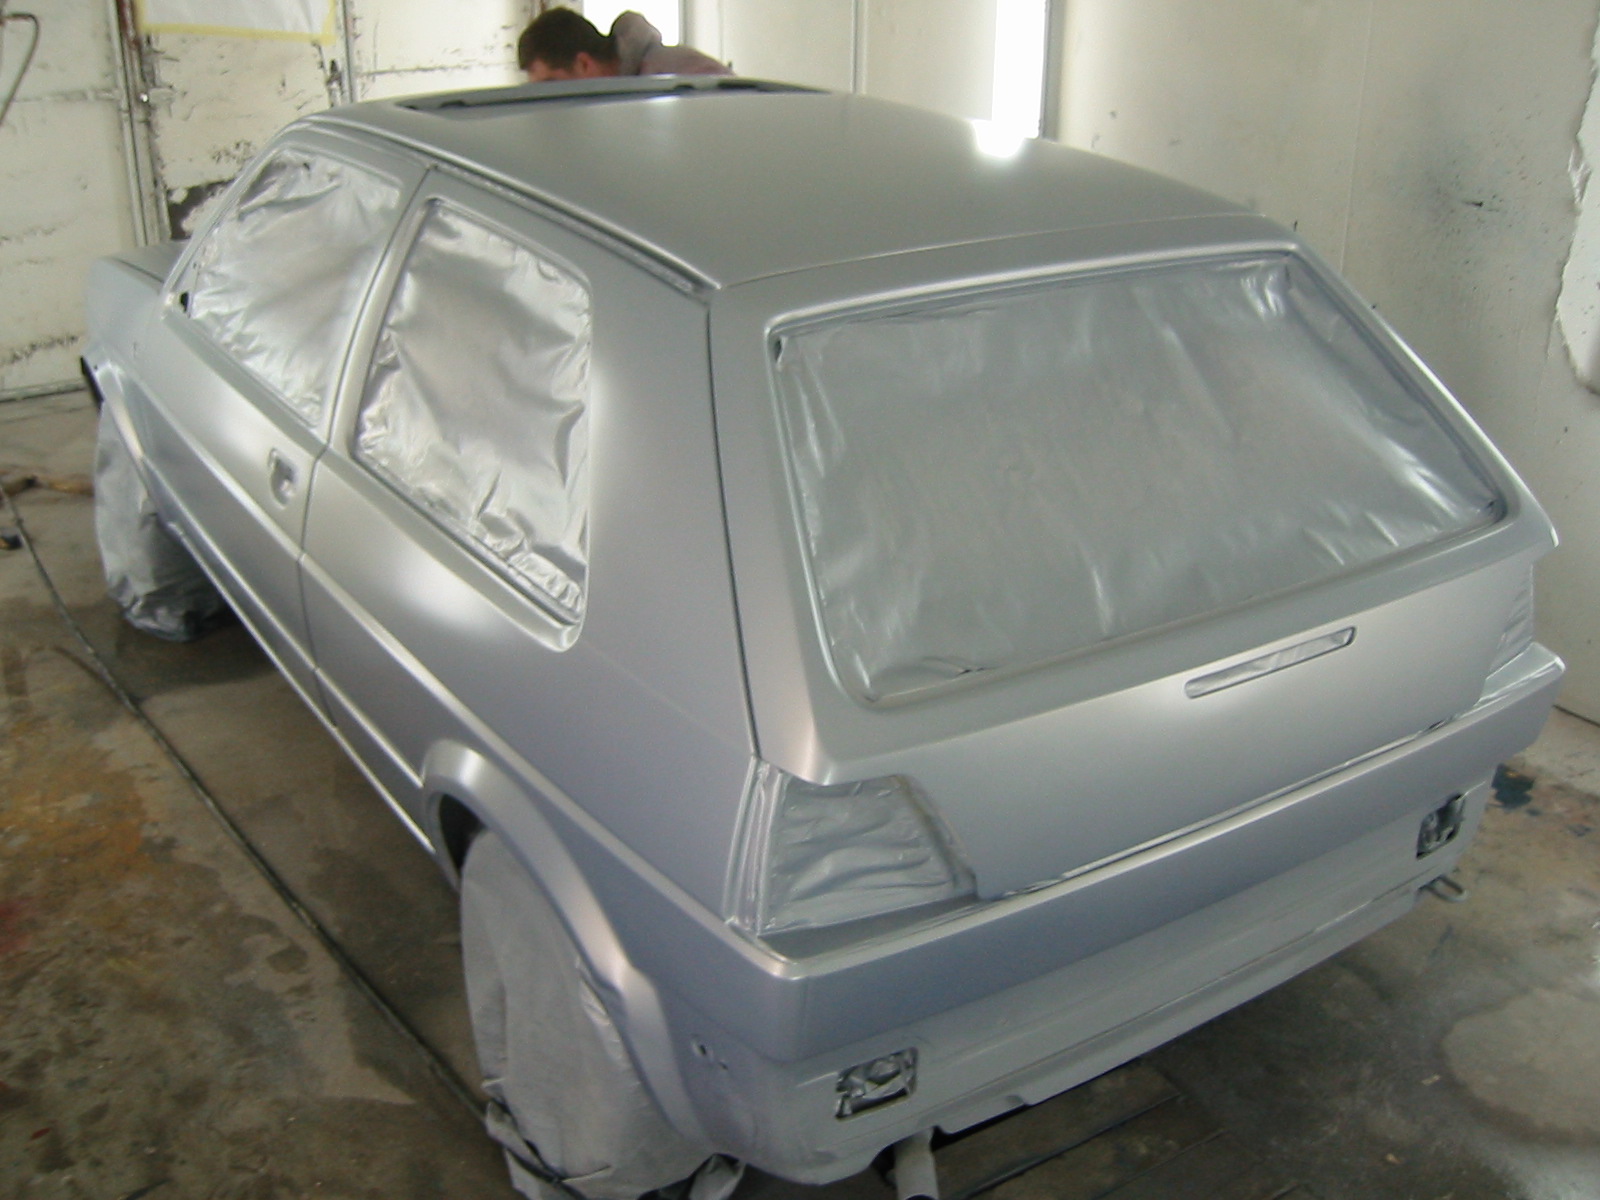
From the rear quarter. A really striking colour, at least under artificial light: silver with a purple tint. No clear coat yet in this picture... Then the camera battery died.
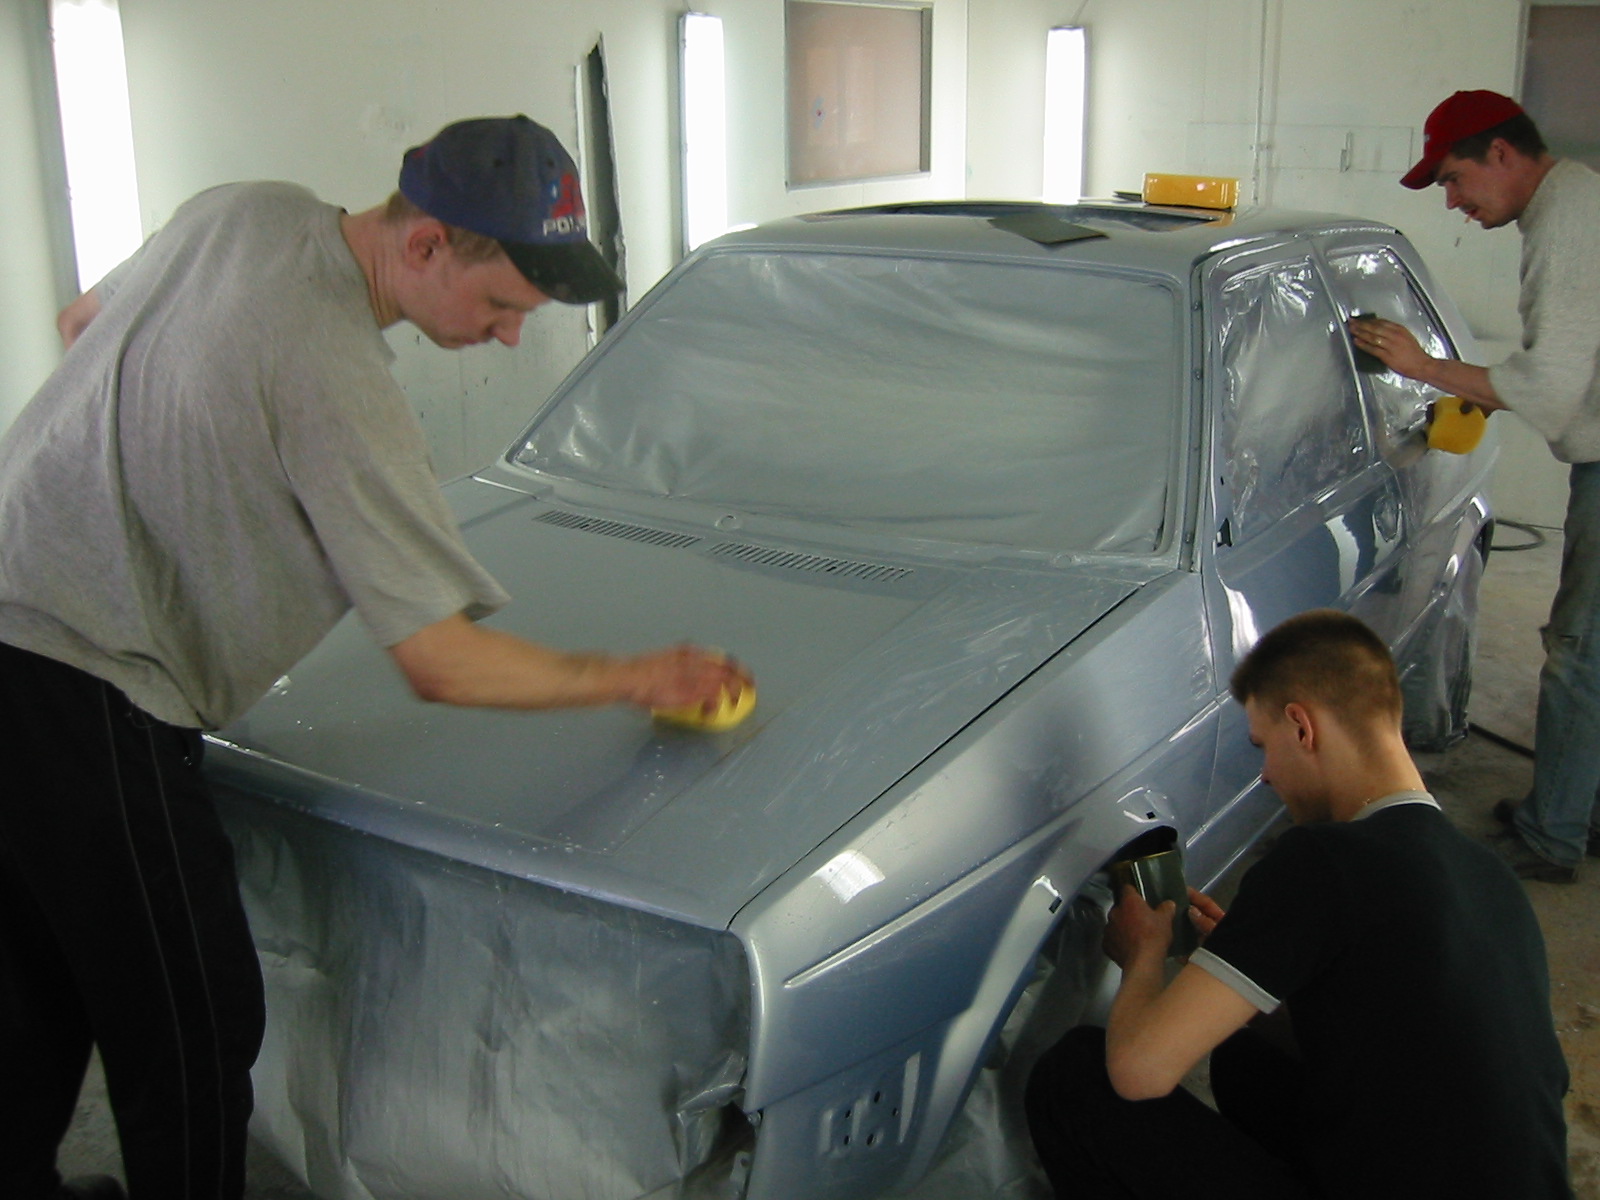
Once the clear had dried, Peksi and the painter decided to wet-sand the whole car and add more clear. That removed a few specks of dirt and the painter's trademark, a run ;-)
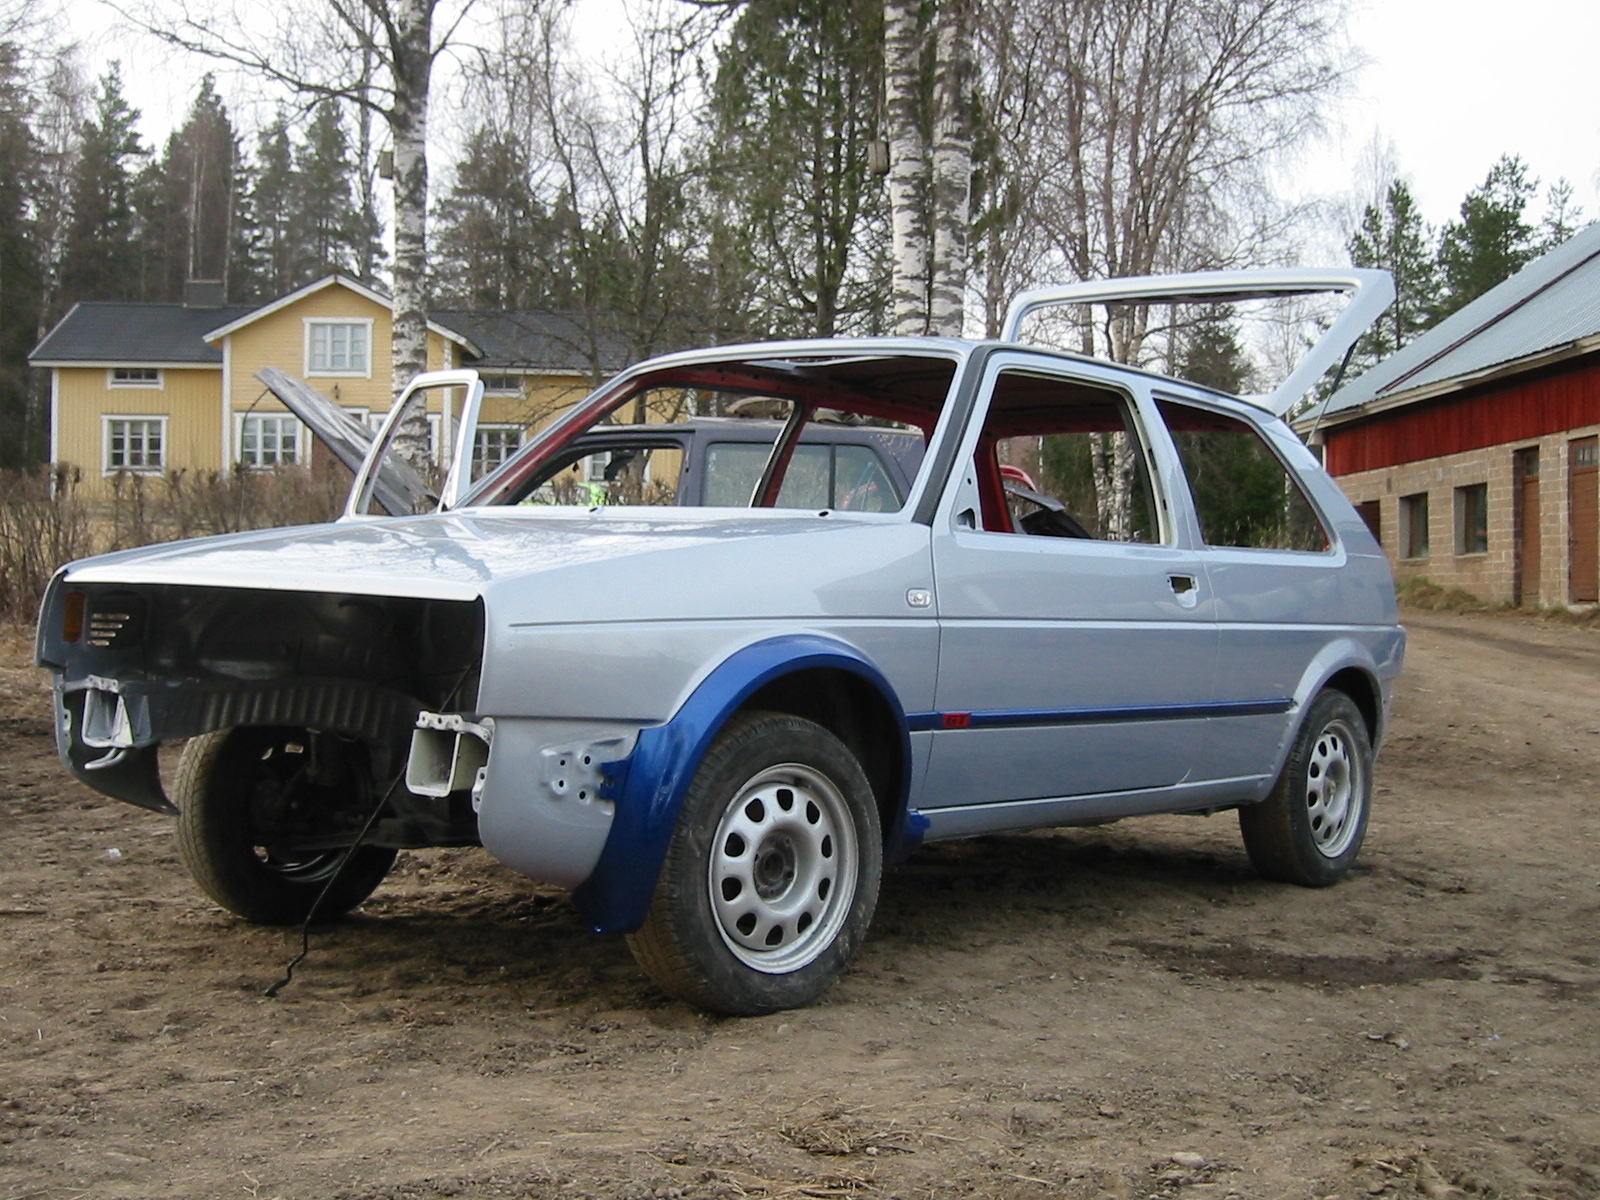
Back at our own garage. Of course we immediately had to try the blue mouldings and arches against the 'slightly' lighter blue body. It should turn out pretty nice, shouldn't it?
Now the serious reassembly begins. First the interior was pressure-washed to remove all the filler dust and other debris.
Reassembly — part 1
The following pages collect photos and stories from the different stages of putting everything back together after painting.
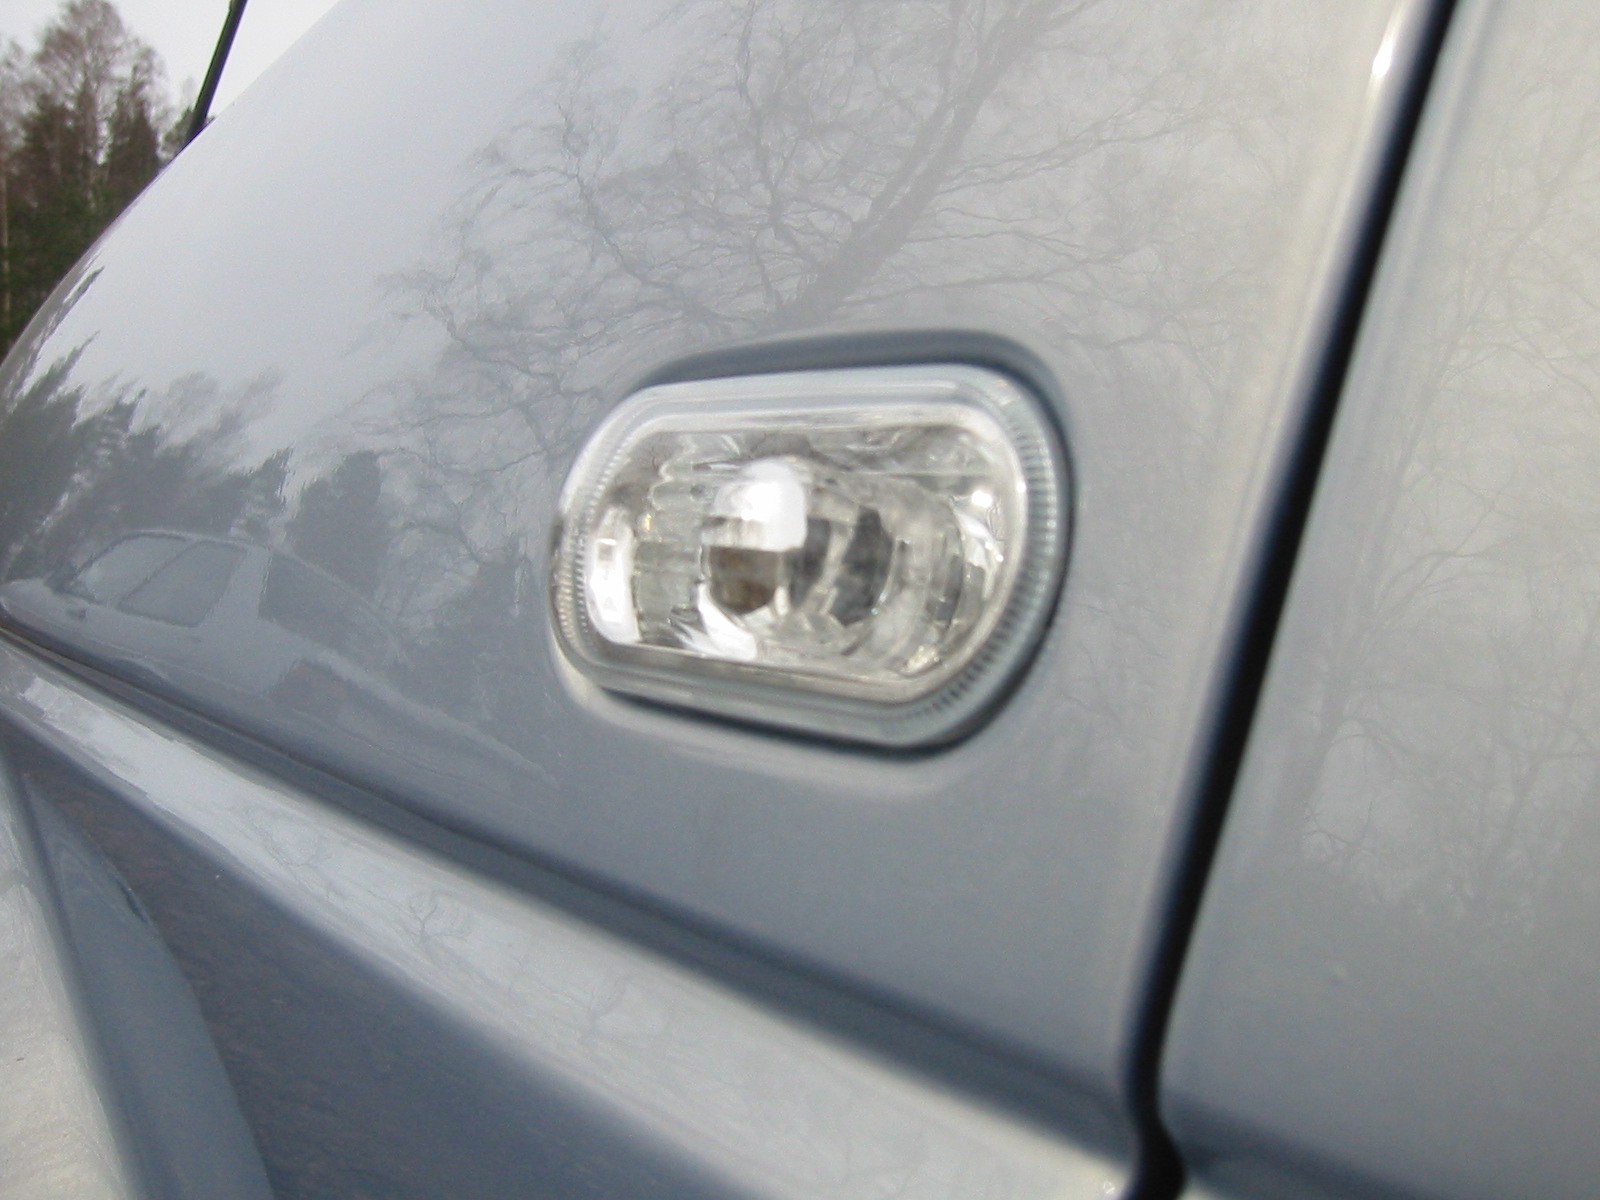
As soon as the car was back in the yard, the first thing was to click in the Mk4 clear-lens side repeaters :-)
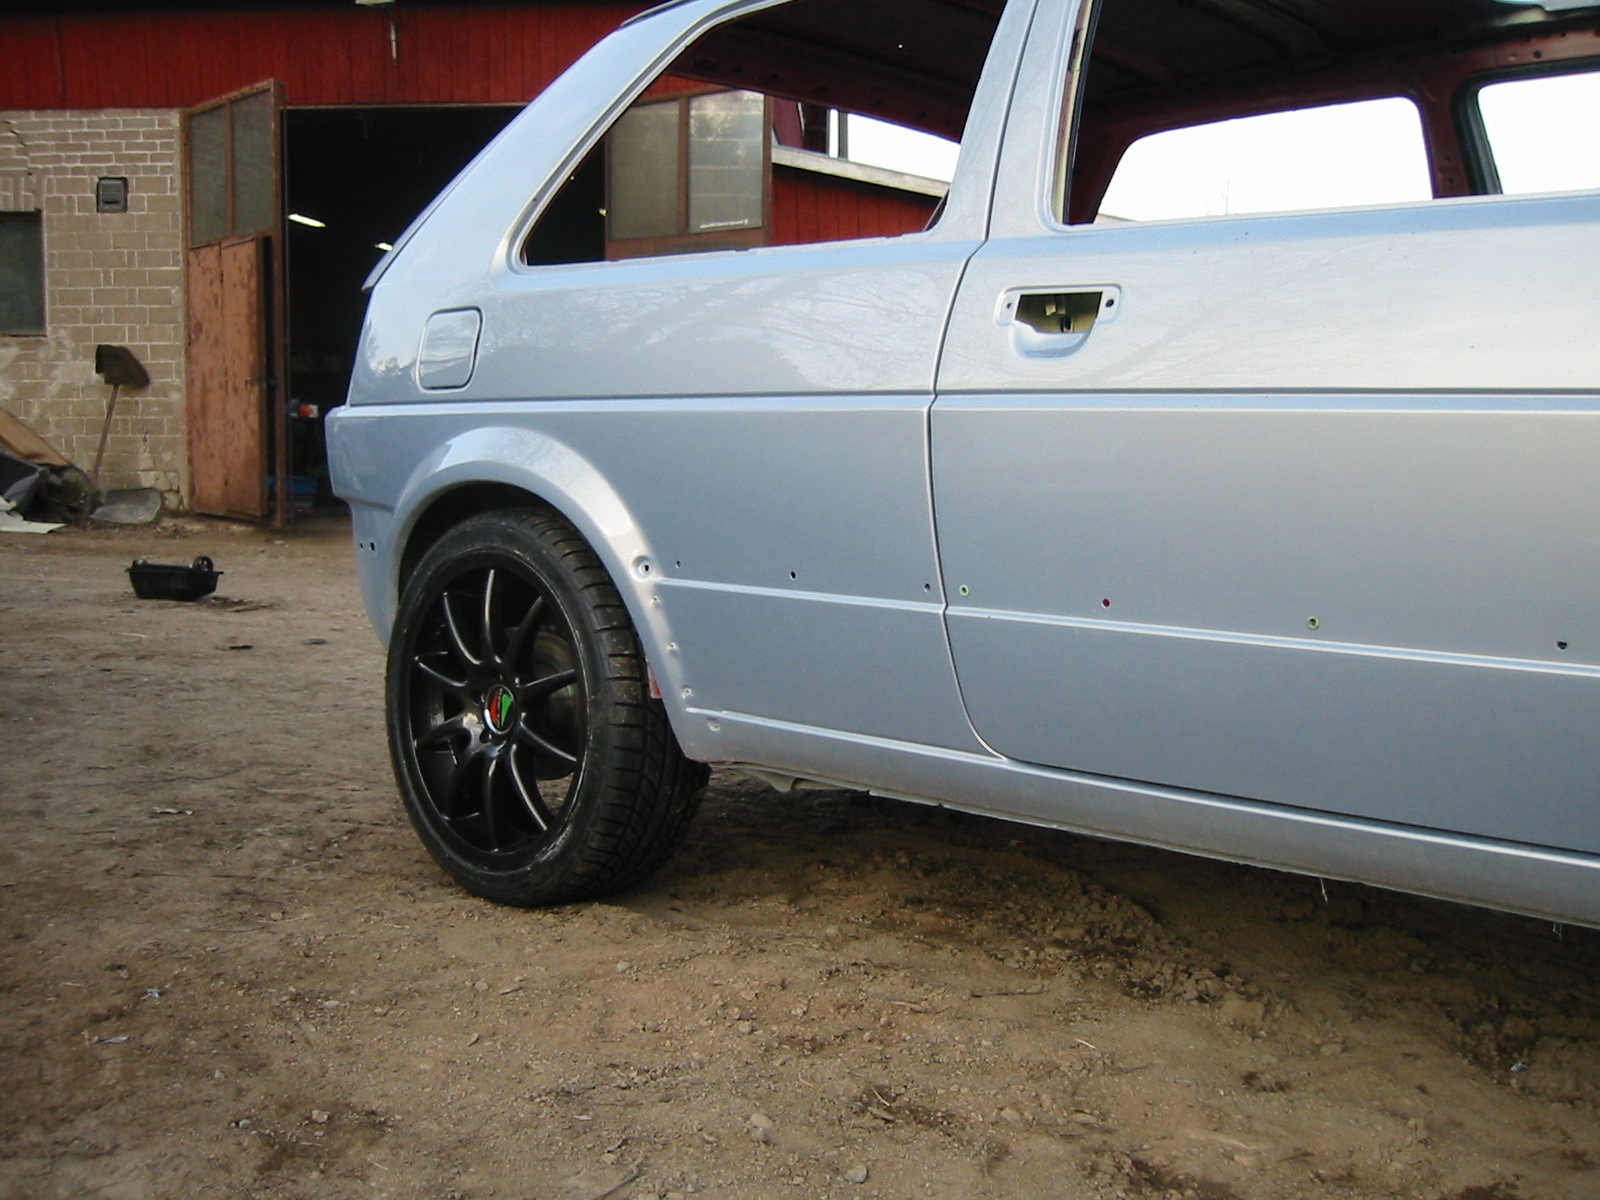
Next, naturally, the wheels... It's still a little high with no load in it.
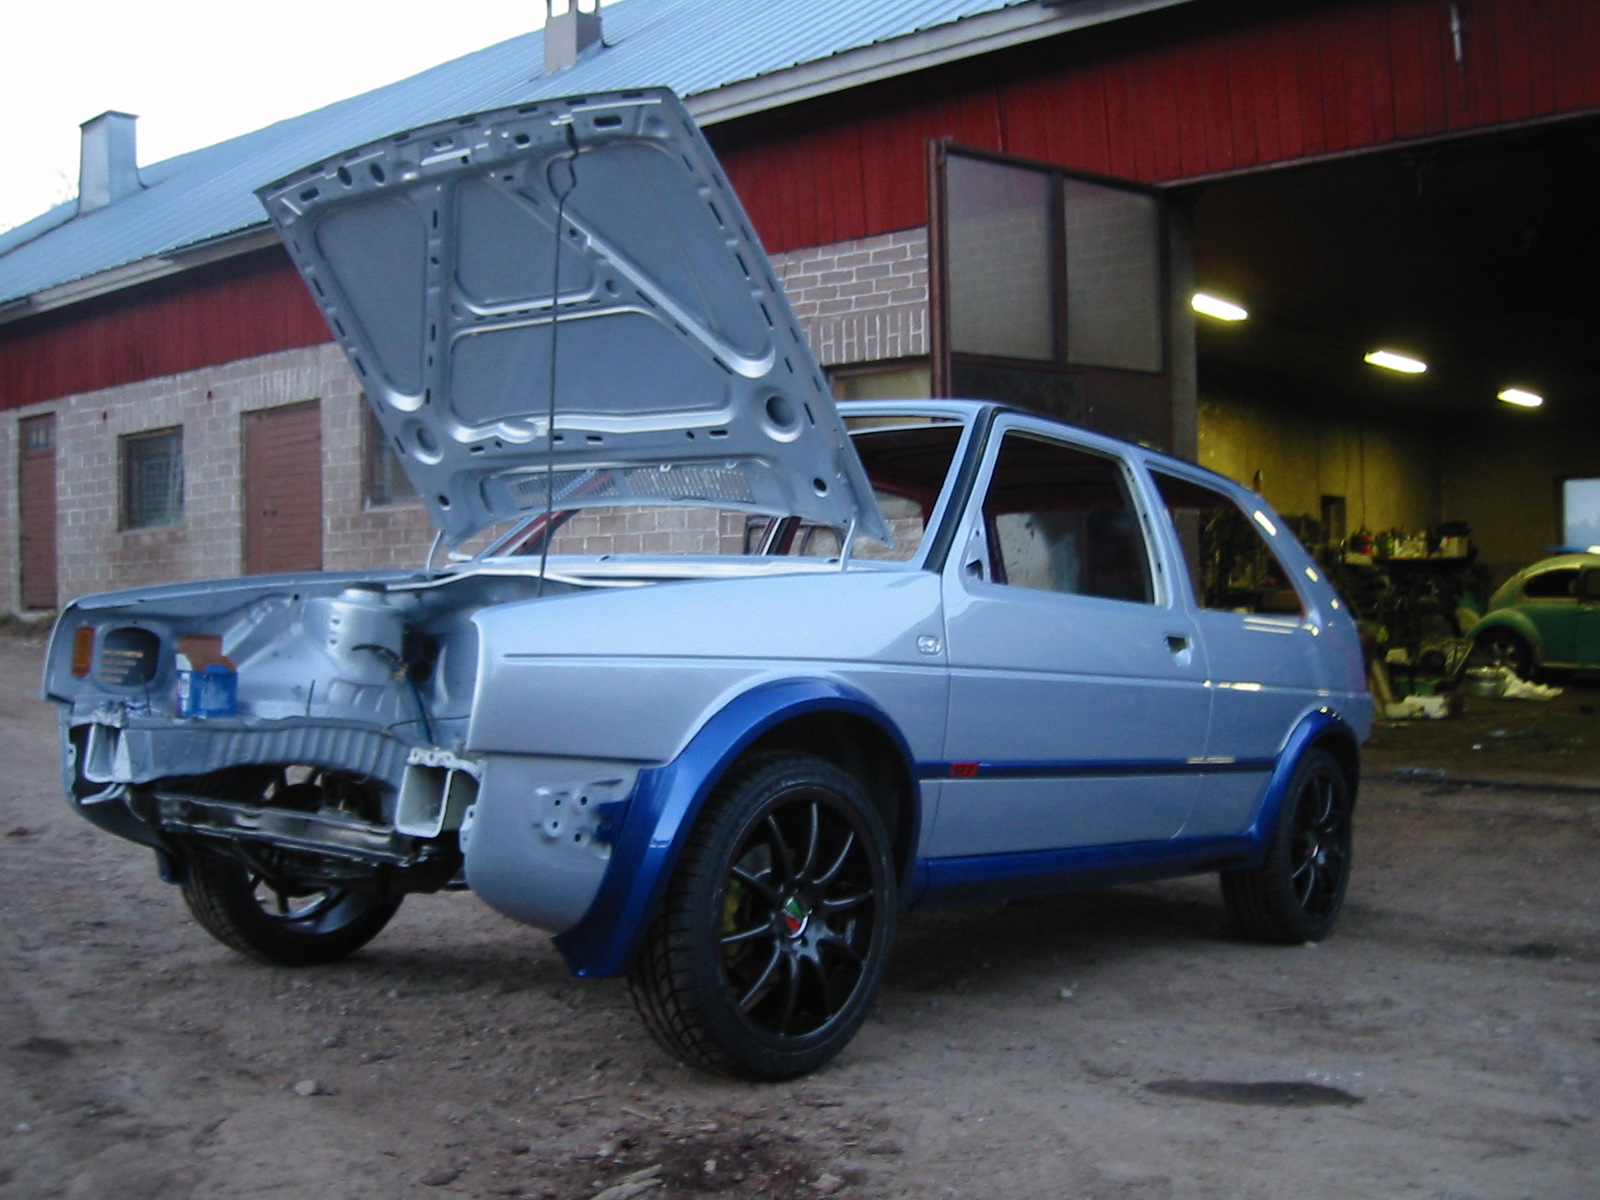
Now the front wheels are on too. Before that came the Mk3 hubs and brakes, apparently from a Passat: 256 mm vented discs, anyway. Bilstein dampers at the front, with some red Swedish springs :-) Koni Sports will go at the rear.
Peksi also fitted the arches and sill trims permanently to get a taste of how the car would look, with plenty of cavity wax underneath.
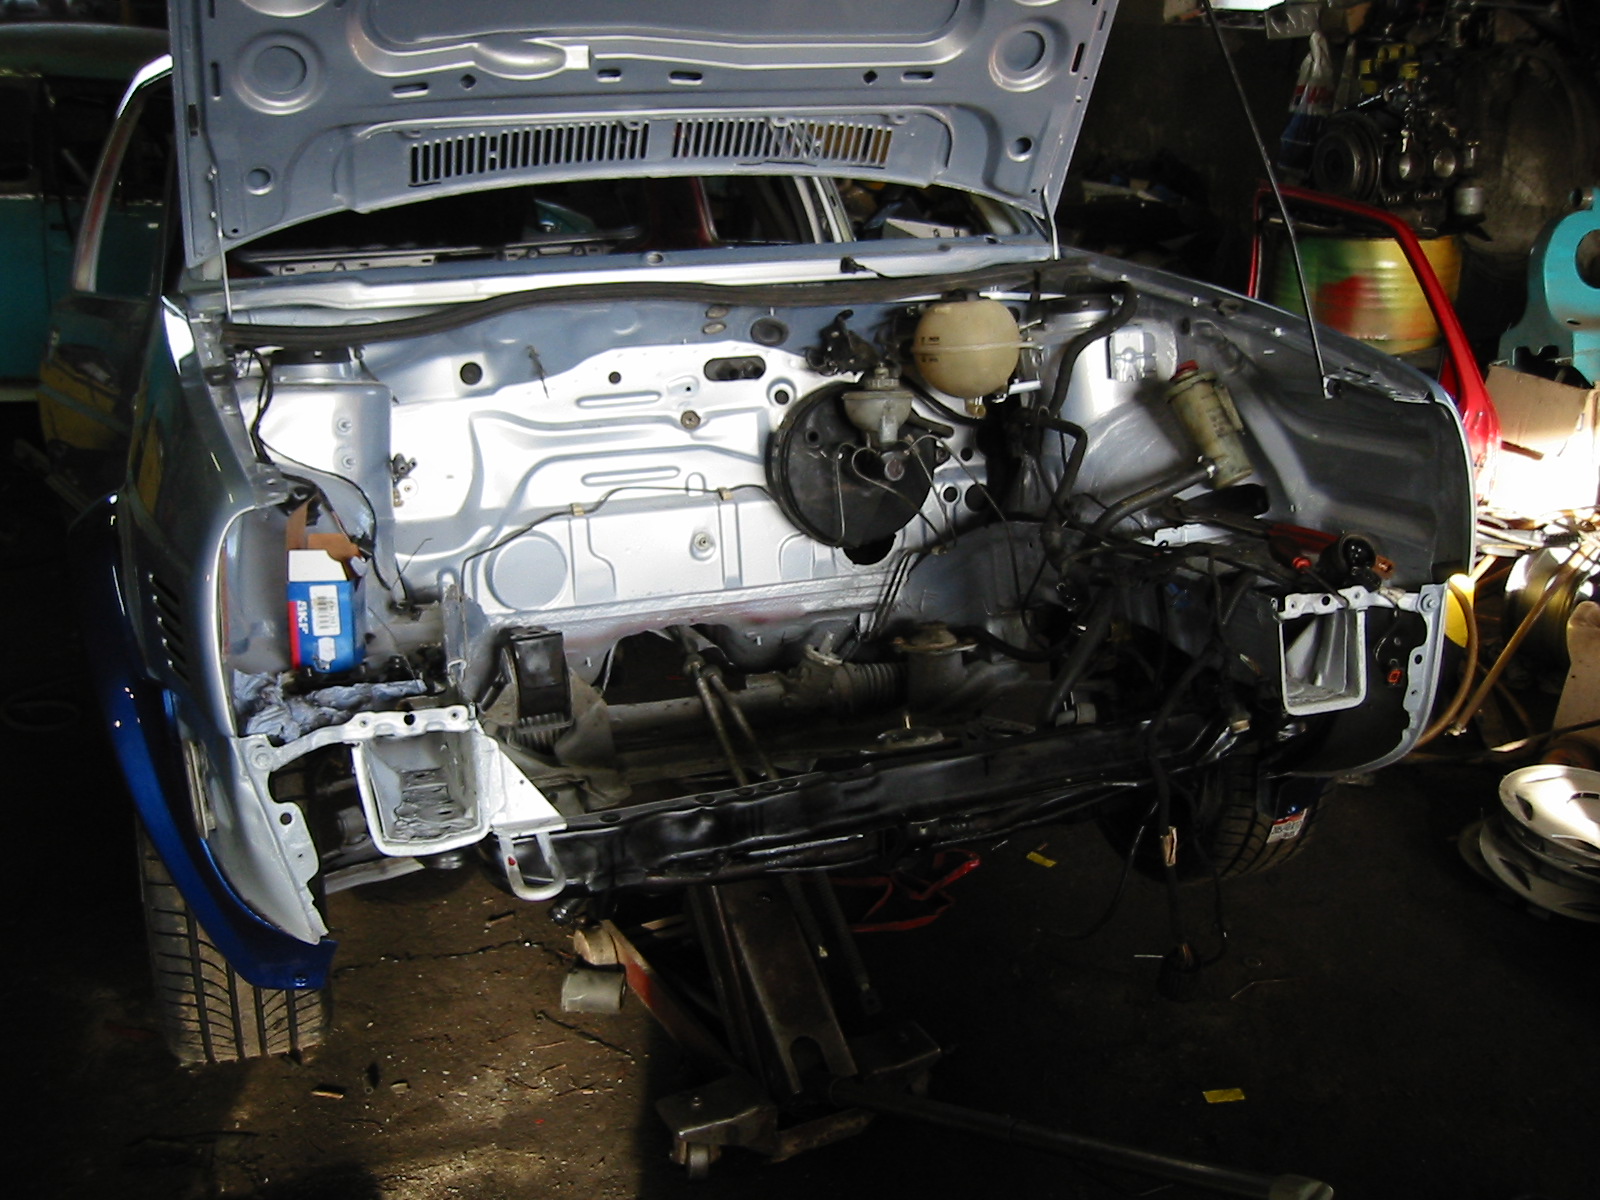
Already installed: brake servo and clutch cylinder, engine mounts, cable gearshift, a big bundle of wiring, power-steering hoses and pipes...
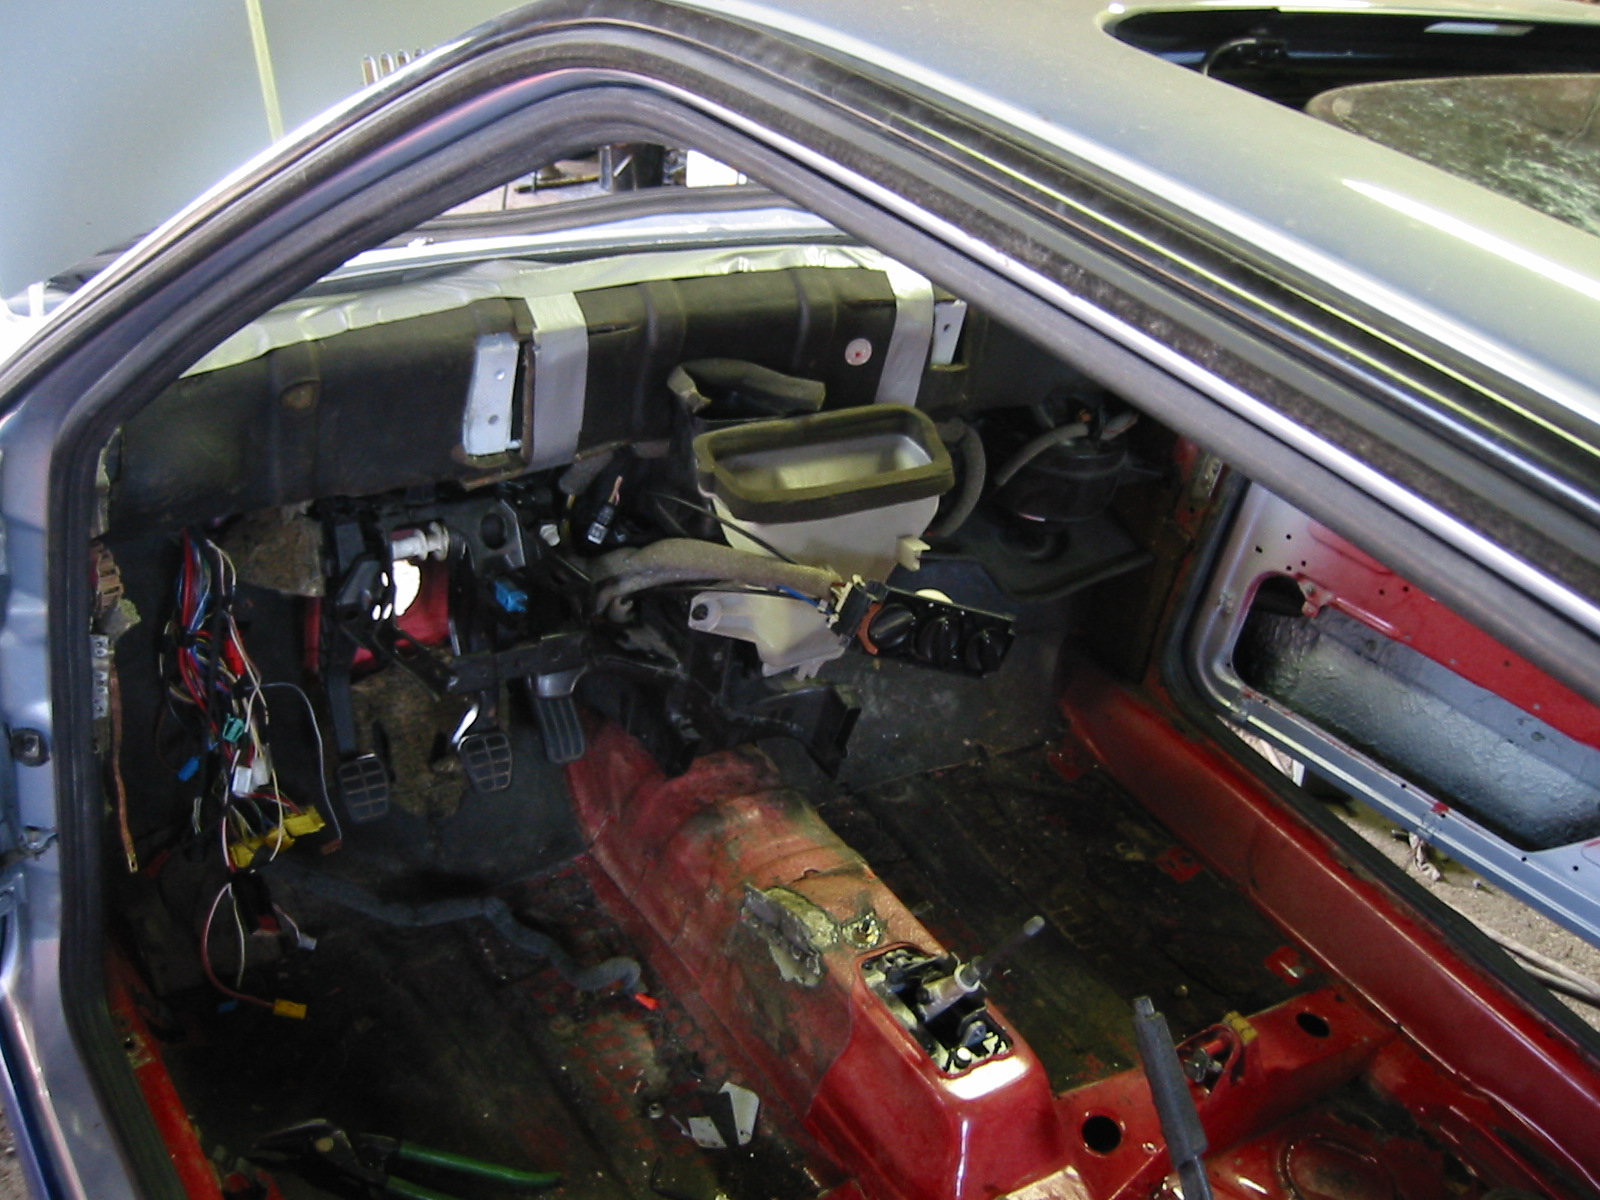
...sound insulation behind the dash, pedals, heater, sunroof...
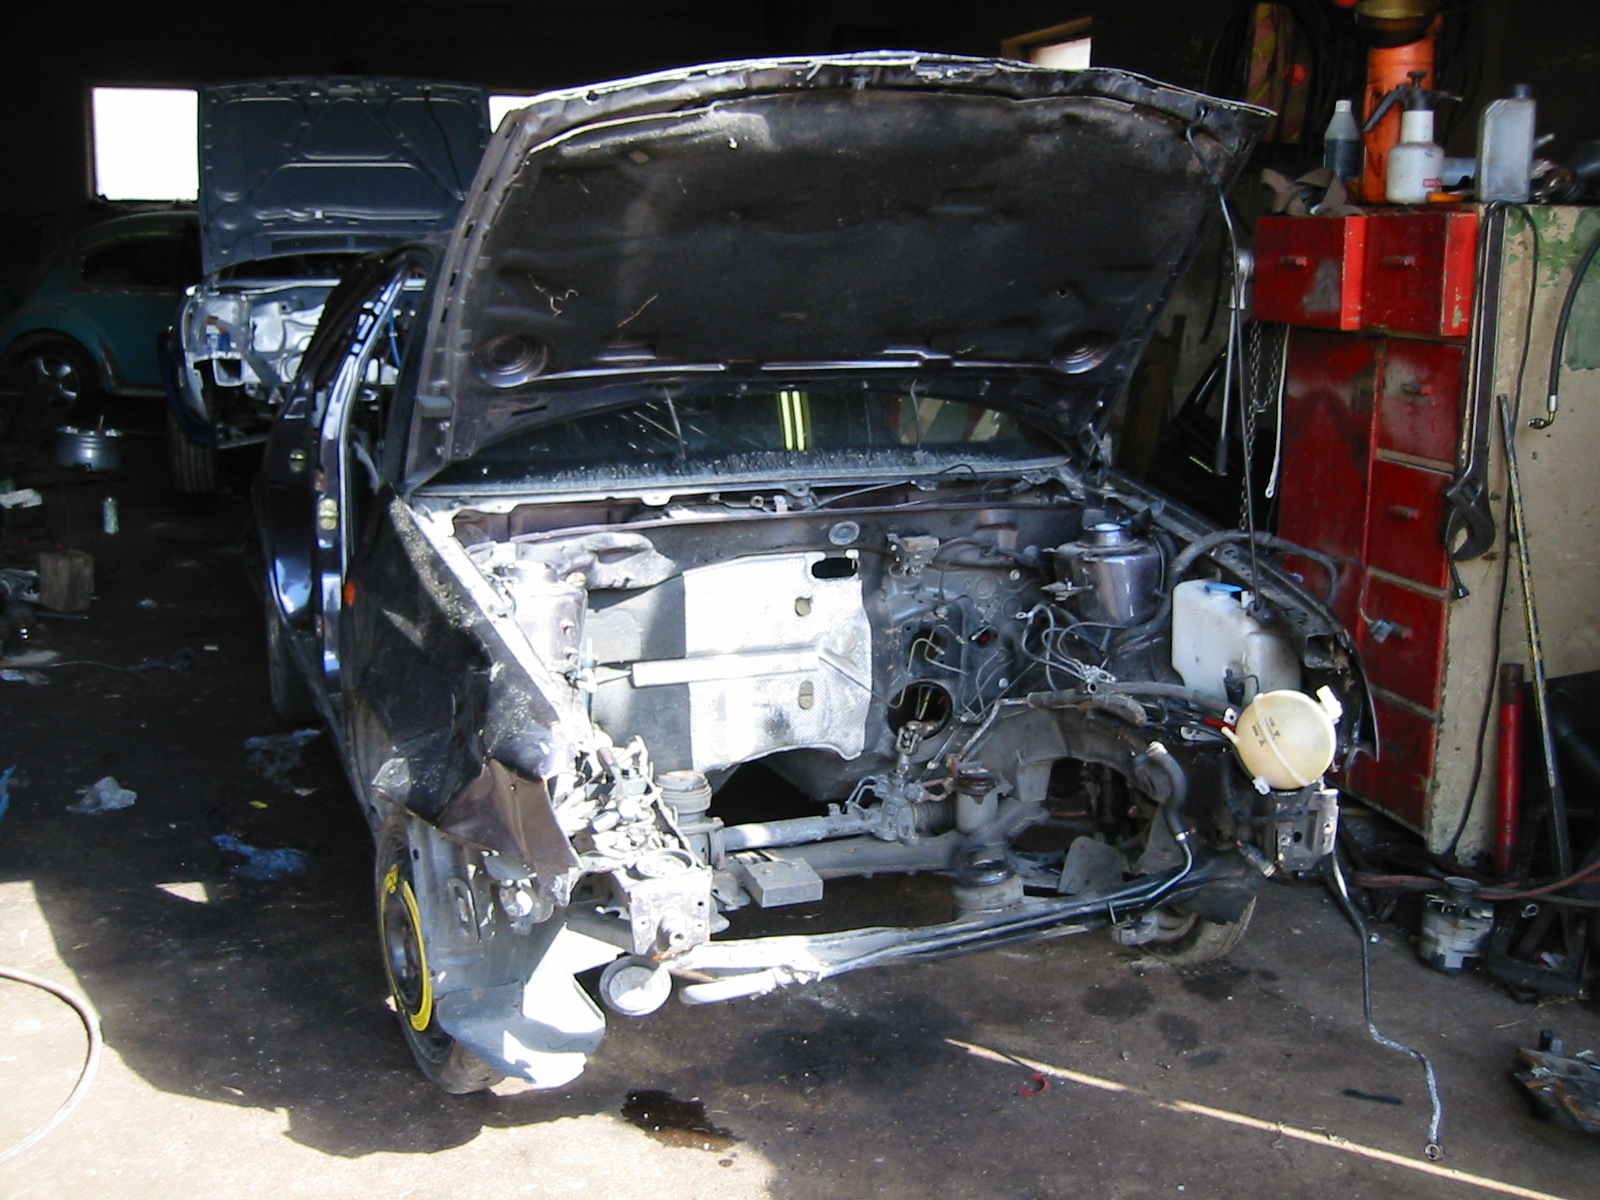
Not much left of the donor. The power-steering rack is still there, I think; that will move over once Peksi gets new ends for it.
Reassembly — part 2
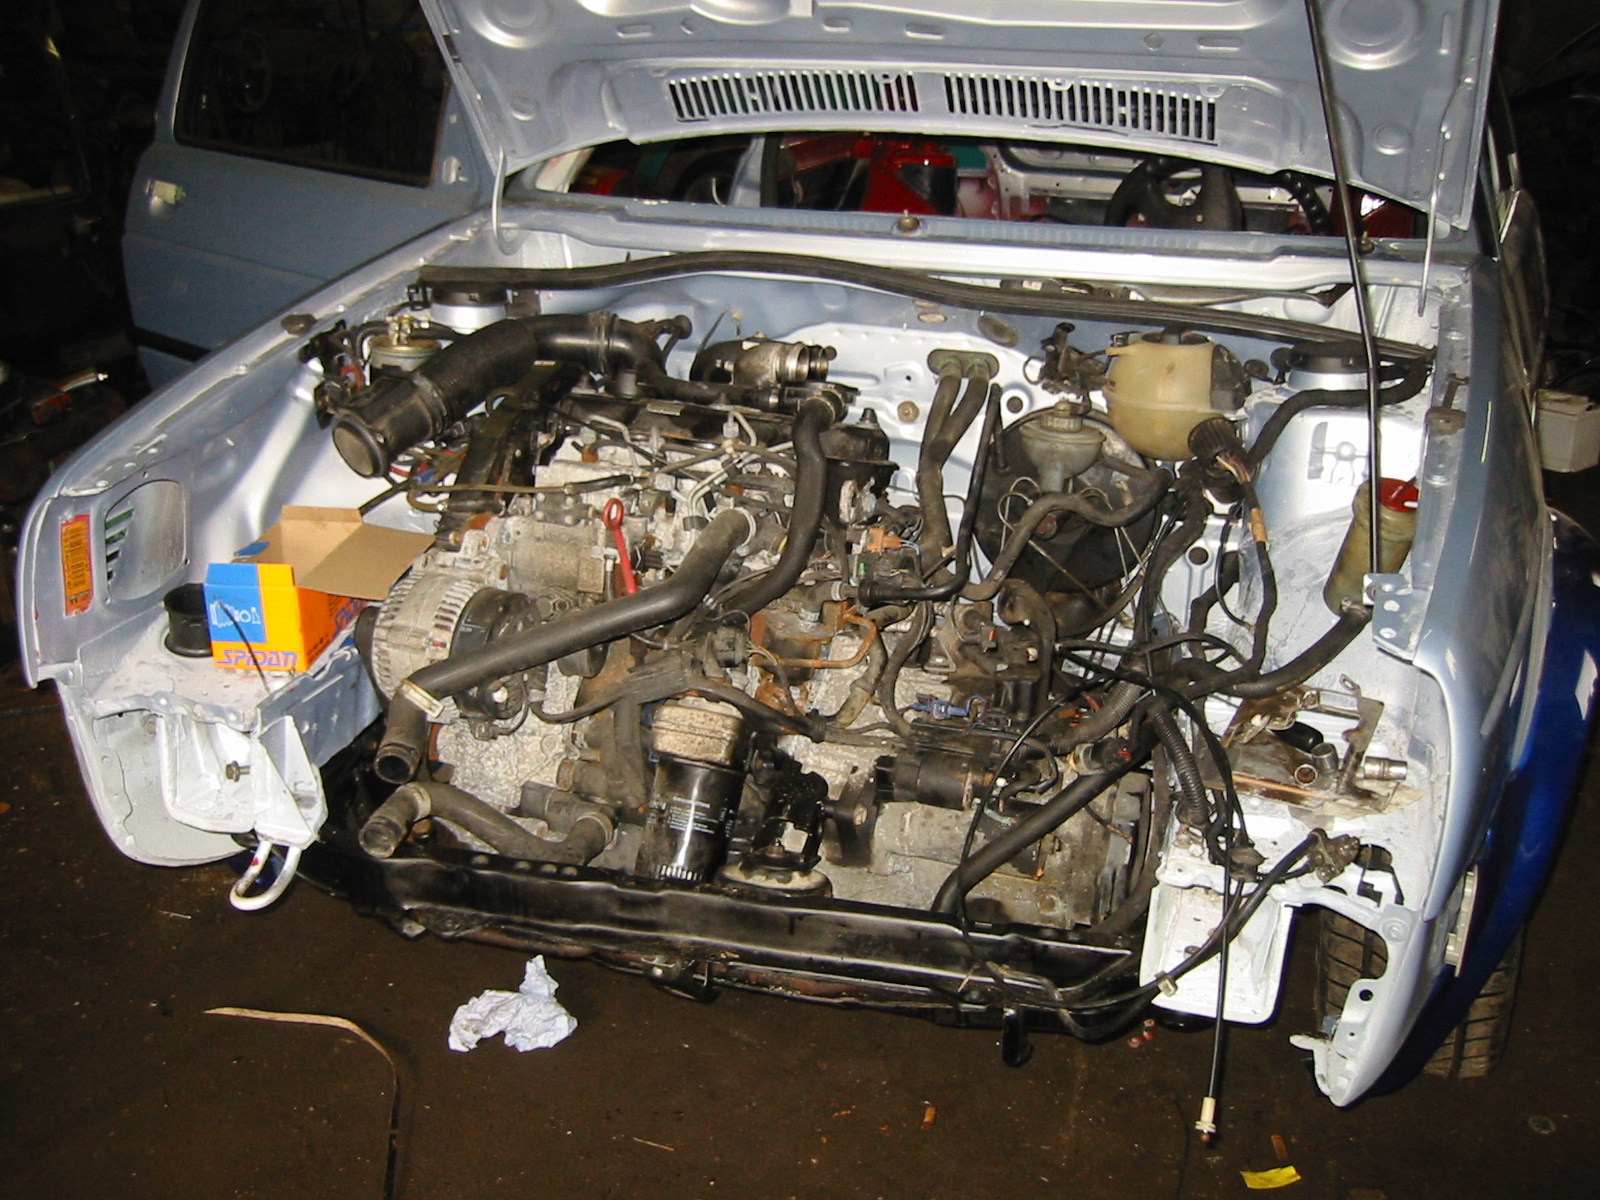
Pekka was busy on May Day, and there sits the TDI engine. It dropped in nicely. Really only the wiring runs need a little work: a couple of openings for the engine control unit cables.
Inside, most of the electrics are connected too. The dash beam and steering column are in. Essentially only the electric-window, mirror and central-locking wiring remains.
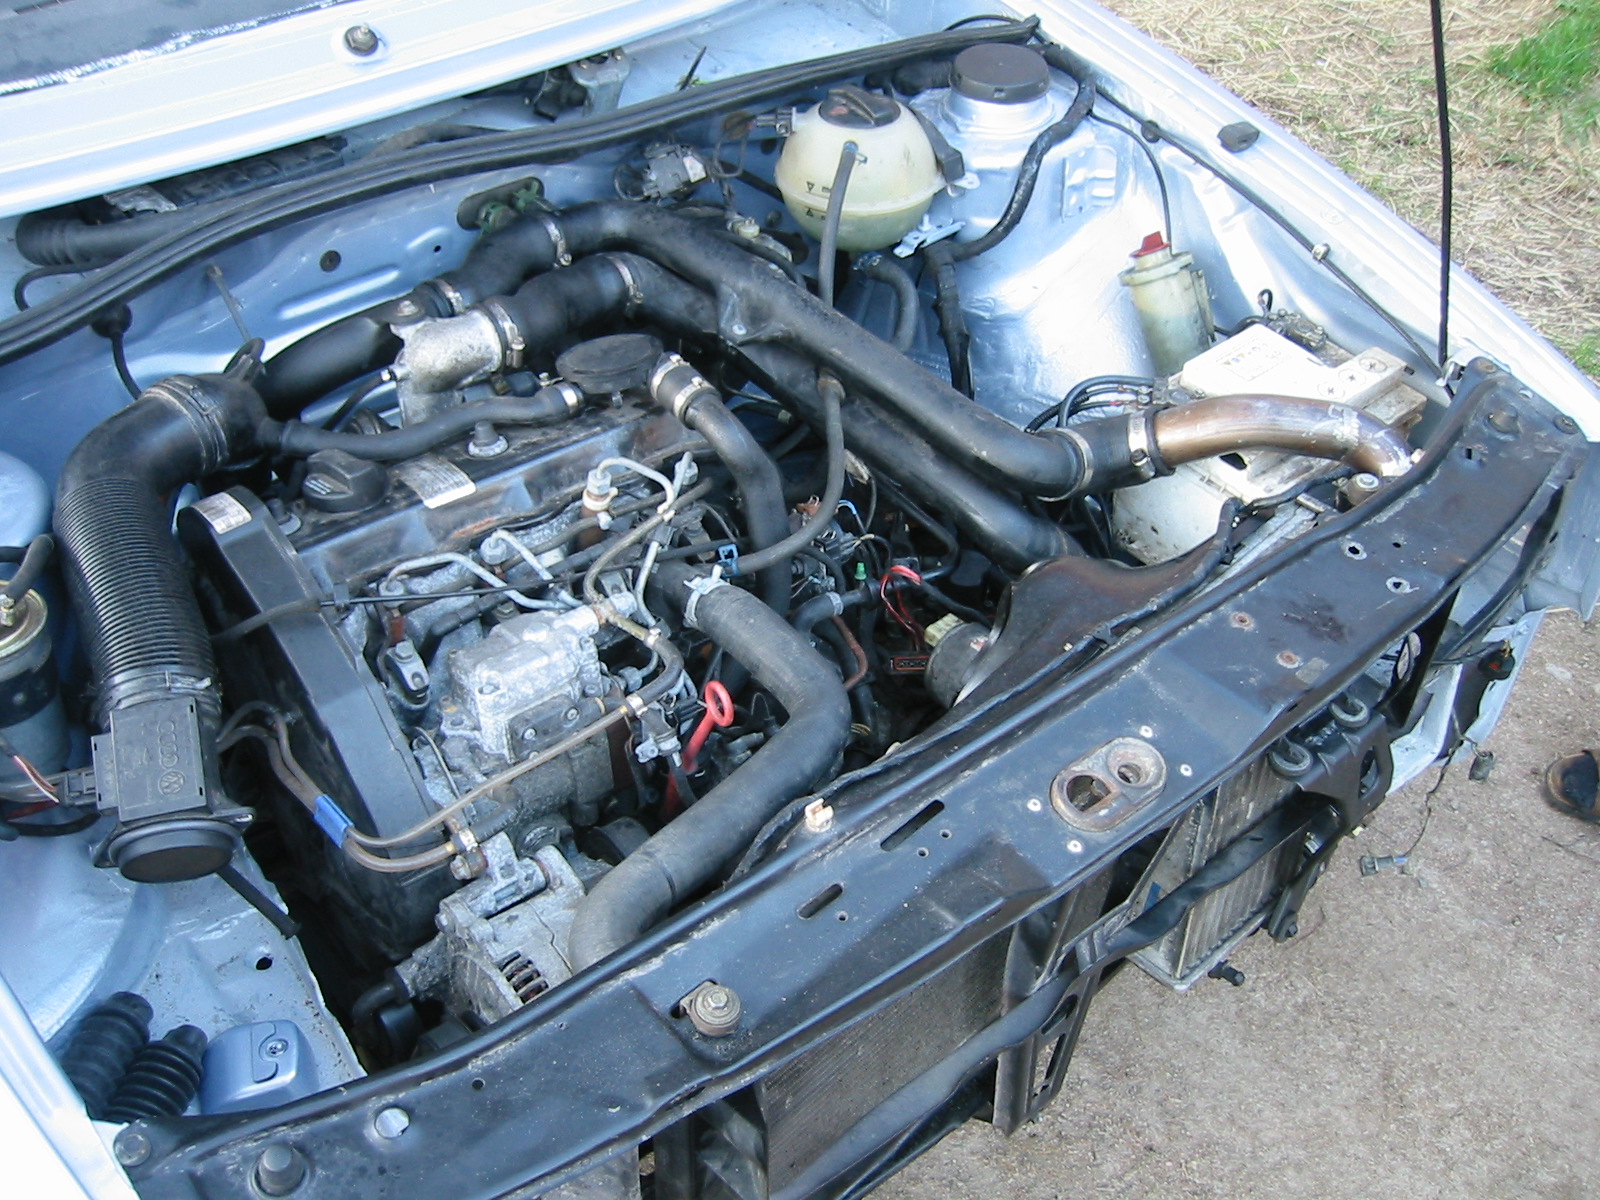
The engine is ready to run: all electrics connected, coolant in the radiator, fuel hoses sorted, intercooler pipes fitted and so on. Even the electric sunroof works. Just position the dashboard, connect the instruments...
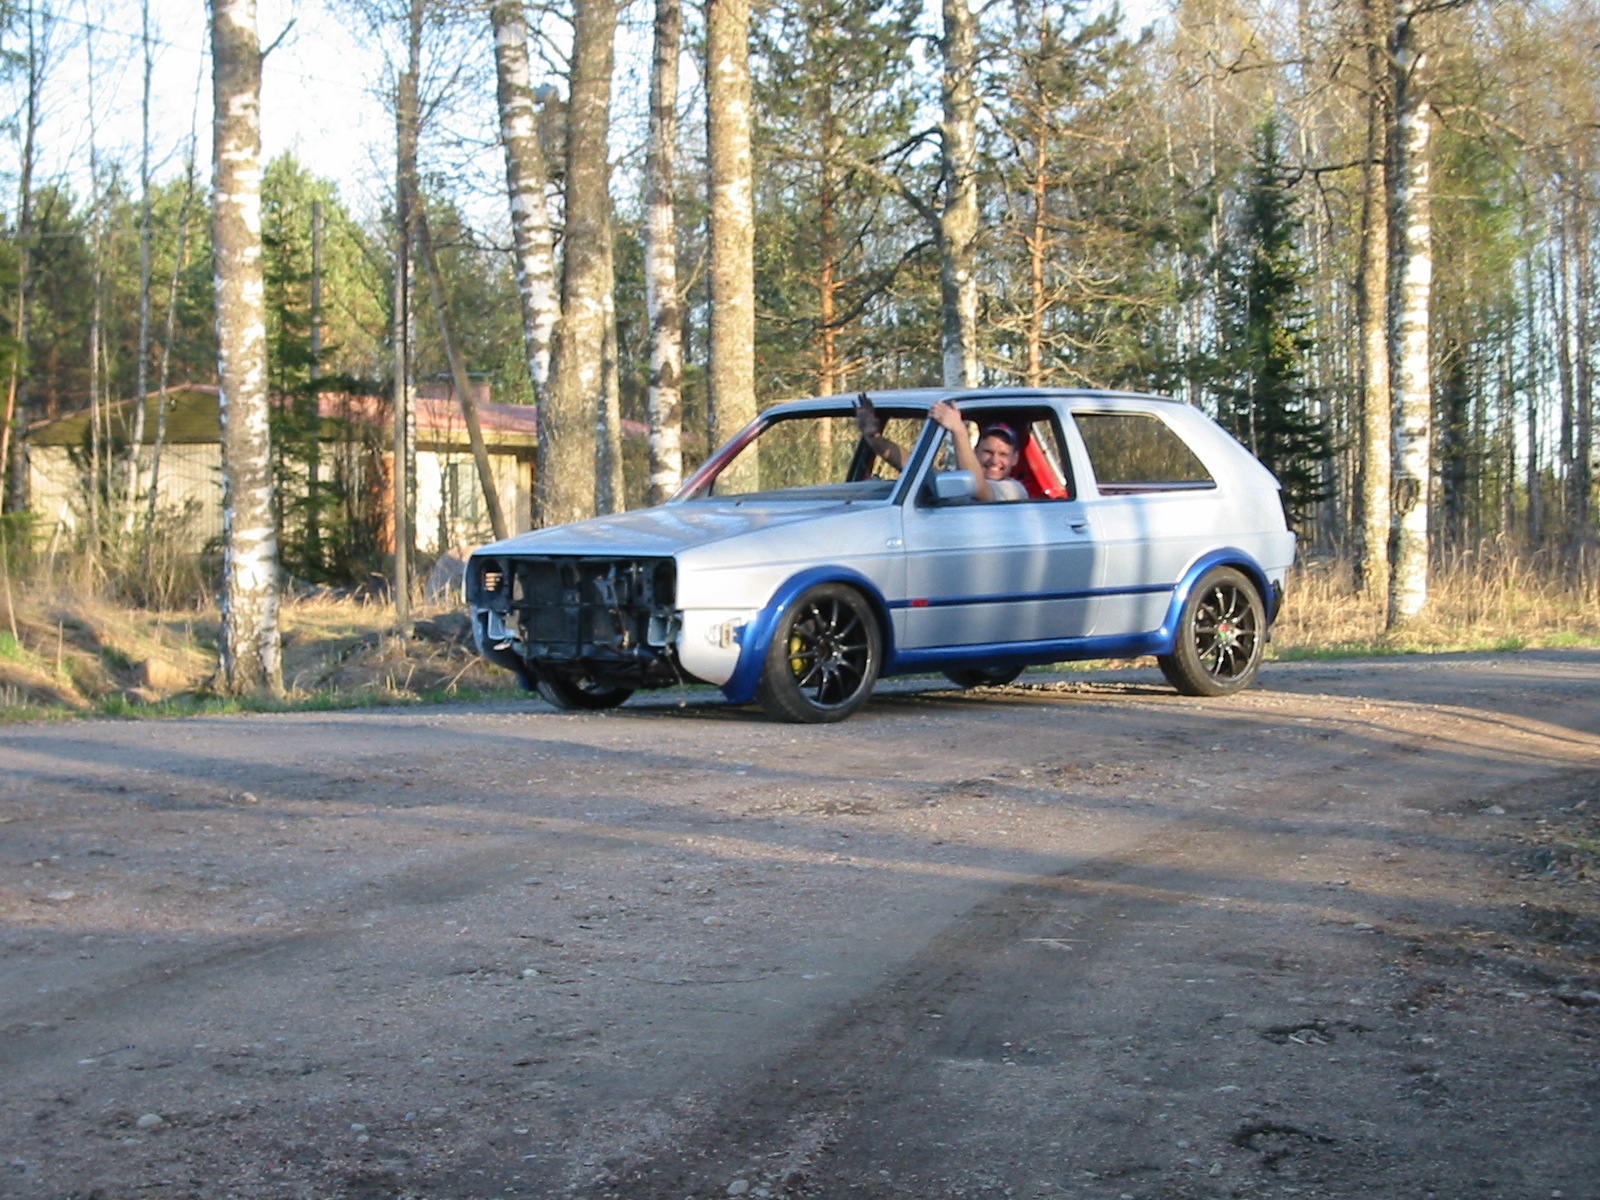
...and go for a test drive! On the evening of 6 May 2002, Peksi drove the first metres in his 1988 TDI. A gentle familiarisation drive without windows or seats :-) The engine runs nicely and everything seems to work as it should. The bumpers are painted too, and progress is roughly on schedule. We should still make Bug Run: one month to go :-)
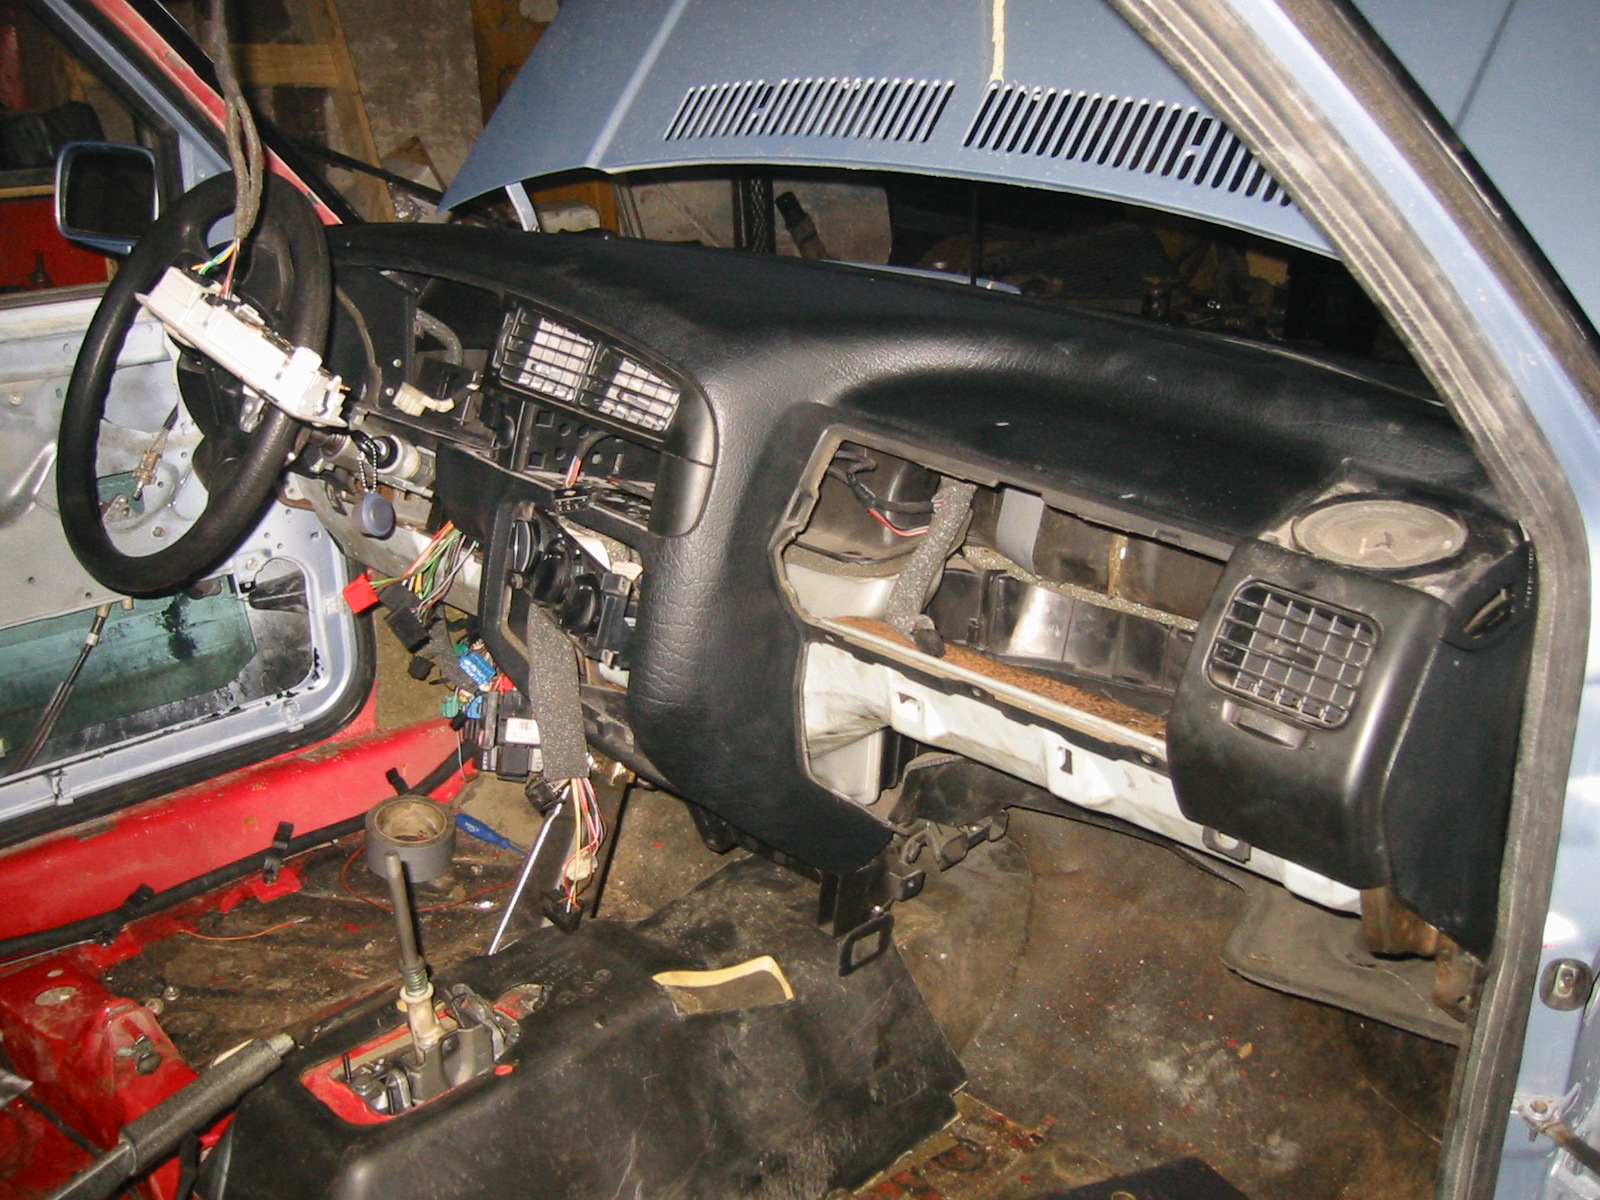
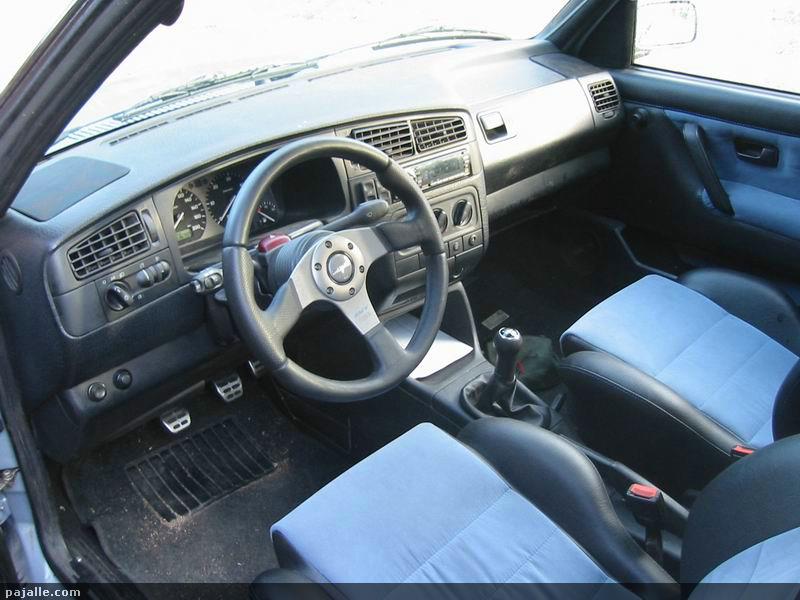
The dashboard finally installed too. Tight to fit, but it goes in. Hopefully it won't need removing again soon :-)
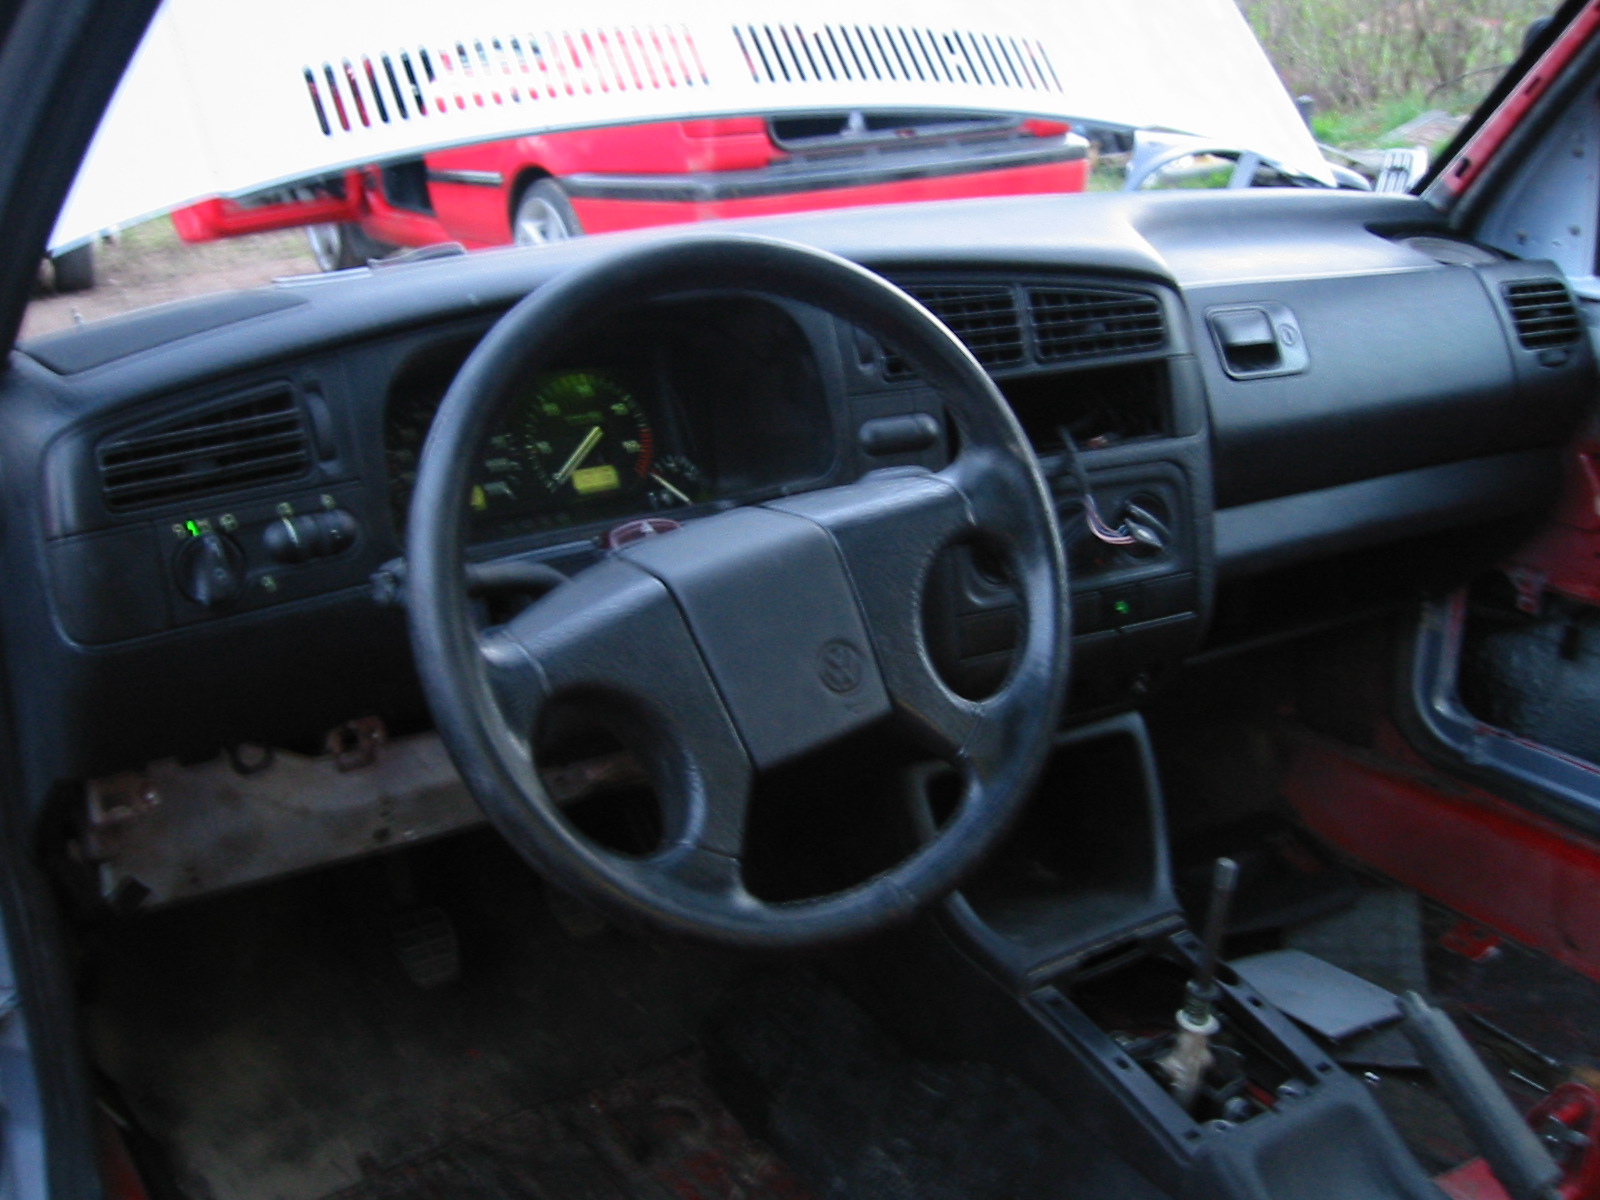
The dashboard more or less assembled. Lights, indicators and so on work. Perhaps we should fit the driver's seat and bonnet latch so we can do a little driving :-)
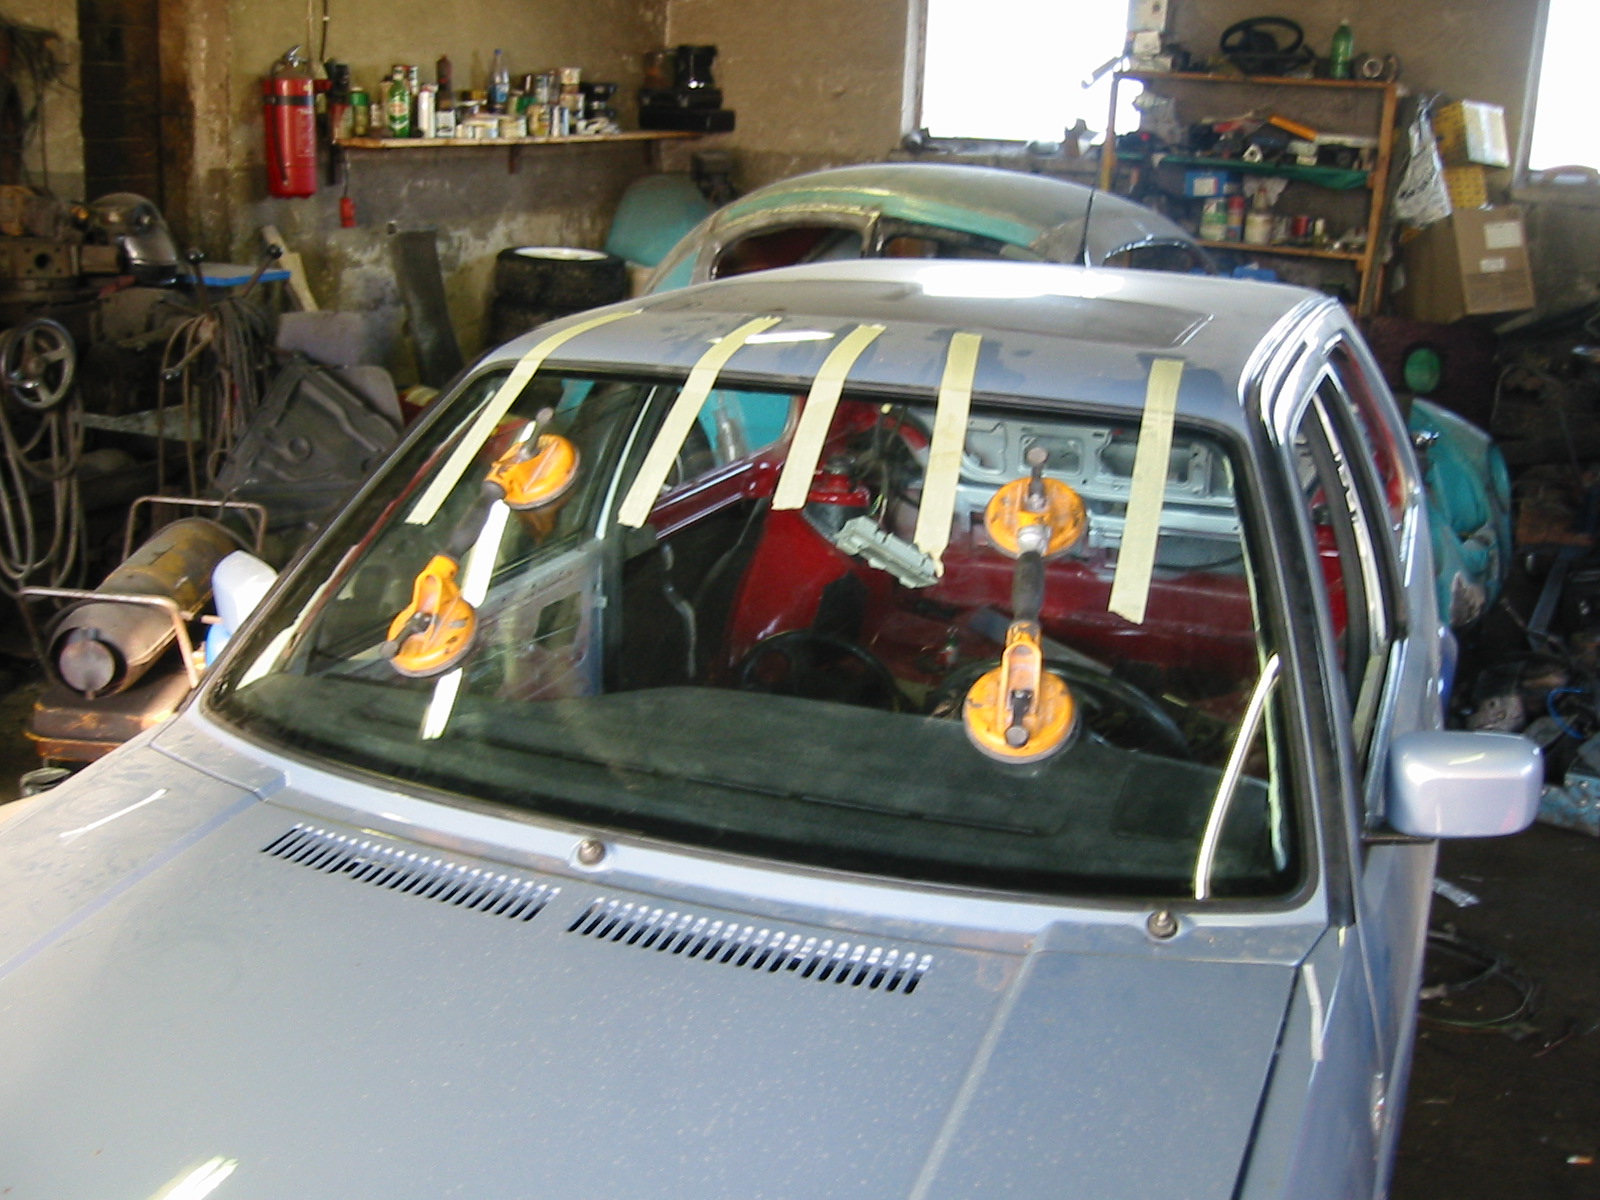
The windscreen bonded in. It has a bonded screen, as on the G60.
Reassembly — part 3
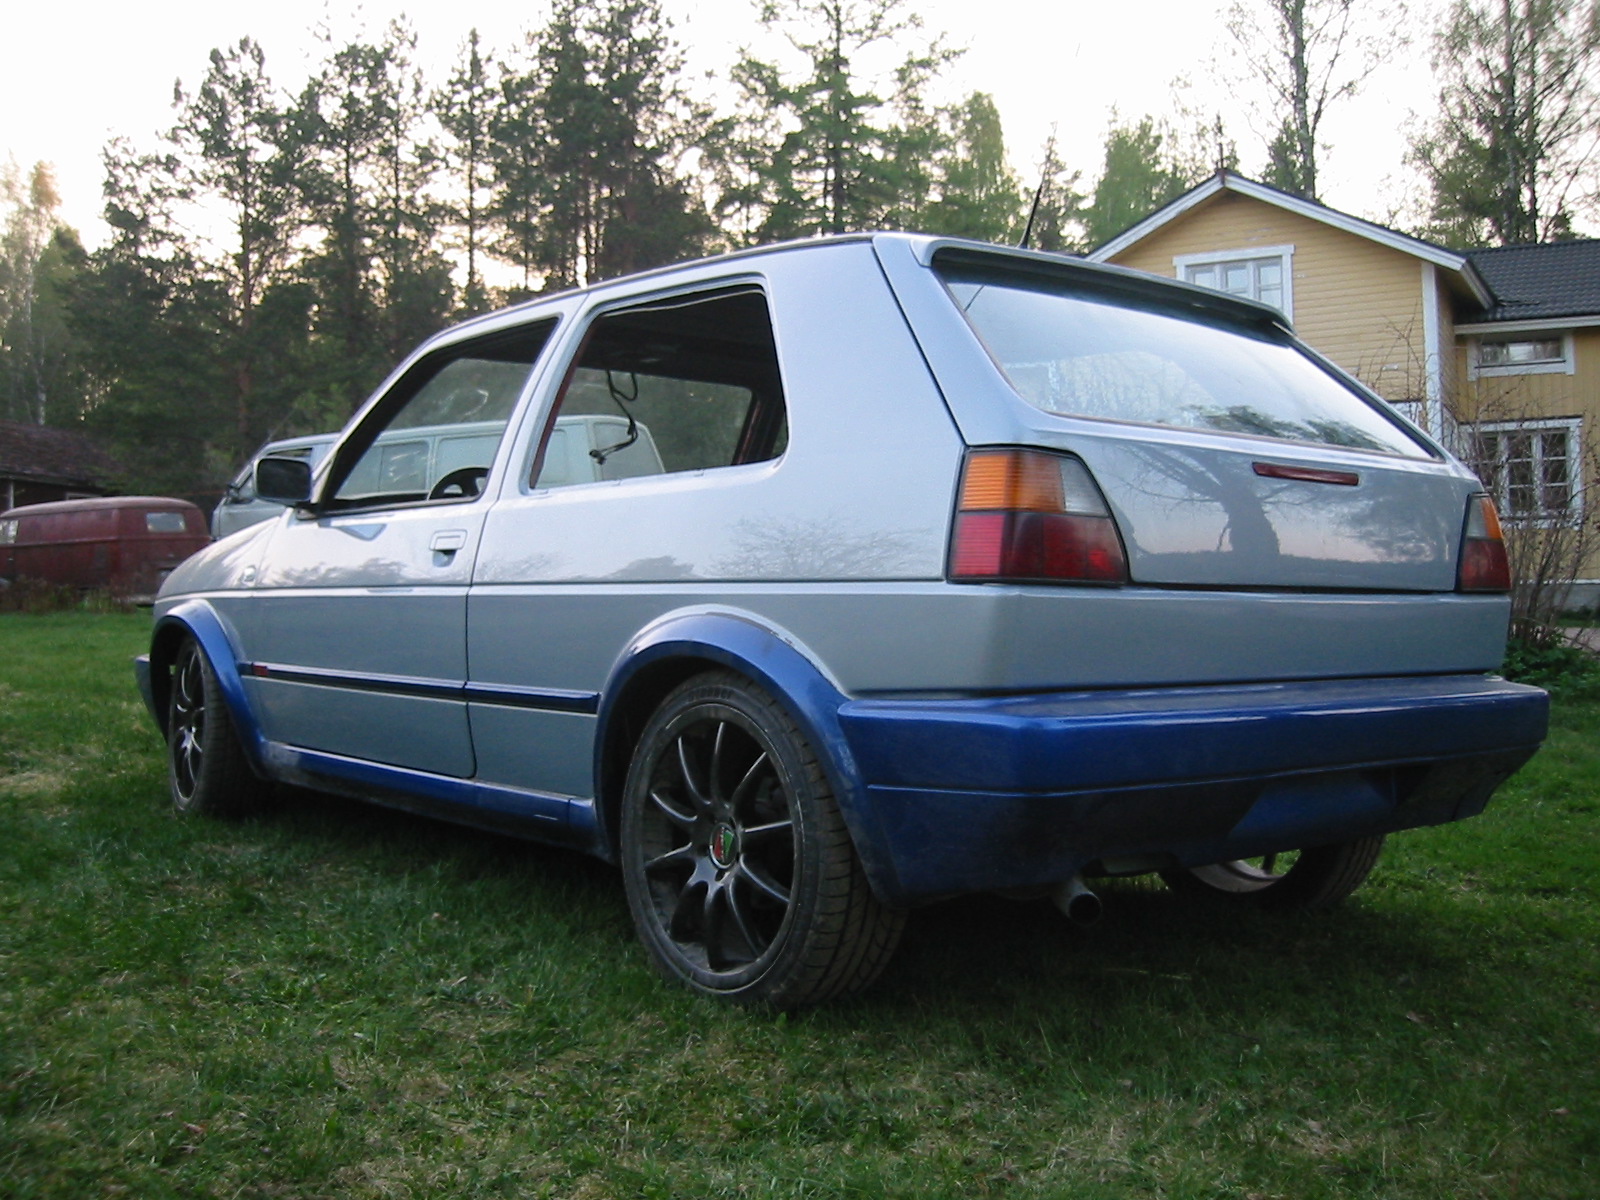
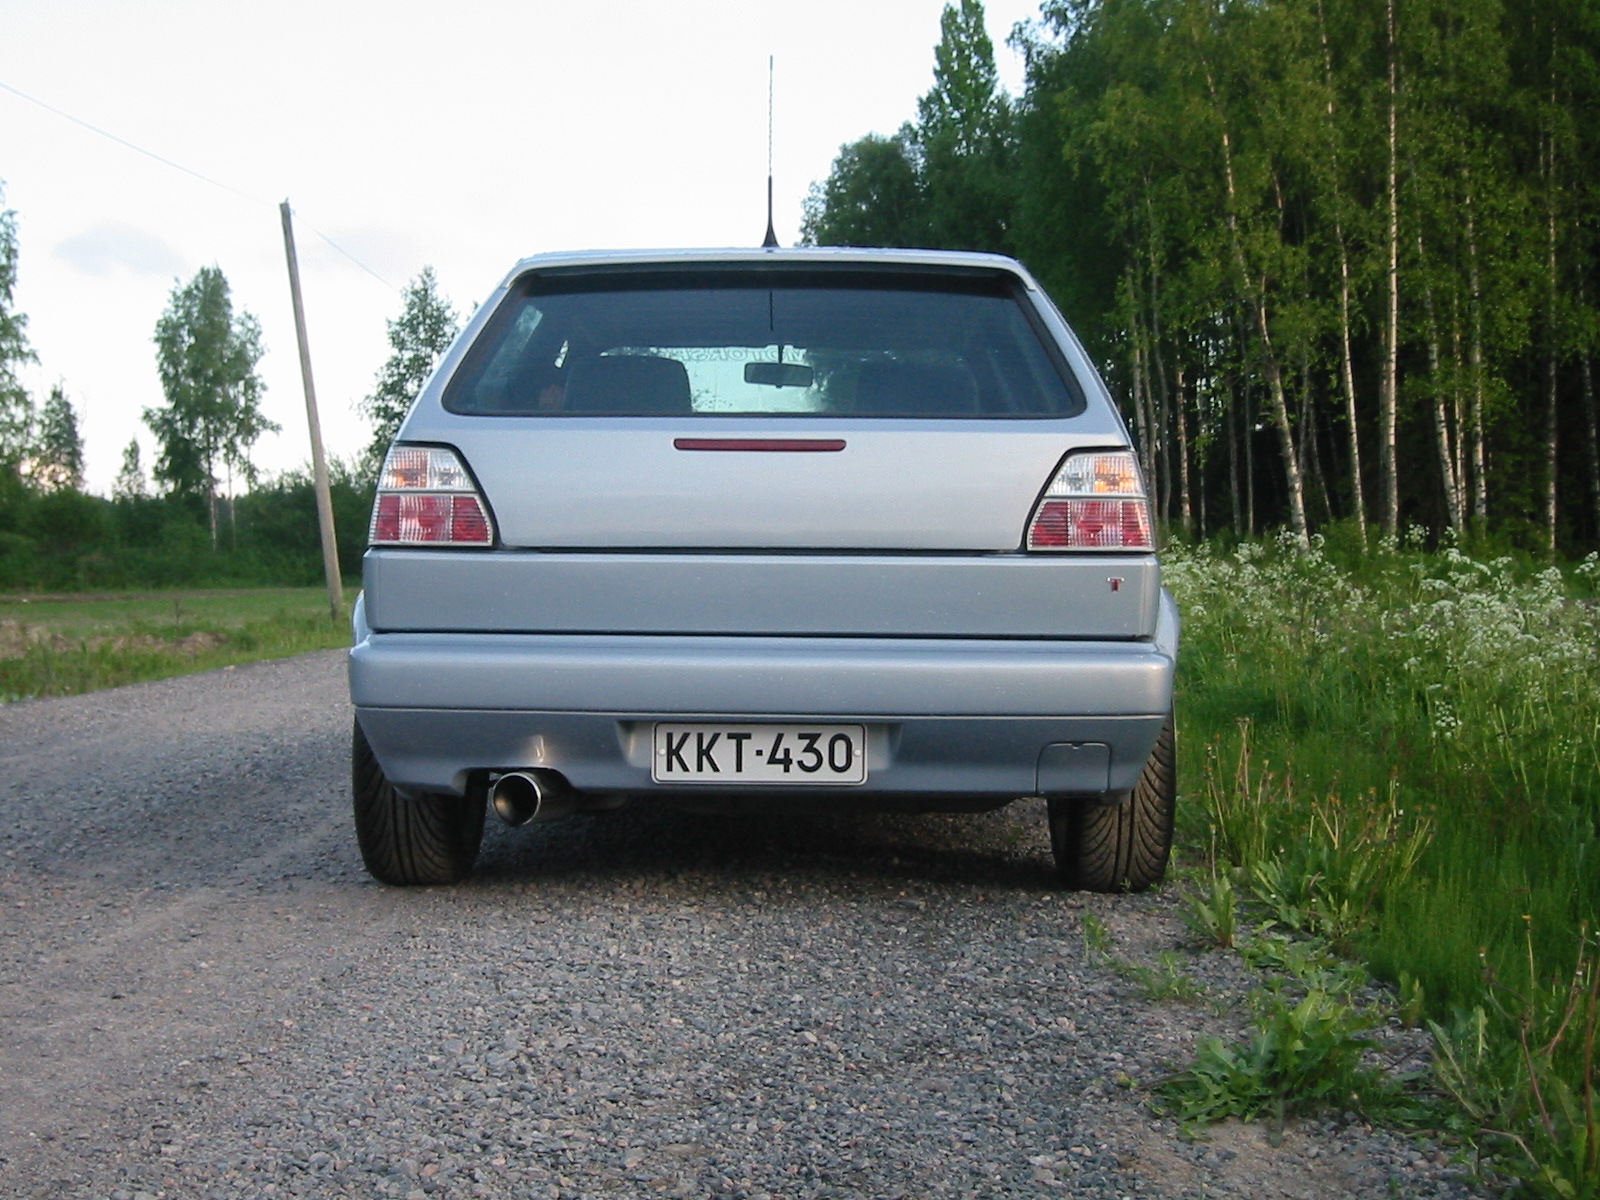
The third brake light and bumper installed at the rear. The tail lights will still change to something a little more 'tuning' :-) Perhaps slightly wider wheels would be appropriate...?
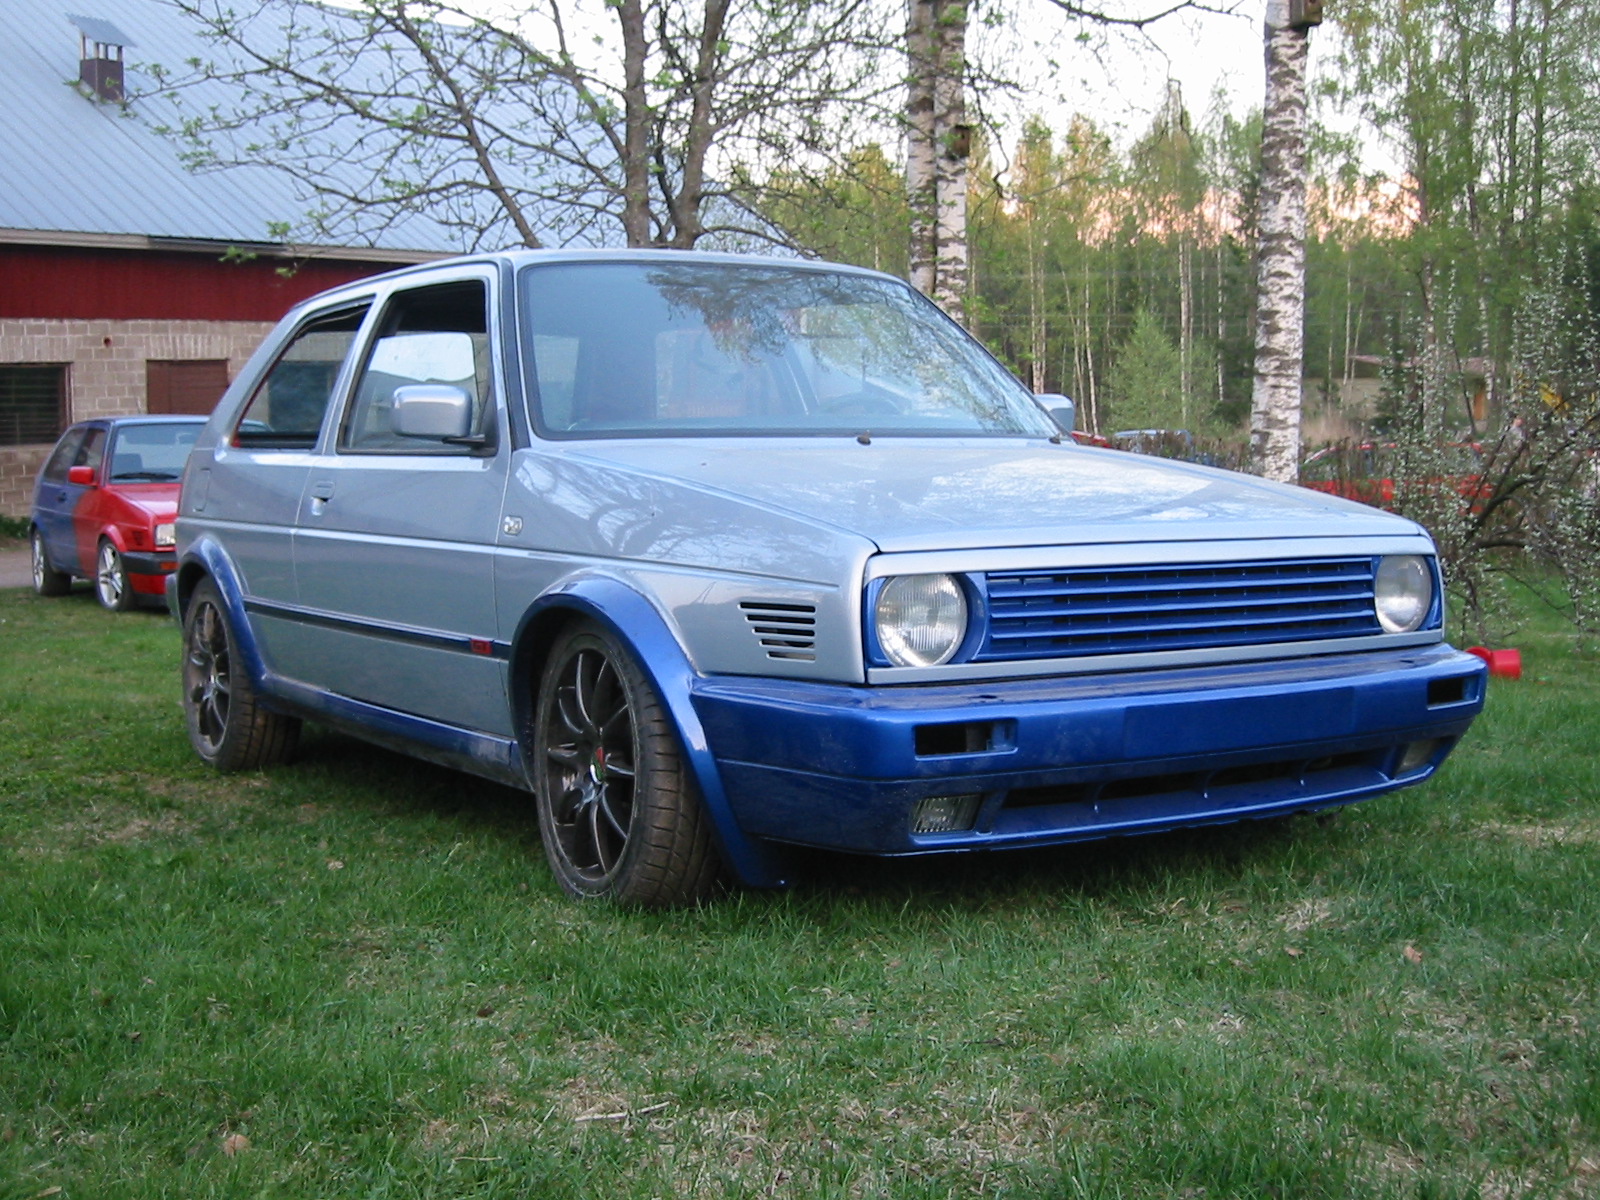
The bumper and grille fitted at the front too, with original headlights temporarily.
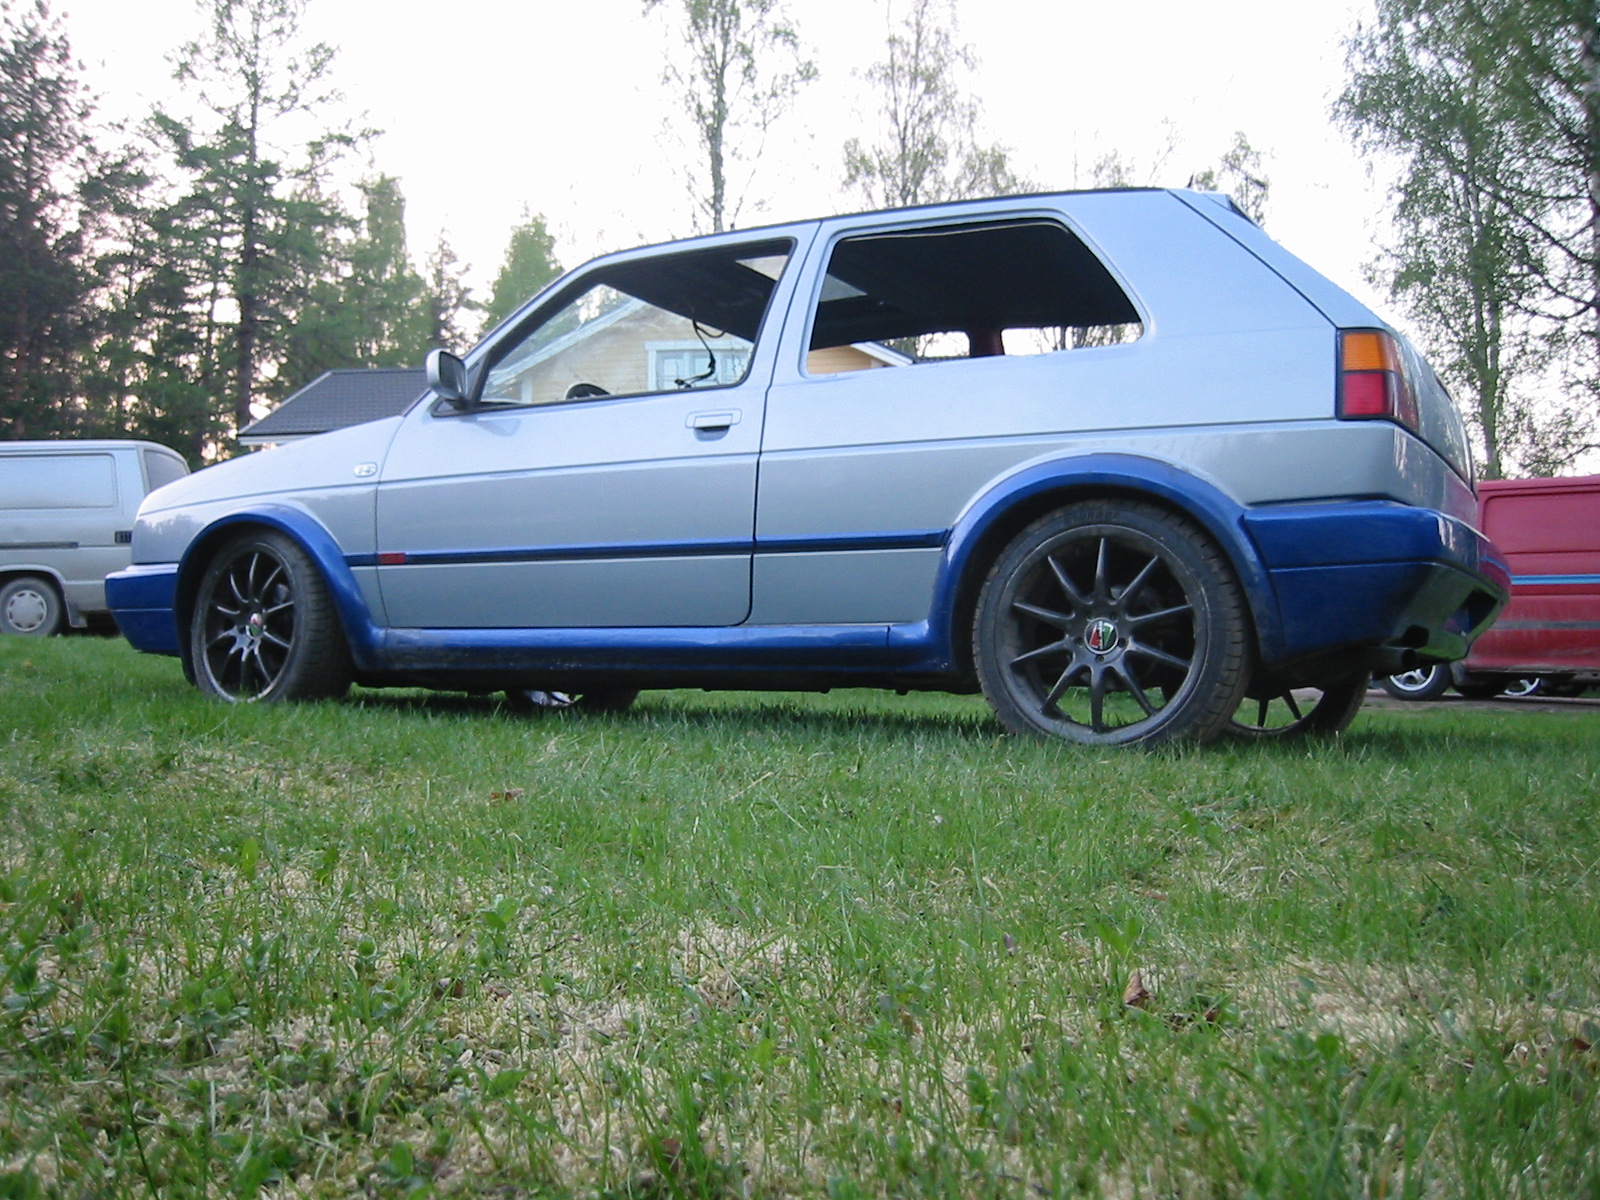
The same from the side. The rear will drop a little more once the interior is in.
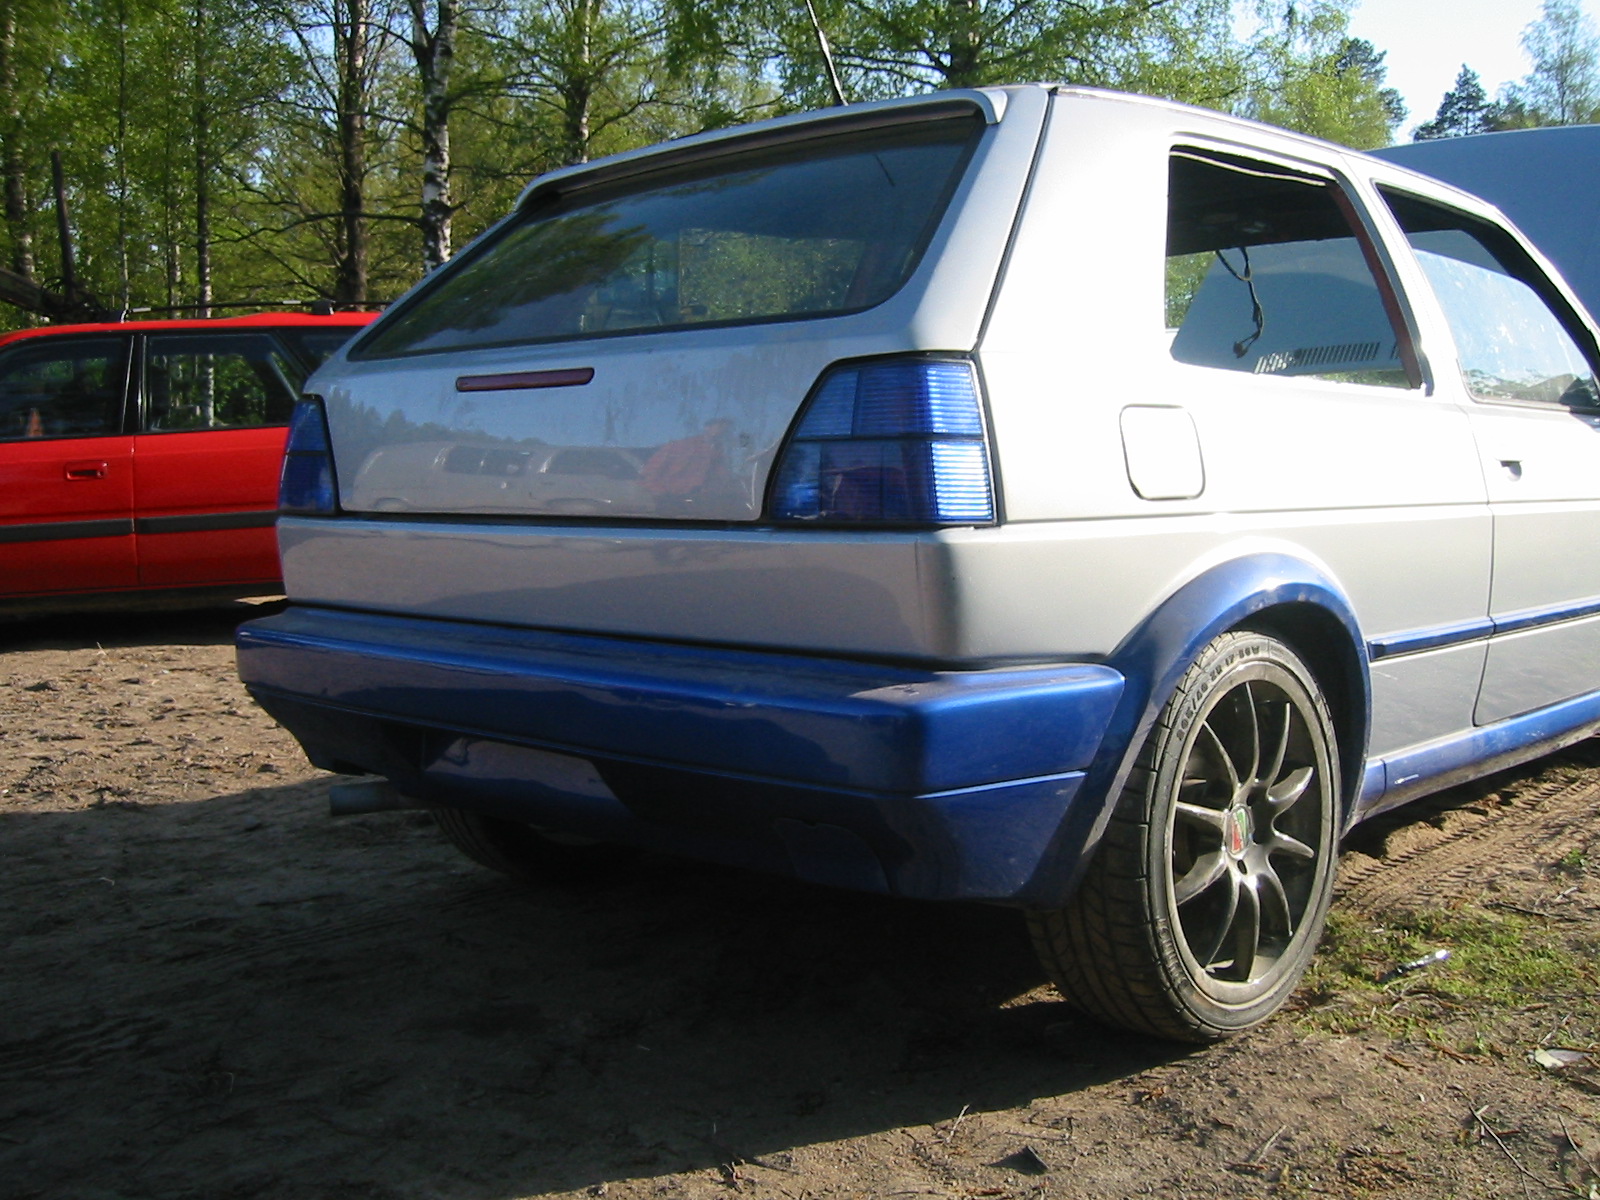
Blue Hella tail lights. Where could we find a blue Almera third brake light? :-)
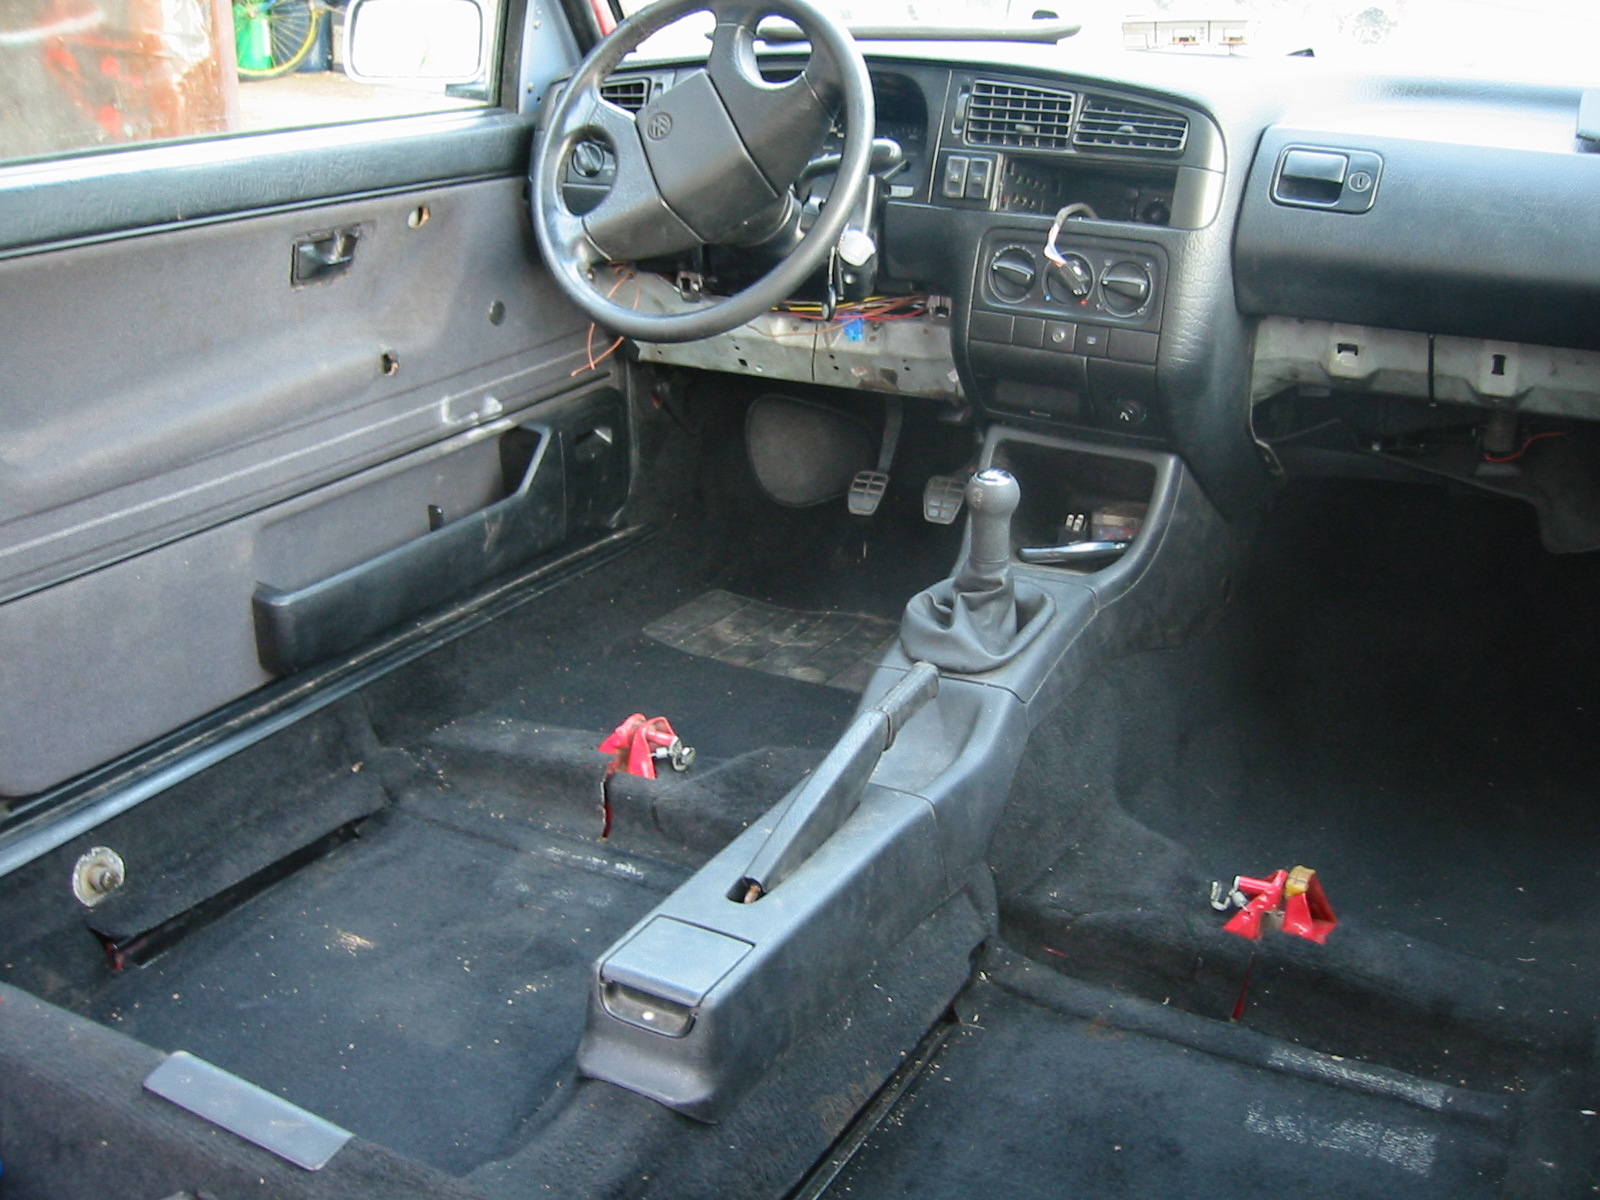
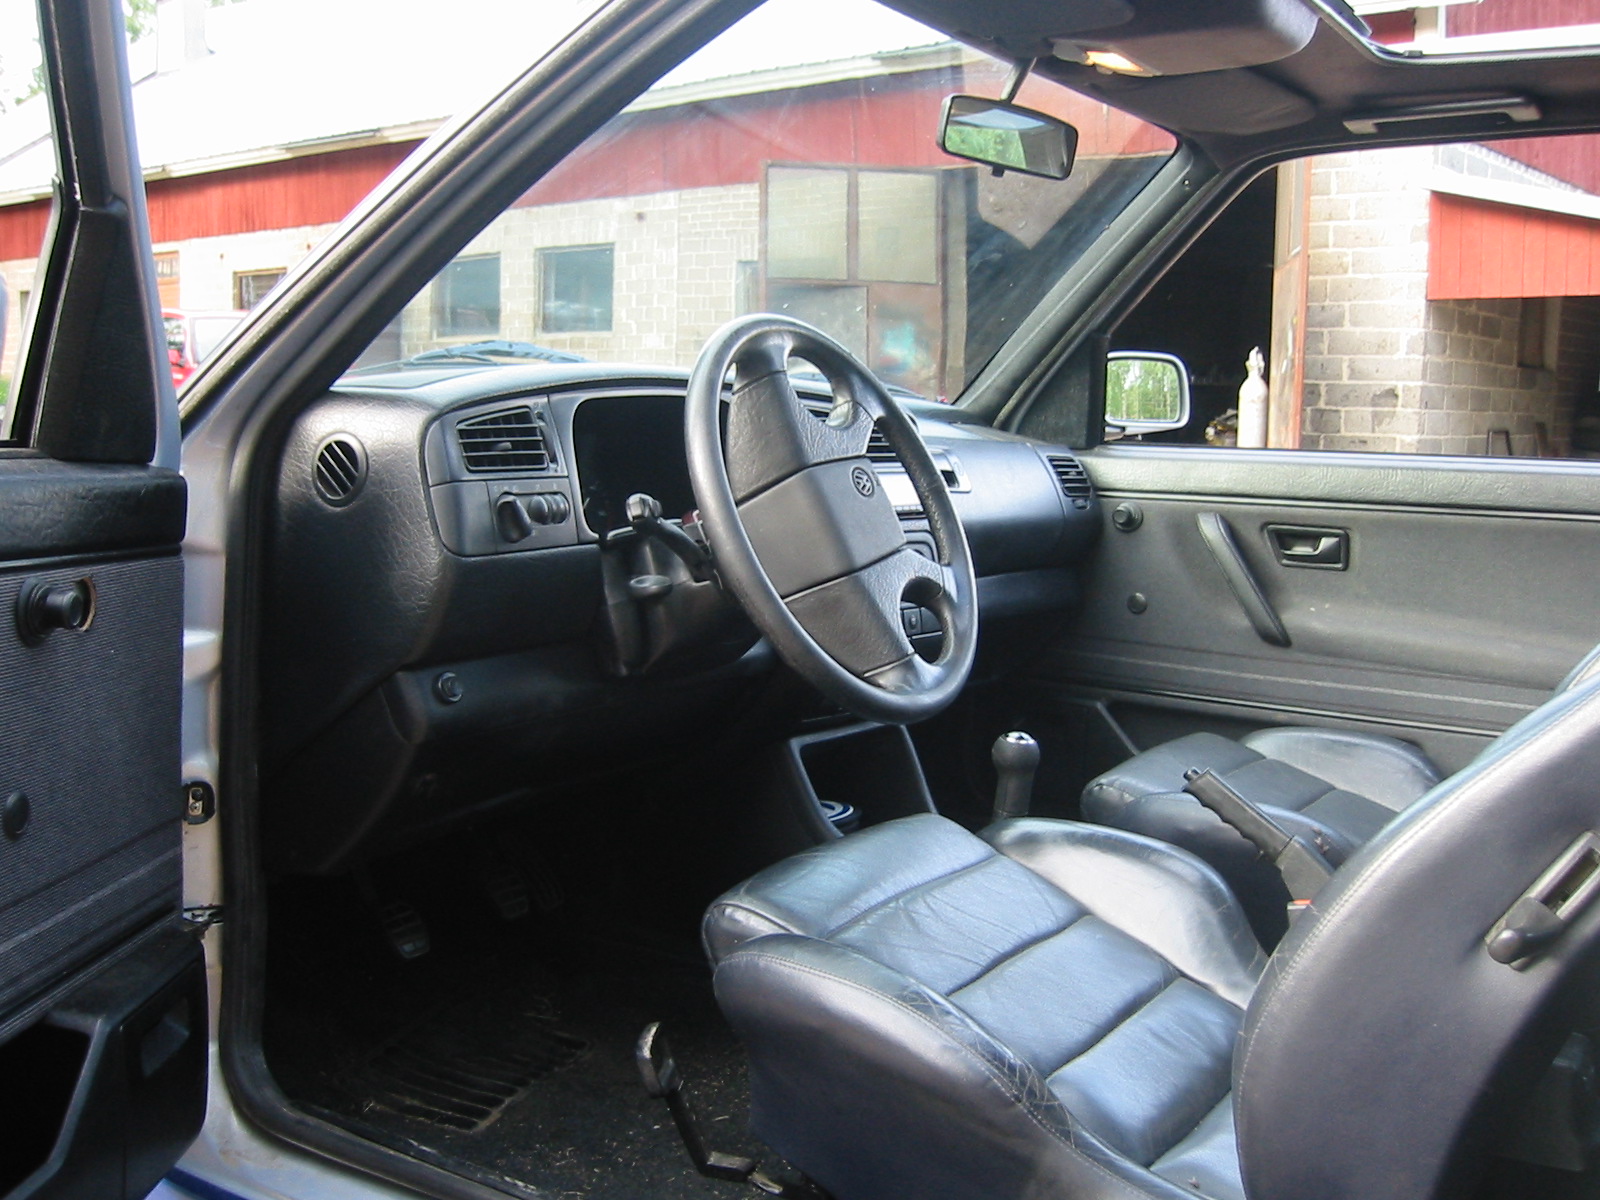
Interior assembly progresses... The centre console already sits nicely. Note the Mk4 gear knob :-) The door cards fit unchanged, although they touch the dashboard when shut. The mirror adjustment knobs need moving backwards... We tried to persuade Peksi to fit electric mirrors, but his enthusiasm for electrical work was running out. They can be done later; time is short enough as it is.
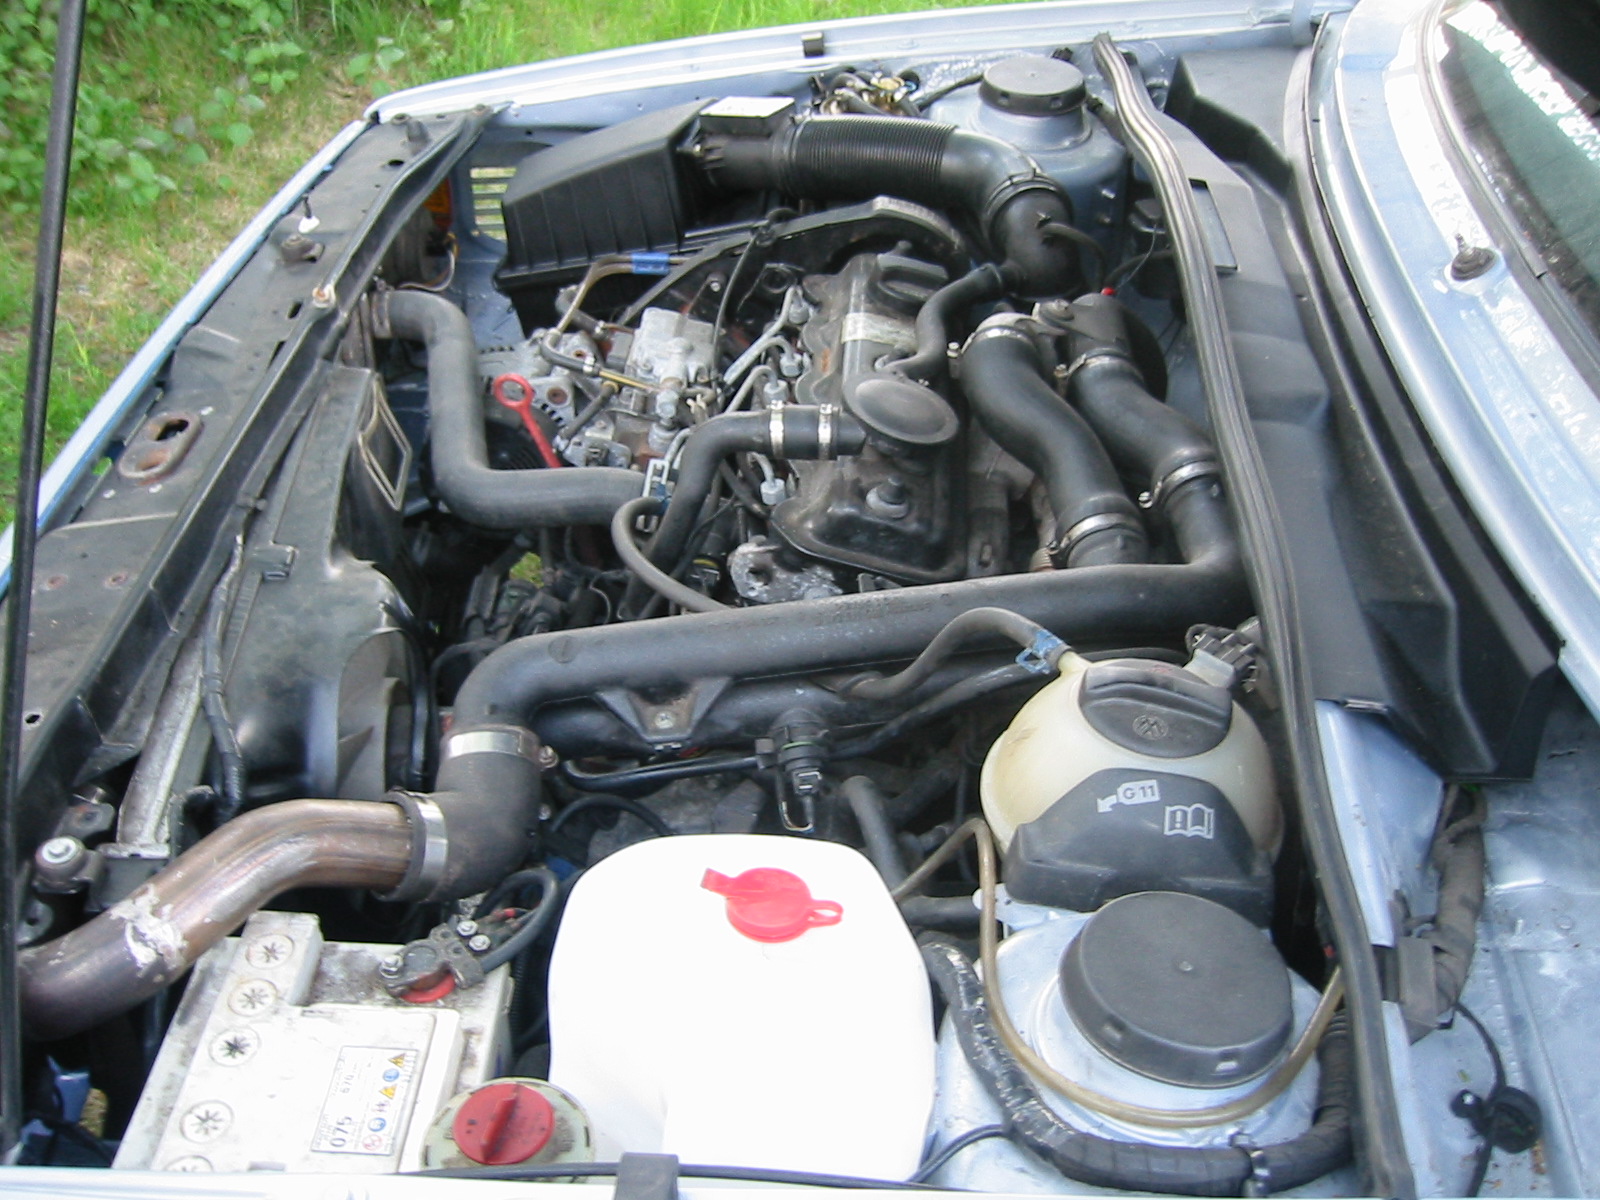
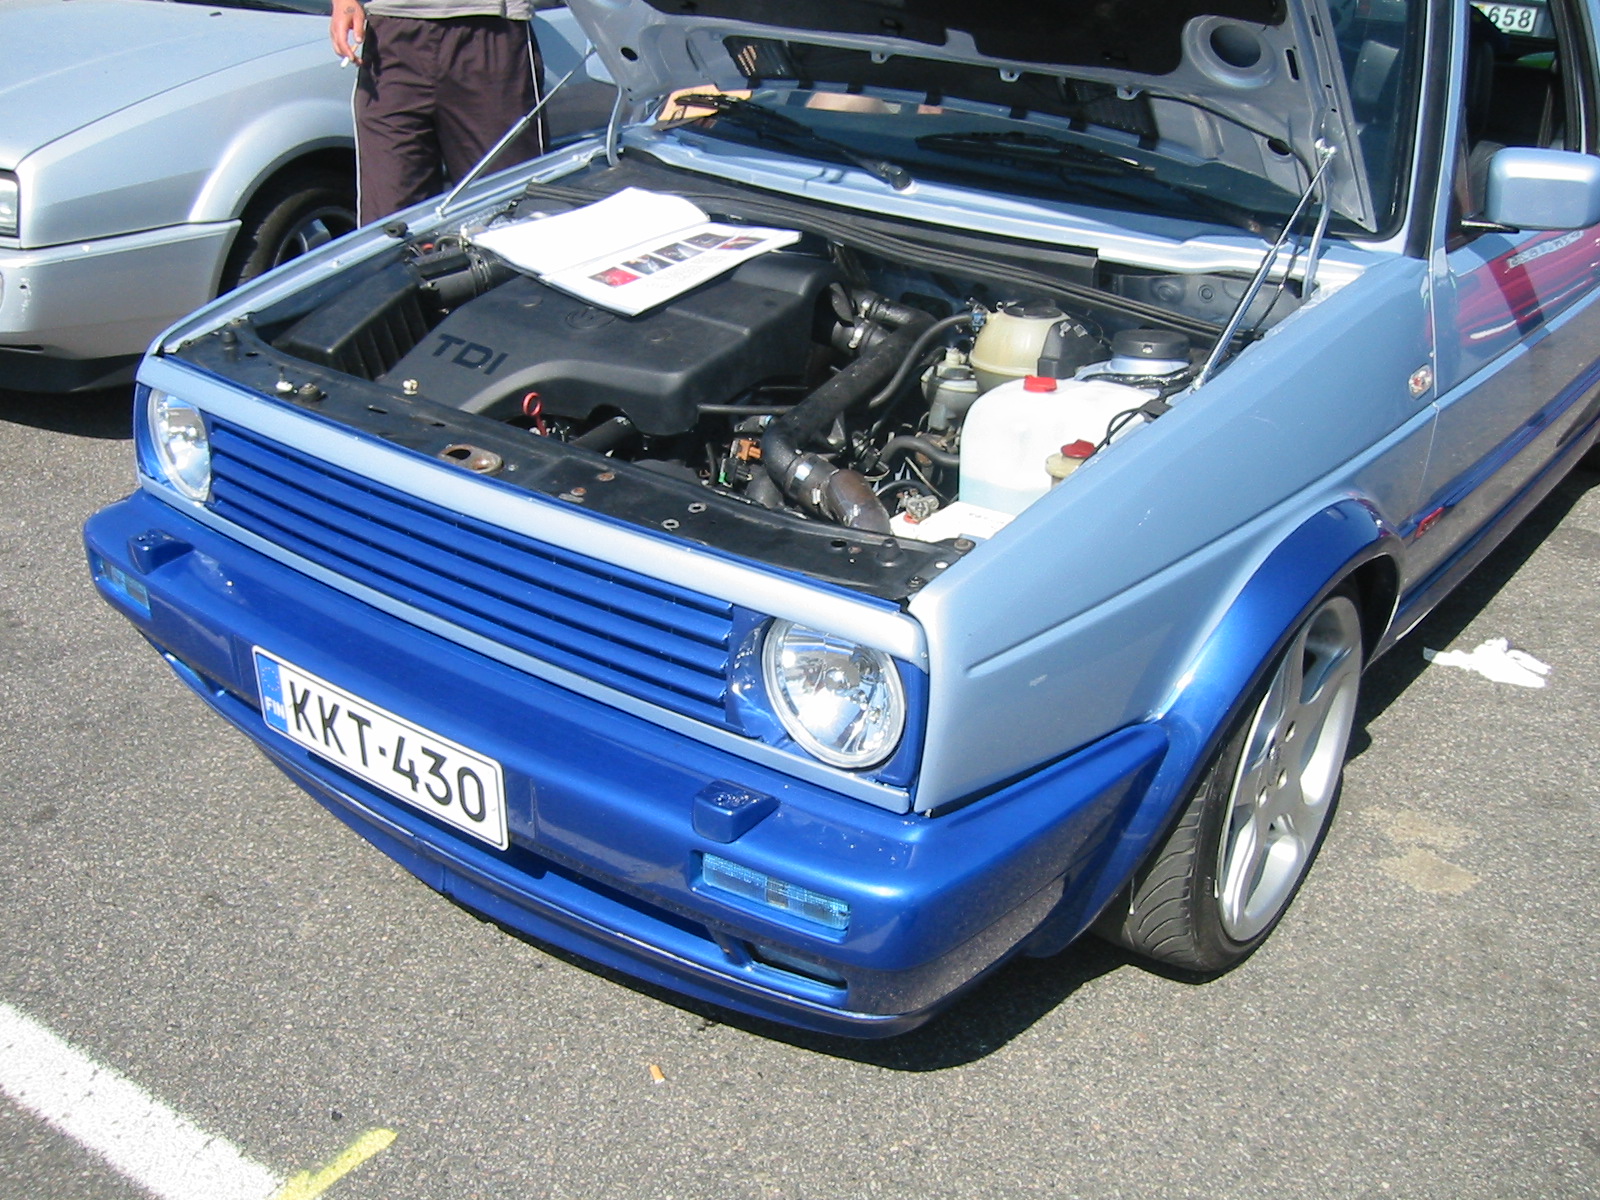
Almost everything is ready in the engine bay; only the plastic engine cover is missing. The air filter housing is from a Seat Toledo. The washer reservoir had to be changed to a smaller four-litre one because the larger one touched the oddly shaped gearshift counterweight. We reused as much of the original TDI boost piping as possible. It gained a few extra bends, but those shouldn't matter. A tuning chip has been ordered too.
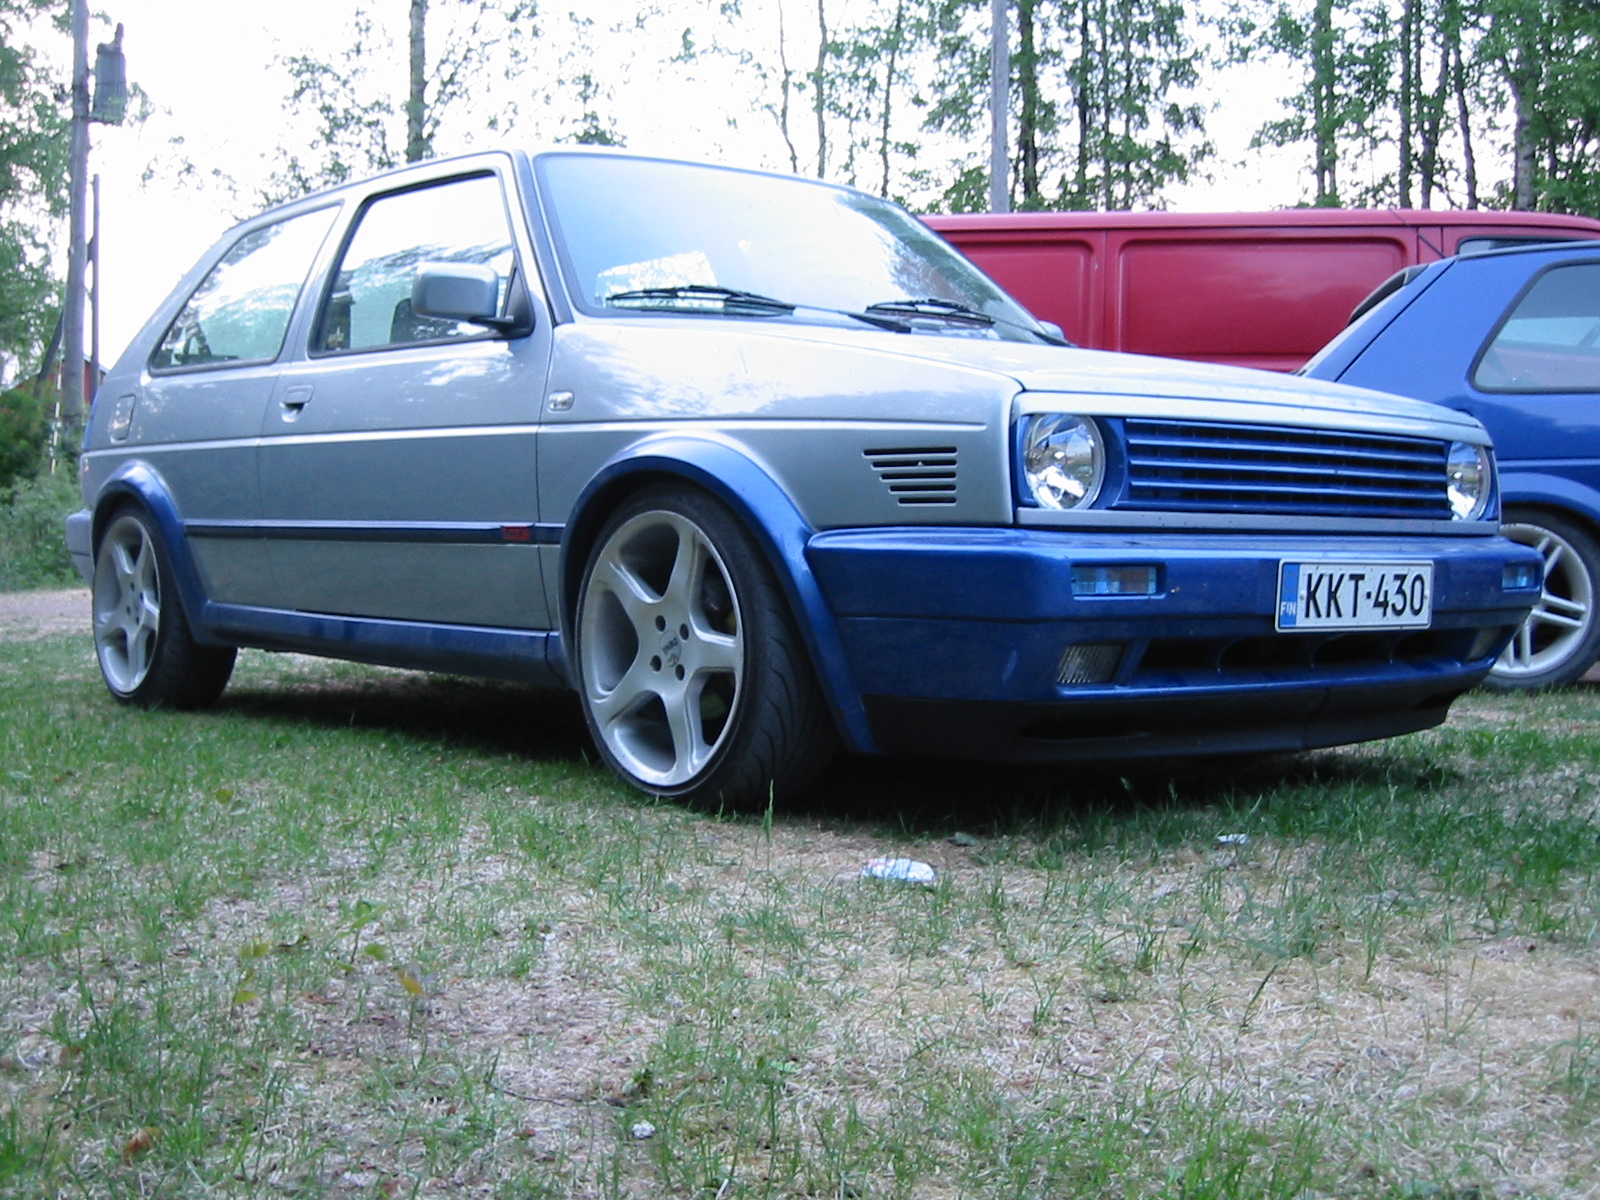
3 June 2002. The car is more or less together and passed its inspection first time without remarks, with about 31% of parts changed. We also swapped on the wheels from Heikki's Vento, which suit its appearance better. Kenny's Car Styling supplied the front lip, clear-lens headlights, blue front indicators and a few other bits... A little painting remained, including the front lip, plus polishing and cleaning, then on Thursday we headed to Sweden for Bug Run...
Details — part 1
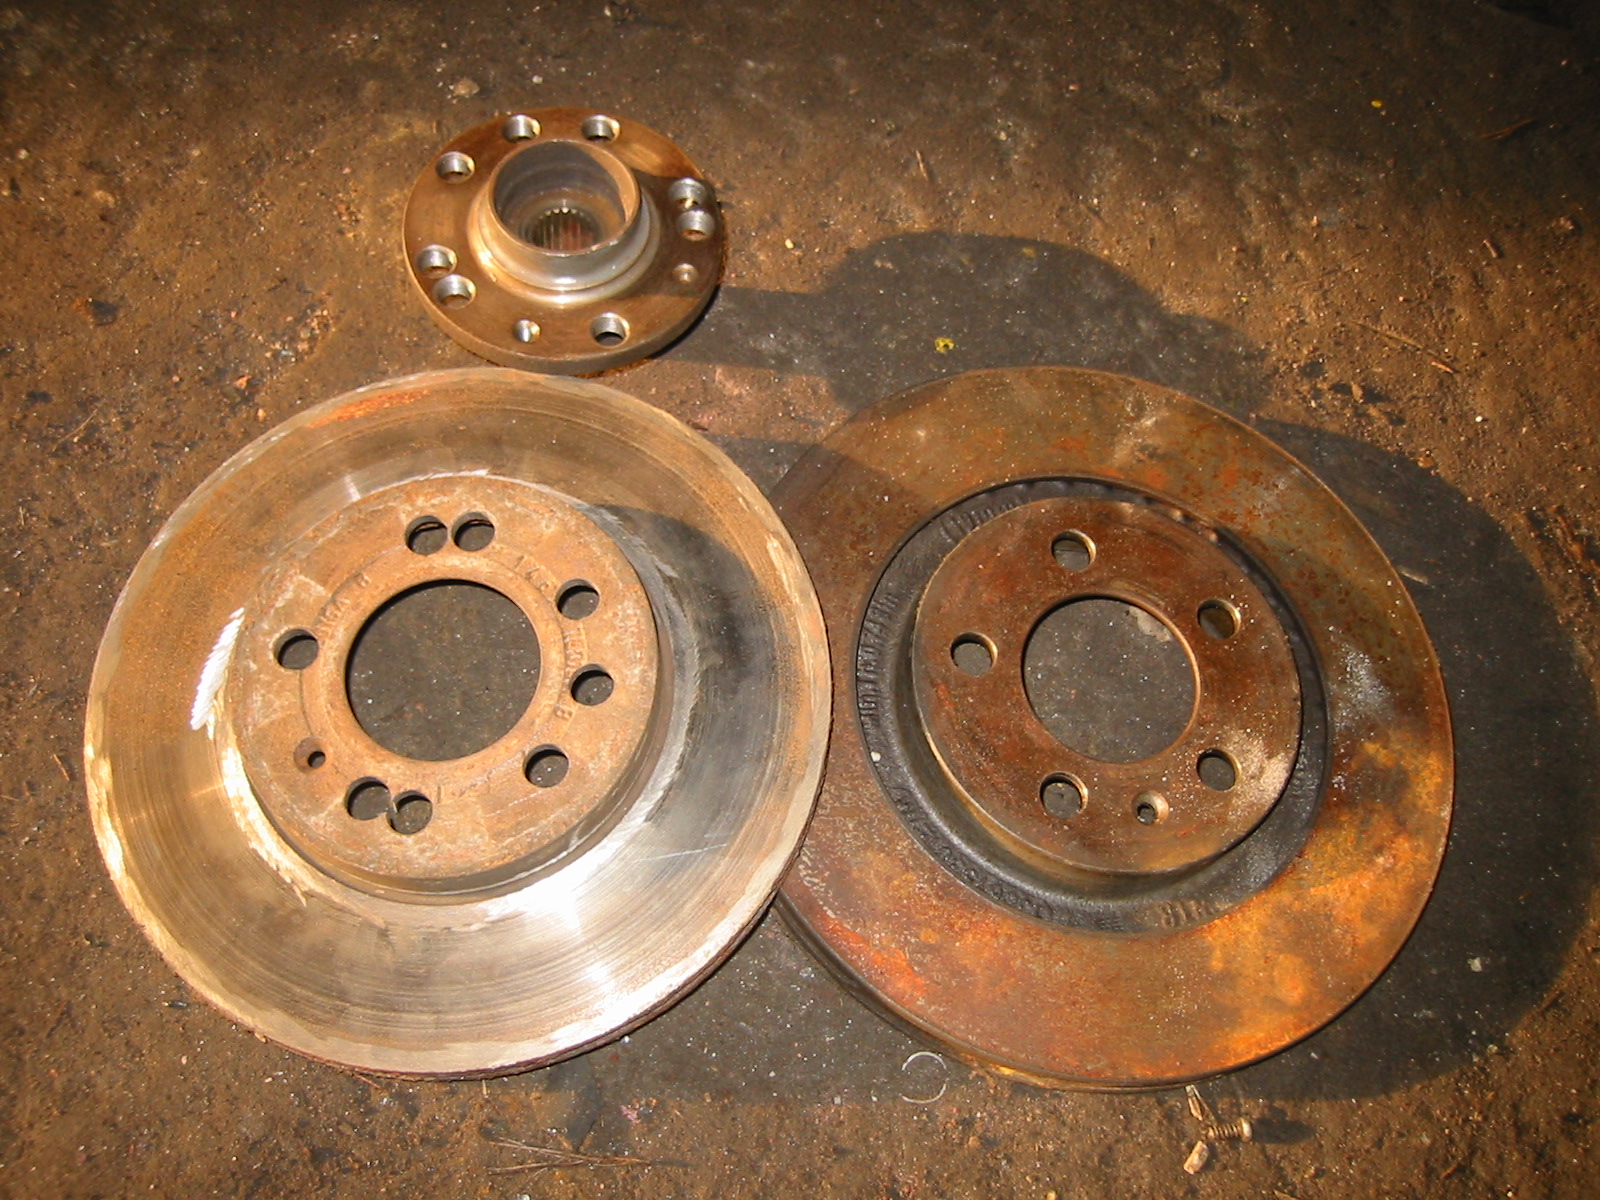
Peksi drilled dual bolt patterns in the discs and hubs, so both 4x100 and 5x100 wheels now fit. Some holes are quite close together, with only 3–4 mm between them in the hub at the narrowest point. We'll see how it holds up :-)
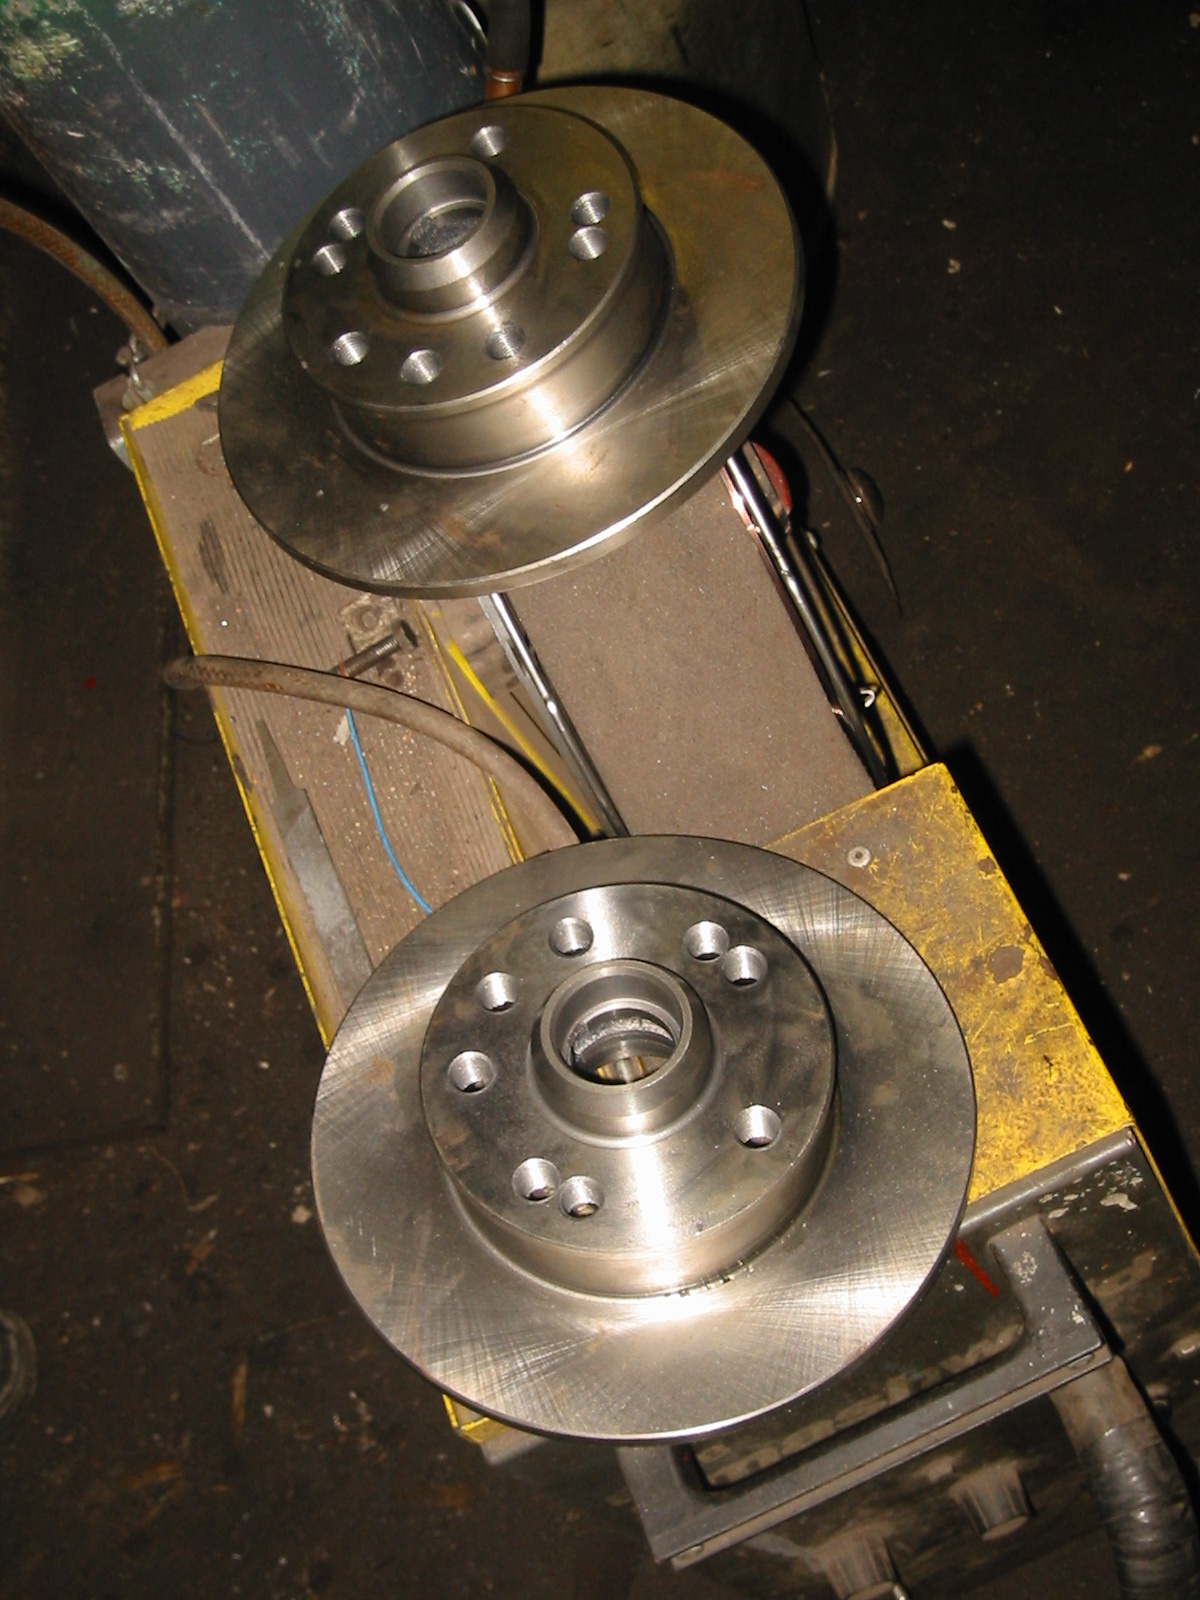
1. Enlarge the hub flange bolt holes — the part at the top of the previous picture — from 12 to 14 mm. 2. Attach the five-bolt VR6 disc shown on the right with one tapered bolt to use as a template. 3. Mark the positions with an exactly sized 16 mm drill, drill the holes smaller and then tap them. 4. Use the same principle to make matching holes in the four-bolt disc. 5. At the rear, only new holes and threads in the discs are needed, along with enlarging the original holes.
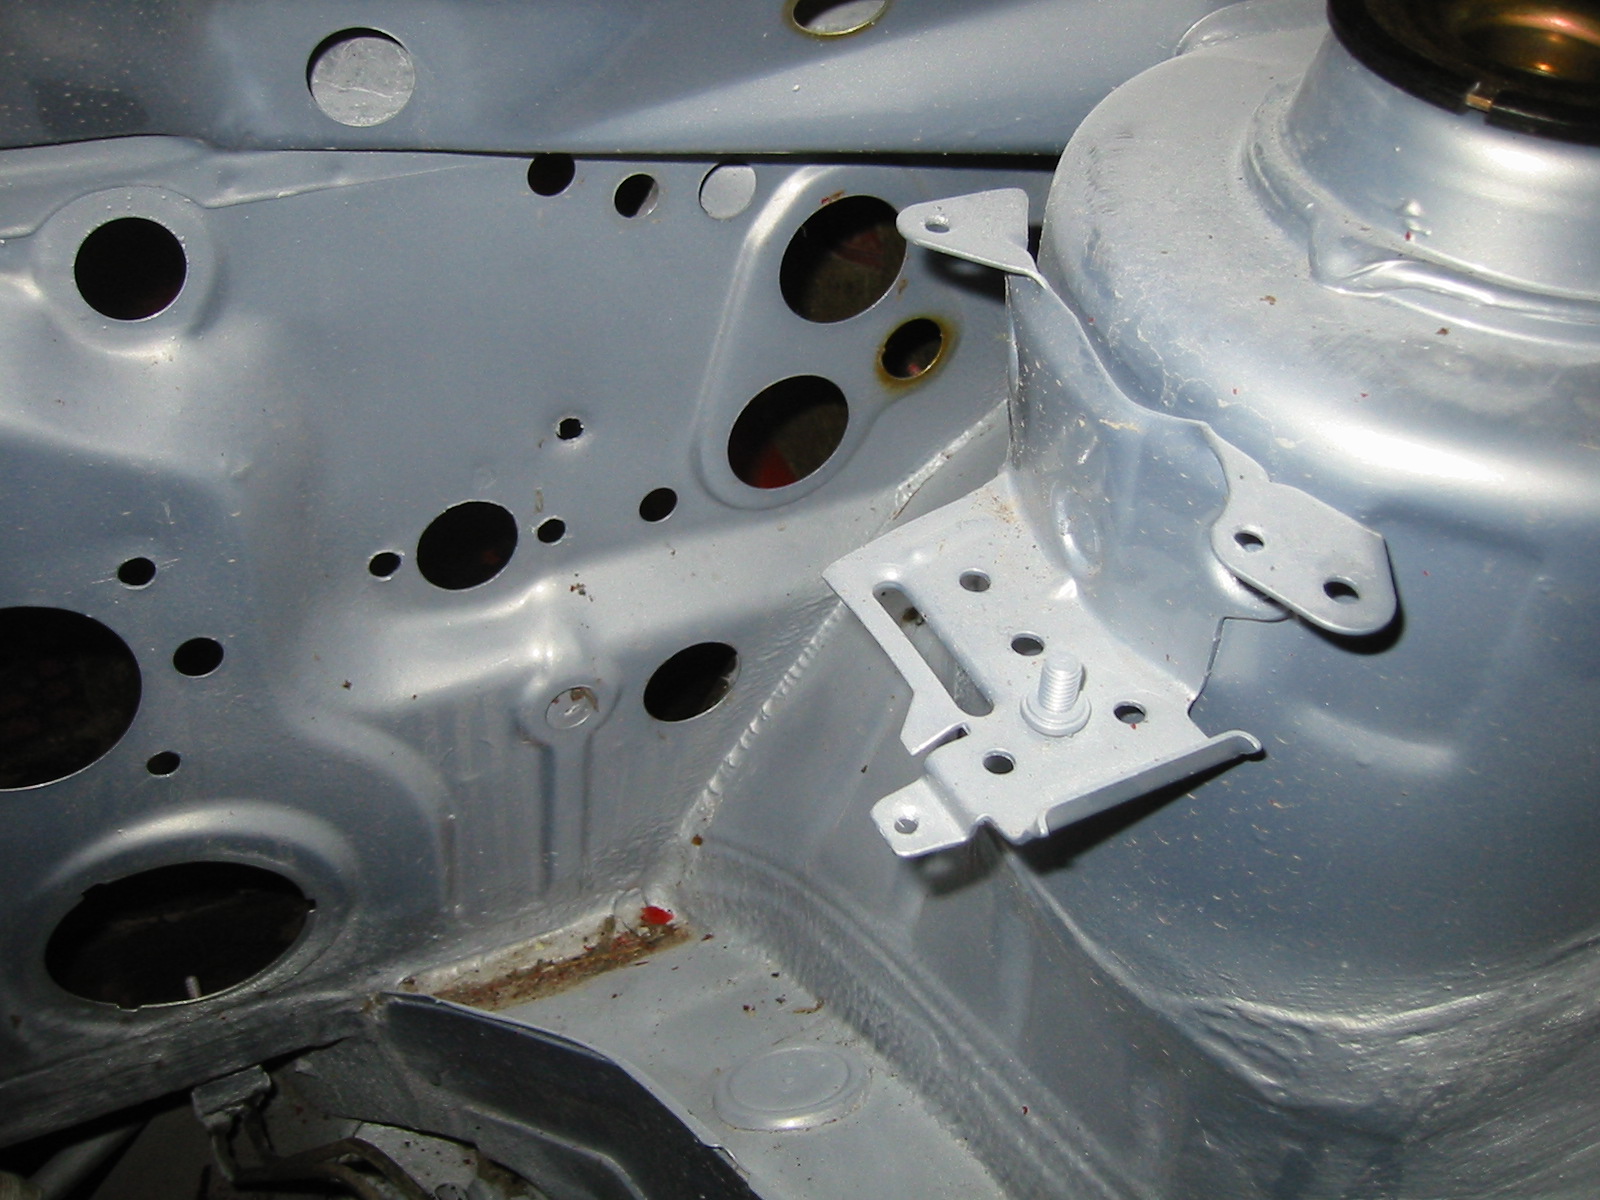
A Mk3 expansion-tank bracket. You can also see the holes made in the bulkhead for the clutch cylinder: the medium-sized hole with a smaller one on each side :-)
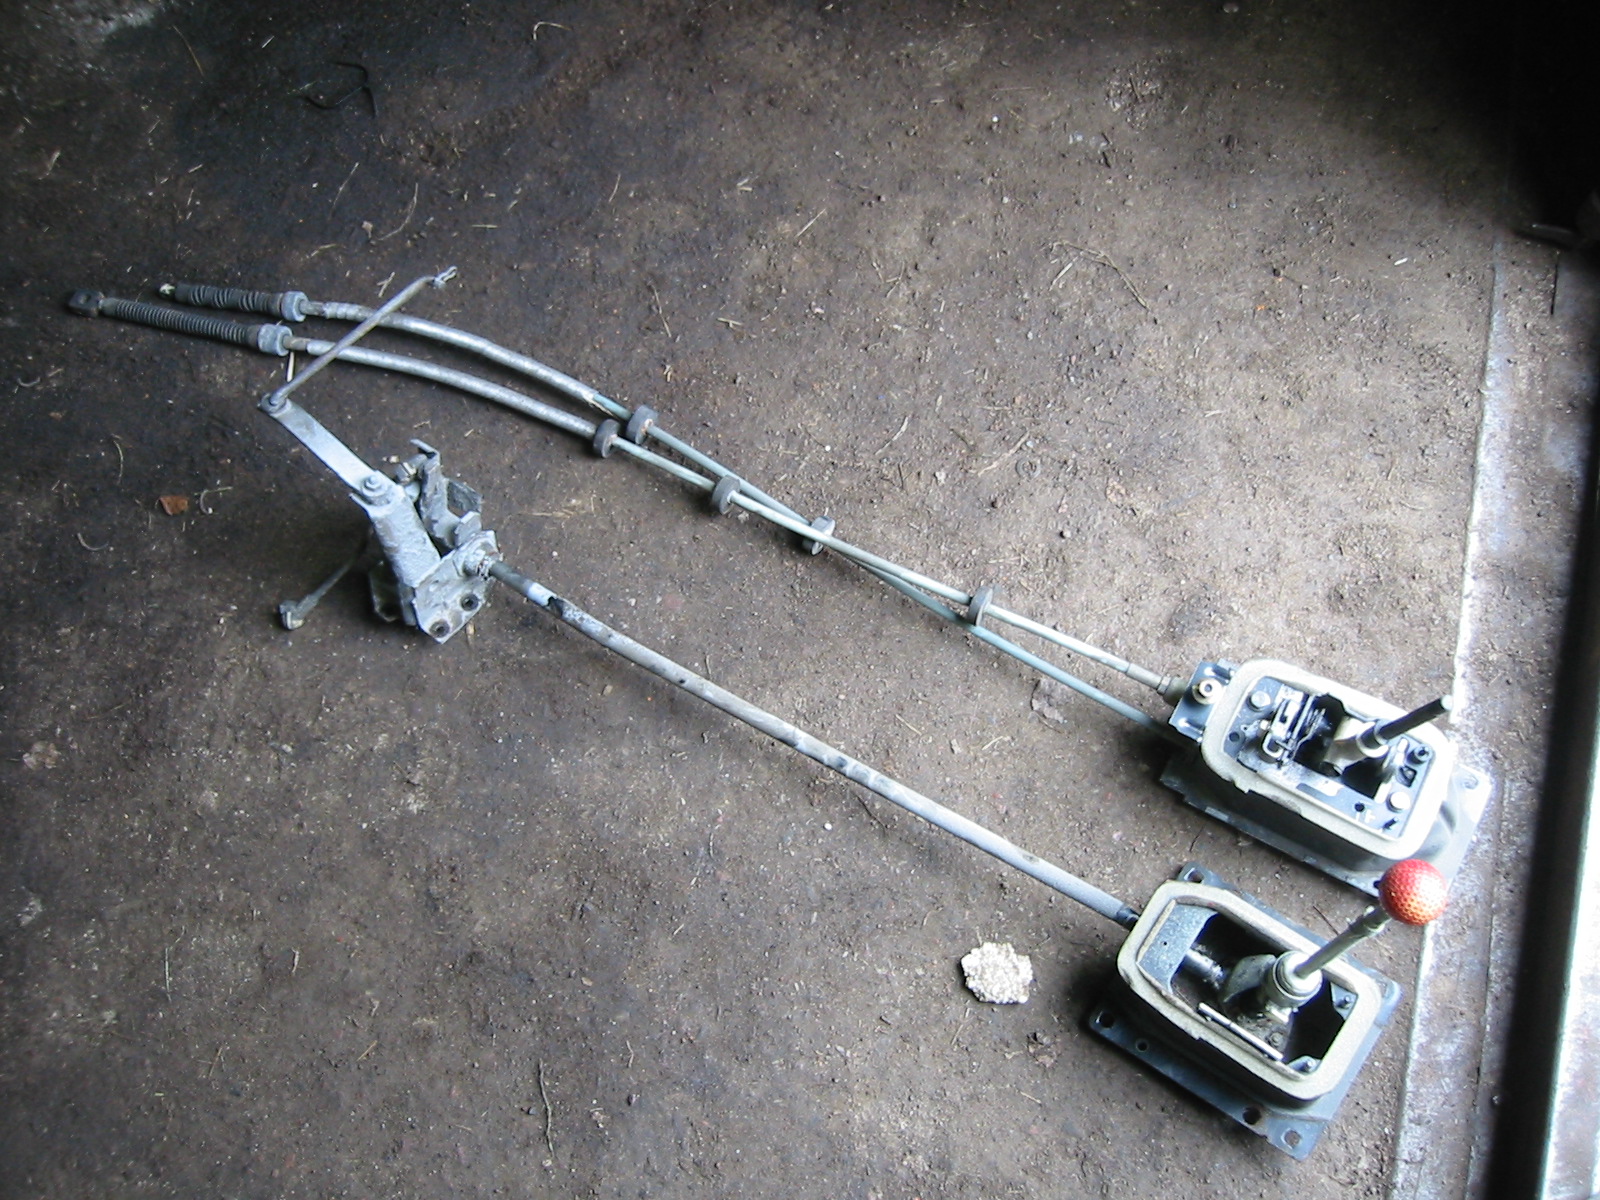
The TDI uses cable gear selection. The housing at the base of the lever is slightly different too, but no major modifications are needed to attach it to the Mk2 tunnel.
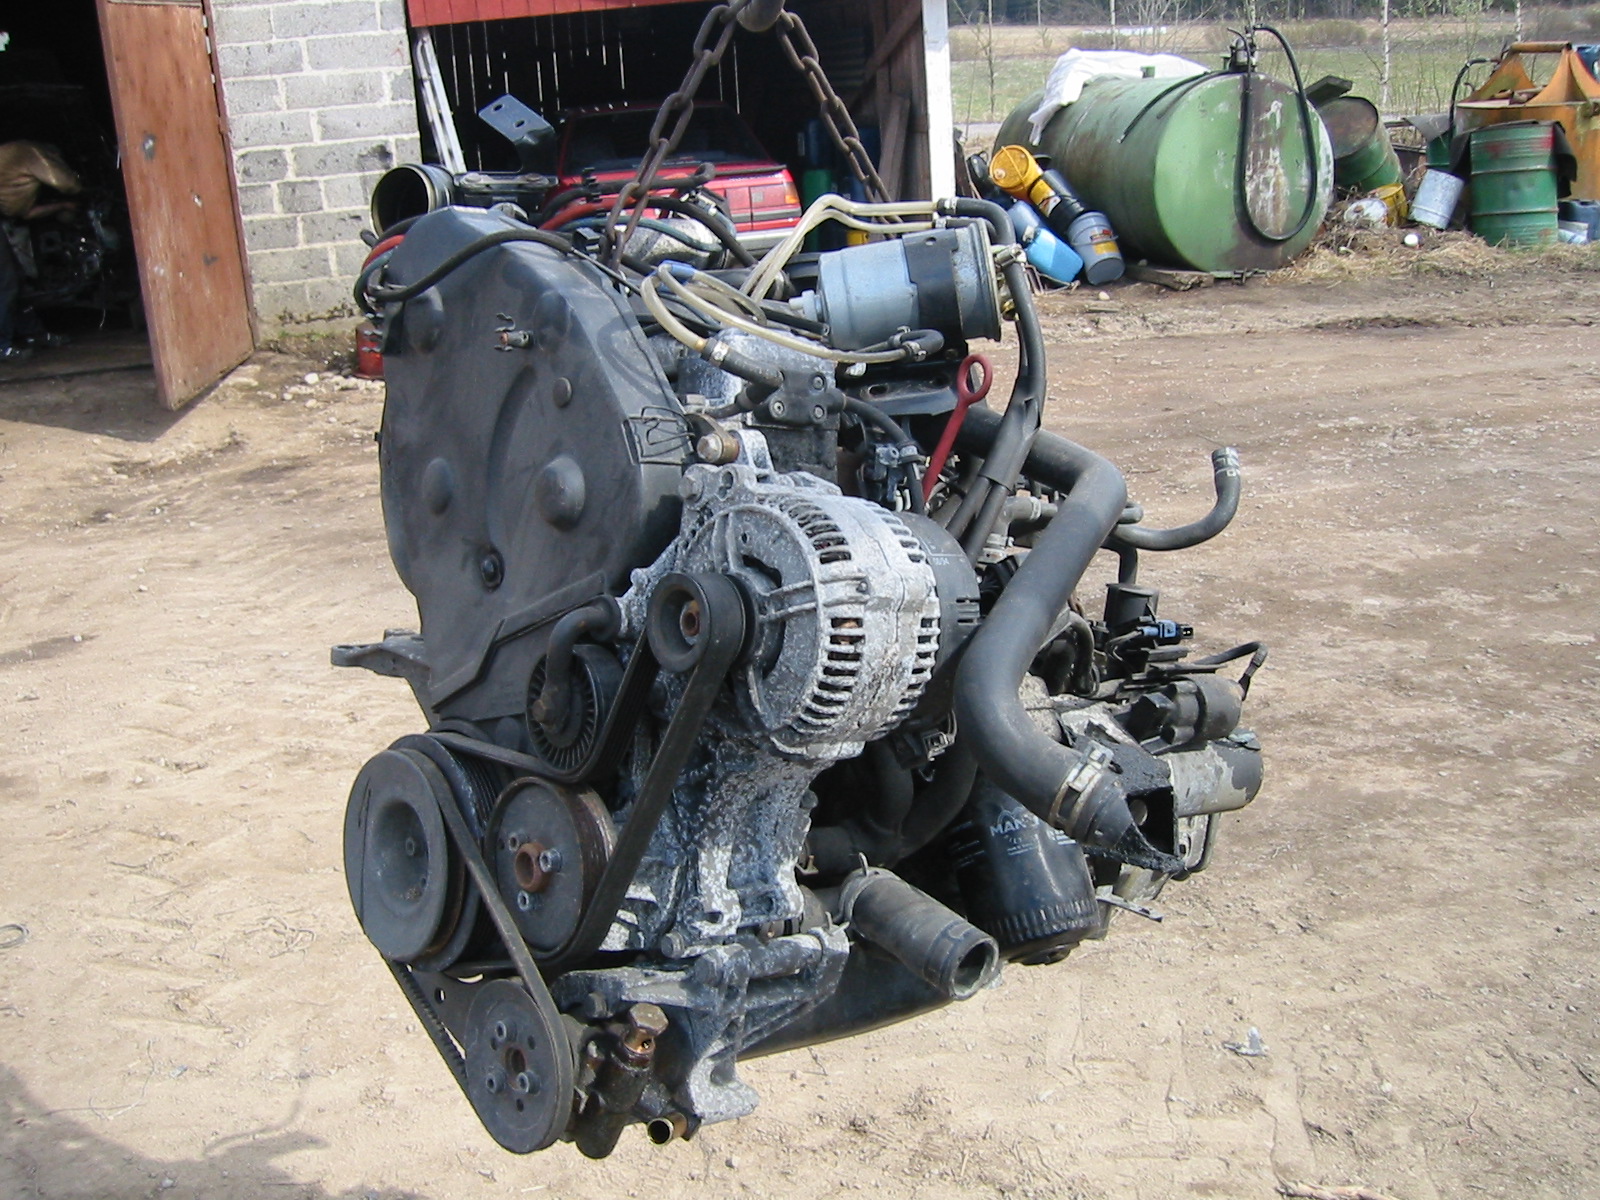
There hangs the engine: 90 hp of diesel power, and a 120 A alternator. While it hung from the tractor's front loader, Pekka replaced the timing belt and tensioner. The old belt was almost broken: the previous 'mechanic' had fitted the tensioner incorrectly somehow.
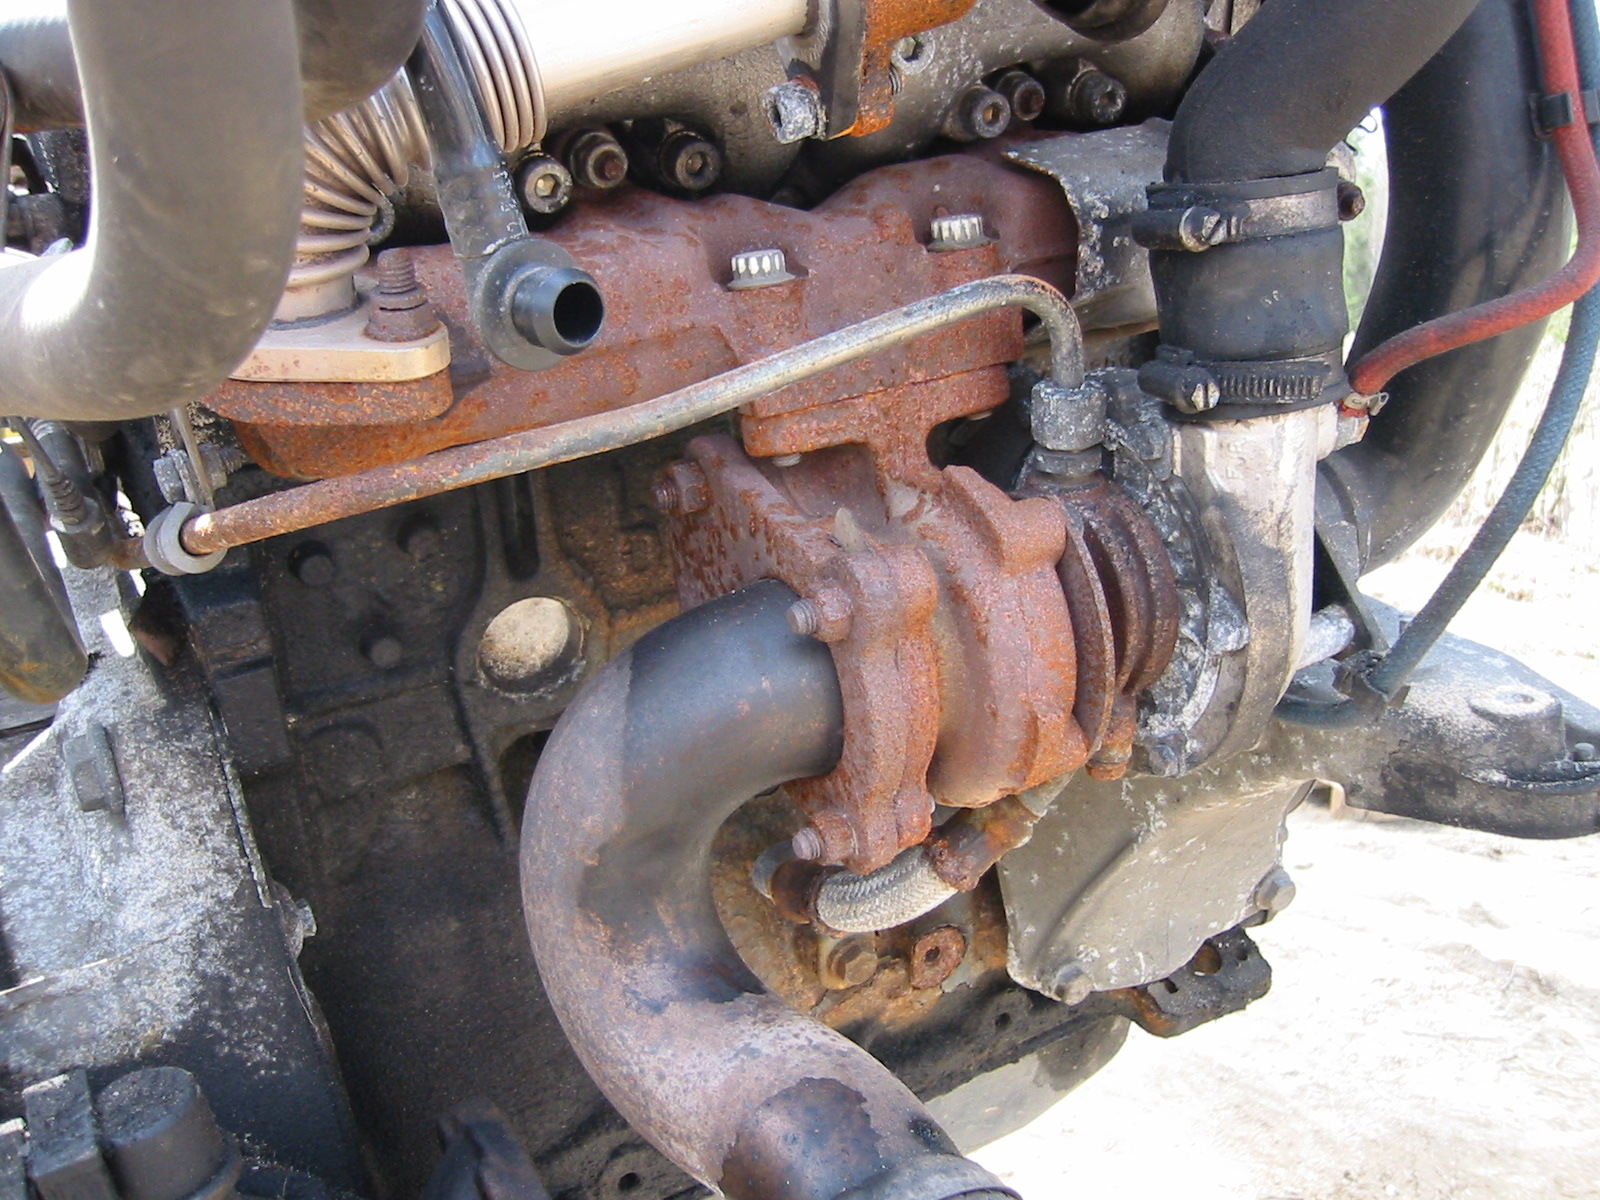
'Just like a turbo, only small...' :-)
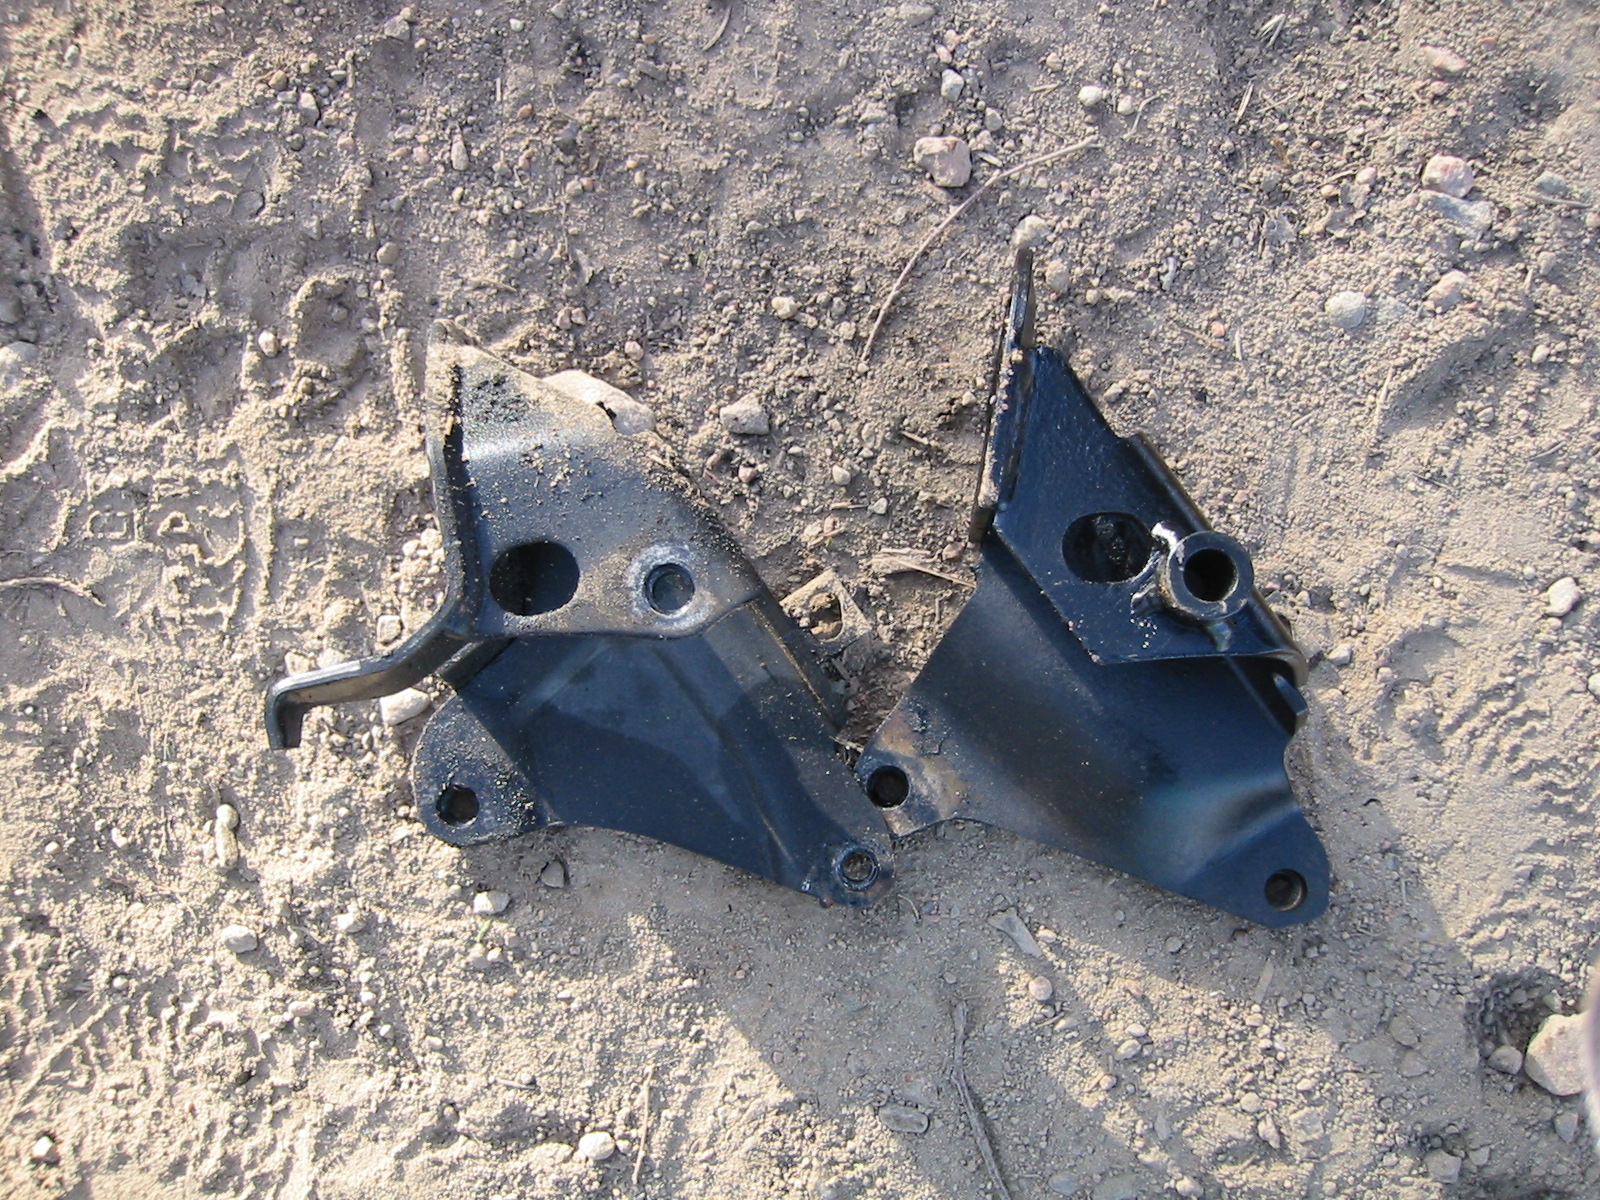
The front mounting bracket was replaced, as the Mk2 mount sits at a slightly different angle from the Mk3's.
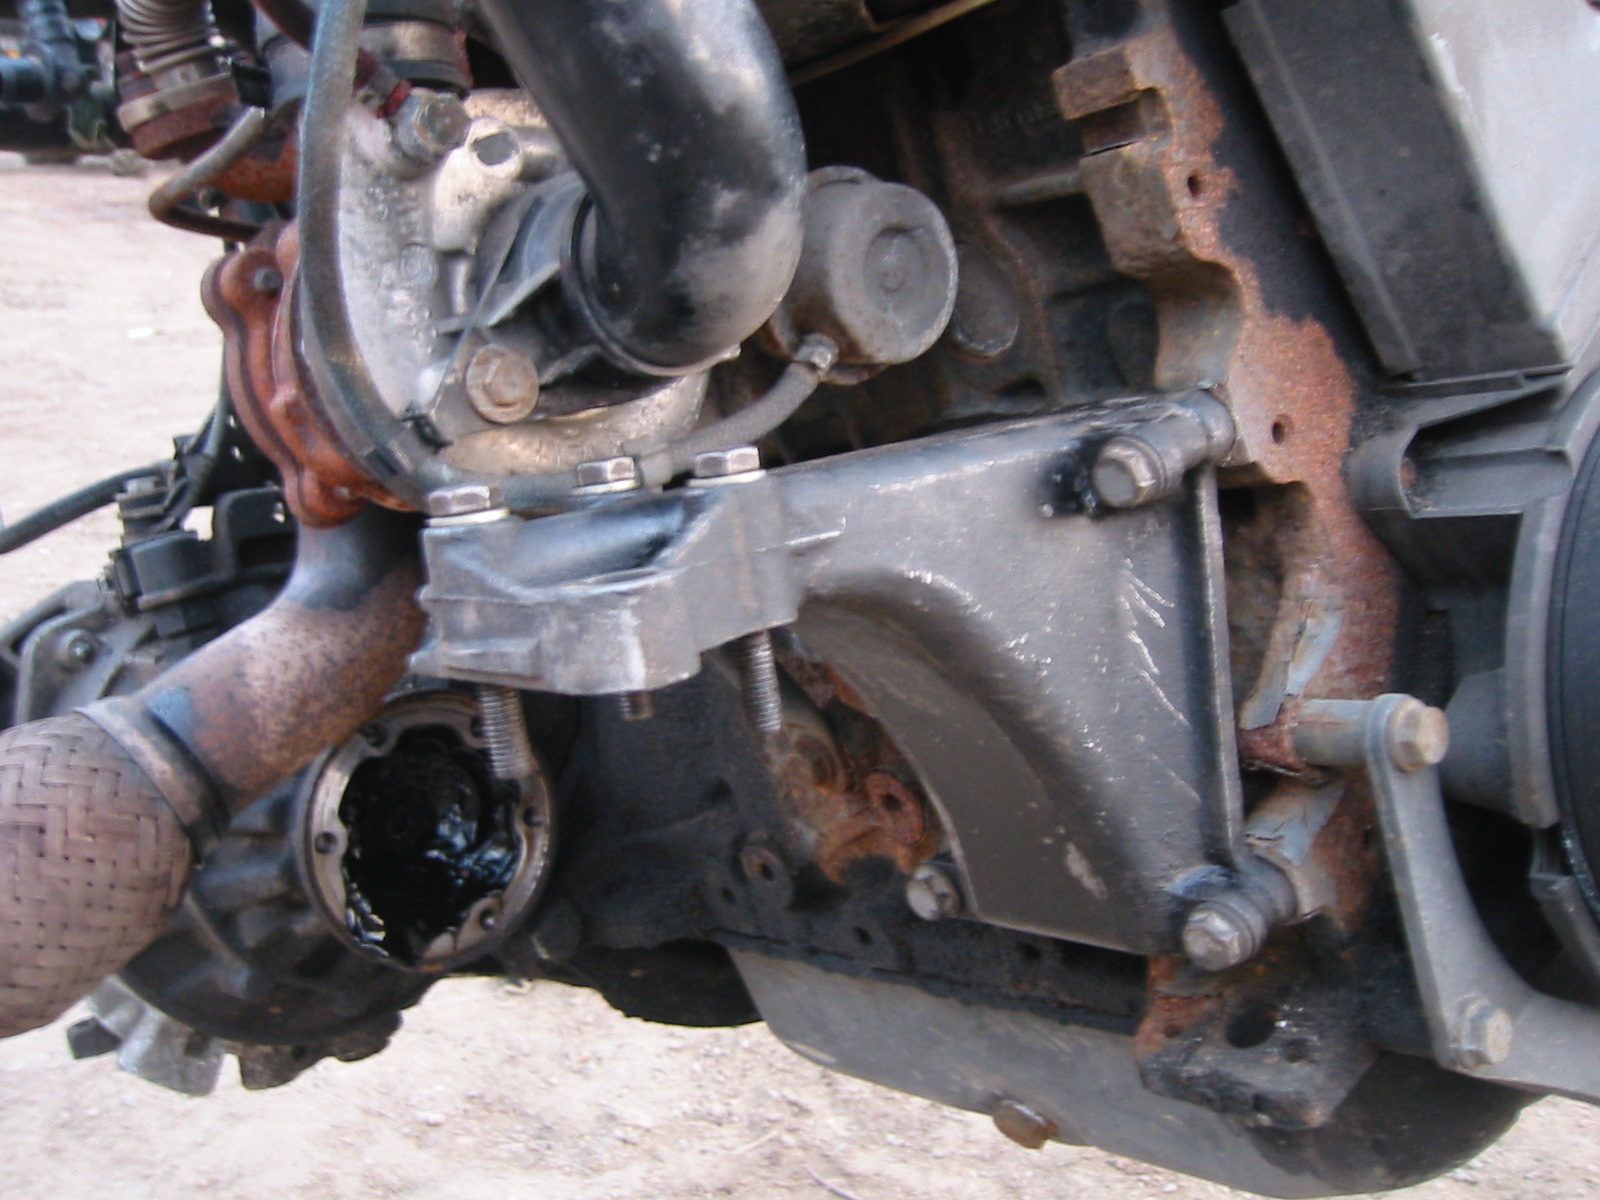
The rear bracket was changed to a Mk2 one too. The Mk3 uses a different mount attached to its bracket by one bolt, which would also have required changing the front subframe. You can glimpse that bracket in the turbo photo above. The subframes are otherwise the same, but the mount attachment differs. It was easier to keep the Mk2 subframe and mount and use a Mk2 engine bracket as well. That saves some parts-change percentage too.
Details — part 2
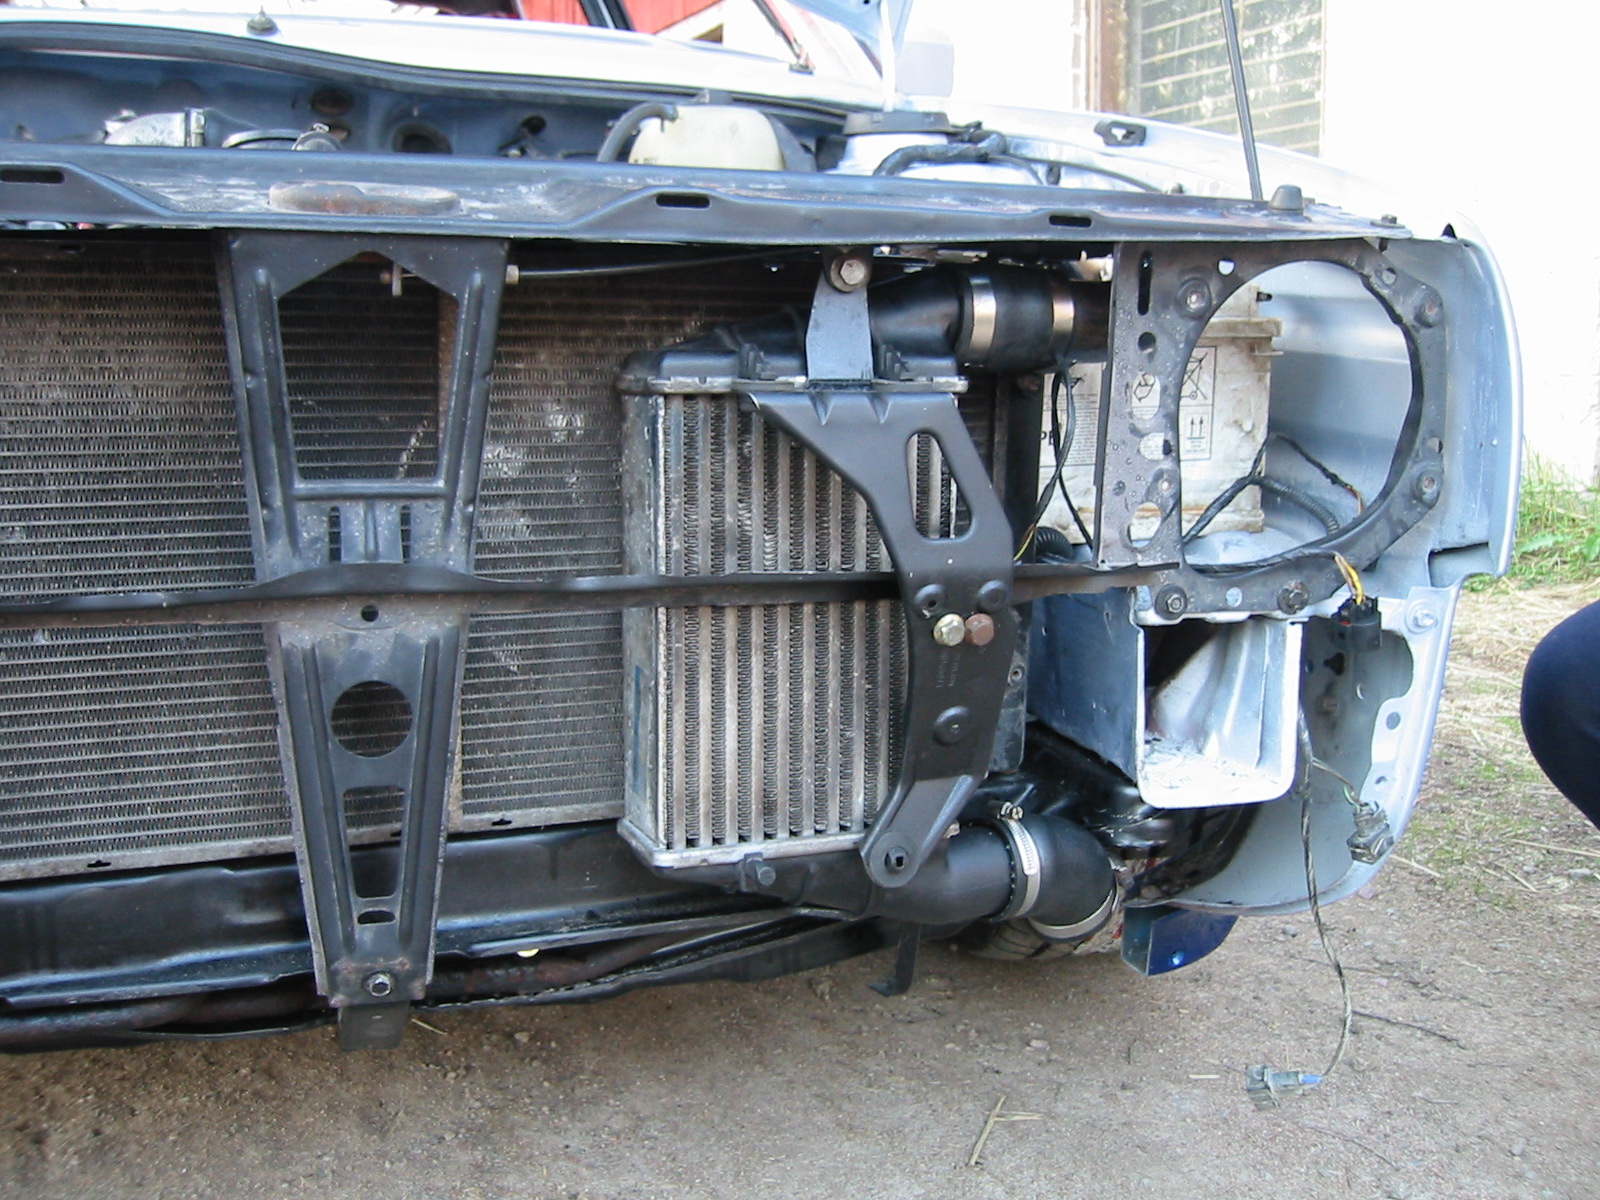
The intercooler sits in front of the radiator. Pipe routing was tight because we fitted the longest radiator available, from a 1.6 TD. The intercooler and its bracket are Passat parts.
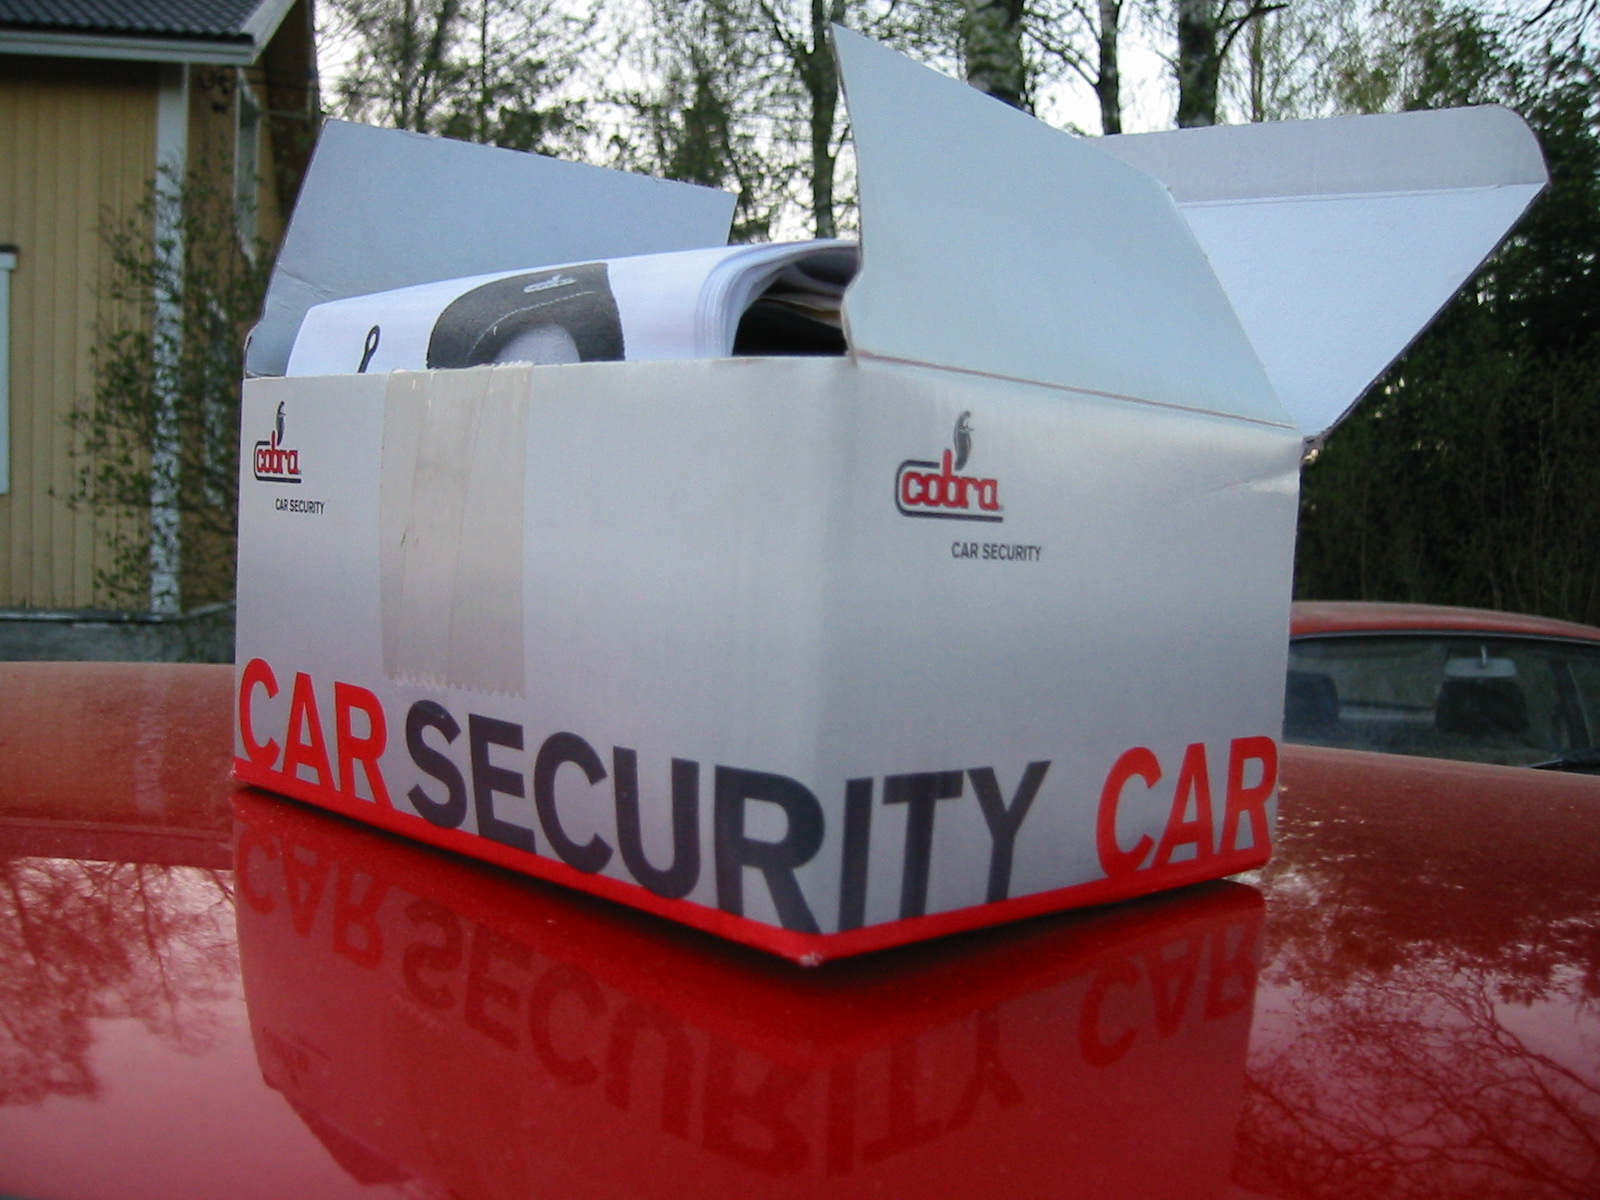
Security: yes.
This locks the doors too, since the handles have no keyholes. It controls the central locking and includes an immobiliser and the other usual modern alarm features.
The same unit remotely opens the tailgate.
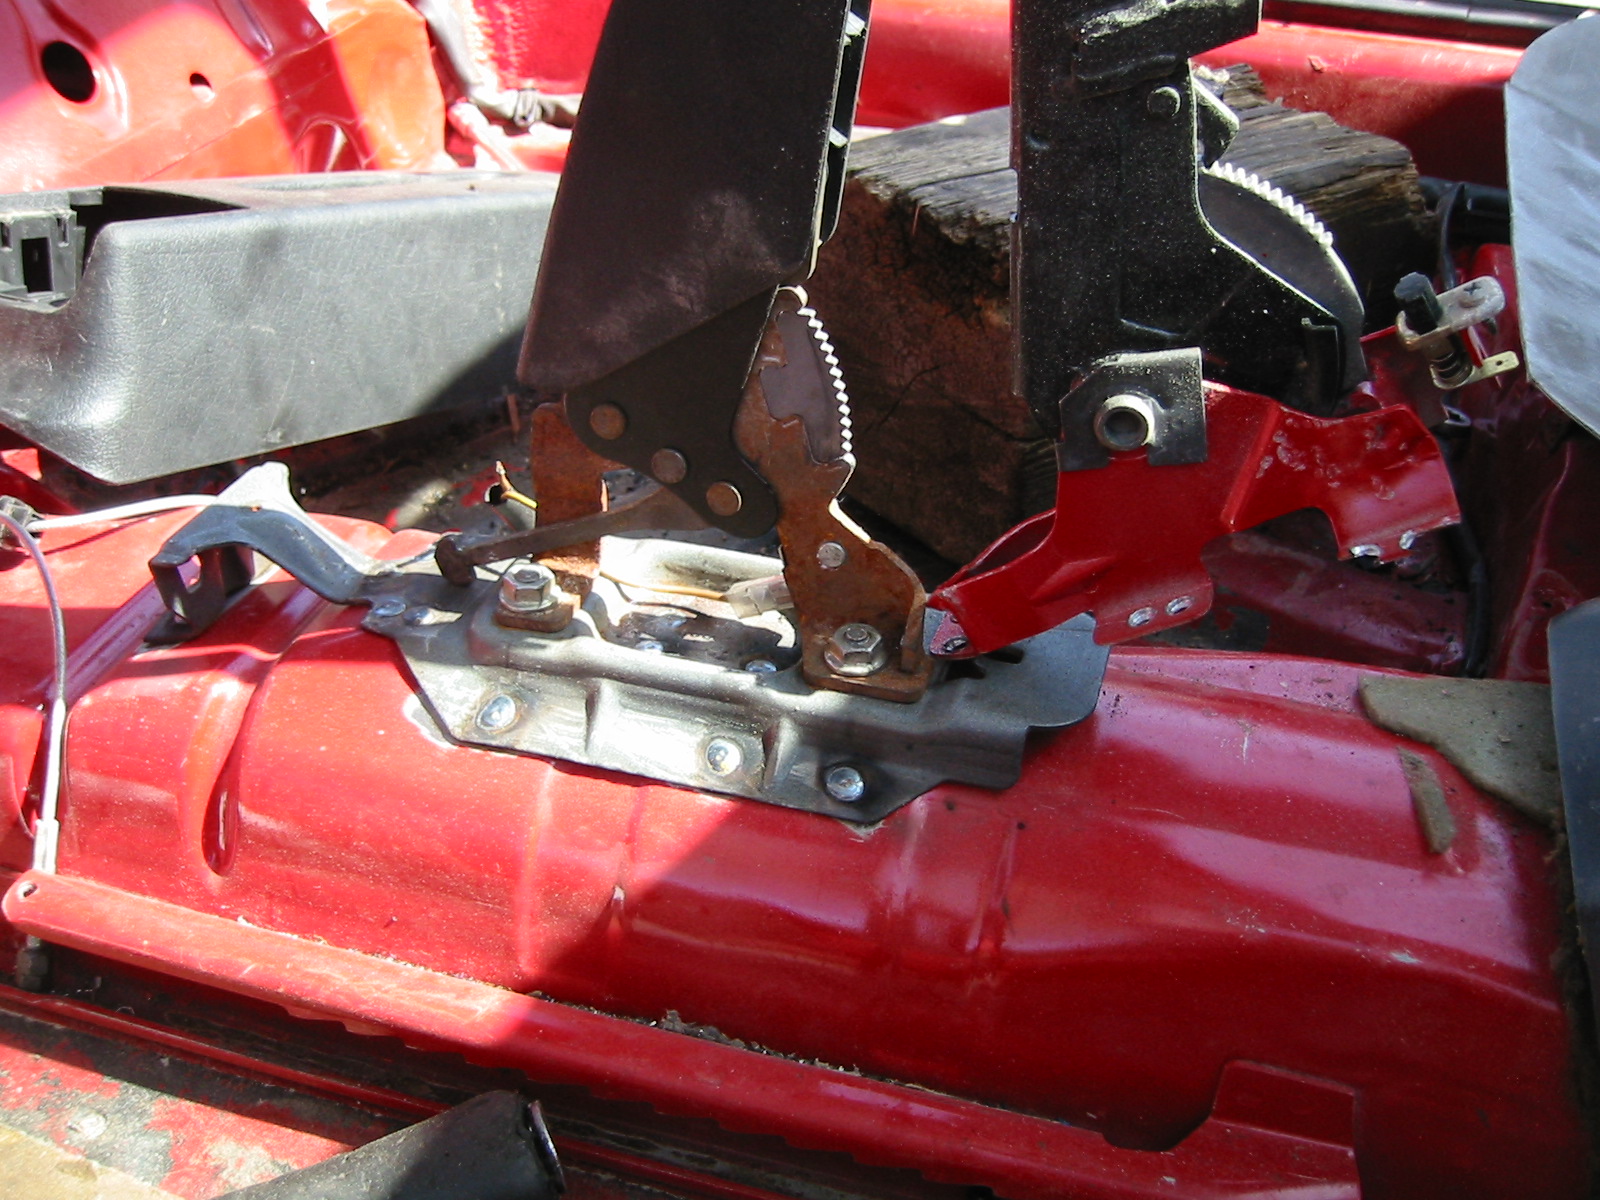
The handbrake lever and its mounting bracket had to be changed to the later type to fit the Mk3 centre console.
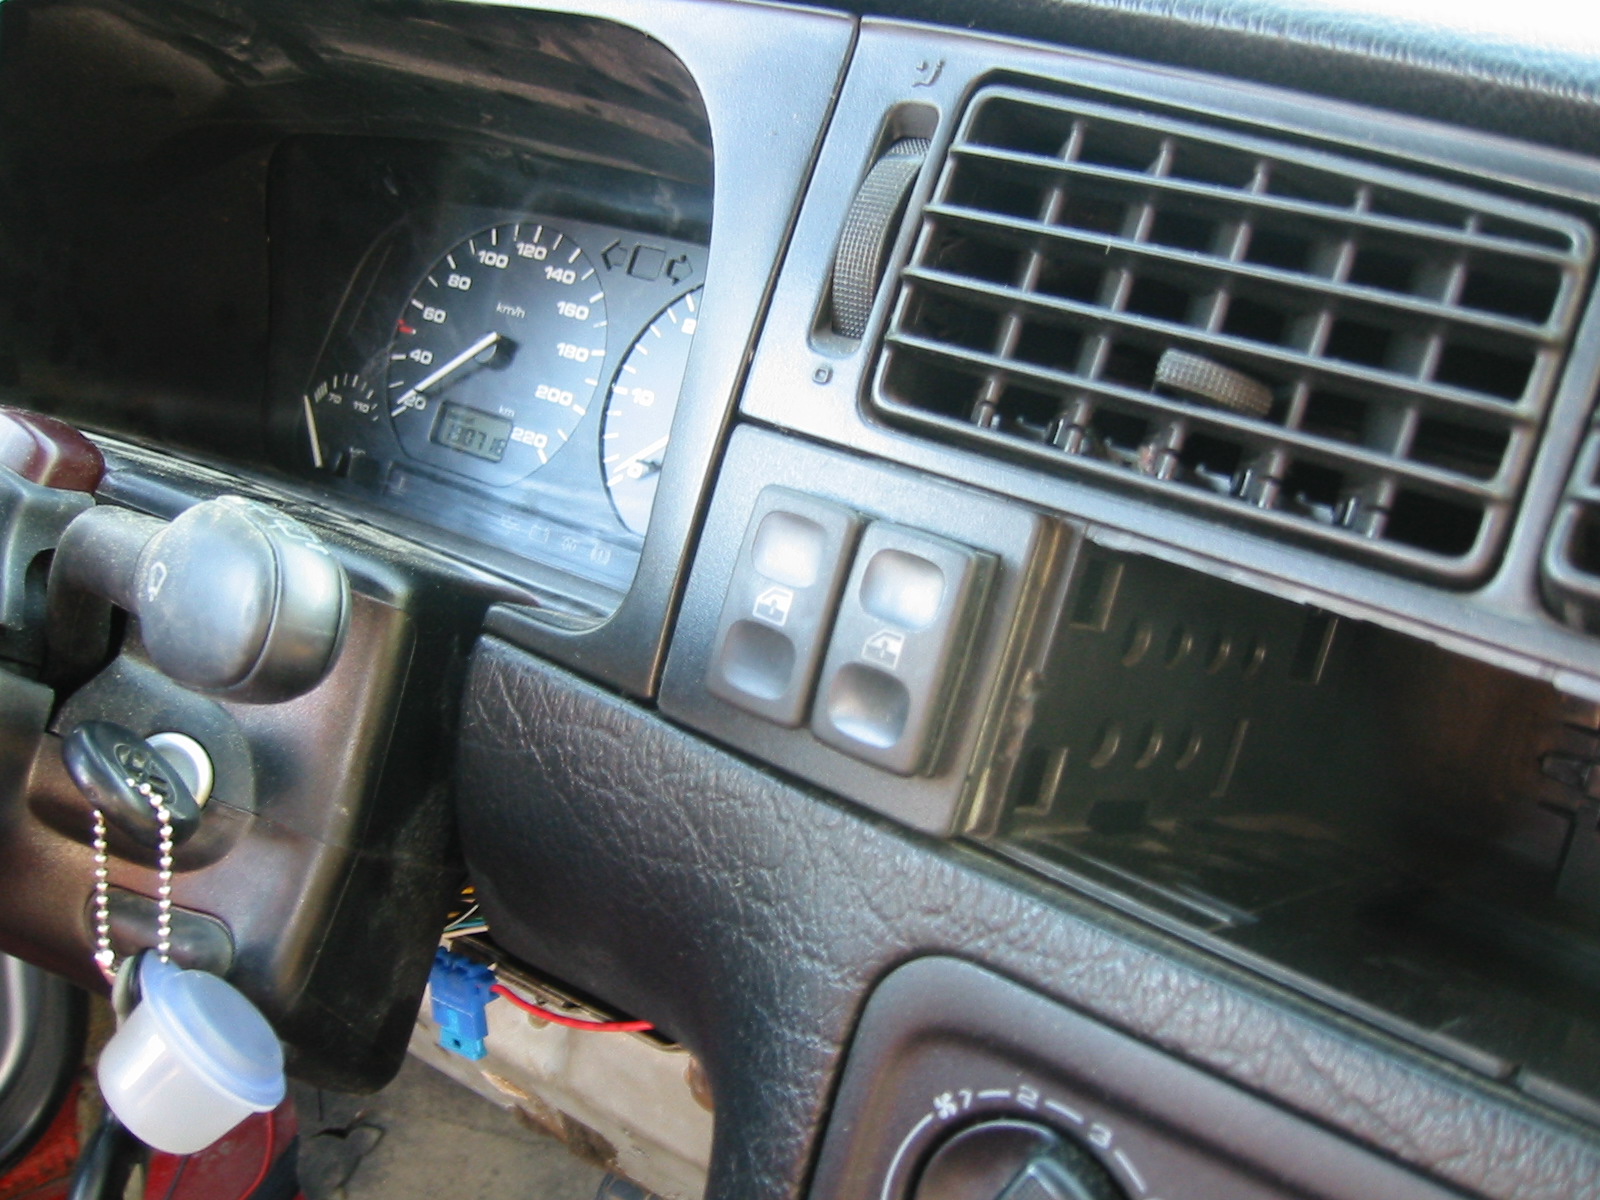
Peksi fitted the Mk2 electric-window switches where the Mk3 heated-seat switches normally go.
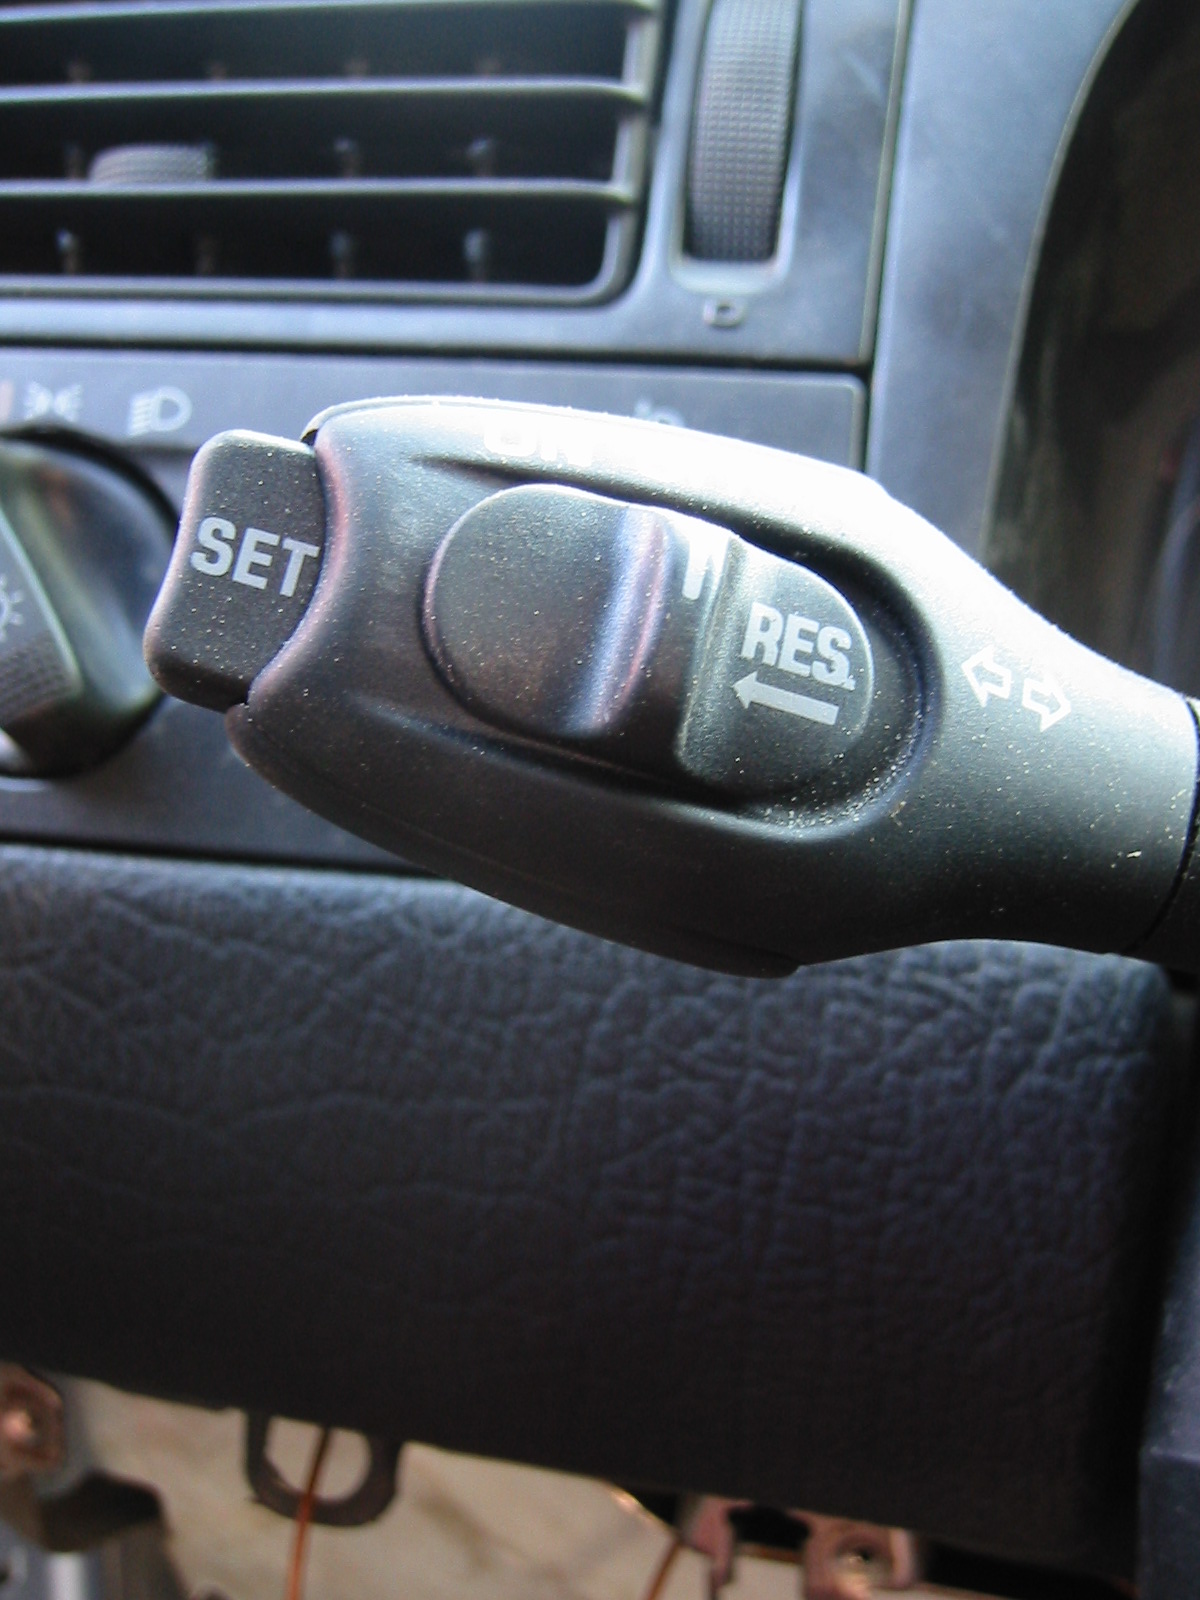
Cruise control is a must :)
Finished
It took six months. Now the car is finally presentable enough to show the Swedes at Bug Run. There wasn't a moment to spare: the last parts were painted on Tuesday 4 June, and Wednesday still involved fitting and fettling.
The following pictures need no further explanation ;-)
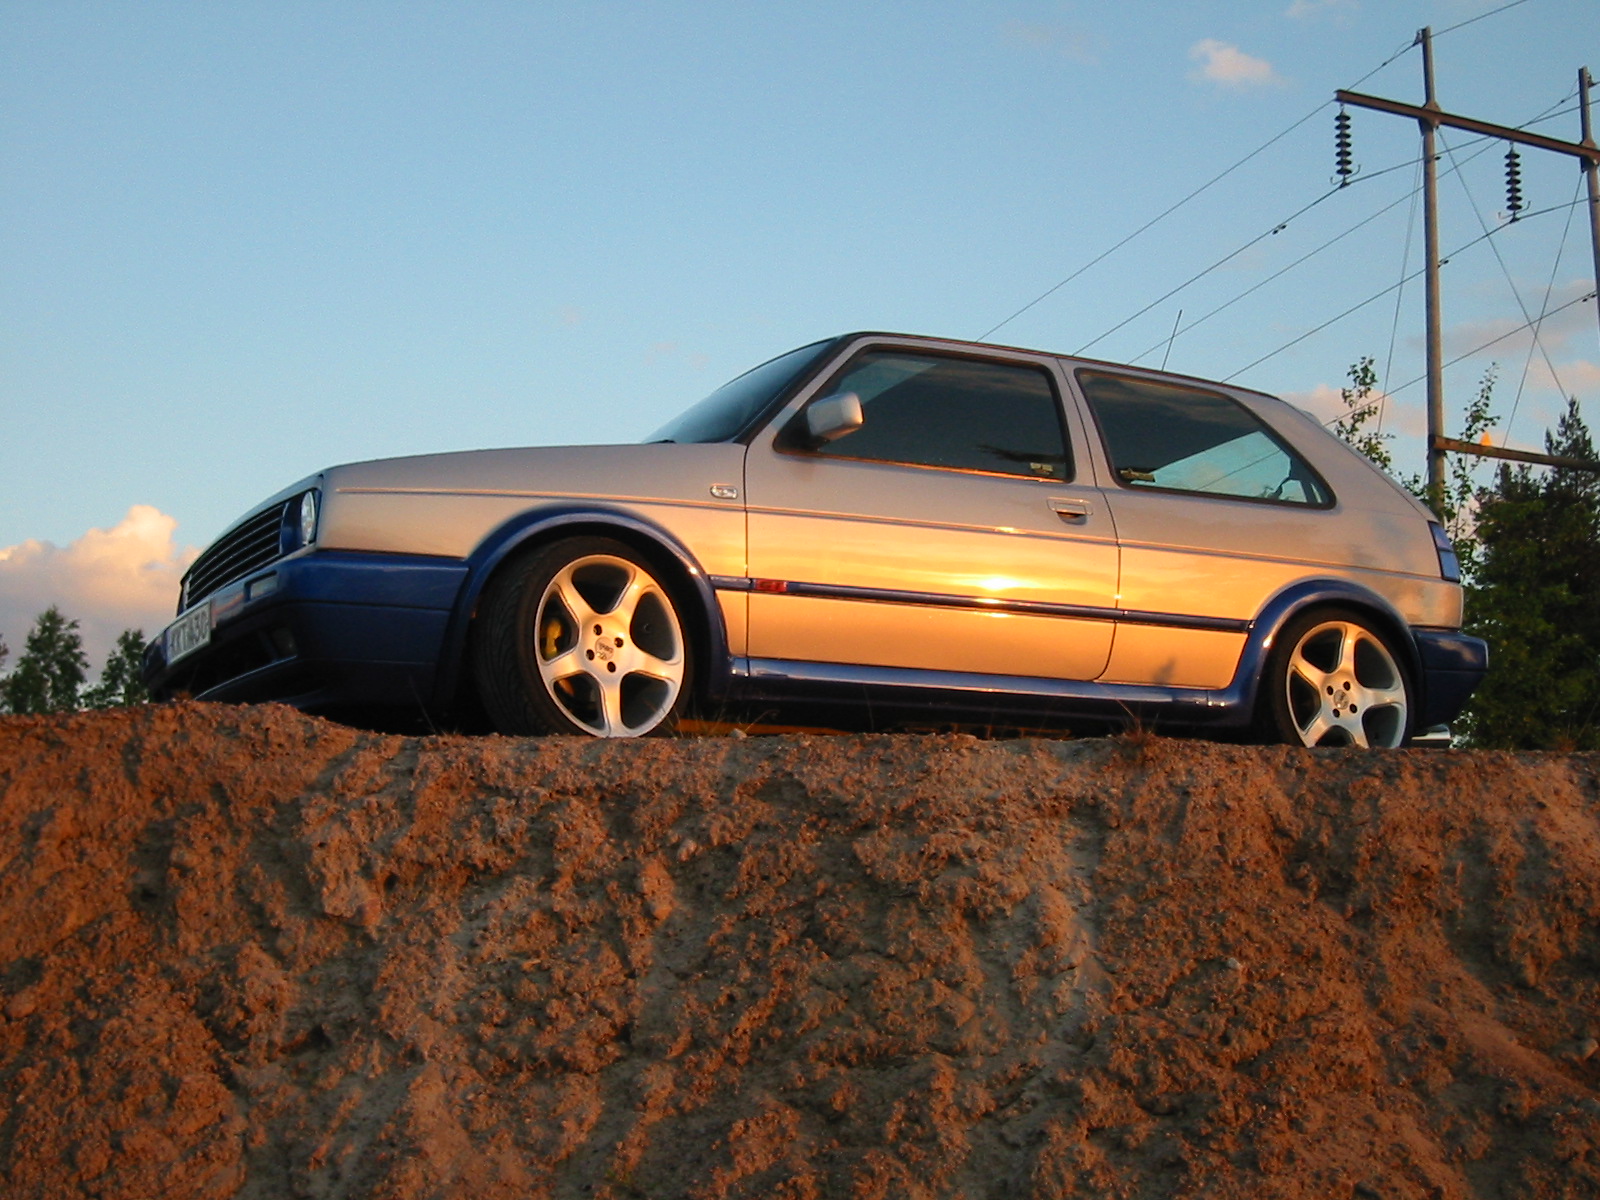
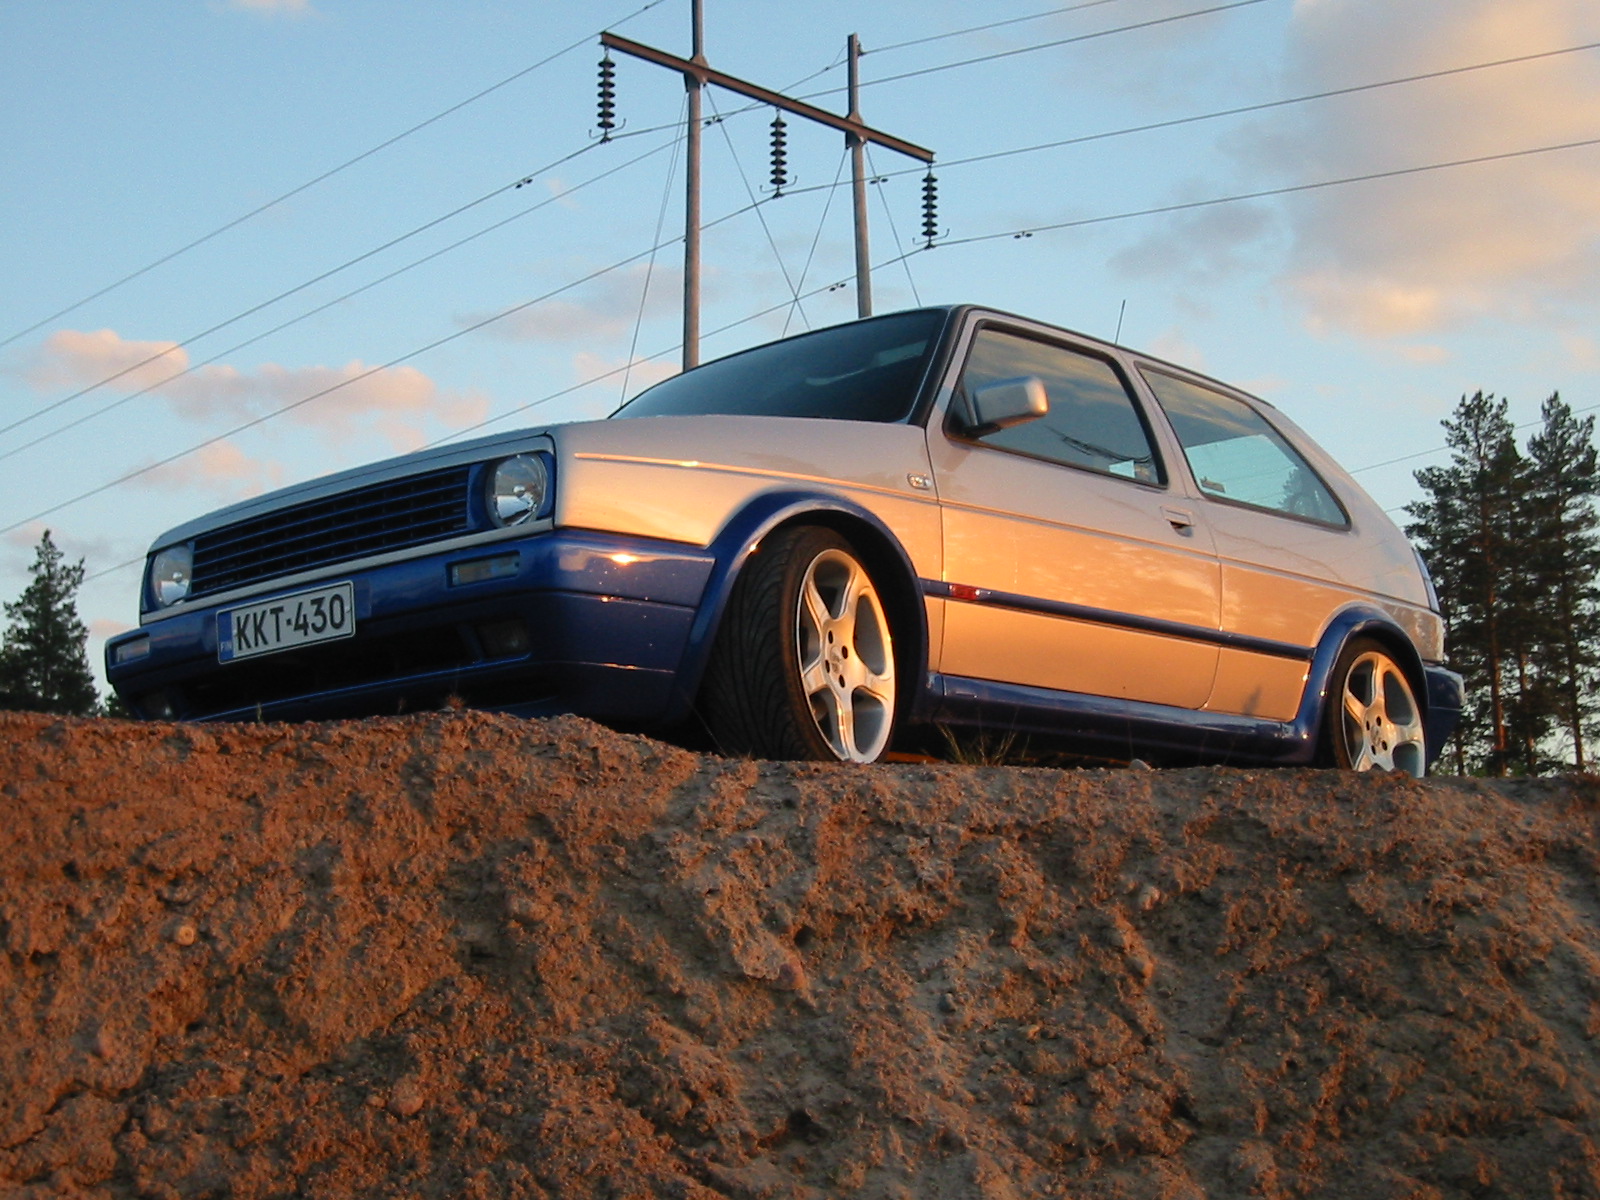
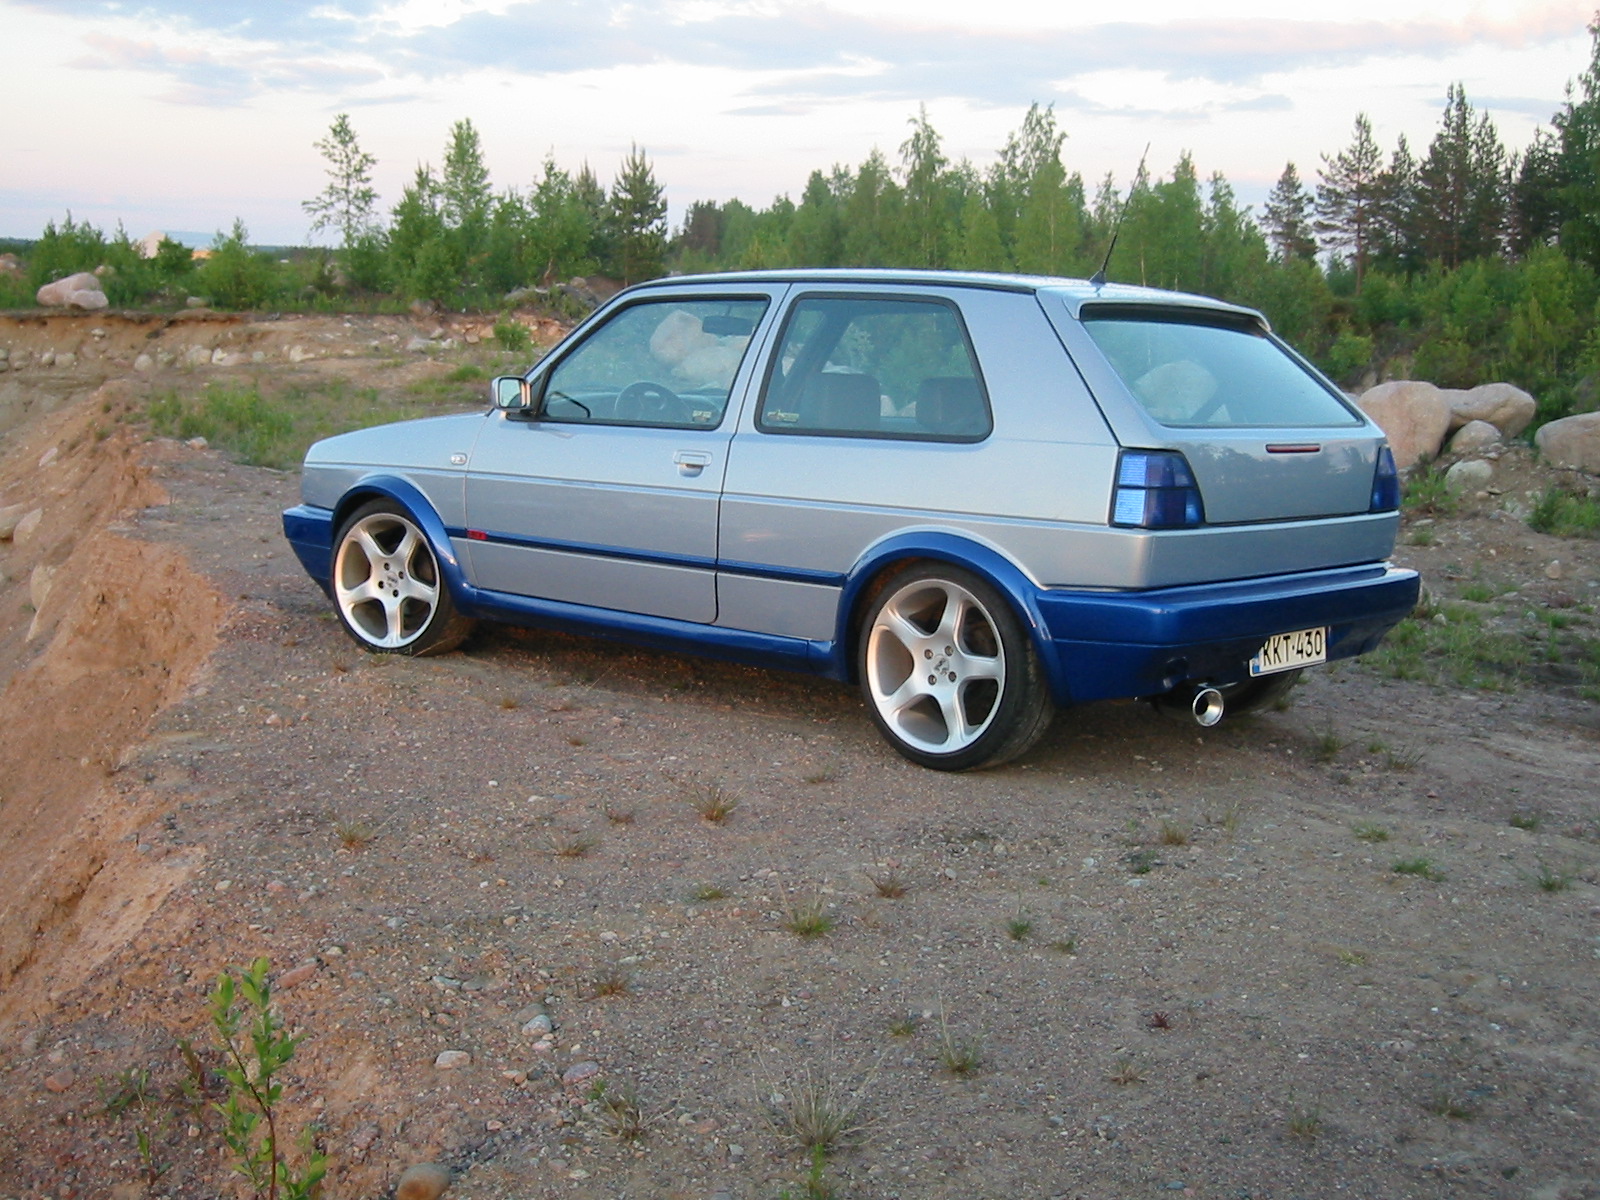
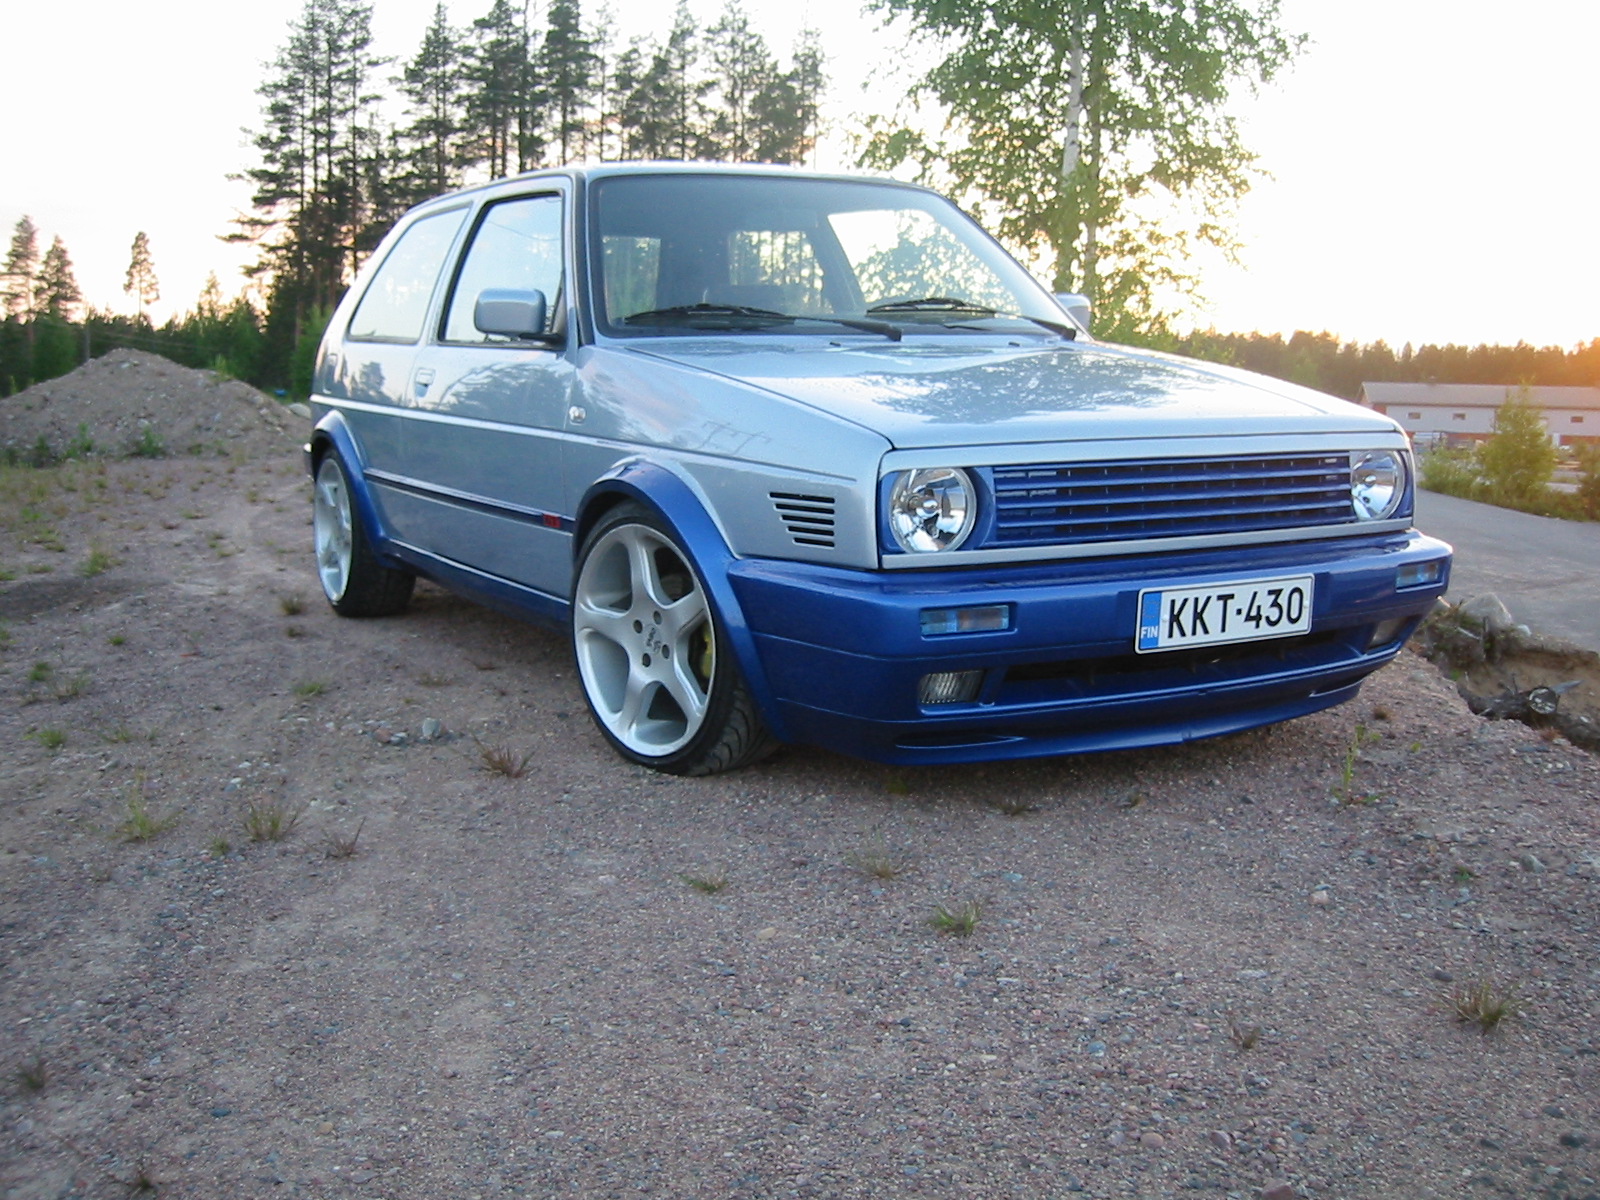
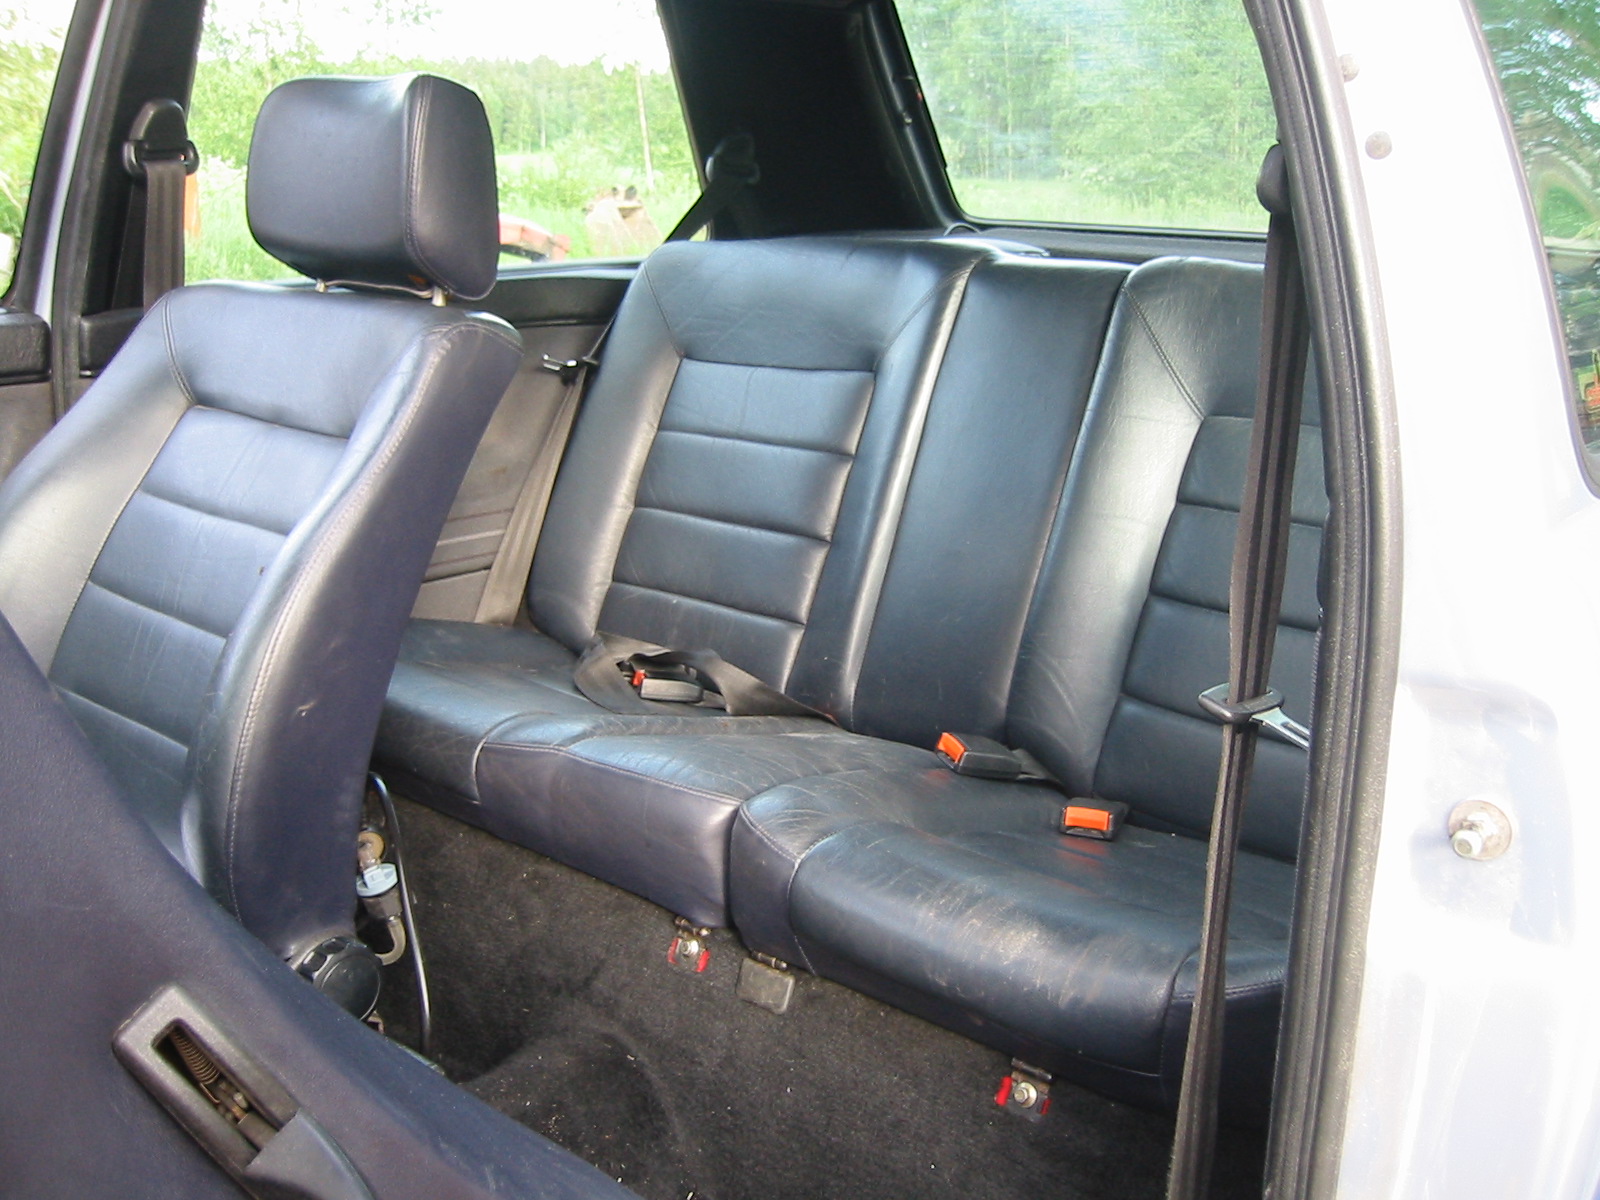
A few more photos below, mainly of the interior. A local automotive upholstery shop did the headlining.
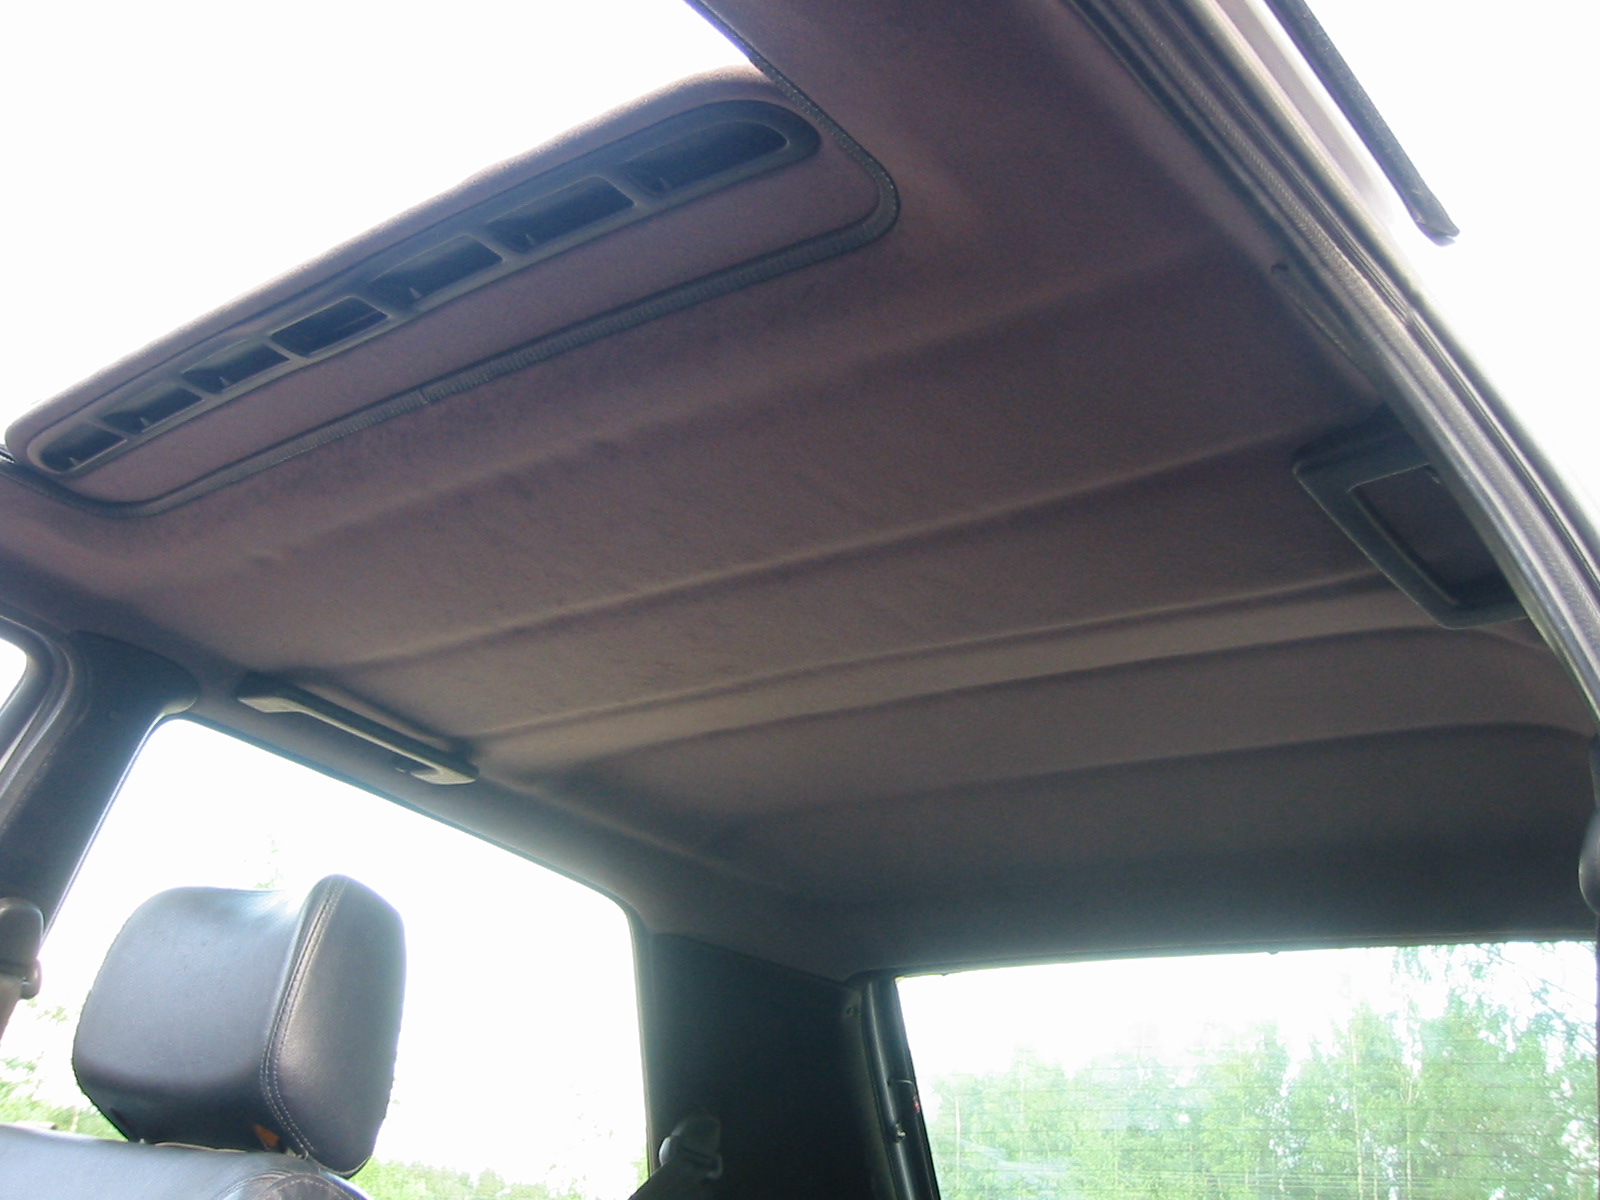
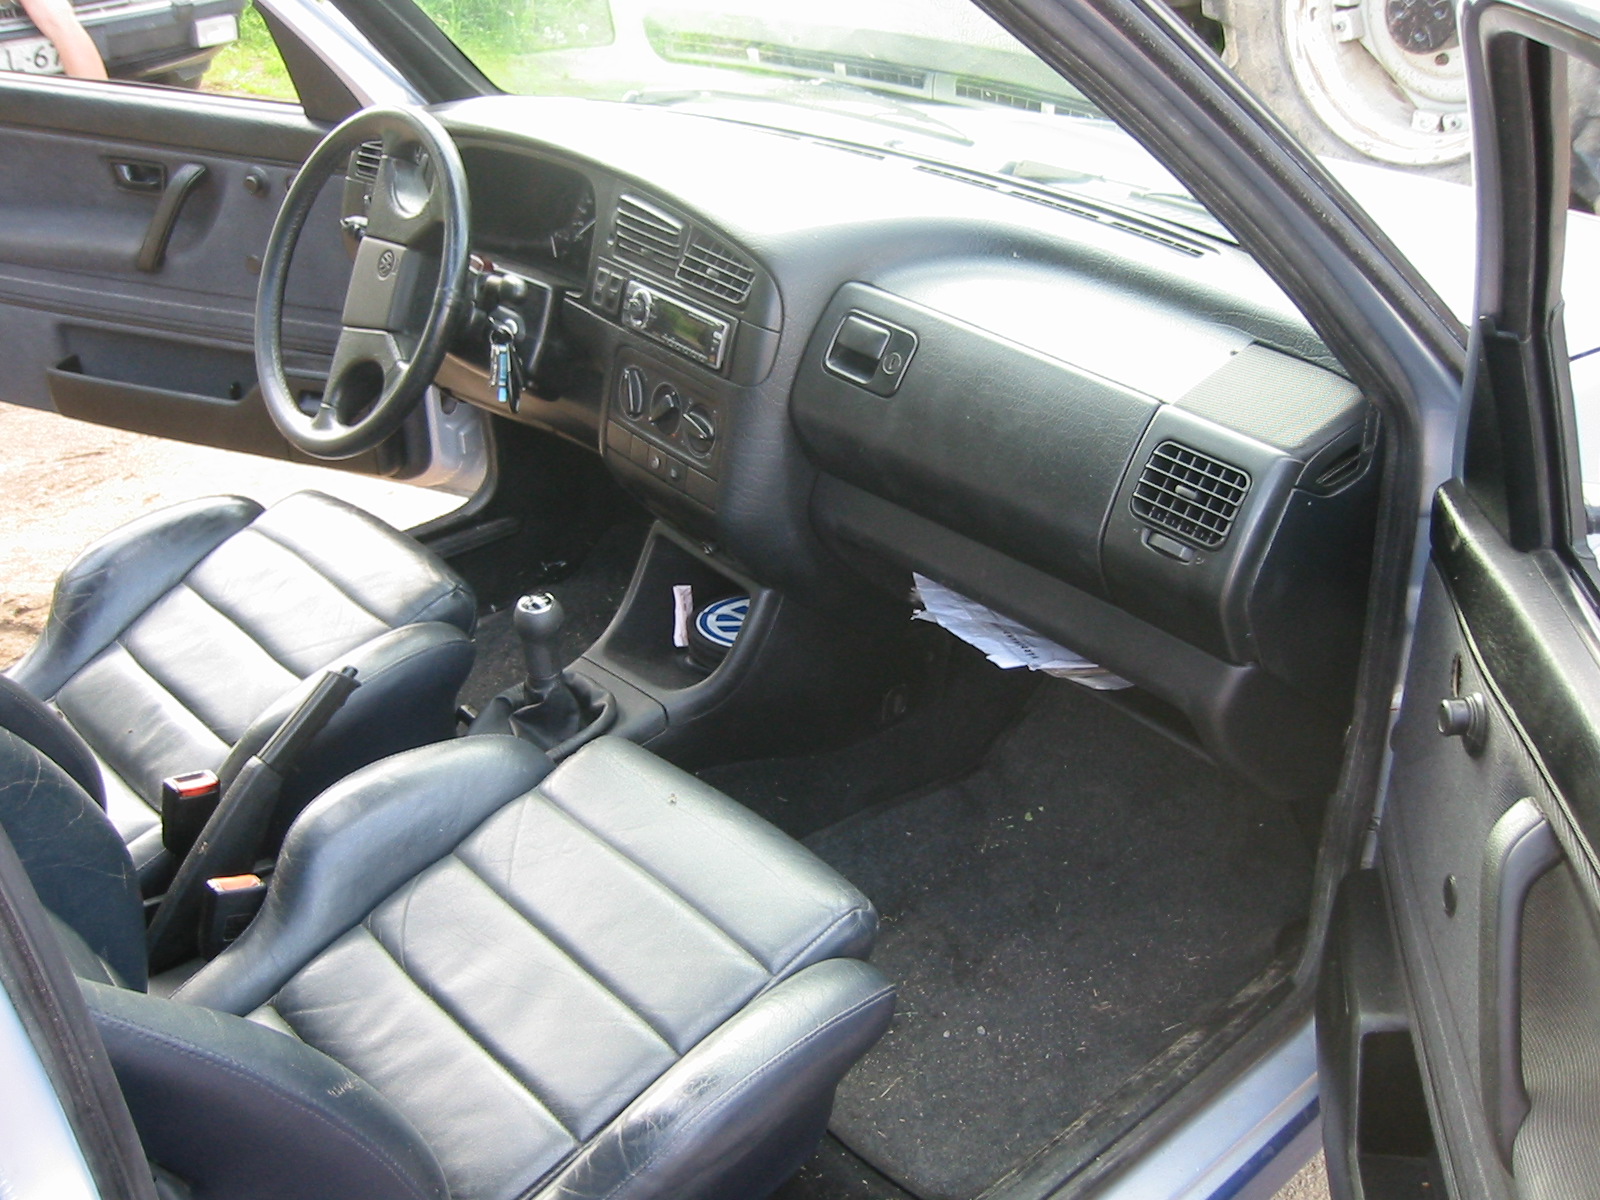
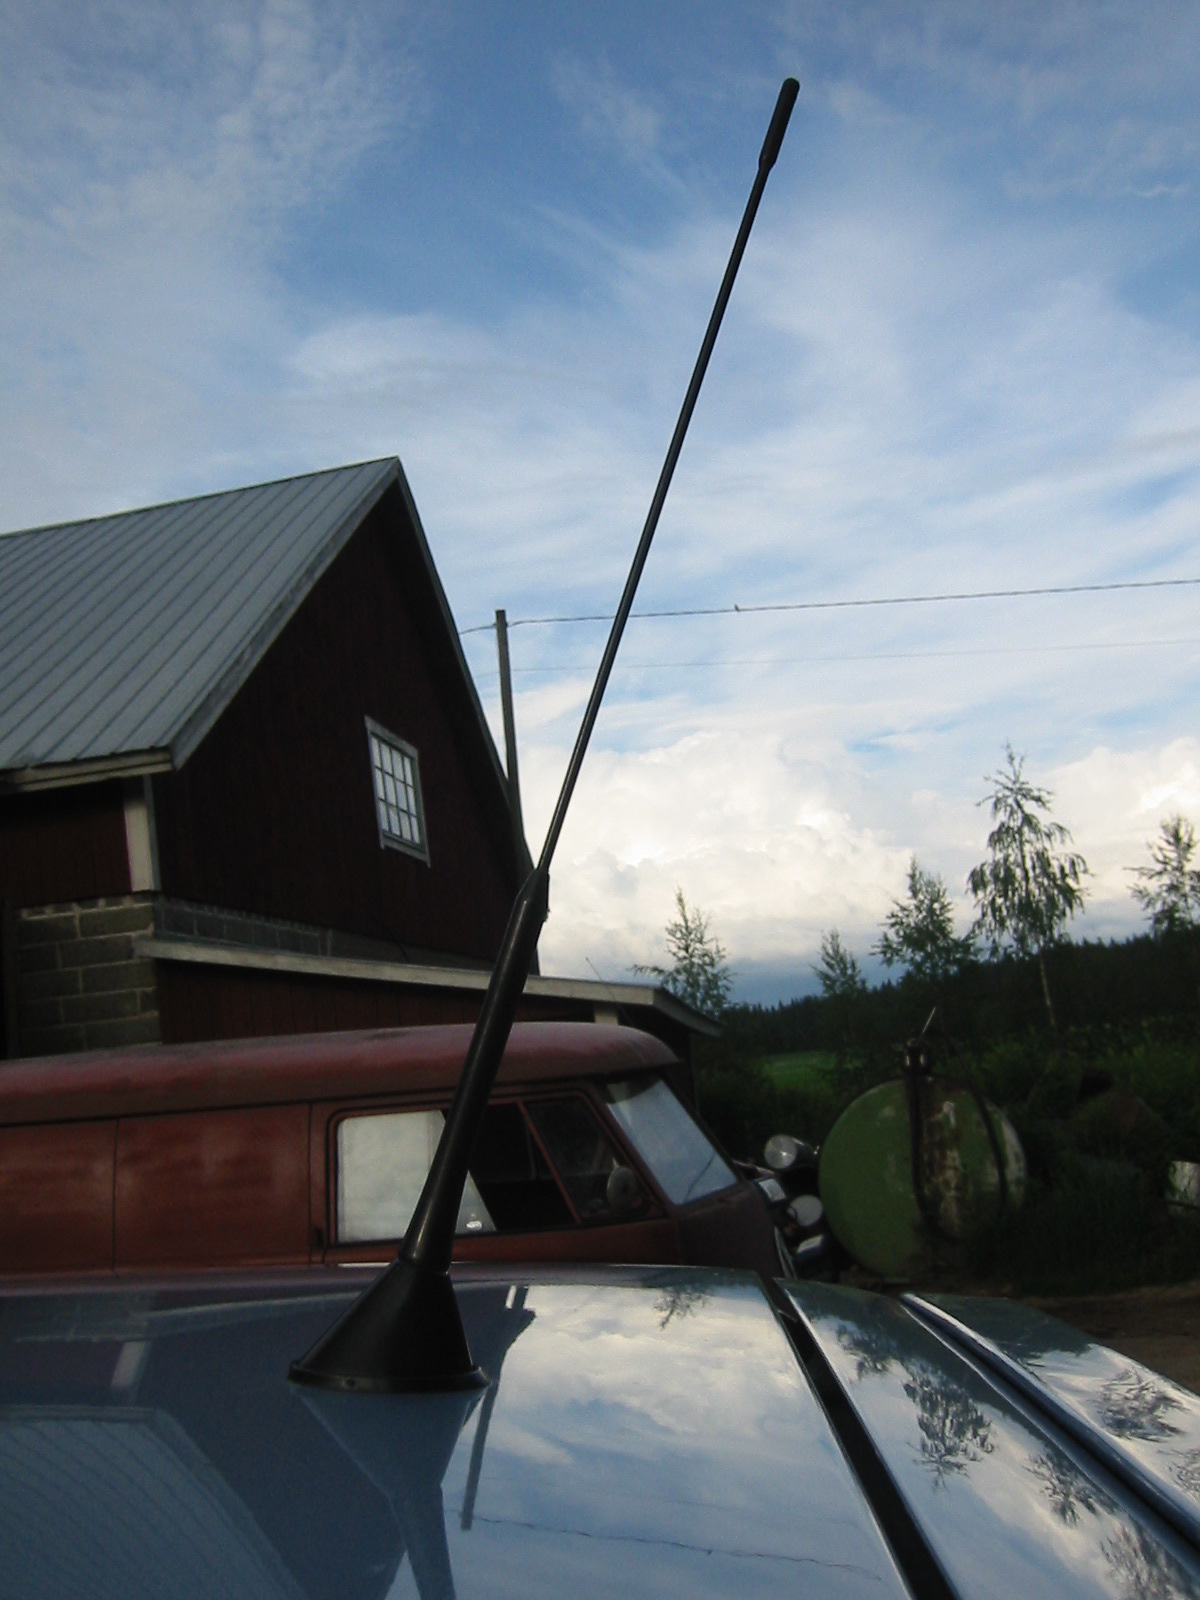
The aerial is from a Skoda Octavia, by the way :-) And a good aerial it is. Probably not much different from VW's own, apart from standing a little more upright.
Bug Run 2002
On 10–11 June in Mantorp, Sweden, the Nordic region's biggest VW event, Bug Run, was held for the 19th time. The car attracted plenty of interest from enthusiasts in neighbouring countries, but no prizes :( The Mk2 class went to a VR6-powered Golf, impressive enough in its own right. Diesel numbers were clearly rising in Sweden too, and our presentation folder saw plenty of use. We didn't see another Mk2 with a Mk3 dashboard or glass sunroof... Or a TDI drivetrain...
We also tried the dyno, since a free run was offered. The figures were quite nice, and Pekka was very pleased. It does go rather well. The Koch chip is quite aggressive, if you can say that of a chip, and mainly intended for competition use.
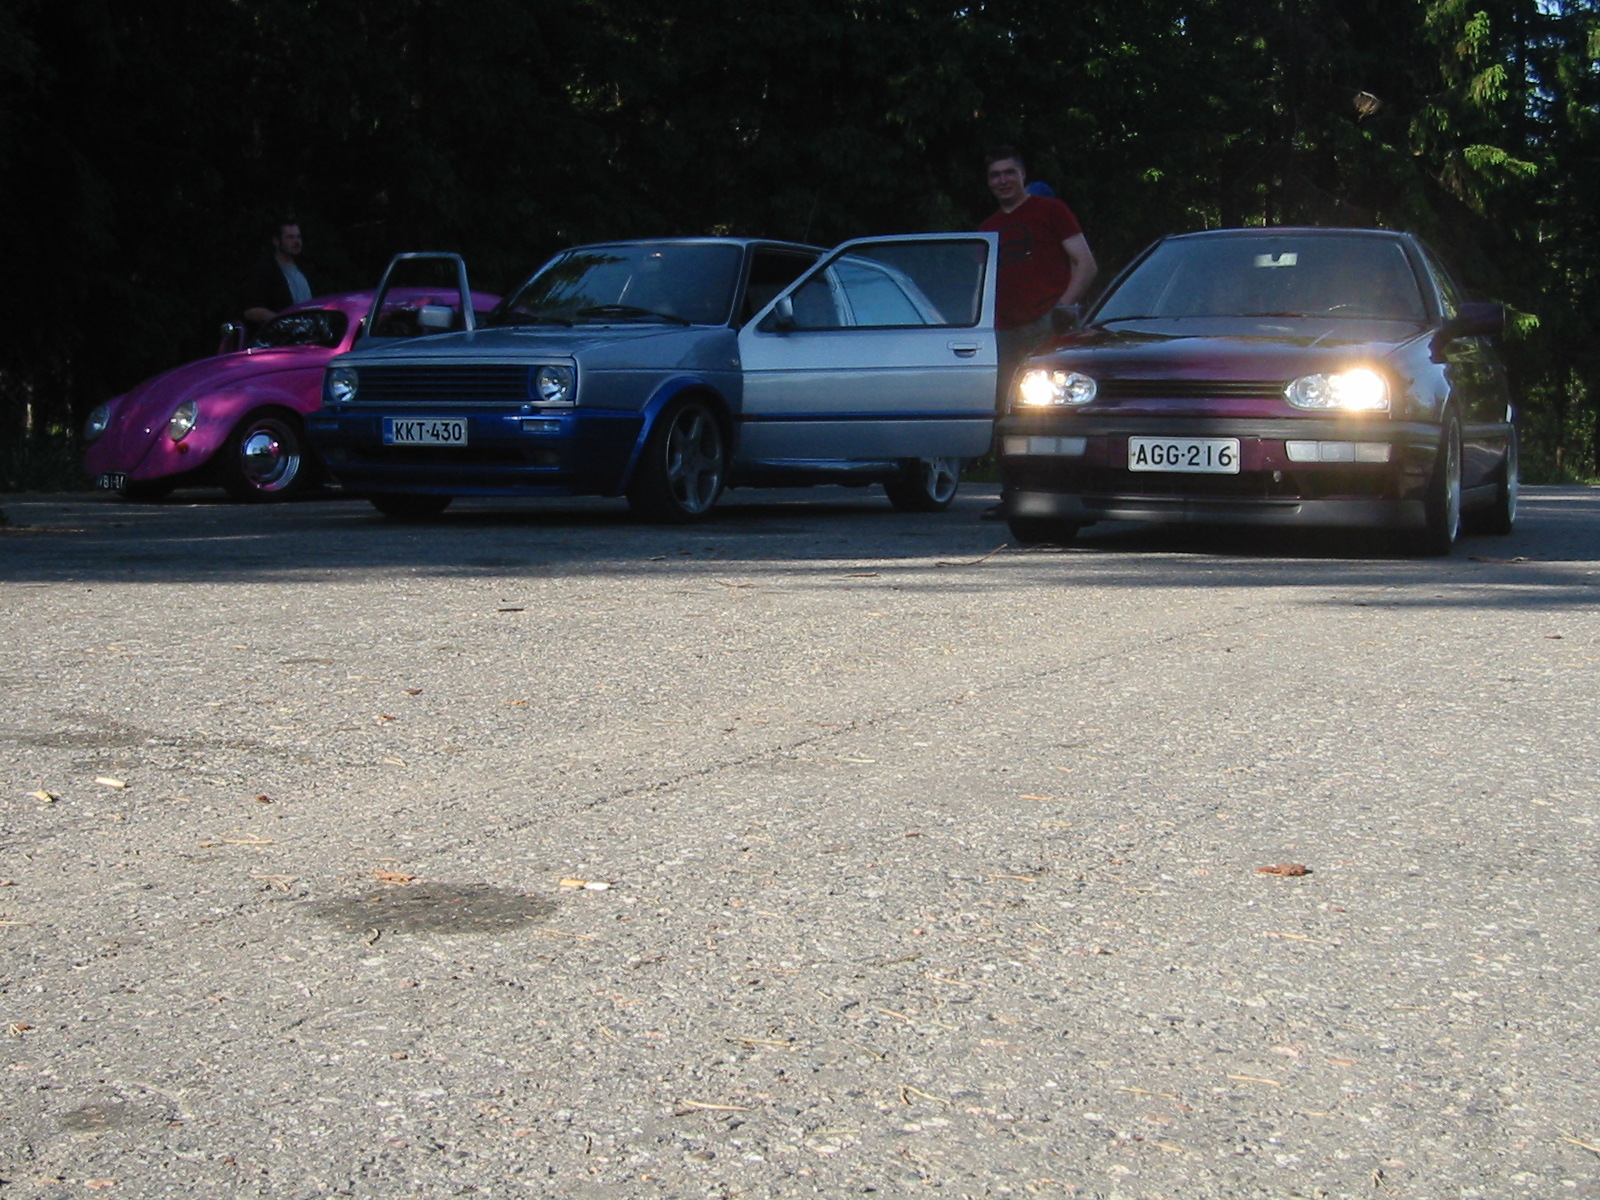
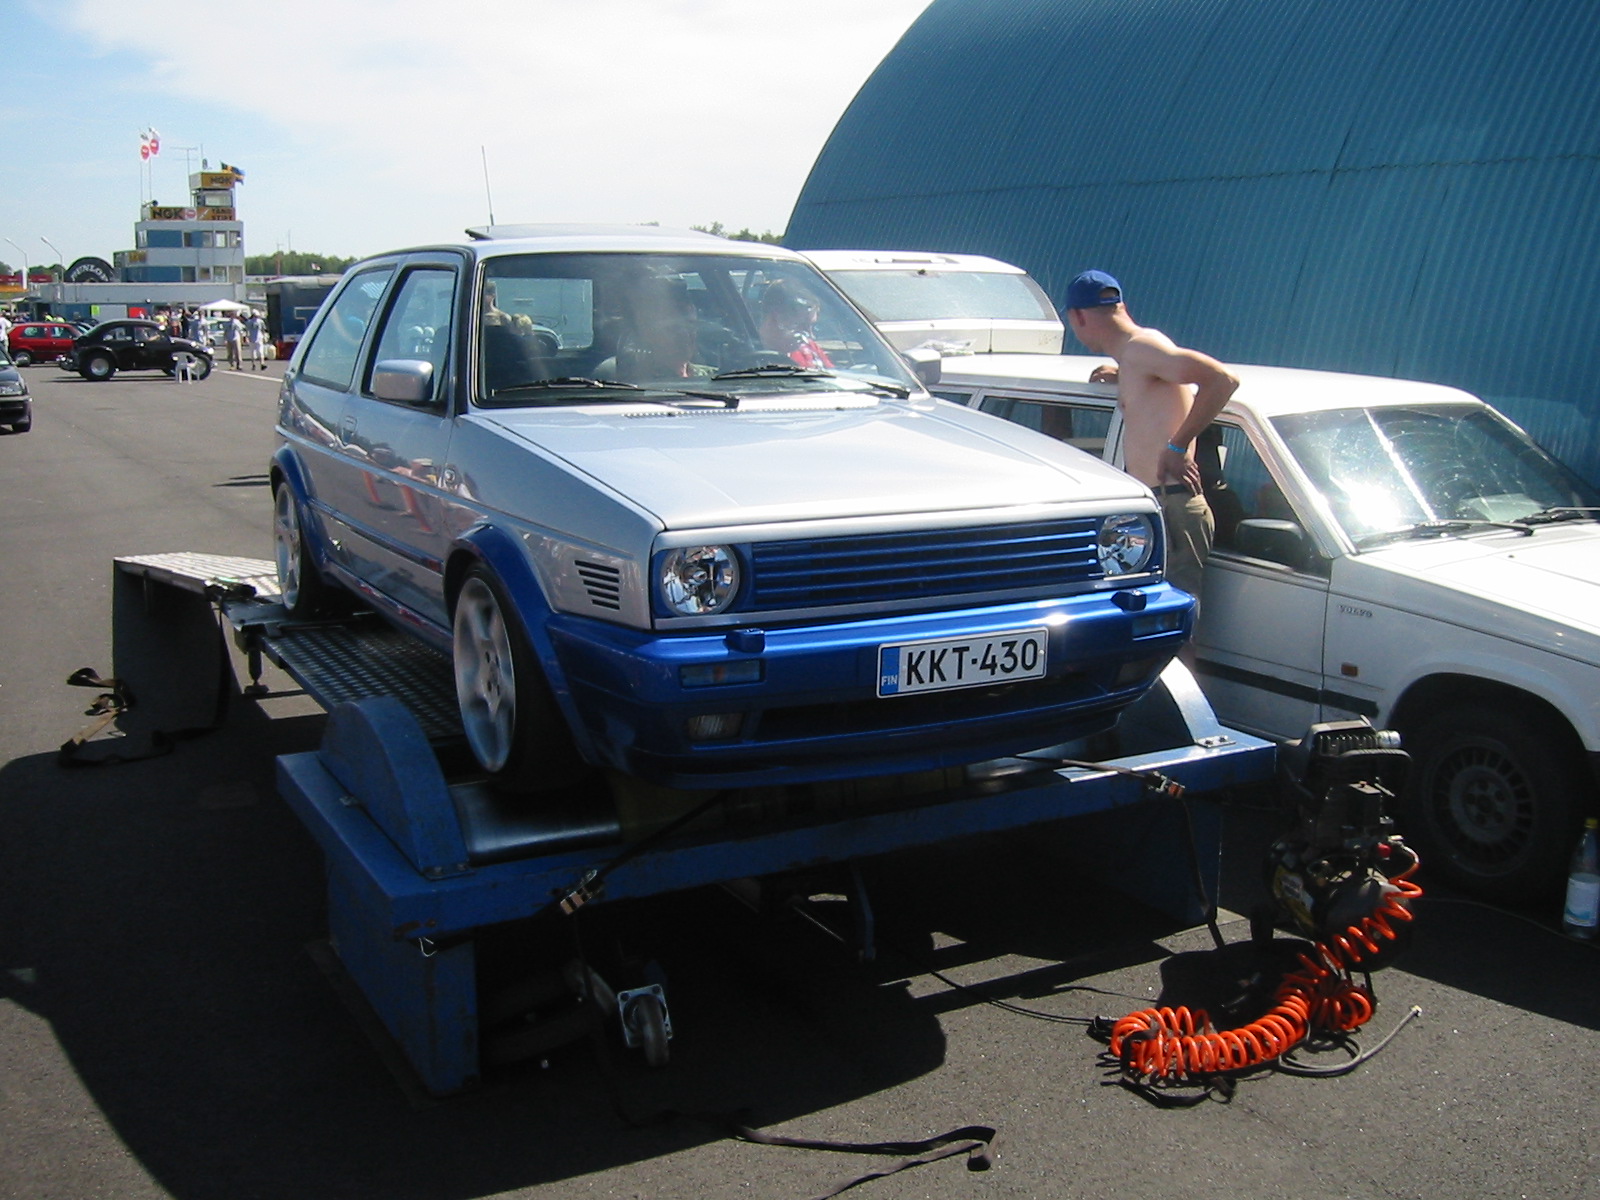
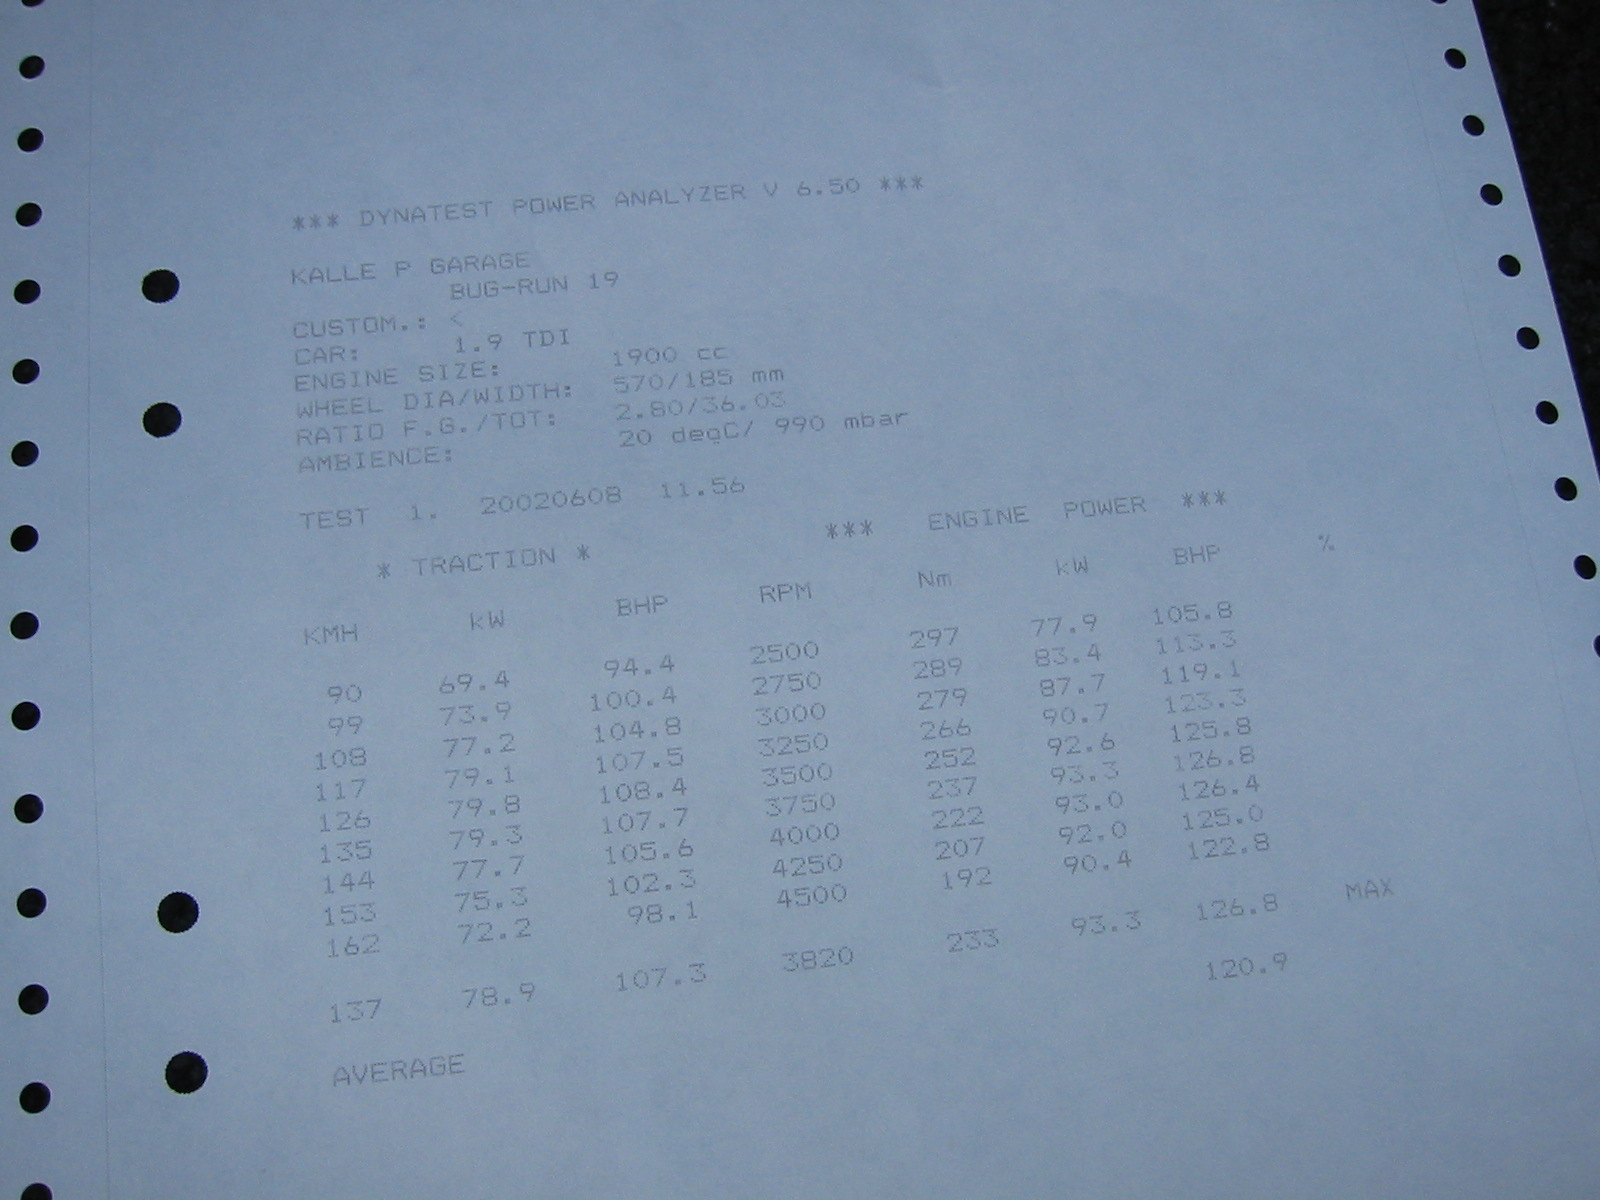
126.8 hp at 3,820 rpm
297 Nm at 2,500 rpm
Wrecked
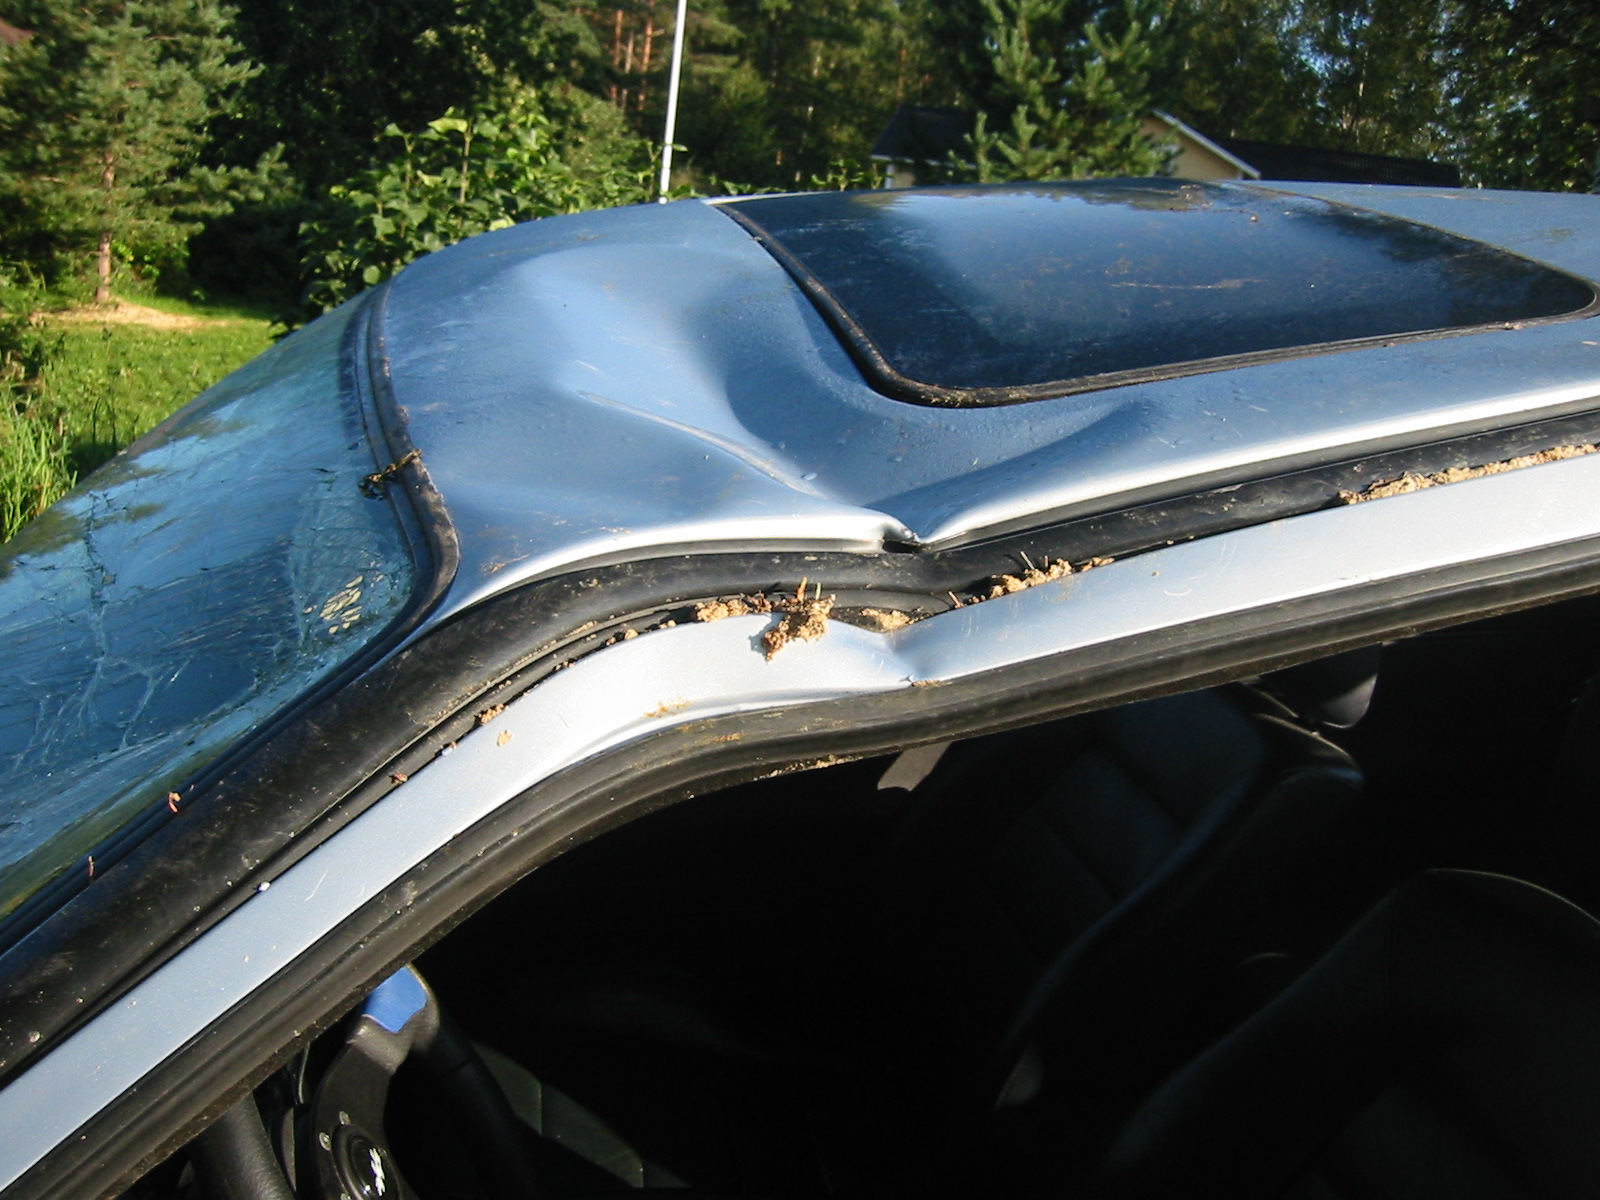
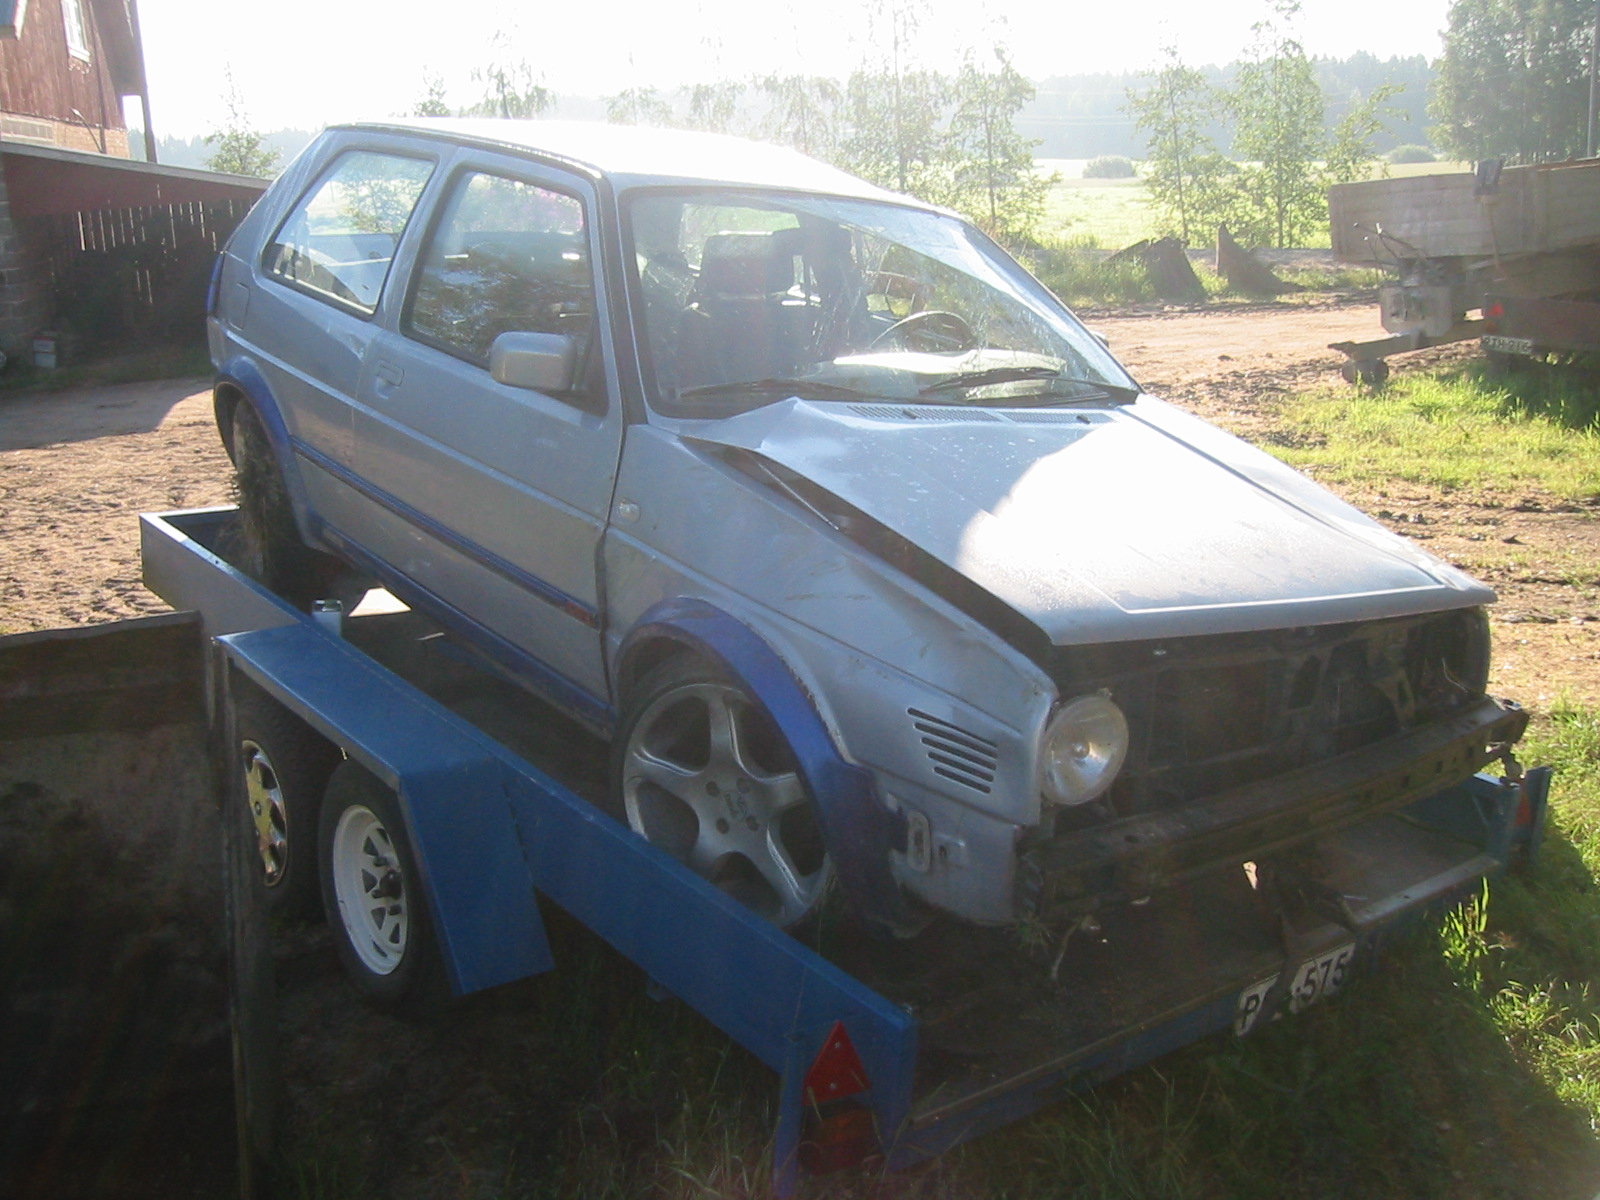
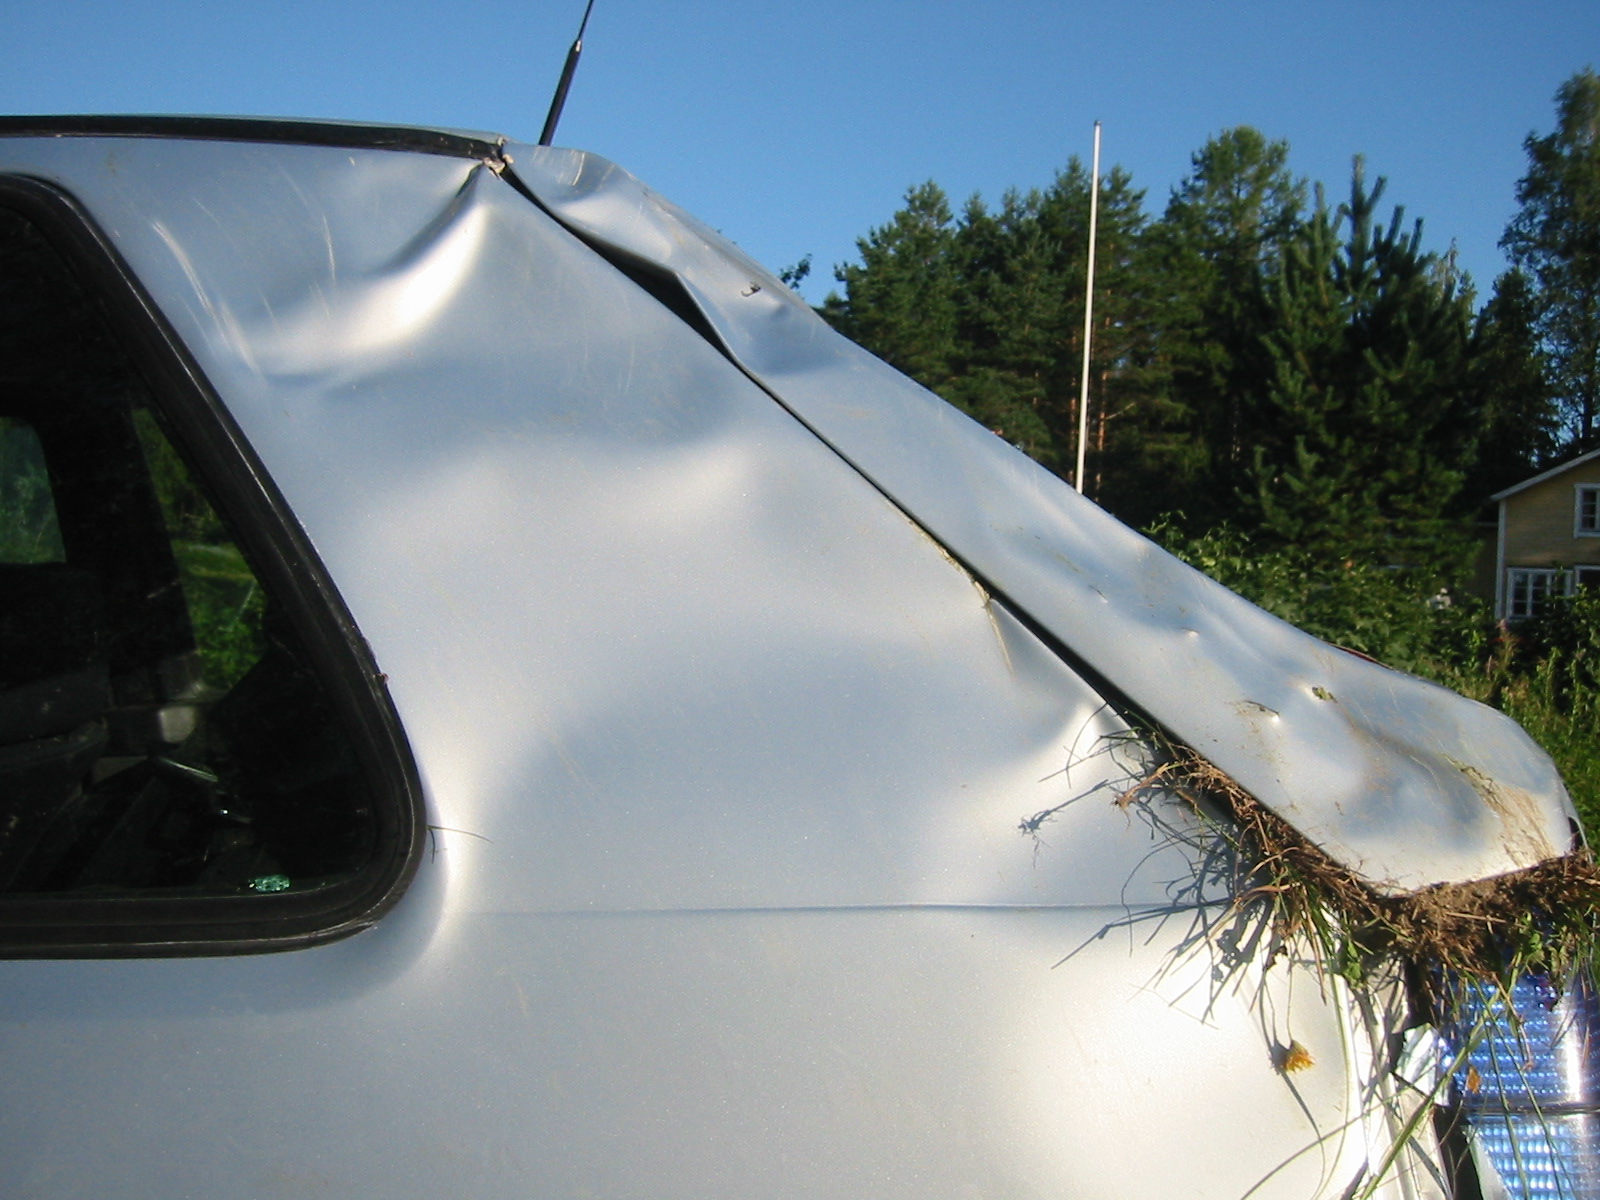
On 29 July 2002, it all went wrong.
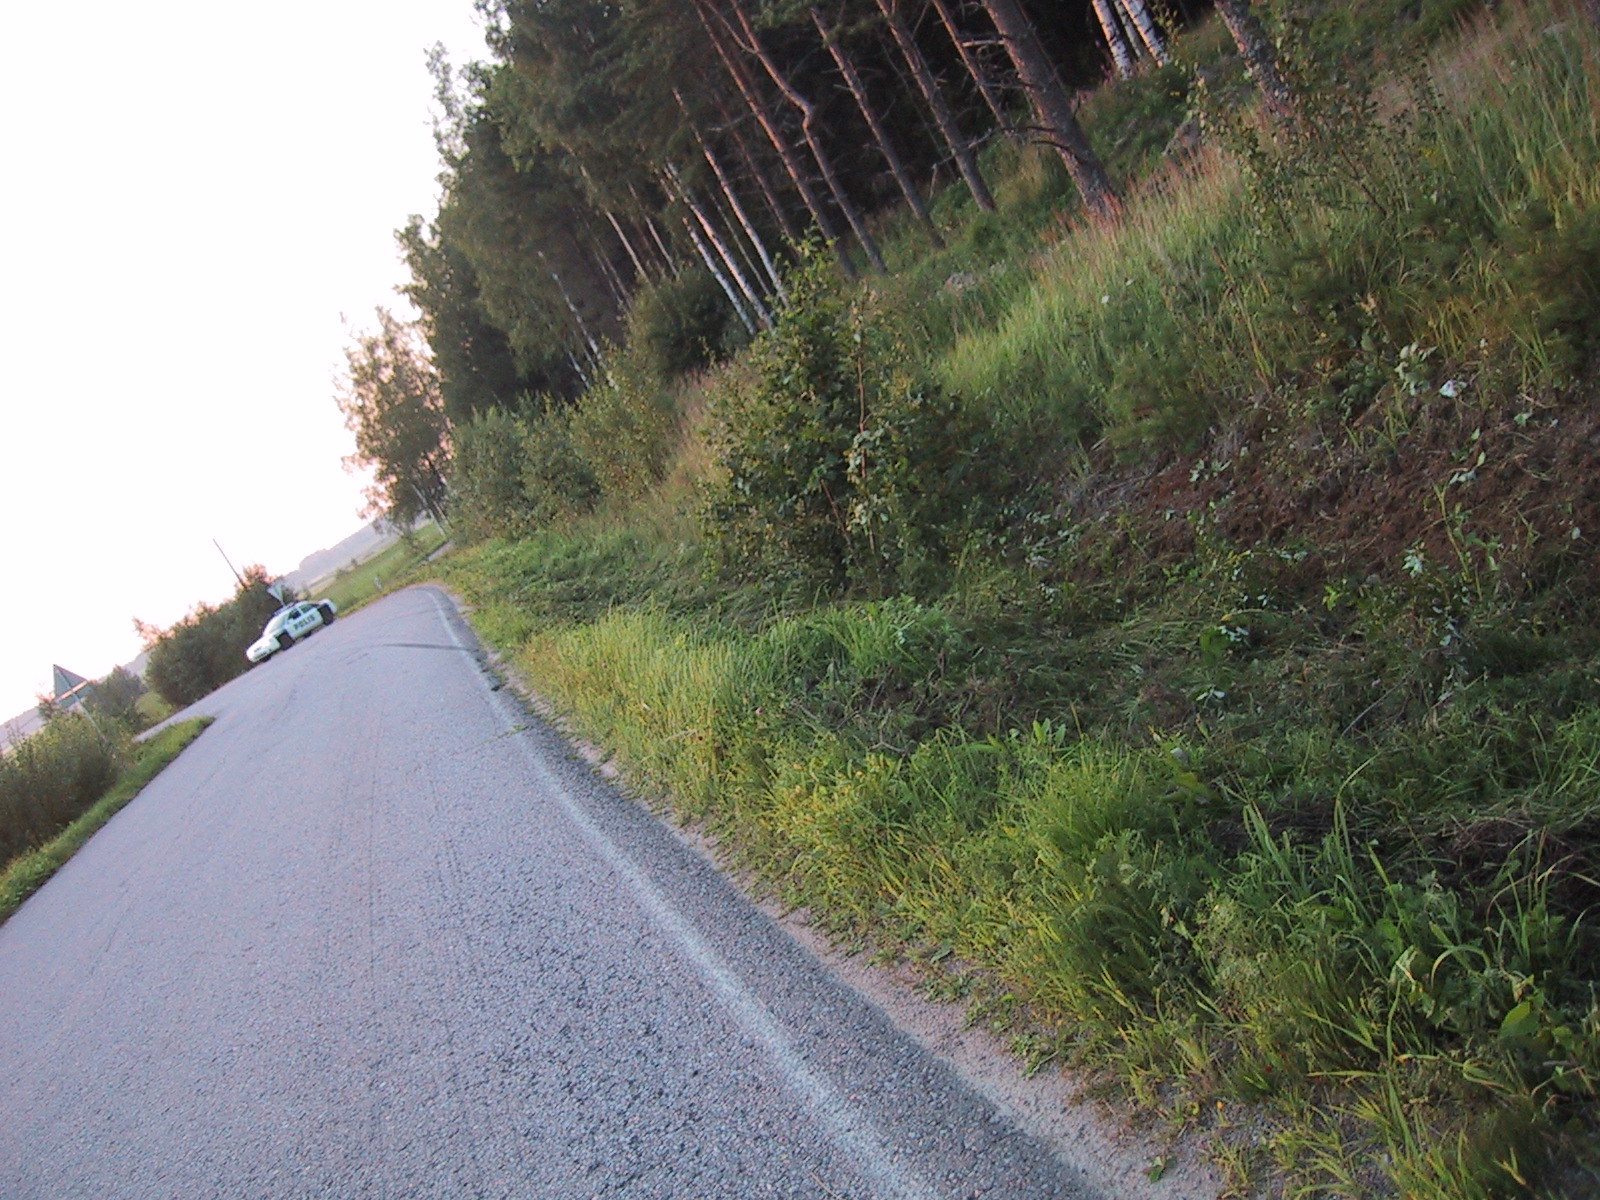
We were coming from there...
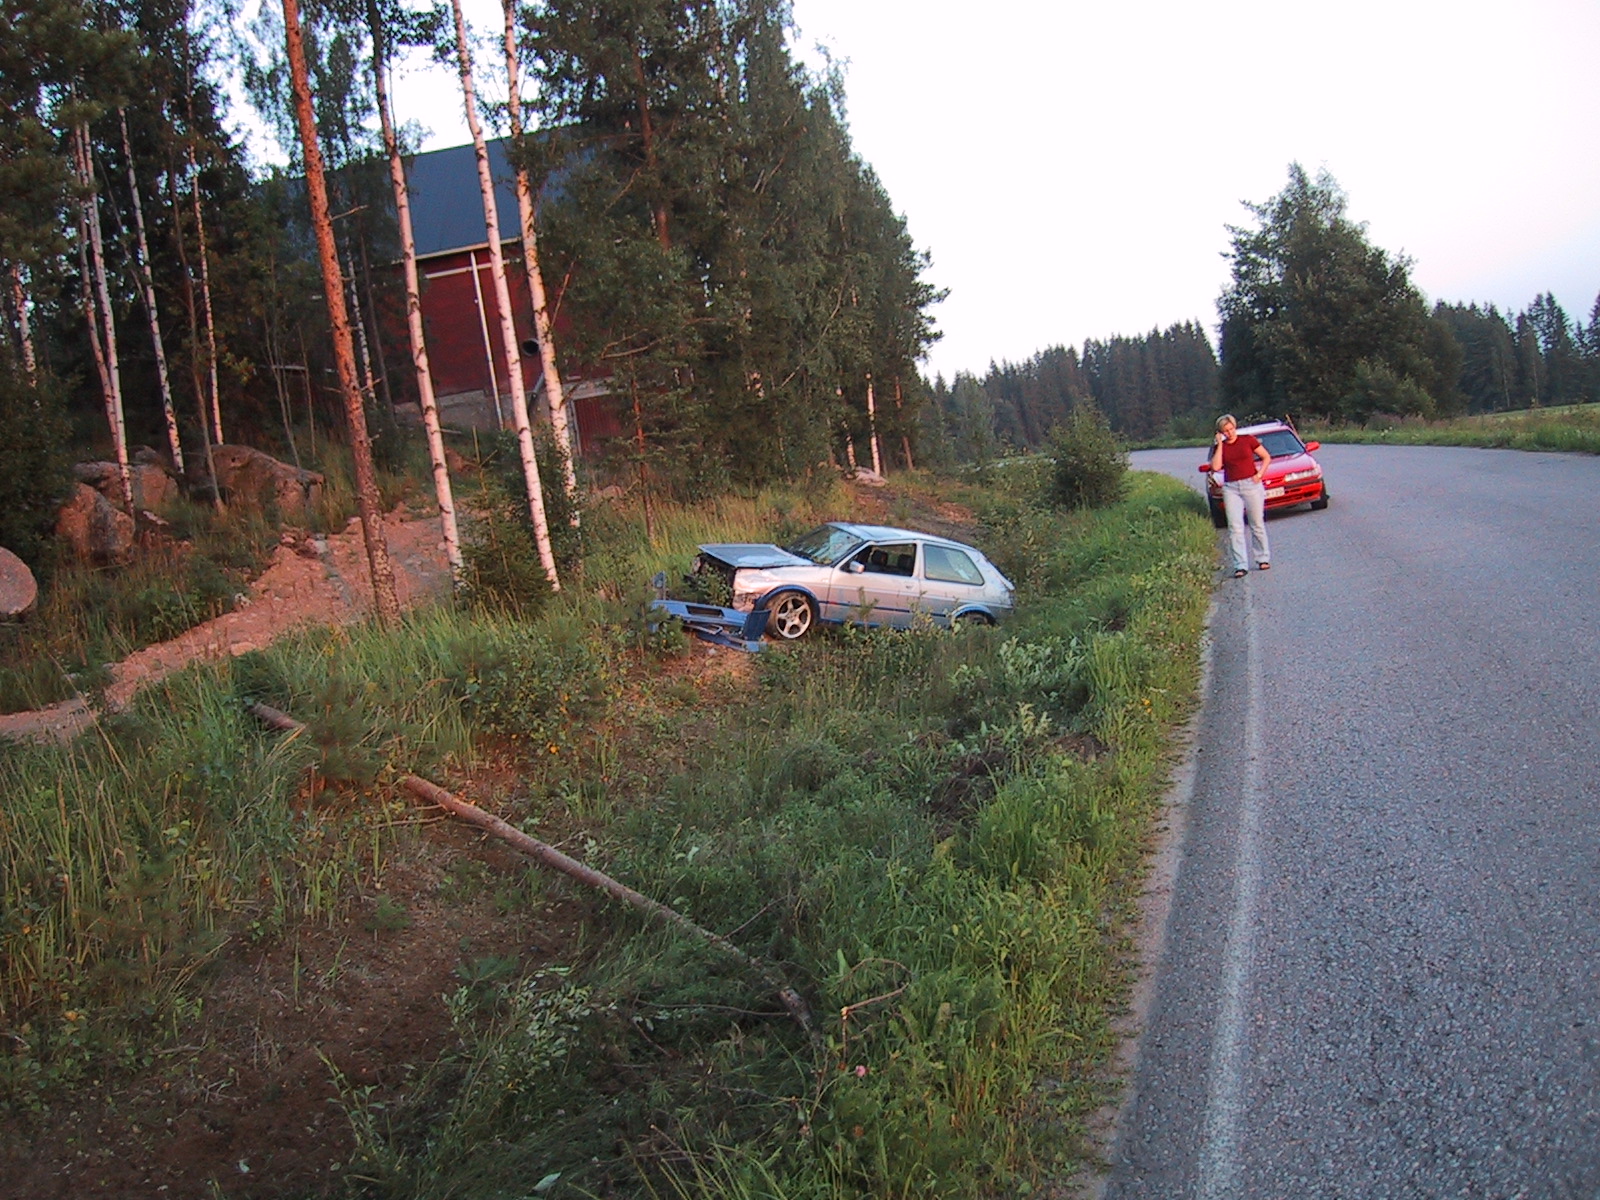
...and ended up over there.
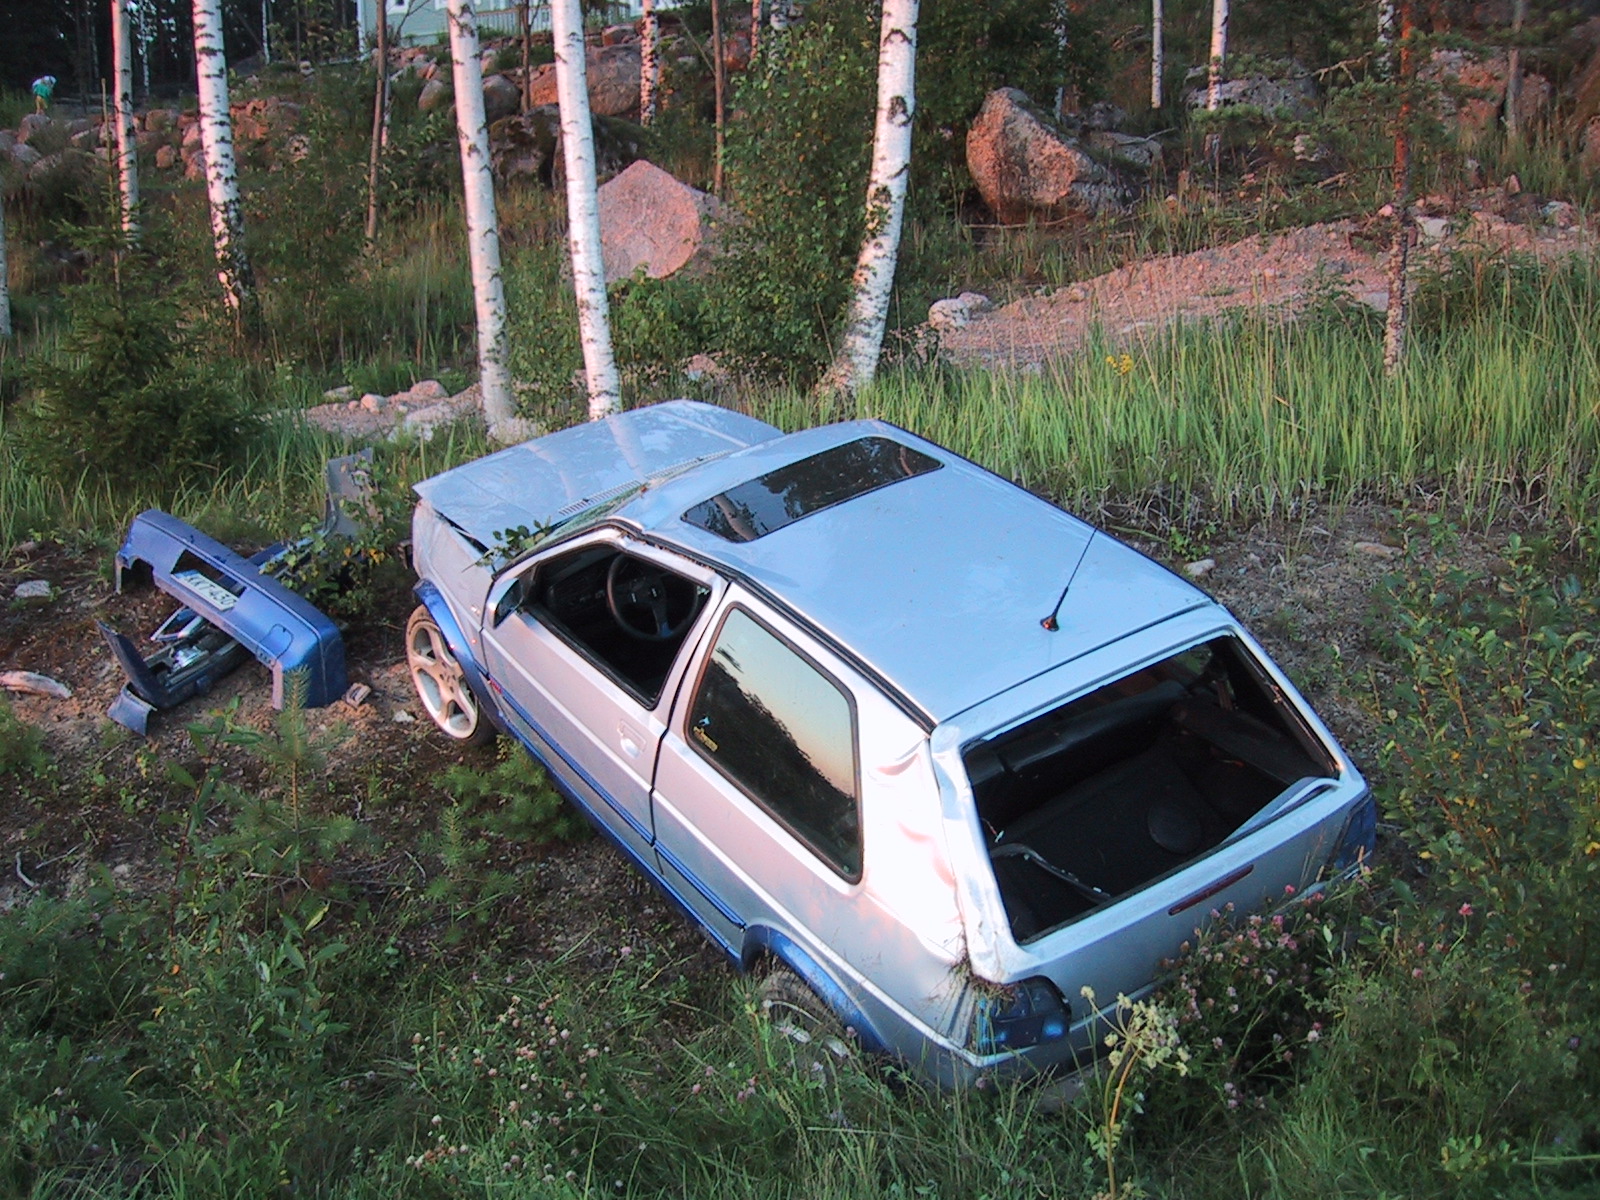
After several rolls, this is where we stopped.
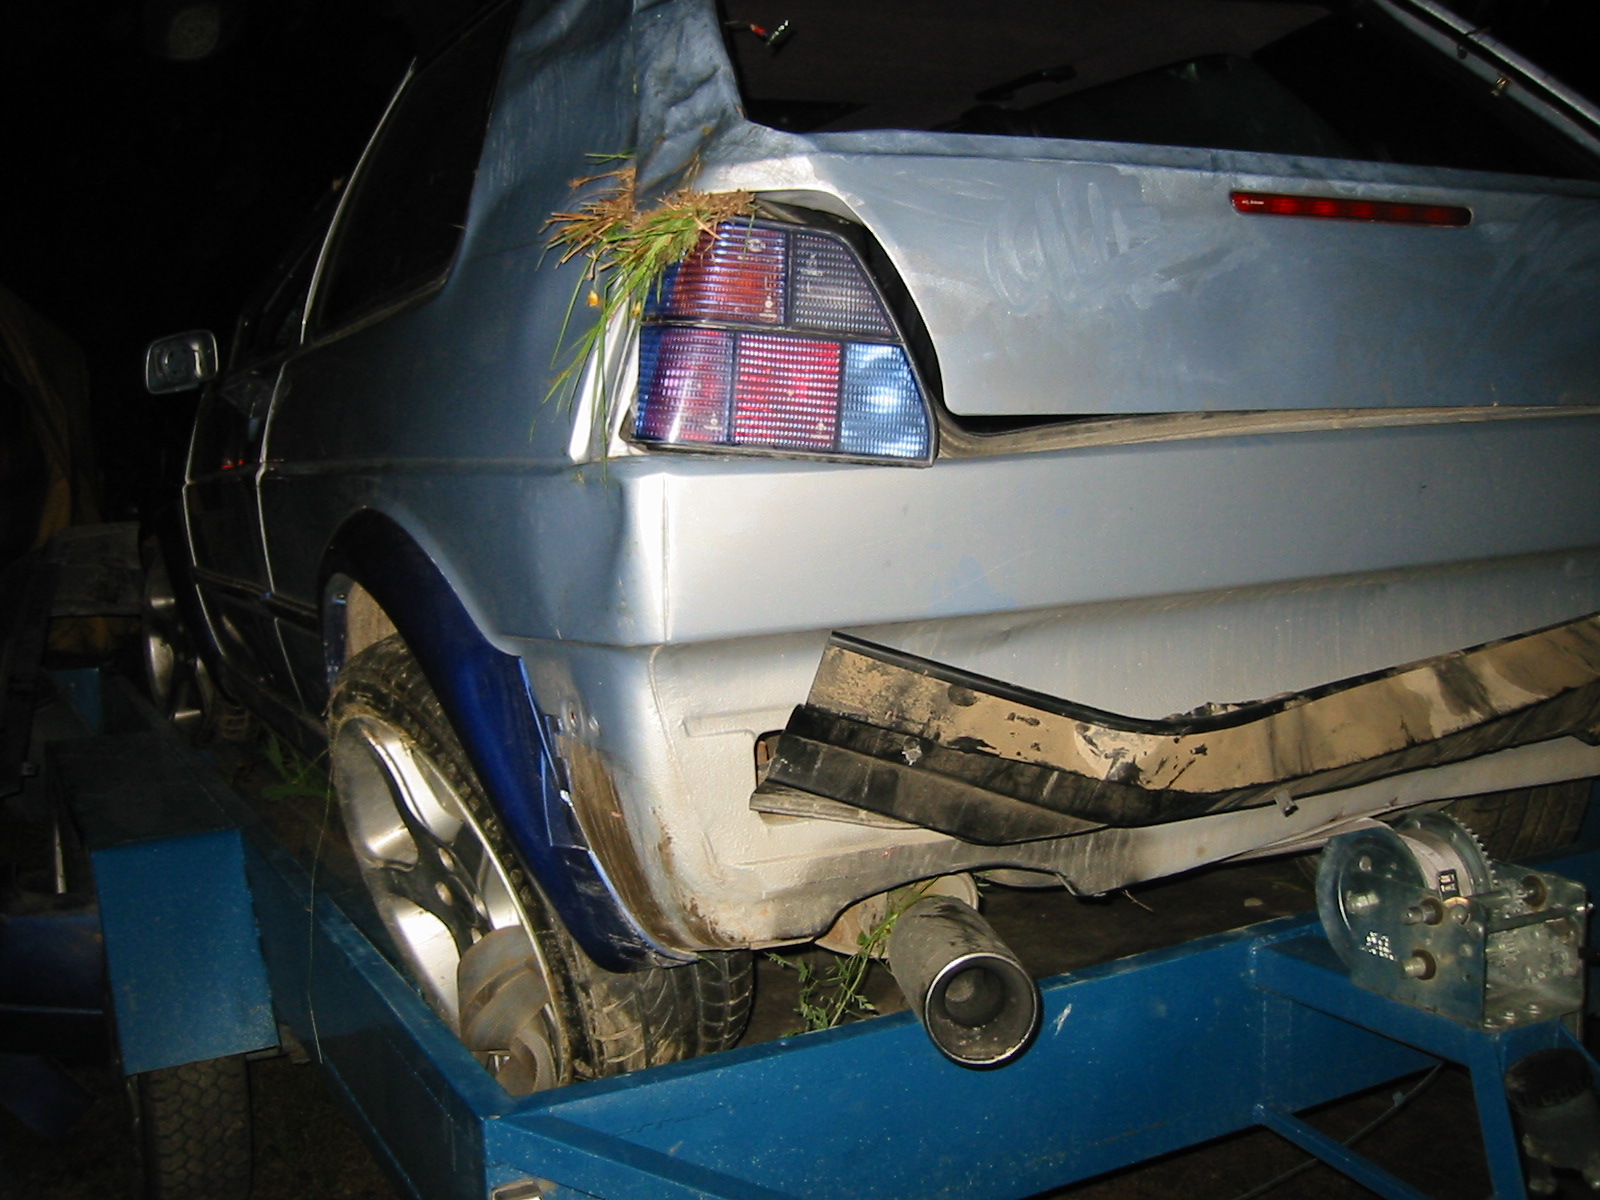
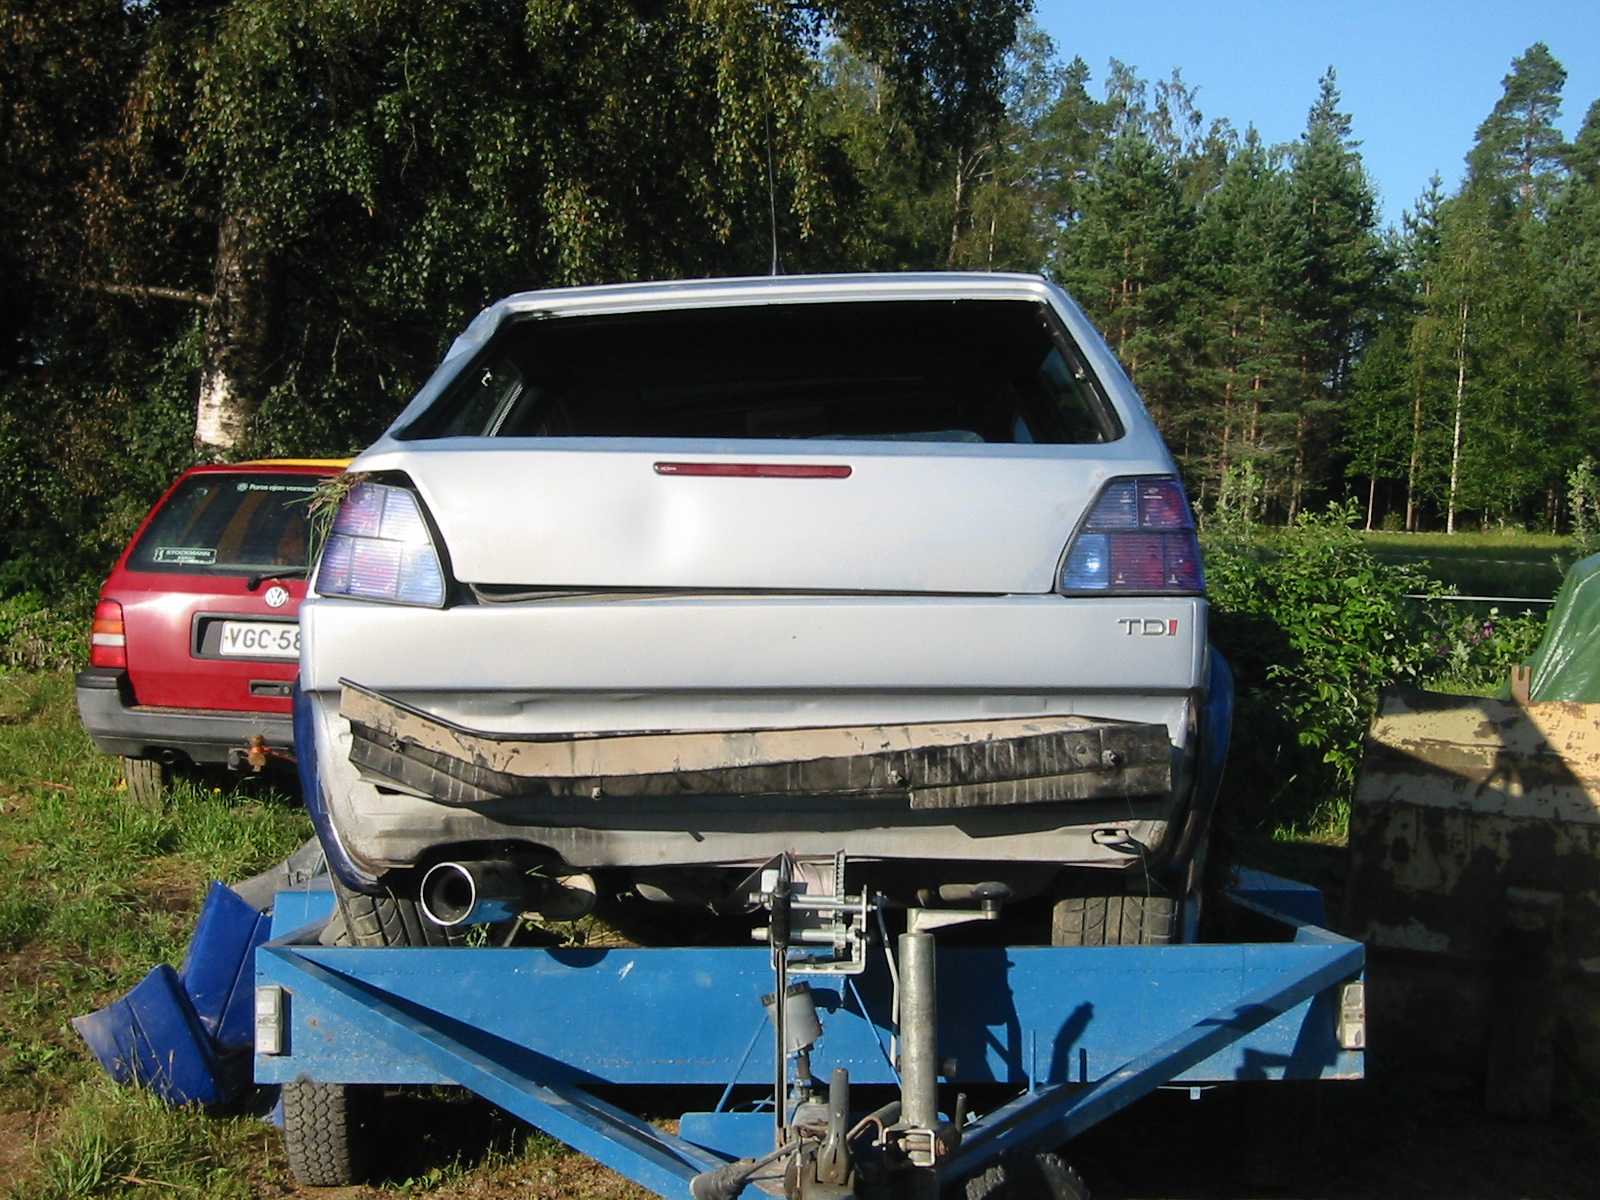
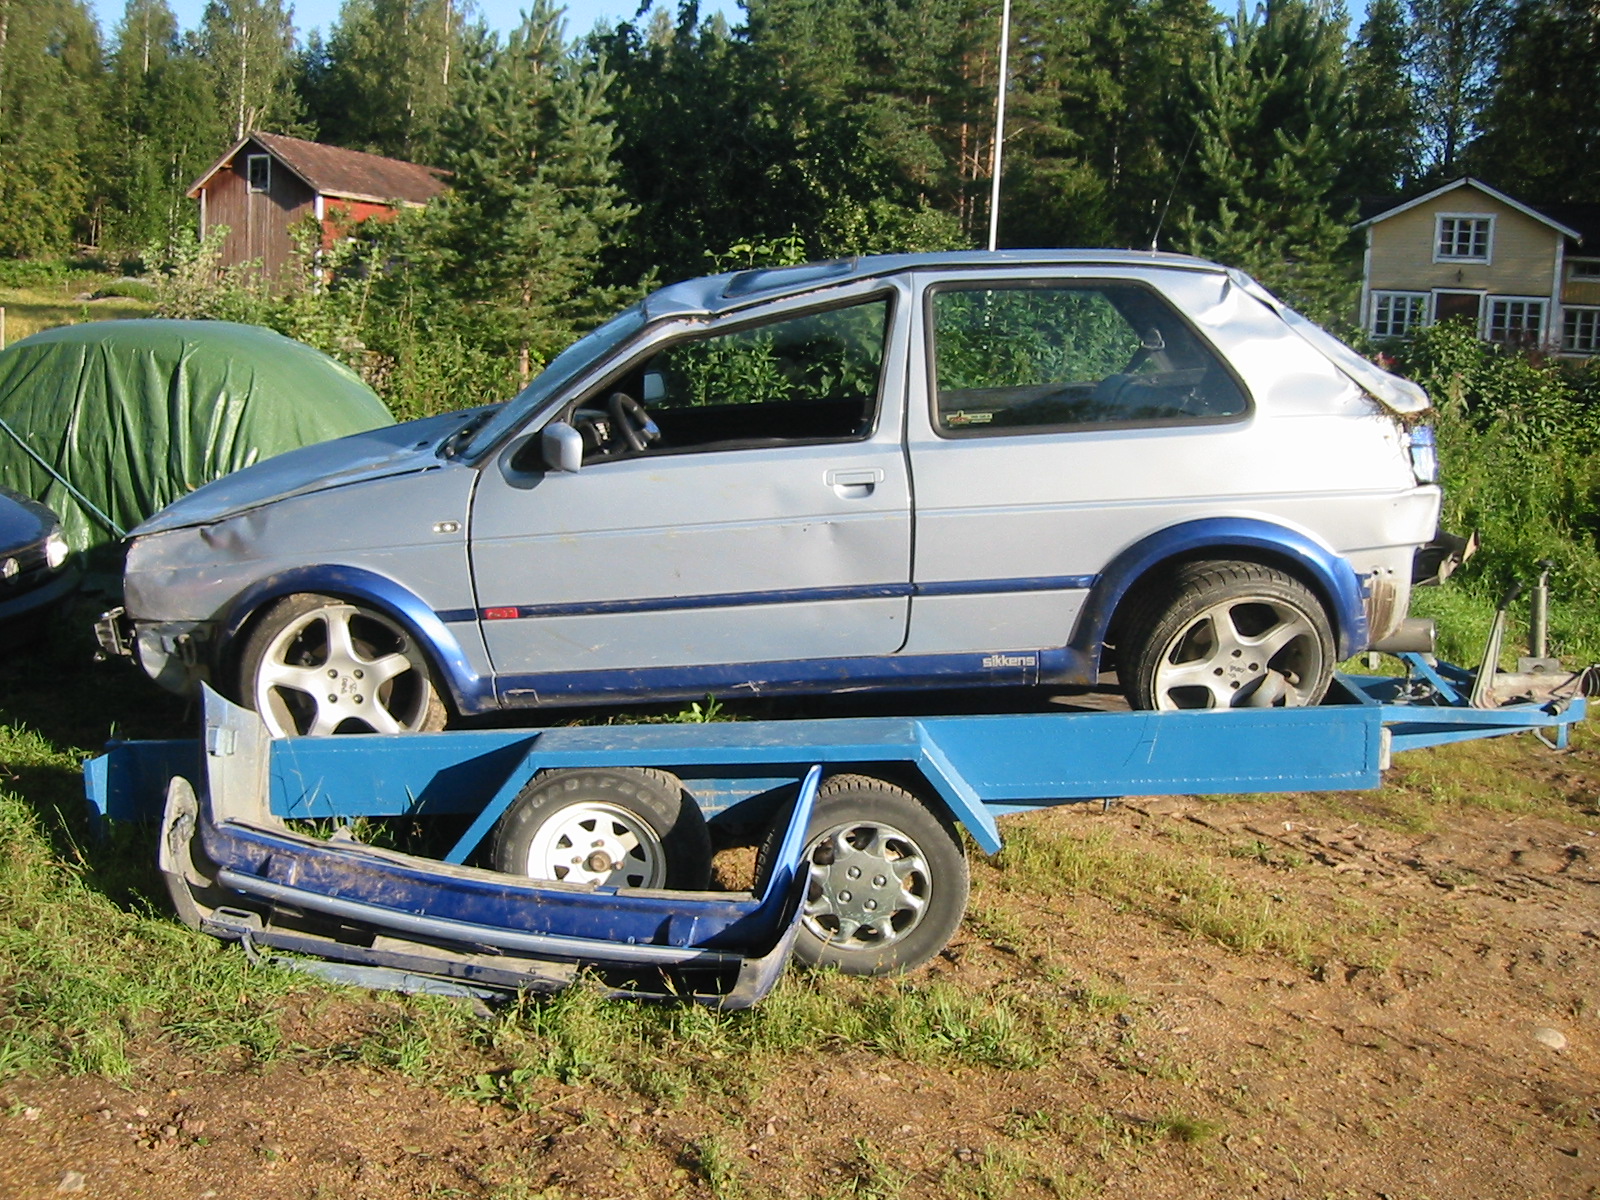
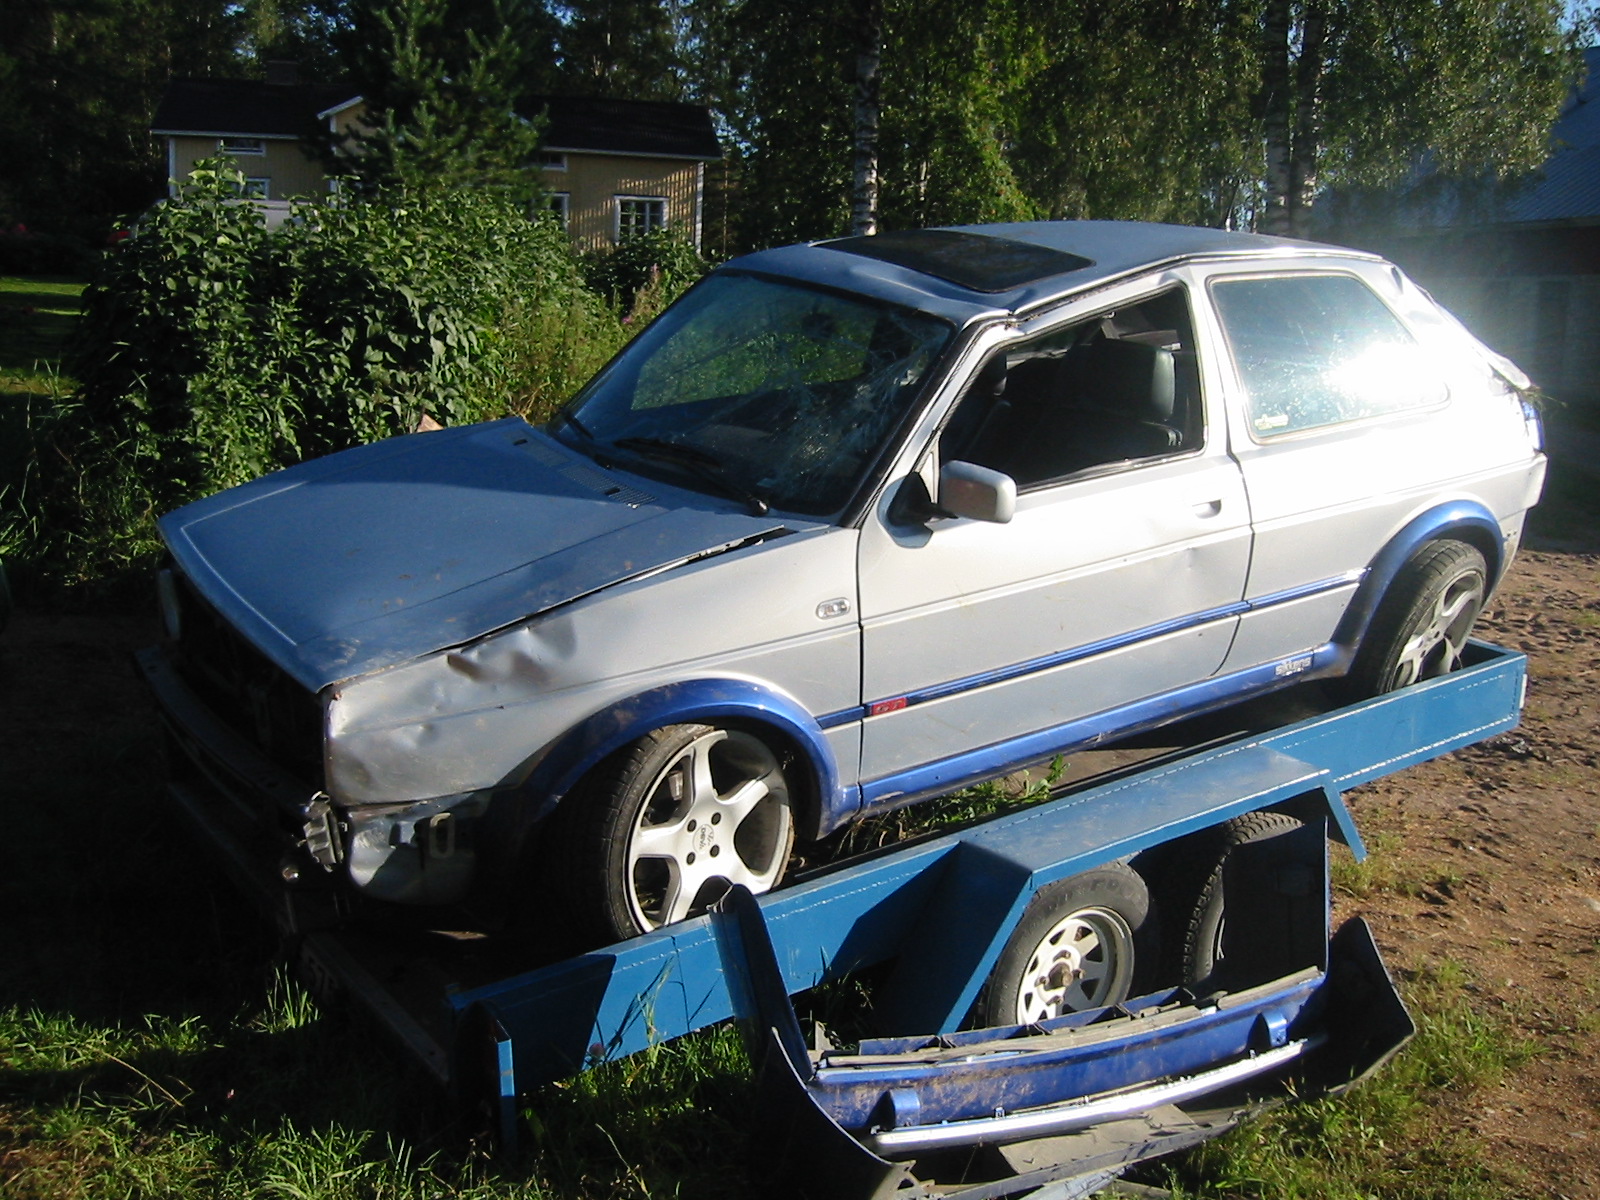
Driver and passenger escaped mainly with psychological injuries, which were far from minor. Guess whether it had comprehensive insurance?
Too much speed.
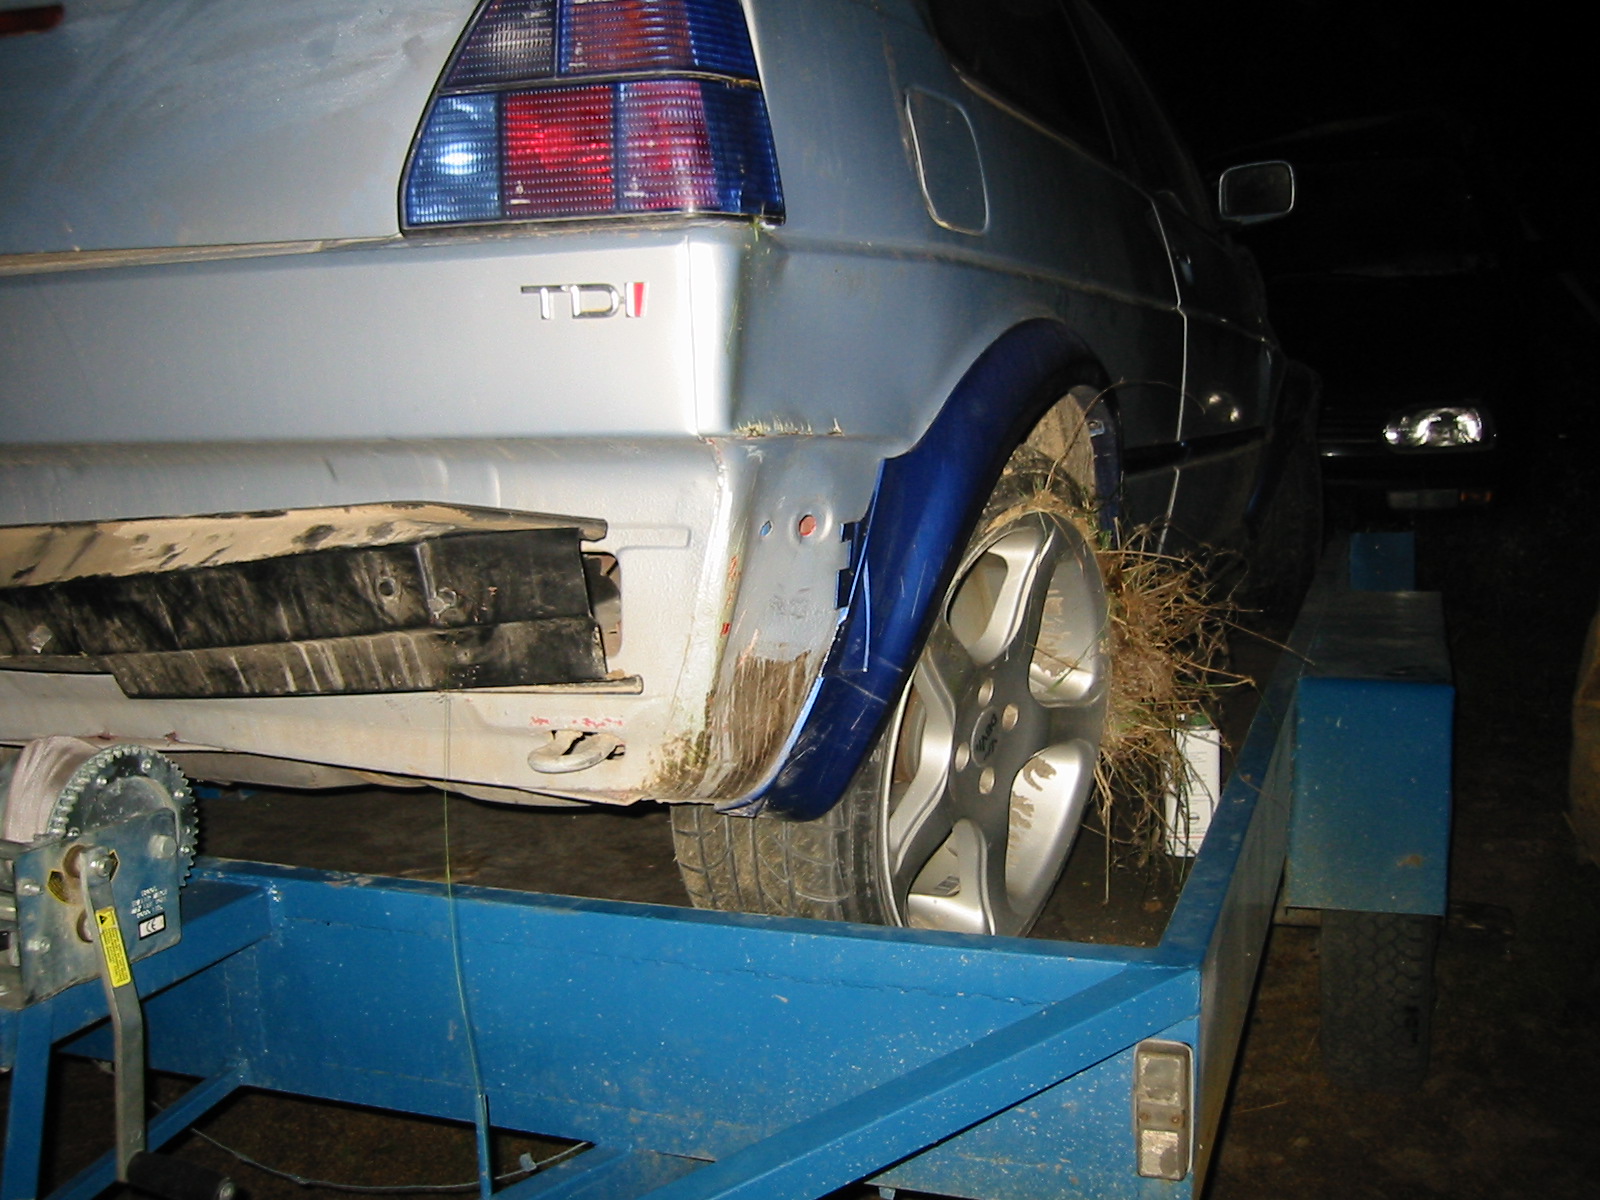
A new life
Without comprehensive insurance, there was no point asking the insurer for compensation. Pekka had little choice but to strip the car and sell what could be sold. Some parts went into our other projects: the engine, for instance, returned to a Mk3 Golf, this time an estate. A couple of photos from November 2002 below.
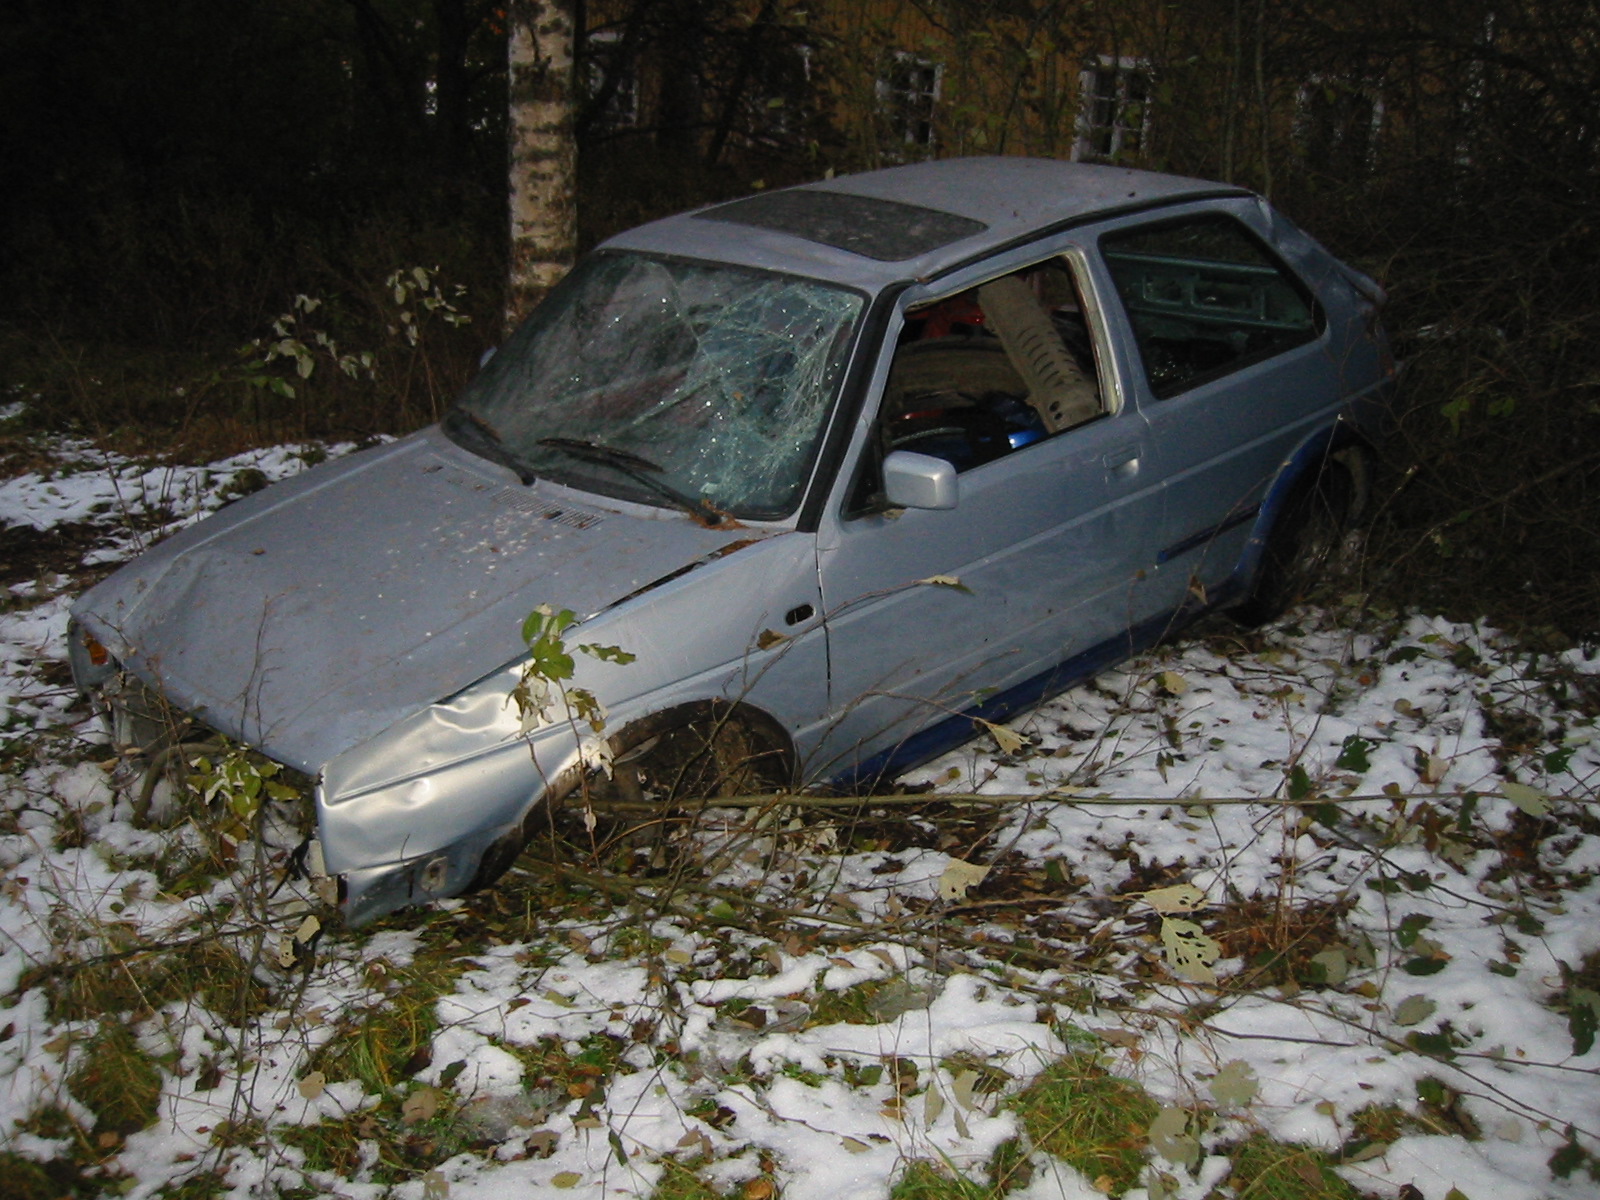
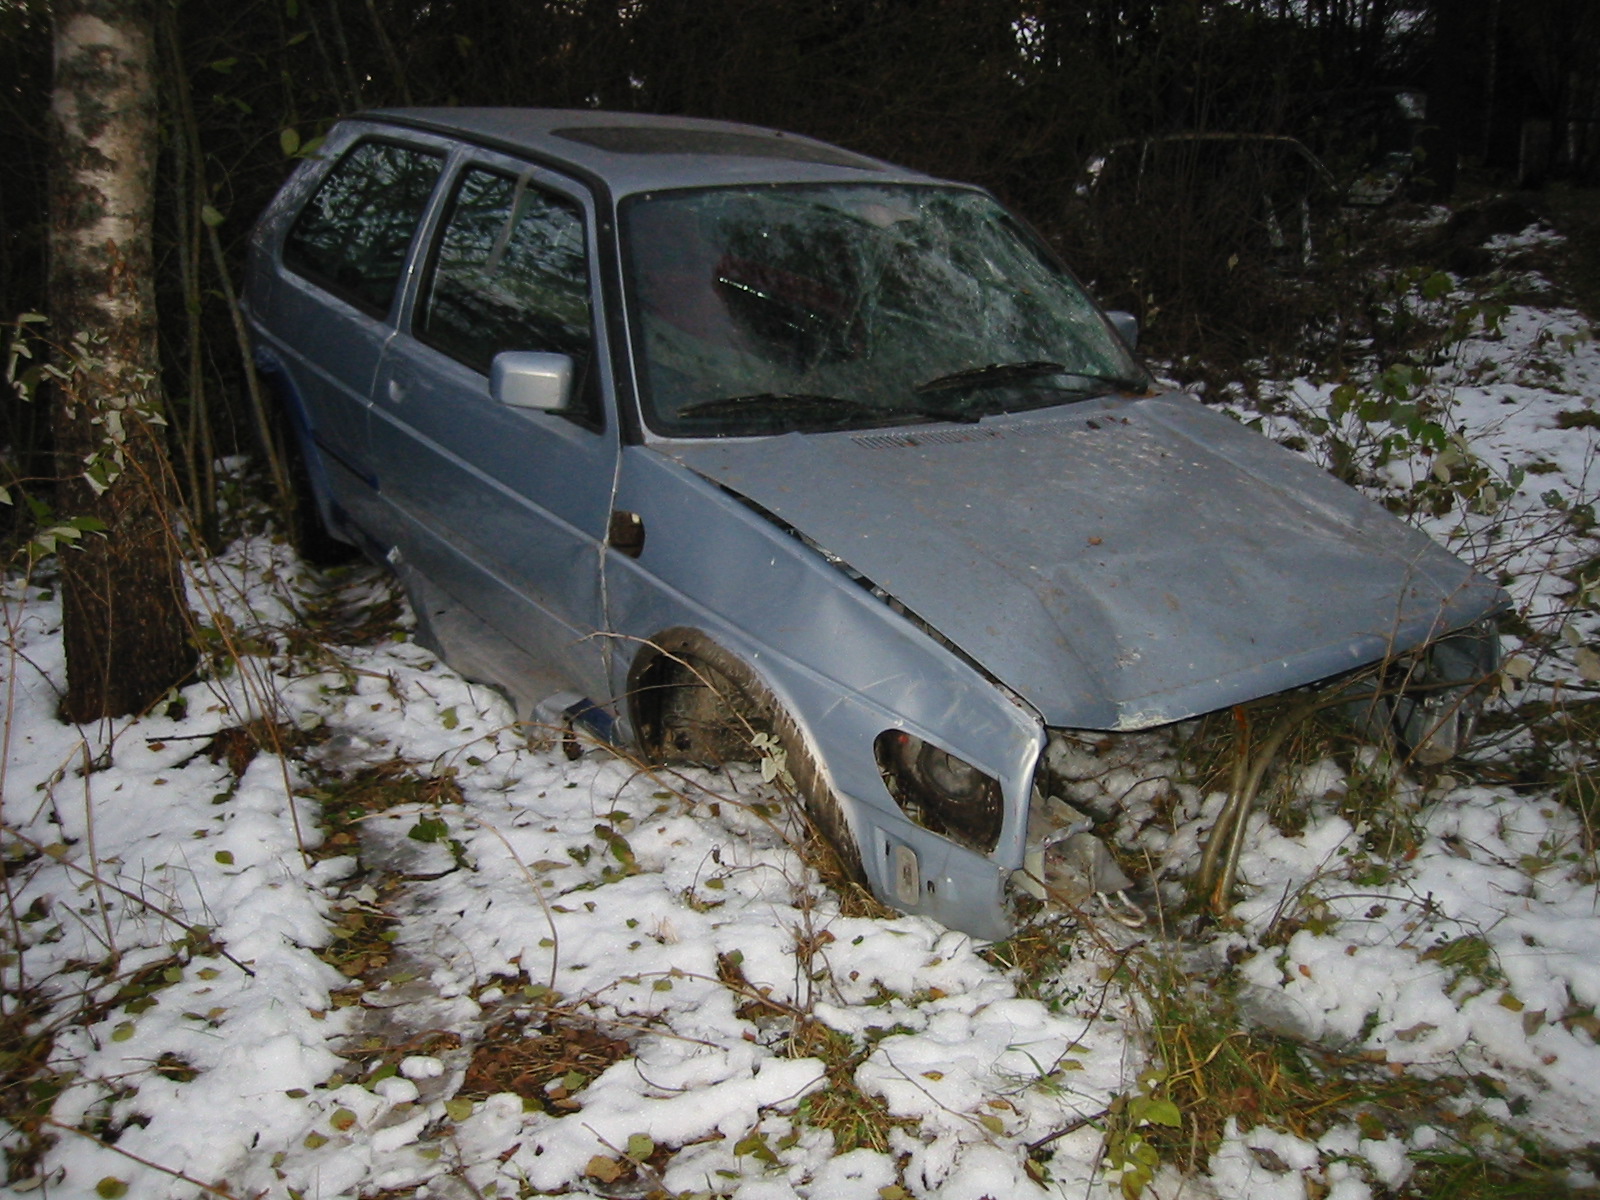
...but what happened next? We should have guessed! Pekka couldn't bear looking at the wrecked Golf up on the hill for long. The summer's accident still bothered him, and he decided that mistake had to be put right. Towards the end of January, things slowly started happening...
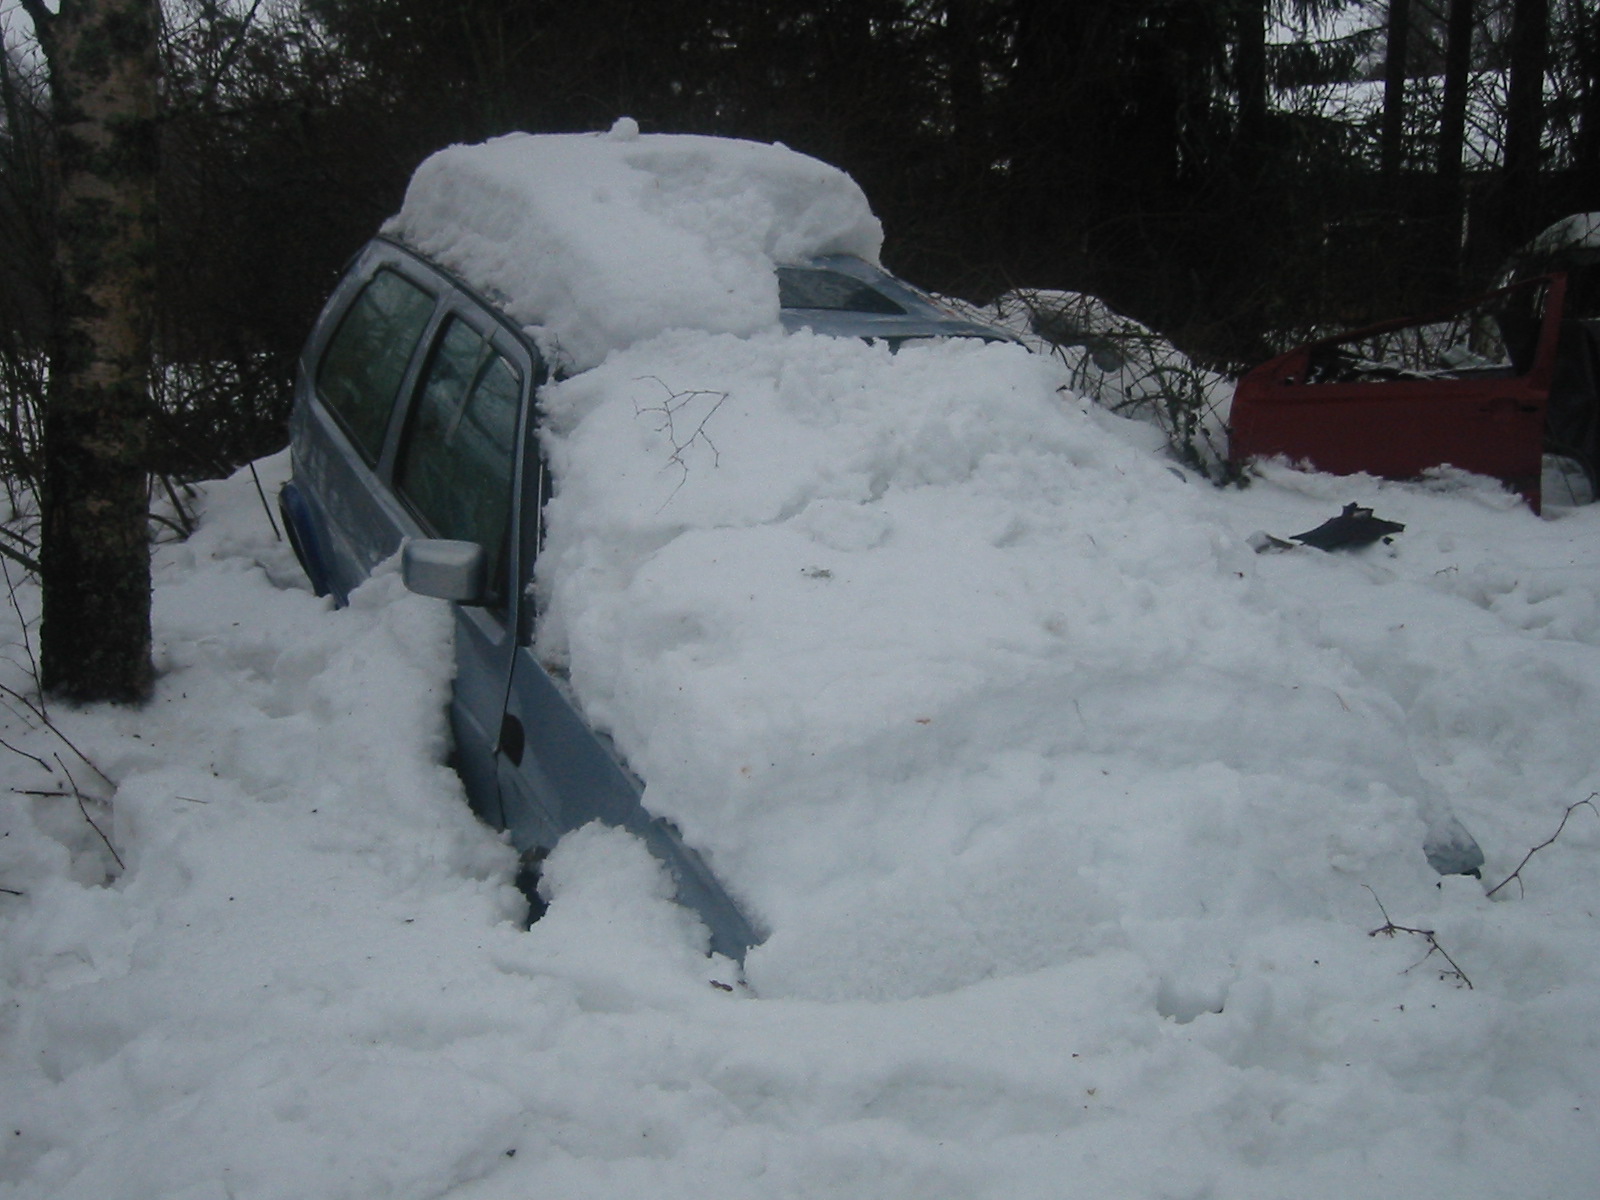
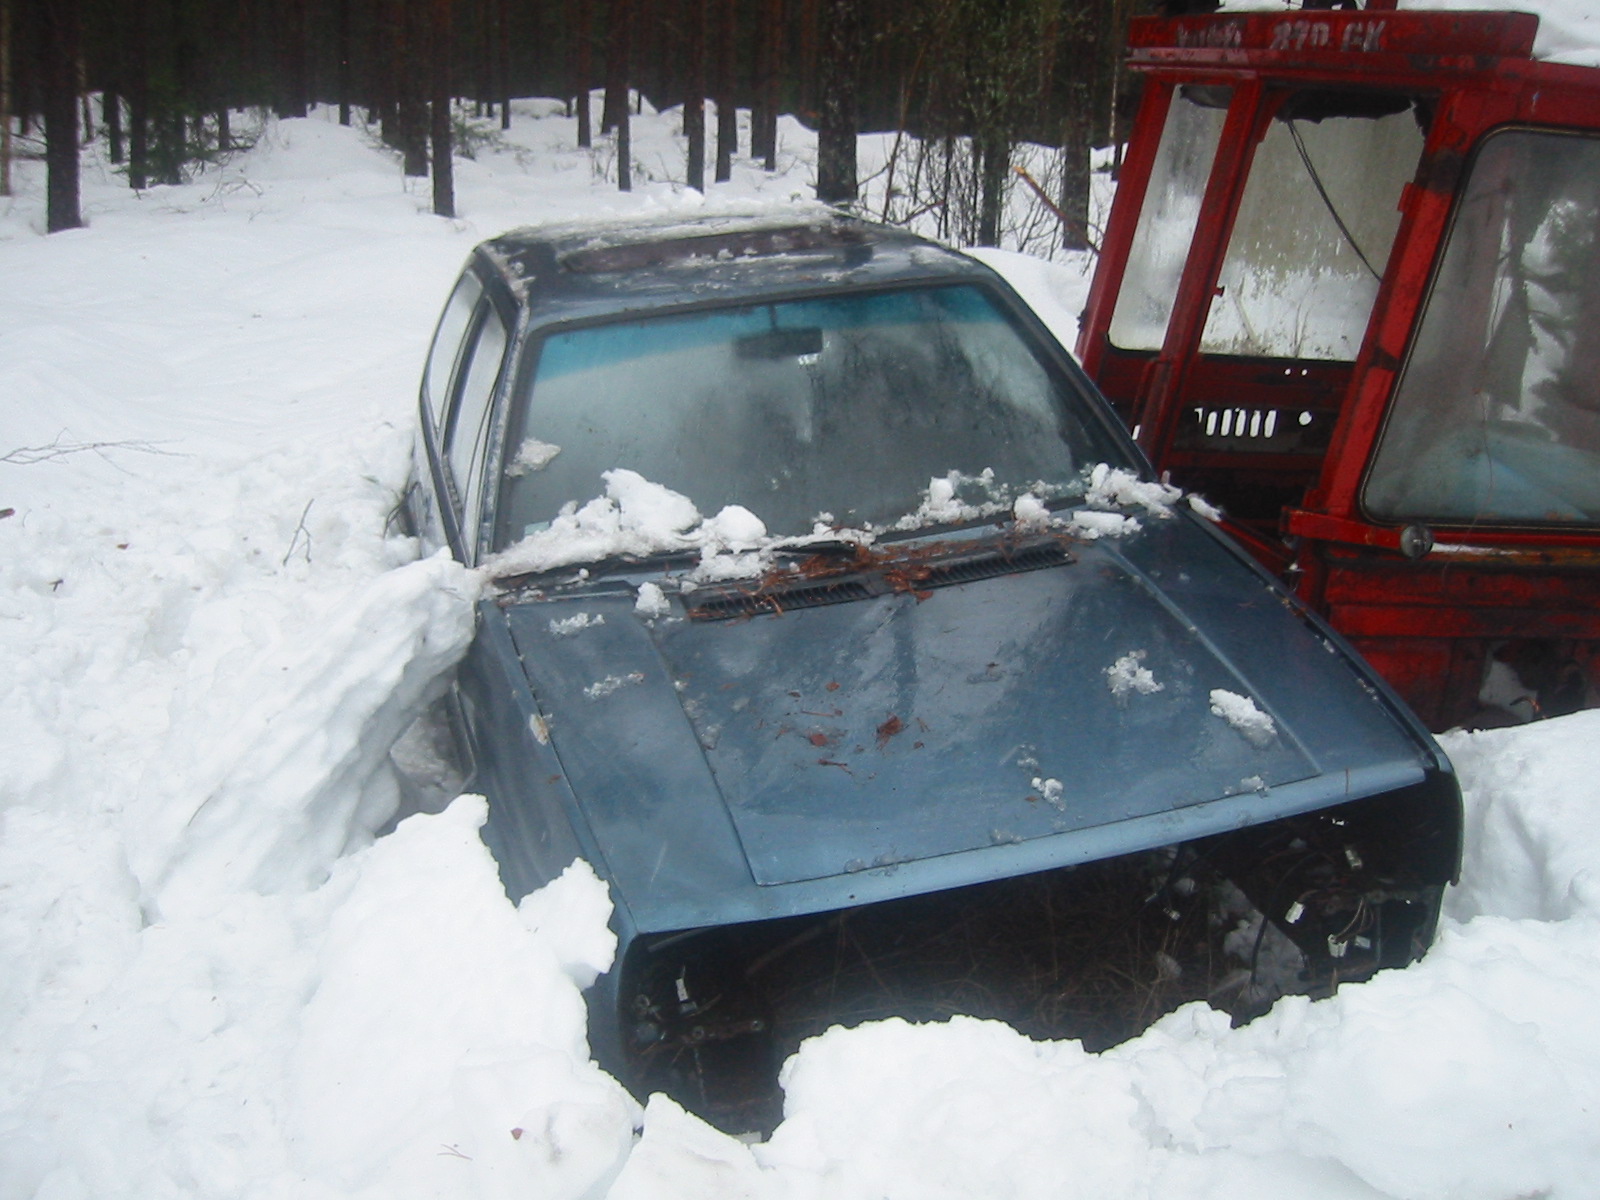
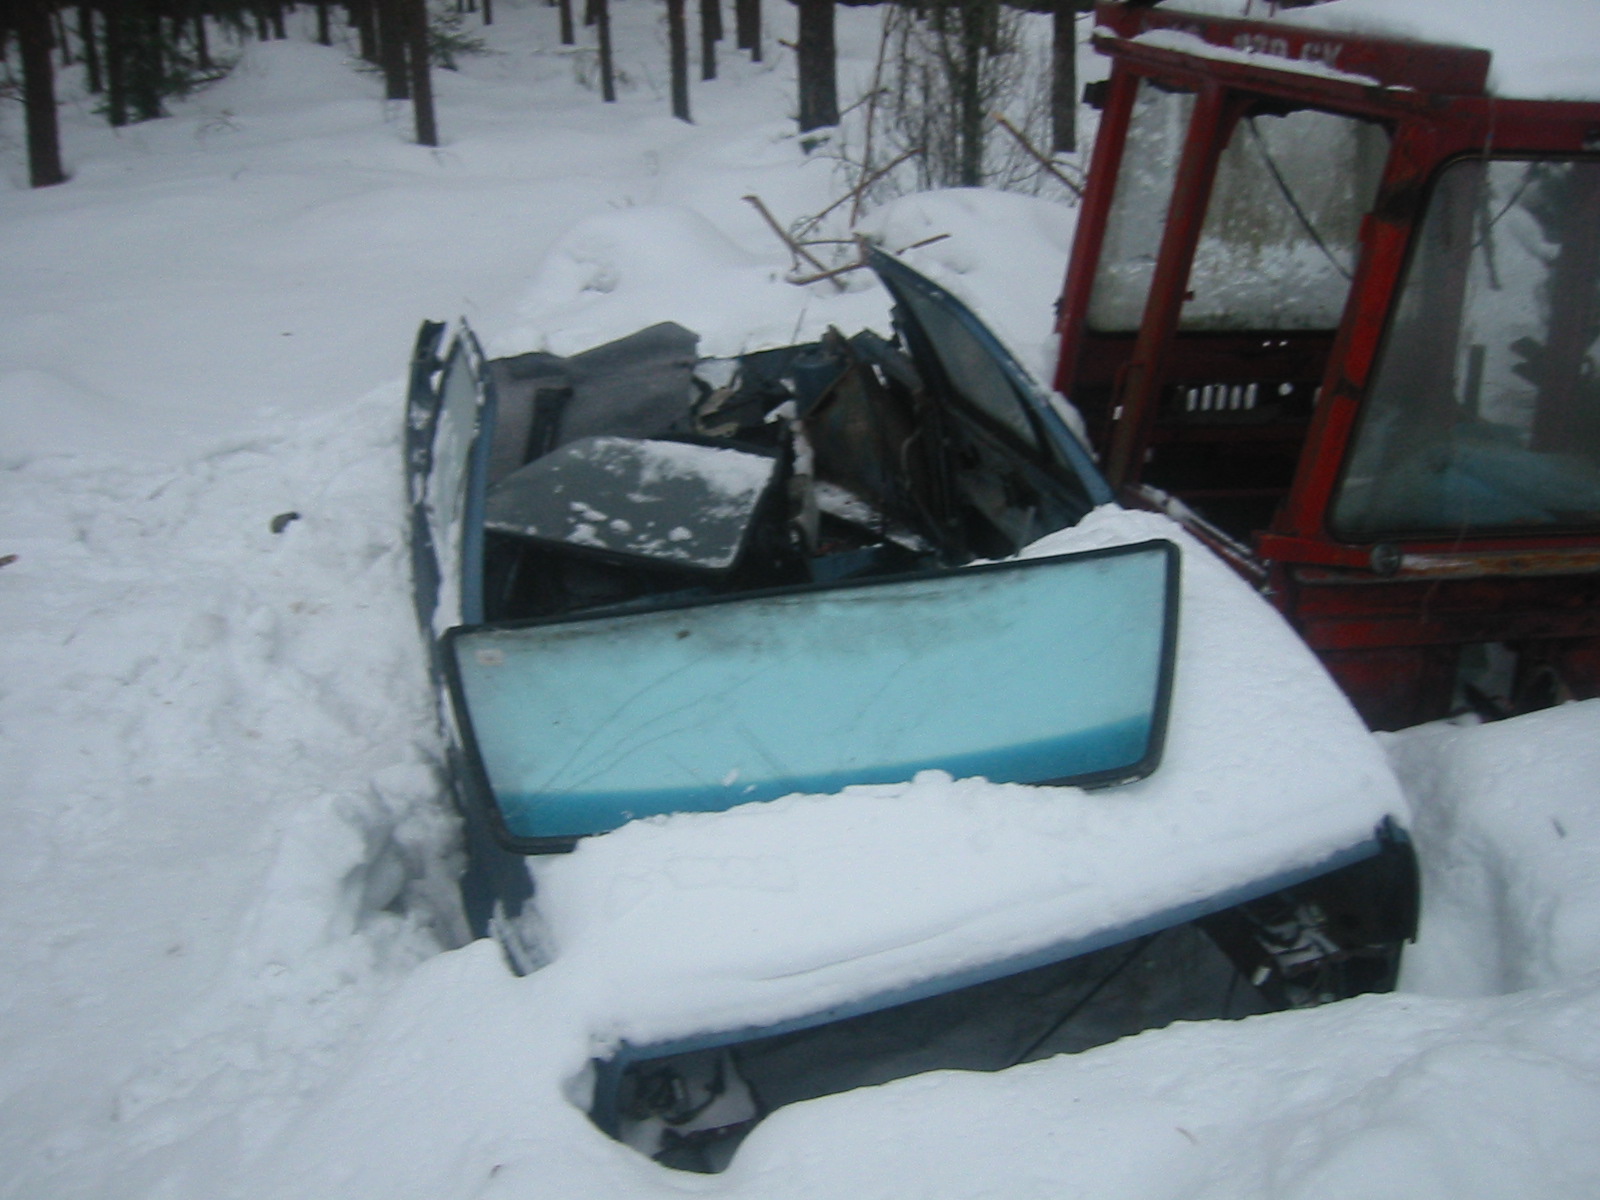
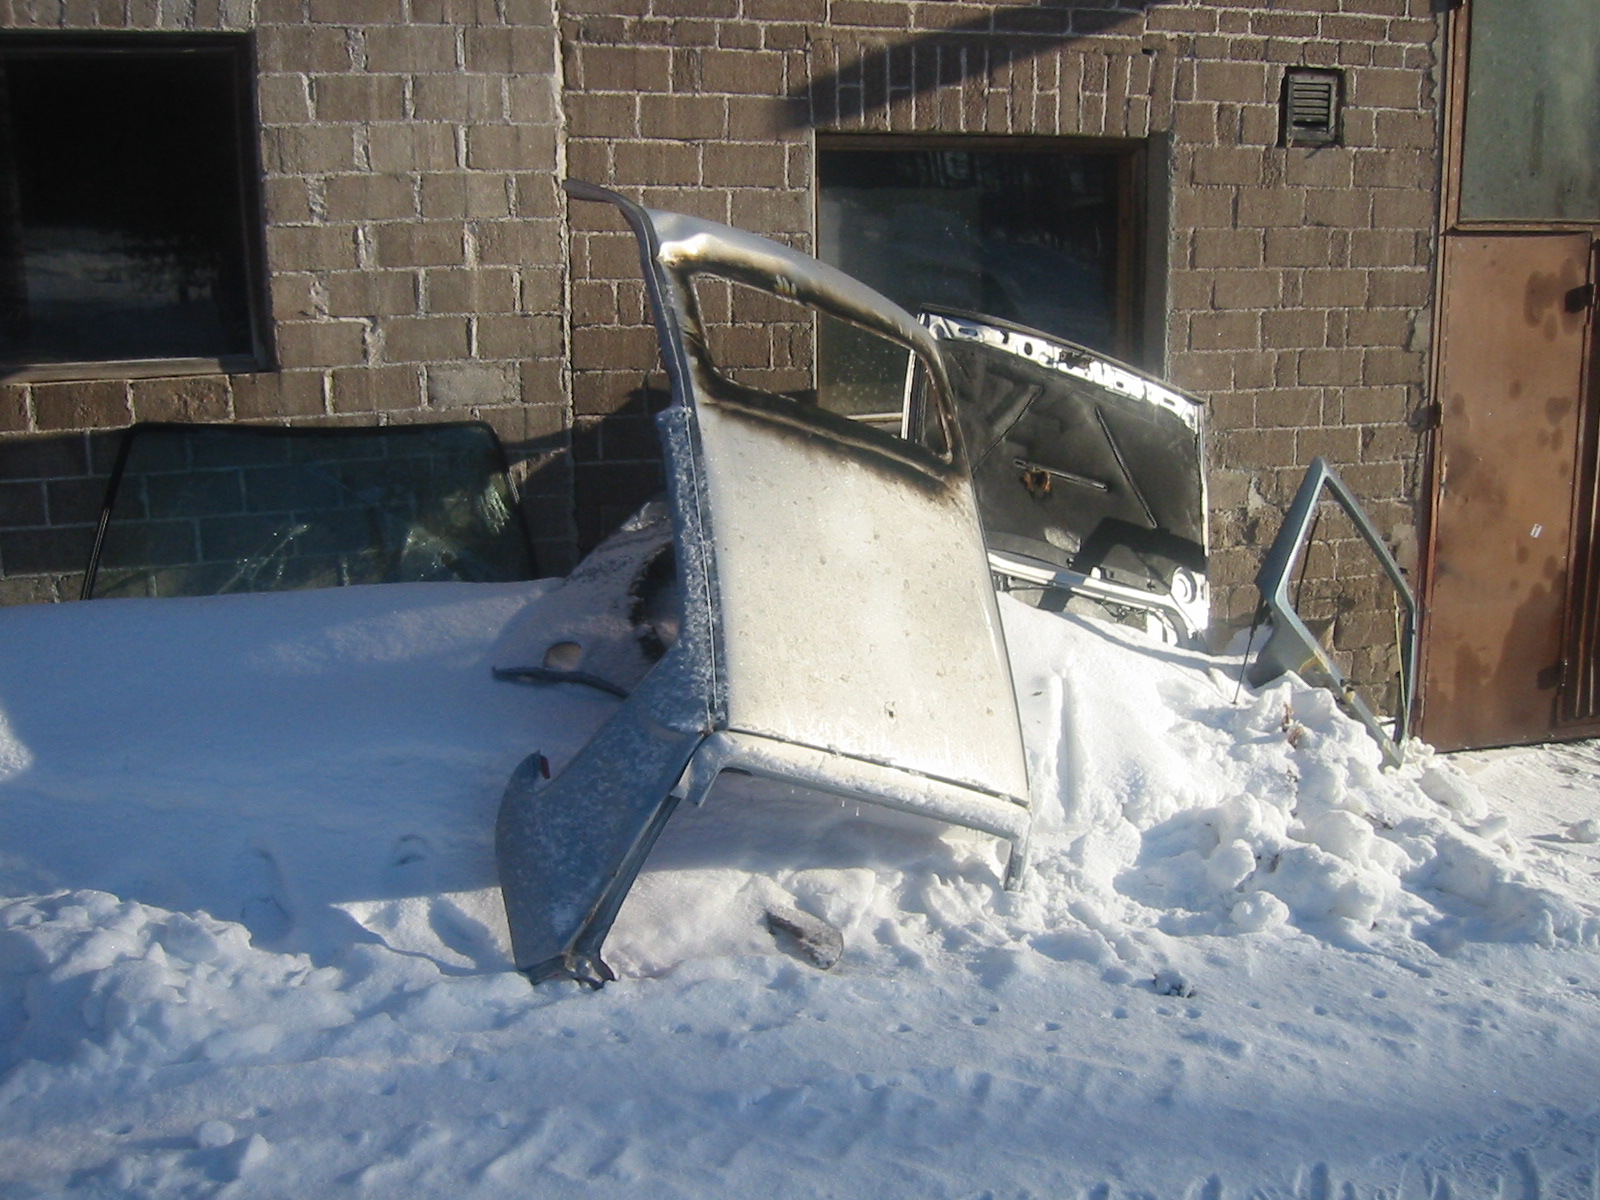
The starting point: one Mk2 Golf, mildly 'tuned' the previous summer, then rolled into a ditch. Note how it's stored in soft snow to avoid further dents.
Tailgate
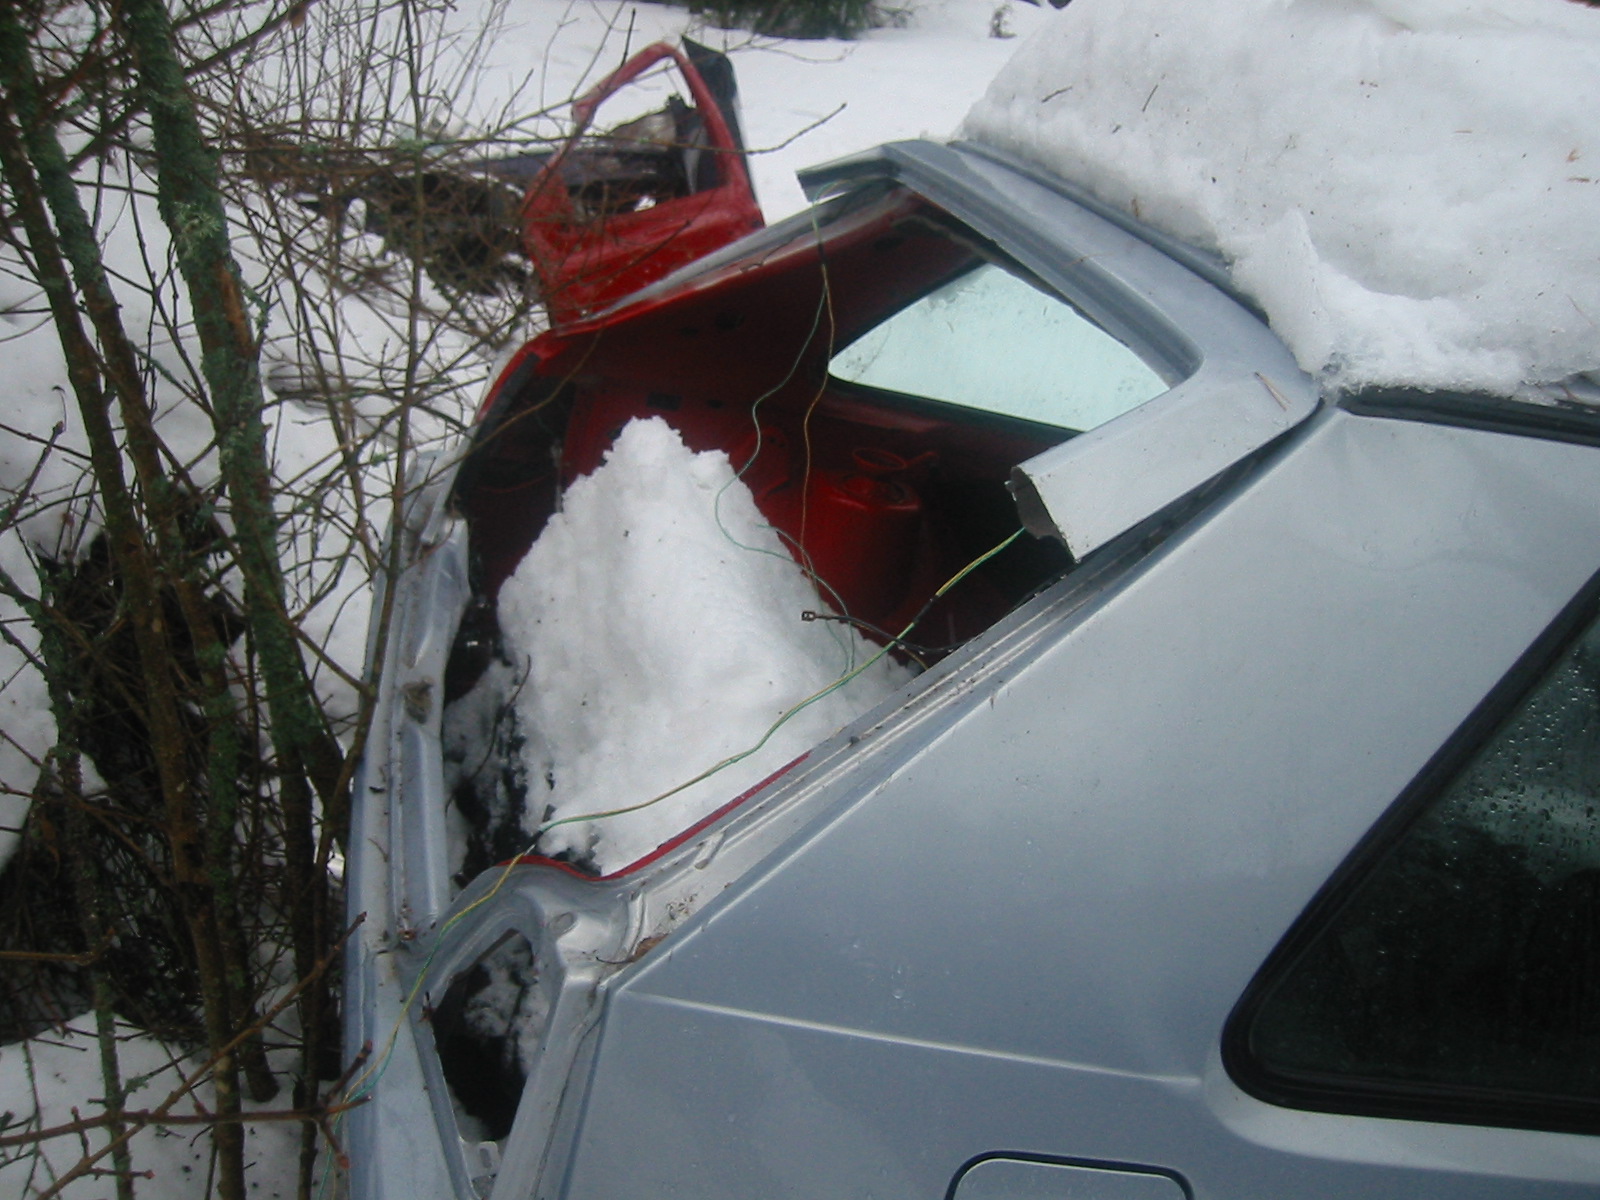
We start gently with the tailgate. First cut off the amount of repairable tailgate needed: no point dragging the whole car to the garage just for one tailgate.
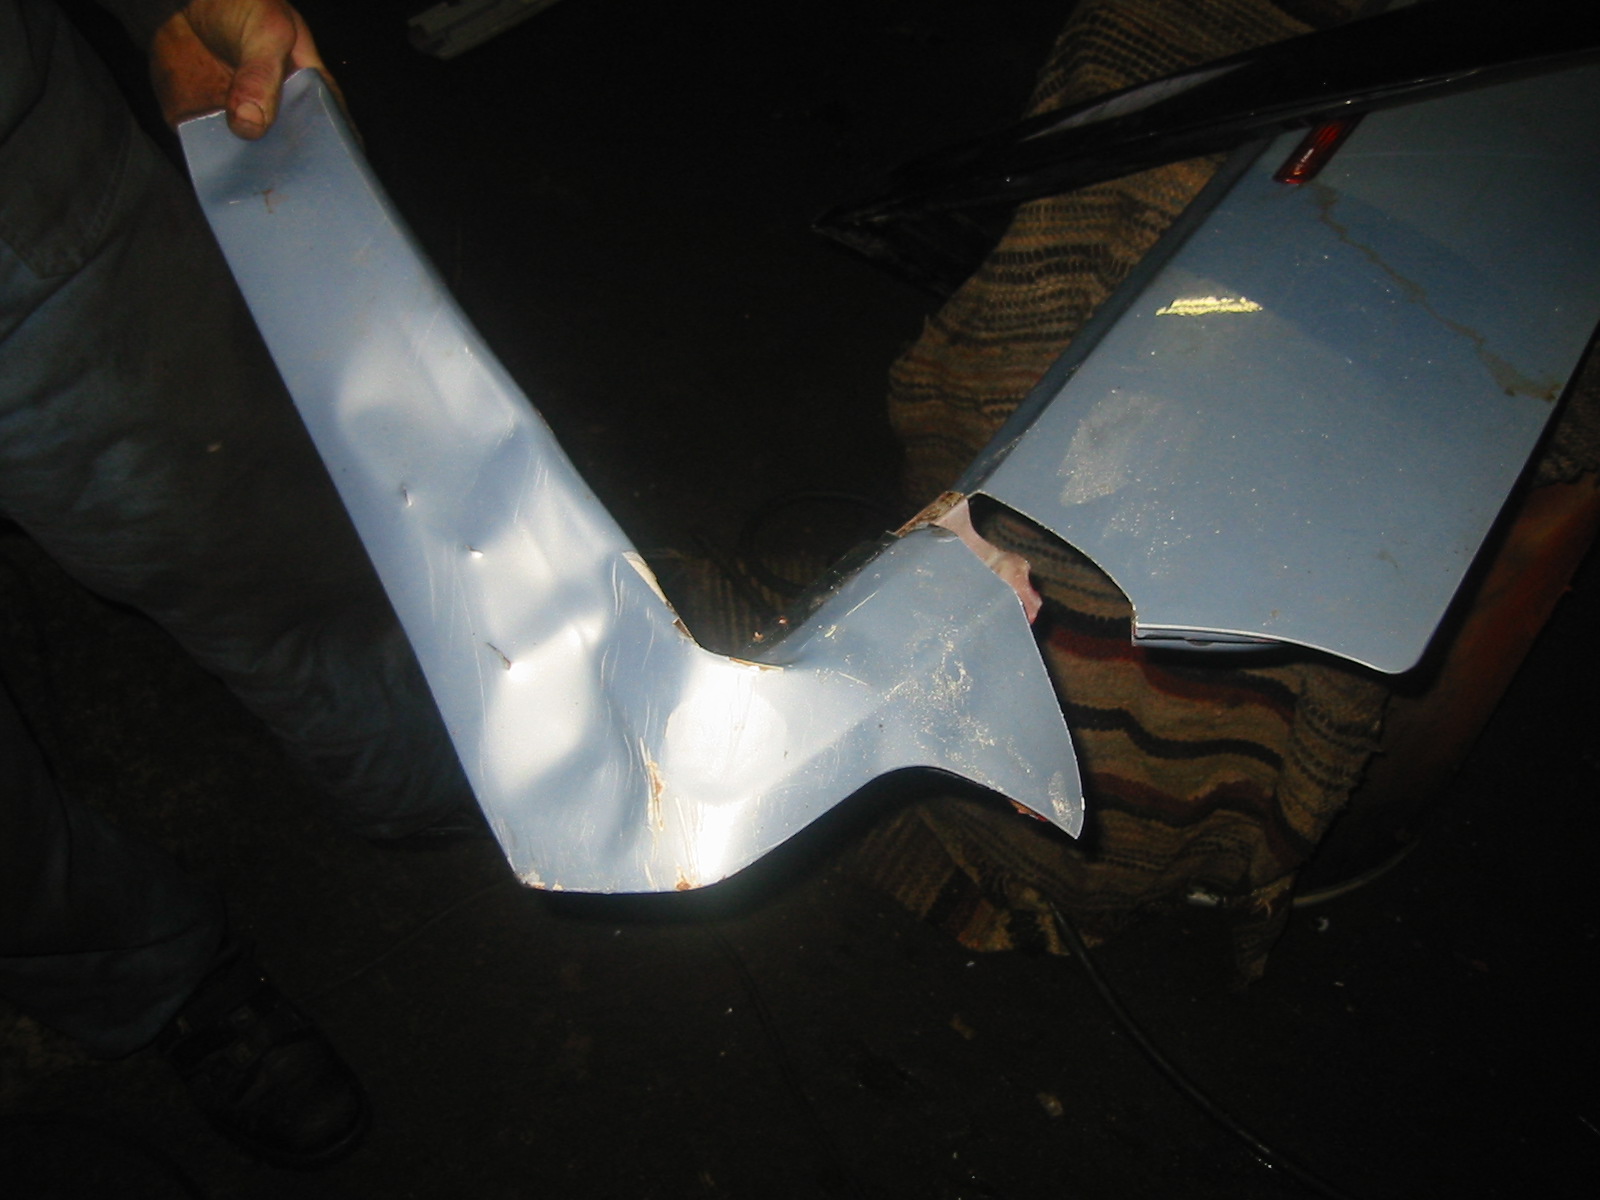
Then various sawing operations remove the damaged parts.
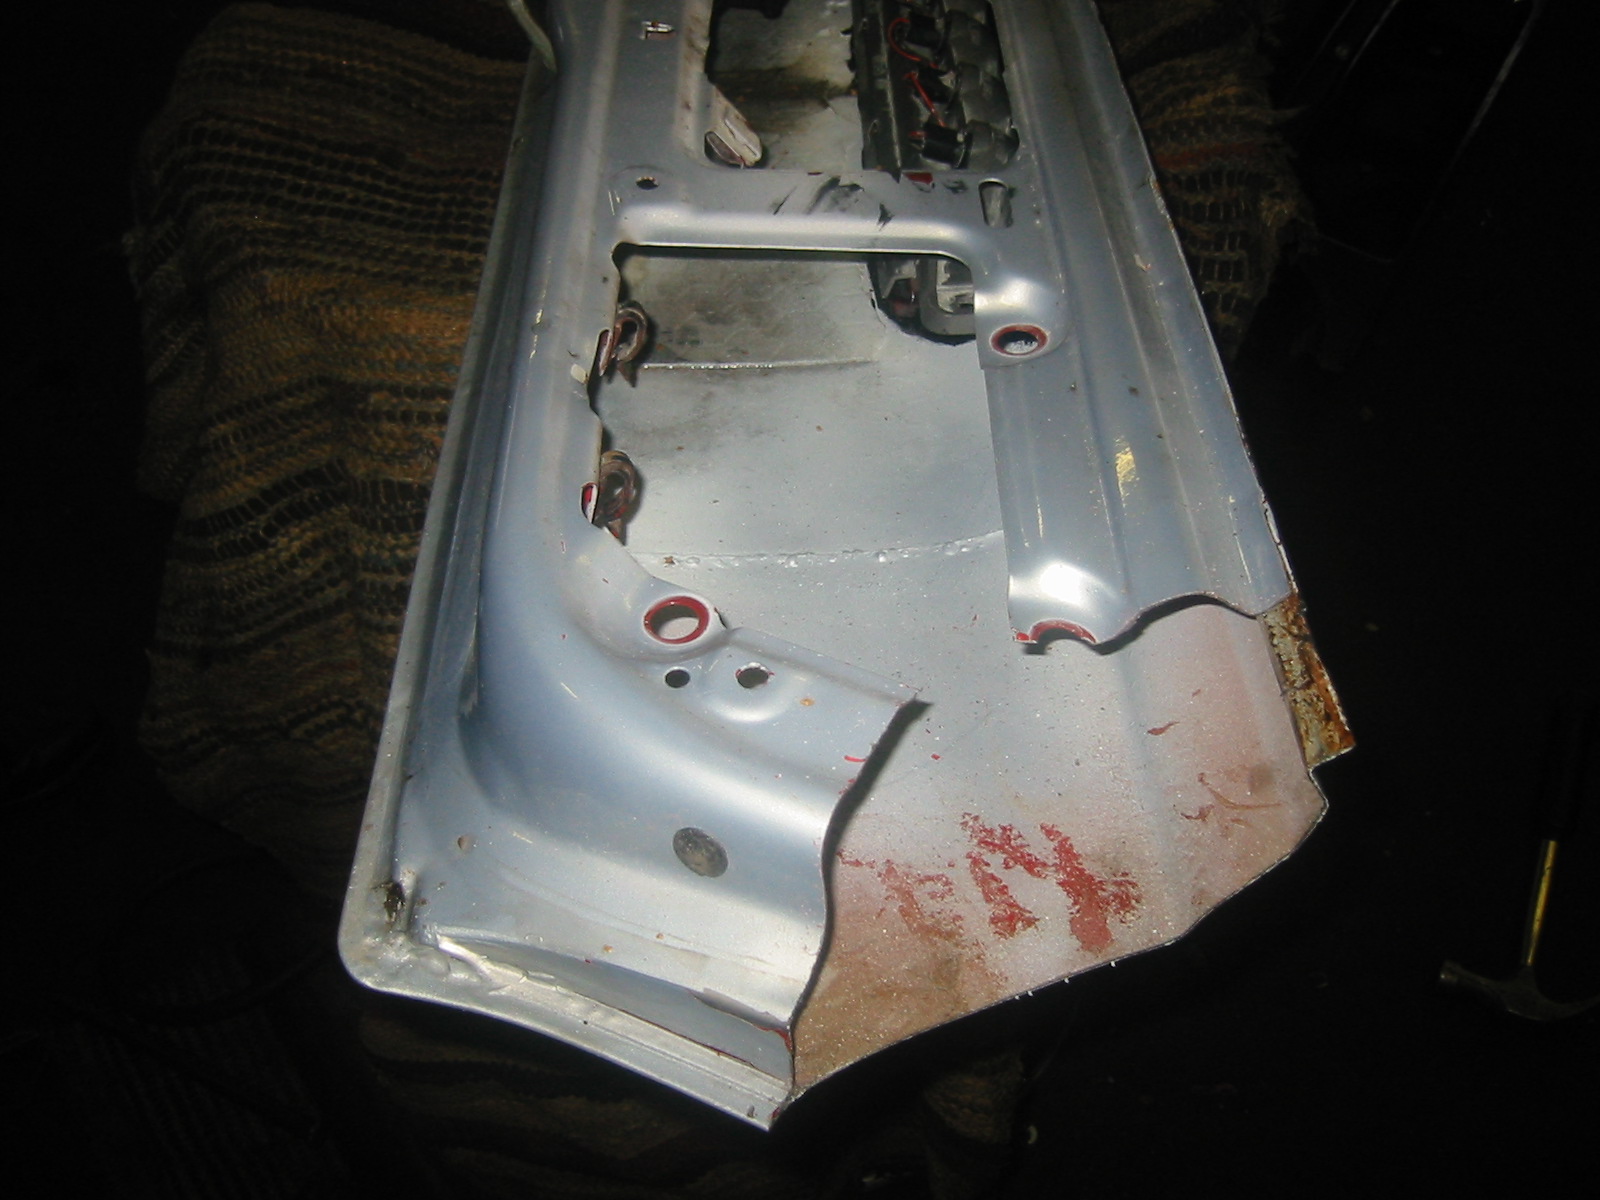
Only part of the lower tailgate remains. We decided to repair this one because its number plate recess was already removed and it had that very cool Nissan third brake light ;)
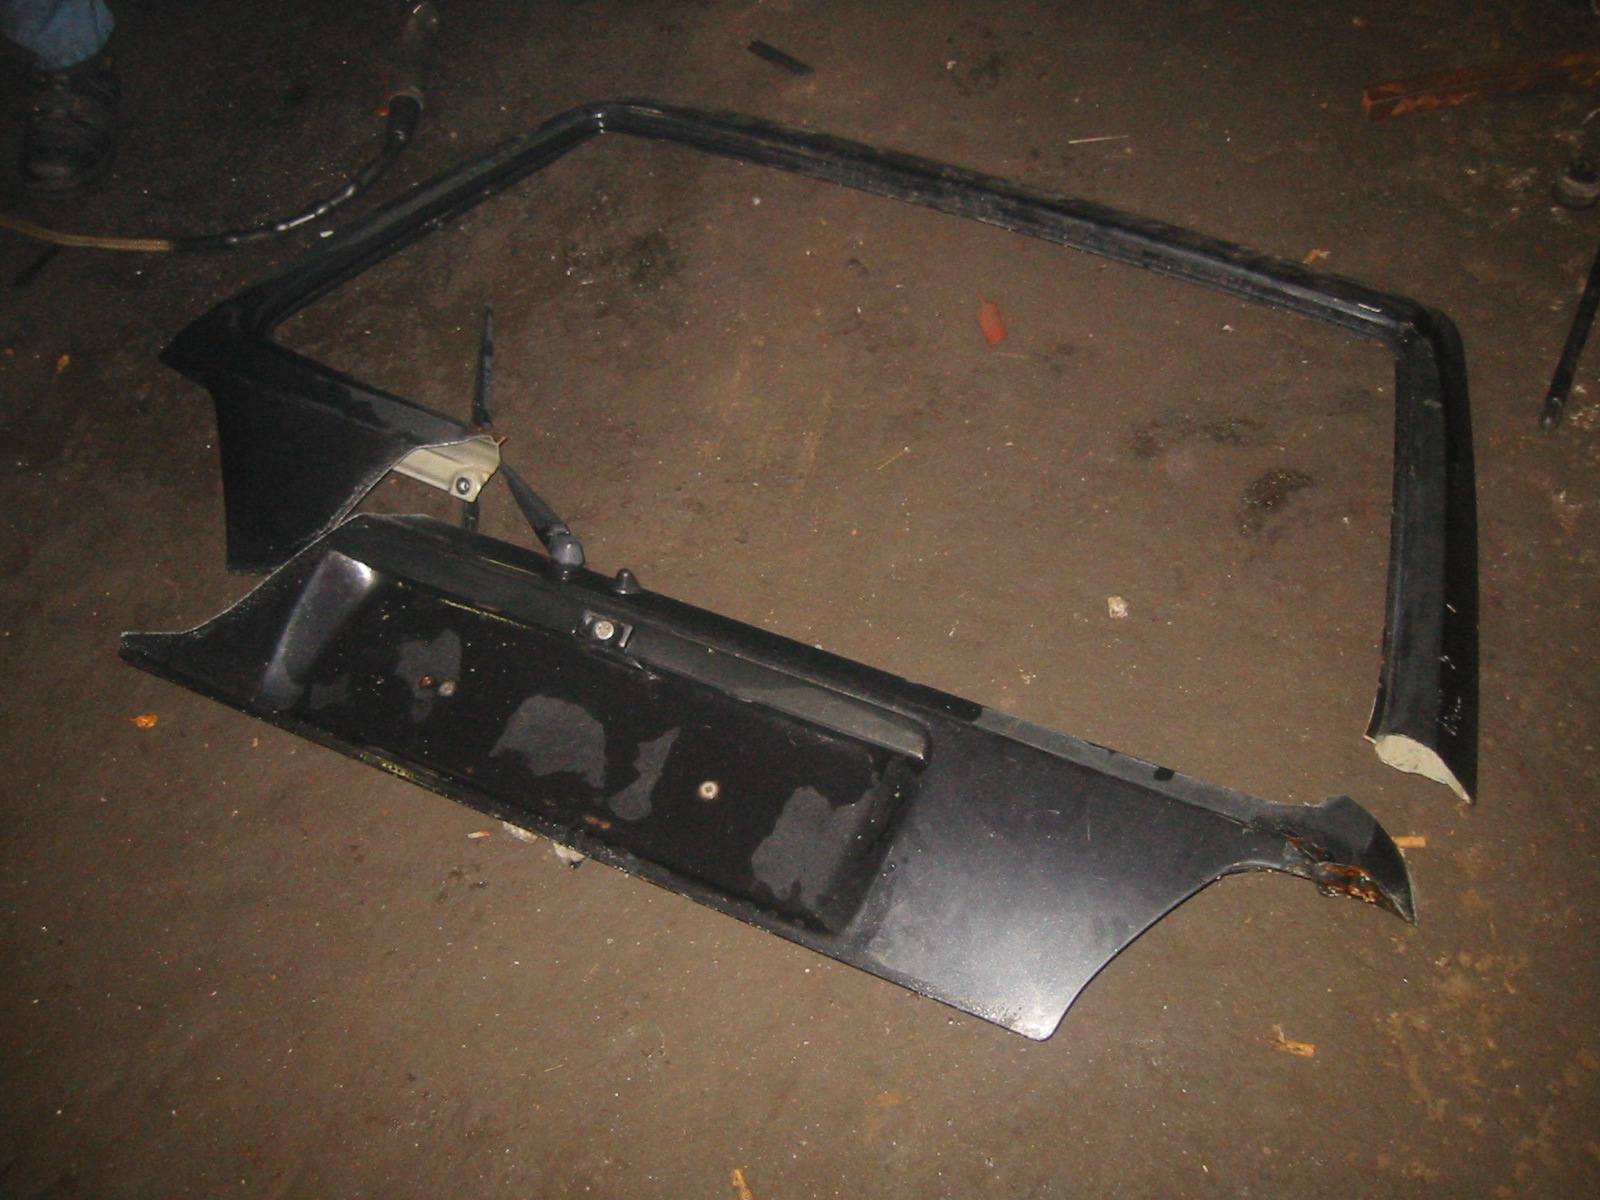
Next, find another damaged tailgate to donate its frame. The body saw gets going again...
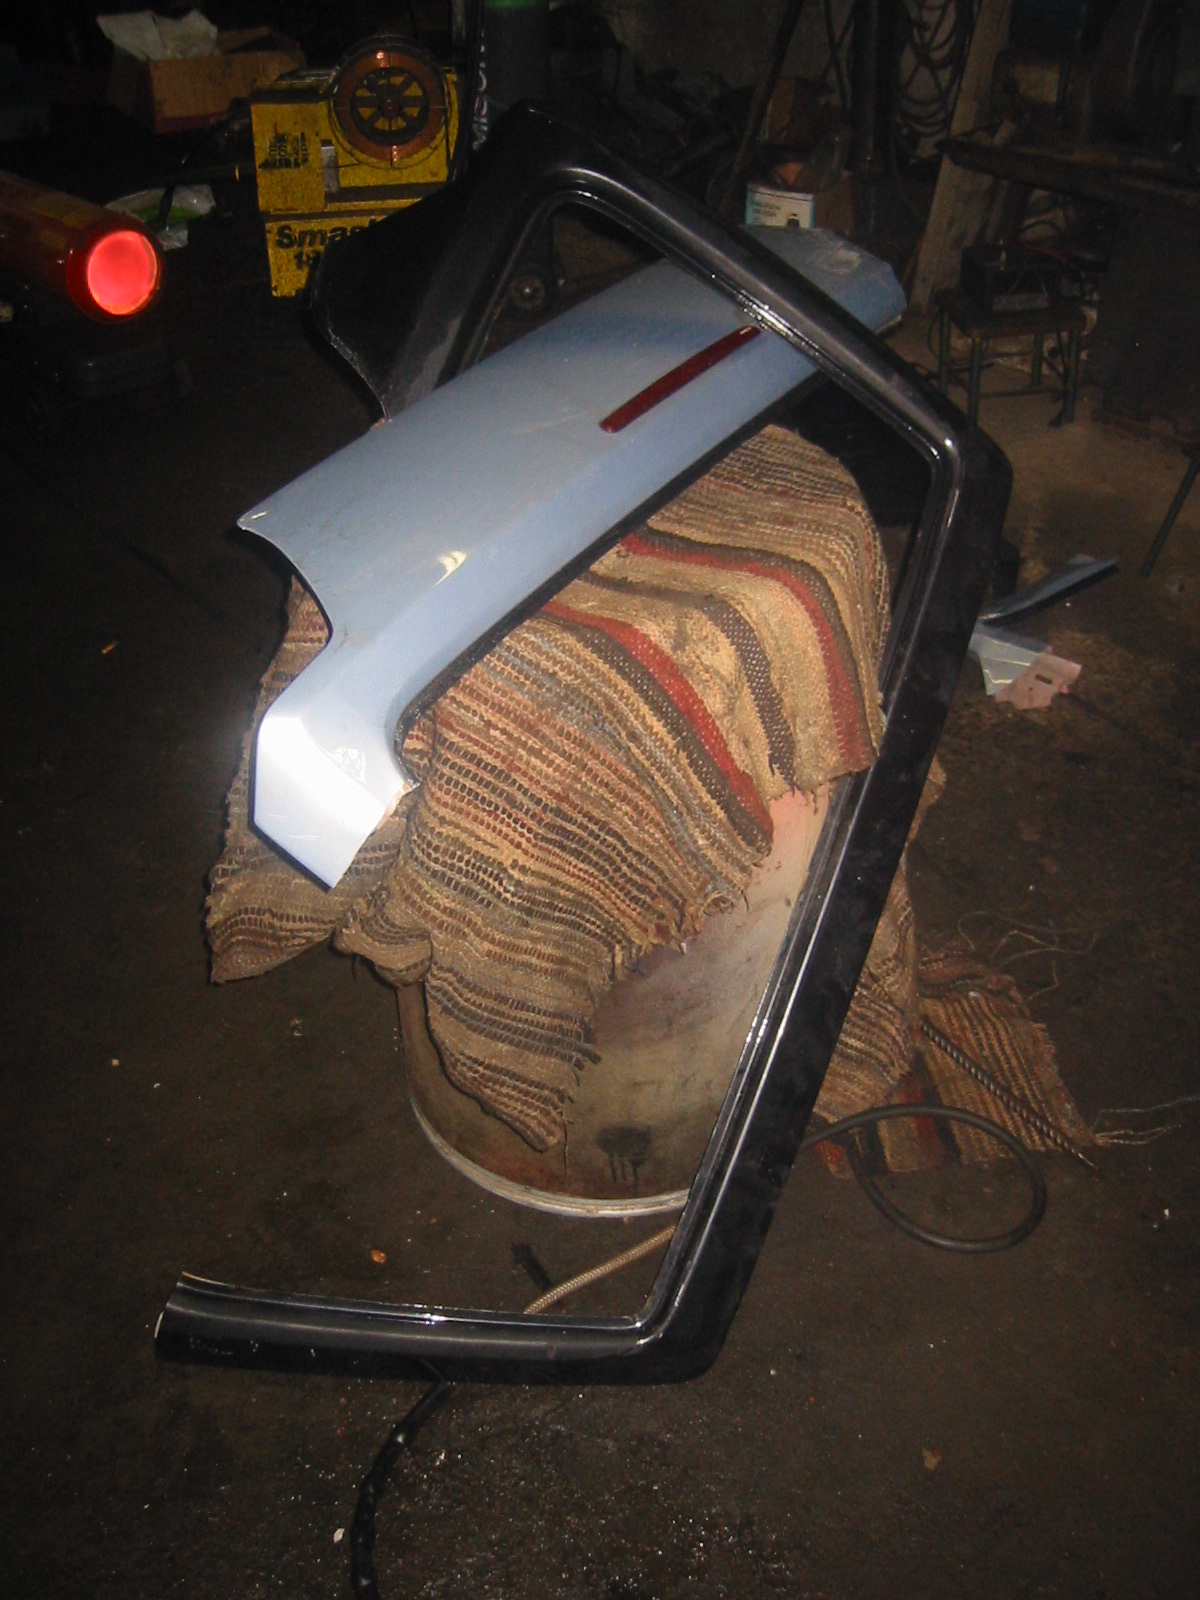
These two pieces will be welded into one straight tailgate with a third brake light.
Now came the famous fettling: roughly cut off the excess, try, cut, try, tack with the MIG, cut, try, tack, bend, twist, and so on...
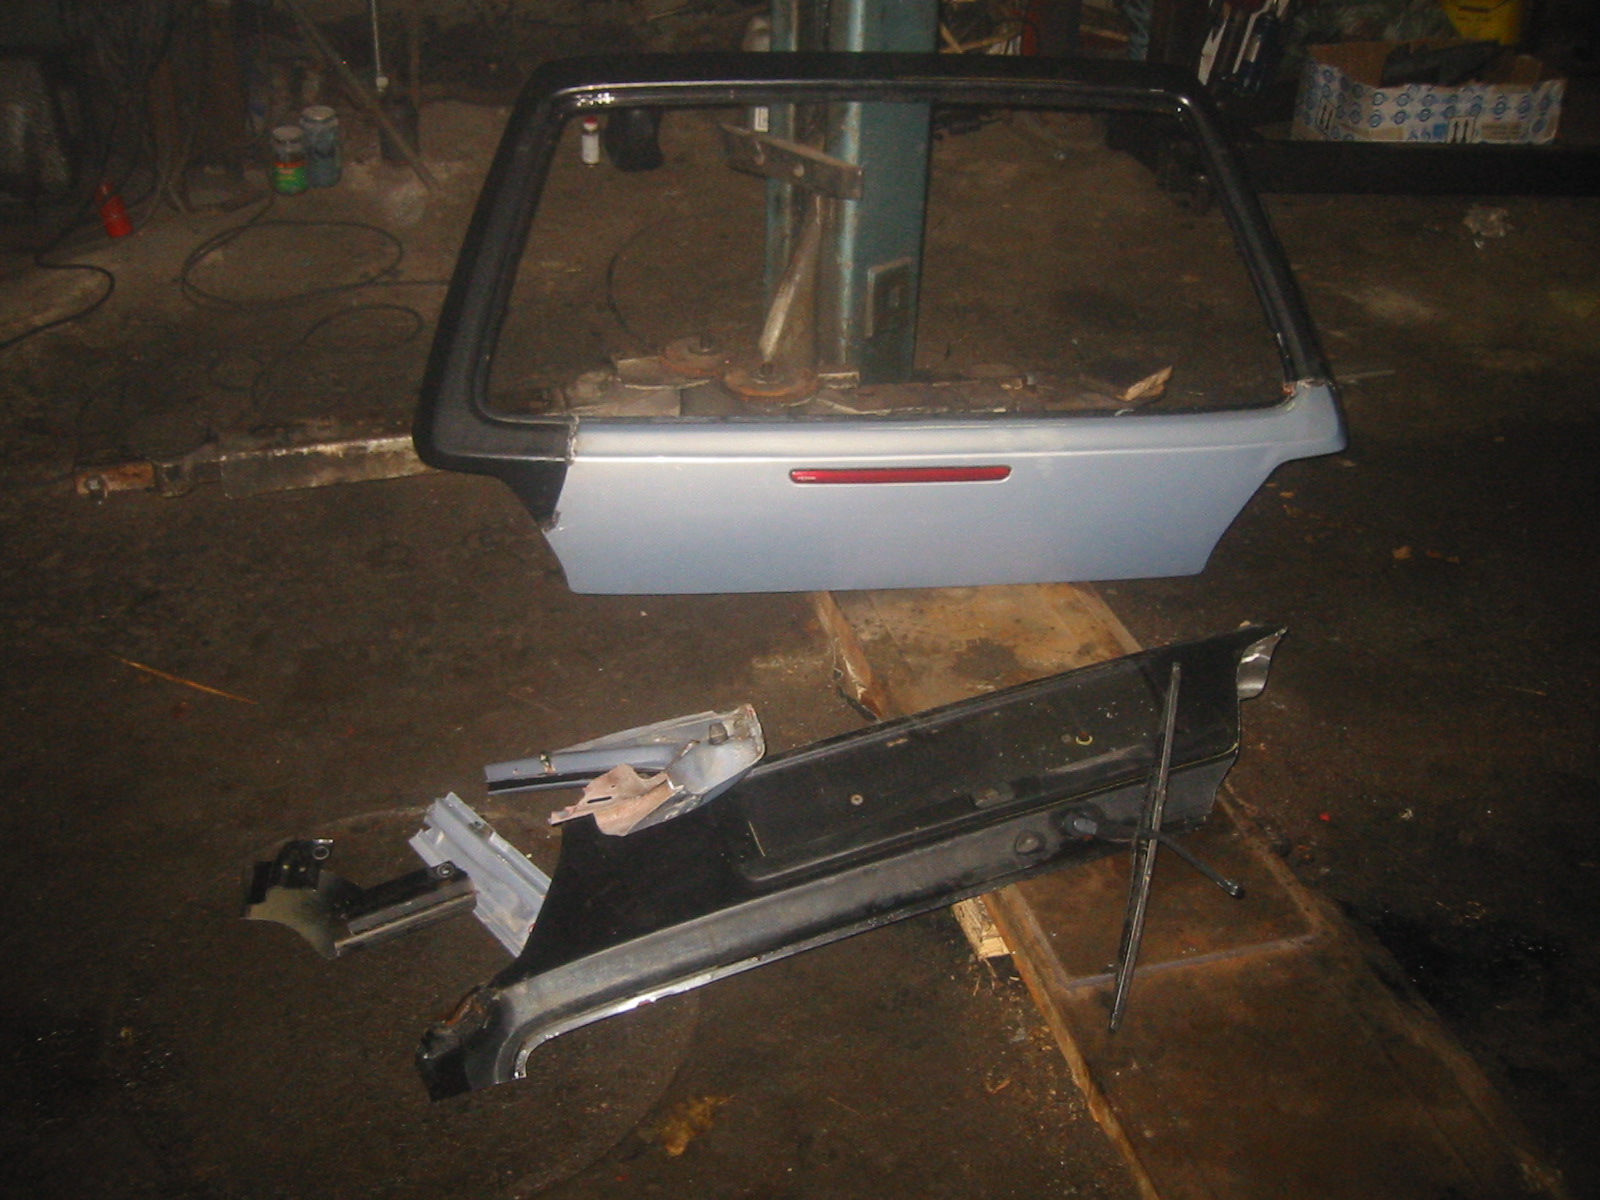
...until the shape and diagonal measurements were right. Here are some of the leftovers from turning two damaged tailgates into one sound one.
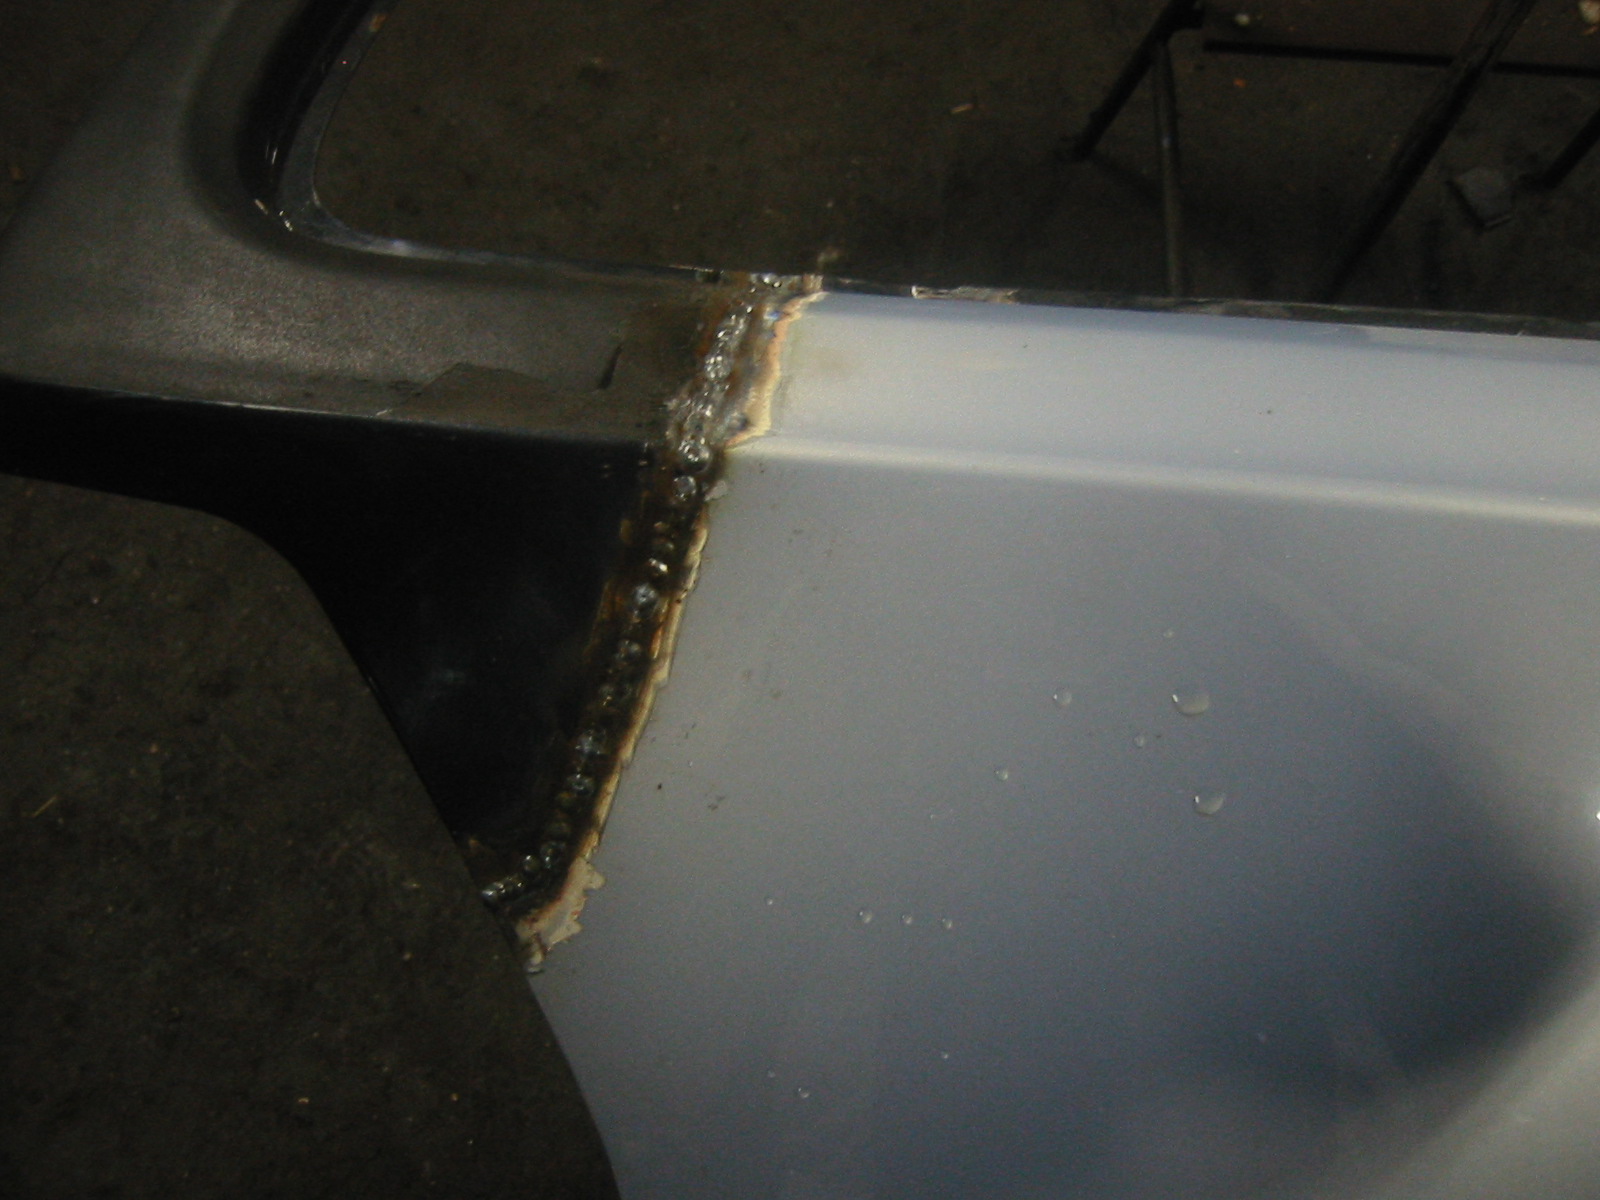
Then the seams are fully welded...
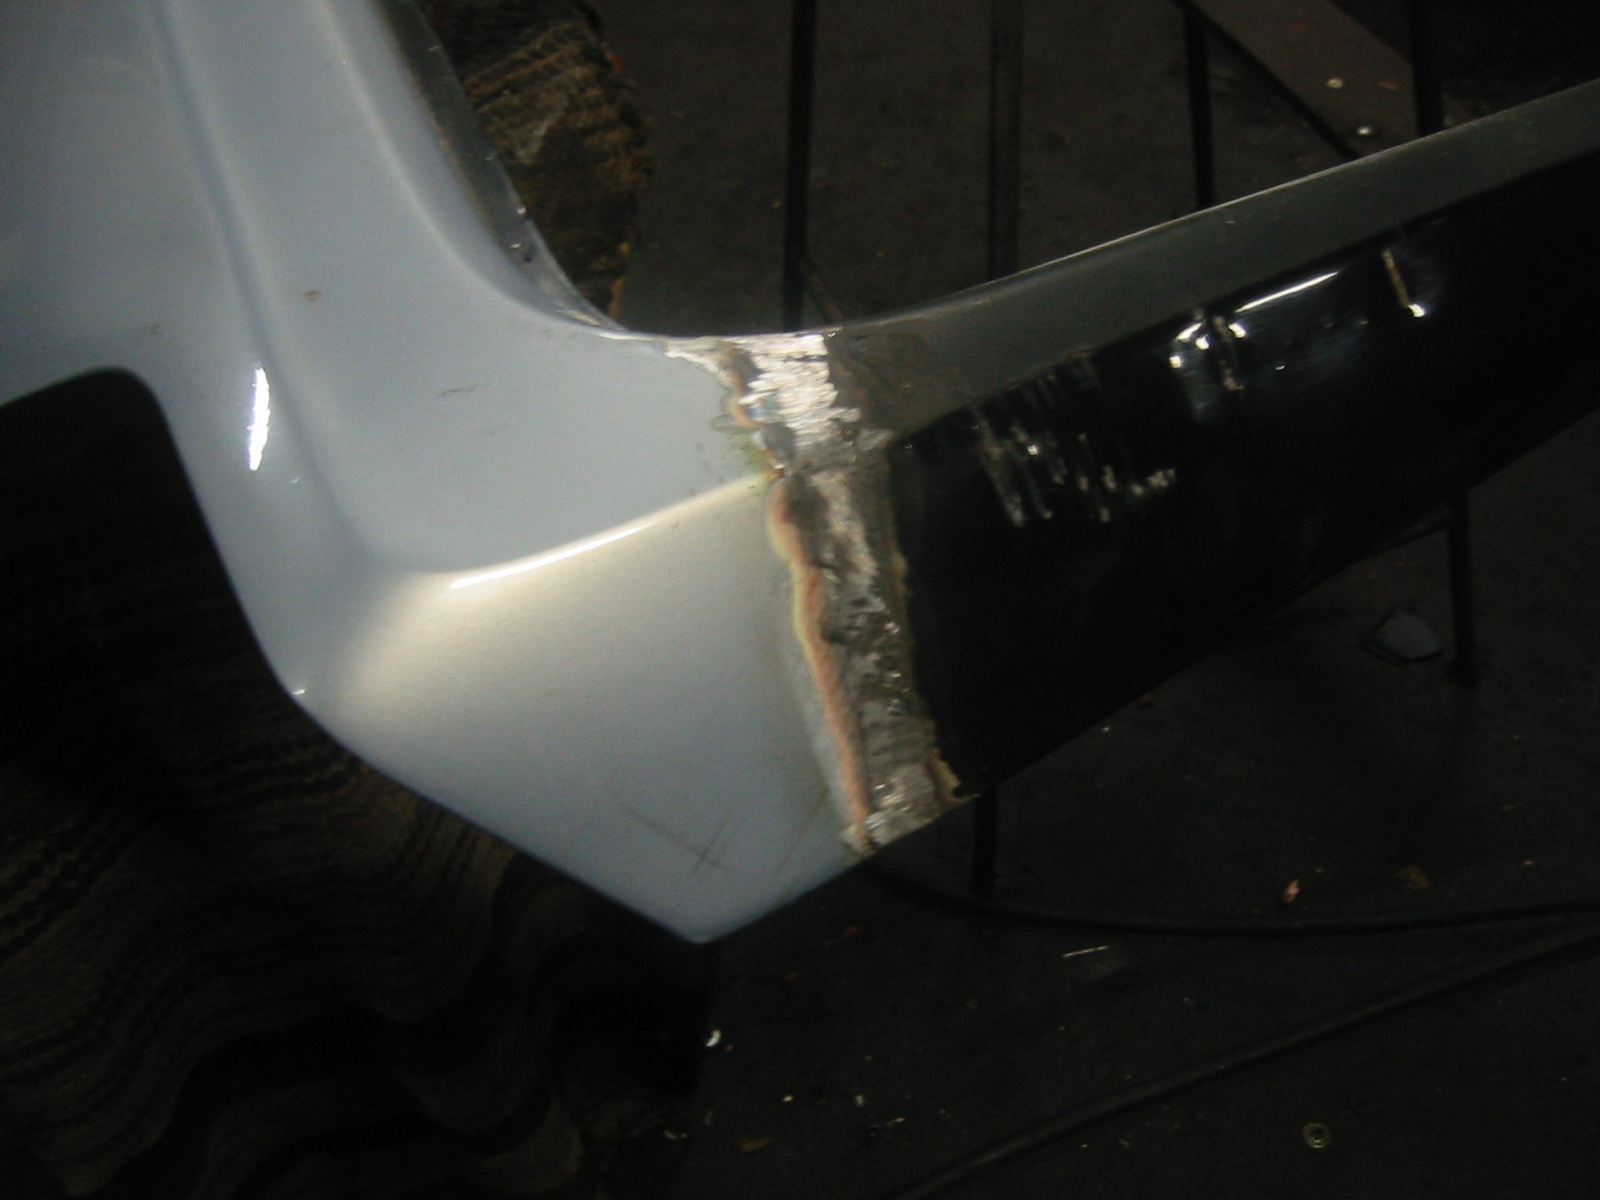
...and the excess ground away. The tailgate is ready for filler and paint.
Doors
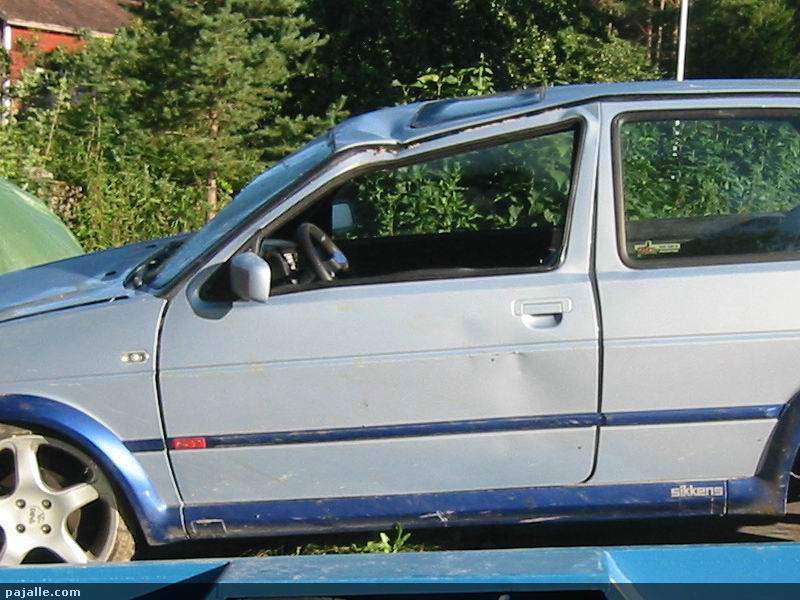
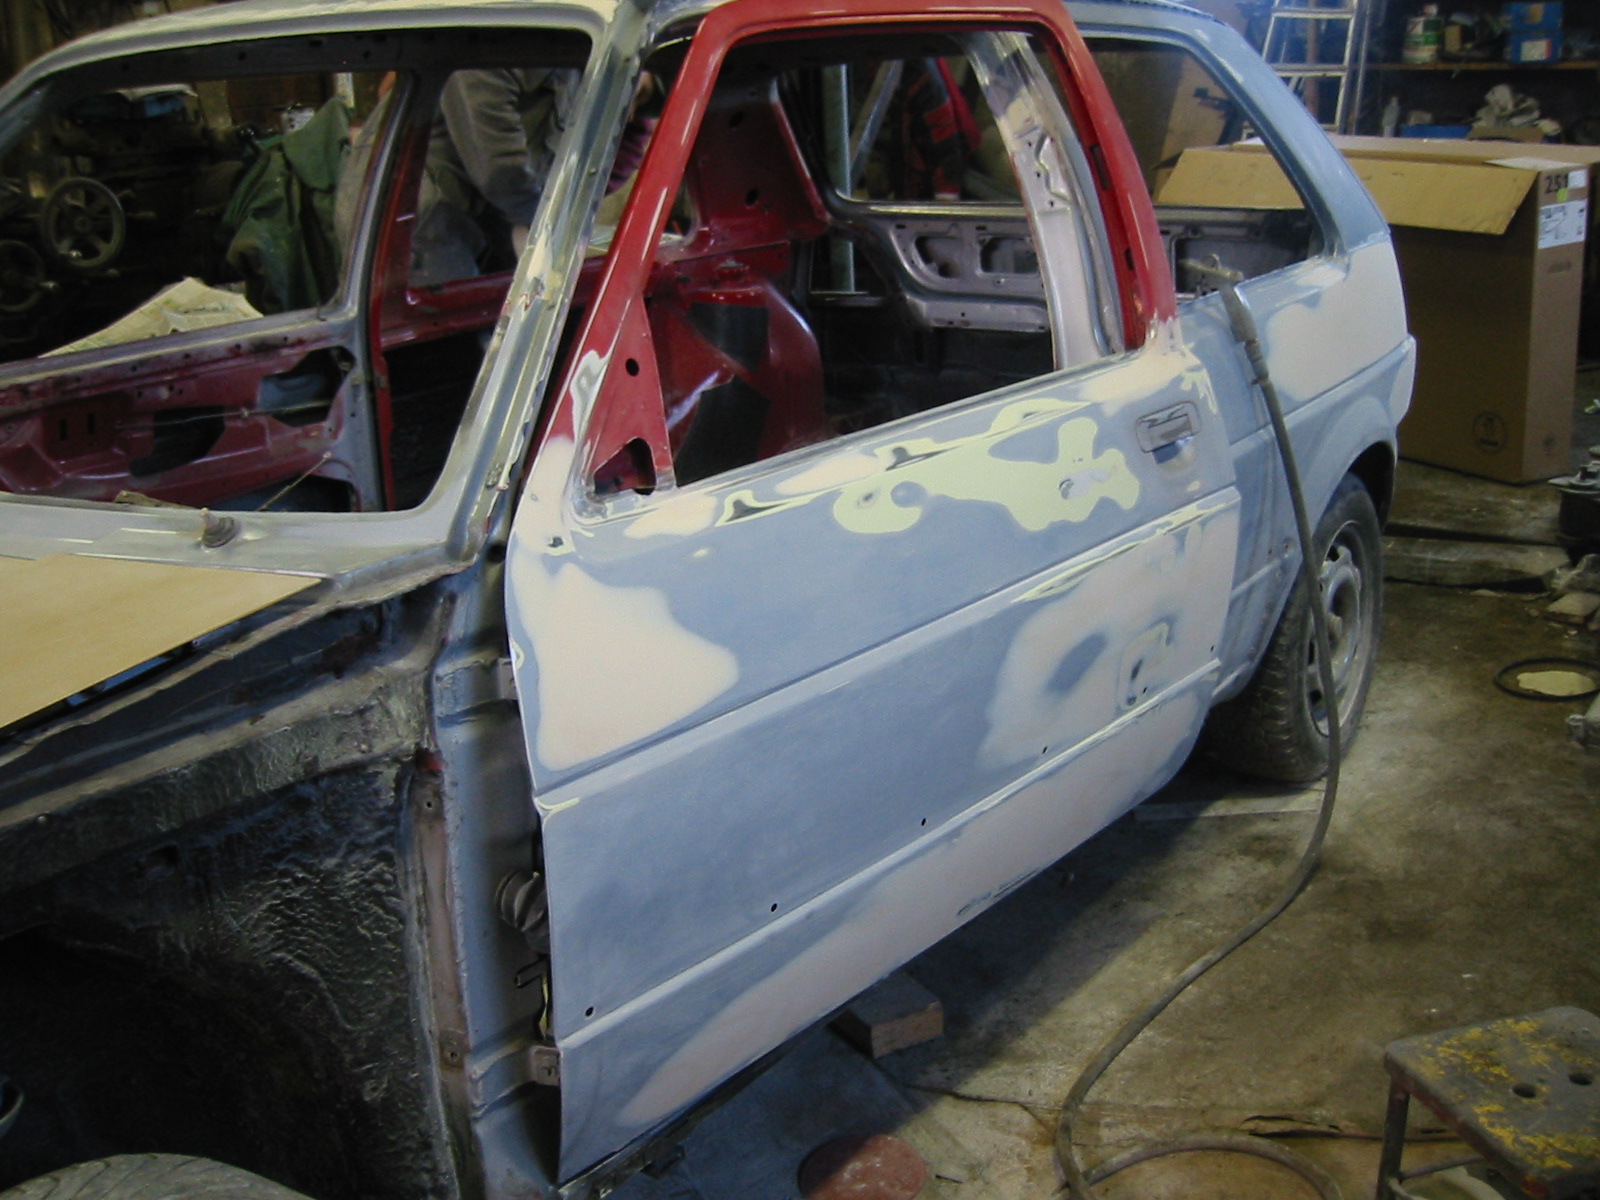
After the tailgate came the doors. Both were damaged in the accident, but Pekka thought they were repairable... And they already had the Audi handles fitted.
The left door first. As you can see, the frame is twisted, with a couple of dents for good measure.
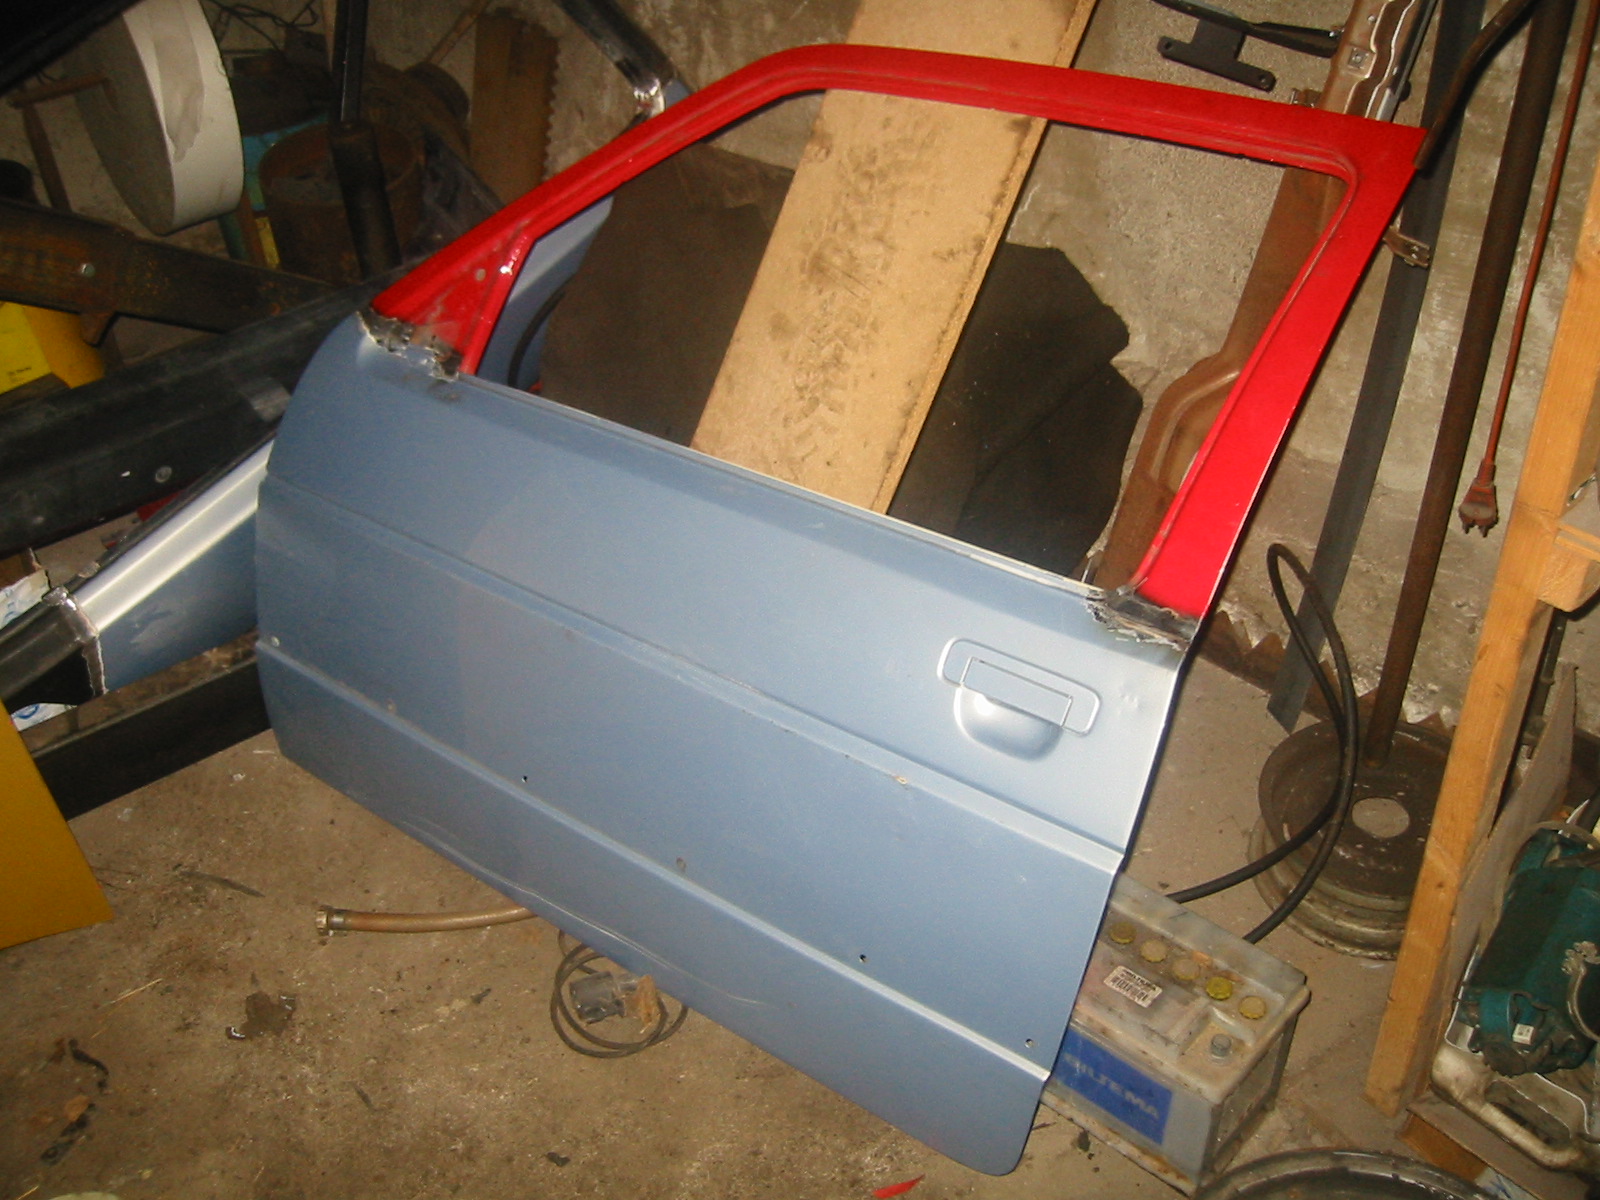
The frame replacement was much like the tailgate job. The dents were pushed out and the frame replaced.
Of course it will need filler, but so would fitting the Audi handle to another undamaged door.
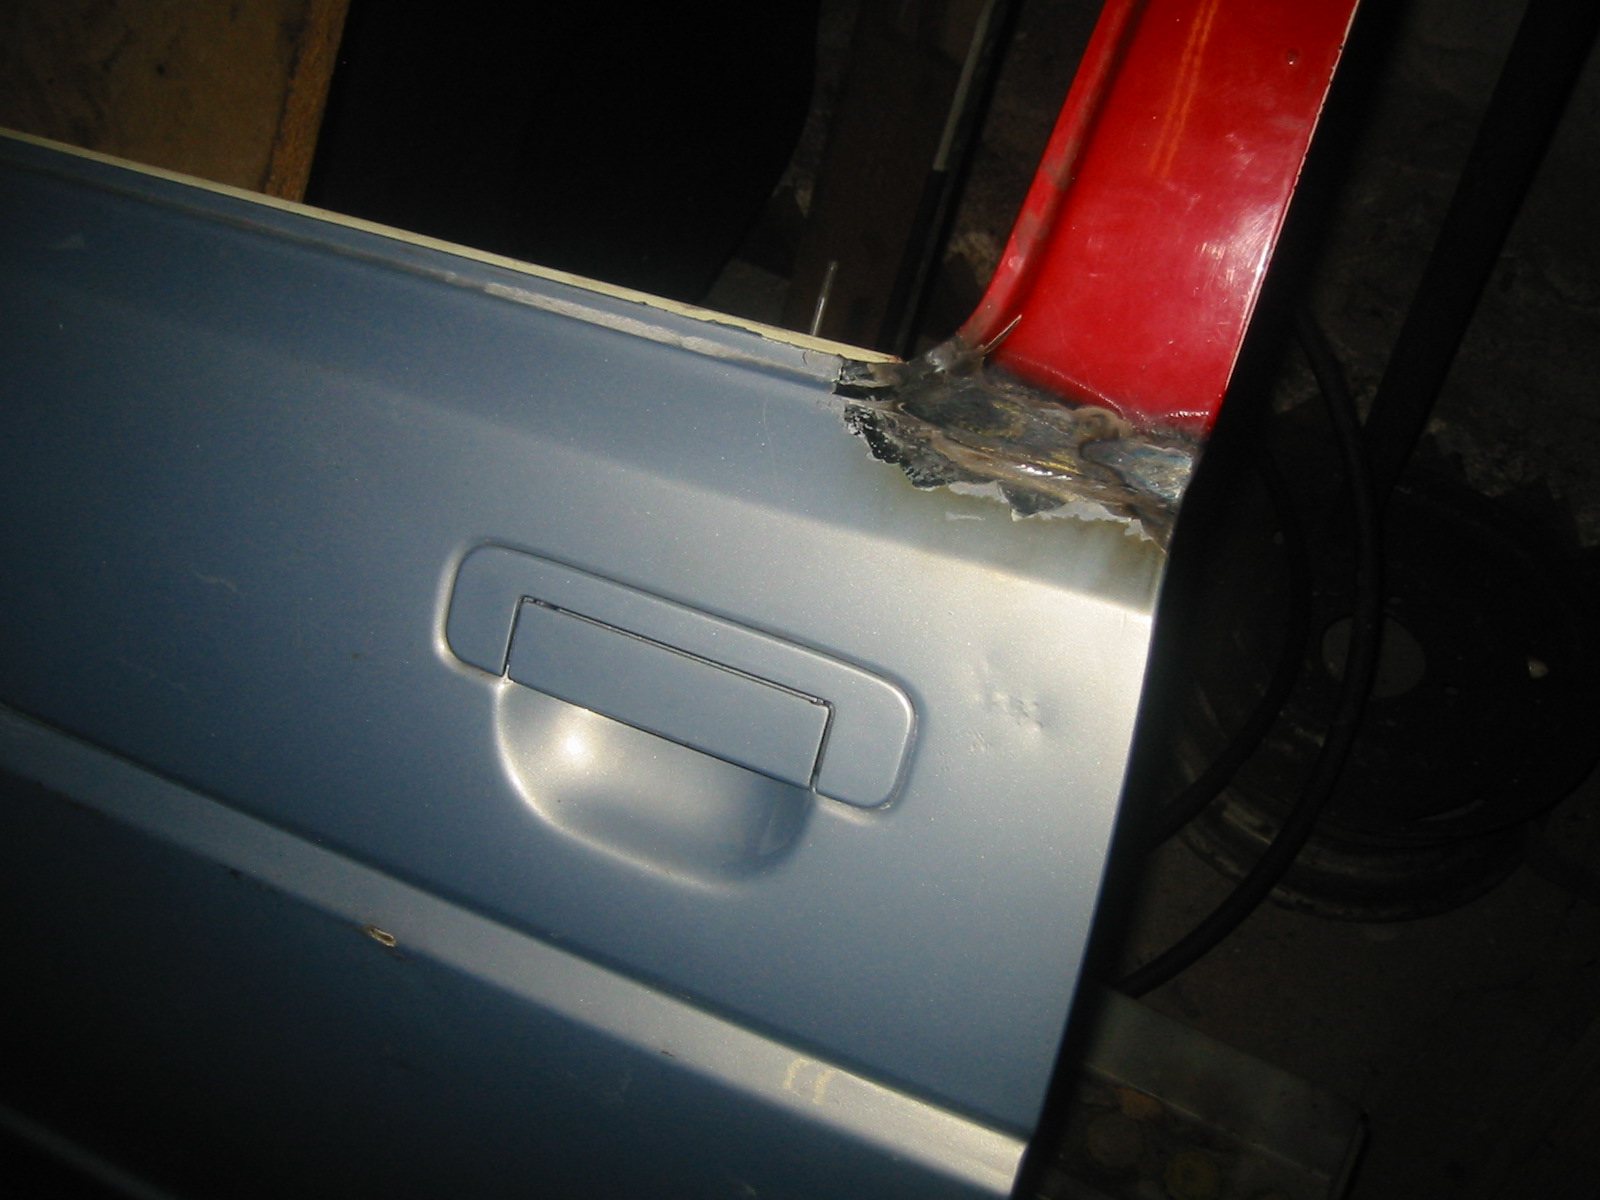
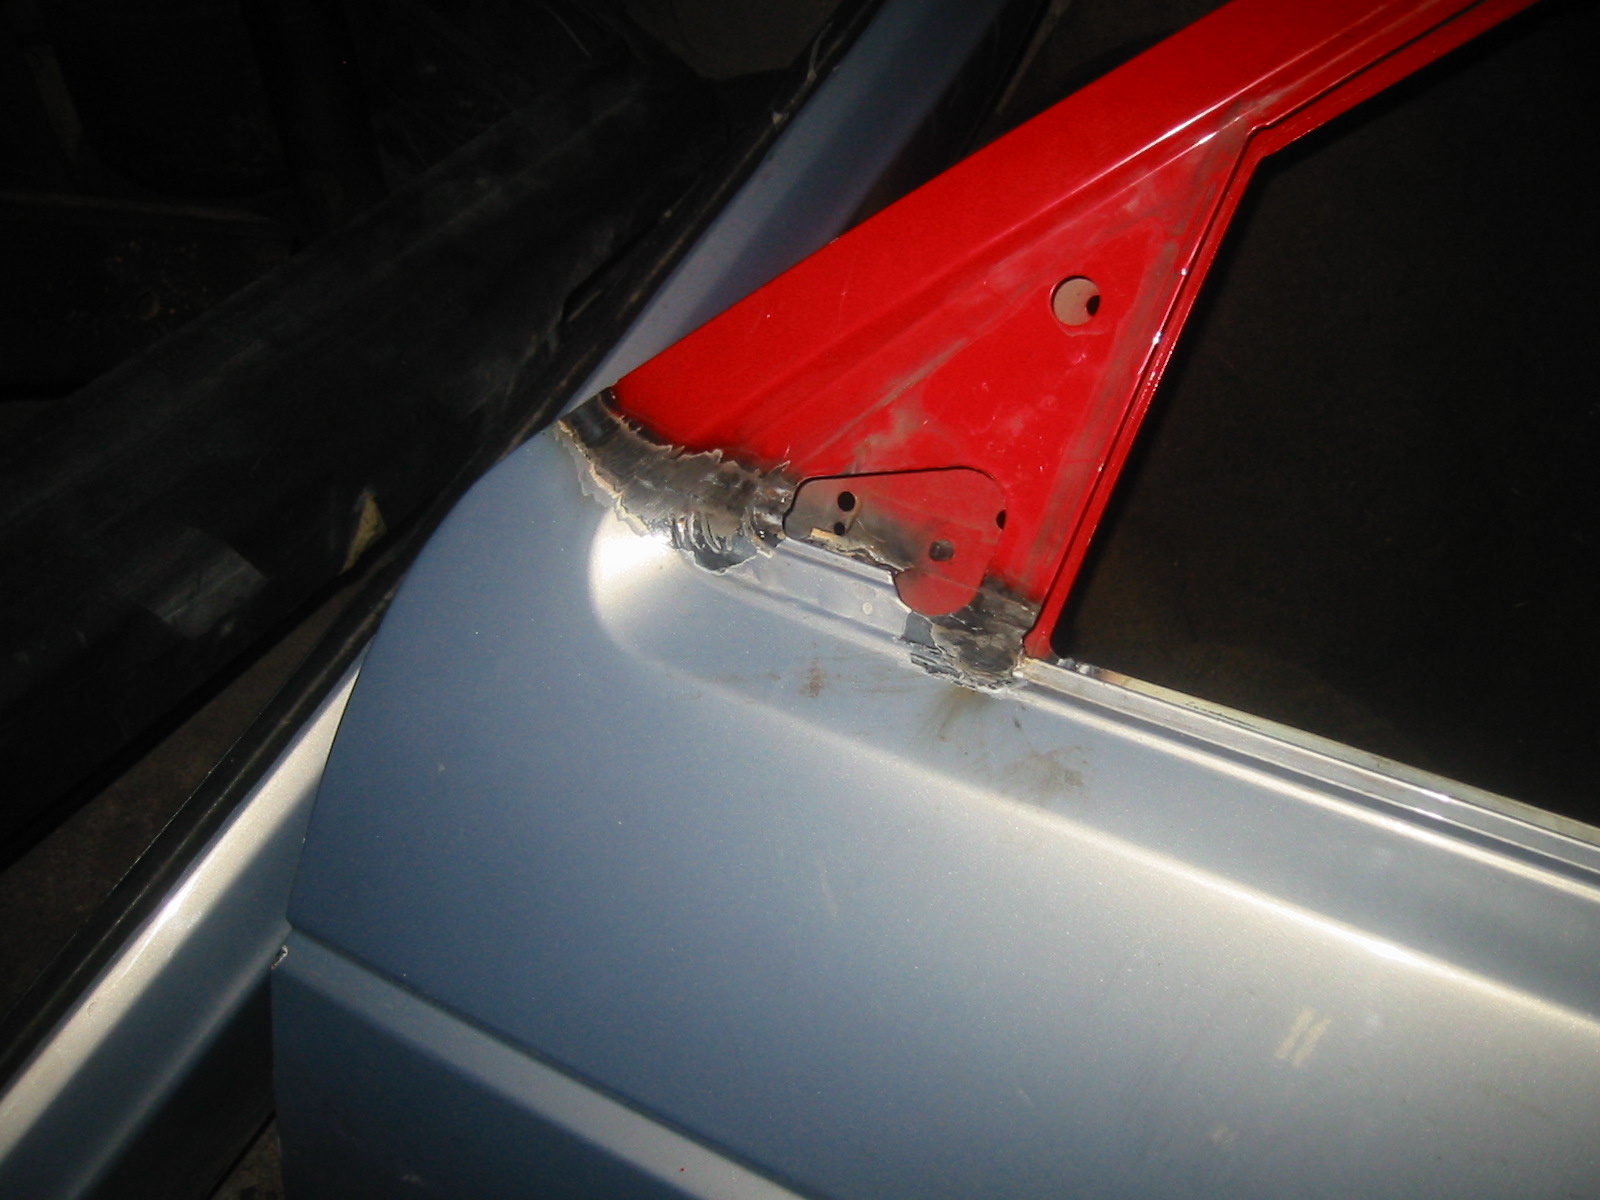
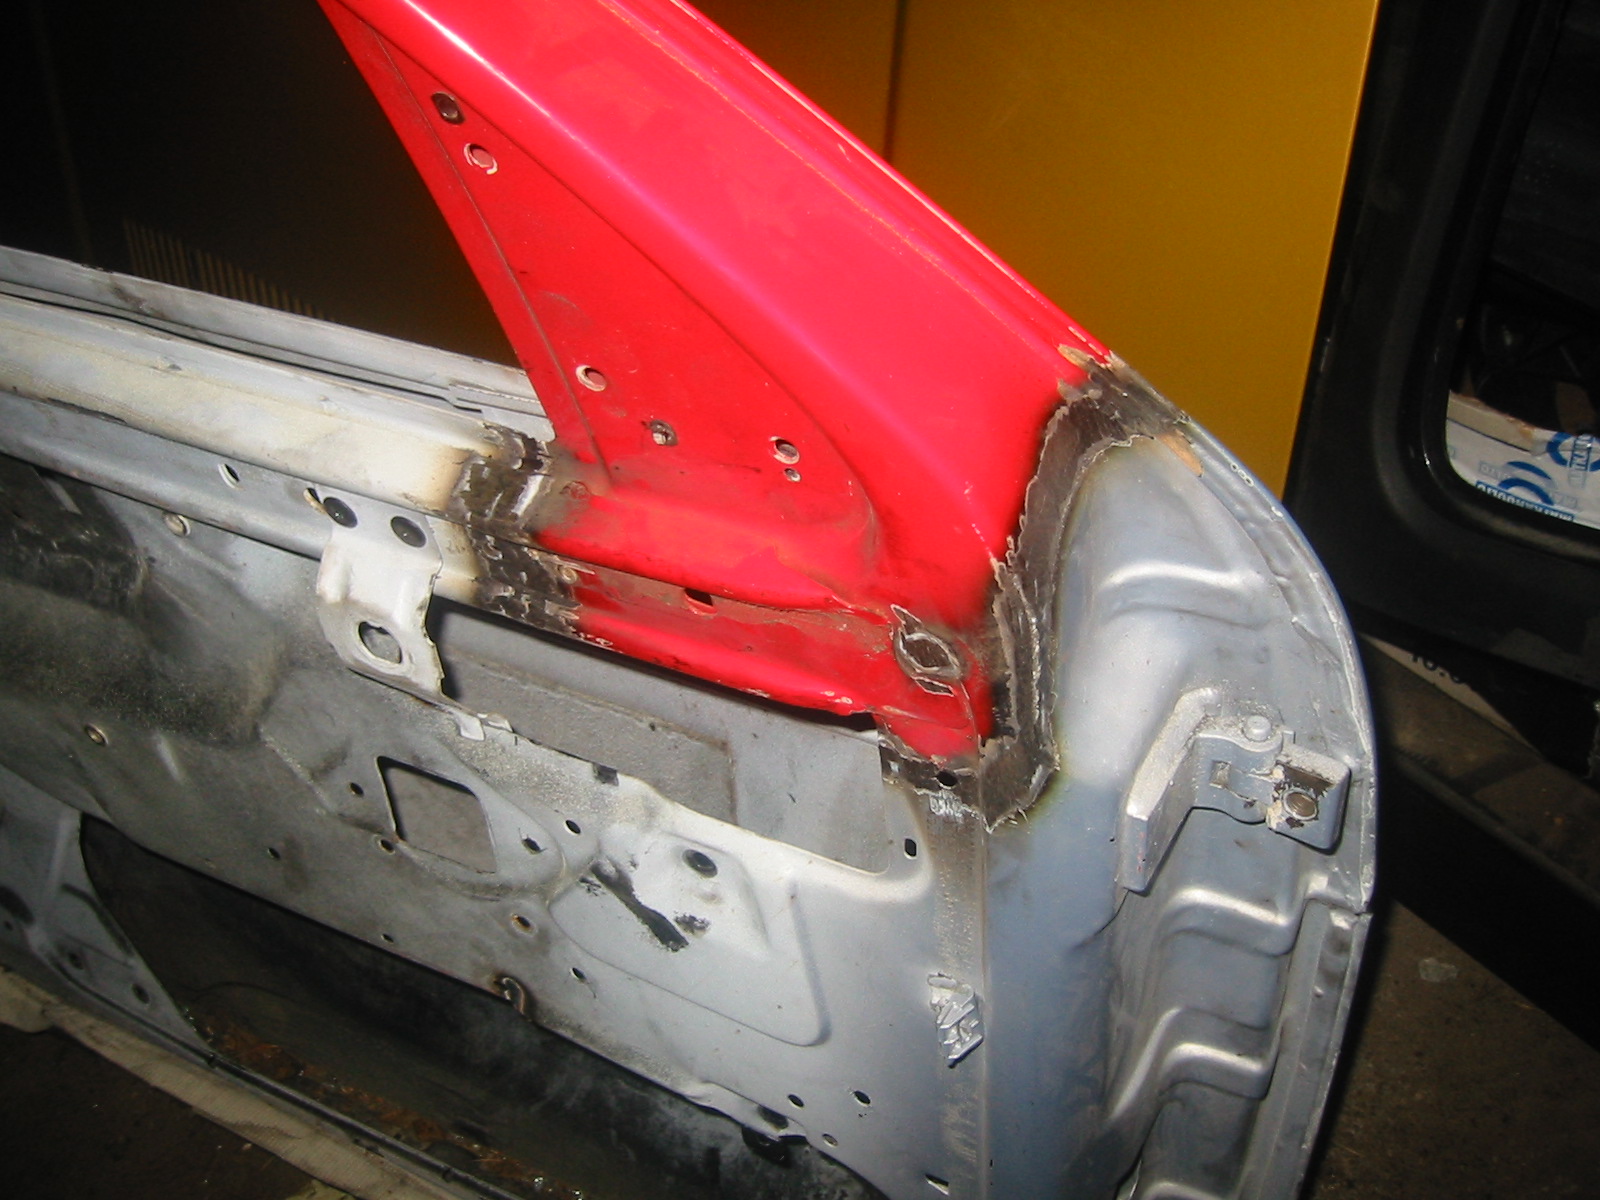
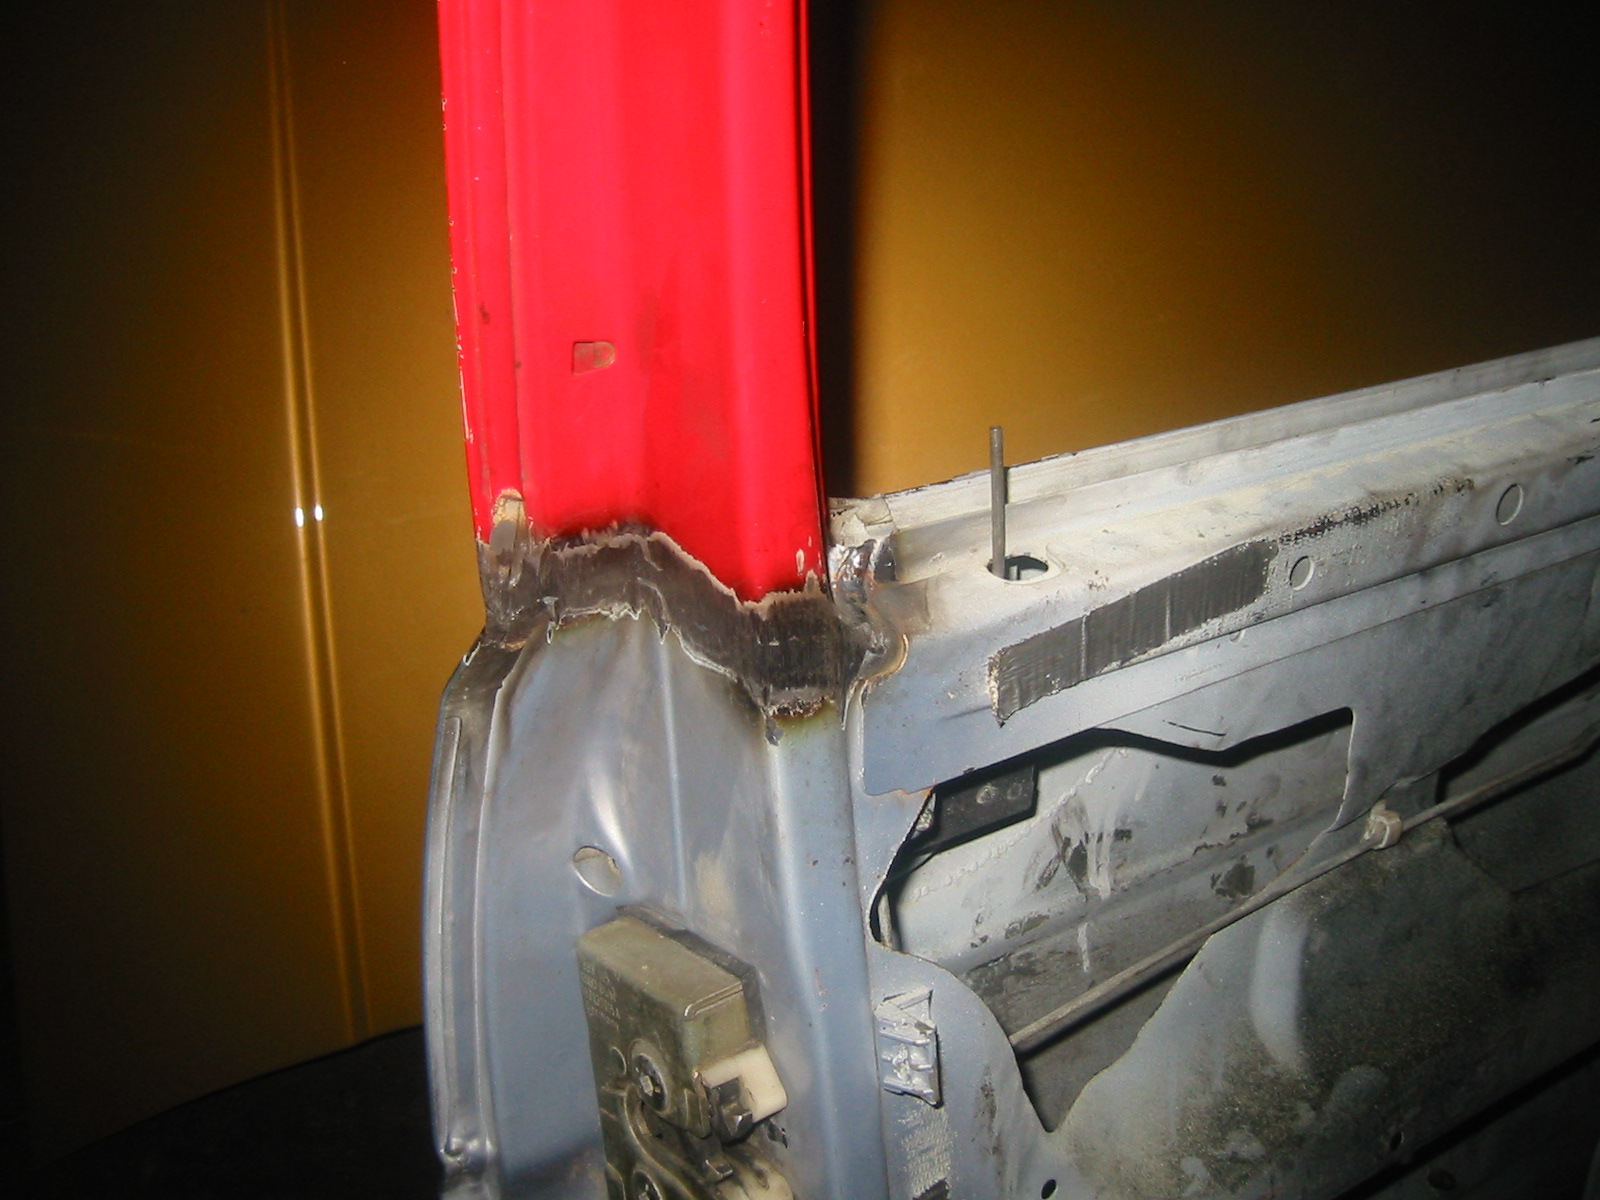
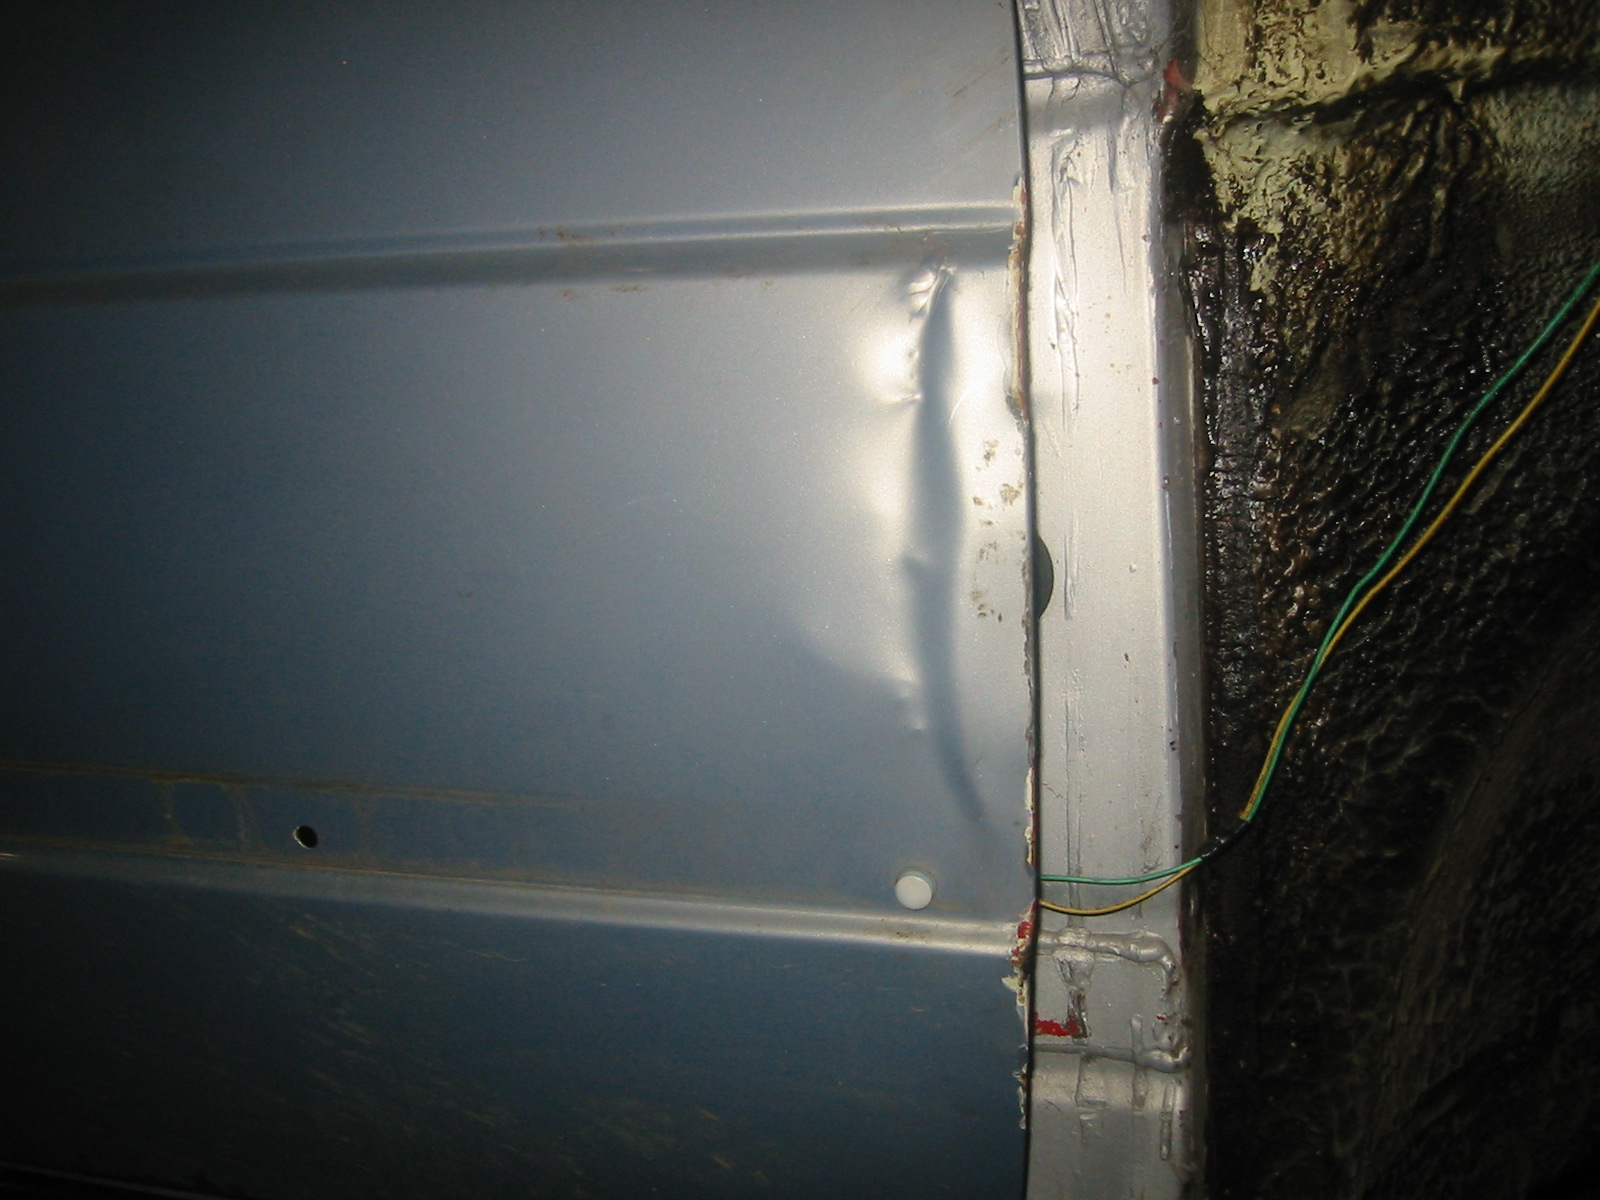
The right door only had a 'small' dent at its front edge, which could be straightened. Some straightening had already been done here: the cameraman was late again...
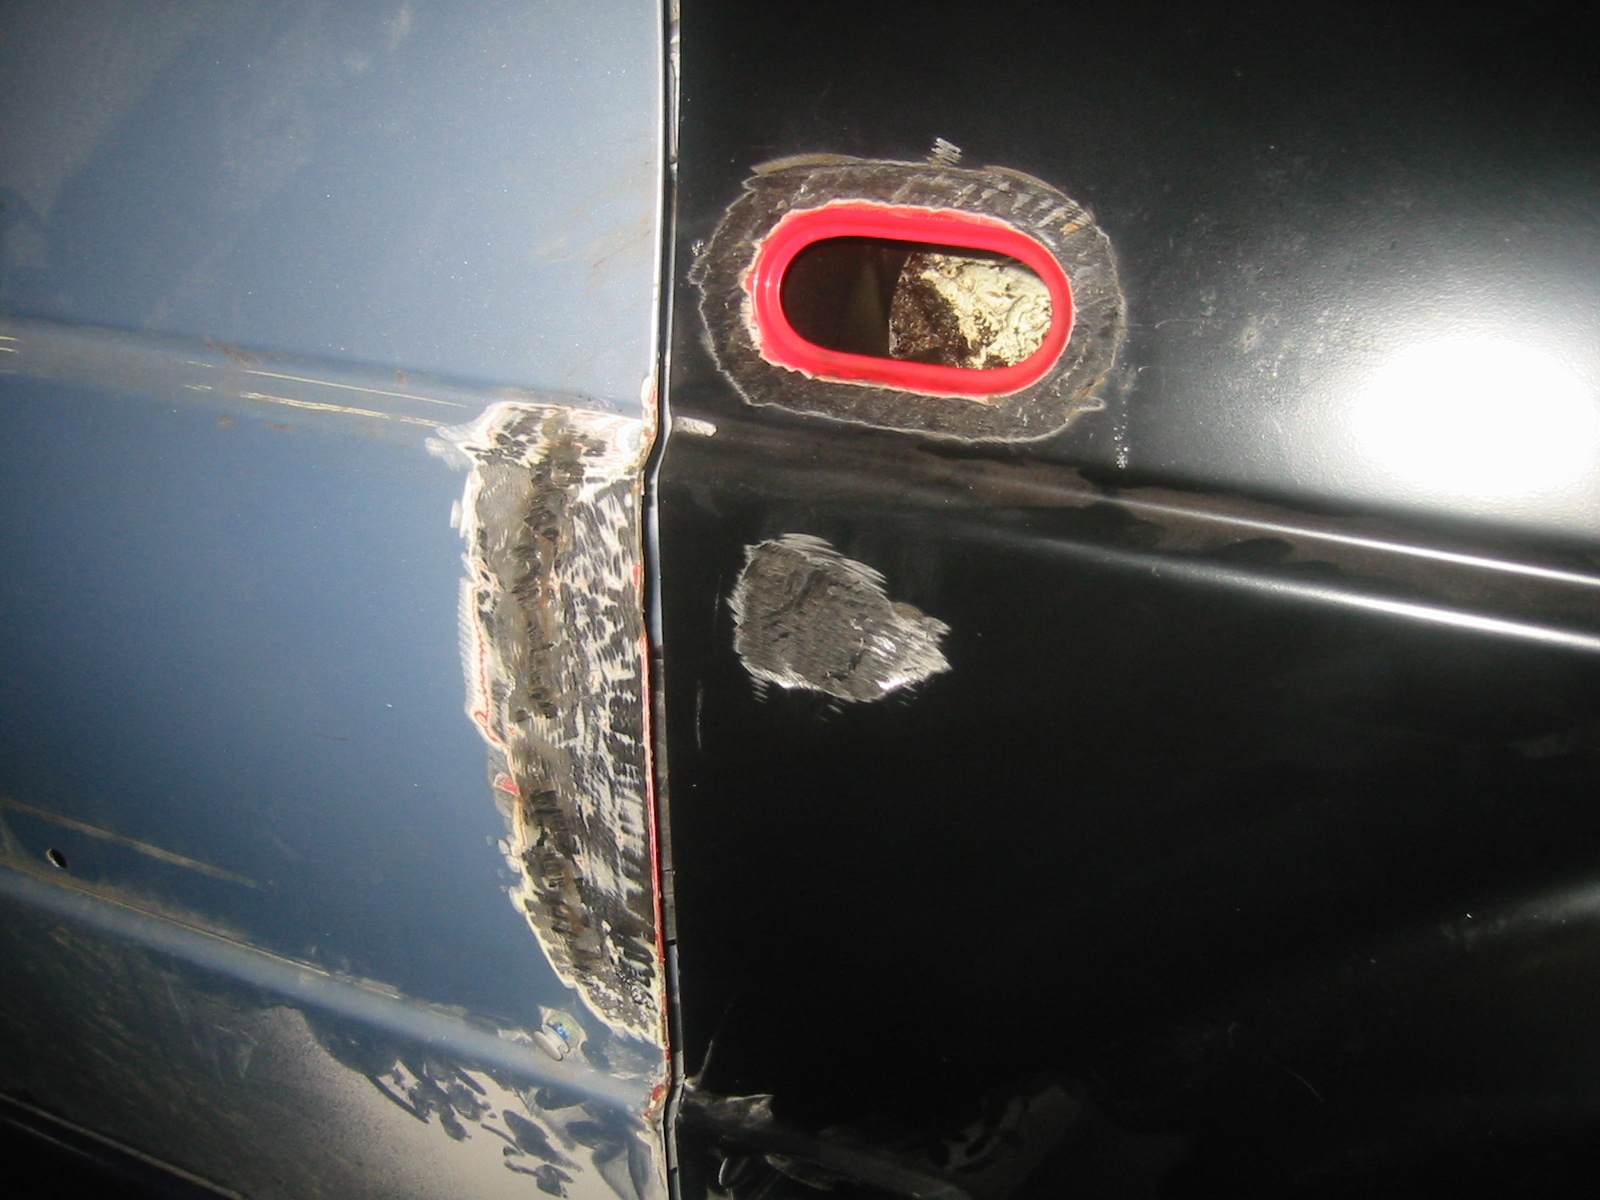
The front edge of the door straightened.
Mk4 crystal-clear side repeaters are planned again, mounted higher than usual on a Mk2.
Roof — part 1
There's a small difference between the pictures below. Can you spot it?
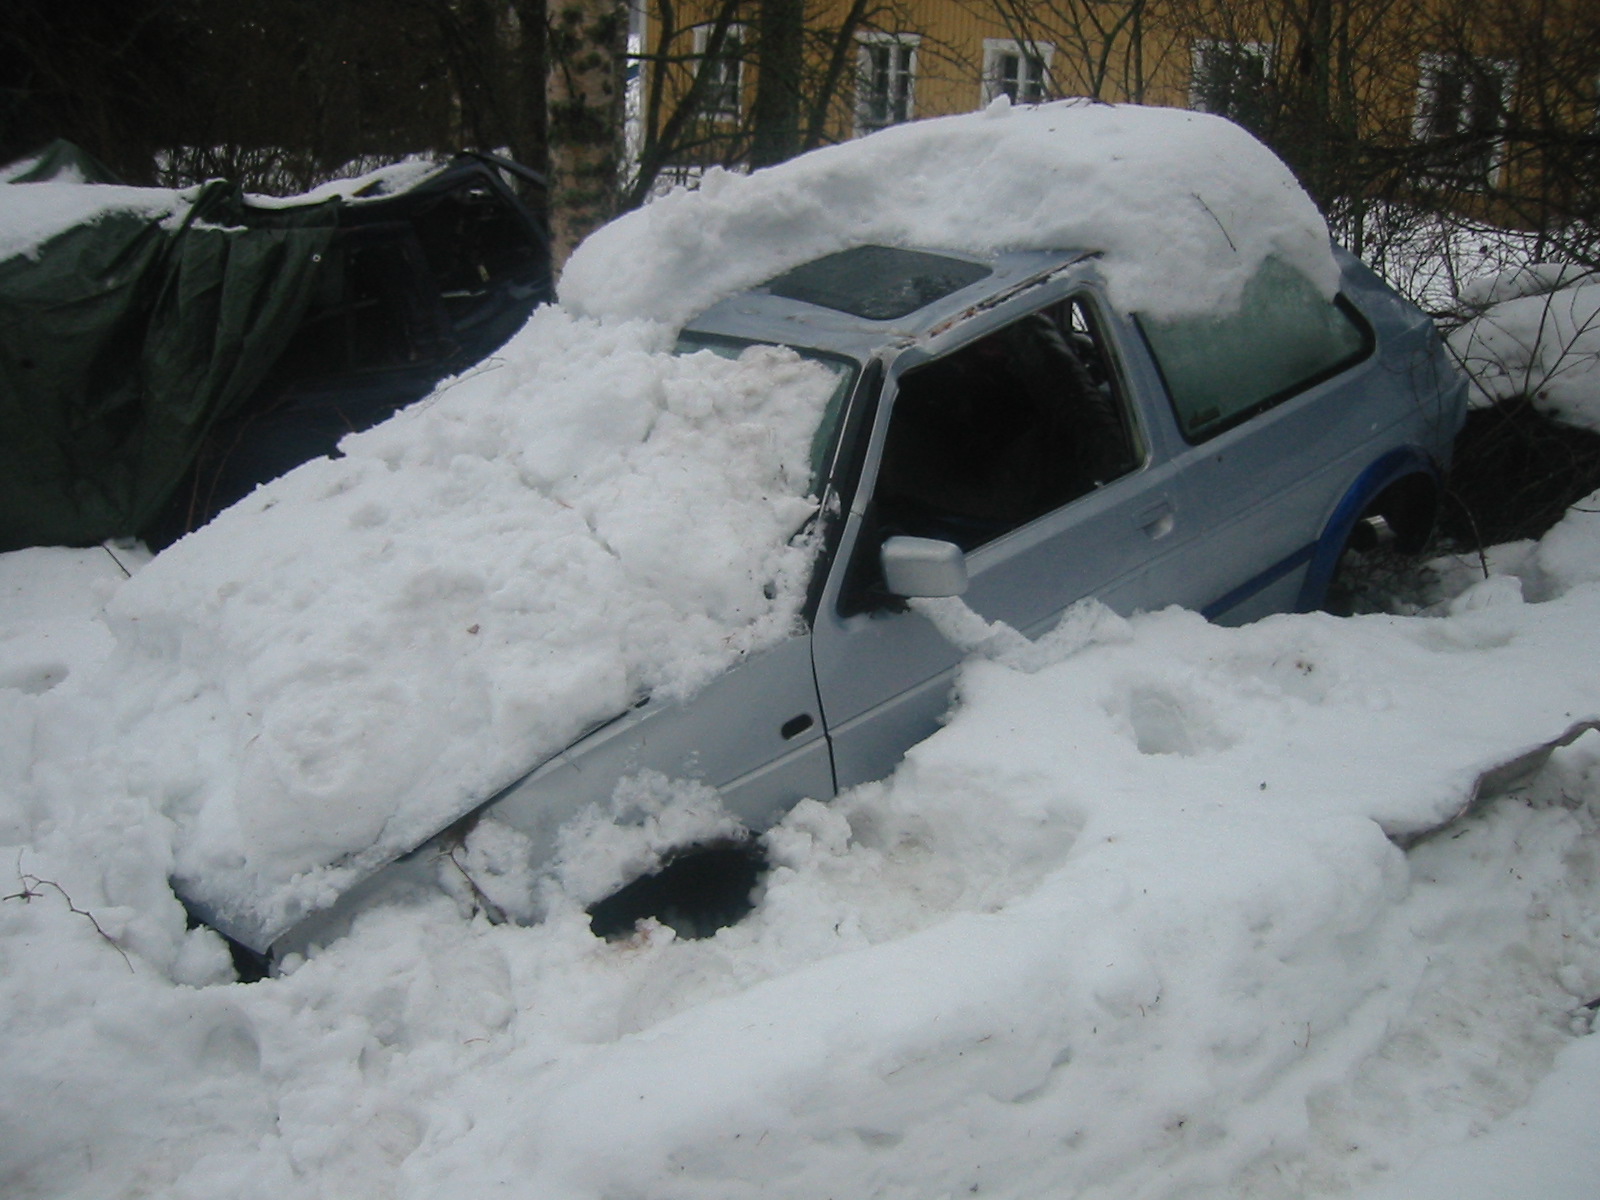
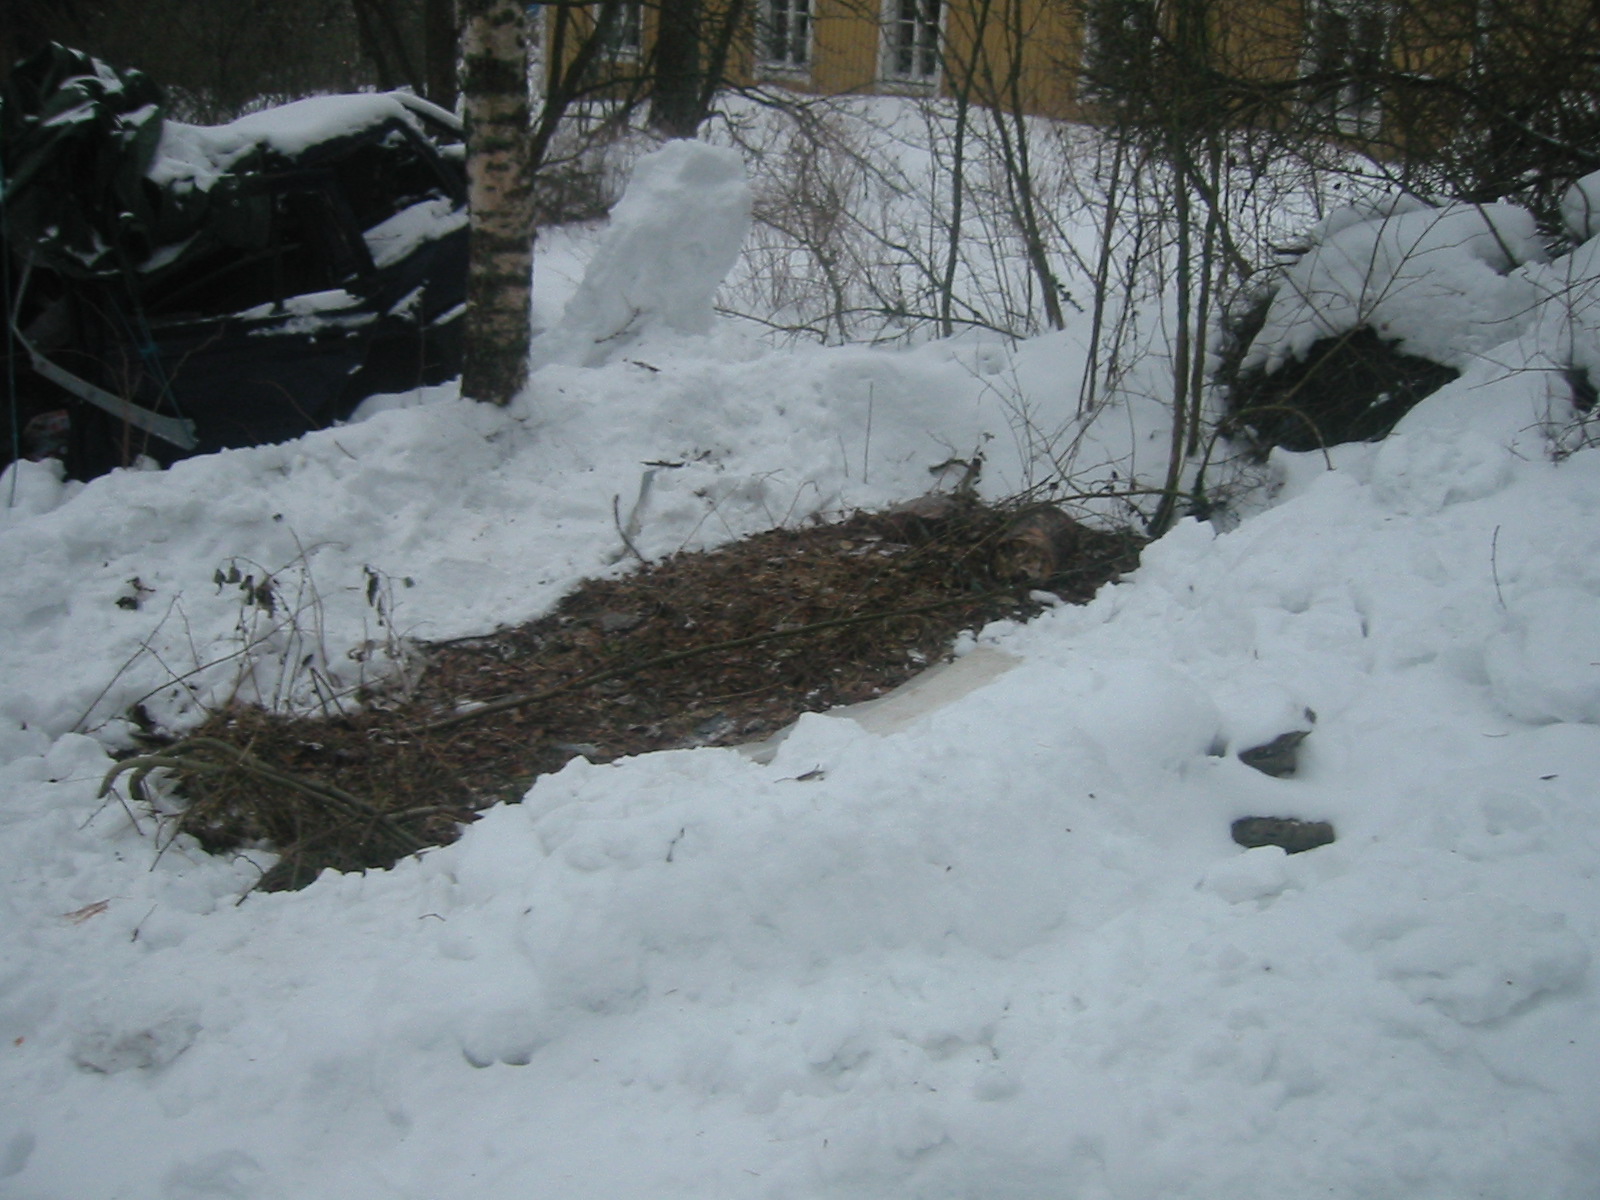
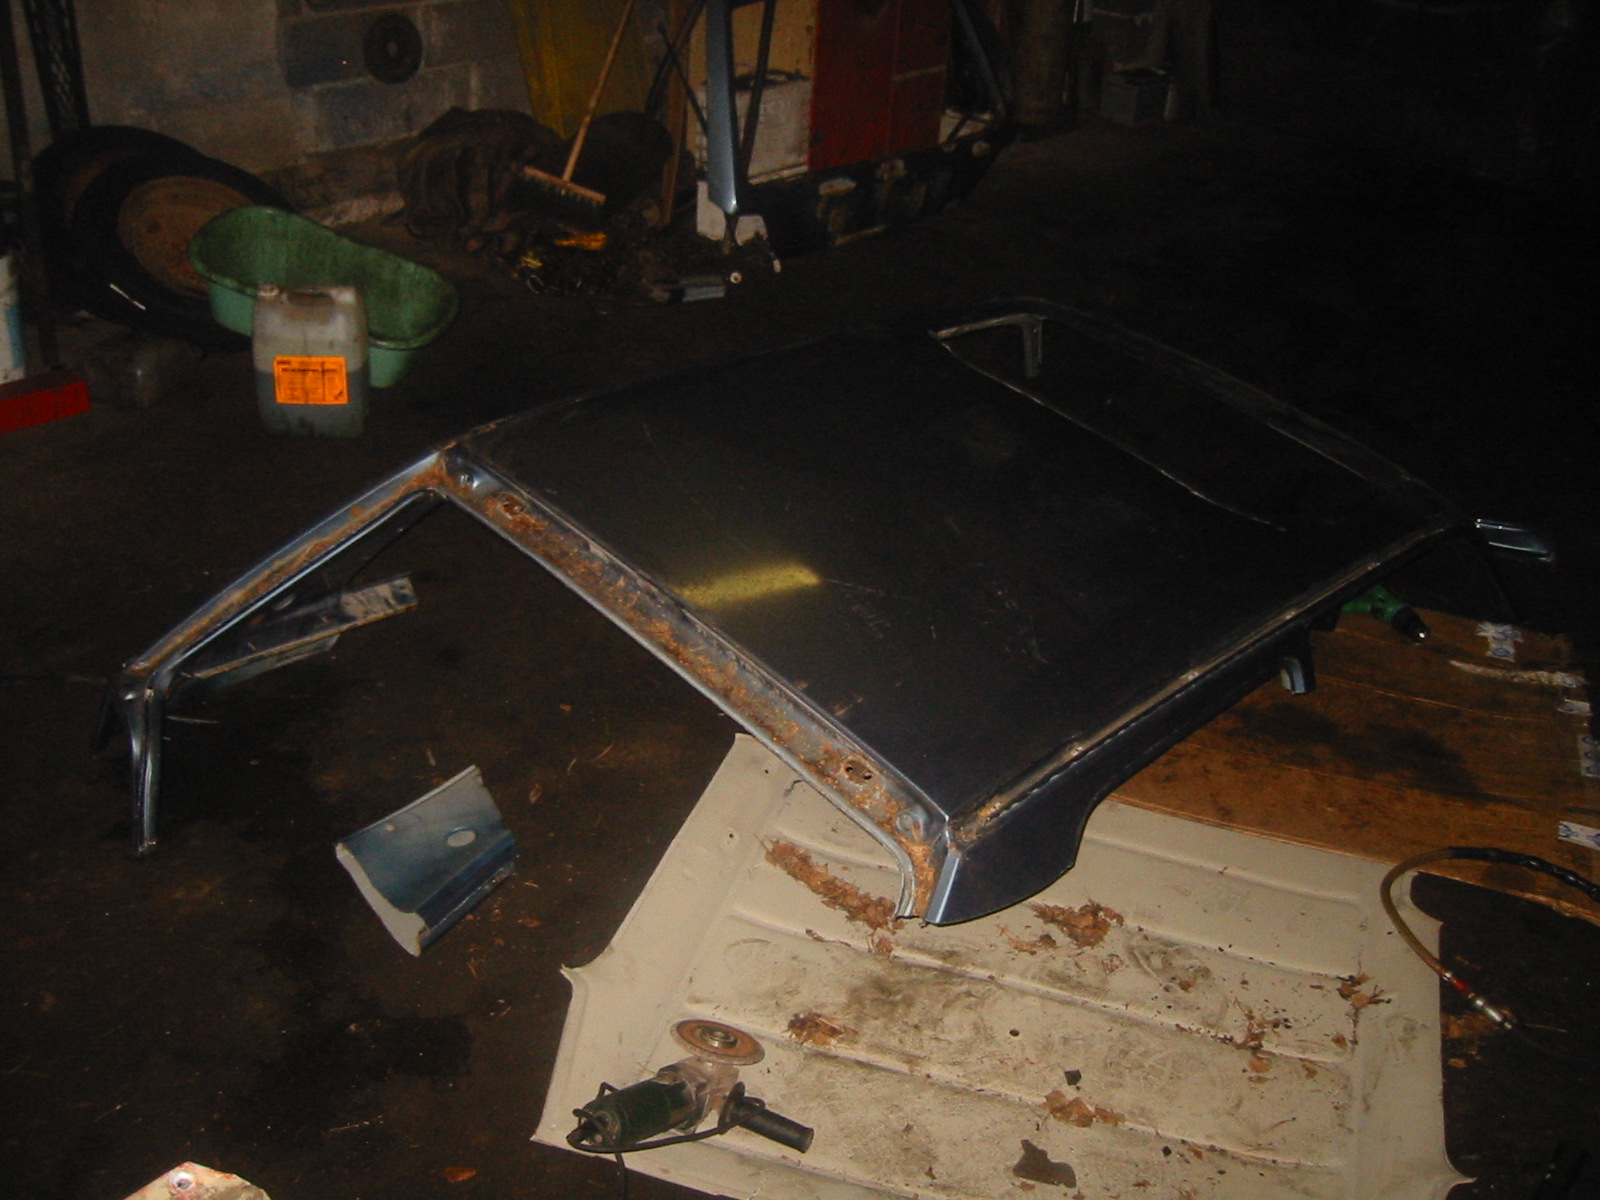
Yes, after the doors it was finally time to tackle the body itself, starting with a straight replacement roof. Luckily there's a suitable donor up on the hill, completely rotten underneath but with a usable roof. So Pekka went back to work with a hacksaw: no point dragging an entire car to the garage just to remove its roof.
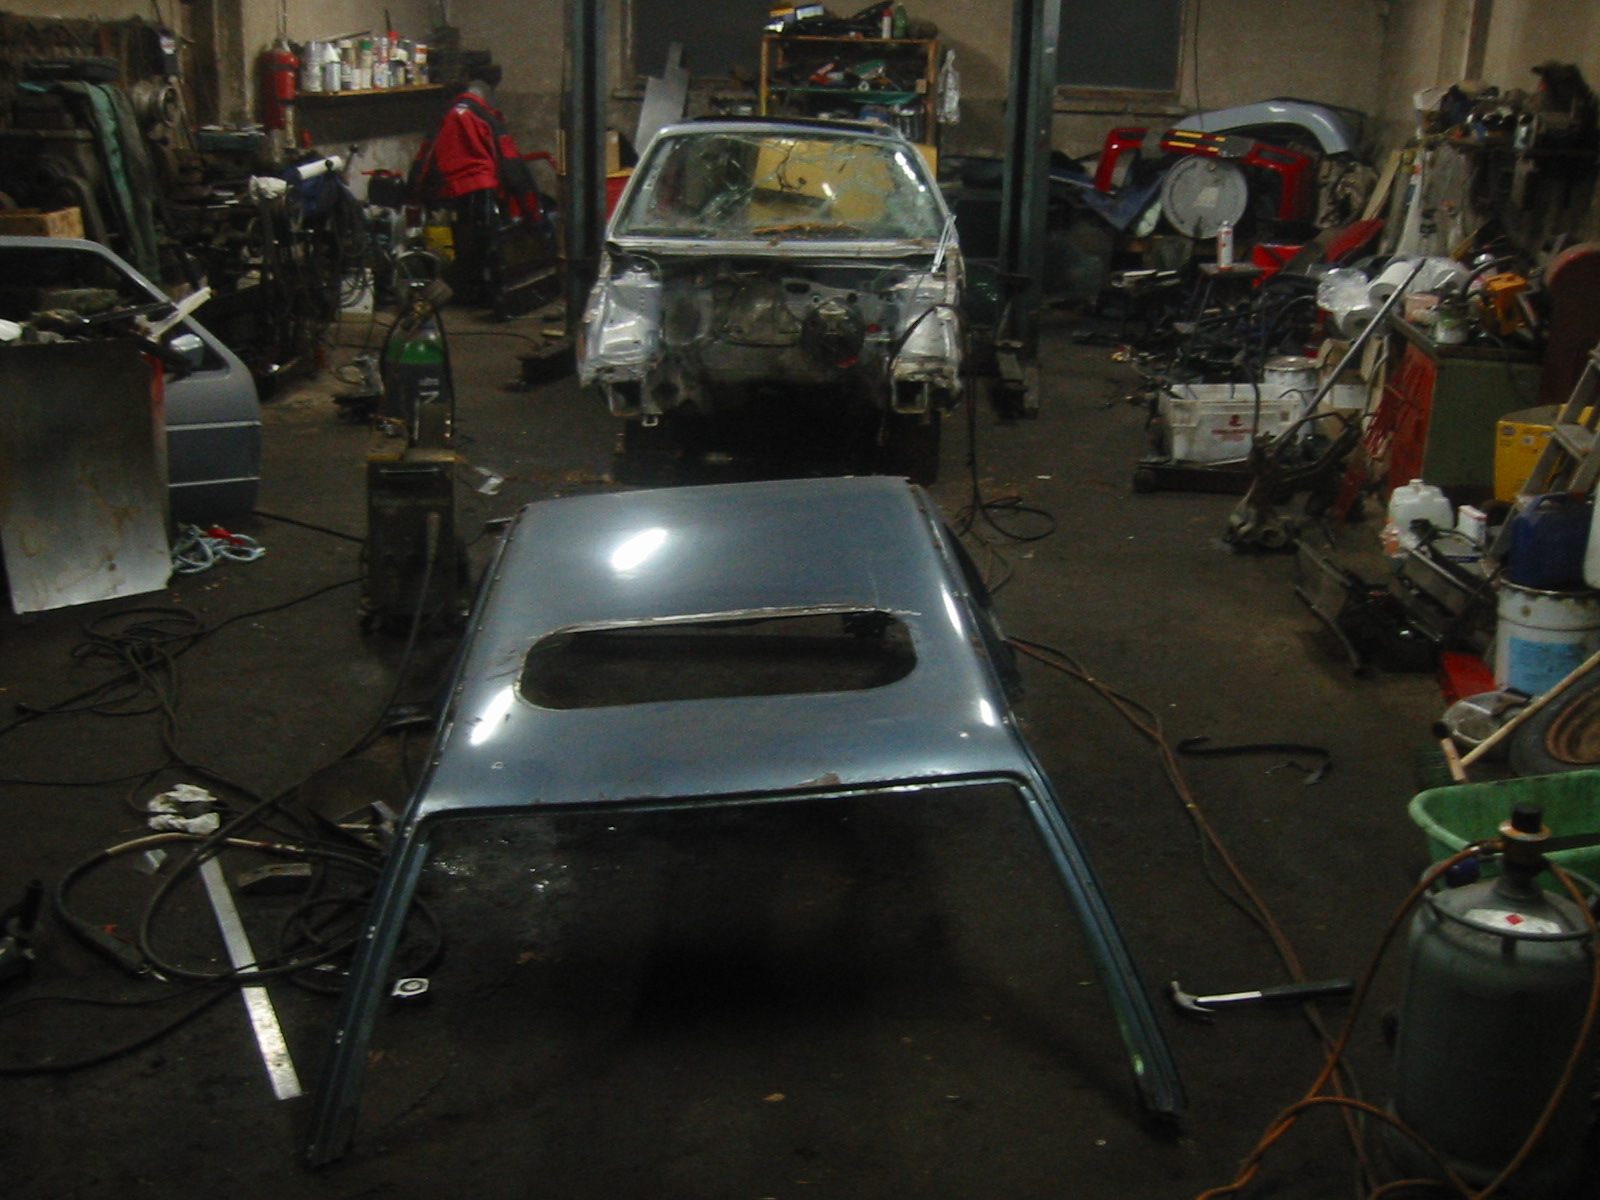
There they are: roof and car, both finally in the garage.
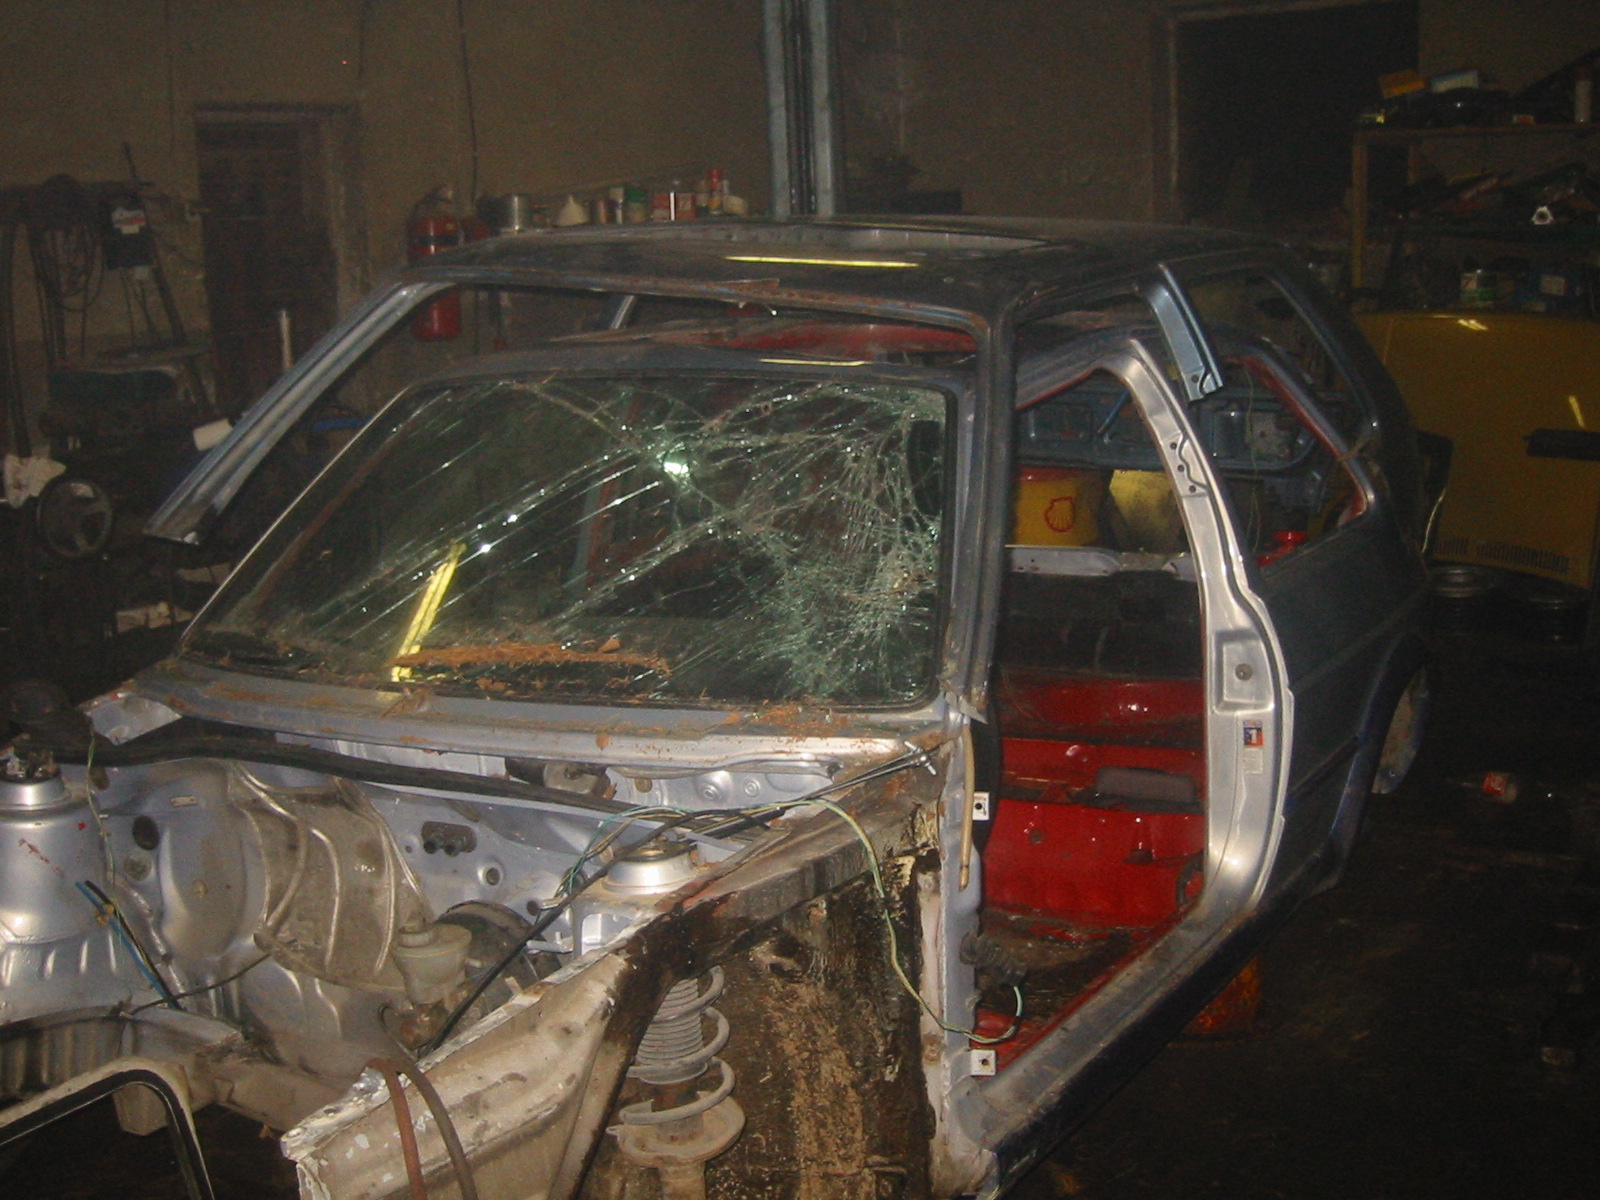
Hmm...
Roof — part 2
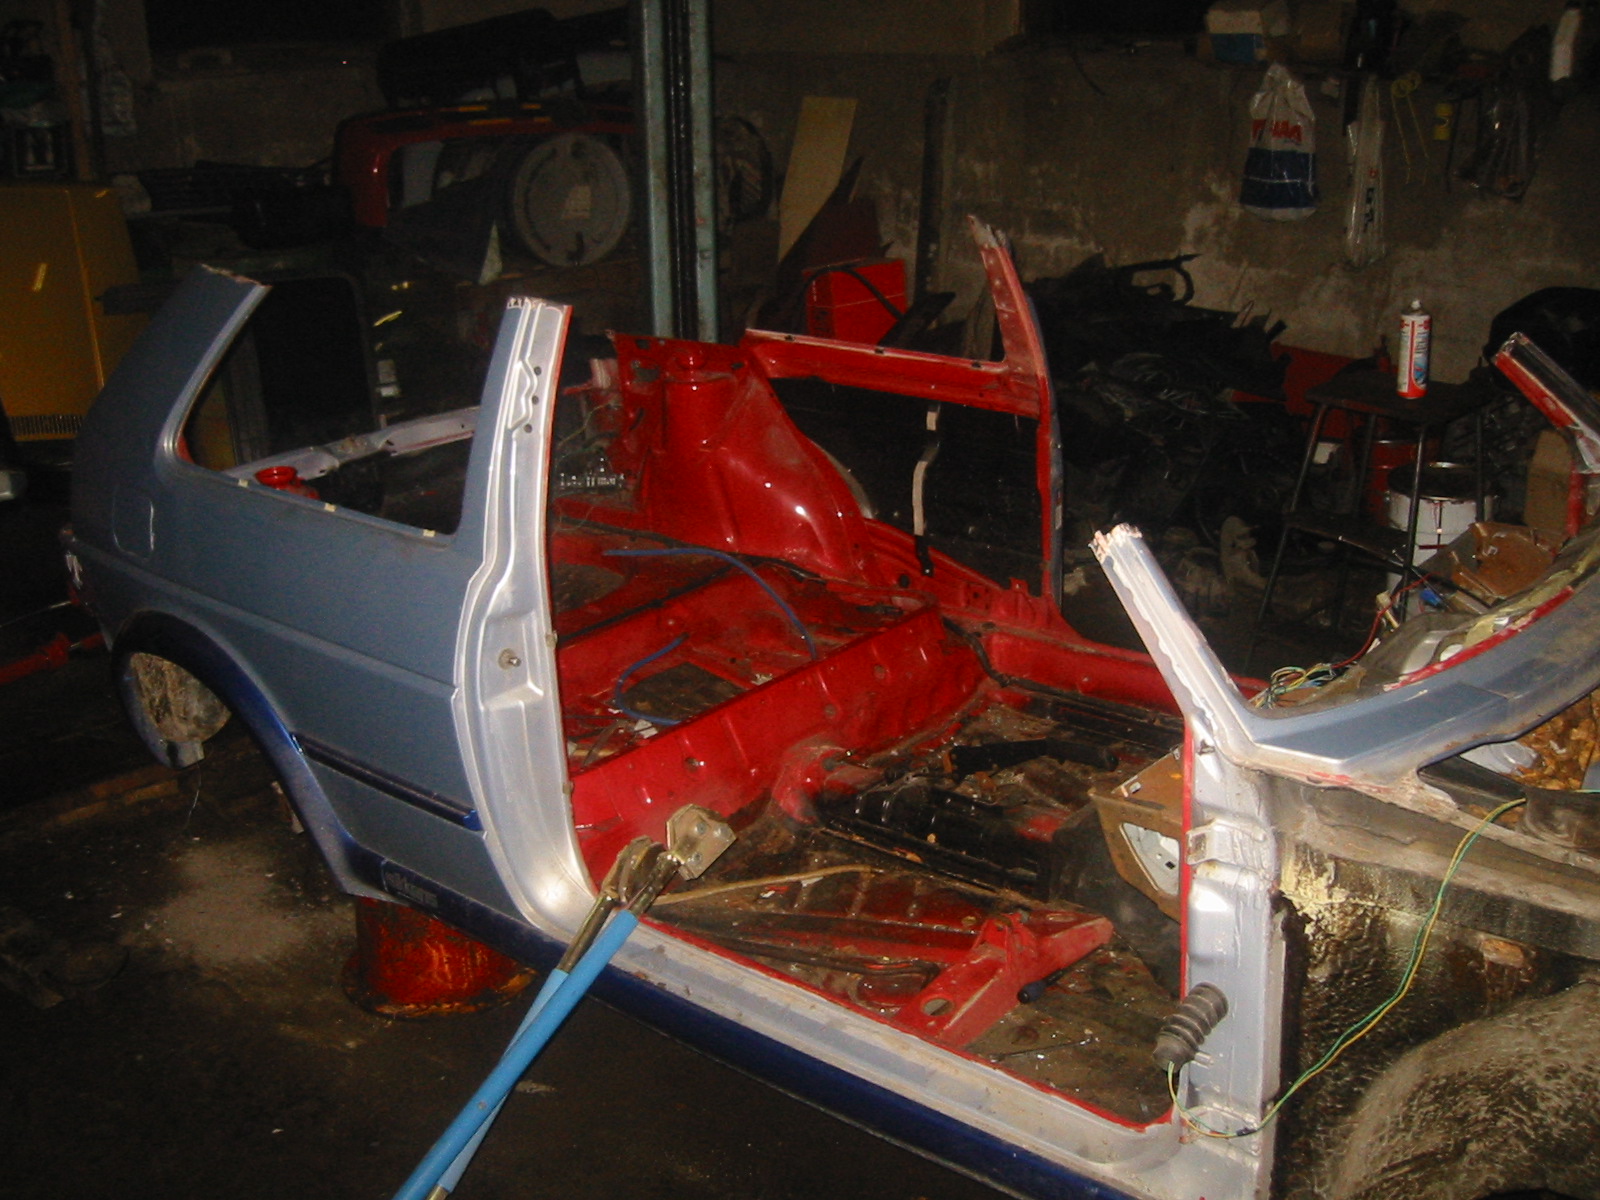
Some of the leftover scrap. The blackened part of the roof will be explained when we get to the sunroof.
Time for the saw again.
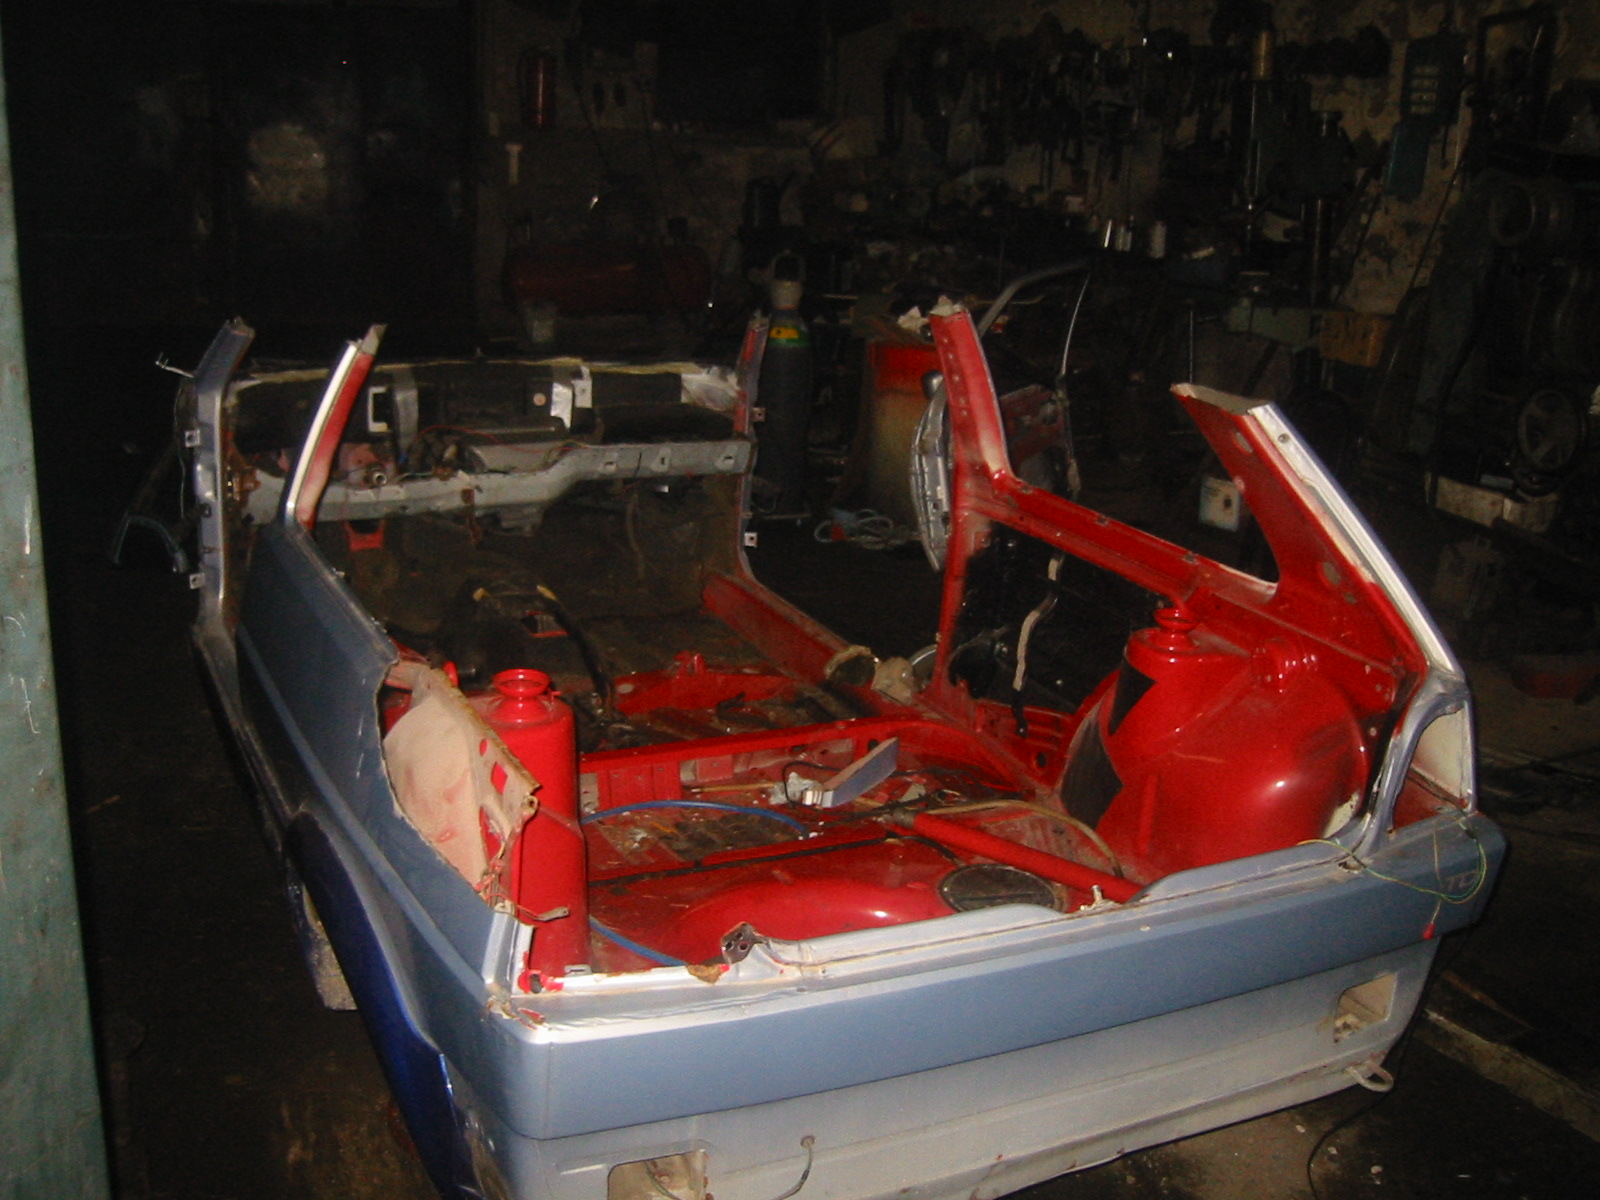
The same from the other side. A larger section had to come out of the left rear corner because it was more badly damaged.
The excess is cut from the roof... More fettling: trim, try, measure, and eventually the roof sits in place.
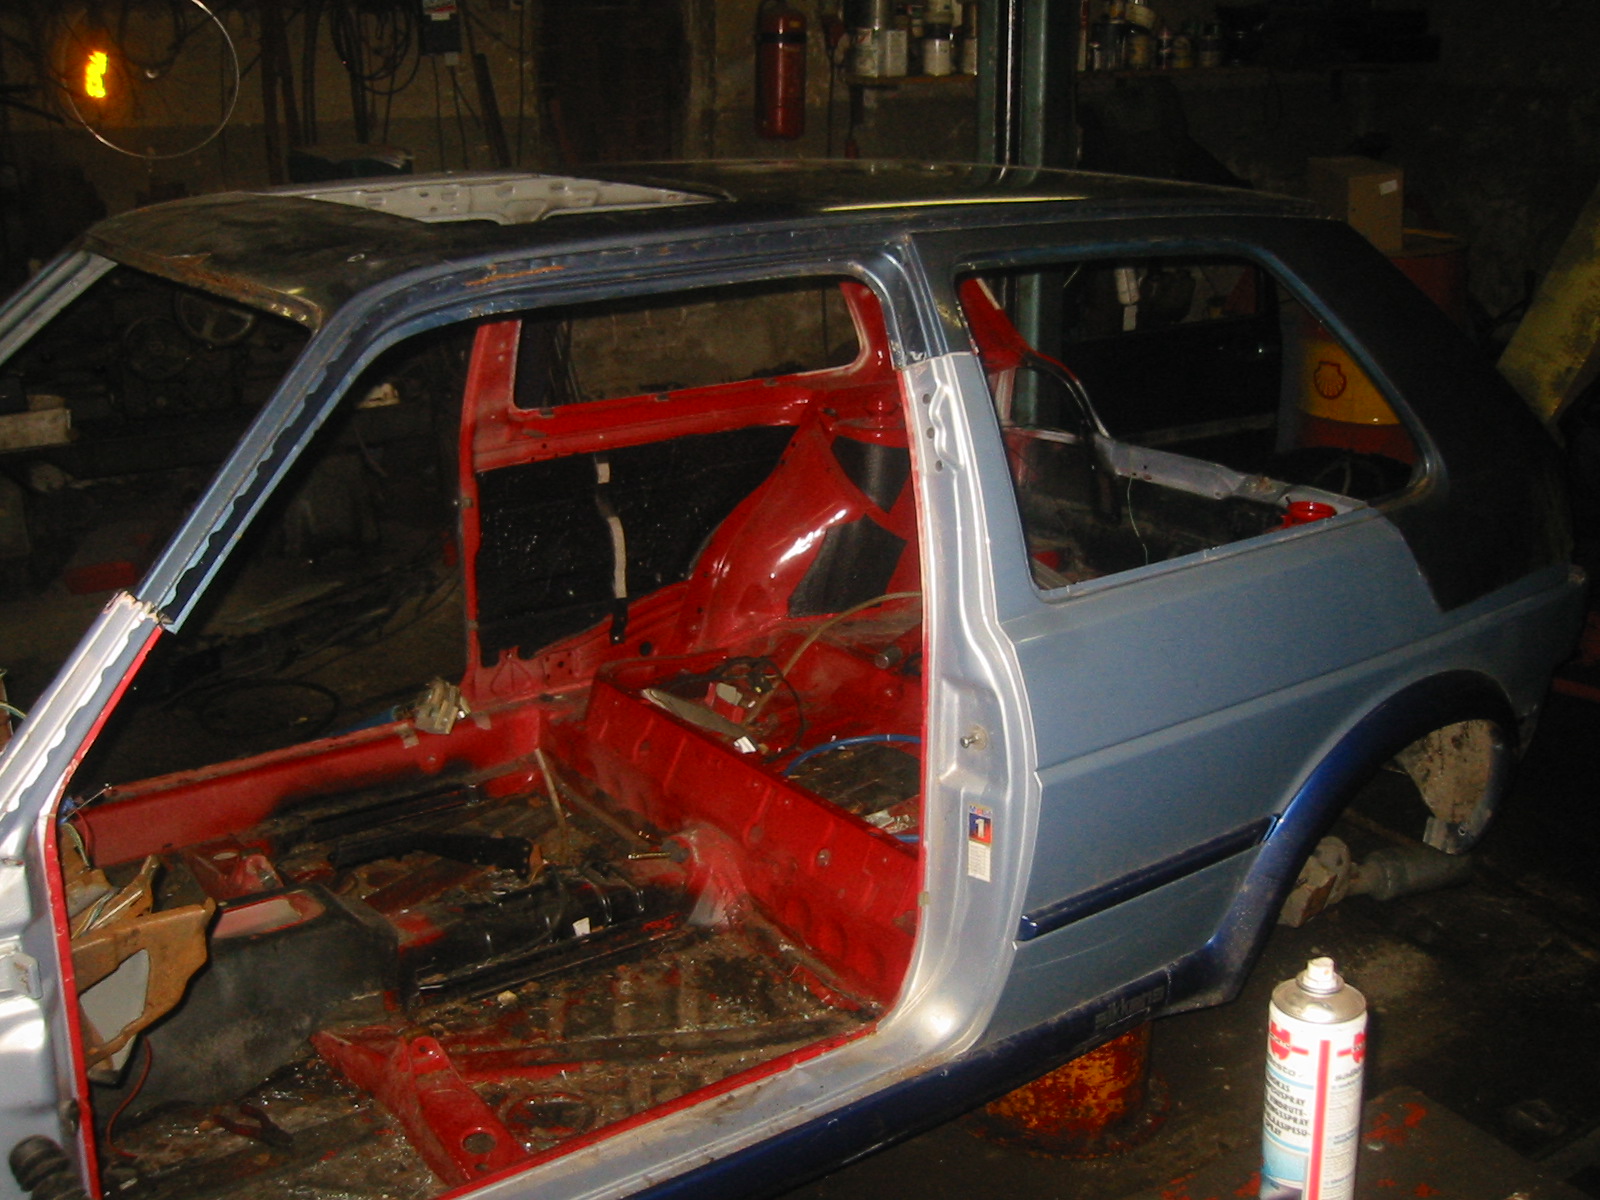
A couple more photos of fitting the roof.
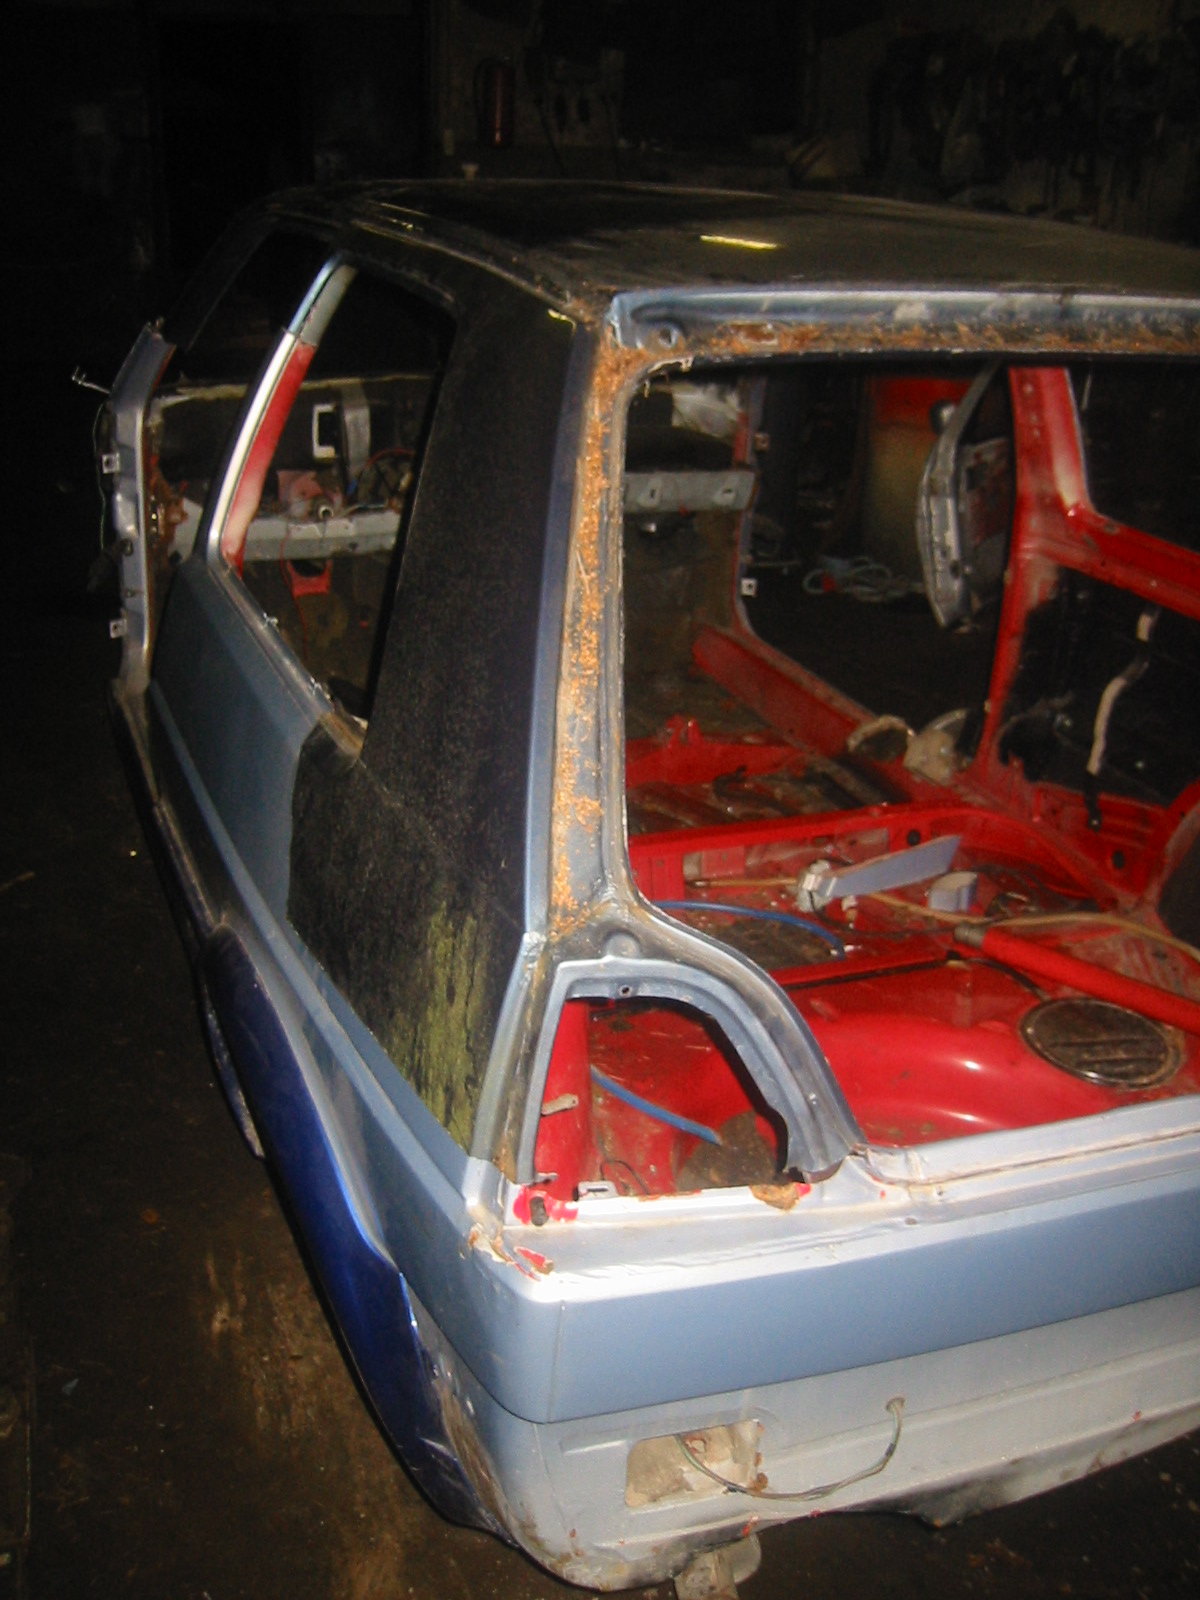
As you can see, there's still plenty of extra metal on the roof section here, to be cut away.
Roof — part 3
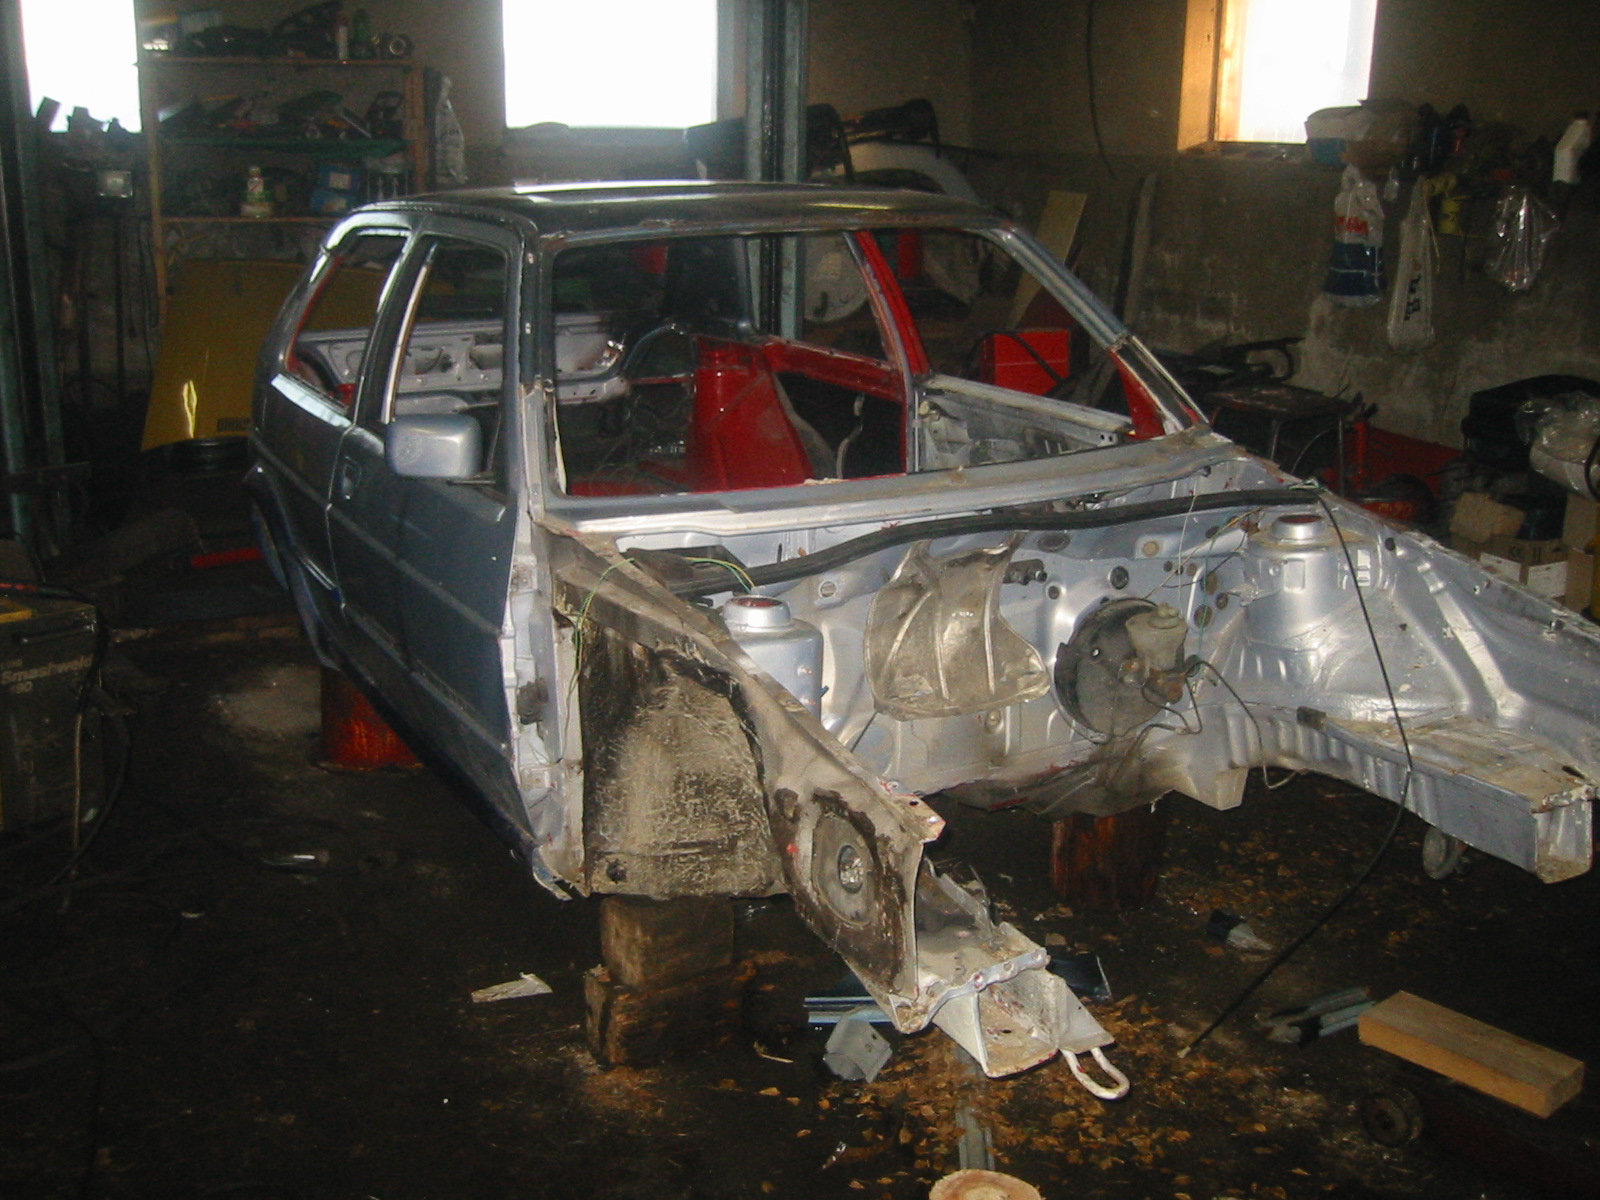
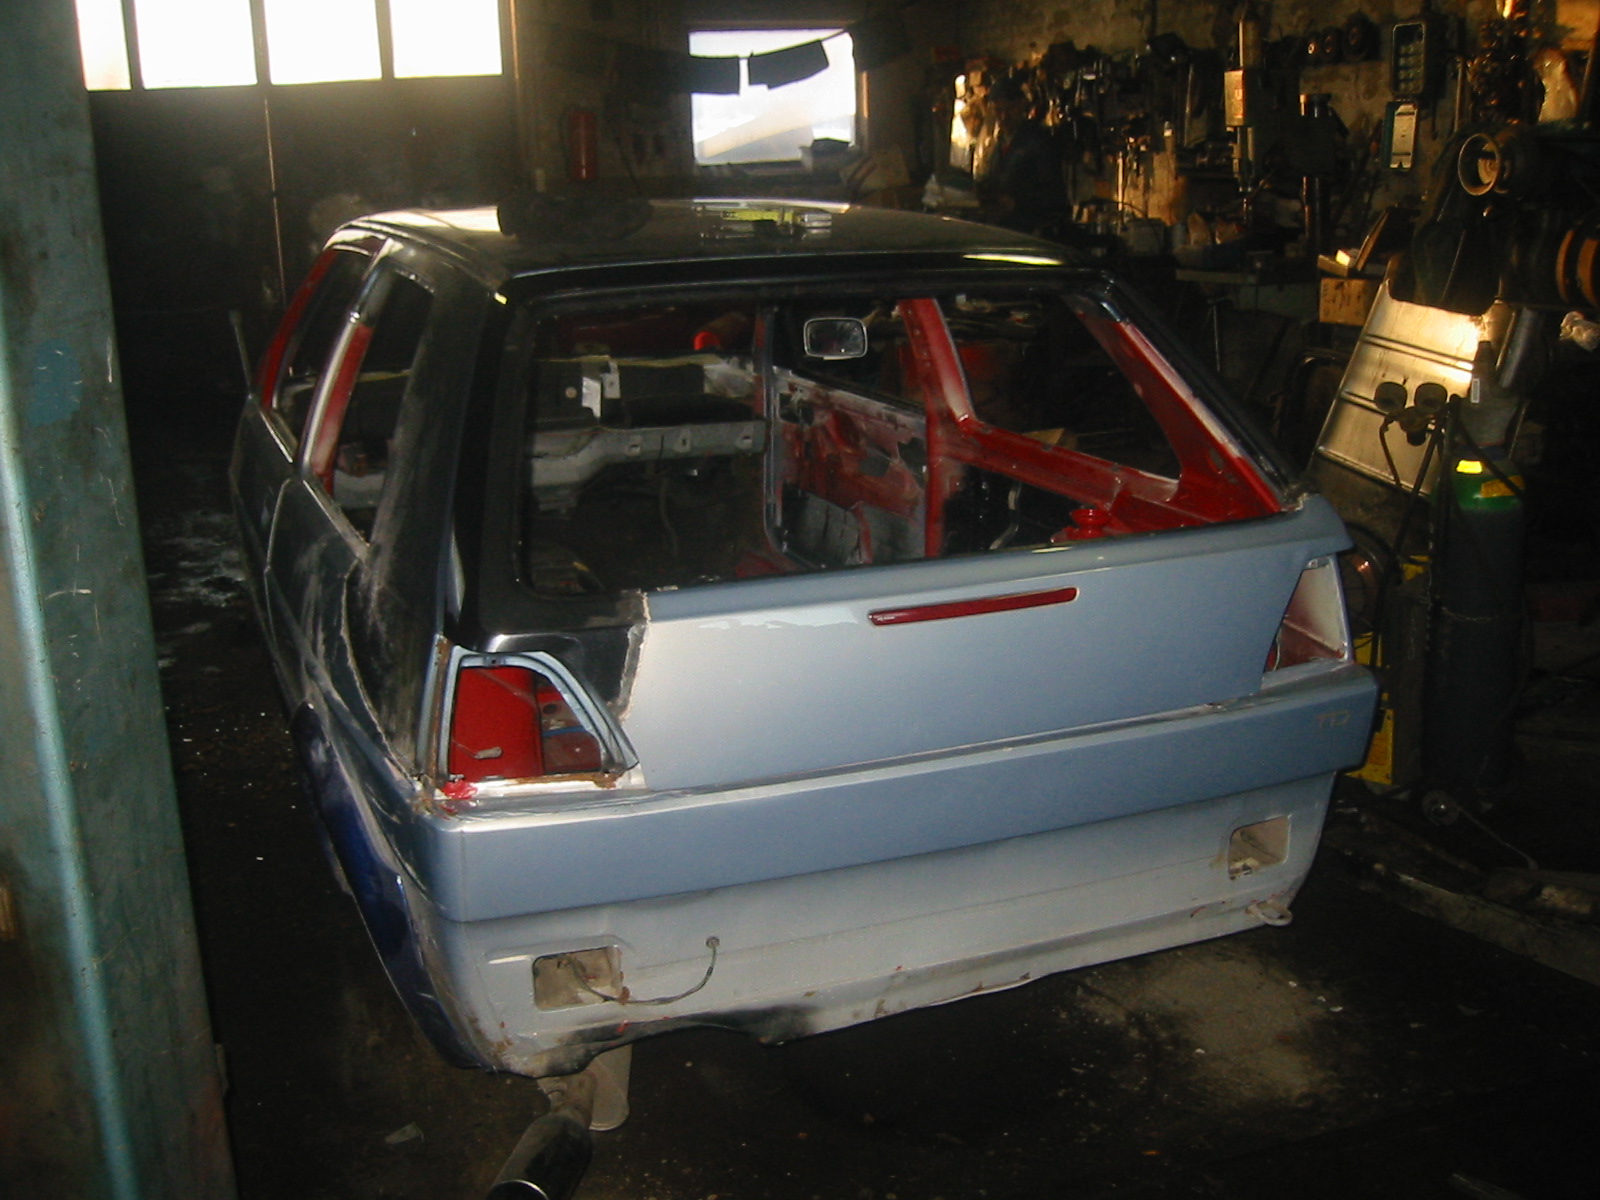
The roof is now tacked on and we can try the doors and tailgate. This showed how well the left door and tailgate repairs had worked... They still needed a little tweaking, but fitted surprisingly well!
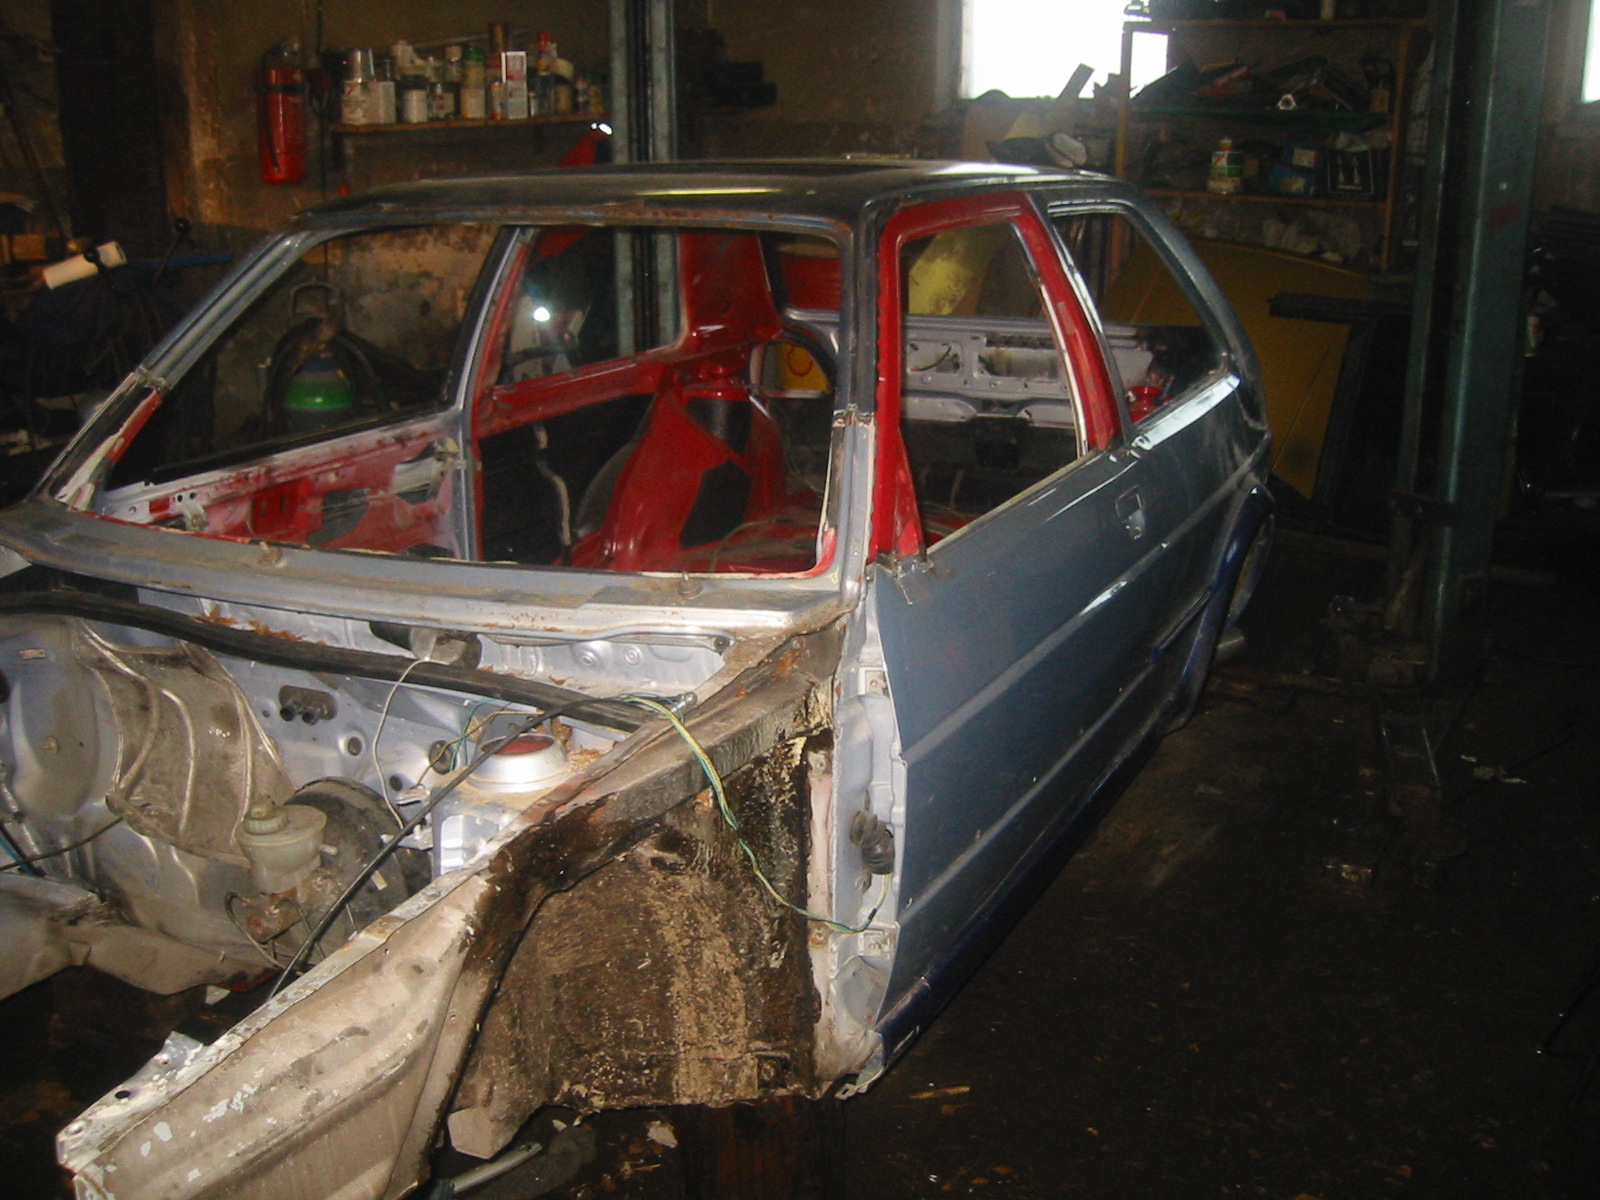
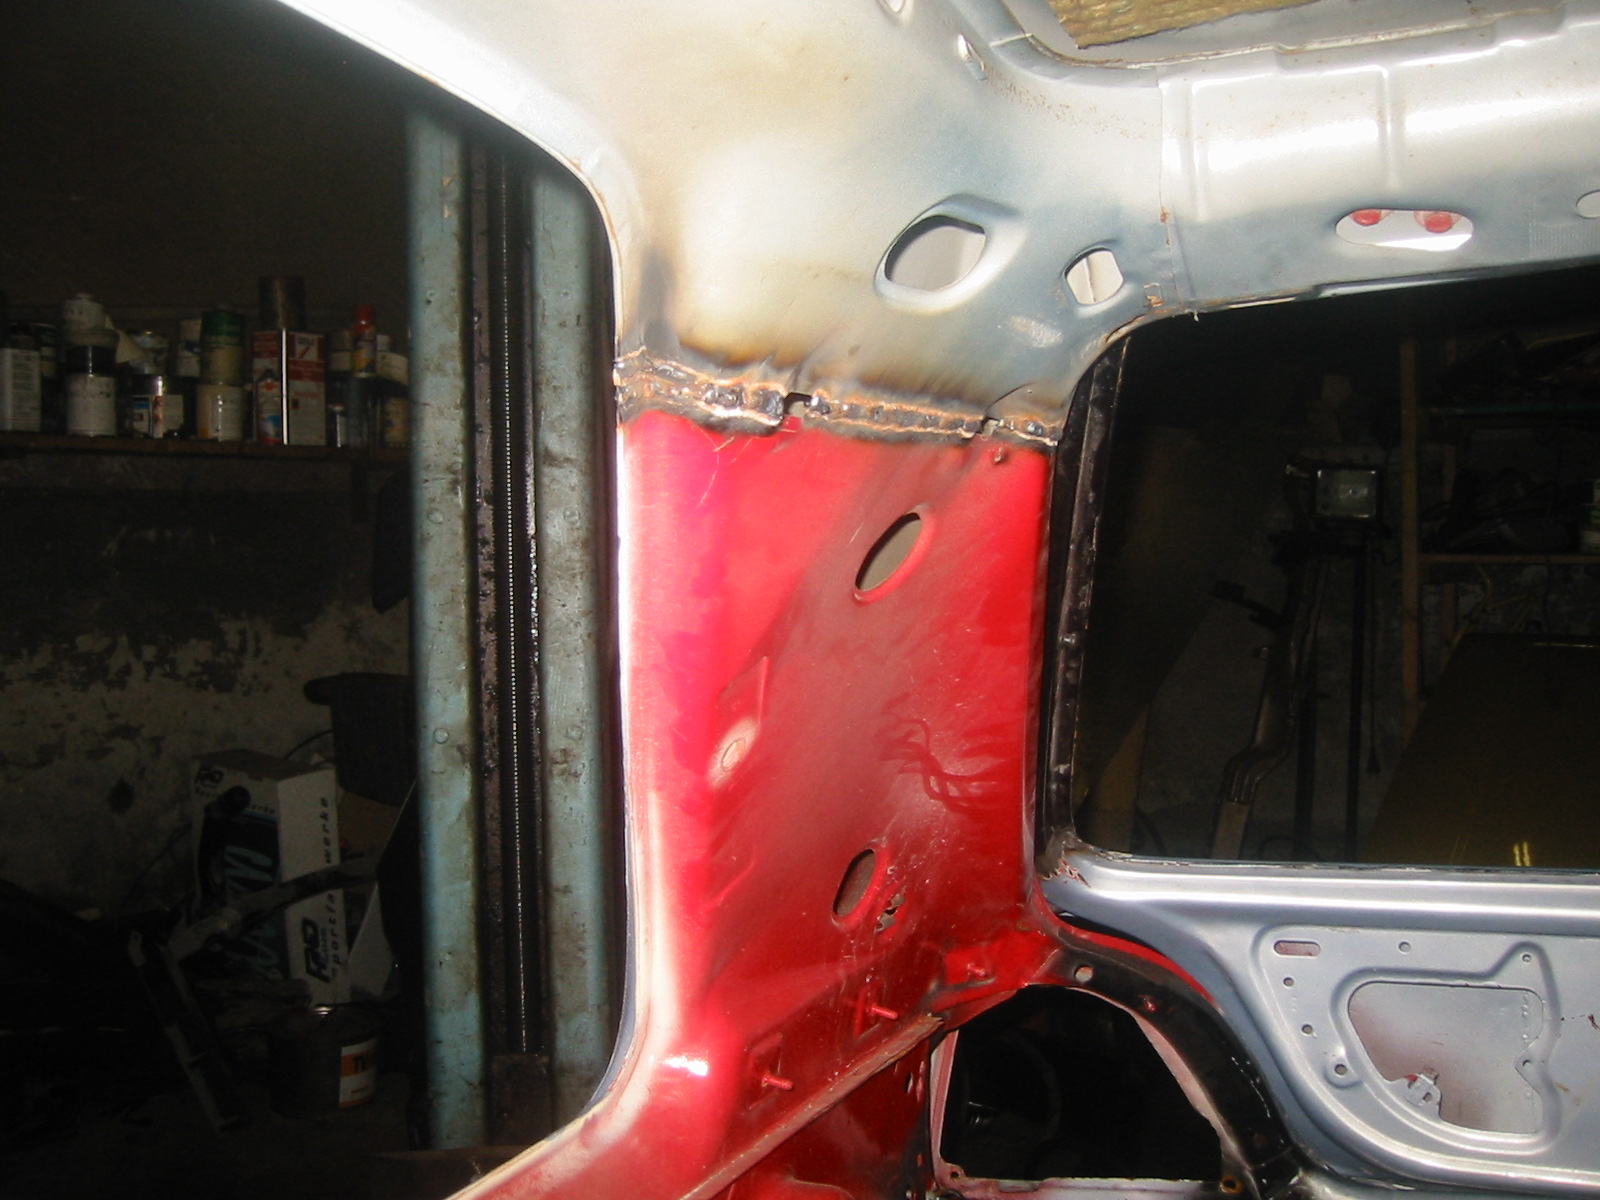
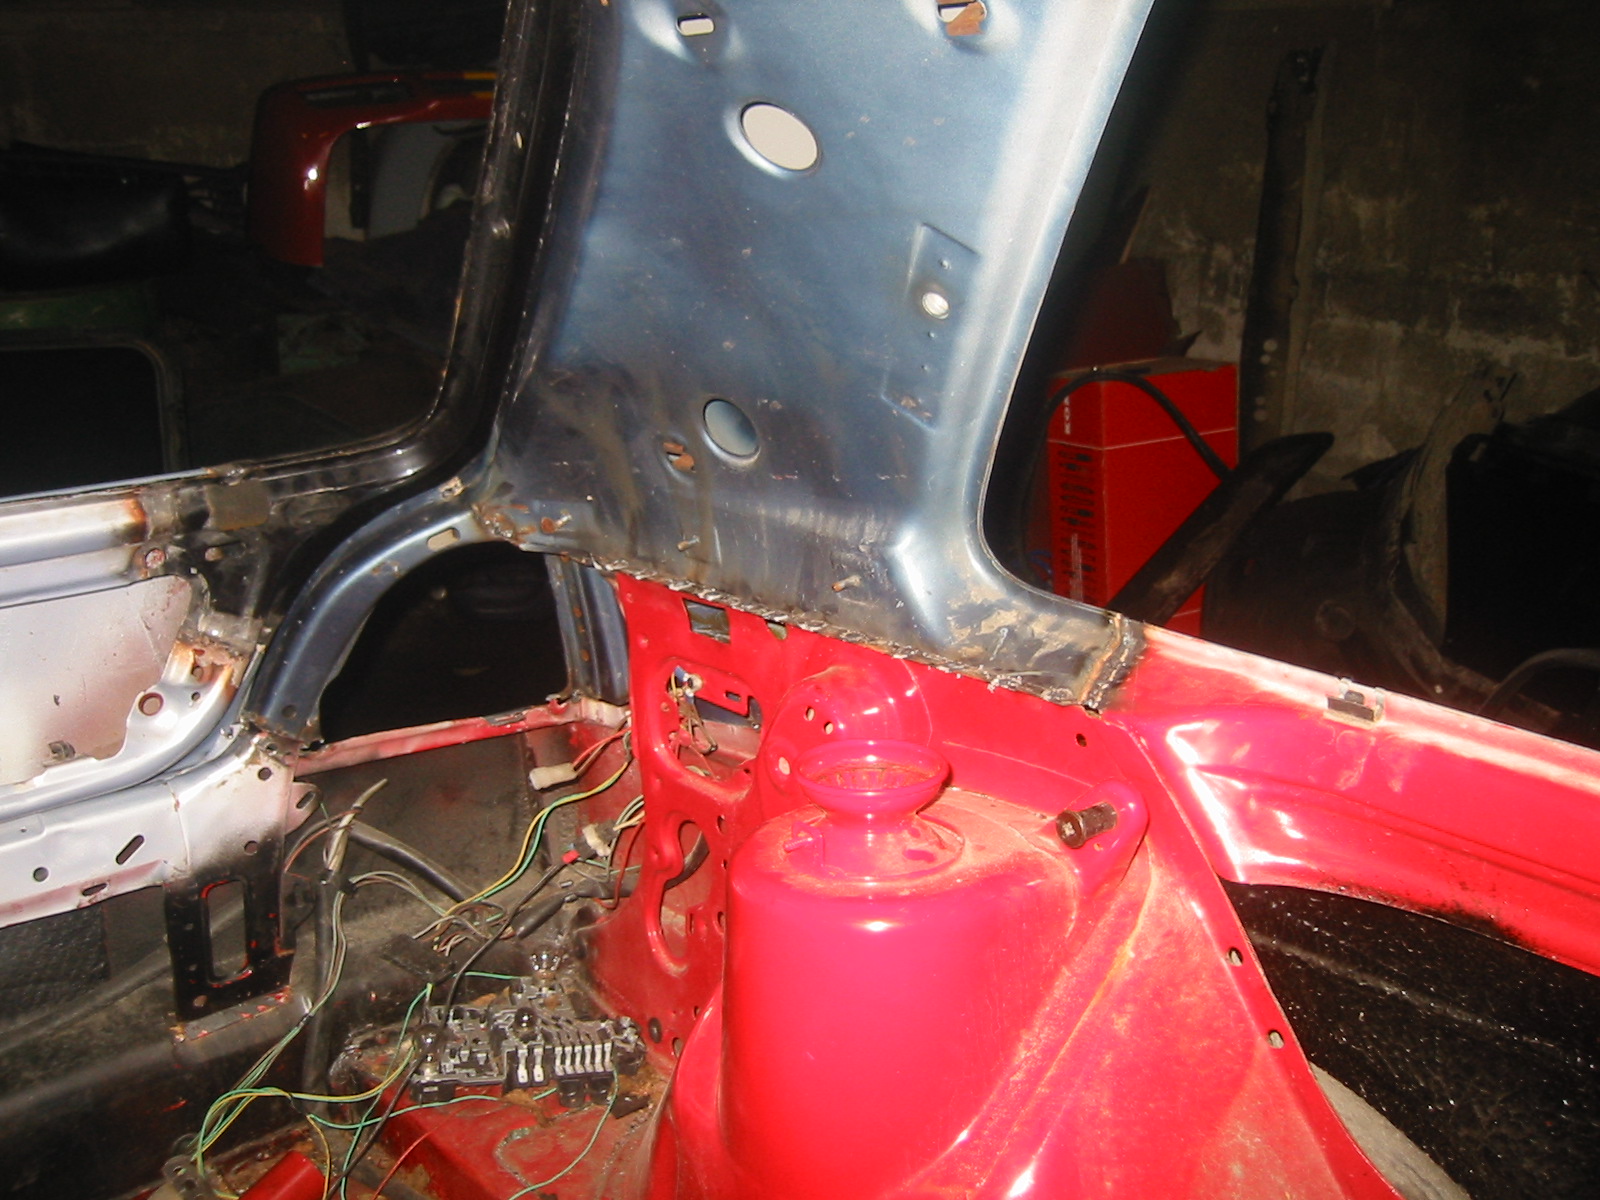
Then the seams are fully welded, starting inside. The left rear corner picture clearly shows where the inner seam runs.
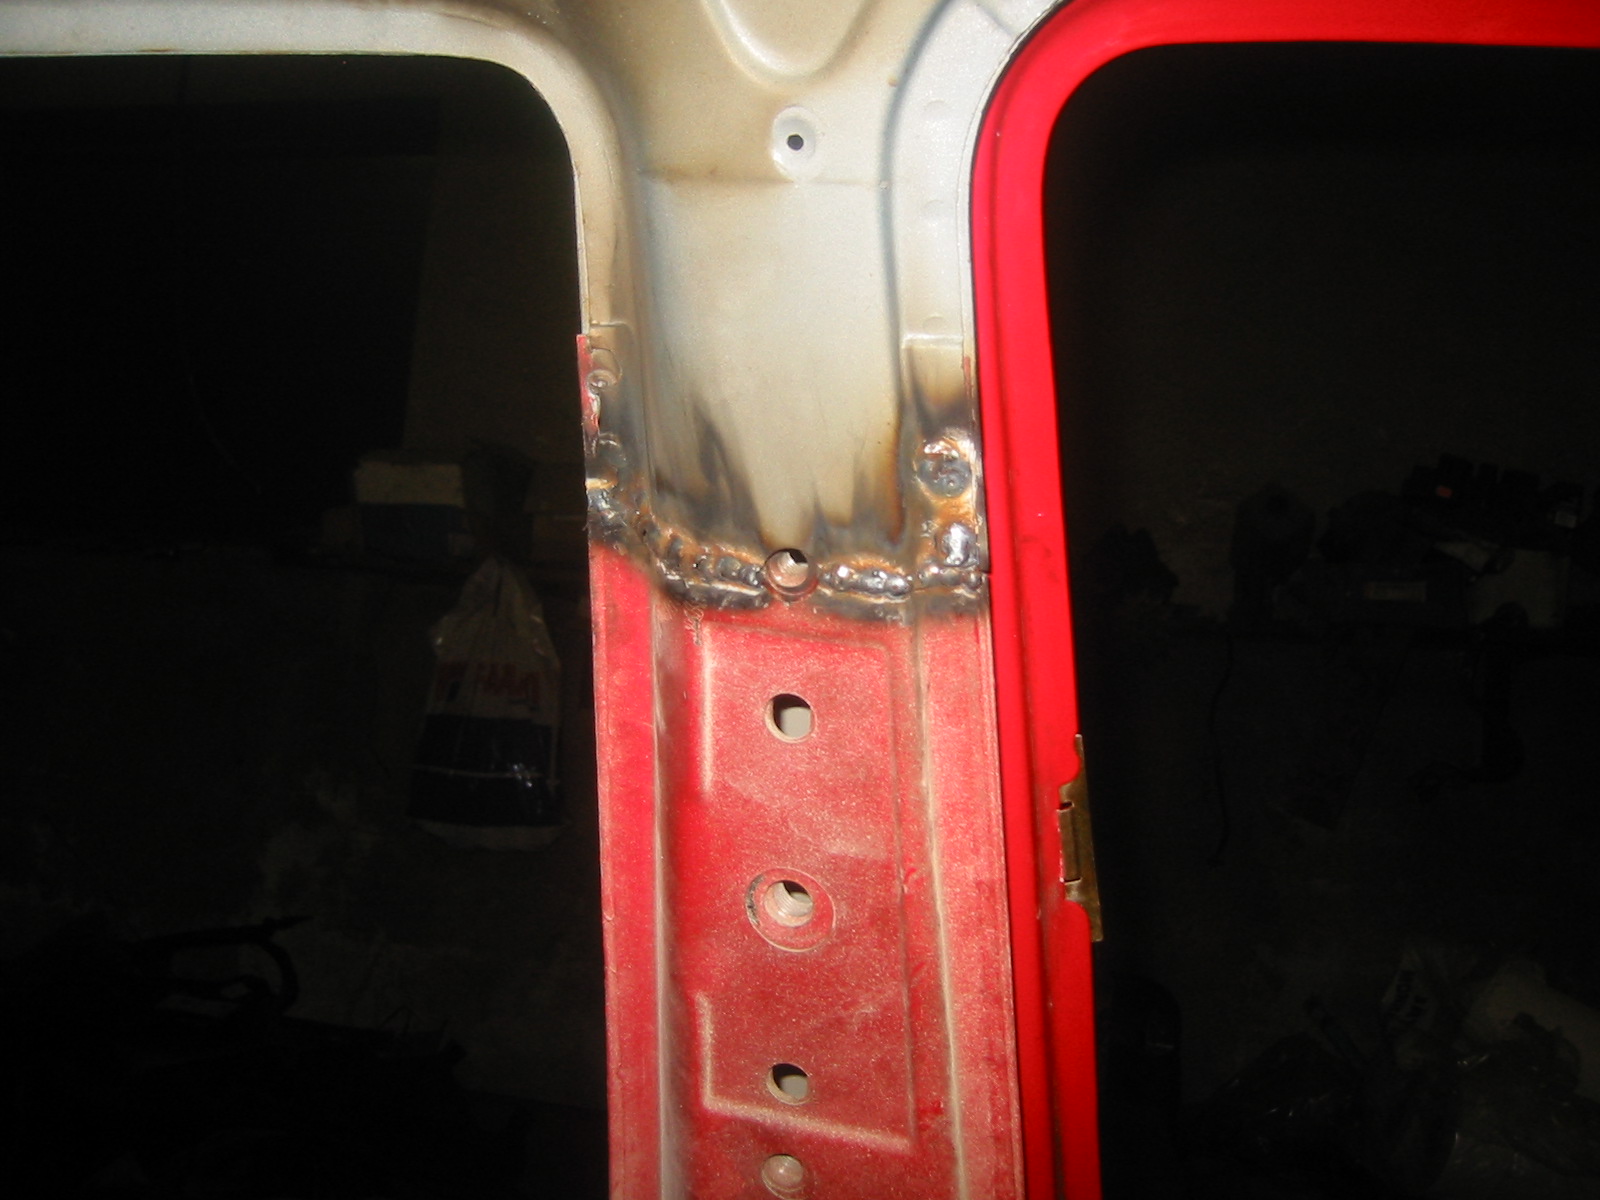
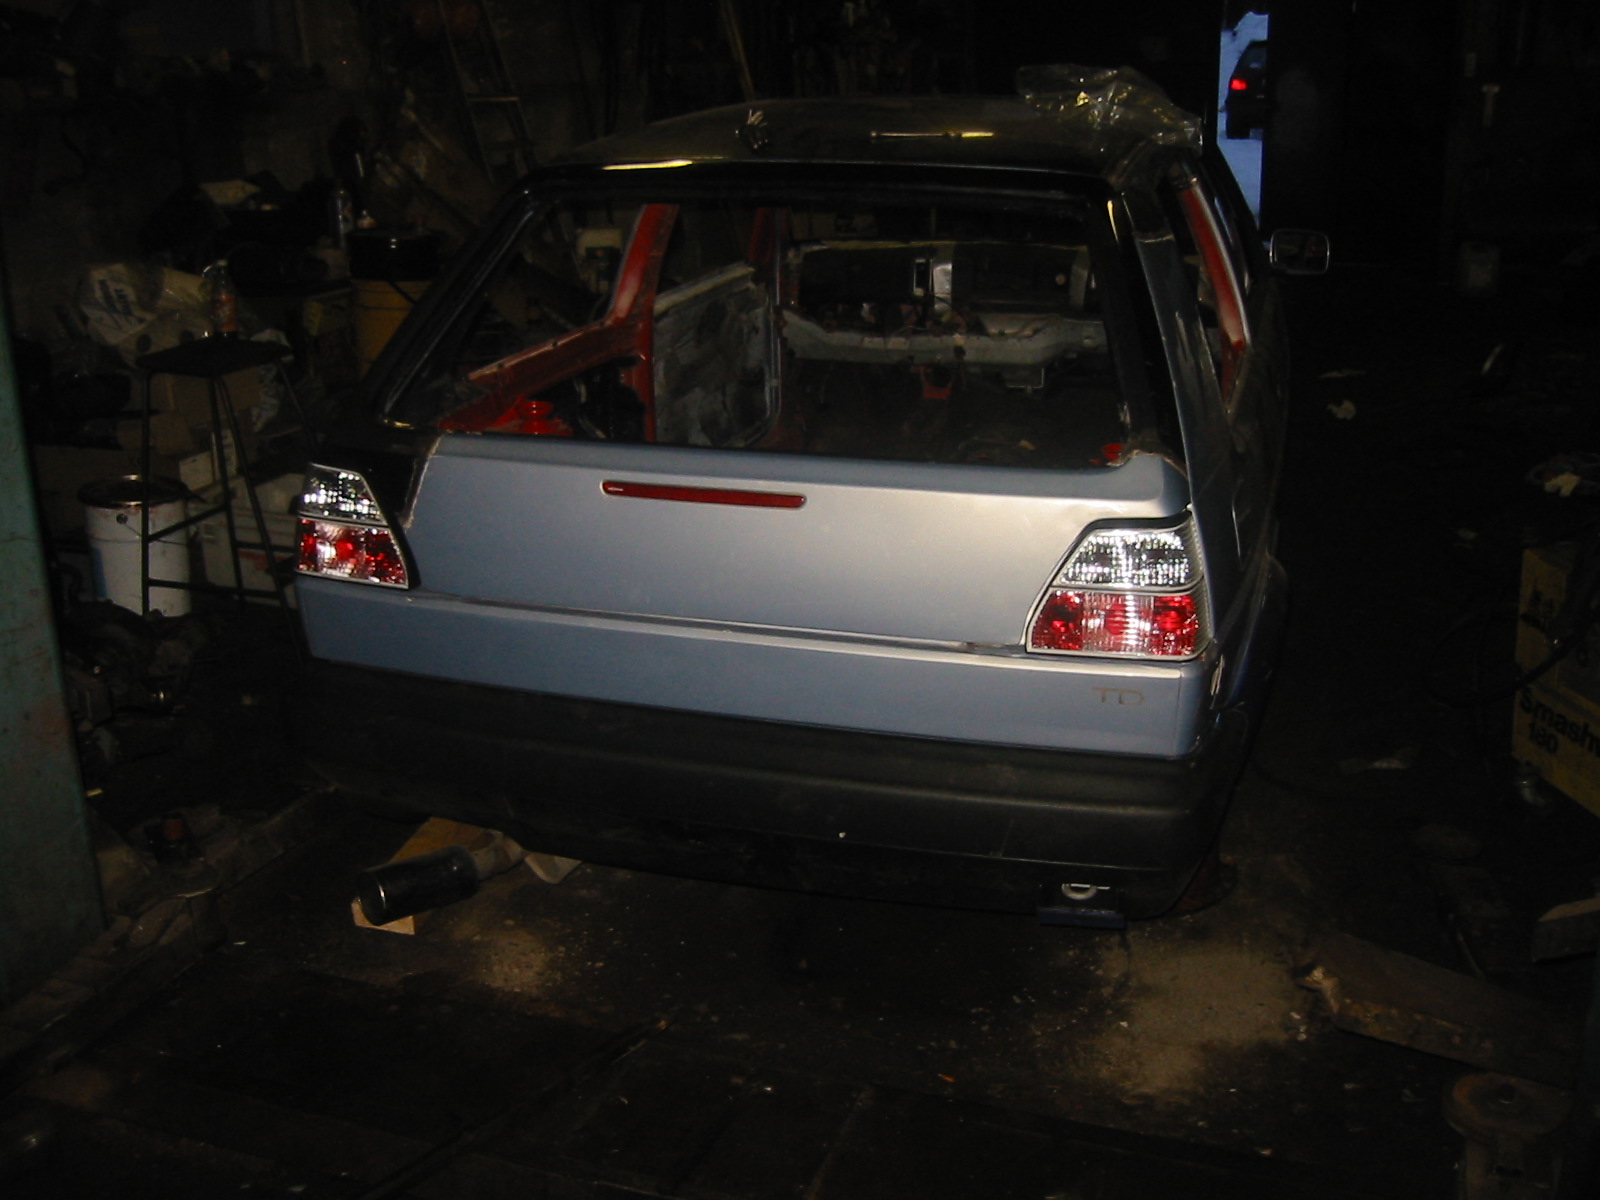
We had to buy the tail lights already to make the final adjustments to the rear and tailgate before finishing the welding :)
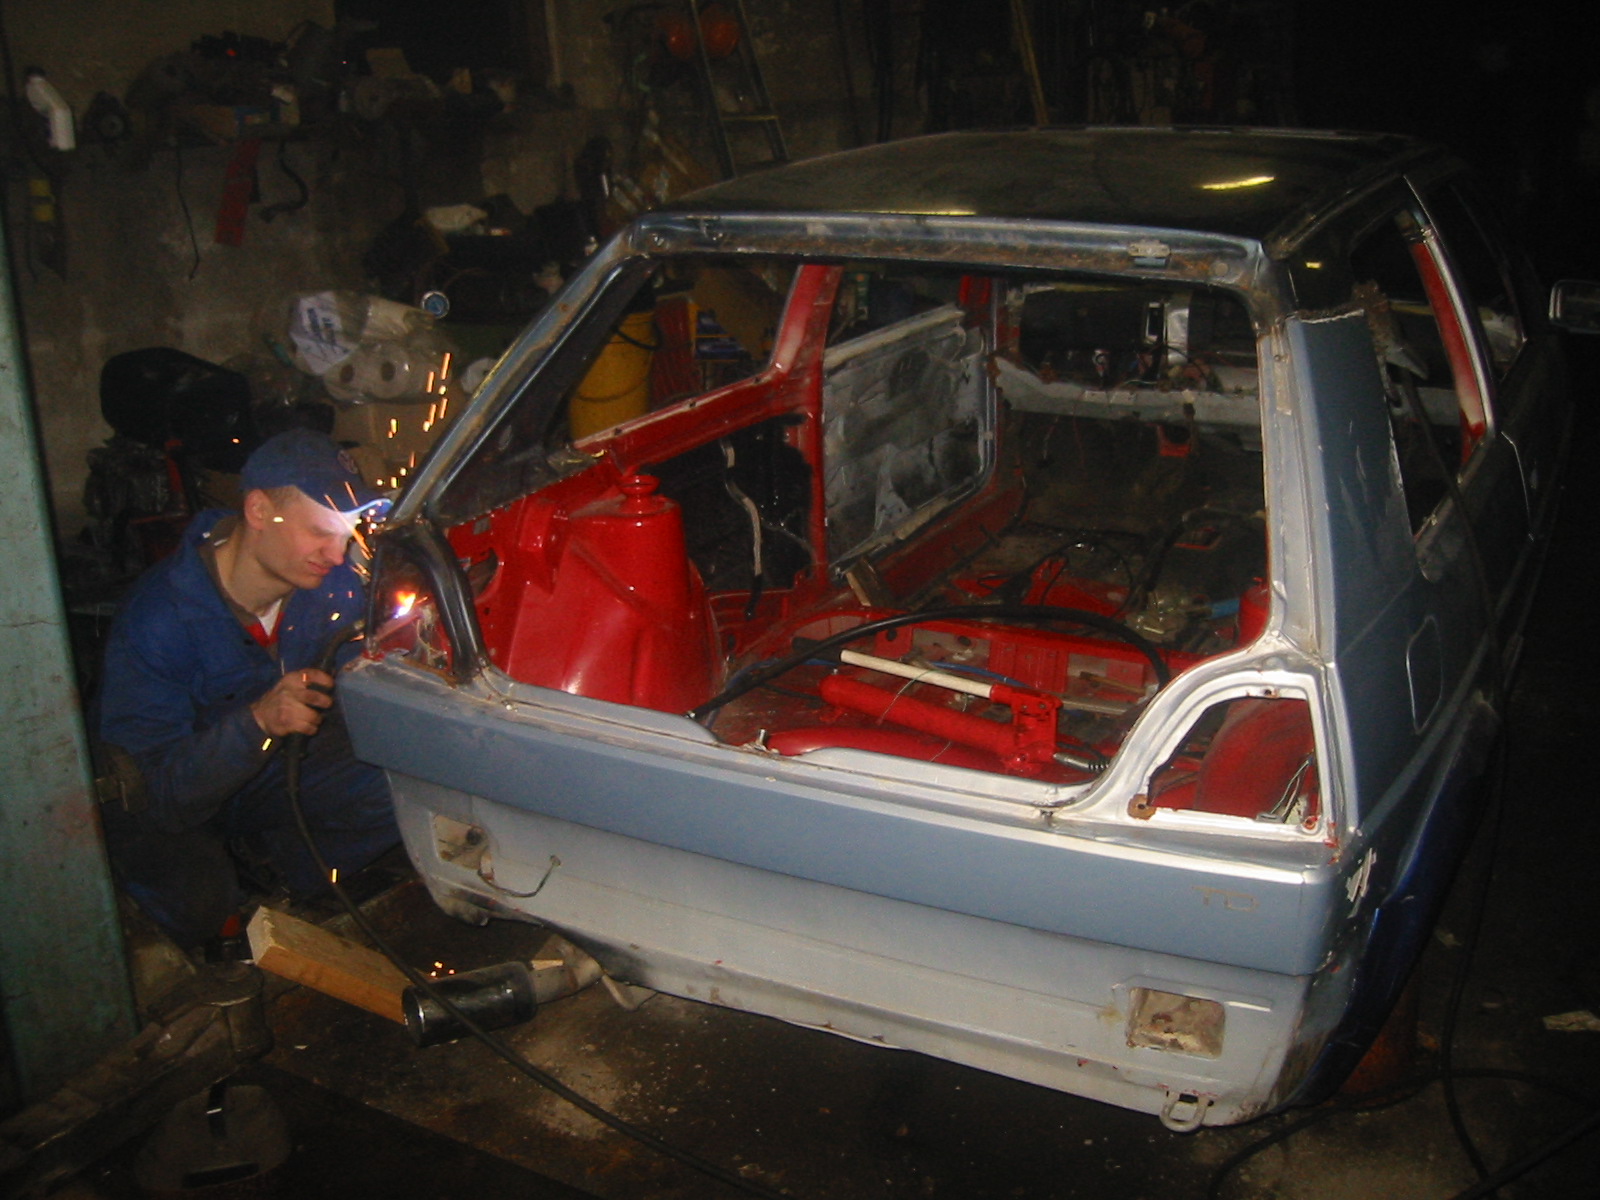
What goggles or welding helmet? Just close your eyes and weld... ;)
Actually we're only tacking the panels into alignment here. We do have a helmet for when there's more than a few spots to weld. The roof is nearly in place.
Sunroof — part 1
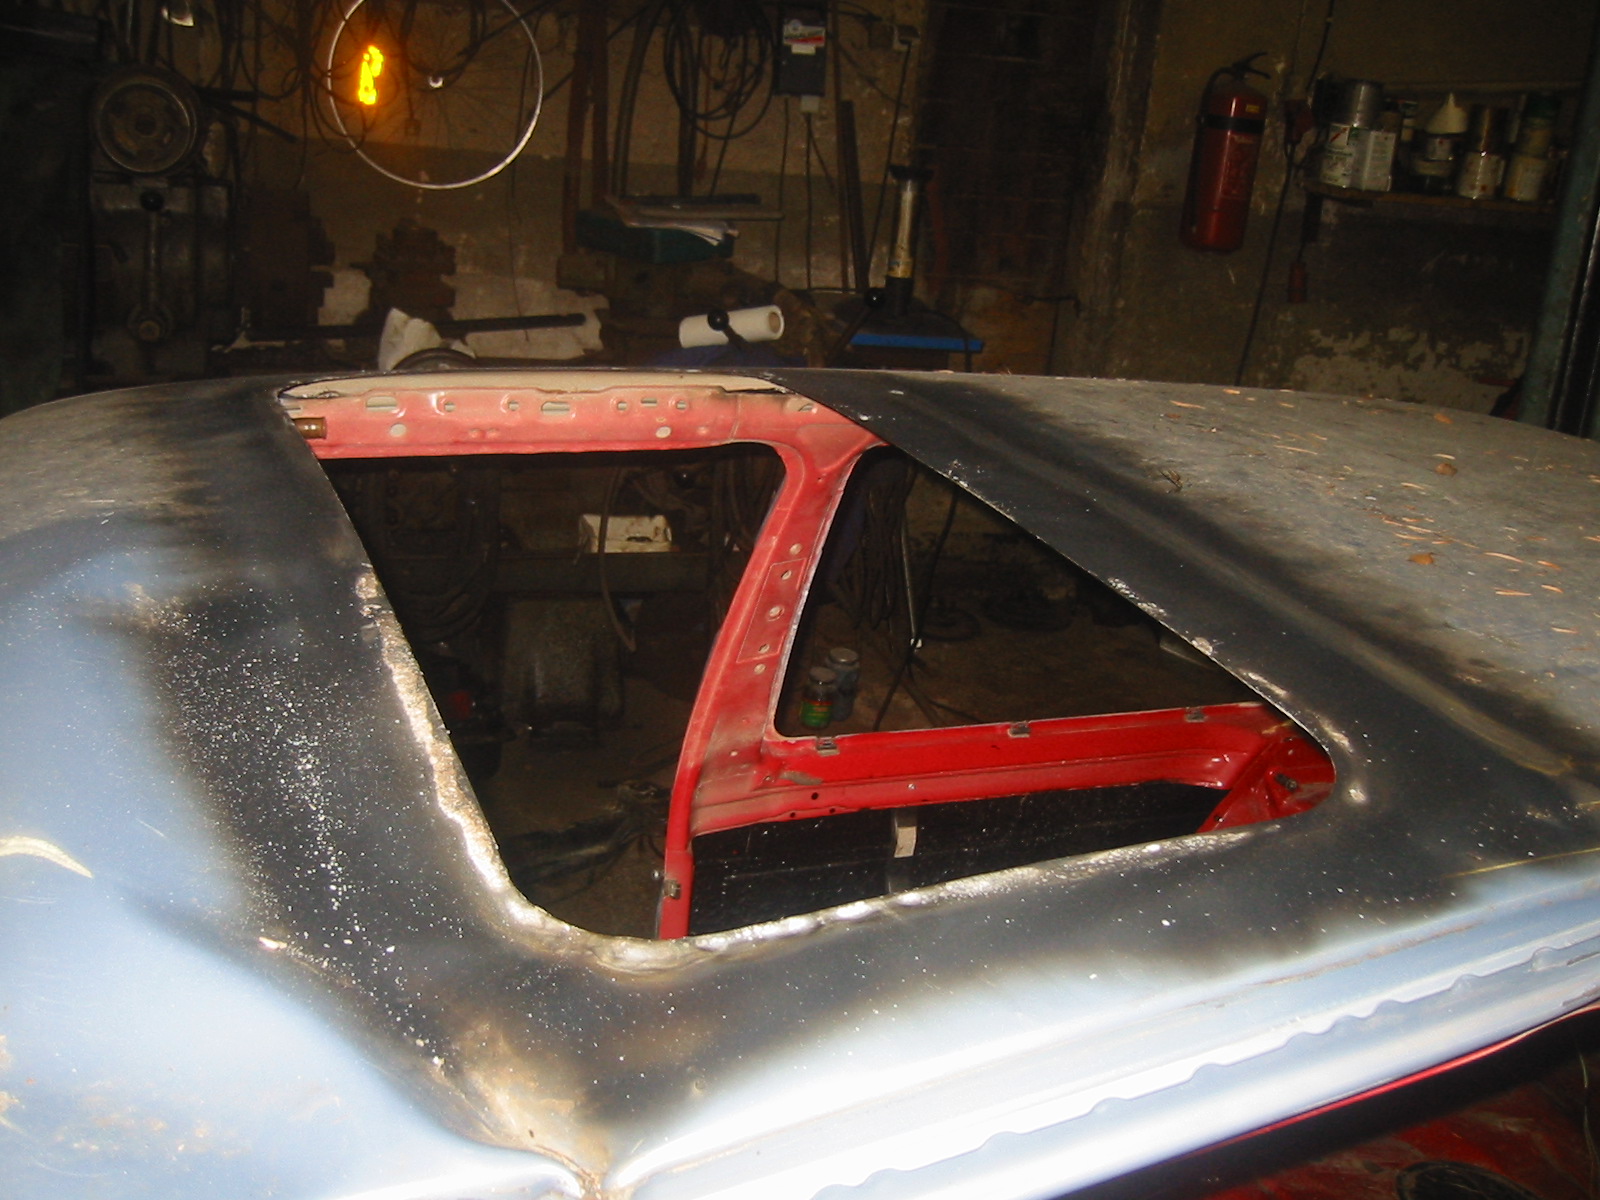
Replacing the roof didn't mean giving up the sunroof. It's the same electric glass panel from a Mk3 Golf.
The frame had been bonded into the old roof with body adhesive. Peksi tried heating the roof with a gas torch, and it did come free, apparently popping loose as the roof skin warmed up.
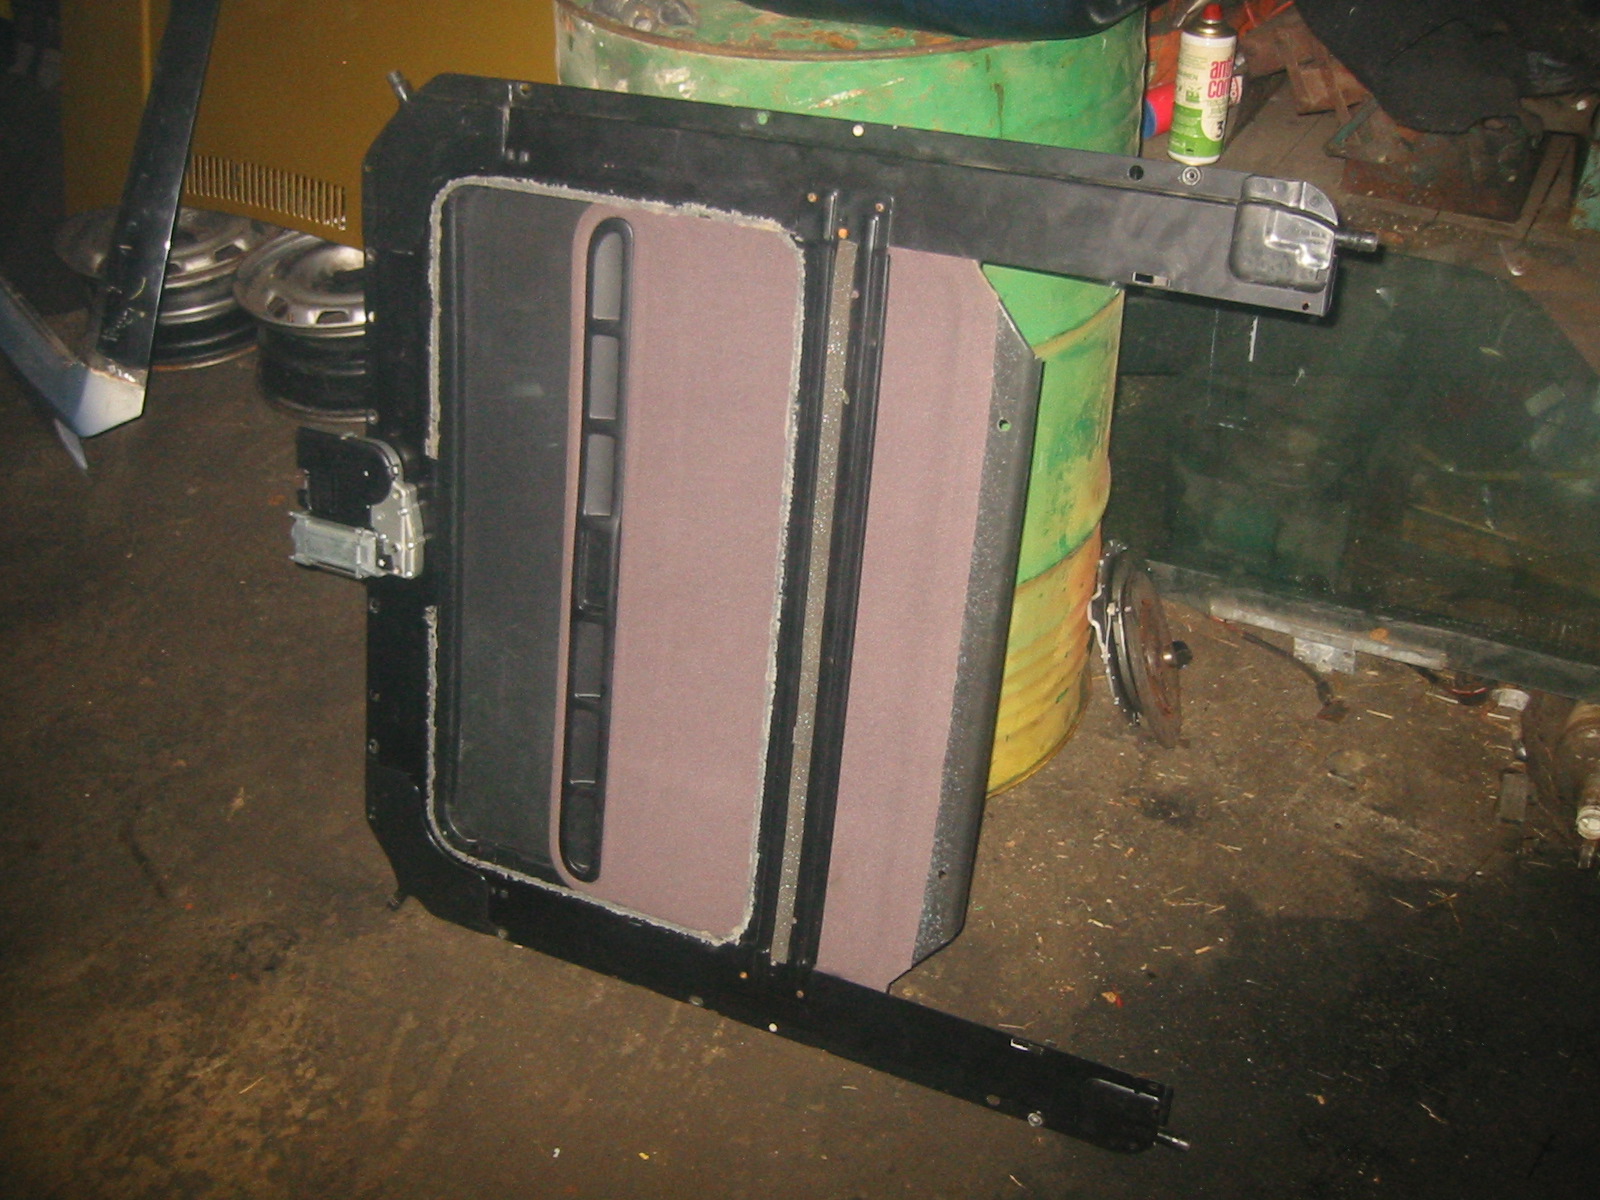
Amazingly the sunroof mechanism survived intact. Usually when the roof bends, something in the mechanism breaks and the sunroof stops working.
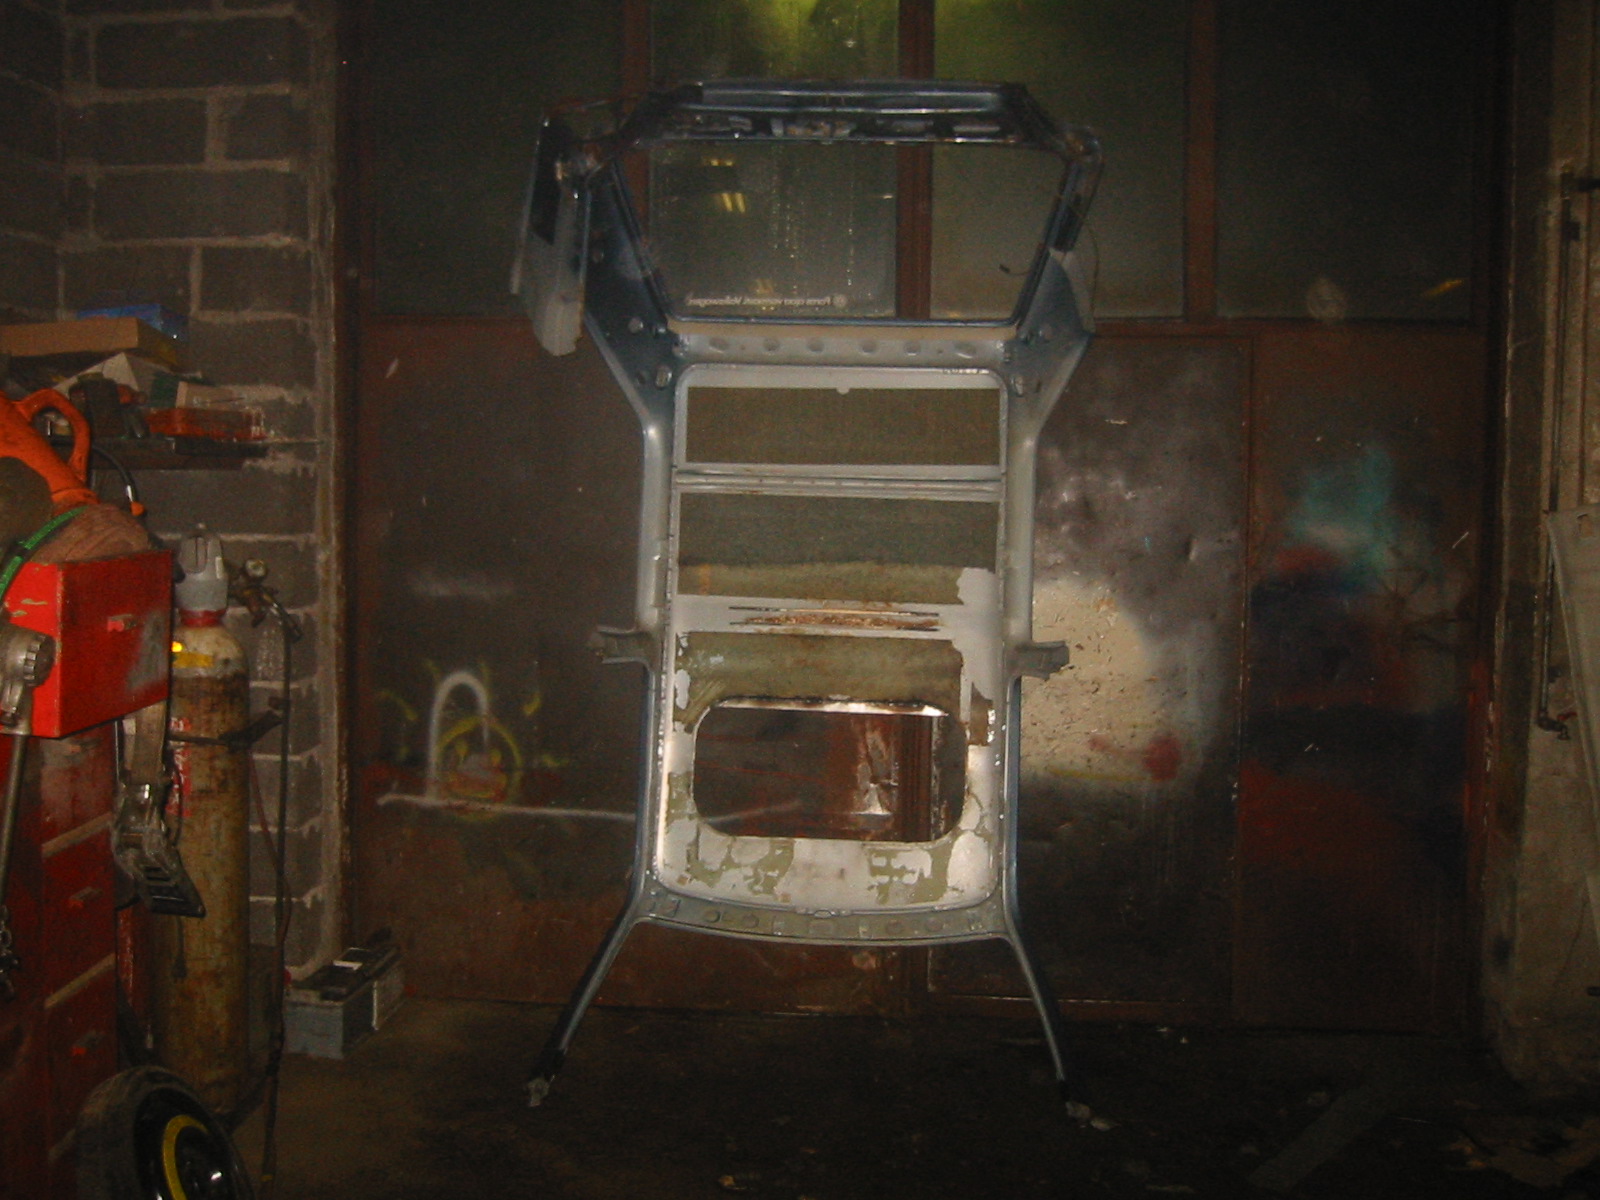
Sometimes the 'new' roof was easier to work on in this position too :)
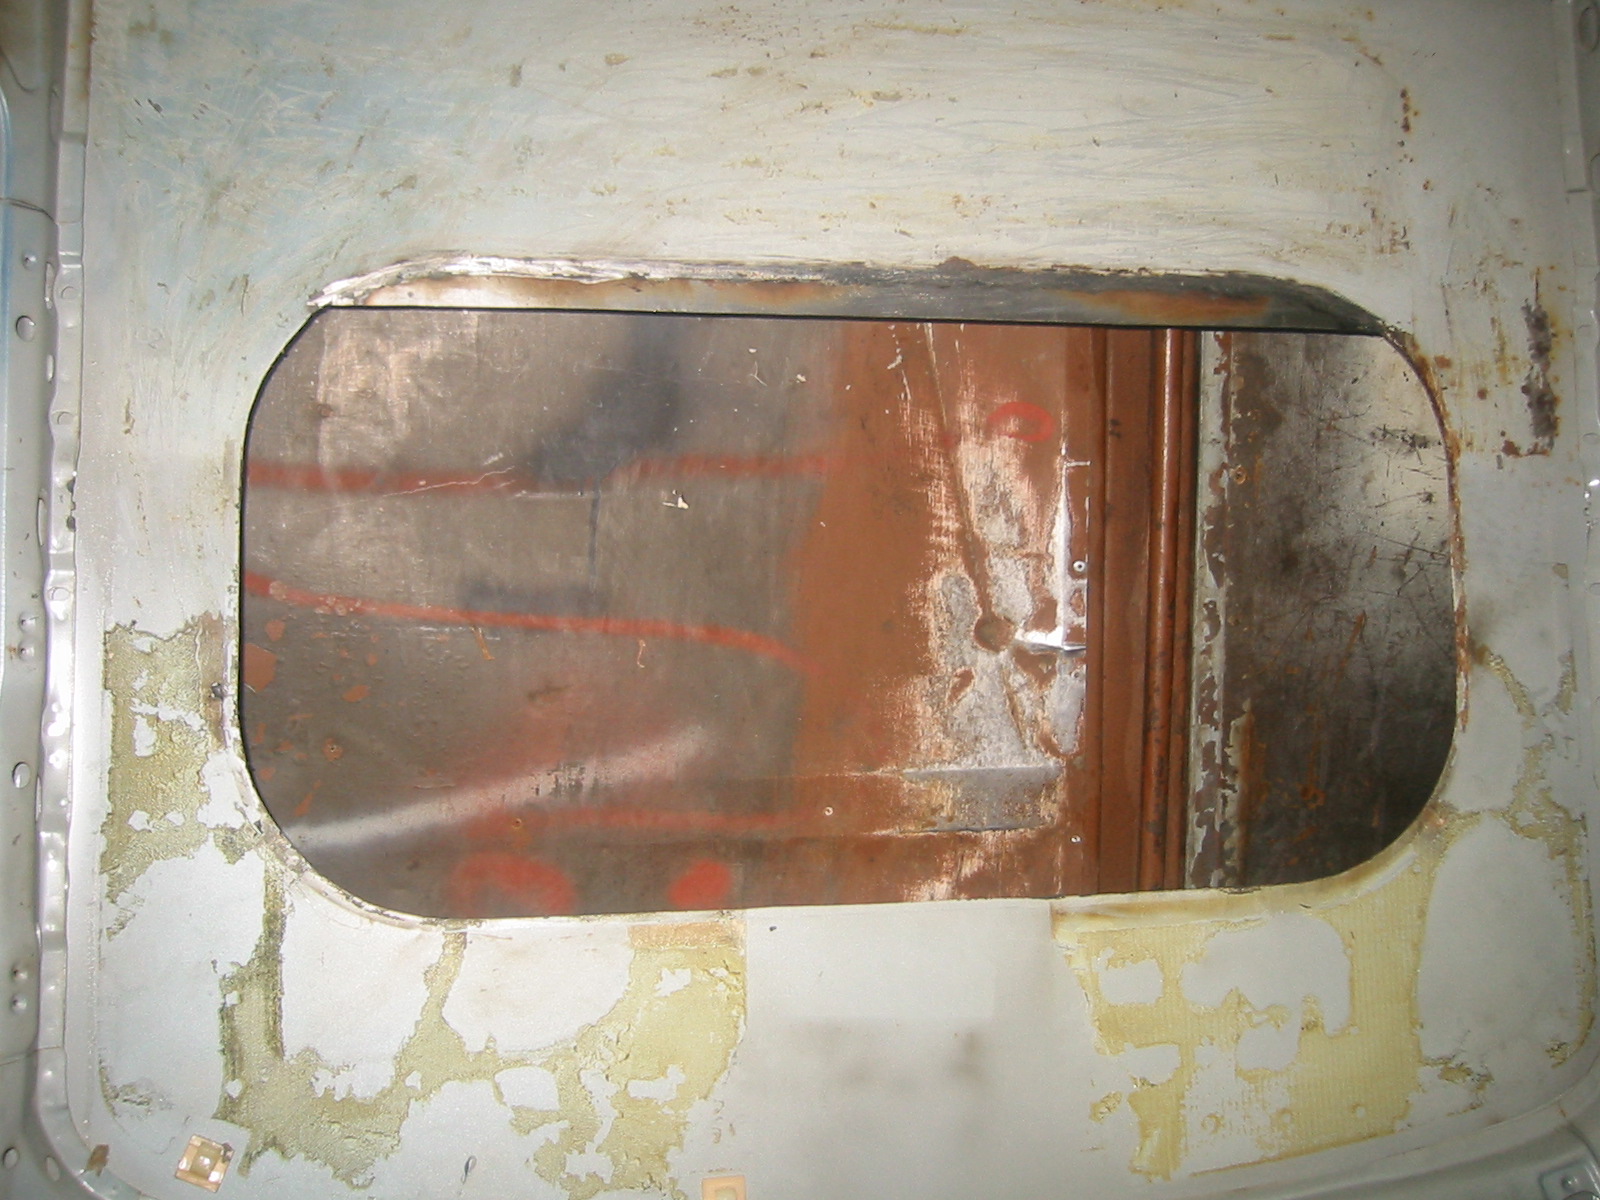
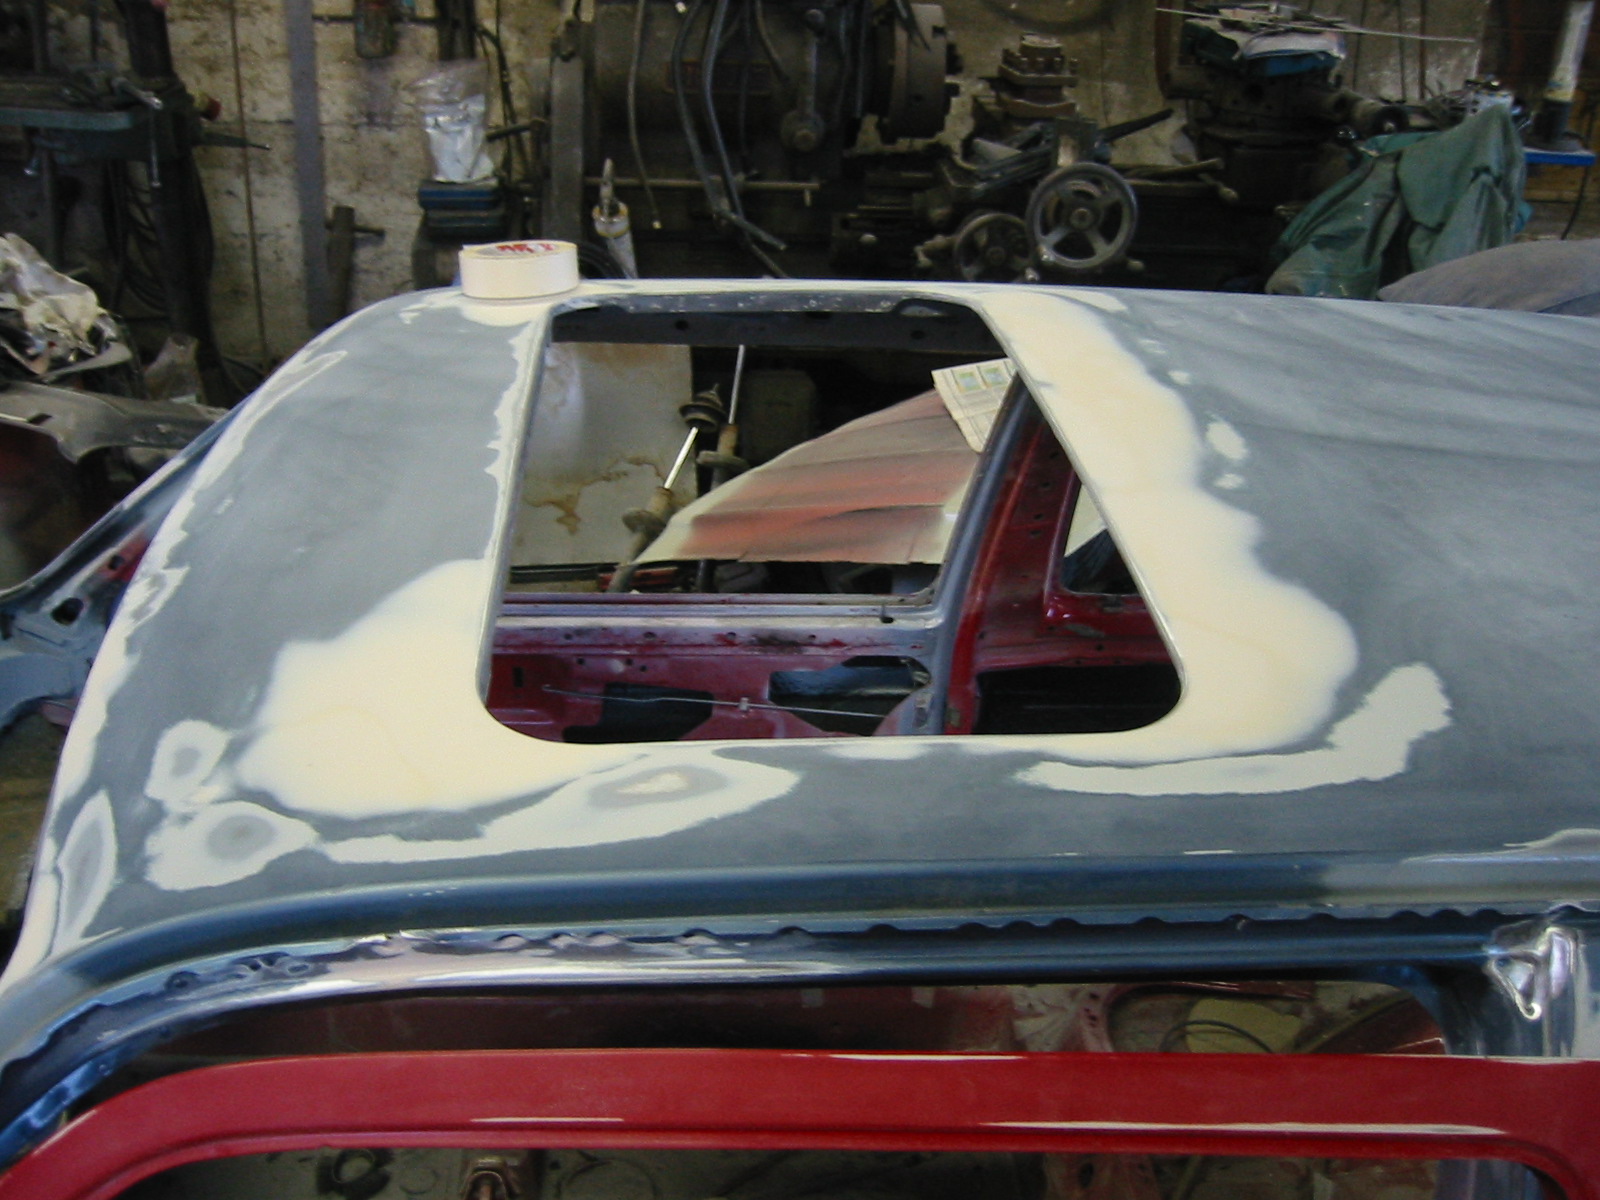
The replacement roof already had an aftermarket sunroof, but the opening was in slightly the wrong place... Peksi wanted it in the same position as before to avoid having the expensive headlining remade. The opening had to move a few centimetres, starting by welding extra metal along the rear edge.
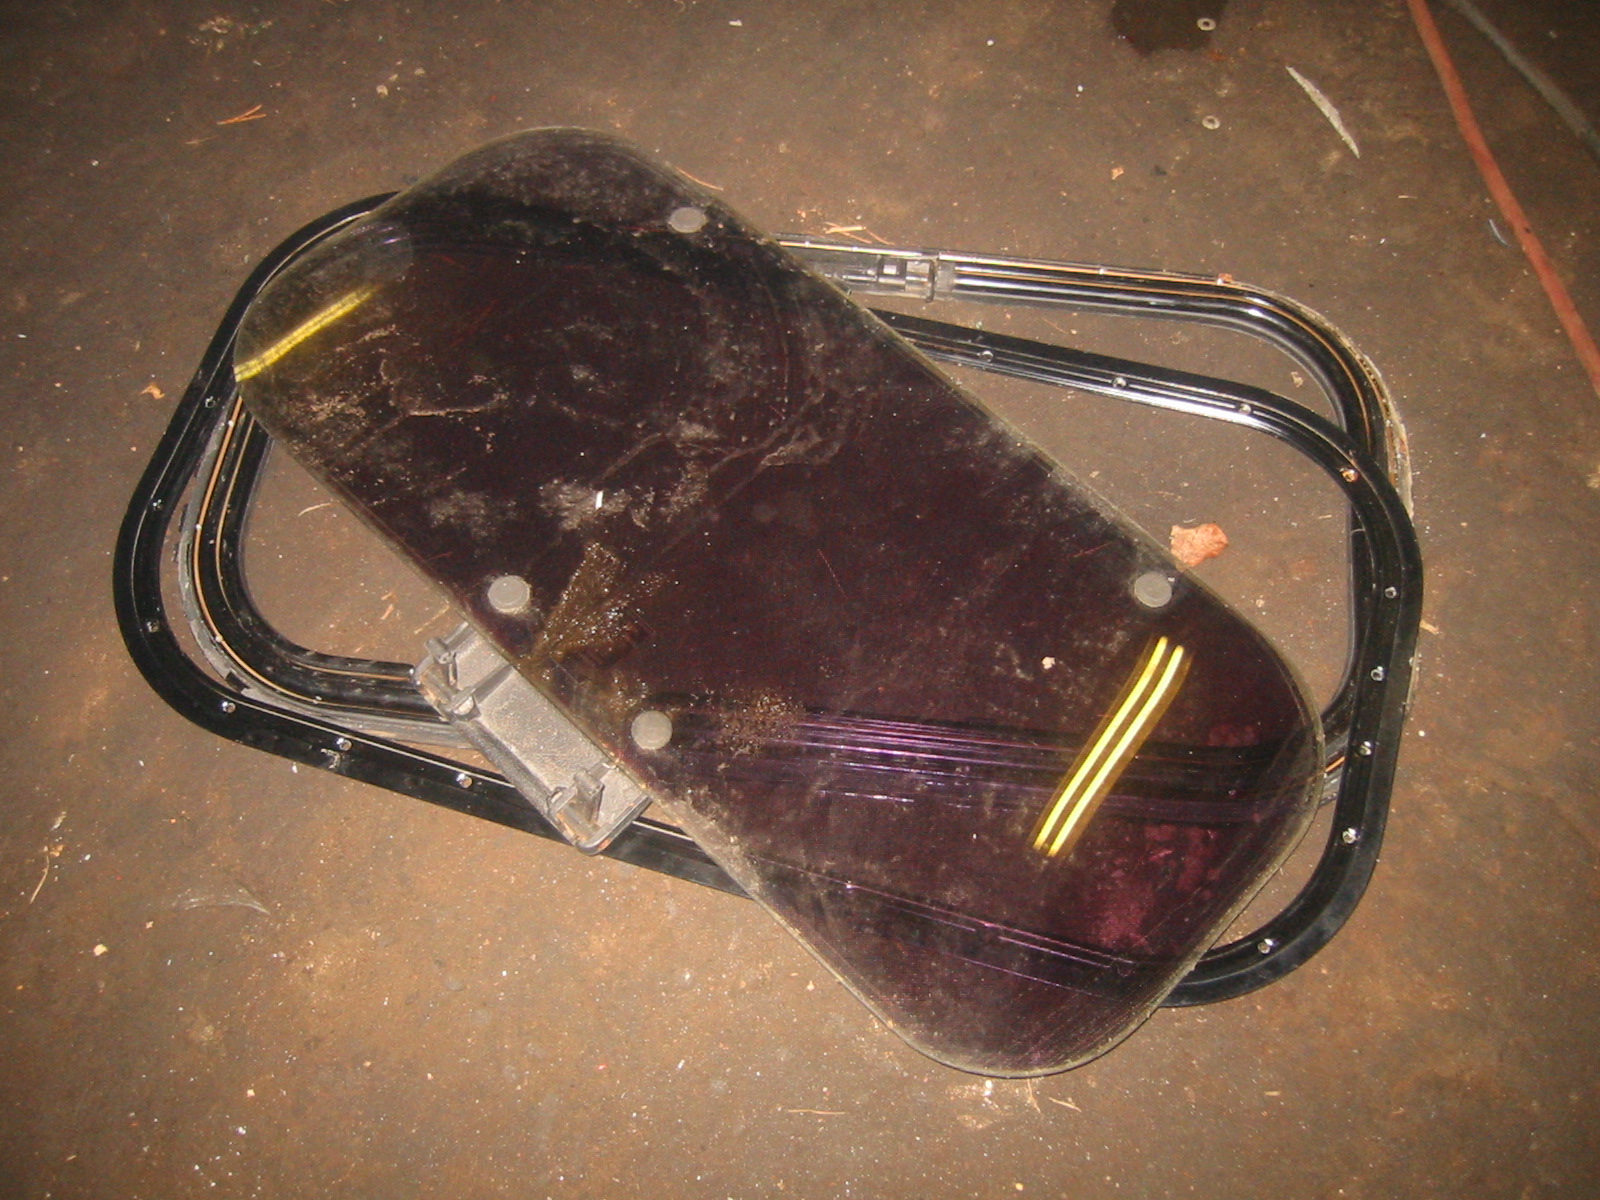
Using the frame as a template, we marked the area to remove.
Sunroof — part 2
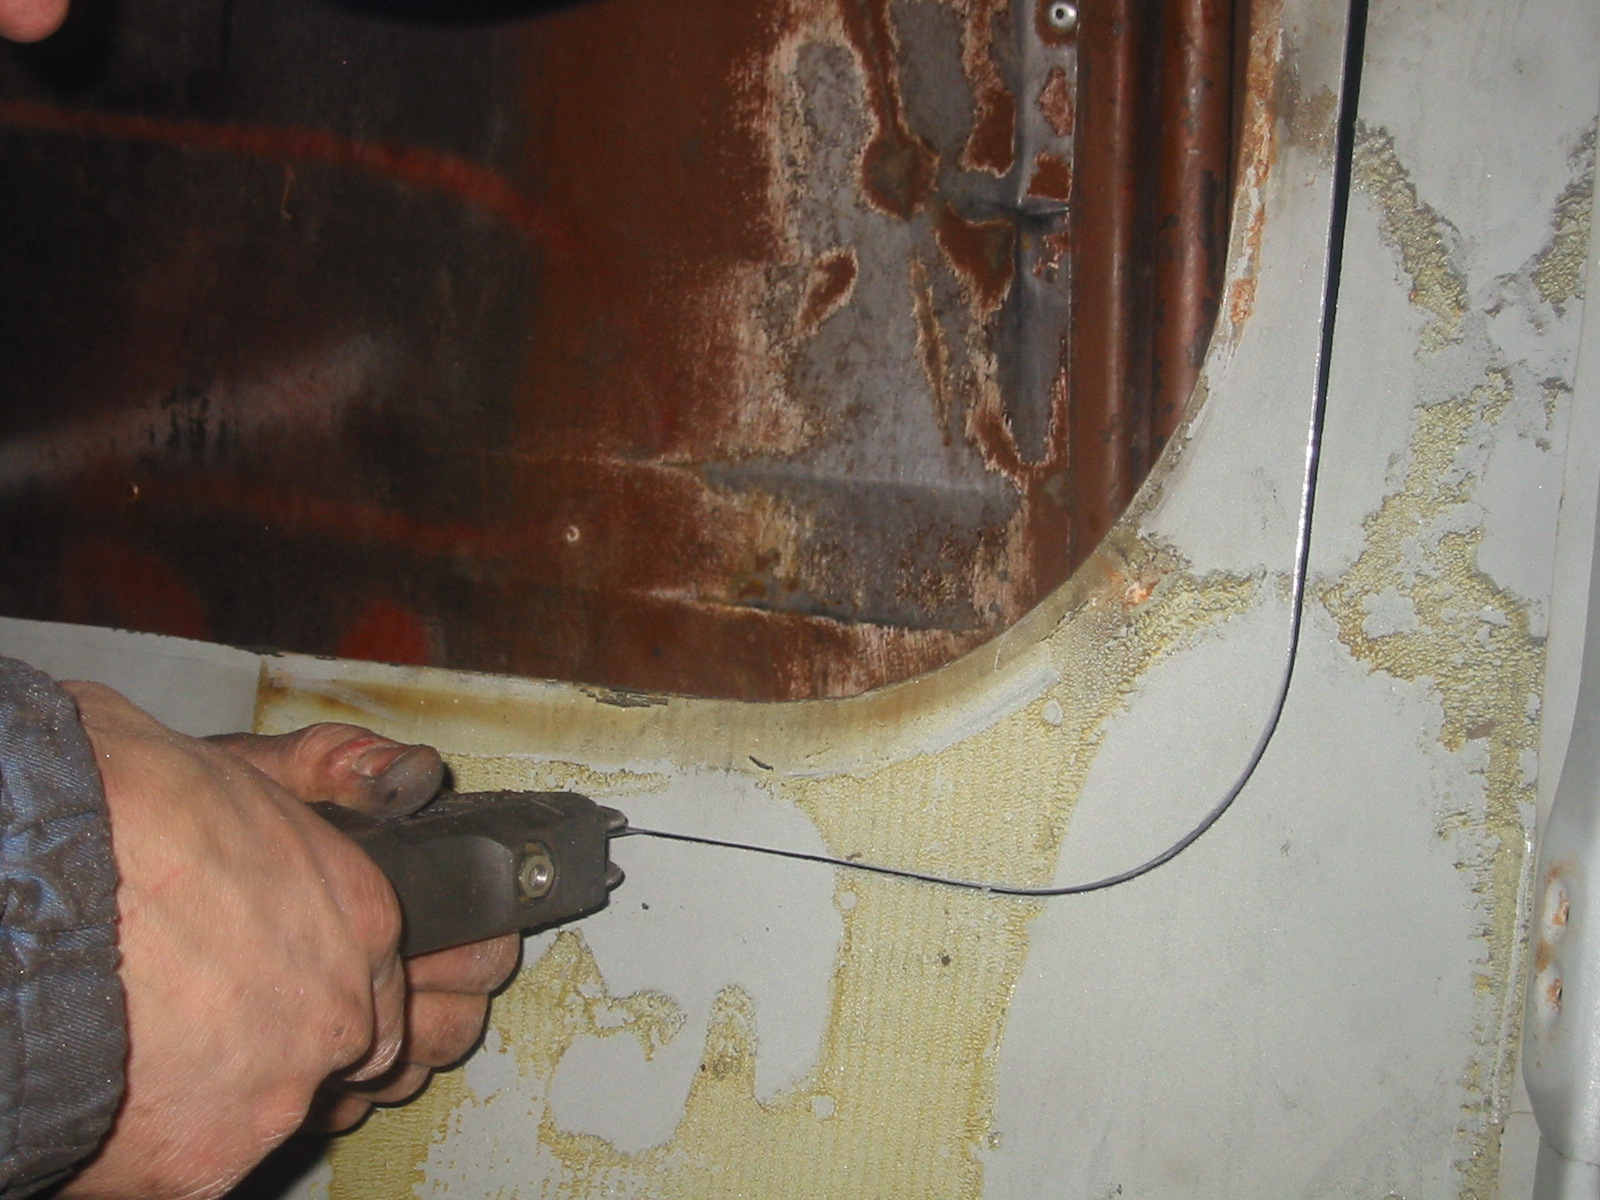
The saw gets going again...
The rest repeats the earlier sunroof installation, so here are just pictures. No energy to explain everything twice...
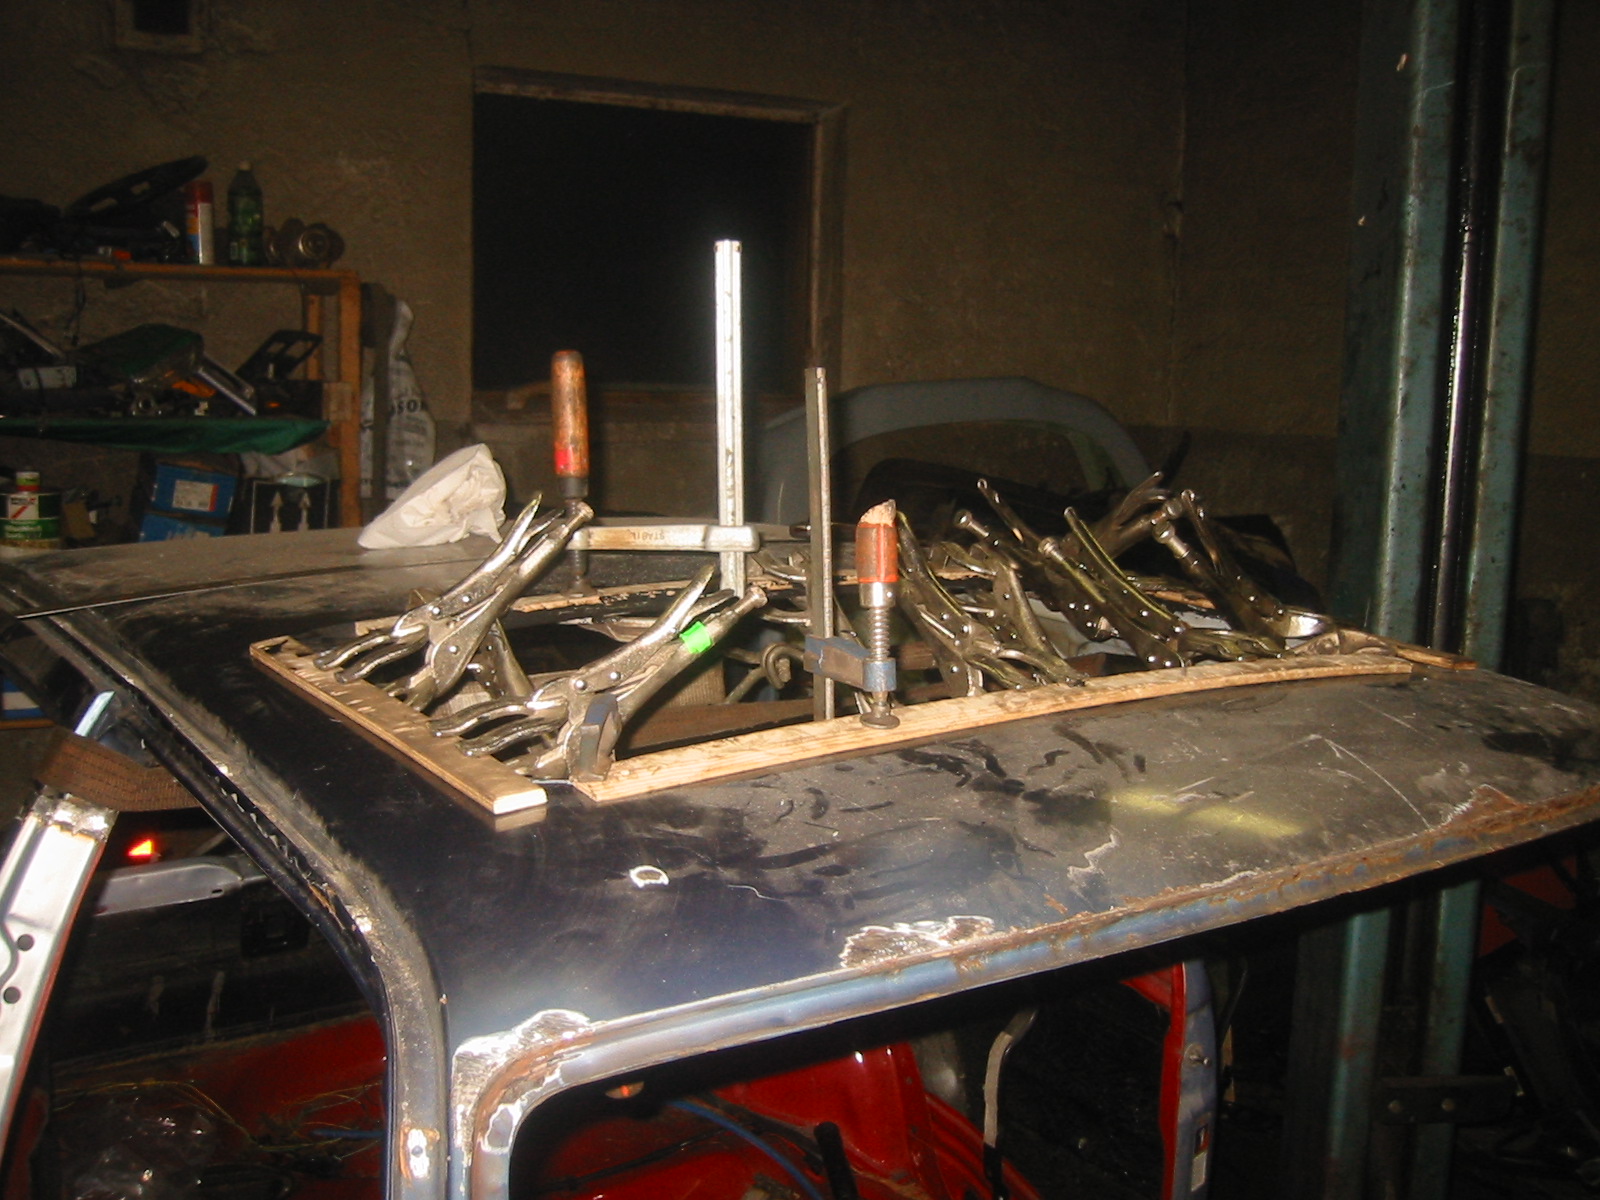
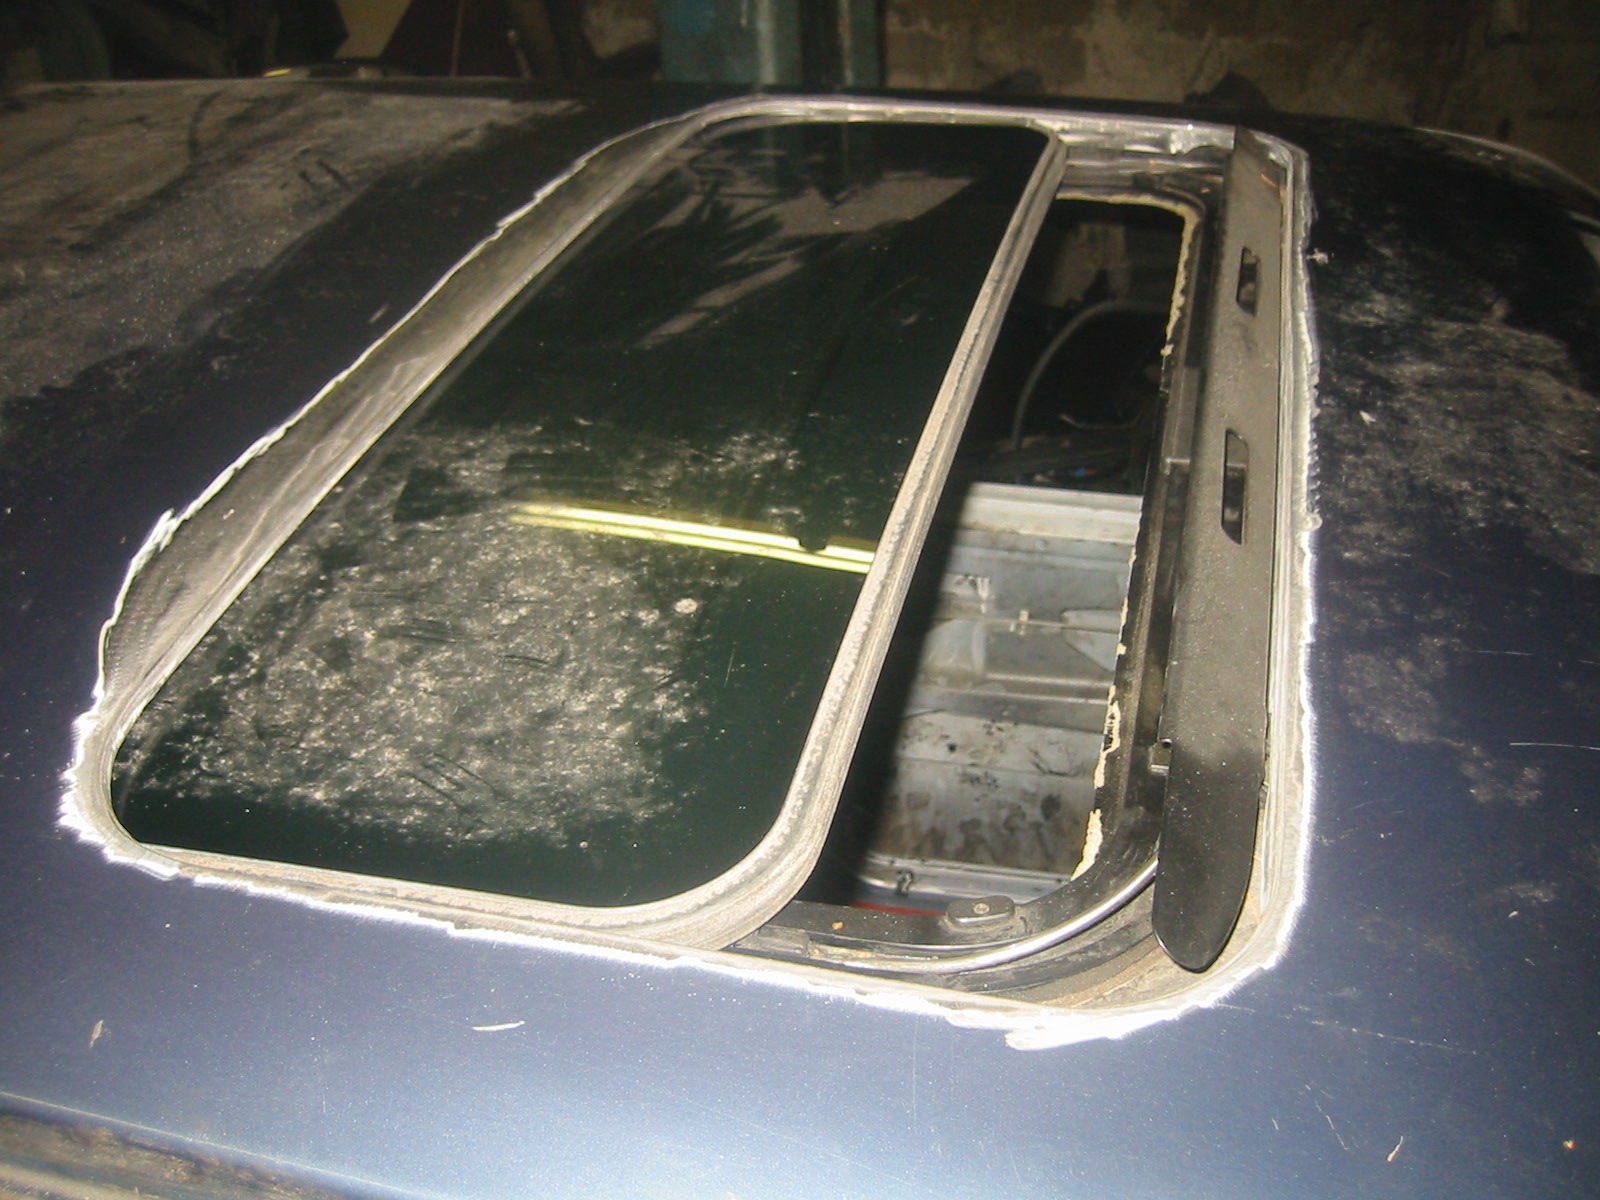
There it is again. Better than last time. Practice makes perfect :-)
Fuel flap
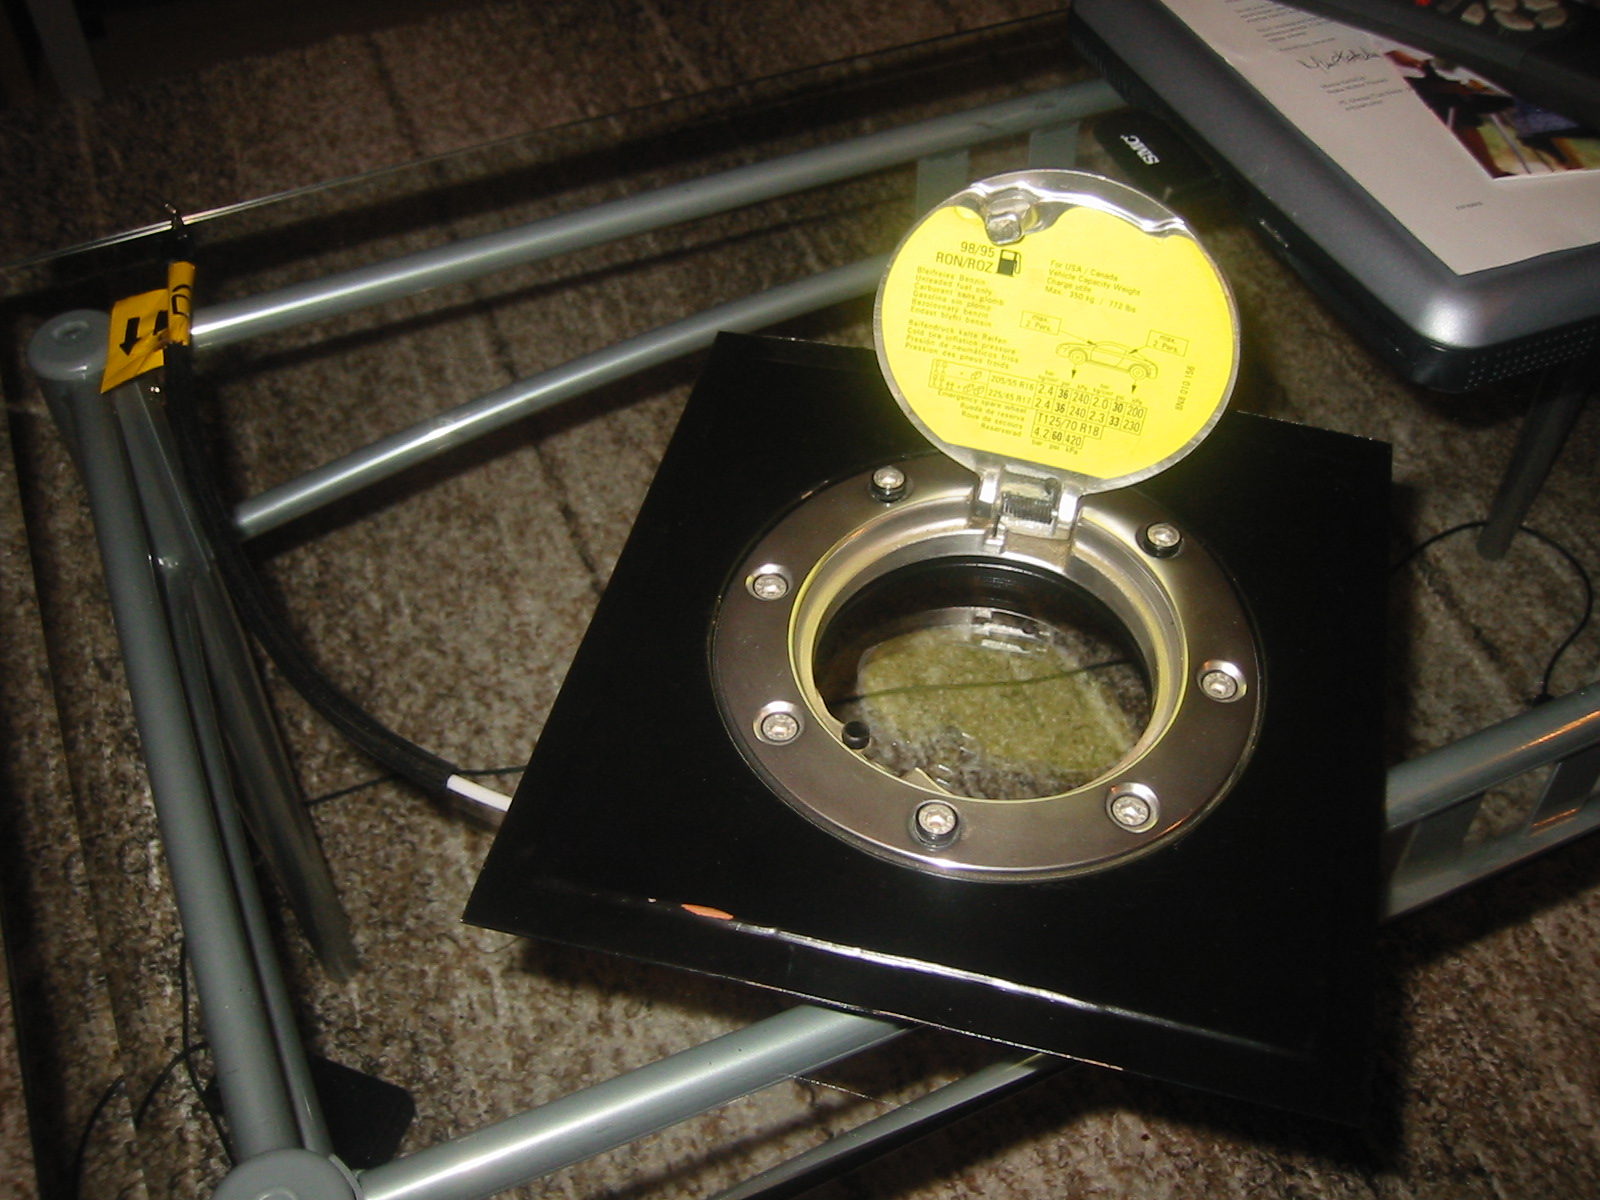
When an original Audi TT fuel flap happened to come along, we had to fit it to the Golf.
The kit included the surrounding panel, so no need to find a TT wing to cut up :)
It lacked the release solenoid, but a suitable one came from a New Beetle.
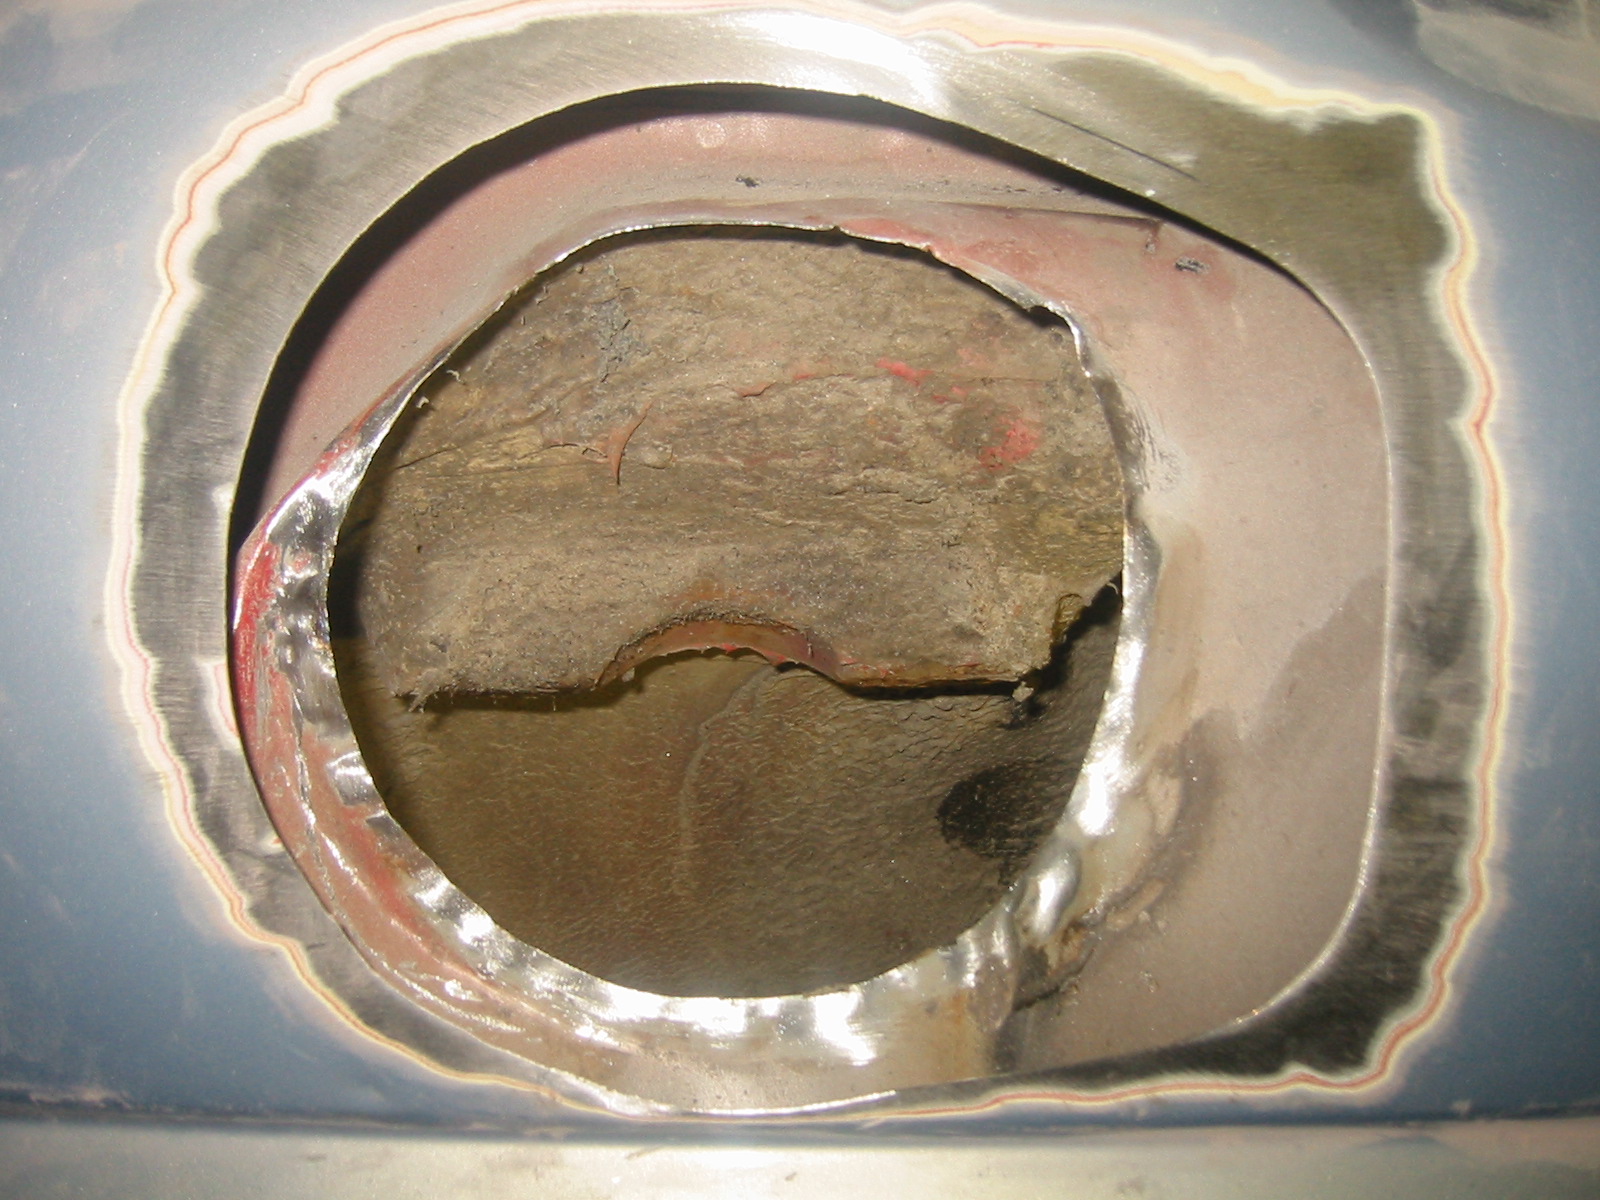
First the fuel tank was lowered out, then a suitable piece cut from the side... A little grinding for better welding. The inner wheel arch panel needed some shaping too.
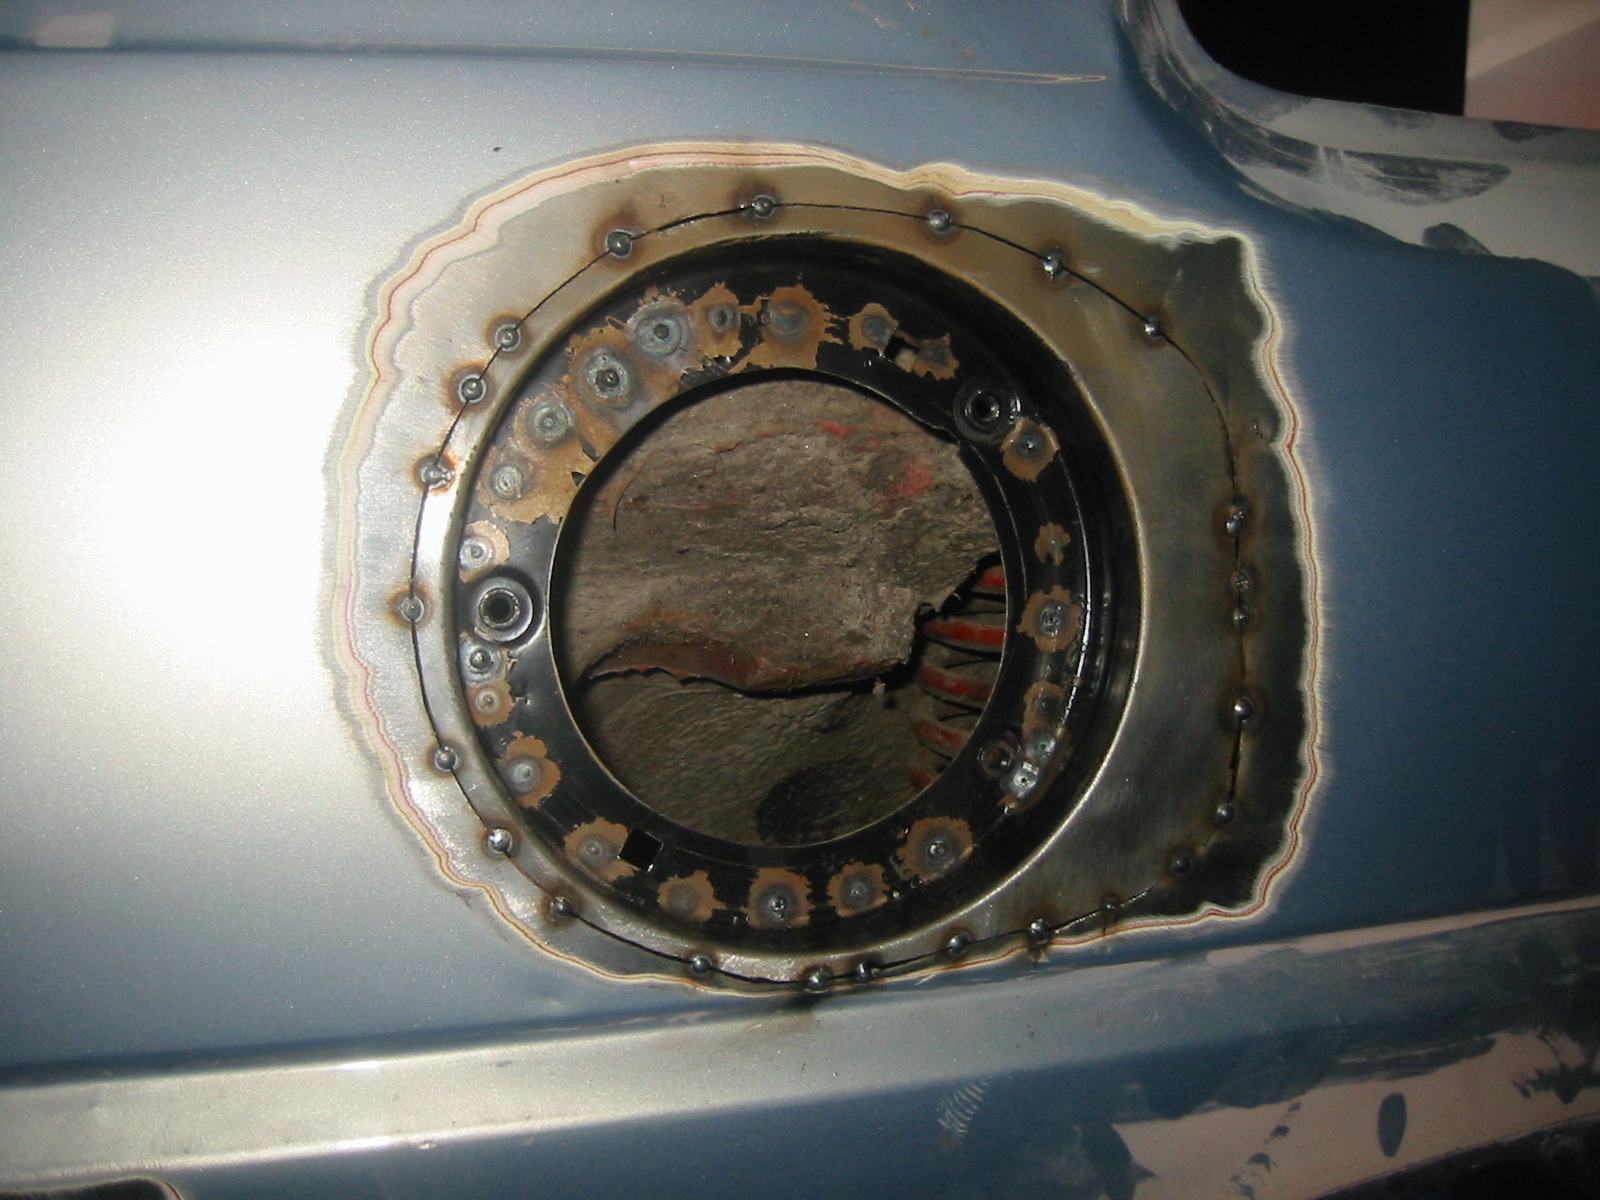
The supplied mounting panel naturally needed shaping too, with excess metal cut away. Here it's already welded in.
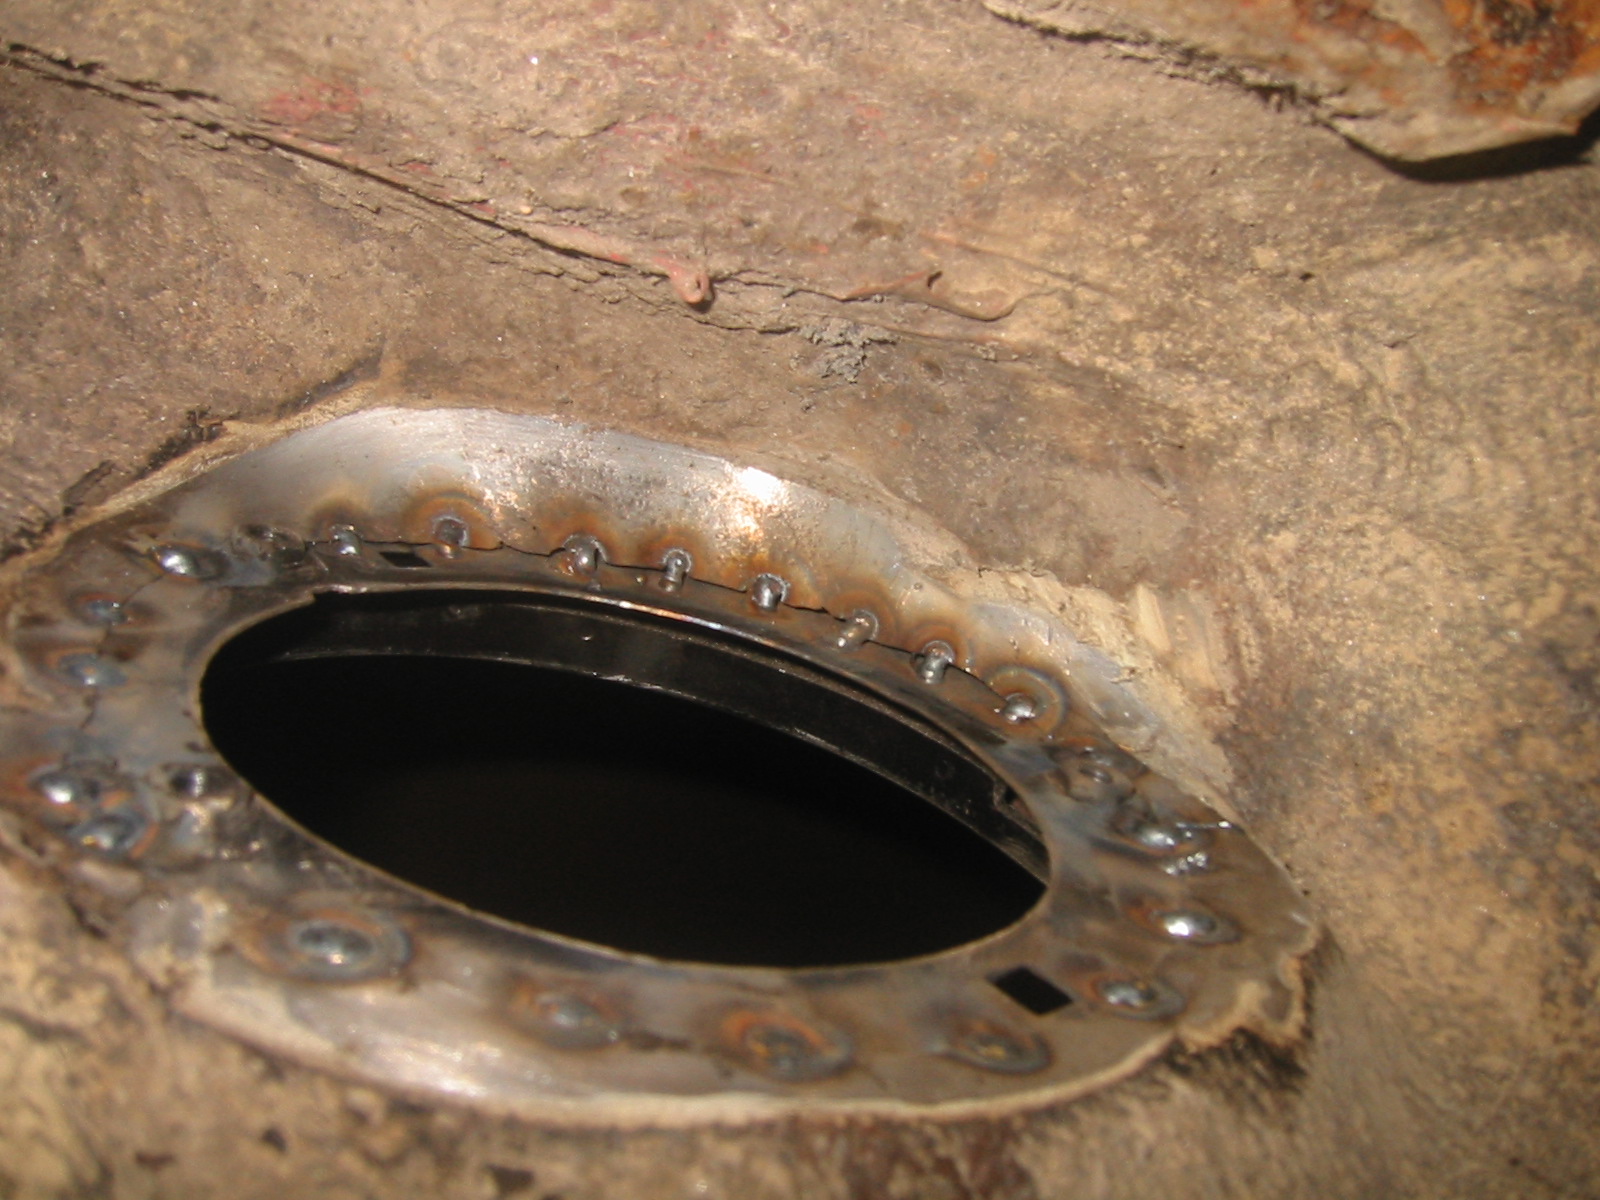
Inside the wing. The idea is to retain the original fuel cap and its surrounding rubber collar, keeping the muck out of the flap recess.
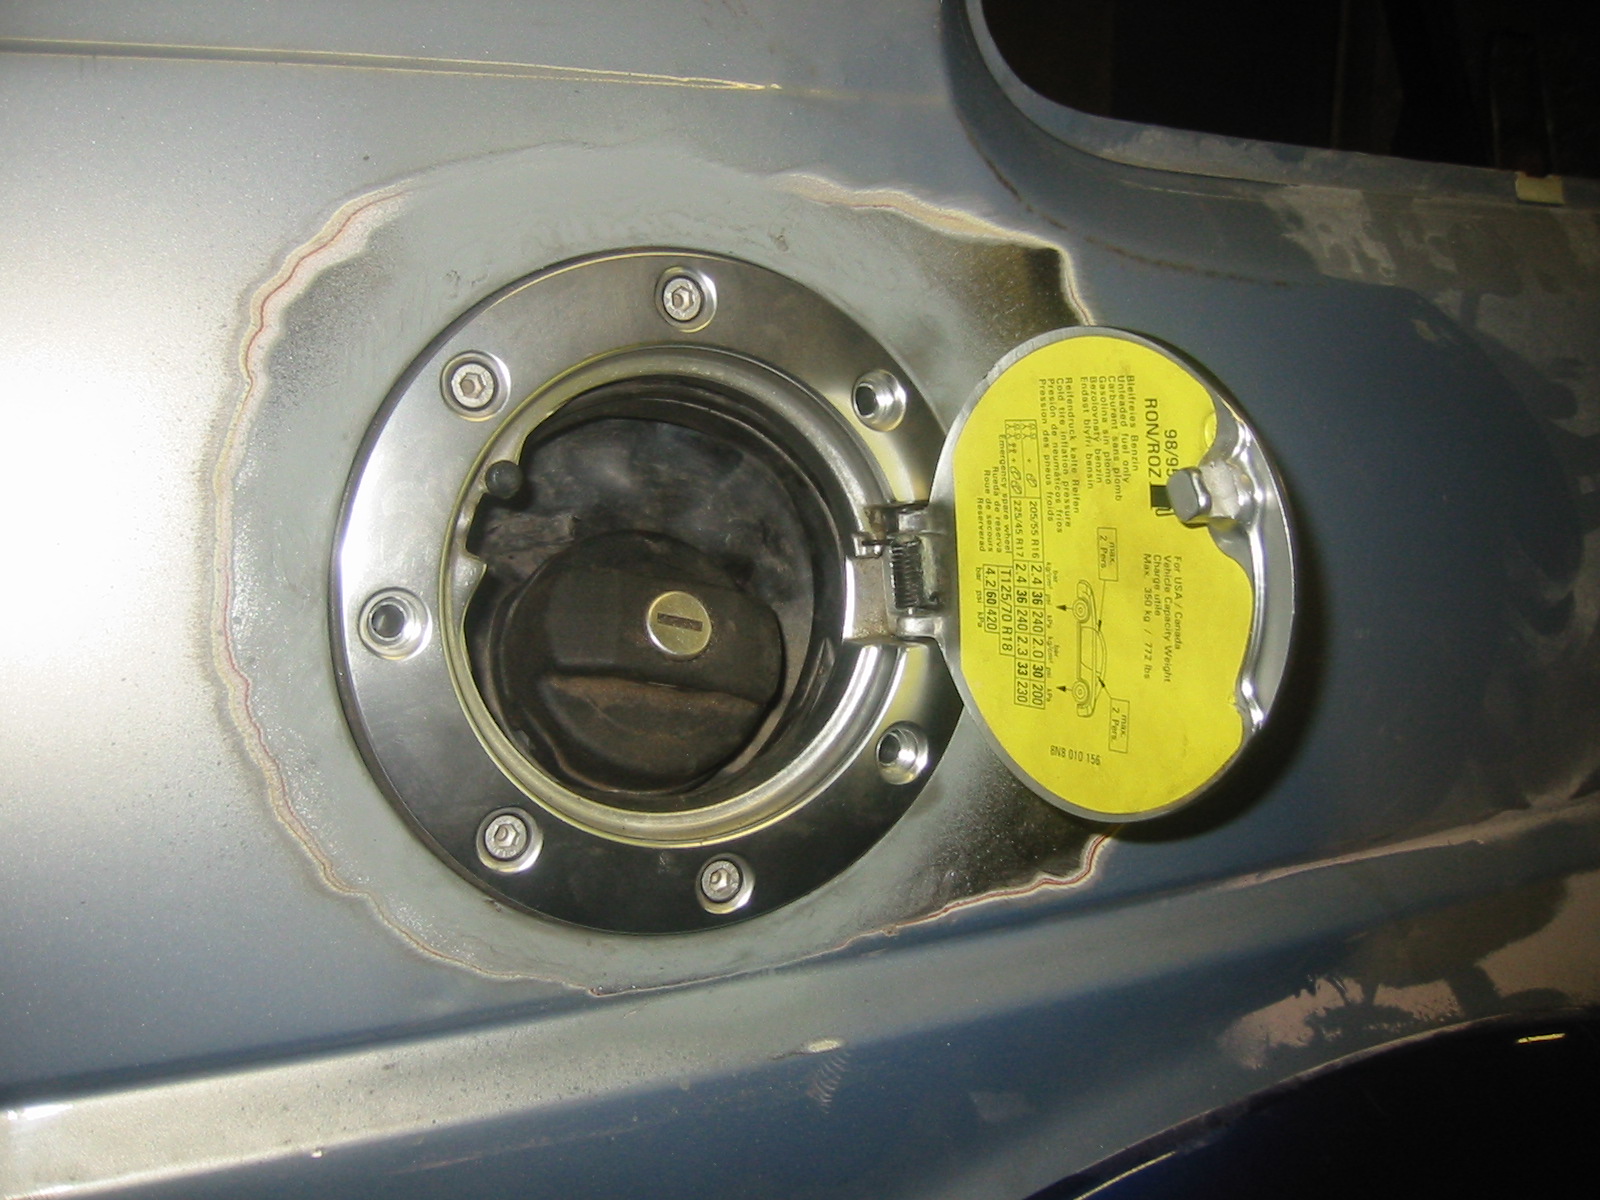
There it sits. The cap no longer needs locking, because the flap can only be opened from inside using the solenoid.
Other small jobs
Yes... Replacing the roof wasn't quite enough to straighten the body; some jacking was needed too.
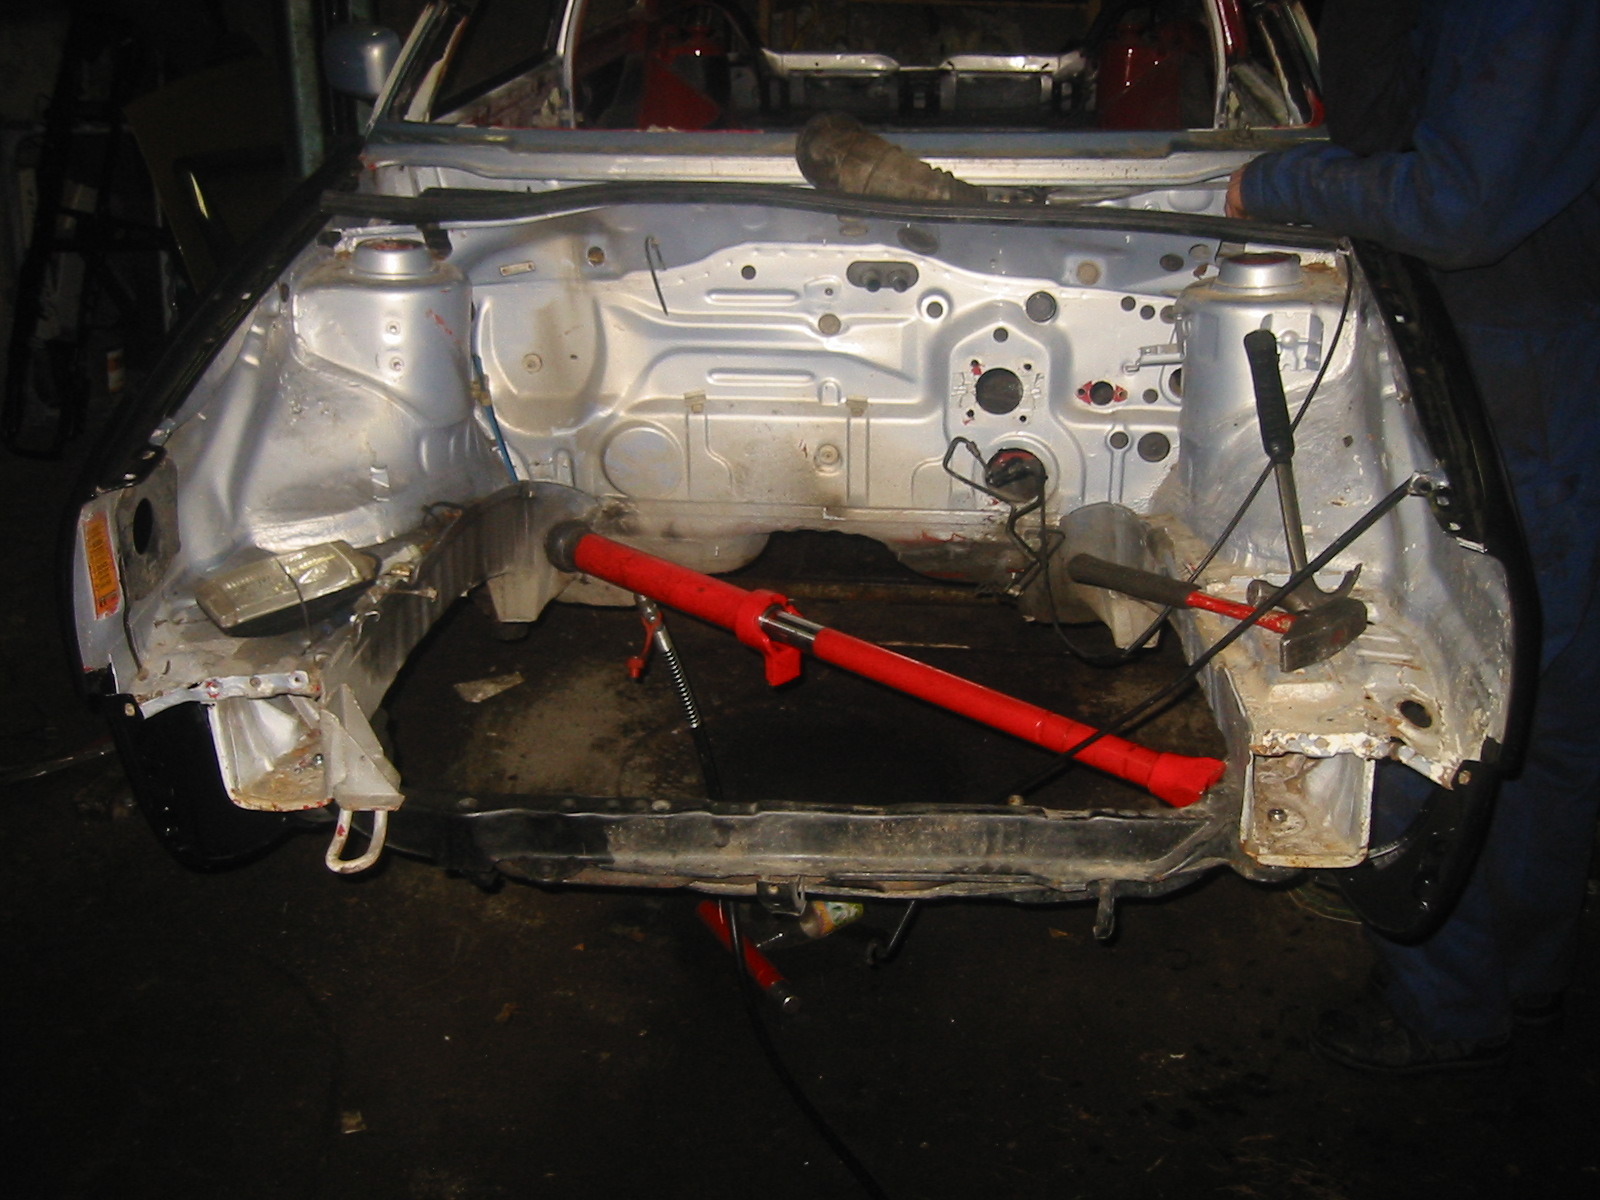
The body was otherwise within its dimensions, but the front chassis legs needed a little straightening.
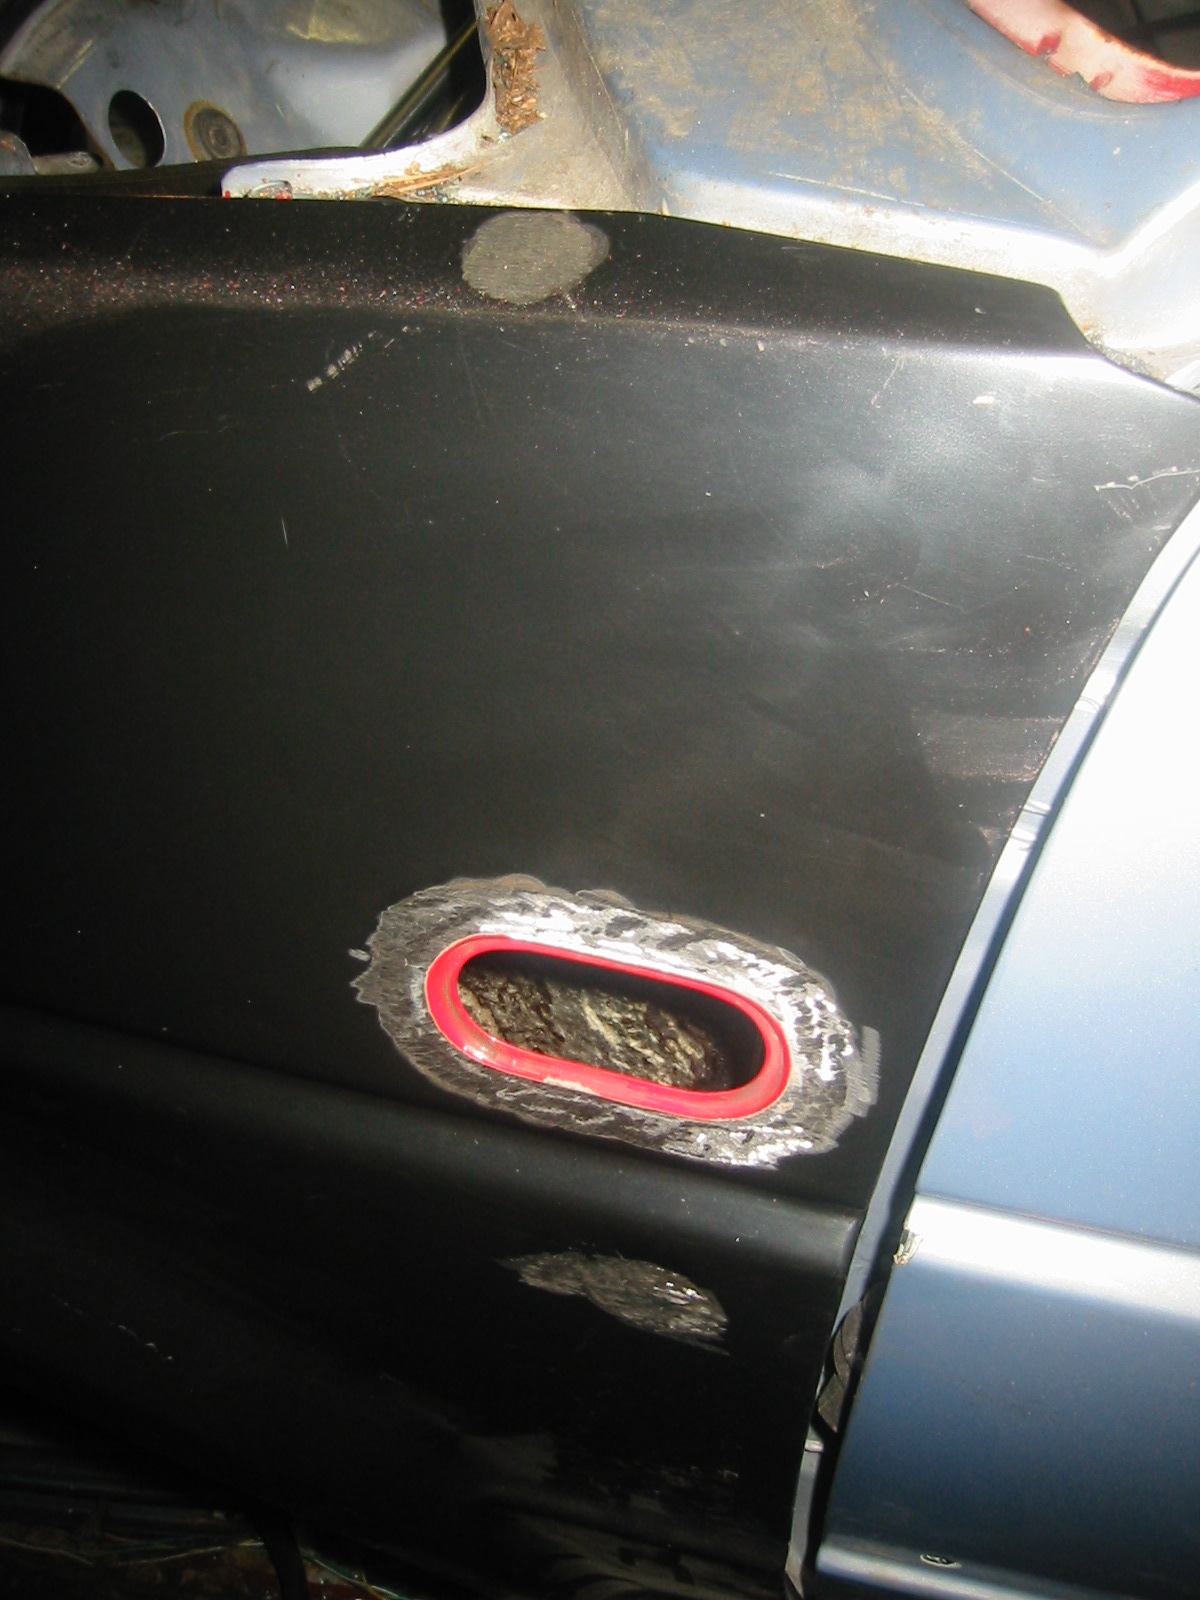
The other side's indicator opening appeared on the previous page... Naturally the aerial hole had to be closed too.
The Rallye Golf has its side repeater in about the same place.
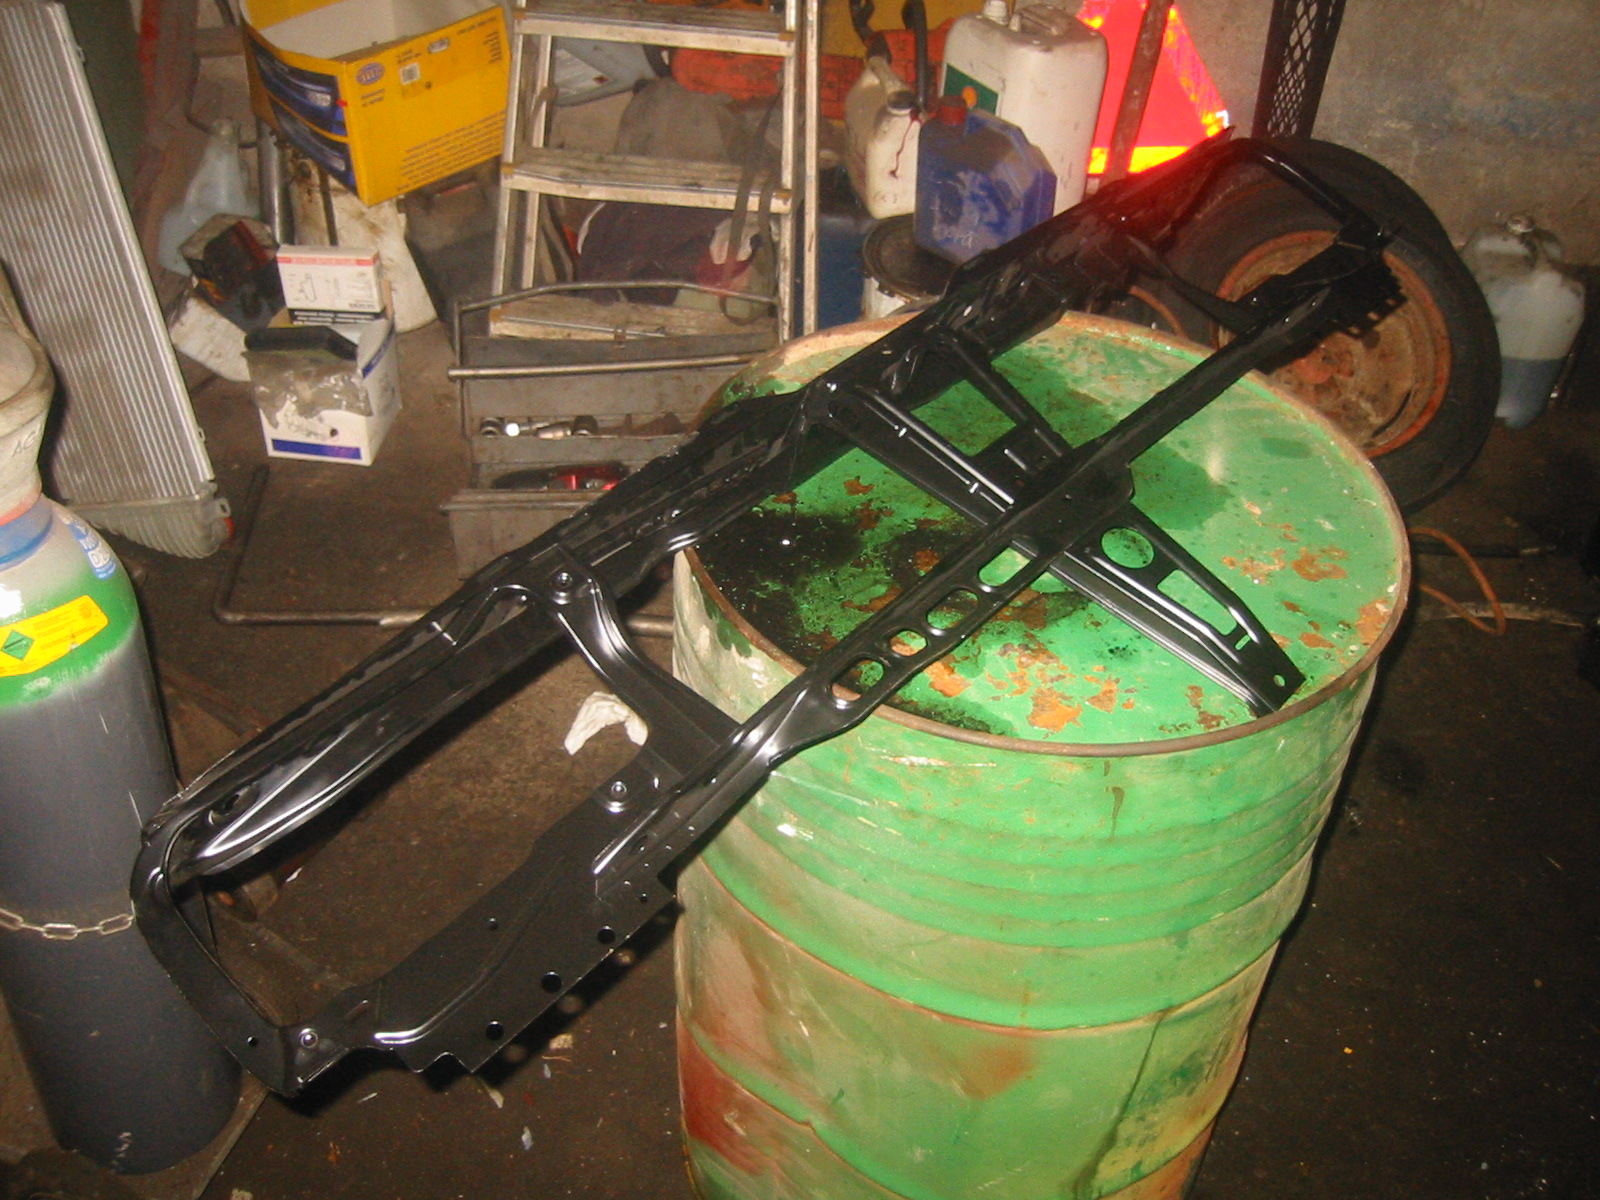
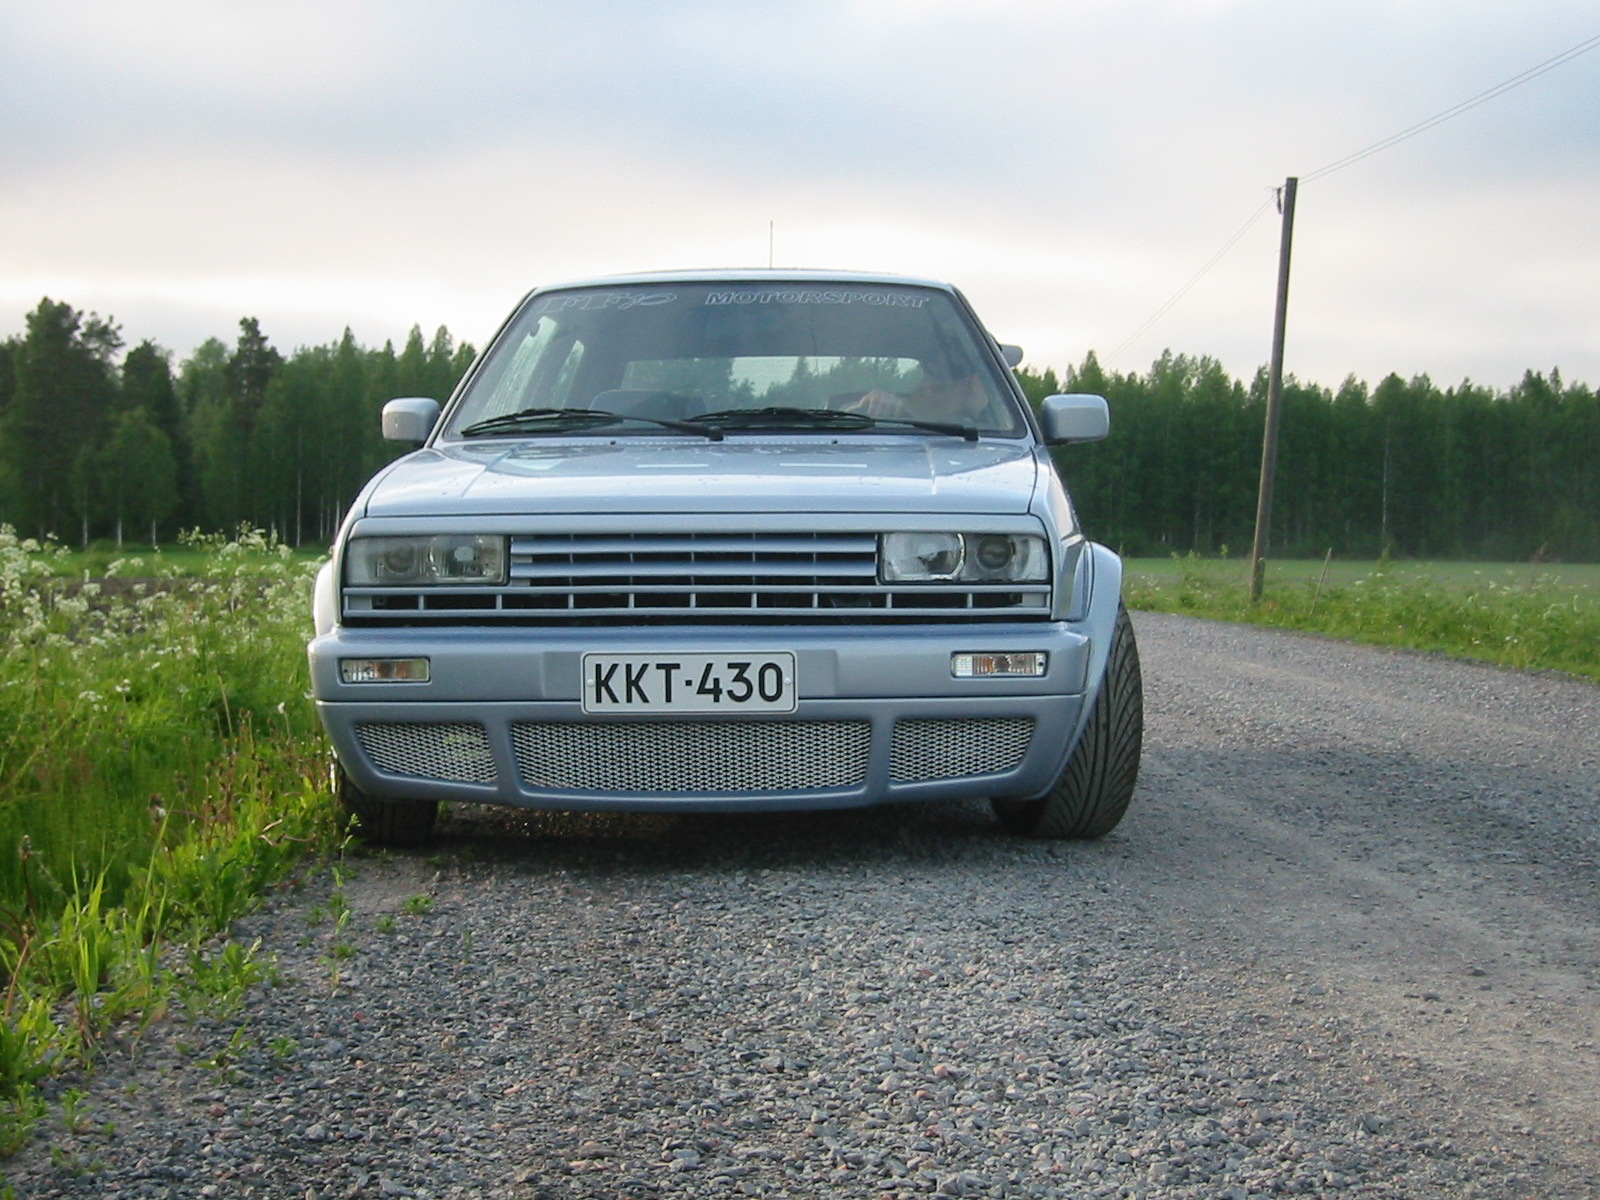
This time the Golf gets a Rallye front end... They seem to be fashionable these days :)
The front panel is incredibly light compared with the original Golf one.
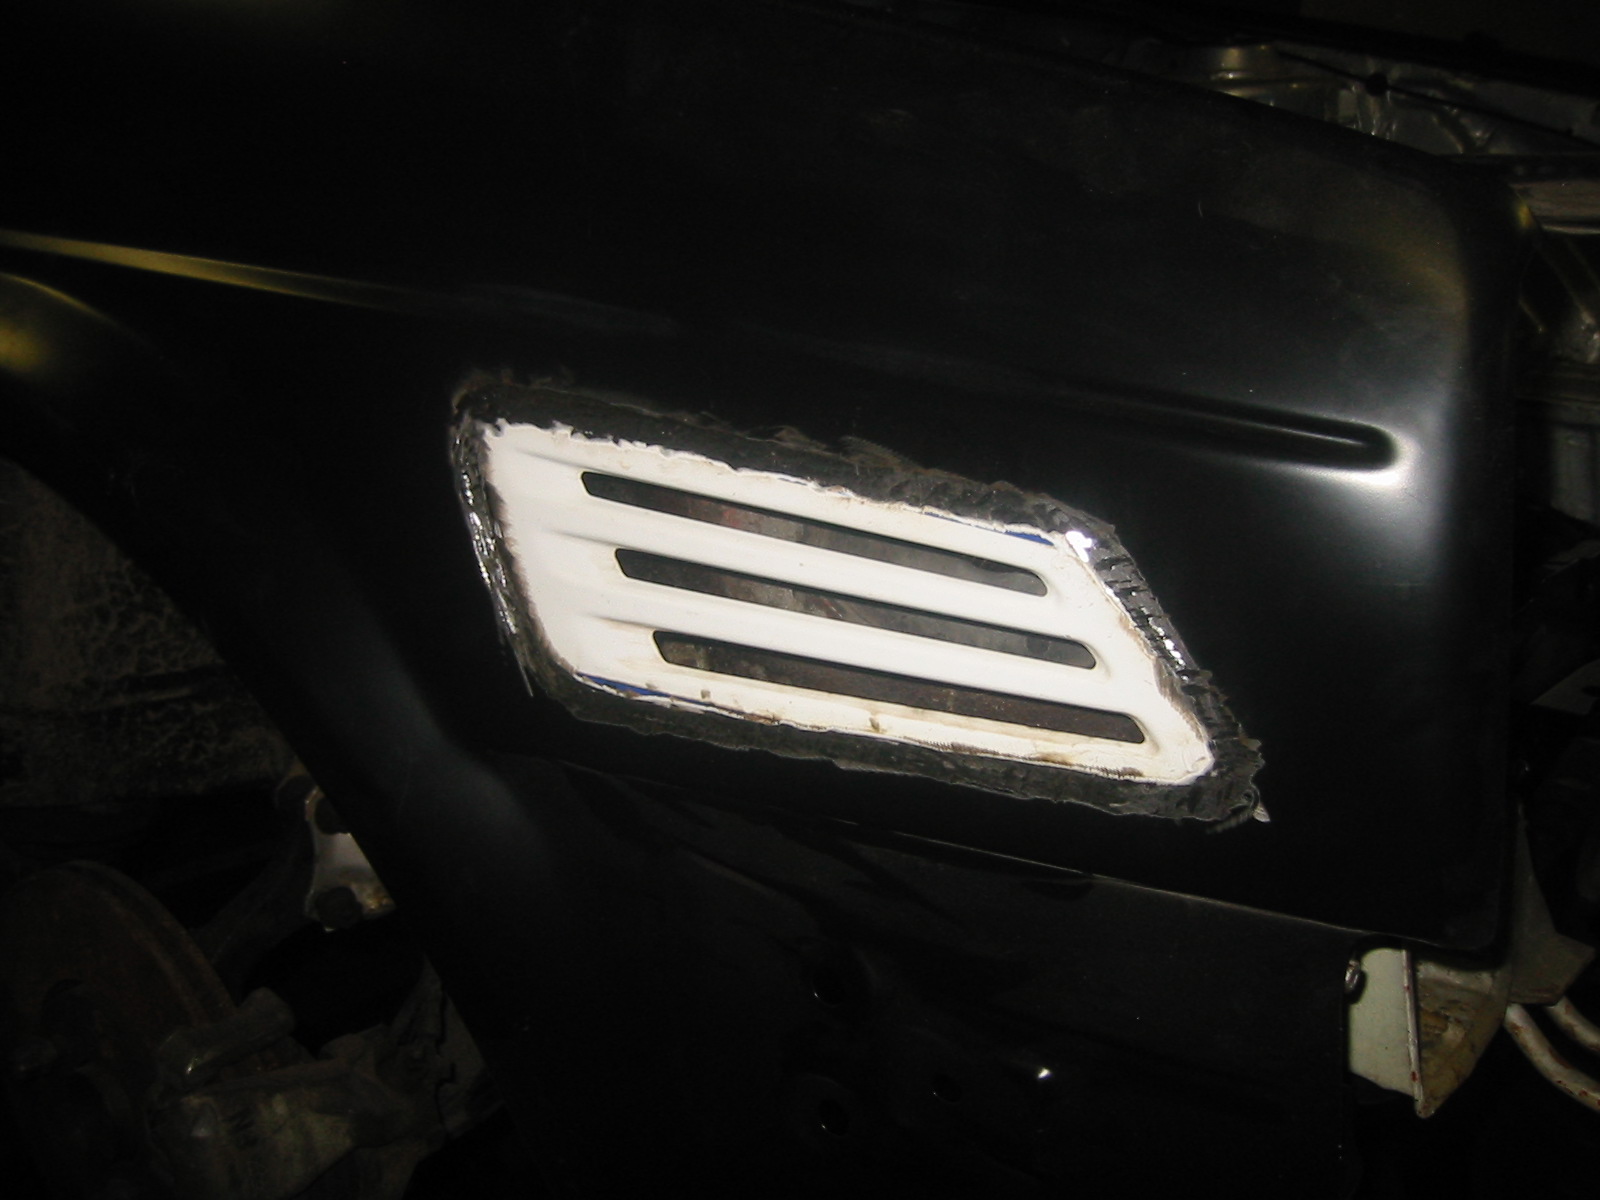
The obligatory wing vent, this time from a Mercedes.
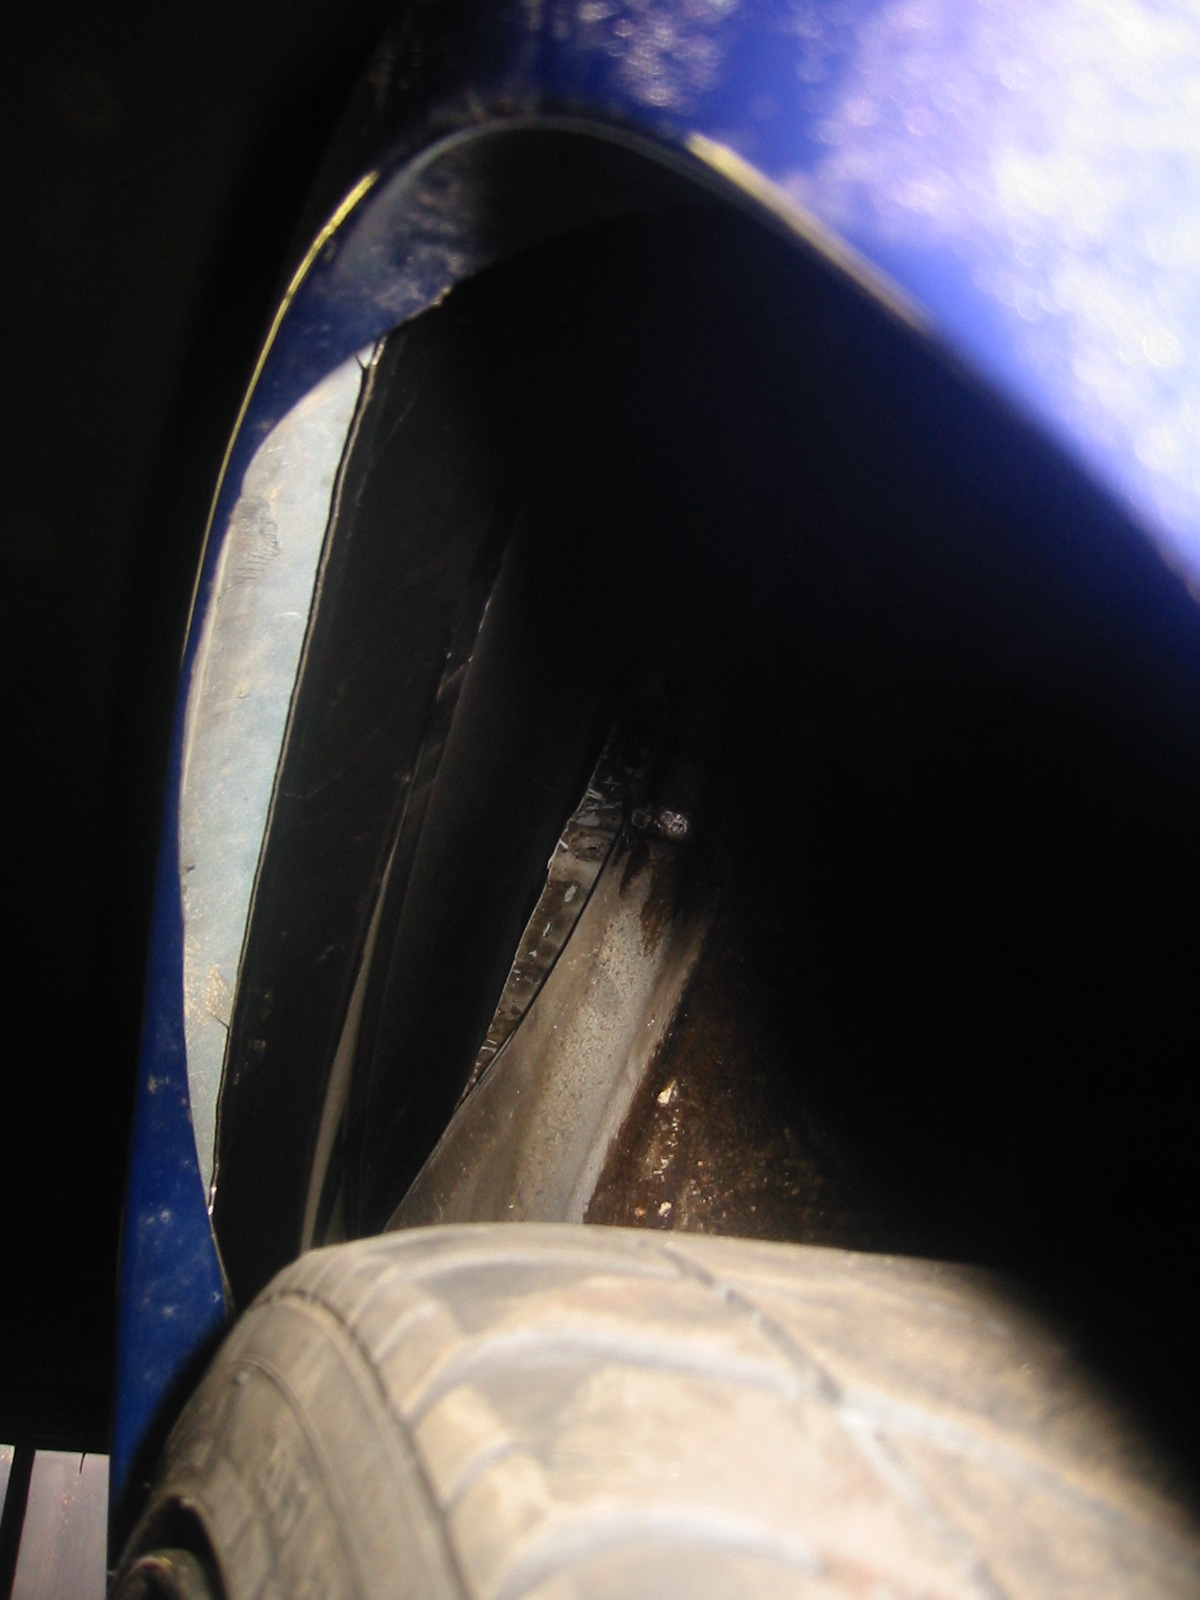
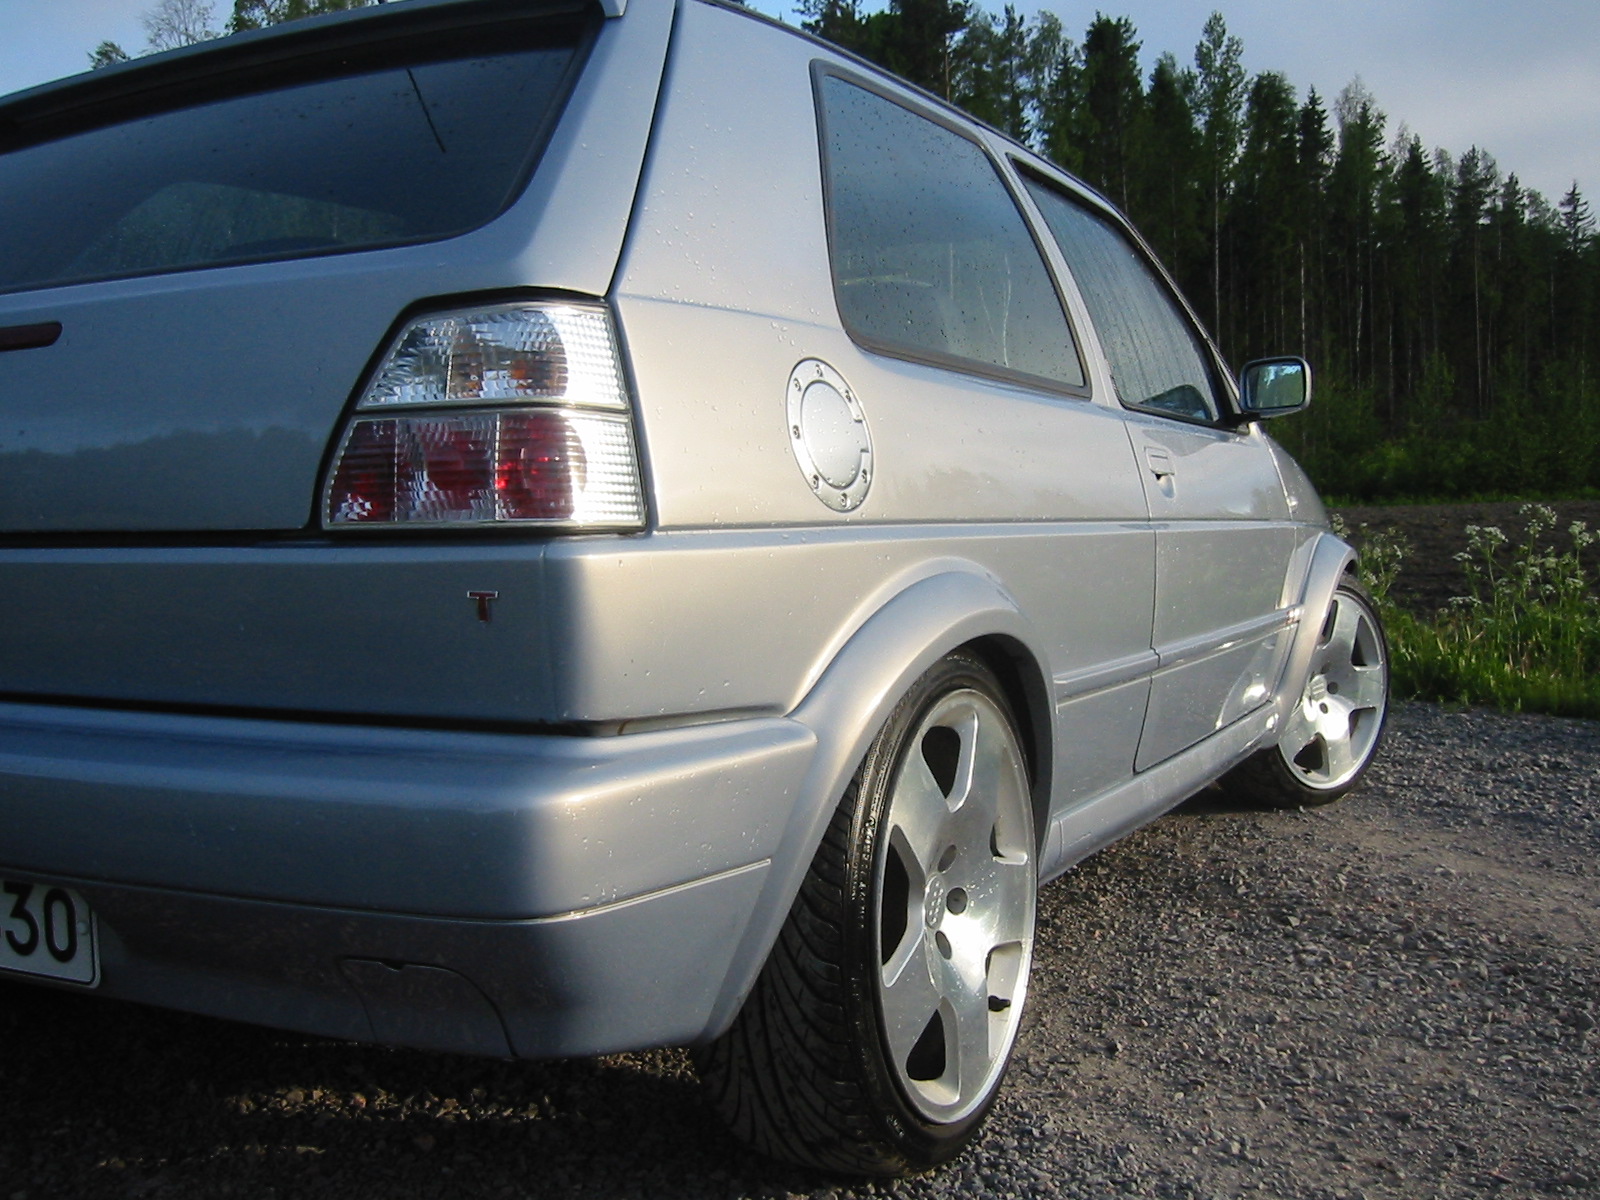
Excess material was cut from the G60 arches and wings so the ET32 7.5x17-inch wheels and tyres would turn freely with the wider-than-standard track. More about that on the next page.
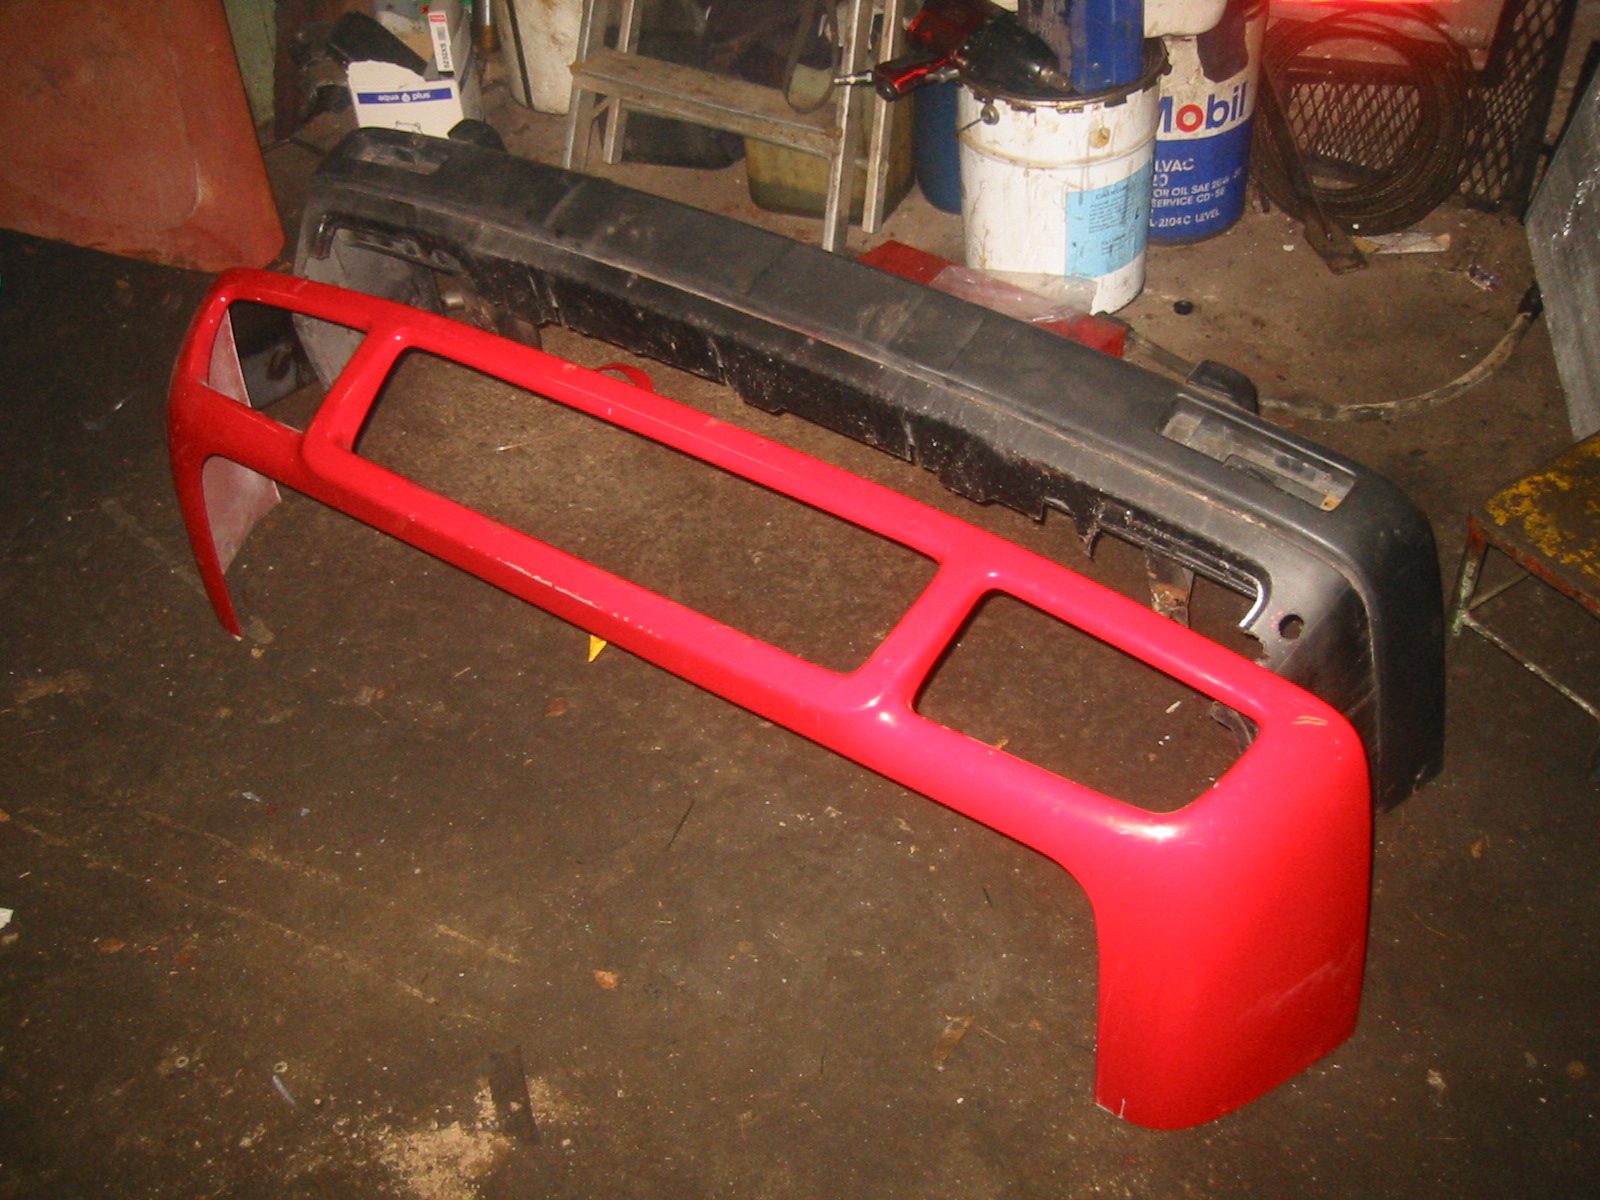
The front bumper is an original big bumper with a Maxxlook front spoiler fitted over it.
Suspension — part 1
This time Pekka wanted to invest a little more in the suspension than a year earlier, when it had standard Mk2 GT axles and brakes. This time it got Mk3 parts.
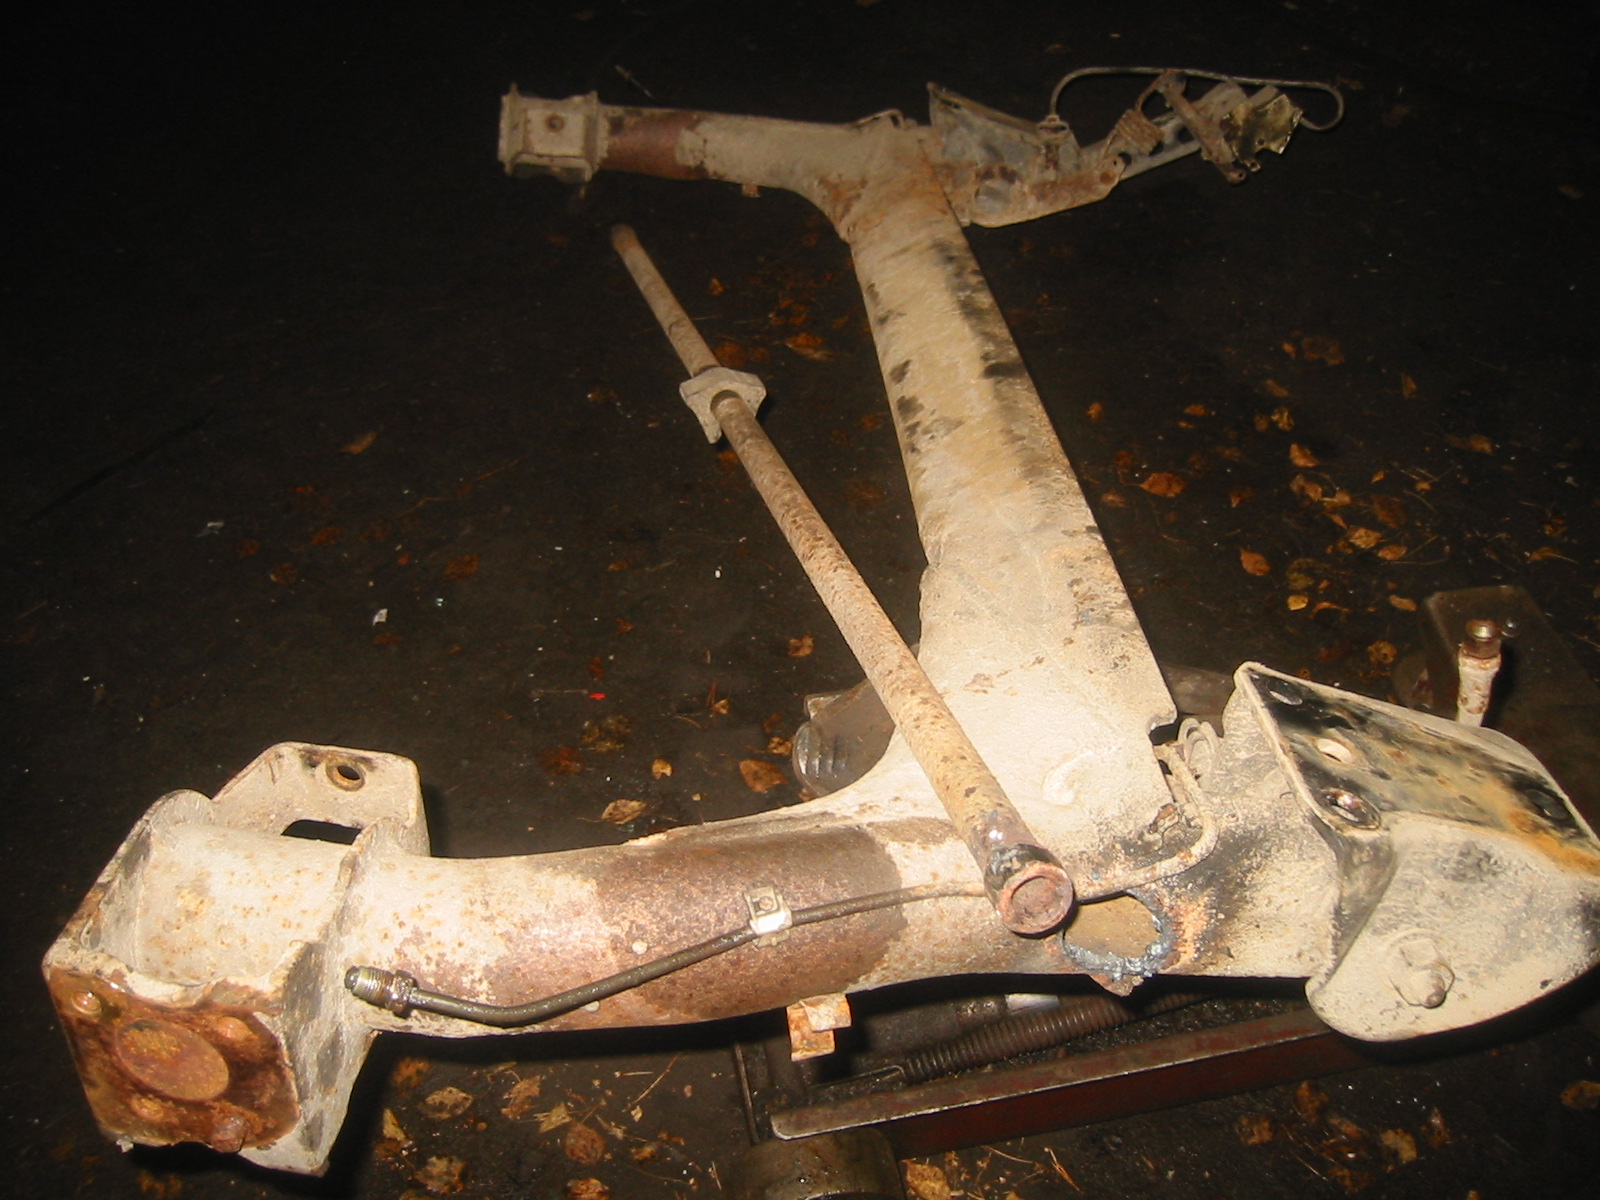
The rear axle is a Mk3 unit, with one small omission: no anti-roll bar. There was one in the damaged GT axle, so we removed it and welded it into the Mk3 beam :-)
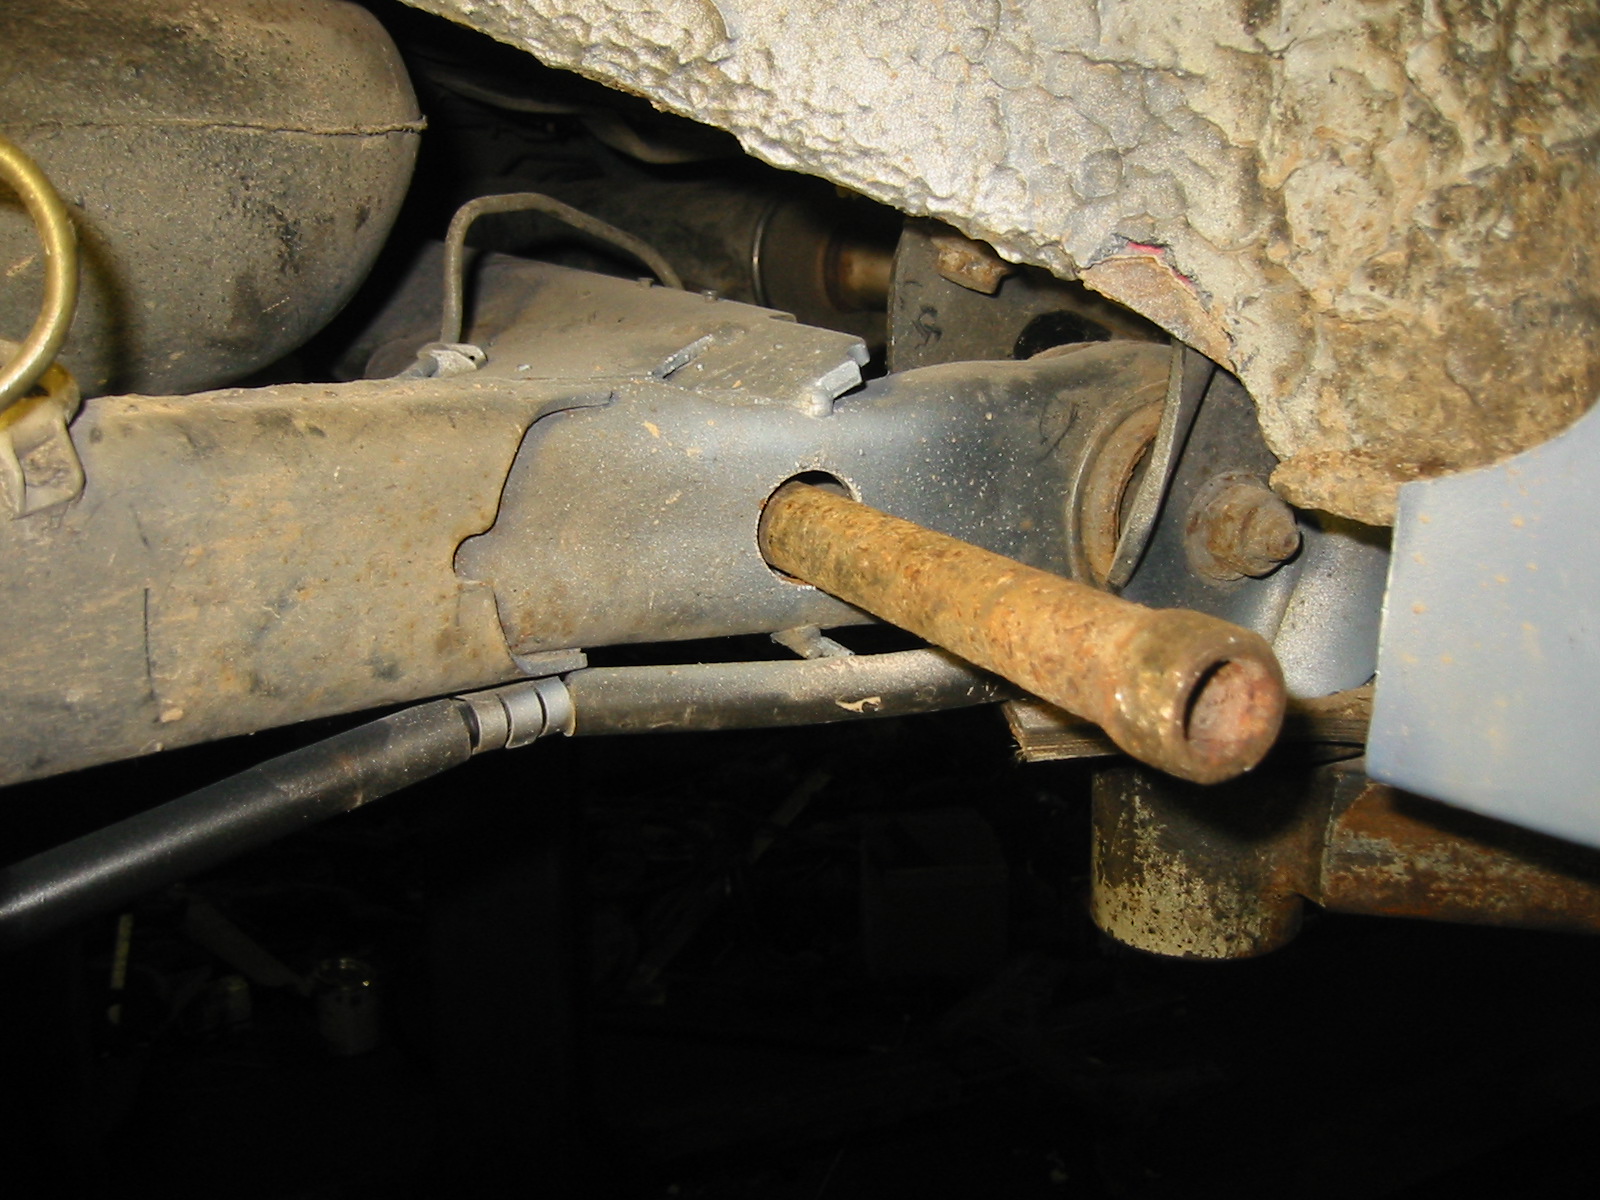
The hole has already been cut in the beam and the bar is going in...
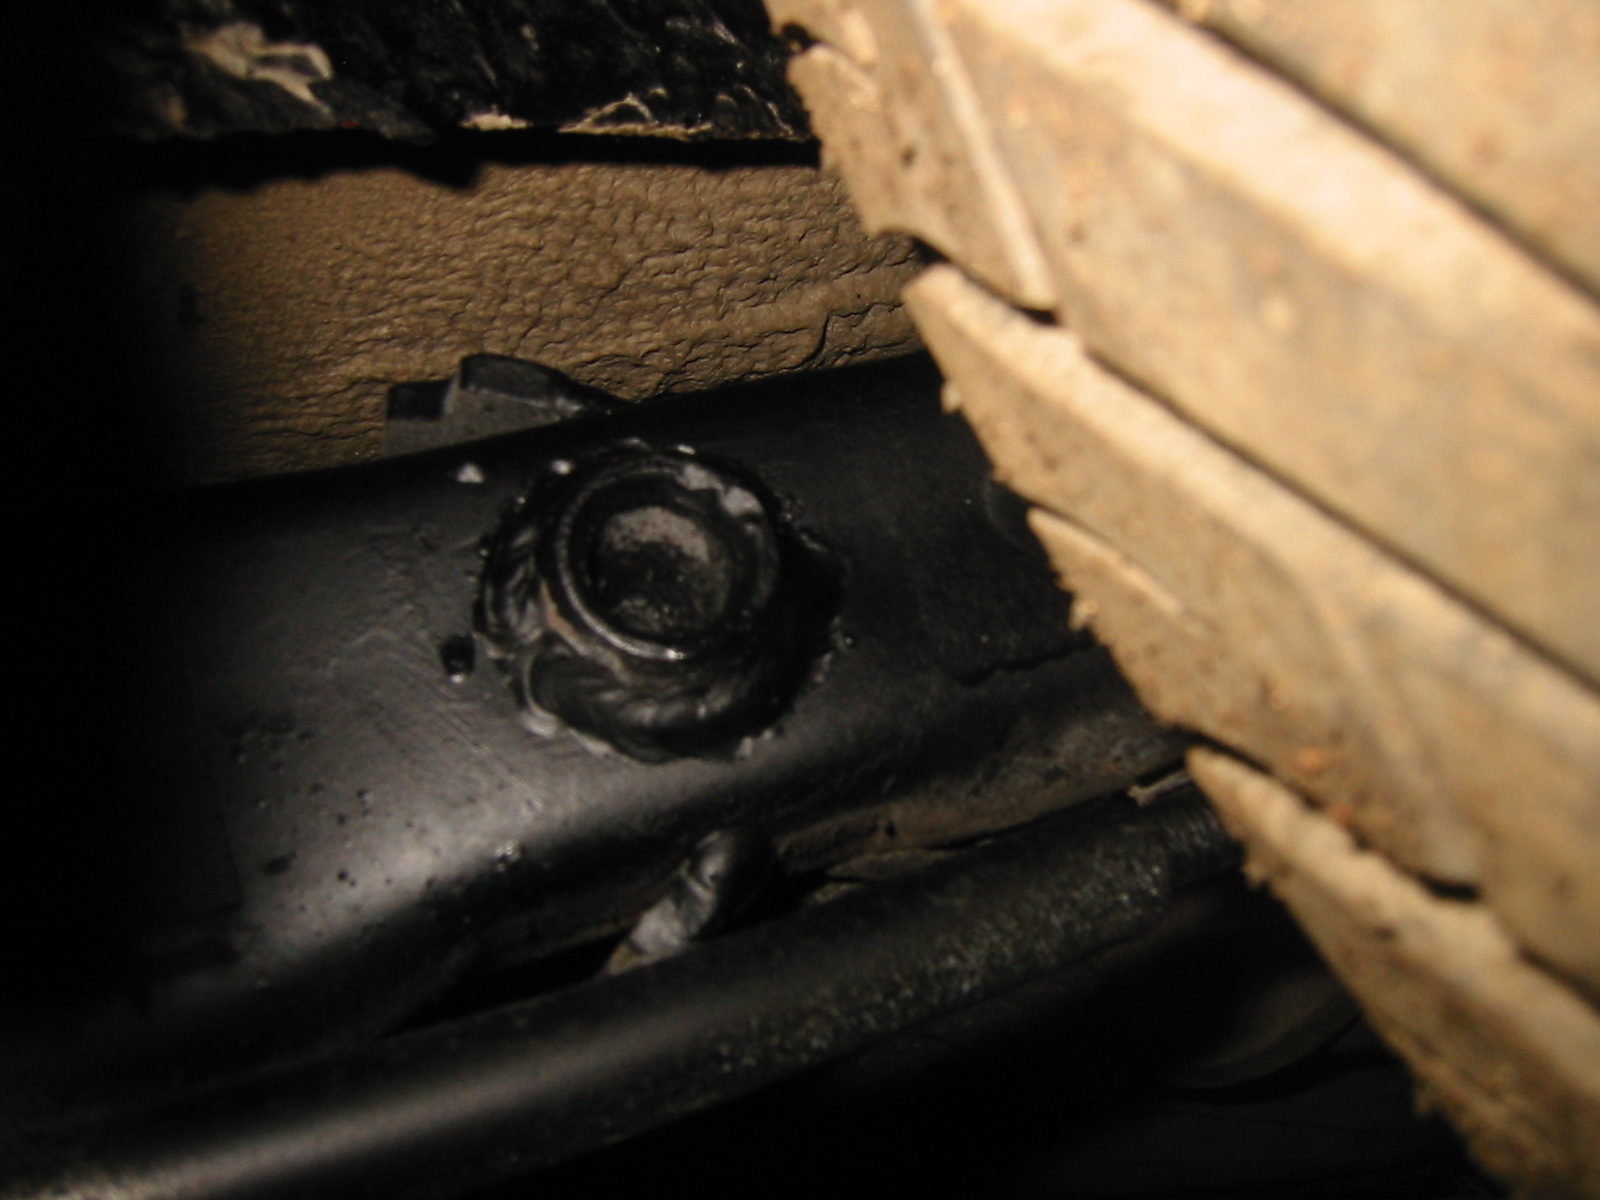
...and here it is welded in.
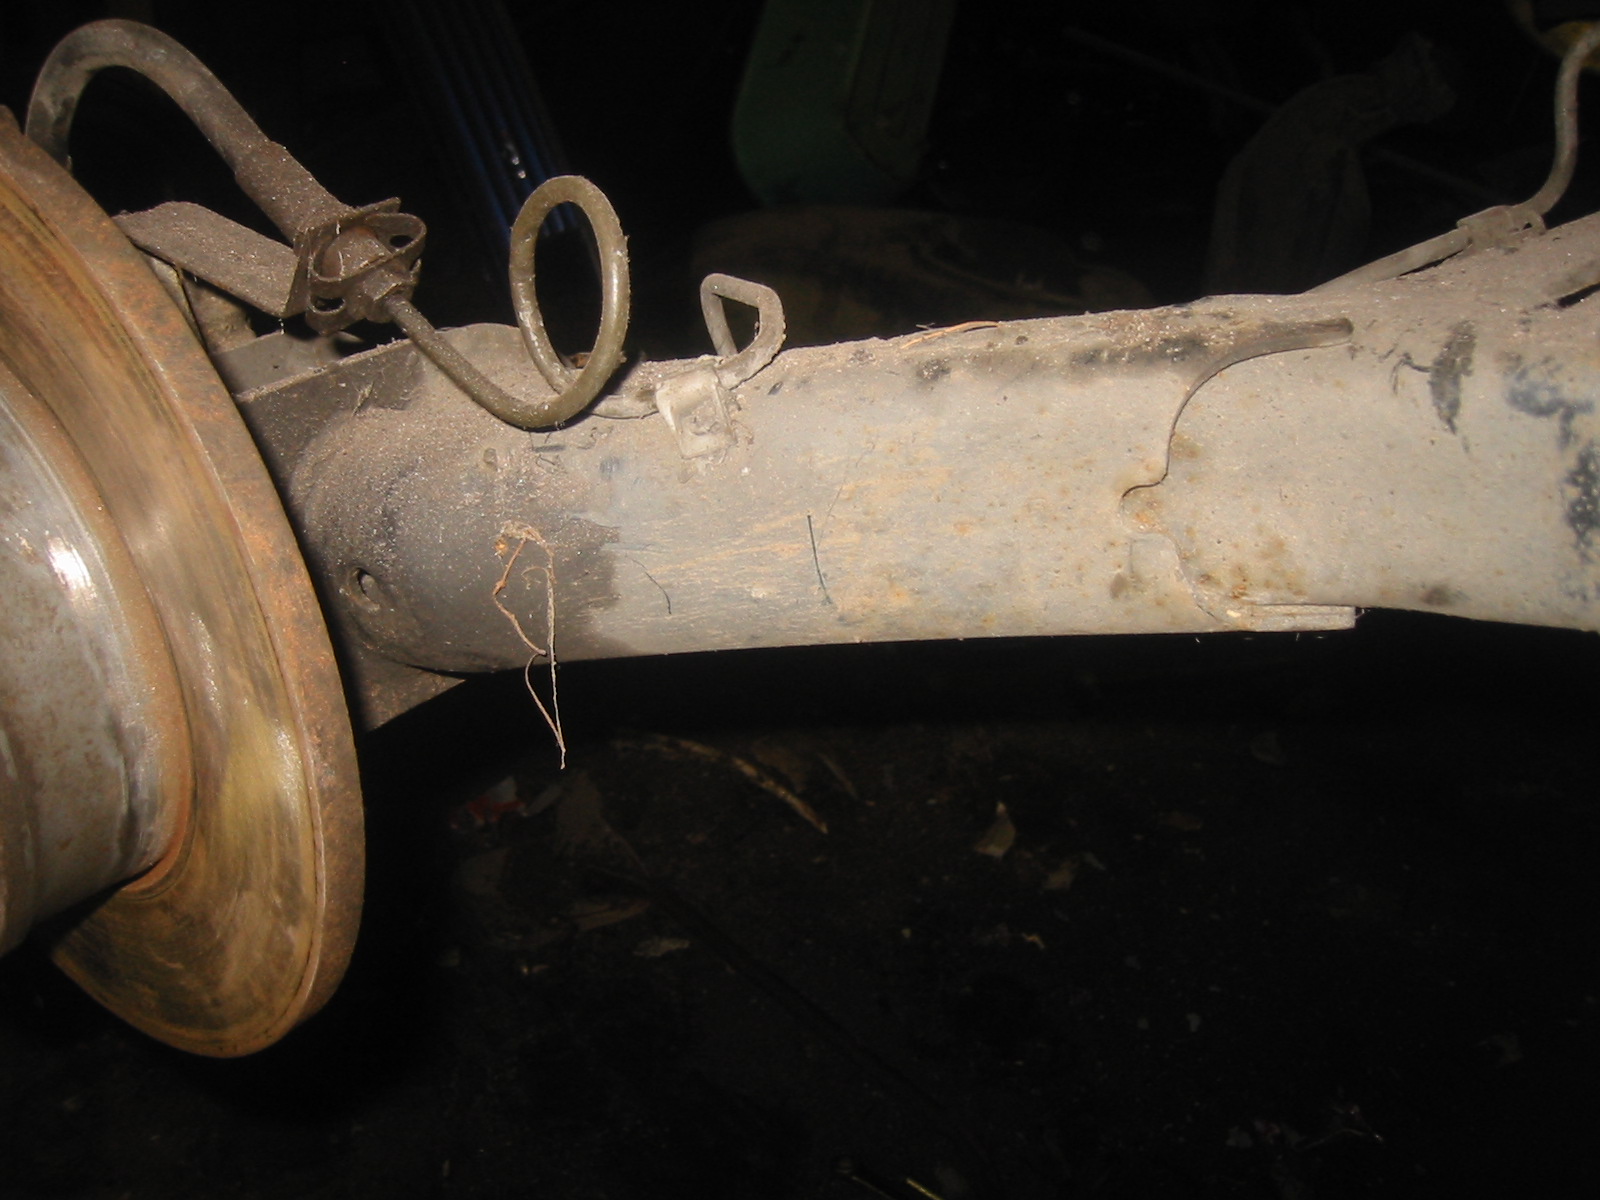
The Mk3 axle bolts straight into the Mk2. The track is wider, the beam has reinforcements as seen in the previous picture, and the brake pressure regulator differs... I think that's about it.
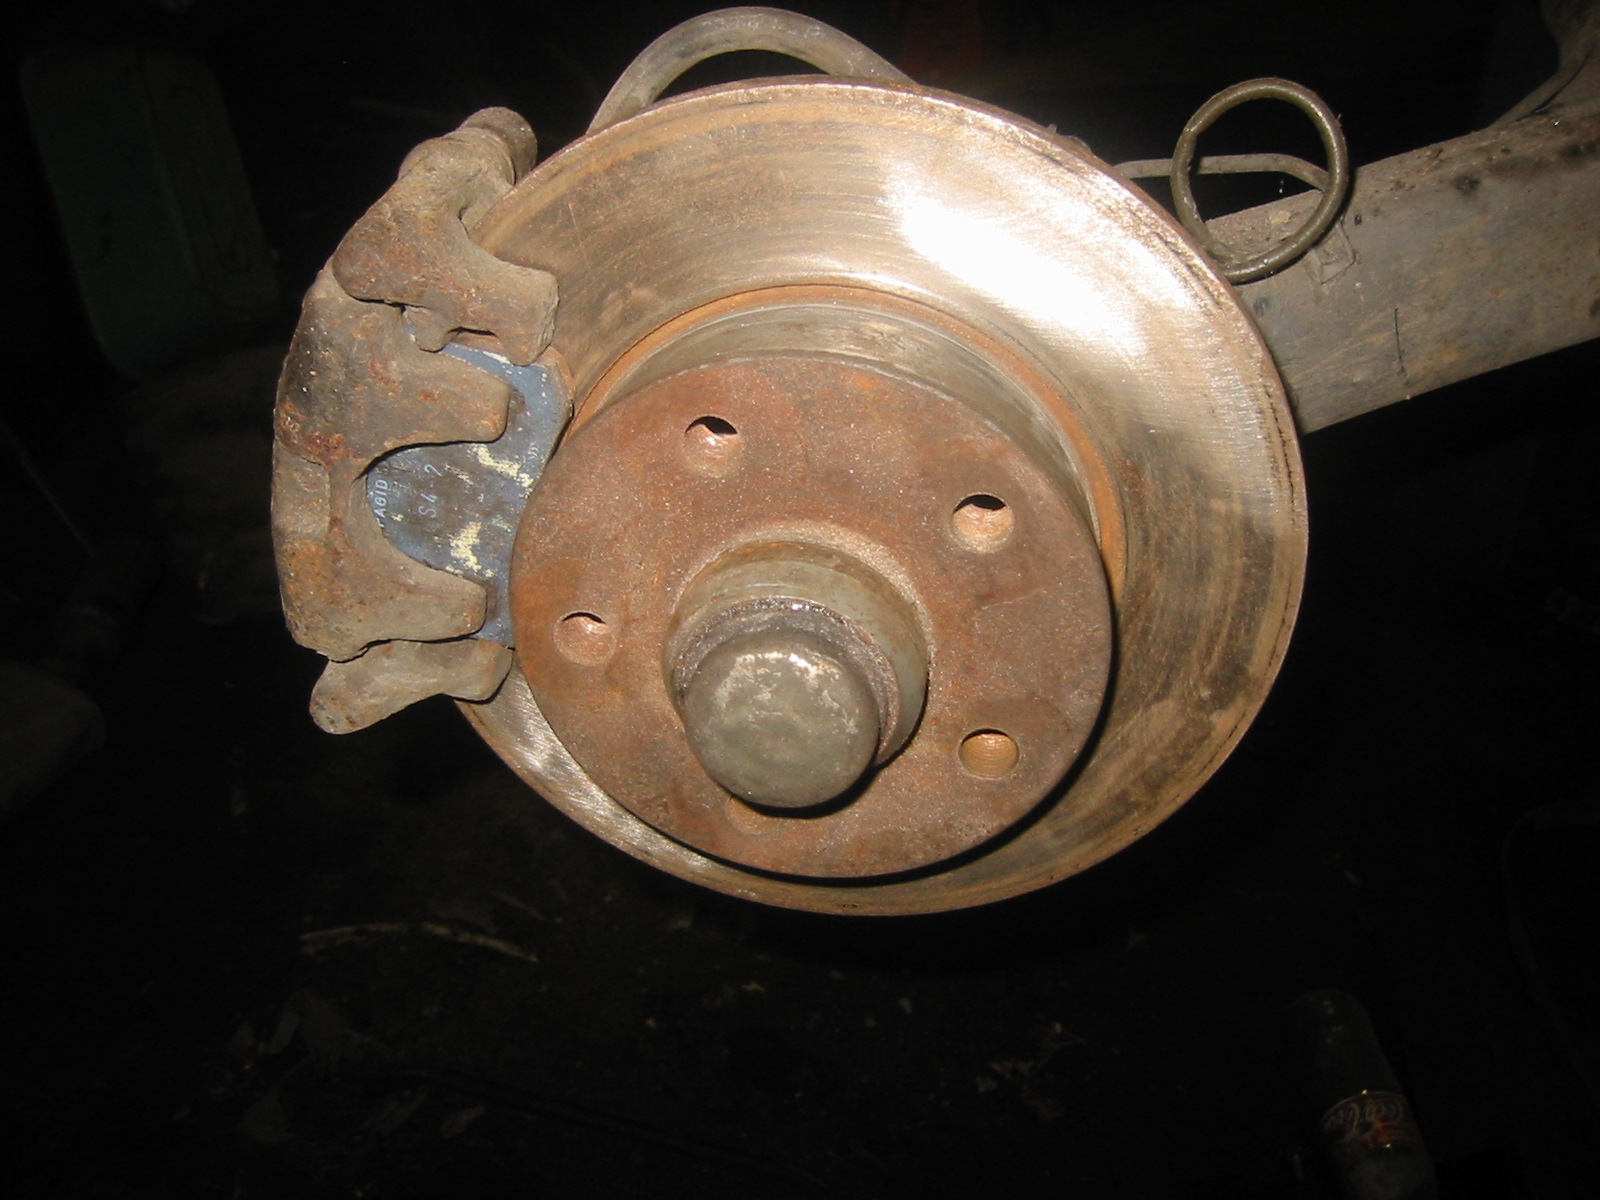
Brakes from a Mk3 VR6/GTI. The rear disc is otherwise the same as the Mk2 equivalent; only the bolt pattern differs, at 5x100.
Suspension — part 2
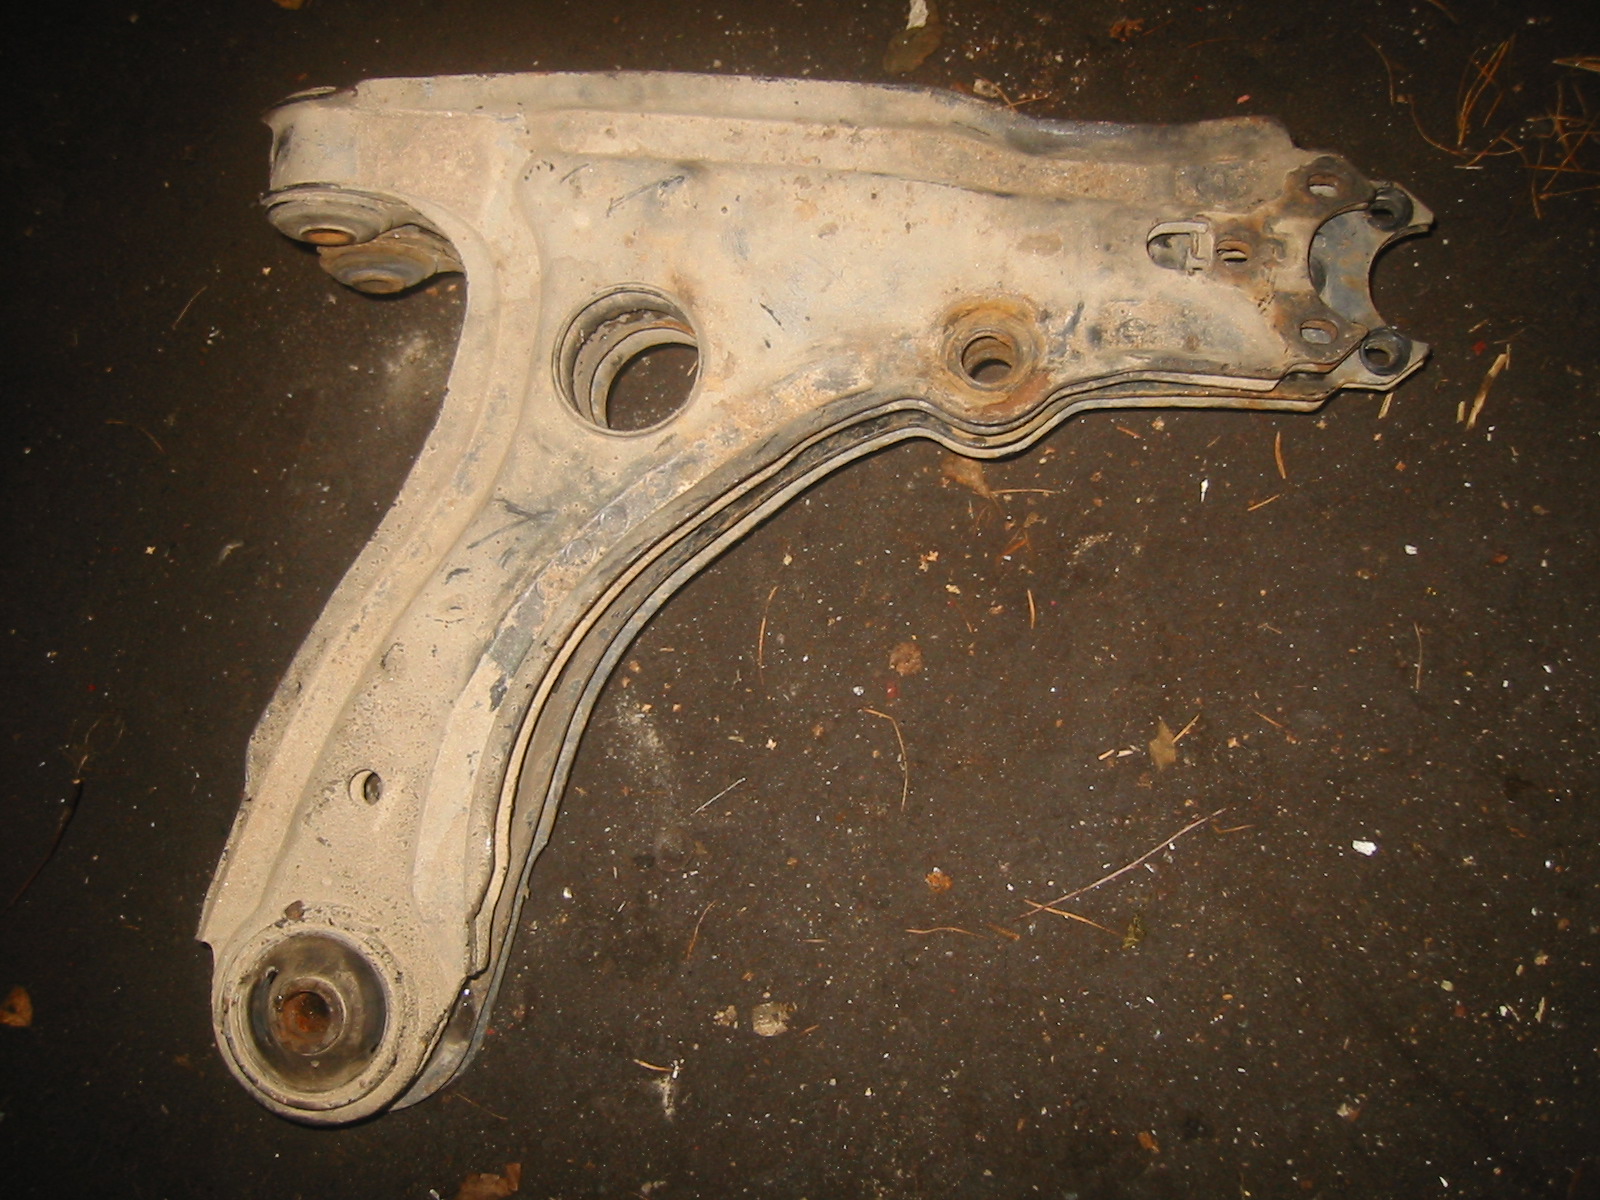
At the front, the VR6 suspension differs more. Here are ordinary Mk3, below, and Mk2 lower control arms. Note the length difference that gives the Mk3 its wider track.
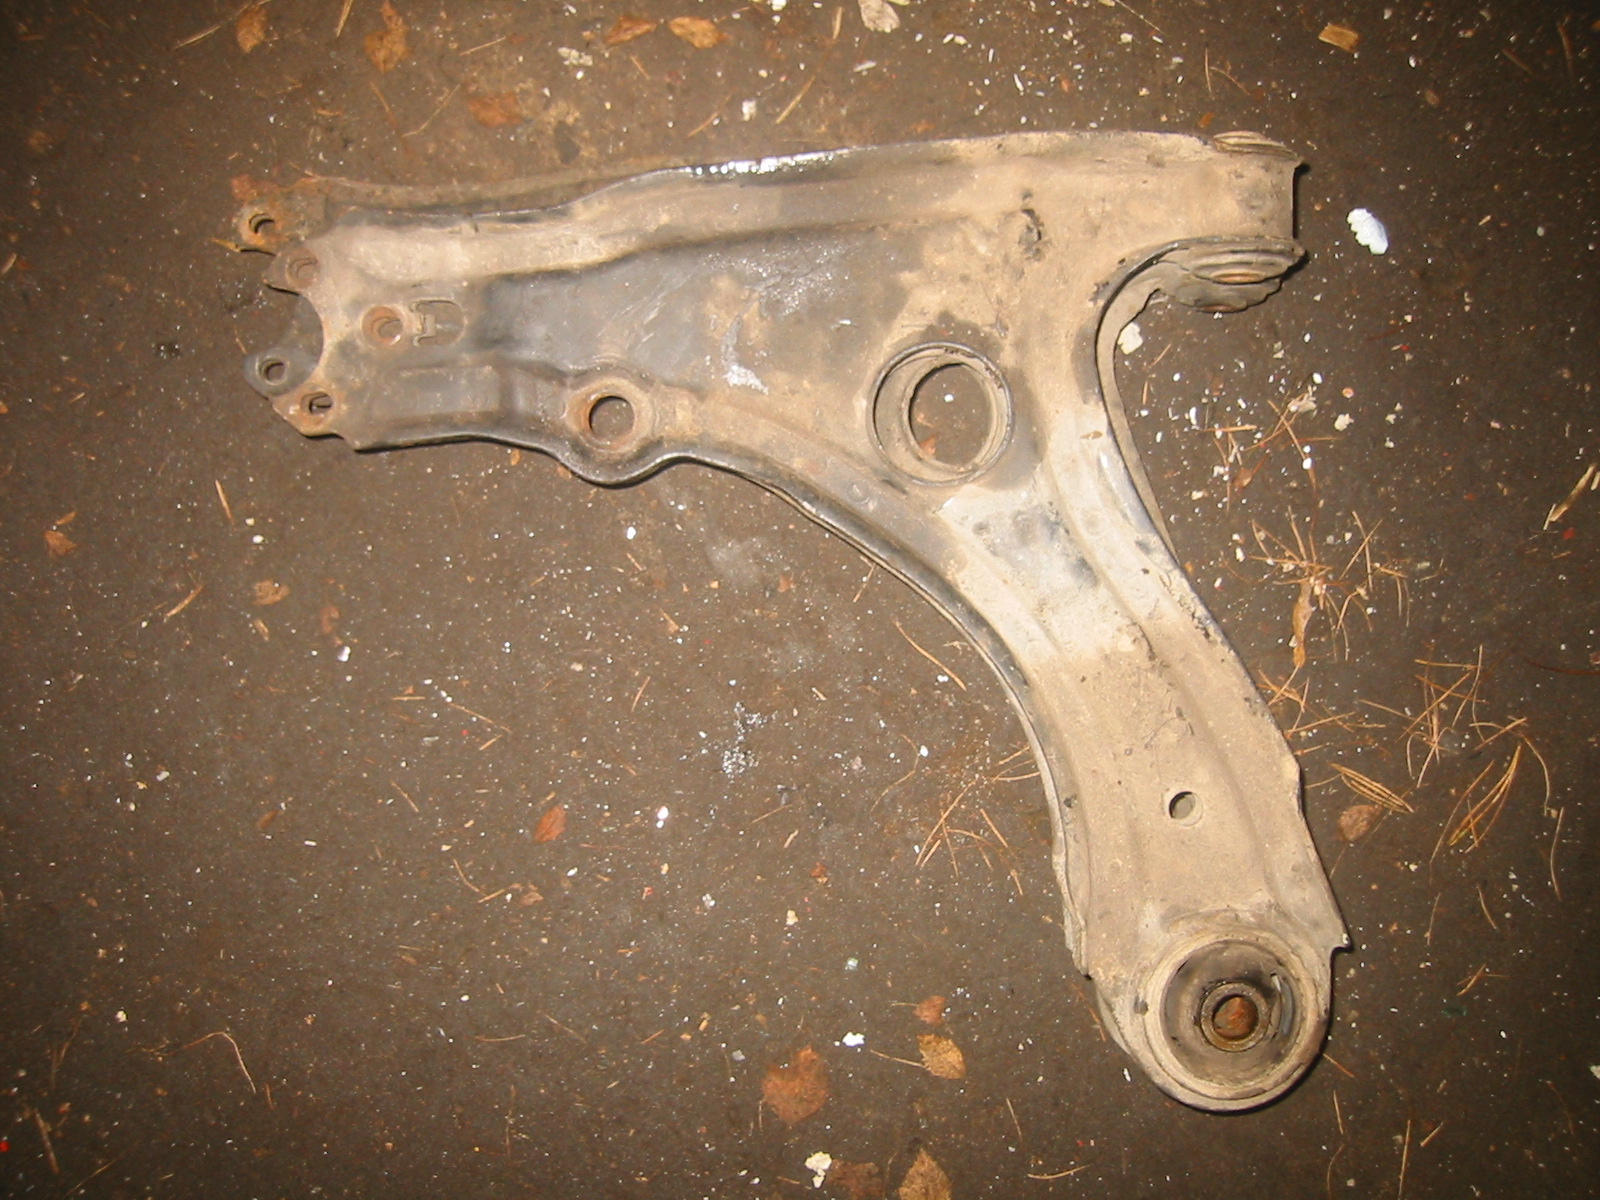
Here are the VR6 arm, below, and a normal Mk3 arm. The VR6 one is slightly longer again, and its lower ball joint mounting is a little further forward...
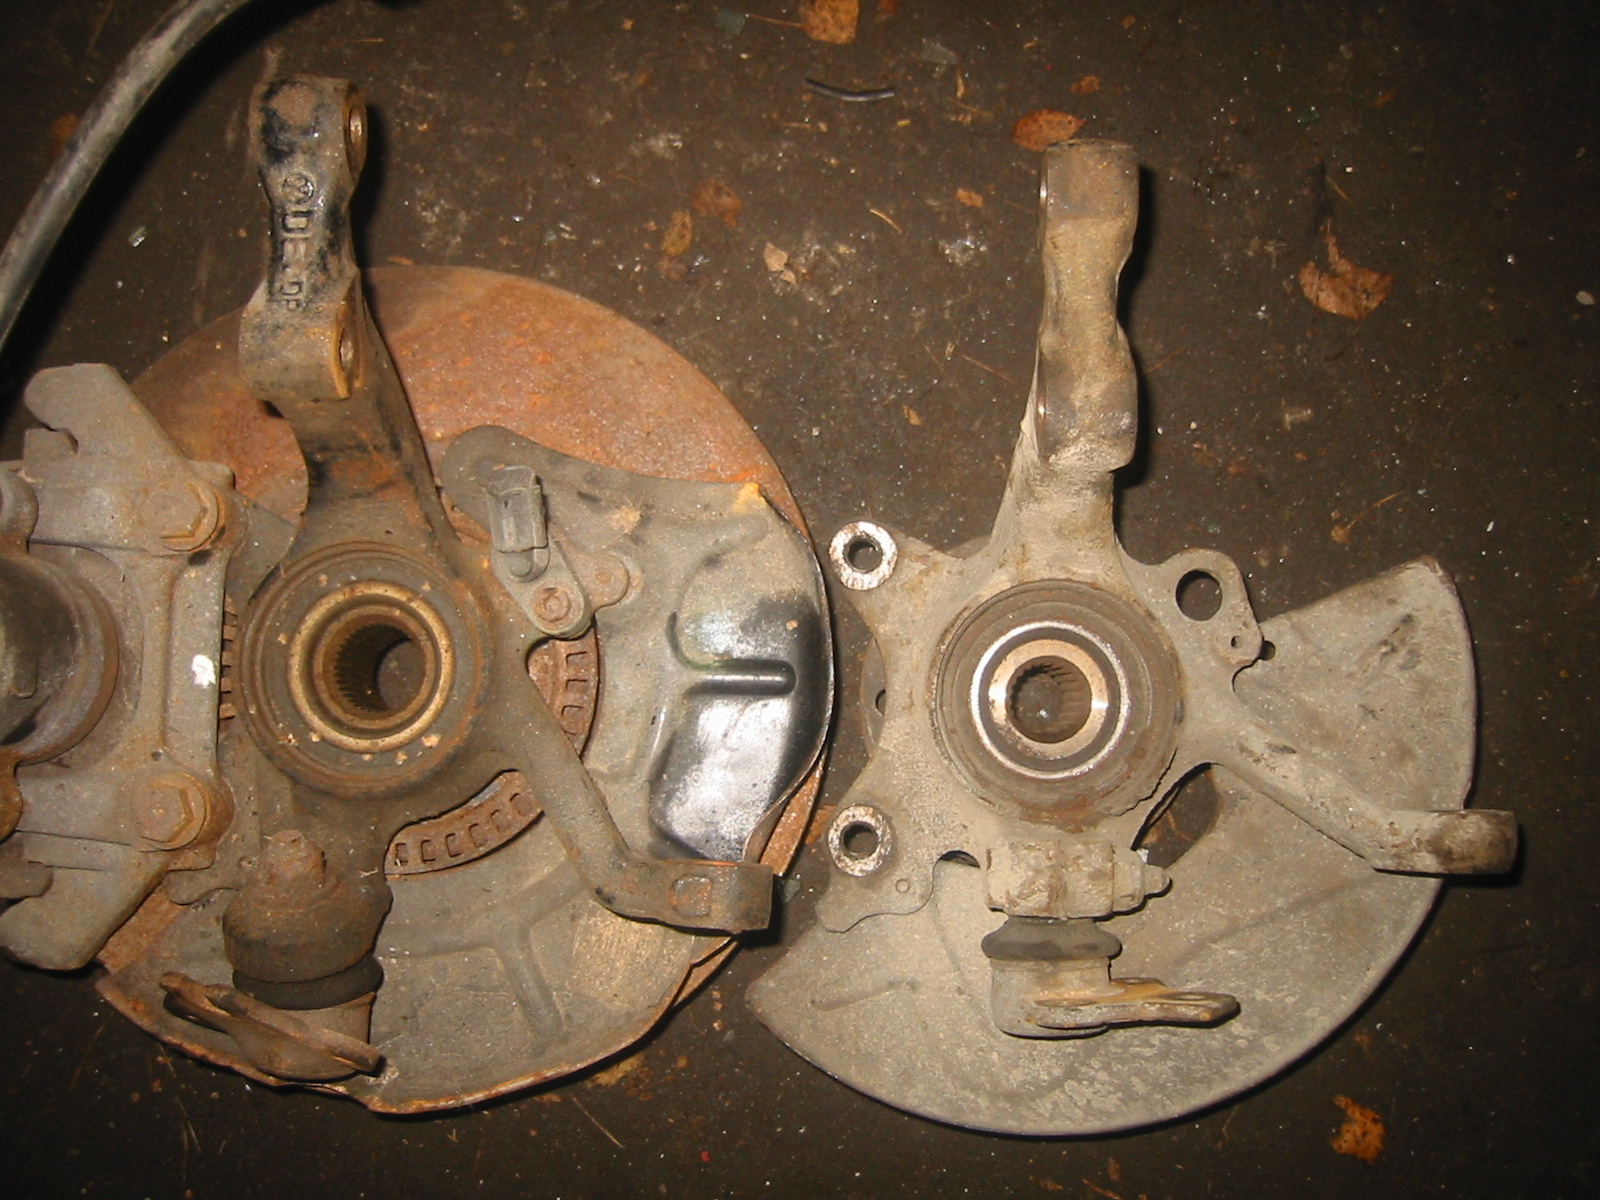
...which also shows in this picture: VR6 hub on the left, ordinary Mk2/Mk3 hub on the right.
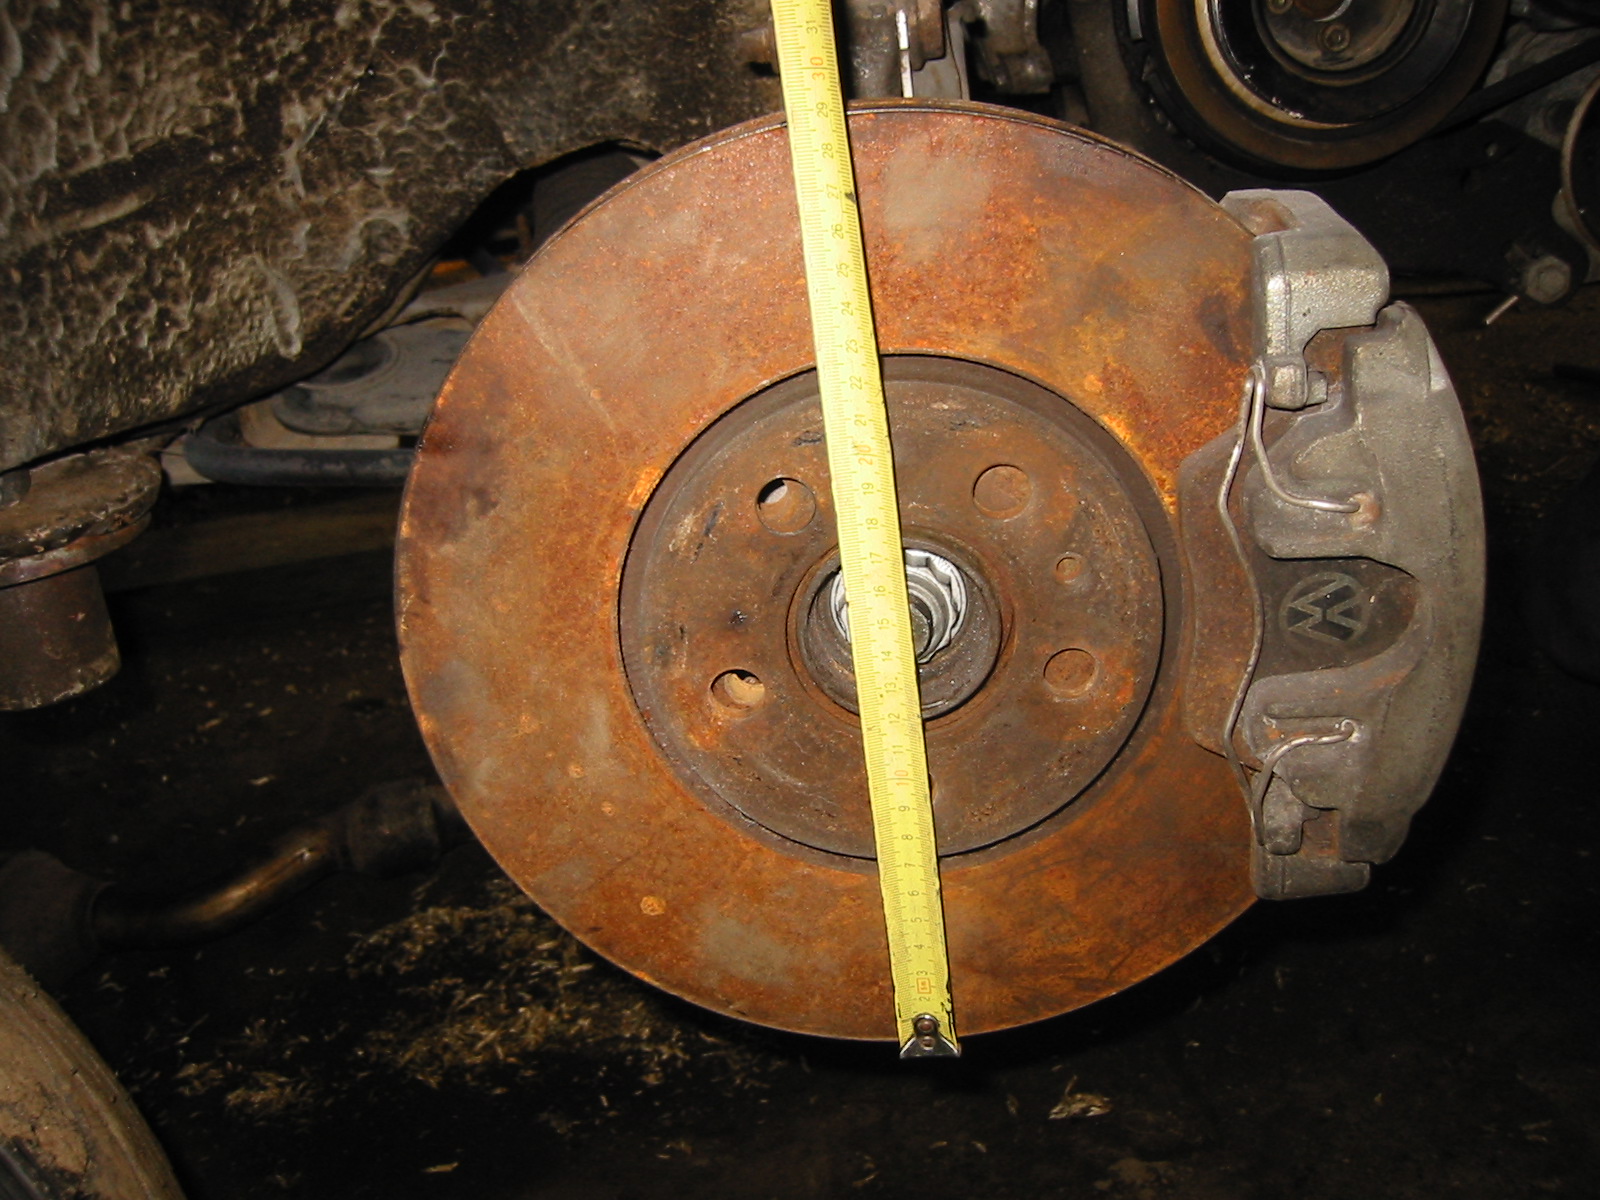
The front brake disc is a decent size at 288 mm.
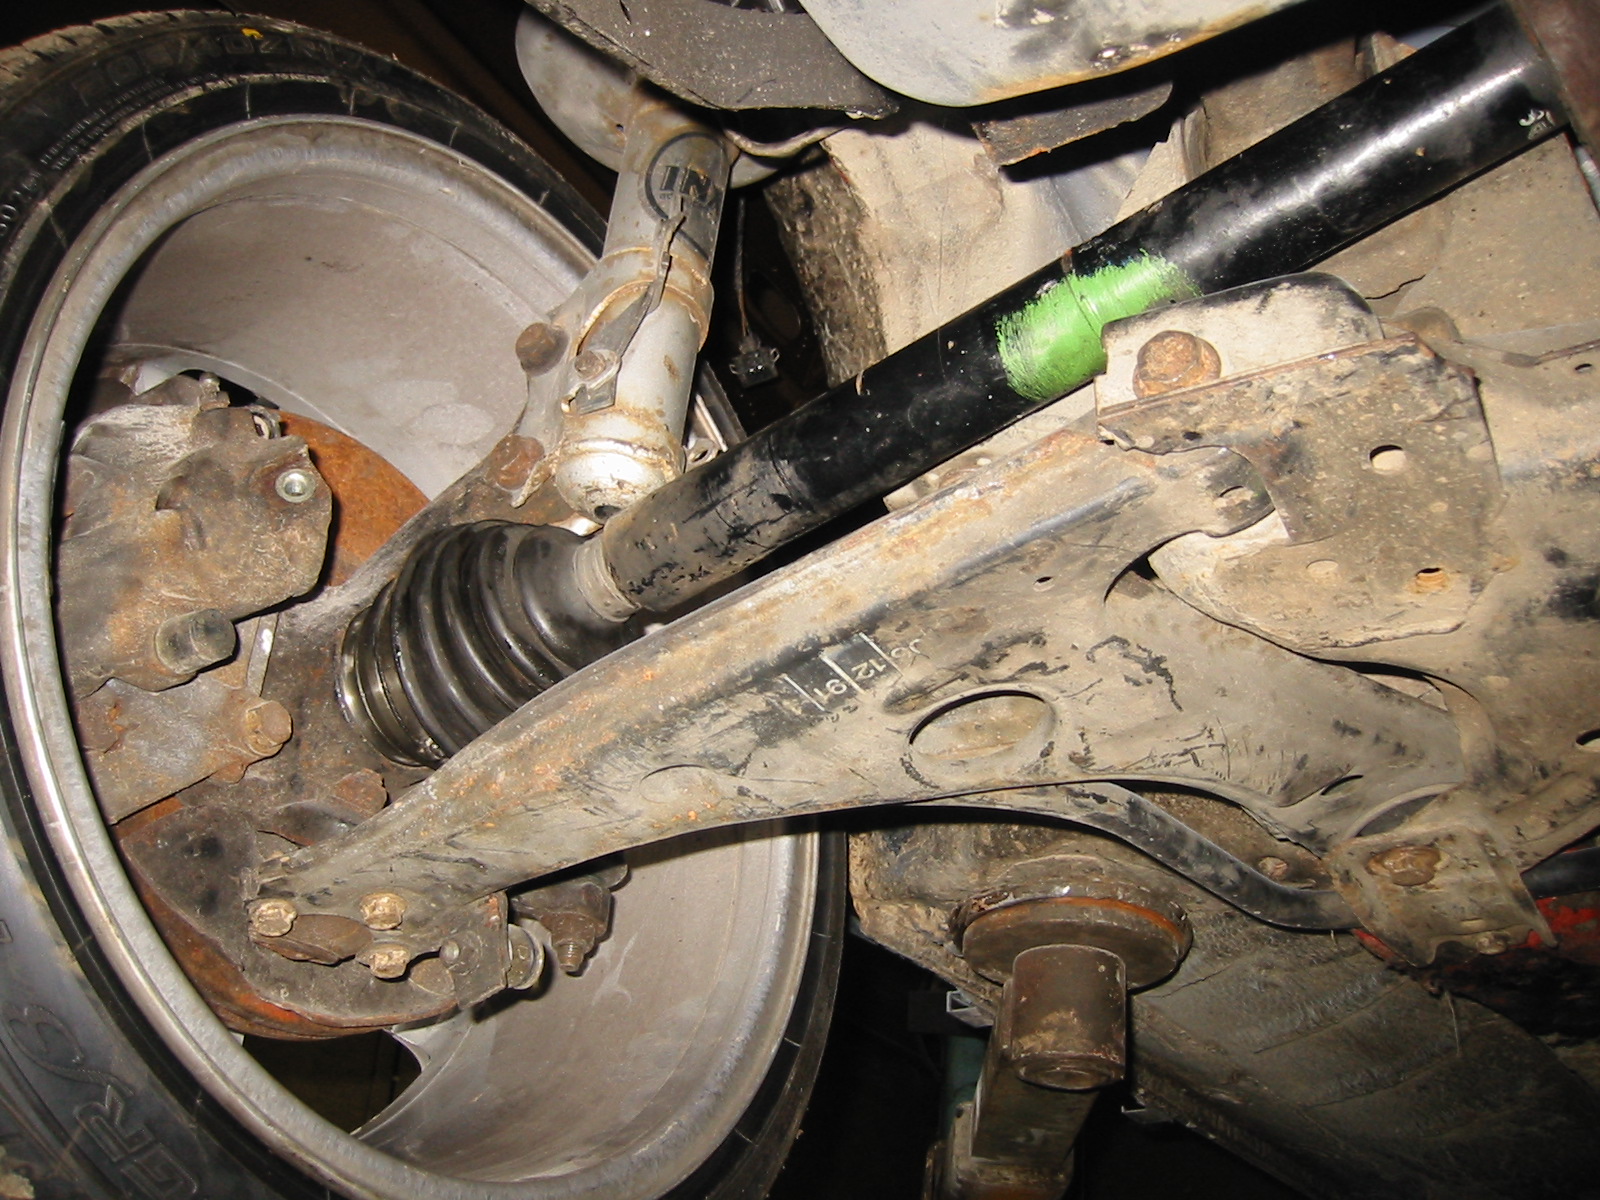
From underneath at the front. The brake hoses are still missing and the damper isn't the final one. The lower arm's construction differs slightly from ordinary Mk2 and Mk3 arms, but it bolts straight to the Mk2 subframe.
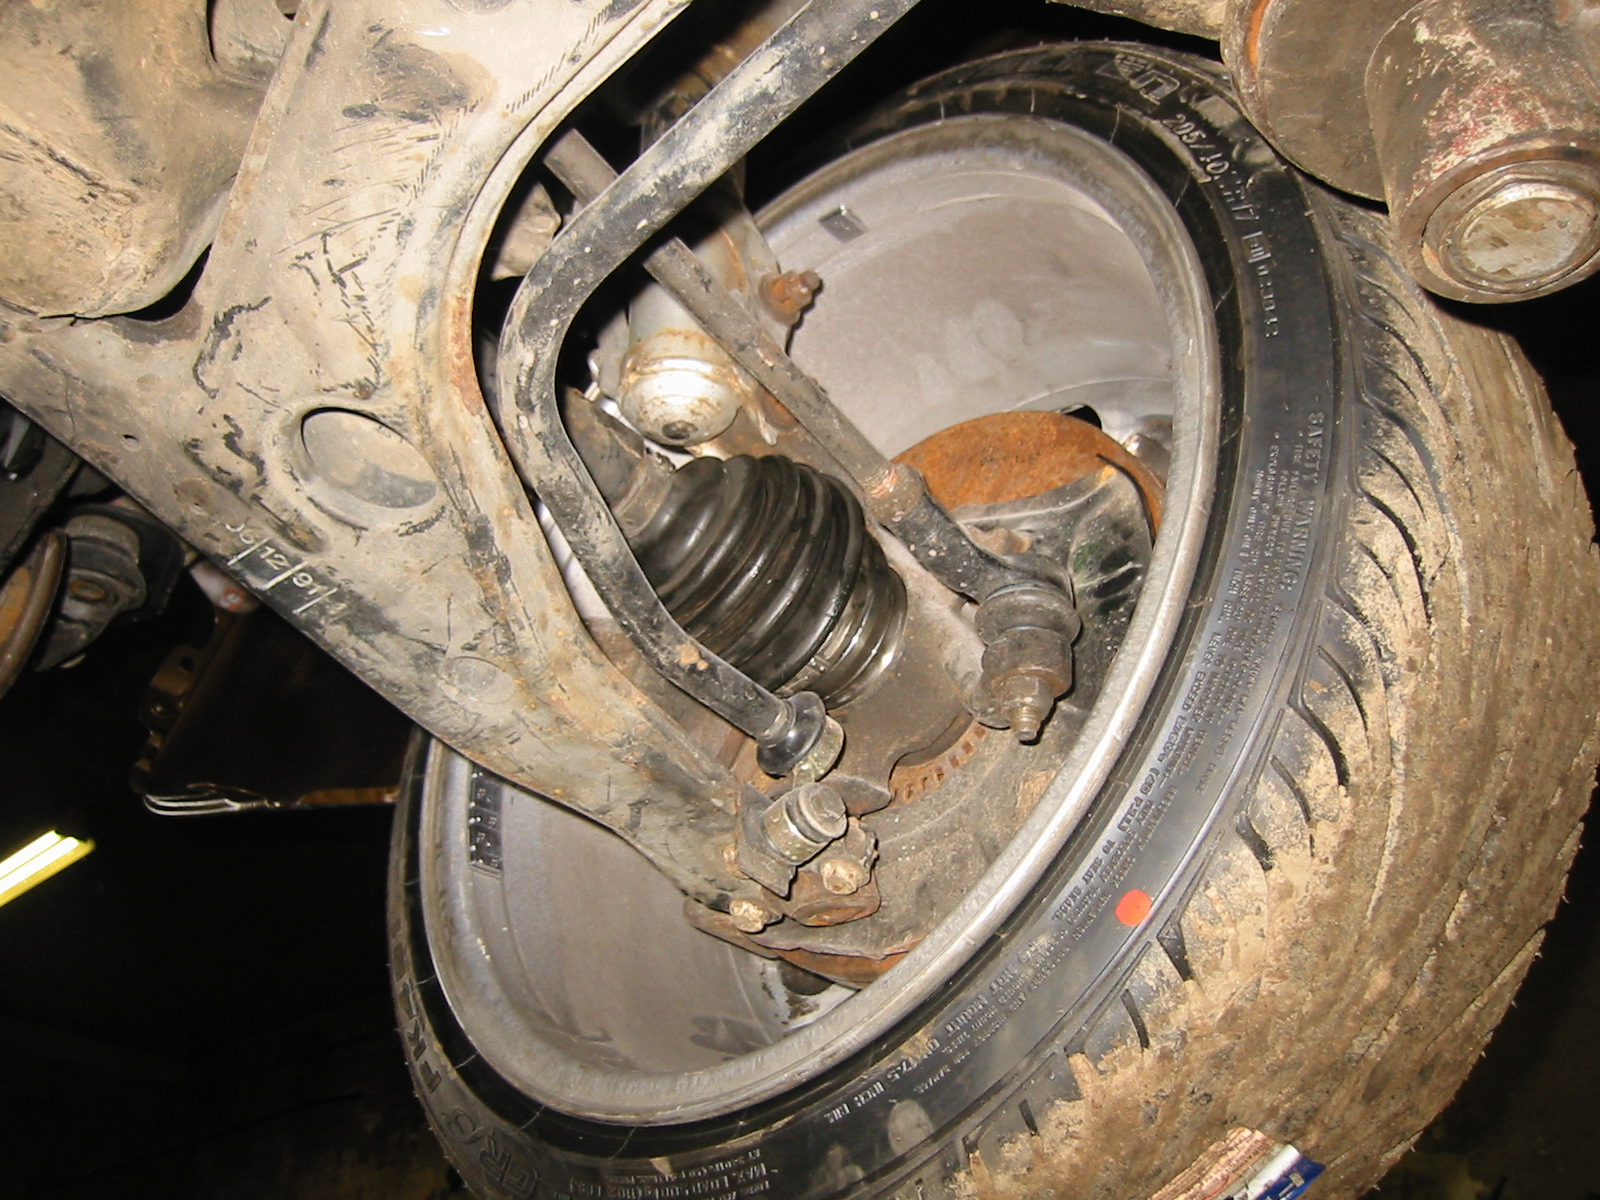
From underneath at the rear. The anti-roll bar connects to the control arms with drop links.
It's now ready for ABS too: just add the wiring someday if we feel like it :-)
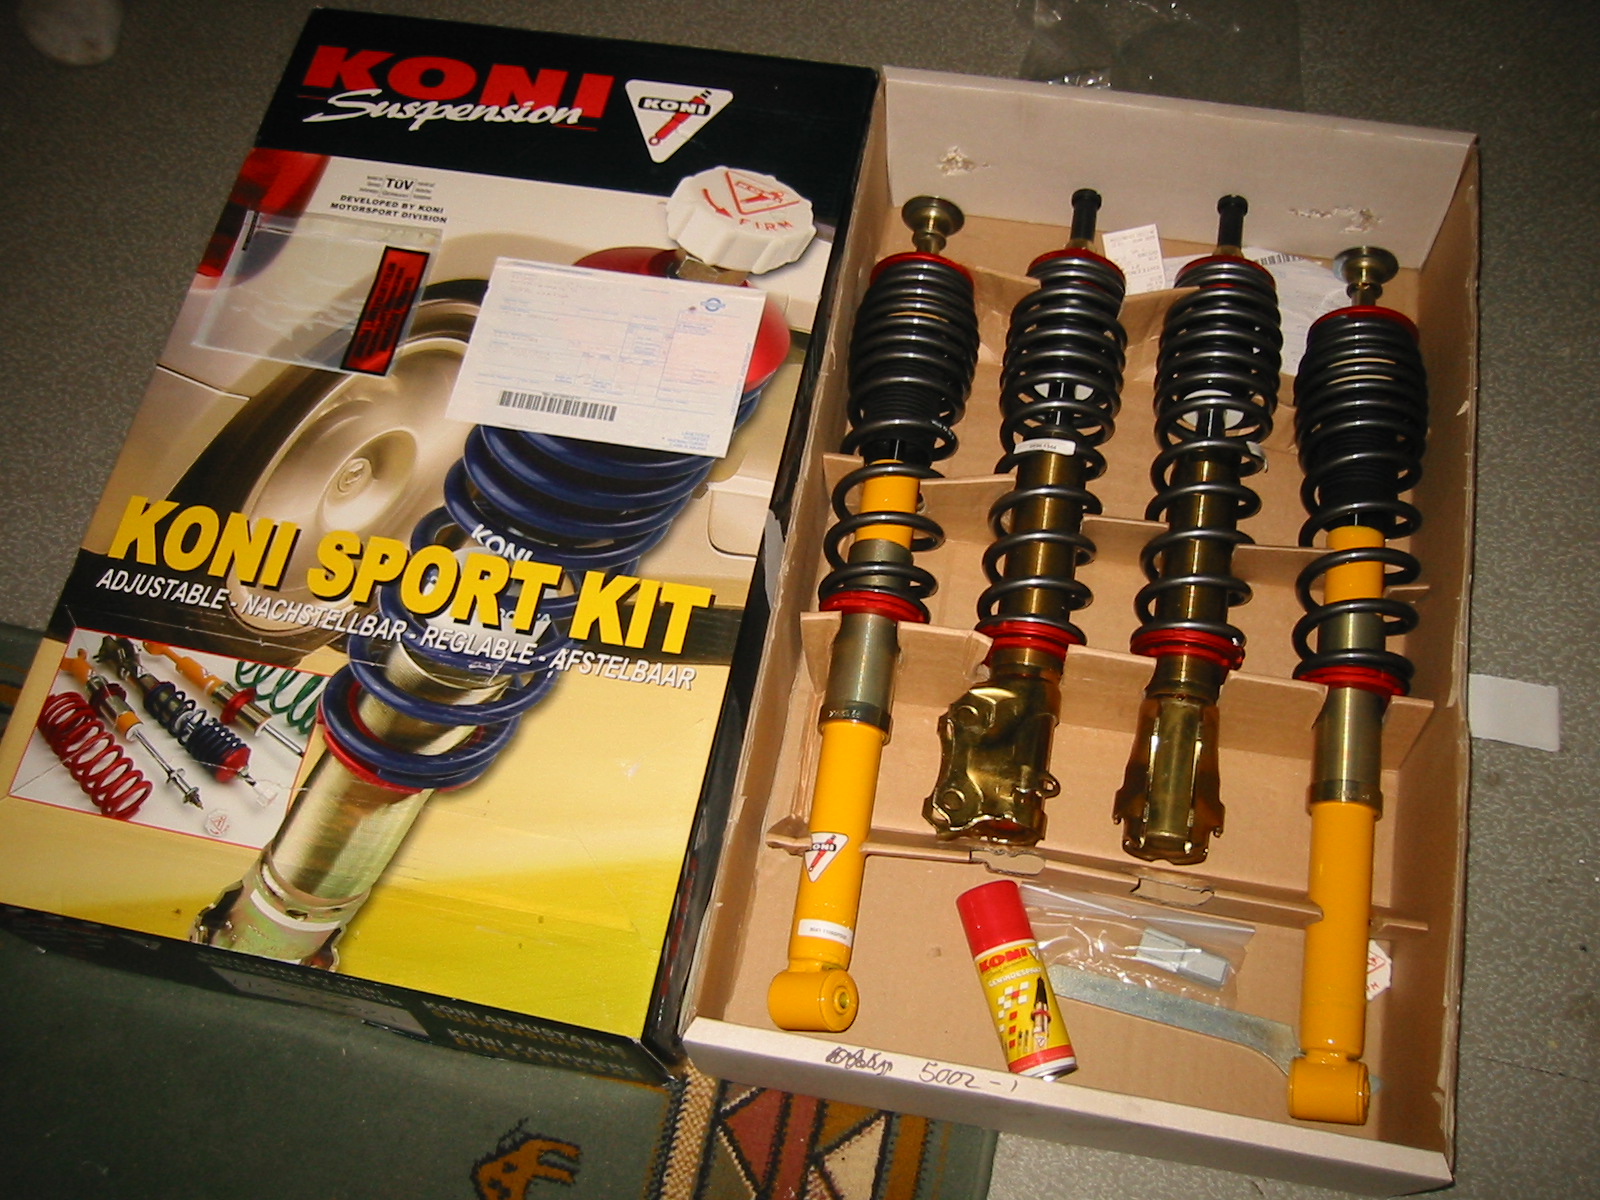
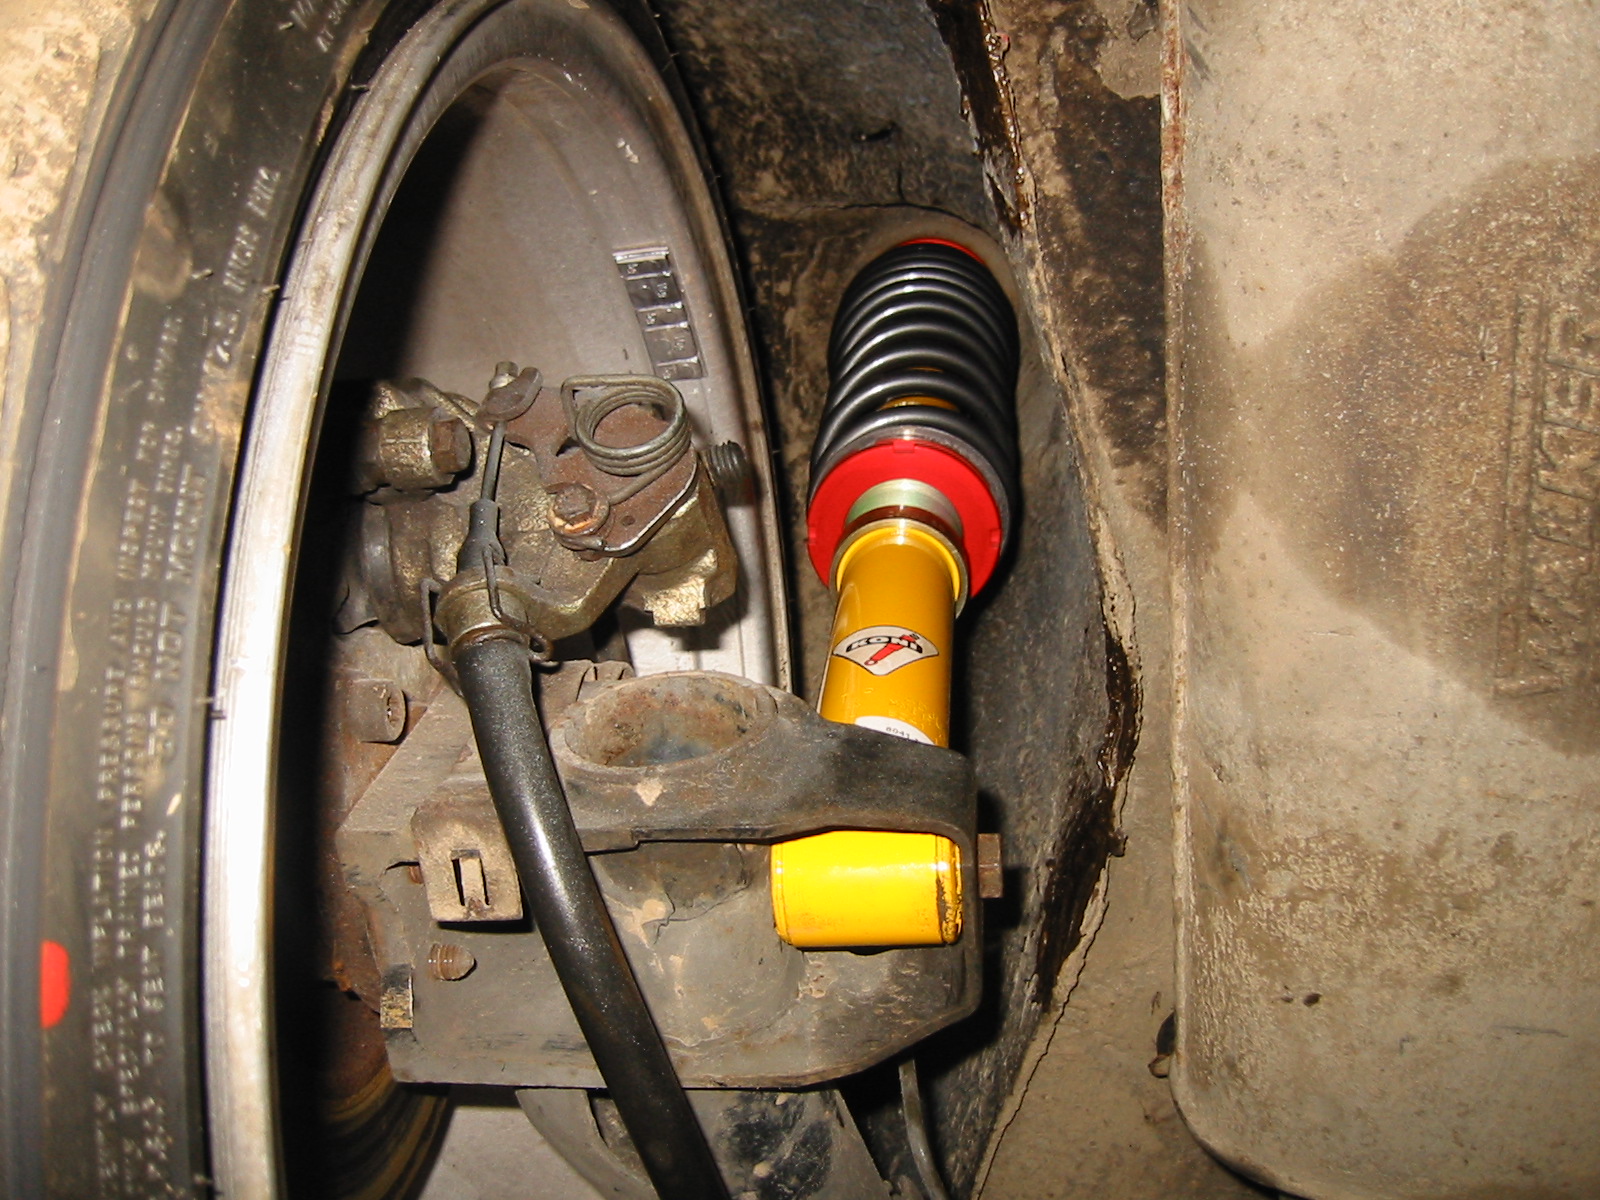
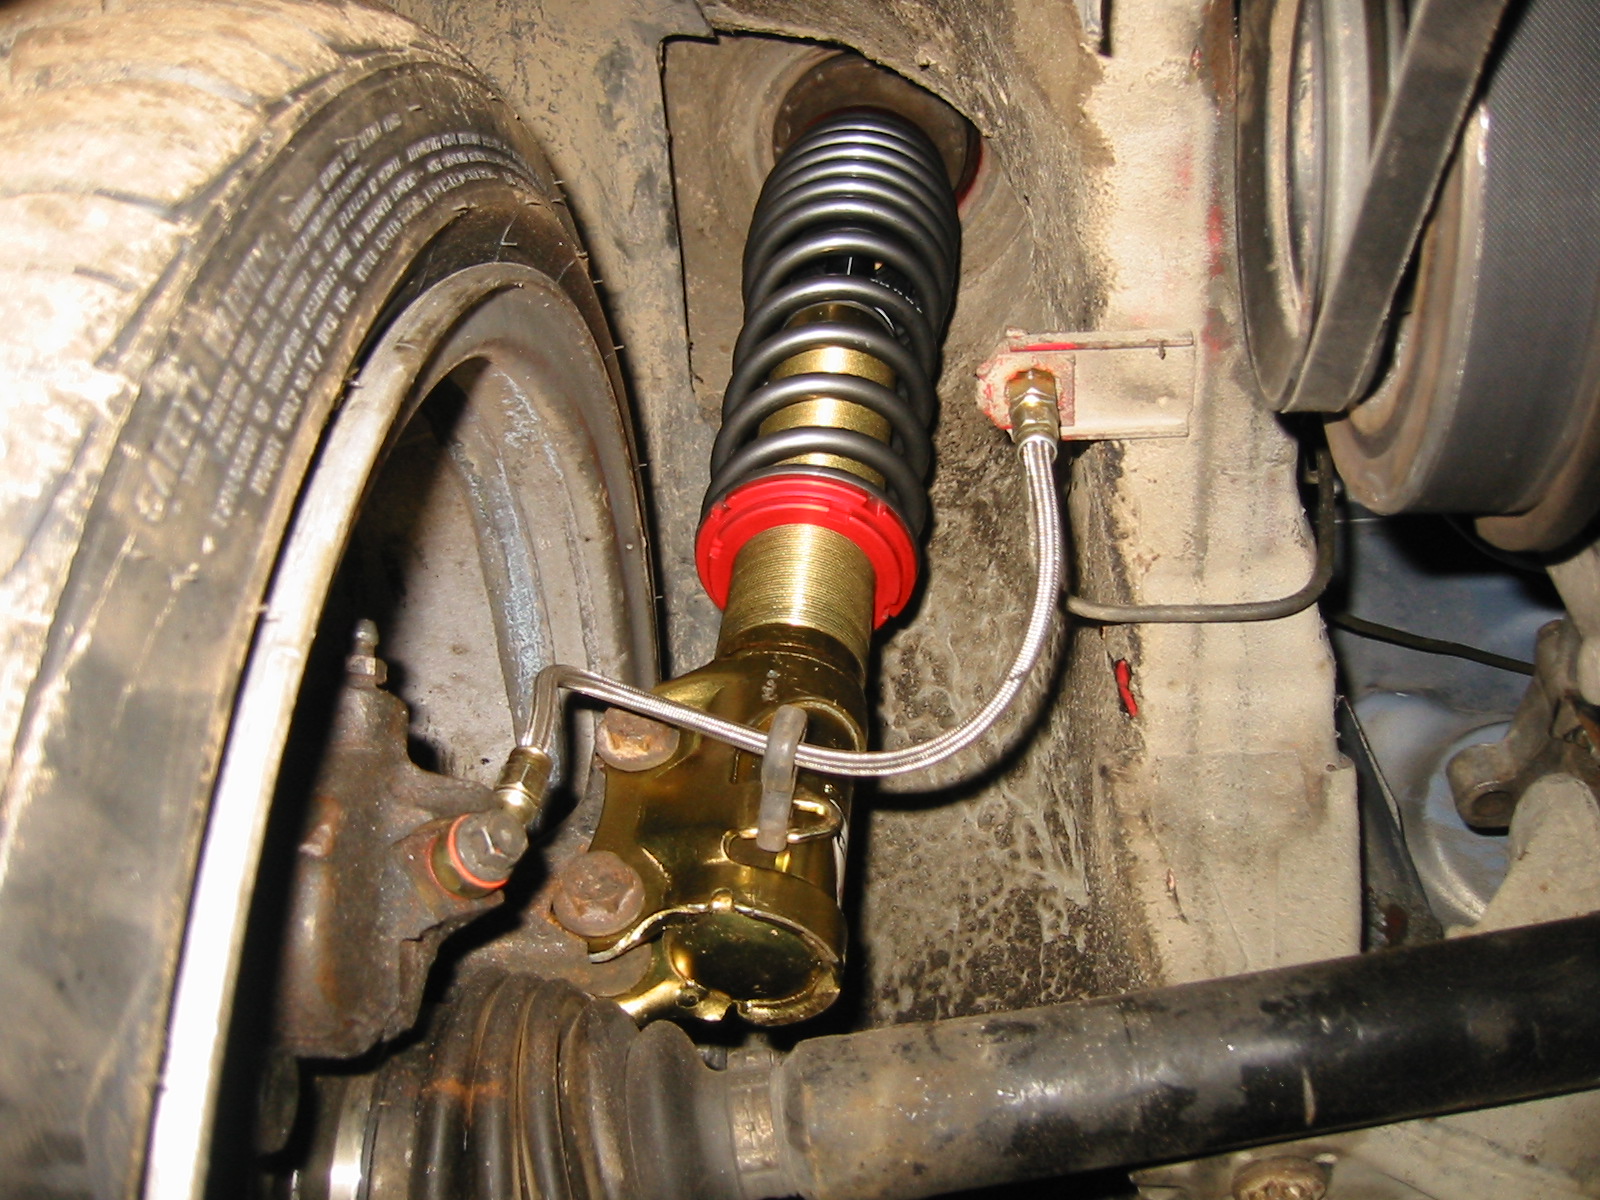
The suspension kit finally chosen was a Koni Sport Kit, fitted a couple of days later. Braided hoses went at the front, with silicone brake fluid.
Painting — part 1
The car was painted the same colour as last time, Mercedes Chalcedon blue. First came some preparation, though; understandably filler was needed all round the car.
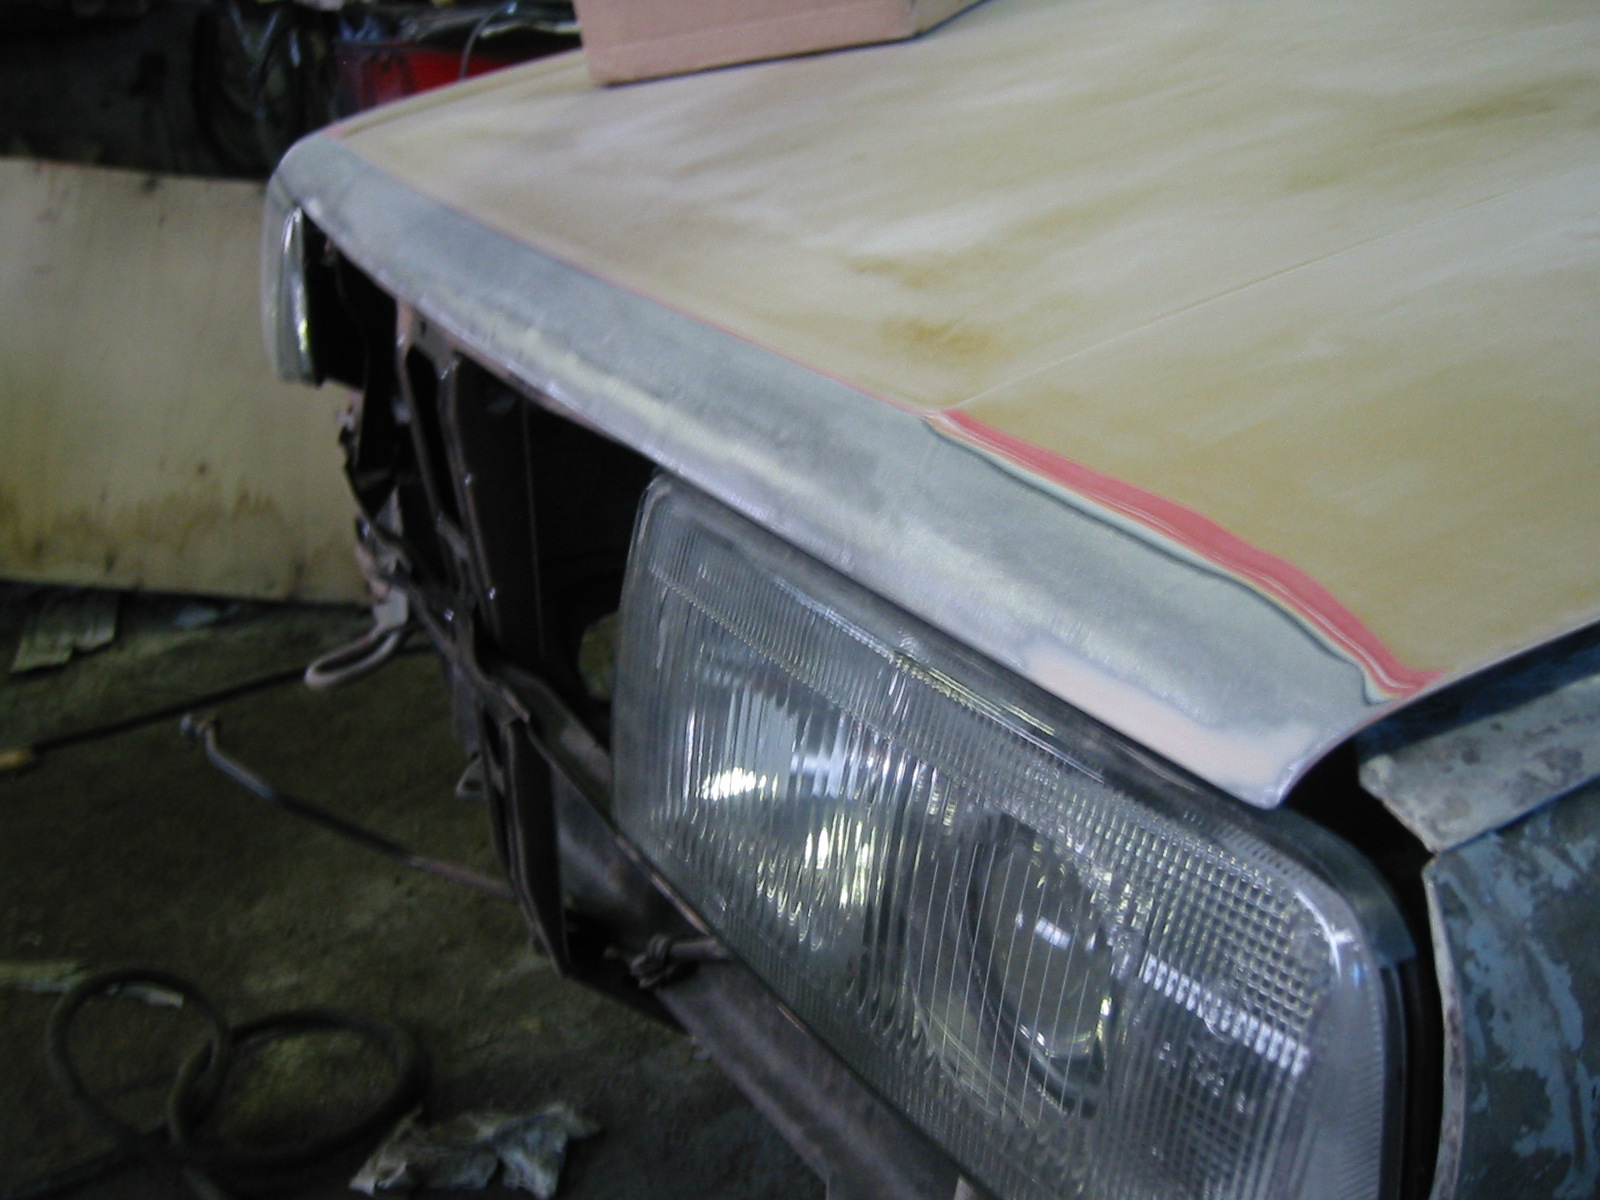
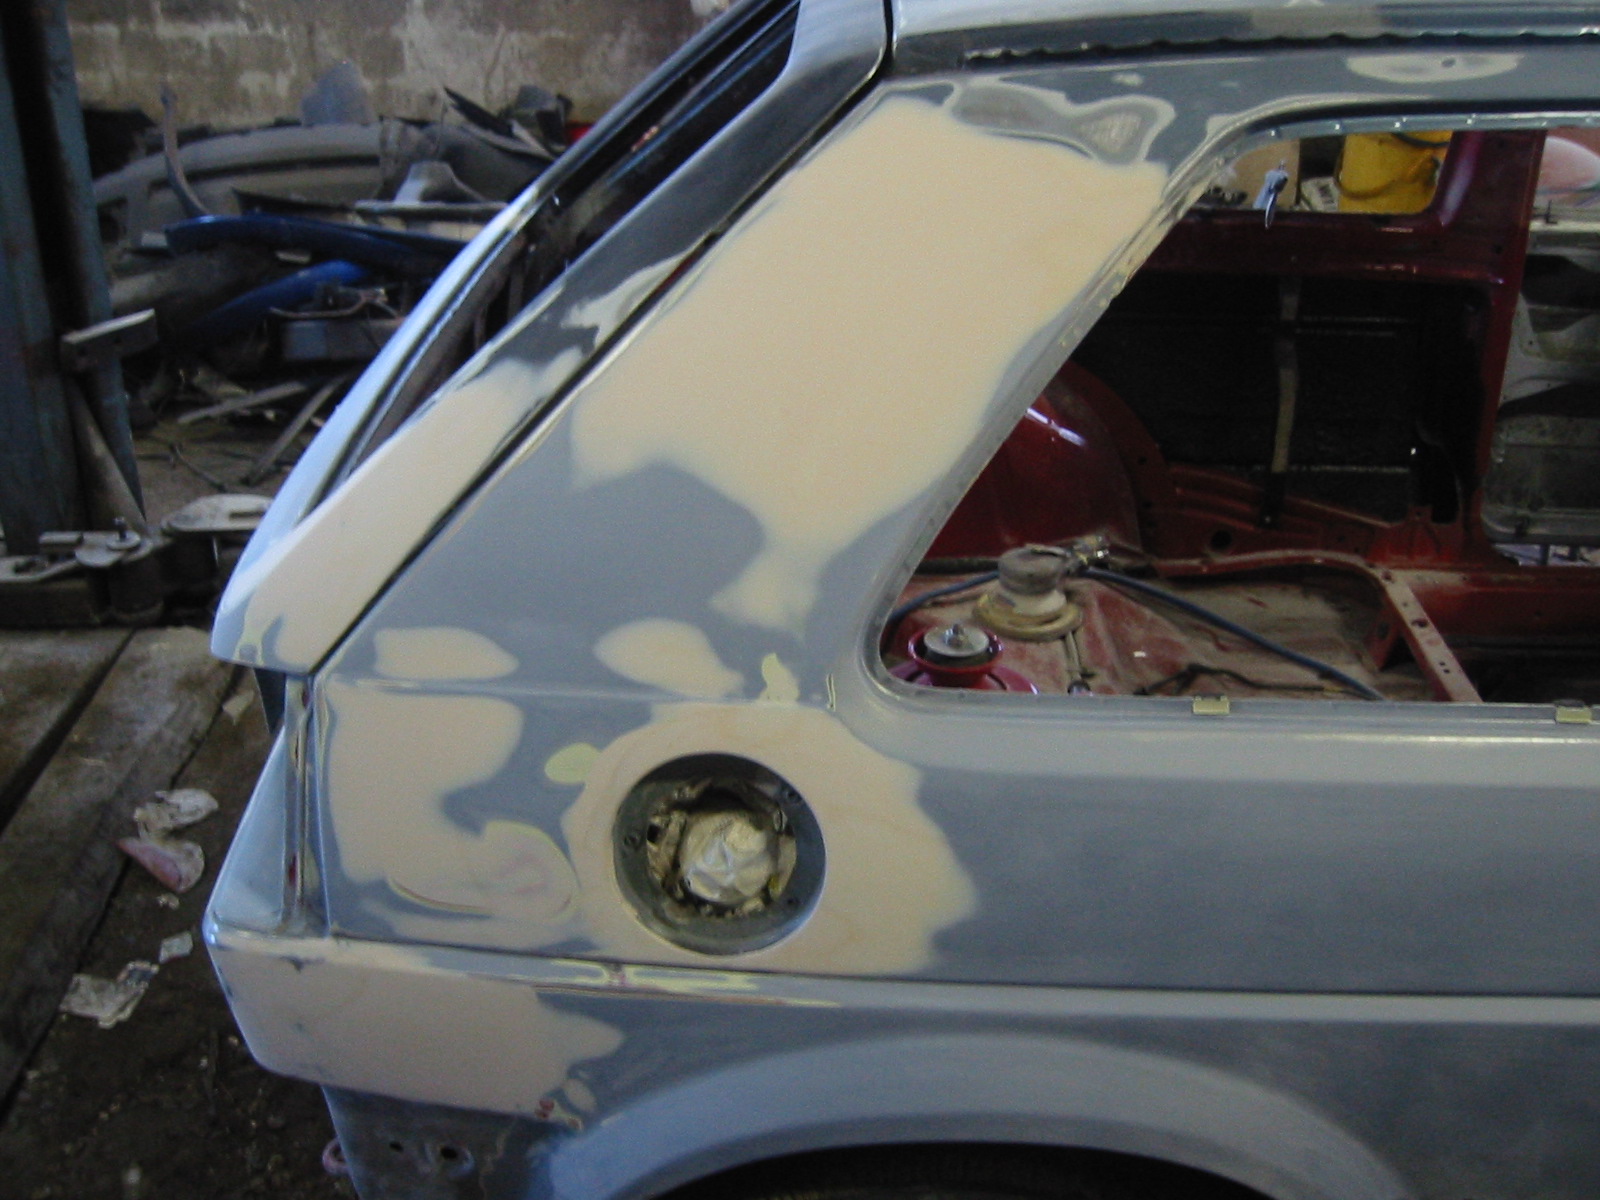
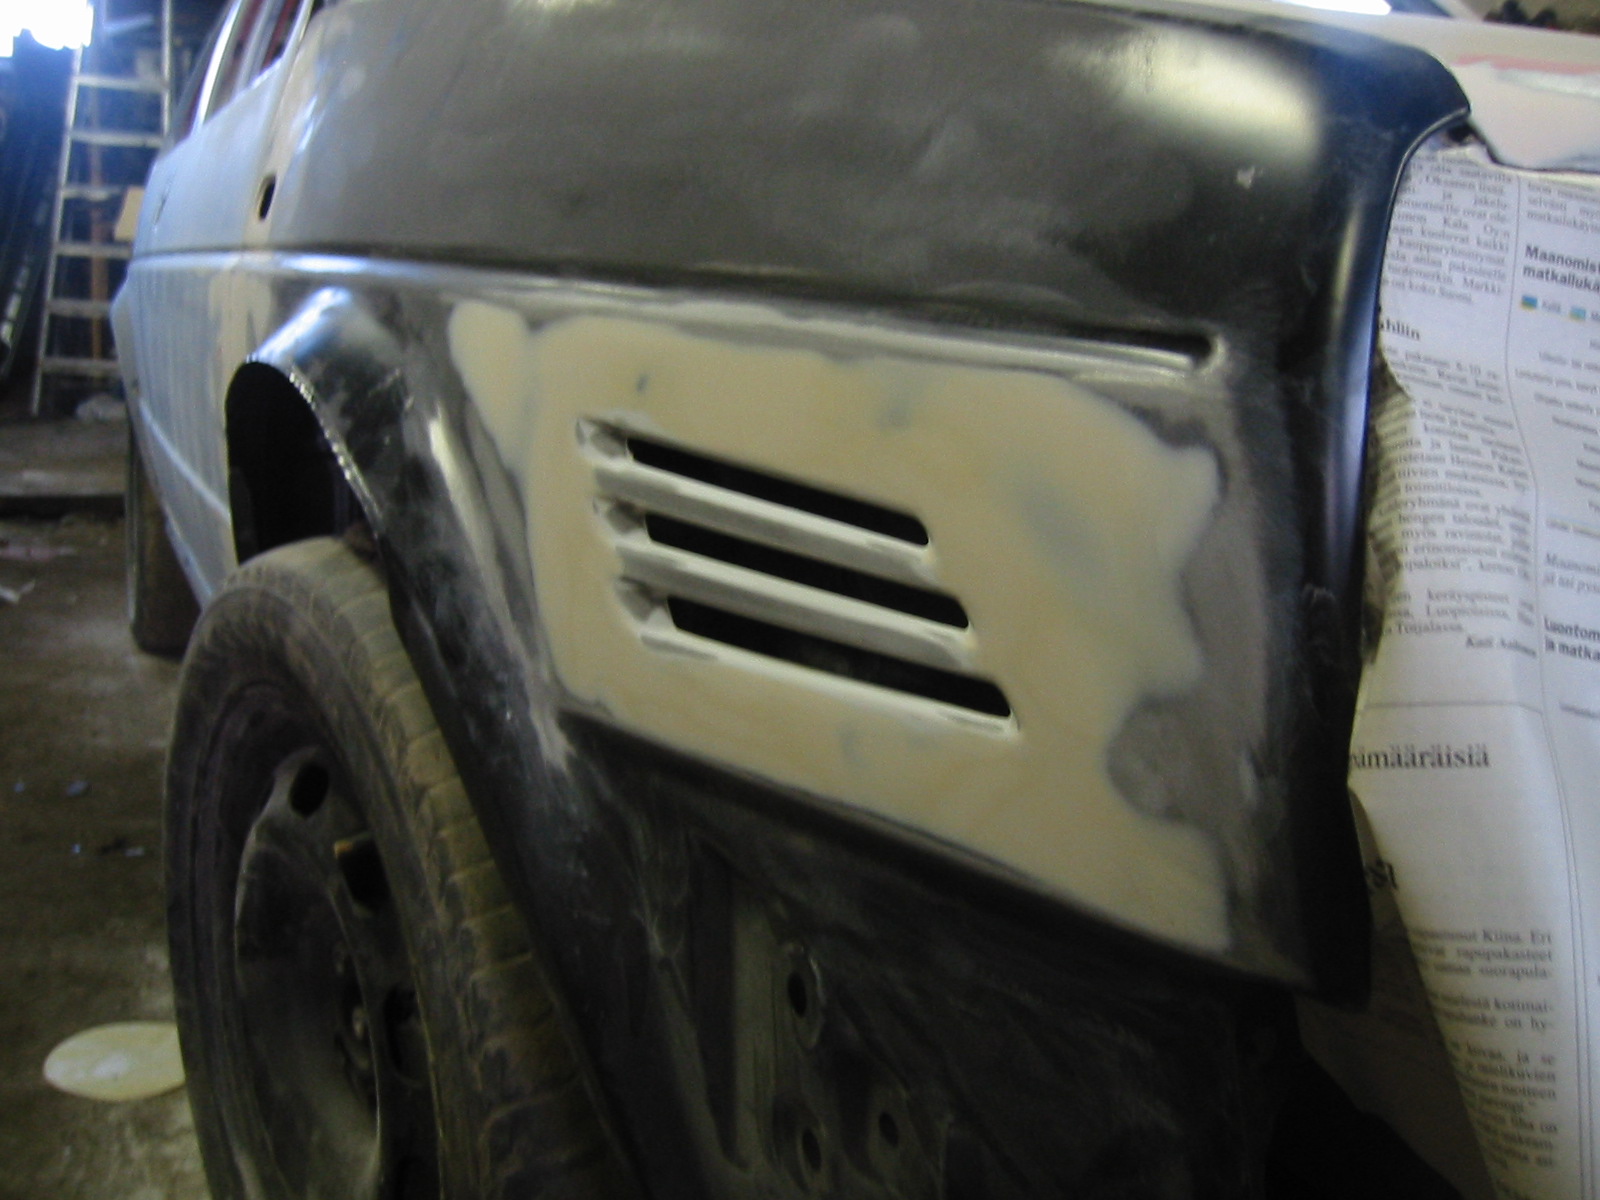
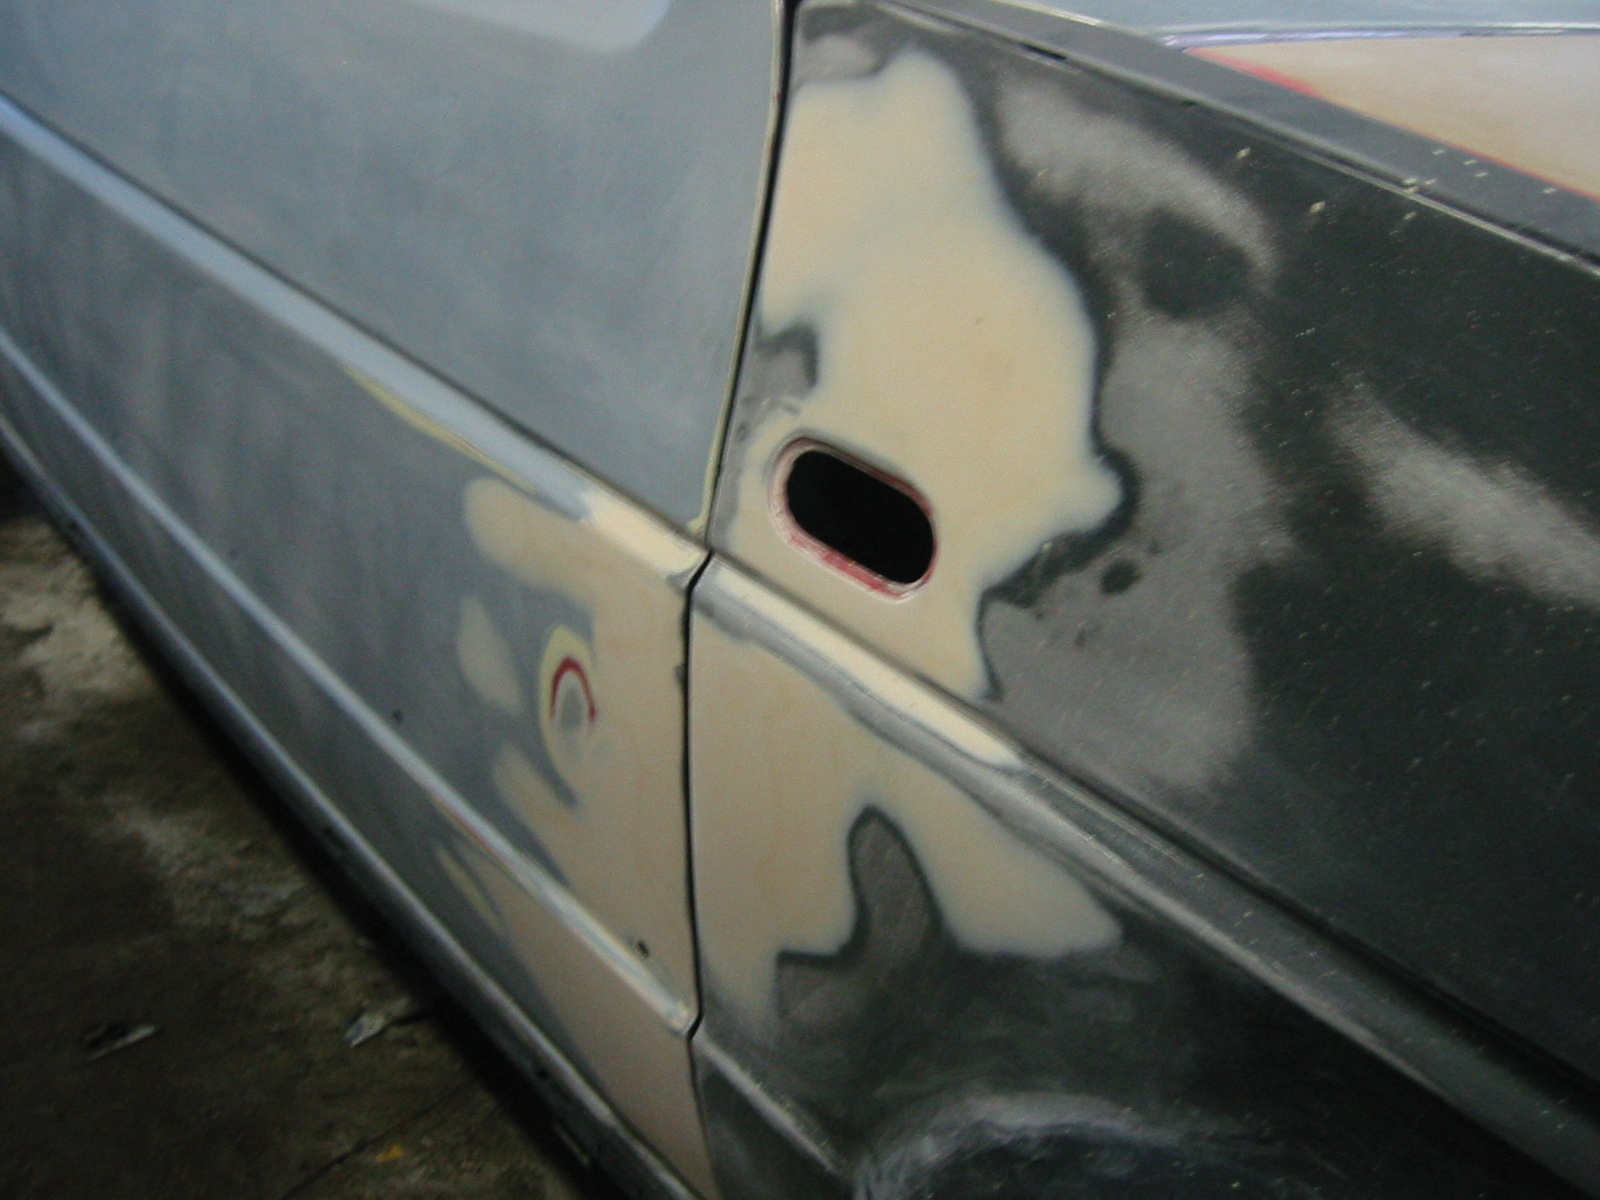
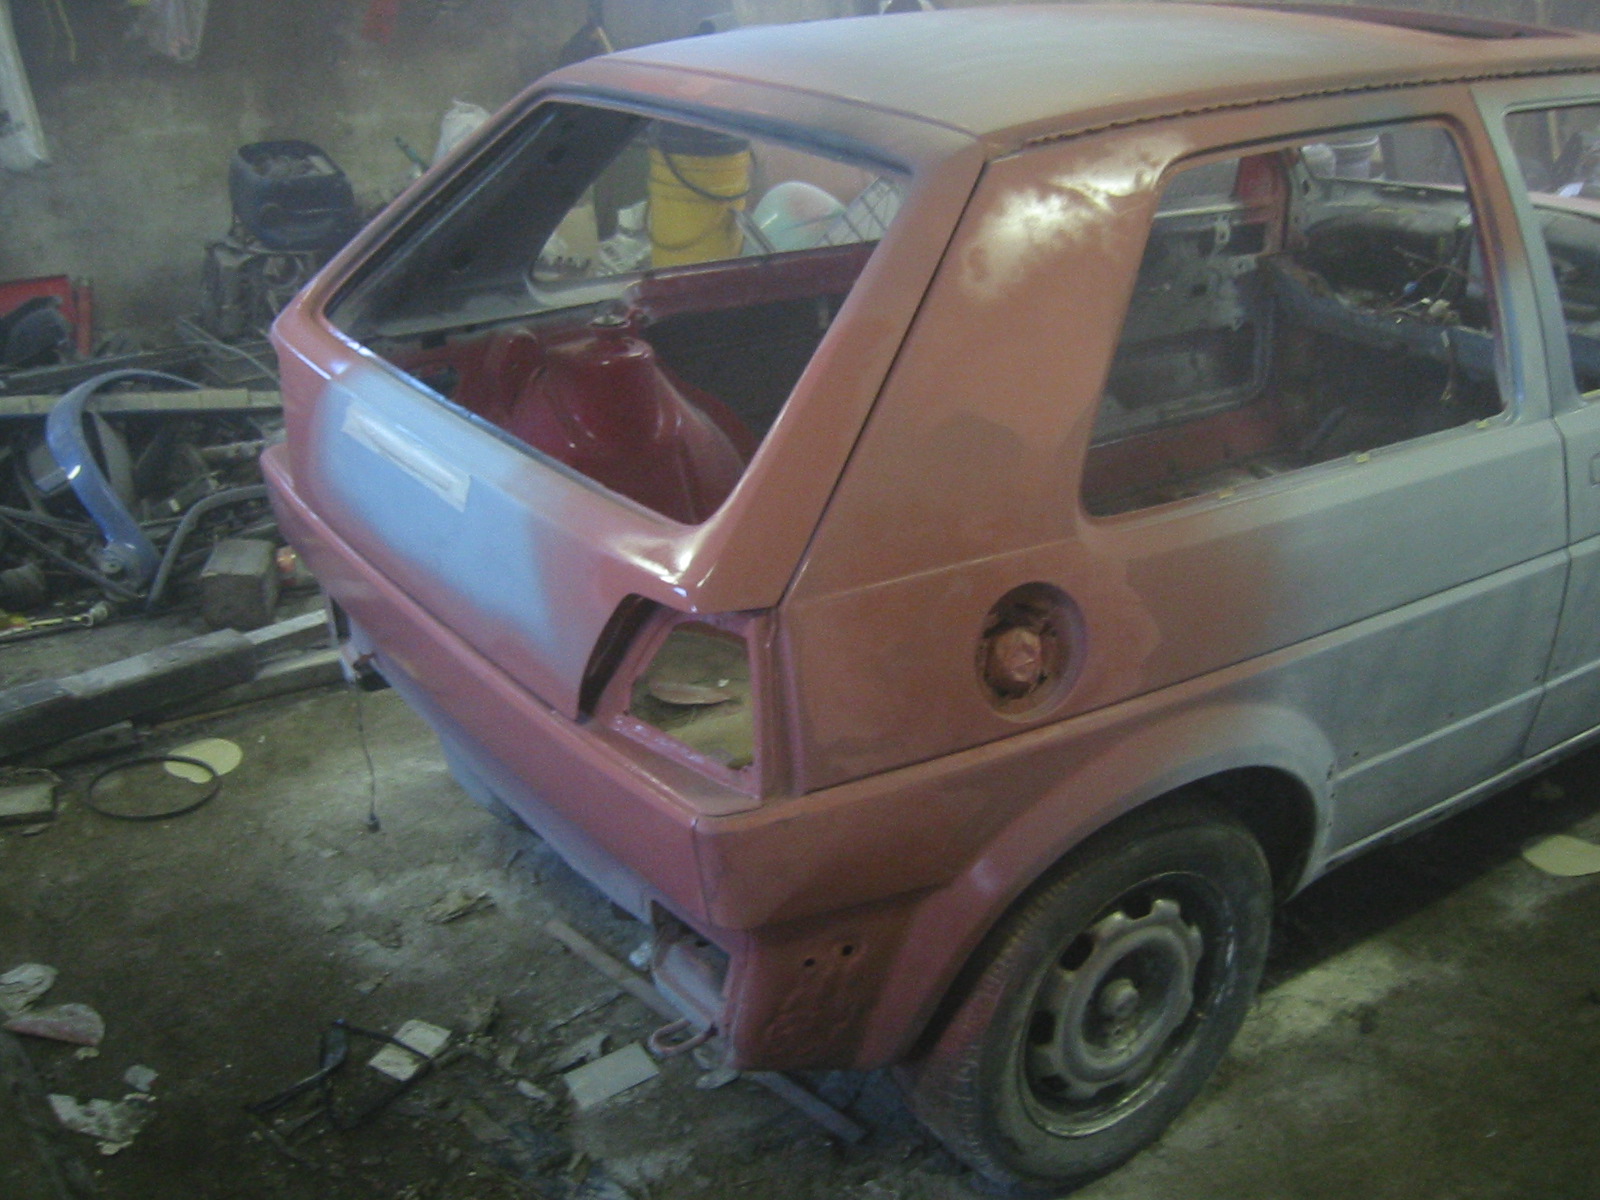
First a coat of primer over the filler.
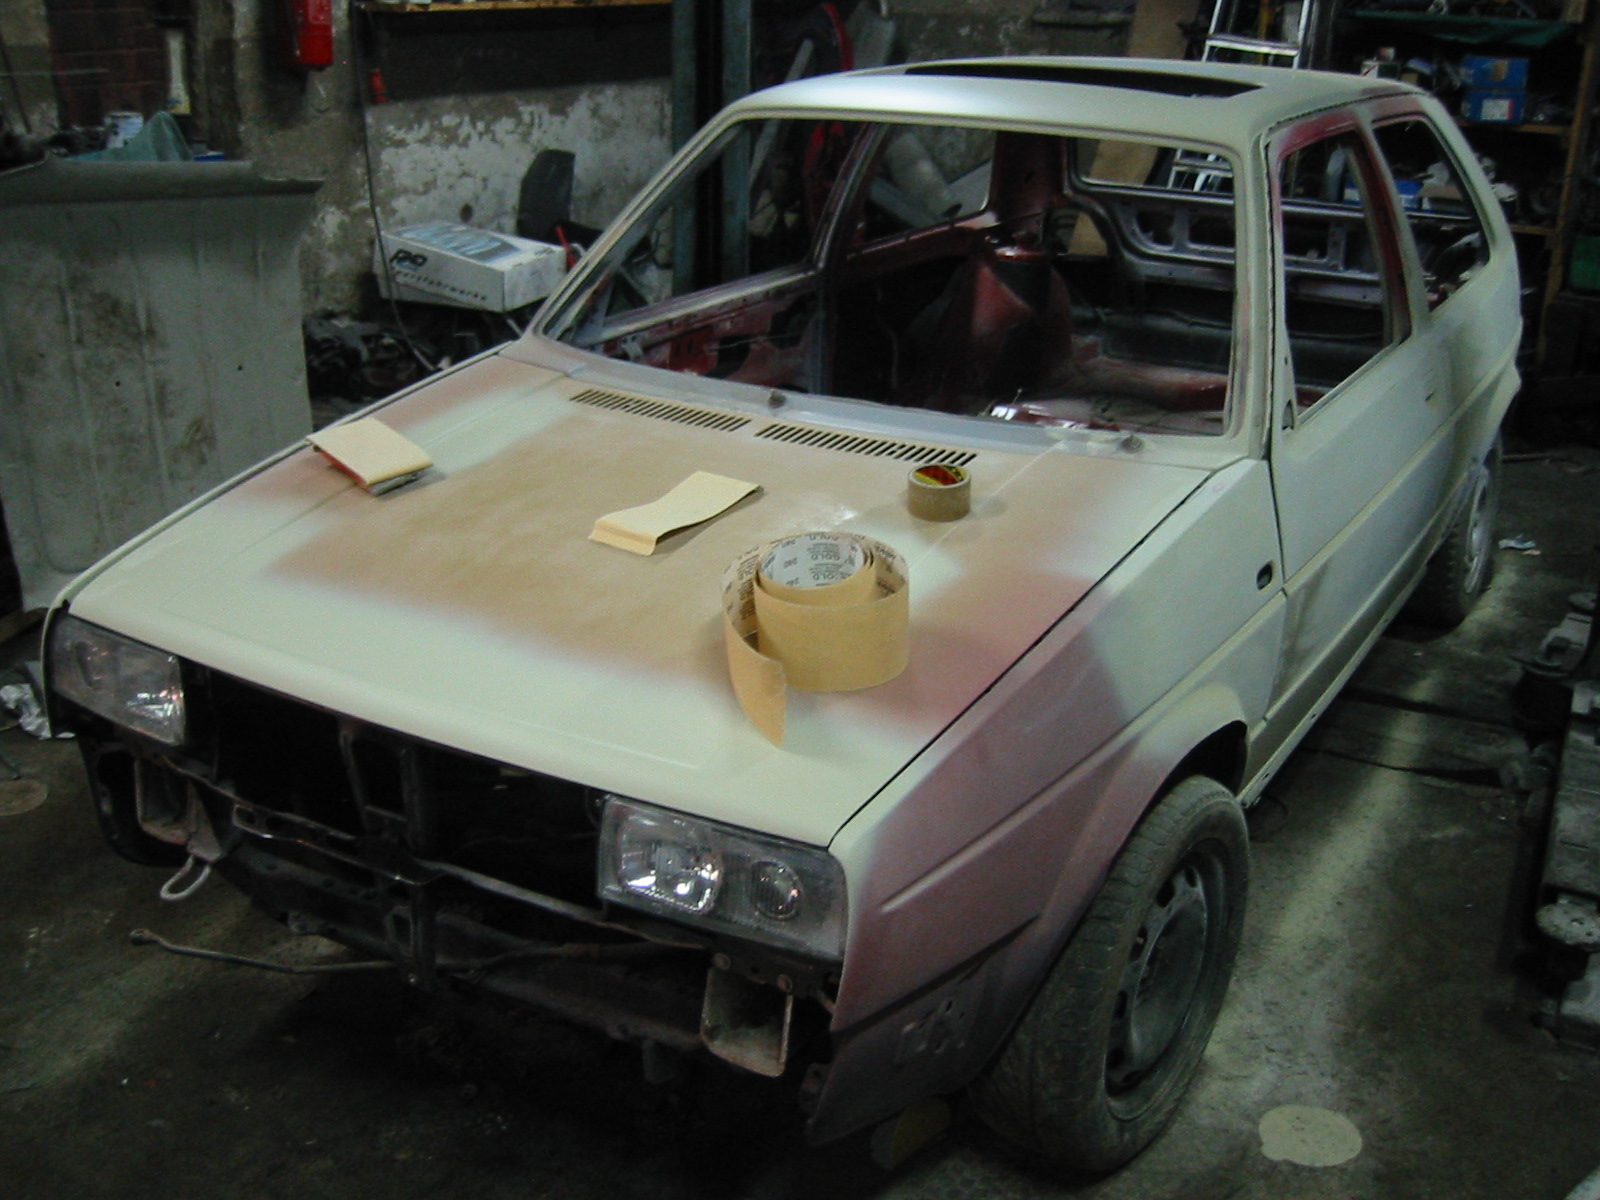
Primer-surfacer over that.
Painting — part 2
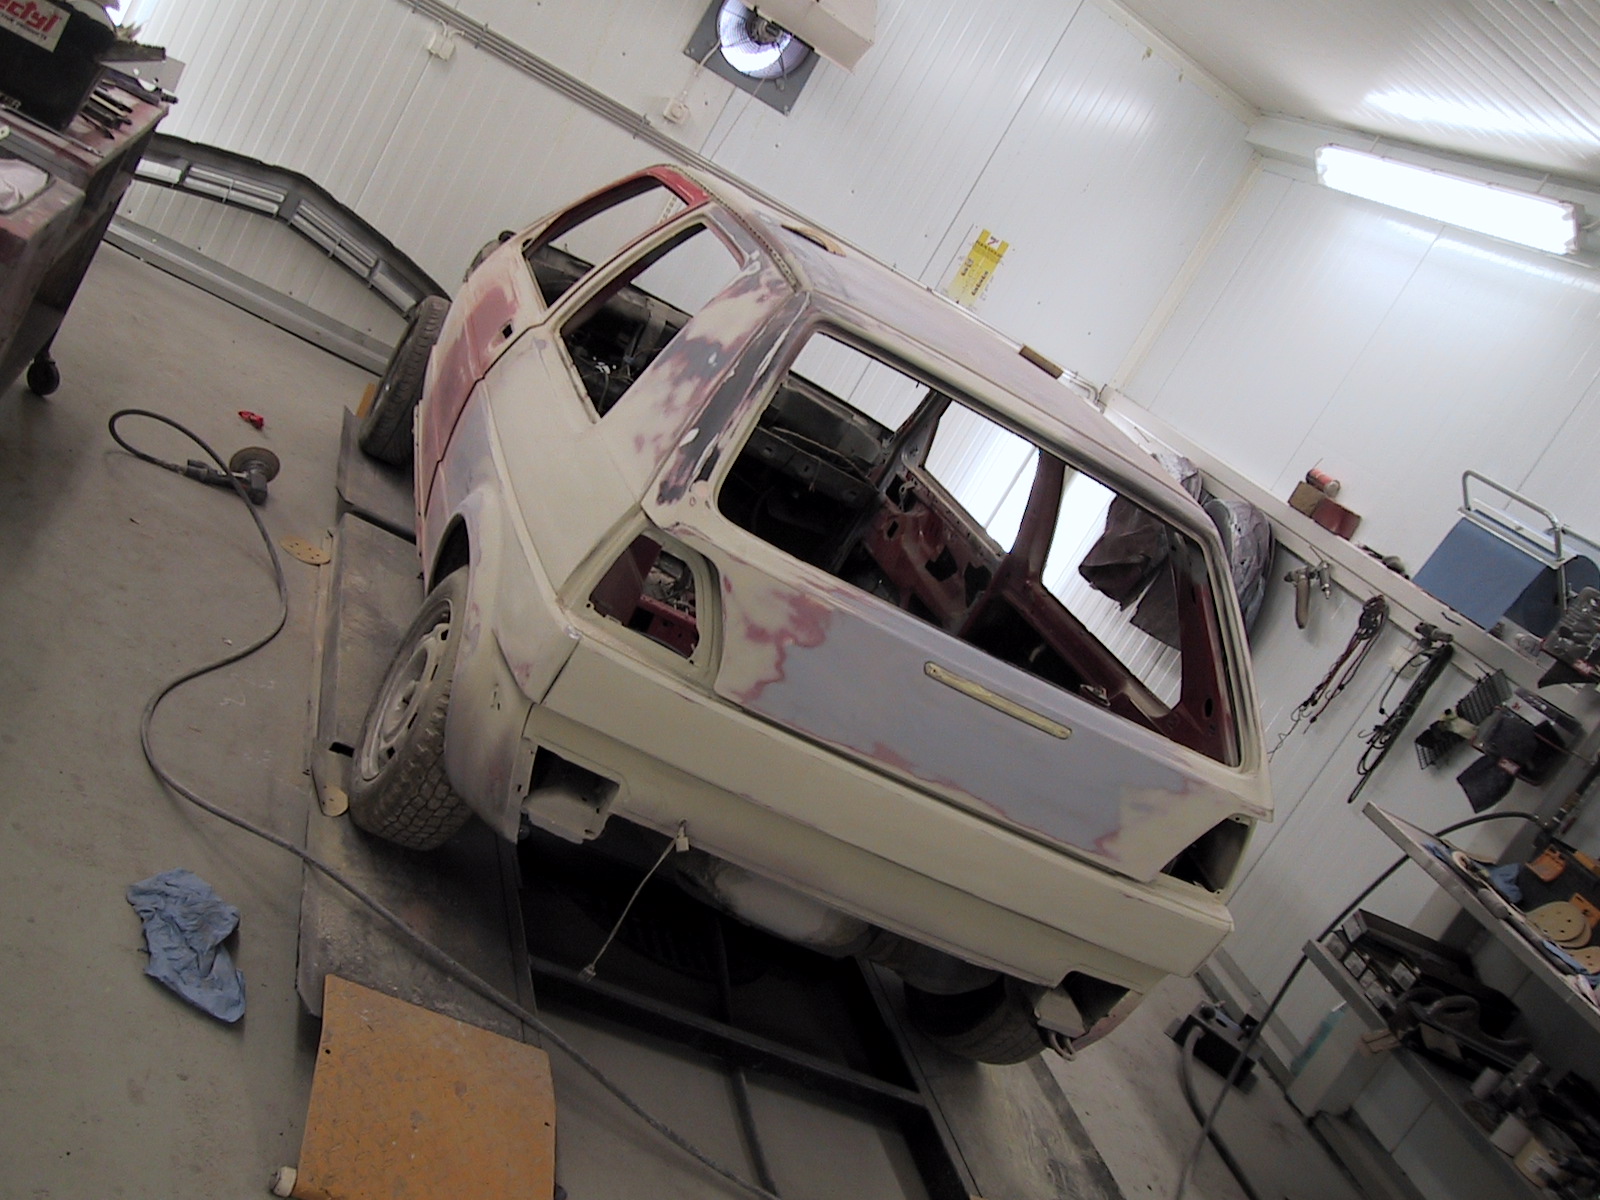
The car is nearly ready for the actual painting.
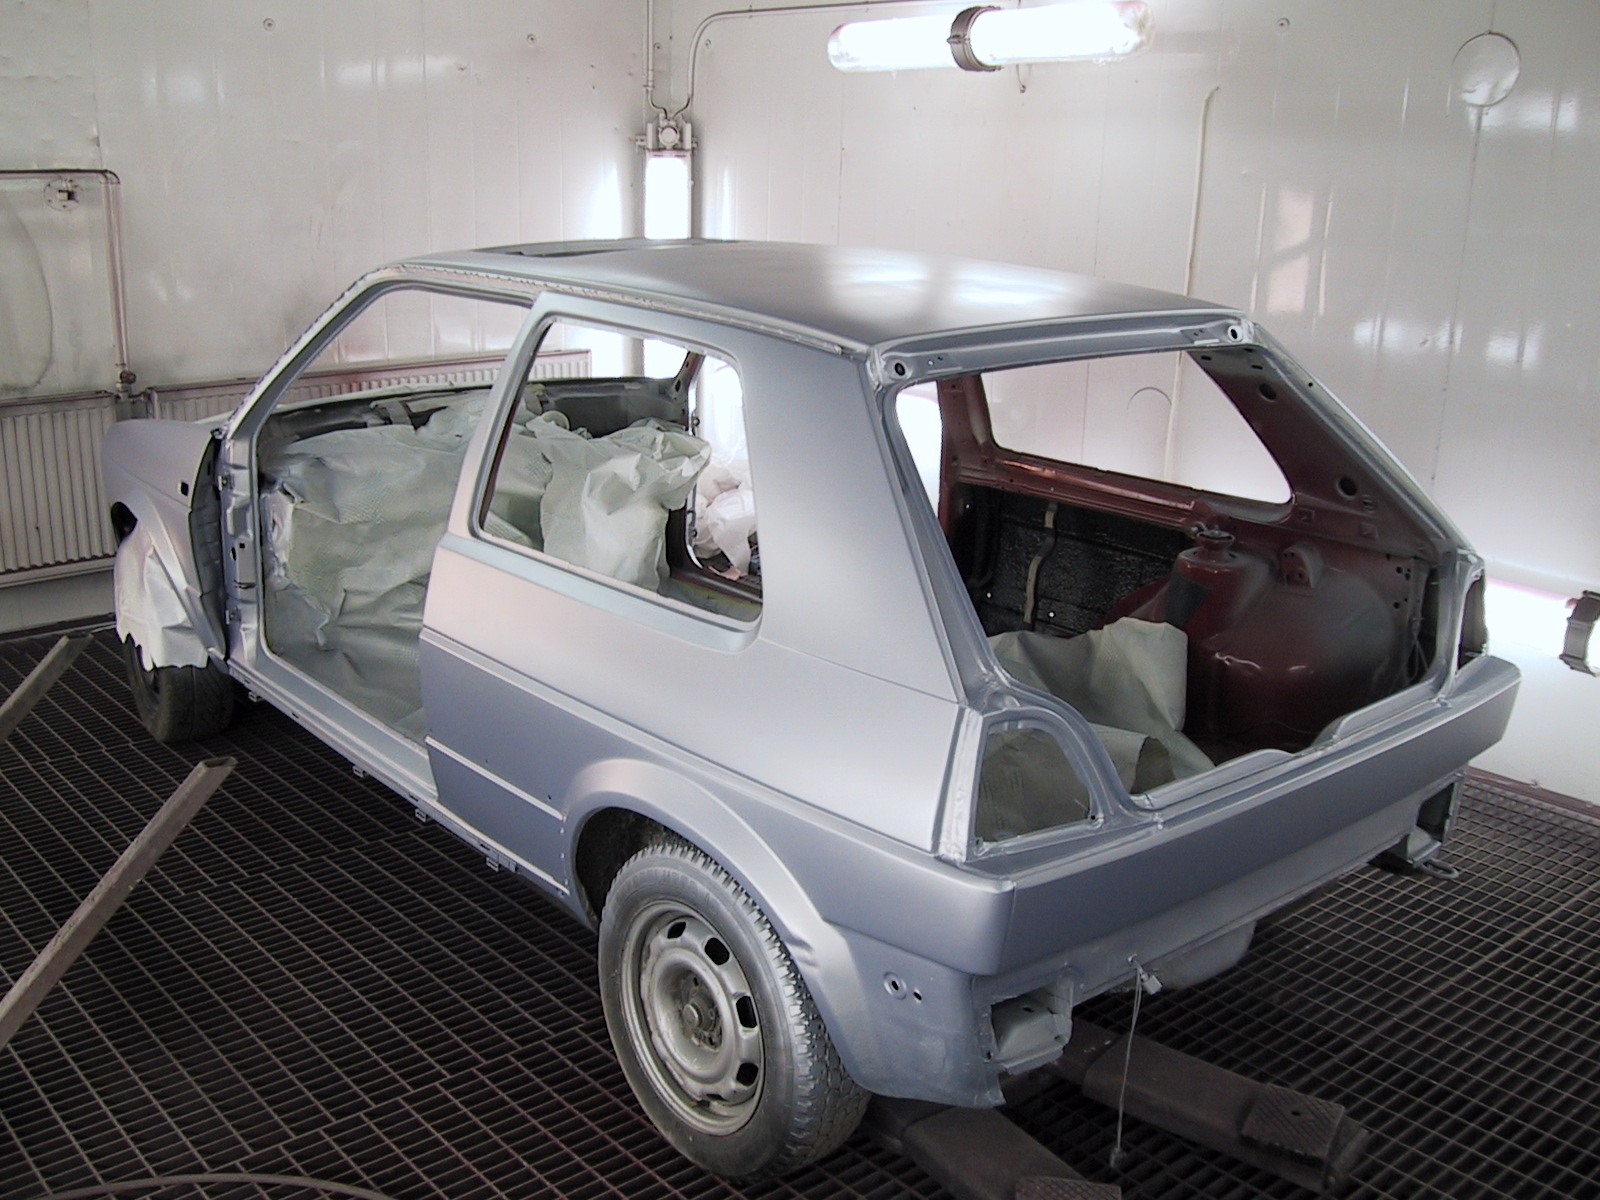
Basecoat applied.
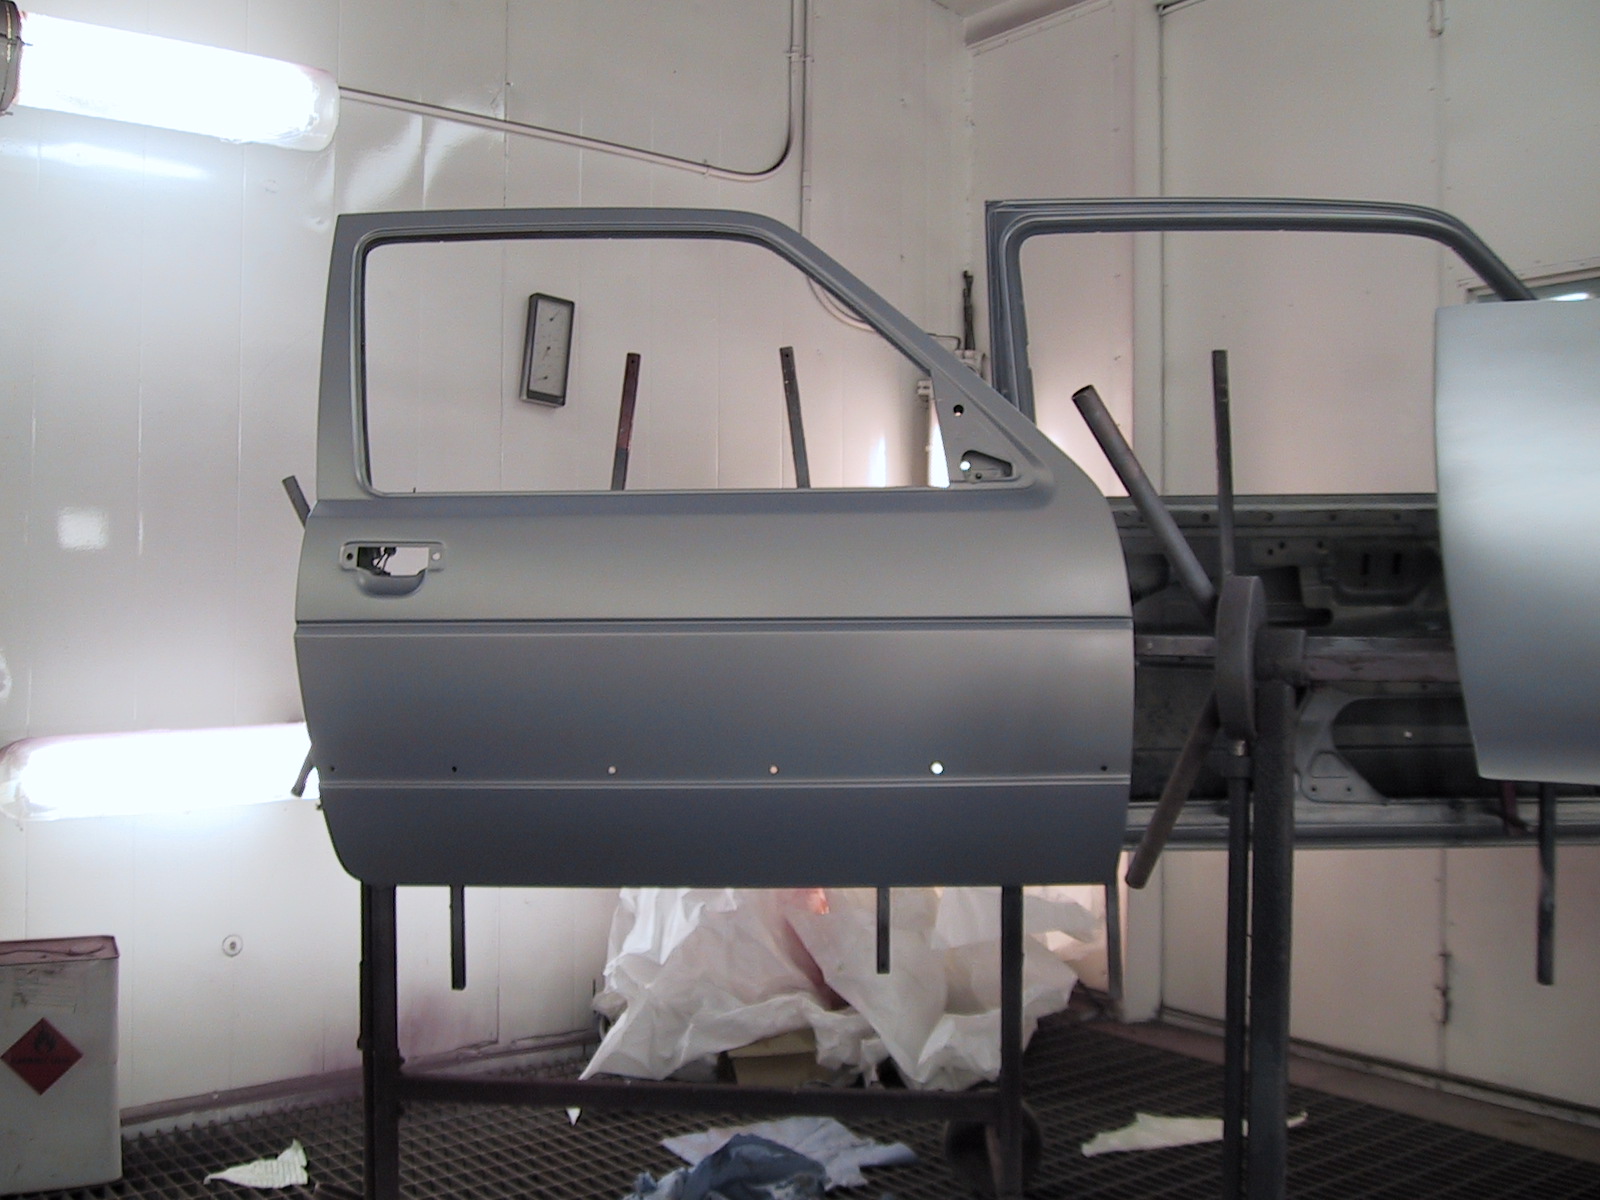
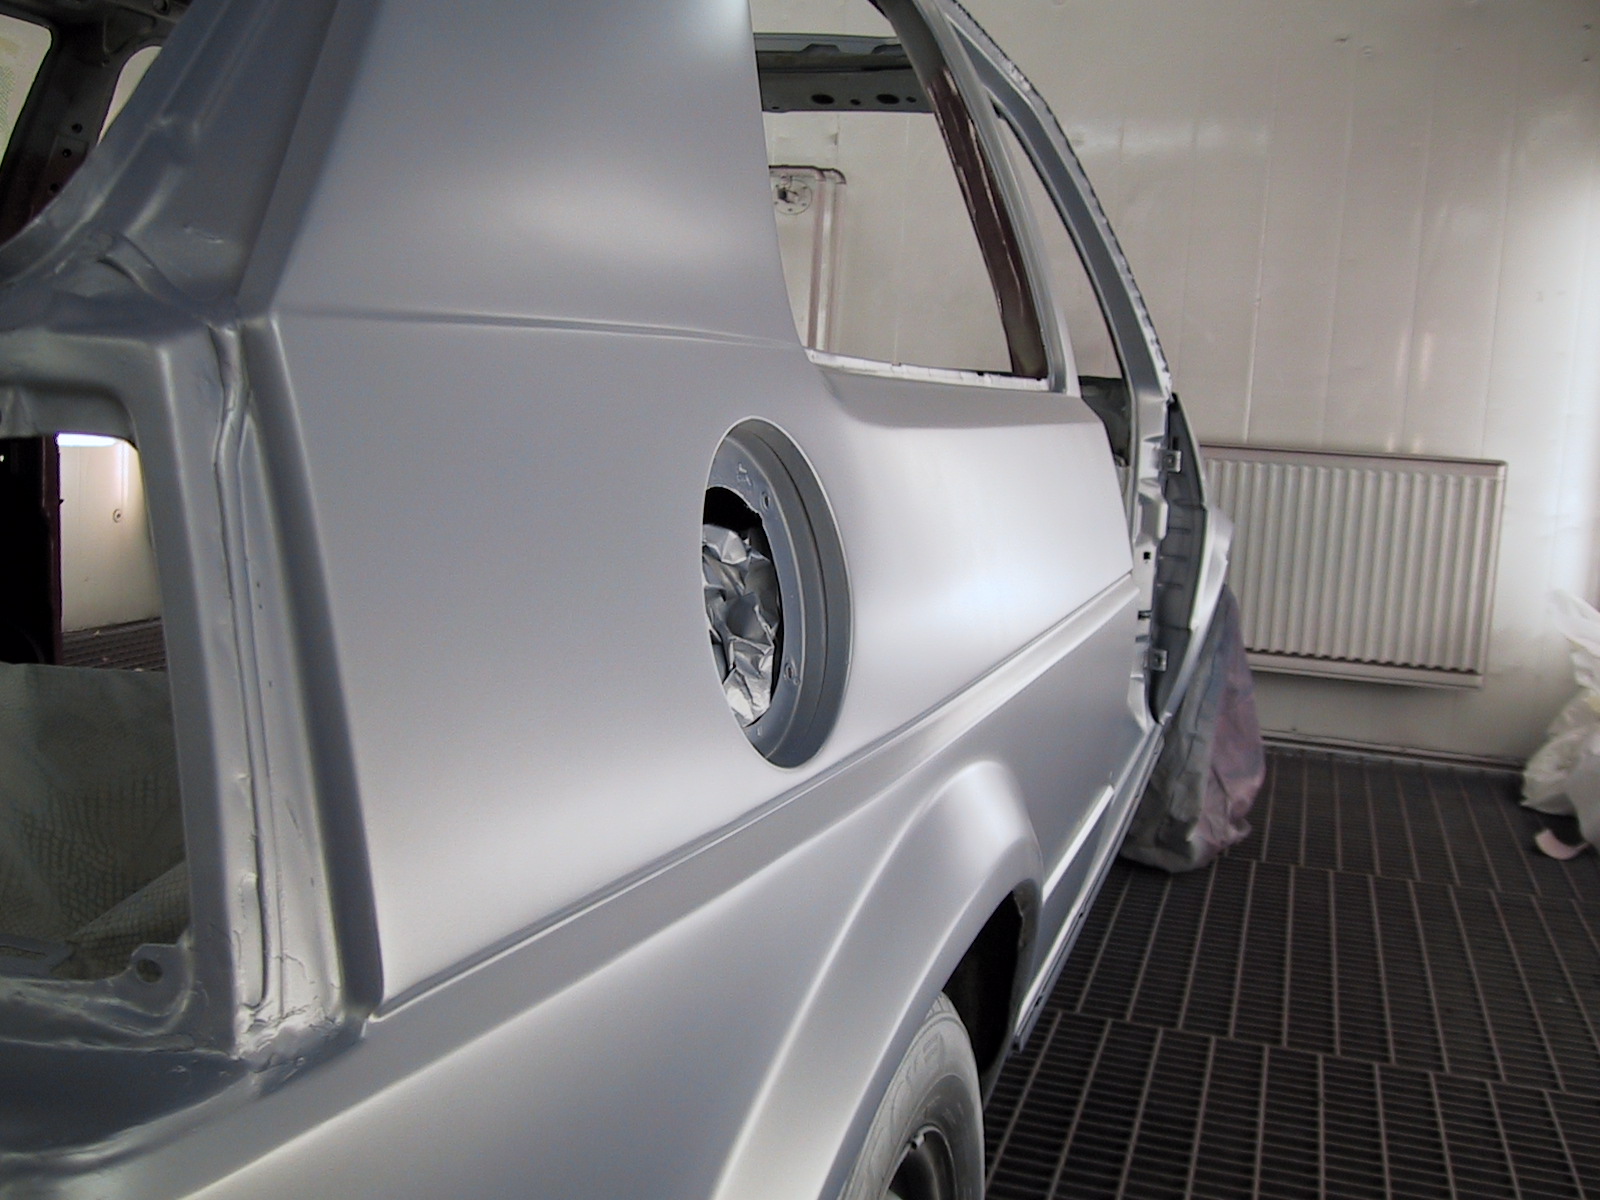
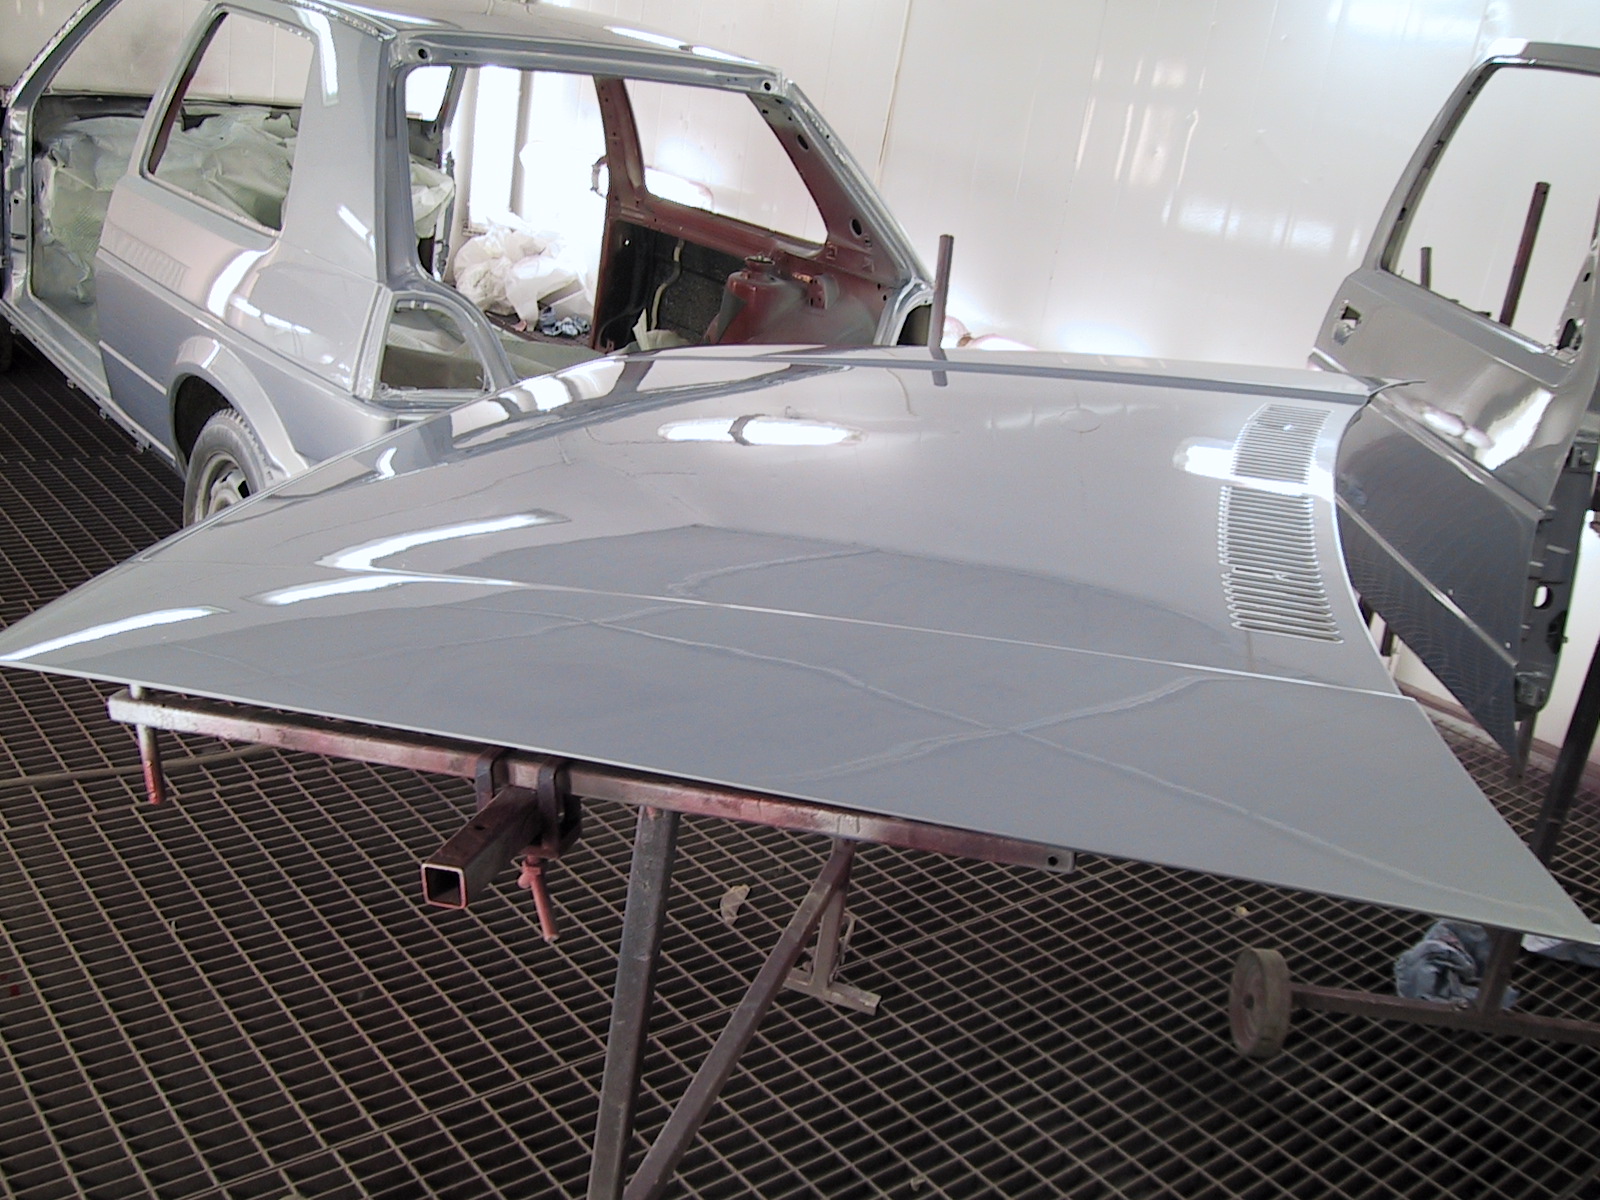
Then clear coat on top.
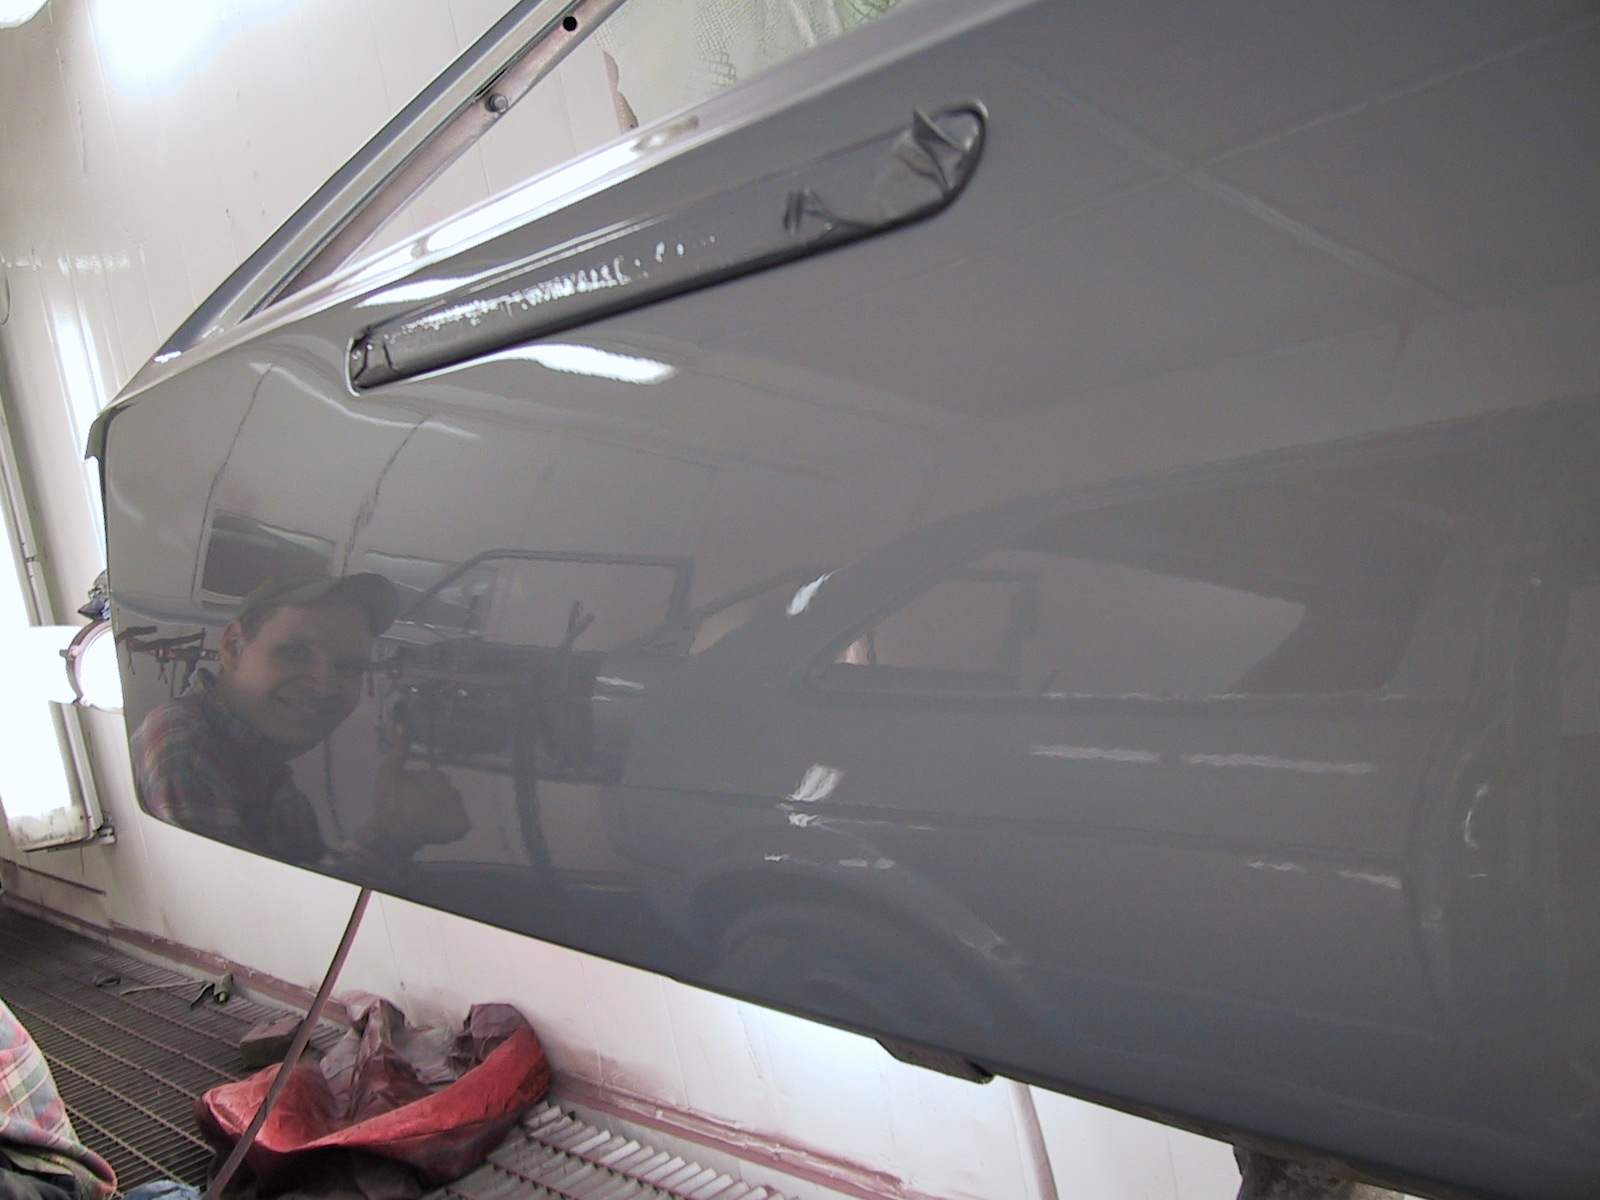
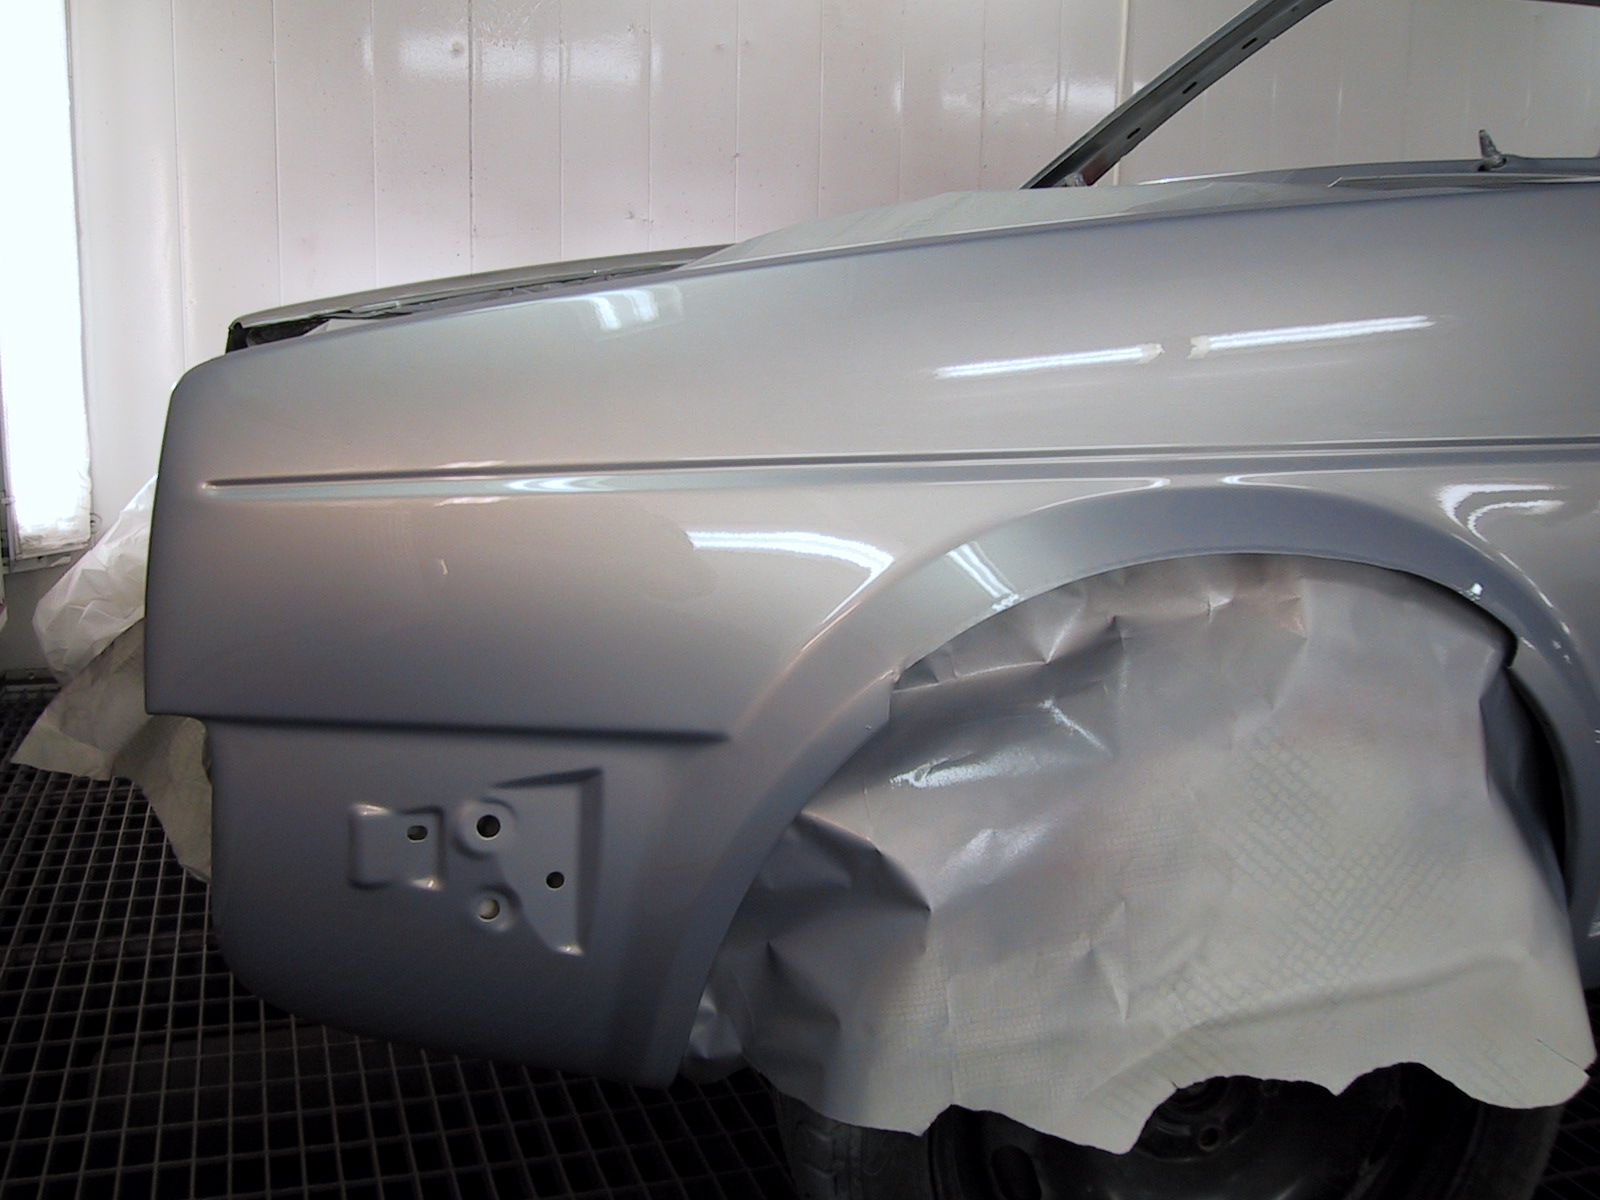
Painting finished, heading home. Afterwards rustproofing was also applied inside the panels. The bumpers, arches, sill trims and so on were painted separately later.
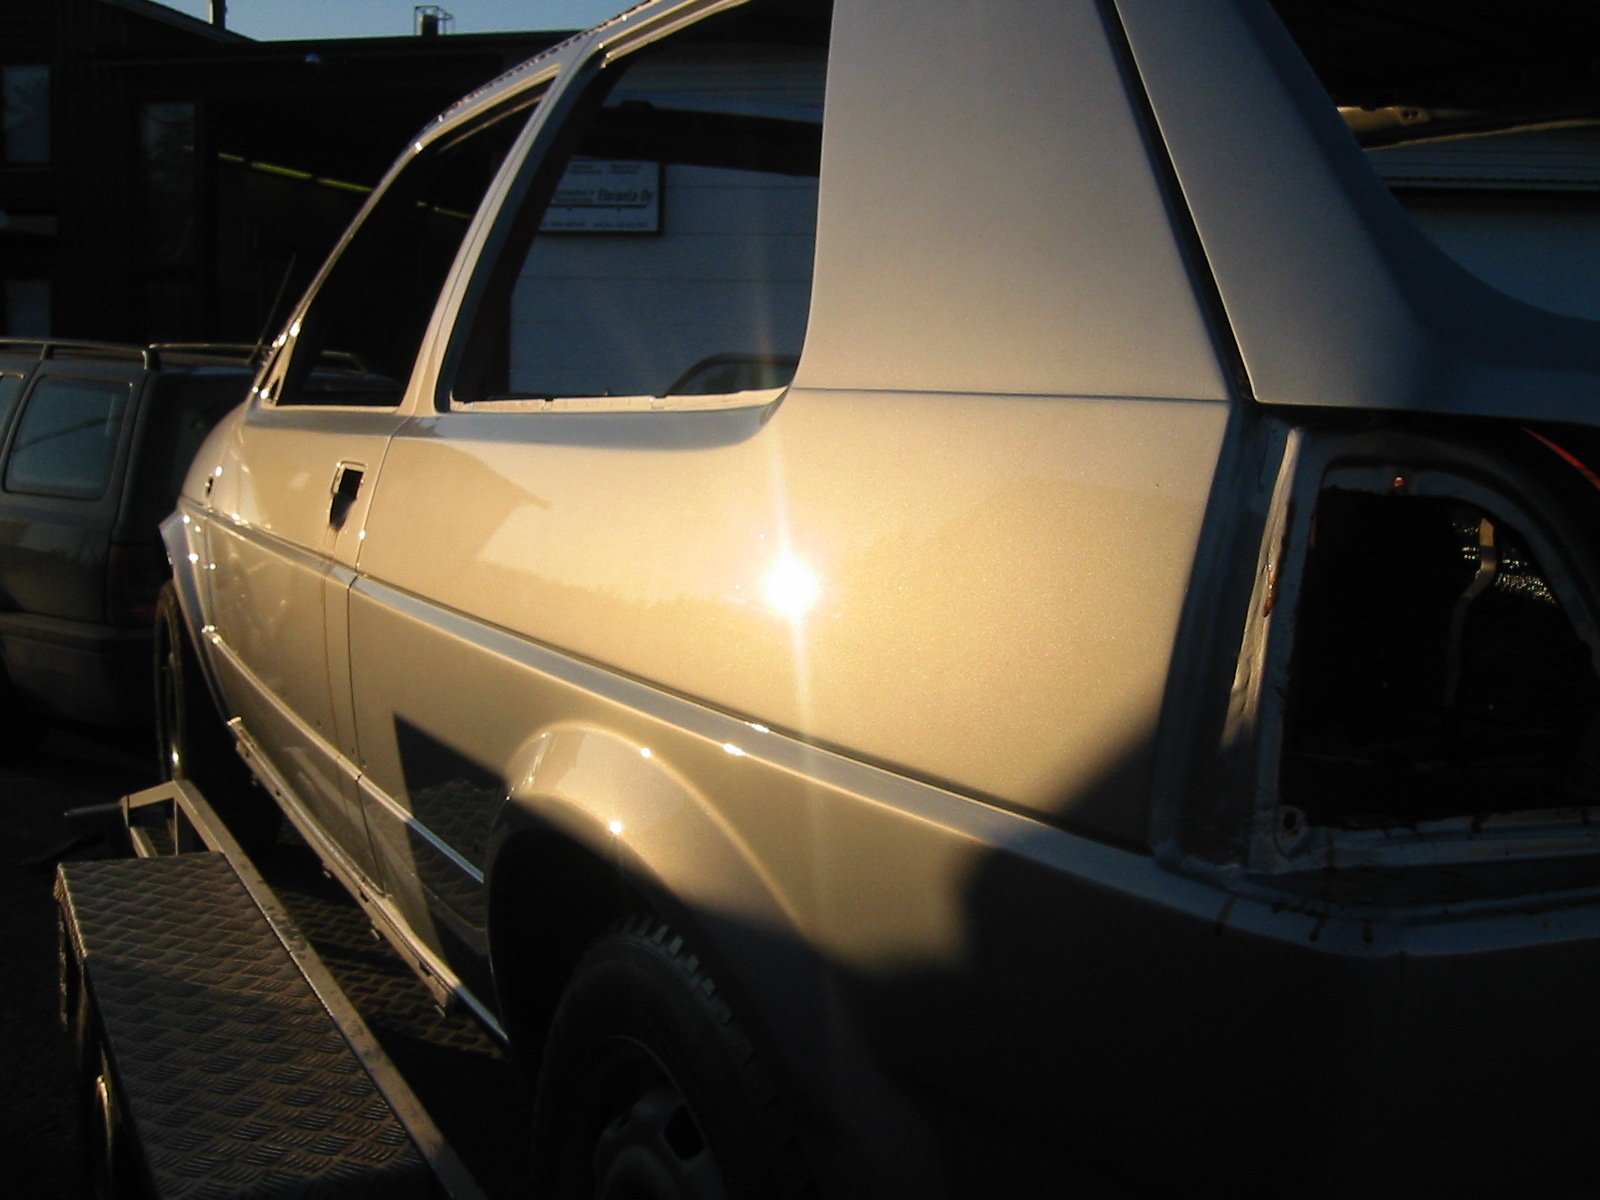
That Mercedes colour is interesting: in daylight it's silver with a hint of blue, while the evening sun brings out champagne tones.
Reassembly — part 1
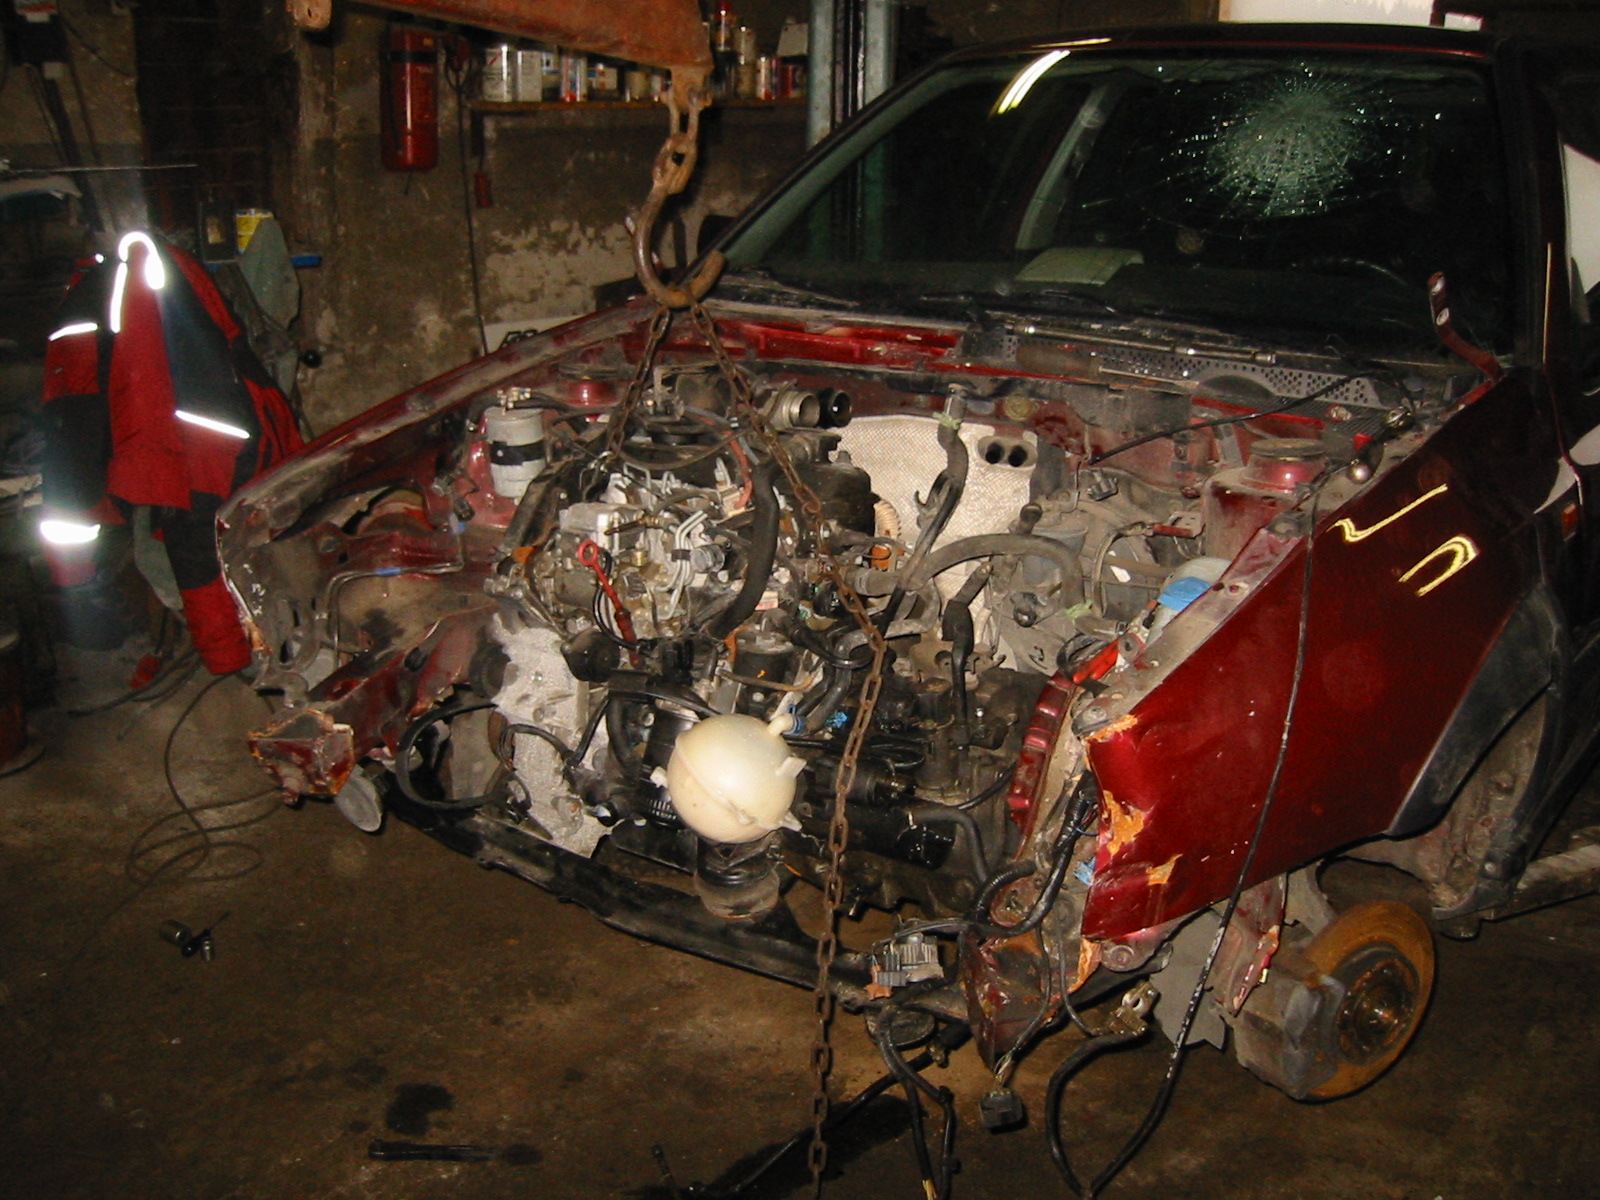
mk2tdi249.jpg
The engine again came from a Mk3 Golf, this time a 1995 model, a year newer than before. There are some electrical differences: a slightly different engine loom, and the control unit's boost sensor can read pressures 0.5 bar higher.
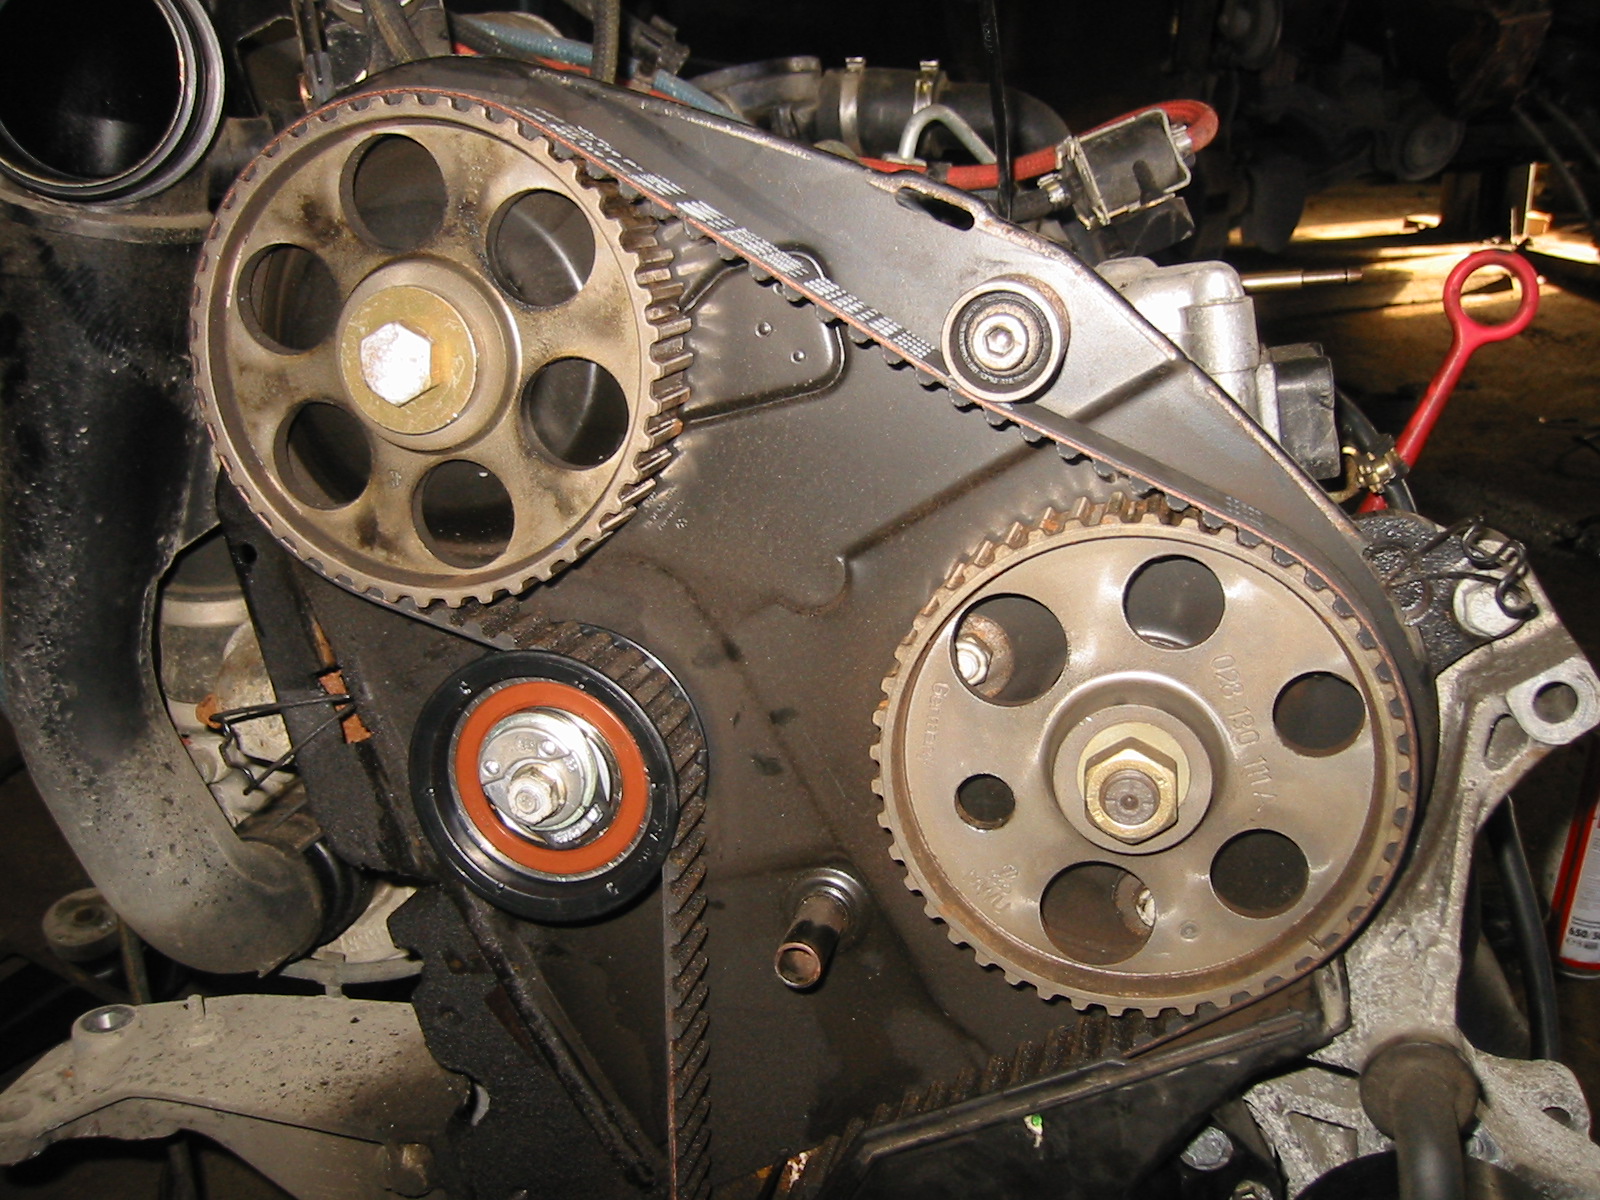
With the engine out, the timing belt and tensioner were renewed.
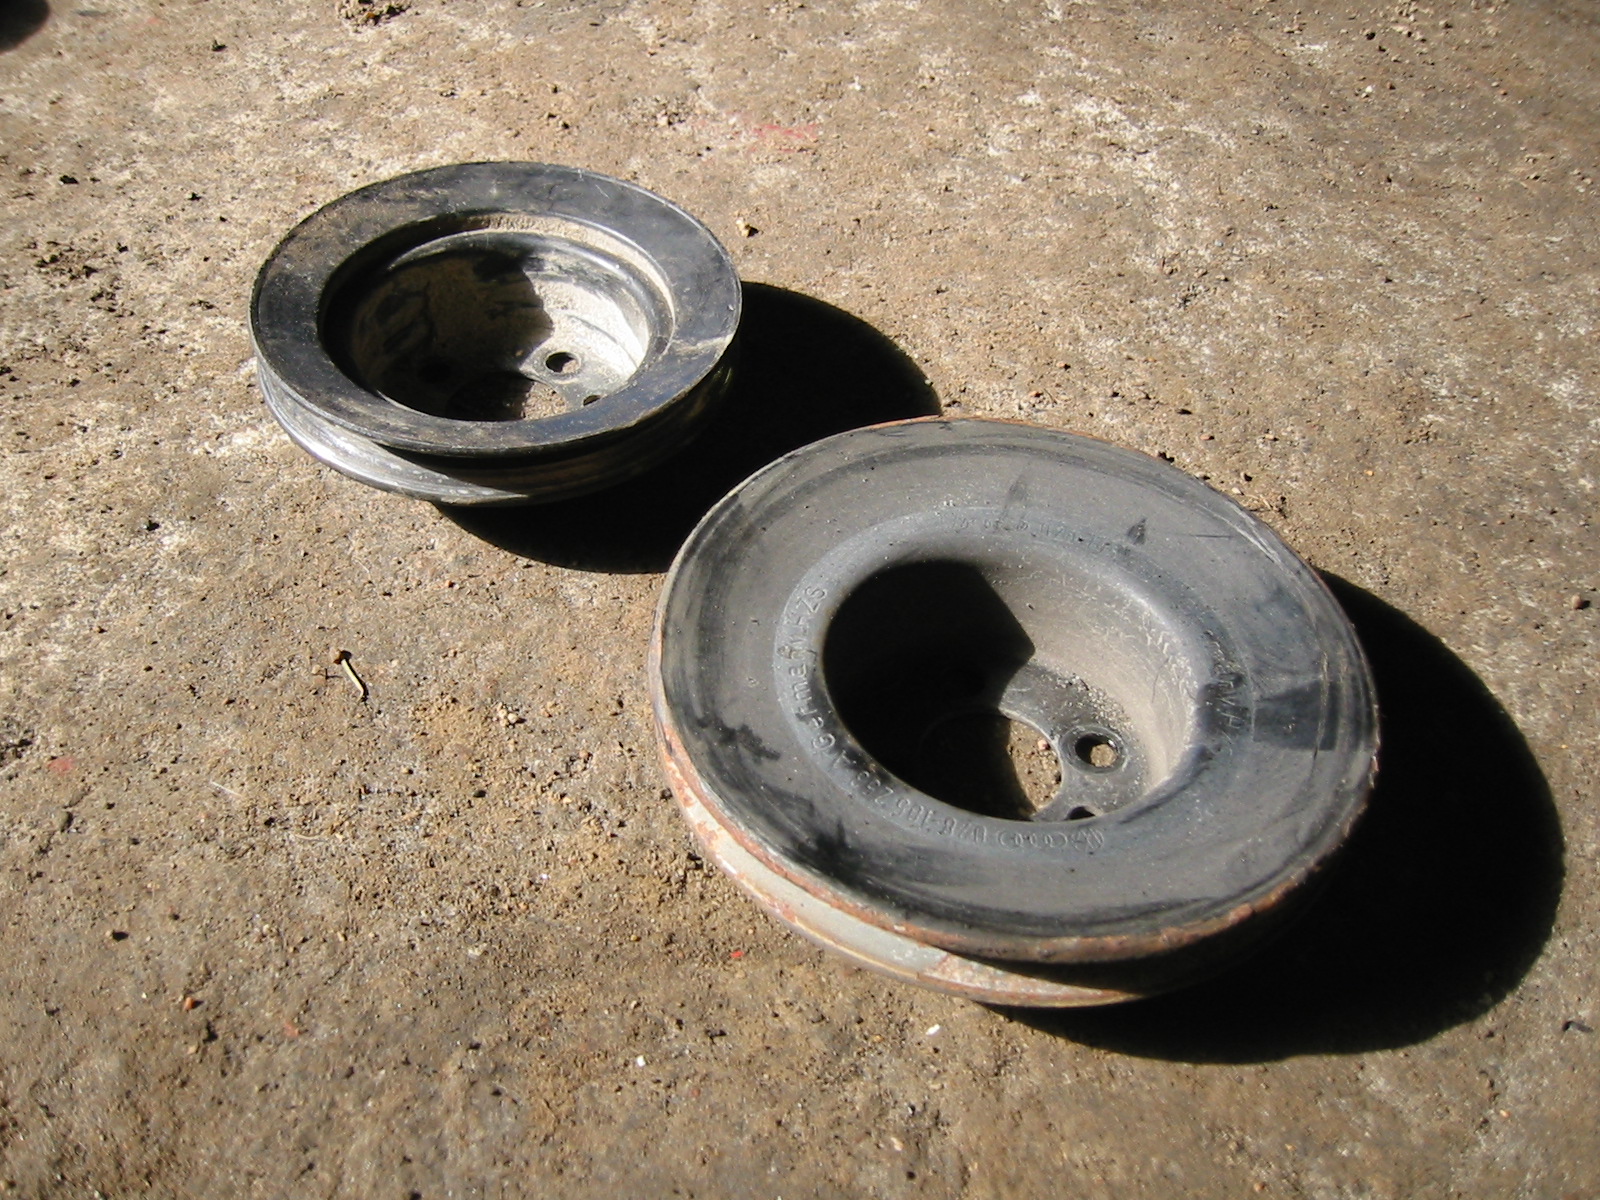
The crankshaft pulley driving the power steering was replaced with a smaller petrol-model one, which fits better between the Mk2 chassis legs.
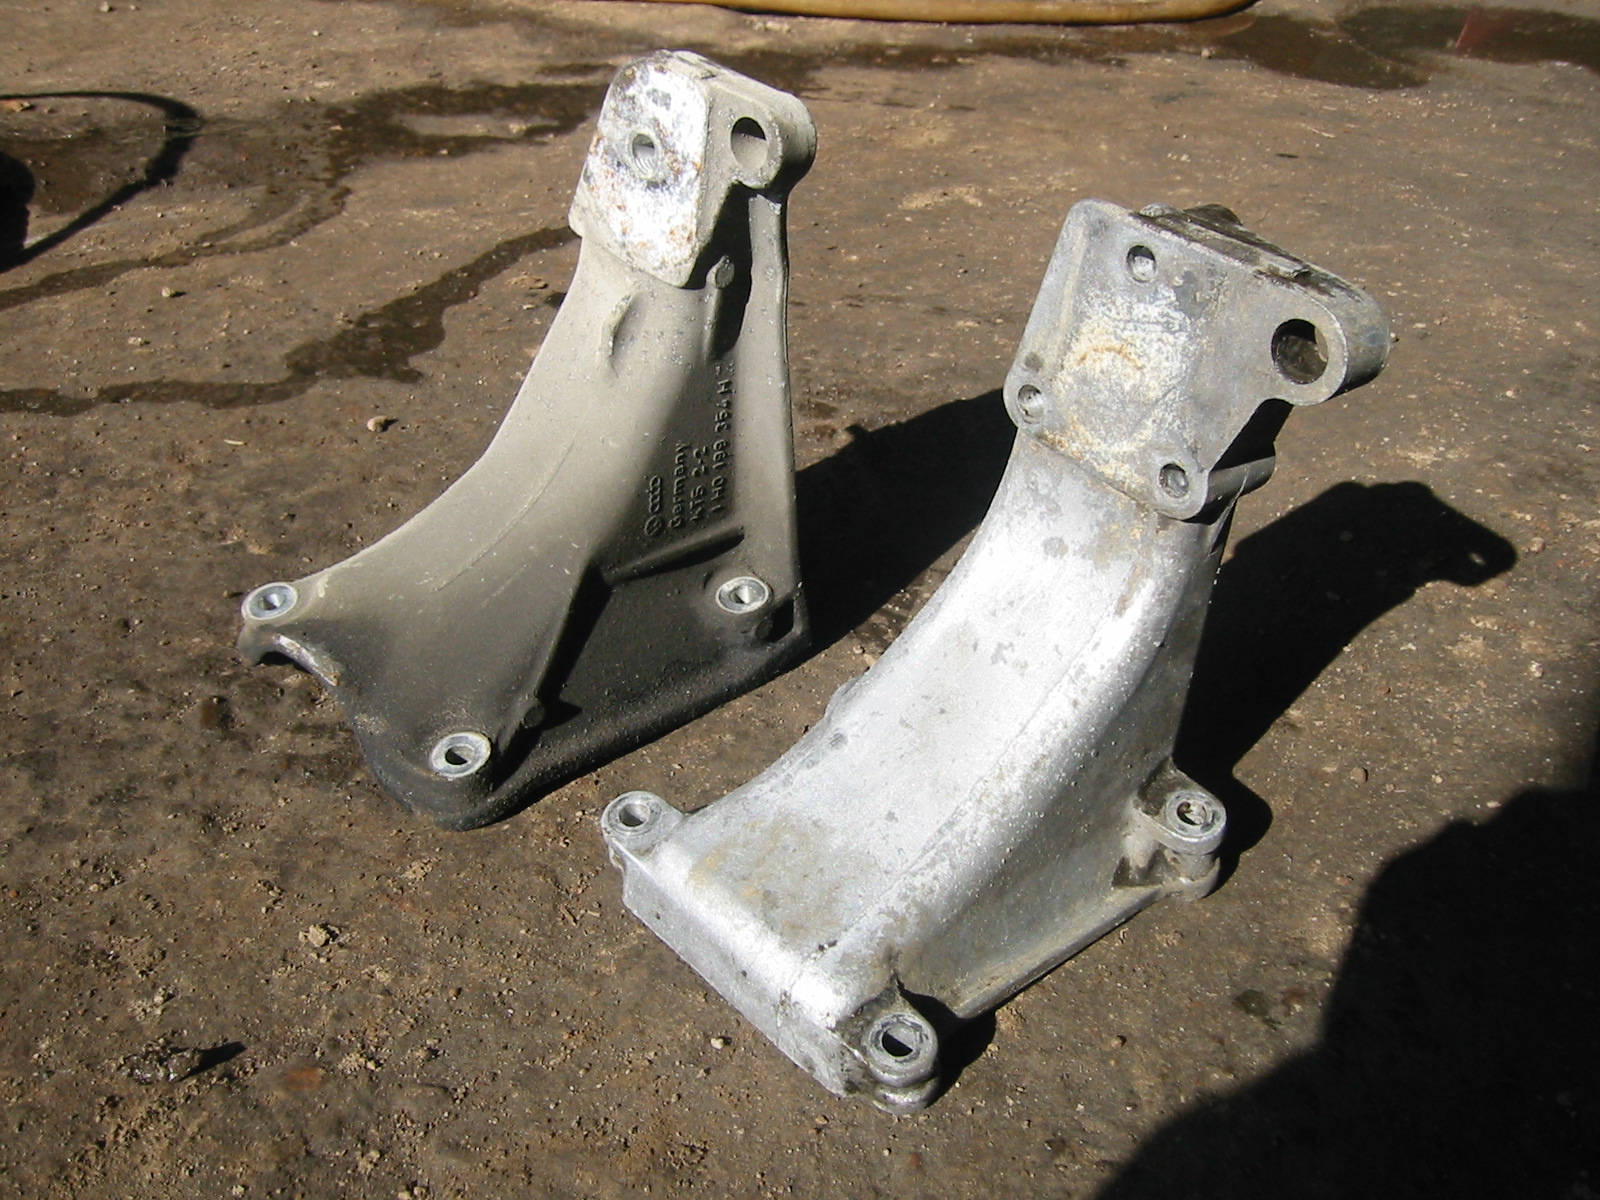
The rear engine bracket was again replaced with a Mk2 one.
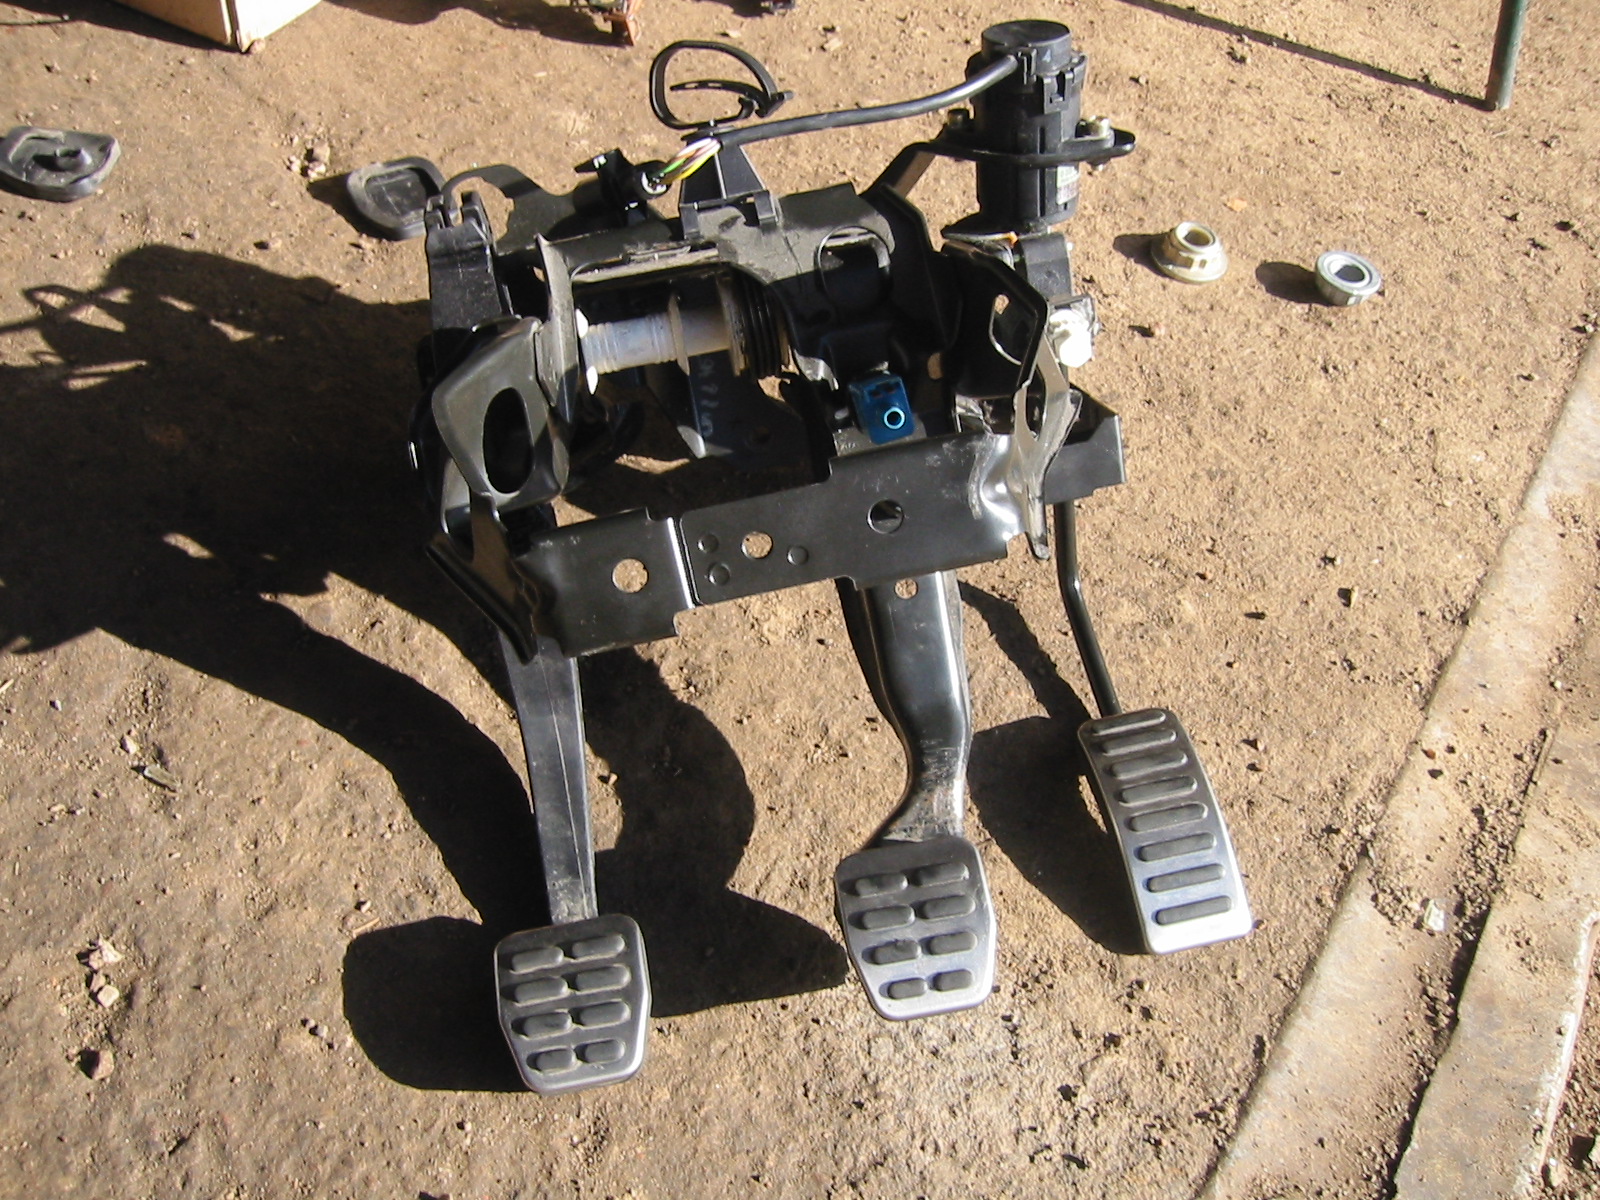
Before installing the engine, the Mk3 pedal assembly went in. Pedal pads from an Audi TT.
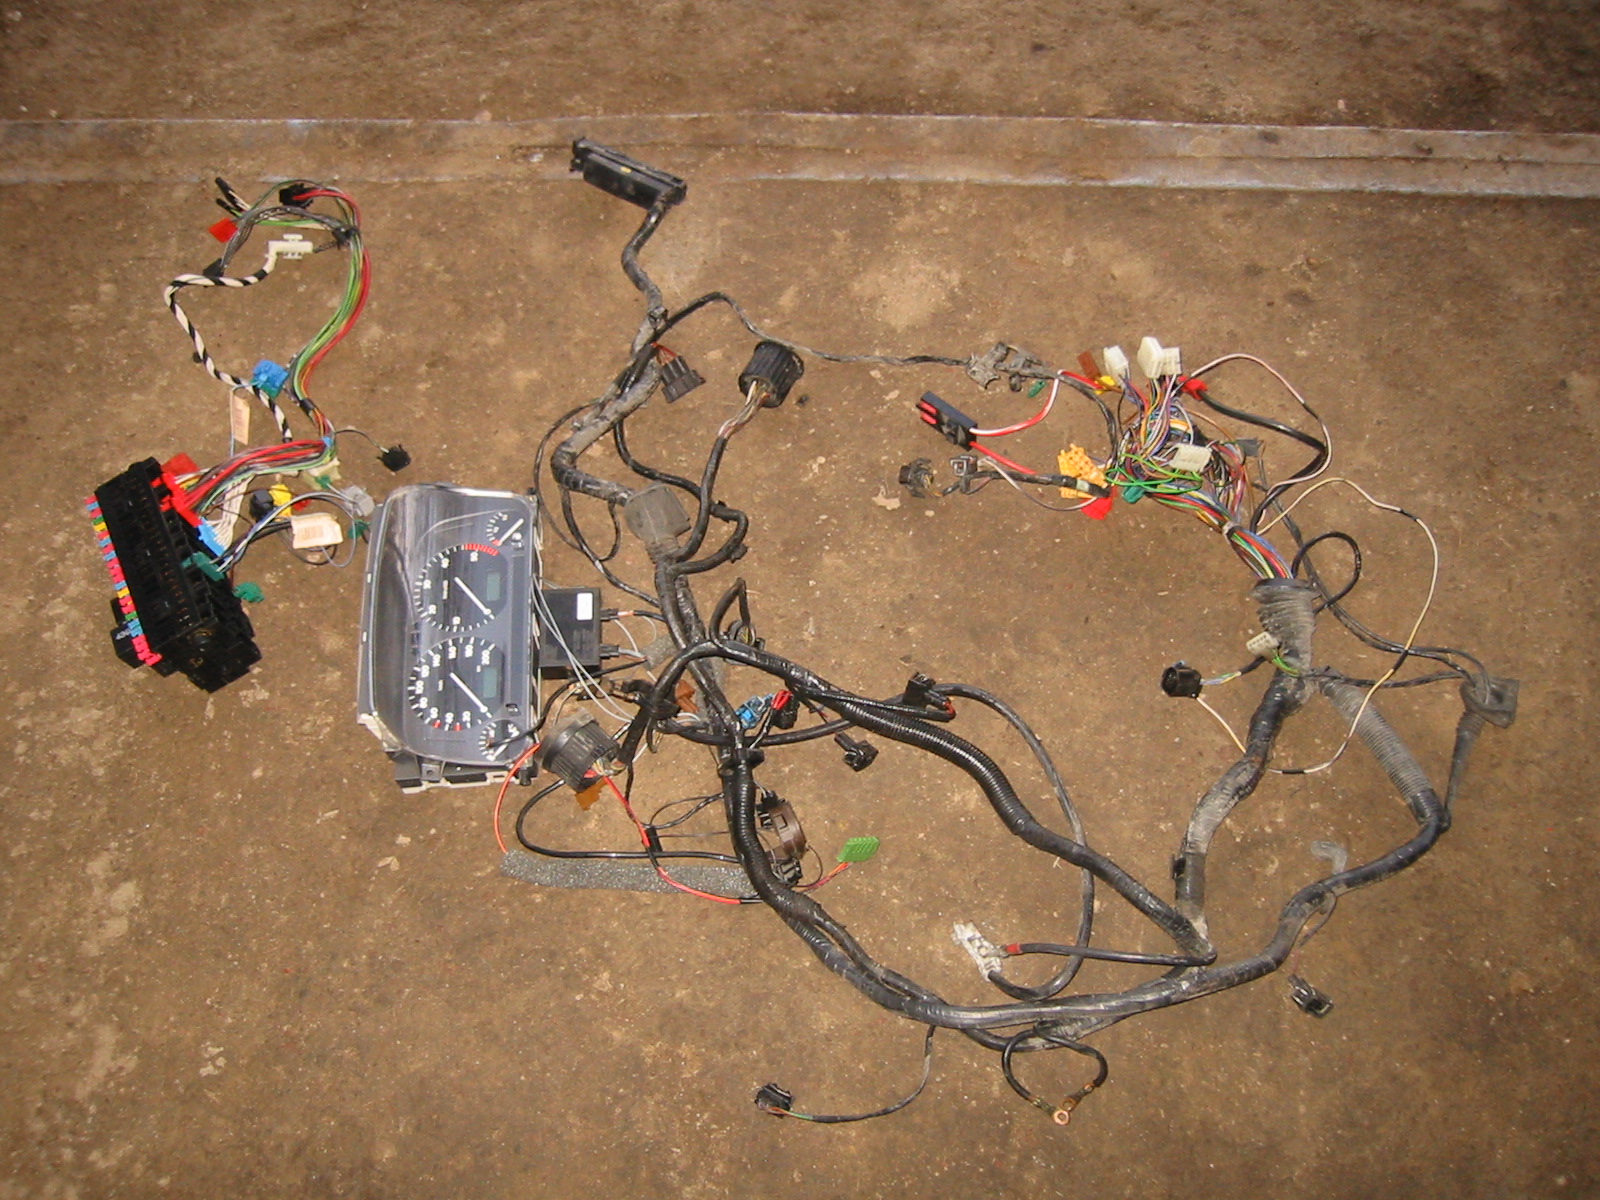
This bundle of wiring went in. From left: relay/fuse panel and some dashboard wiring, instrument cluster, front loom, and somewhere underneath, immobiliser wiring.
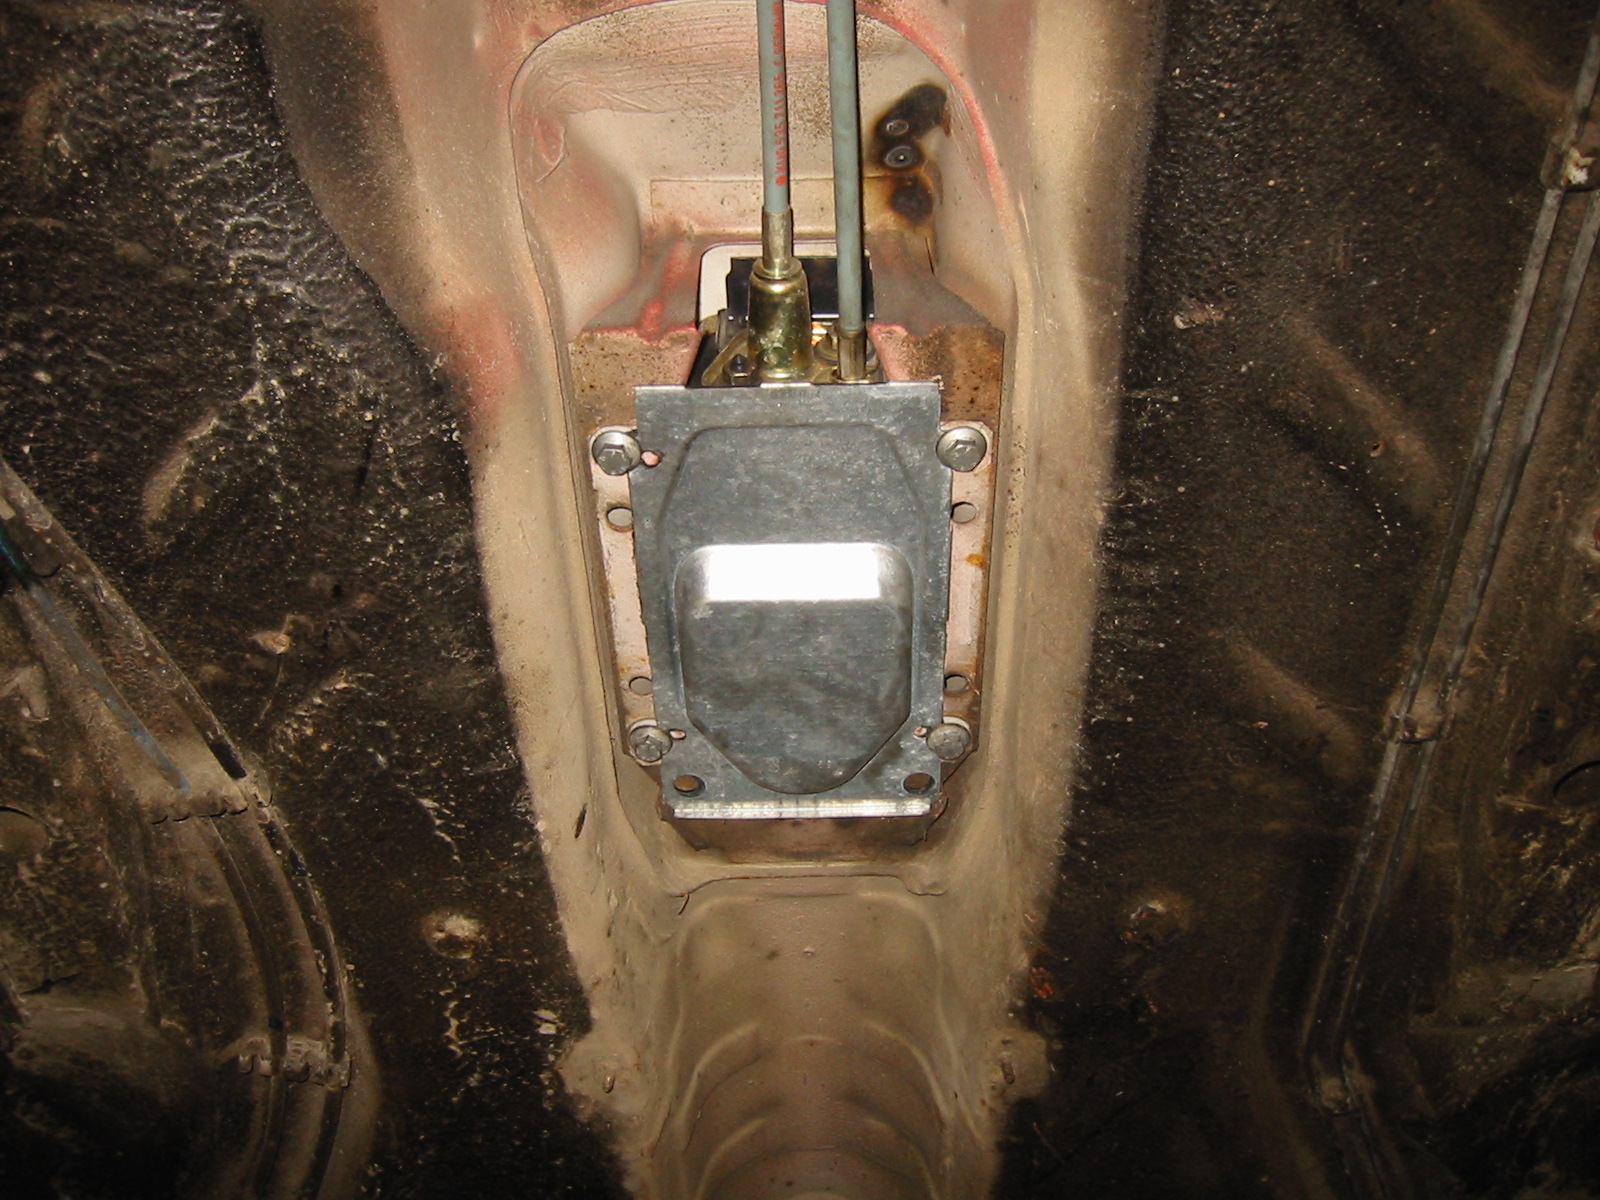
The cable gearshift mechanism from underneath.
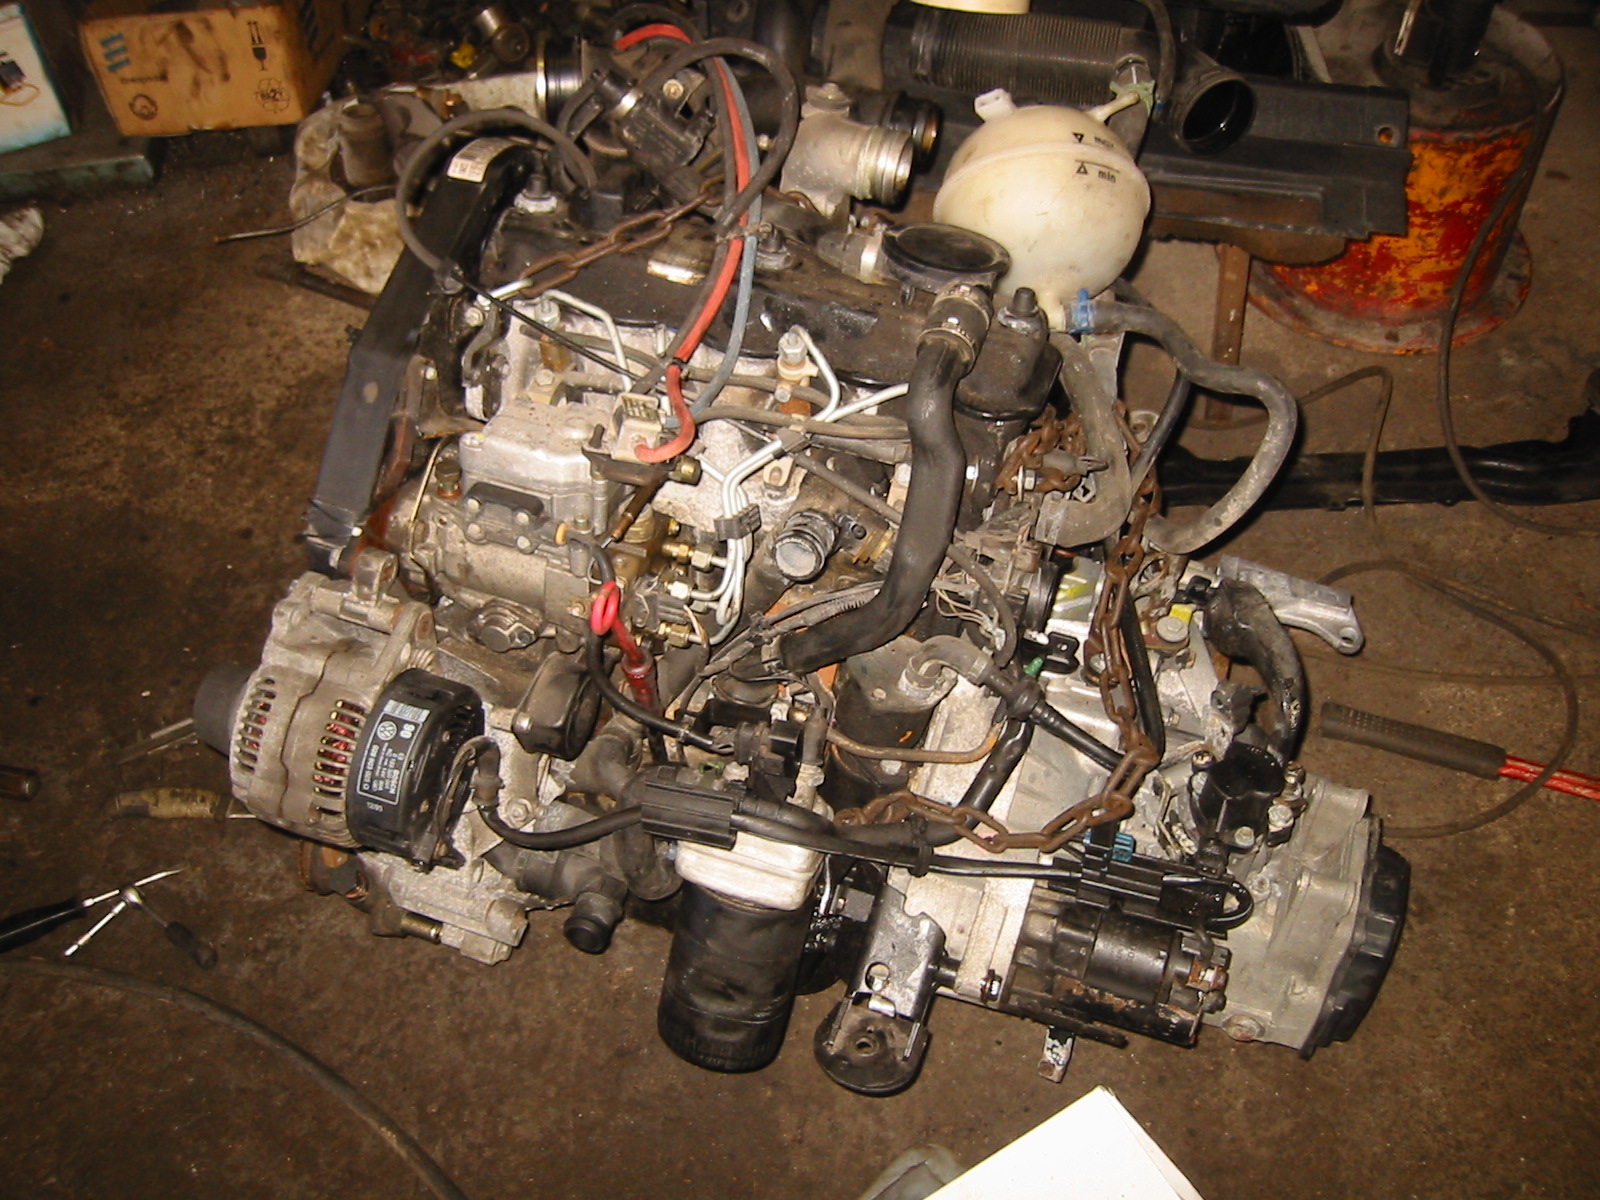
The engine ready to be lifted into the Mk2 Golf.
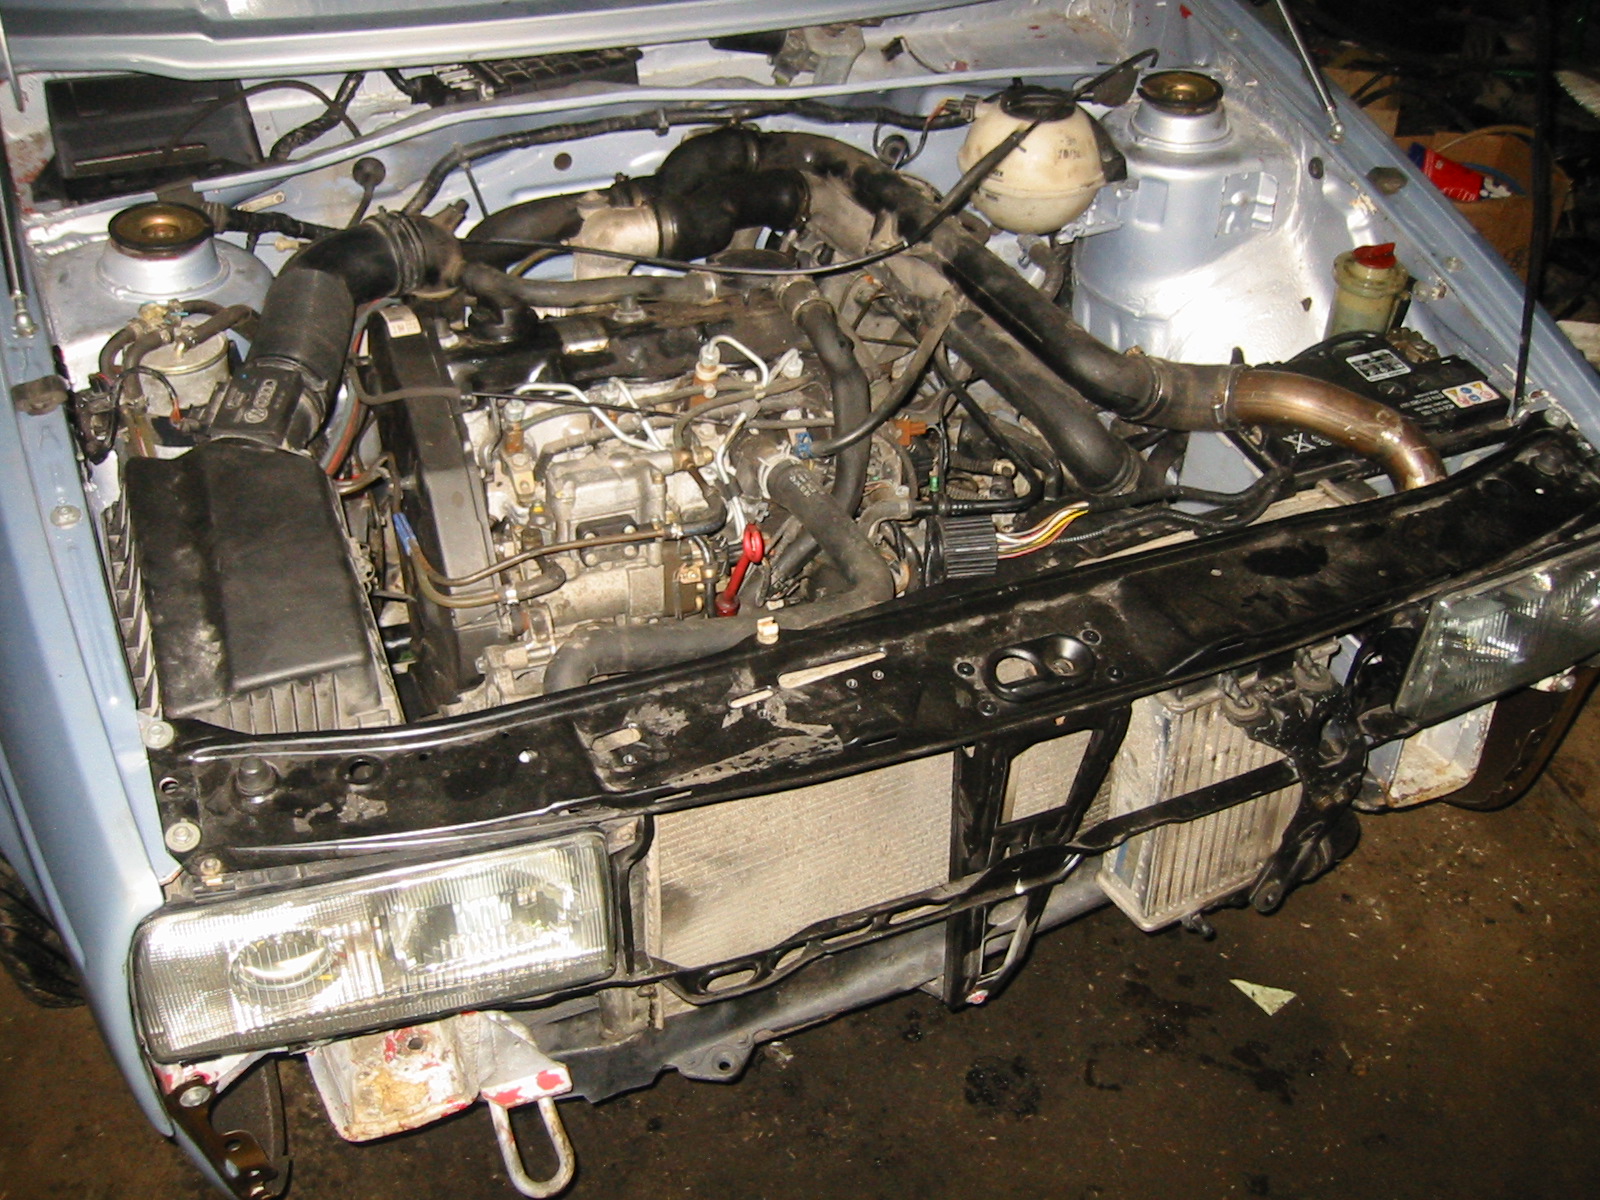
There it sits, already running. The newer engine electronics and chip should give more boost than last year. We'll see the power figures in due course.
The intercooler is the same type as last year. The boost pipes will be remade eventually; for now these will do.
Reassembly — part 2
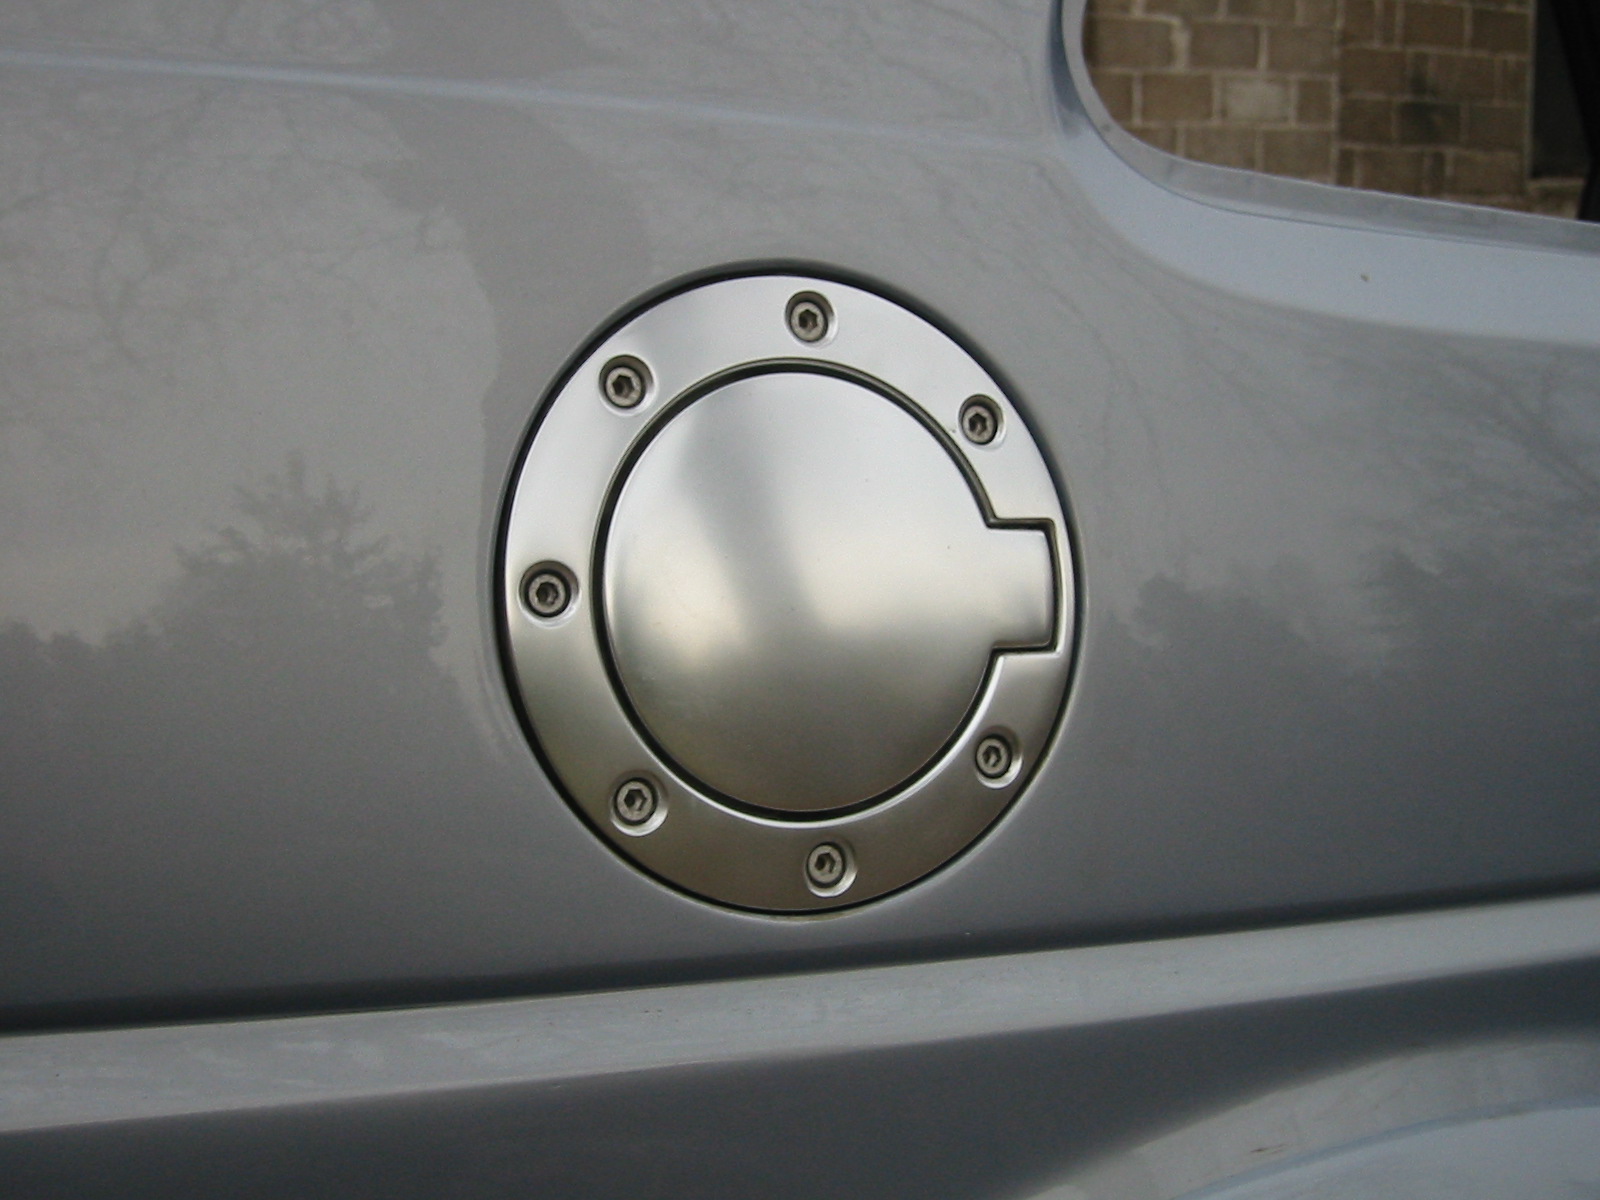
The fuel cap — or rather the flap — was probably the first accessory fitted.
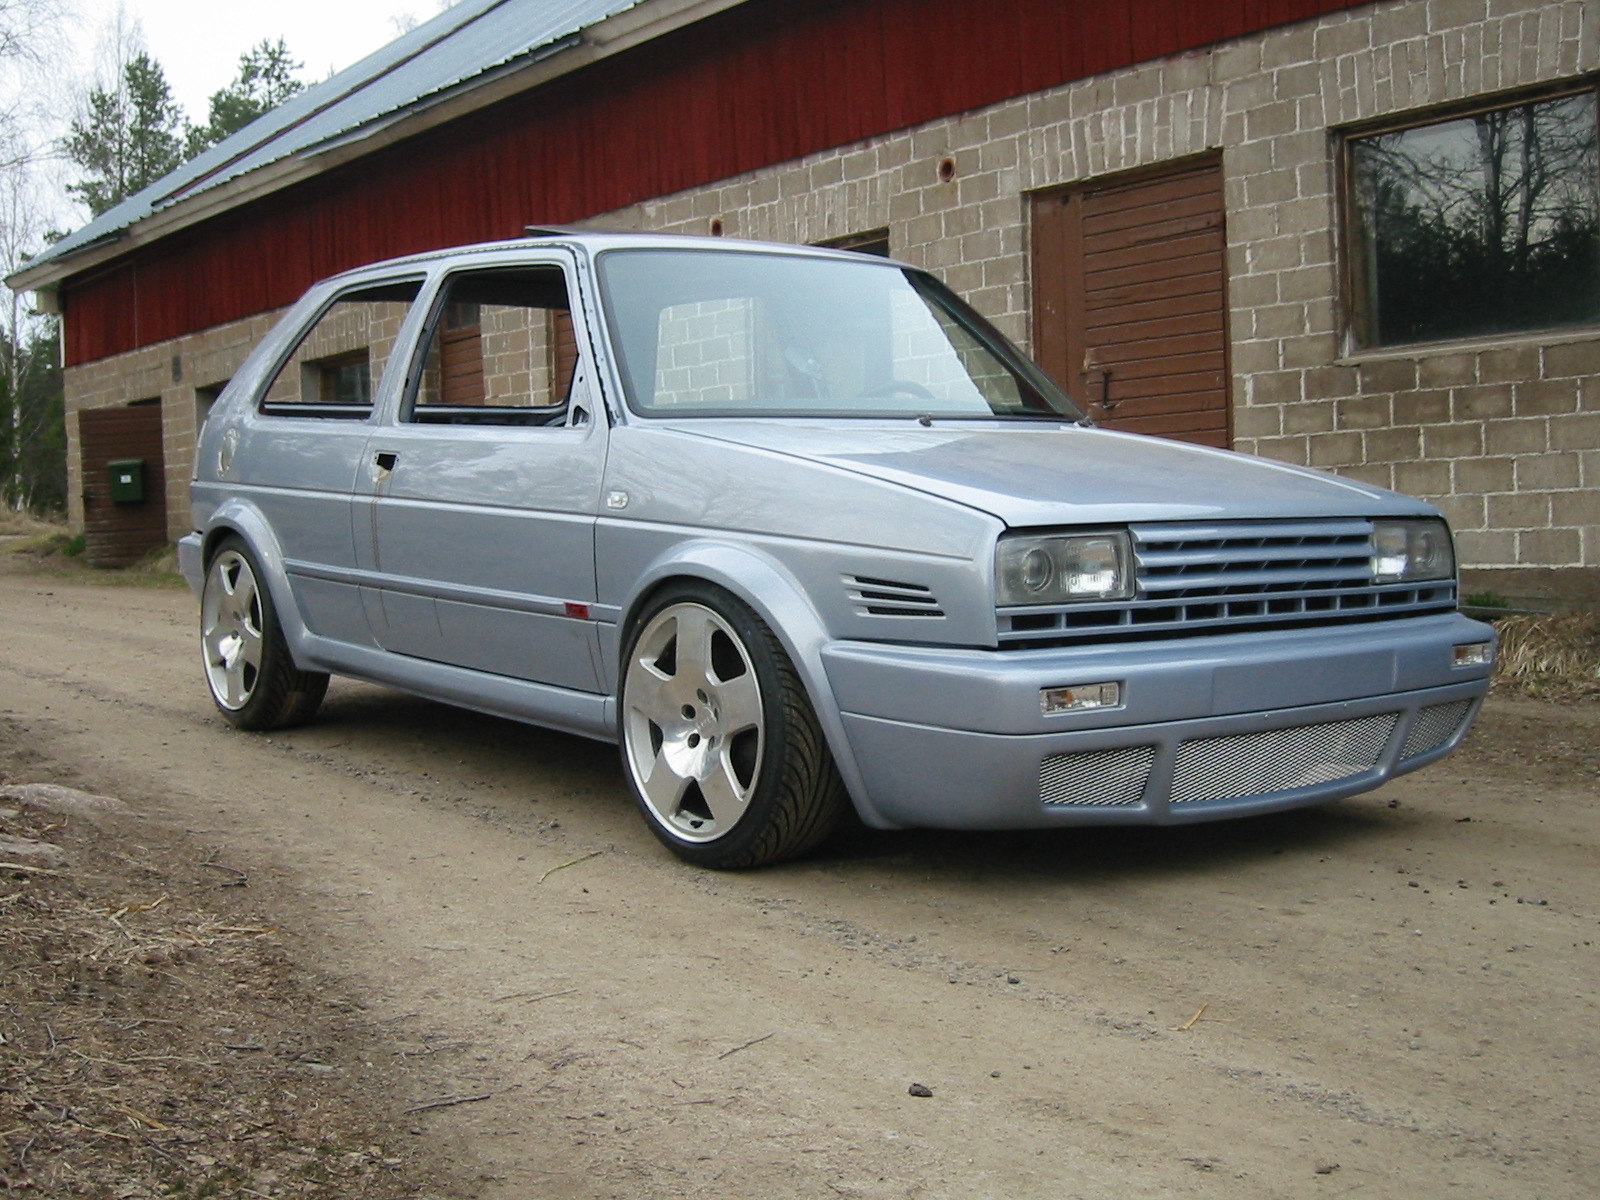
5 May 2003. A month until Bug Run :) Fitted: Rallye front end with a debadged grille, Maxxlook front lip, clear front indicators, clear side repeaters, Audi TT Parabol wheels...
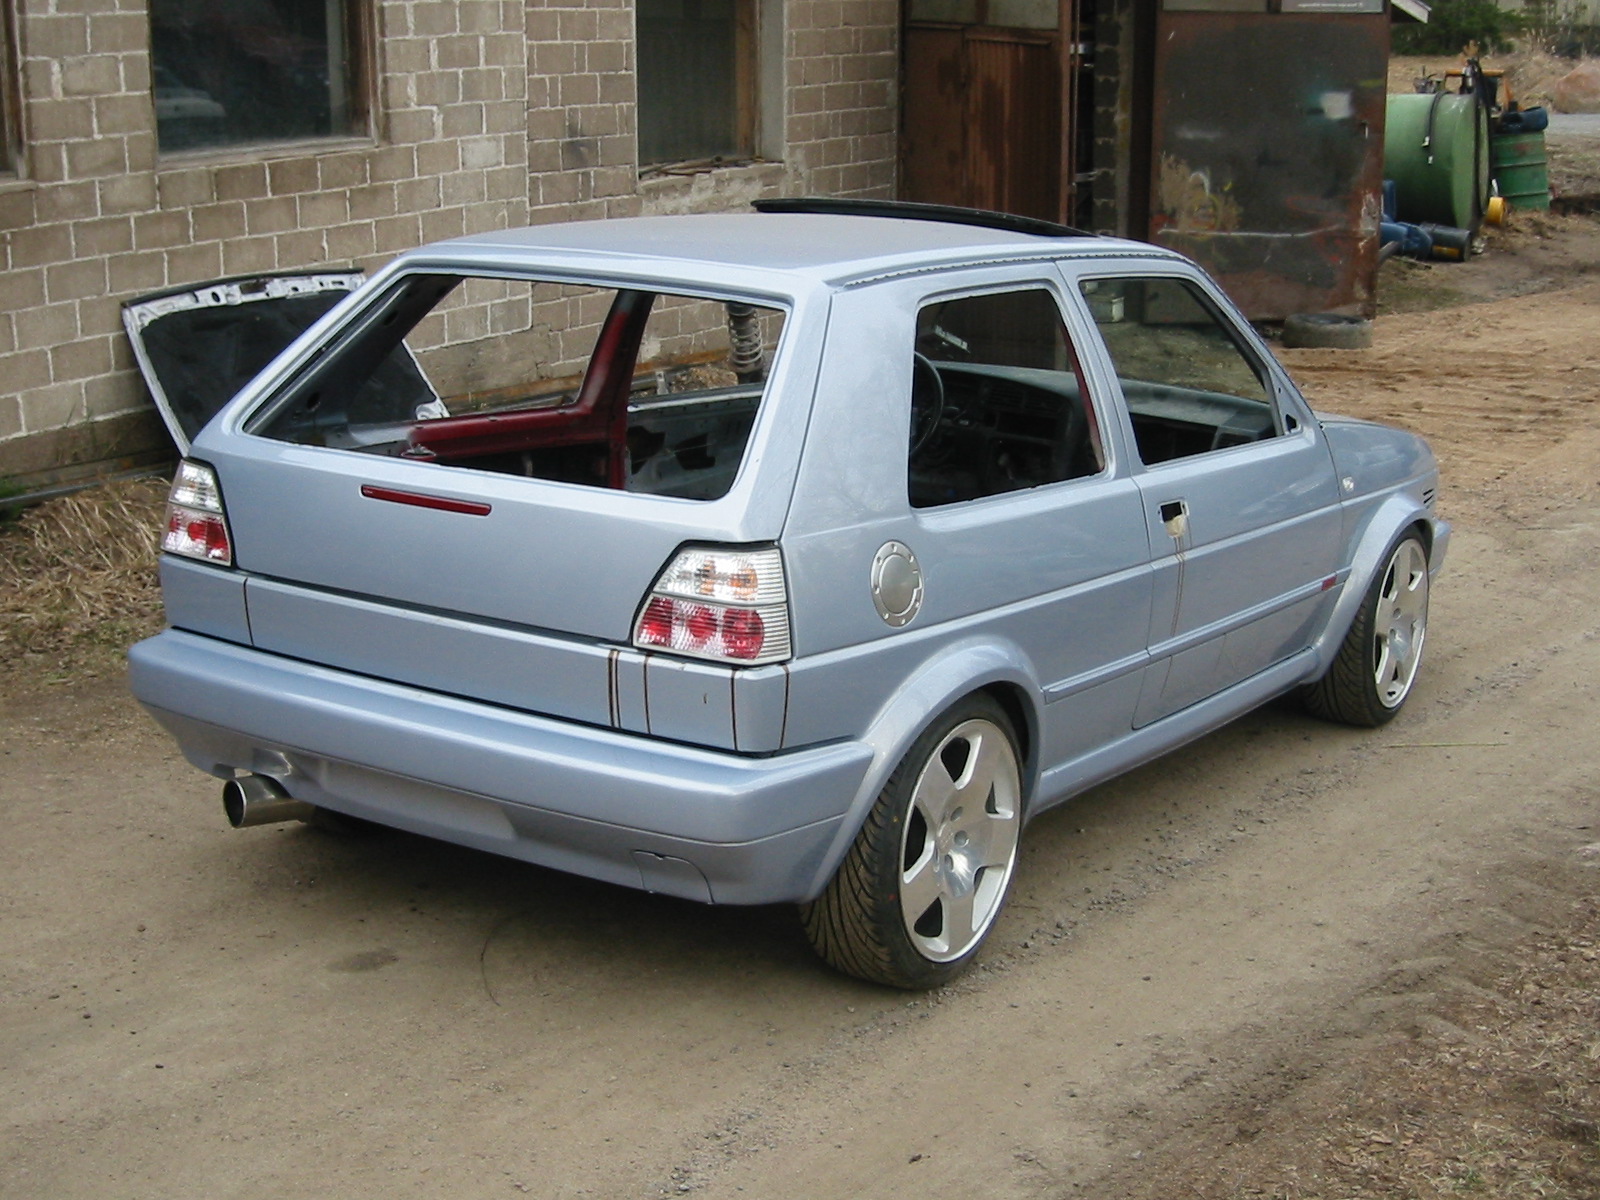
...G60 arches, mouldings and sill trims, clear tail lights, and a big rear bumper with a number plate recess. Rustproofing is still running down the sides. At least it won't rust if it spends next winter under a tree covered in snow again ;-)
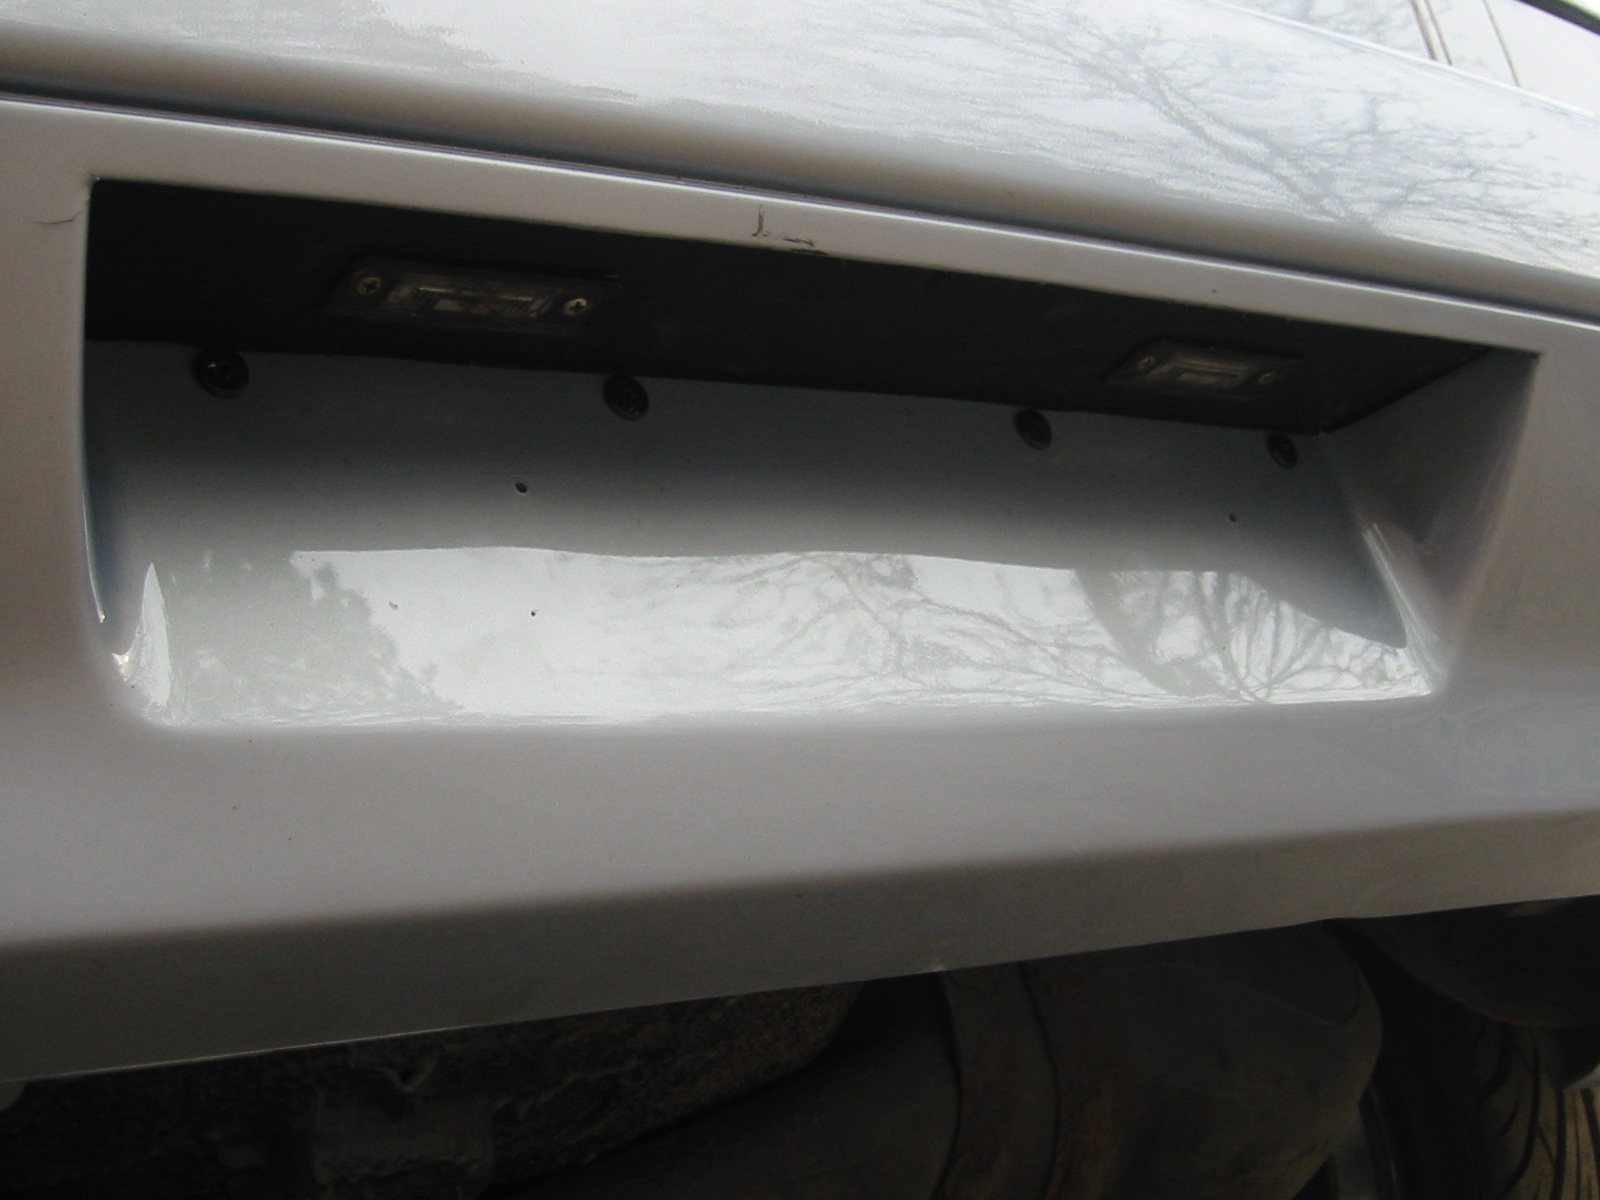
This time Pekka made the plate recess using the recess from a 2002 Polo bumper. The plate lights are Mk4 Golf parts.
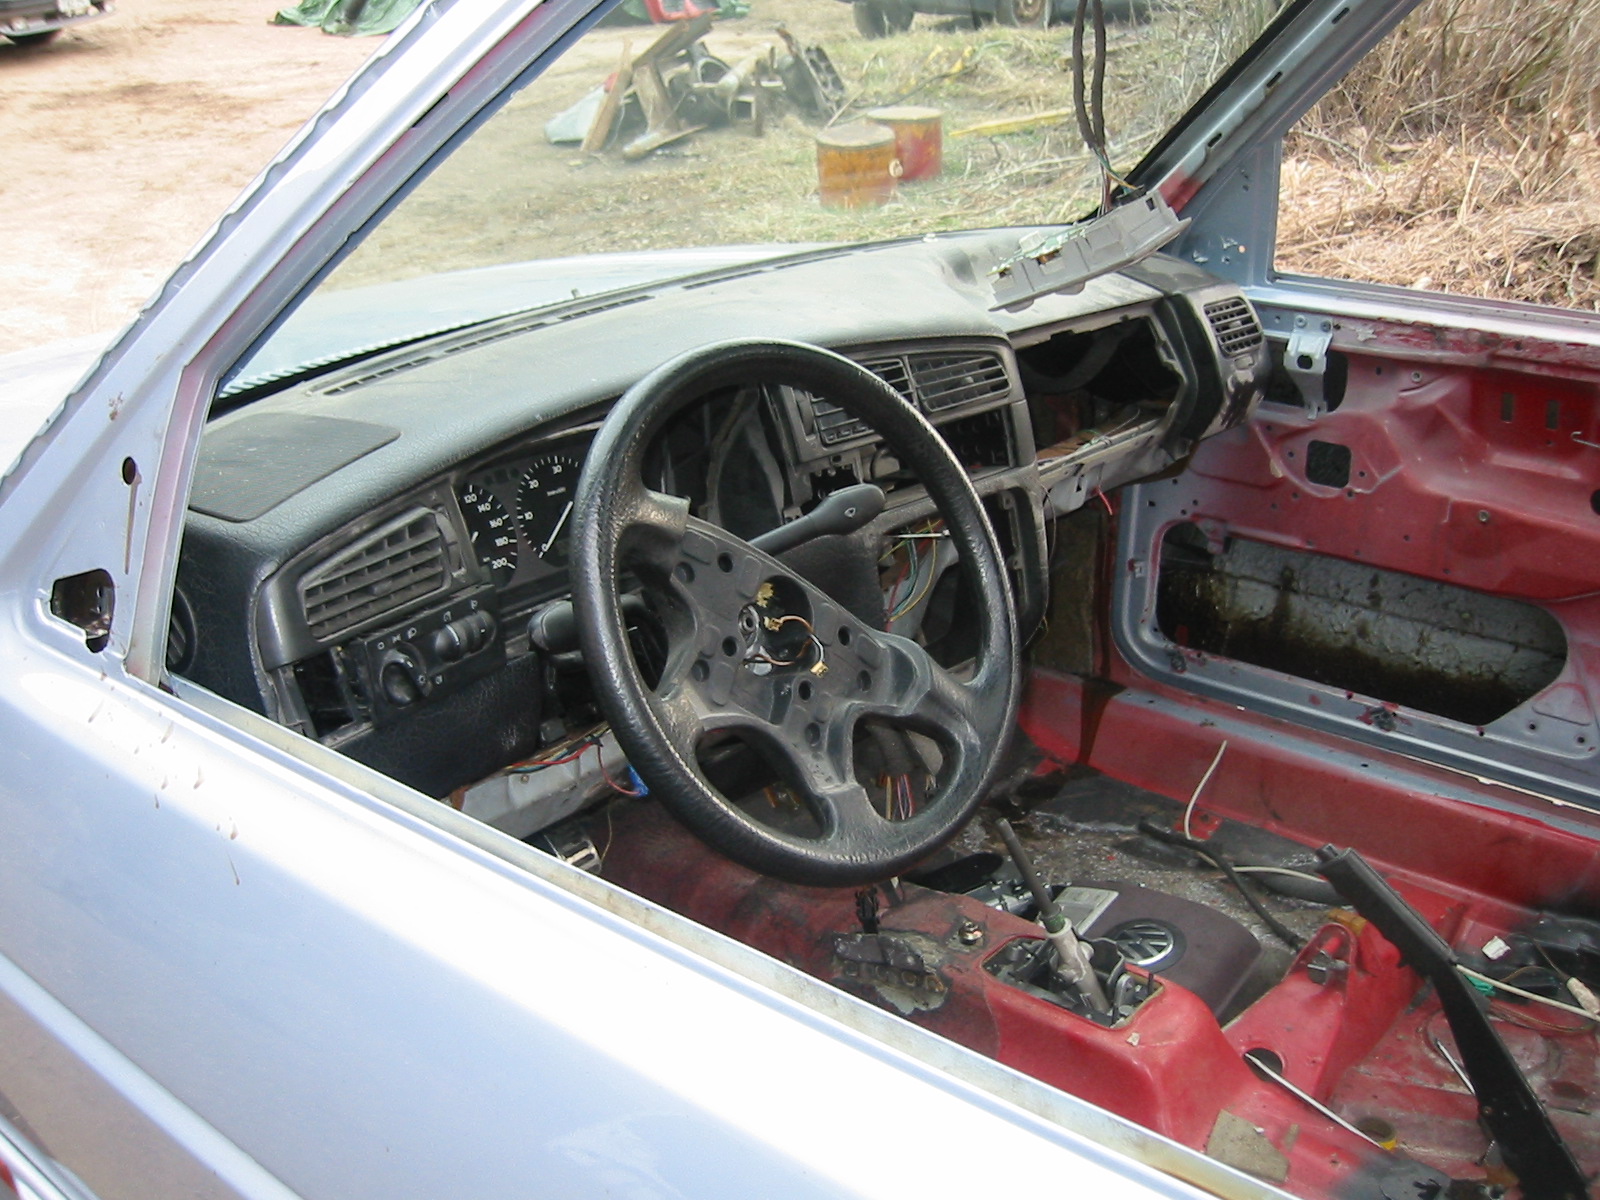
The Mk3 Golf dashboard installed.
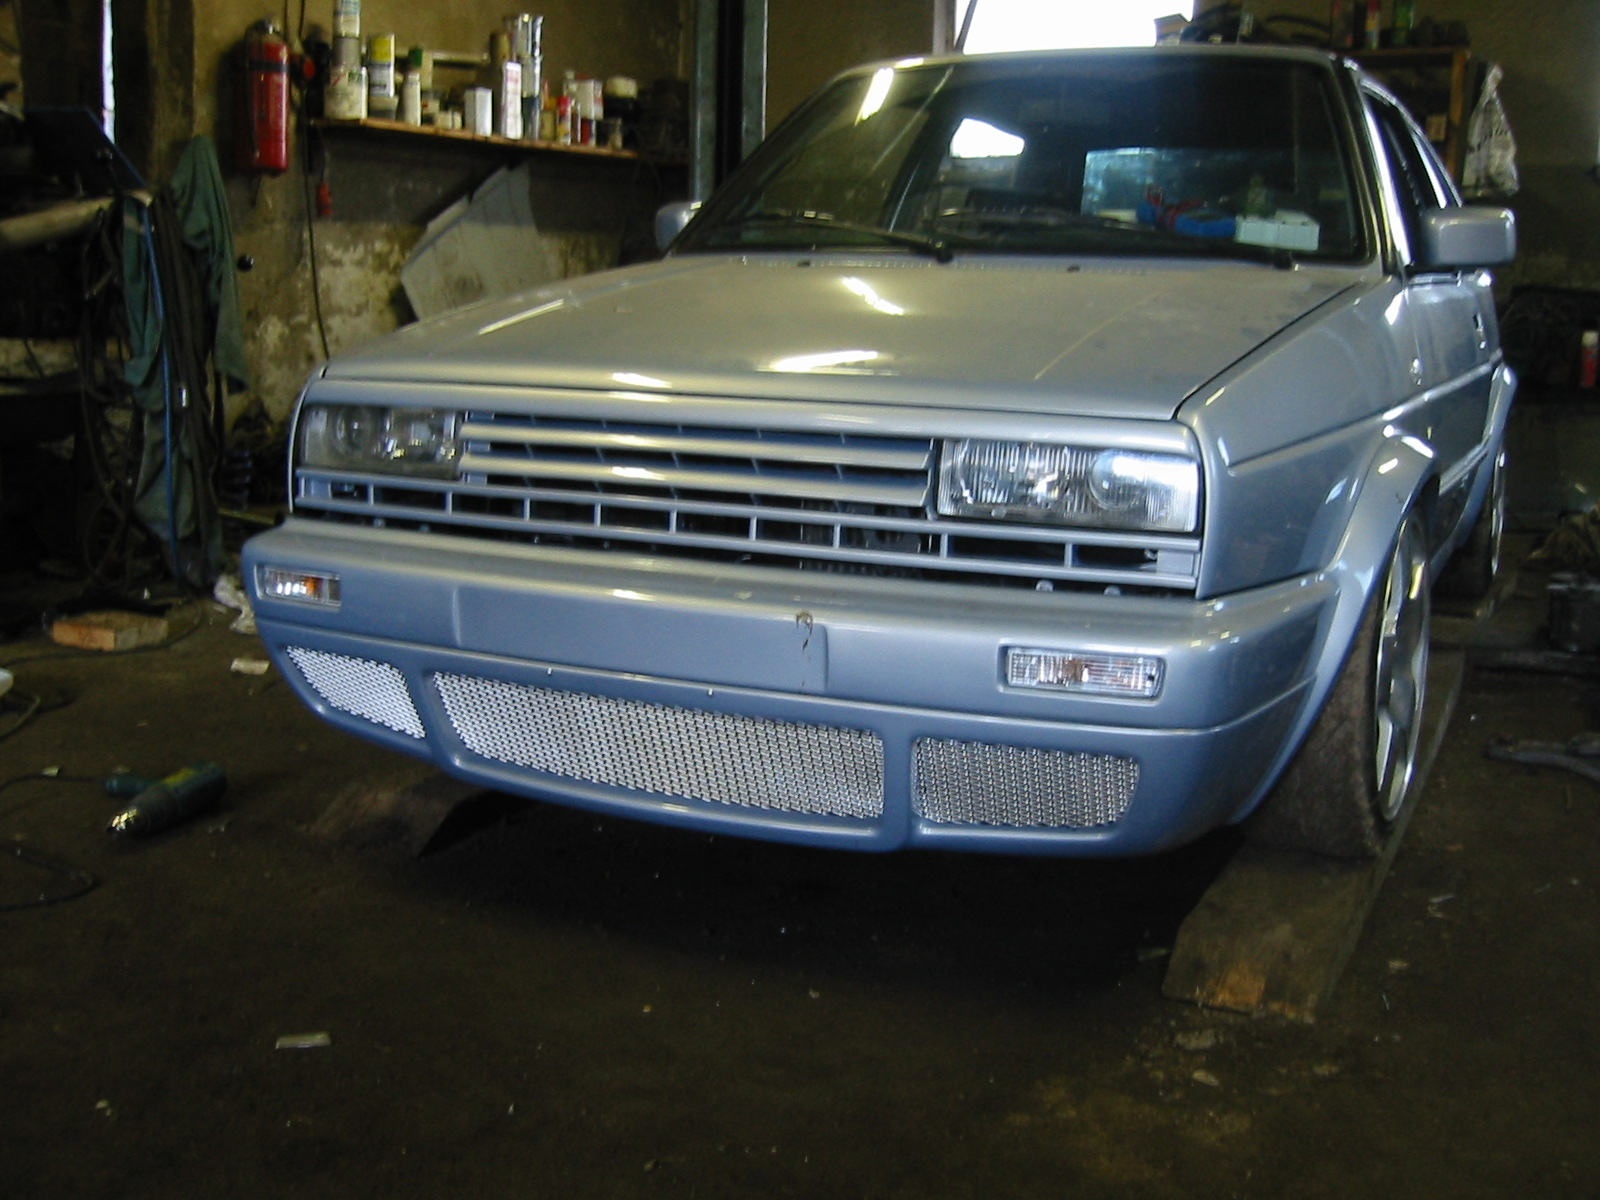
22 May 2003. Pekka fitted a Kamei Jetta grille spoiler, changing the front's expression a little.
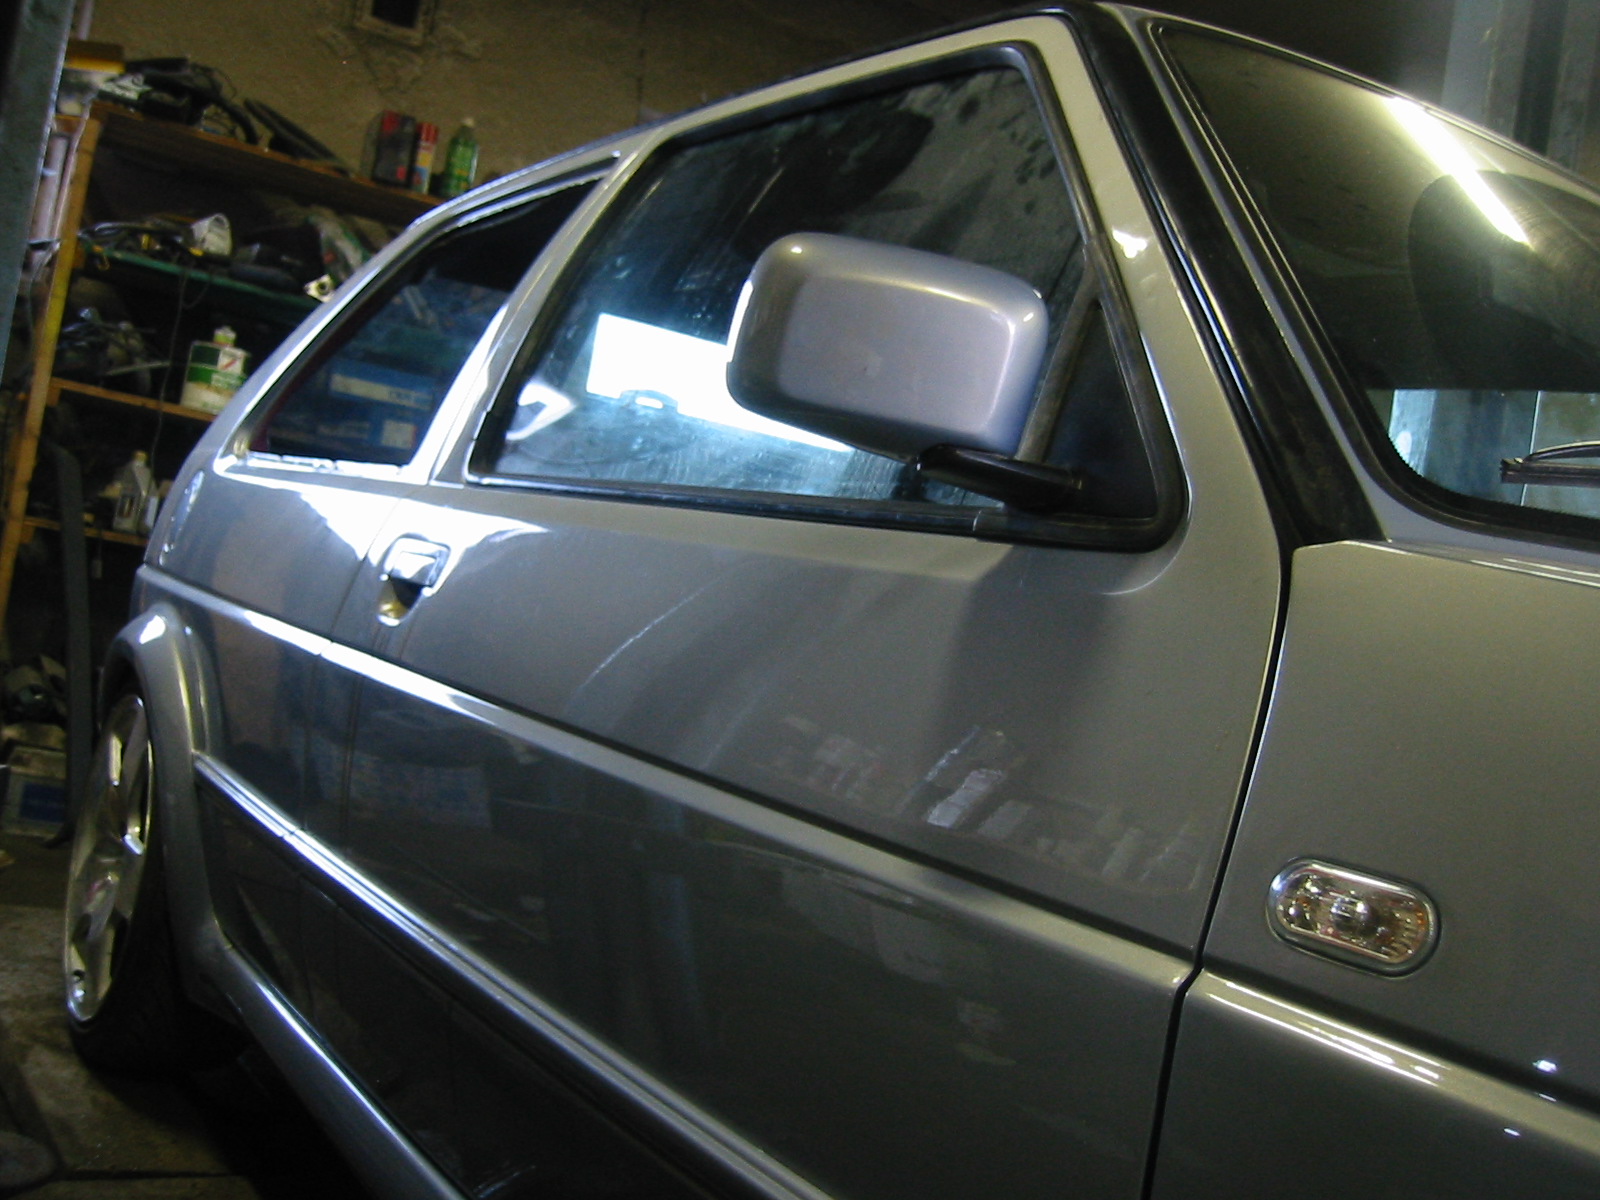
Also fitted: mirrors, handles, electric windows, central locking, alarm...
Essentially only the seats and side trim are missing, still at the upholsterer's. Of course there are plenty of small adjustments left, but Pekka should still make Bug Run.
Finished
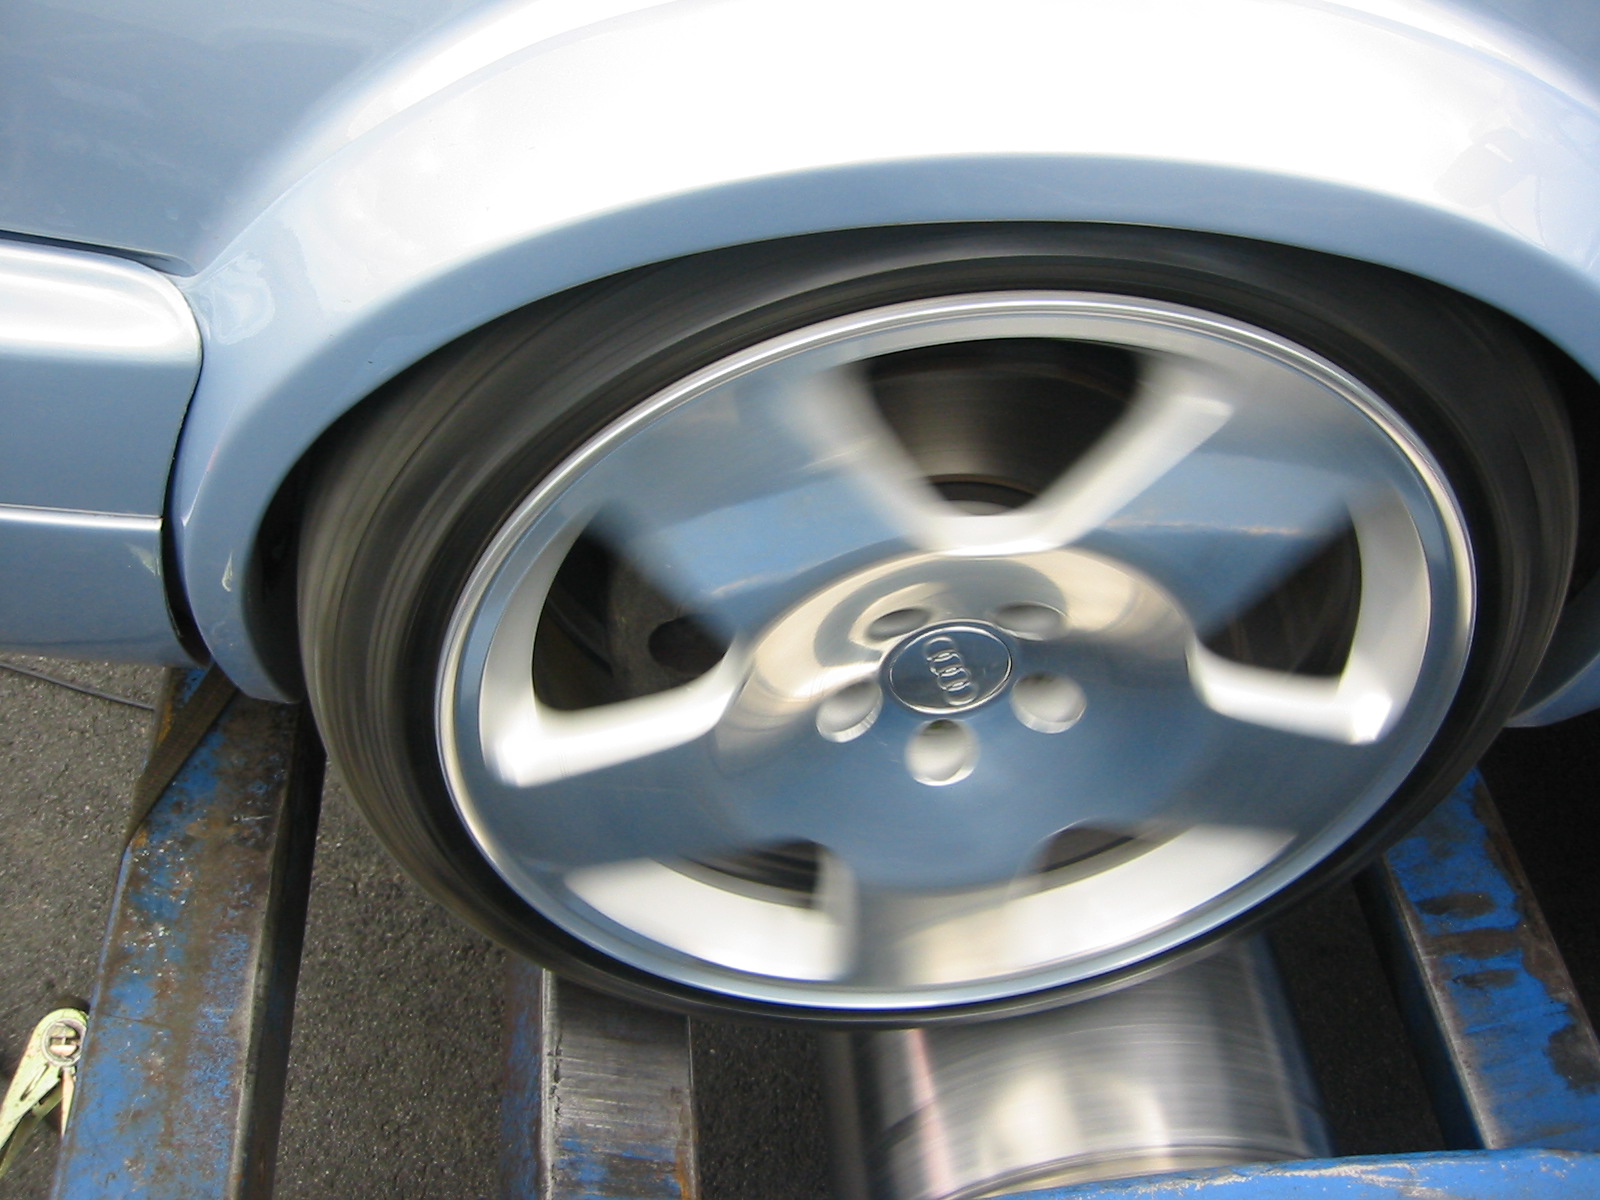
The Golf went on the dyno at Bug Run again in 2003. This time it showed 128 hp and 270 Nm.
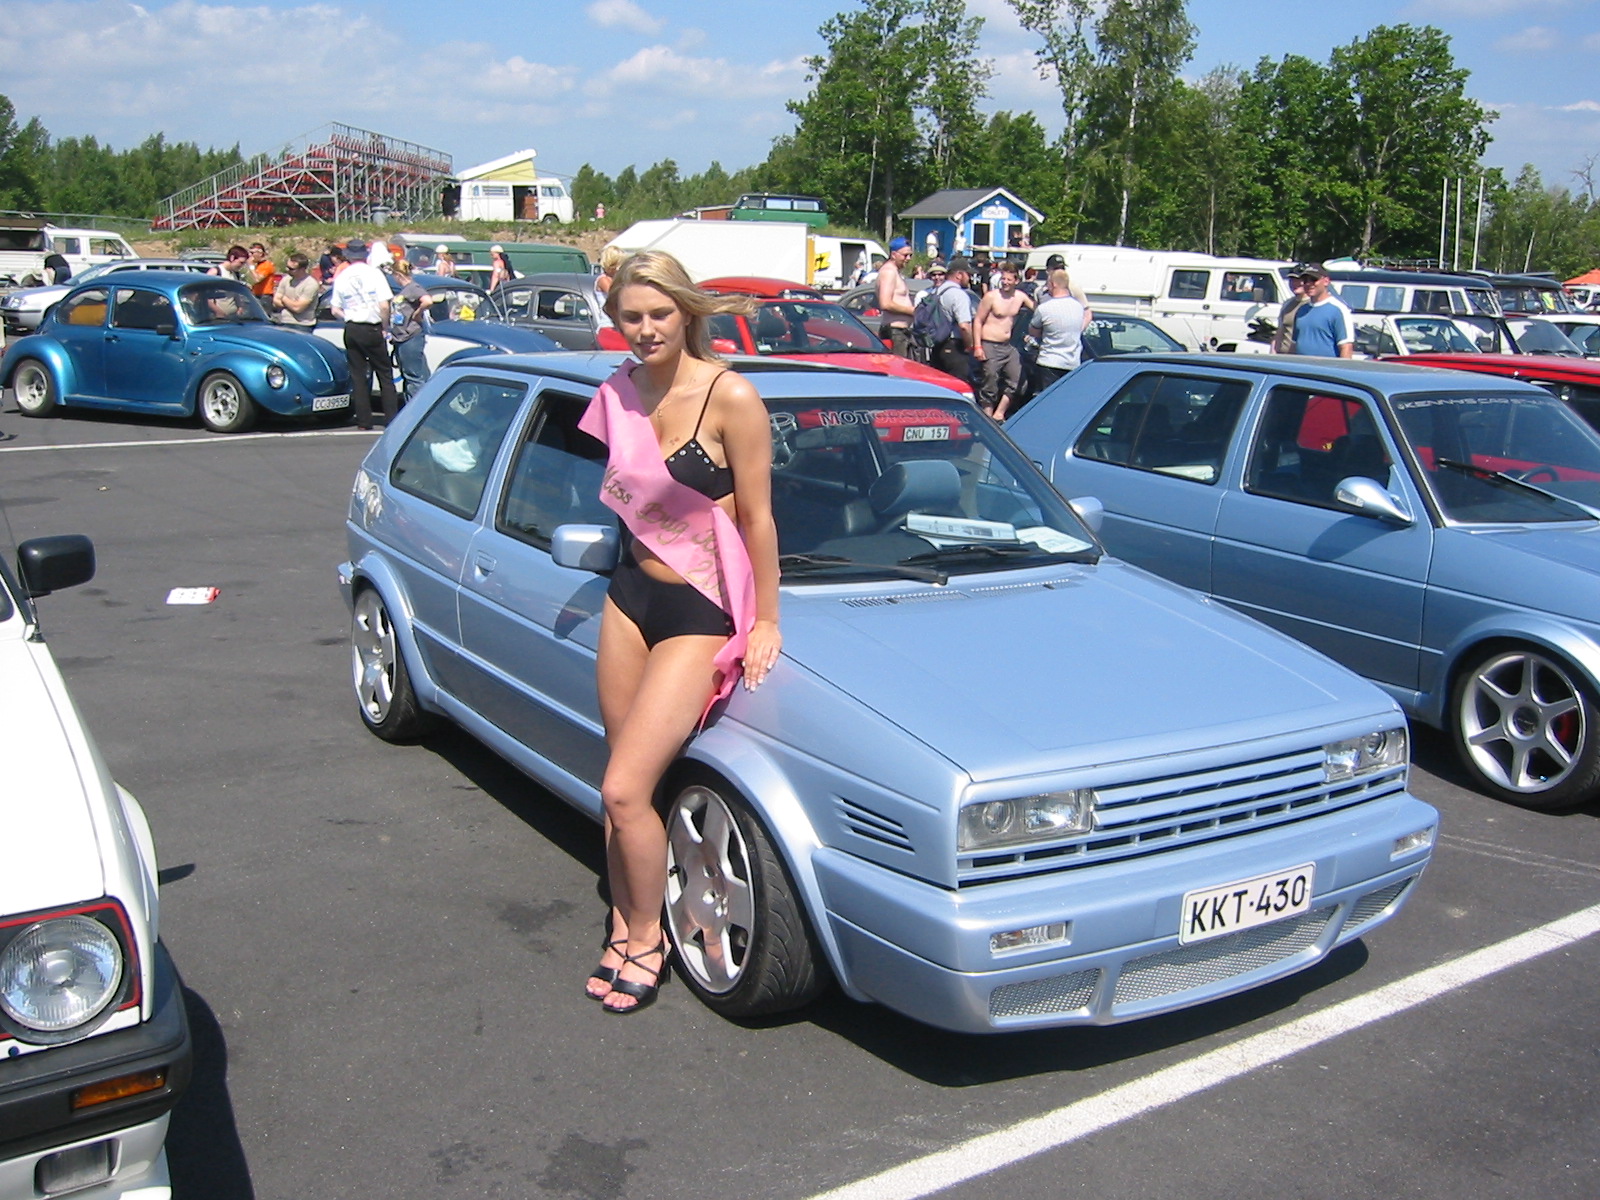
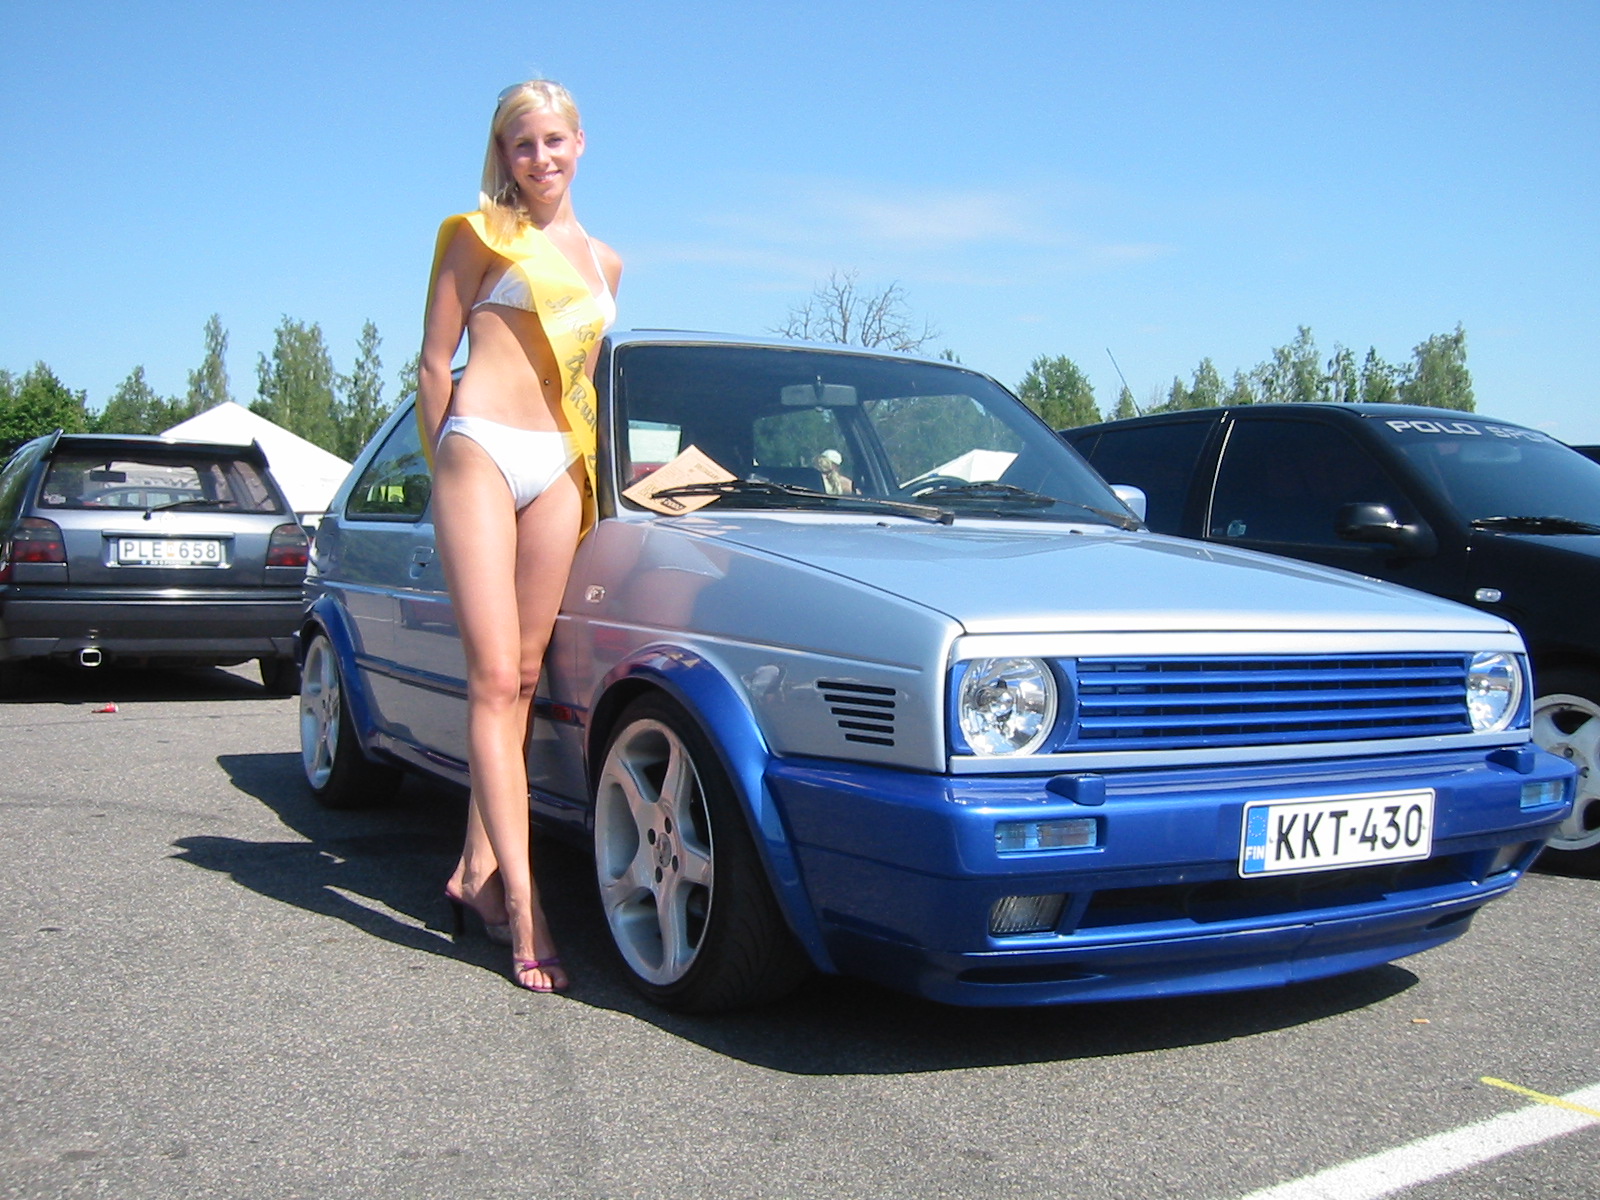
The Golf and Miss Bug Run.
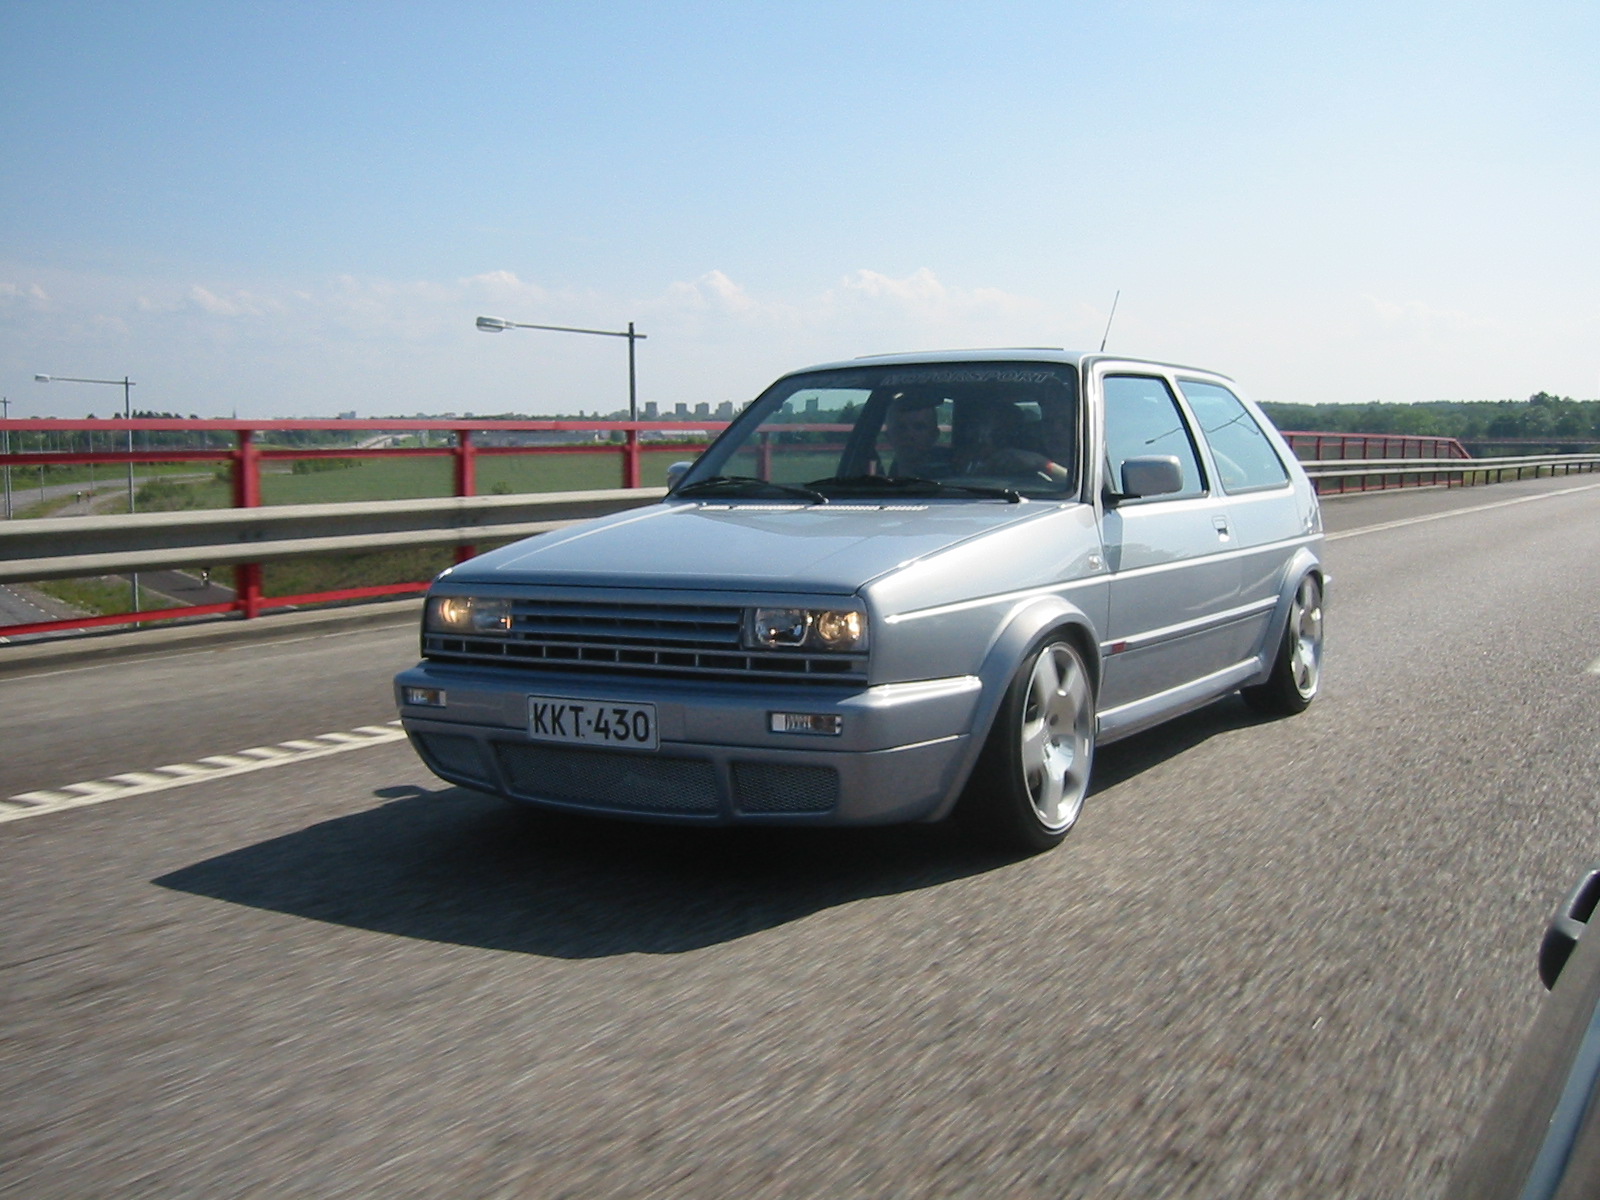
On the motorway in Sweden. Unfortunately something hit a headlight on the way to Mantorp... One wrecked headlight. The interior was retrimmed too, using Mk3 Golf Sport seats.
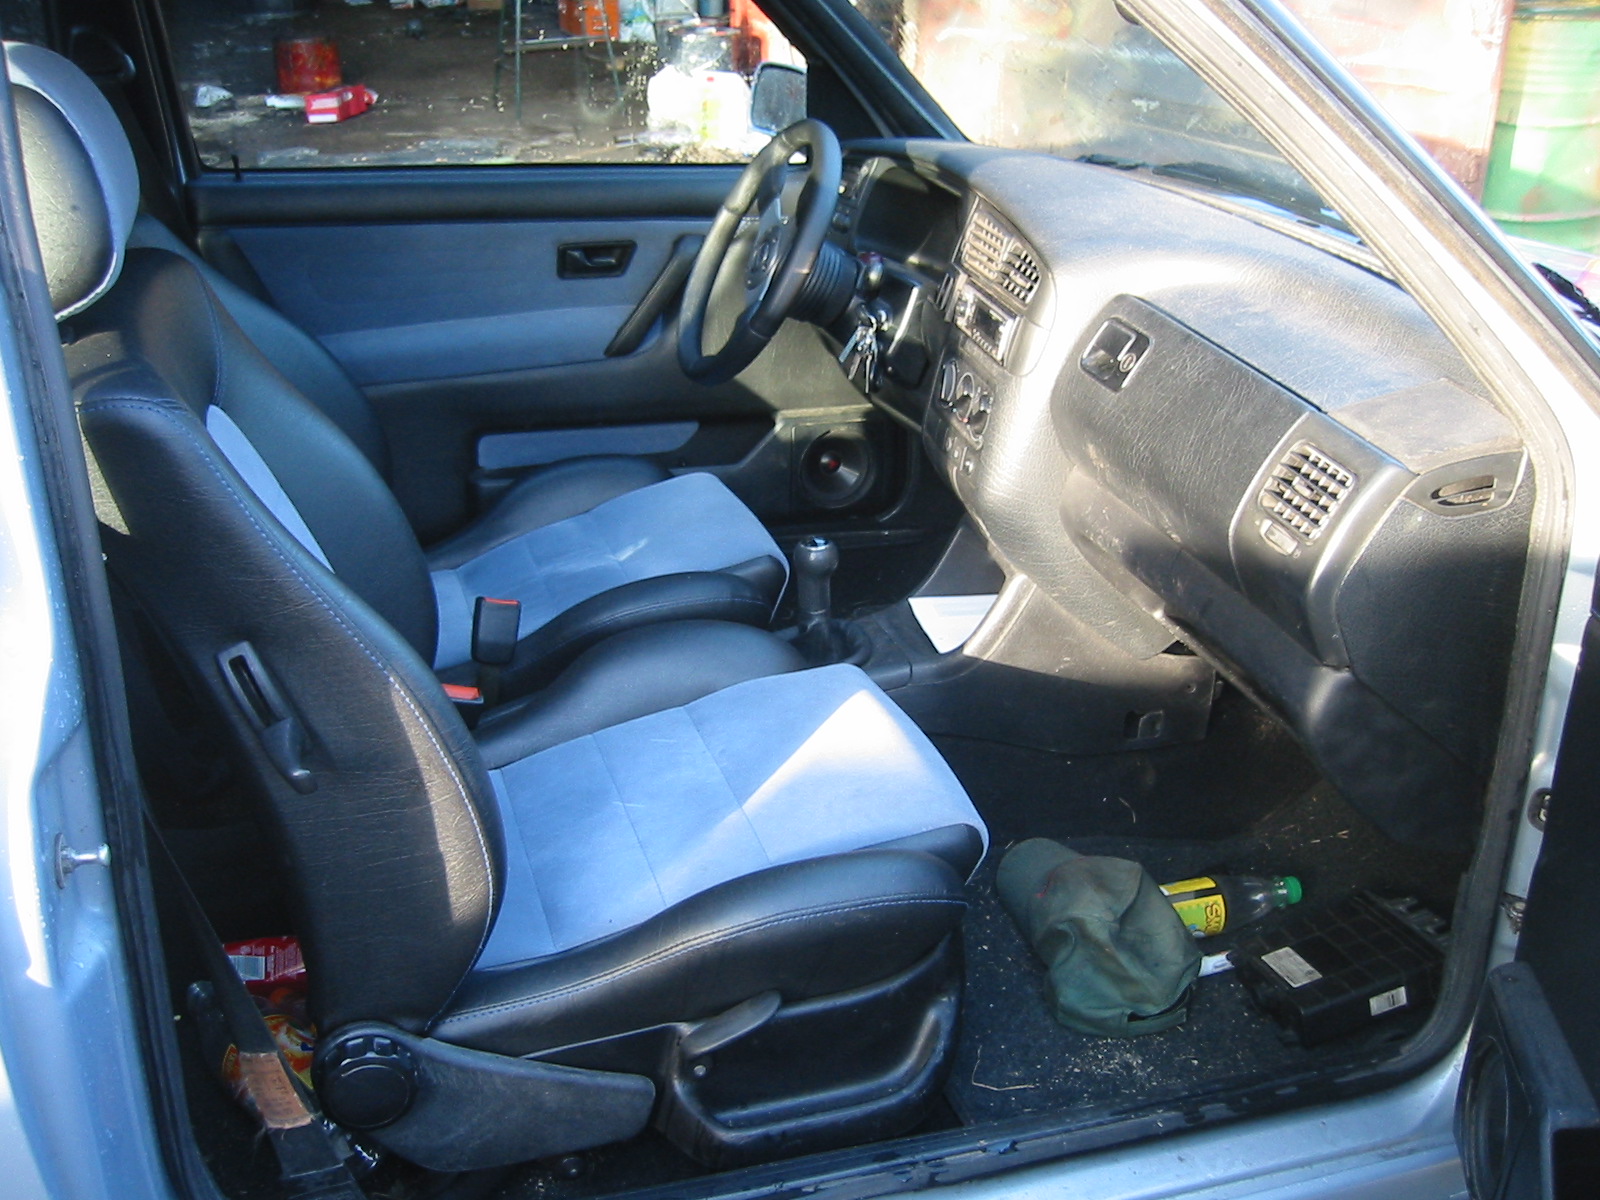
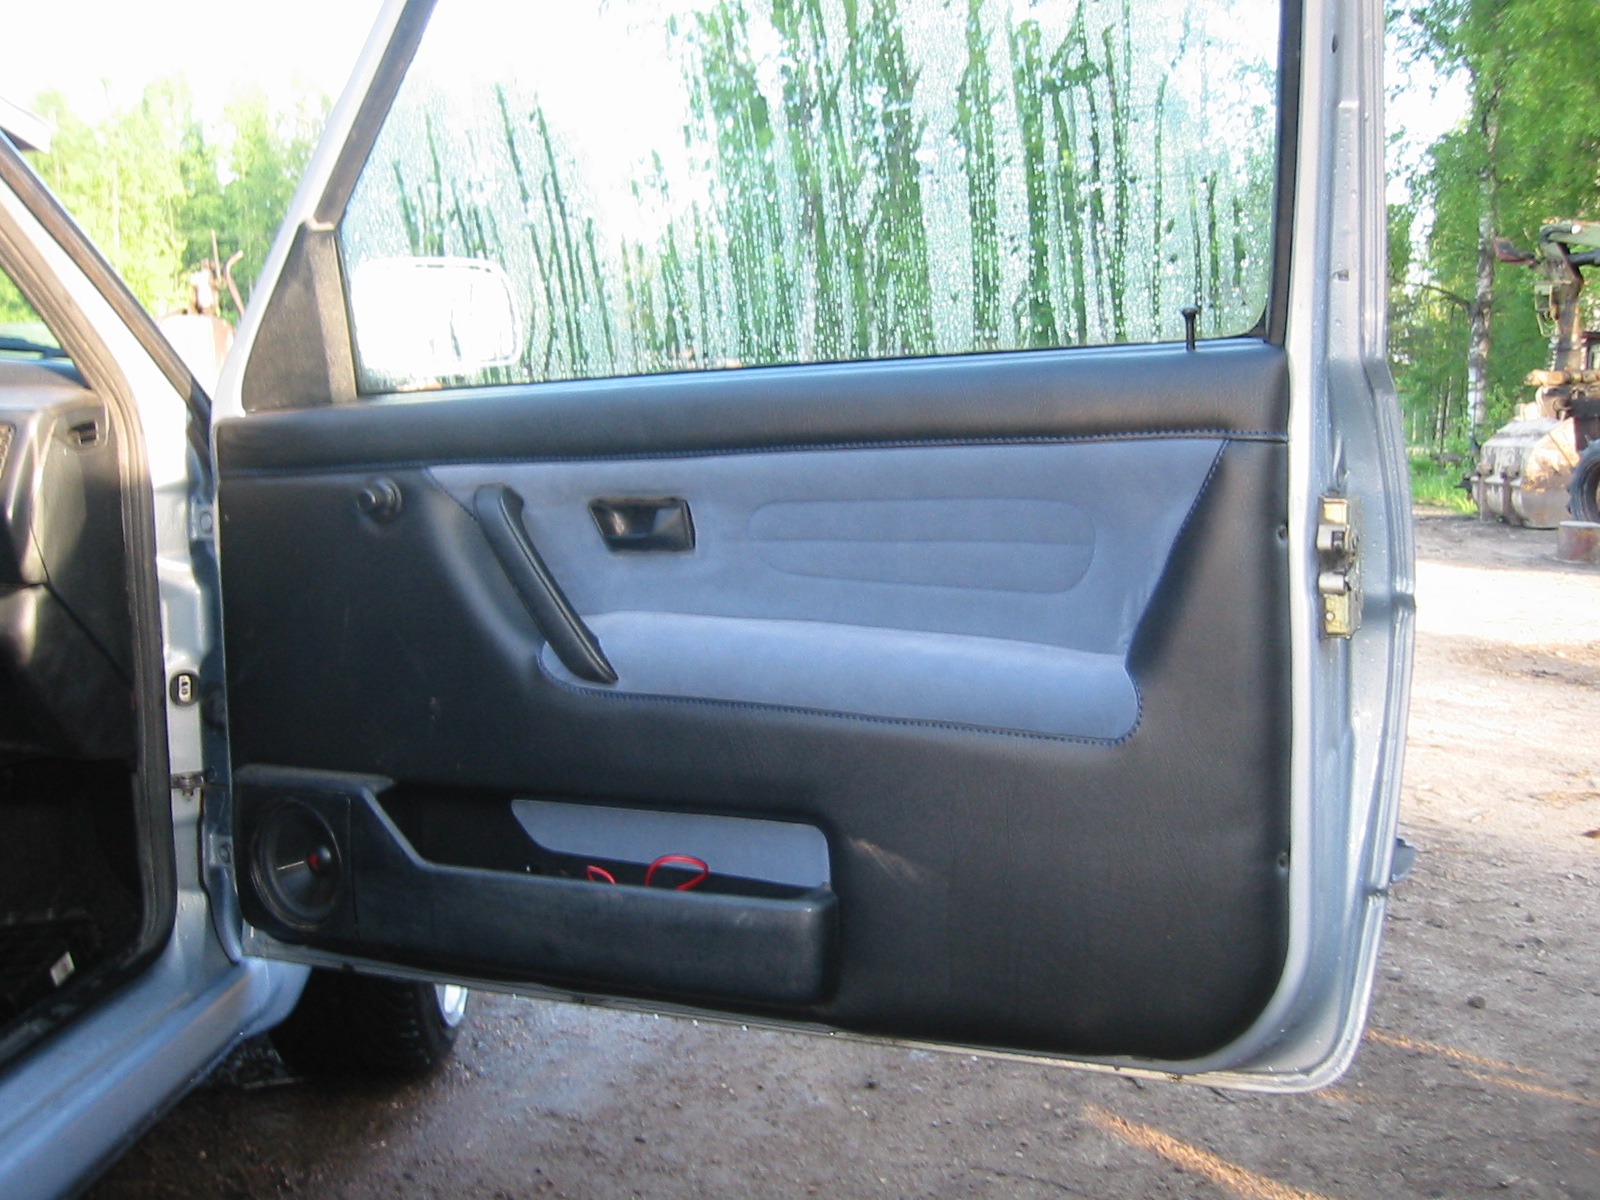
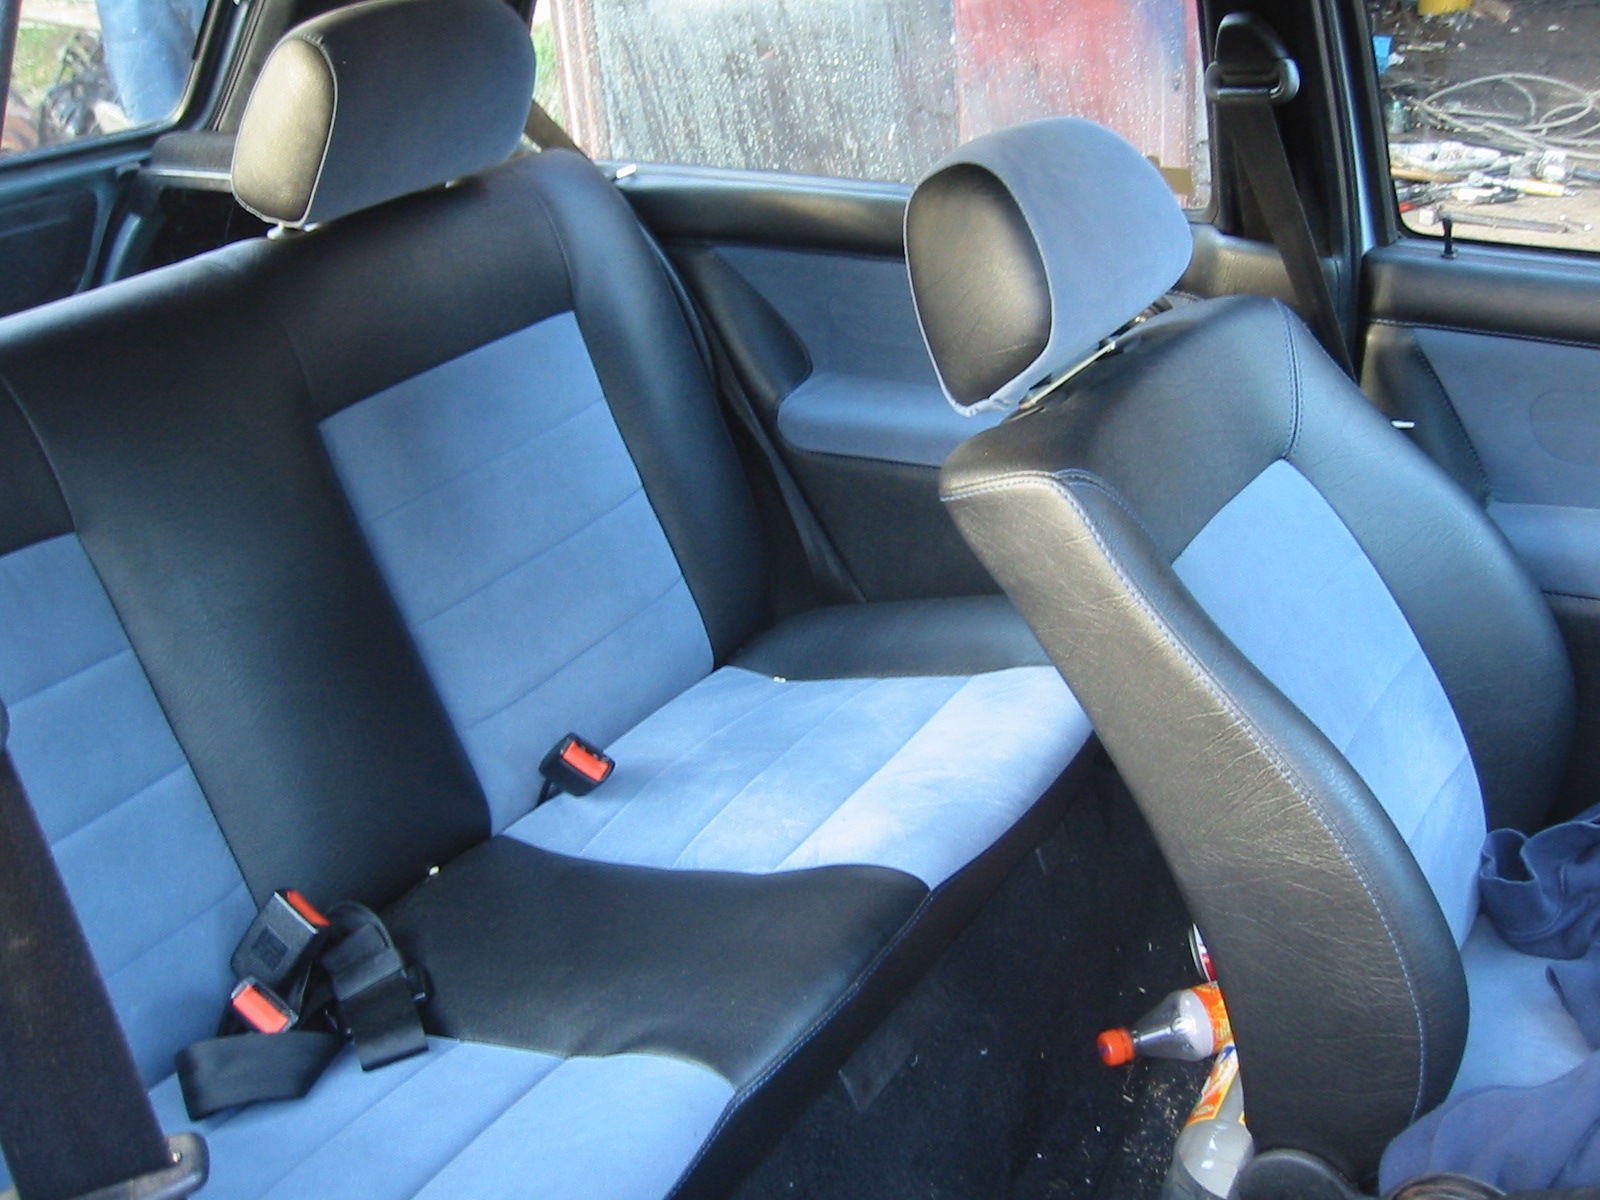
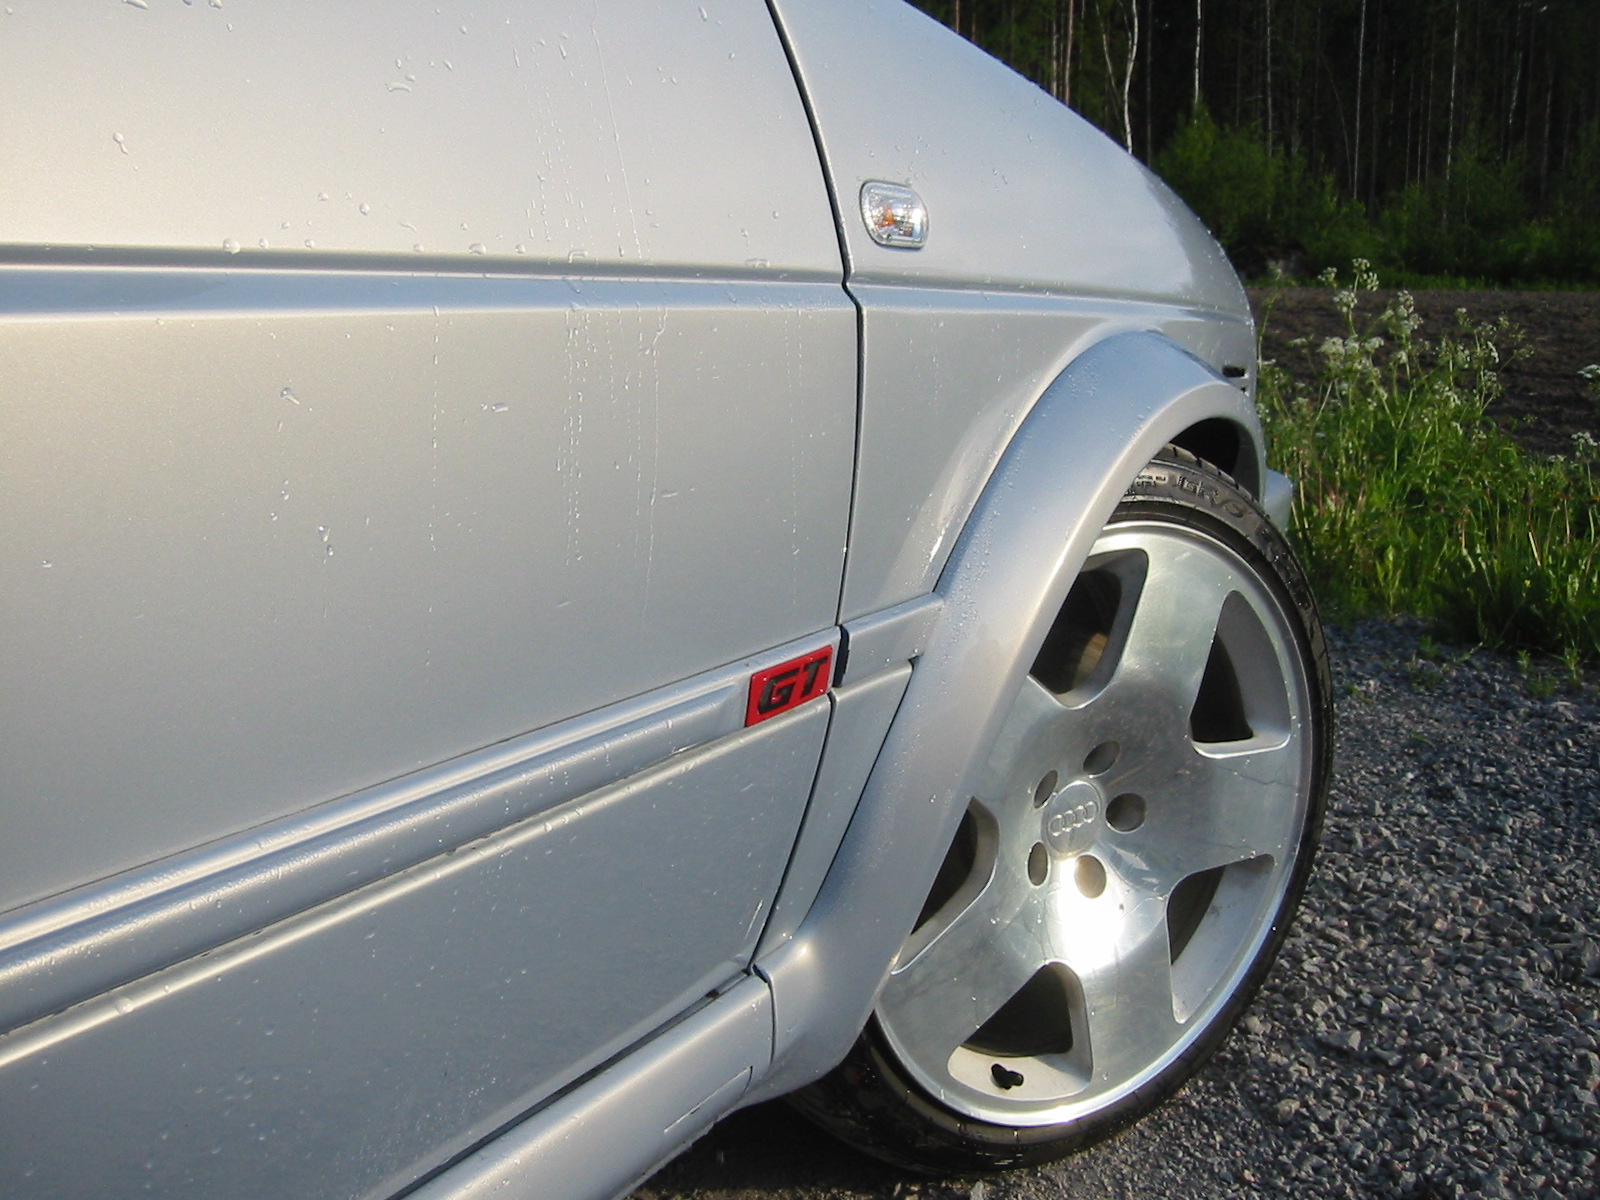
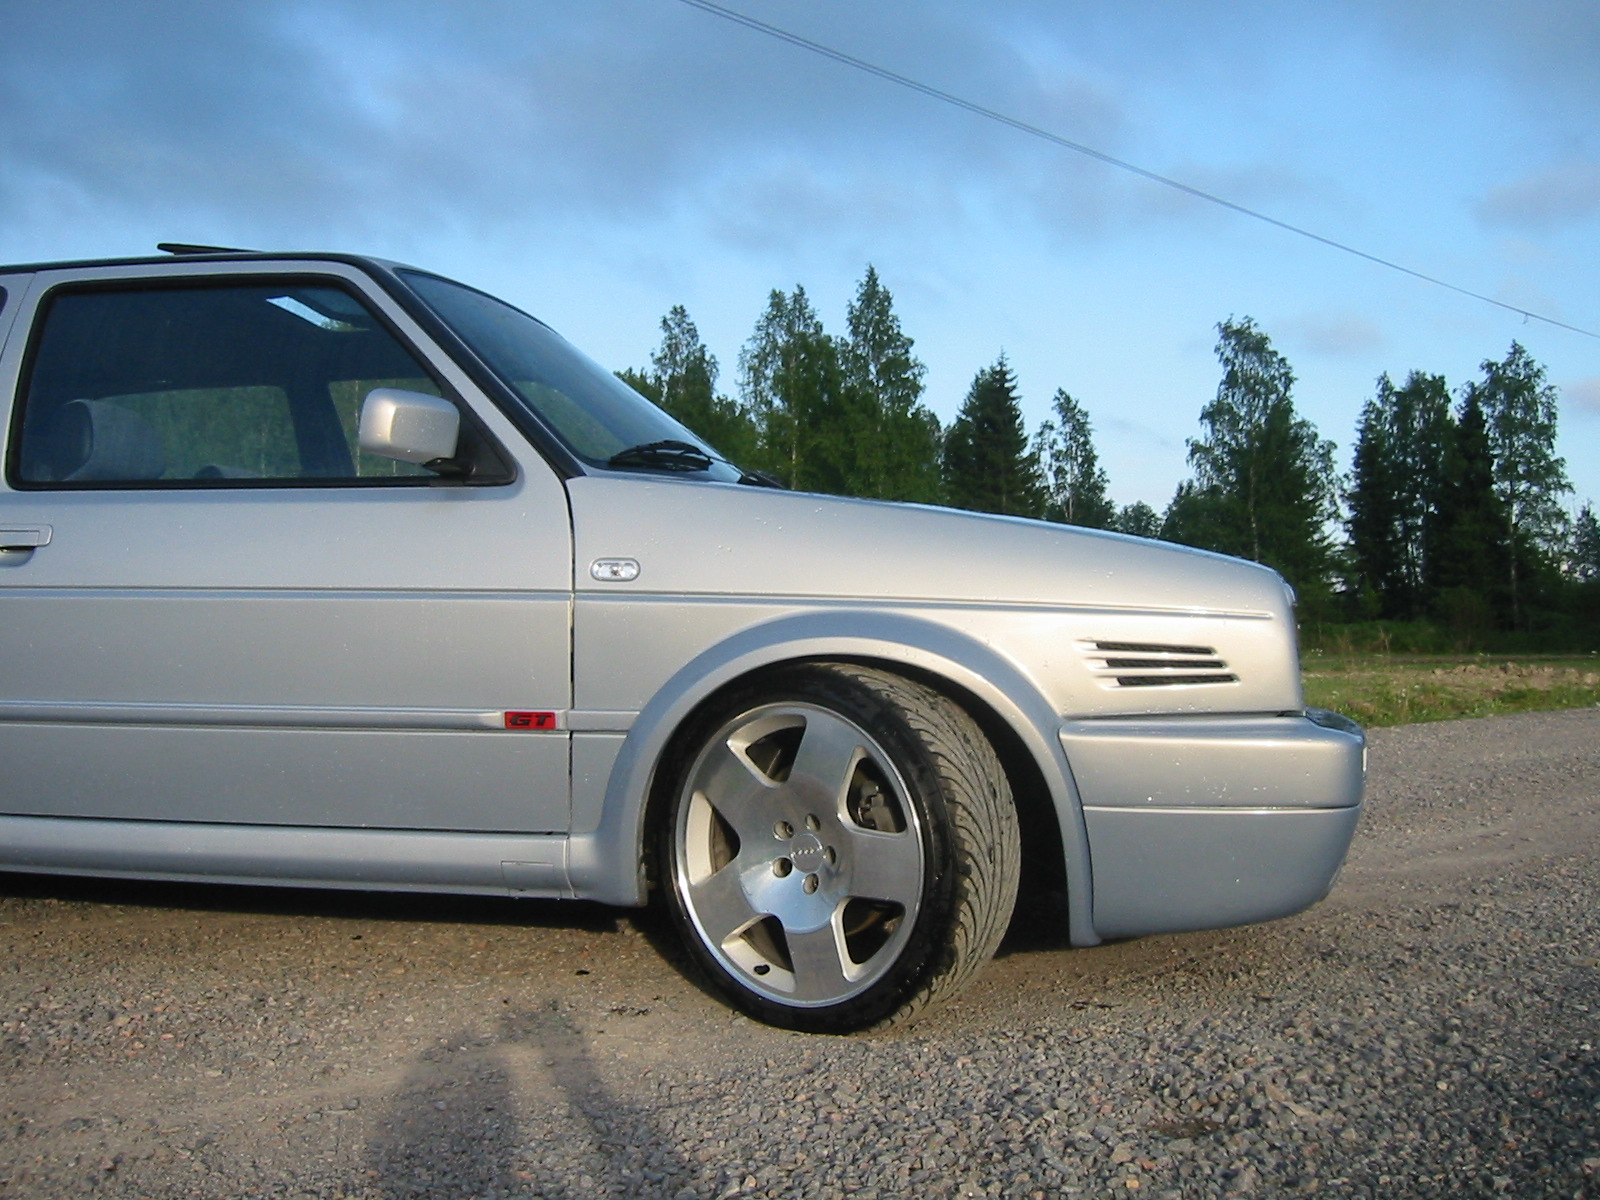
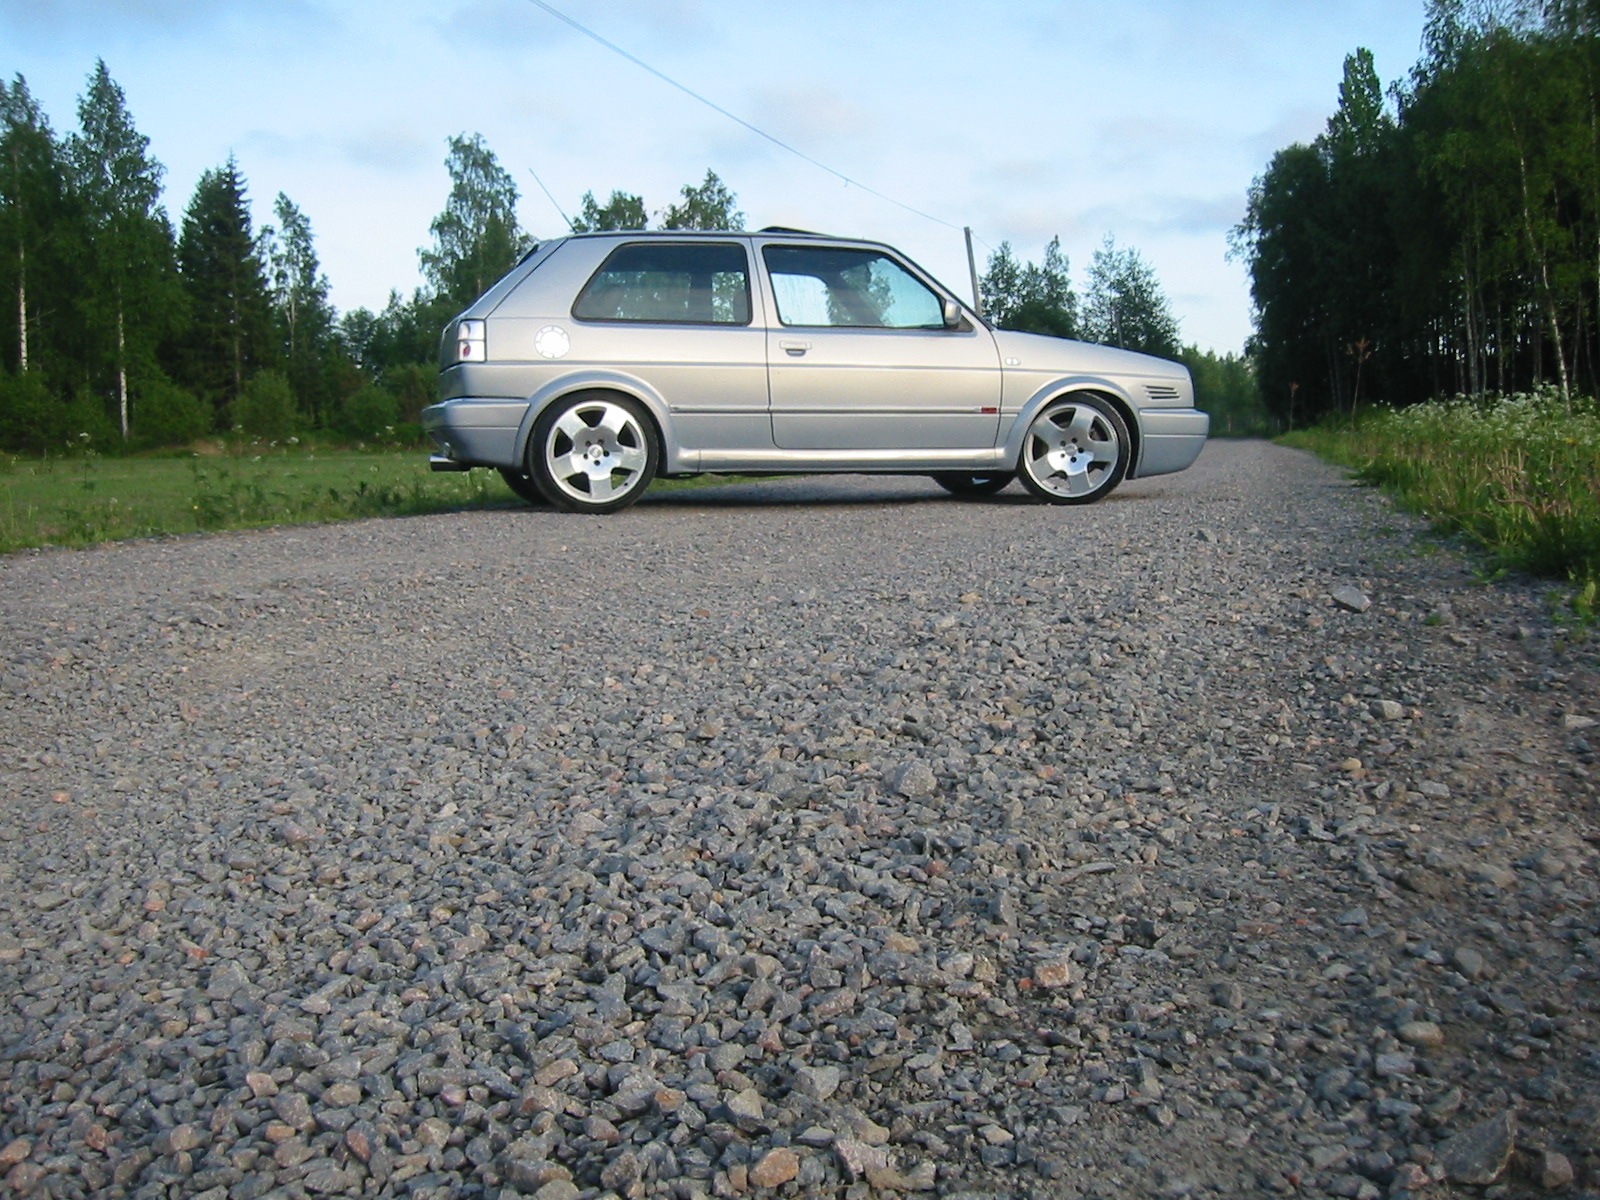
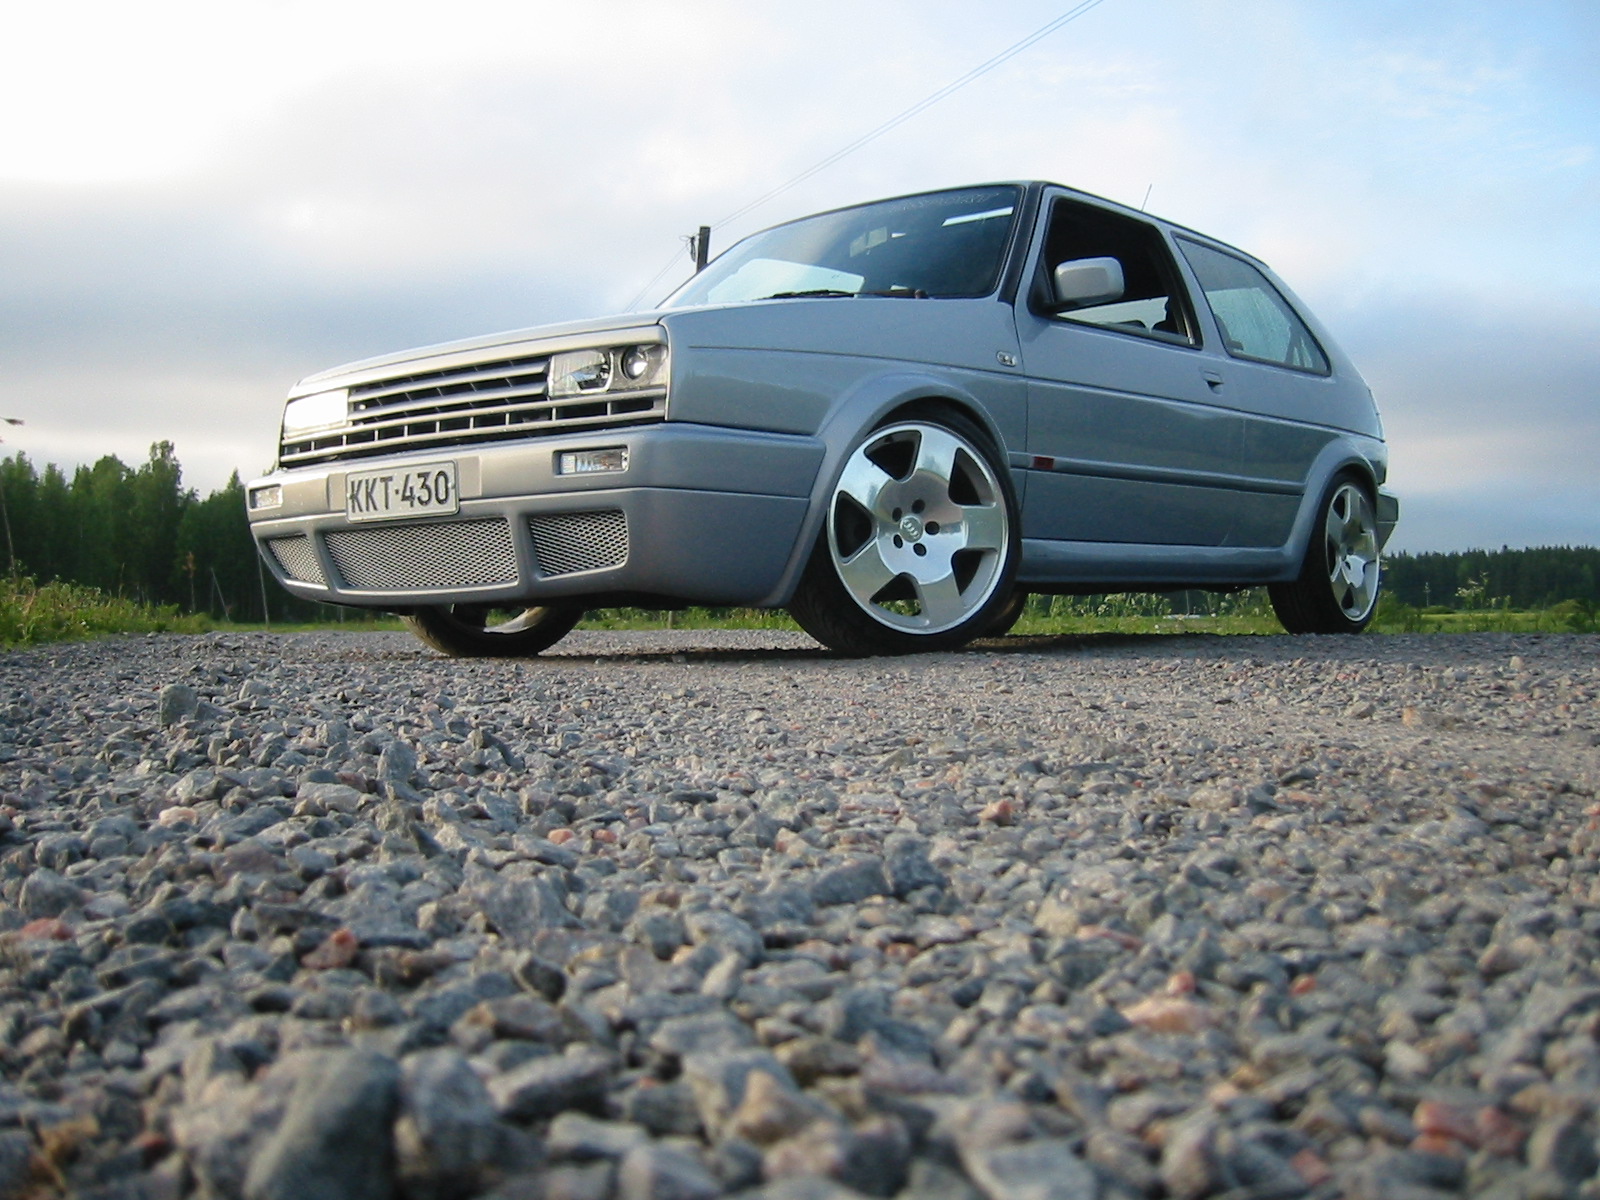
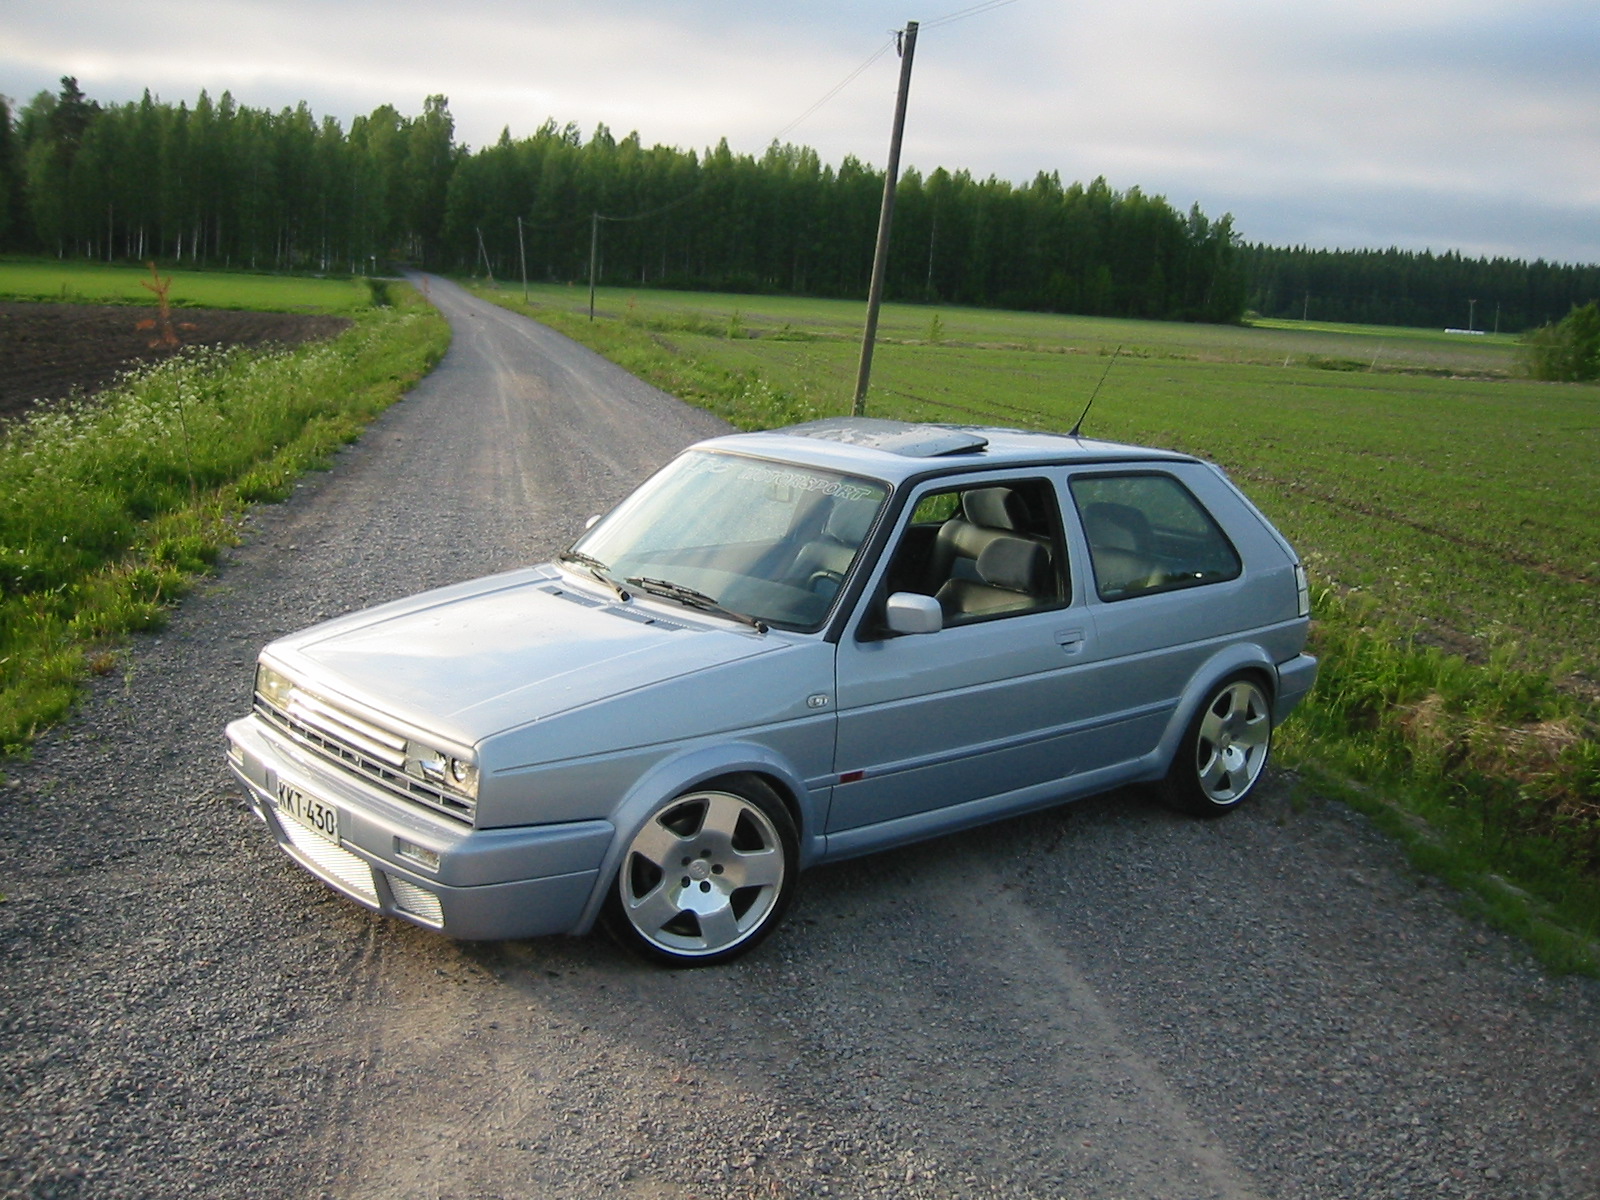
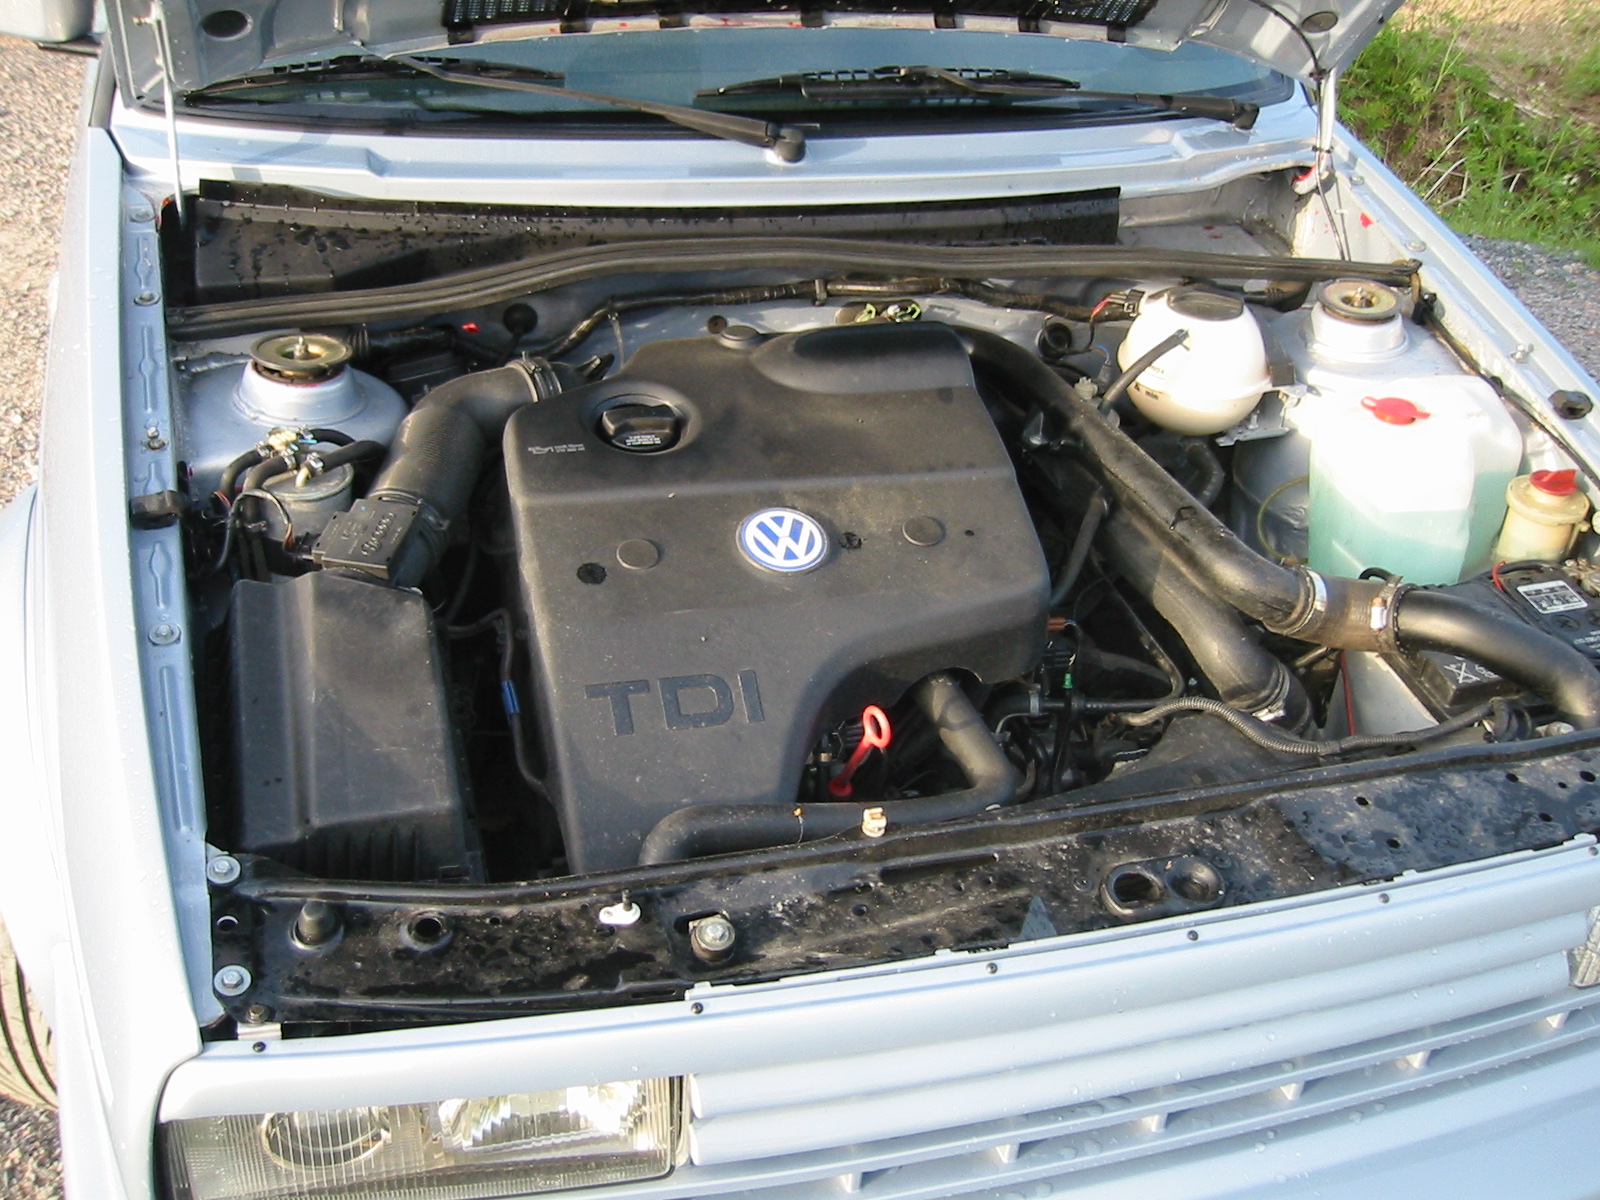
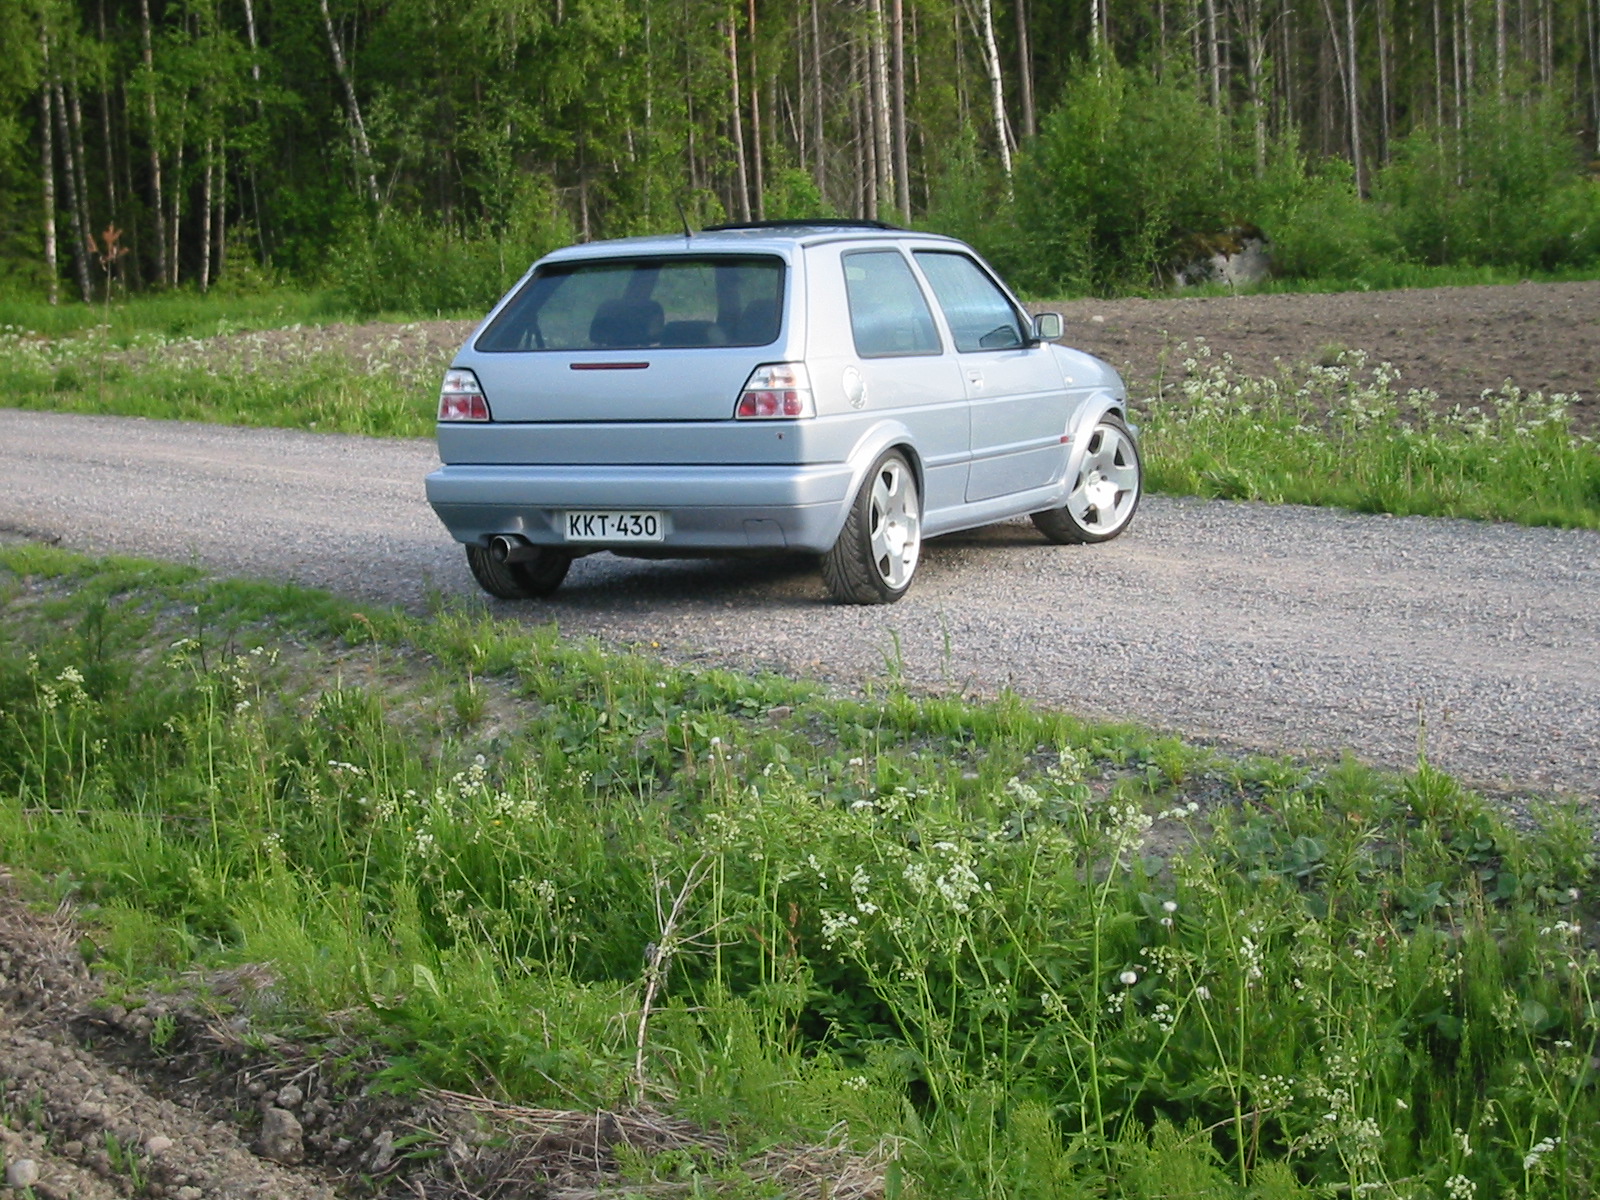
Soon after Bug Run, Pekka began to feel he'd given this Golf everything he could and wanted to... The tank was empty, so to speak. Other projects offered new challenges, and with interested buyers around, the car was sold just a couple of weeks after Bug Run, already in June 2003.
Includes original English text and AI-assisted translations.