ARCHIVE / PAJALLE
Beetle ’69
Heikki’s long-term VW Beetle project.
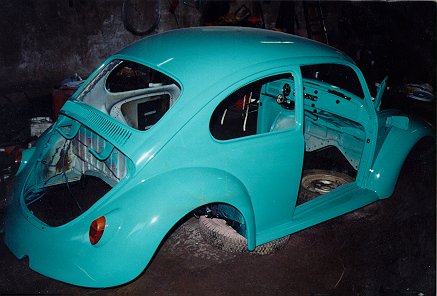
The early days
Sorry, not in English yet :(
This is the earliest photo I have of this Beetle, taken after painting in autumn 1994. It was painted at a friend's place, mainly thanks to Pekka: Heikki was doing his military service at the time.
We tried to save money on the paint too and used synthetic resin paint. Another mistake. When it needs repainting, who knows how the old paint underneath will react, or whether it should all be scraped off somehow. Then again, so many panels have been replaced since then that there isn't much of that paint left... By this point the front end had already been replaced from the fuel tank opening forward because it was rotten. We found a donor in the same village: an otherwise finished 1965 Beetle. We still replaced the bonnet latch panel on that front section with a newer one, because for some reason we wanted to keep the short bonnet (!). No idea where that decision came from; the fashionable thing would have been a long bonnet. I can't remember any more...
On the road in the 1990s
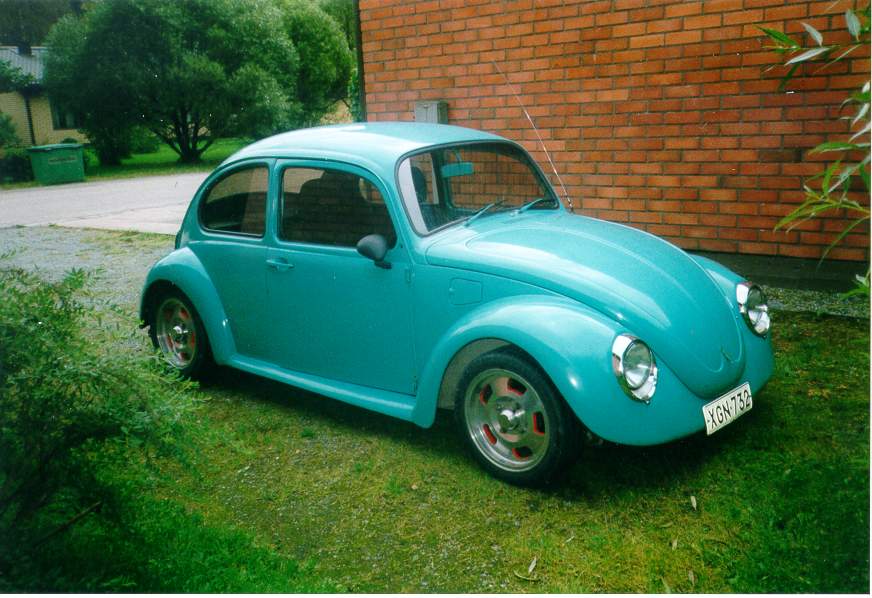
This was the little gem sometime in summer 1995 or 1996. Tinted windows (there's a little story about those too), 'lovely' teardrop mirrors and Rossi headlights. The Rossis were a must: no need for horrible indicator arrangements, as the indicators could be fitted where the Rossis originally had their sidelights.
A little fitting and some orange bulbs were needed, and holes for the sidelights had to be drilled into the H4 headlamp units. I think the Rossis came from a classified ad.
Lowering was essential, of course. The rear was lowered the usual way by turning the torsion bar splines. I have no idea which end or how many notches, but it rests pretty much on the bump stops. For the front, we found an adjustable axle with disc brakes through the classifieds, from Forssa if I remember correctly.
By then we had ordered well over 5,000 Finnish marks' worth of stuff from Hot Cars, including the tinted windows and chrome bits for the engine bay...
Following the example of an article in Tekniikan Maailma, the bumpers came off too. Perhaps we kept the short bonnet because we wanted the number plate in the middle. Quite a funny idea in hindsight.
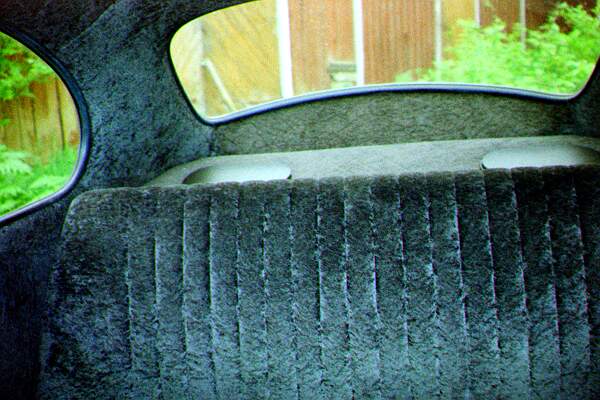
The Beetle also went to a local upholstery shop. Everything inside except the front seats was retrimmed. The roof, sides and rear seat got black plush, with tougher carpet on the floor. The rear seat is a standard Beetle one. I quickly made a plywood parcel shelf and installed JBL 6x9 speakers.
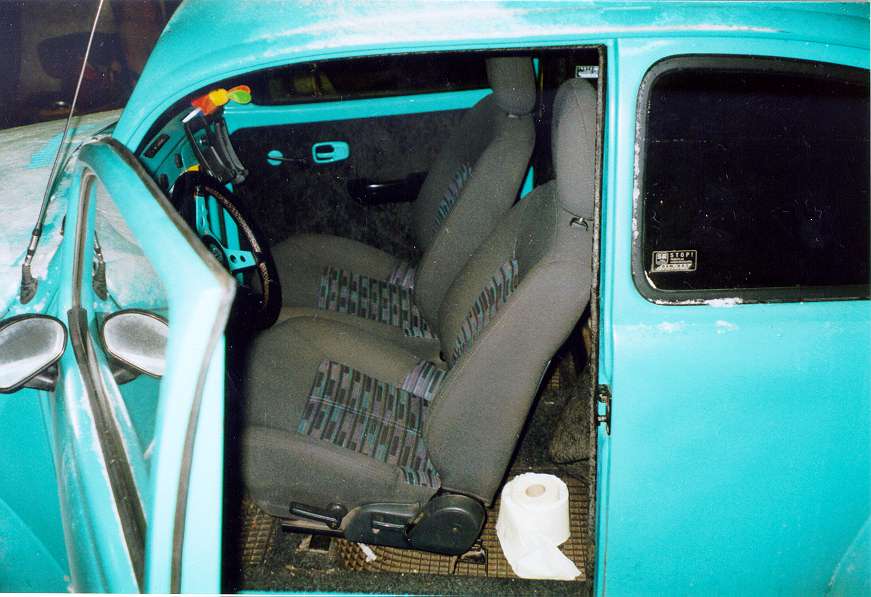
The front seats are from a Mazda 323F. We happened to find them through a friend's relative, practically unused. That's why they weren't retrimmed. It saved a thousand marks, they still look quite tidy, and I don't really think plush would be particularly hard-wearing. Completely new mounts had to be welded up for the seats; there's a photo (link to go here) much later on.
There's a funny story about the seats too. A Mazda driver spotted the car in Tampere and left a note on the window saying something like: 'Hi, nice Beetle! Could you call XXX-XXXXX?' As we were laughing about the note, a couple pulled up in a red Mazda 323F. The man came over for a chat. He knew something about Volkswagens too, but was more interested in the seats. He was determined to buy the UPHOLSTERY off them!
The upholstery in his own Mazda was a little frayed and he wanted to sort the seats out... His partner looked a bit embarrassed. Apparently it was expensive fabric that would have to be ordered all the way from Japan. We agreed on some sort of deal after he offered to have my seats trimmed however I wanted, but eventually the whole thing was forgotten.
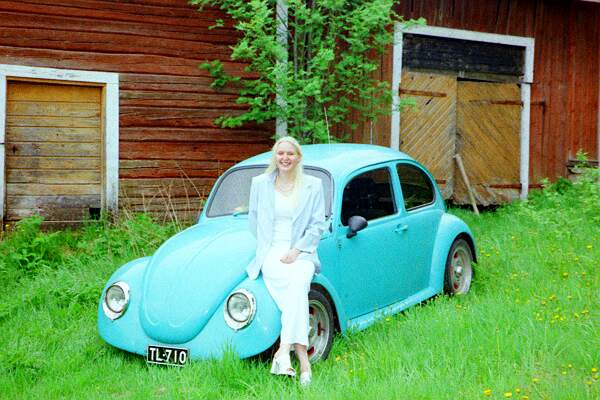
Of course my girlfriend had to get a chance to pose with the car too. This picture is a little later, as it already has black number plates. We ordered those when it became possible to get back the old black plates the car had originally worn. I think this is from early summer 1999, on my little sister's graduation day.
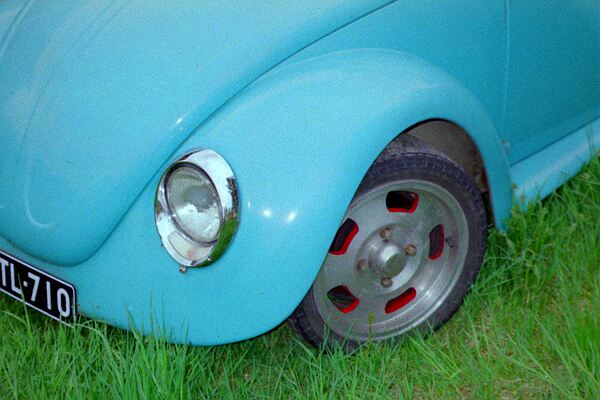
Here you can see the Rossi headlight better, along with the AP alloy wheels. Those wheels seem fairly rare these days, or at least they're out of fashion. We found them by chance, half buried in snow in the yard of a relative who raced in folk racing.
In this photo it has ultra-low-profile 185/45/15 tyres. Taller ones always rubbed on the wheel arch edges. These, on the other hand, look far too small in the arches. We'll see what wheels and tyres we come up with after the latest changes. The plan is 17-inch wheels under standard wings...
Engine — part 1
In the early days the engine was a normal Type 1, enlarged from 1.3 to 1.7 litres. Working on it was quite a lesson in engine building, and we never really managed to make it last. Even after the crankcase was machined oversize and the bearings and so on replaced, it still seized at a main bearing. At first it had some twin-choke sidedraught carb bought from an army mate, and later a different twin-choke downdraught Dellorto. The car went quite nicely when the engine was working. All the tuning was done by ear.
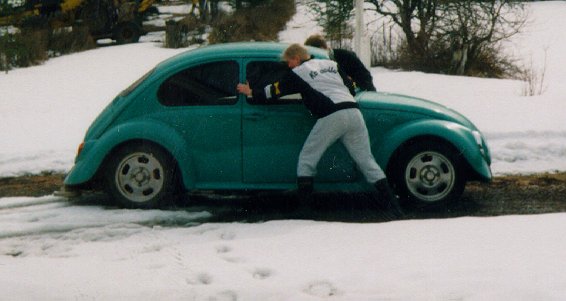
The situation in this picture was fairly typical, though: the engine wasn't running, so more environmentally friendly ways of moving it were needed. Strangely enough, I never got stranded on the road. The last time the engine blew was when Mum had borrowed the car — the one time I lent it out.
After that we decided a new engine had to be found. And we found one. A 1974 VW van was for sale in the same village, so we went to look at it. The engine looked a bit odd, but we bought the van as it wasn't expensive. The engine came out the same day, and we started figuring out how to put it in the Beetle. The cooling system was different, but we thought we could just swap over the cooling parts from the old engine. It soon became clear that the crankcase was different. I'd never seen one like it in the flesh.
There was nothing for it but to go through the VW magazines on the shelf. Eventually we discovered it was a so-called Type 4 engine. The case is much stronger than the original Type 1 case, entirely aluminium, and in this instance already 1.8 litres as standard. The magazines showed these engines fitted to Beetles, so it didn't take long to decide to try a Type 4 in mine too.
German and American Type 4 enthusiasts naturally used Porsche cooling systems and similar solutions, which were completely beyond my budget. As we didn't know of any alternatives, we had to try fitting it with its original cooling system, mounted at the end of the engine. That meant simply cutting the rear apron off the car. I think this photo is from around 1997.
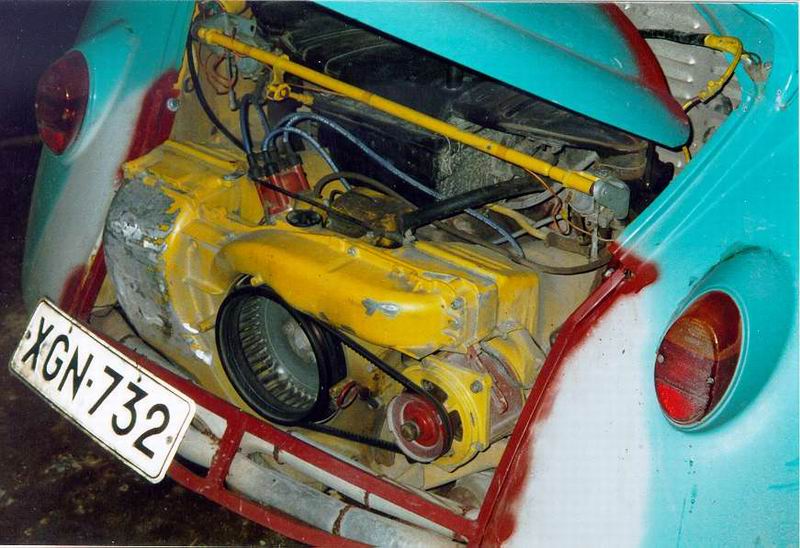
The plan was to reshape the rear later to make it as clean as possible, and removable to make engine removal easier. We reckoned it wouldn't look impossibly awful with the engine lid left slightly open at both the top and bottom.
The photo also shows the first exhaust arrangement, which was absolutely horrible. It used the original Type 4 front sections — the heat exchangers — with all their heat-exchanging features removed. The rest was welded together from who knows what pieces of pipe, including water pipe. The pipes joined in the middle and fed one silencer from a 'twin turbo' system bought from Hot Cars. Pekka had reversed into something and flattened the other one, so we decided to remove it altogether.
A rear engine support also had to be welded up. We tried driving without one first, but that was no good: a Type 4 is quite a lot heavier than a Type 1. The support and its mounting points came from the same van. The mounts were simply welded to the sides of the engine bay. The support was shortened a little because the Beetle's engine bay is narrower than the van's.
We used the original twin Solex carburettors with a few modifications. There were vacuum pipes coming off the manifolds, presumably for the brake servo or something, so the manifolds needed some work. There were a few other small changes too, which certainly didn't improve the way it ran.
I drove one summer without an air filter, because that was such an ugly great lump too. You could tell: the piston rings had to be replaced for the following summer, although the cylinders were already quite worn as well. The next summer — perhaps by now it was 1998 — I drove with the original air filter and some bloody expensive new piston rings.
In general, Type 4 parts later proved very expensive. The usual joke is that it's called a Type 4 because the parts cost four times as much.
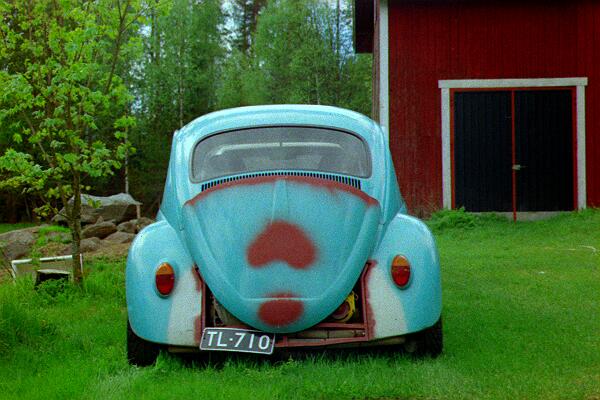
We drove it looking like this for a few years, about 15,000 km. Oddly enough, nobody questioned it at the inspection... Perhaps it helped that the Beetle had been registered as a 1.7-litre after the earlier modifications. The rear end did look pretty awful, and a friend even had a minor collision because he was staring at the back of my car :-)
Engine — part 2
Over time I learnt more about the Type 4 and found other people interested in it. Through Jan Andersson we heard of an American company called Oregon Performance Products. Quite a few emails went back and forth before I ordered a big batch of parts from OPP. I had to learn how to buy from the USA too.
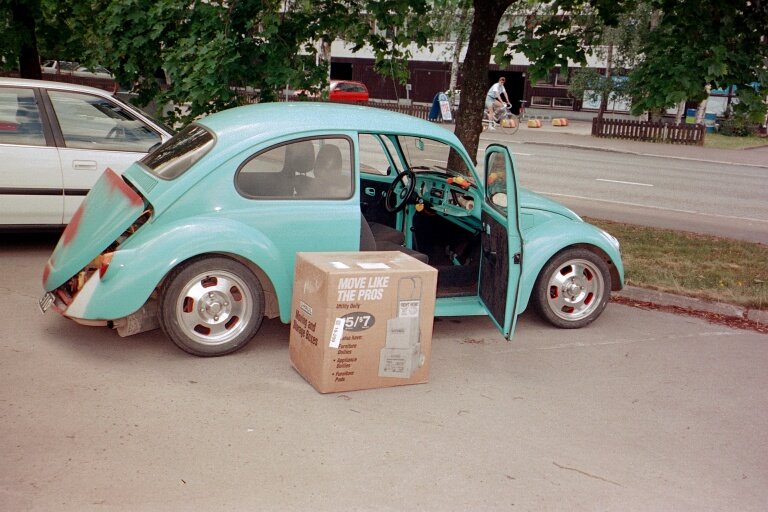
It was awkward without a credit card, but eventually the parts arrived in Finland. The parcel ended up costing quite a lot: shipping, customs duty and taxes nearly doubled the price of the parts.
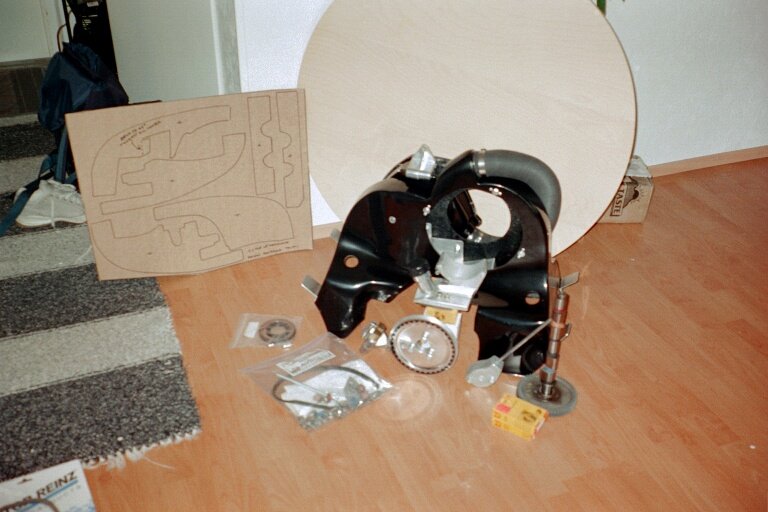
This is what came out of the OPP parcel: a fan shroud, gasket set, camshaft, dipstick adapter, alternator stand, pulley, patterns for making the rest of the engine tin, bearings, screws... The idea was to convert the Type 4 cooling to something resembling the Type 1 system above the engine!
OPP's solution uses a handmade fibreglass fan shroud with a normal Type 1 alternator. It's cheaper than using Porsche parts, and the cooling capacity should certainly cope with well over 100 hp. The shroud is shaped to direct the cooling air evenly between the cylinders on both sides, so each cylinder gets equal cooling without the same heat problems as Type 1 engines.
These days a shroud of the same design can be found here.
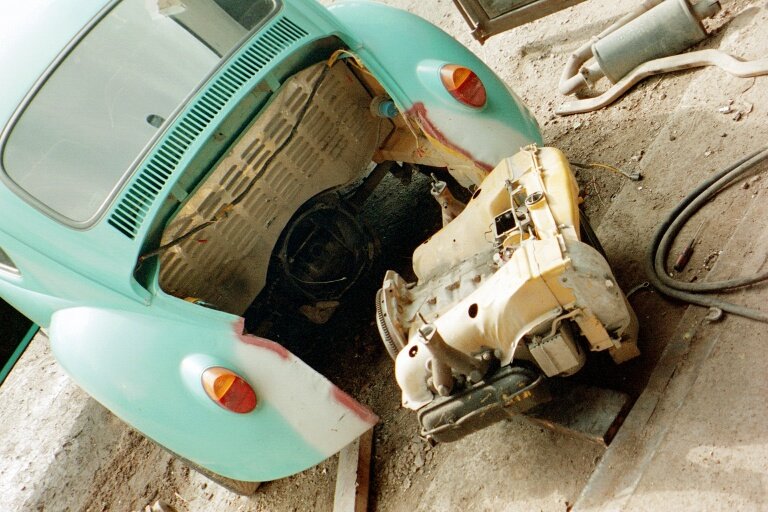
It wasn't long after getting back to the home workshop before the engine was out yet again. You can also see the magnificent decorative firewall panel bought for a lot of money from Hot Cars. That's what a Type 4 looks like without the carburettors and air filter.
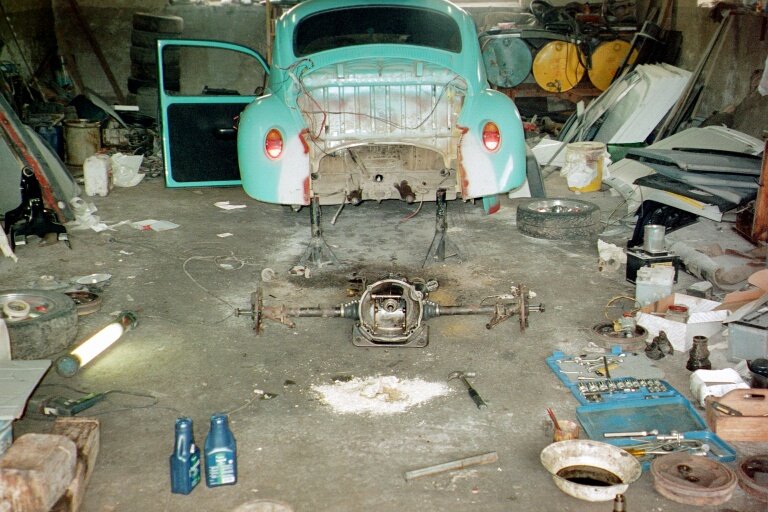
While the engine was out, we changed the gearbox too. It was getting difficult to select second in the old box without crunching. I couldn't be bothered to repair it when there was another gearbox available in a donor car.
The front gearbox mount had to be changed: the design had changed between 1969 and 1973, the year of the 'new' gearbox. Luckily the 1969 mount fitted the 1973 box directly.
The gearbox sits on ordinary rubber mounts on the frame forks, at least for now. Those ought probably to be replaced too, and perhaps some sort of strap around the gearbox added to stop the unnecessary shaking. The rear engine support does help a little, though.
The gearbox is otherwise completely standard. I haven't got around to modifying it yet. It should cope with the slightly over 100 hp planned at this stage. I certainly wouldn't turn down a taller final drive if I could find one at a reasonable price!
Engine — part 3
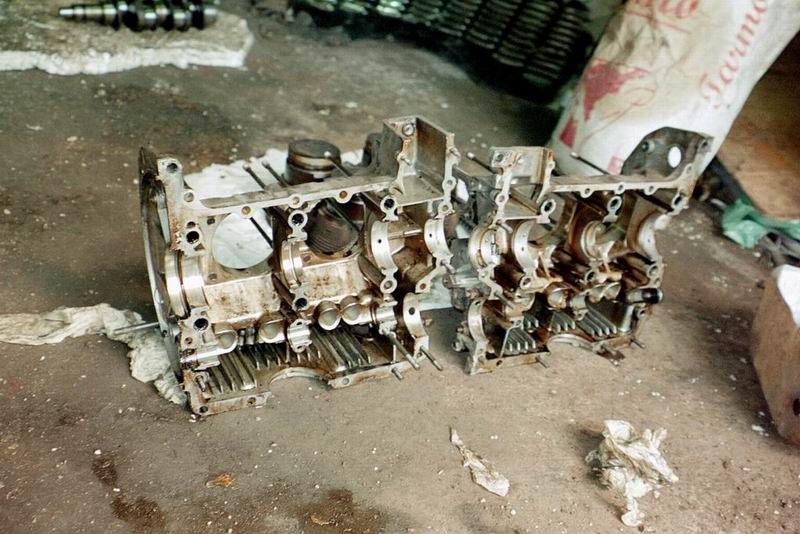
The Type 4 case dismantled. It's a shame I didn't have a Type 1 case to put beside it for the photo, as that would show the differences nicely.
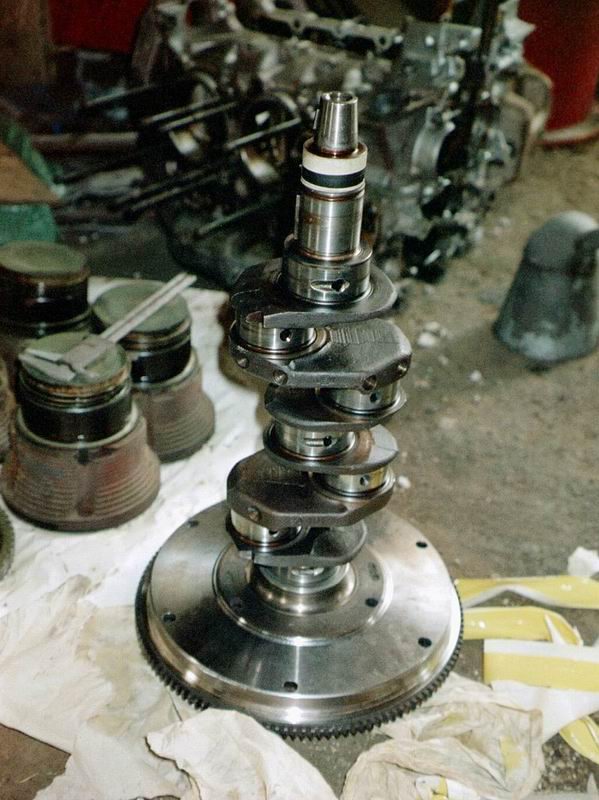
The flywheel went to a local workshop for lightening. We didn't weigh it precisely, but I seem to remember about 1.5 kg came off. Afterwards the assembly still needed balancing. The crankshaft is a standard 1.8-litre Type 4 one. The rest of the internals are standard too, apart from the camshaft.
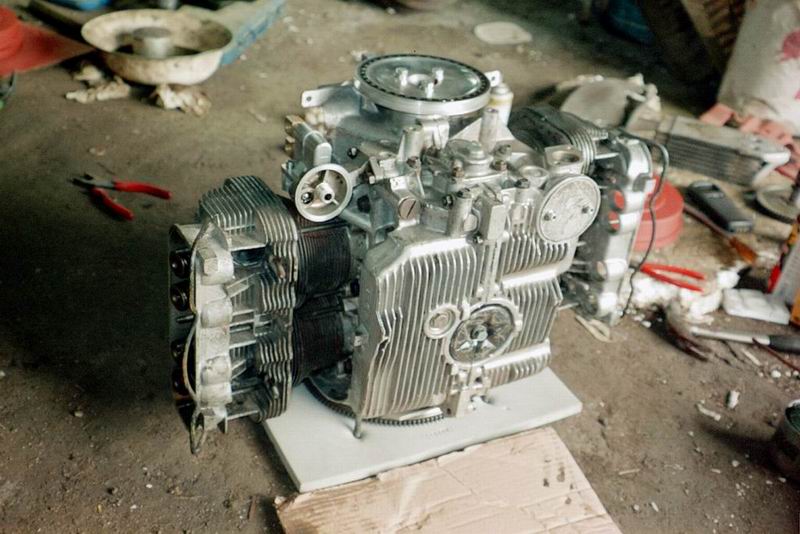
And here is the assembled engine. Original cylinders and pistons, with new piston rings. Unlike the Type 1, the Type 4 also has an oil filter as standard. There's a provision for an oil heater in the bottom of the case too.
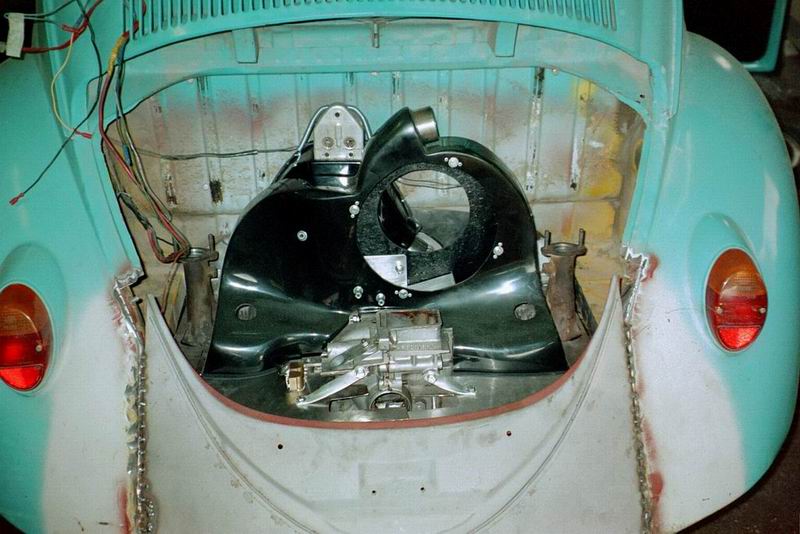
Here we're trying the OPP fan shroud in place. At this stage we also made the rest of the cooling tin around it using the supplied patterns.
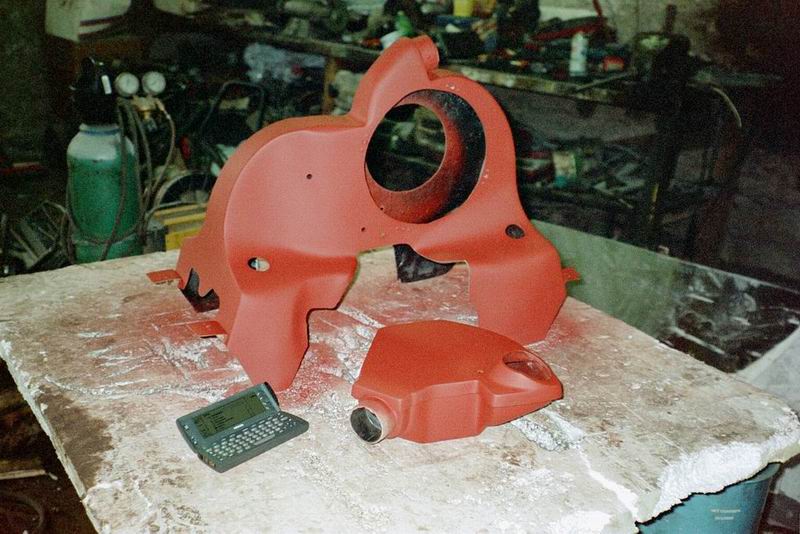
The shroud in primer. My work phone of the day had to make it into the picture too. I must have only just got it, judging by the need to show it off =)
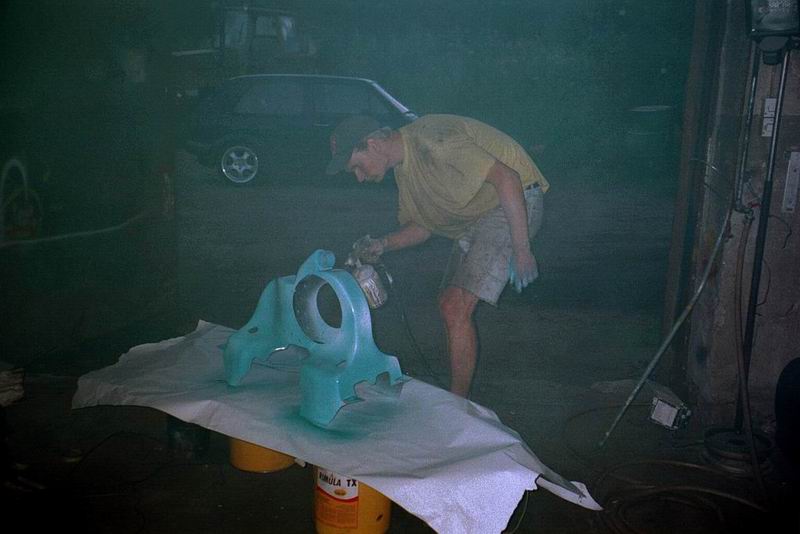
Pekka painting the shroud to match the car.
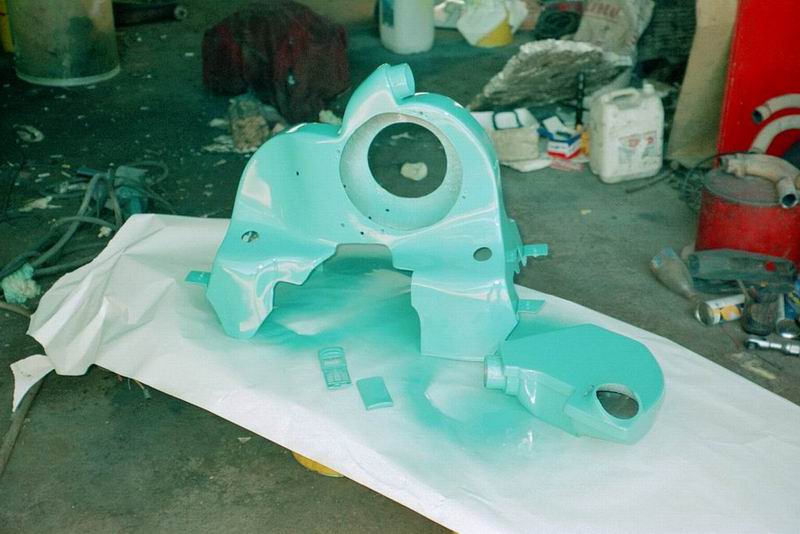
The painted shroud. At the same time we painted the case of my first mobile phone, a Nokia 8110 'banana'. I regret selling that phone later: one of Nokia's best-looking handsets...
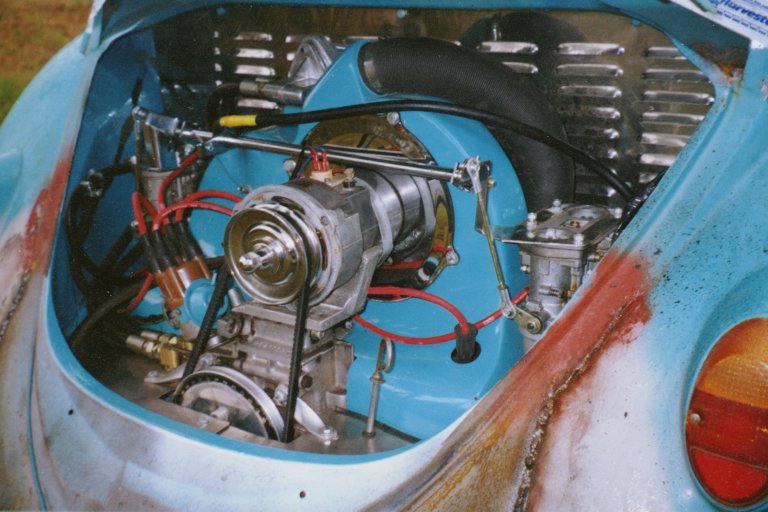
This is how the engine and engine bay look with the OPP shroud, a normal alternator, a few chrome bits and twin 40 mm Webers. The alternator pulley nearly caused trouble: with the standard pulley, the belt ran about 5 mm out of line.
I was already worrying that the fancy American fan shroud wasn't going to fit after all. What a relief when the chrome pulley ordered from Hot Cars brought the belt into line!
You can also see the rear apron welded back in. It isn't actually the original apron, but one from an older car: the same 1965 Beetle that donated the front end, and later the roof panel.
Exhaust
At the same time I remade the exhaust, now there was more room without the fan shroud at the end of the engine. I took inspiration from an Ahnendorp system I'd found a photo of online. I think it turned out reasonably well, though of course it could be better. I suppose it must have worked out, as I've had a few offers to buy it.
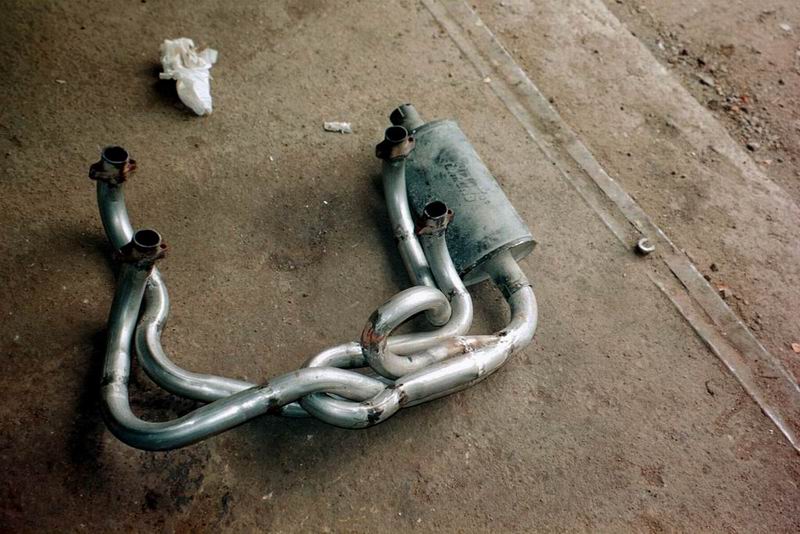
I assembled the system from bends apparently taken from a Volvo exhaust. It's important for all the pipes to be the same length, which explains the unusual twists.
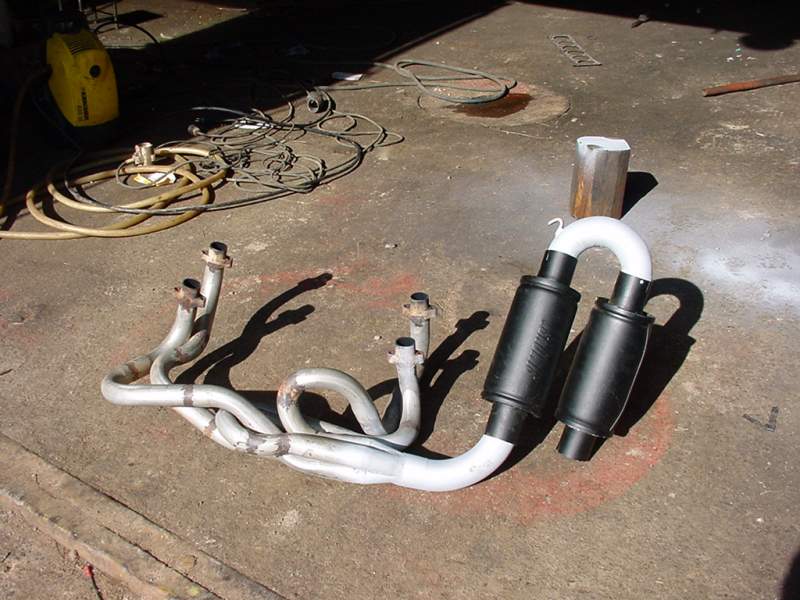
Originally the plan was one silencer on each side of the engine, with a pipe crossing underneath the gearbox. But the car was already too low, so there was no room for a pipe beneath the box. I also considered going over the gearbox, then decided to think of something else.
I spent a while trying different layouts and bought the two smallest Simons silencers I could find with a sensible pipe diameter.
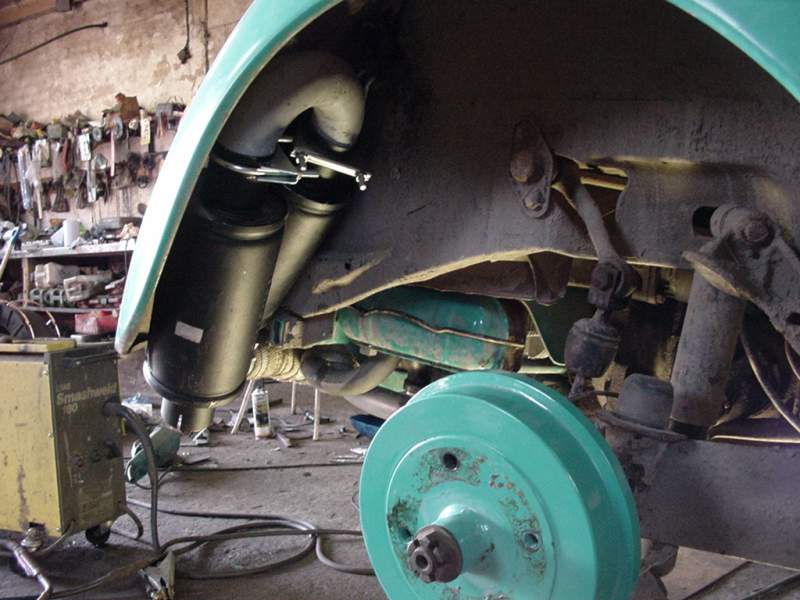
This is how the exhaust sits between the tyre and the wing. It fits nicely. There's one rubber hanger supporting it at the upper bend.
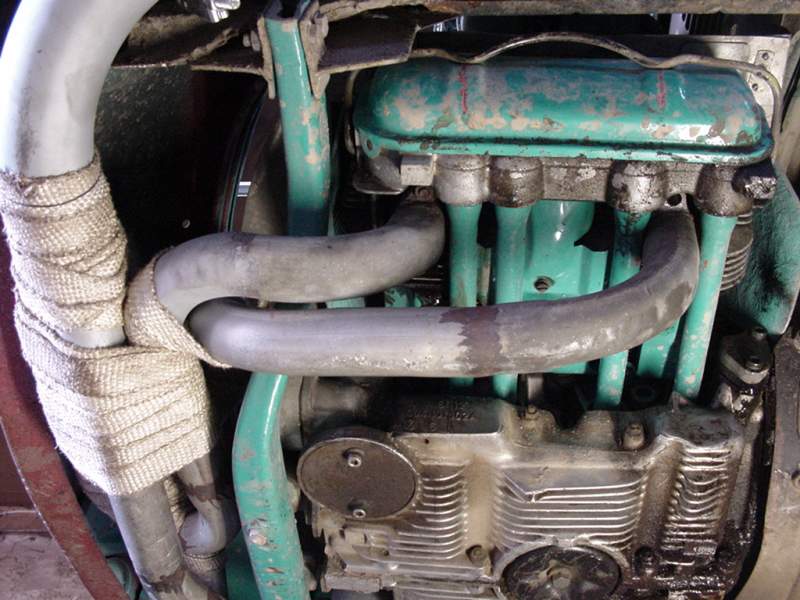
We soon noticed that the rear apron got too hot to touch above the exhaust. Something had to be done: paint wouldn't stay on metal that hot either. I heard about Thermo-Tec wrap and initially bought 10 metres, as that was all we could get. It didn't go far at all. We bought more later, and still need more...
The photo also shows the rear engine support. Another Type 4 feature worth mentioning is that the pushrod tubes can be removed without taking the cylinder head off, unlike on a Type 1. That means the whole valve train, right down to the tappets, can be dismantled without removing the engine or otherwise opening it up.
A lambda sensor boss was later welded into the bend visible at the top left. It was needed when the car went on the dyno.
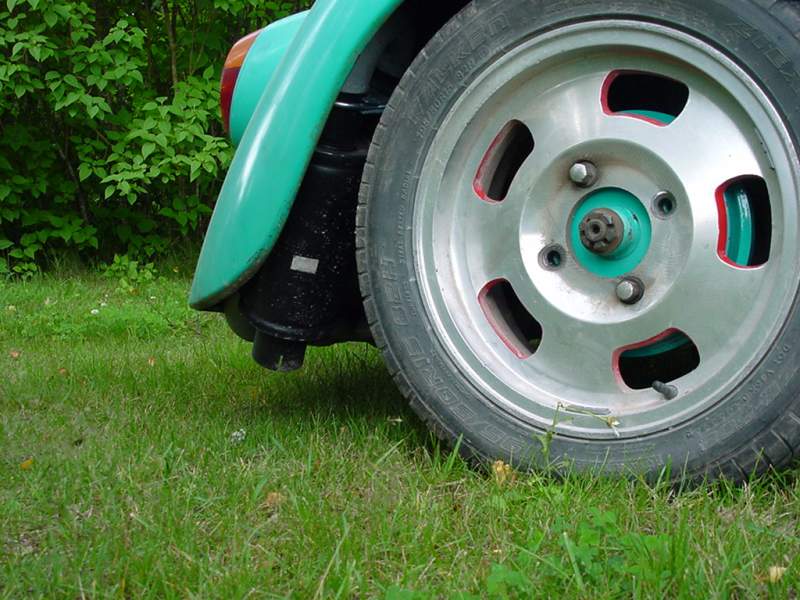
The exhaust fits nicely between the tyre and wing. I'm a little nervous about how it will work with the 17-inch wheels planned for the future.
Signs of use
Next on the agenda was SUPPOSED to be a complete respray. The following pictures show what happens when the wings and running boards are blended into the body badly. That first attempt was a learning exercise...
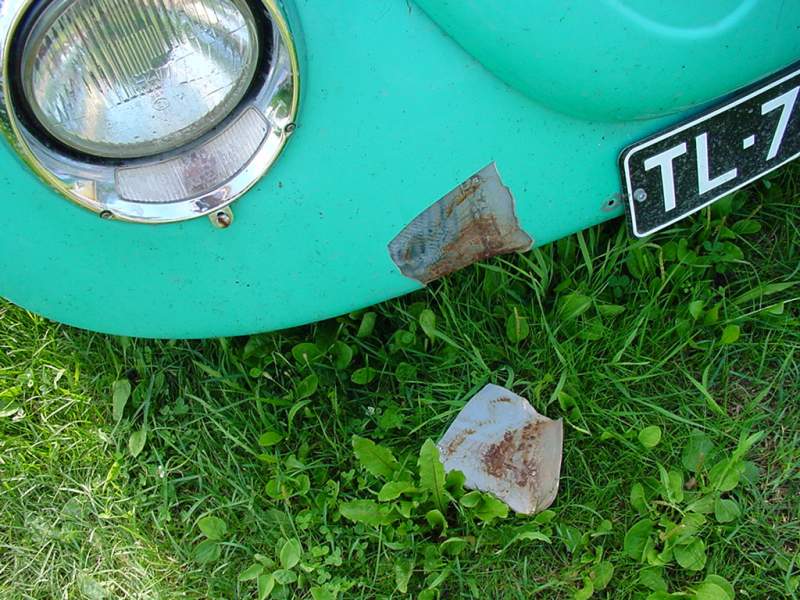
Both the front and rear aprons needed fairly thick layers of filler to get them straight. Naturally the filler didn't stay there without cracking. They need body solder instead.
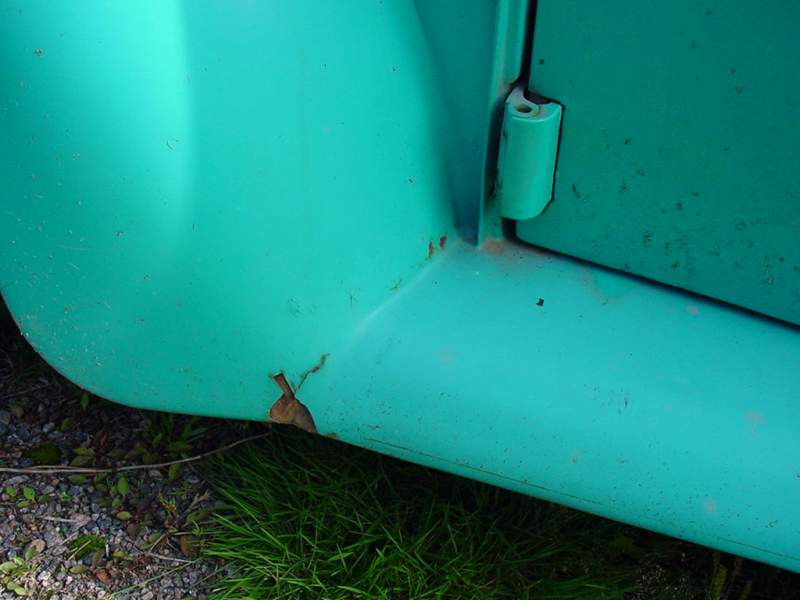
The rear edges of the front wings move enough to crack the filler there too. We'll weld supports inside next time.
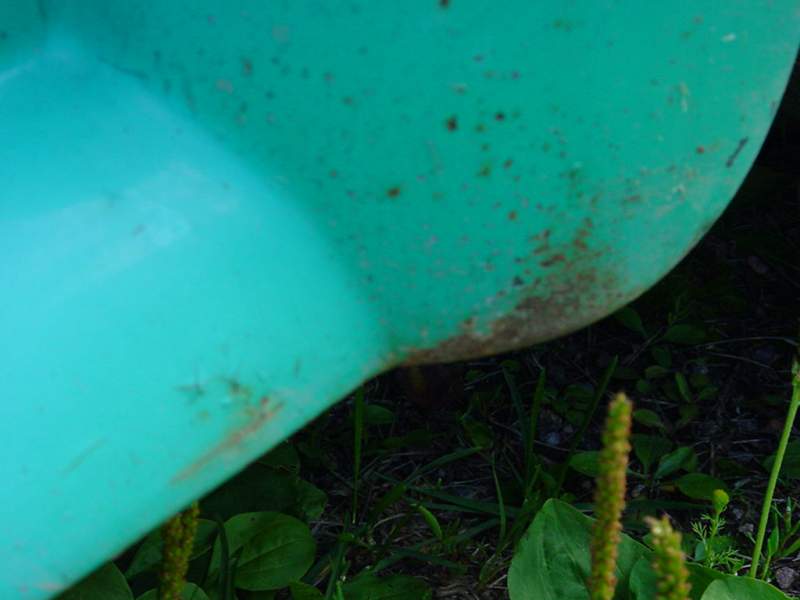
The front edge of the rear wing has had quite a sandblasting. Something needs to be done about that too.
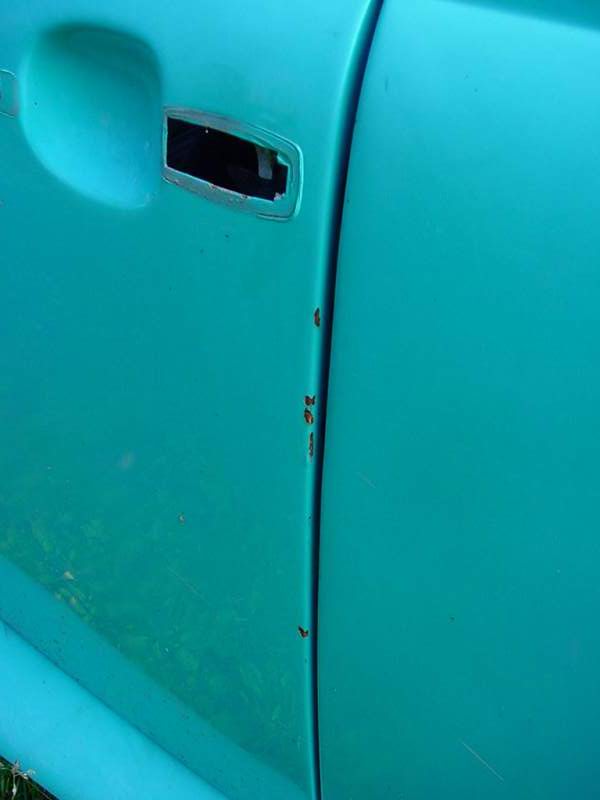
The rear edge of the door has collected all sorts of knocks.
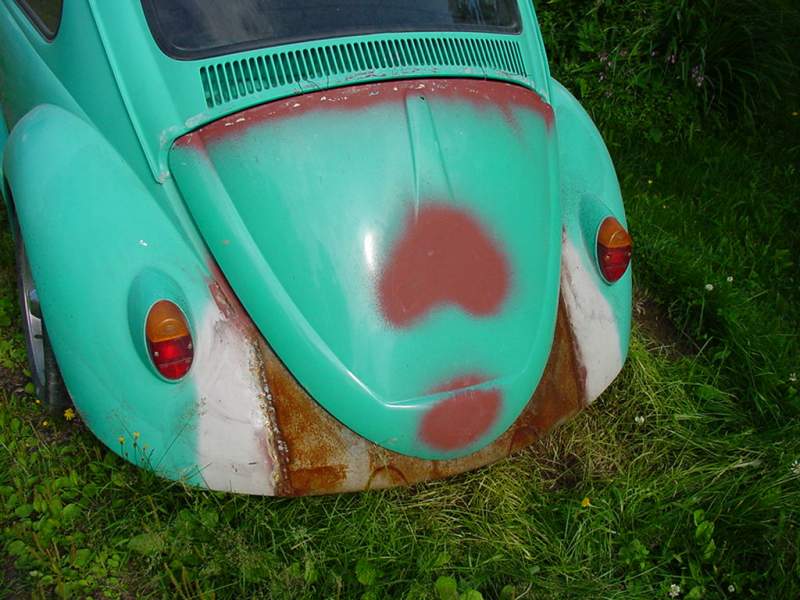
For some strange reason the rear apron is missing a little paint too. The old number plate light housing and release button/handle have been removed from the engine lid.
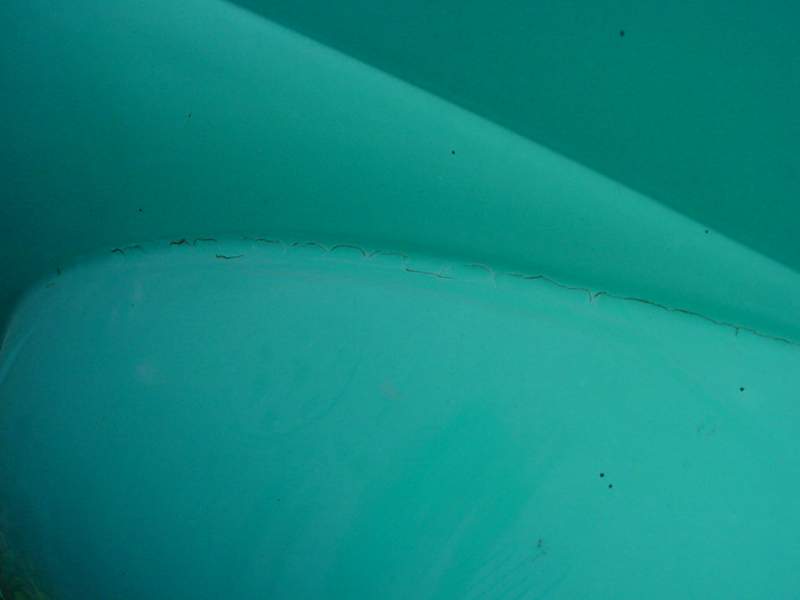
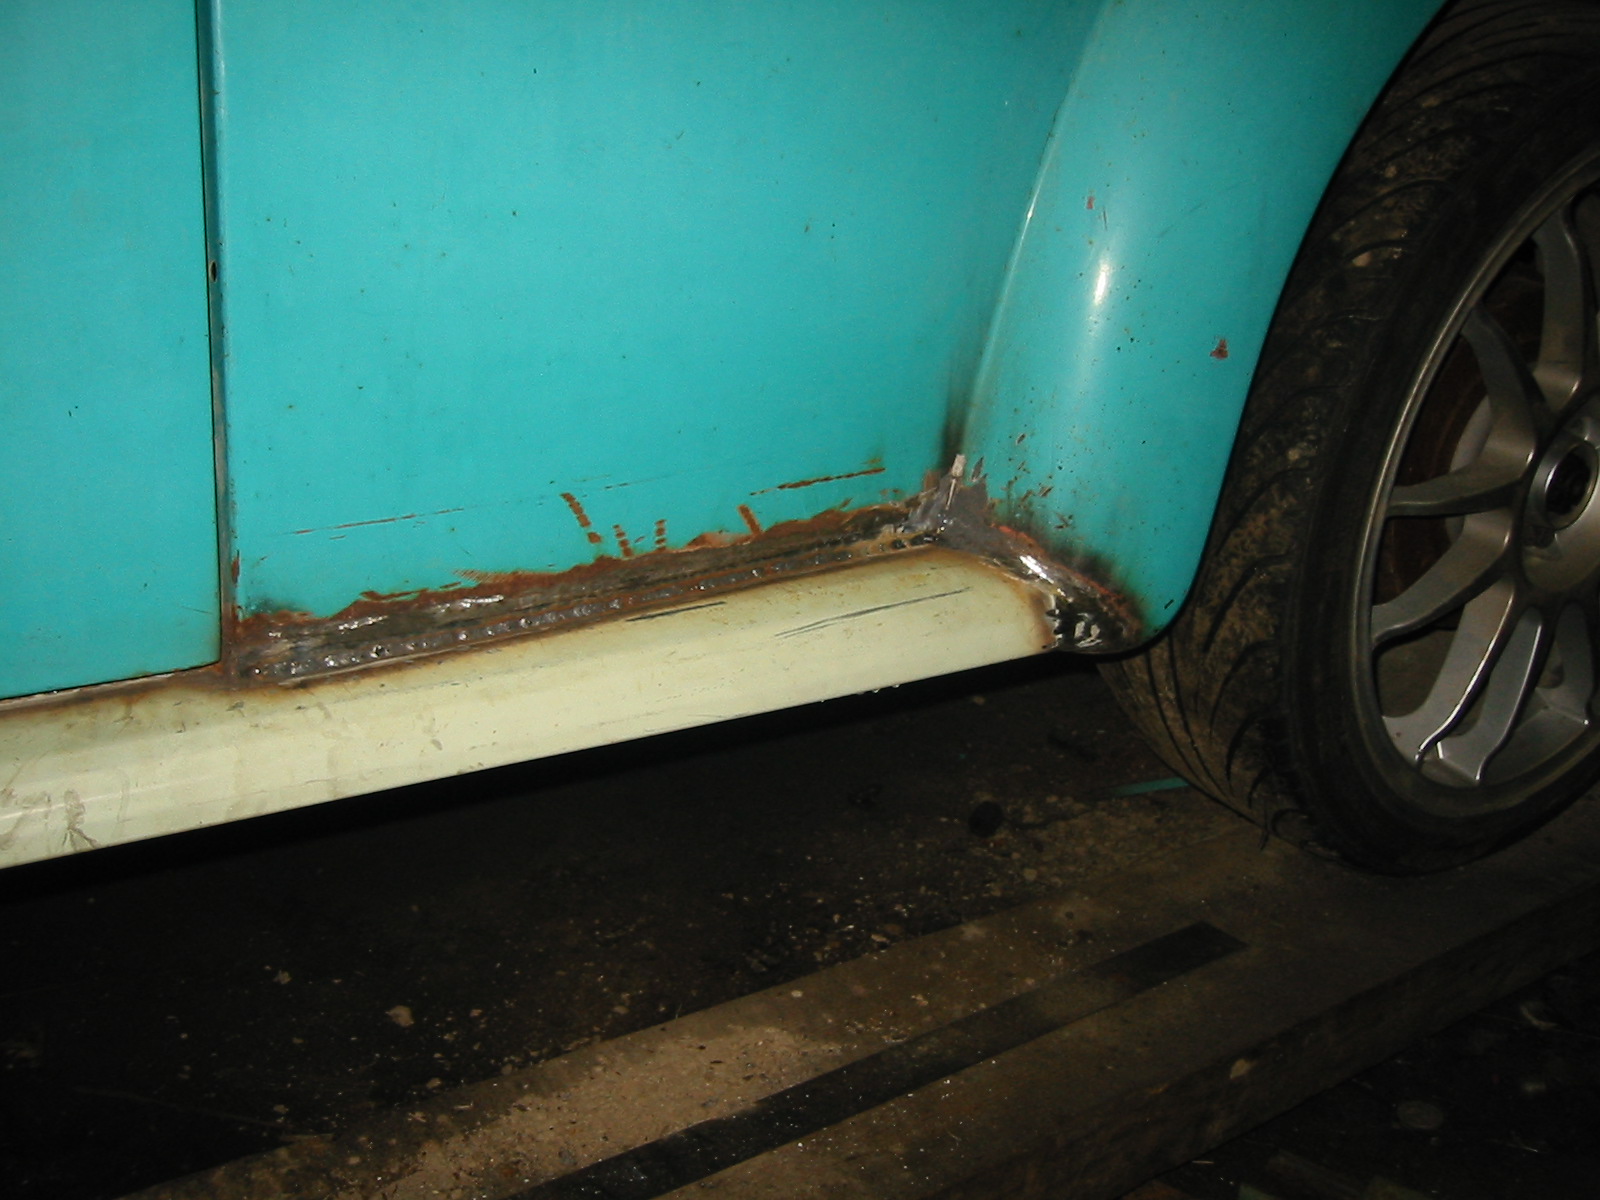
The wing seam hasn't escaped rust either. Perhaps moisture got into the joint from underneath...?
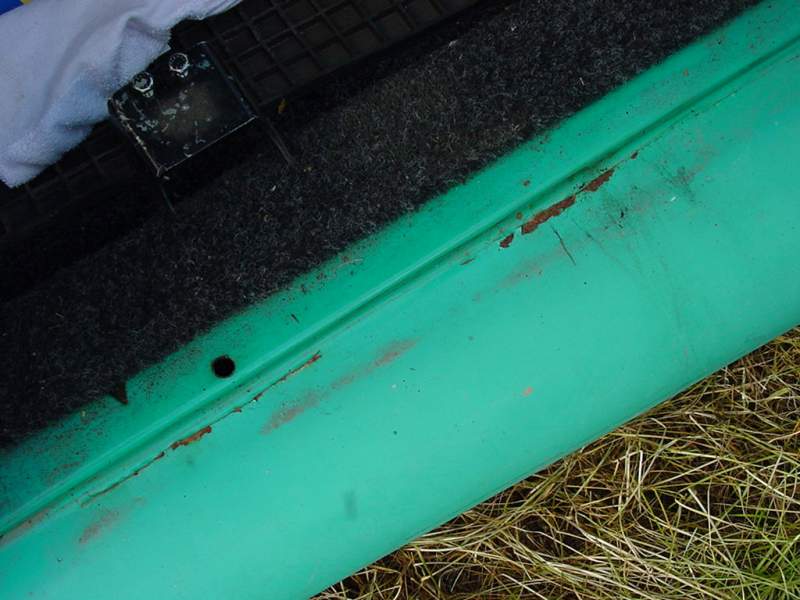
And then the running boards. The joint between the board and body has moved too — replacement running boards are rather flimsy, made from thin sheet metal — and the seam has opened up and rusted.
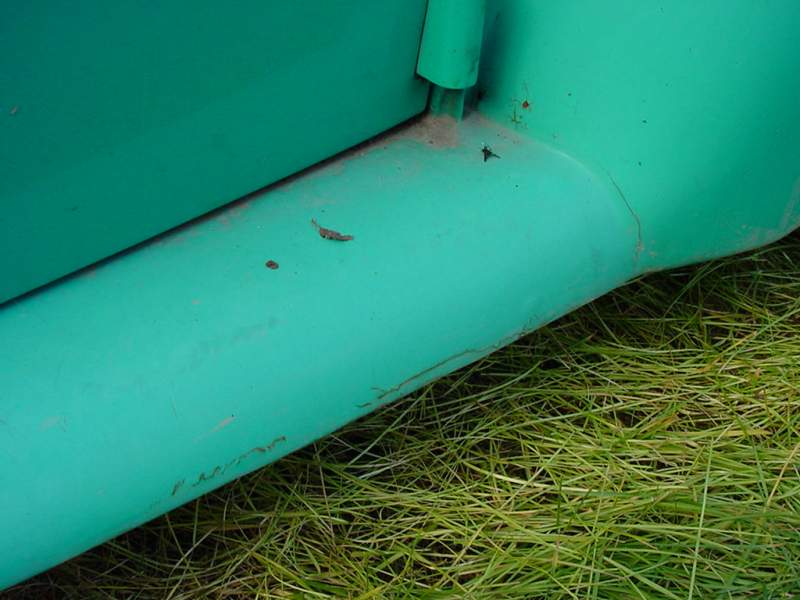
More running board trouble. Moisture seems to have got into the folded edge too, and it's rusting through.
Split rear window — part 1
What could possibly follow from this??? This was where things rather got out of hand :-)
I asked Pekka to help work out how to do the painting. He asked whether, if we were respraying it anyway, we ought to make a few more changes too... Up on the hill was the rear roof section of a split-window Beetle, collected from Hämeenkyrö some time earlier after a tree had fallen on it years ago. The things we've accumulated... There was a better one available too, but Pekka said there was no point wasting that: this one would do! I had serious doubts...
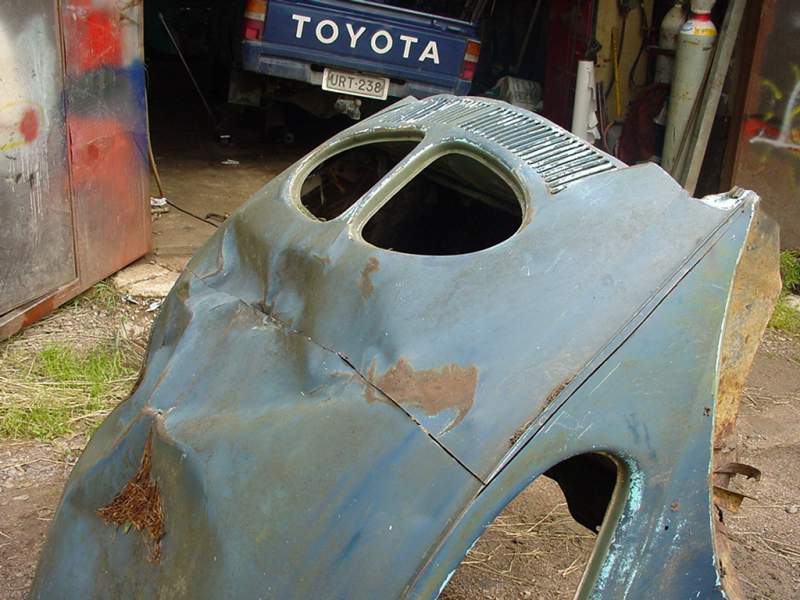
These rear-window-conversion splits have had plenty of criticism on the Finnish VW Association's forum, for example. Too 1980s, and so on. Well, everyone is entitled to their opinion. This Beetle was going to be such an unusual thing anyway that it had to have that legendary rear window too.
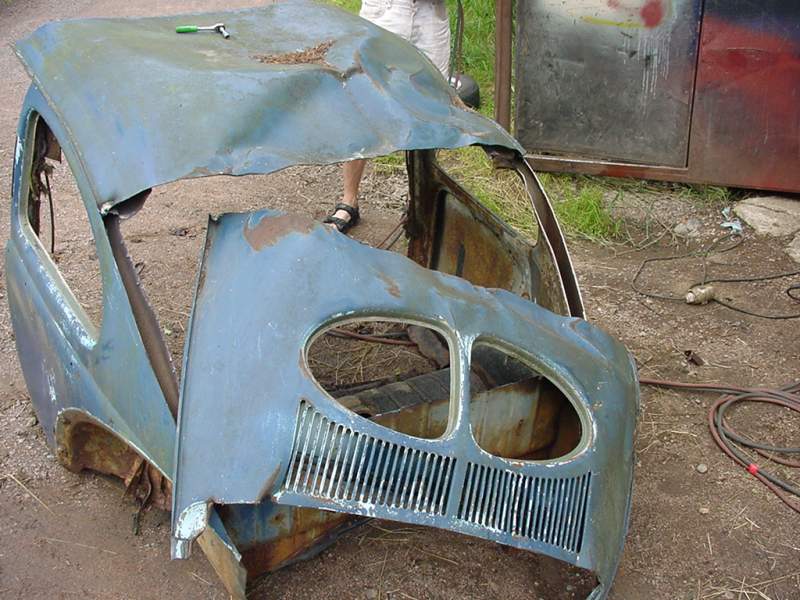
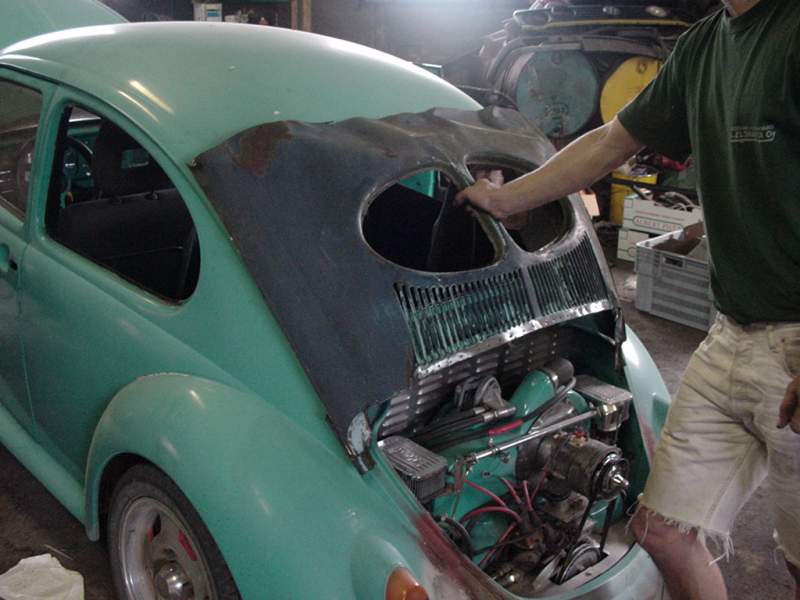
The rear window frame cut out with the grinder. It needed a little help from the gas torch too. As the pictures show, the frame really is quite twisted. Pekka knows the tricks for straightening something like this, though.
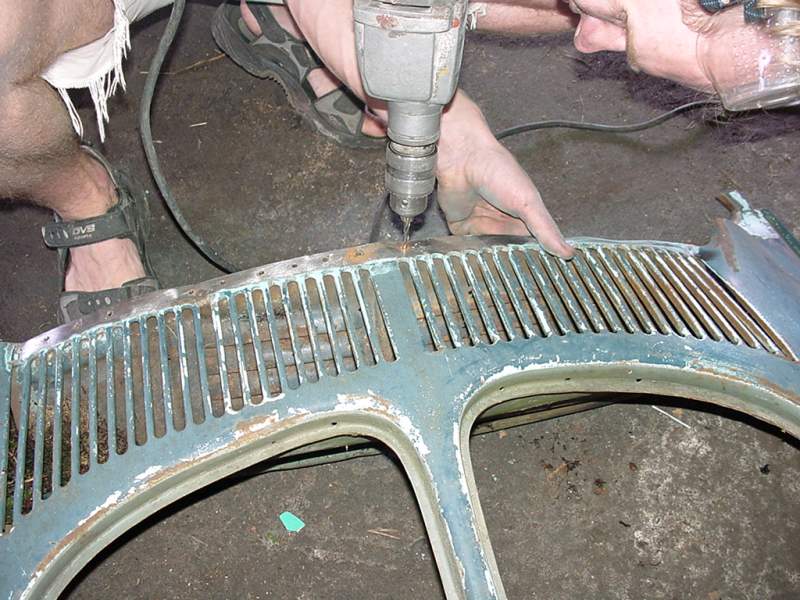
Time to drill apart the two halves of the rear window frame. They're joined with spot welds.
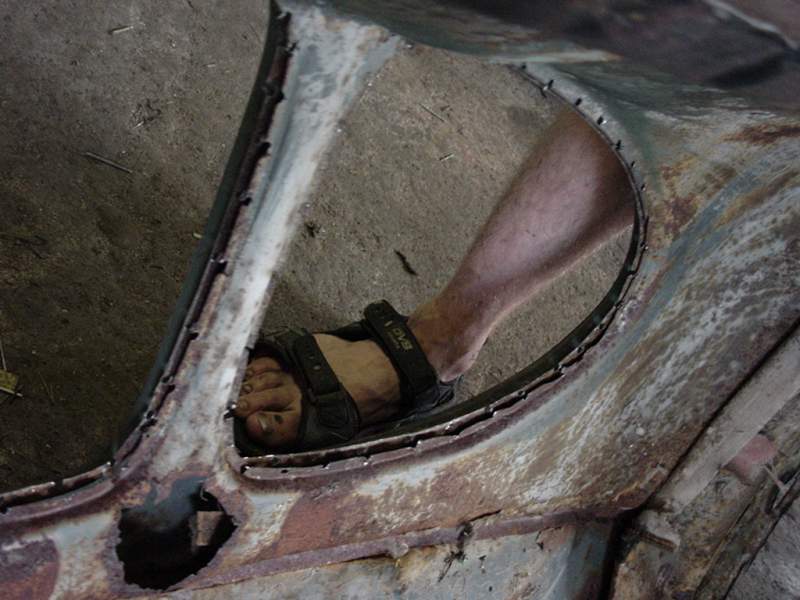
Soon the frame is in two halves. We'll close the original interior light opening: it's so rusty the split's light wouldn't stay in it anyway. My Beetle already has two interior lights, one above the B-pillar on each side. Pekka added the passenger-side one himself.
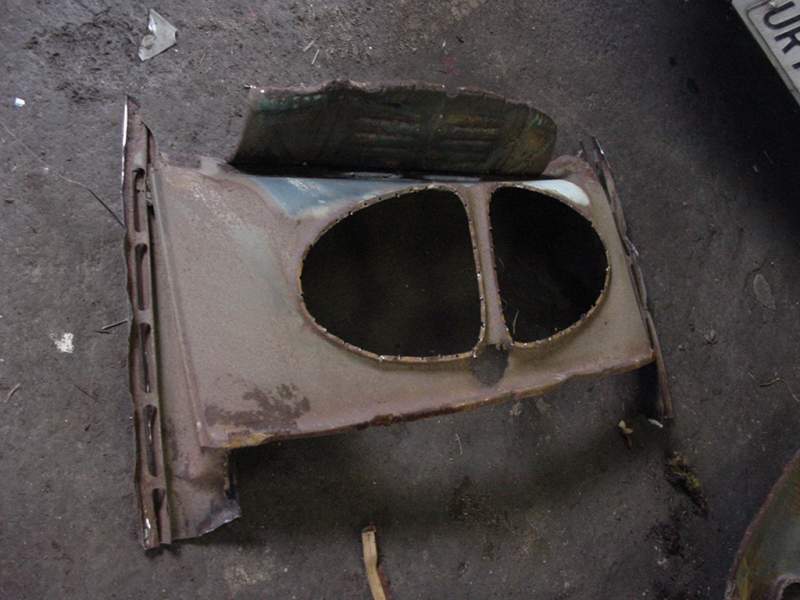
Here is the inside half of the split-window frame.
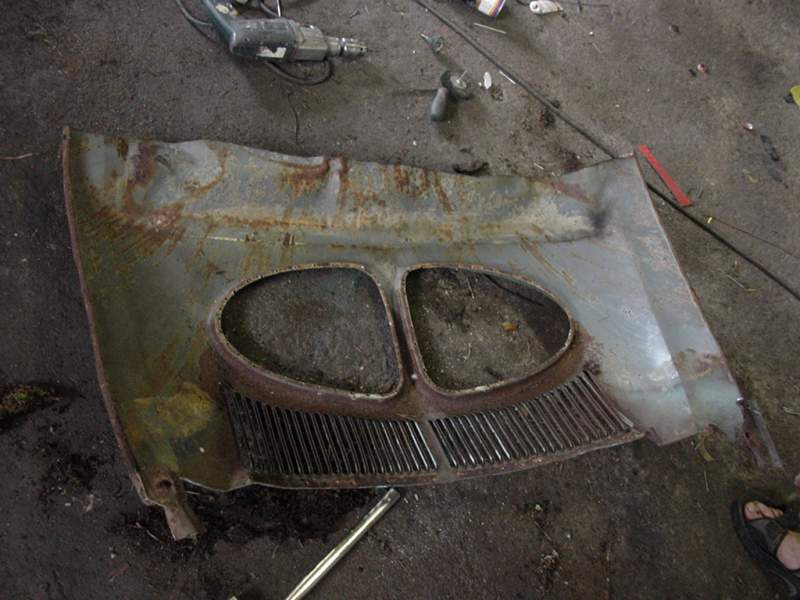
And here is the outside. It already looks much easier to straighten! A little skill, a hammer and an anvil, and that twisted scrap of roof yielded plenty of usable metal!
The inner surfaces of both halves were sandblasted and primed with anti-corrosion paint.
Split rear window — part 2
This is where that badly dented rear window frame is eventually supposed to fit... The previous page described what we did to it.
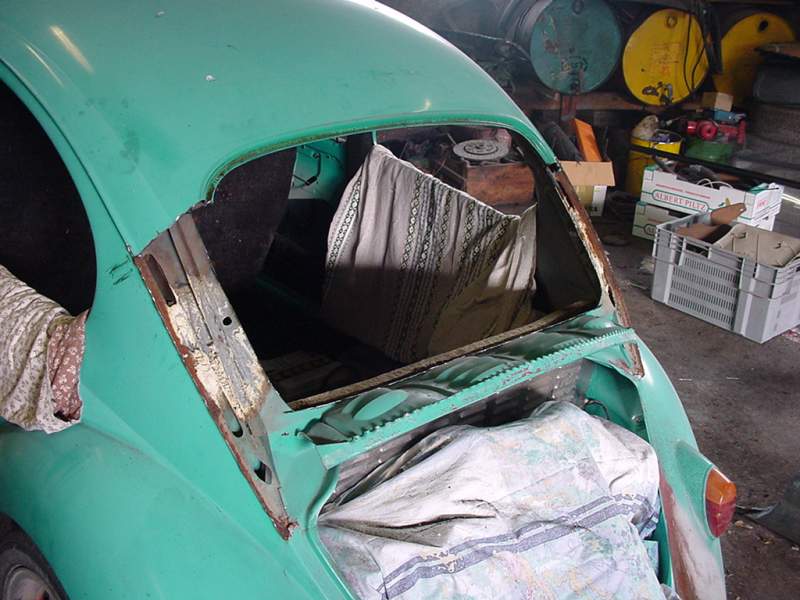
We began carefully taking the Beetle's rear apart, piece by piece. The seam between the roof and side panel was ground open and the lower part of the rear window frame removed.
There was polyurethane foam inside the C-pillar. Rust had been enjoying itself between the foam and the metal.
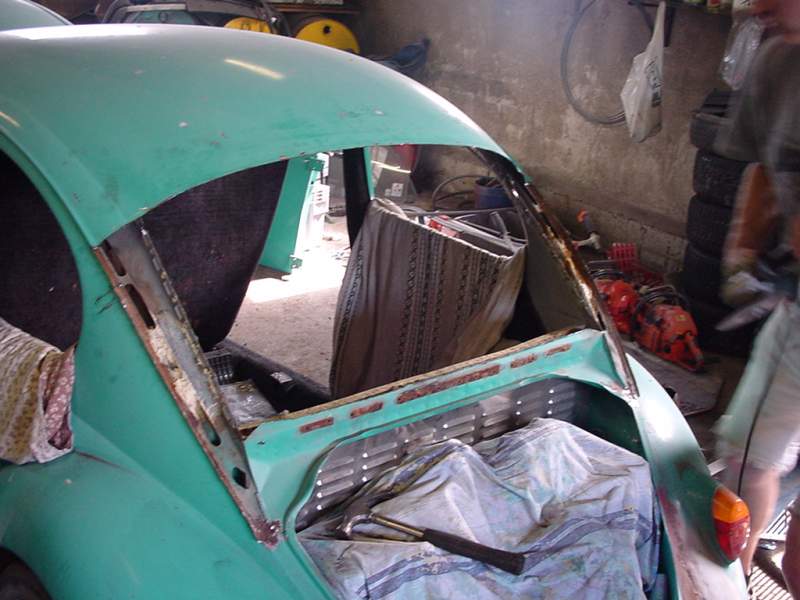
At this point we measured up with the split-window frame and carefully removed the remaining excess metal.
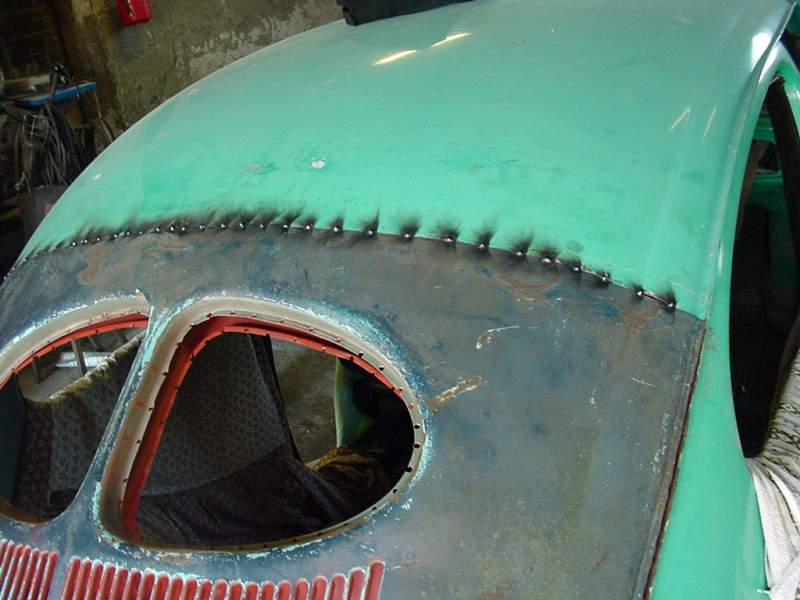
Here the frame is tacked into place. The inner panel was simply put in position without welding. Then the outer panel was welded in, followed by welding the inner panel to the outer one.
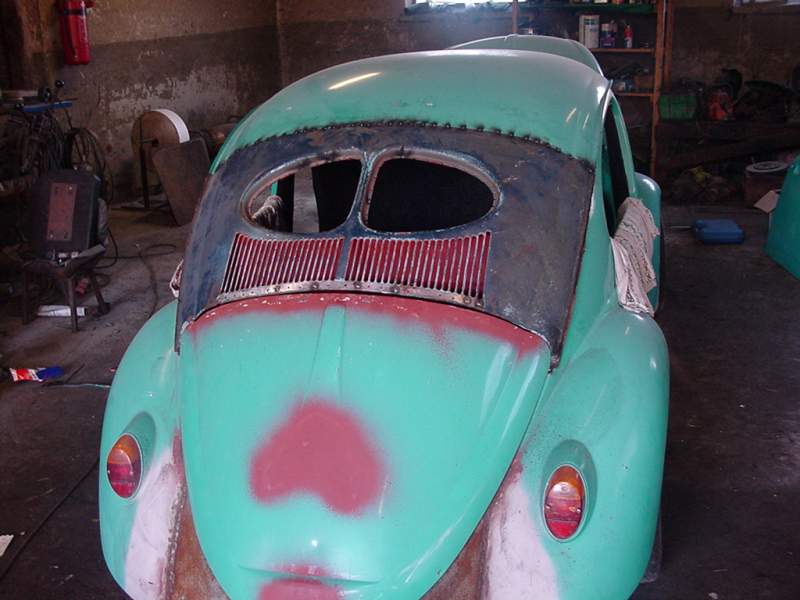
And this is how it looks. Or looked in summer 2000. The whole job took only a few days of summer holiday. Pekka is quite a panel beater... but you ain't seen nothing yet!
Running boards
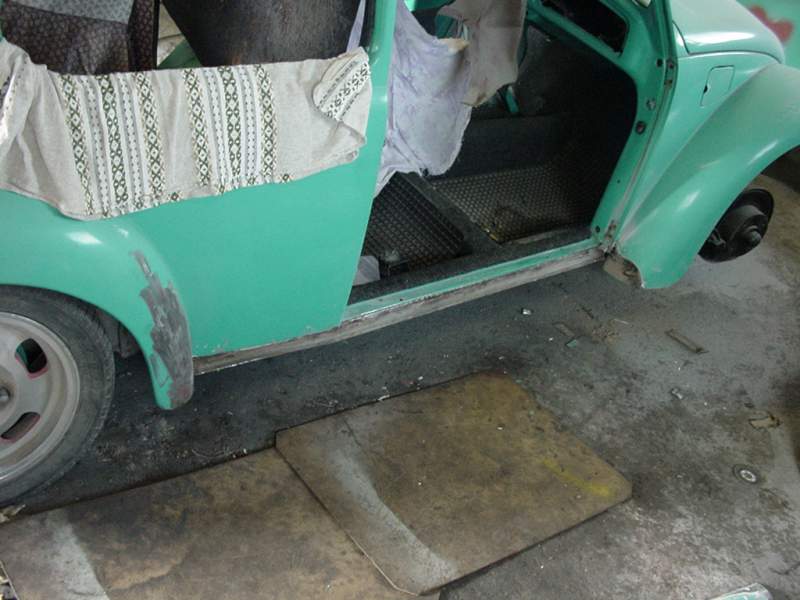
At the same time as the rear window conversion, we remade the running boards. The old ones were rusty and, above all, floppy. Removing them took an unbelievable amount of time: Pekka had welded them on firmly!
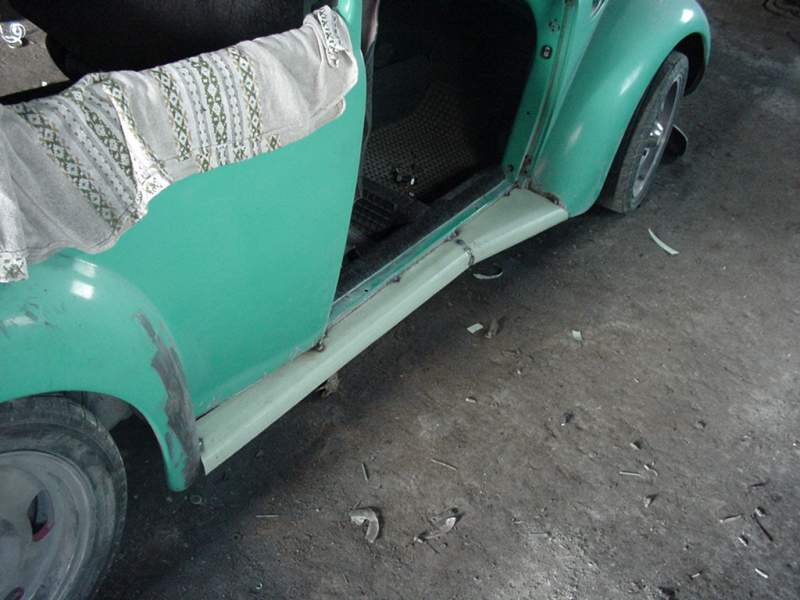
Here are the new ones tacked in place. I got some sheet metal from a local tinsmith — about a millimetre thick, I think — and we folded the boards at a friend's place.
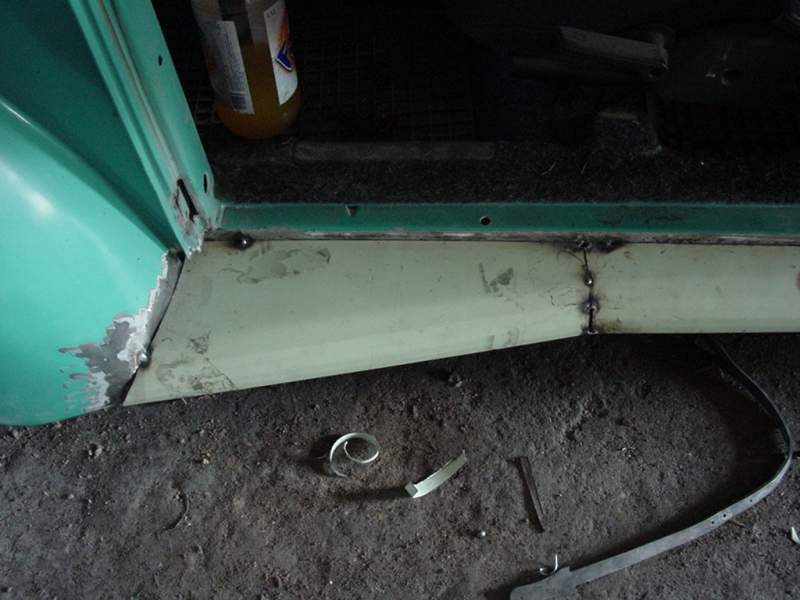
The running boards are made in two parts. There are no doubled-over edges to trap moisture. The lower edge is folded inward at 90 degrees.
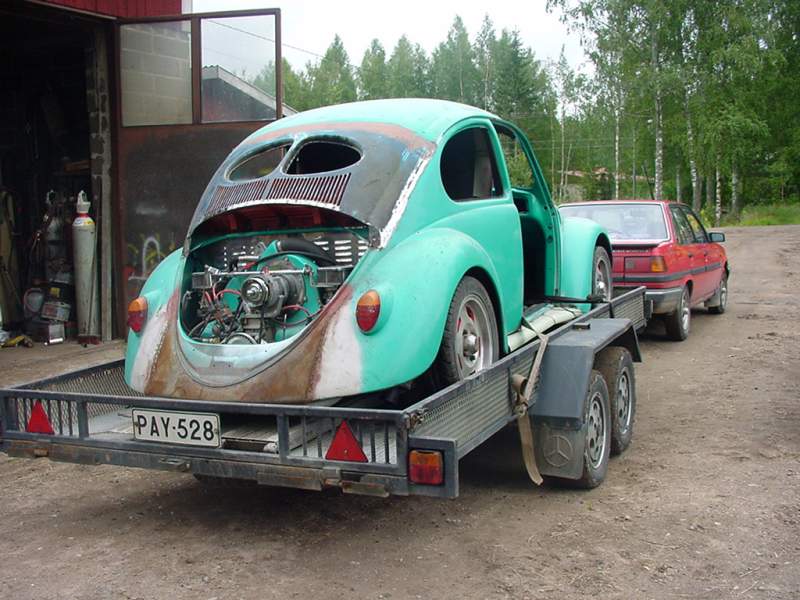
Here we are in late summer 2000, about to head to the Special Motors dyno in Noormarkku to get the engine and carbs properly tuned... But things didn't quite go to plan.
Instead of a dyno printout, we got advice to make the engine seal properly before attempting serious tuning. There was leakage in pretty much every cylinder! That was quite a blow to my confidence: apparently I still hadn't learnt anything about building engines. There were leaks almost everywhere possible, through both inlet and exhaust valves and past the cylinders too.
I knew the cylinders were worn, but hadn't thought they were that bad. I hadn't touched the heads at all, and probably should have. My motivation for the whole car pretty much disappeared, and the summer holiday was nearly over too. This is where the car was left in autumn 2000, and practically nothing happened until the following spring.
The remaining window frames — part 1
Right, winter came, and about the only thing I managed over the winter was to take the engine apart again. Actually I left the case assembled, but intended to replace the cylinders and pistons. More about that later.
In spring 2001 we were finally going to get serious about painting the body. But looking at the car, I began to regret that rear window swap... A split window in a thin-pillar Beetle.
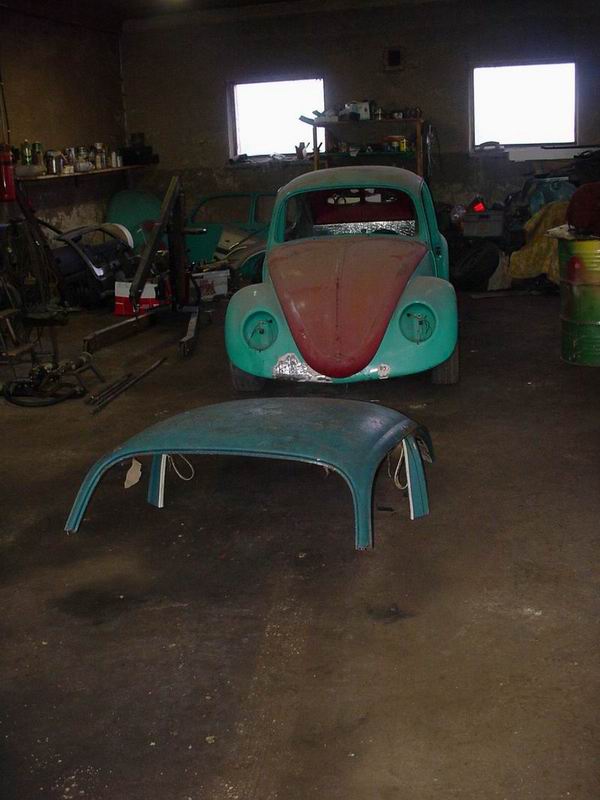
We reasoned that we certainly weren't putting the old window back, so we'd change the rest of the window openings too :-). And since the roof would be in so many pieces anyway, we decided to chop it as well.
Mika Nopola gave me a couple of magazine articles about roof chops, and we based our plans on those. There was a spare roof up on the hill that we'd need later. Before the actual chop, though, we changed the window openings so it would be easier to get them in the right places. The bonnet has already been changed to the longer style too.
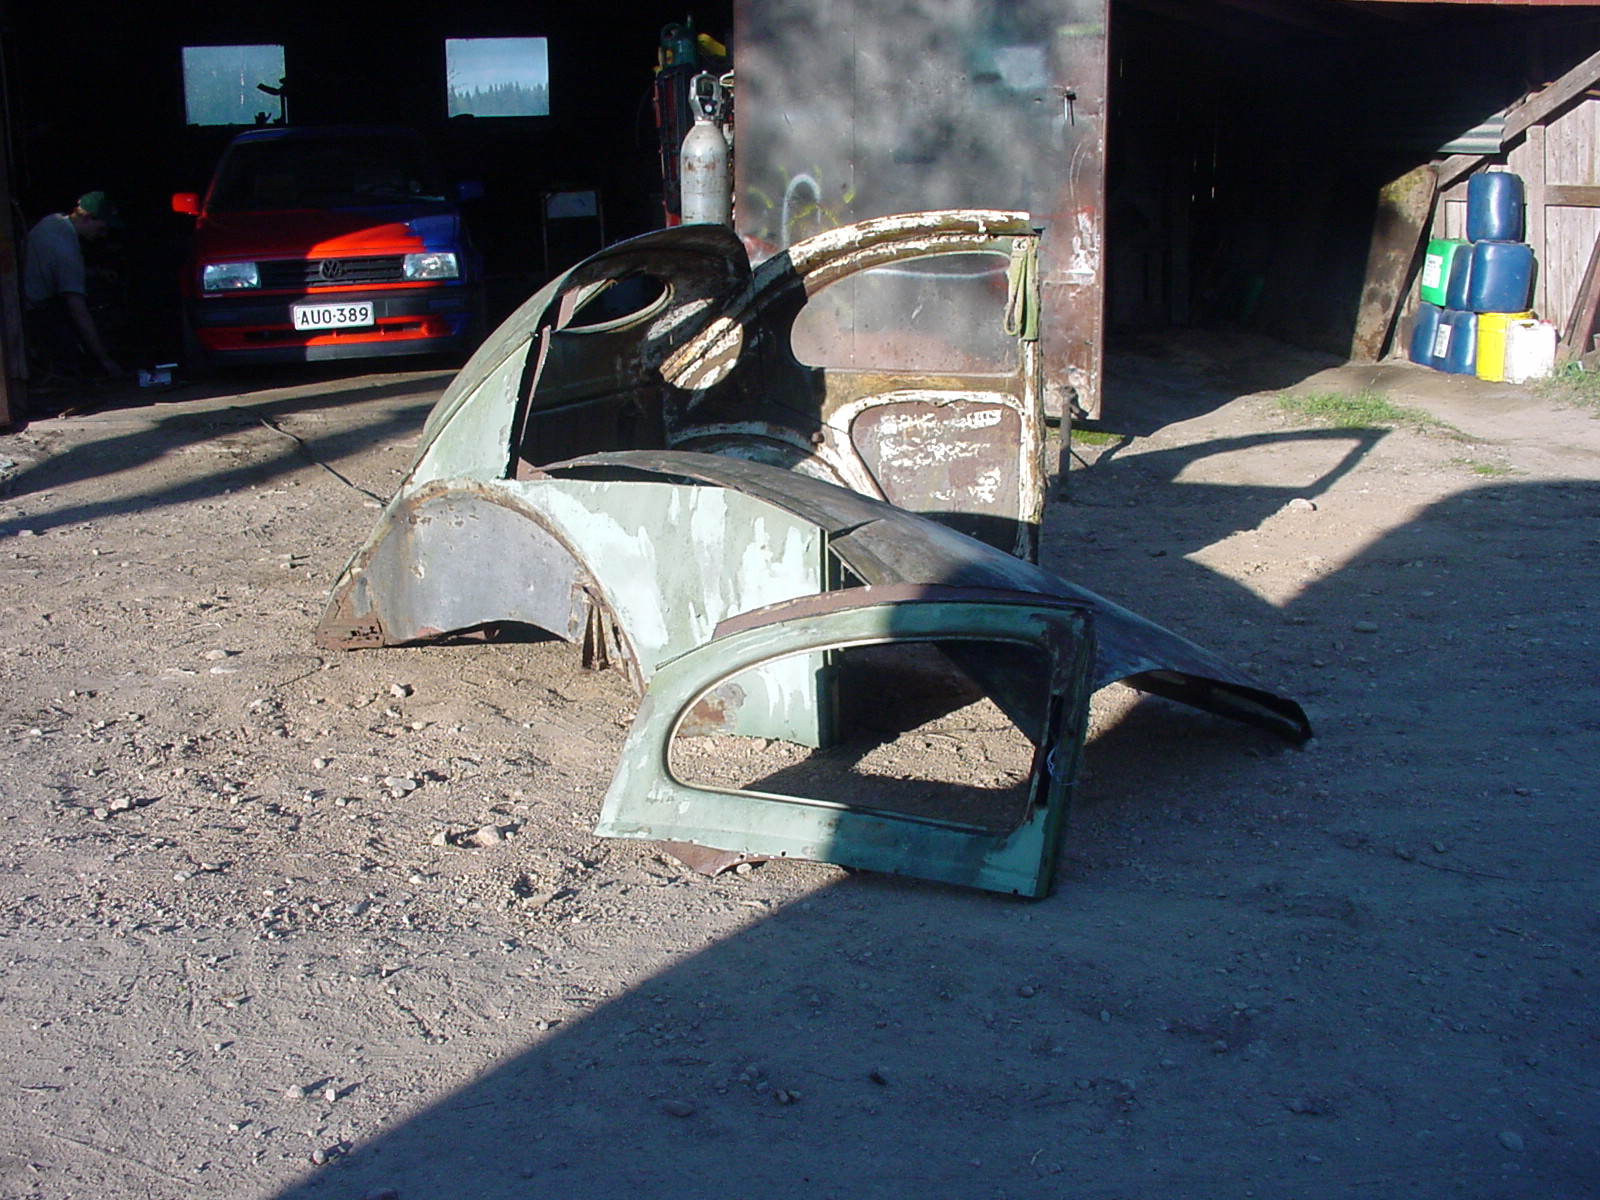
There was also a wrecked split-window body up on the hill: its roof had buckled and then been cut in half, the lower parts were completely rotten, and so on. We decided to cut the window openings we needed out of it. Naturally we saved the rear window section: someone would need it sooner or later.
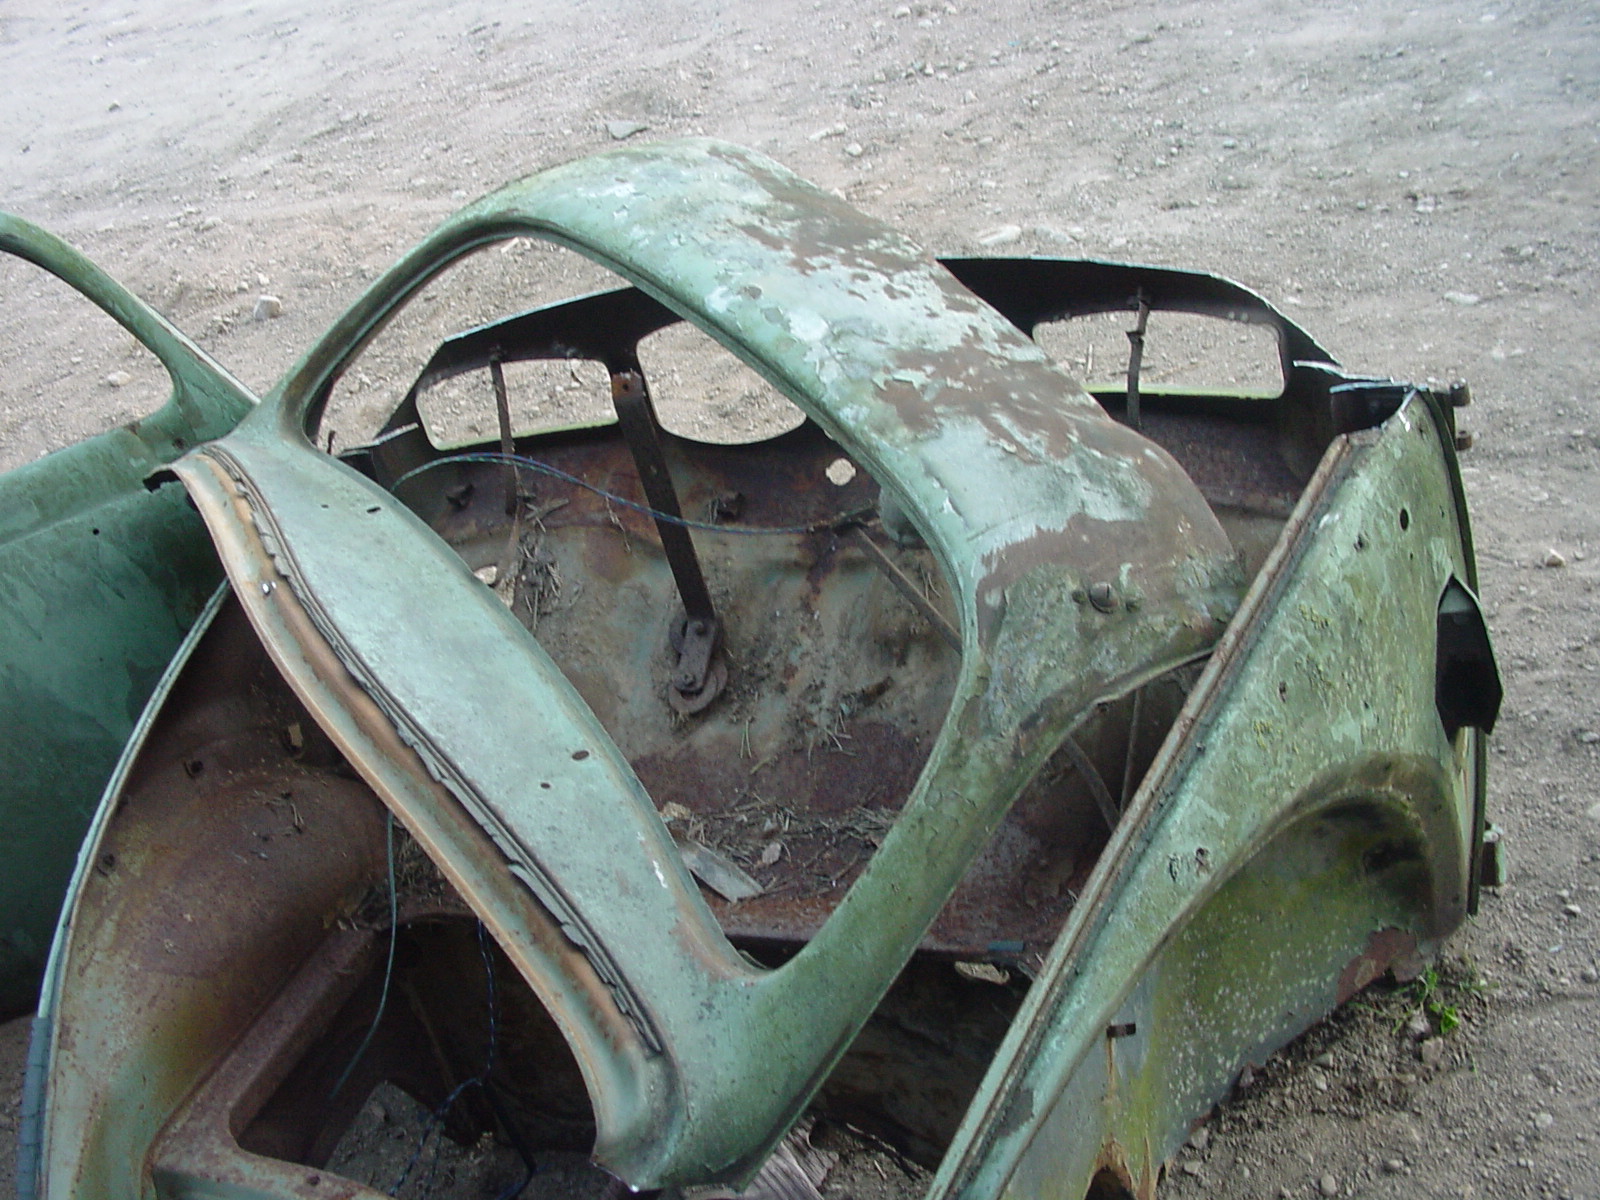
The windscreen opening came from the same body. We didn't use the dashboard, as the Beetle will get a clean panel without holes.
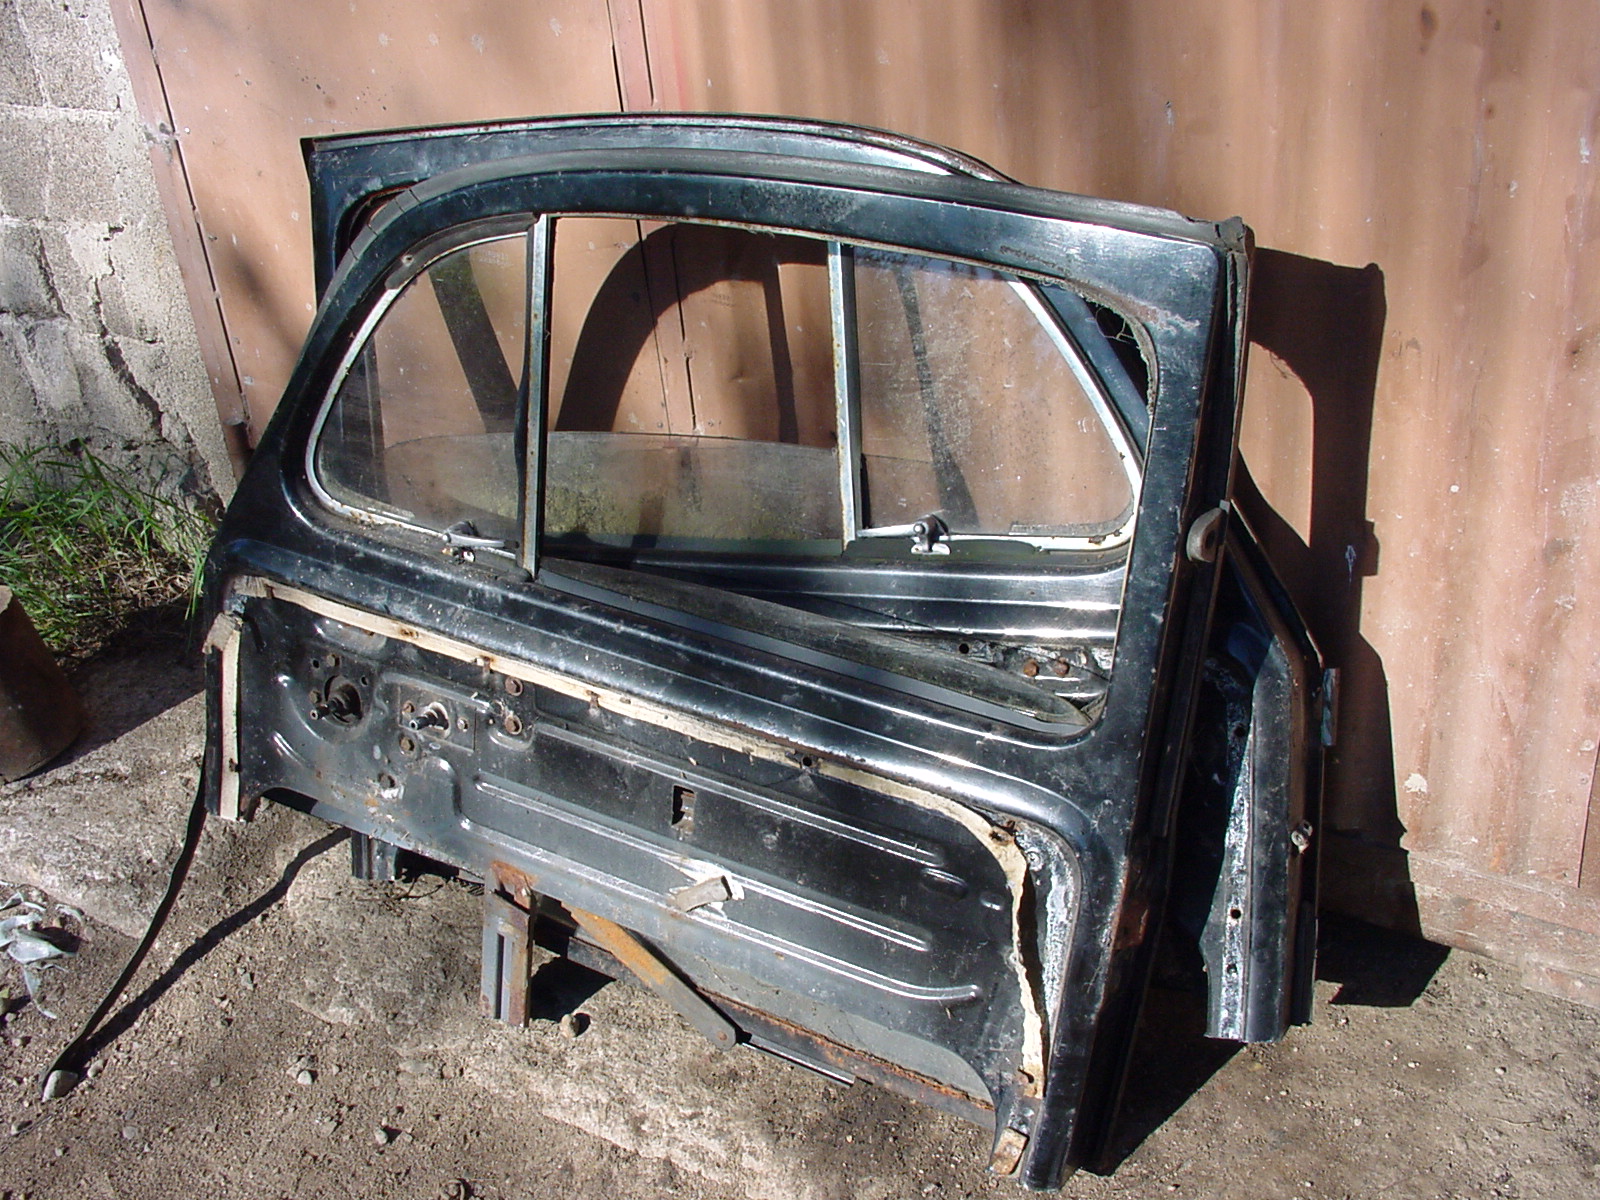
The pieces needed for the doors came back with us from Helsinki: oval-window doors with ruined lower halves.
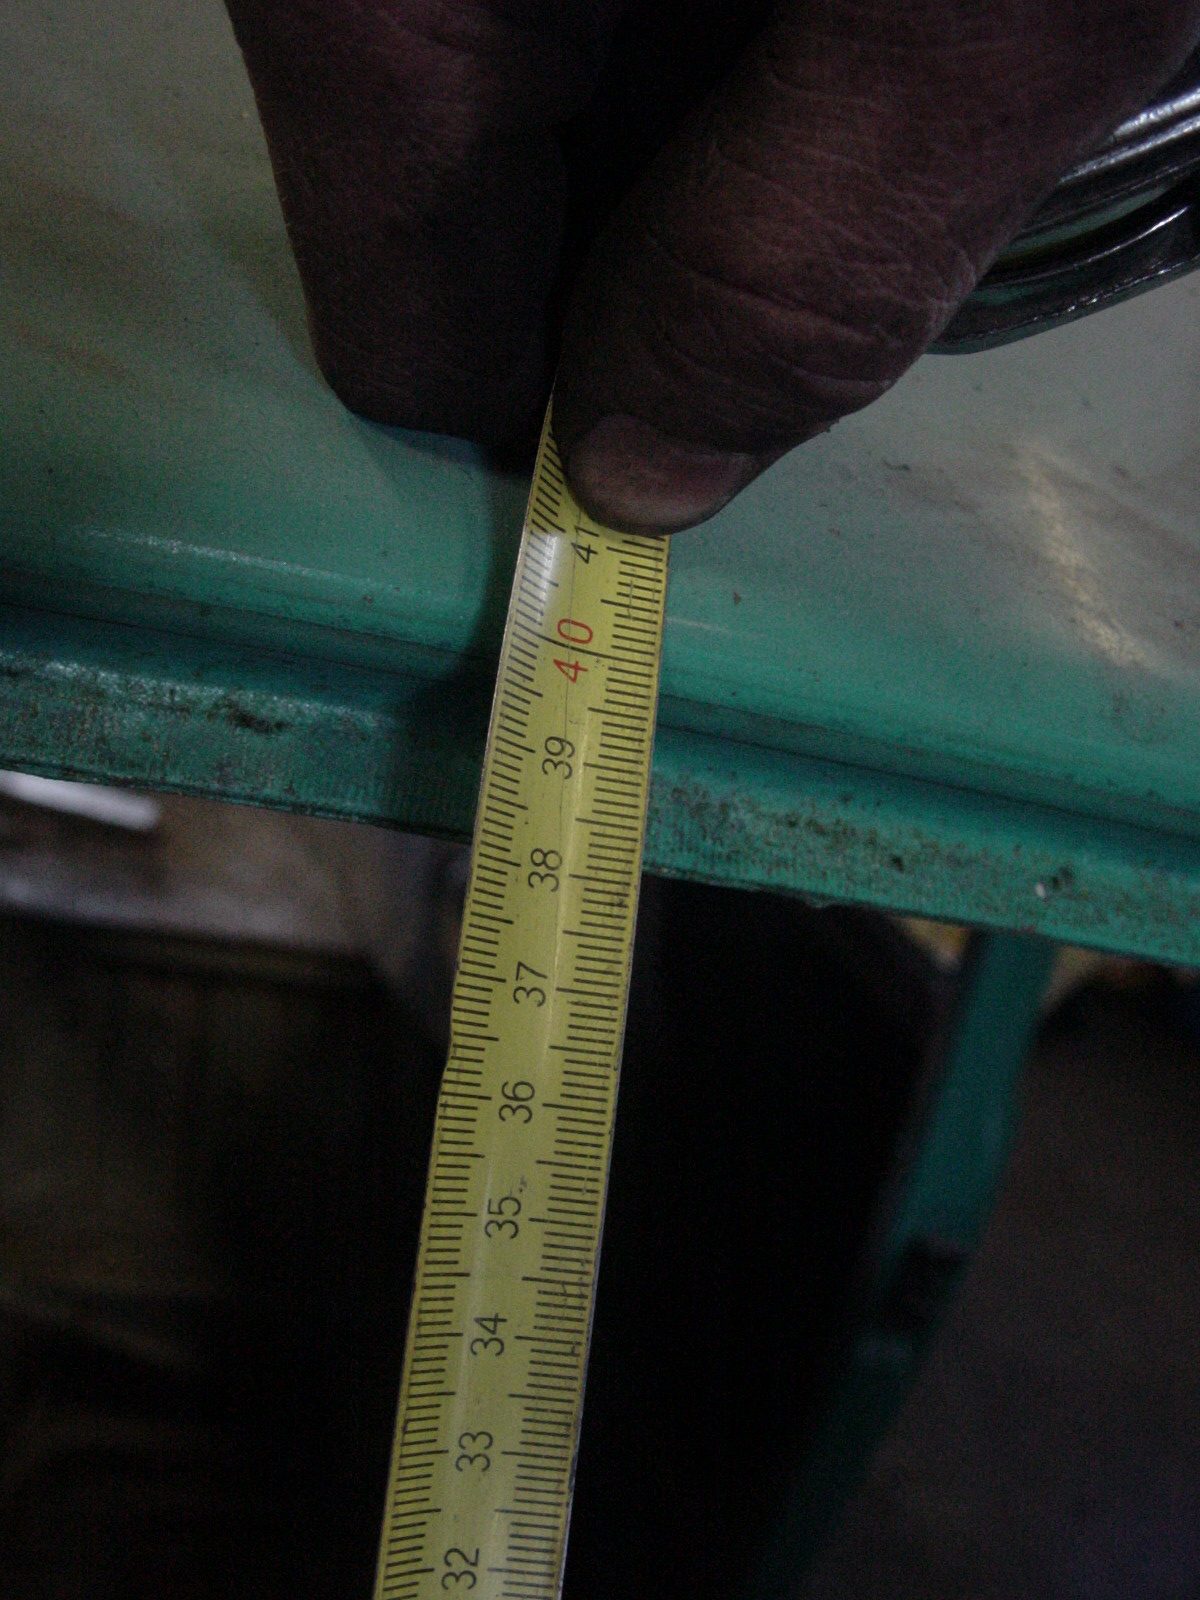
Here you can see the original windscreen height...
The remaining window frames — part 2
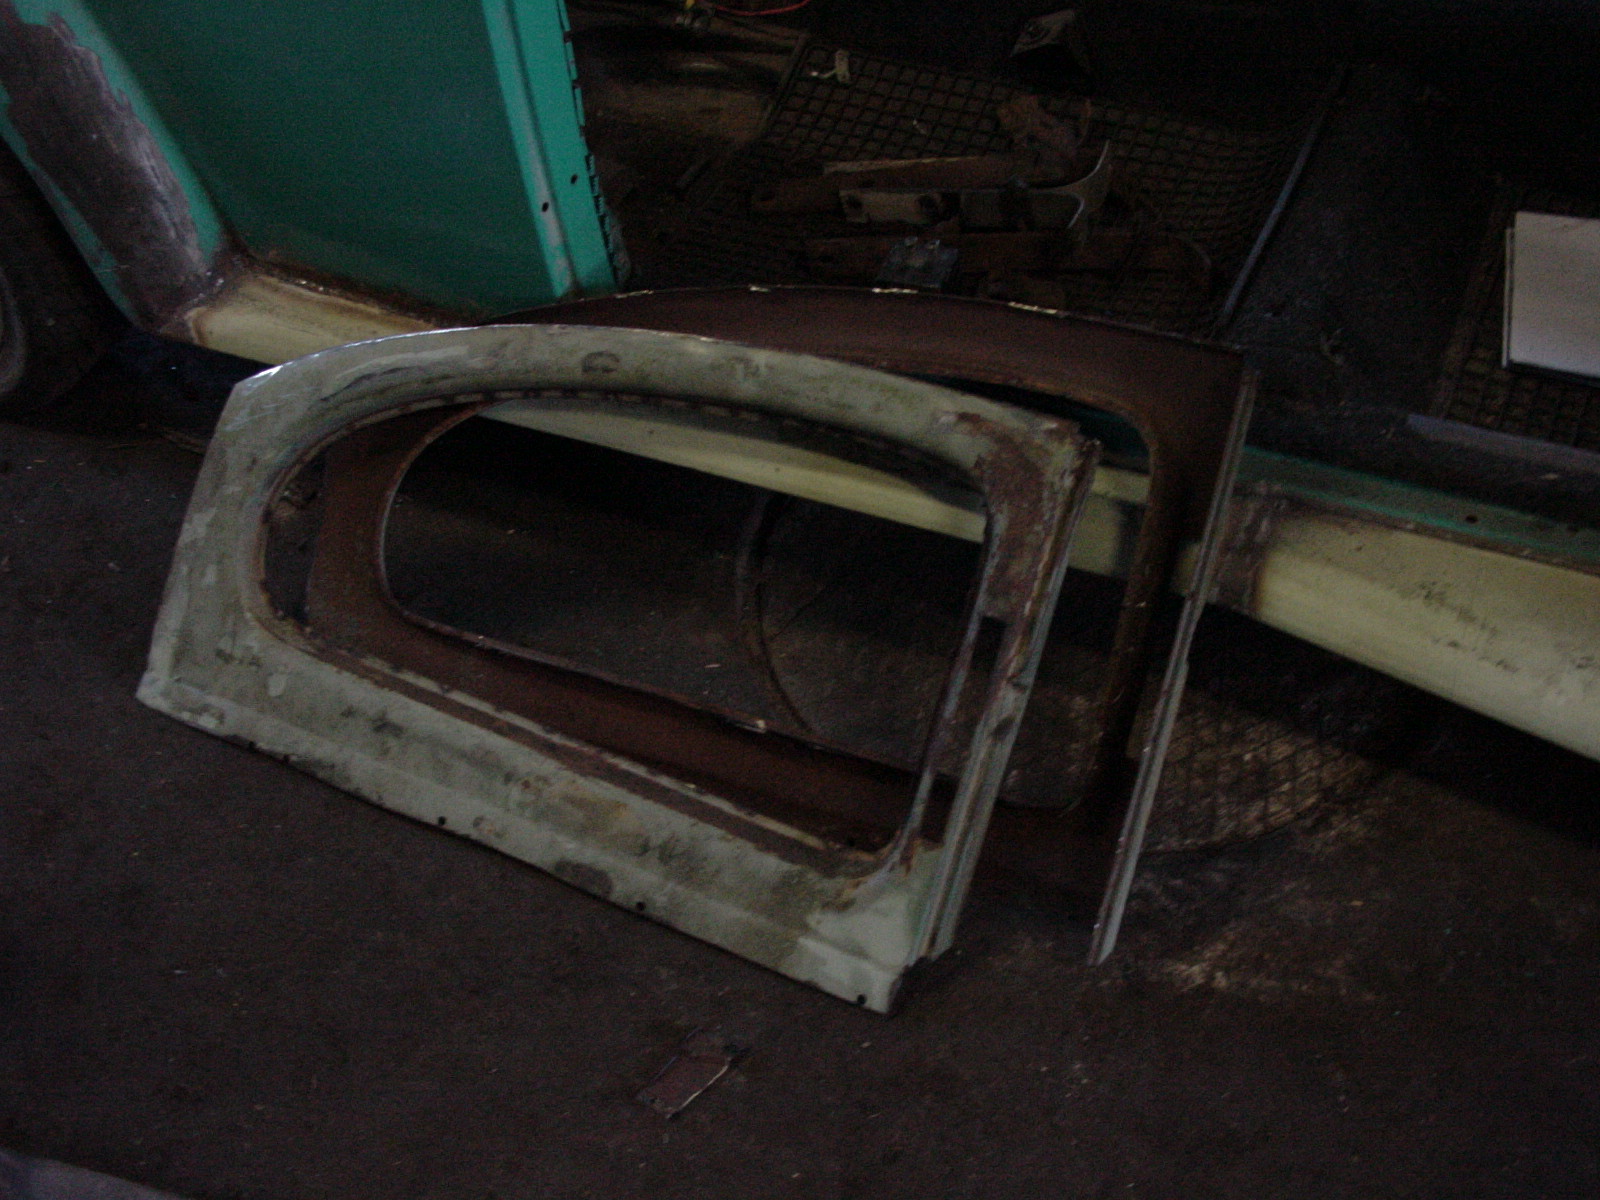
The side-window sections cut out and cleaned up, with the excess metal removed. Only the outer panel will be replaced. They did go for sandblasting after this picture was taken.
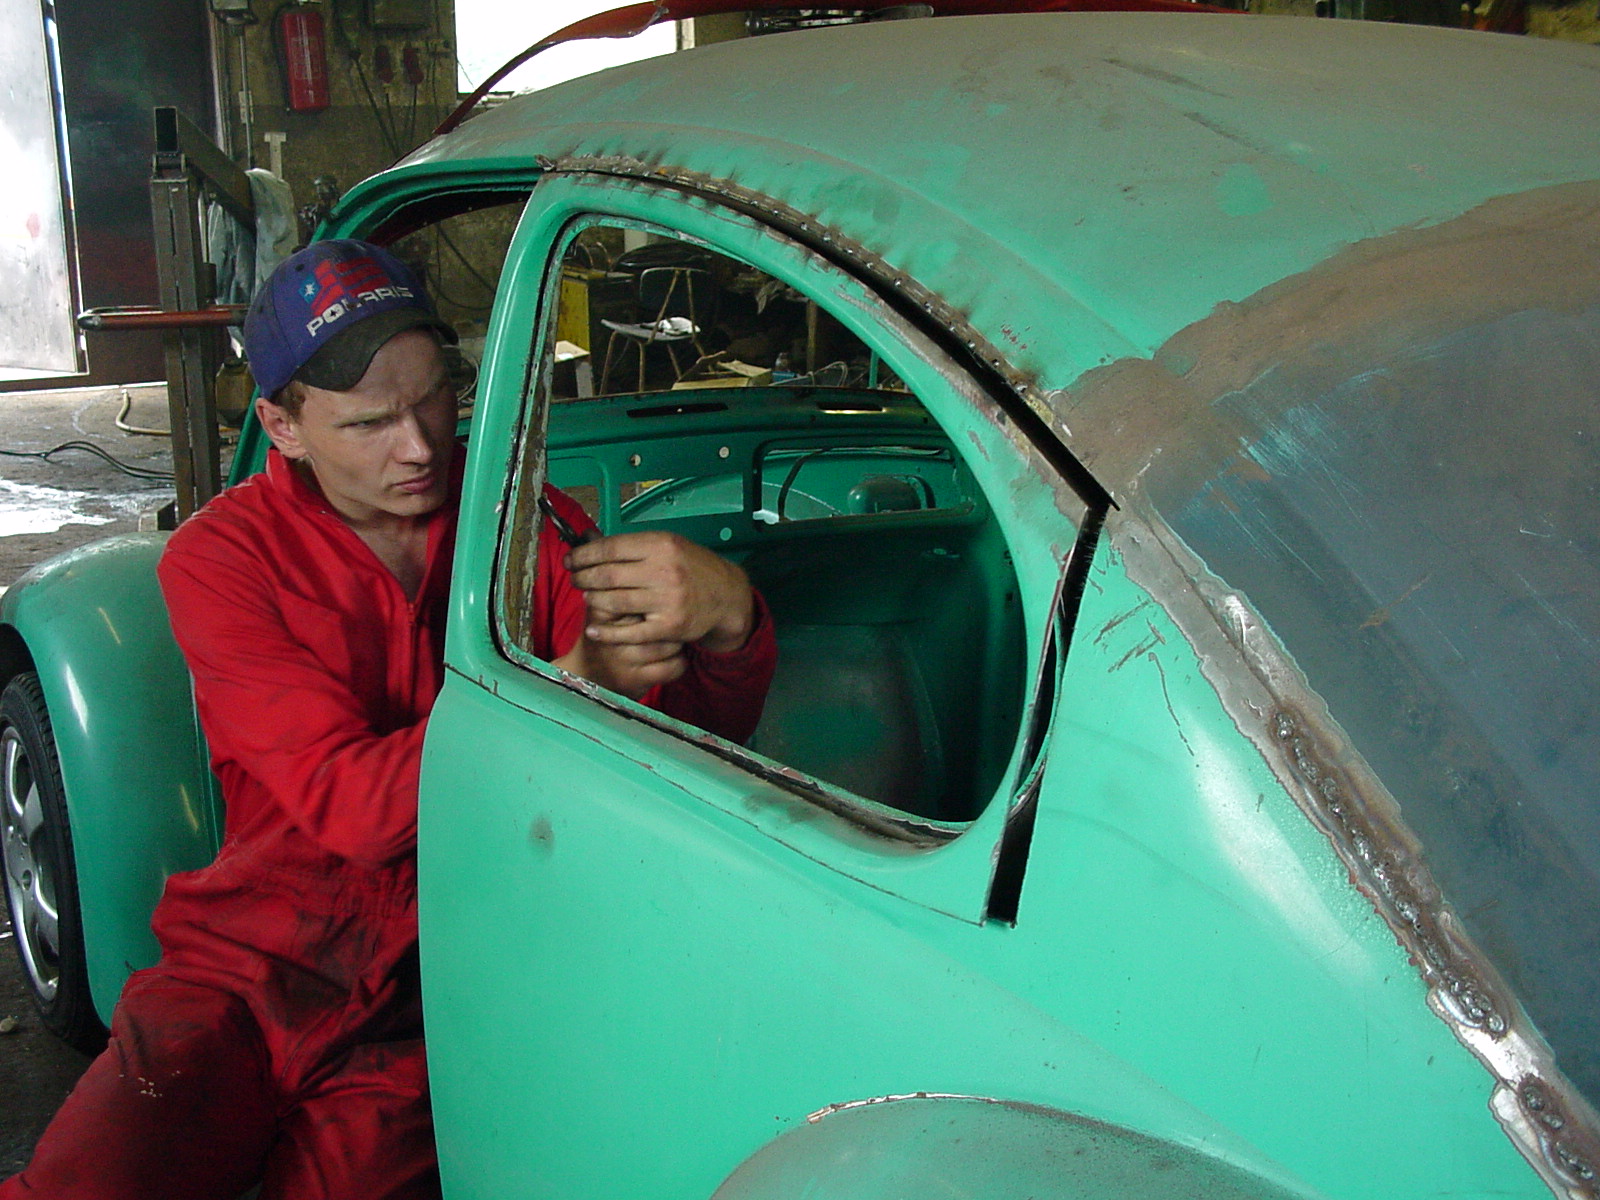
Here the 1969 window opening is coming out. Just the outer panel, that is.
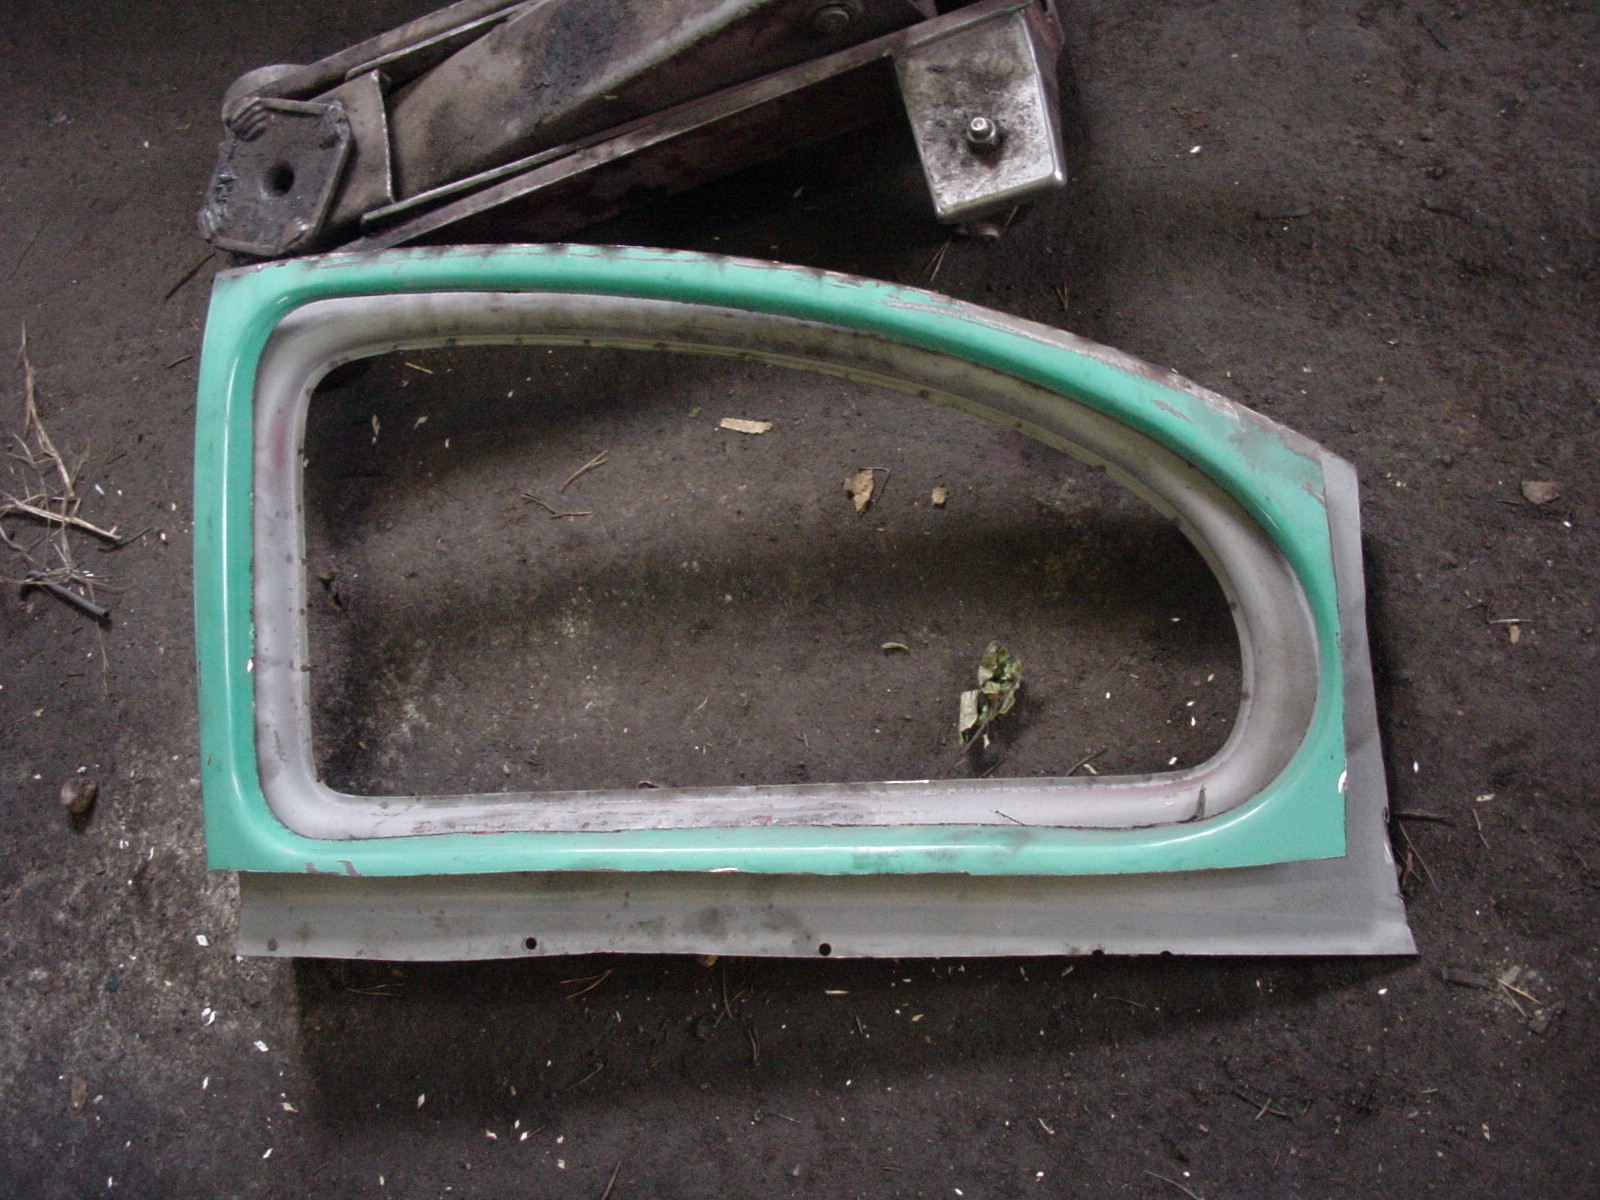
The new and old side-window openings. You can see the difference in size...
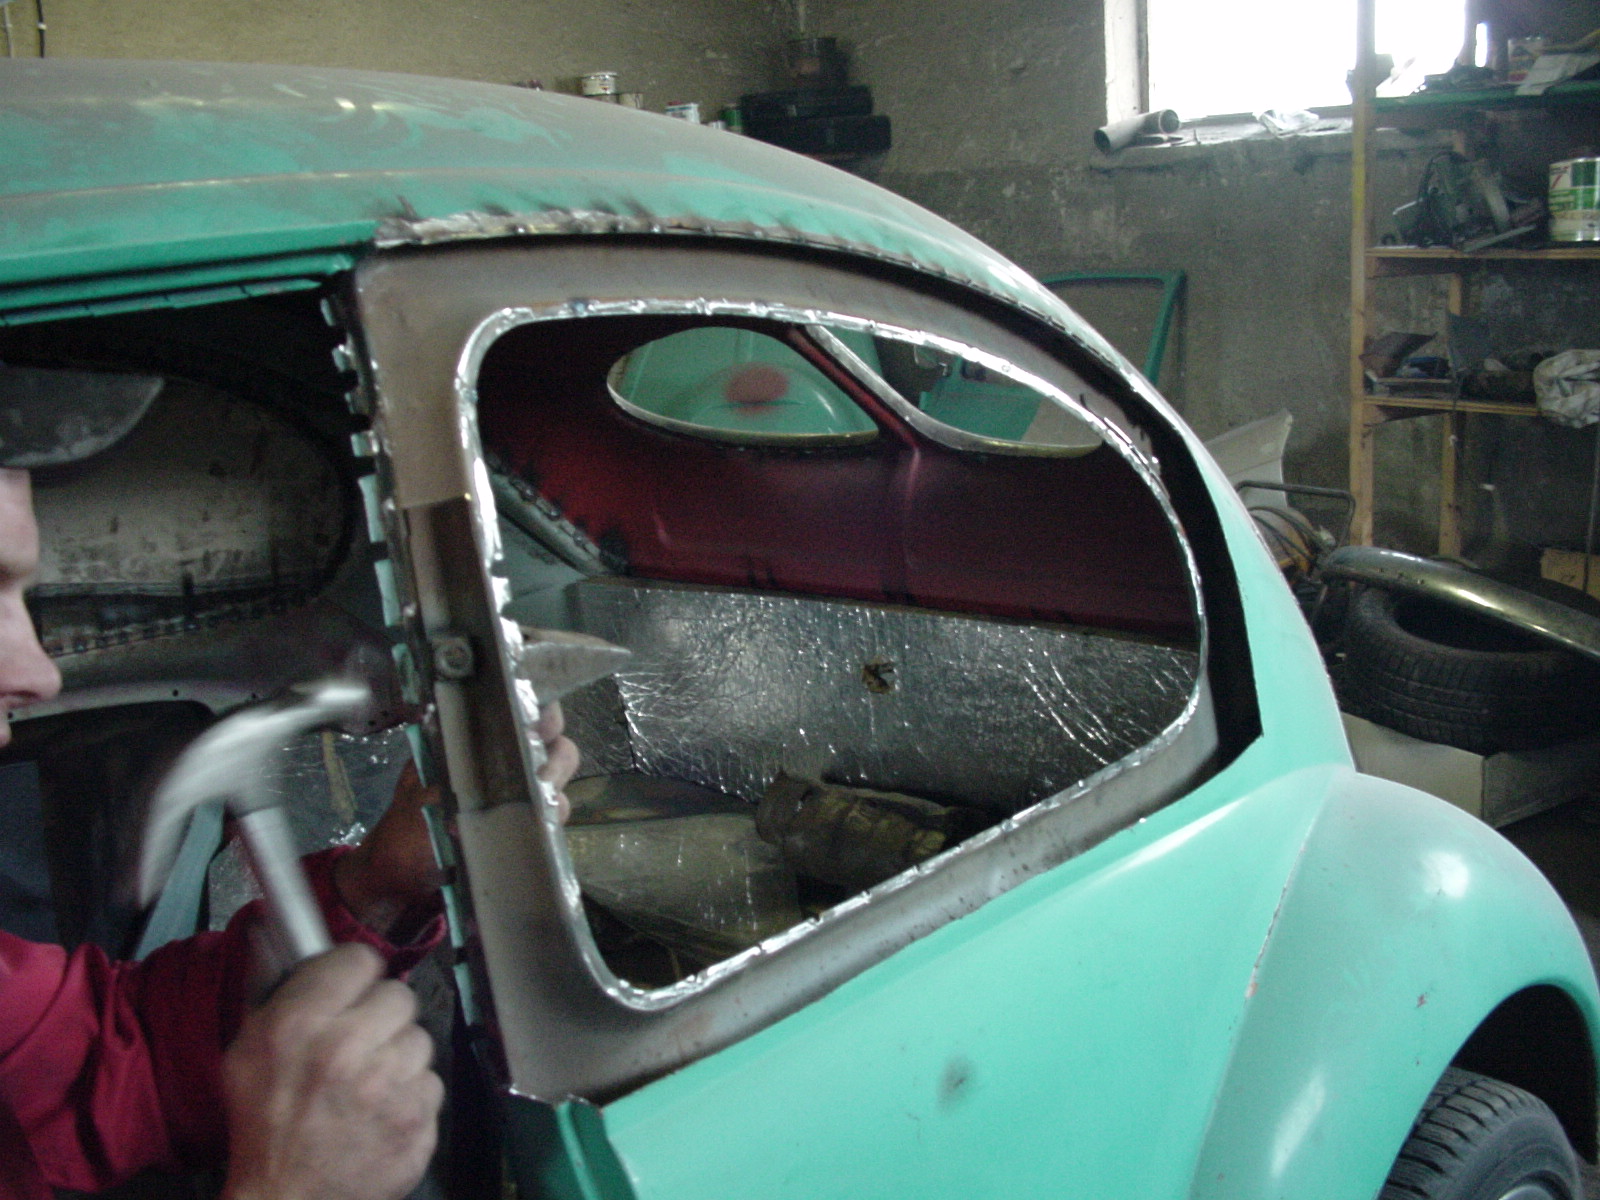
Like this...
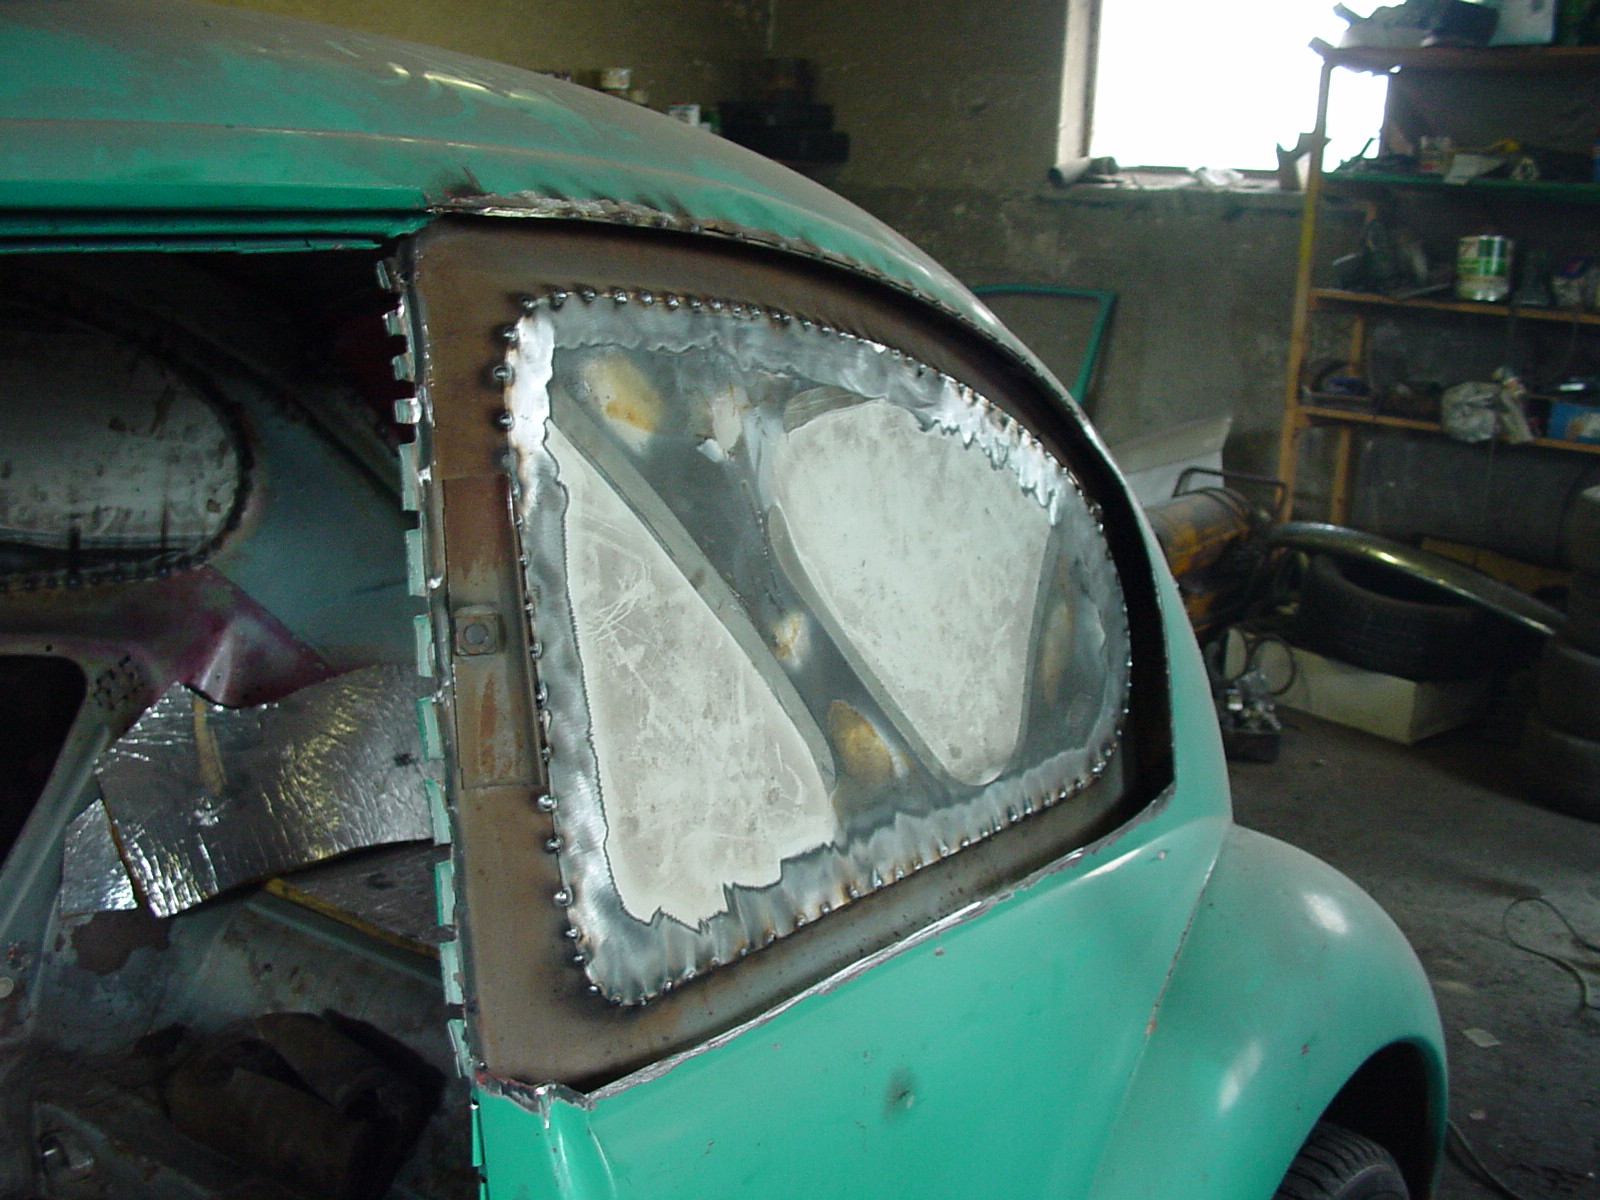
Because the opening in the new outer panel is smaller, the inner panel needed extending. Pekka first welded the opening completely shut, ready for a correctly sized hole to be cut later. A good use for a crash-damaged Golf bonnet :-)
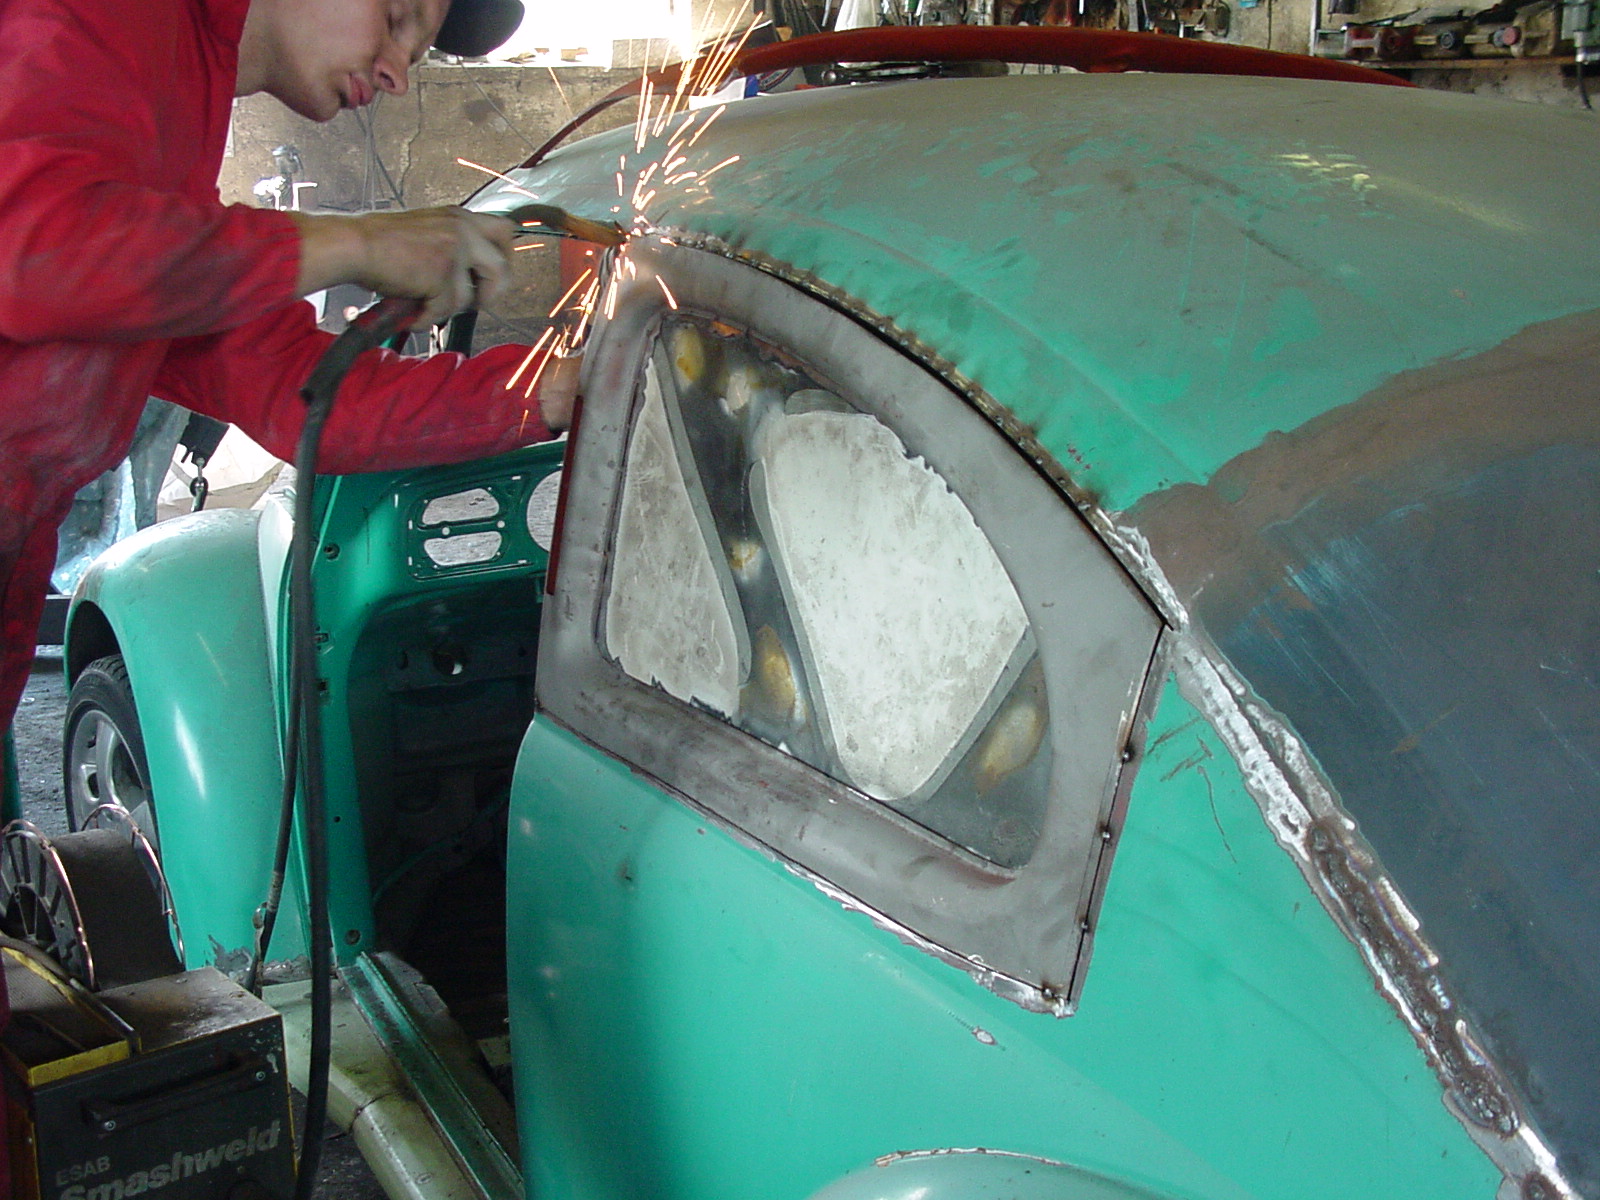
The 'new' window frame almost in place.
The remaining window frames — part 3
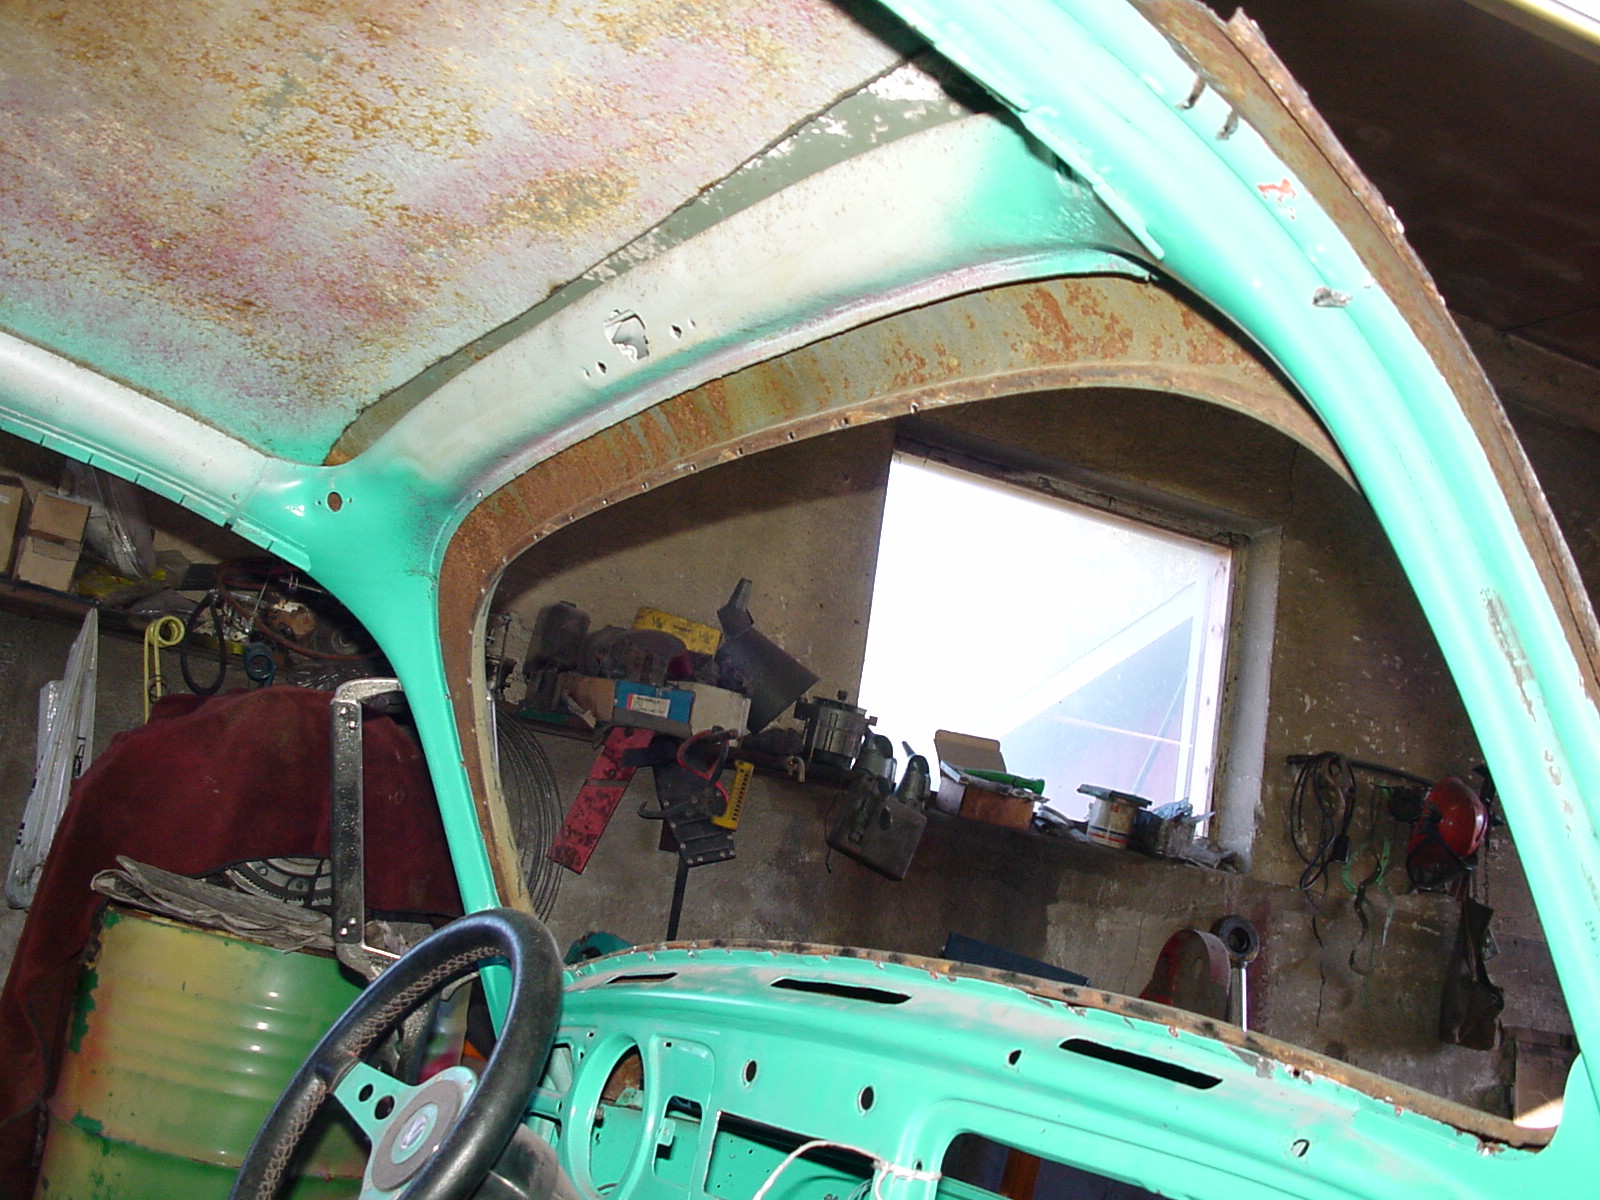
After the side windows, onto the windscreen. We did the same as with the rear window frame: drilled out the spot welds and separated the two halves. First we fitted the outer panel. This shows nicely how much the height of the windscreen opening changed between 1952 and 1969. The lower edges met once the top of the 1969 dashboard was bent upwards a little.
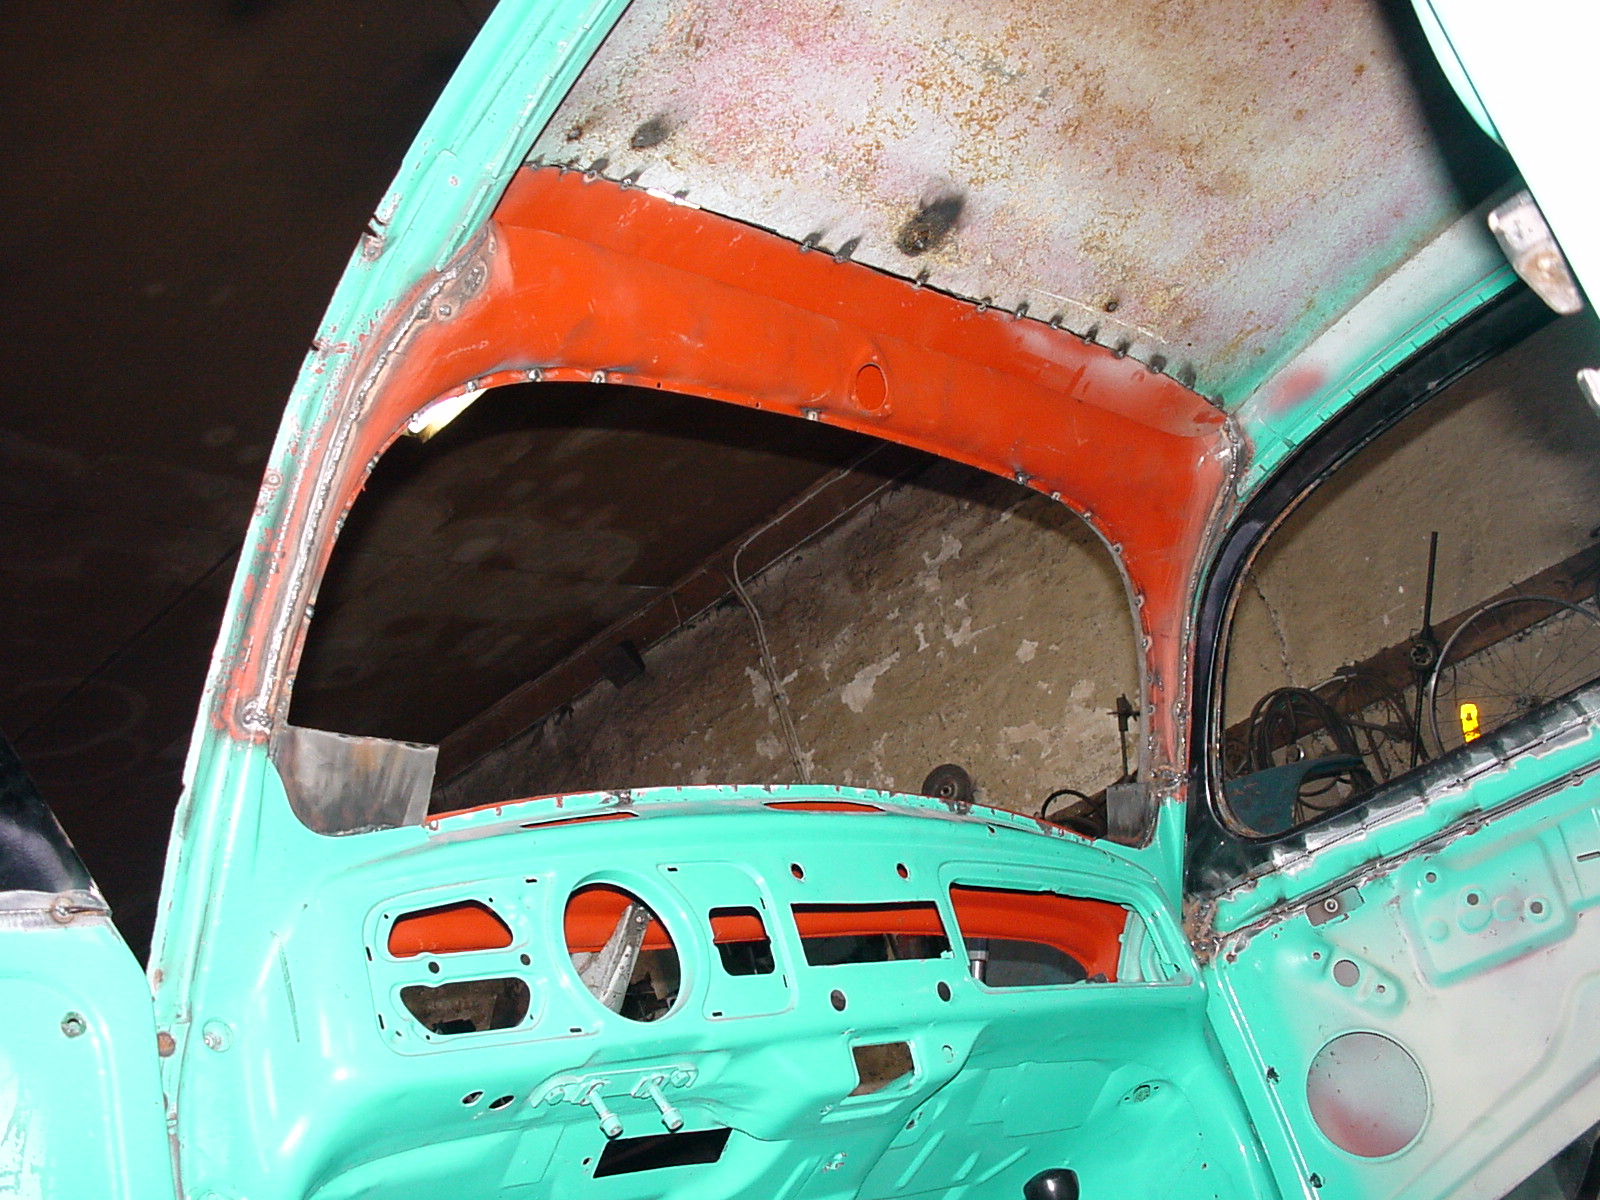
Once the outer skin was tacked in, we replaced the relevant portions of the inside. The larger picture shows more clearly where we chose to put the seams. Small plates were welded into the corners to make the joints meet.
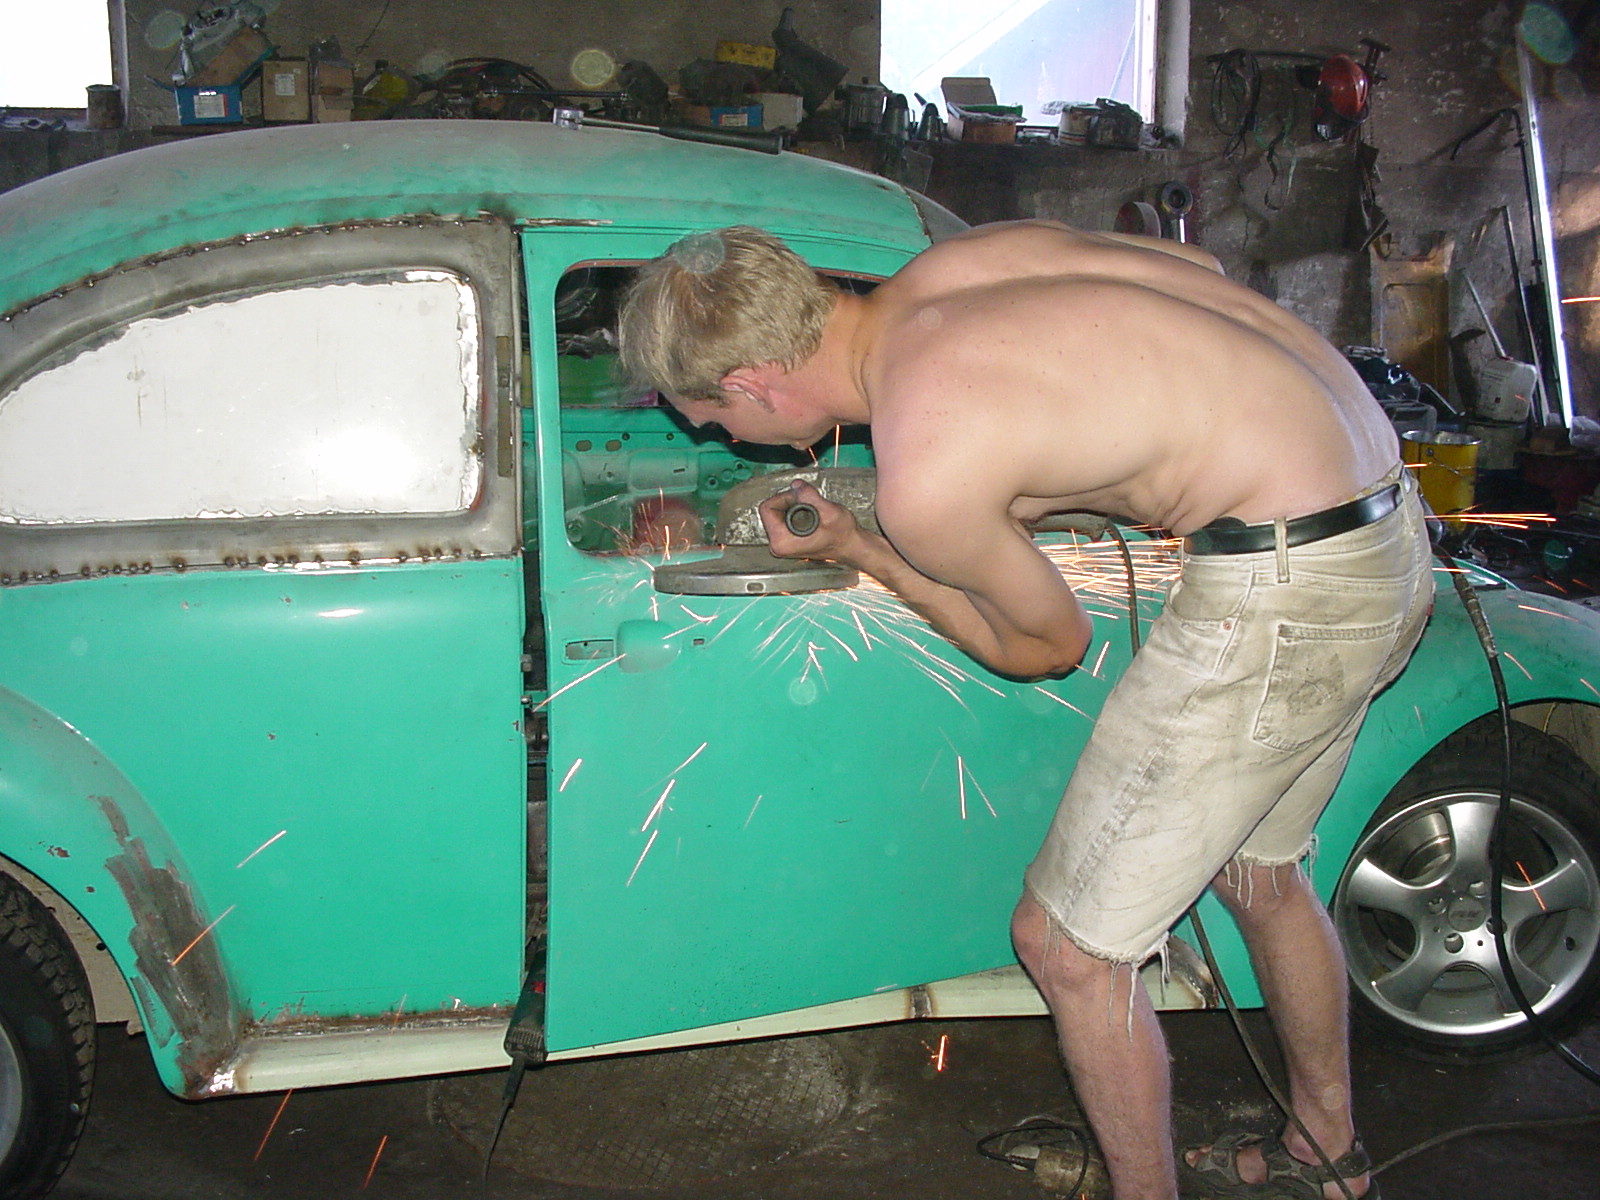
After the windscreen came the doors. It might have been easier to fit complete thick-pillar doors... But then the lock strikers and so on would have needed changing. We decided to replace only the upper parts.
And yes, who needs protective equipment... It only makes you sweat on a hot summer day :-)
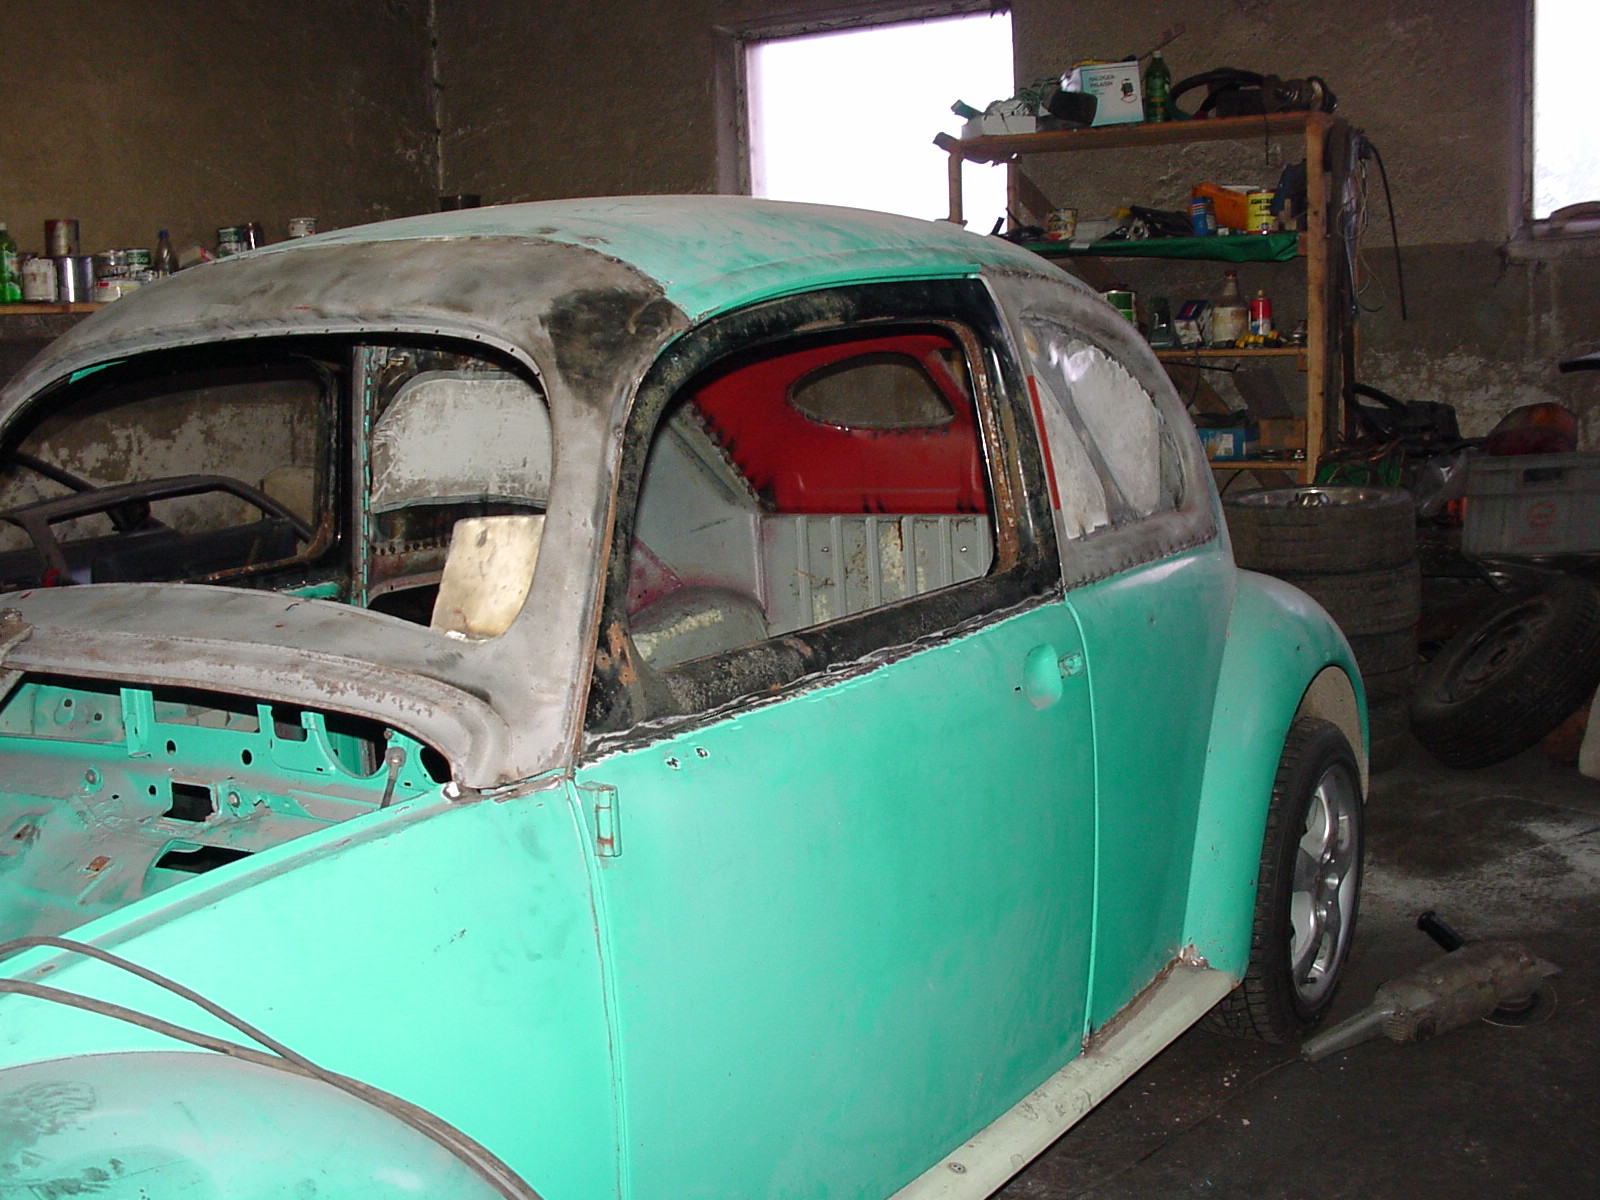
They took a little measuring before they were right. In this picture they're all starting to be in place.
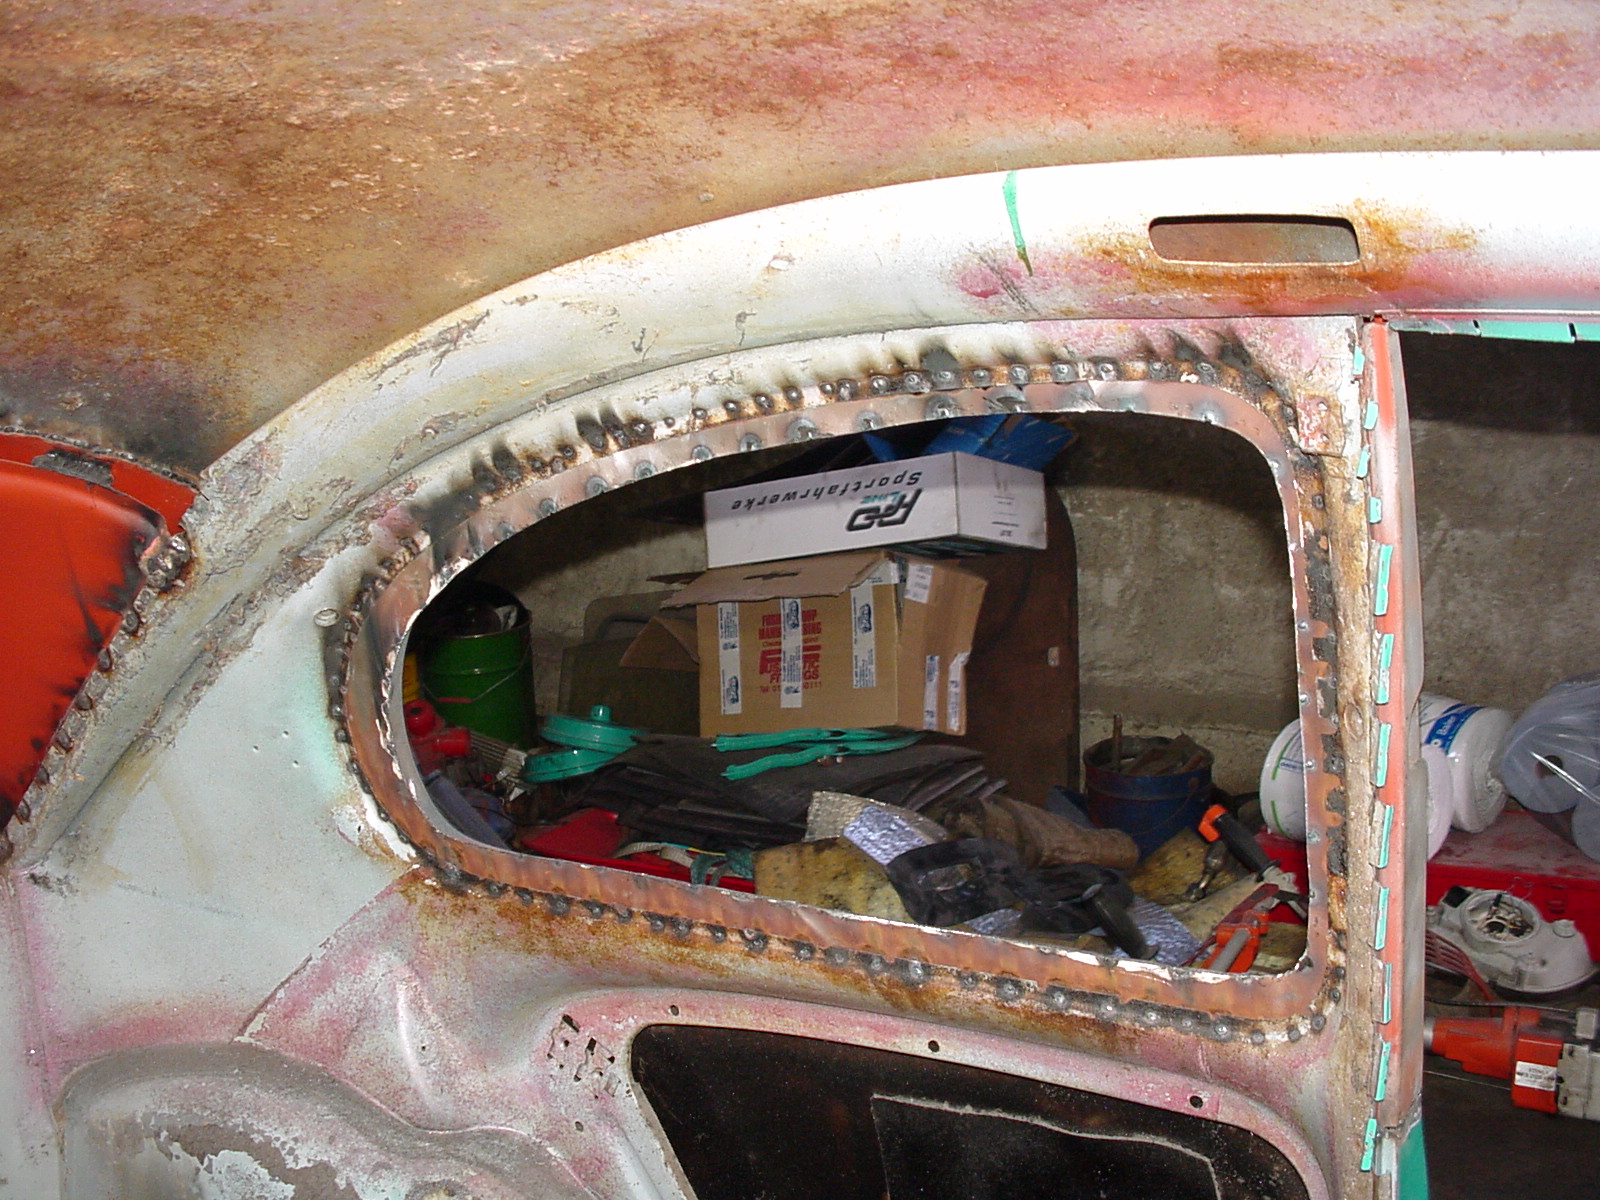
The finished rear side window. That's how much the inner panel had to be extended to bring the panel edges together.
Roof chop — part 1
If you landed directly on this page from a link on another site, it's probably worth reading the preceding couple of pages first to get some idea of what all this is about :)
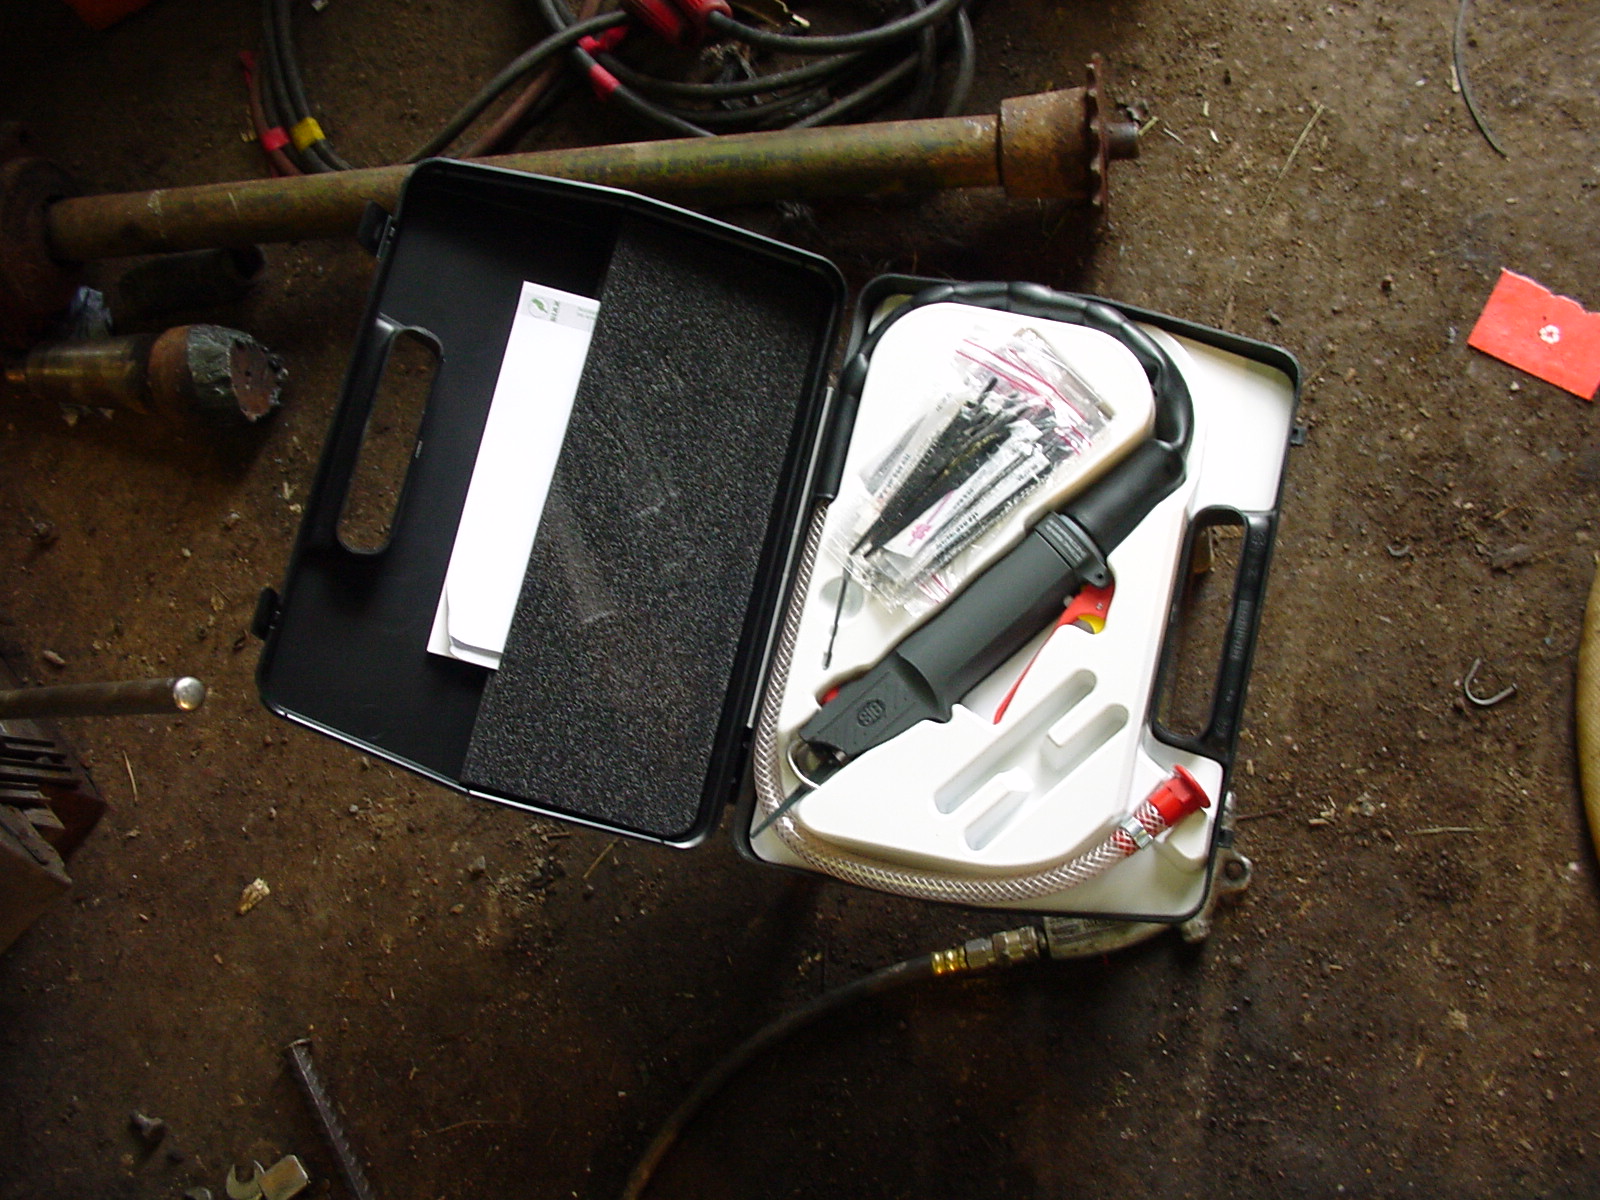
Before starting the actual chop, we bought an indispensable tool: a body saw. It cuts sheet metal neatly, even in tight spaces, without unnecessarily heating it up, and so on. Until then we'd done everything with a grinder...
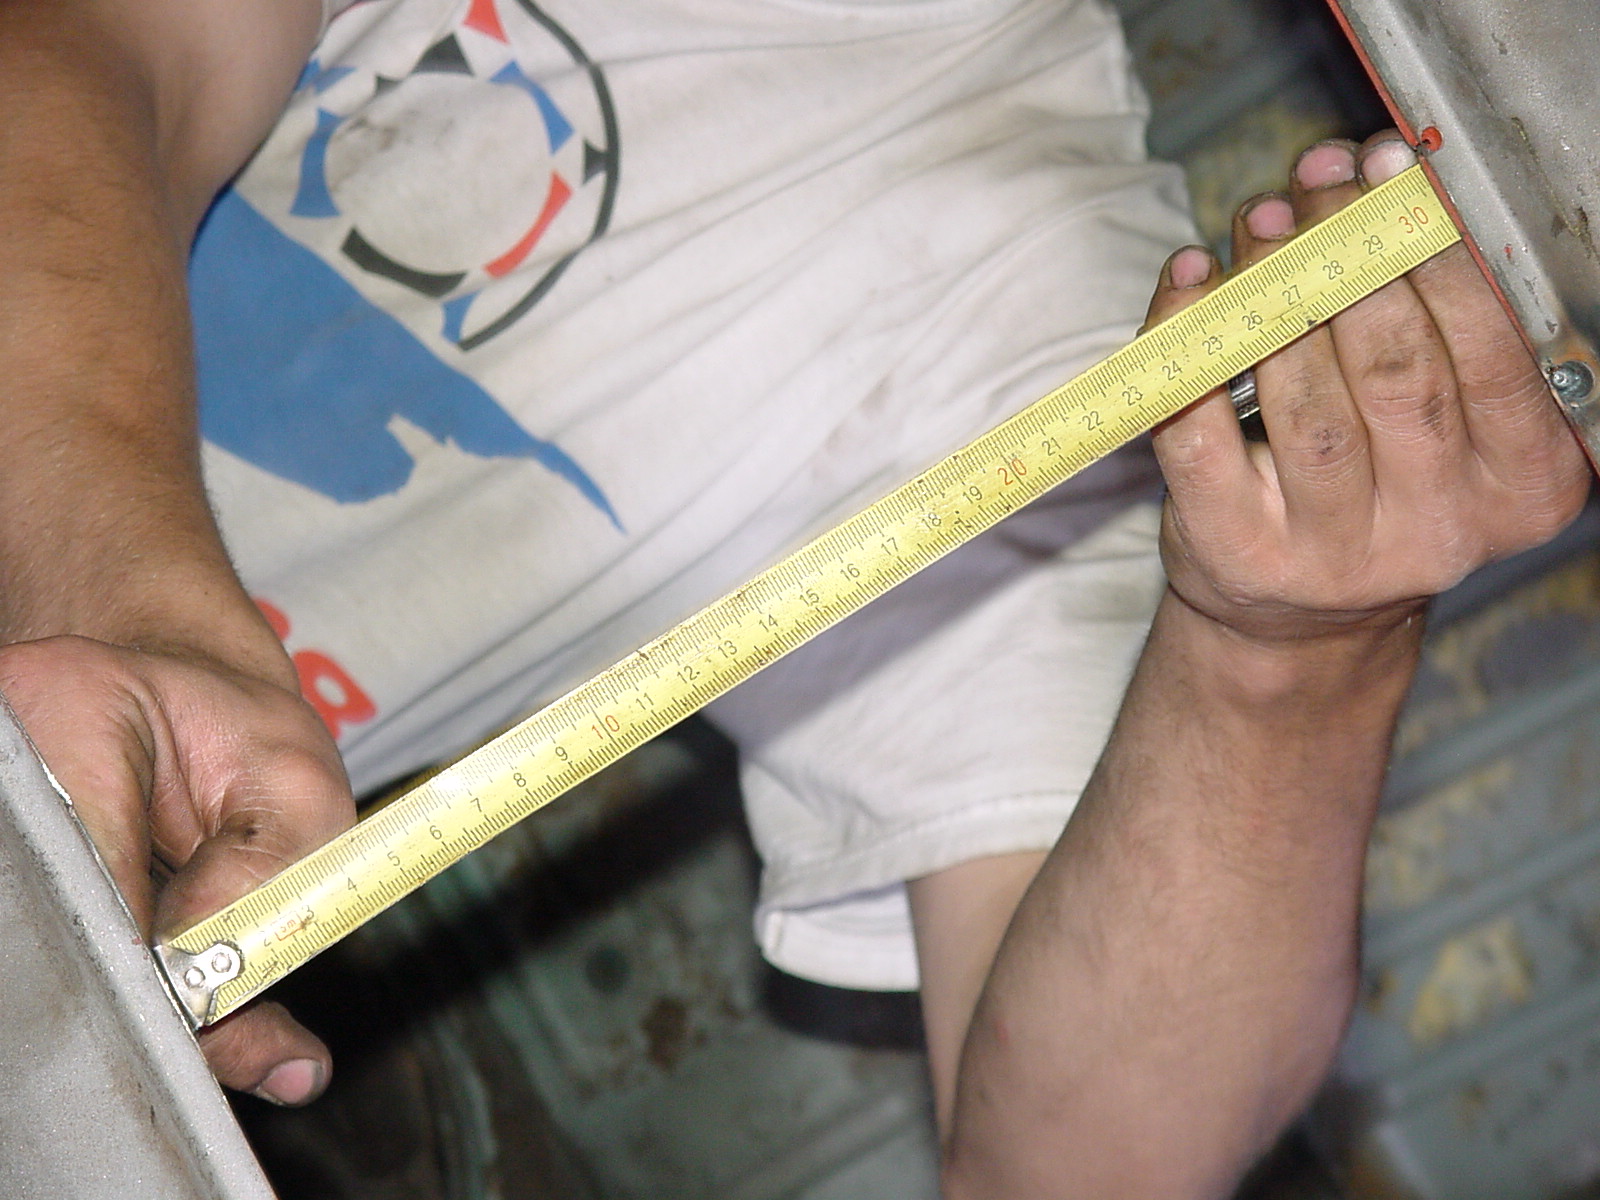
The windscreen height before chopping. We reckoned this was the measurement to use for the legally permitted 16% reduction...
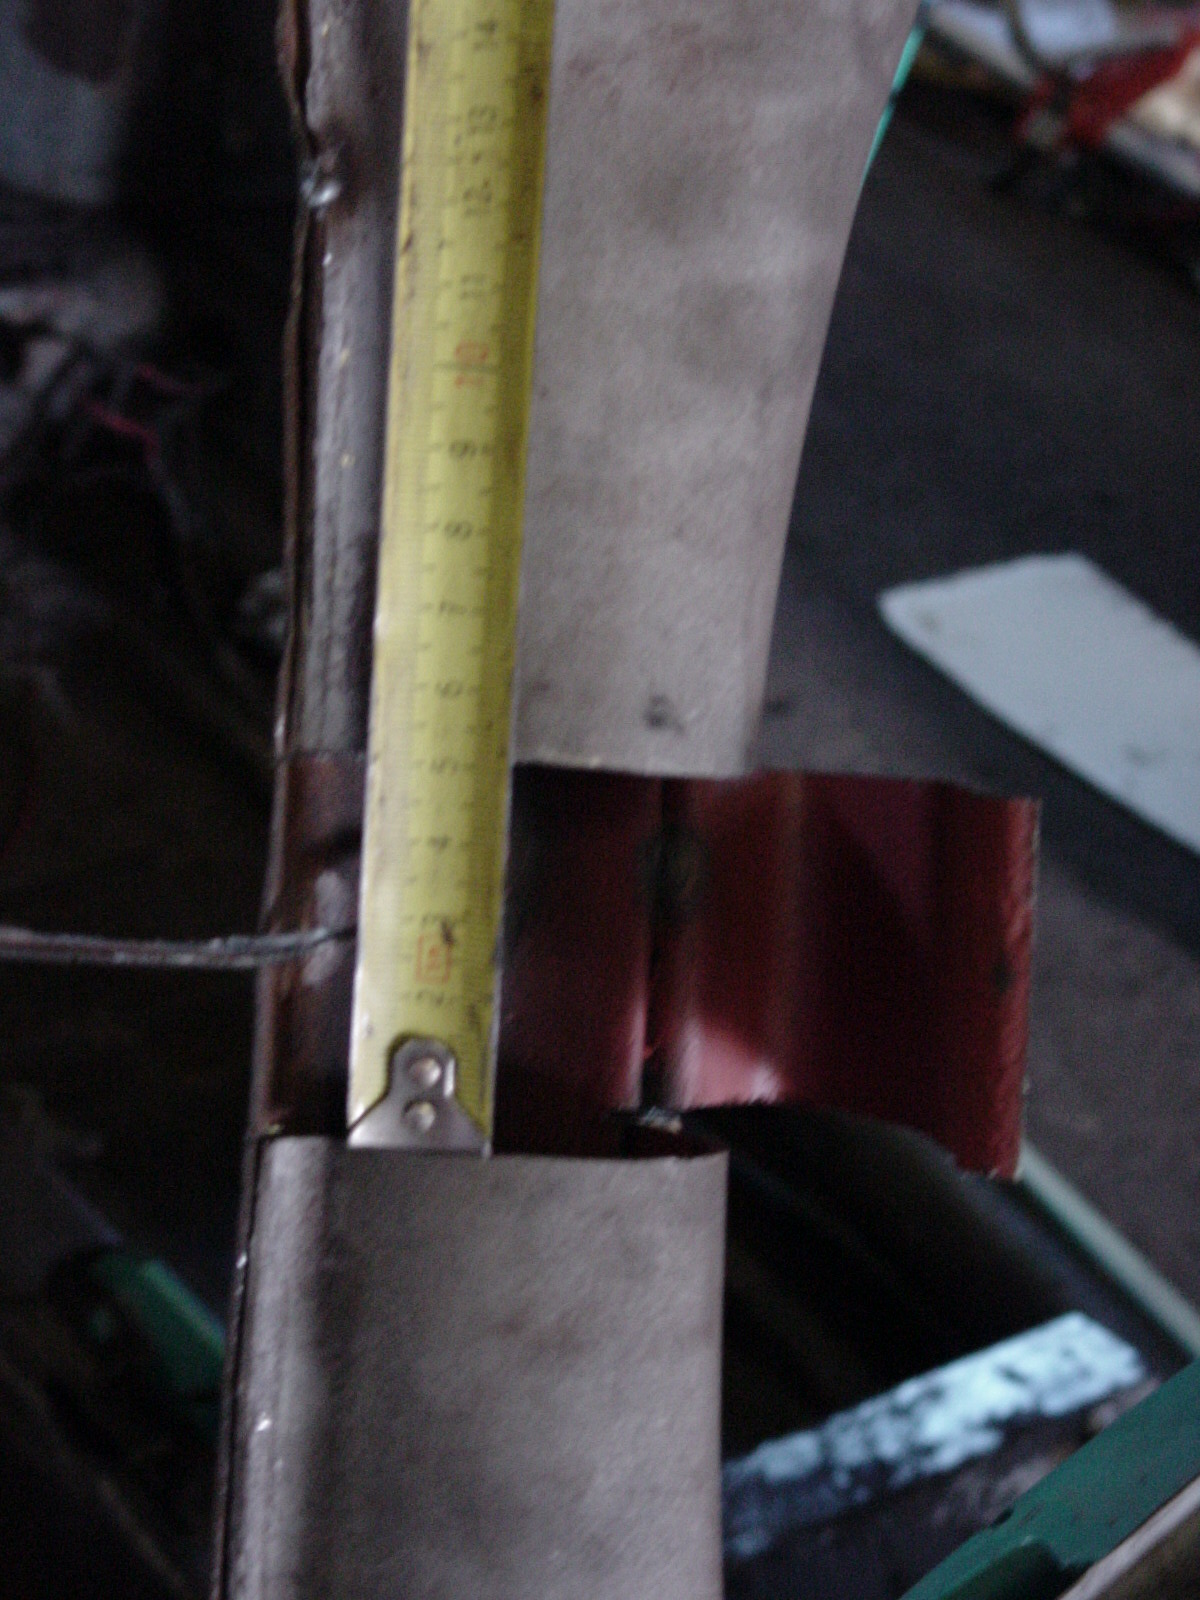
...which is about 5 cm measured along the pillar, as shown here. This was the first test of the new saw. First it neatly split the windscreen pillar...
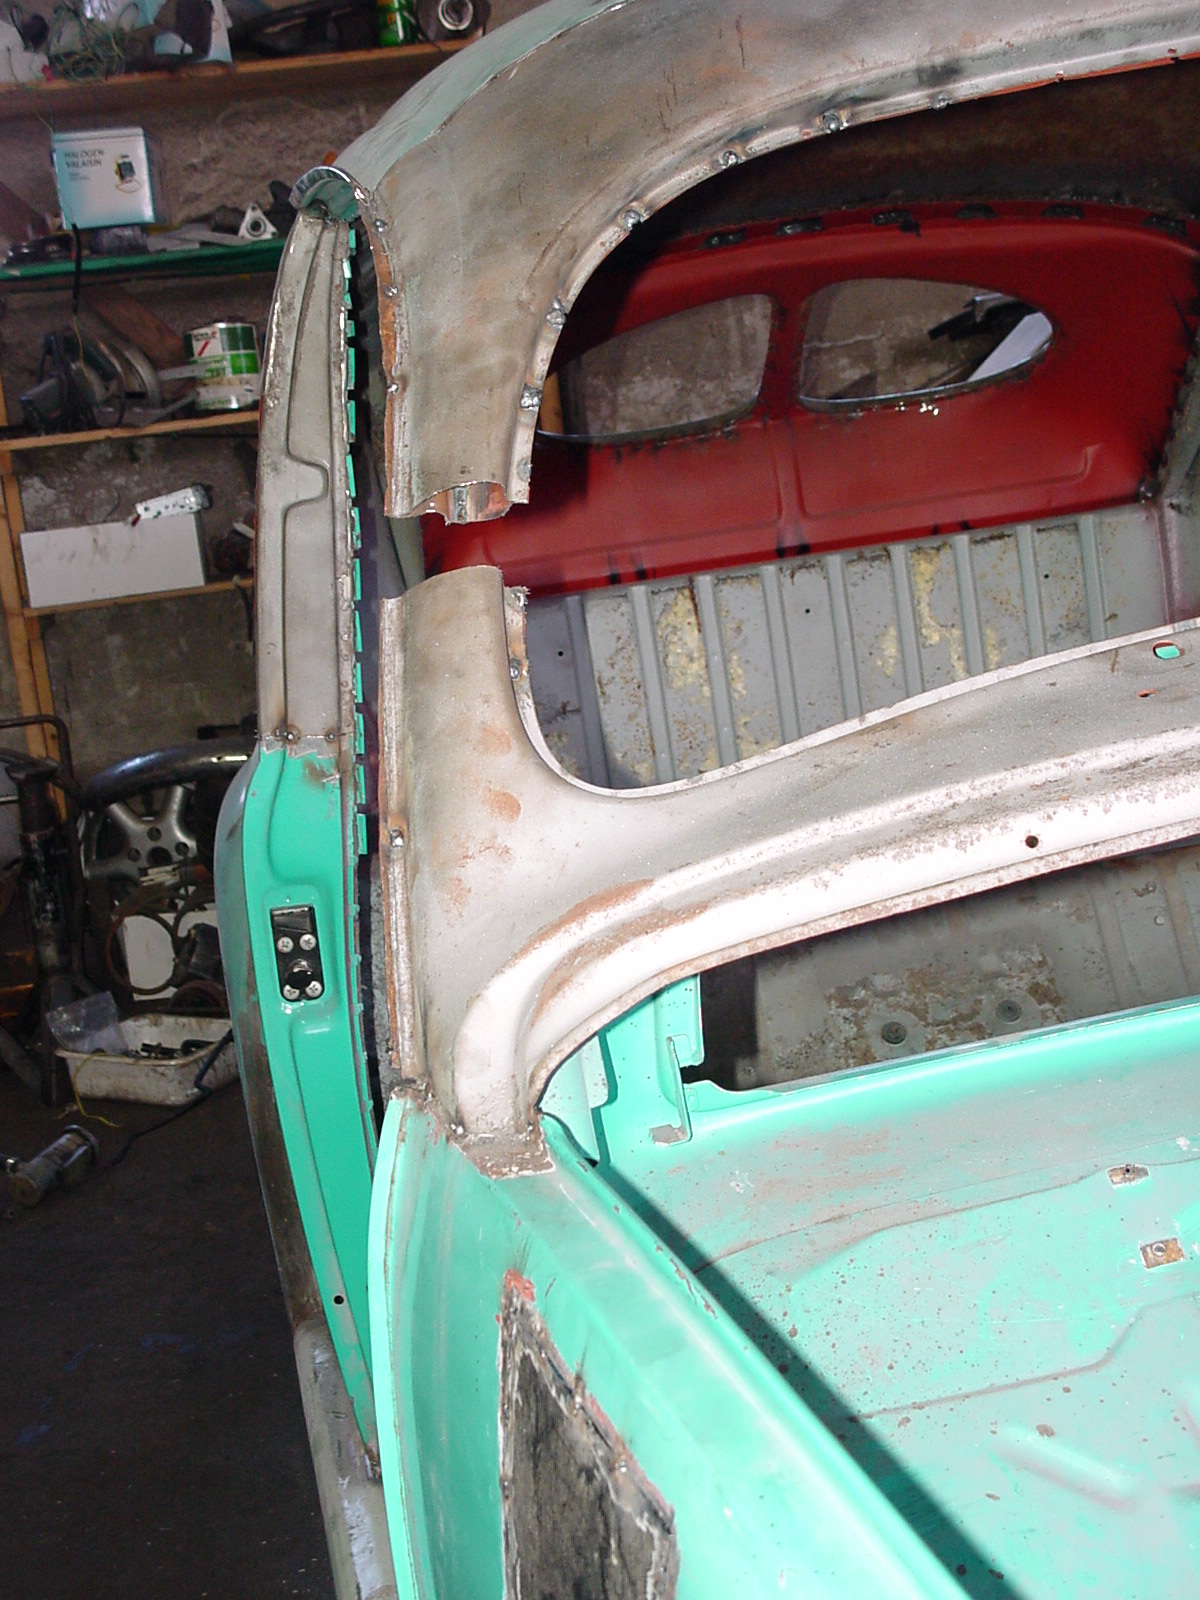
...and then cut right through it. As you can already see, the ends won't meet if you simply bend the roof down. We'd chosen a chopping method that leaves the rear at its original height and tilts the front of the roof downwards.
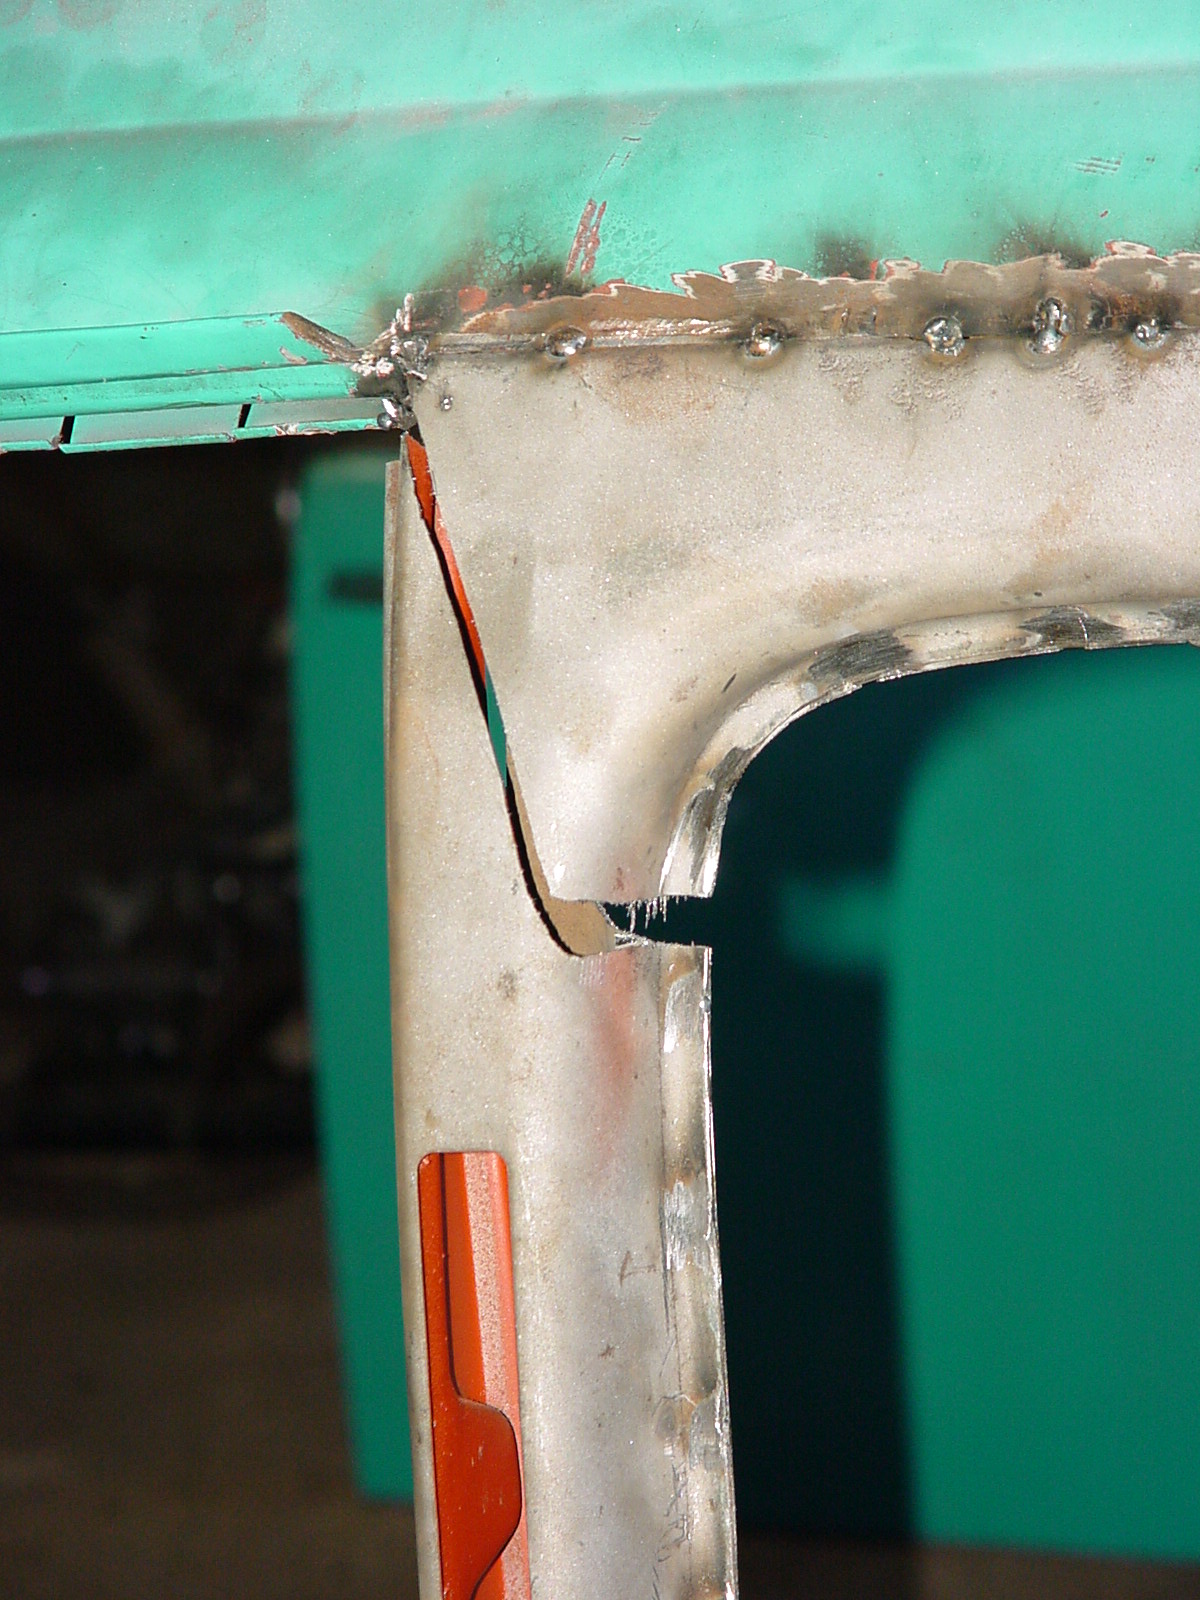
After the windscreen pillars, we cut the B-pillars. We chose an angled cut as shown, so tilting the roof wouldn't tilt the pillar. Cutting it in the middle would have put the top part at an angle, leaving a bend in the pillar.
Roof chop — part 2
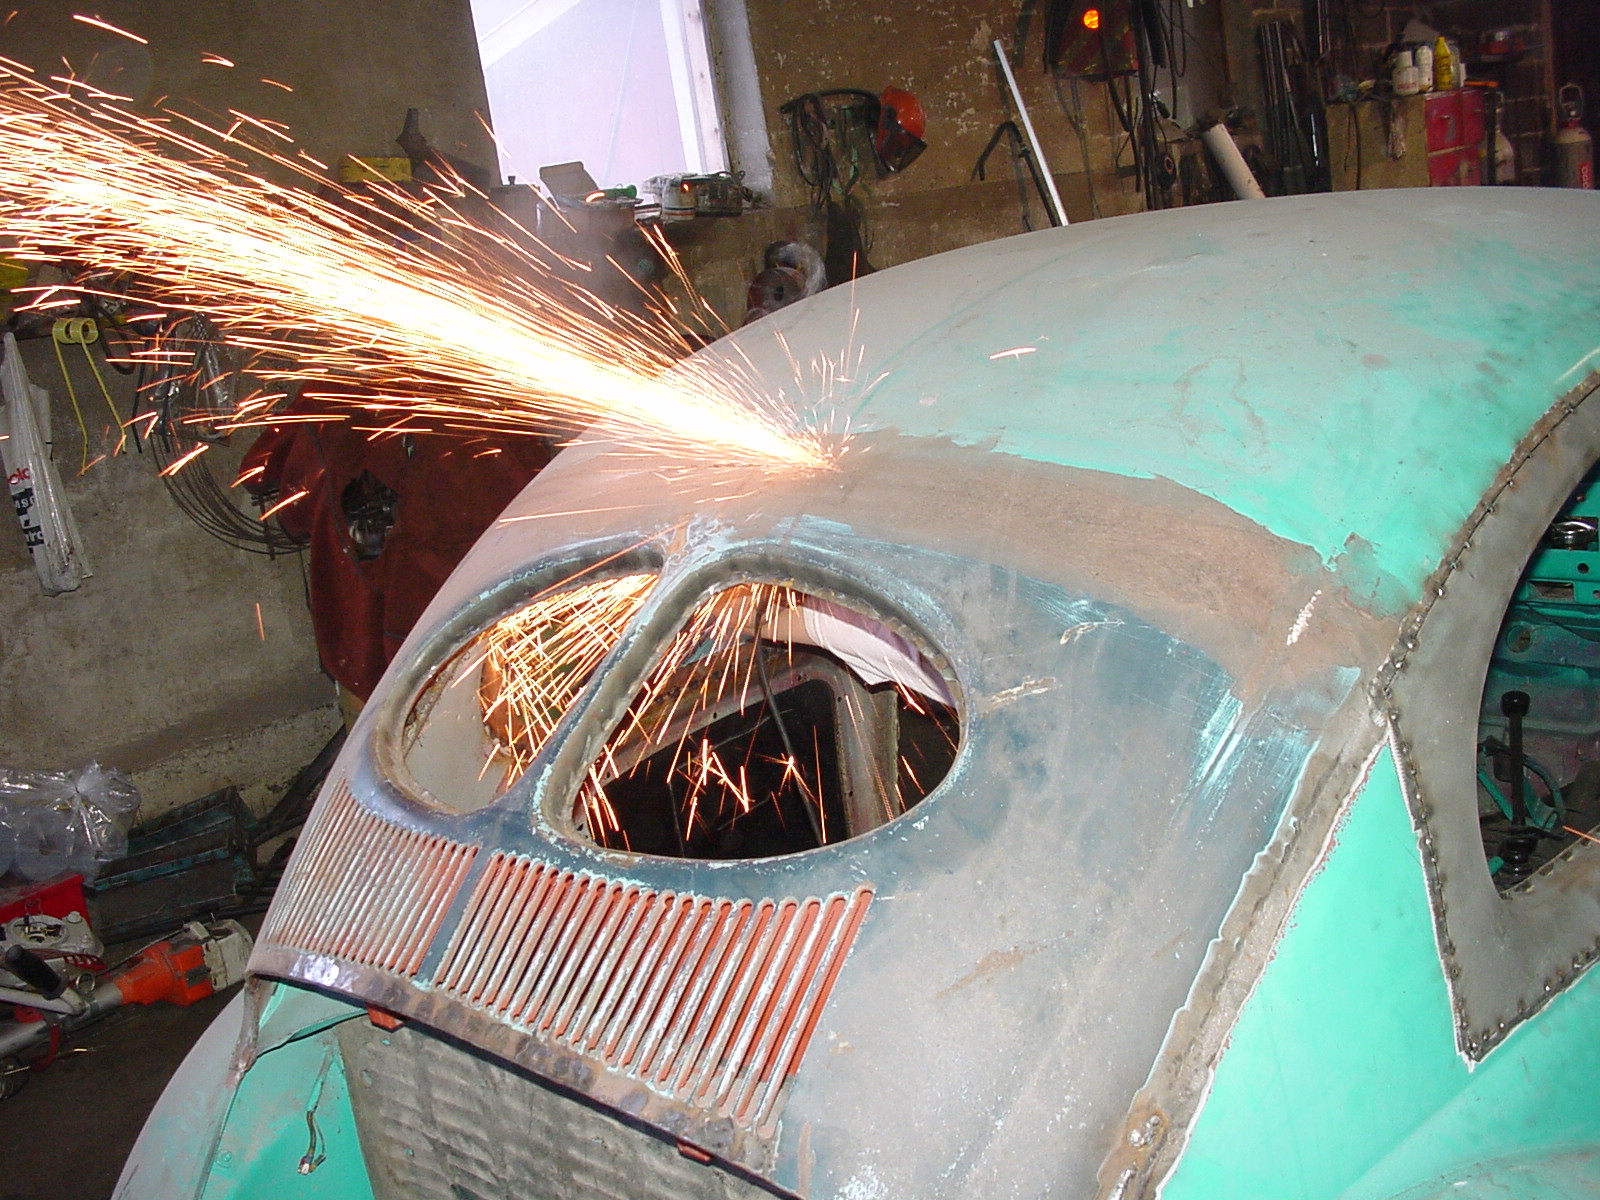
And finally, opening up the seam we'd already welded and even roughly filled once... The grinder came out again here, as this cut wasn't so critical...
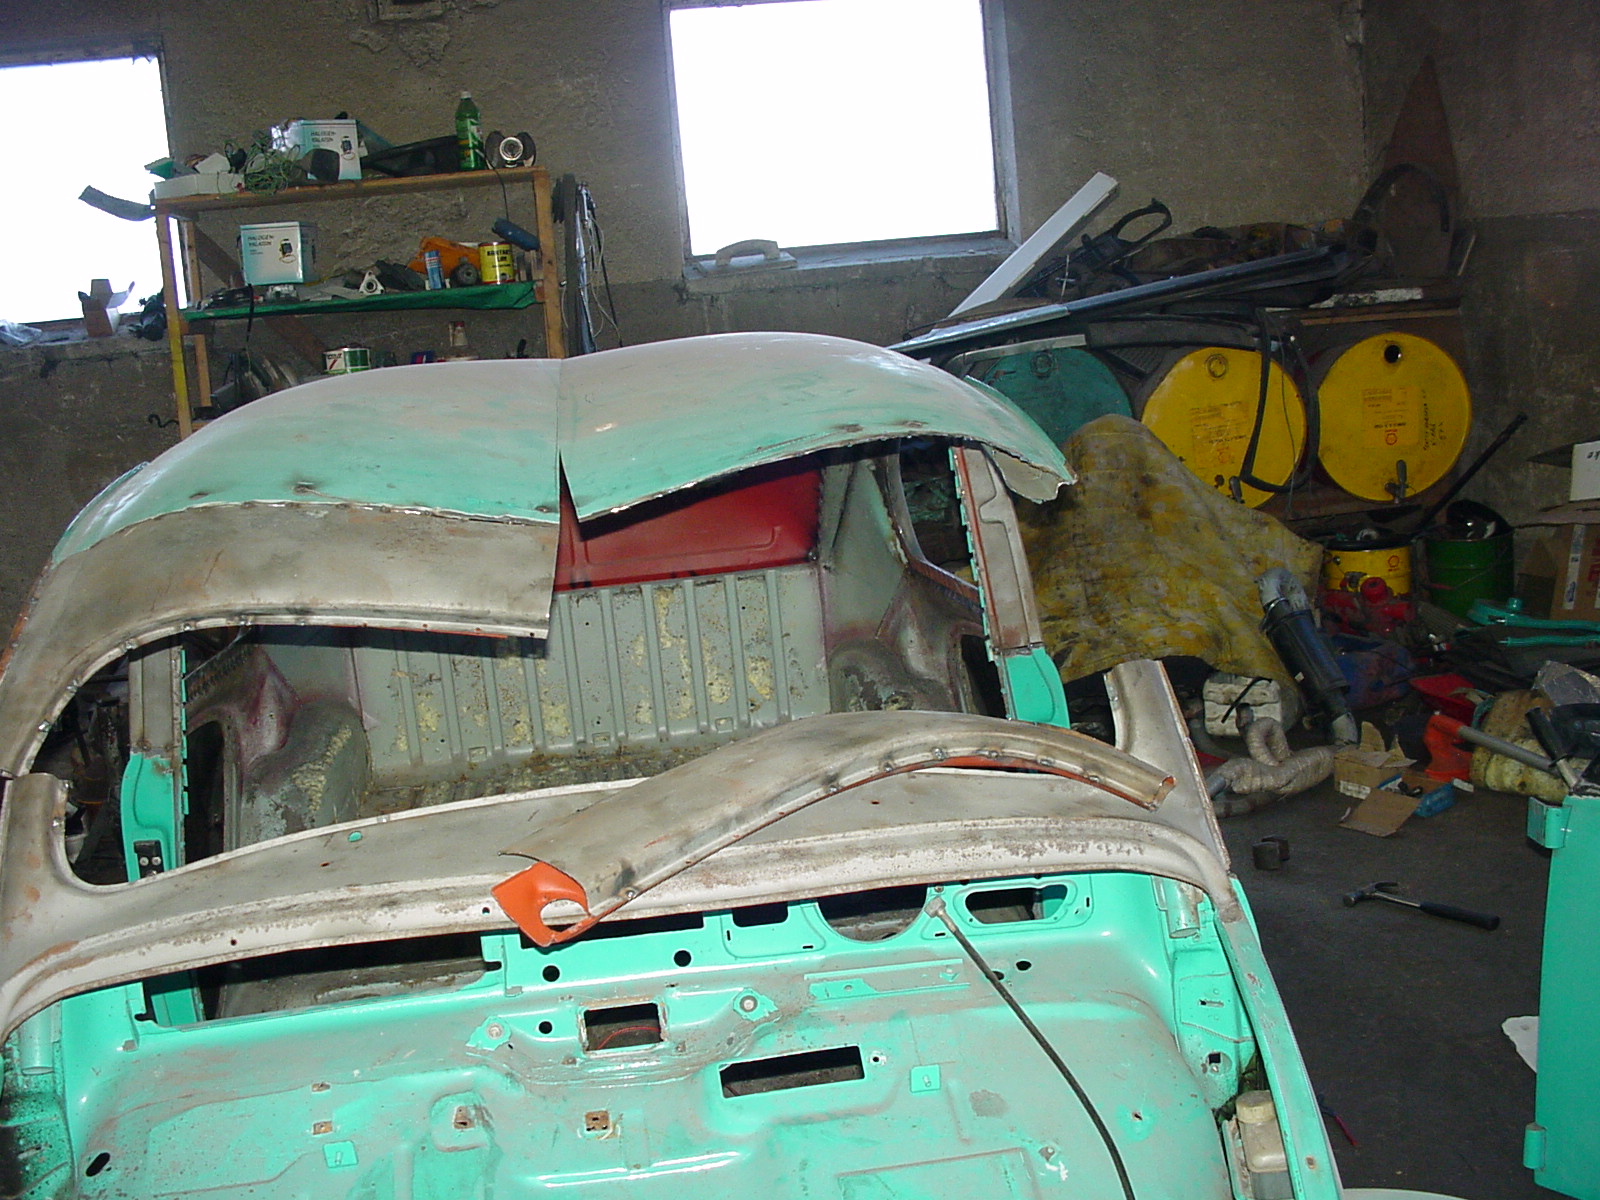
Because the pillars are angled, the roof eventually has to be cut into pieces to get the pillars to line up. We split it down the middle and across where we'd replaced the windscreen frame.
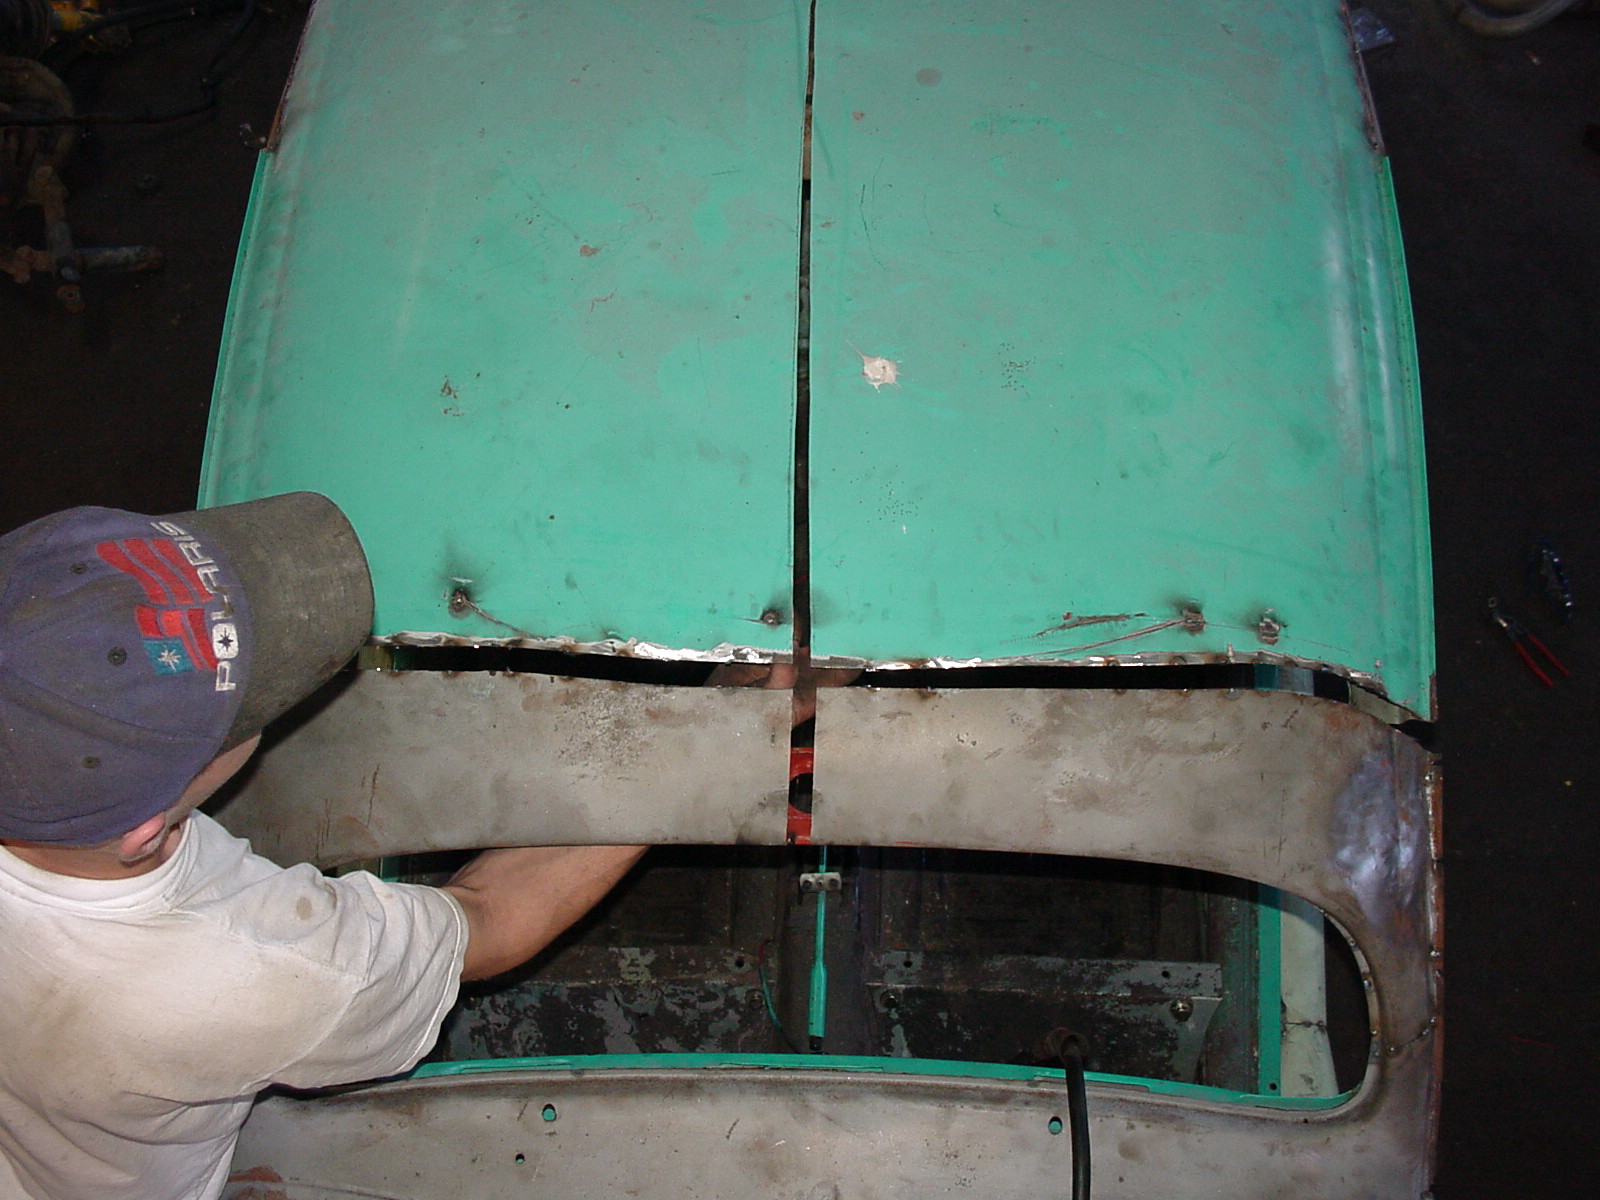
Then we tacked the windscreen frame into shape and started moving the roof sections into position. This clearly shows how much extra width and length a 5 cm chop at the front requires.
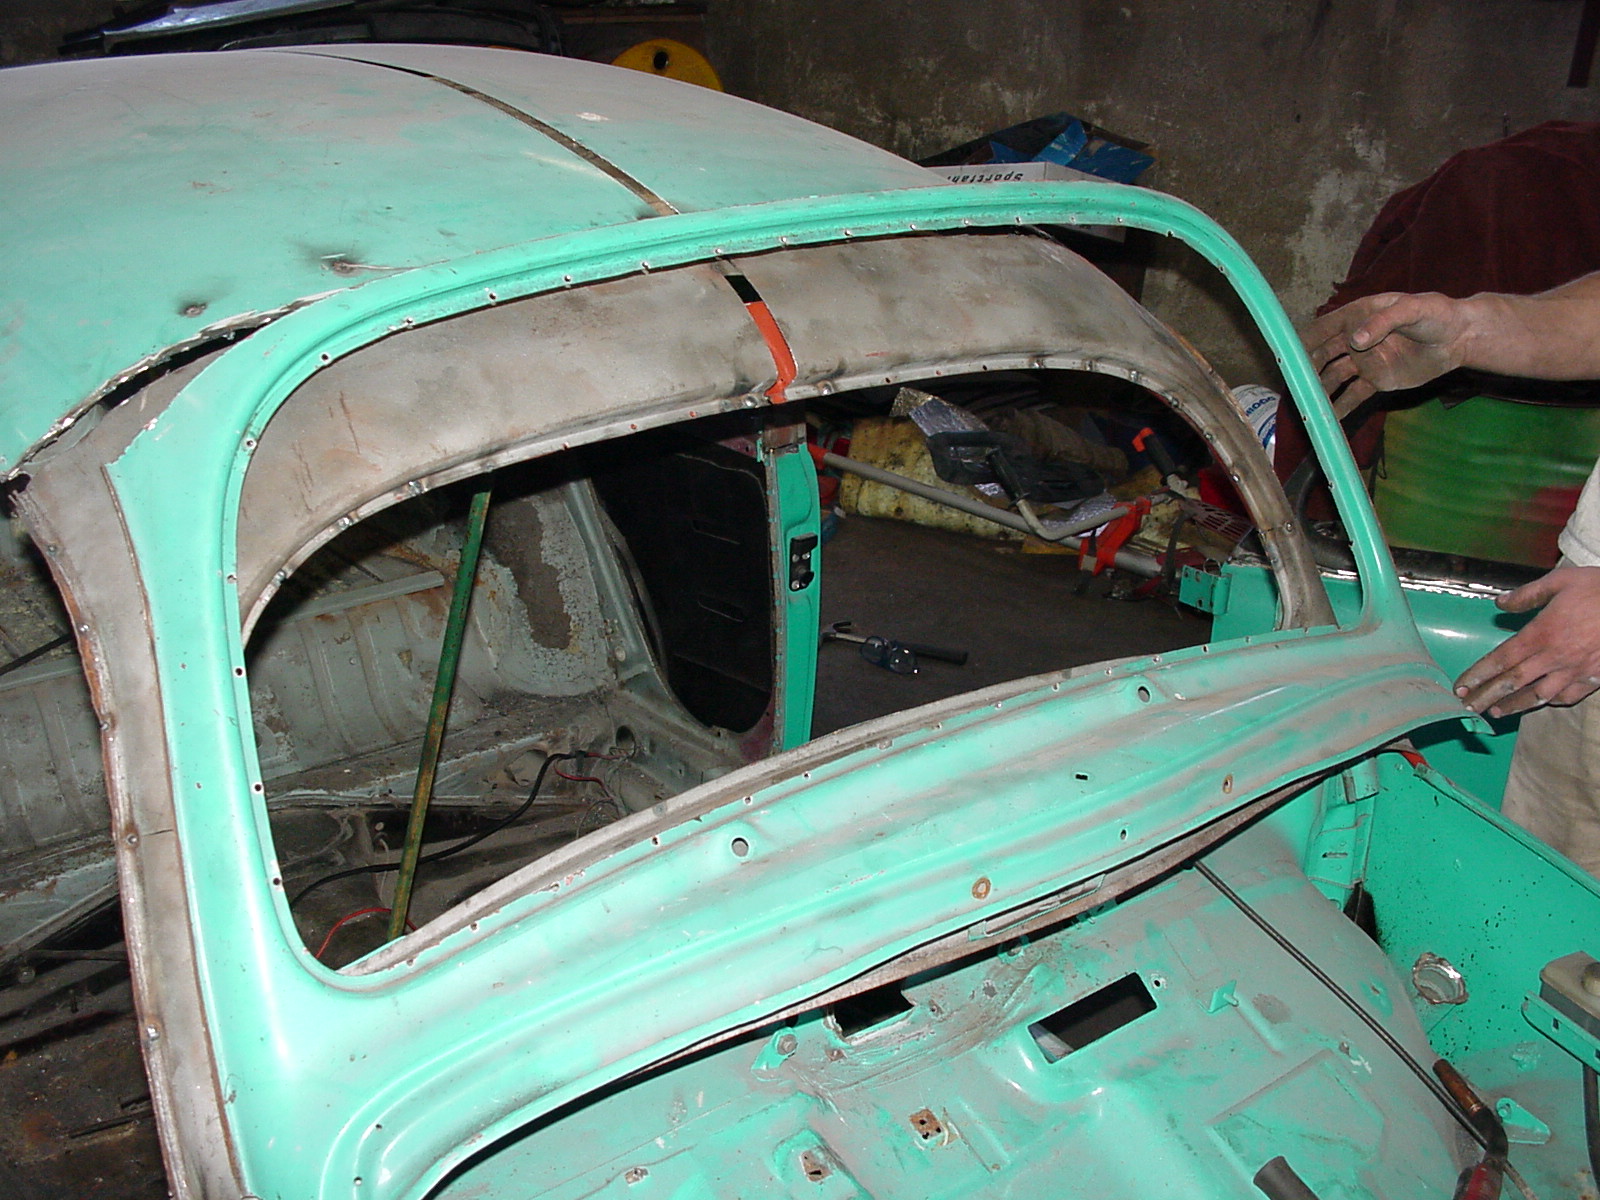
The original and new windscreen heights. Quite a dramatic change... There isn't a photo with a tape measure yet, but there will be!
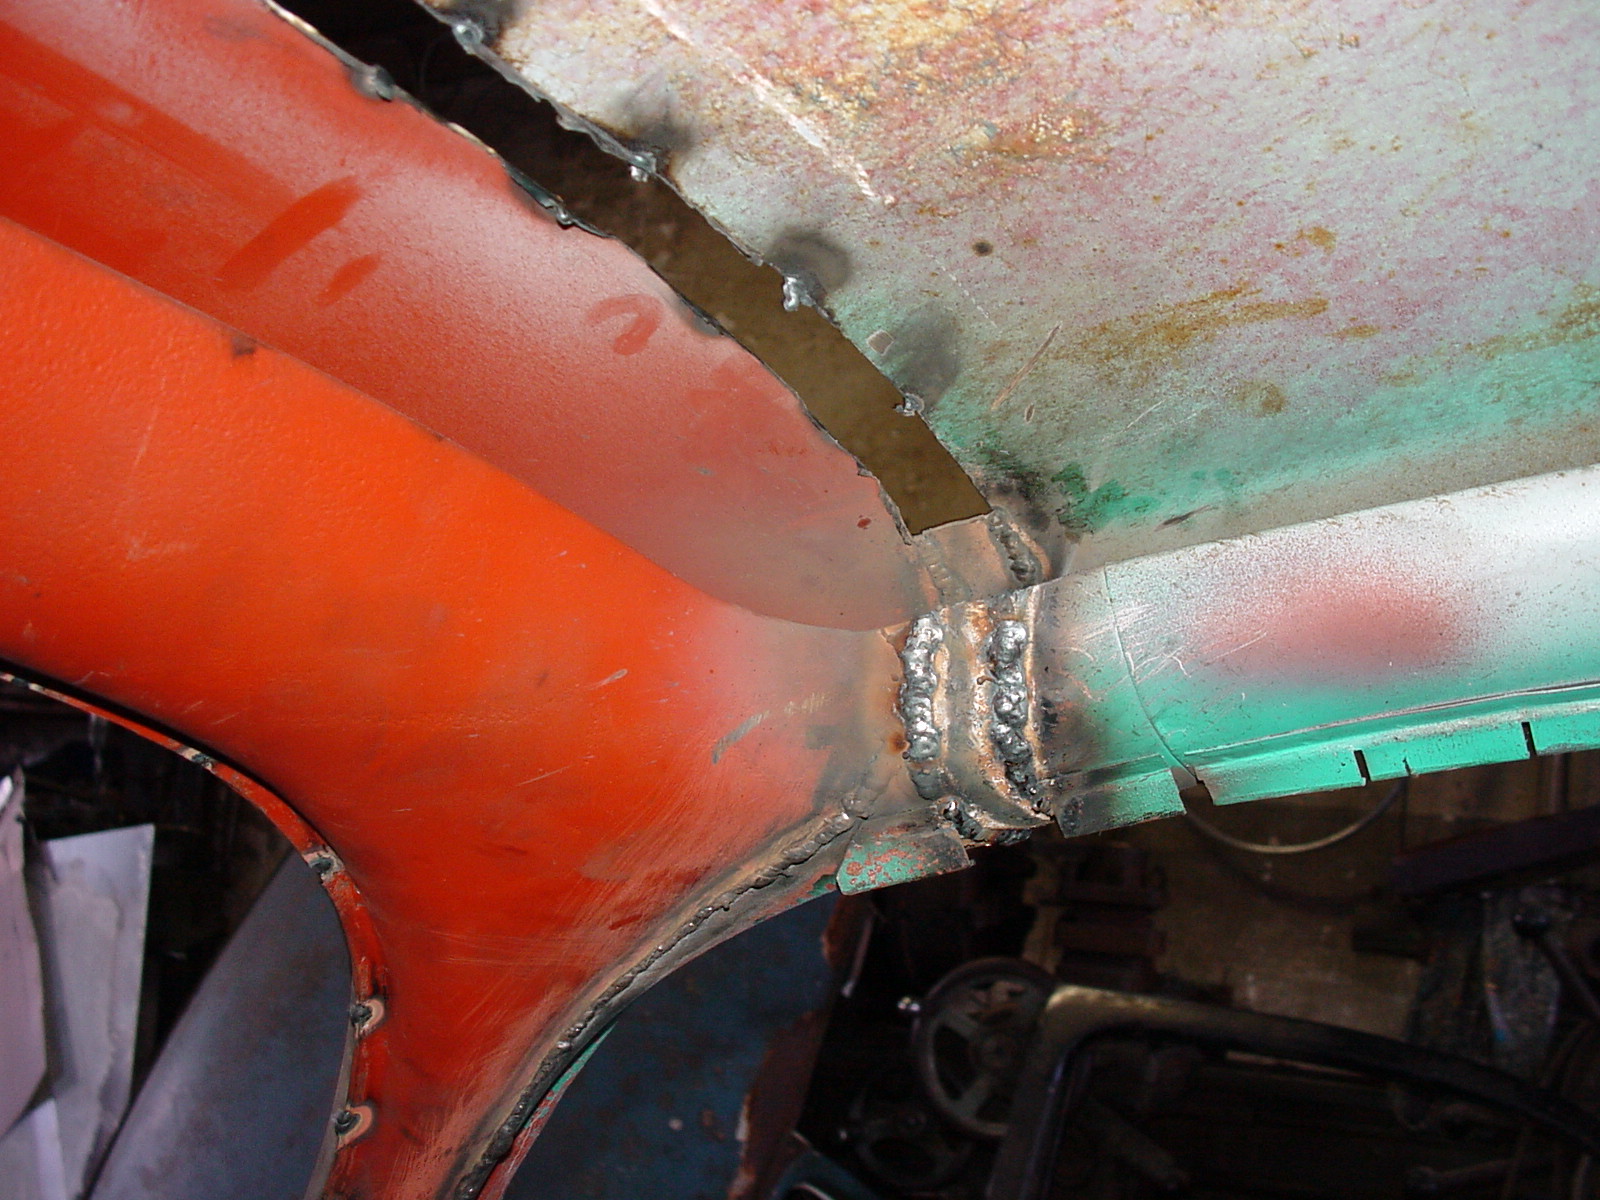
The inside welded up. After this the roof no longer flexes easily in any direction.
Roof chop — part 3
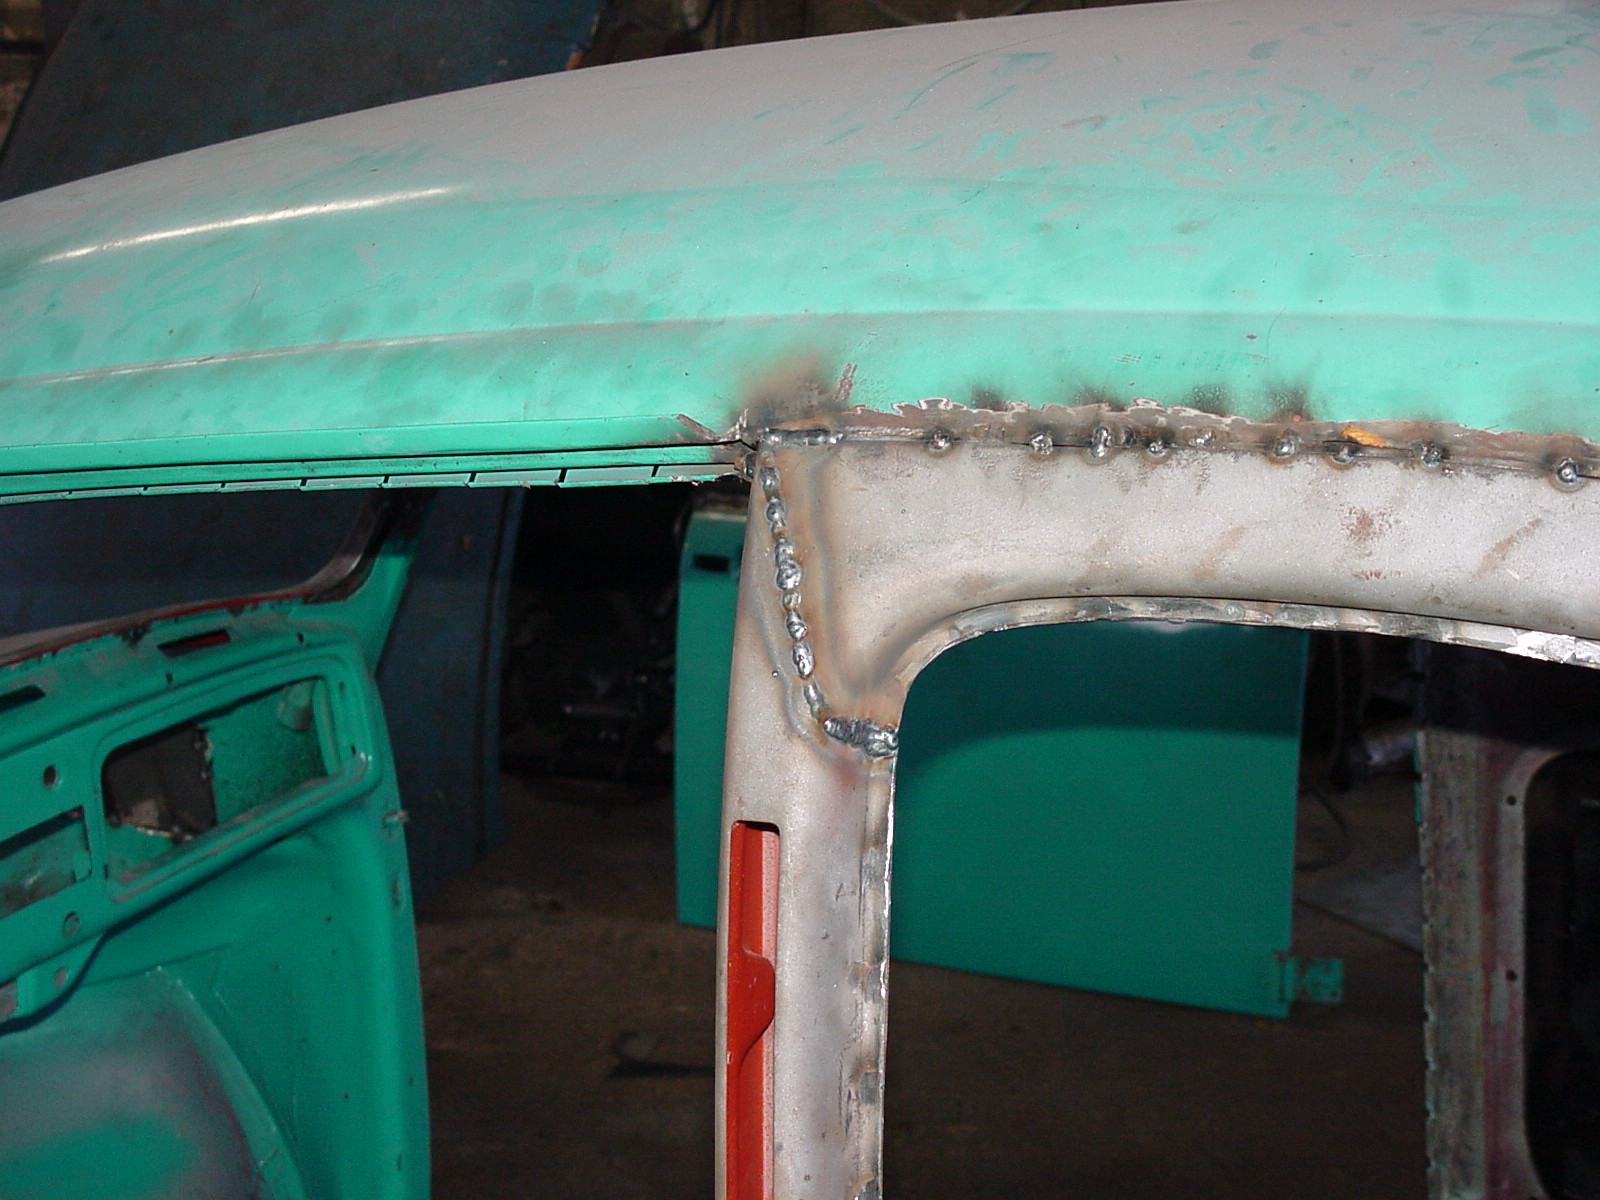
The B-pillar gets welded too...
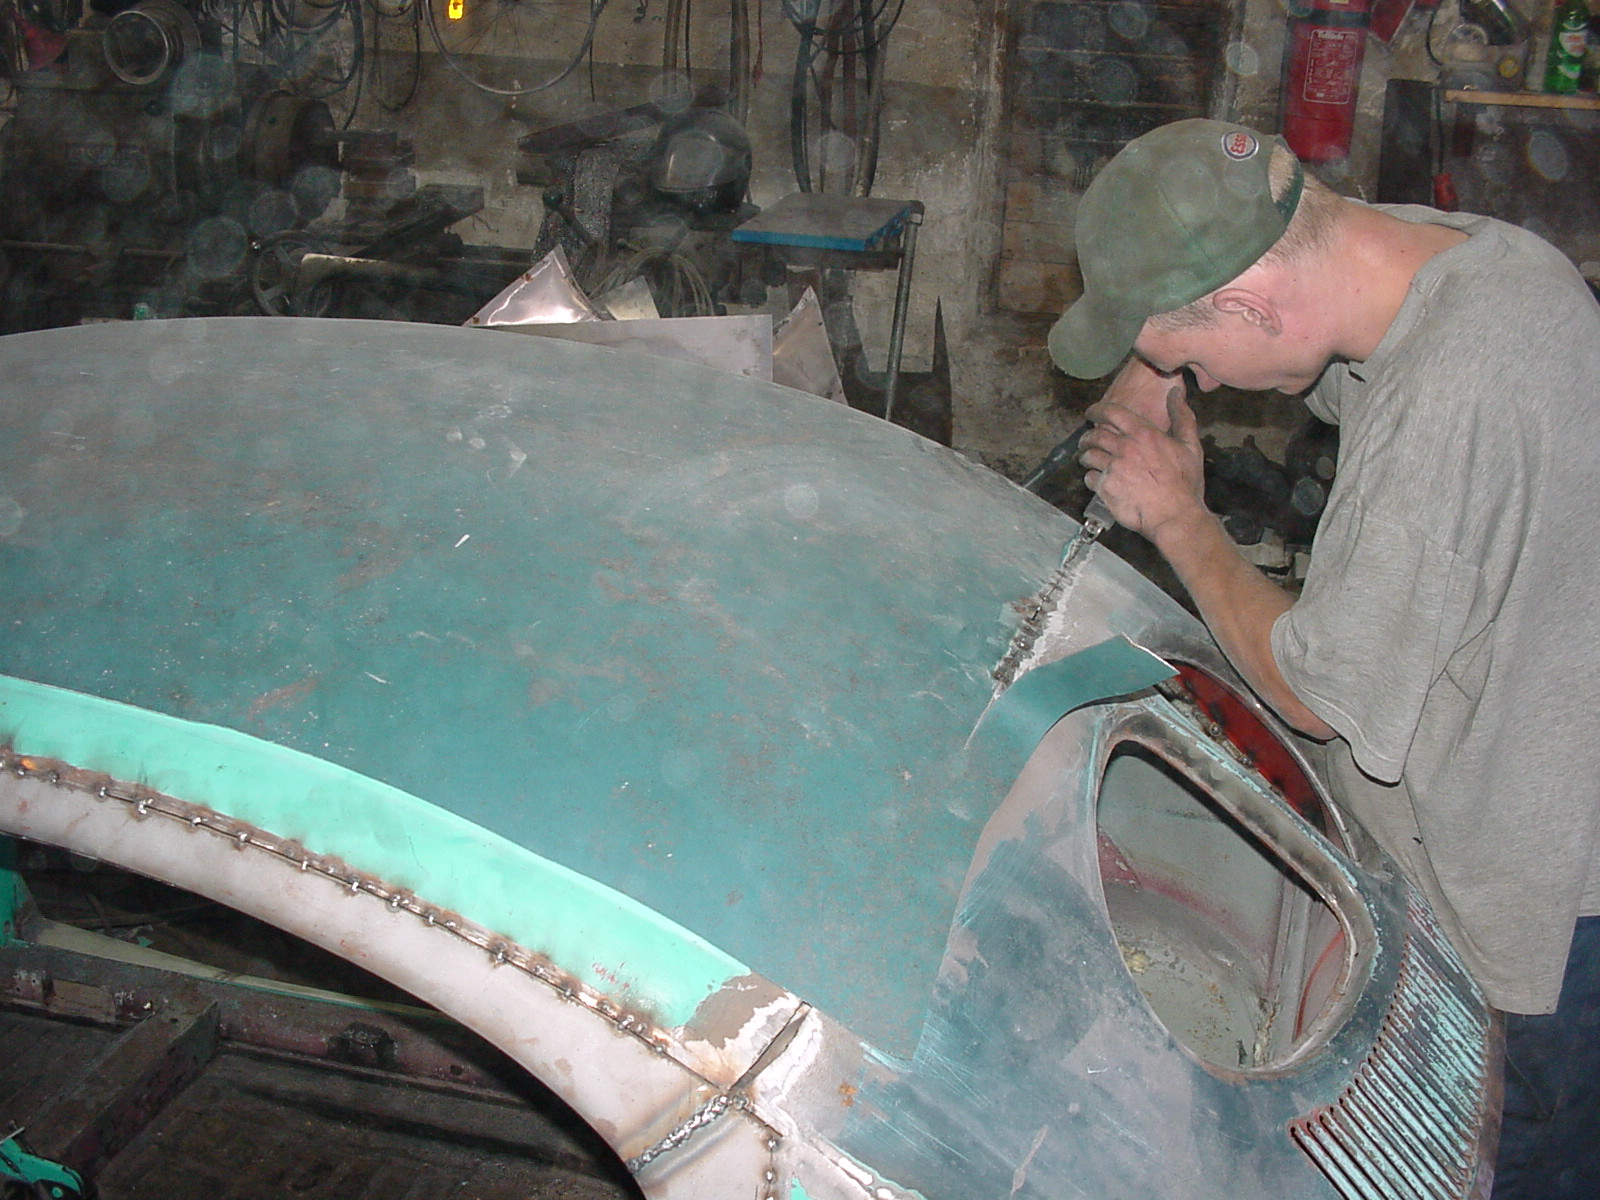
...and then we replace the roof skin as well. We decided it would be much easier to get the shape right using an intact, already shaped roof skin than by filling the strips left in the middle of the roof. The total length of weld is exactly the same this way. The saw is particularly good here: you can cut twenty centimetres or so, tack it, then carry on. It would be quite a juggling act with a grinder.
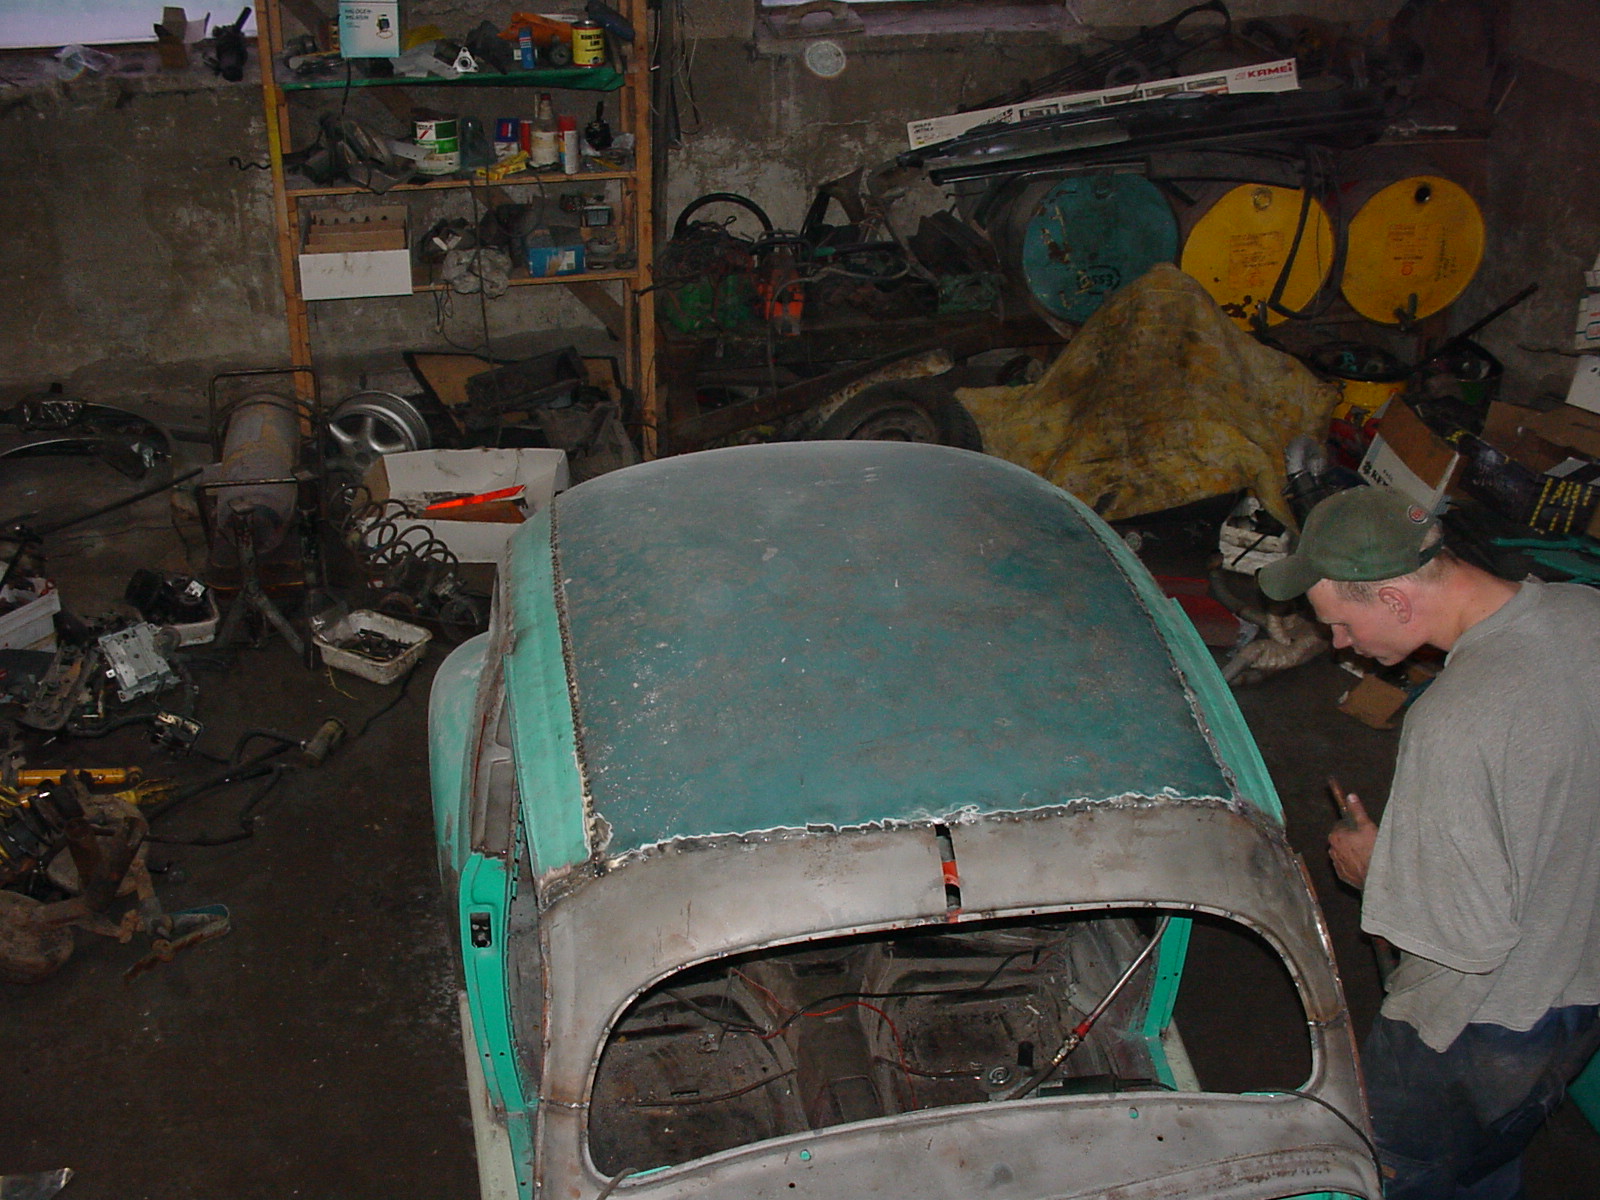
This picture clearly shows where the seams ended up.
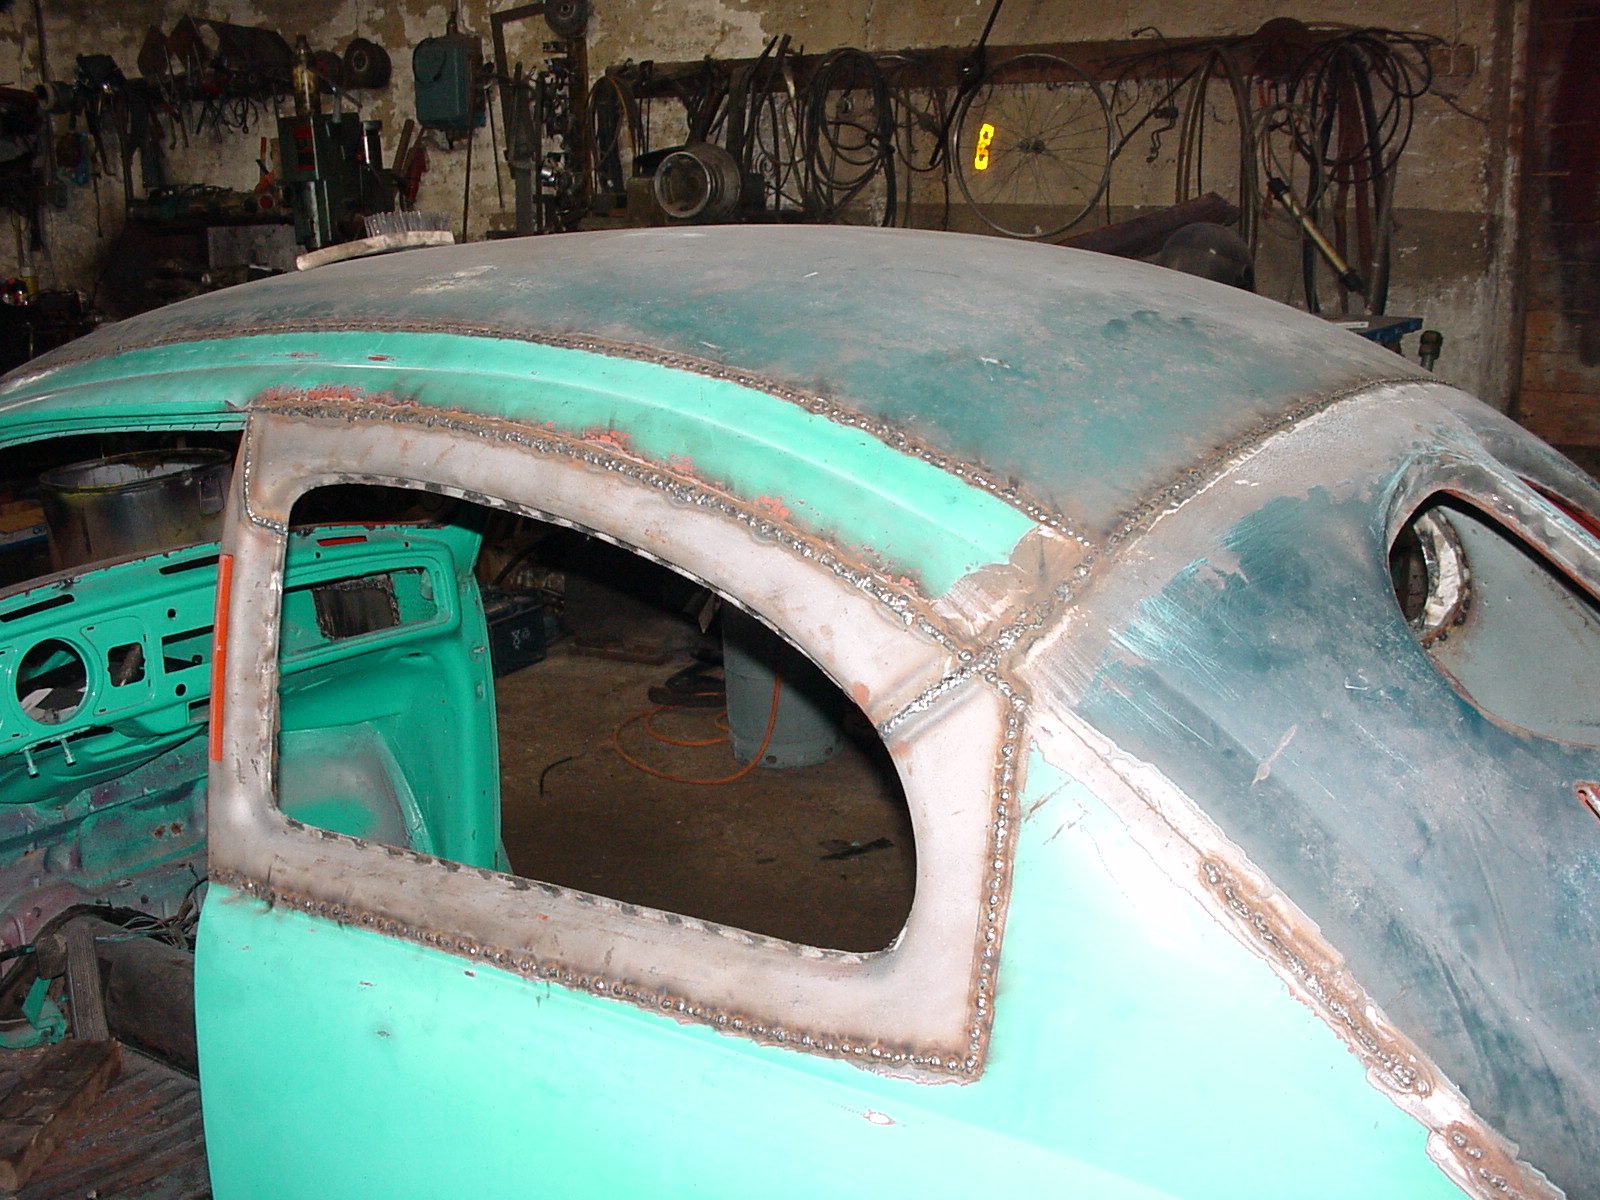
The roof welded. Still a few metres of weld to grind down...
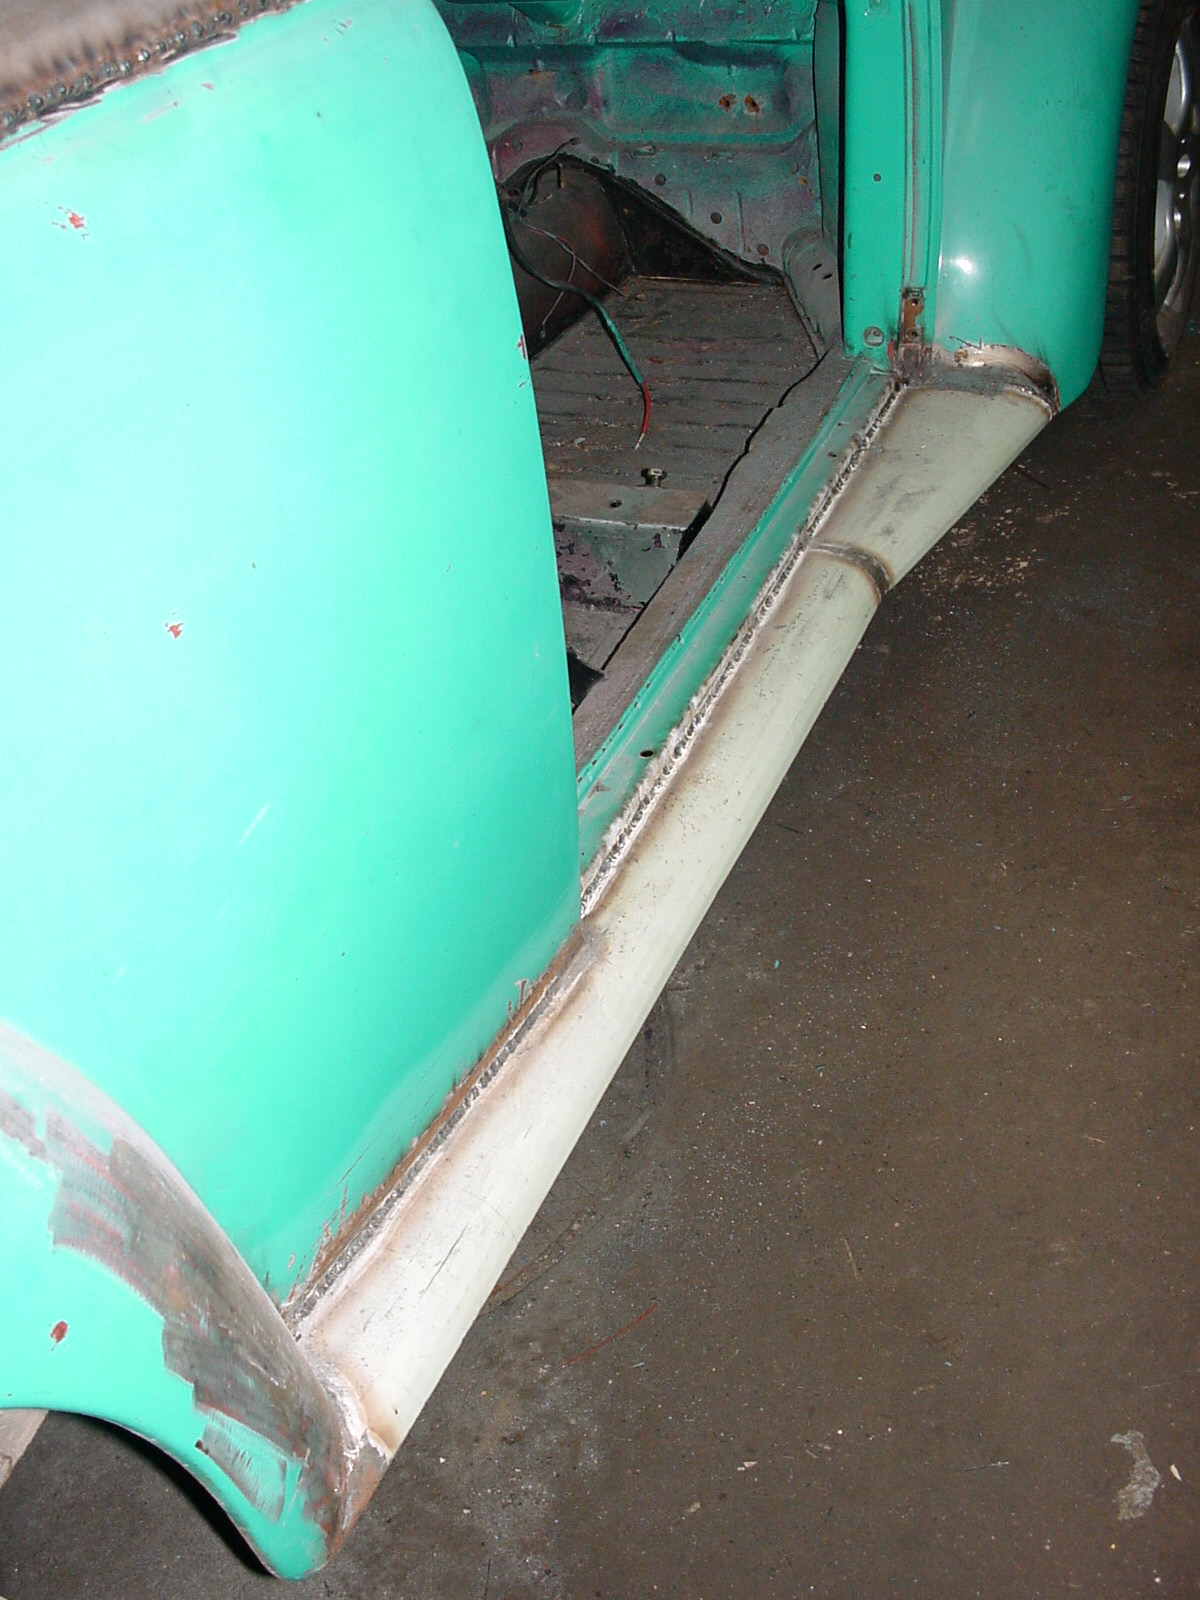
The running boards were now properly welded on too. Those need grinding as well...
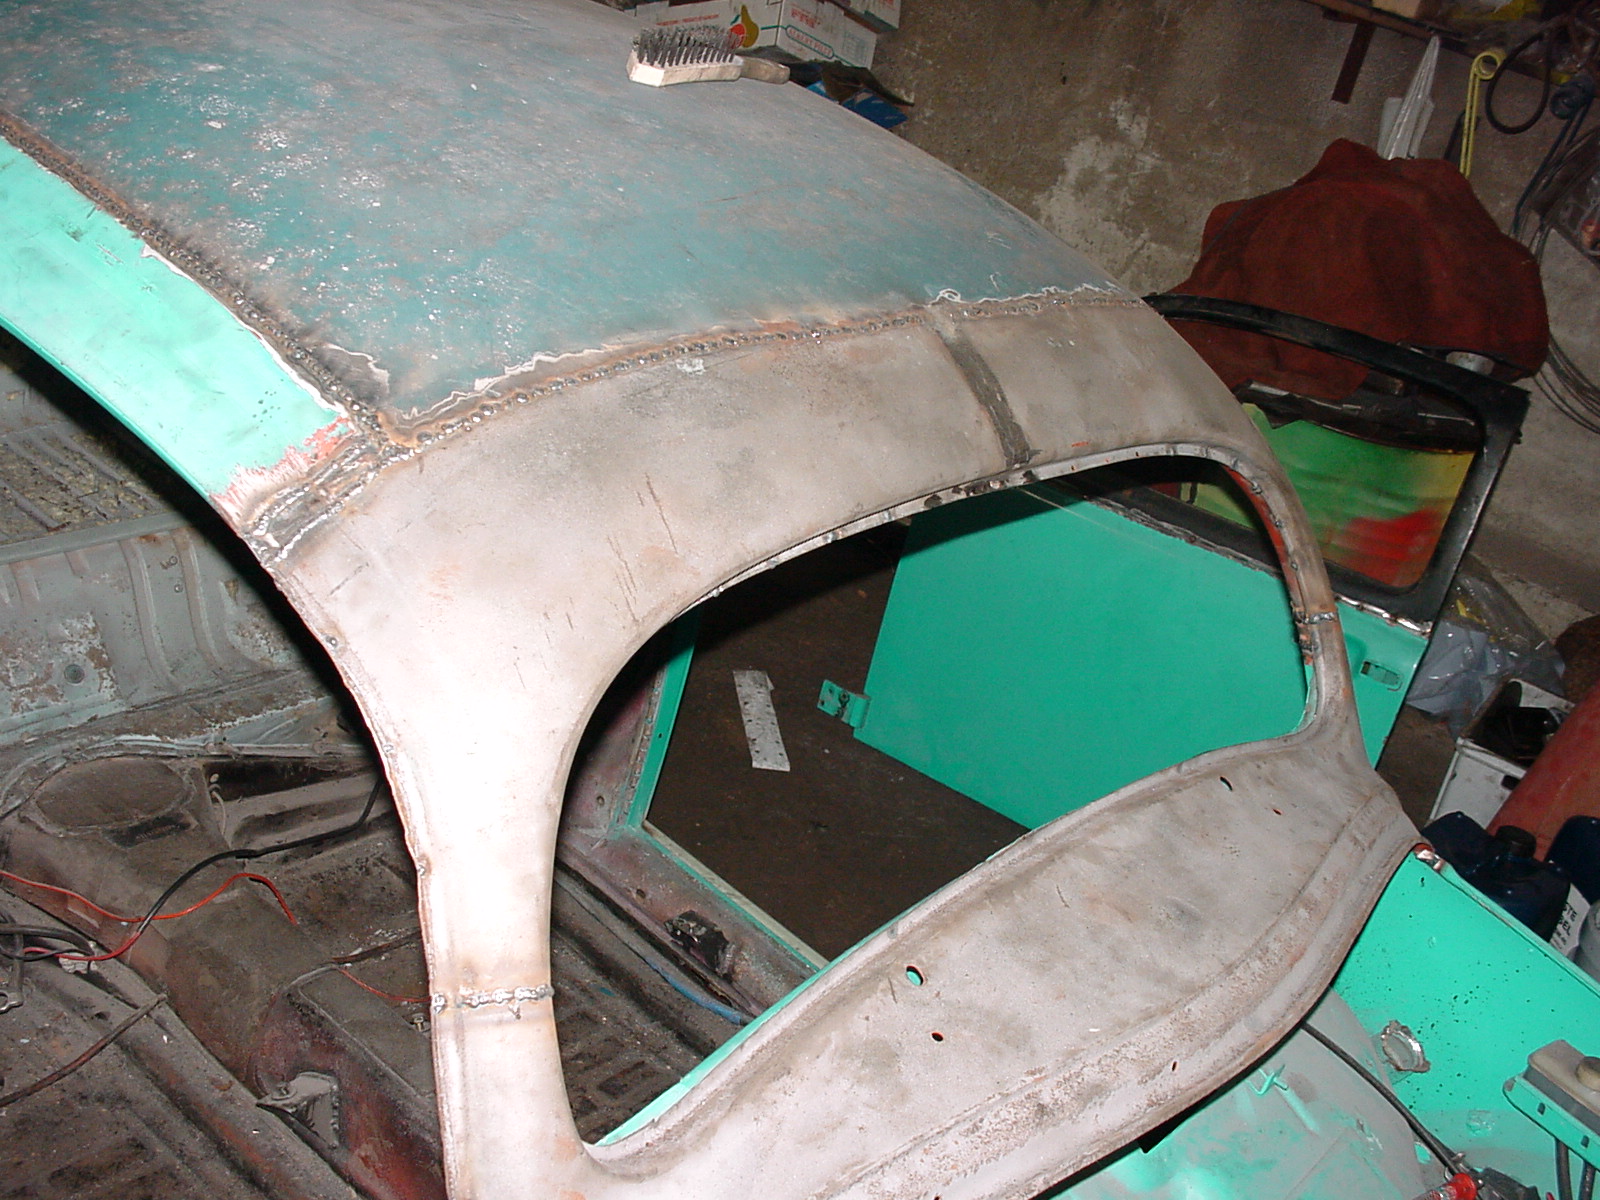
And the front. No end to the seams. As I write this in January 2002, the doors still haven't been chopped. Work has stalled again because of the Vento project. I really ought to get back to this soon if it's going to be driven next summer. (Later note: it wasn't.)
Slowly...
During winter 2001 I also decided to change the wheels. It needed something bigger! The Beetle's original bolt pattern is awkward, so that had to change.
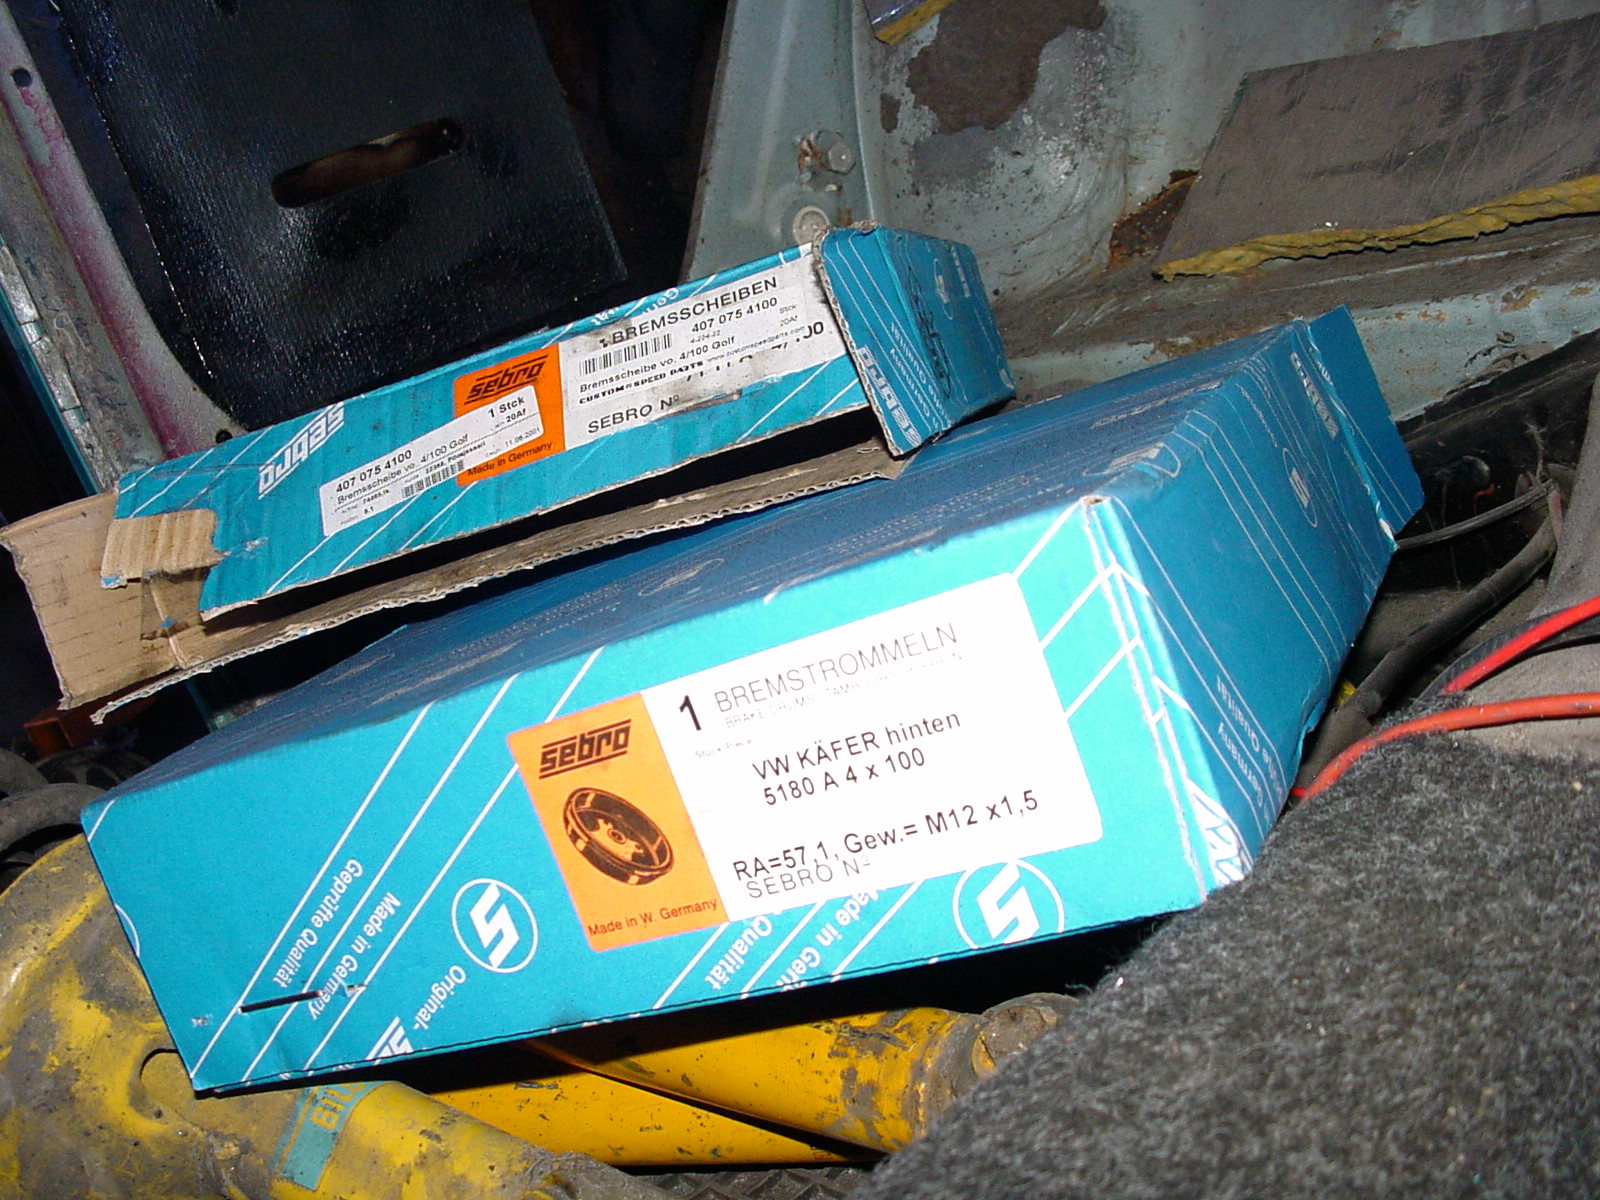
Through Ari Pihlajasaari I ordered new brake drums and discs with a 4x100 pattern, which seemed the most sensible choice at the time. It's very common on newer VWs and there are plenty of wheels available. Later I did wonder whether the Porsche pattern might have been best after all. Those Turbo wheels are just so ridiculously nice.
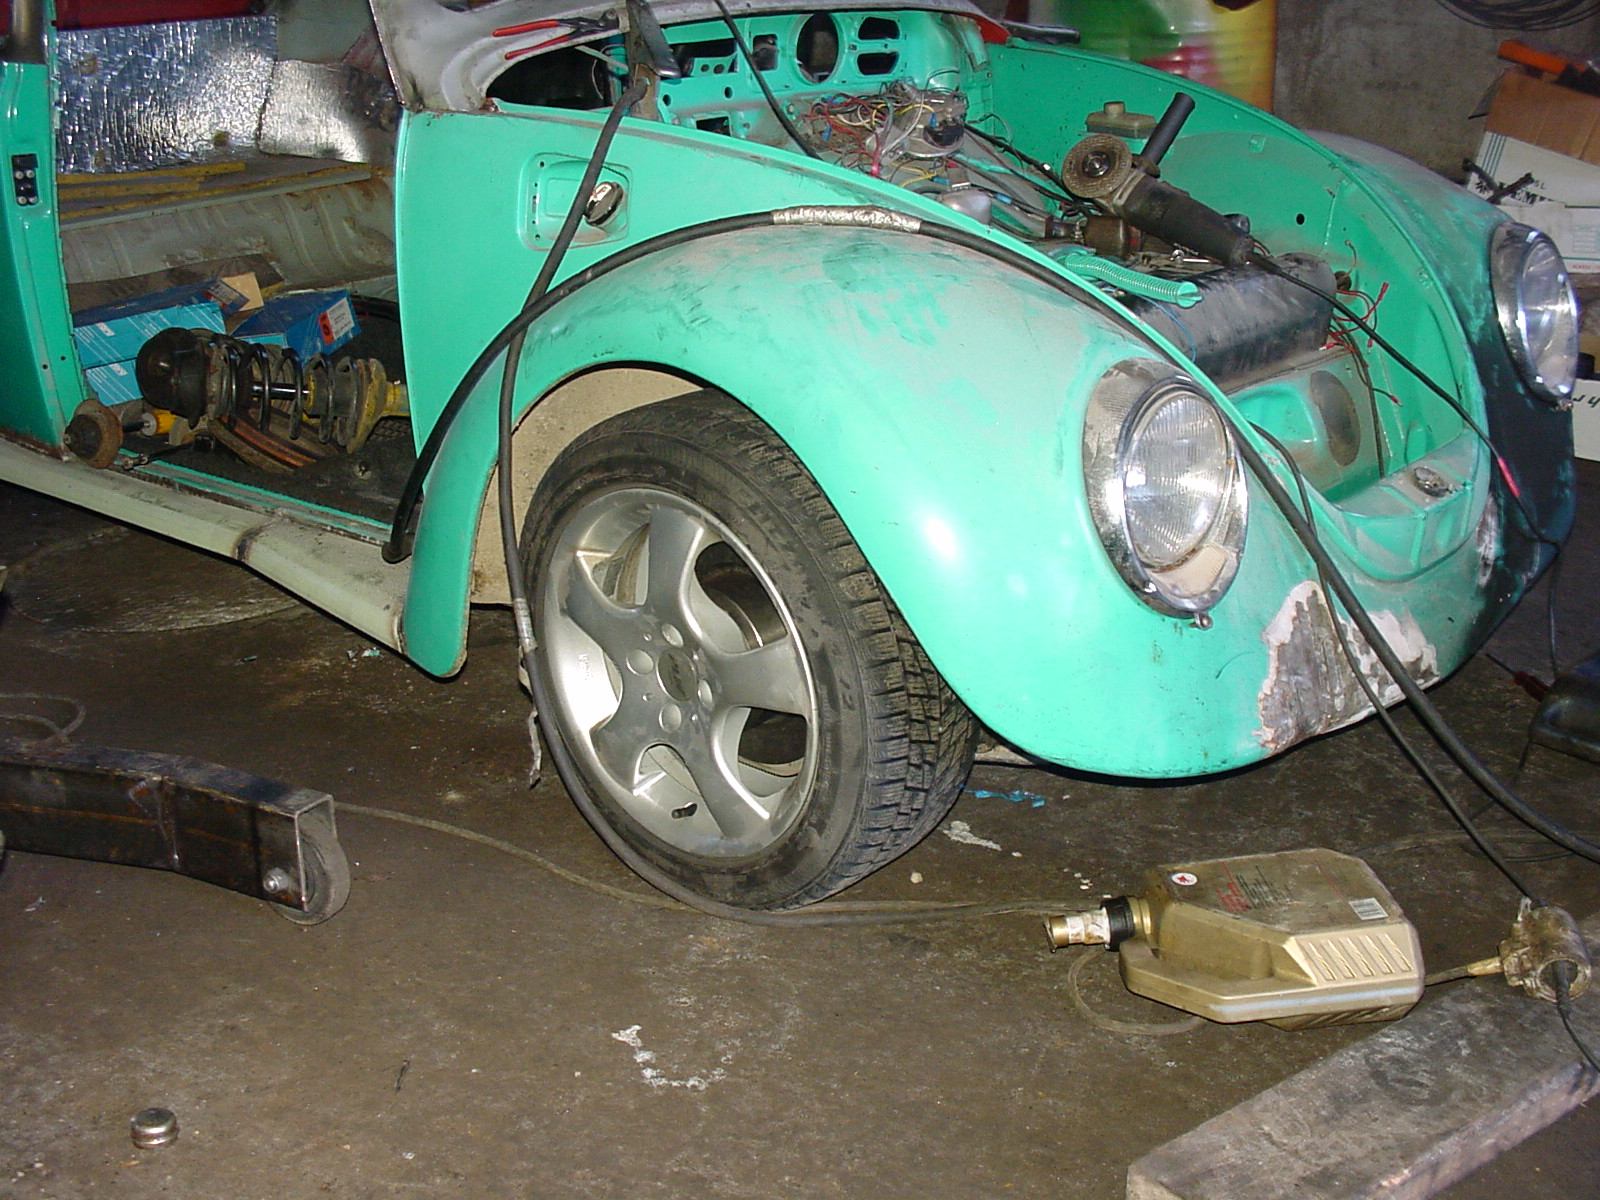
Here's an idea of how Pekka's 15-inch winter wheel and tyre fit... Small, yes, but quite nice. The intention is still to fit wheels about 17 inches in diameter under those standard-width wings. We'll see how it goes. The wheels certainly can't be wider than 7 inches, and the offset needs to be higher than the 35 and 38 common on VWs.
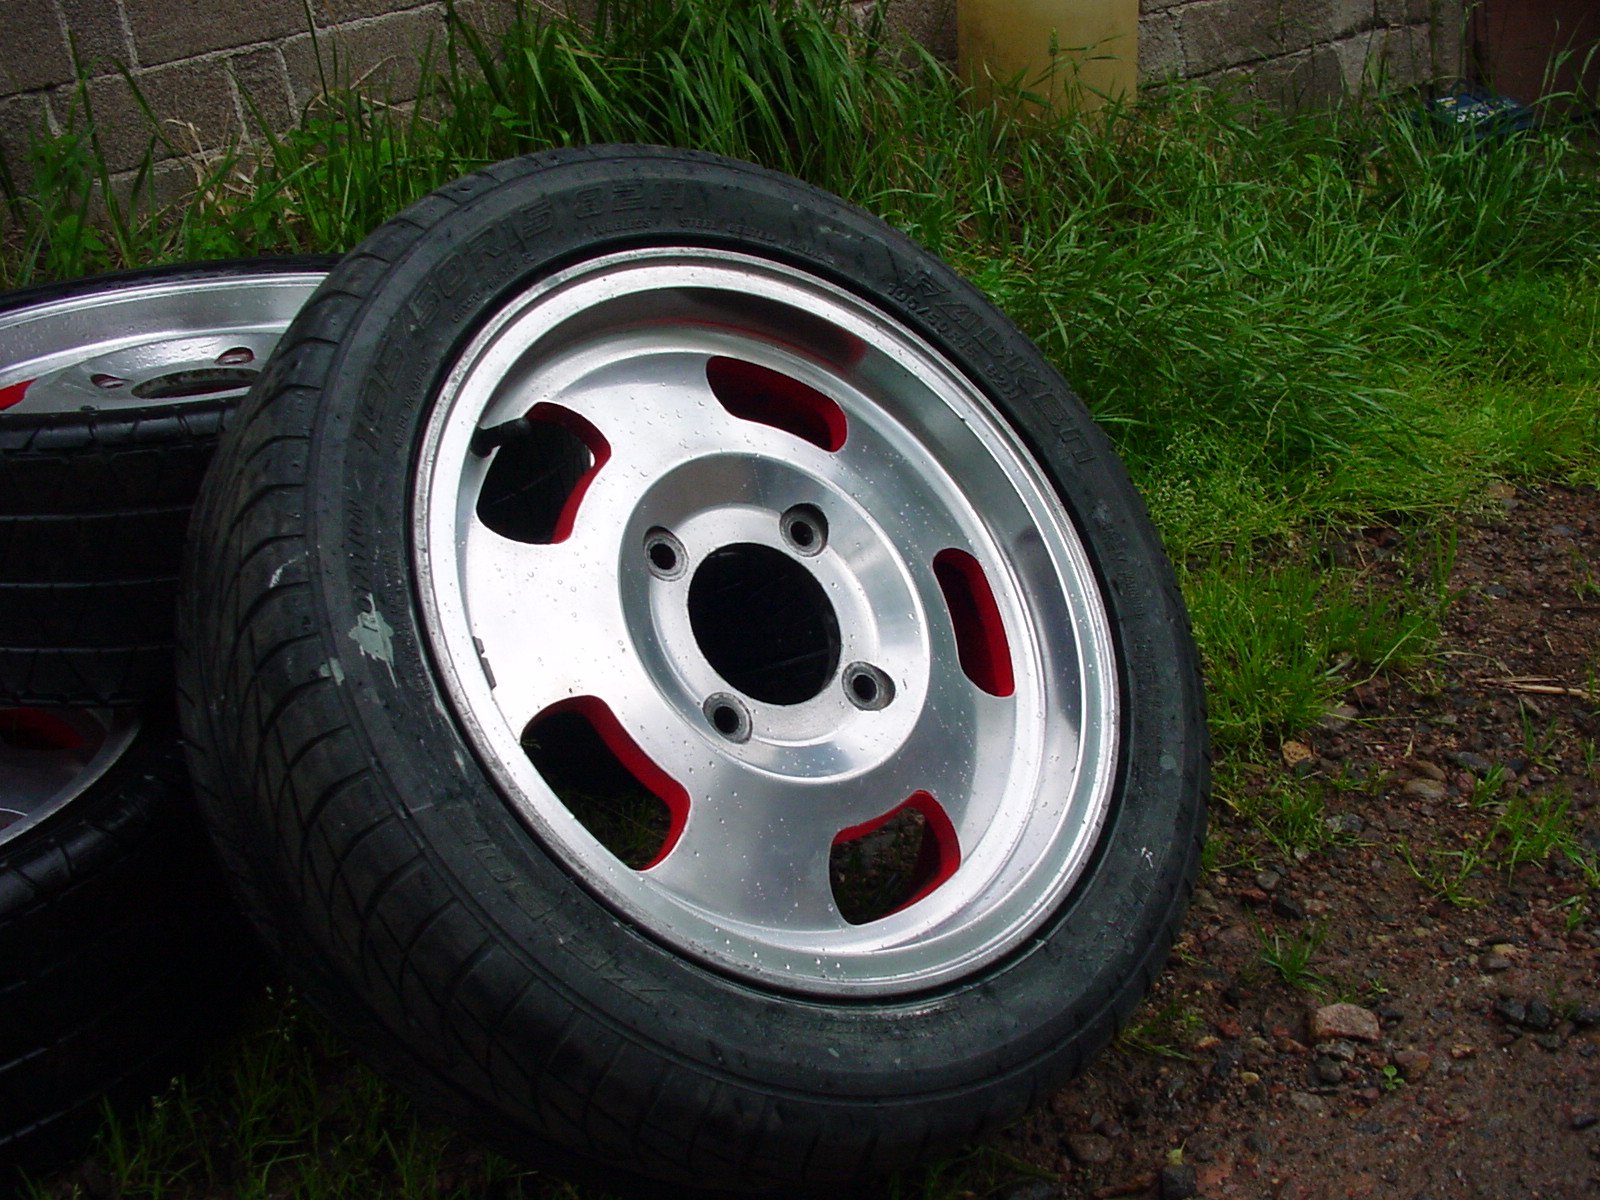
Another picture of my old wheels... I already miss them; those are nice too! Well, sold is sold.
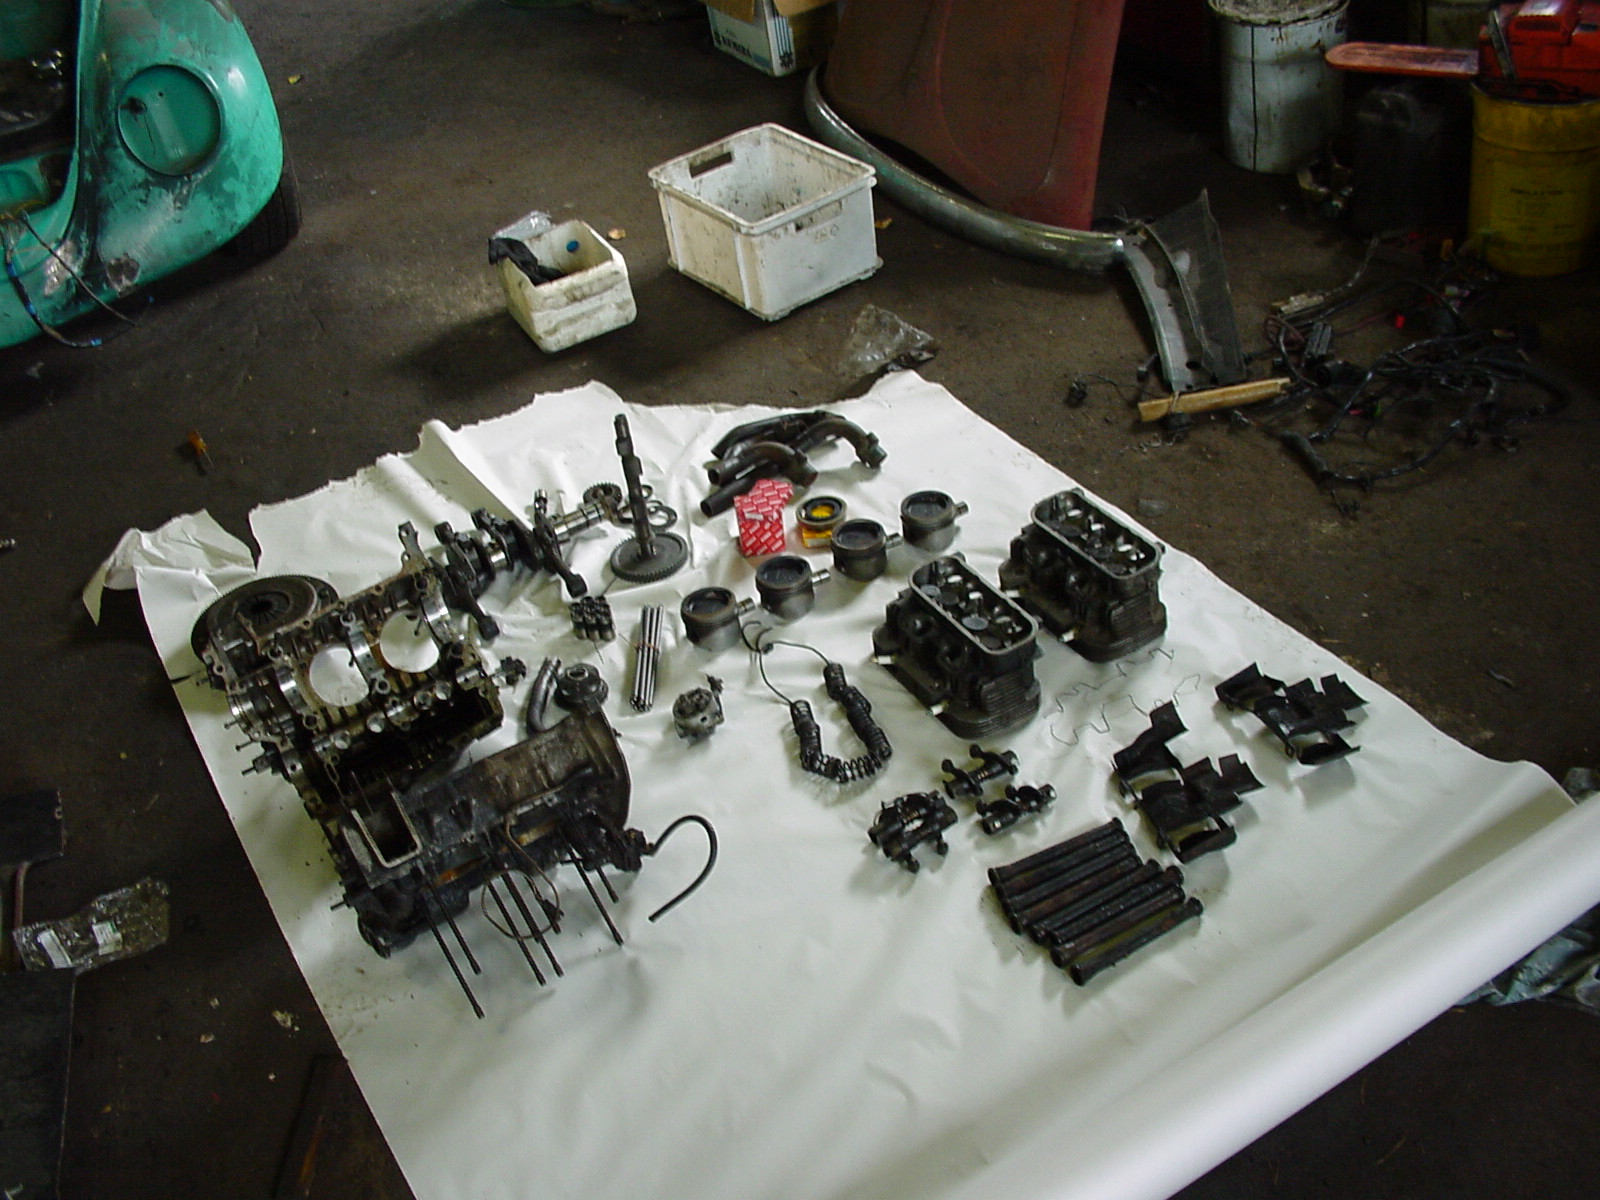
In exchange for the wheels I got quite a pile of engine parts, with a little money changing hands too. The photo includes a 1700 cc Type 4 case, two-litre internals and heads, and so on. The plan is to build a two-litre Type 4 for the Beetle from these, although the case number identifies it as a 1.7-litre, which is also what my Beetle's documents say. The engine project is still ongoing: the lightened flywheel and crankshaft need to go for balancing.
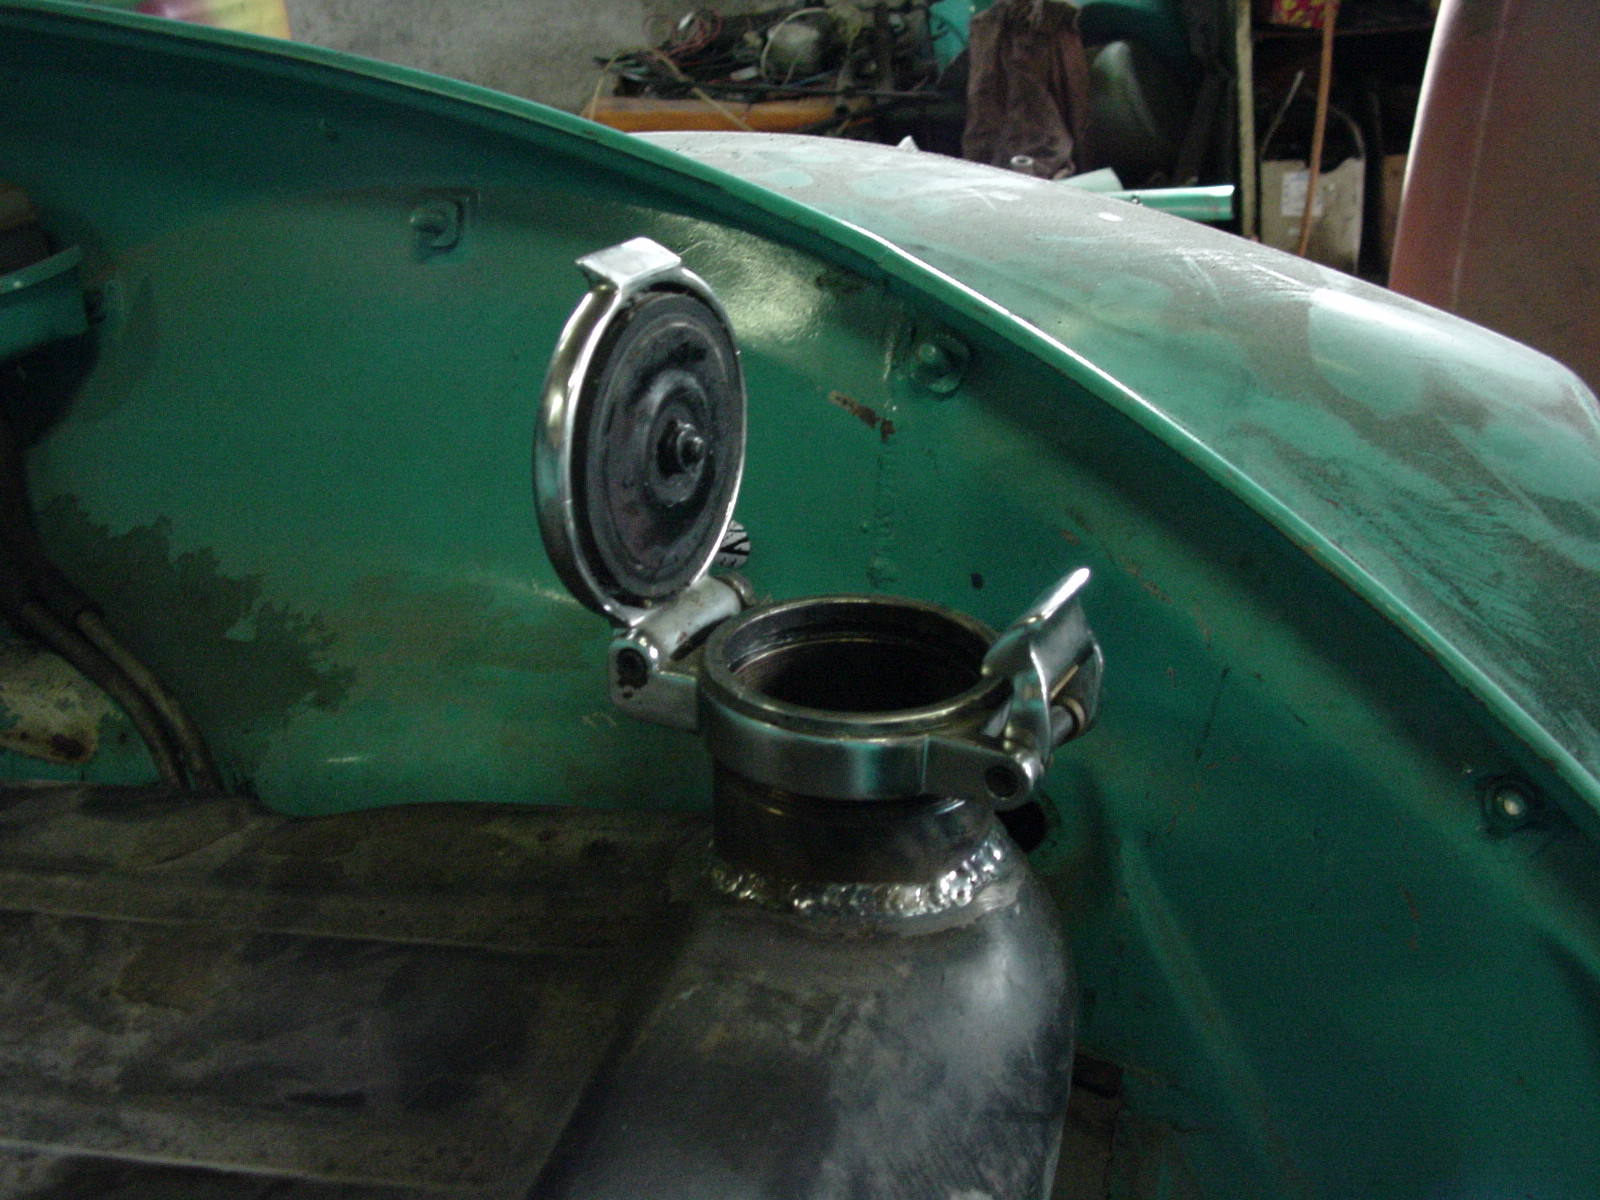
Here's the new fuel cap. The opening in the side was welded shut and a Vanaja truck oil filler cap was fitted to the tank! Quite stylish... I just had to get a machinist to make a short tube matching the cap's thread, then weld it into a suitably sized hole in the tank. Apparently Harleys use fuel caps like this.
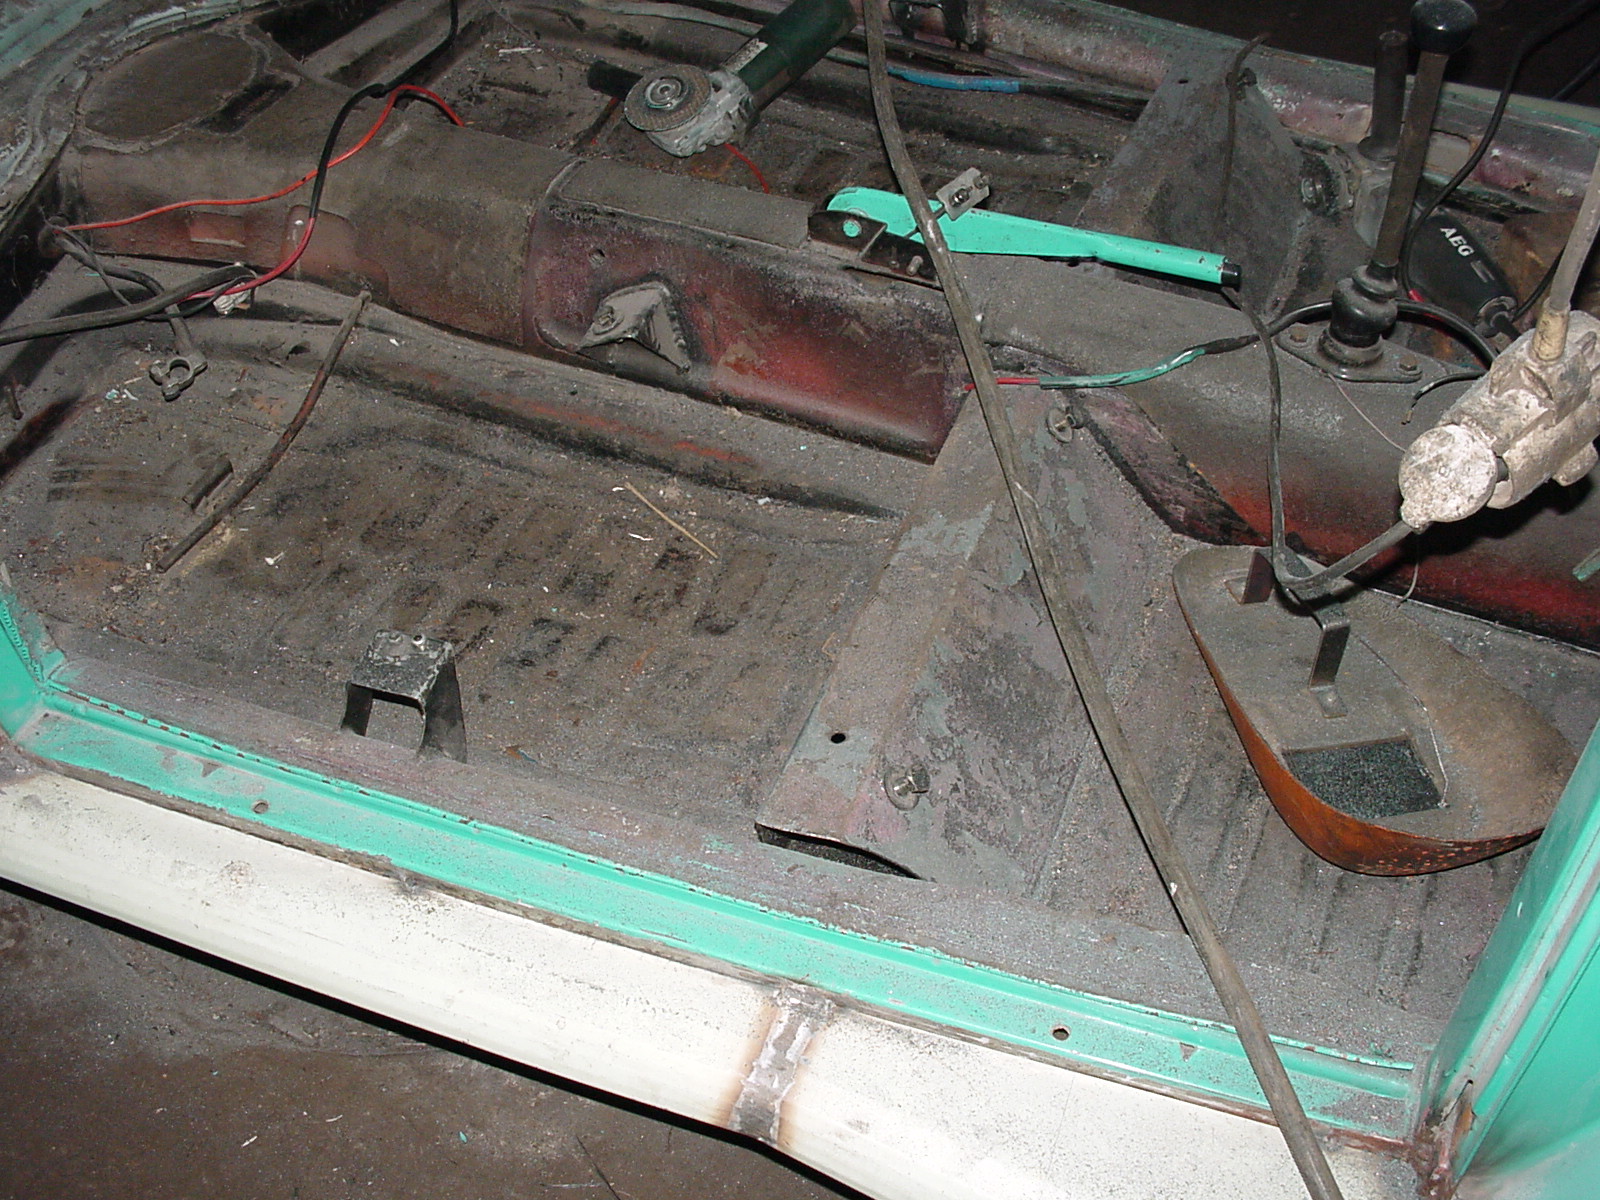
This picture finally shows the mounts welded to the floor to fit those Mazda 323F front seats. Each seat is attached by five bolts altogether, three 8 mm and two 6 mm. They should stay put. There's still plenty of room in the back, including room for feet under the front seats.
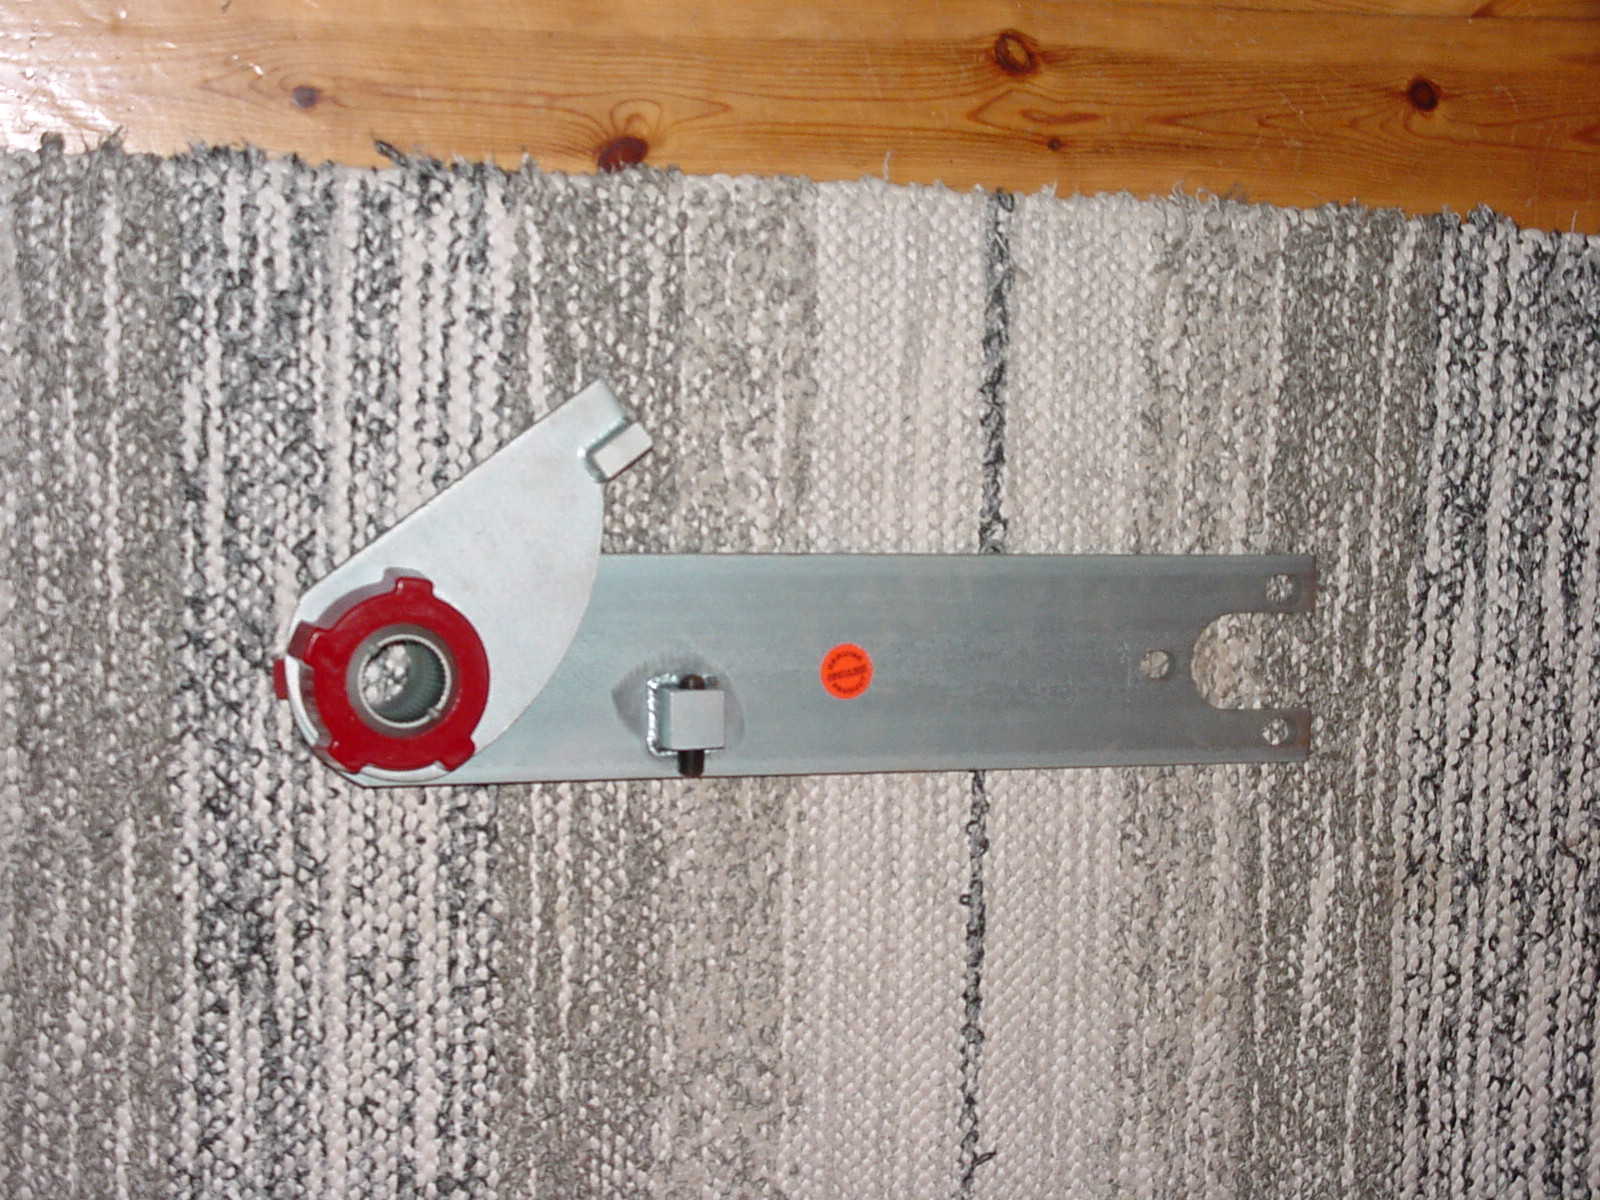
In late summer I also bought an adjustable rear suspension setup from a friend. That should make it relatively easy to raise the car to inspection height ;-) It hasn't been fitted yet.
...but surely...
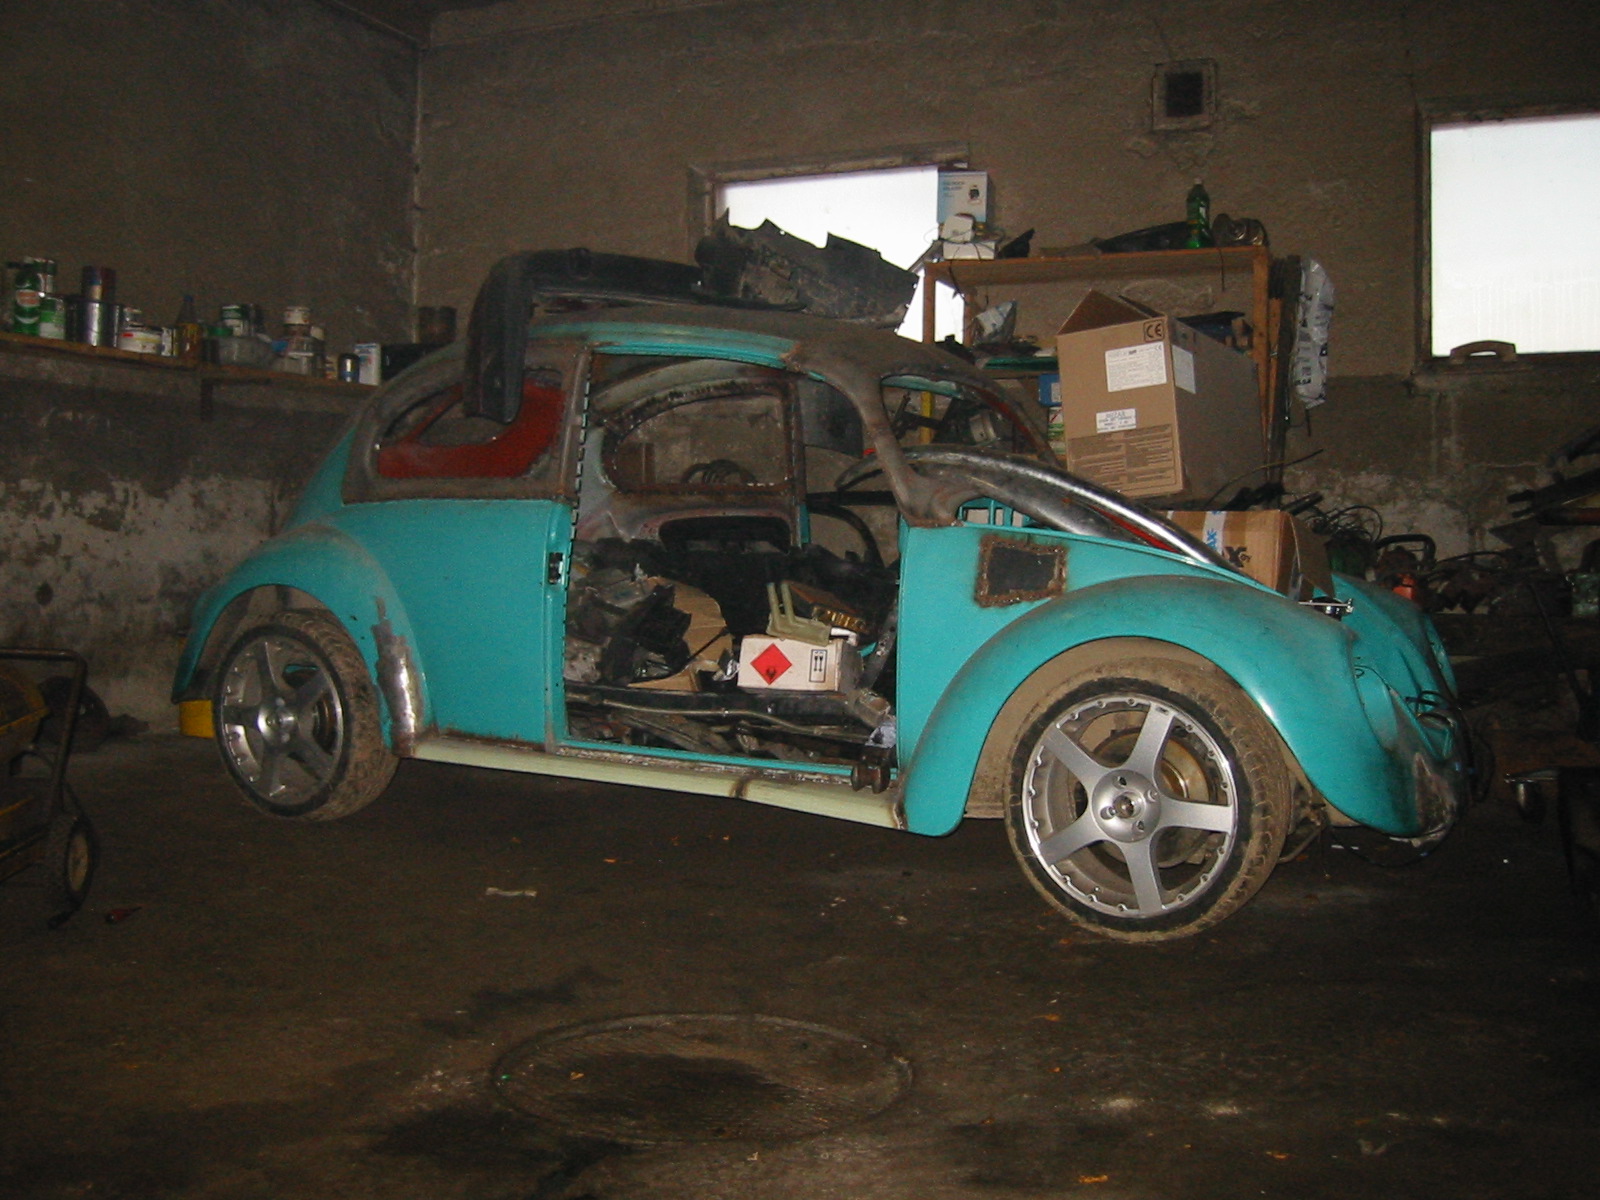
This was the state of things at the end of January 2002. The plan was to clear the pile of junk off the car and out of it, then start grinding all those welds. It's wearing a friend's Mazda summer wheels. We had to try those too. The vital statistics were 205/40 tyres on 7x17-inch ET42 wheels, if I remember correctly. They might even turn freely once the car is assembled and at least 5 cm lower!
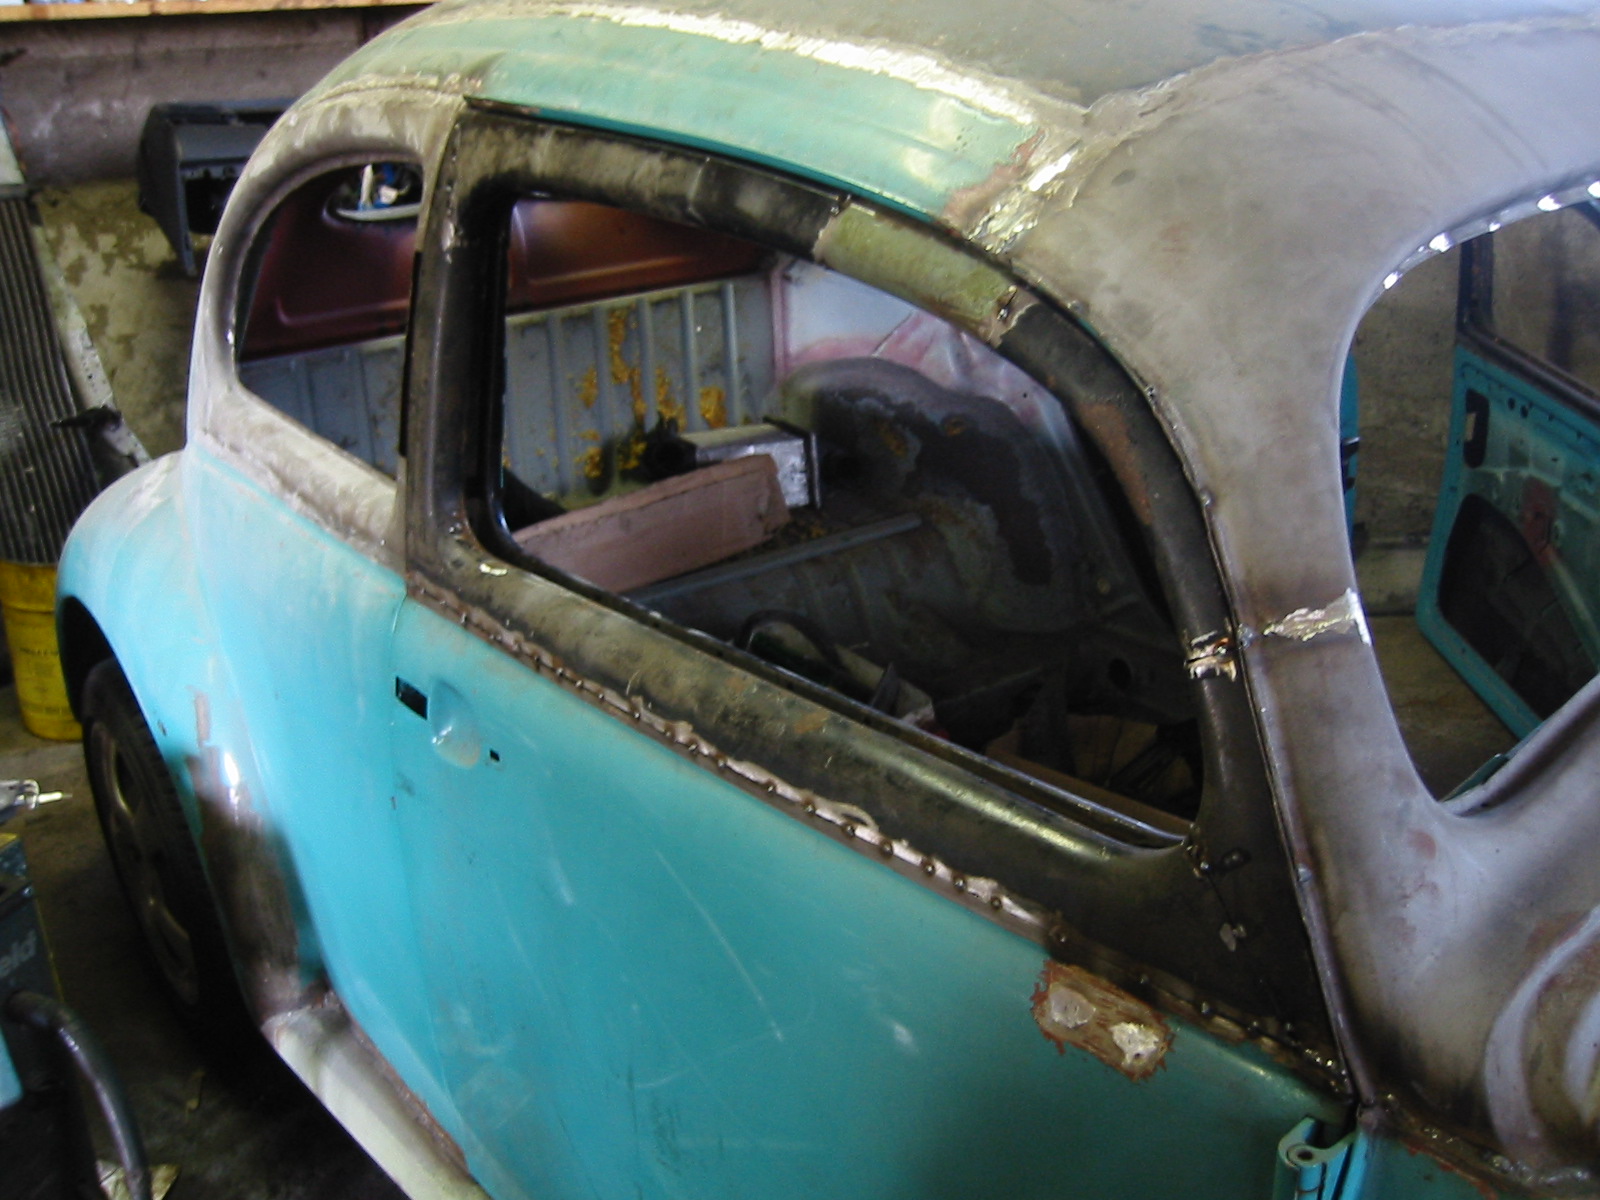
29 April 2002. A little more progress. I chopped the passenger door on the same principle as the roof: cut the pillar into pieces with the saw and fit them back in place. The door is now the right shape, though there's still plenty of welding to do...
That door is becoming quite a collection: the lower part is from who knows where, the window opening from an oval, and there's a piece of split-window door in the frame too :-)
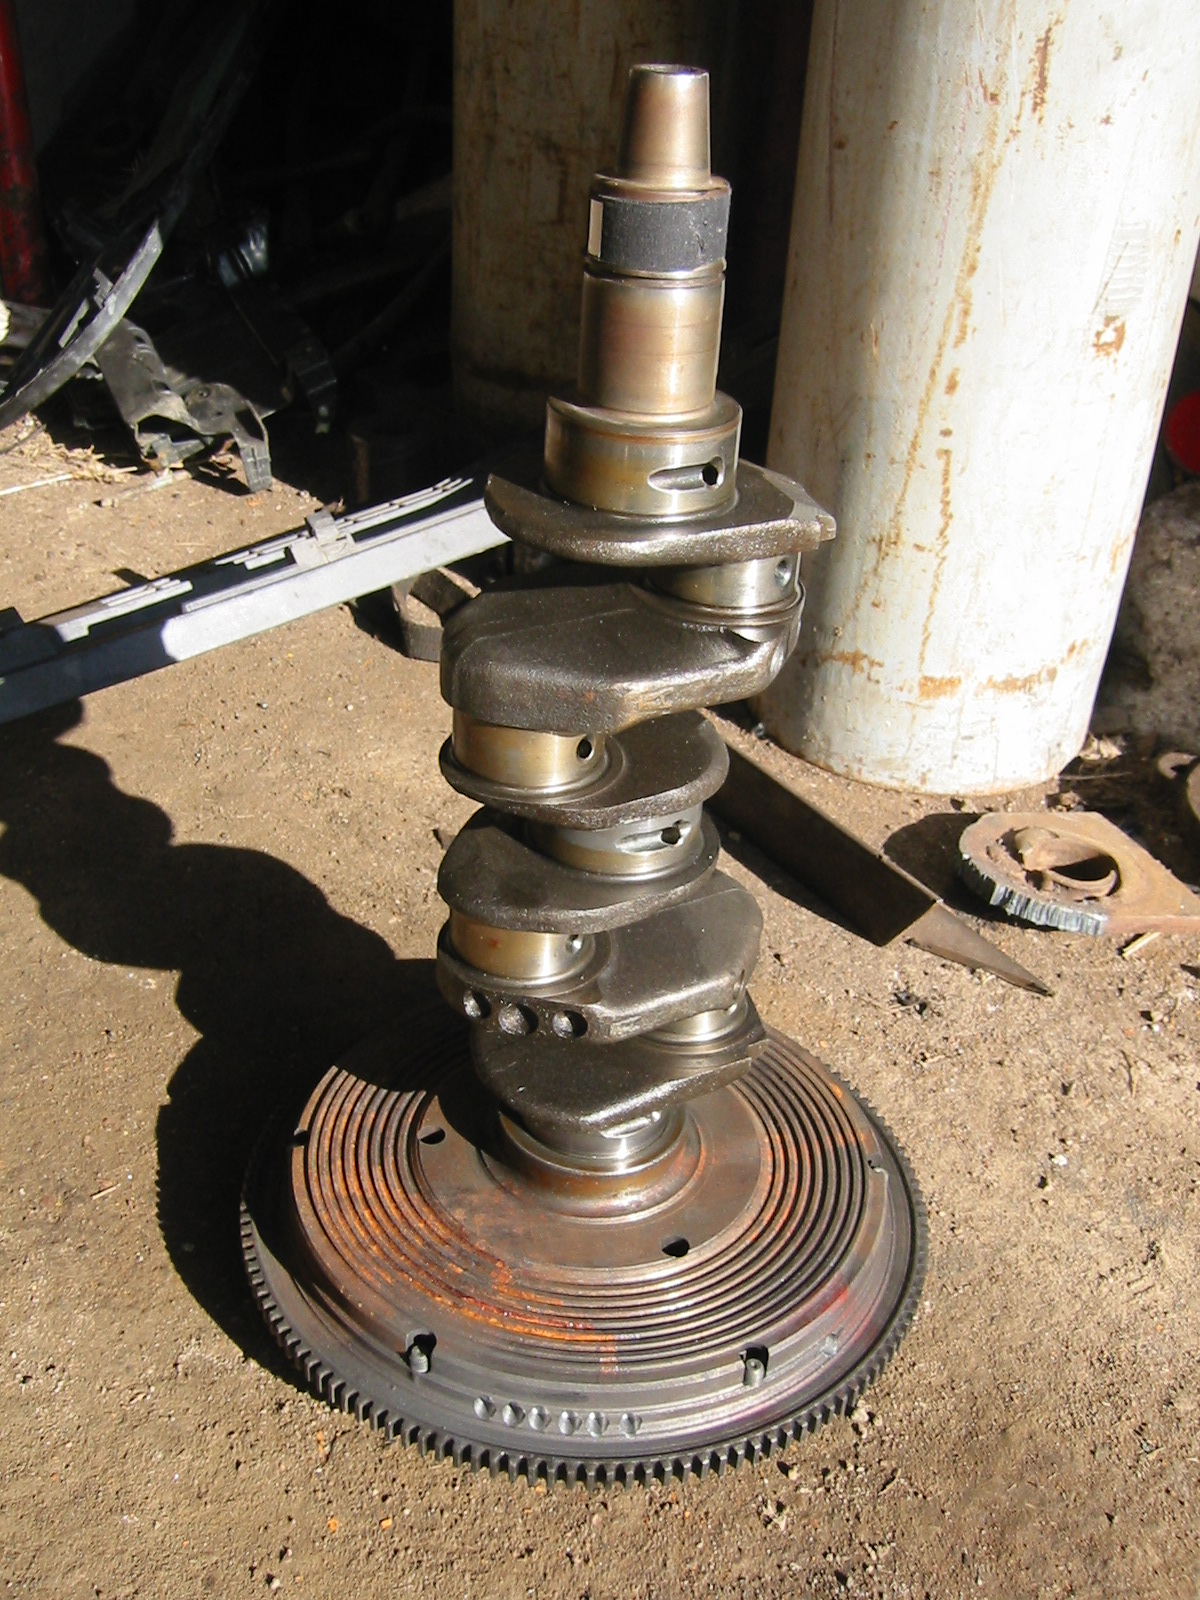
7 May 2002. More progress: the crankshaft and flywheel have been balanced. The 65 euros certainly wasn't wasted: a few drill marks had appeared in the flywheel and the crankshaft too, though you can't see those in the picture.
Update: I've now found the balancing report. Before balancing, the imbalance in the D plane was 16 grams at 44 degrees and in the N plane 3 grams at 110 degrees. Afterwards the figures were 0.6 g and 0.5 g, both at about 190 degrees. Whatever those planes actually mean :-)
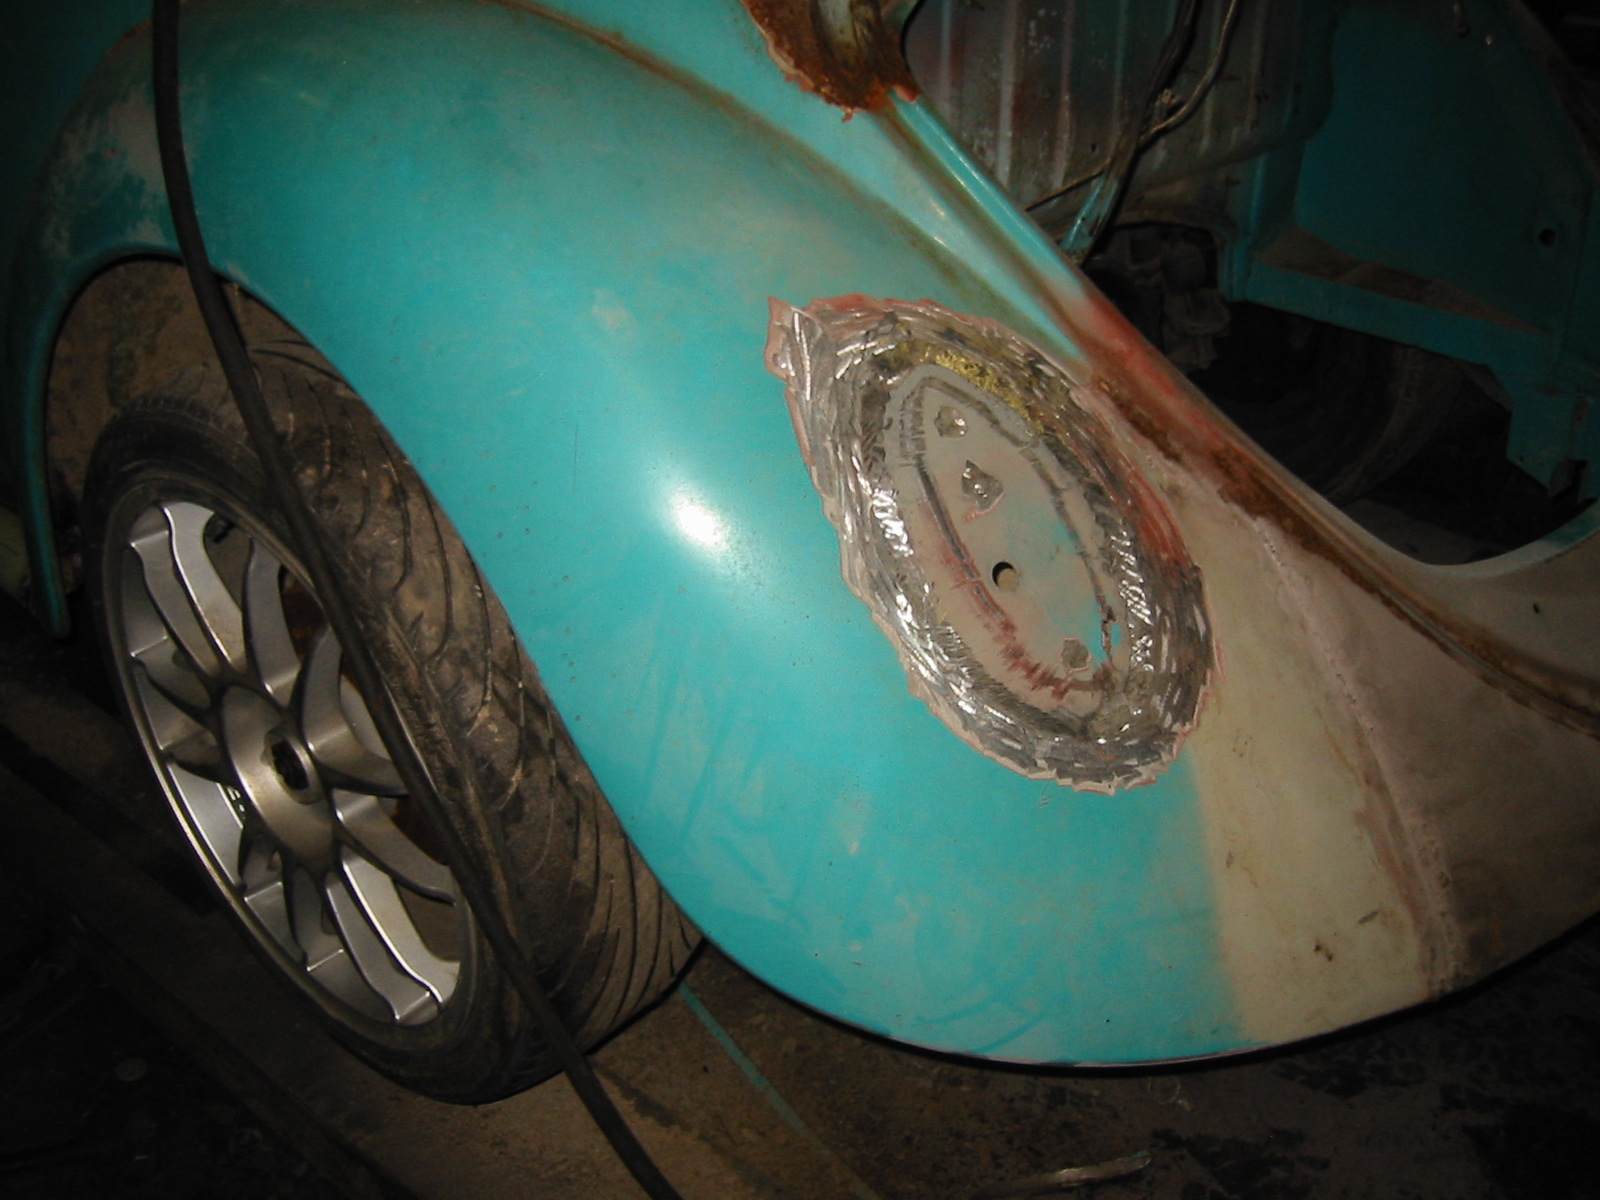
November 2003. The project is moving again! Pekka felt inspired to start welding, so on went the Leggeras and into the garage went the car...
The rear lights came off. Split-window lights will replace them.
The apron is now fully welded too.
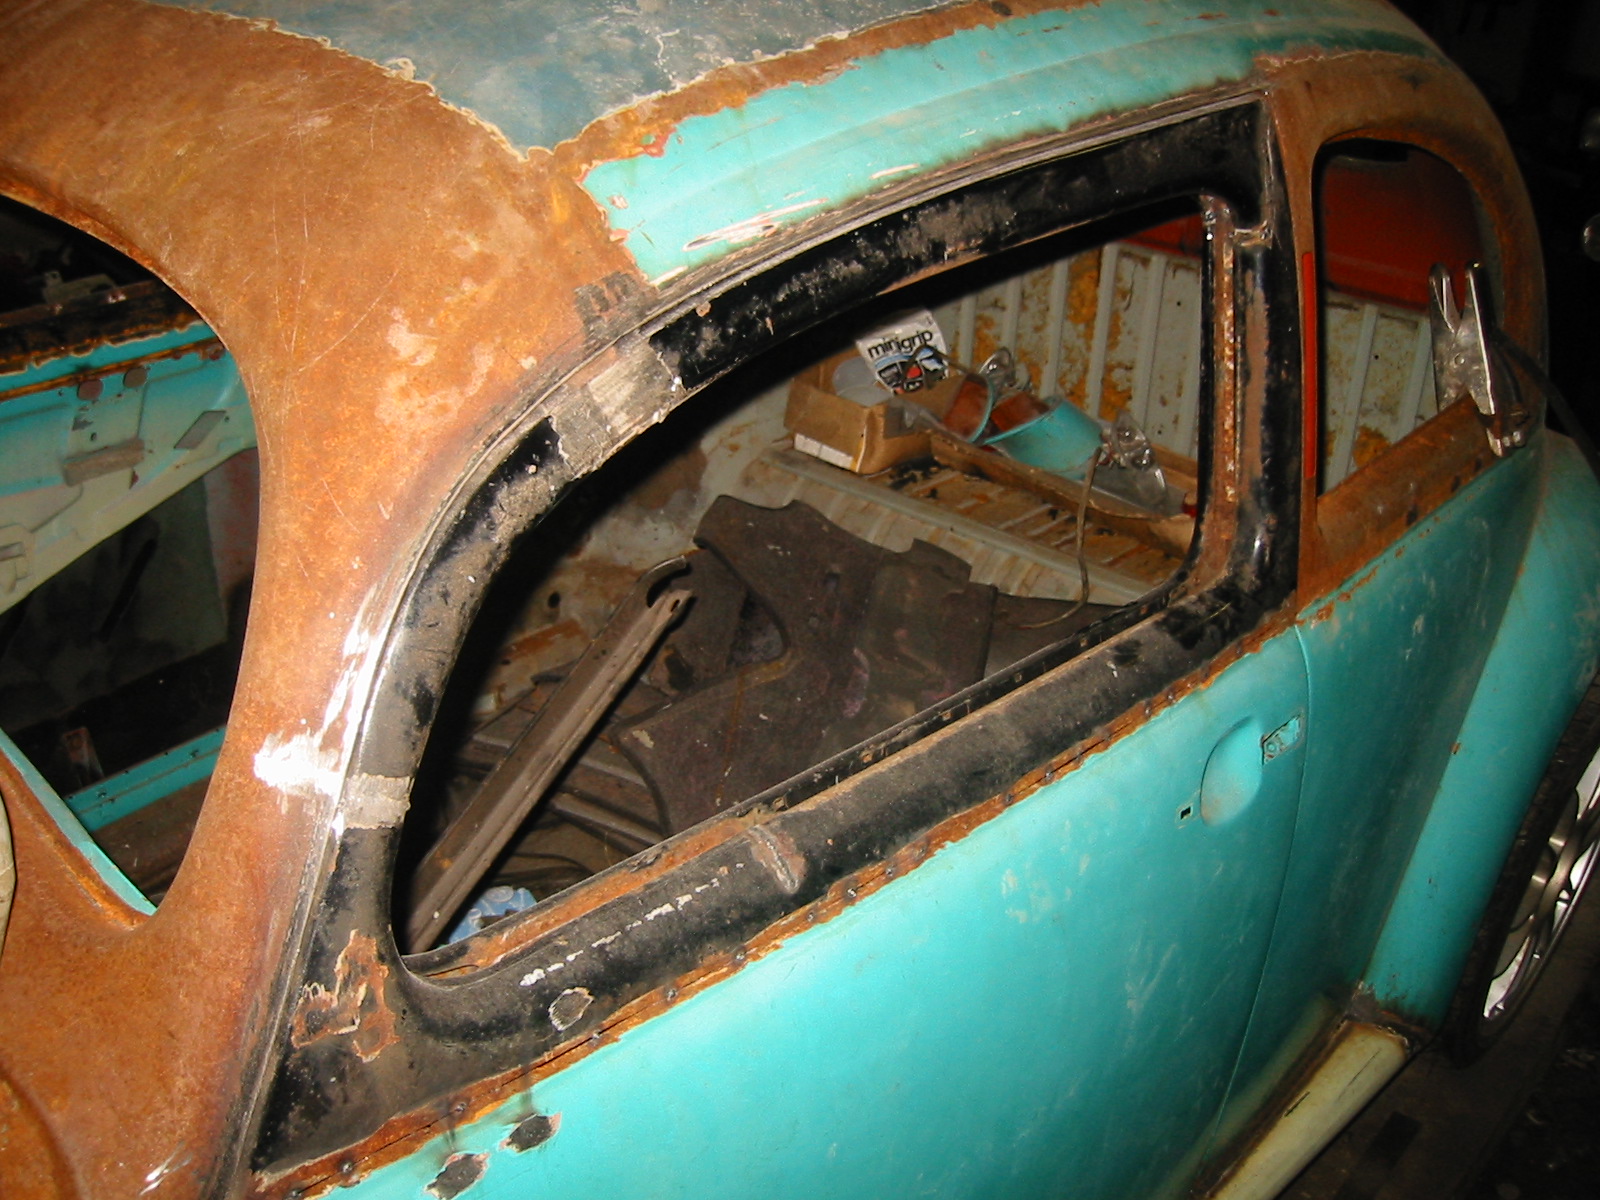
The driver's door frame assembled, with the rain gutter already removed.
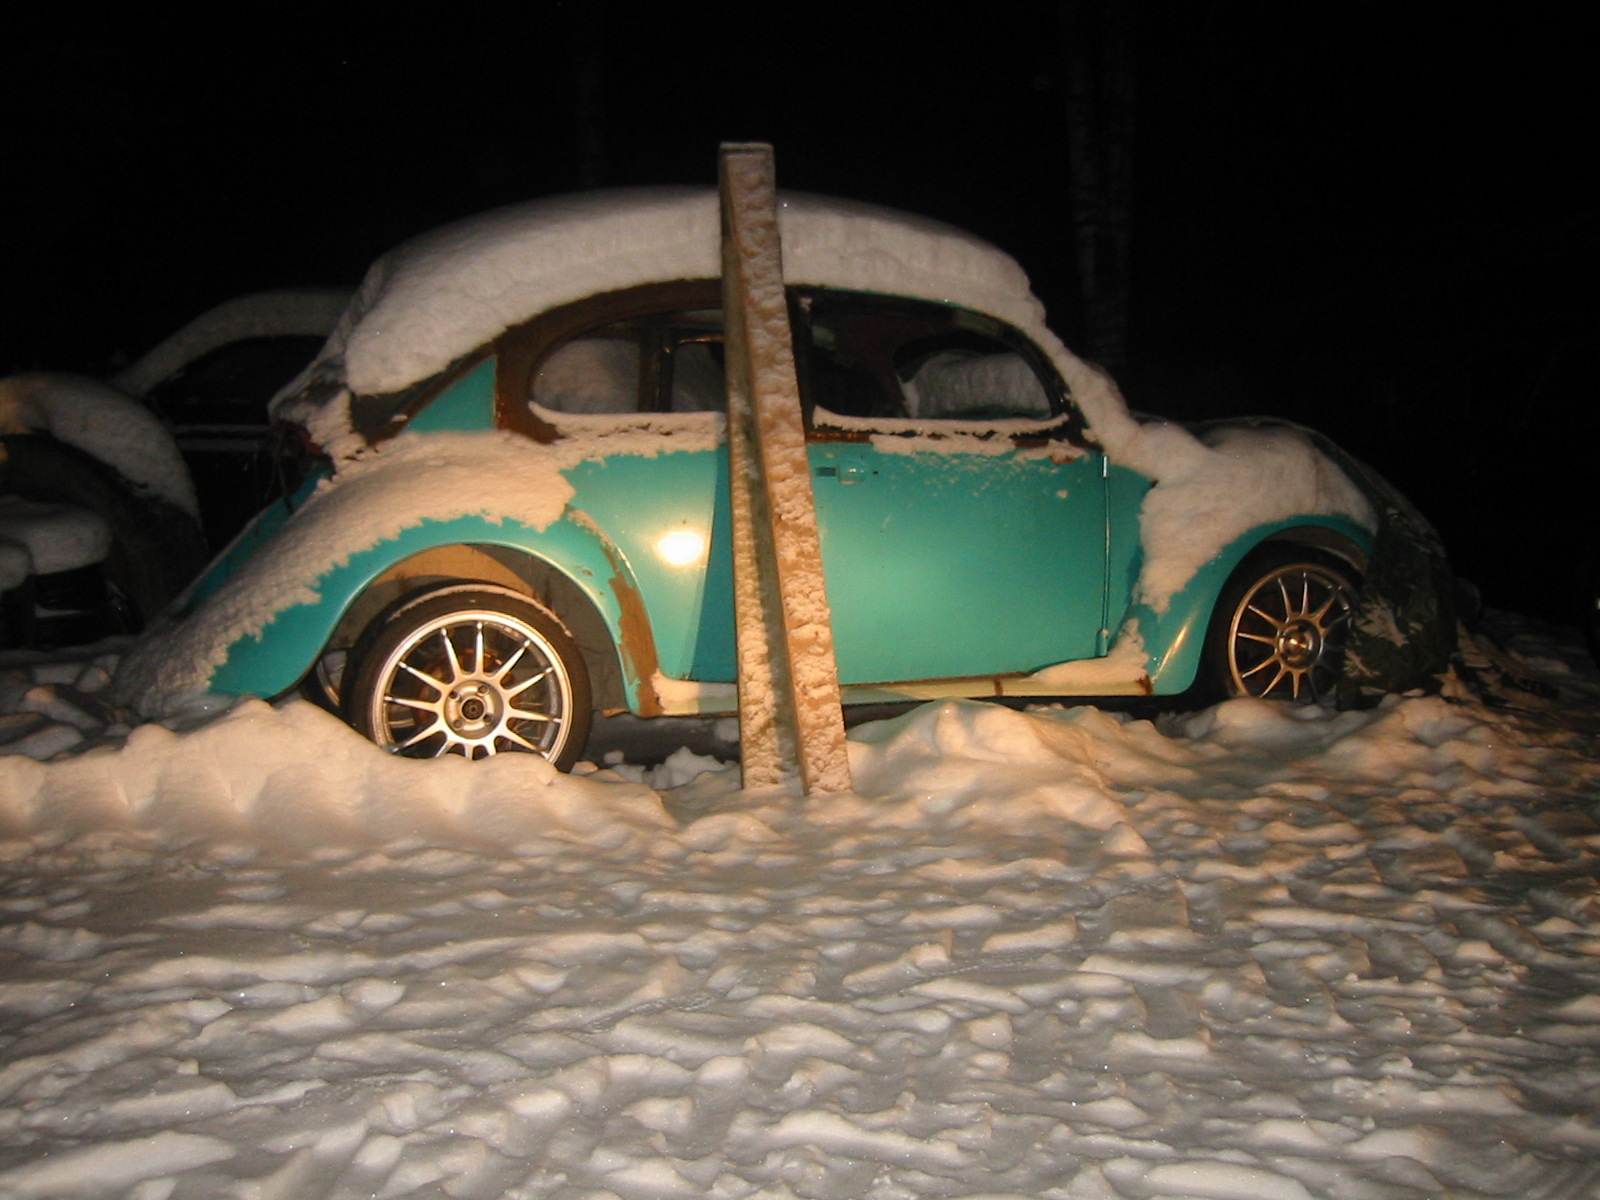
26 January 2004. Pekka has other things to do... The welding is on hold 'a little' again...
7 February 2005. Absolutely no progress. Those wheels have been sold, though.
2011-06-28 · A test from my phone
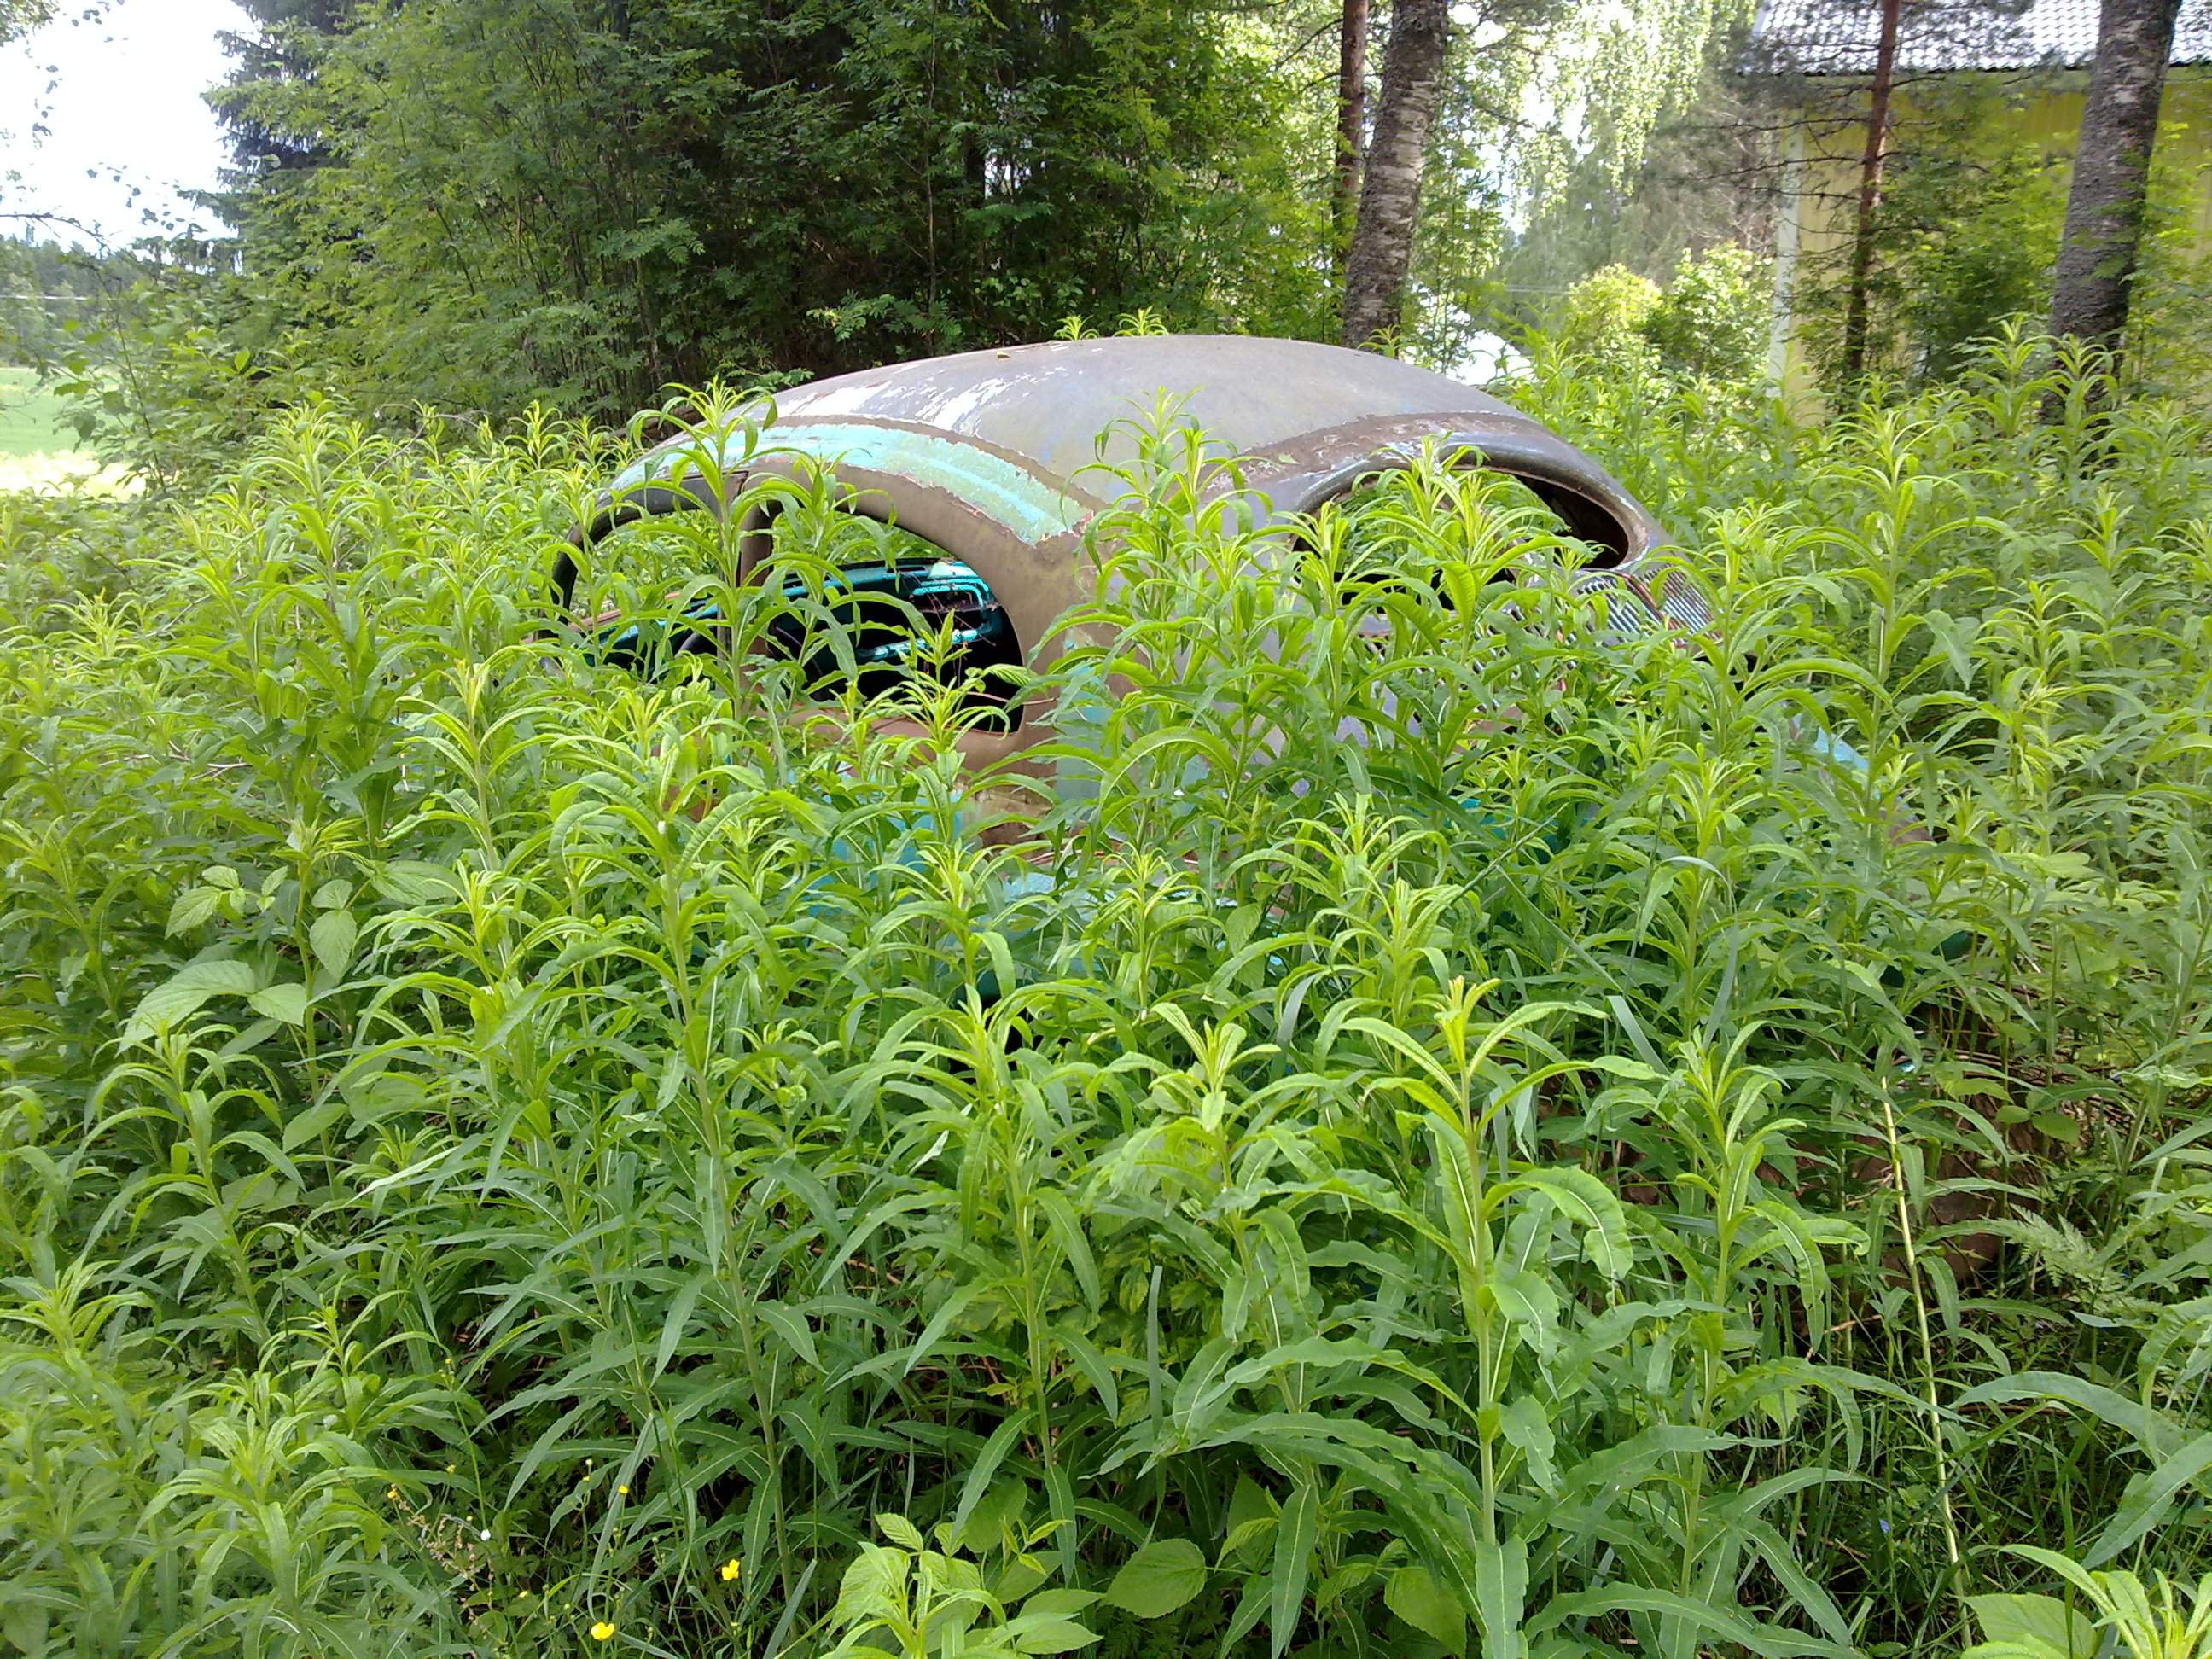
A little test of updating the site from my phone. And a photo of how the Beetle is doing :)
2013-01-08 · Air-cooled updates
Someone on Facebook asked how the never-ending Beetle project was getting on. The willowherb isn't quite growing through the floor yet, but it's getting close... The last photos were taken when we moved the cars out of the way of the new workshop. Pekka's Karmann Ghia is missing from the photos — at least that one's under a roof...
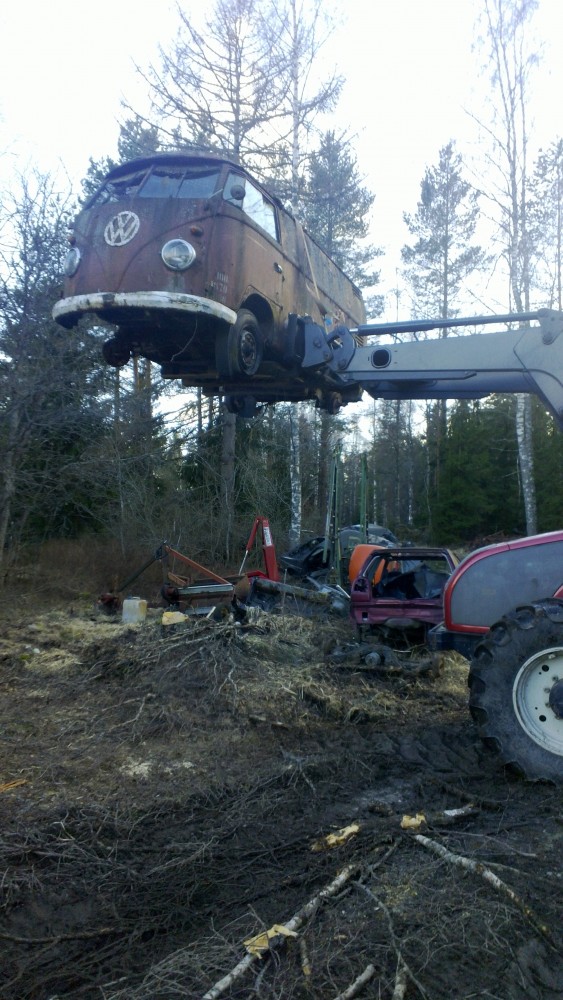
The split-screen van went out to see a bit of the scenery.
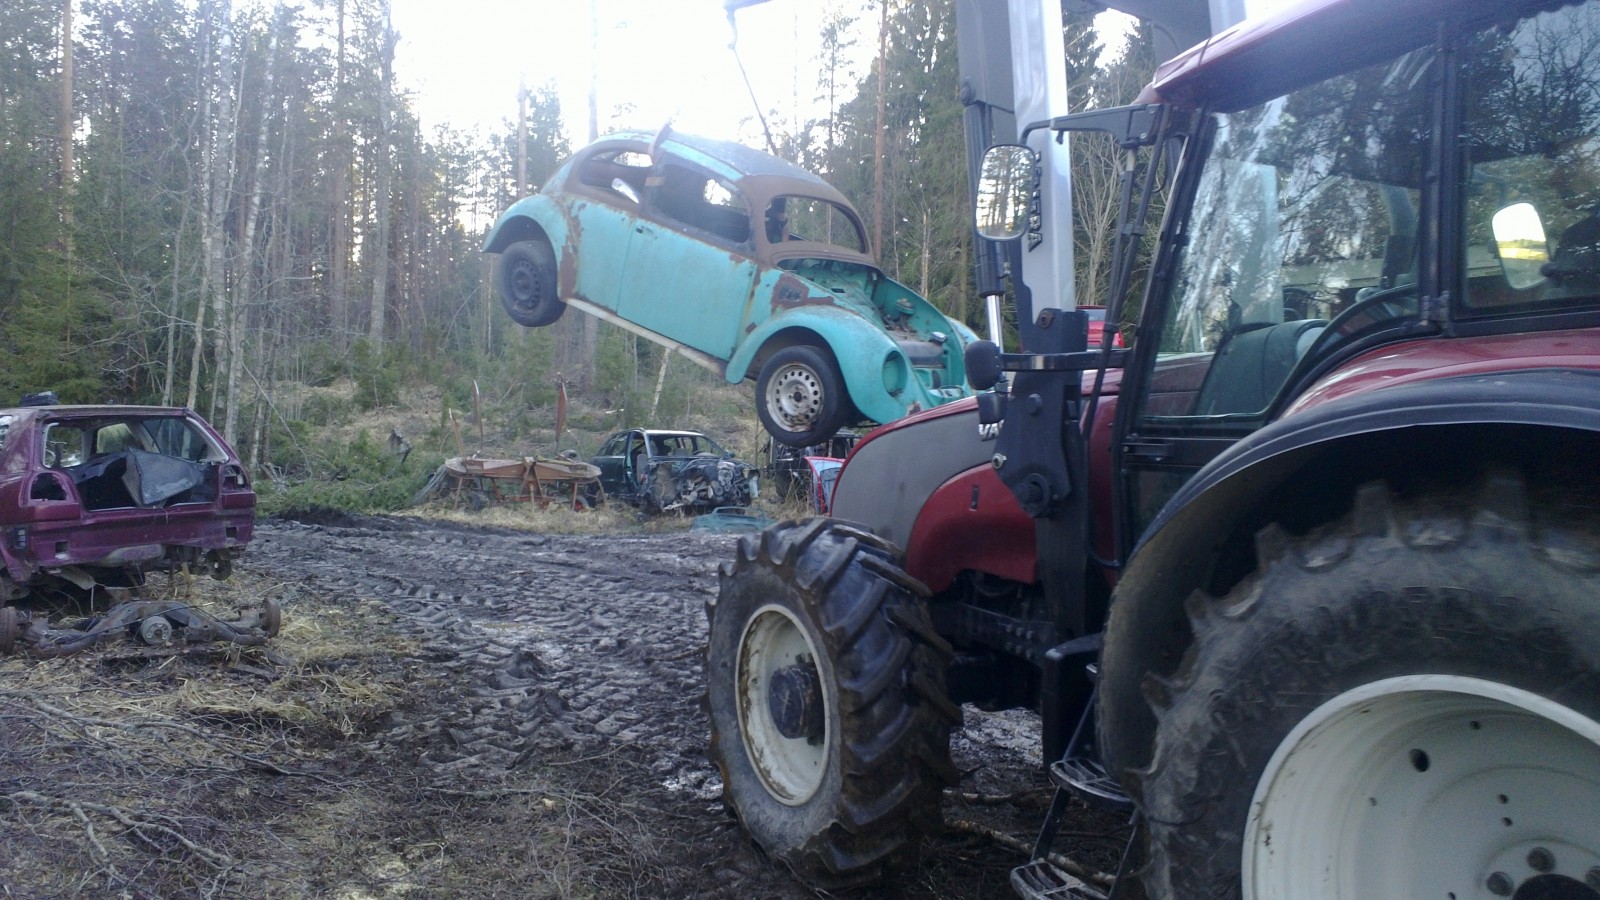
A tow from the tractor was the easiest way to move the Beetle too.
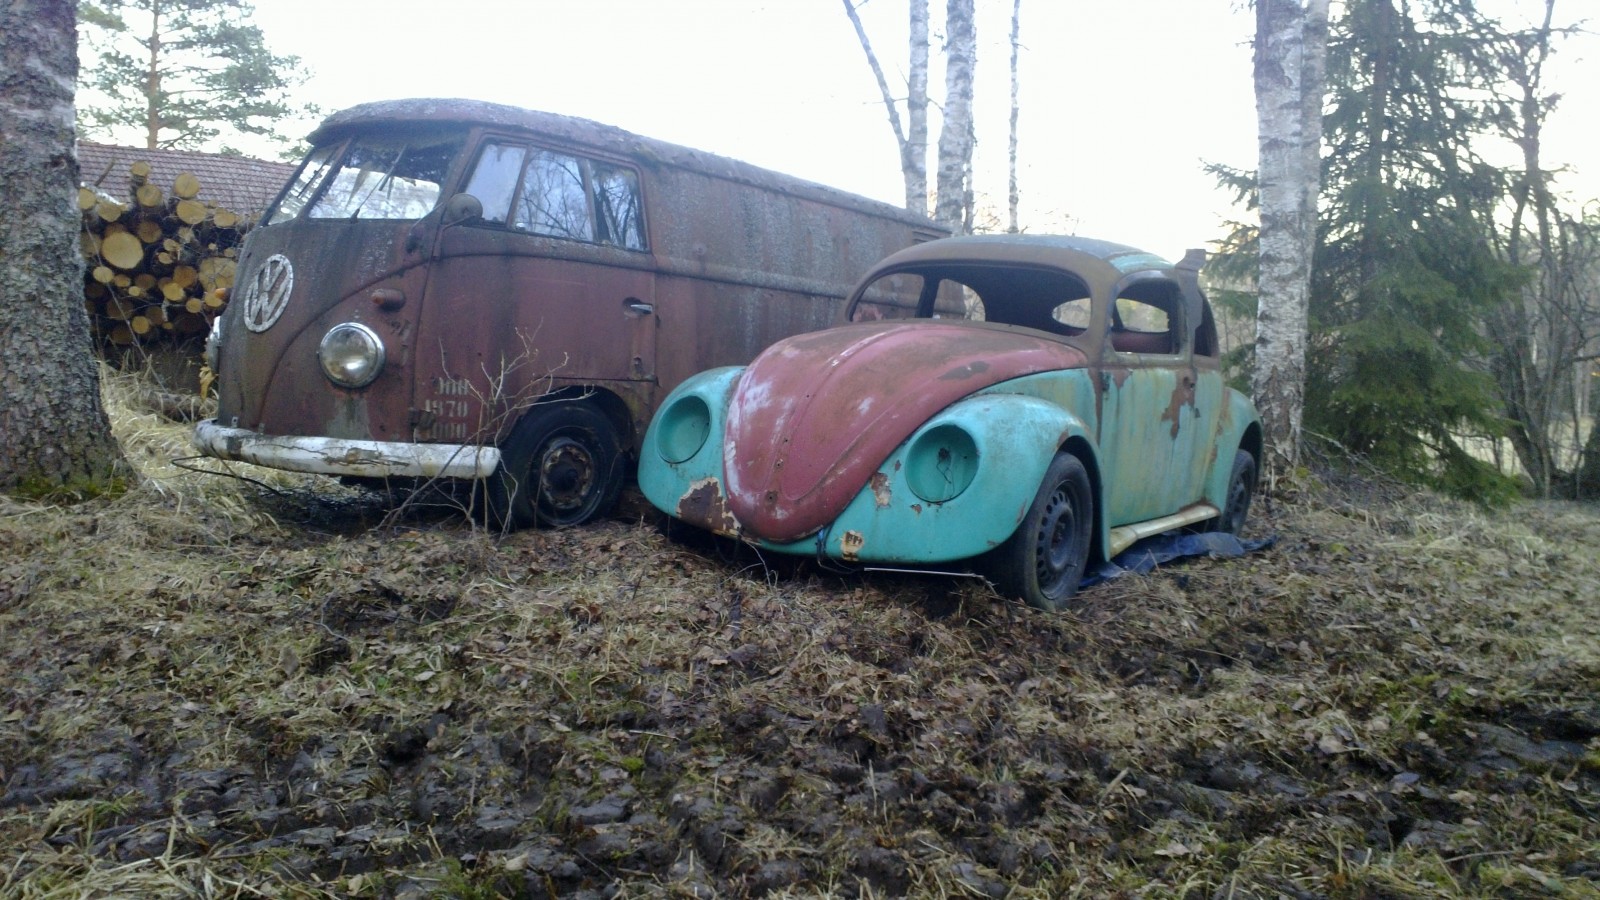
There they are, side by side. Let's see how many years they spend in this spot…
Includes original English text and AI-assisted translations.