ARCHIVE / PAJALLE
Golf V 2.0 TDI 16v
Crash repairs on Jaska’s Mk5 Golf, including newer body construction techniques. Perhaps pajalle.com’s most challenging repair at the time.
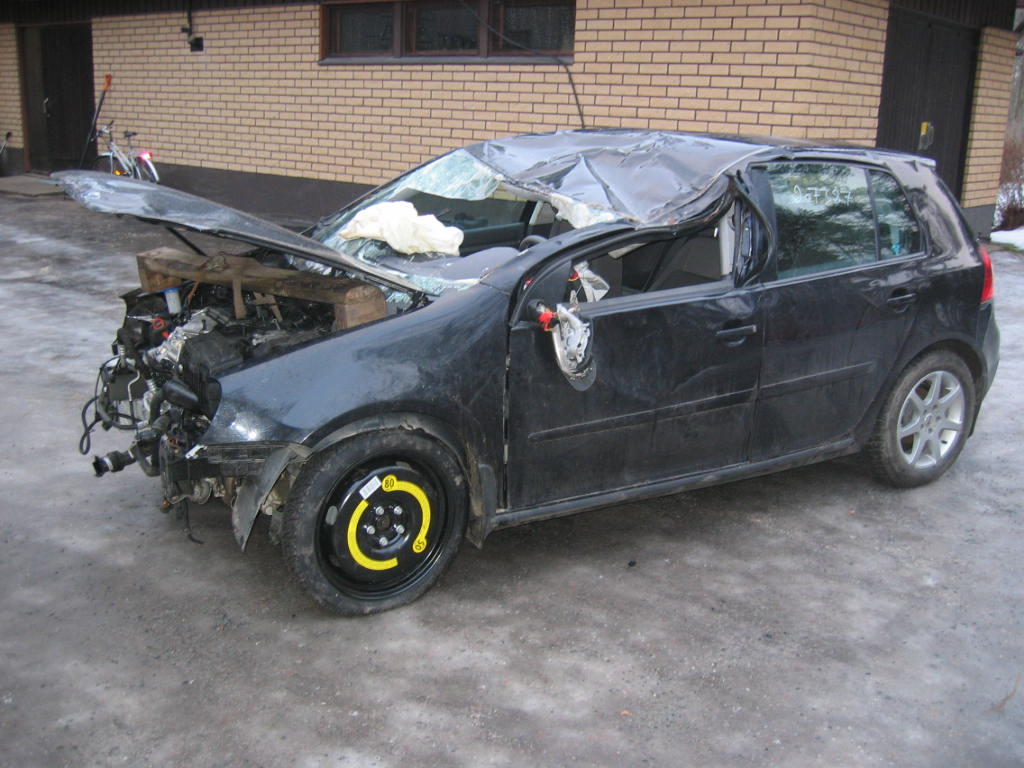
Golf V with some damage
December 2004. Jaska had sold his earlier project and had some money in the pocket, and a need for a bit more powerful diesel-engined car. Soon he found a suitable one, a crashed Golf V with 2-liter, 16 valve engine that gives a nice output of 140bhp and 320Nm... without any chiptuning. The engine had been barely run in, only 20 000kms in the odometer.
There's a little dent on the roof, and none of the front parts can be reused. Well, actually the left front wing is pretty good.
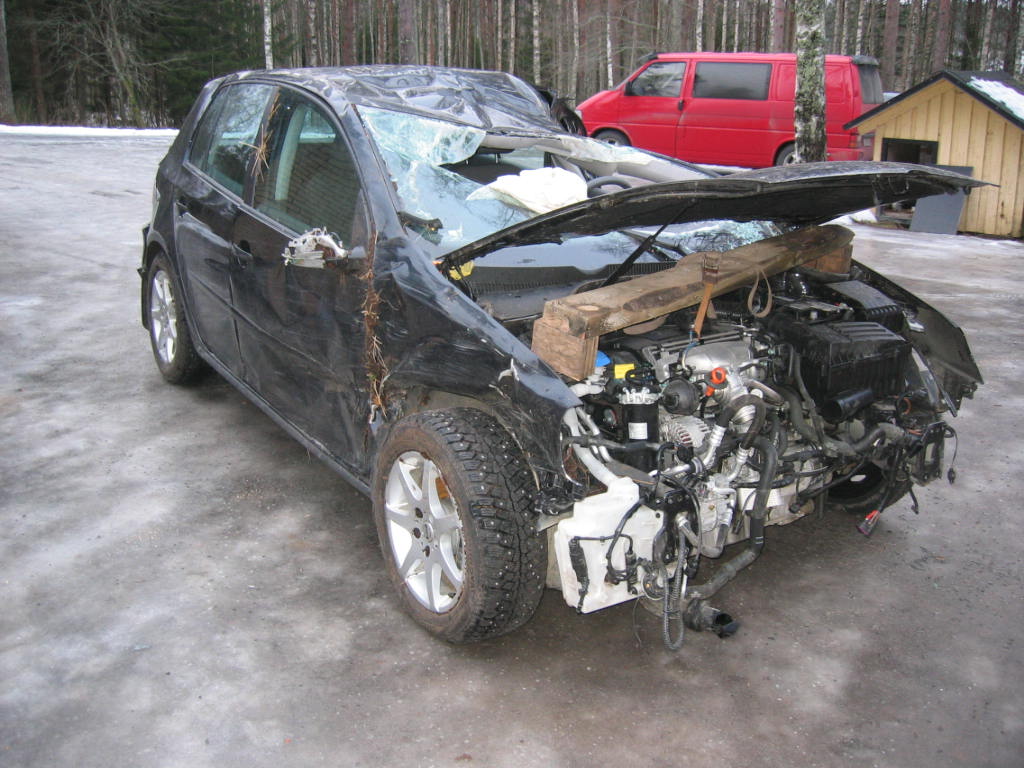
Right engine support is broken, that's why there's an "aftermarket" support under the hood.
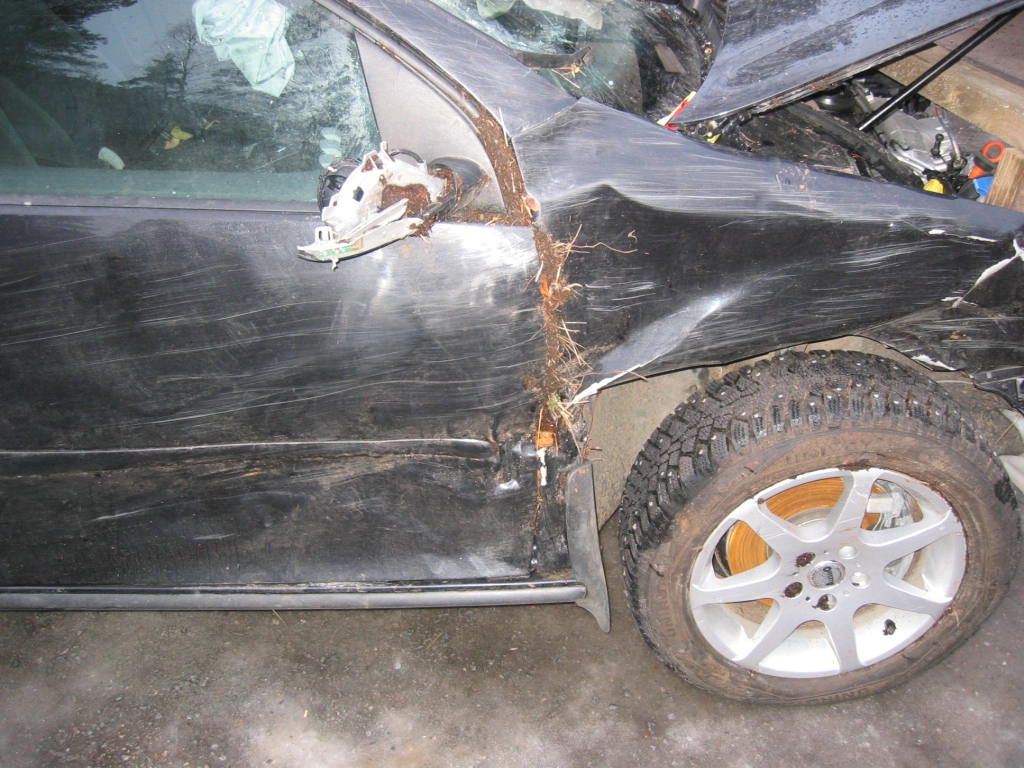
Lower part of the a-pillar is also damaged.
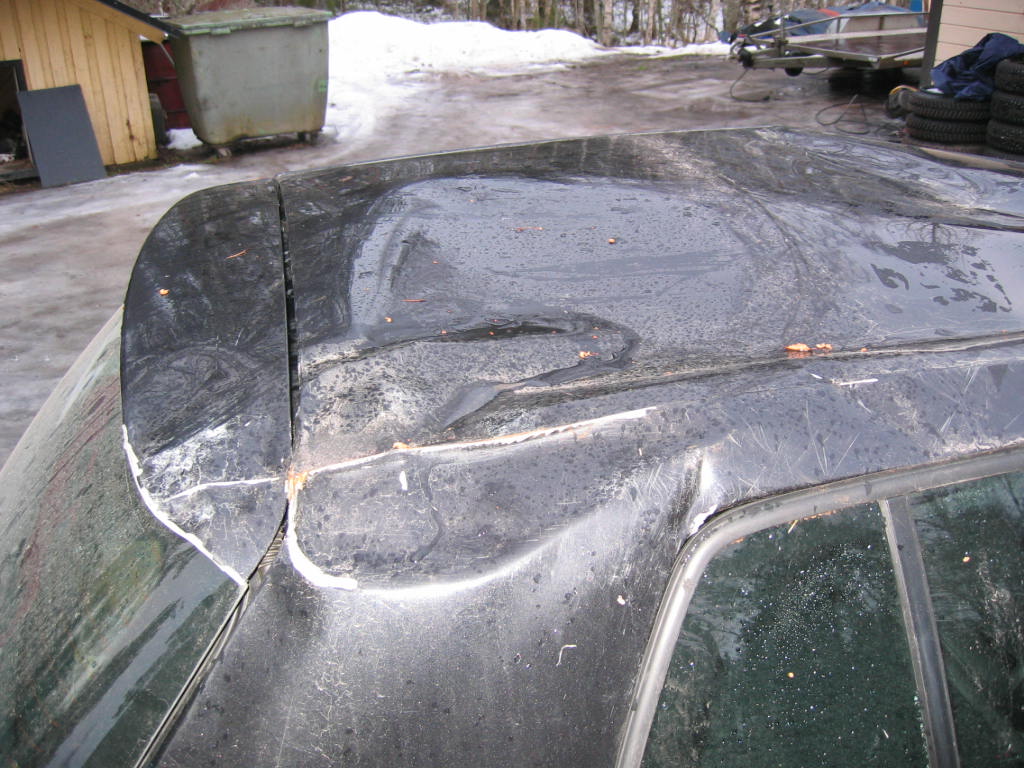
A small dent also in the rear of the roof, partly in c-pillar.
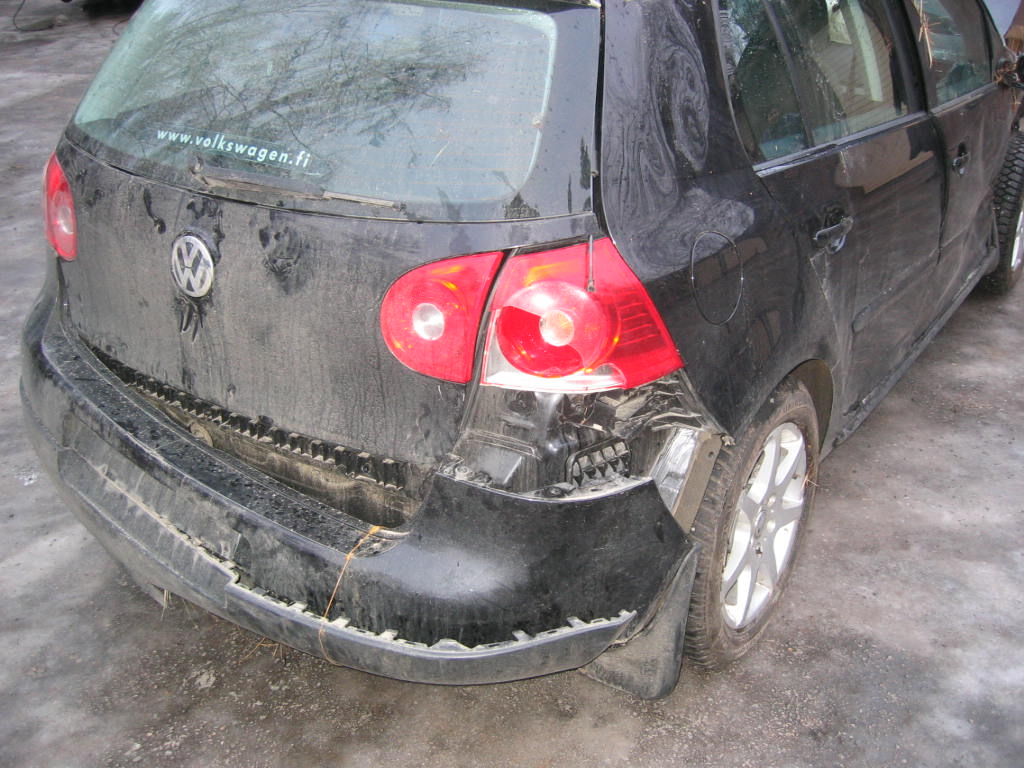
Boot lid has also some fitting problems. The rear bumper is OK, only the right support had failed and the spoiler had partly come out.
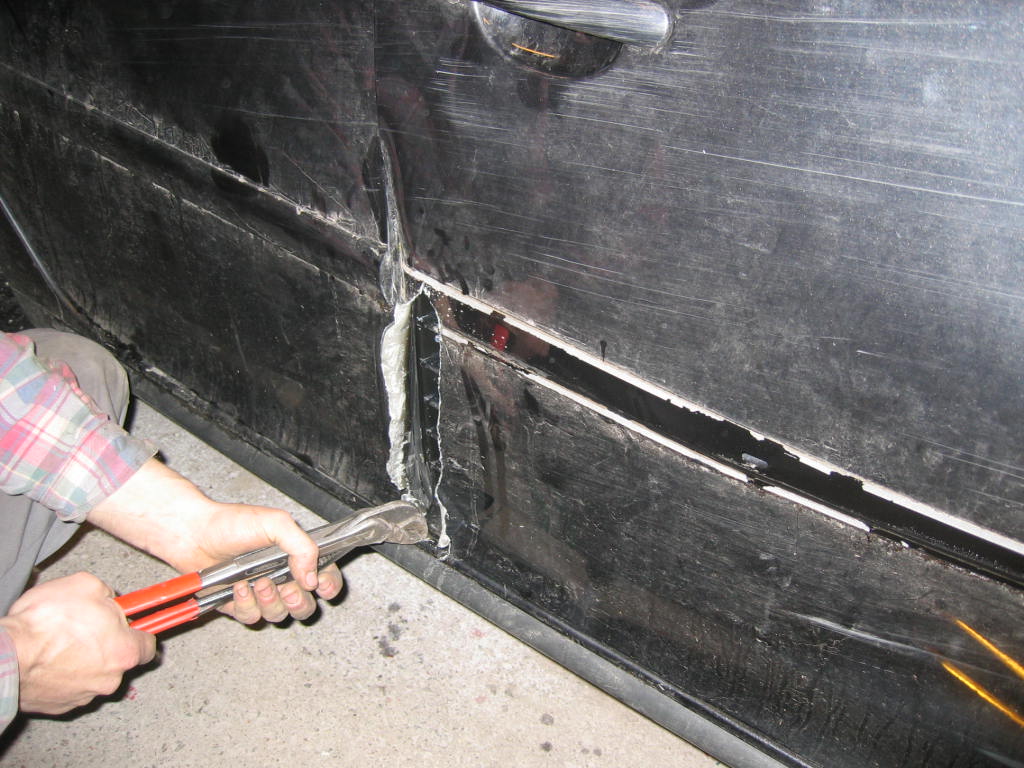
Some force had to be used to open the left front door. Back door is OK, so we didn't want to hurt it more while opening the front door.
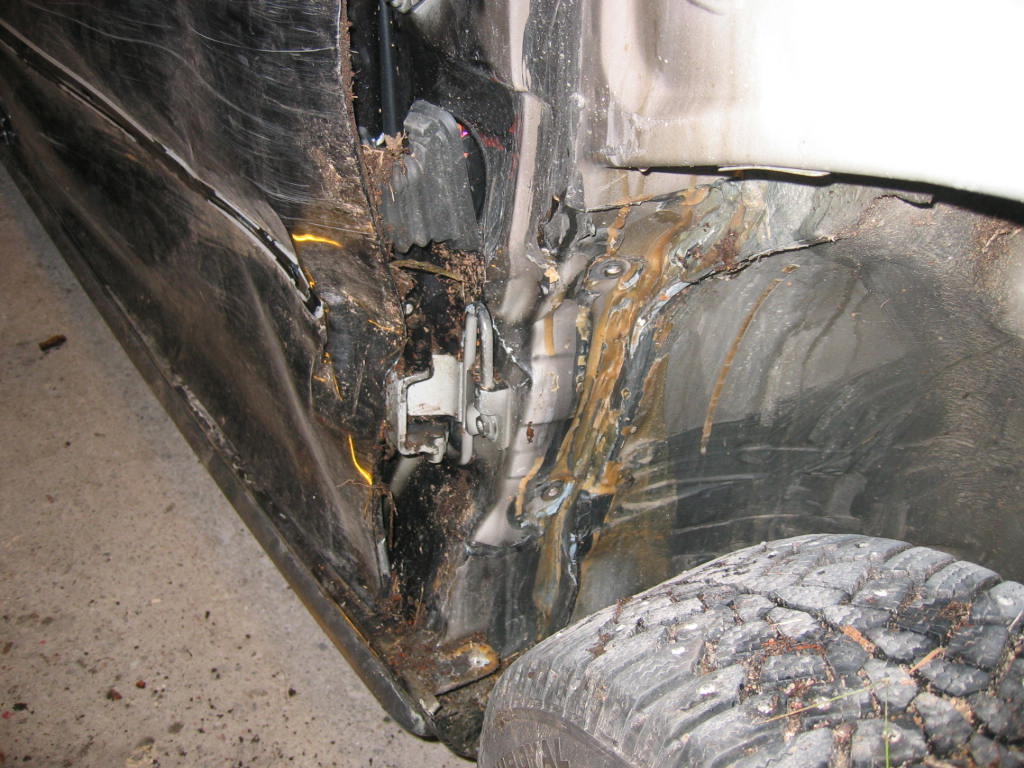
Another view of the damaged a-pillar.
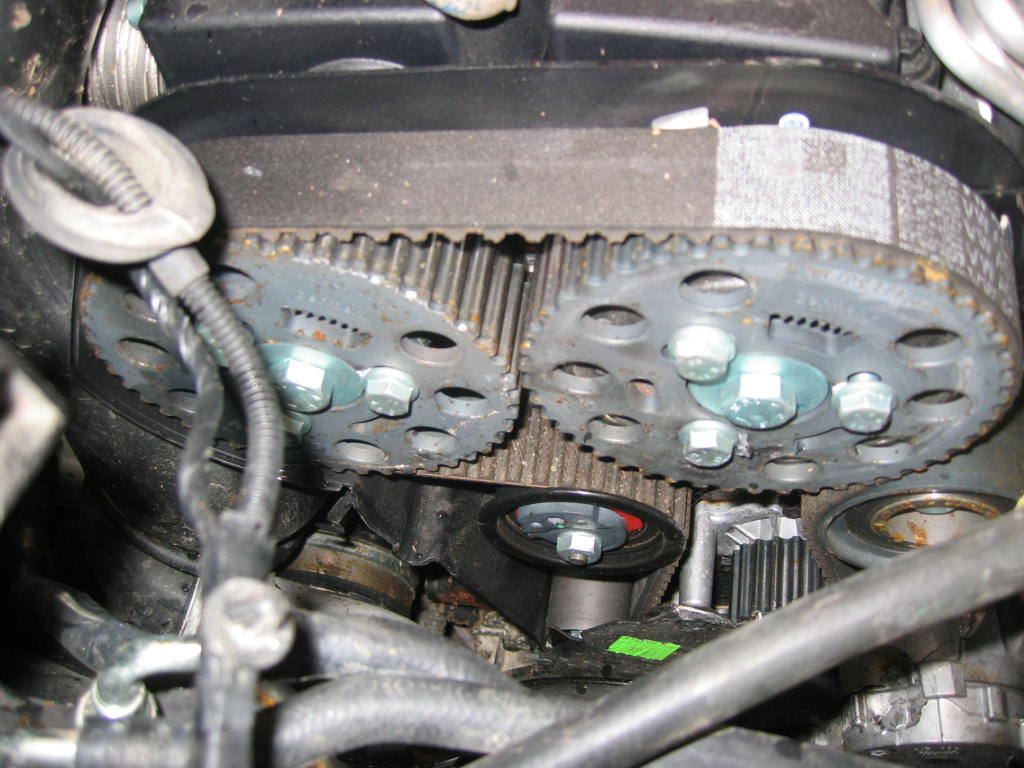
The timing drive of the 16V TDI engine.
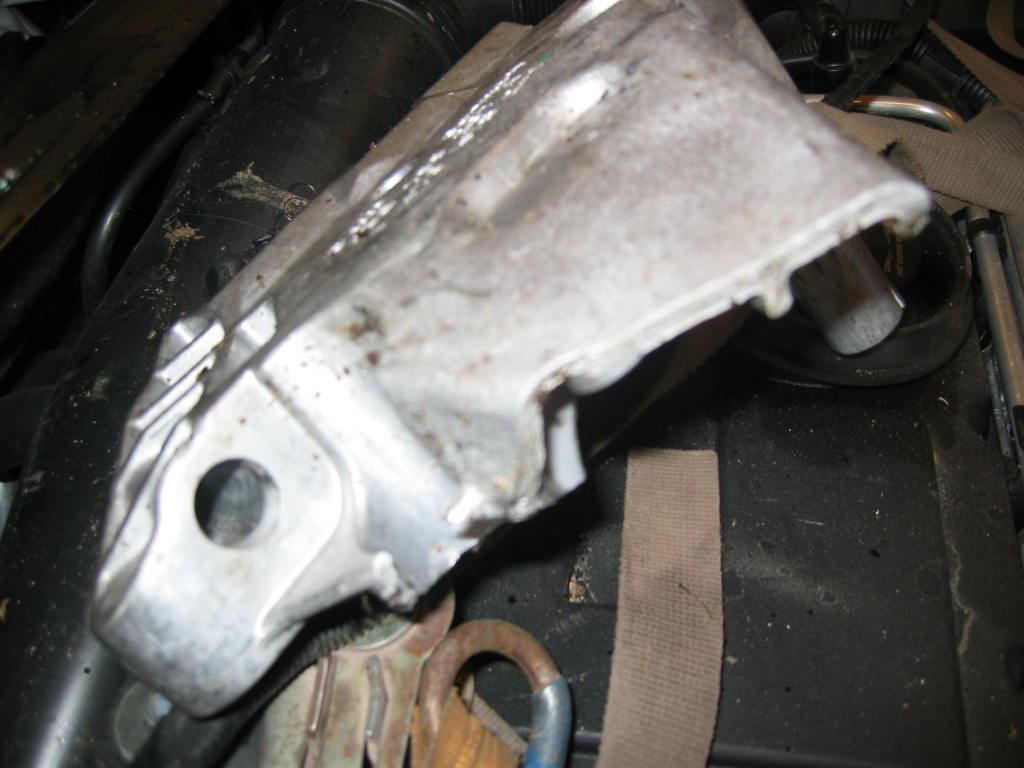
Not a good image, but here's the failed right engine support... a new one was ordered from the manufacturer.
Tearing down, more damage
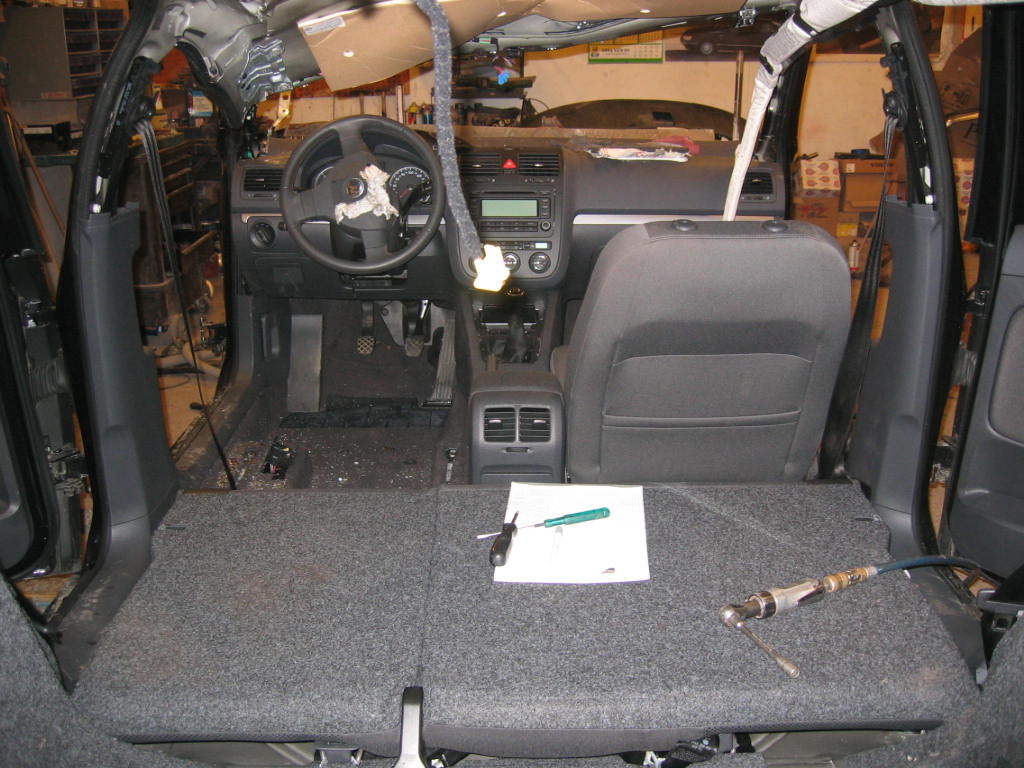
Some of the interior already taken away. Front airbags and seat belt tensioners had gone off, but all the other safety equipment is OK. The passenger airbag has broken the dashboard, it needs to replaced with a new one.
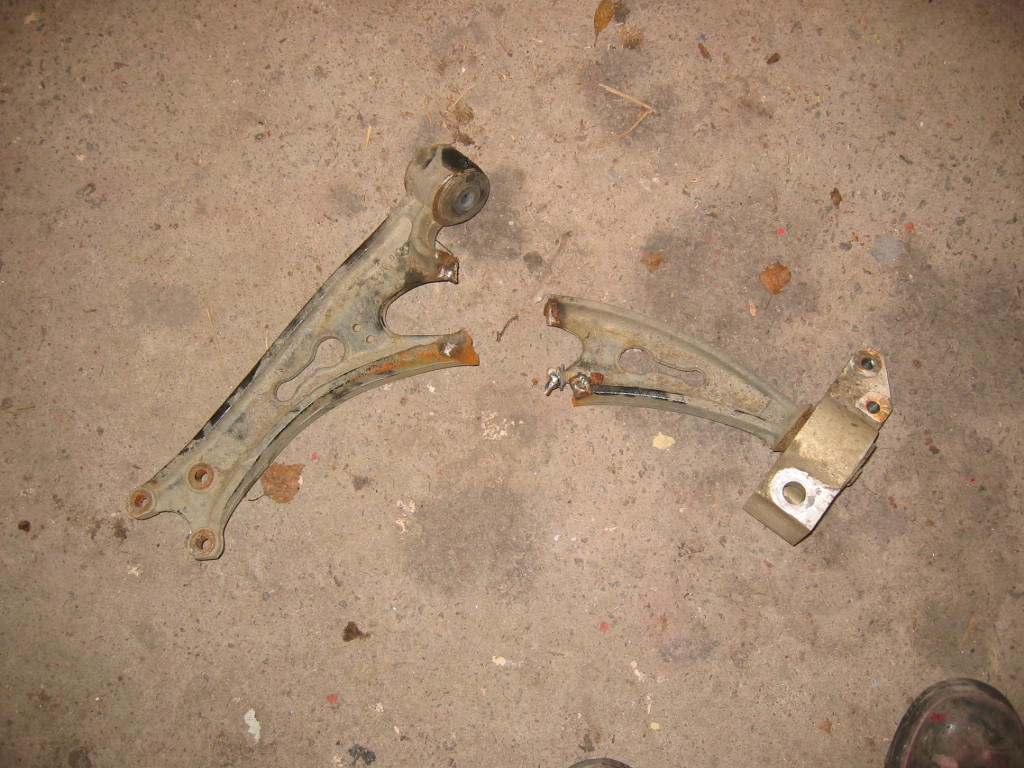
Left track control arm had snapped into two parts. We tried to weld it a little to make it easier to move the car around the yard... without much success.
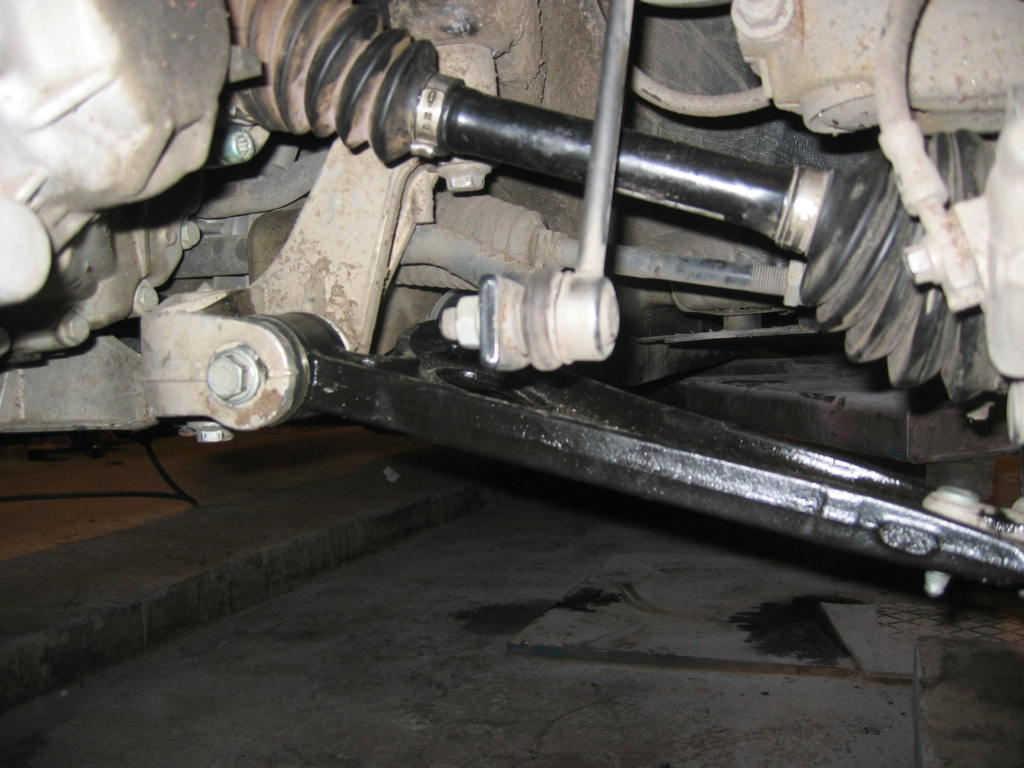
New track control arm installed. Also the inner joint was broken and replaced.
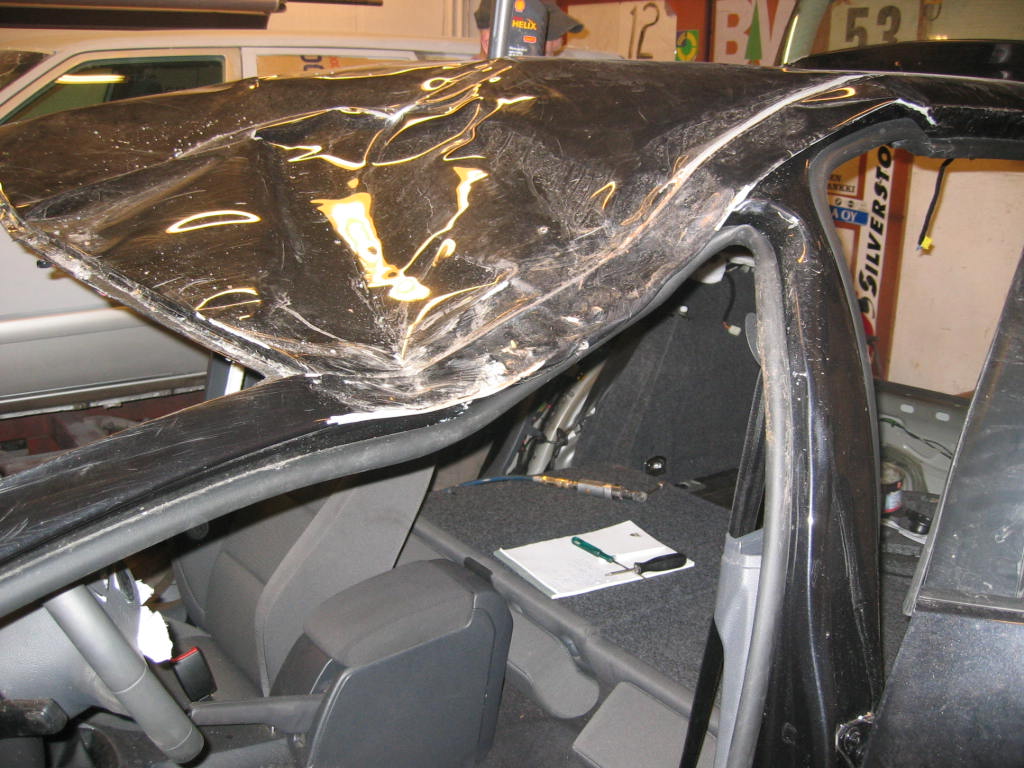
The little dent in the front of the roof.
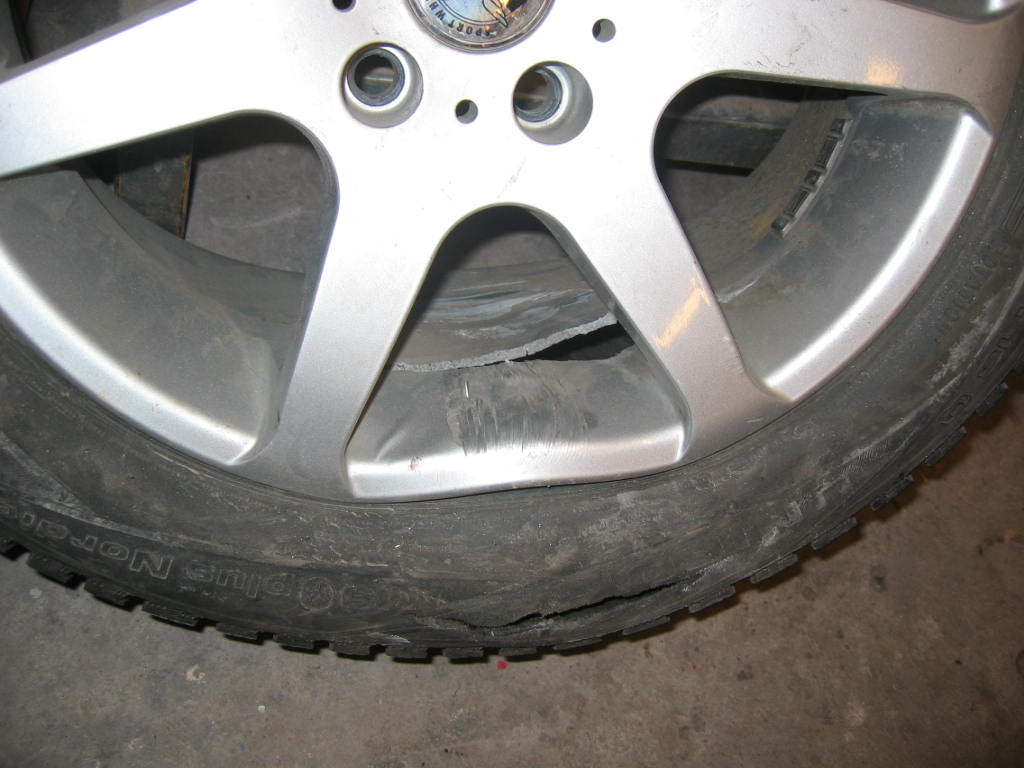
Damage on the wheel.
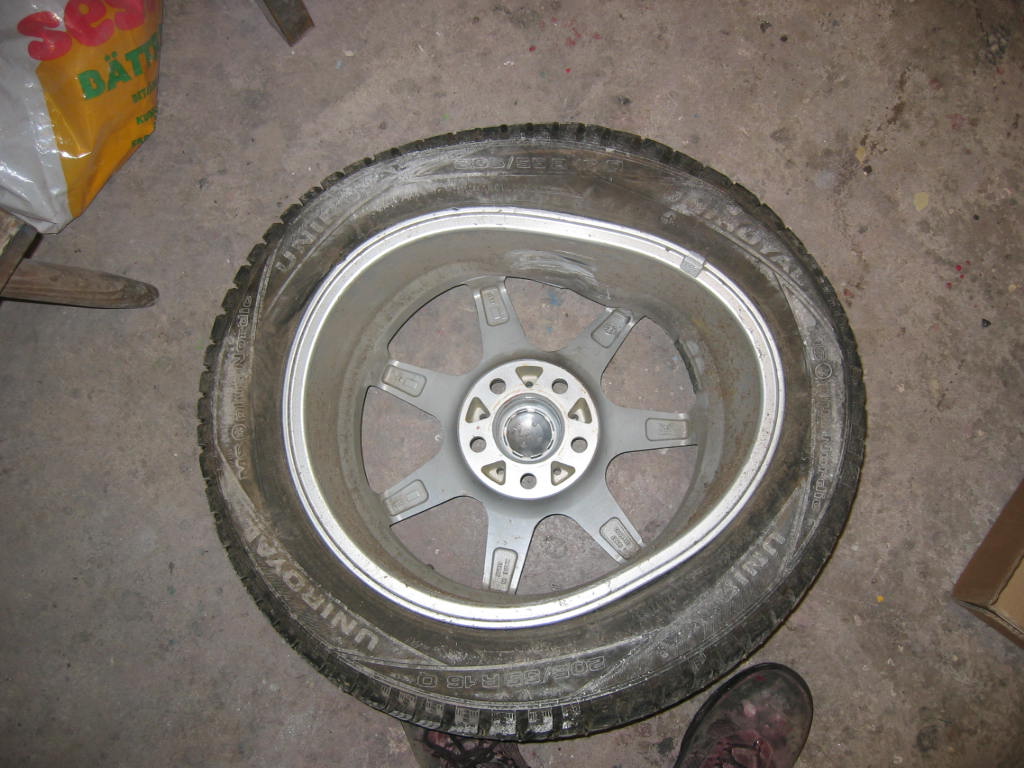
Need a little balancing weights...
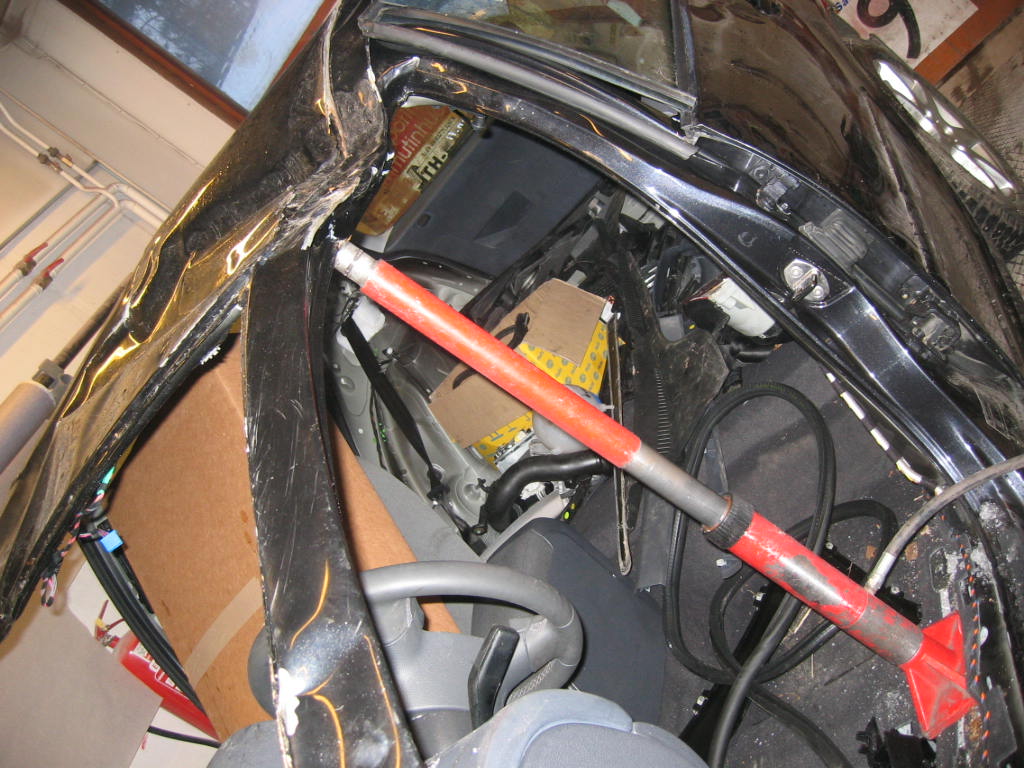
The bodywork was started by lifting up the damaged corner of the roof.
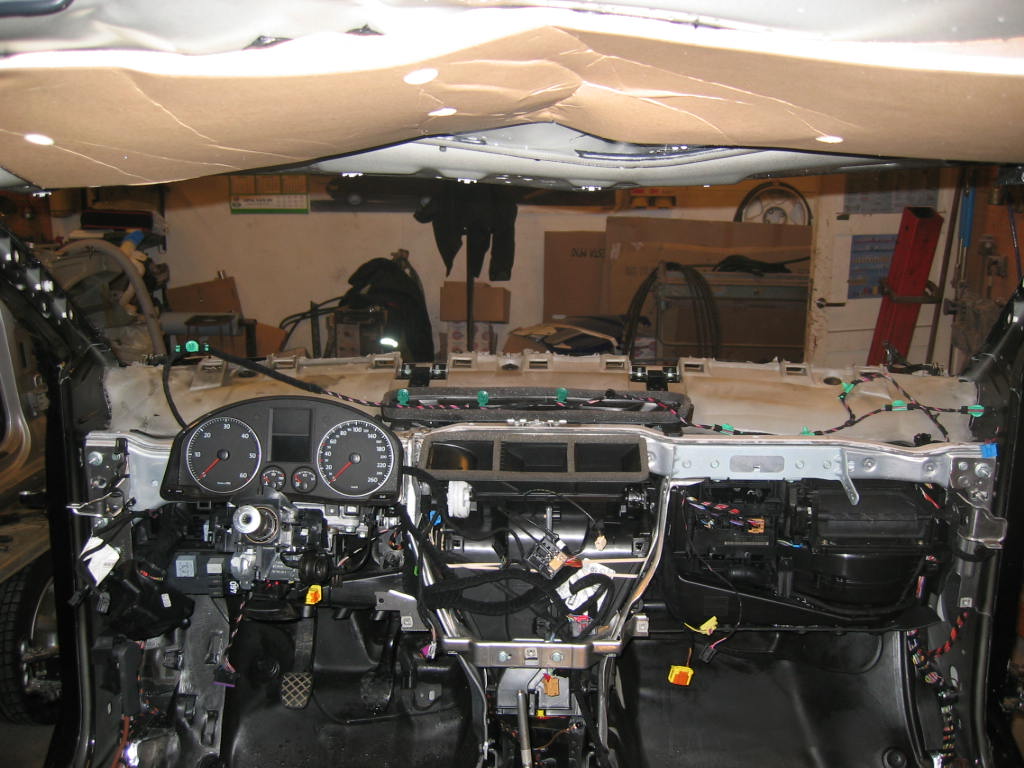
The dashboard was disassembled to give more space. The instruments are still there because of the immobilizer... we moved the car around by driving it.
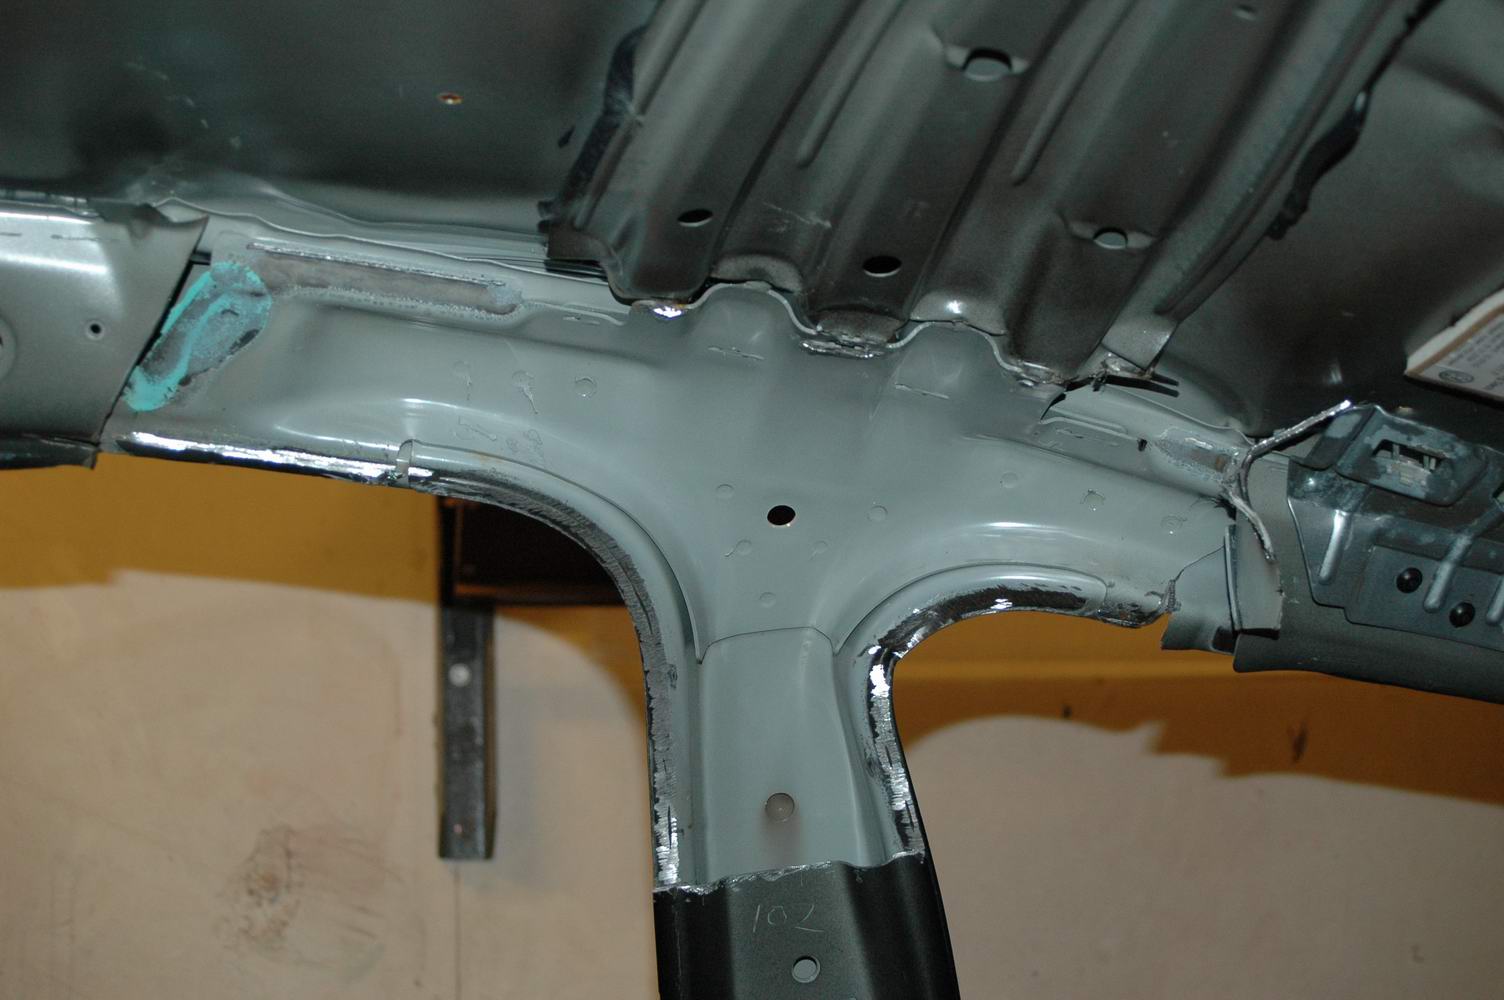
First we cut away some metal to find out how the body is made (what kind of parts we find inside the outer metals). Here's what we found from the inner side of the B-pillar.
Inside we find reinforcements, made from very hard steel. It doesn't bend much, but breaks instead, as seen on the right side of the opening.
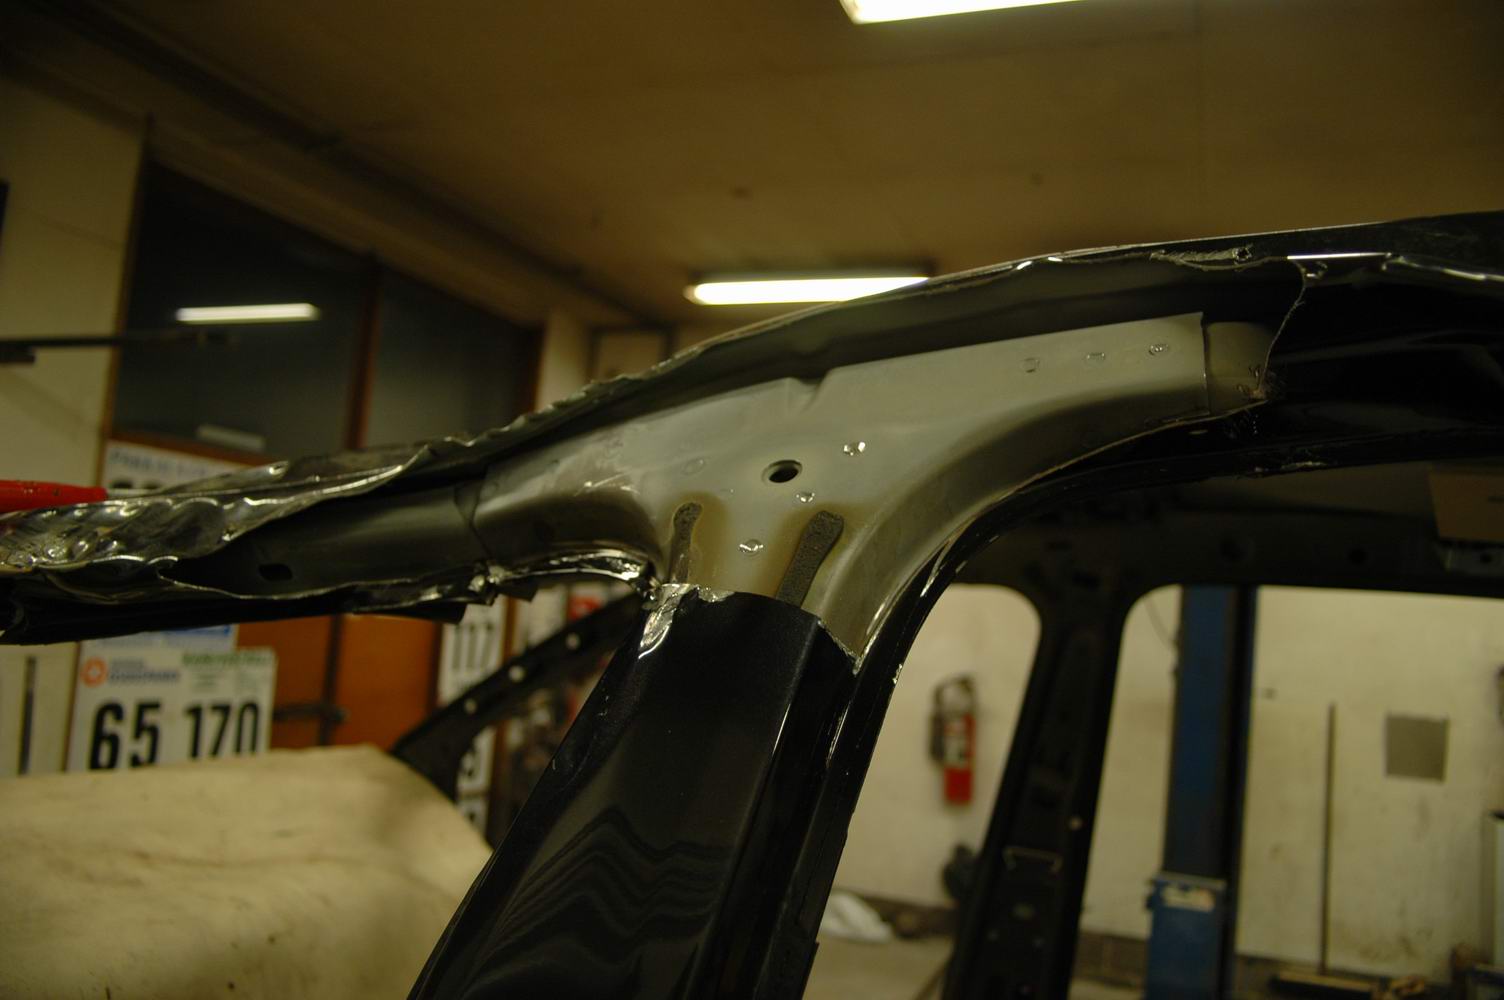
Similar opening on the outside. Another reinforcement on the outside. It goes inside the b-pillar all the way down. These reinforcements make the repair a bit tricky, because its allowed (by manufacturers repair instructions) to cut and weld these only from some defined areas. It's not even possible to drill the spot welds with a normal drill bit.
Cutting the roof away
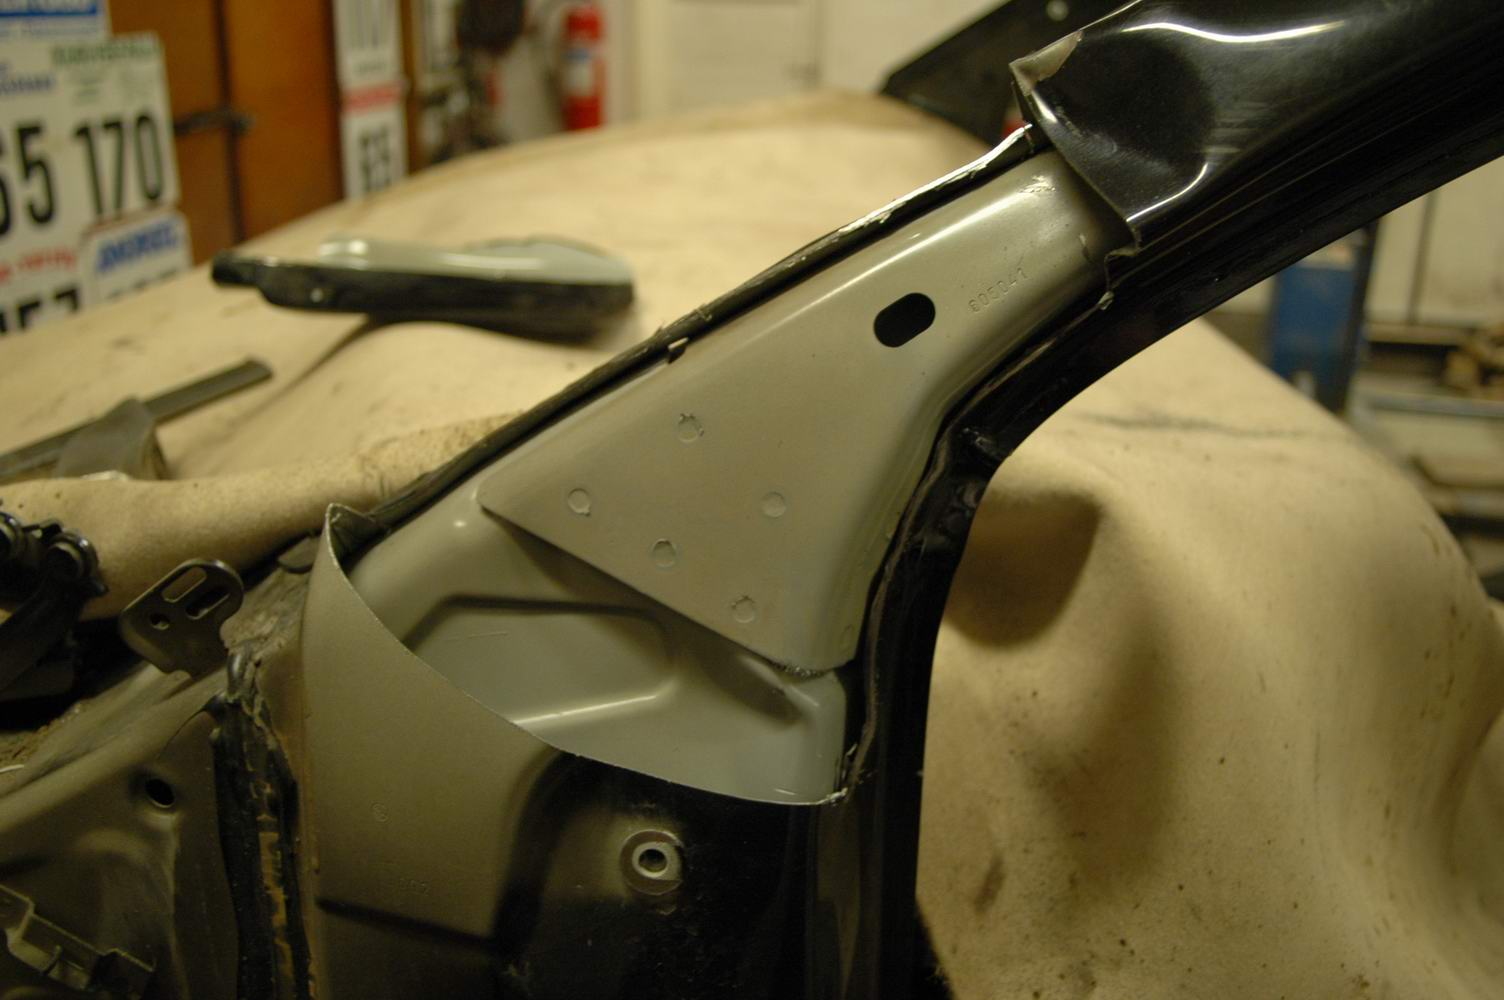
The pillars were cut open to better see the body structure, locations of the reinforcements etc. Here's the driver side A-pillar, here starts the reinforcement that goes up towards the B-pillar.
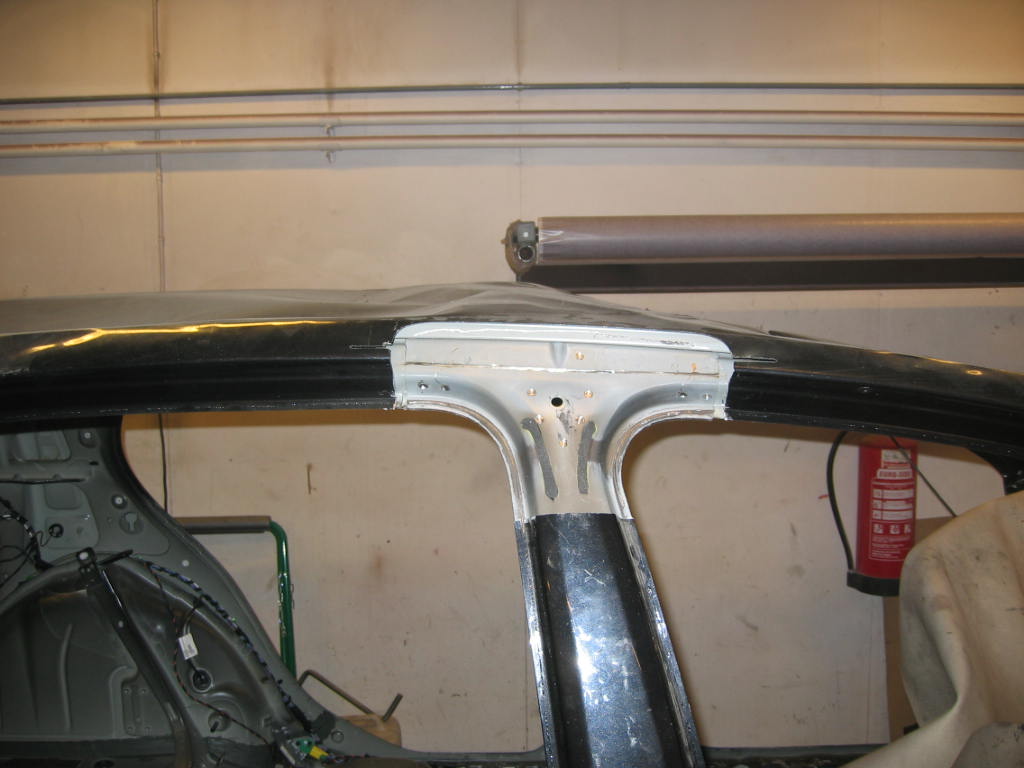
Top of the passenger side B-pillar cut open and the reinforcement cut just like it's allowed based on manufacturers repair instructions. It's not allowed to cut and weld the reinforcements wherever one likes, because then it wouldn't be a reinforcement anymore. It's necessary to cut it there to remove the roof.
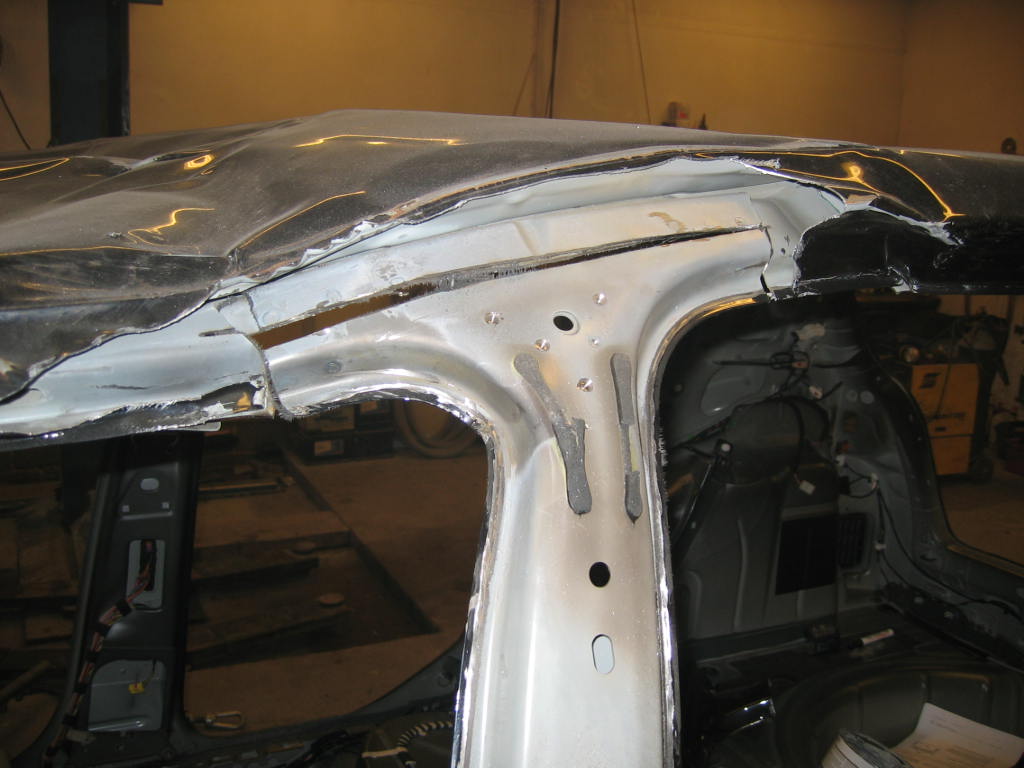
The top of driver side B-pillar in this image looks worse than it actually was. Here you can also see the place where it's allowed to cut the B-pillar reinforcement.
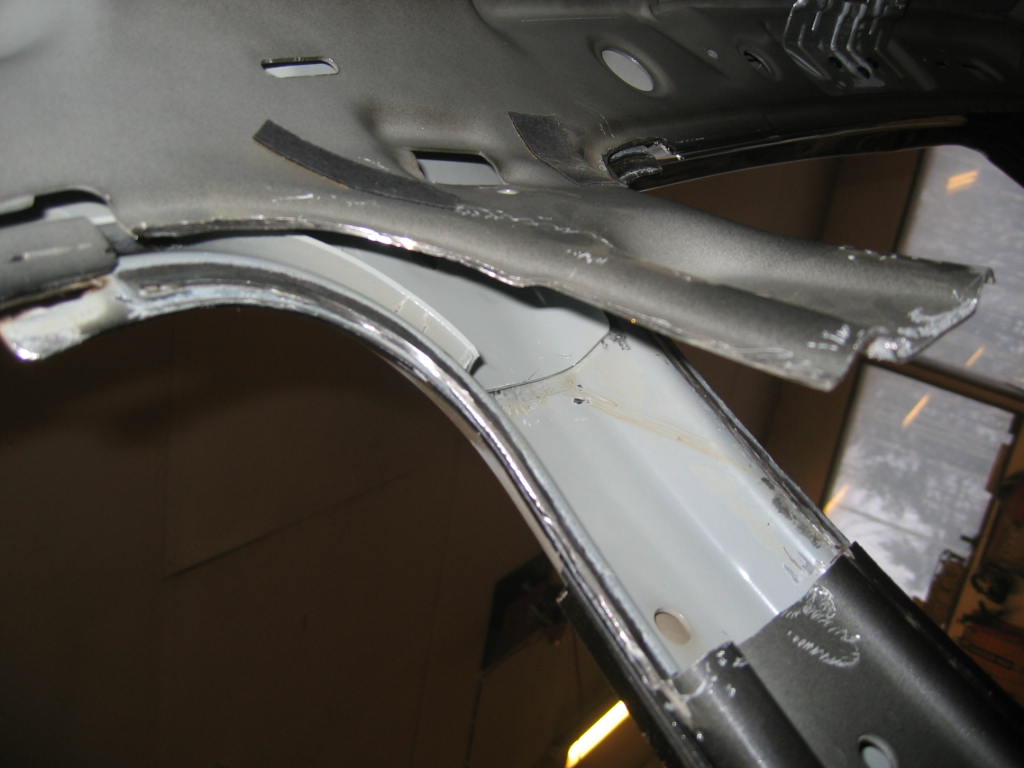
The inner metal cut open and bent a little to help lifting the roof off.
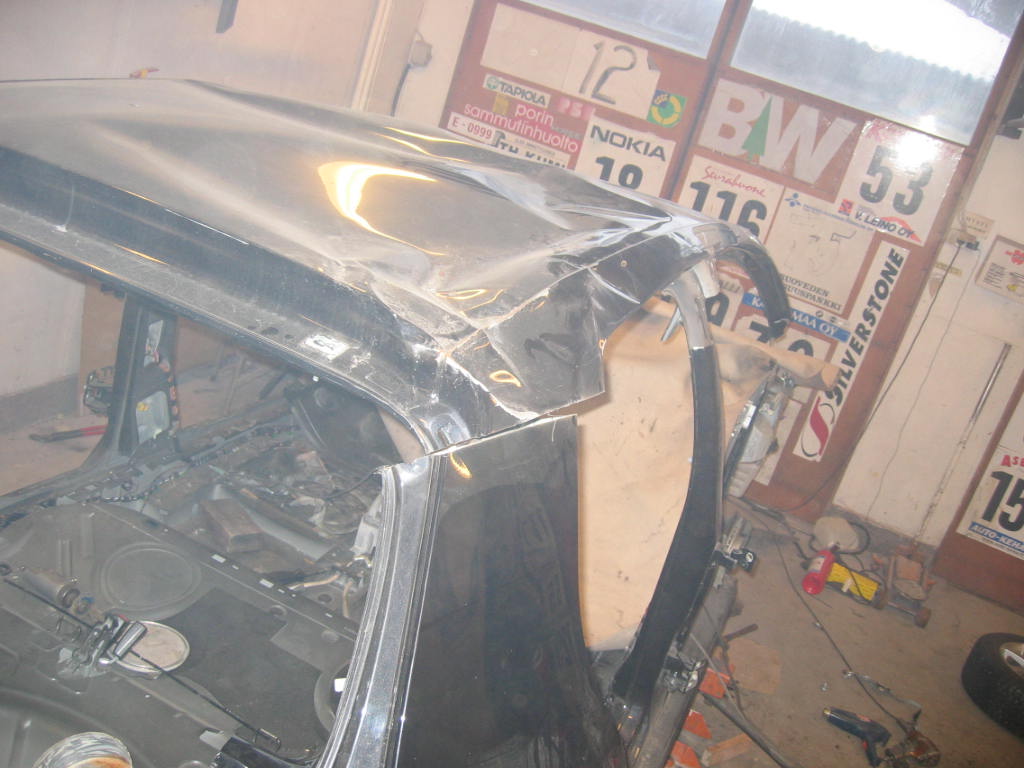
After cutting the C-pillar...
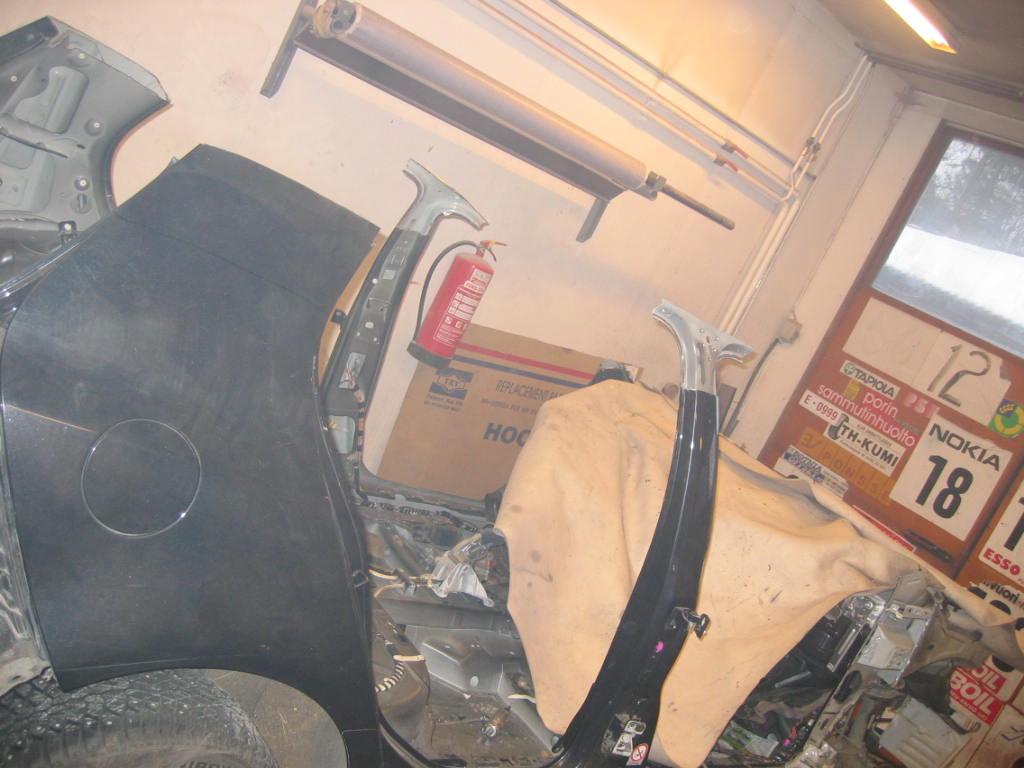
...it's time to remove the roof.
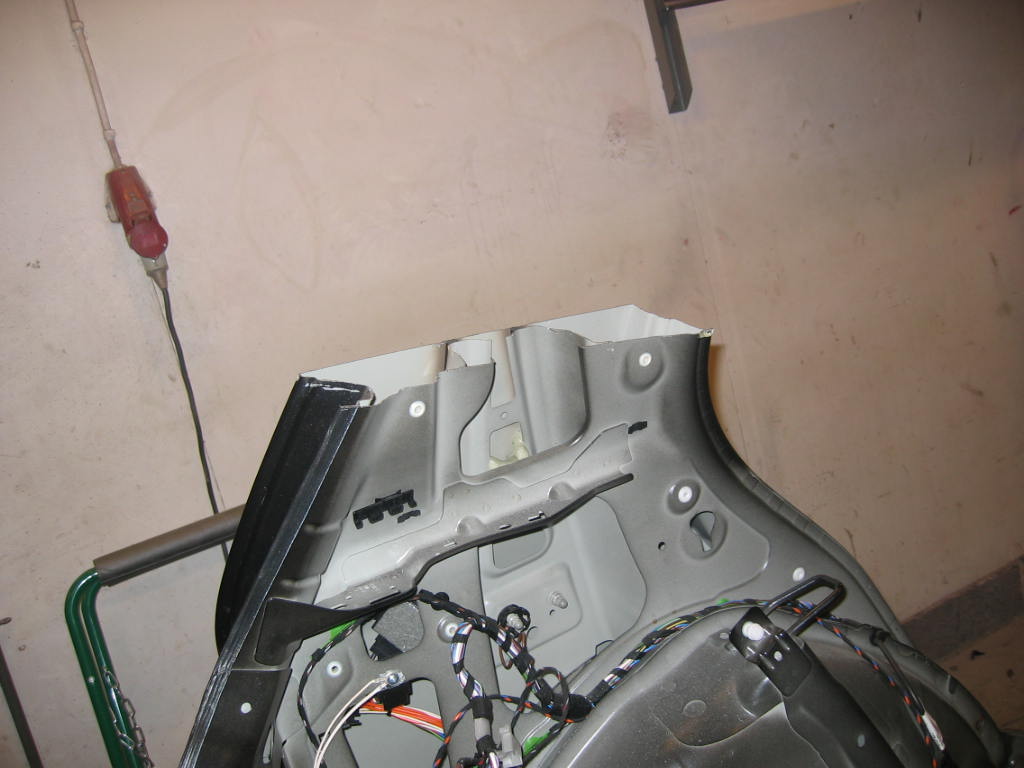
C-pillar after some tidying. The instructions where to cut the C-pillar can also be found from the manufacturer's repair instructions.
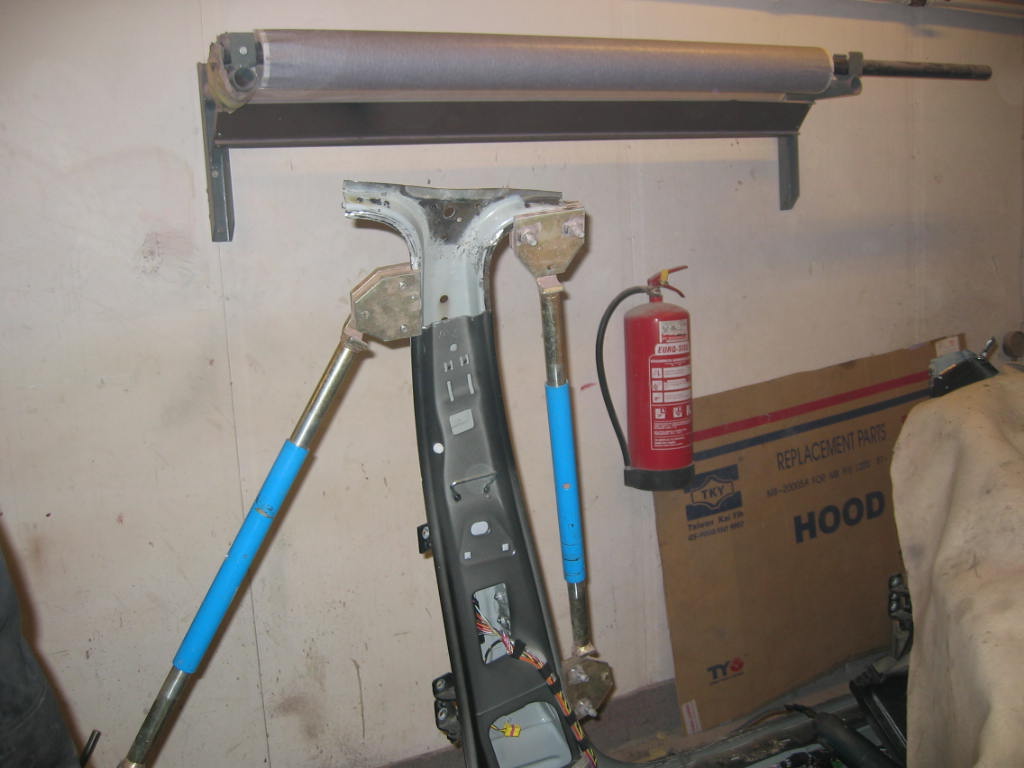
As seen in previous images, the driver side B-pillar needed a little bit work until it was ready to receive the new roof...
New body from Sweden
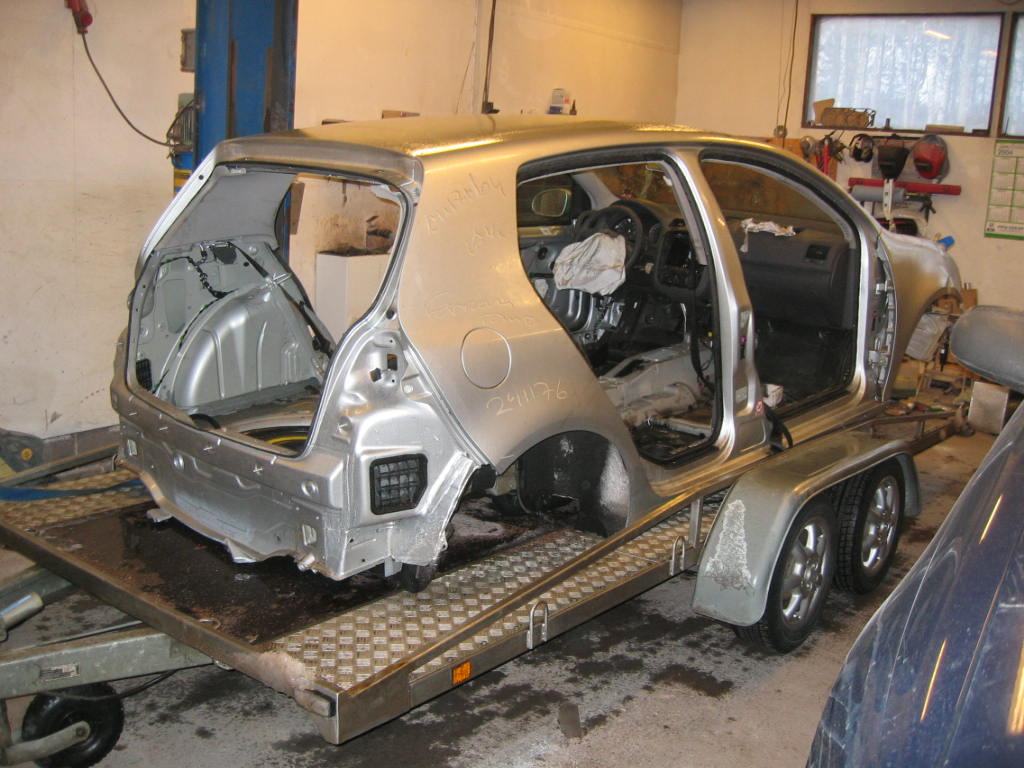
We tried to locate a roof or preferrably a complete body in Finland to donate the roof, but couldn't find one... so we had to get one from Sweden. Some might ask why we didn't swap the complete body, but unfortenately also this body had crash damage in front... and it's not legal to swap the body in Finland.
Anyway, this body gave lots of good, top quality parts and even more.
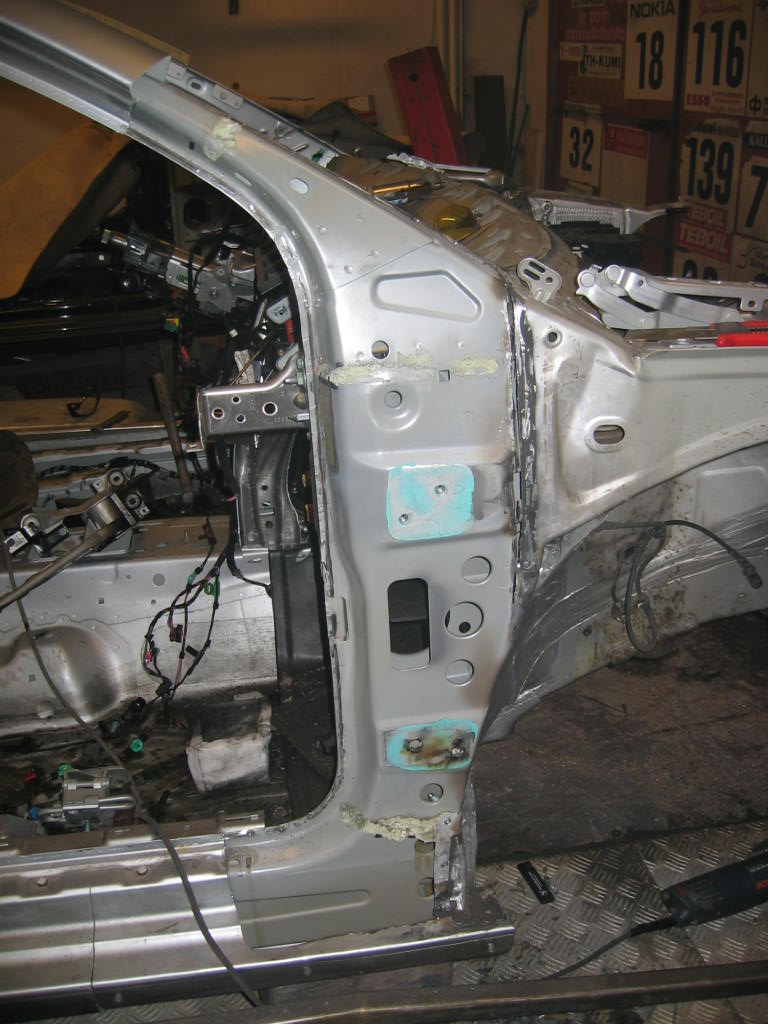
In the beginning of January we started to take this body to parts...
The front of the side panel removed.
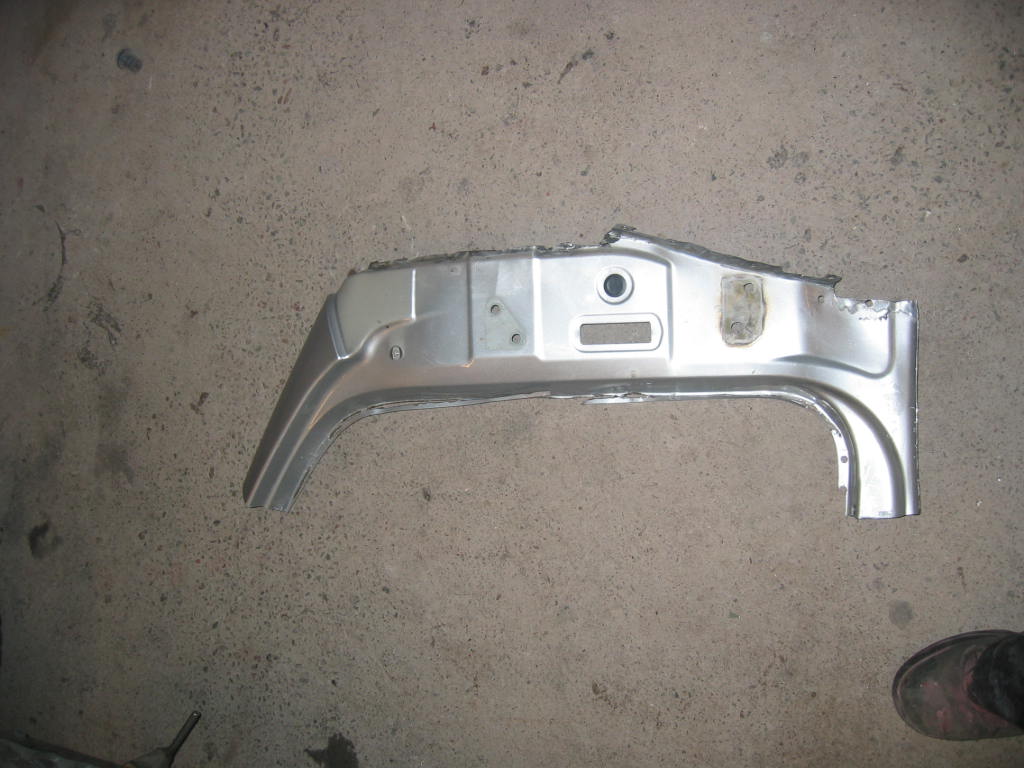
The front of the side panel.
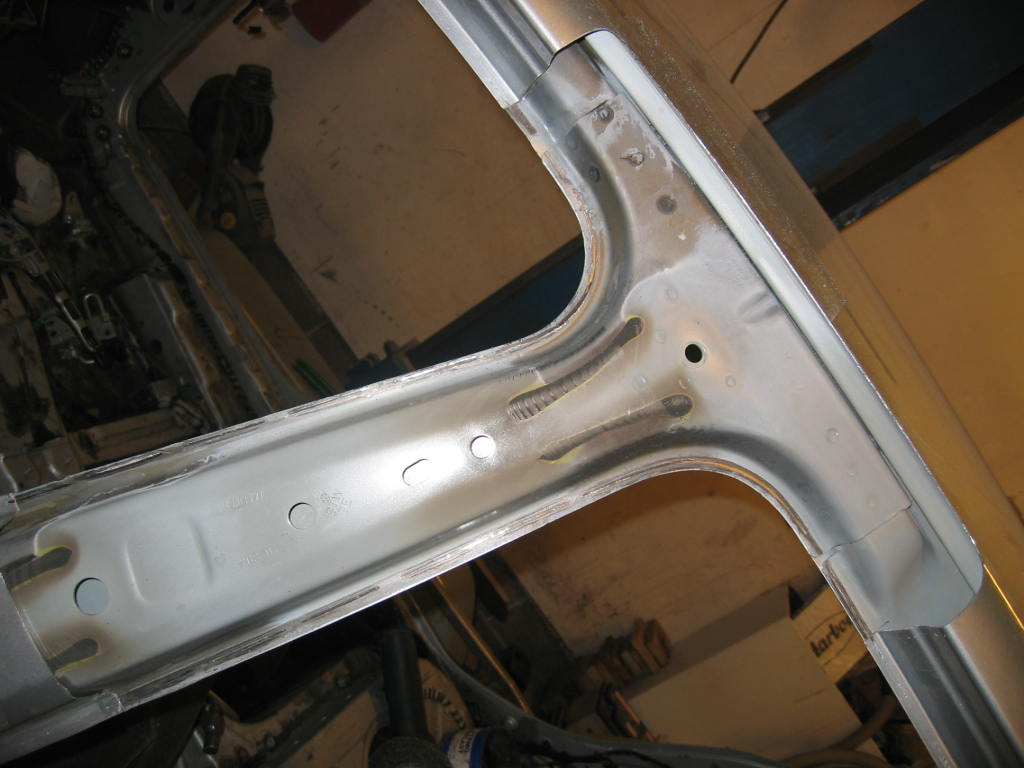
iThen the top of the B-pillar...
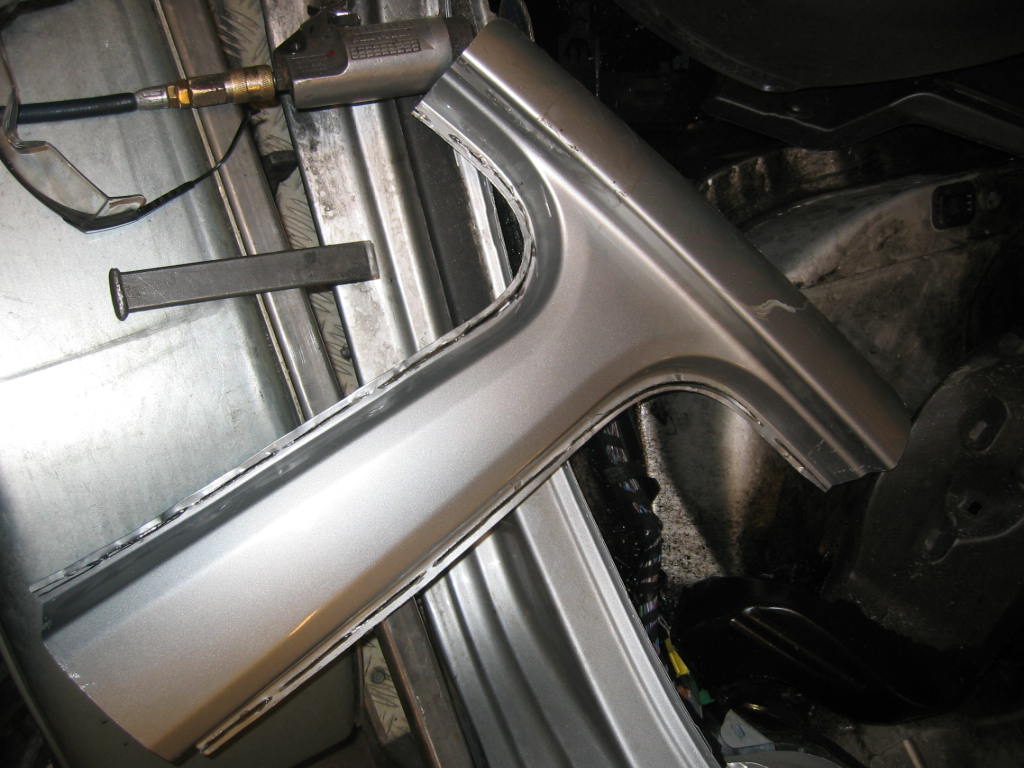
...as seen here.
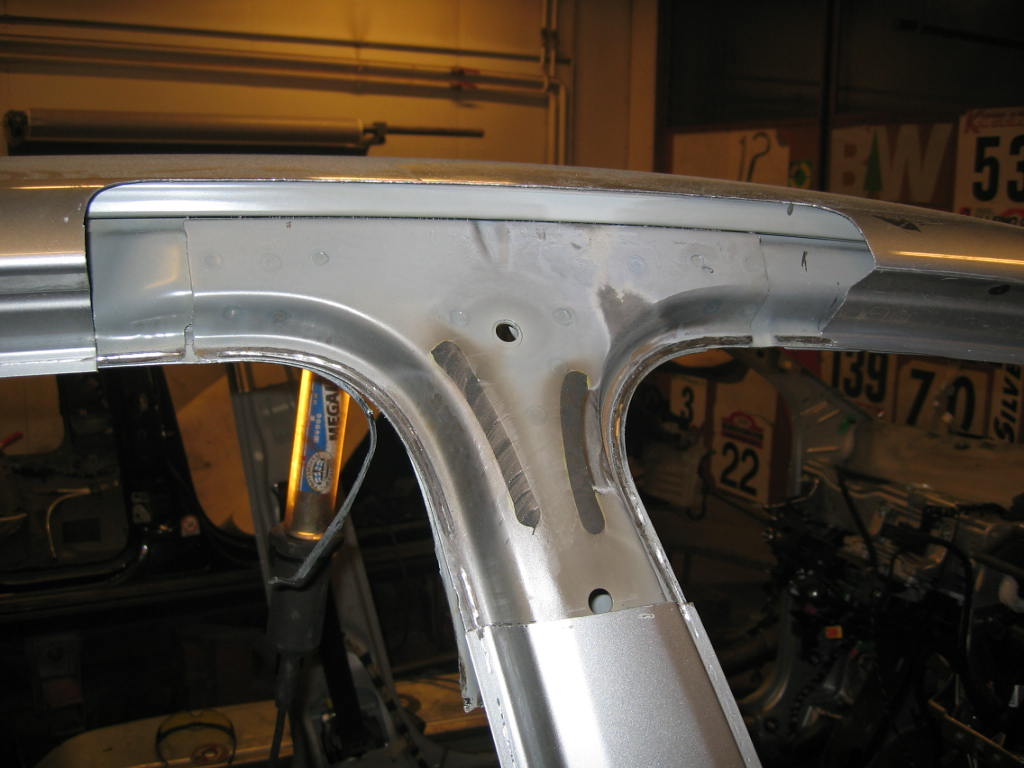
Also the right side. Got to do this way to get the access to the reinfocement and it's spot welds.
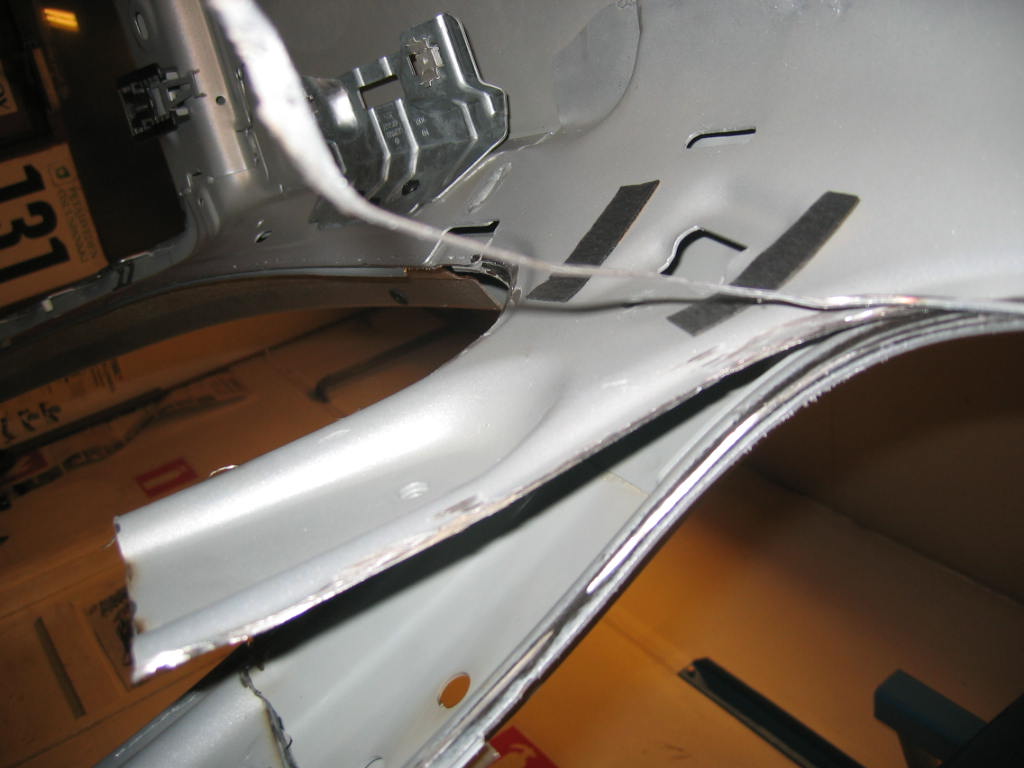
Cutting on the inside.
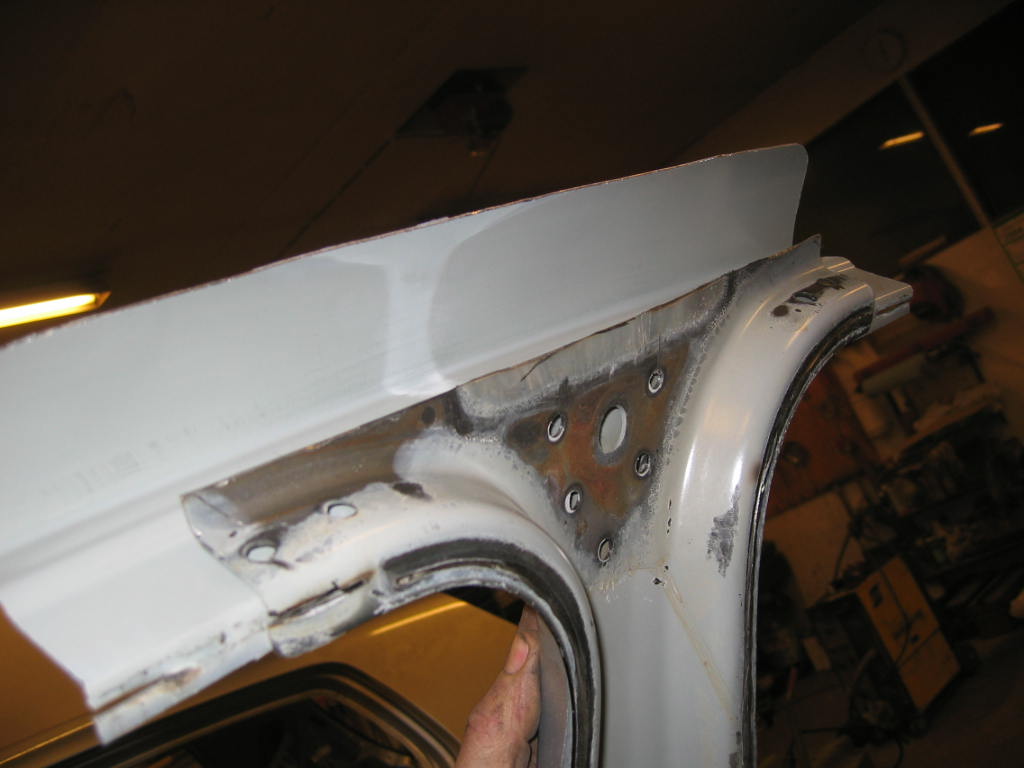
Some fitting of the driver side B-pillar (that had to be repaired a little as seen on the previous page).
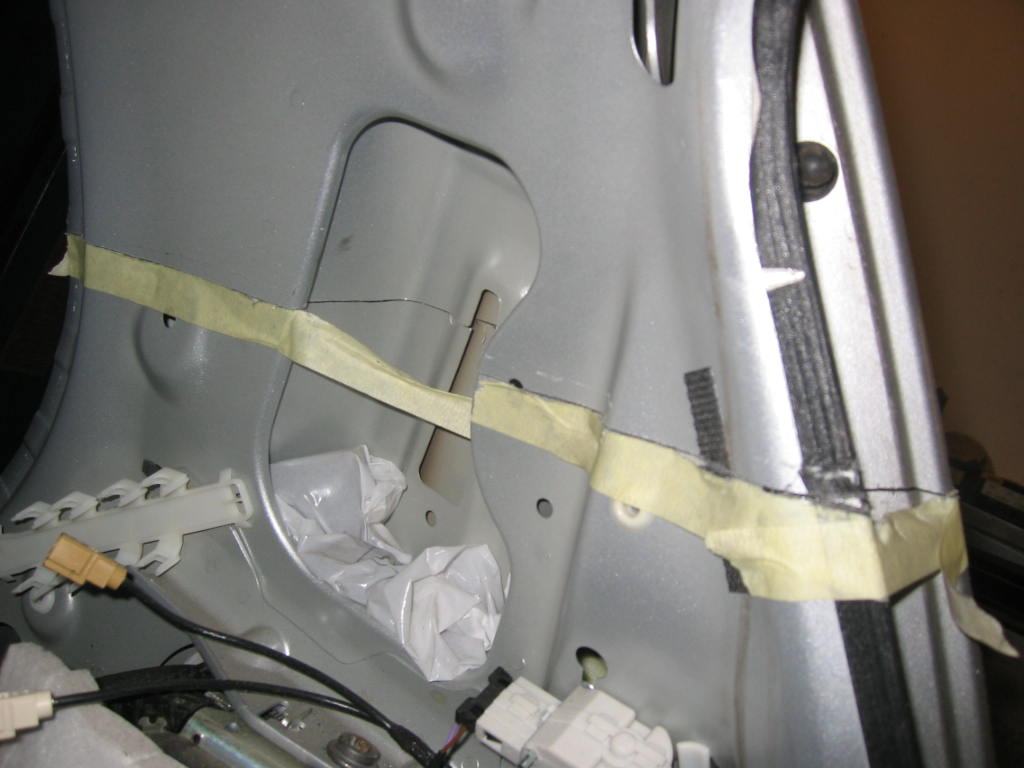
We used masking tape to mark the line where to cut the C-pillars.
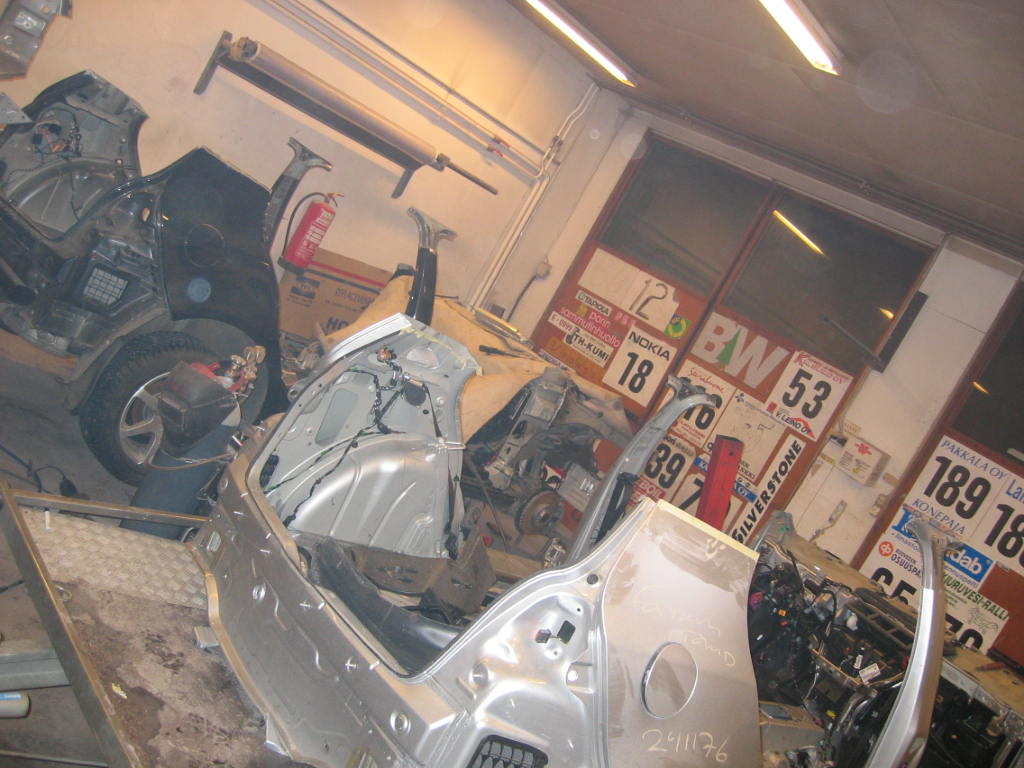
Both bodies without the roofs here...
Placing the new roof
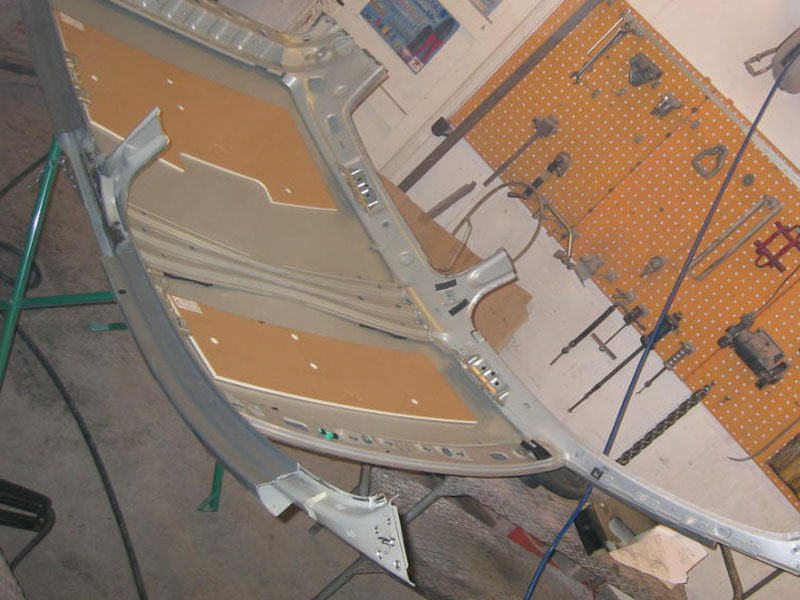
Now that the roof is cut away from the donor car...
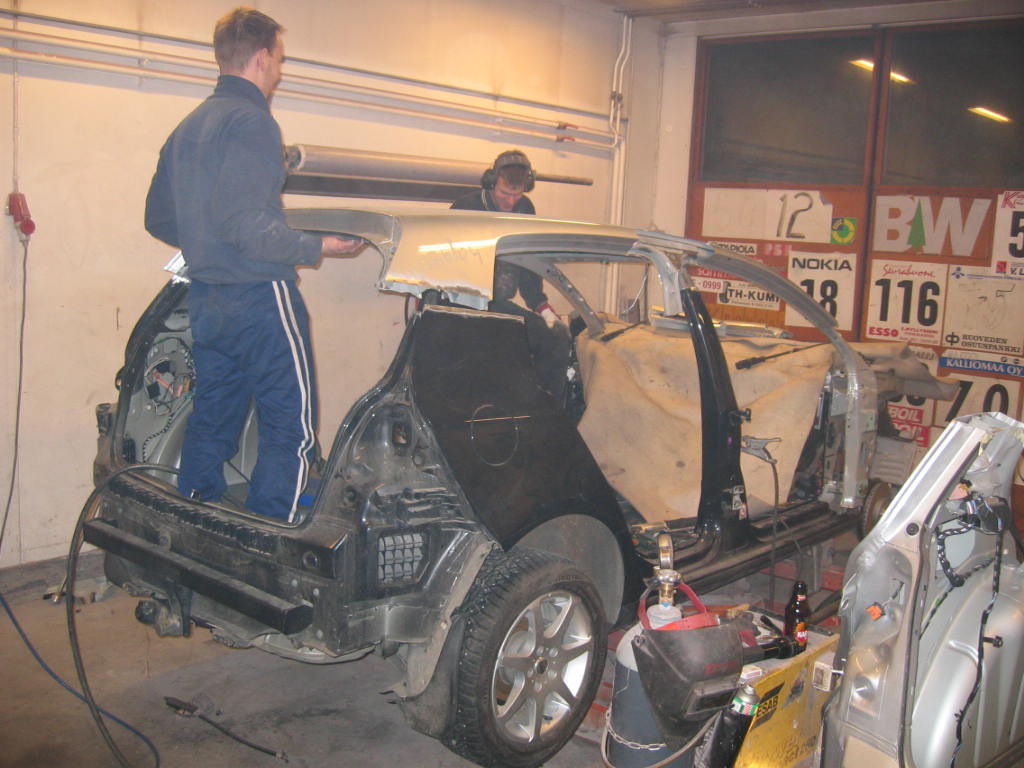
...it's time to give the black golf a new roof!
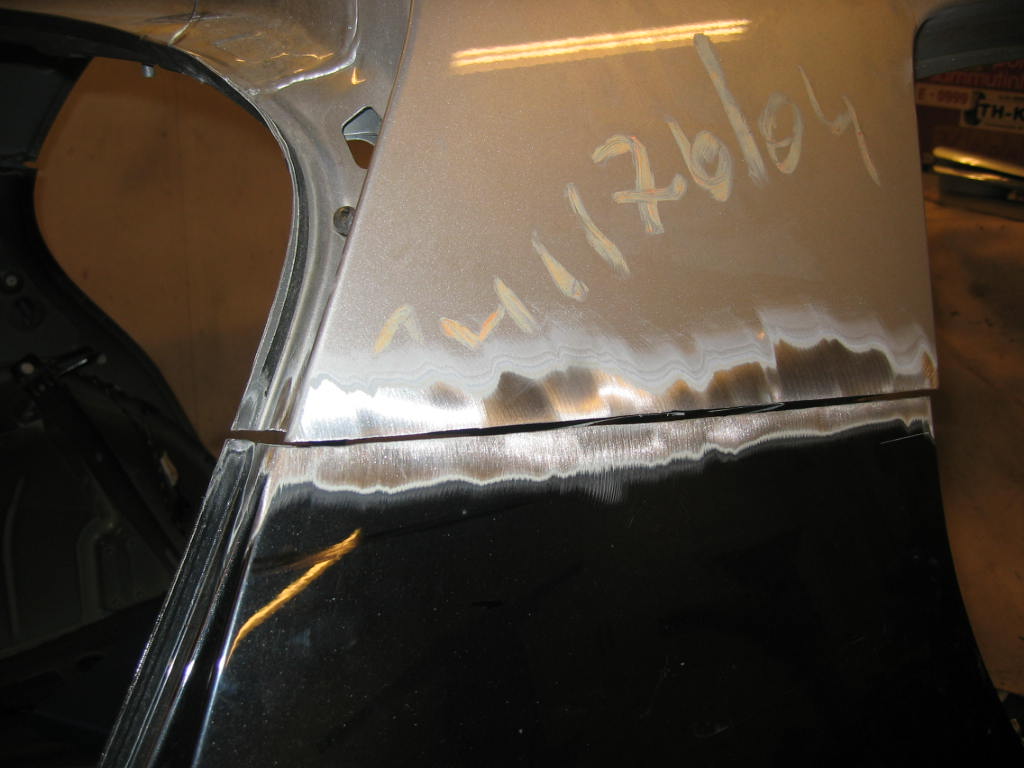
Naturally the pillars meet perfectly... :)
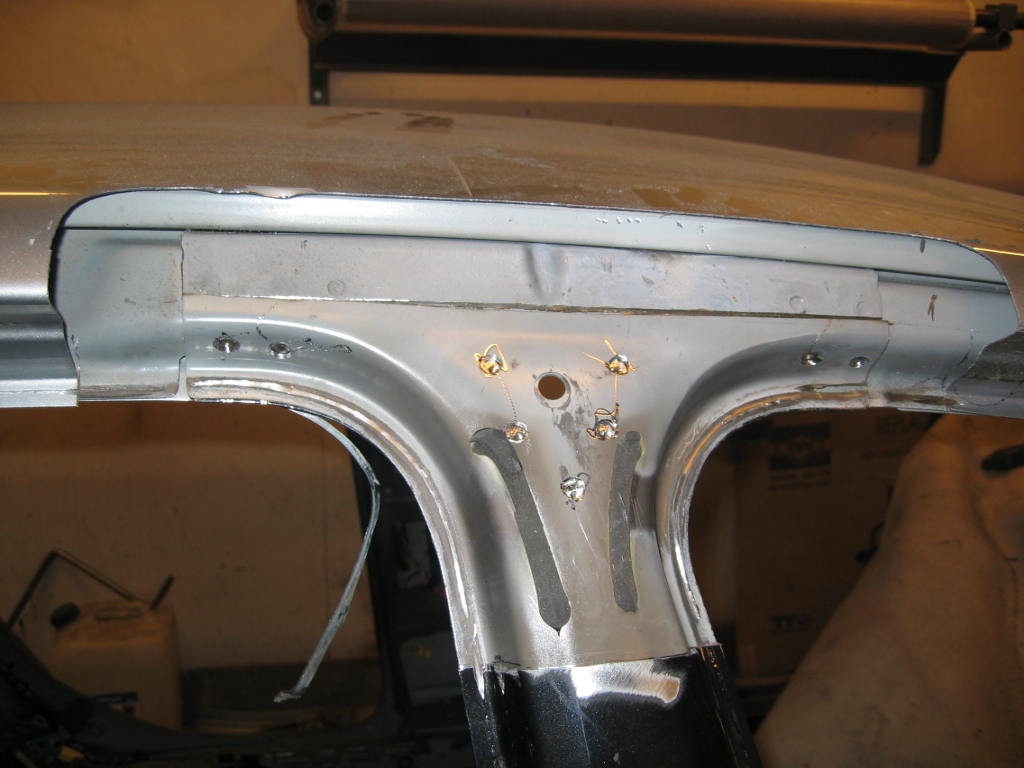
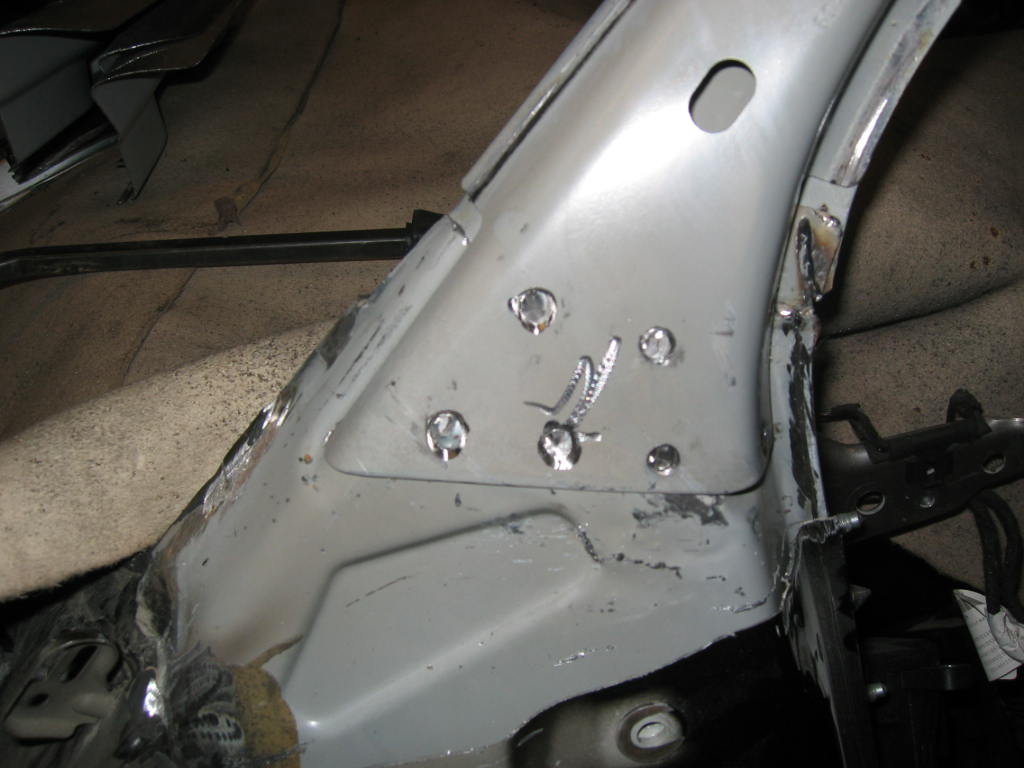
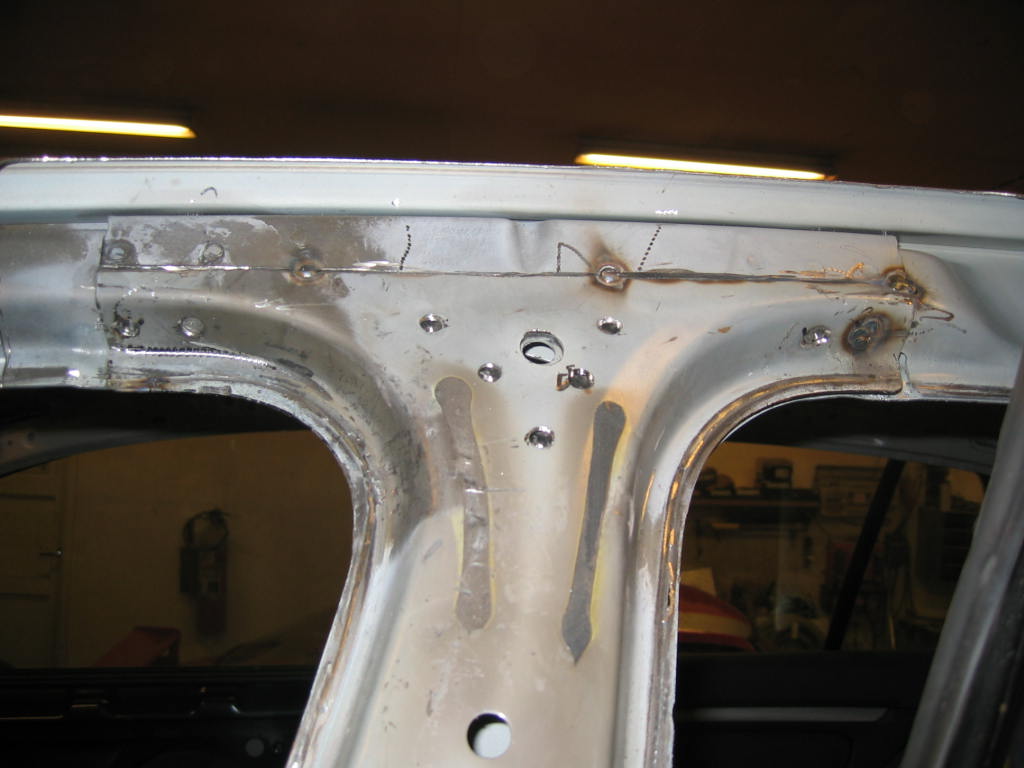
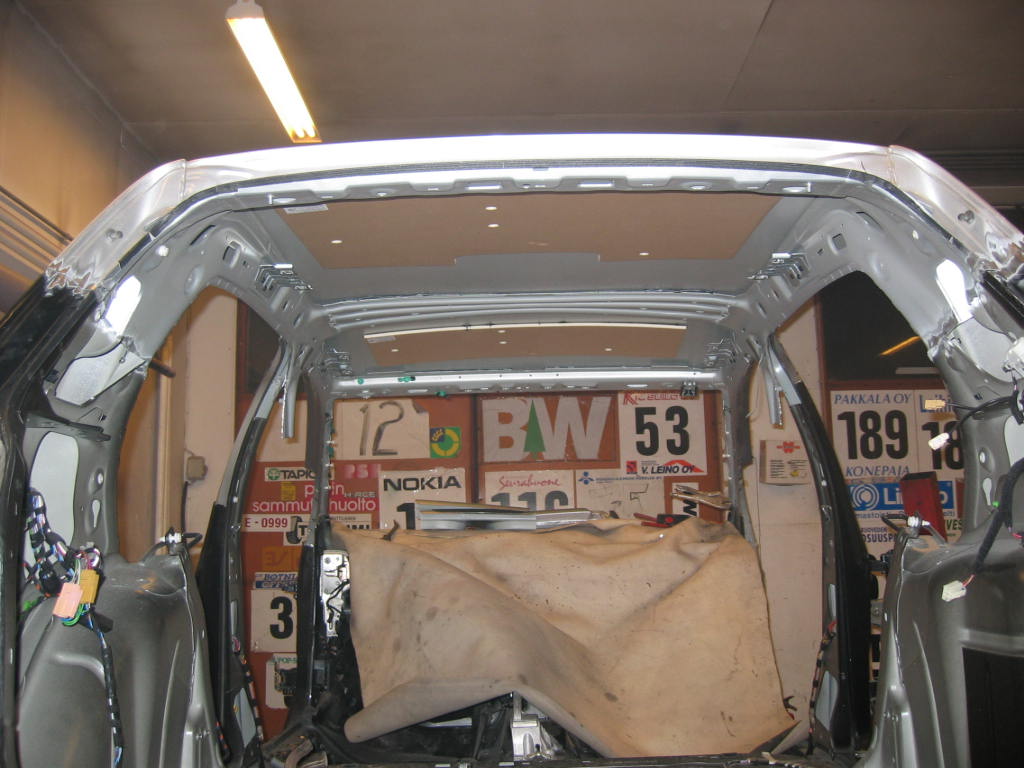
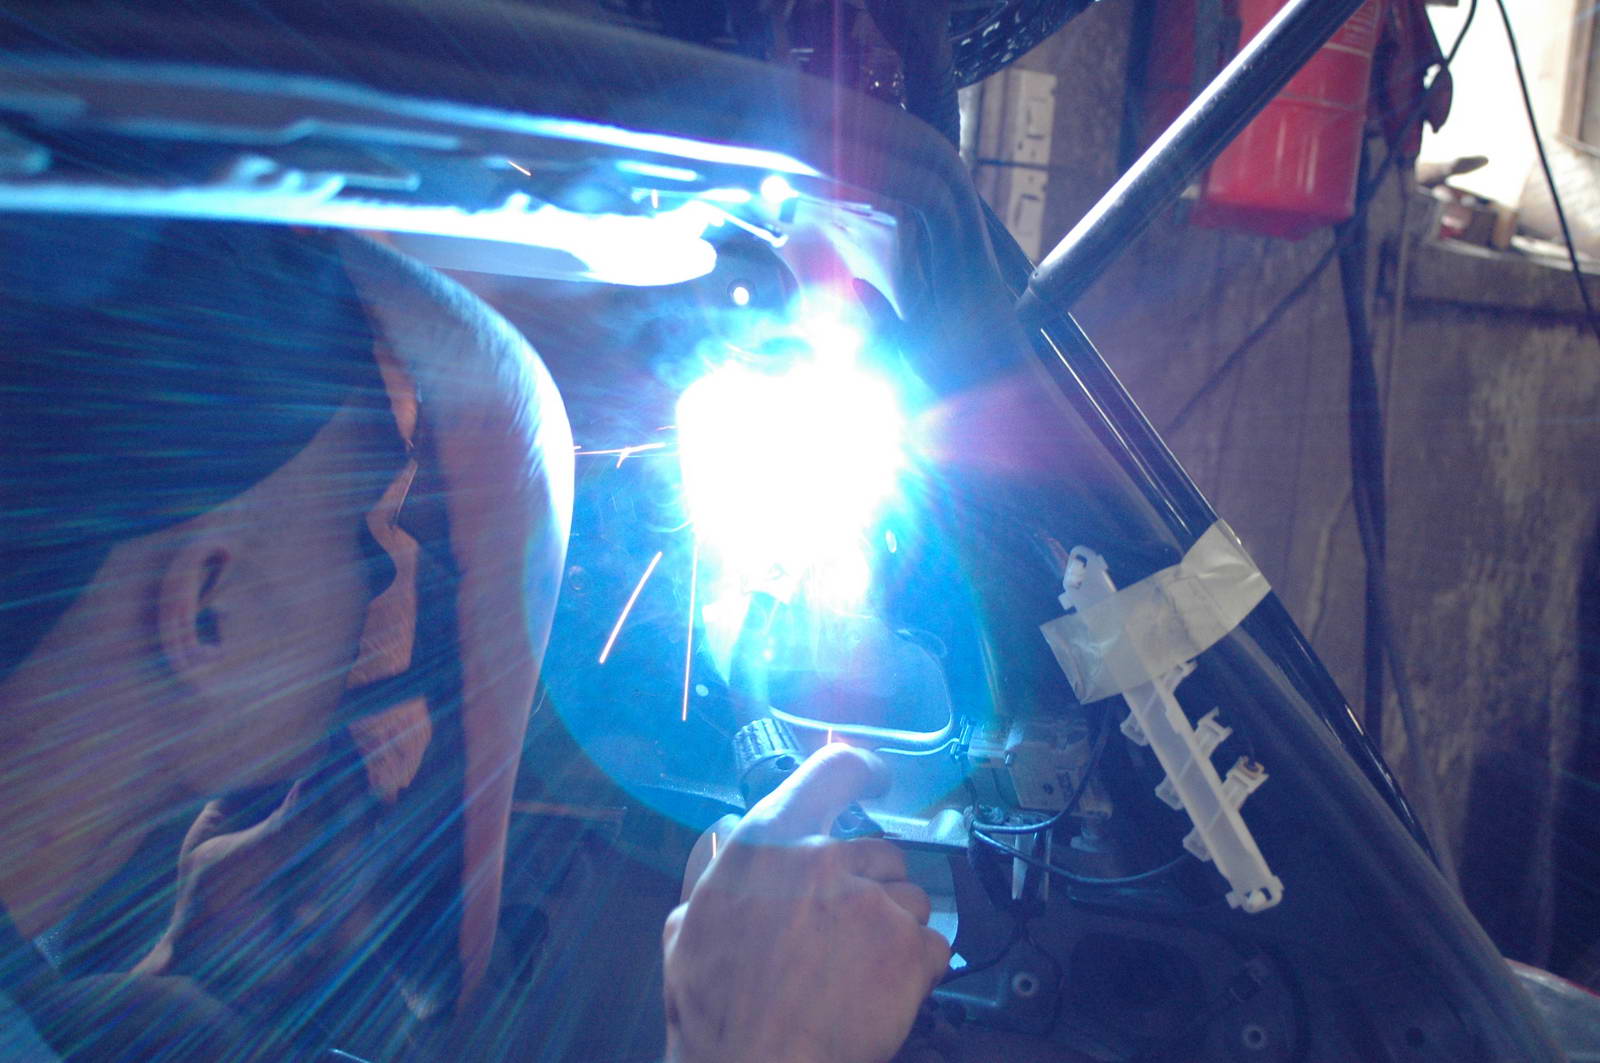
Welding the C-pillar...
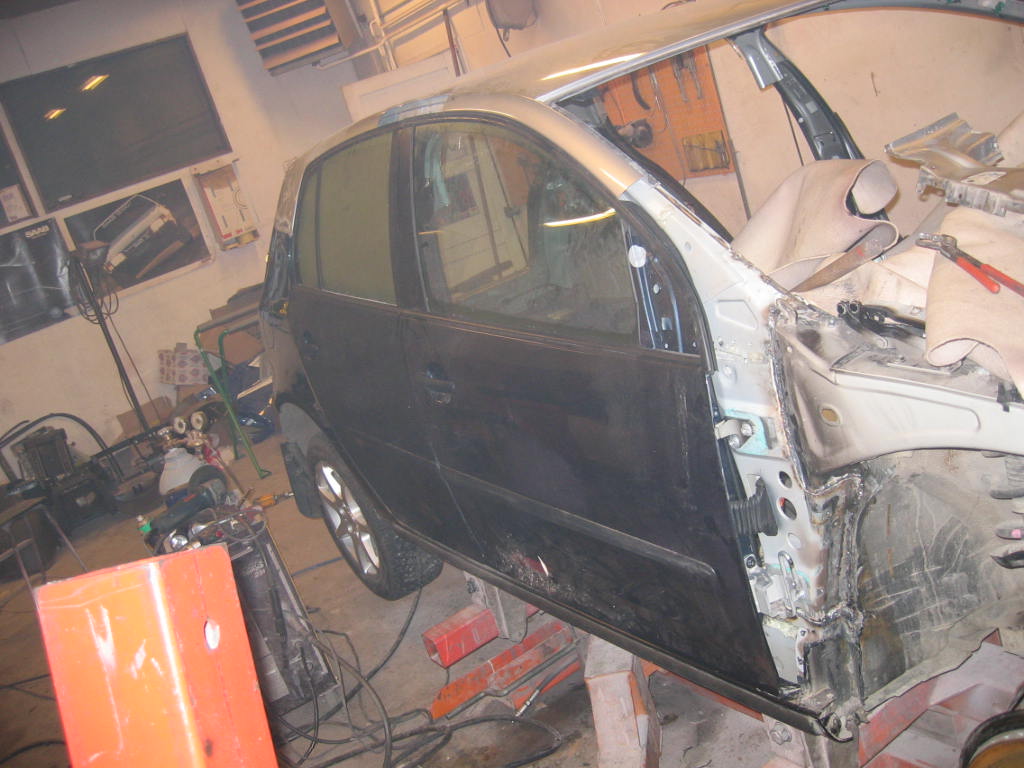
Before final welding we still tested with the doors that everything is OK, the doors close well etc.
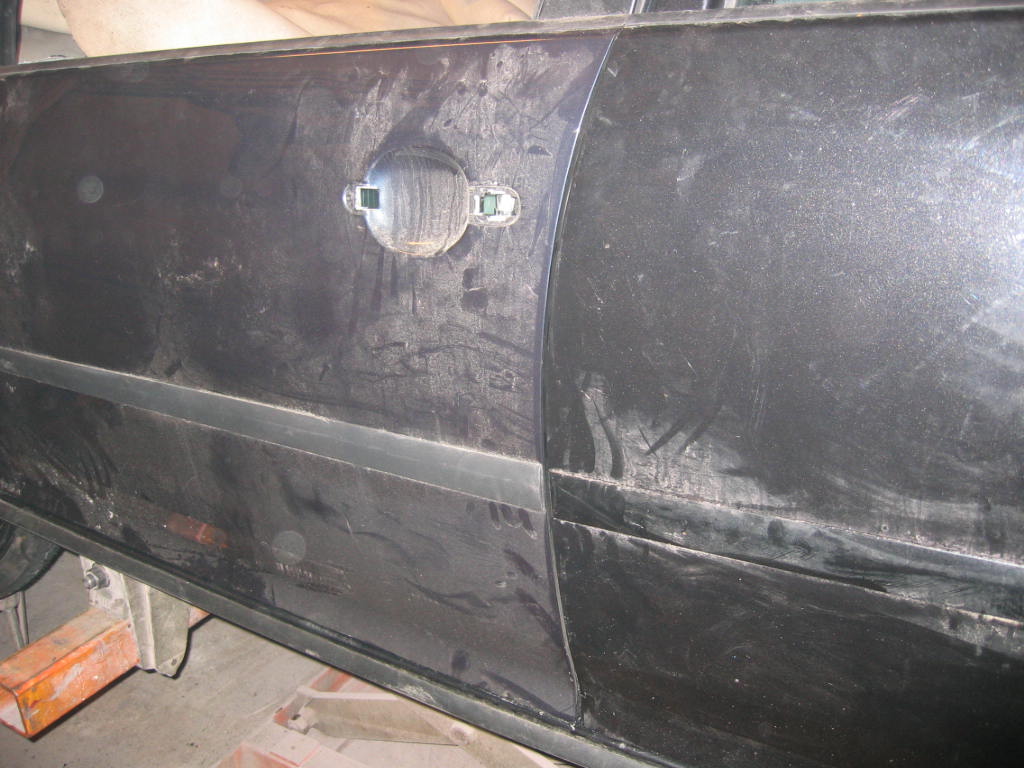
A view from the driver side (which was in worse condition in the beginning).
Finishing the repair
The car was inspected by the instance that controls the crash repairs, and we got permission to paint the car. The paintwork was done by Antti Selivaara. Unfortenately we don't have any images of this phase.
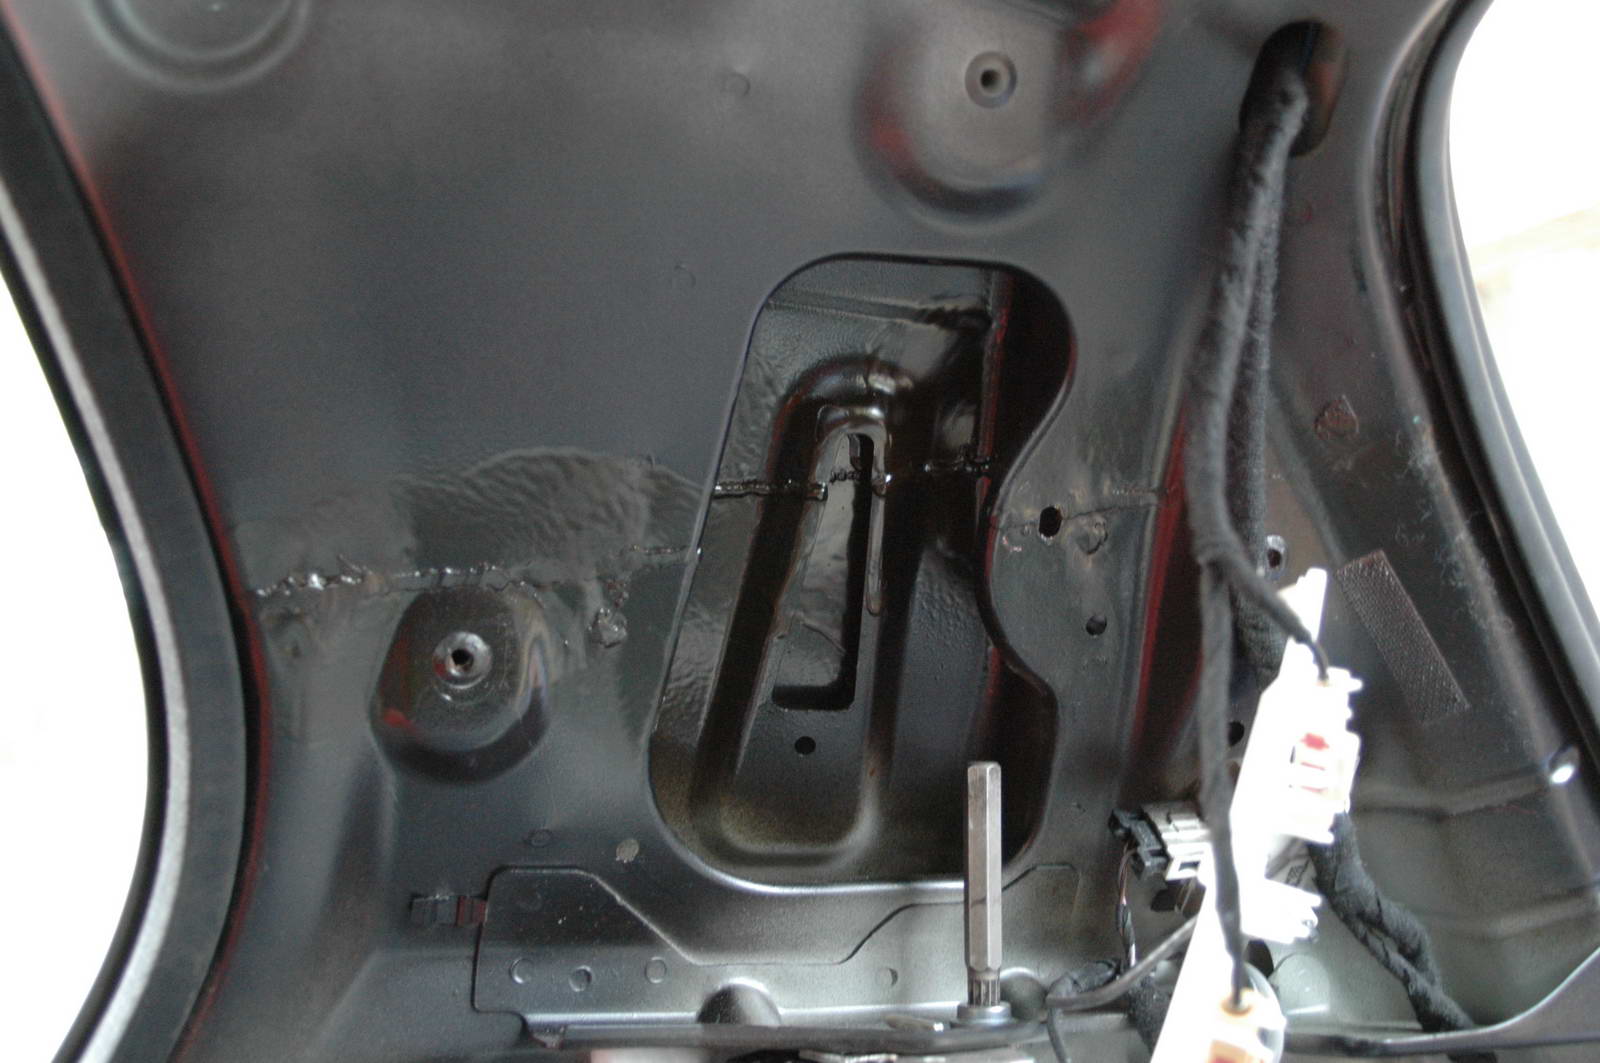
Finished C-pillar from the inside, after painting and rust protection treatment.
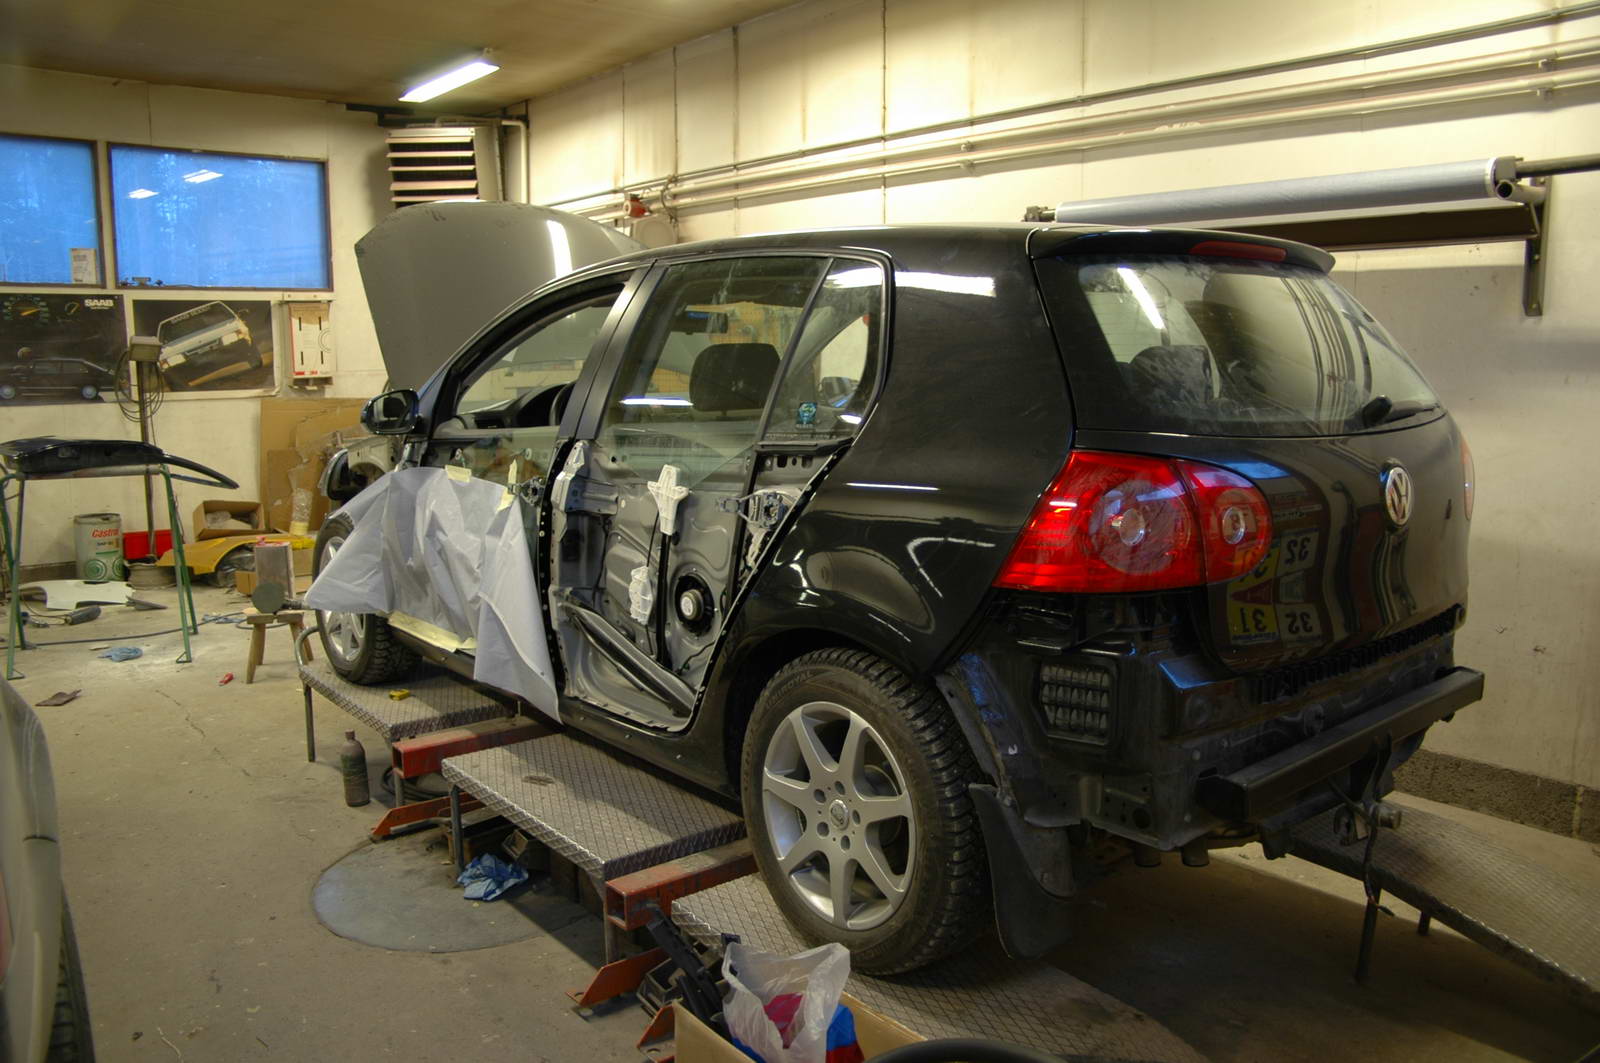
The car almost finished, assembling the doors.
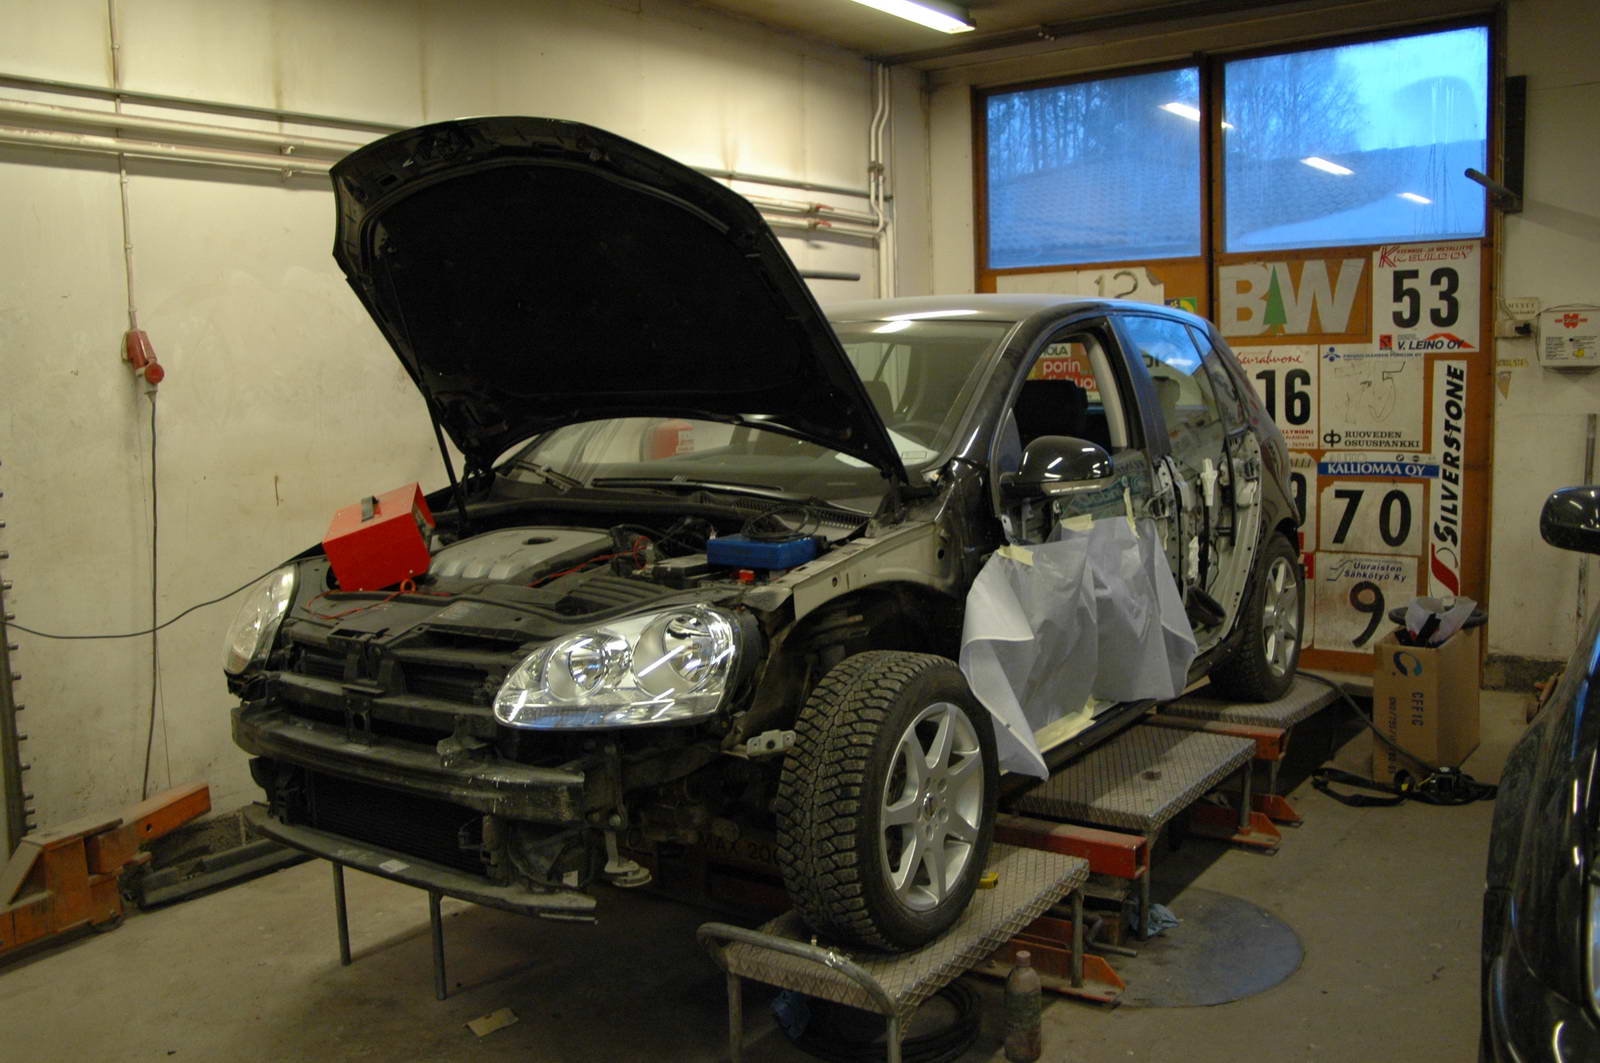
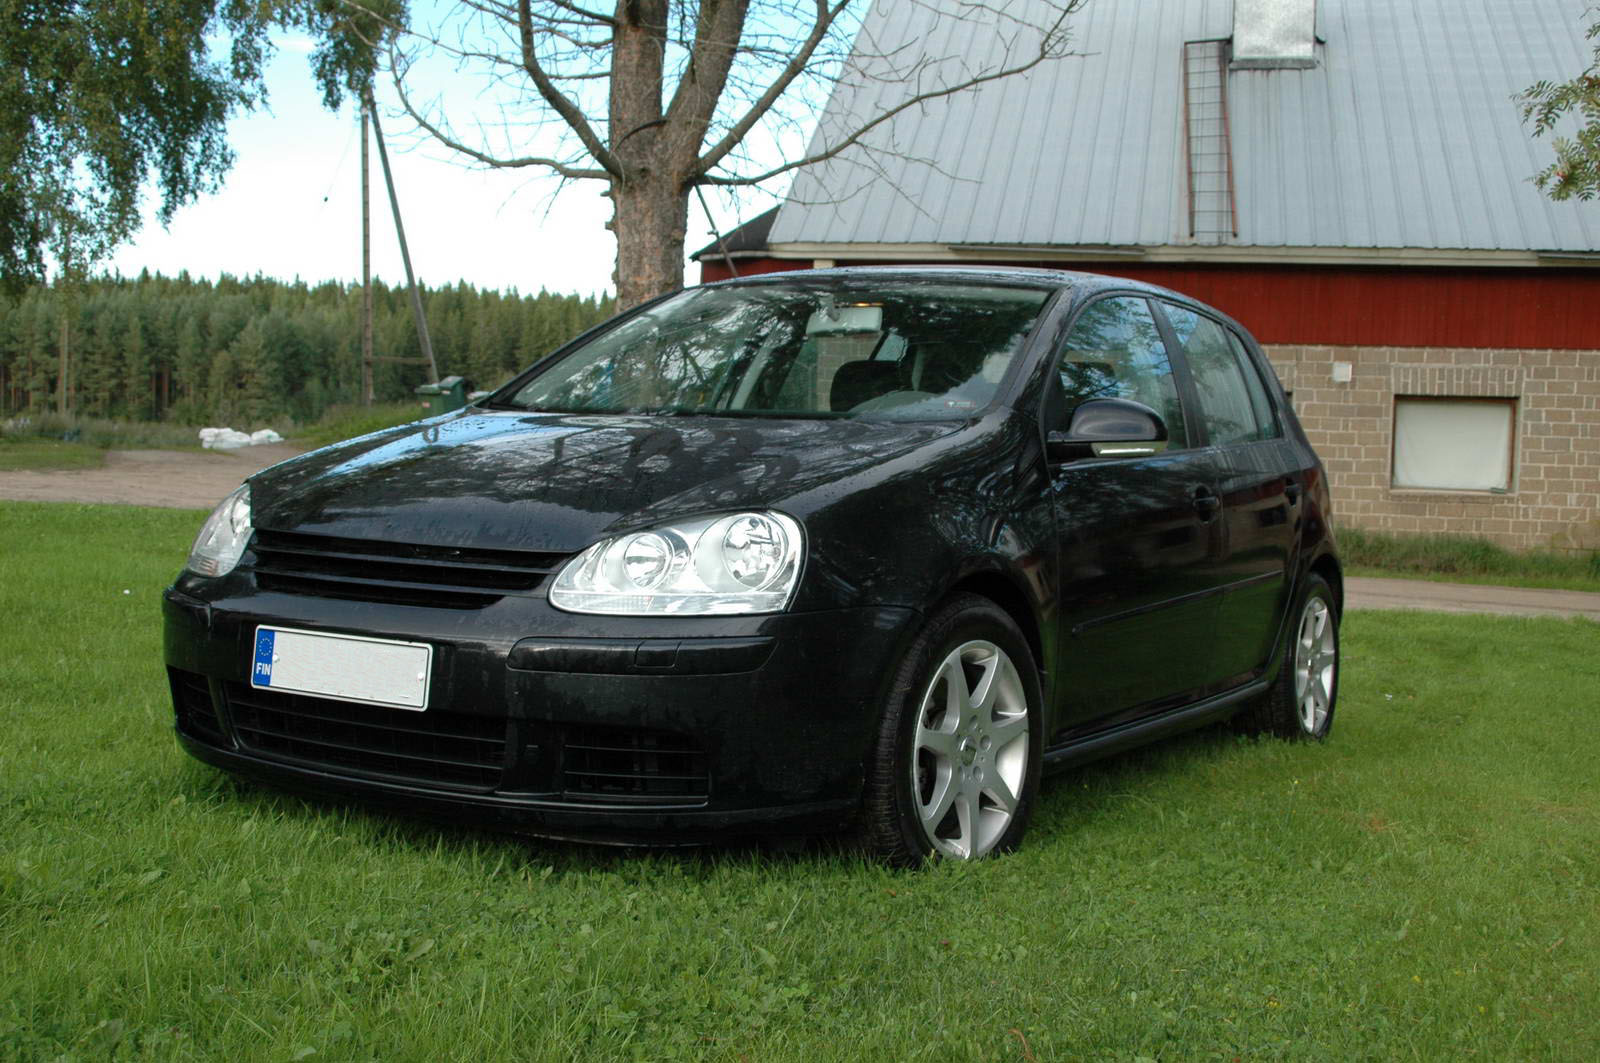
In the front we used 2005 model headlights (they have more chrome inside). Badgeless grill was also sourced... and it naturally lead to smoothing the badge holes also from the hood and the bumper.
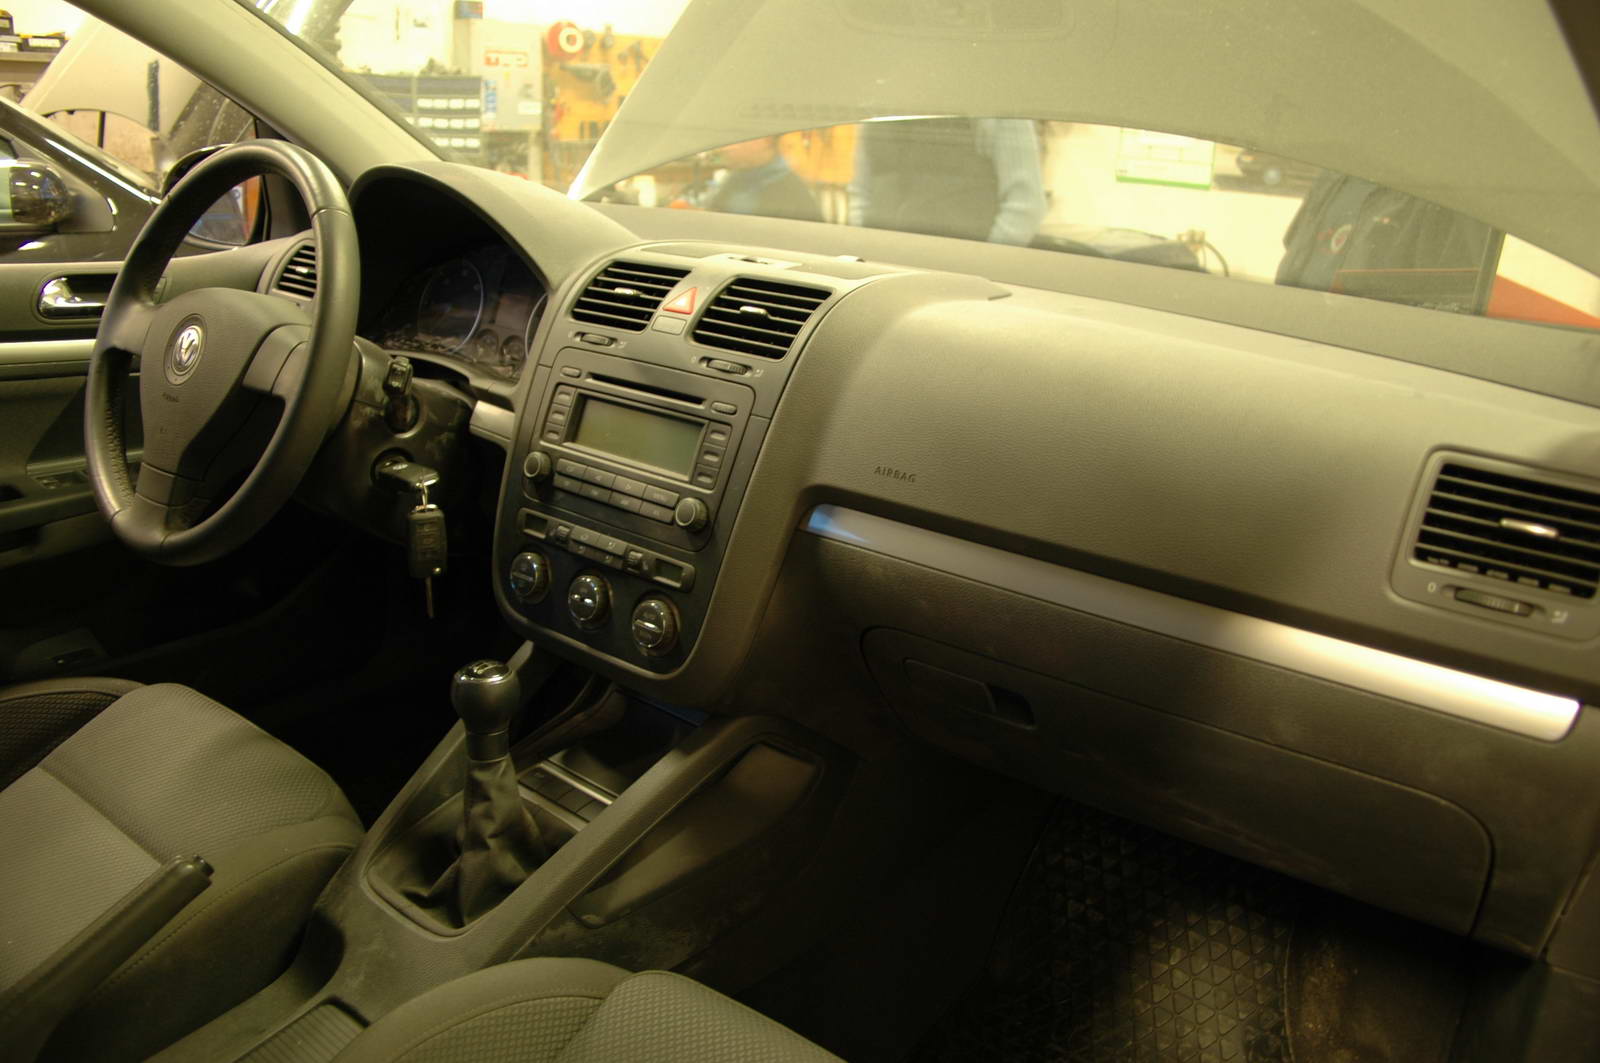
Interiour finished, new dashboard installed (naturally with new airbags).
The car was ready in mid April. That's when the problems started. The instance that was in charge of controlling the repair suddenly started to change the requirements for the repair work. They started to require many kinds of certificates for the repair work, papers that we couldn't get anywhere, not even from the Finnish sole distributor.
We tried to get all the papers we could, but finally the C-pillar turned out to be the biggest problem. The repair instructions were pretty inexact on that area, and we had done the repair the best way we could. SVT (the instance that controlled the repair) didn't want to give approval for the C-pillar repair, althought they had done that already when they gave us permission to paint the car!
We were already ordering new side panels and stuff like that, but luckily VW published a new version of the repair instructions which were more accurate on C-pillar, and we had done the repair exactly like the instructions told. Finally, in the beginning of the August we got all the required papers and got the car registered! Basicly it took us more than three months just with the paperwork. It's not always so easy to get a crashed car registered again in Finland...
It's good that crash repairs are controlled (by insurance companies), but right now the system in Finland is pretty wild, seems like nobody really knows how the body repairs of cars with new technology (like the new ultra-high strength reinforcements in the body) should be controlled. Hopefully the system improves in the future, it feels really frustrating to make tens of calls when trying to obtain all the required approvals and certificates. We feel that in this case SVT could have used more common sense that just require papers that were impossible to obtain.
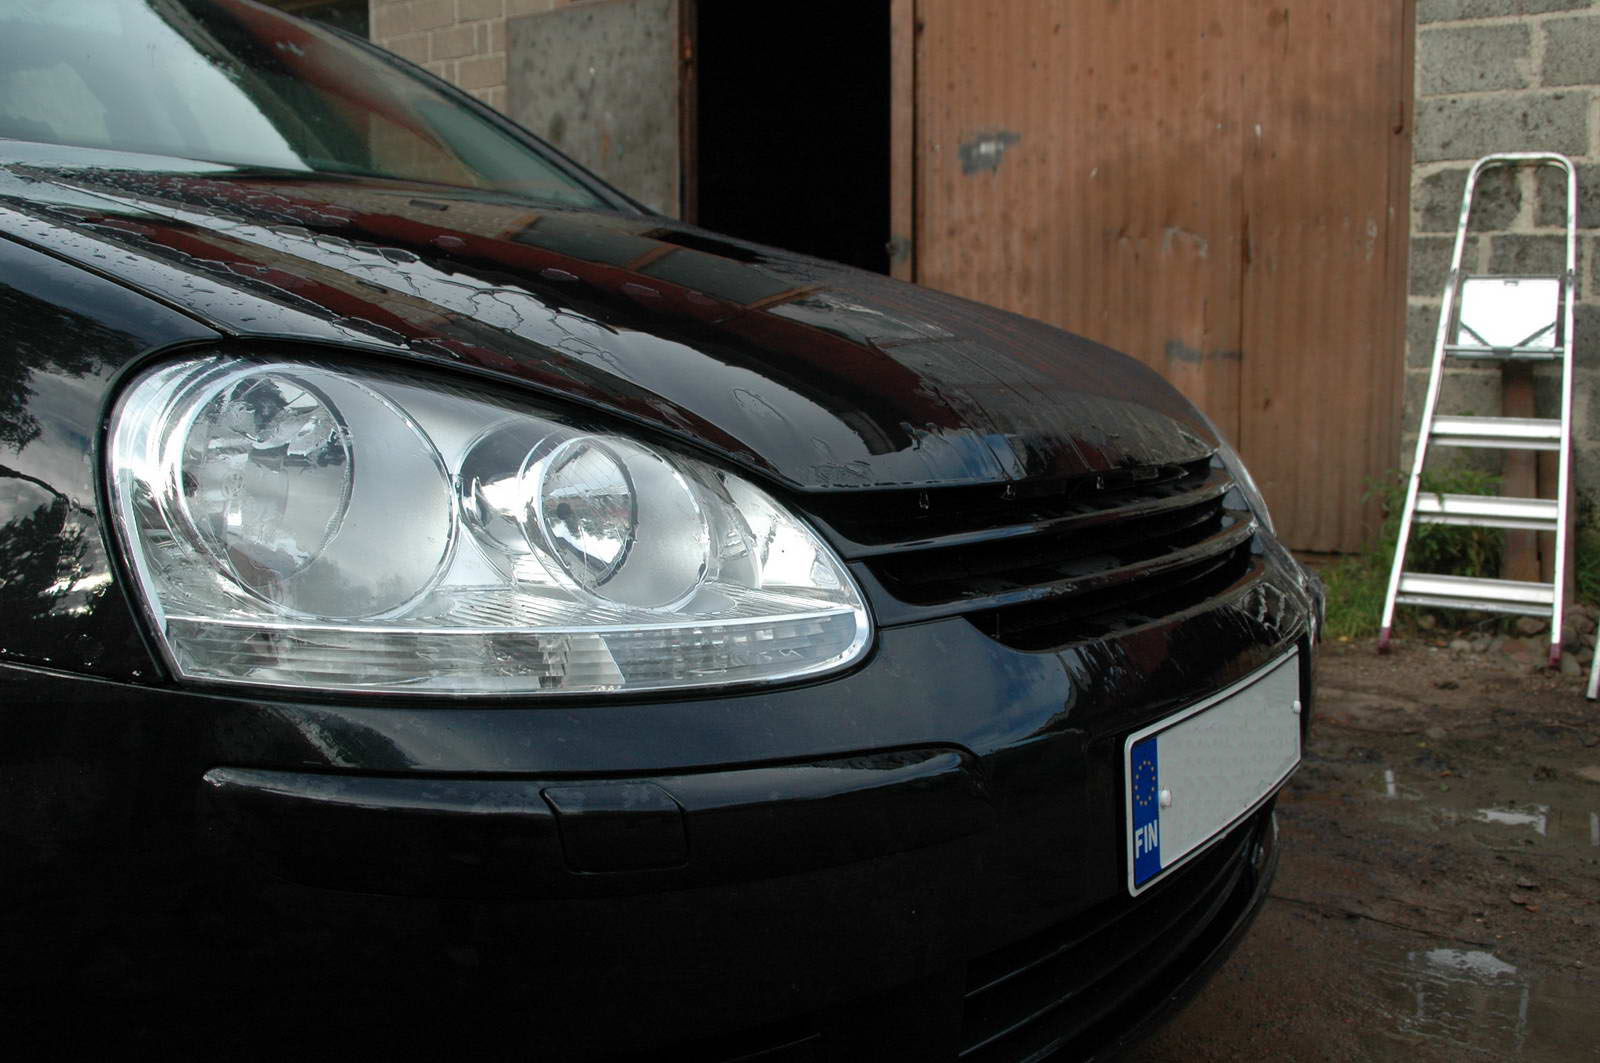
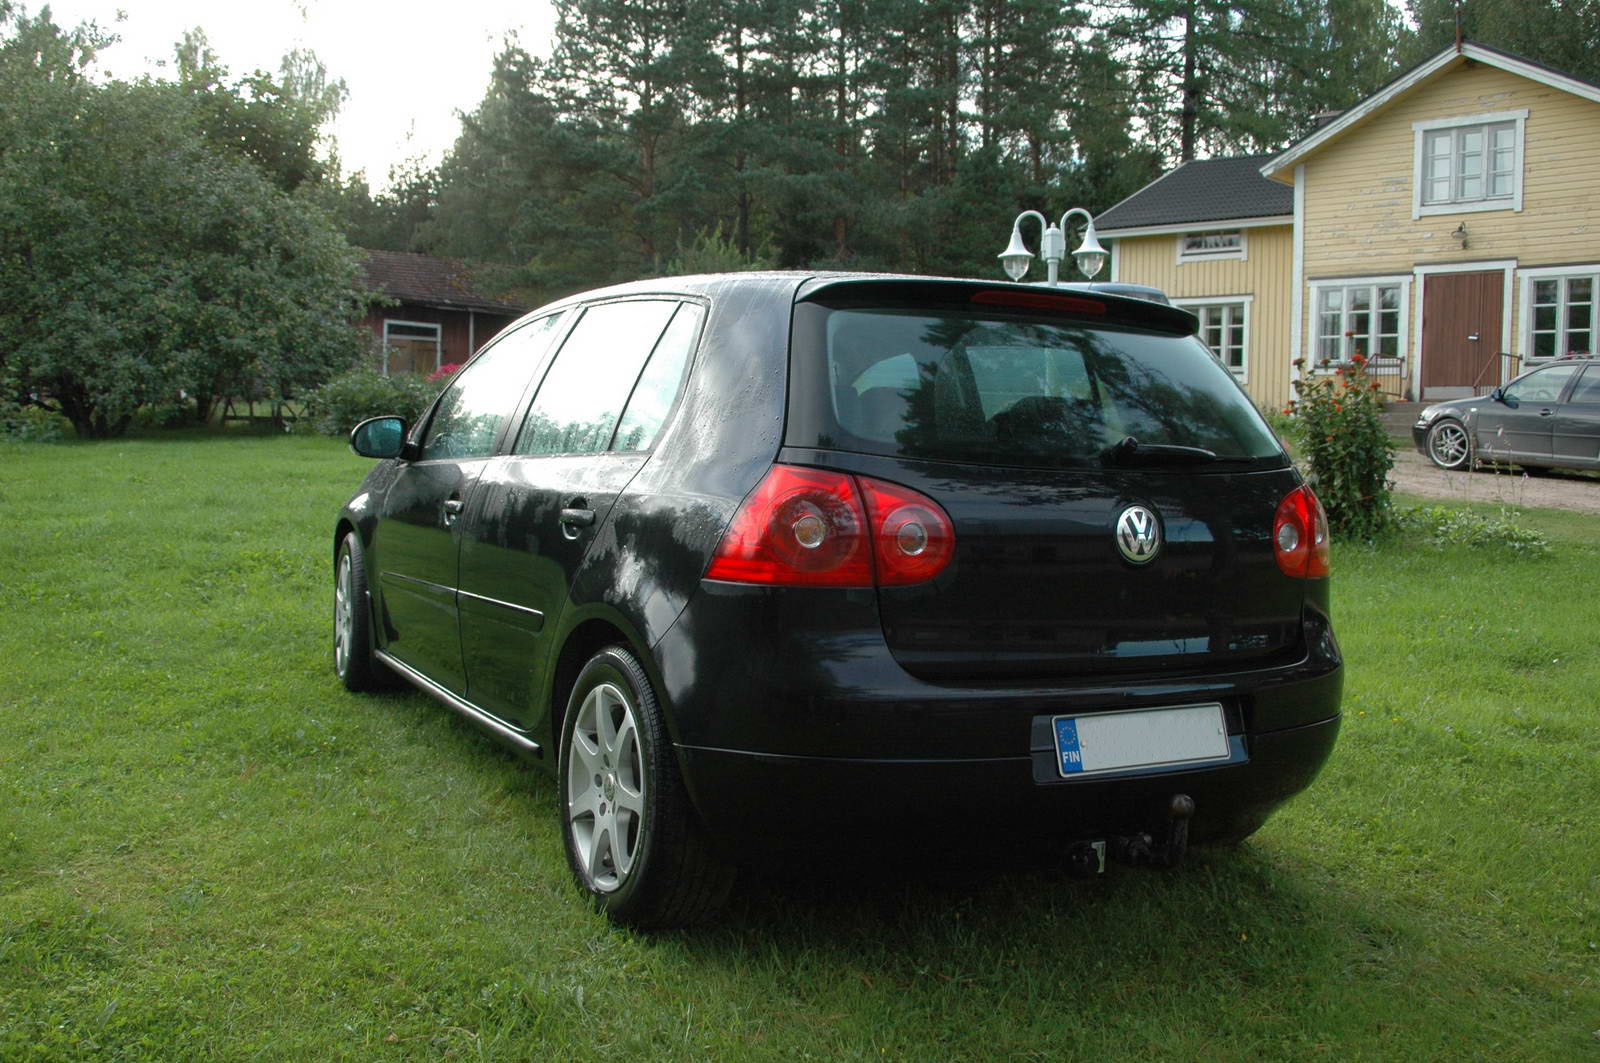
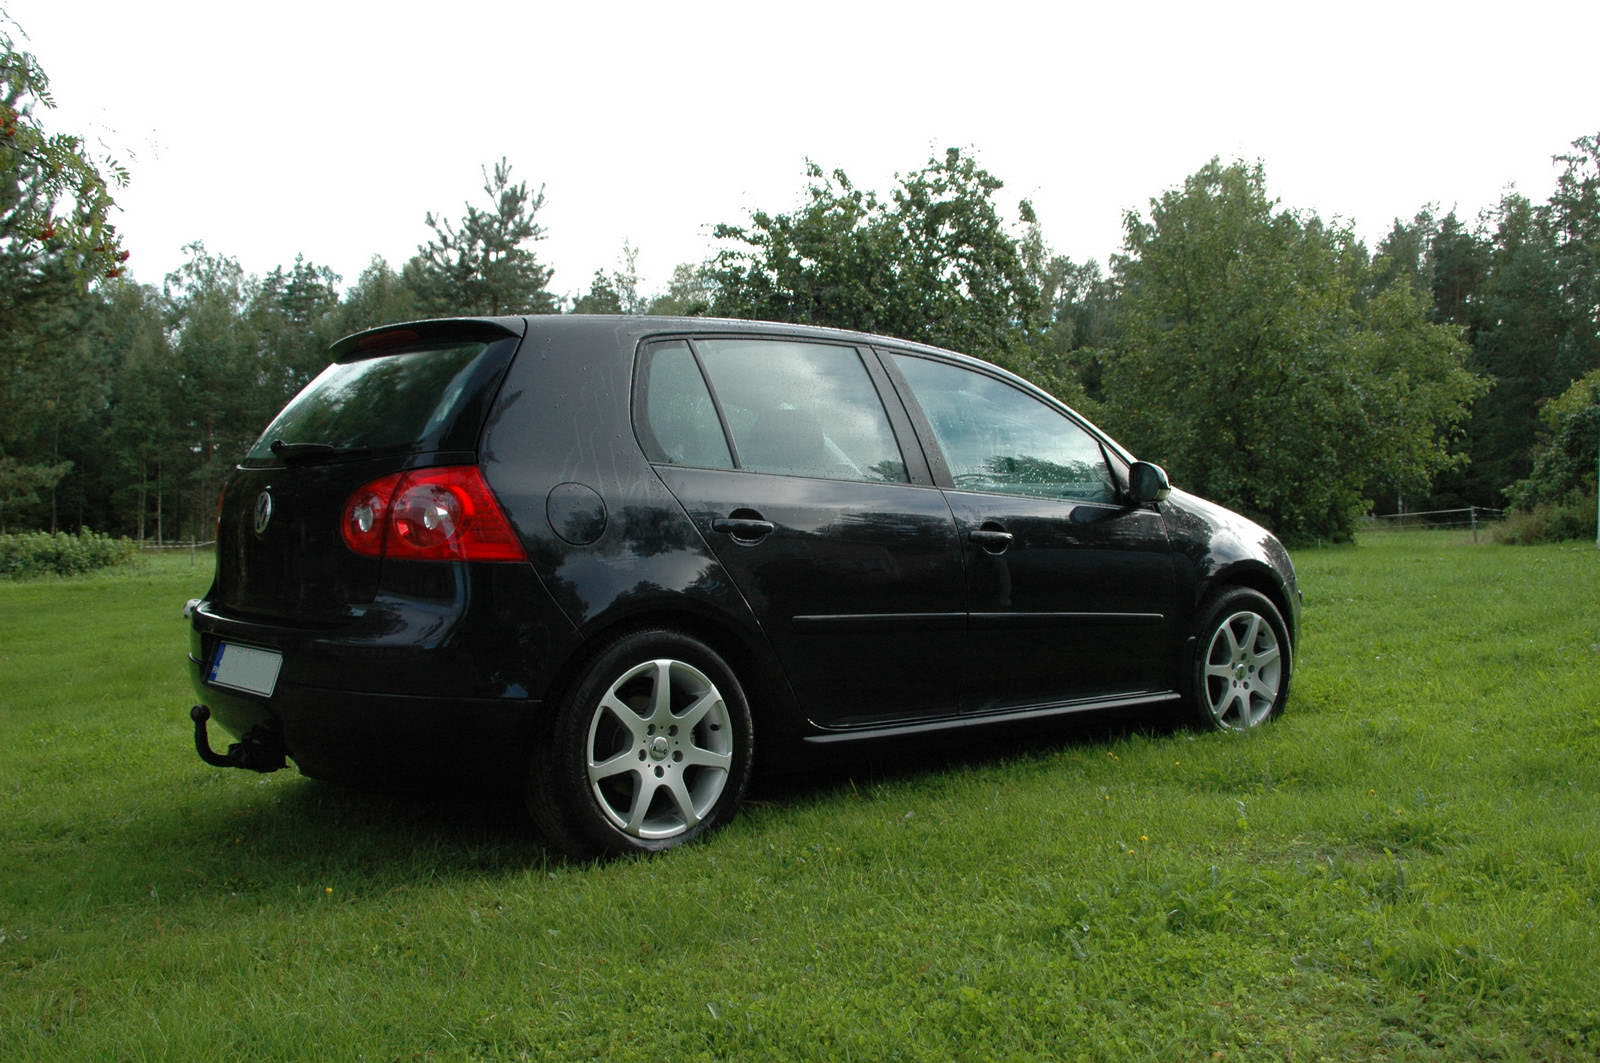
Below a few fotos of the car finished, with lisence plates :) So far all "tuning" is in the front (newer model headlights, badgeless grill).
Includes original English text and AI-assisted translations.